LE SEGHE CON IL DORSO (BACKSAWS) \ BACKSAWS
English translation at the end of the article

Le seghe manuali sono utensili indispensabili nella falegnameria amanuense. In alcuni articoli ho già parlato delle loro caratteristiche principali, gli utilizzi e la loro affilatura. Non mi dilungherò quindi in questo post su aspetti già trattati rimandandovi ai link a fine articolo se vorrete approfondire.
A parte la distinzione che viene fatta tra seghe occidentali ed orientali e tra seghe per tagli lungo vena e seghe per tagli traverso vena, le seghe manuali occidentali si possono suddividere in due grandi categorie:
– seghe senza il dorso (in inglese handsaws), riconoscibili anche dalle maggiori dimensioni e dall’impugnatura chiusa del manico;
– seghe con il dorso (in inglese backsaws), riconoscibili anche dalle dimensioni più contenute e dall’impugnatura, che talvolta può essere sagomata (aperta o chiusa) oppure dritta.
A loro volta, le seghe con il dorso si dividono in:
– seghe per tenoni (in inglese tenon saws o carcass saws);
– seghe per code di rondine (in inglese dovetail saws);
– seghe per piccoli incastri (gentleman saws o gent’s saws).
Rimandiamo l’approfondimento delle seghe senza il dorso ad un prossimo post mentre vediamo adesso le seghe con il dorso, premettendo che mi riferirò spesso ai vari modelli con i loro nomi inglesi.
Il dorso delle seghe.
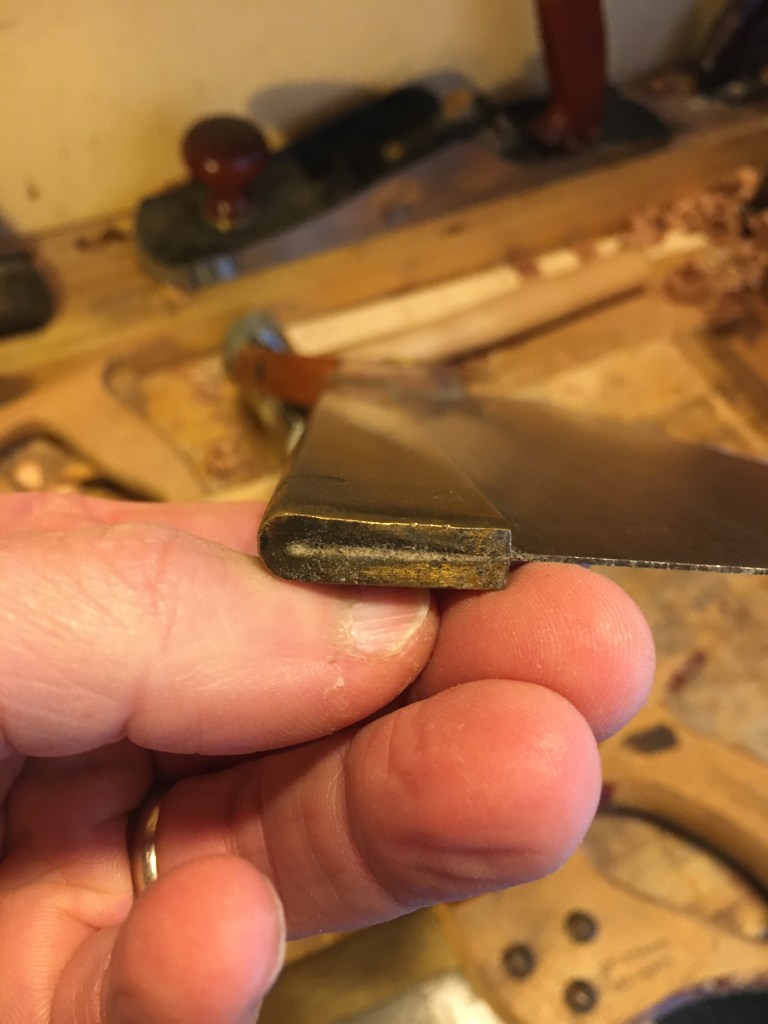
L’elemento fondamentale delle backsaws è il dorso. Il dorso è un rinforzo posto sulla parte superiore della lama della sega che la racchiude e gli conferisce rigidità.
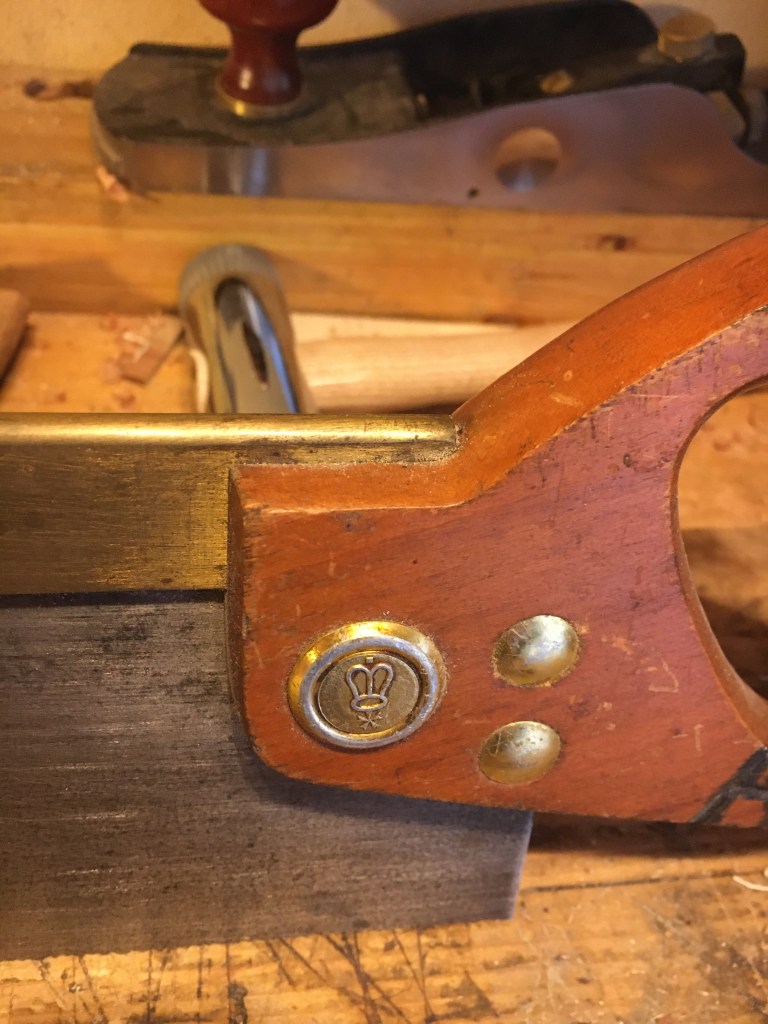
La parte terminale del dorso si inserisce in una scanalatura del manico (o per mezzo di un perno, come nelle gent’s saws) mentre il manico e la lama sono uniti tra loro per mezzo di viti a cannocchiale in modo tale che dorso, impugnatura e lama risultino strettamente collegate.


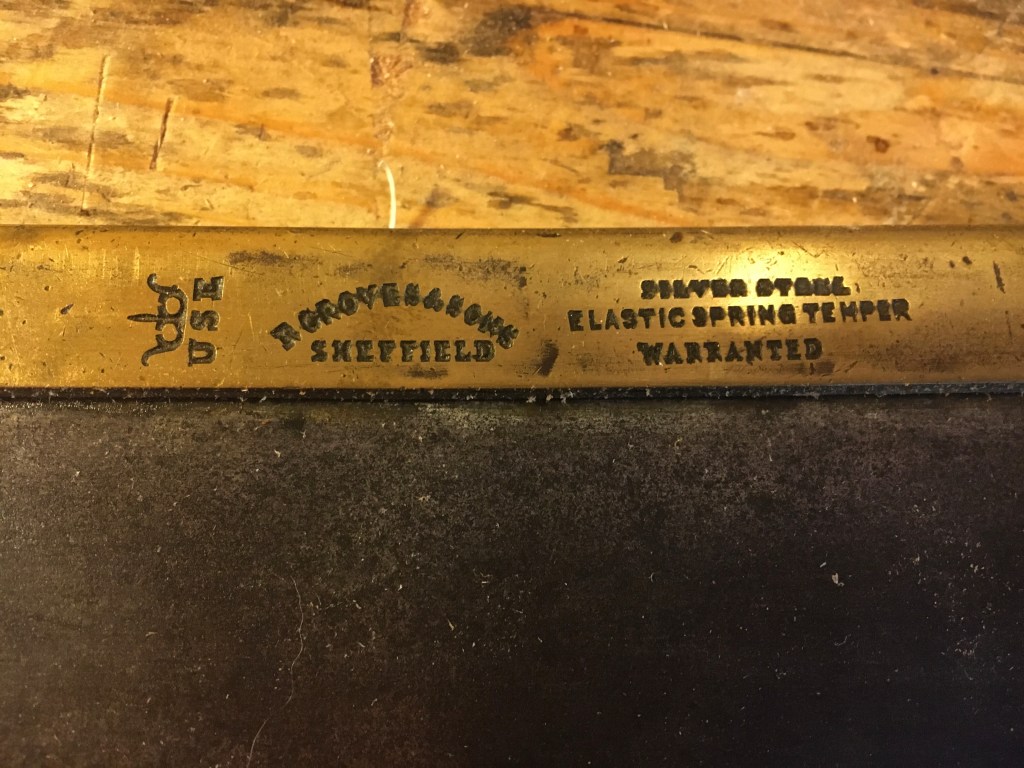
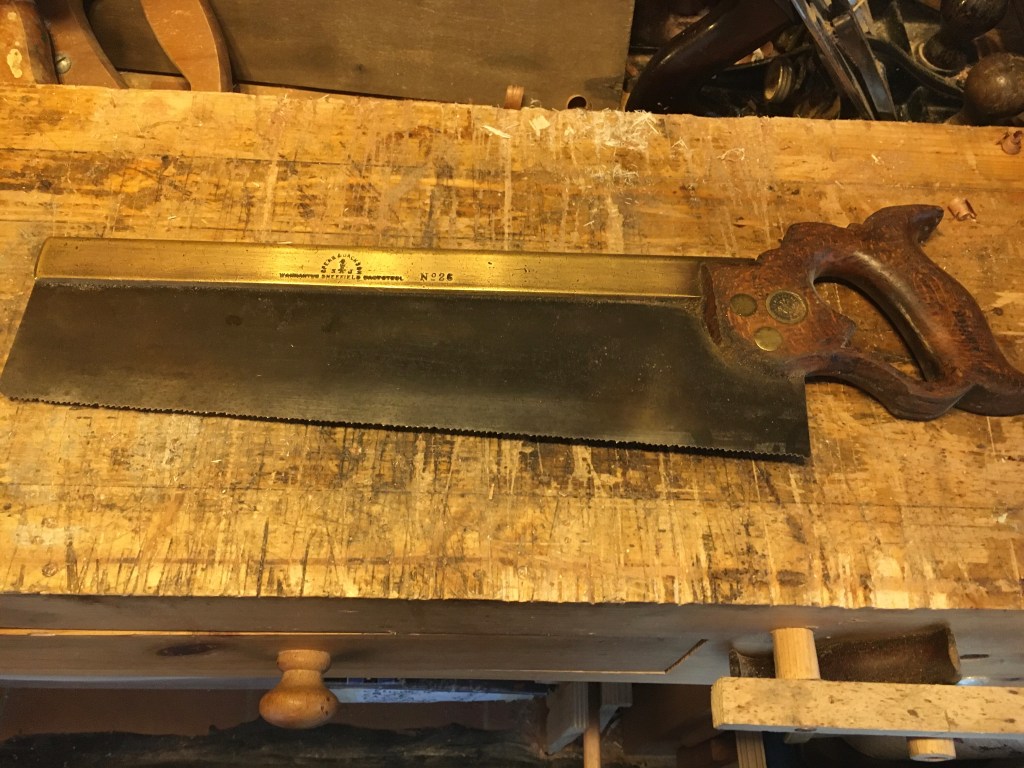
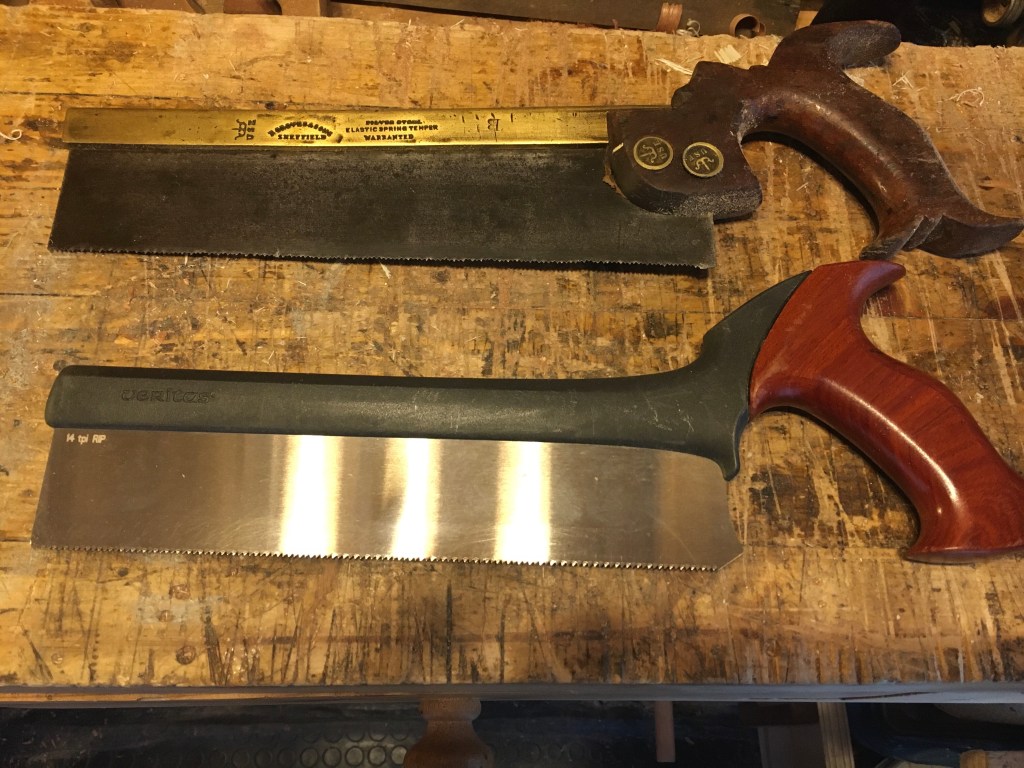
Nelle seghe tradizionali il dorso era fatto in acciaio o in ottone ma le seghe più moderne possono avere il dorso anche in plastica dura (un esempio su tutti la sega per code di rondine della Veritas). Il dorso in ottone, oltre ad essere oggettivamente più bello da vedersi, ha uno spessore maggiore ed è quindi leggermente più pesante di quello in acciaio oltre a non essere soggetto a ruggine. Per questi motivi le seghe con dorso in ottone vengono solitamente preferite ai modelli con dorso in acciaio, costando però un pò di più sul mercato dell’usato.

Il dorso non è solo un tratto distintivo di questo tipo di seghe ma, come anticipato, svolge un ruolo fondamentale per la loro funzionalità. Le backsaws infatti sono seghe per incastri, utilizzate soprattutto per fare tenoni e code di rondine. Il dorso, conferendo rigidità e robustezza alla lama, permette di ottenere tagli dritti e precisi. Per contro, lo stesso dorso costituisce un limite alla profondità di taglio, permettendo di poter segare fin quando la grandezza della lama lo permette.

All’atto pratico, trattandosi di dover fare brevi tagli nel legno per praticare gli incastri, la limitazione che impone la presenza del dorso, non reca quasi mai problemi, a patto di utilizzare sempre la sega appropriata per il tipo di taglio che dobbiamo effettuare. Il dorso, almeno nelle seghe tradizionali, può anche essere rimosso per permettere correzioni e manutenzioni alla lama.
Classificazione.
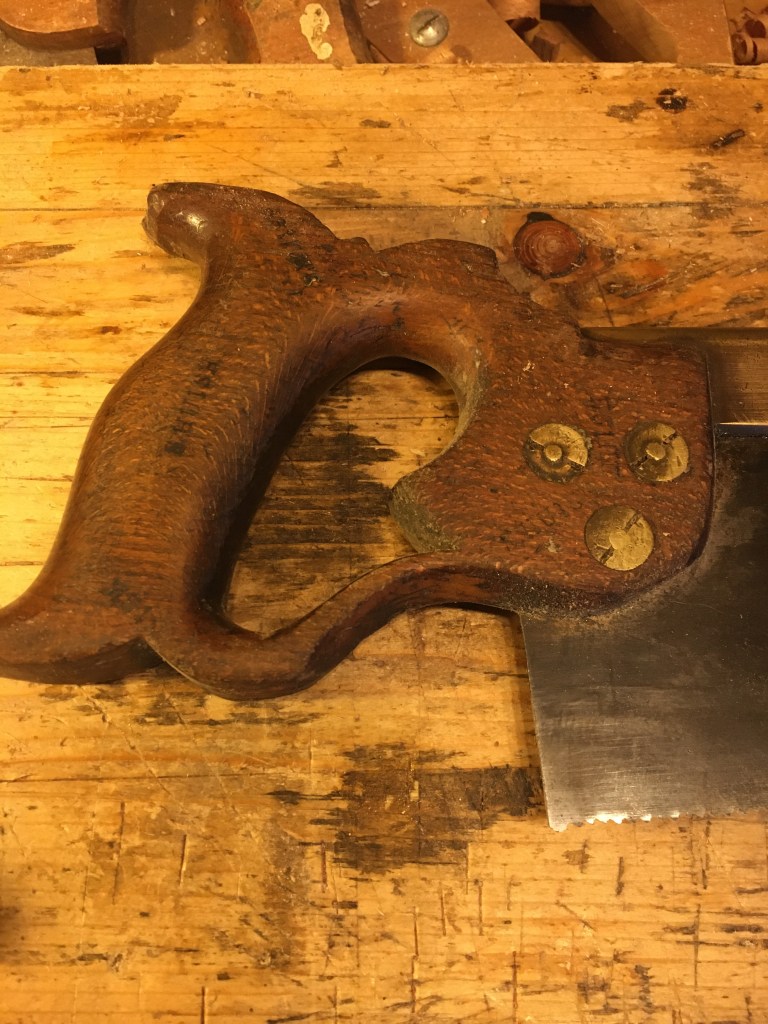
A prima vista, le seghe con il dorso si differenziano dalle altre seghe anche per il fatto che sono più corte, hanno denti più piccoli e fitti ed hanno l’impugnatura sagomata (sia aperta che chiusa). Ma vediamo nello specifico le loro caratteristiche, riferendoci a quelle tradizionali vintage.
- Le seghe per tenoni (tenon saws).
Le tenon saws sono più grandi delle seghe per code di rondine. Le misure tradizionali nelle quali venivano prodotte erano: 36 cm., 30 cm. e 25 cm. di lunghezza. Il numero di punte di denti per pollice (PPI – points per inch, dove un pollice è uguale a 2,54 cm.) varia tra i 12 pollici ed i 16 pollici. Come dice il nome, le seghe per tenoni sono utilizzate soprattutto per la realizzazione di tenoni negli incastri tenone e mortasa, ma si possono impiegare anche per altre lavorazioni. Generalmente hanno l’impugnatura chiusa, tipica delle seghe più grandi e sono realizzate in modelli con affilatura sia ripcut che crosscut (queste ultime, normalmente, solo fino a 14 PPI).
- Le seghe per code di rondine (dovetail saws).
Le seghe per code di rondine sono utilizzate per realizzare le code di rondine e i piccoli incastri. Come per le tenon saws, sono state prodotte in tre grandezze: 25 cm., 20 cm. e 15 cm. di lunghezza. Il numero di punte di denti per pollice (PPI – points per inch, dove un pollice è uguale a 2,54 cm.) varia tra i 16 PPI ed i 22 PPI. Generalmente hanno l’impugnatura aperta, una lama più fine e i denti molto piccoli e ravvicinati che risultano quindi molto difficili da riaffilare.
- Le Gentleman’s (gent’s) saws.
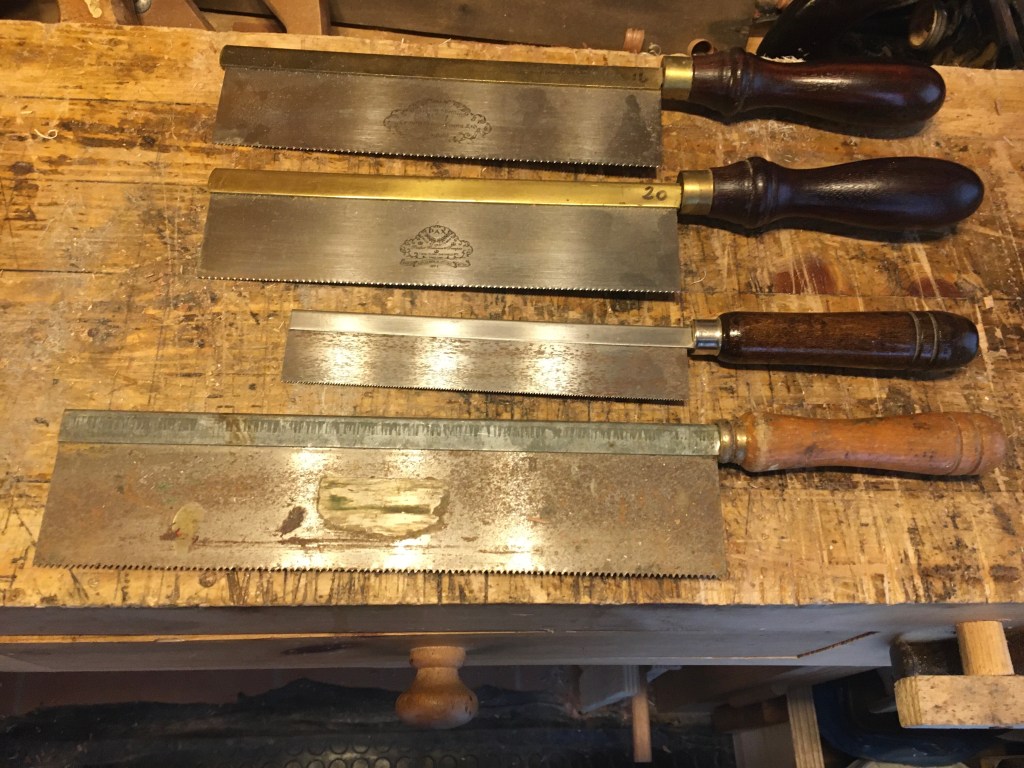
Le gent’s saws sono seghe ancora più piccole delle dovetail saws. Oltre alle misure da 25 cm., 20 cm. e 15 cm. di lunghezza ne esistono anche da 13 cm. e 10 cm. Il numero di PPI (PPI – points per inch, dove un pollice è uguale a 2,54 cm.) varia dai 16 ai 24. Vengono usate, oltre che per le code di rondine, anche per tutti quei lavori dove è richiesto un taglio molto fine e preciso come ad esempio nell’impiallacciatura e nell’intaglio. Sono meno ricercate delle dovetail saws un po’ per il loro ristretto campo d’impiego ma forse anche a causa dell’impugnatura dritta che dona una minor sensazione di maneggevolezza. Anche questo tipo di seghe è molto difficile da riaffilare, date le ridotte dimensioni dei denti.
La classificazione di cui sopra ricomprende le seghe più comunemente usate e prodotte in passato ma non è certamente esaustiva. Infatti, esistono produttori che ancora oggi commercializzano seghe dedicate a lavorazioni specifiche che somigliano molto a delle gentleman’s saw oppure producono delle dovetail saws affilate per tagli cross cut anche fino a 20 PPI e altro ancora. Le varianti sul tema sono quindi molteplici.
Quello che qui è utile sapere è che per effettuare incastri di grandi dimensioni occorrerà usare una sega per incastri di grandi dimensioni, come una tenon saw. Per incastri di media e piccola grandezza è più indicata una dovetail saw o una gent’s saw.
Le seghe occidentali vintage sono riaffilabili. L’affilatura di questo tipo di seghe non è agevole ma è comunque fattibile almeno fino a 16 PPI. Oltre, risulta molto difficoltosa e si corre il rischio di rovinare qualche dente, dato anche il ridotto spessore della lama. È conveniente quindi affilare solo quelle seghe che arrivano fino a 16 PPI e, per questioni di semplicitá legate al metodo di affilatura, affilarle tutte in modalità ripcut anche se dobbiamo utilizzarle per fare tagli traverso vena. Questo perché le ridotte dimensioni degli incastri non faranno apprezzare sostanziali differenze rispetto ad una sega crosscut dedicata.
Il manico.
Un fattore molto importante ma spesso sottovalutato è l’impugnatura della sega. Mentre le seghe vintage venivano prodotte con il manico in legno, quelle più recenti e soprattutto più economiche possono avere il manico in plastica, eventualmente rivestito in gomma. Personalmente preferisco i manici in legno perché li trovo oggettivamente più belli e rispettosi della tradizione ma anche perché è possibile fare manutenzione ed eventualmente adattarli alle dimensioni della propria mano.
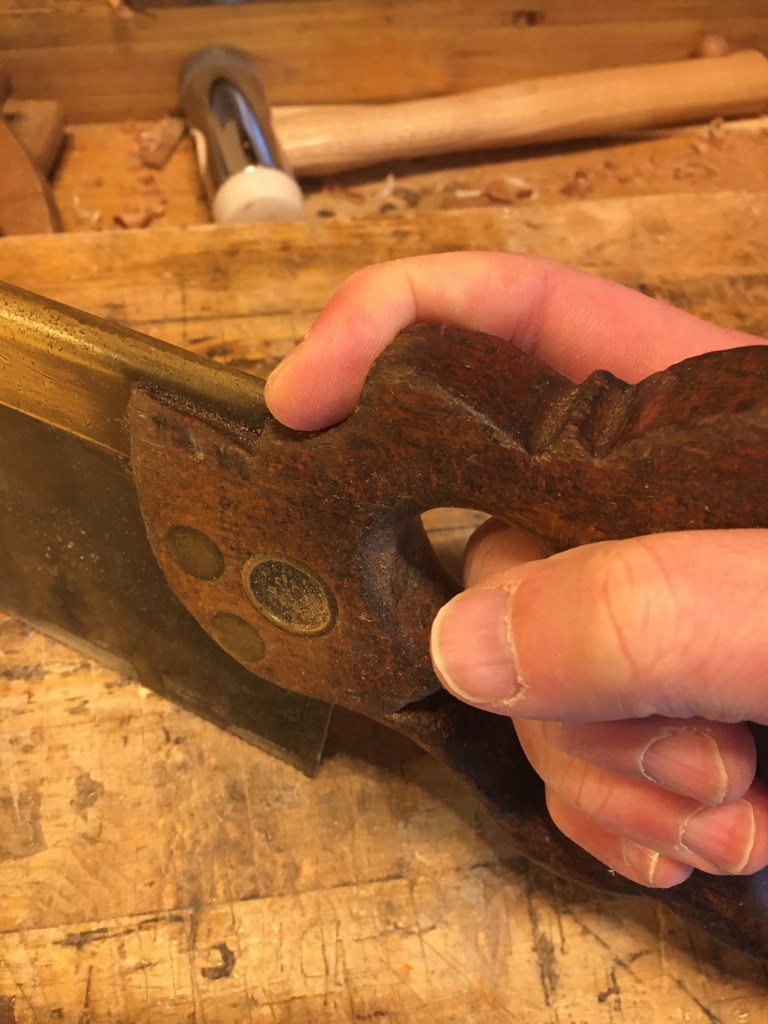
I manici delle dovetail saws, ad esempio, prevedevano una rientranza nella quale era possibile inserire l’indice per un miglior controllo della sega, invece di tenerlo di fianco e puntato in avanti nella classica posizione di taglio.

Di fronte a tanta varietà è semplice fare acquisti errati e finire per ritrovarsi il laboratorio pieno di seghe che in realtà non ci servono. Sebbene anche io, senza rendermene conto, mi sia ritrovato con molte seghe che non uso, posso dire con certezza che per la grande maggioranza dei lavori siano sufficienti solo due/tre tipi di backsaws:
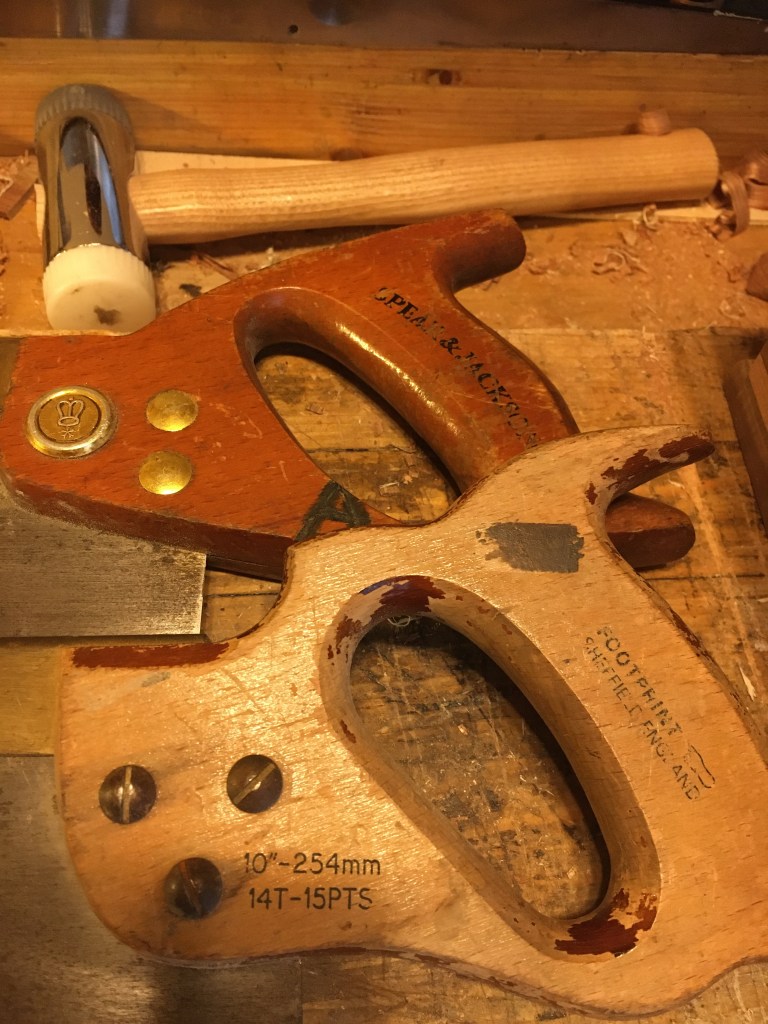
– una tenon saw da 30 centimetri (12 pollici) e/o 36 centimetri (14 pollici) di lunghezza con 14 PPI (13 TPI).
– una dovetail saw da 25 centimetri di lunghezza con 16 PPI (15 TPI) o, in alternativa, una gentleman saw della stessa lunghezza e stesso numero di PPI.
Con questi due/tre tipi di sega é possibile coprire praticamente tutte le nostre esigenze relativamente agli incastri tenone e mortasa e code di rondine, ma anche per fare tagli traverso vena o mitre cut (usando una cutting board), scanalature e altro ancora.
È consigliabile acquistare seghe vintage di qualità come ad esempio Spear & Jackson, Tyzack o Groves, con dorso in ottone e impugnatura sagomata (se aperta o chiusa non ha importanza, se non per l’estetica). Personalmente non mi trovo bene con le gent’s saws. Se acquistiamo su Ebay, ove le foto e la descrizione lo permettano, controlliamo le condizioni del manico e che le viti siano tutte presenti. Ma soprattutto verifichiamo lo stato della lama, ovvero che i denti siano tutti presenti e ben formati, che sia dritta e che non abbia crepe o buchi. Alcuni siti vendono seghe vintage restaurate a prezzi leggermente superiori rispetto a Ebay ma offrono maggiori garanzie. Sul nuovo ovviamente avremo meno problemi. Scegliamo, se possibile, seghe riaffilabili di buona qualità.
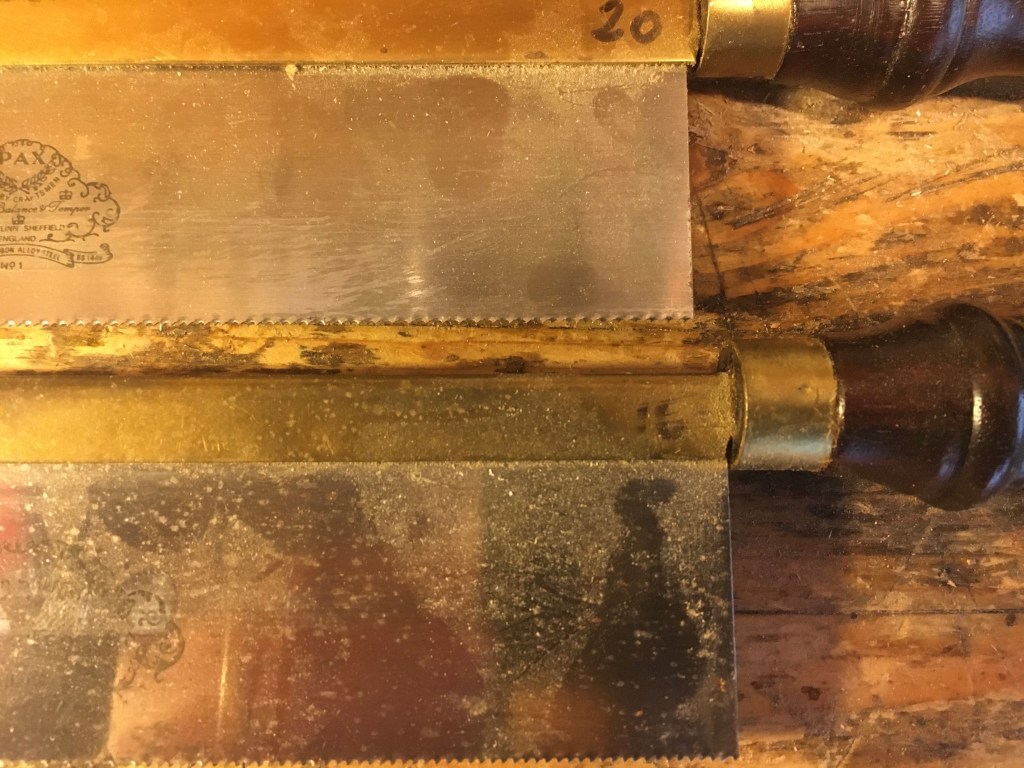
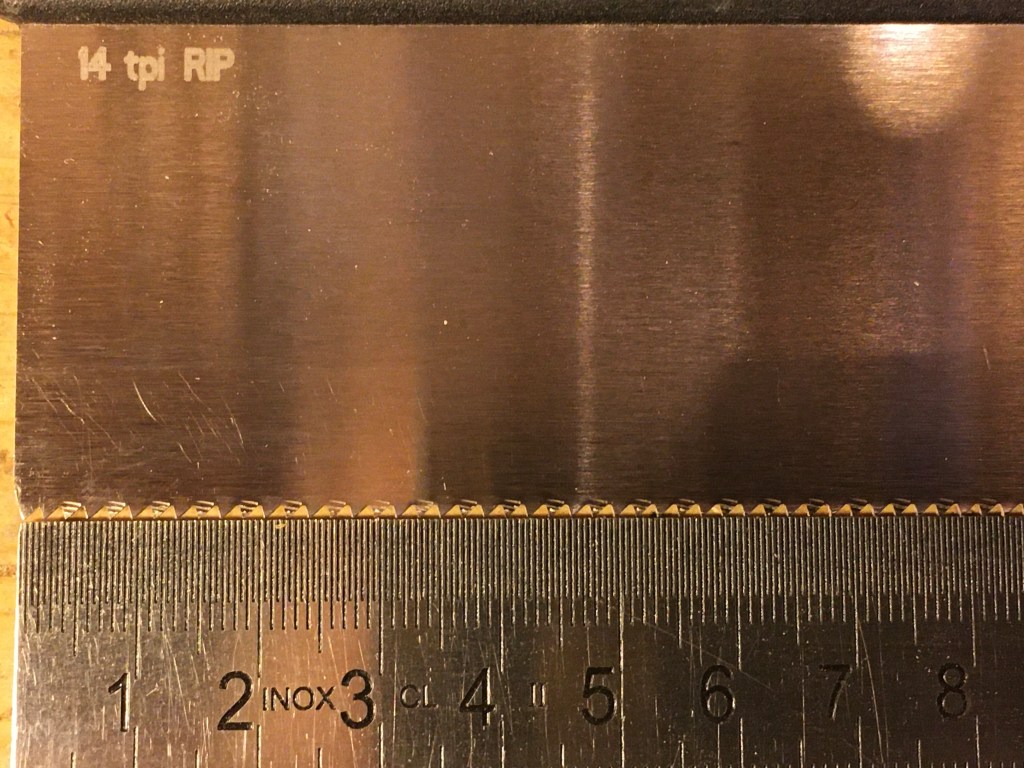
Ad esempio le seghe Pax di Thomas Flinn godono di ottima reputazione anche se sono costose mentre una sega che considero ottima, non costa un’esagerazione e che ricomprerei ad occhi chiusi è la dovetail saw con 15 PPI (14 TPI) versione ripcut prodotta dalla Veritas Lee Valley.

Di seguito un link dove poterla acquistare, anche se al momento sembra molto difficile reperirla online.
https://www.dictum.com/en/back-saws-baag/veritas-dovetail-saw-standard-712920
Link ai vecchi post sulle seghe manuali:
Riguardo le Seghe / About Saws
Utilizzo delle Seghe Occidentali / To use Western Saws
Come affilare una sega / How to sharpen a saw
___________________________________________________________________________________
Hand saws are very important tools in woodworking by hand. In some articles I have already talked about their main characteristics, uses and their sharpening. So I will not talk about those aspects already dealt with in this post, referring to the links above if you want to learn more.
Apart from the distinction that is made between western and eastern saws and between crosscut and ripcut saws, western hand saws can be divided into two main categories:
handsaws, also recognizable by the larger dimensions and the closed grip of the handle;
backsaws, recognizable also by the smaller dimensions and the handle, which can sometimes be shaped (open or closed) or straight.
backsaws are divided into:
tenon saws;
dovetail saws;
gentleman saws or gent’s saws.
We will talk about handsaws in a future post while we now see the backsaws.
The spine.
The fundamental element of the backsaws is the spine. The spine is a reinforcement placed on the upper part of the saw blade that encloses it and gives it rigidity. The terminal part of the spine fits into a groove in the handle (or by means of a pin, as in gent’s saws ) while the handle and the blade are joined together by screws so that the spine, handle and blade are closely connected. In traditional saws the spine was made of steel or brass but the most modern saws can also have the spine of hard plastic (an example above all the Veritas dovetail saw). The brass spine, in addition to being objectively more beautiful to look at, has a greater thickness and is therefore slightly heavier than the steel one as well as not being subject to rust. For these reasons, saws with brass spine are usually preferred to models with steel spine, but they cost a little more on the second-hand market. The spine is not only a distinctive feature of this type of saw but, as anticipated, plays a fundamental role in their functionality. The backsaws are in fact joint saws, used above all to make tenons and dovetails. The spine , giving rigidity and strength to the blade, allows to obtain straight and precise cuts. On the other hand, the spine itself constitutes a limit to the depth of cut, allowing you to be able to saw as long as the size of the blade allows it. In practice, since it is a question of having to make short cuts in the wood to make the joints, the limitation imposed by the presence of the spine almost never causes problems, as long as you always use the appropriate saw for the type of cut we have to make. The spine, at least in traditional saws, can also be removed to allow corrections and maintenance to the blade.
Classification .
At first glance, backsaws differ from other saws also because they are shorter, have smaller and finer teeth and have a shaped handle (both open and closed). But let’s see specifically their characteristics, referring to the traditional vintage ones.
Tenon saws.
The tenon saws are larger than dovetail saws. The traditional saws were produced in three measures: 36 cm., 30 cm. and 25 cm. of length. The number of points per inch (PPI – points per inch, where one inch equals 2.54 cm.) varies between 12 inches and 16 inches. As the name says, tenon saws are mainly used for making tenons in mortise and tenon joints, but they can also be used for other processes. They generally have a closed handle, typical of larger saws and are made in models with both ripcut and crosscut sharpening (the latter, normally, only up to 14 PPI).
Dovetail saws.
Dovetail saws are used to make dovetails and small joints. As for the tenon saws, were produced in three sizes: 25 cm., 20 cm. and 15 cm. of length. The number of points per inch (PPI – points per inch , where one inch equals 2.54 cm.) varies between 16 PPI and 22 PPI. They generally have an open handle, a finer blade and very small and closely spaced teeth which are therefore very difficult to sharpen.
Gentleman (gent’s) saws .
The gent’s saws are even smaller saws than dovetail saws. In addition to the measures of 25 cm., 20 cm. and 15 cm. in length there are also 13 cm. and 10 cm. The number of PPI (PPI – points per inch , where one inch is equal to 2.54 cm.) varies from 16 to 24. They are used, as well as for dovetails, also for all those jobs where a cut is required very fine and precise such as in veneer and carving. They are less requested than dovetail saws because of their narrow range of use but perhaps also because of the straight handle that gives a lesser feeling of handling. This type of saw is also very difficult to sharpen due to the small size of the teeth.
The above classification includes the most commonly used and produced saws in the past but is certainly not exhaustive. In fact, there are manufacturers who still sell saws dedicated to specific processes that closely resemble gentleman’s saw or produce dovetail saws sharpened for crosscuts up to 20 PPI and more. The variations on the theme are therefore manifold.
What is useful to know here is that to make large joints you will need to use a large backsaw, such as a tenon saw. A dovetail saw is more suitable for medium and small sized joints where a gent’s saw is useful the same way.
Vintage western saws are resharpenable. Sharpening this type of saw is not easy but it is still possible up to at least 16 PPI. Further, it is very difficult to sharpen by hand and there is the risk of damaging some teeth, because of the reduced thickness of the blade. It is therefore convenient to sharpen only those saws that reach up to 16 PPI and, for reasons of simplicity related to the sharpening method, sharpen them all in ripcut mode even if we have to use them to make crosscuts. This is because the small size of the joints will not make you appreciate substantial differences compared to a dedicated crosscut saw.
The handle.
A very important but often underestimated factor is the handle of the saw. While vintage saws were produced with a wooden handle, the more recent and above all cheaper ones can have a plastic handle, possibly covered in rubber. Personally I prefer wooden handles because I find them objectively more beautiful and in line with tradition but also because it is possible to do maintenance and possibly adapt them to the size of your hand. Dovetail handle saws, for example, had a recess in which the index finger could be inserted for better control of the saw, instead of holding it at the side and pointing forward in the classic cutting position.
Faced with so much variety, it’s easy to make the wrong purchases and end up finding yourself in the workshop full of saws that we don’t really need. Although I too, without realizing it, have found myself with many saws that I don’t use, I can say with certainty that for the vast majority of jobs only two types of backsaws are sufficient :
– a tenon saw from 30 centimeters (12 inches) or 36 centimeters (14 inches) in length with 14 PPI (13 TPI).
– a dovetail 25cm long saw with 16 PPI (15 TPI) or, alternatively, a gentleman saw of the same length and PPI number.
With these two / three types of saw it is possible to cover all our needs regarding mortise and tenon joints and dovetails, but also to make cross cuts or miter cuts (using a cutting board ), grooves and more.
It is advisable to buy quality vintage saws such as Spear & Jackson, Tyzack or Groves, with brass spine and shaped handle (if open or closed it does not matter, if not for the aesthetics). Personally, I don’t get along well with gent’s saws . If we buy on Ebay, where the photos and the description allow it, we check the condition of the handle and that the screws are all present. But above all we check the condition of the blade, that the teeth are all present and well formed, that it is straight and that it does not have cracks or holes. Some sites sell restored vintage saws at slightly higher prices than Ebay but offer more warranties. On the new obviously we will have less problems. We choose, if possible, good quality resharpenable saws. For example, Thomas Flinn ‘s Pax saws enjoy an excellent reputation even if they are expensive while a saw that I consider excellent, does not cost an exaggeration and that I would buy back with my eyes closed is the dovetail saw with 15 PPI (14 TPI) ripcut produced by Veritas Lee Valley. Above is the link where you can buy it.

Lascia un commento