GLI INCASTRI. COME FARE L’INCASTRO A CODA DI RONDINE / THE JOINTS. HOW TO MAKE THE DOVETAIL JOINT.

English translation at the end of the article
L’incastro a coda di rondine, tra tutti i tipi di incastro, è quello che maggiormente colpisce l’immaginario collettivo. Da sempre è sinonimo di tradizione e artigianalità amanuense. Quando vediamo questo tipo di incastro nei mobili si è soliti pensare che siamo di fronte ad un pezzo antico, di valore e di ottima fattura. Questo era sicuramente vero nel passato,
quando non esistevano i macchinari. Oggigiorno le macchine e le dime utilizzate sono in grado di creare code di rondine perfette, di qualsiasi forma e dimensione. E forse, proprio tale perfezione, se riscontrata su un mobile nuovo, dovrebbe far pensare che quelle code di rondine non siano state realizzate a mano, come si faceva una volta, ma per mezzo di macchine elettriche. Dico questo perché la vera bravura di un artigiano si vede proprio nel creare manualmente questo tipo di incastro.
UN SEGRETO IN ROVERE VI ASPETTA AL SALONE DEL LIBRO DI TORINO
Solo 20 copie speciali dei miei libri avranno questo gadget unico numerato
L’incastro a coda di rondine, tra i tre principali tipi che ho citato, è sicuramente quello che garantisce la maggior tenuta, oltre ad essere bello esteticamente, specialmente se enfatizzato dall’unione di legni di specie e colorazioni diverse. È inoltre il più difficile da fare in quanto richiede tecnica e precisione. Se ben realizzato, il risultato finale sarà assolutamente appagante e di sicuro effetto. Per una panoramica sugli incastri di cui abbiamo sin qui parlato vi rimando ai seguenti link.
Gli incastri. I tre incastri fondamentali del legno / The joints. The three essential joints in wood
Gli incastri. Come fare l’incastro dente e canale / The joints. How to make a housing dado joint.
Gli incastri. Come fare l’incastro tenone e mortasa / The joints. How to make the mortise and tenon joint
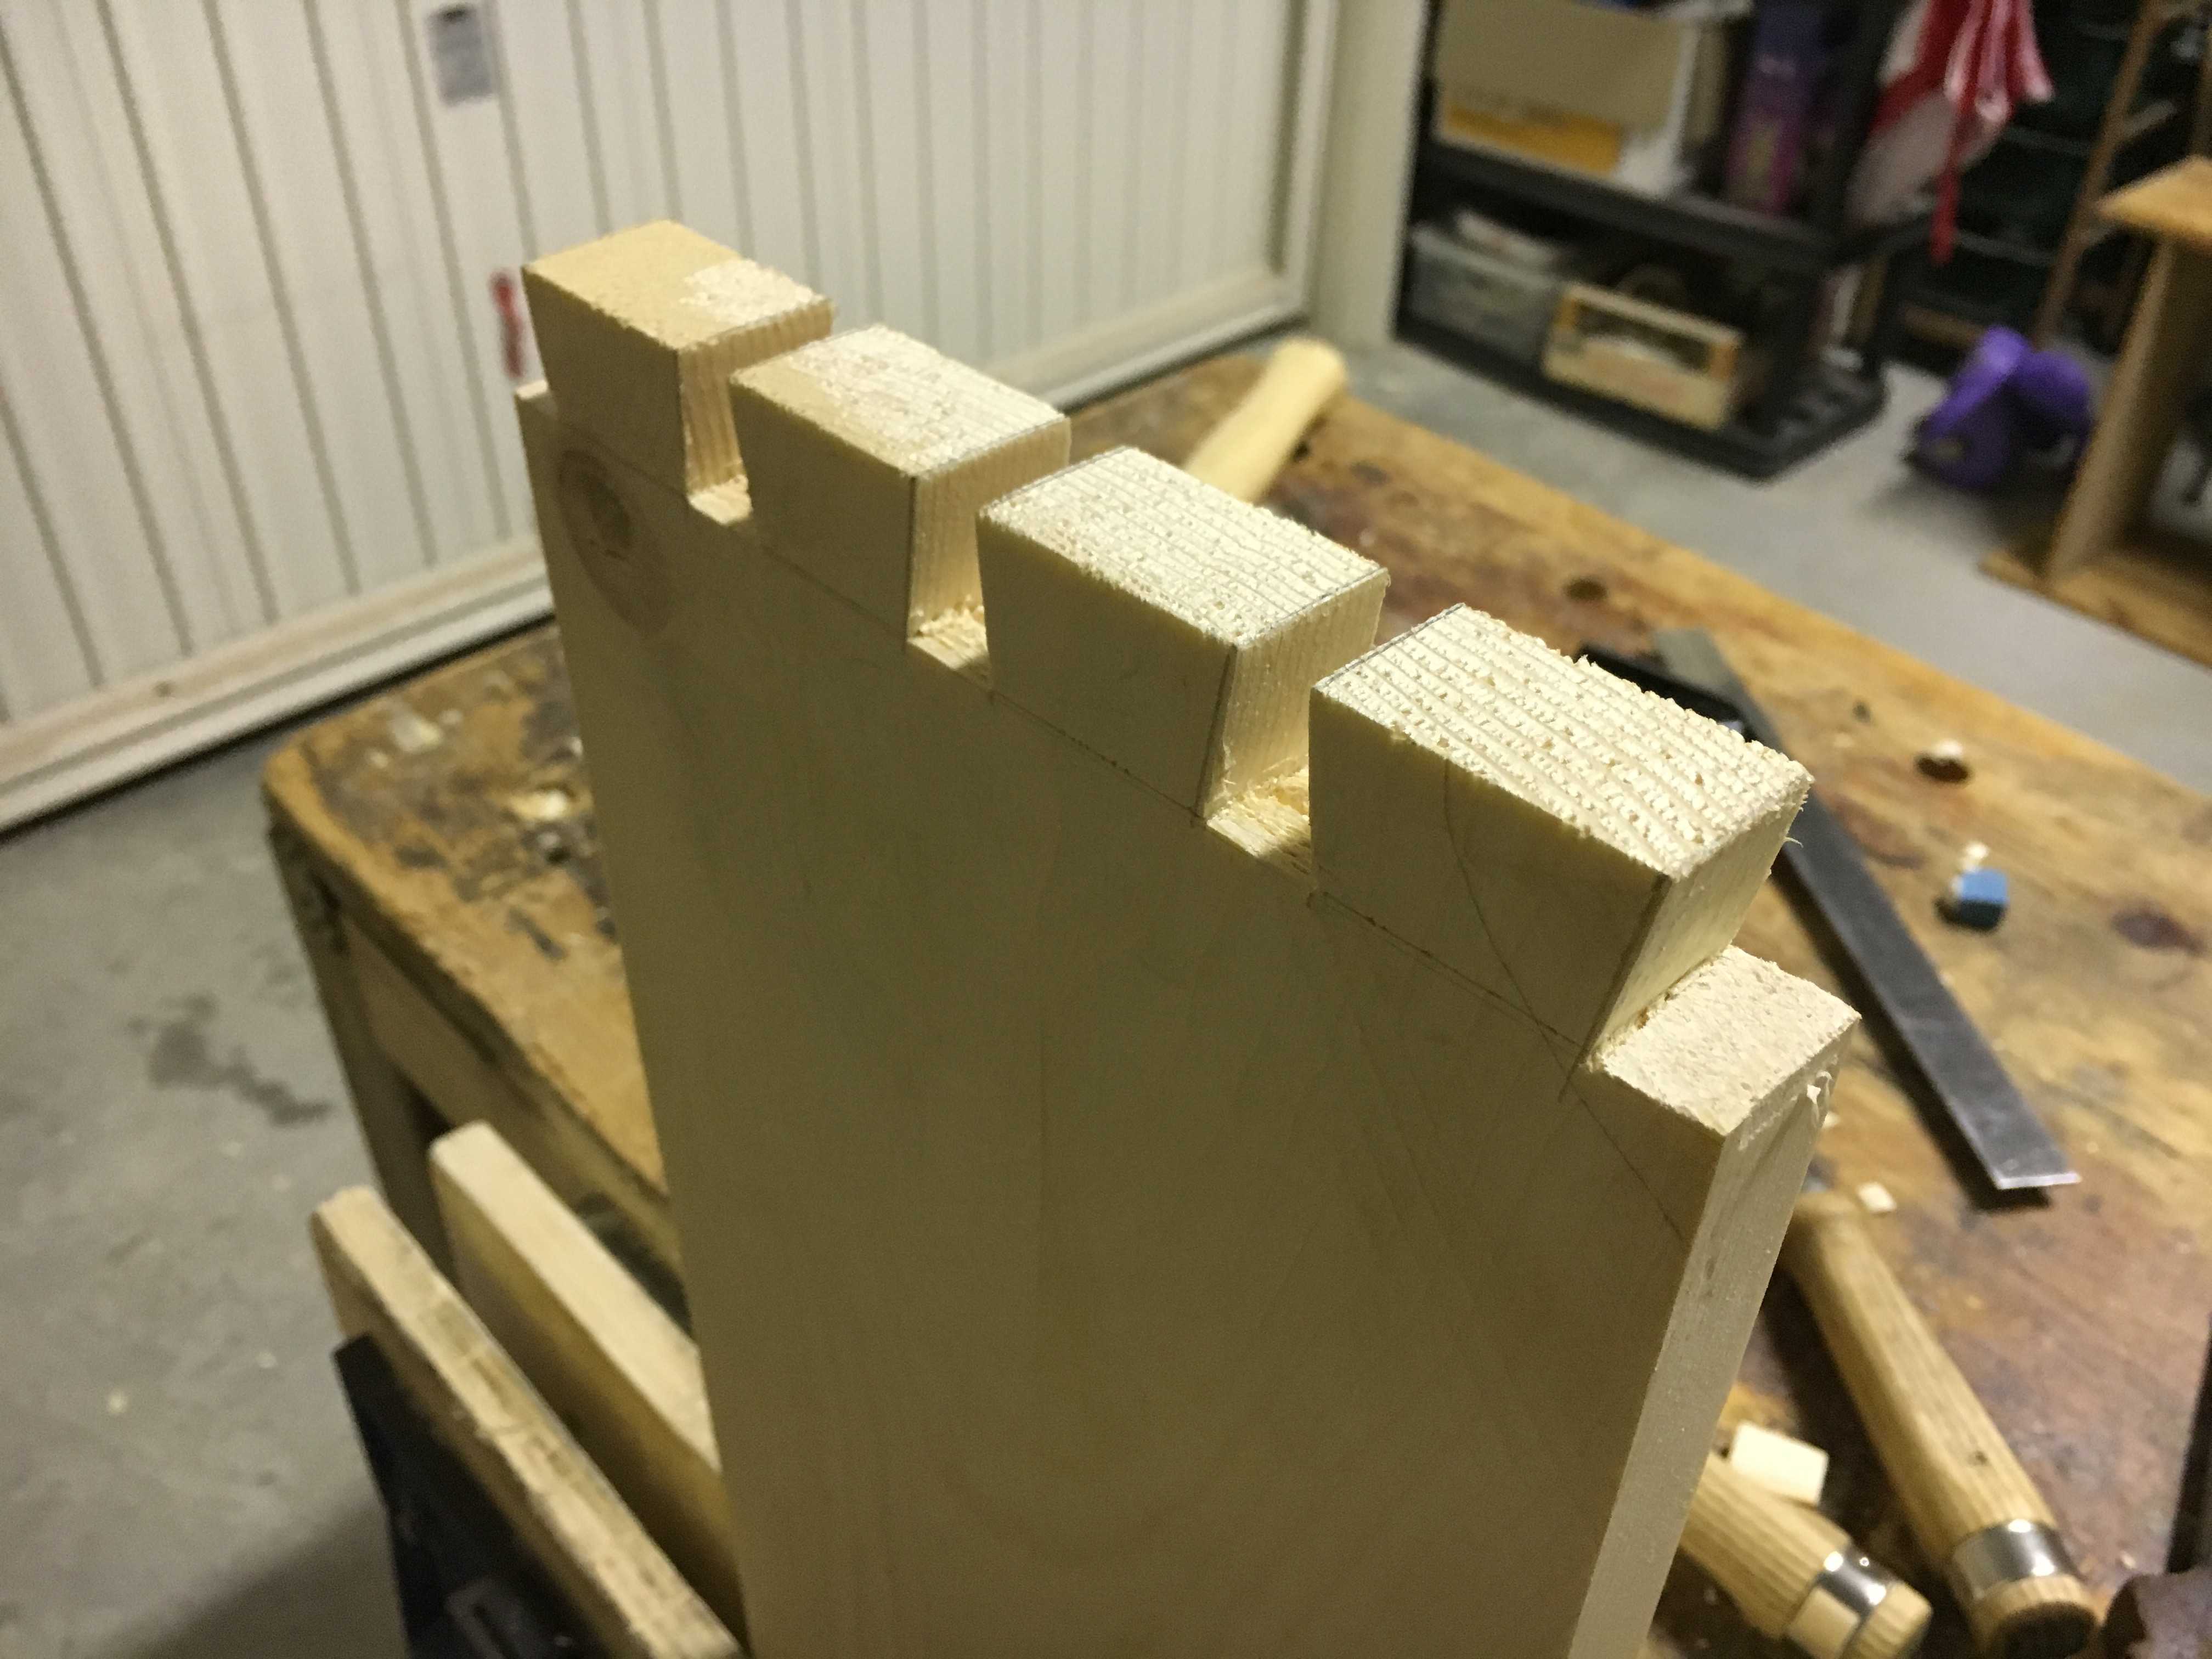
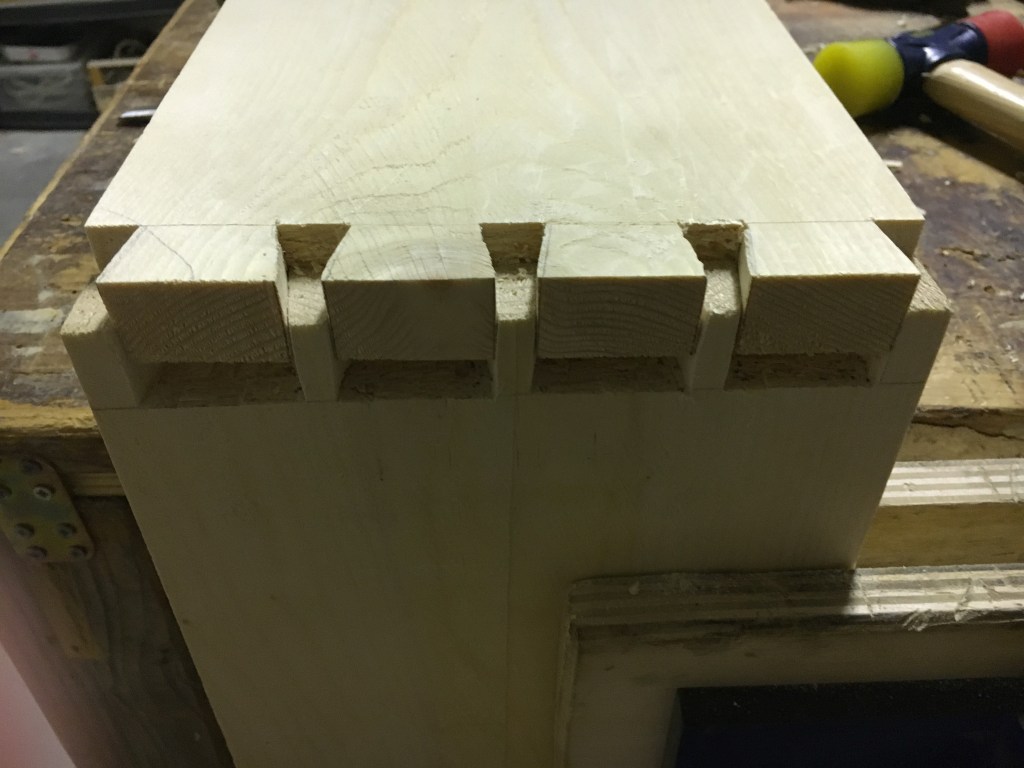
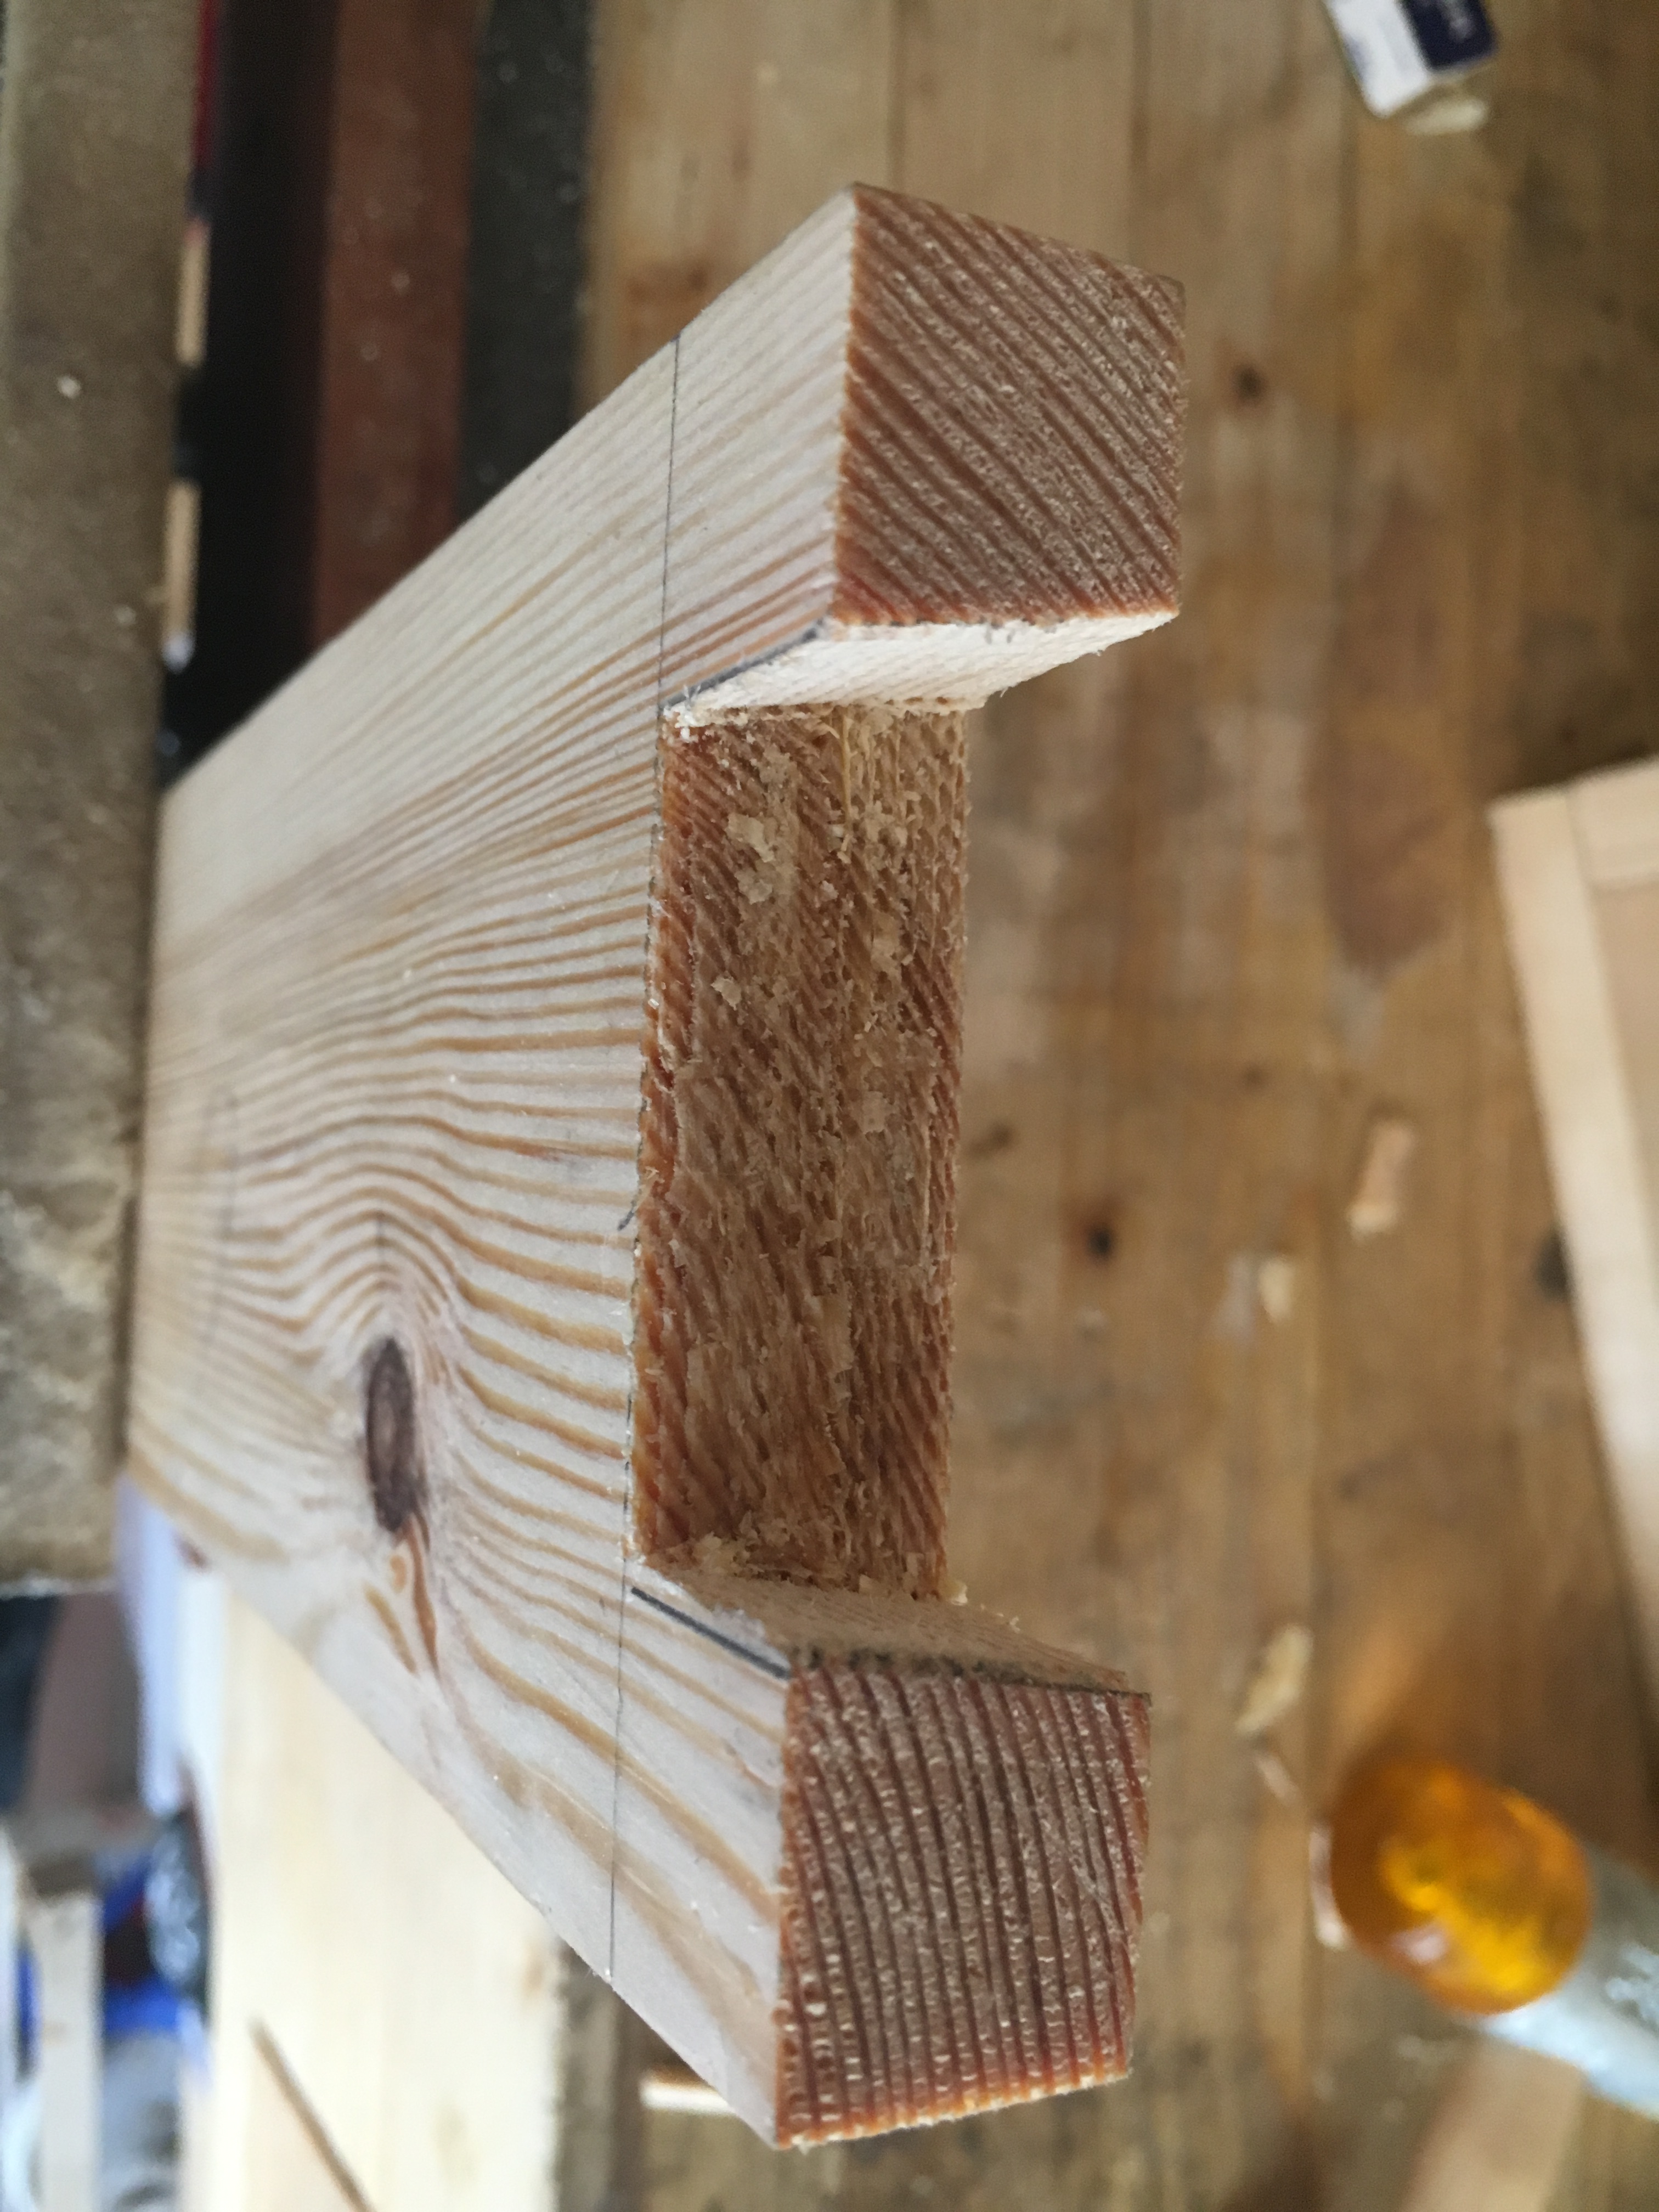
L’incastro a coda di rondine è utilizzato principalmente nella costruzione di carcasse di mobili, dove viene richiesta una particolare forza nell’unione dei pezzi, ma anche nella realizzazione di scatole e cassetti. Trova applicazione quasi prevalentemente come unione d’ angolo di due pezzi di legno: nel primo pezzo vengono ricavati dei denti (code) che andranno ad inserirsi in altrettante cavità (zoccoli o mortase) ricavate nel secondo pezzo da unire. La misura, la forma ed il numero di code che si possono realizzare è altamente personalizzabile ma necessariamente dipendente dalla larghezza dei pezzi e dall’oggettiva possibilità di poter operare con gli utensili manuali.
Esistono principalmente due tipi di incastro a coda di rondine. La coda di rondine aperta (o passante) e la coda di rondine seminascosta. Le altre tipologie di code possono ritenersi varianti delle due appena citate. Nella coda di rondine aperta le code sono visibili su entrambi i pezzi uniti (è usata prevalentemente nella costruzione delle carcasse dei mobili ma anche nella costruzione di scatole). Nella coda di rondine seminascosta invece le code di rondine sono visibili solo su un pezzo in quanto sull’altro pezzo rimangono nascoste dallo spessore del legno (come ad esempio nella costruzione dei frontali dei cassetti).
Come per tutti i lavori, anche per le code di rondine non esiste una sola tecnica realizzativa. Quella che illustrerò di seguito è sicuramente la più tradizionale, usata per centinaia di anni da generazioni di falegnami. Gli utensili da utilizzare sono i seguenti:
– Sega per tagli a coda di rondine (dovetail saw) da 14 a 16 PPI (points per inch, punte dei denti per pollice);
– Scalpelli del tipo bevel edge chisel di varie misure;
– Martello con testa in gomma dura o mazzuolo di legno;
– Coltellino da tracciatura;
– Squadra combinata;
– Righello metallico;
– Falsa squadra o jig per code di rondine;
– Matita, pennarello punta fine, gomma da cancellare;
– Lime, raspe e carta abrasiva;
– Morsetti e colla;
– Compasso (opzionale).
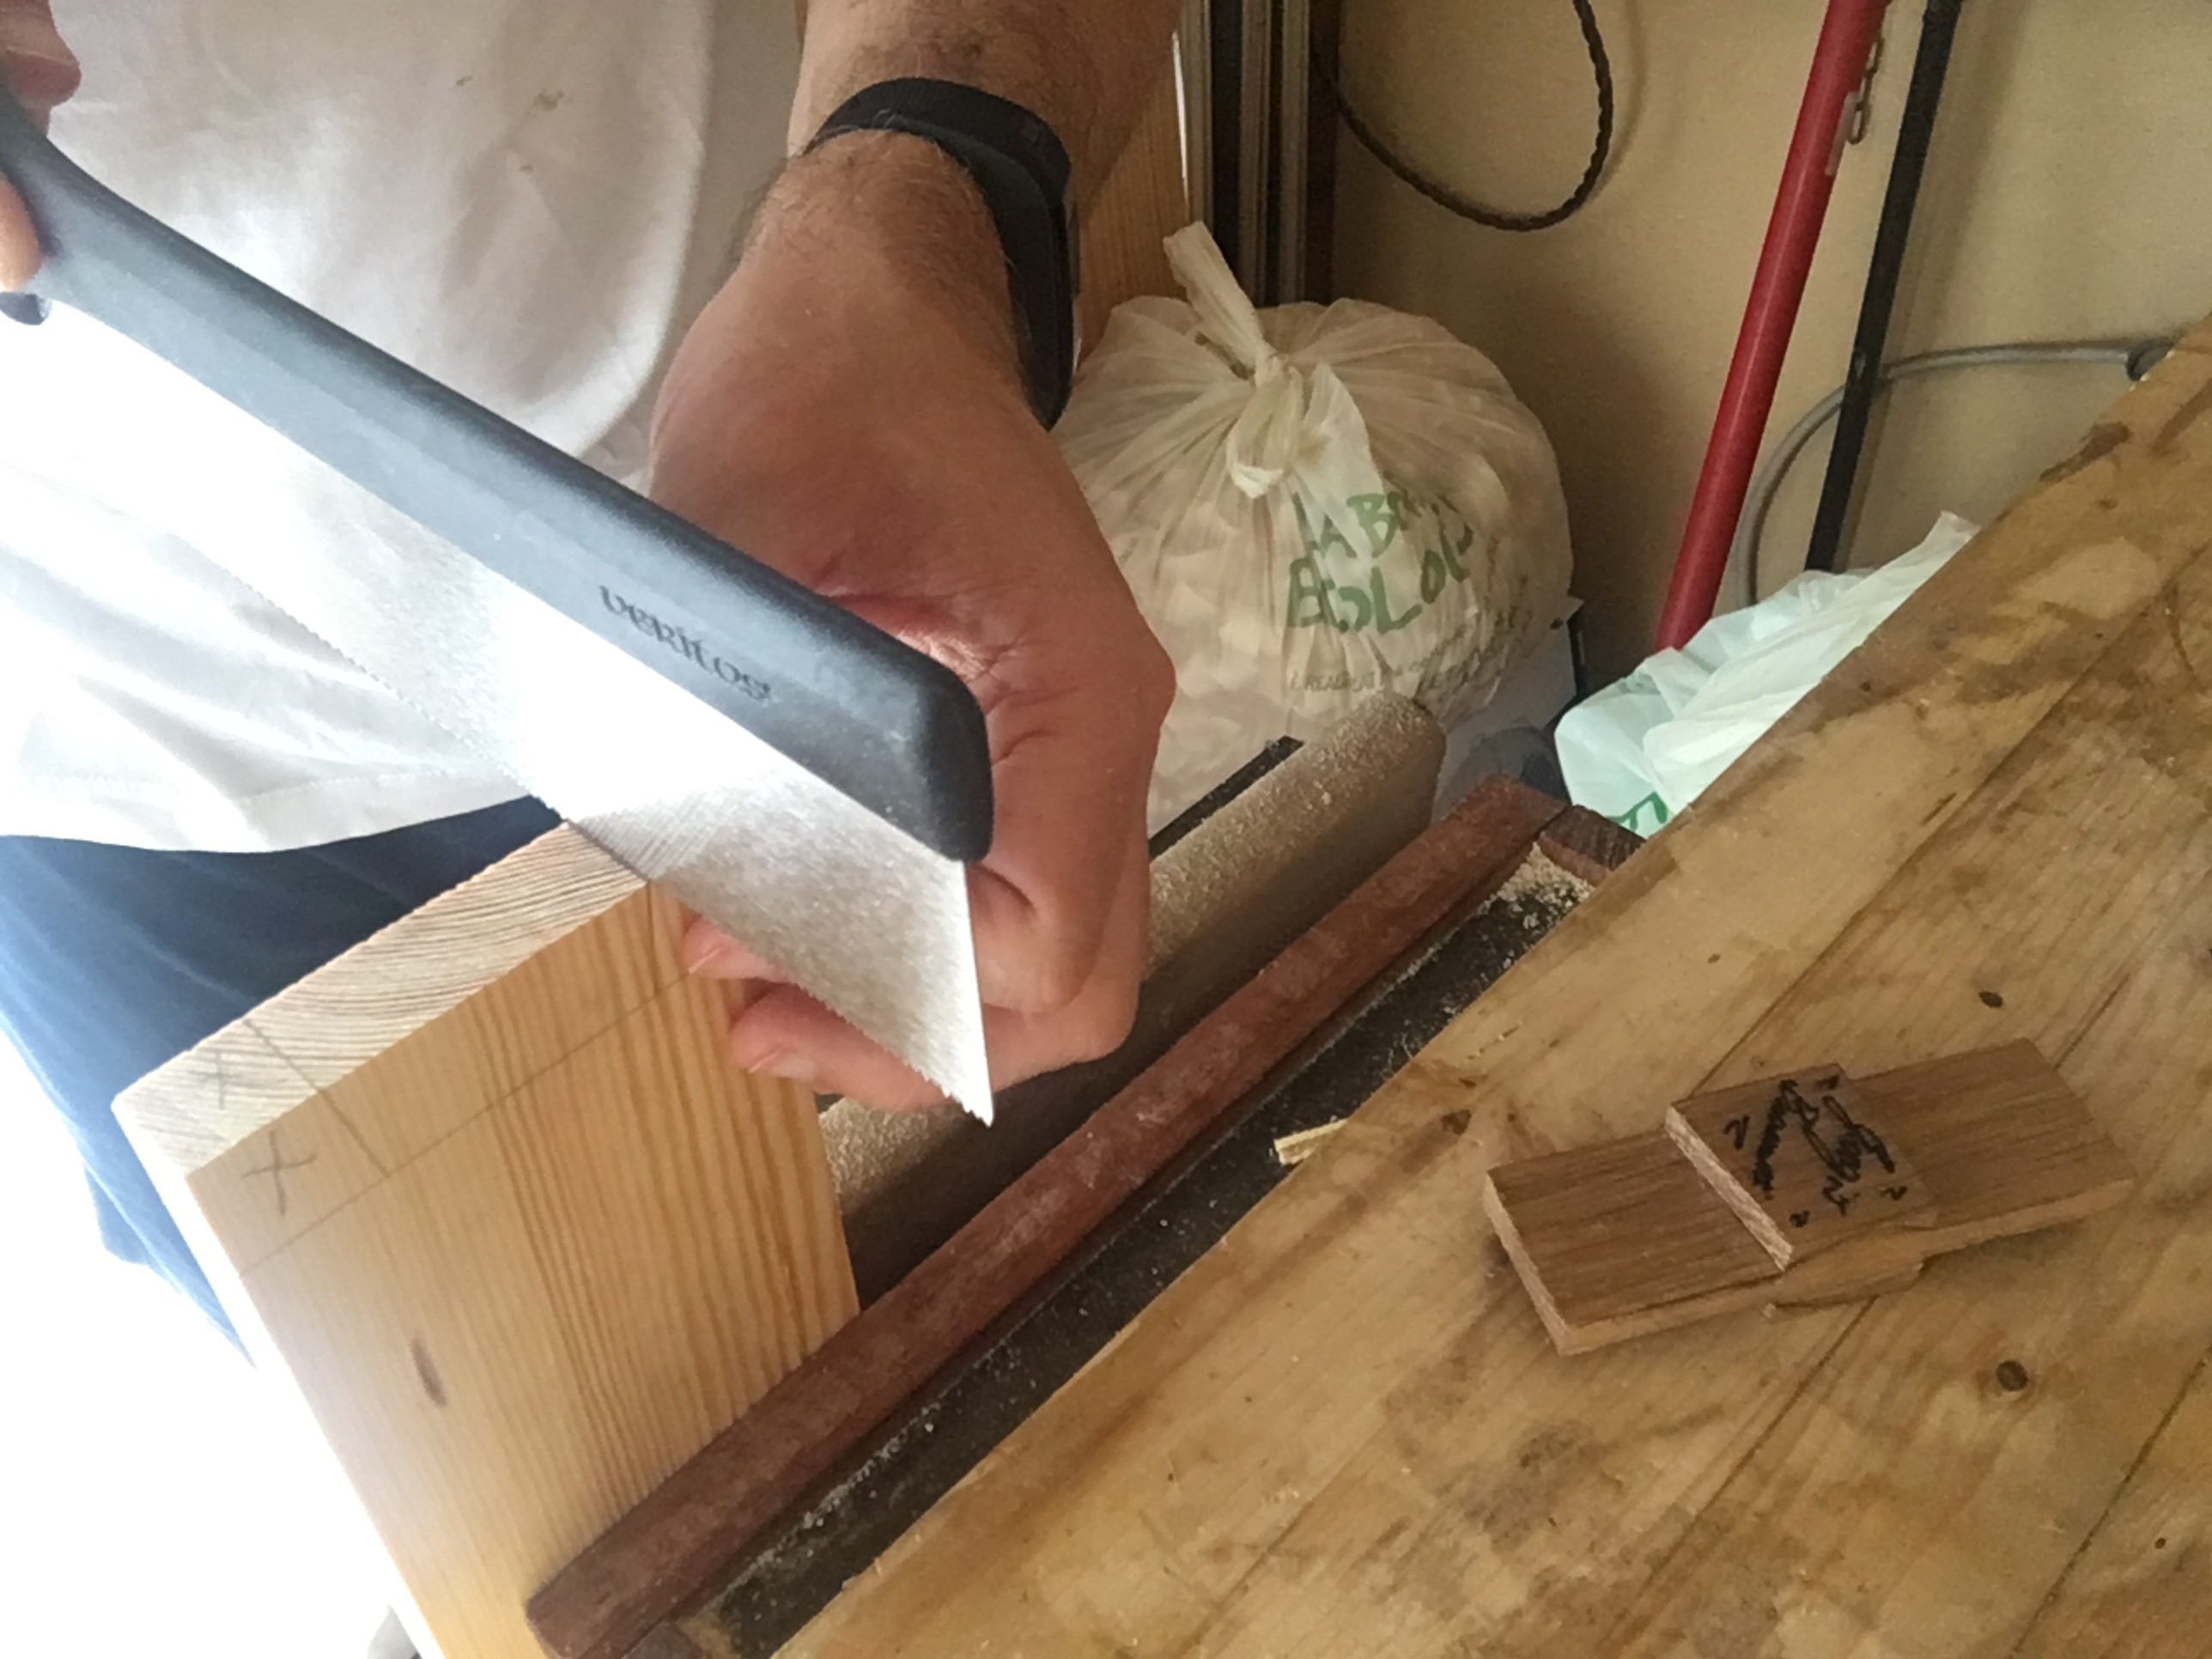
Per rimuovere il legno tra le code e per le mortase molte persone utilizzano il traforo ad archetto. Nel mio caso non servirà in quanto il legno verrà rimosso con gli scalpelli.
Alcune raccomandazioni sugli utensili elencati:
– È meglio utilizzare una sega occidentale, una dovetail saw, rispetto ad una sega giapponese, in quanto risulta più rigida durante il taglio e quindi maggiormente controllabile. L’approccio con il legno sarà più difficoltoso ma è meglio delle giapponesi che, pur avendo un inizio di taglio più soft, tendono poi a “vagare” nel legno. Usare una sega di buona qualità, ben affilata e con un numero di denti tra 14 e 16 PPI garantisce la migliore qualità di taglio e le dovetail saw, affilate in configurazione ripsaw, risultano perfette per questo tipo di incastro.
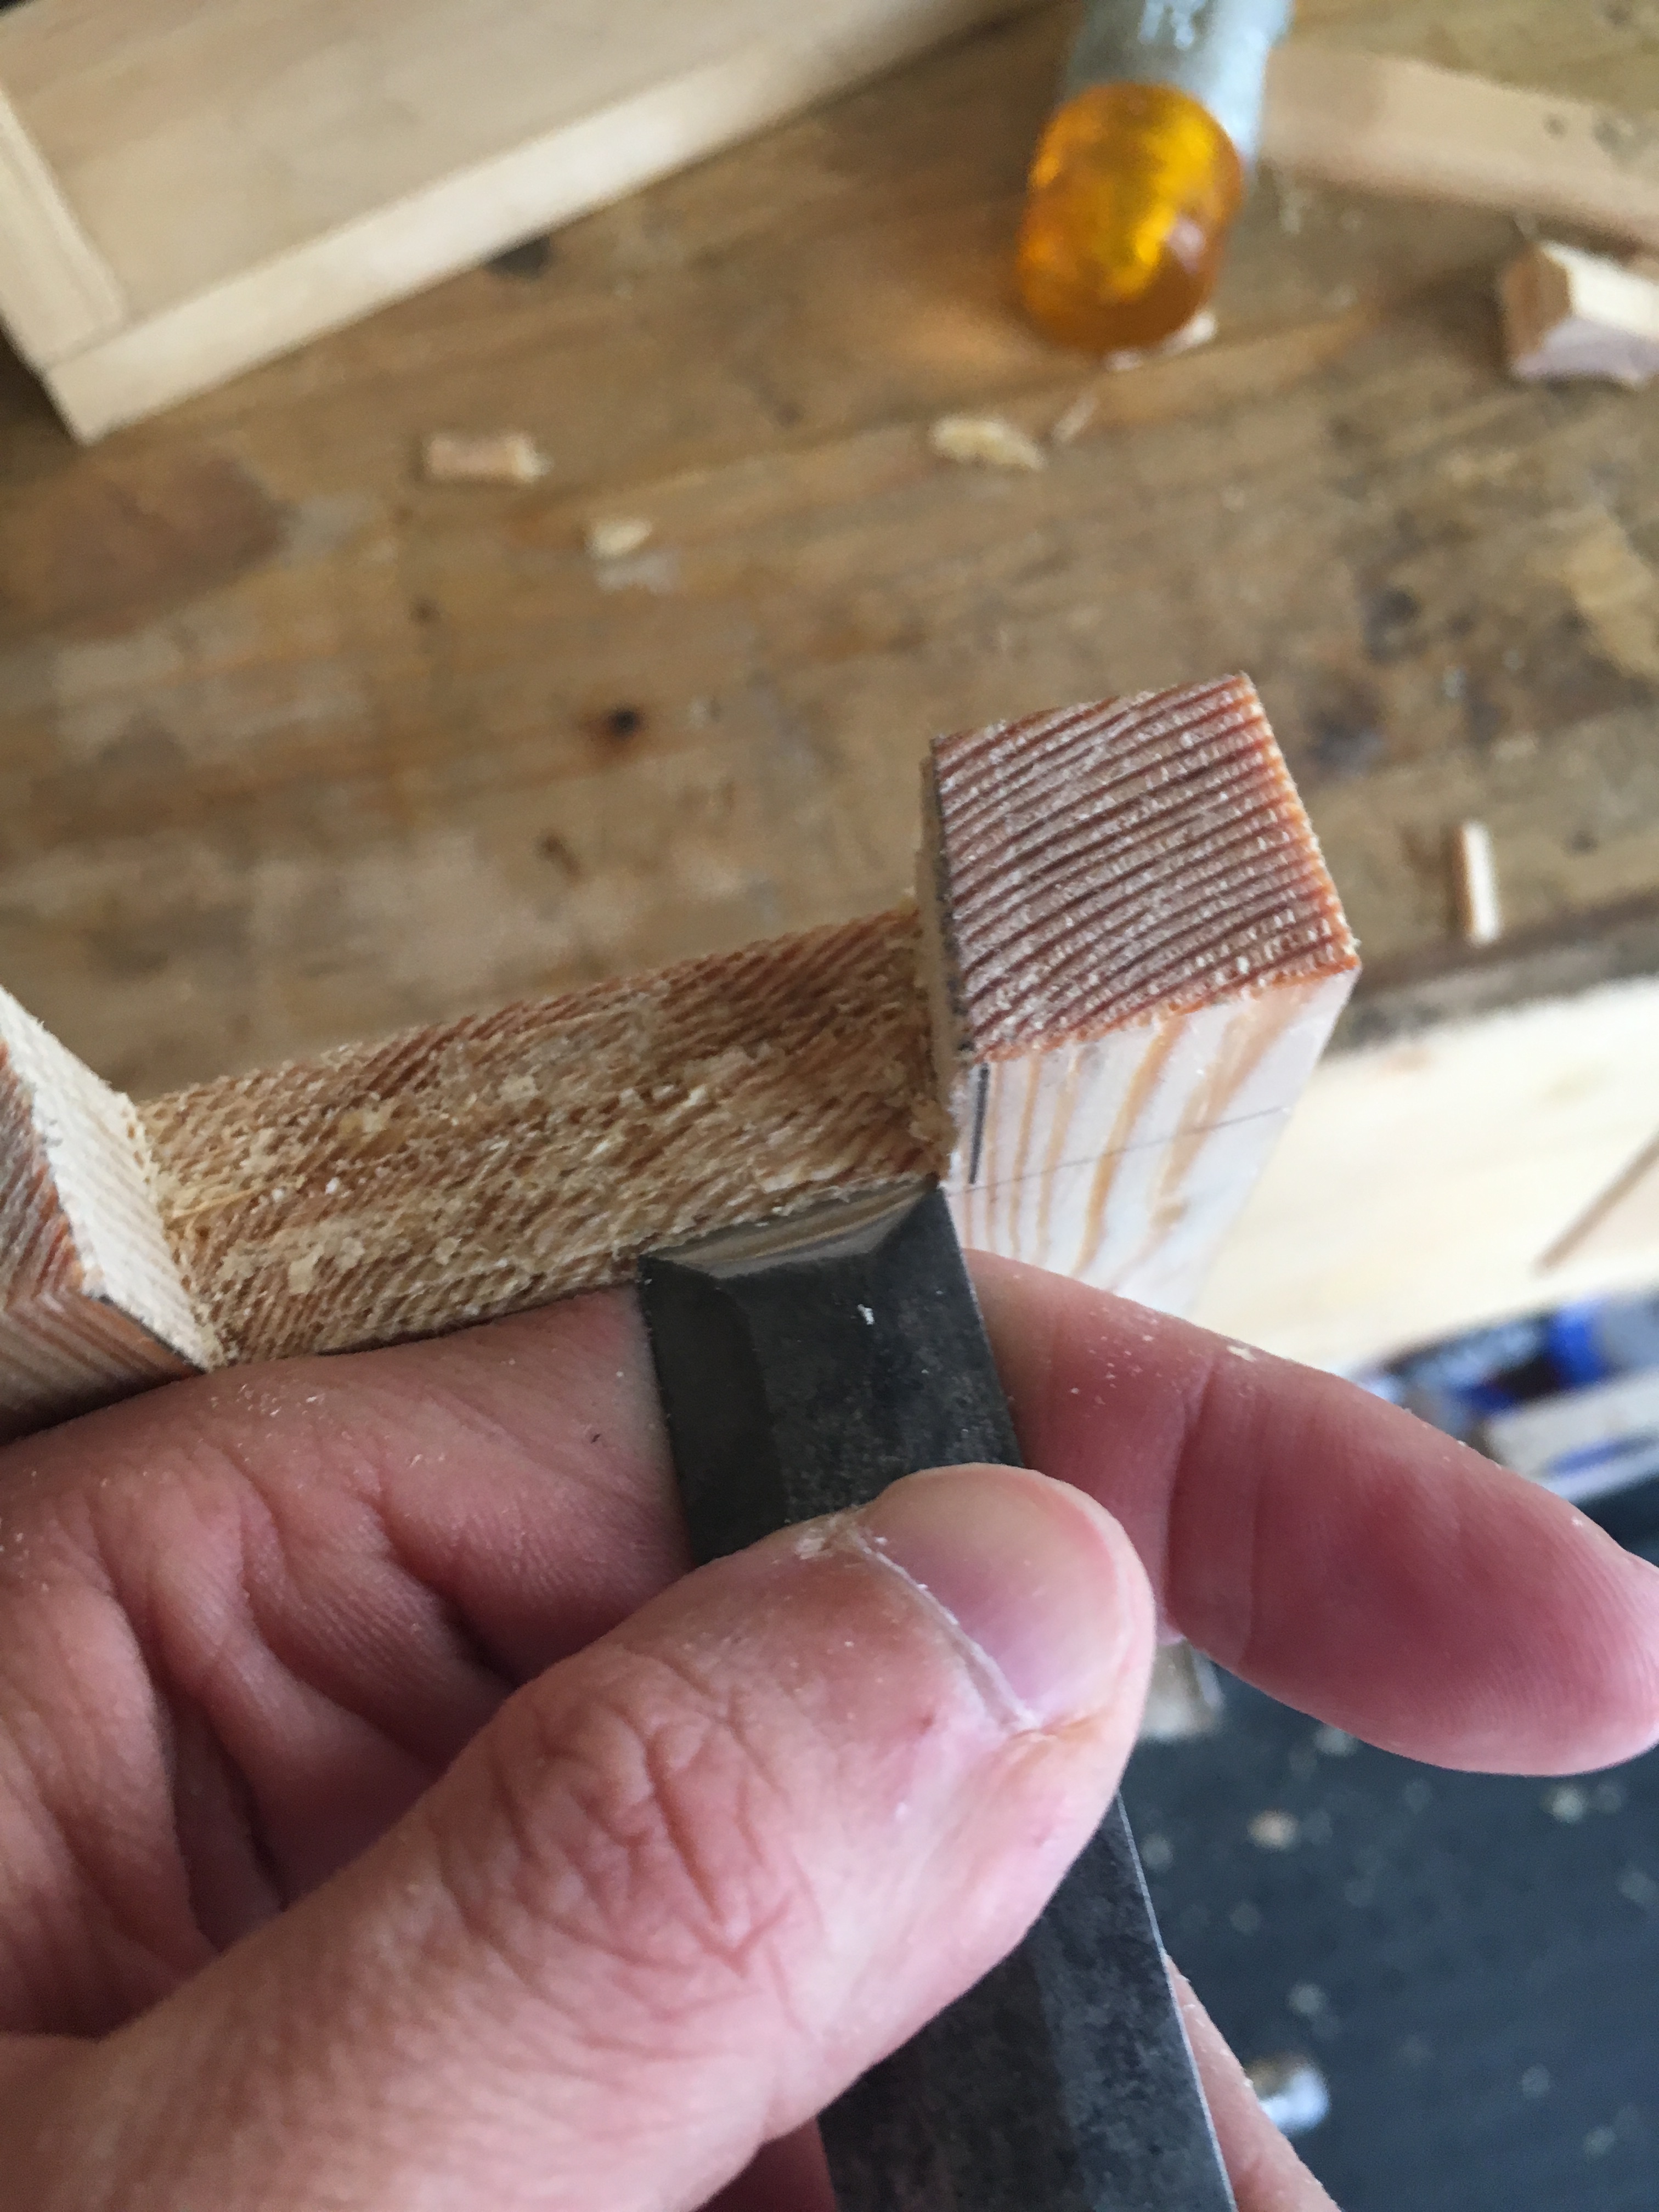
– Usare solo scalpelli del tipo bevel edge, ovvero con i fianchi smussati, in quanto perfetti per lavorare in questo tipo di incastro, per rifinire gli angoli delle code e pulire i fondi delle mortase. Dotarsi di varie misure per potersi adattare alla grandezza delle code ed assicurarsi che siano ben affilati. Meglio sarebbe averne di due tipi. Un tipo con angolo di circa 20 gradi per pulire i fondi delle mortase ed uno di circa 30 gradi per scavare le code e le mortase. Comunque si riesce a fare tutto anche con i normali scalpelli, con lo smusso affilato a 30 gradi.
– La matita deve essere sempre ben temperata ed il coltellino da tracciatura affilato.
– Infine un’ultima raccomandazione riguarda la falsa squadra. Questa andrà benissimo ma presto si sentirà il bisogno di dotarsi di un jig per tracciare le code. Possiamo costruircelo, come ho fatto io, oppure acquistarne uno, ad esempio questo
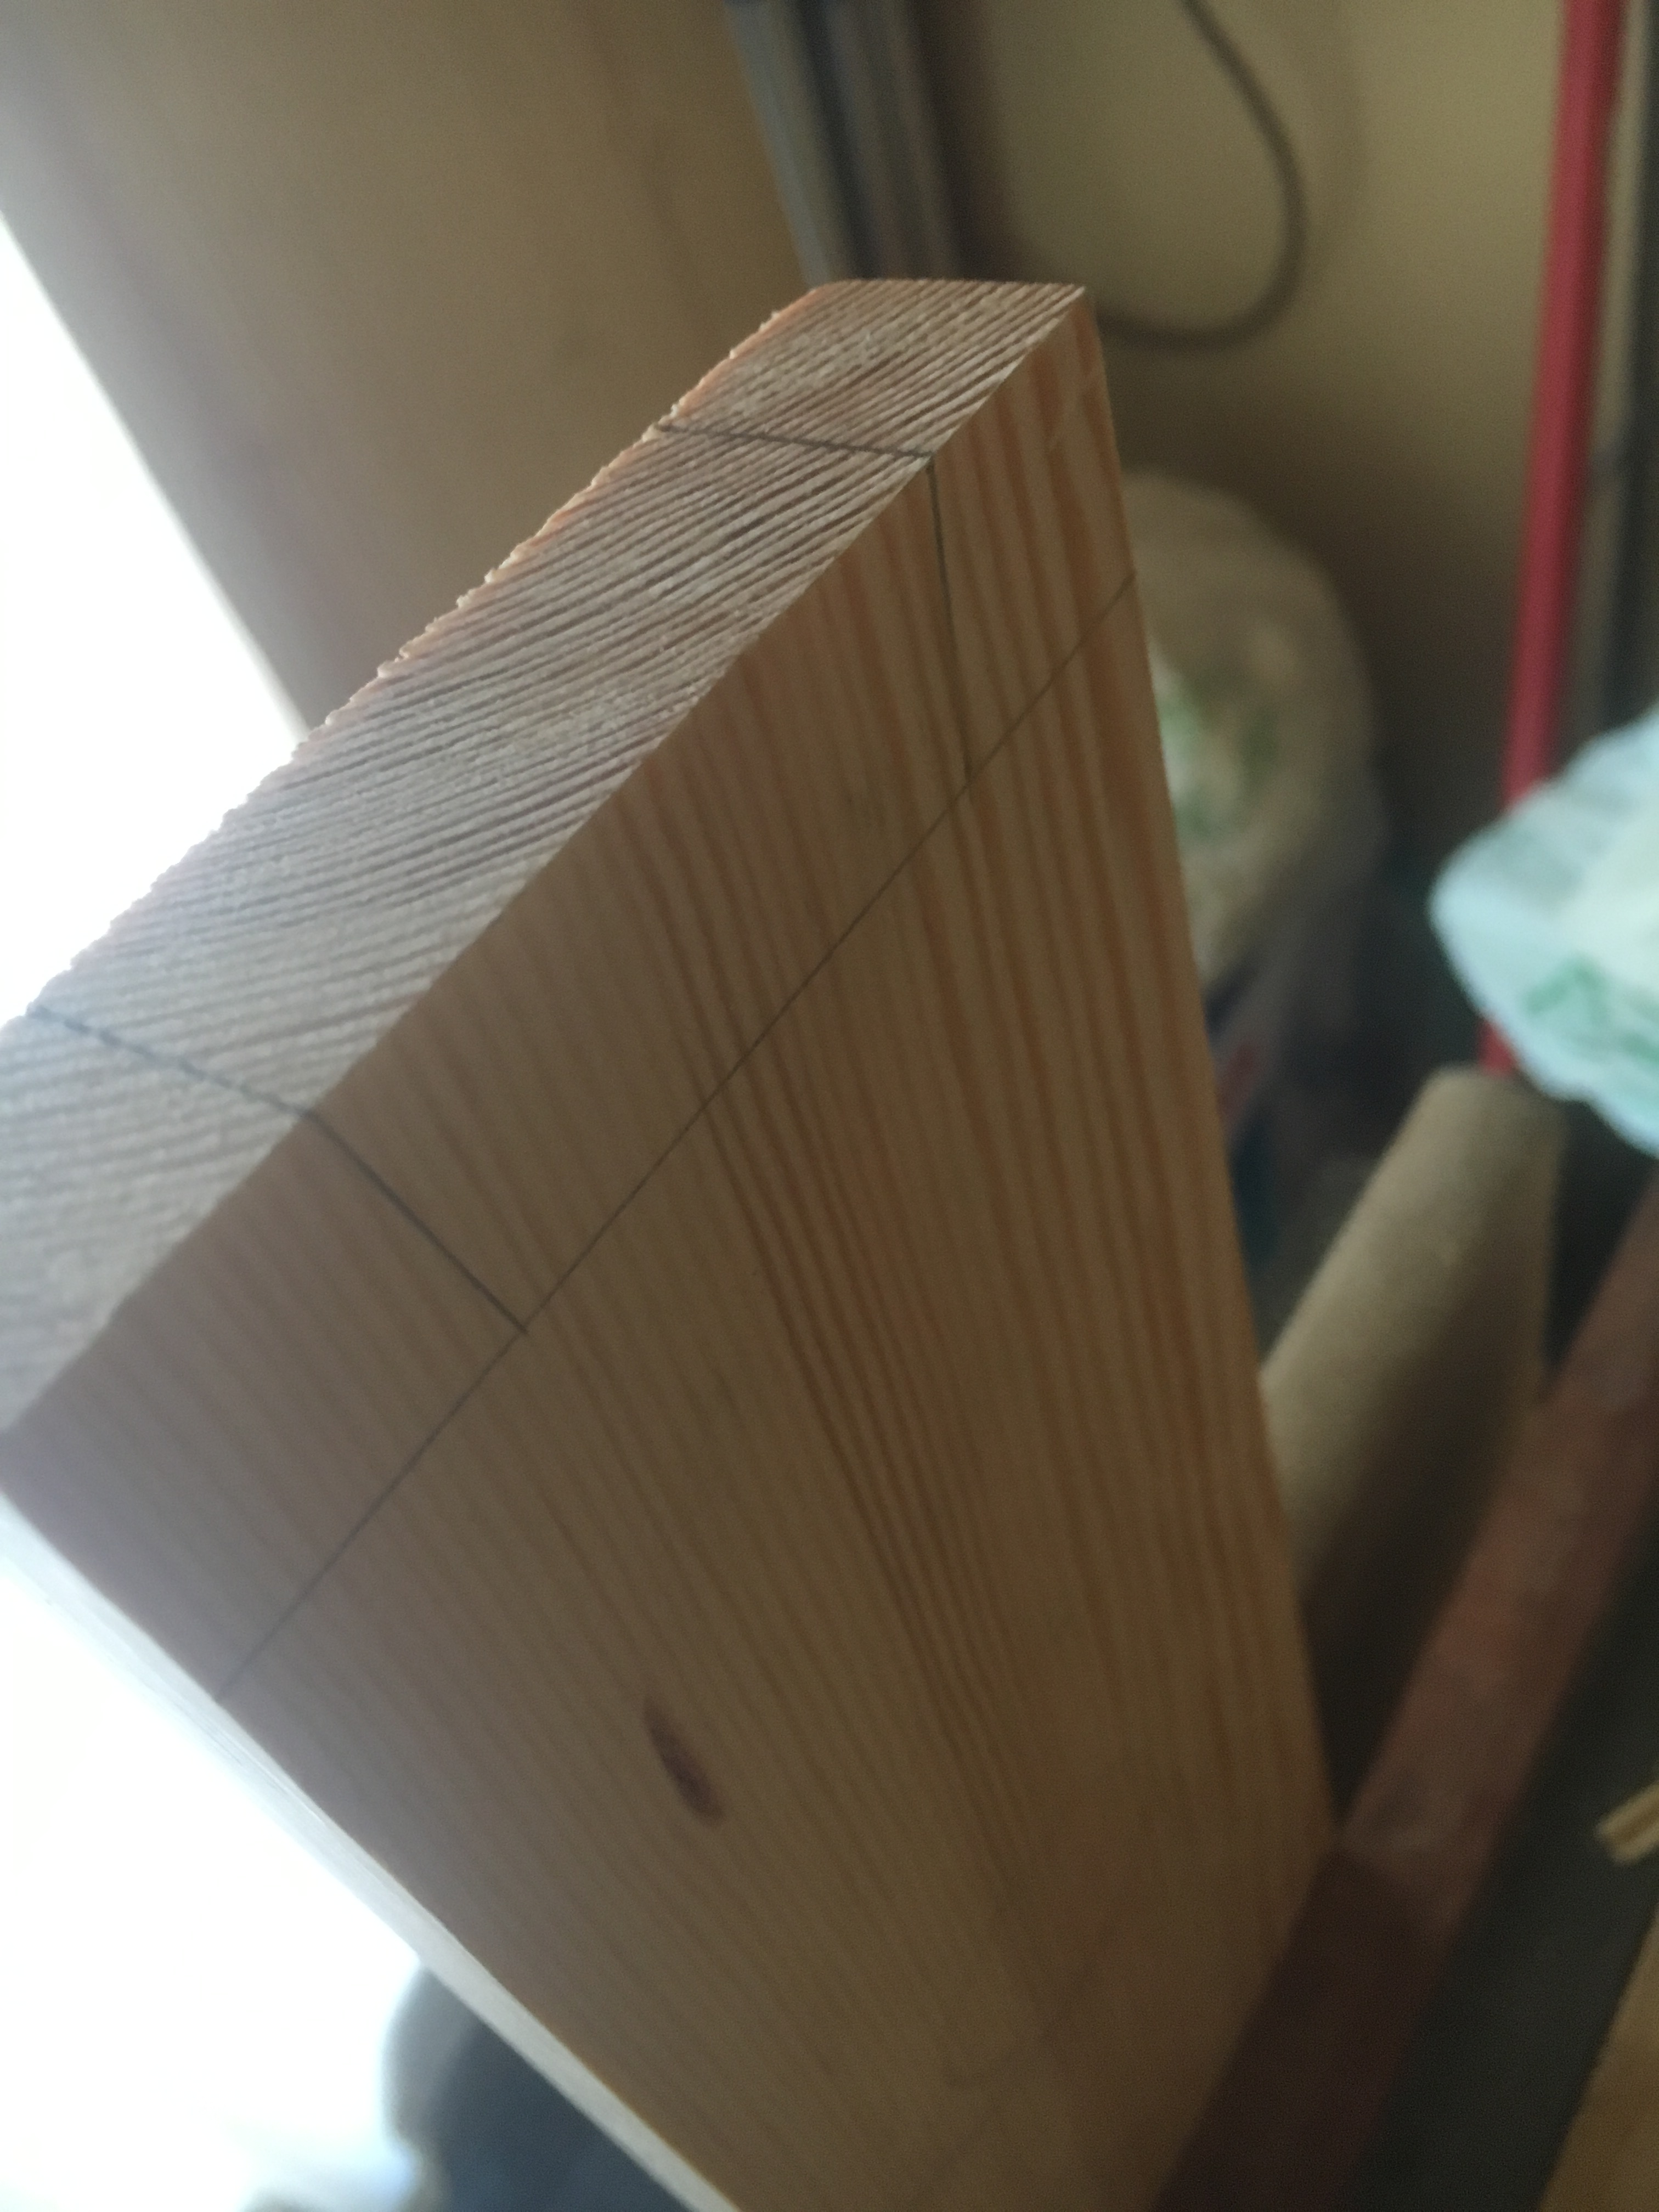
I pezzi da unire devono essere di spessore uguale. Fatta questa premessa è fondamentale che questi siano perfettamente squadrati e con i fianchi assolutamente paralleli tra loro. Prendiamoci quindi del tempo per la preparazione dei pezzi. Se i pezzi non sono in squadra sarà impossibile ottenere un incastro soddisfacente ed avremo sprecato solo il nostro tempo, considerato poi che questo tipo di incastro ne richiede già abbastanza, oltre ad una buona dose di calma e precisione.
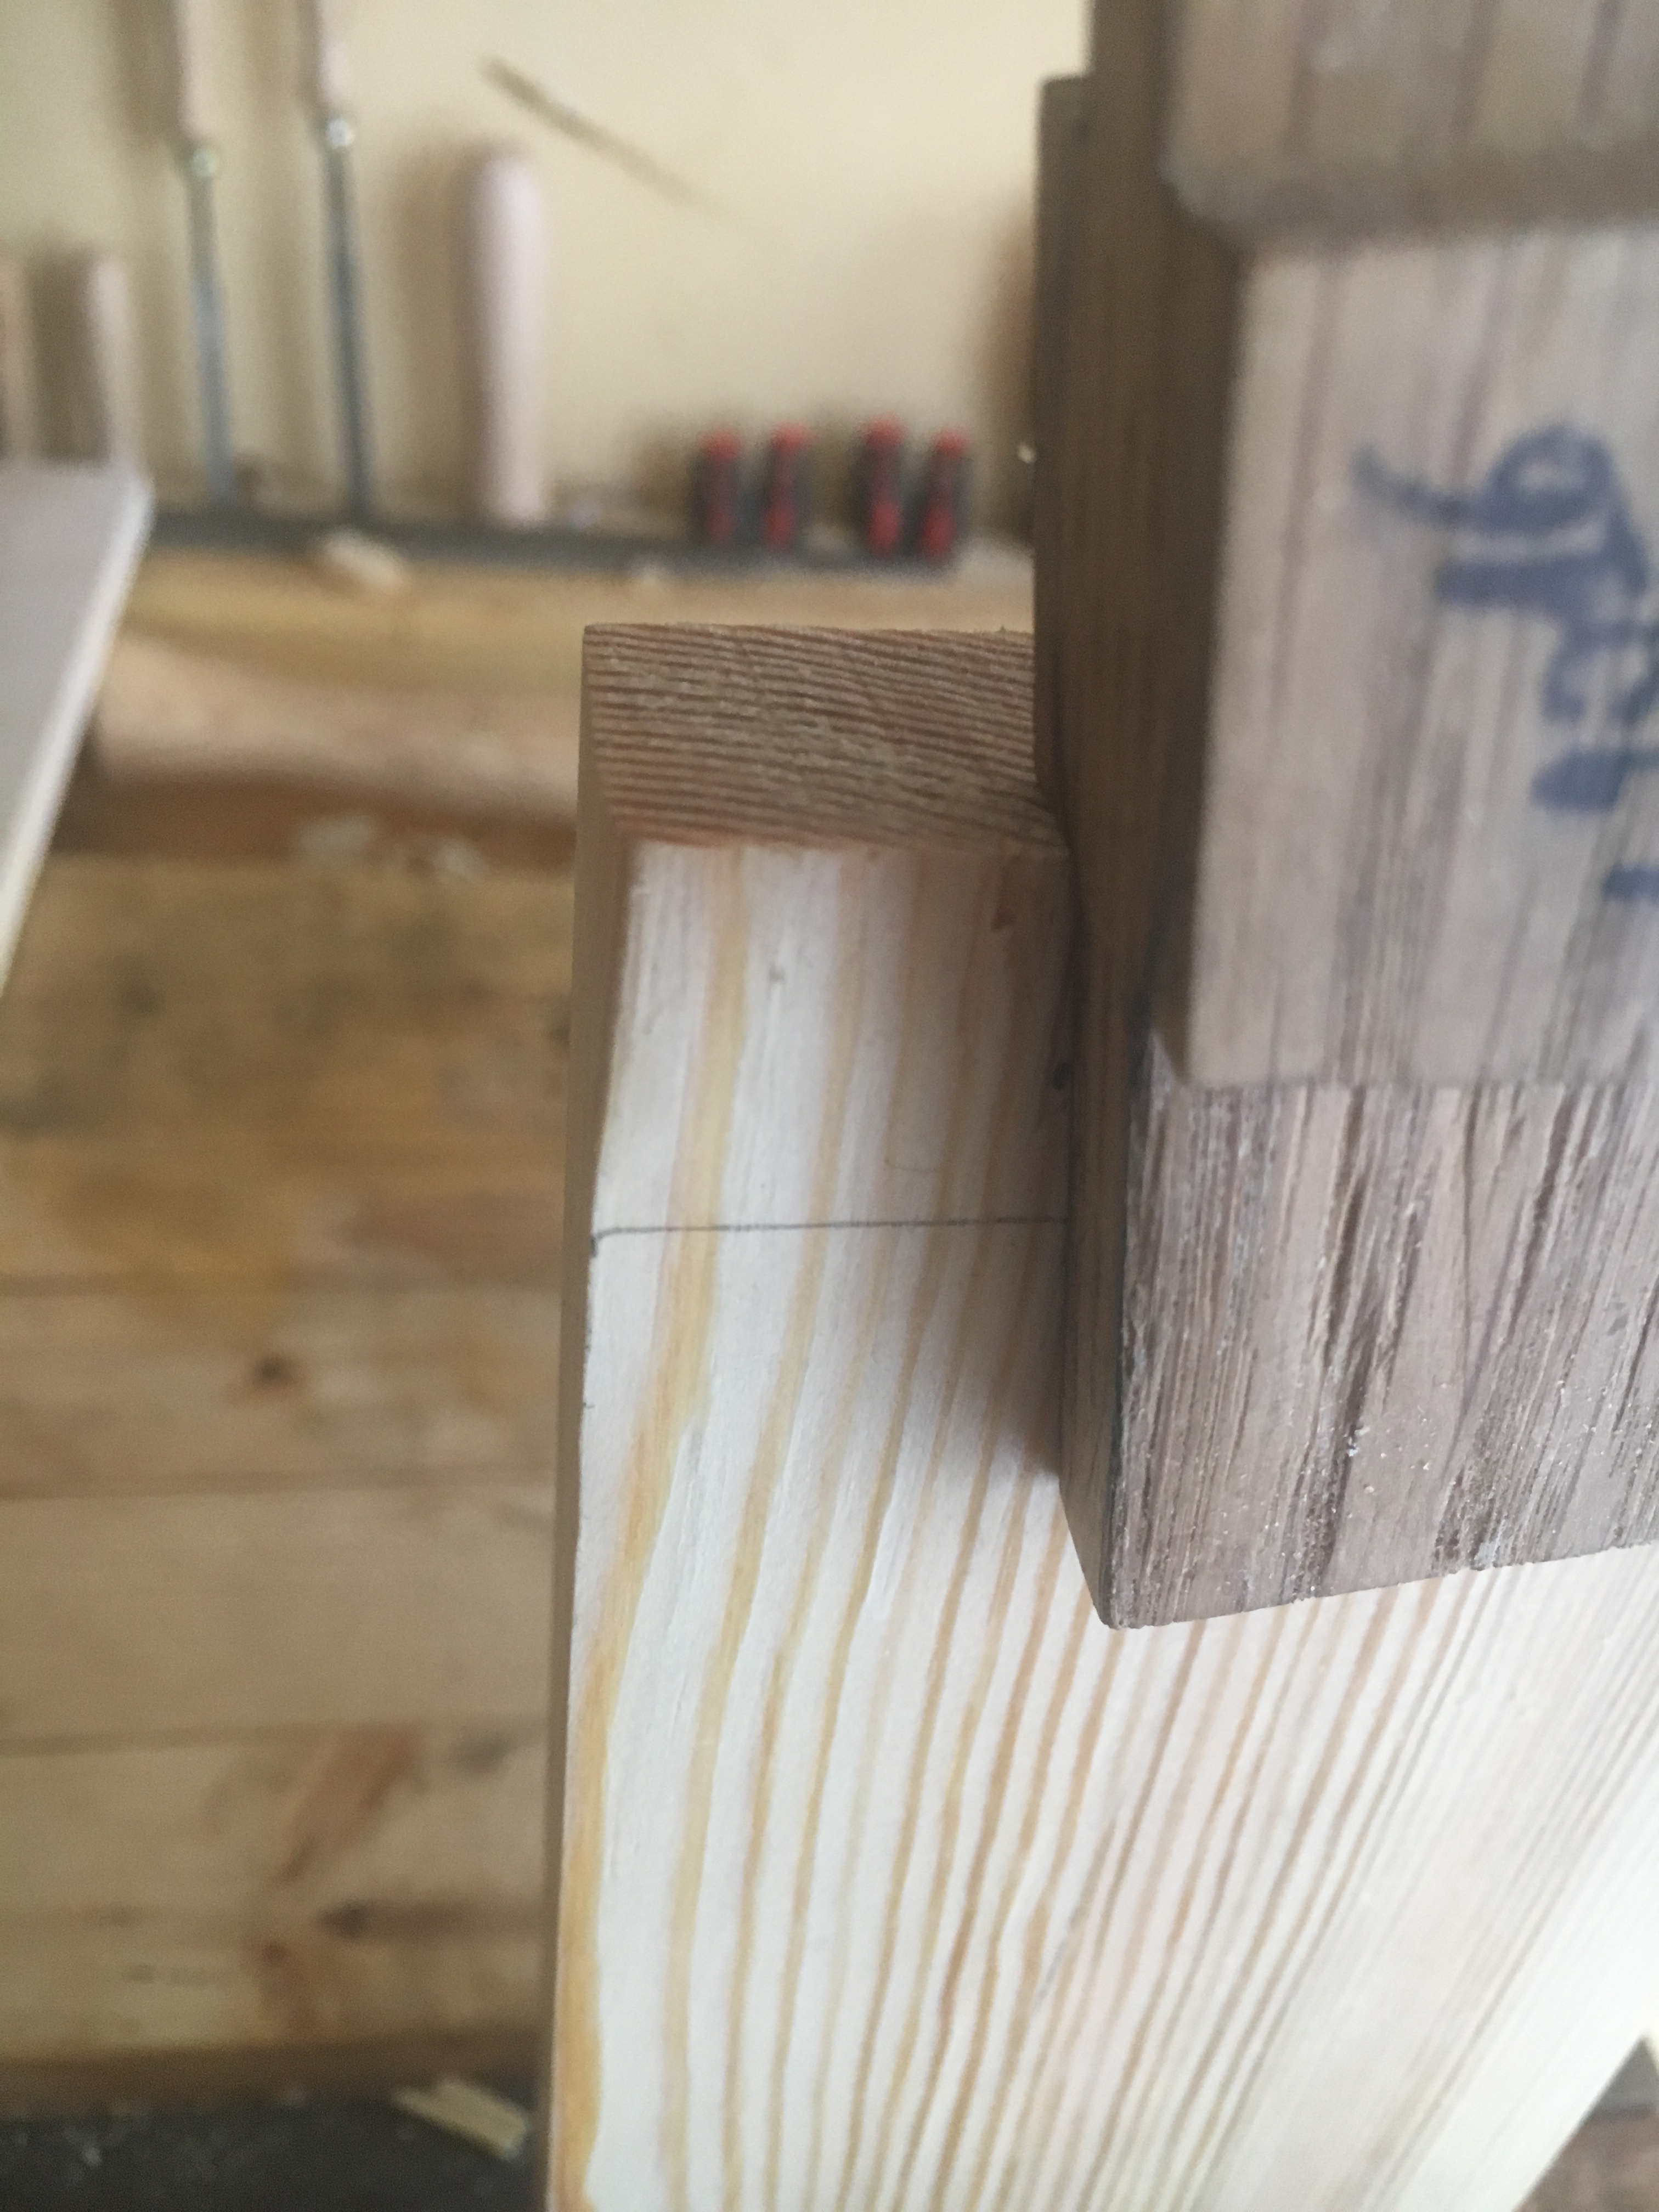
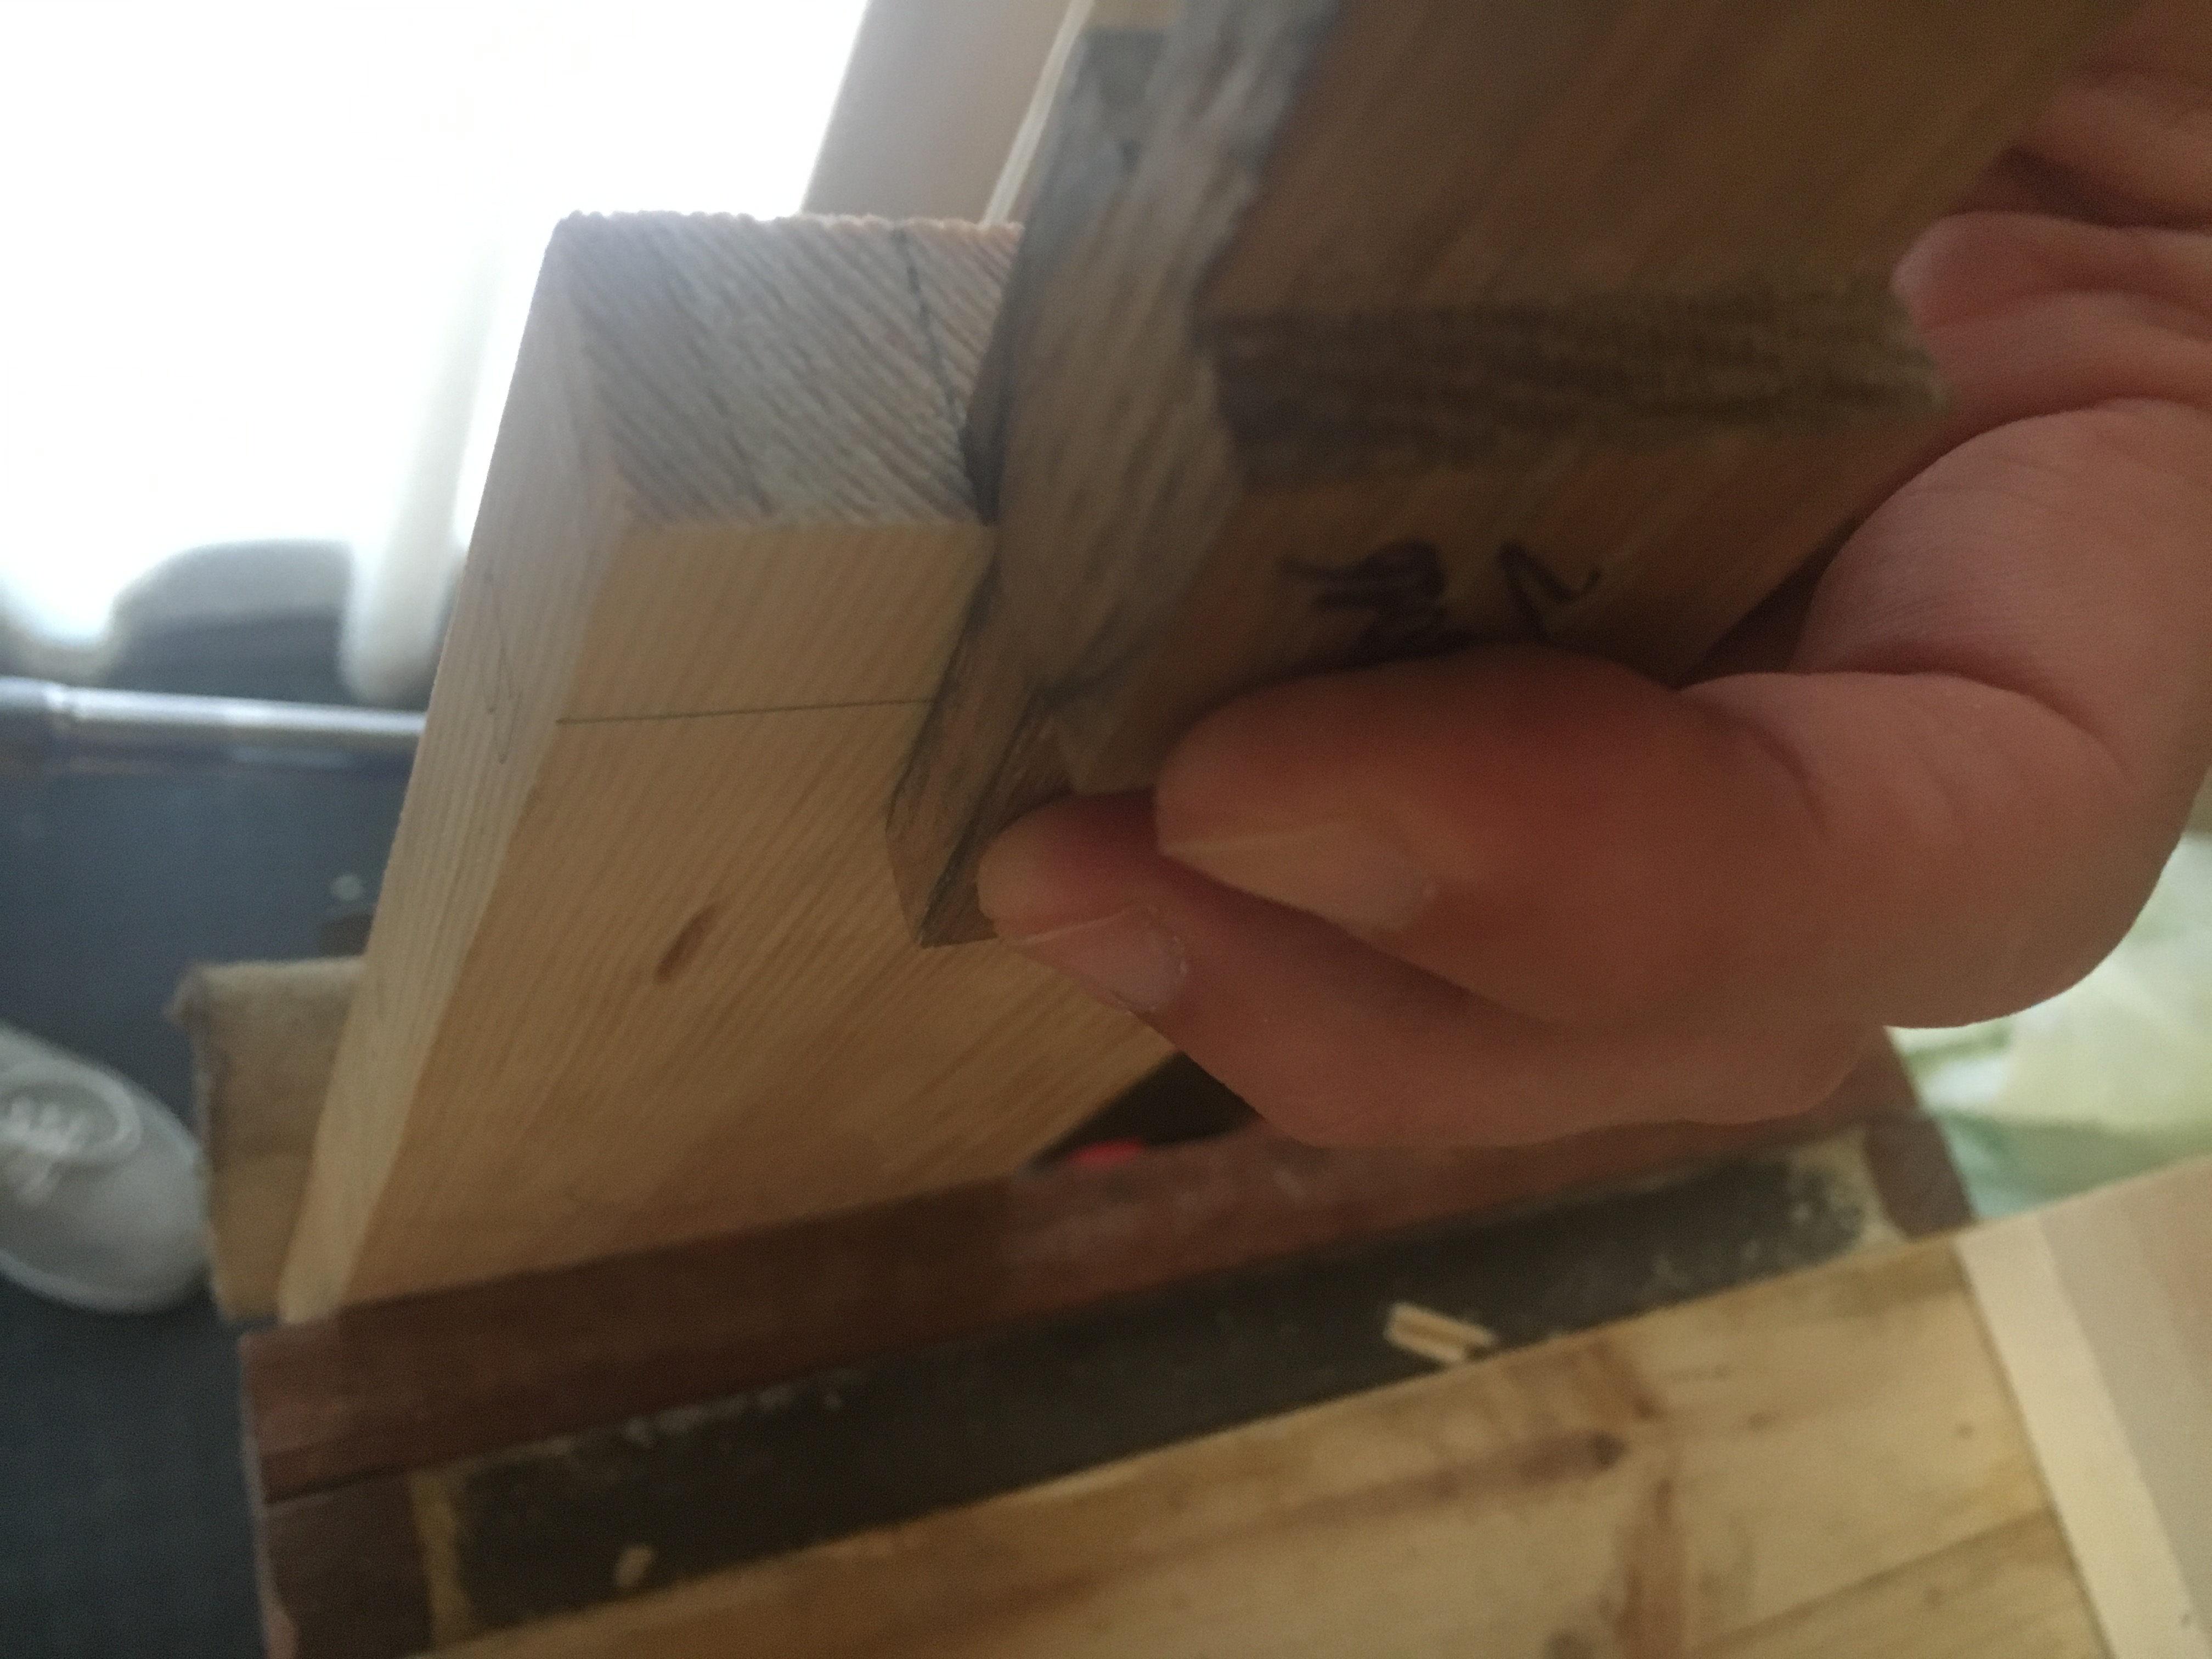
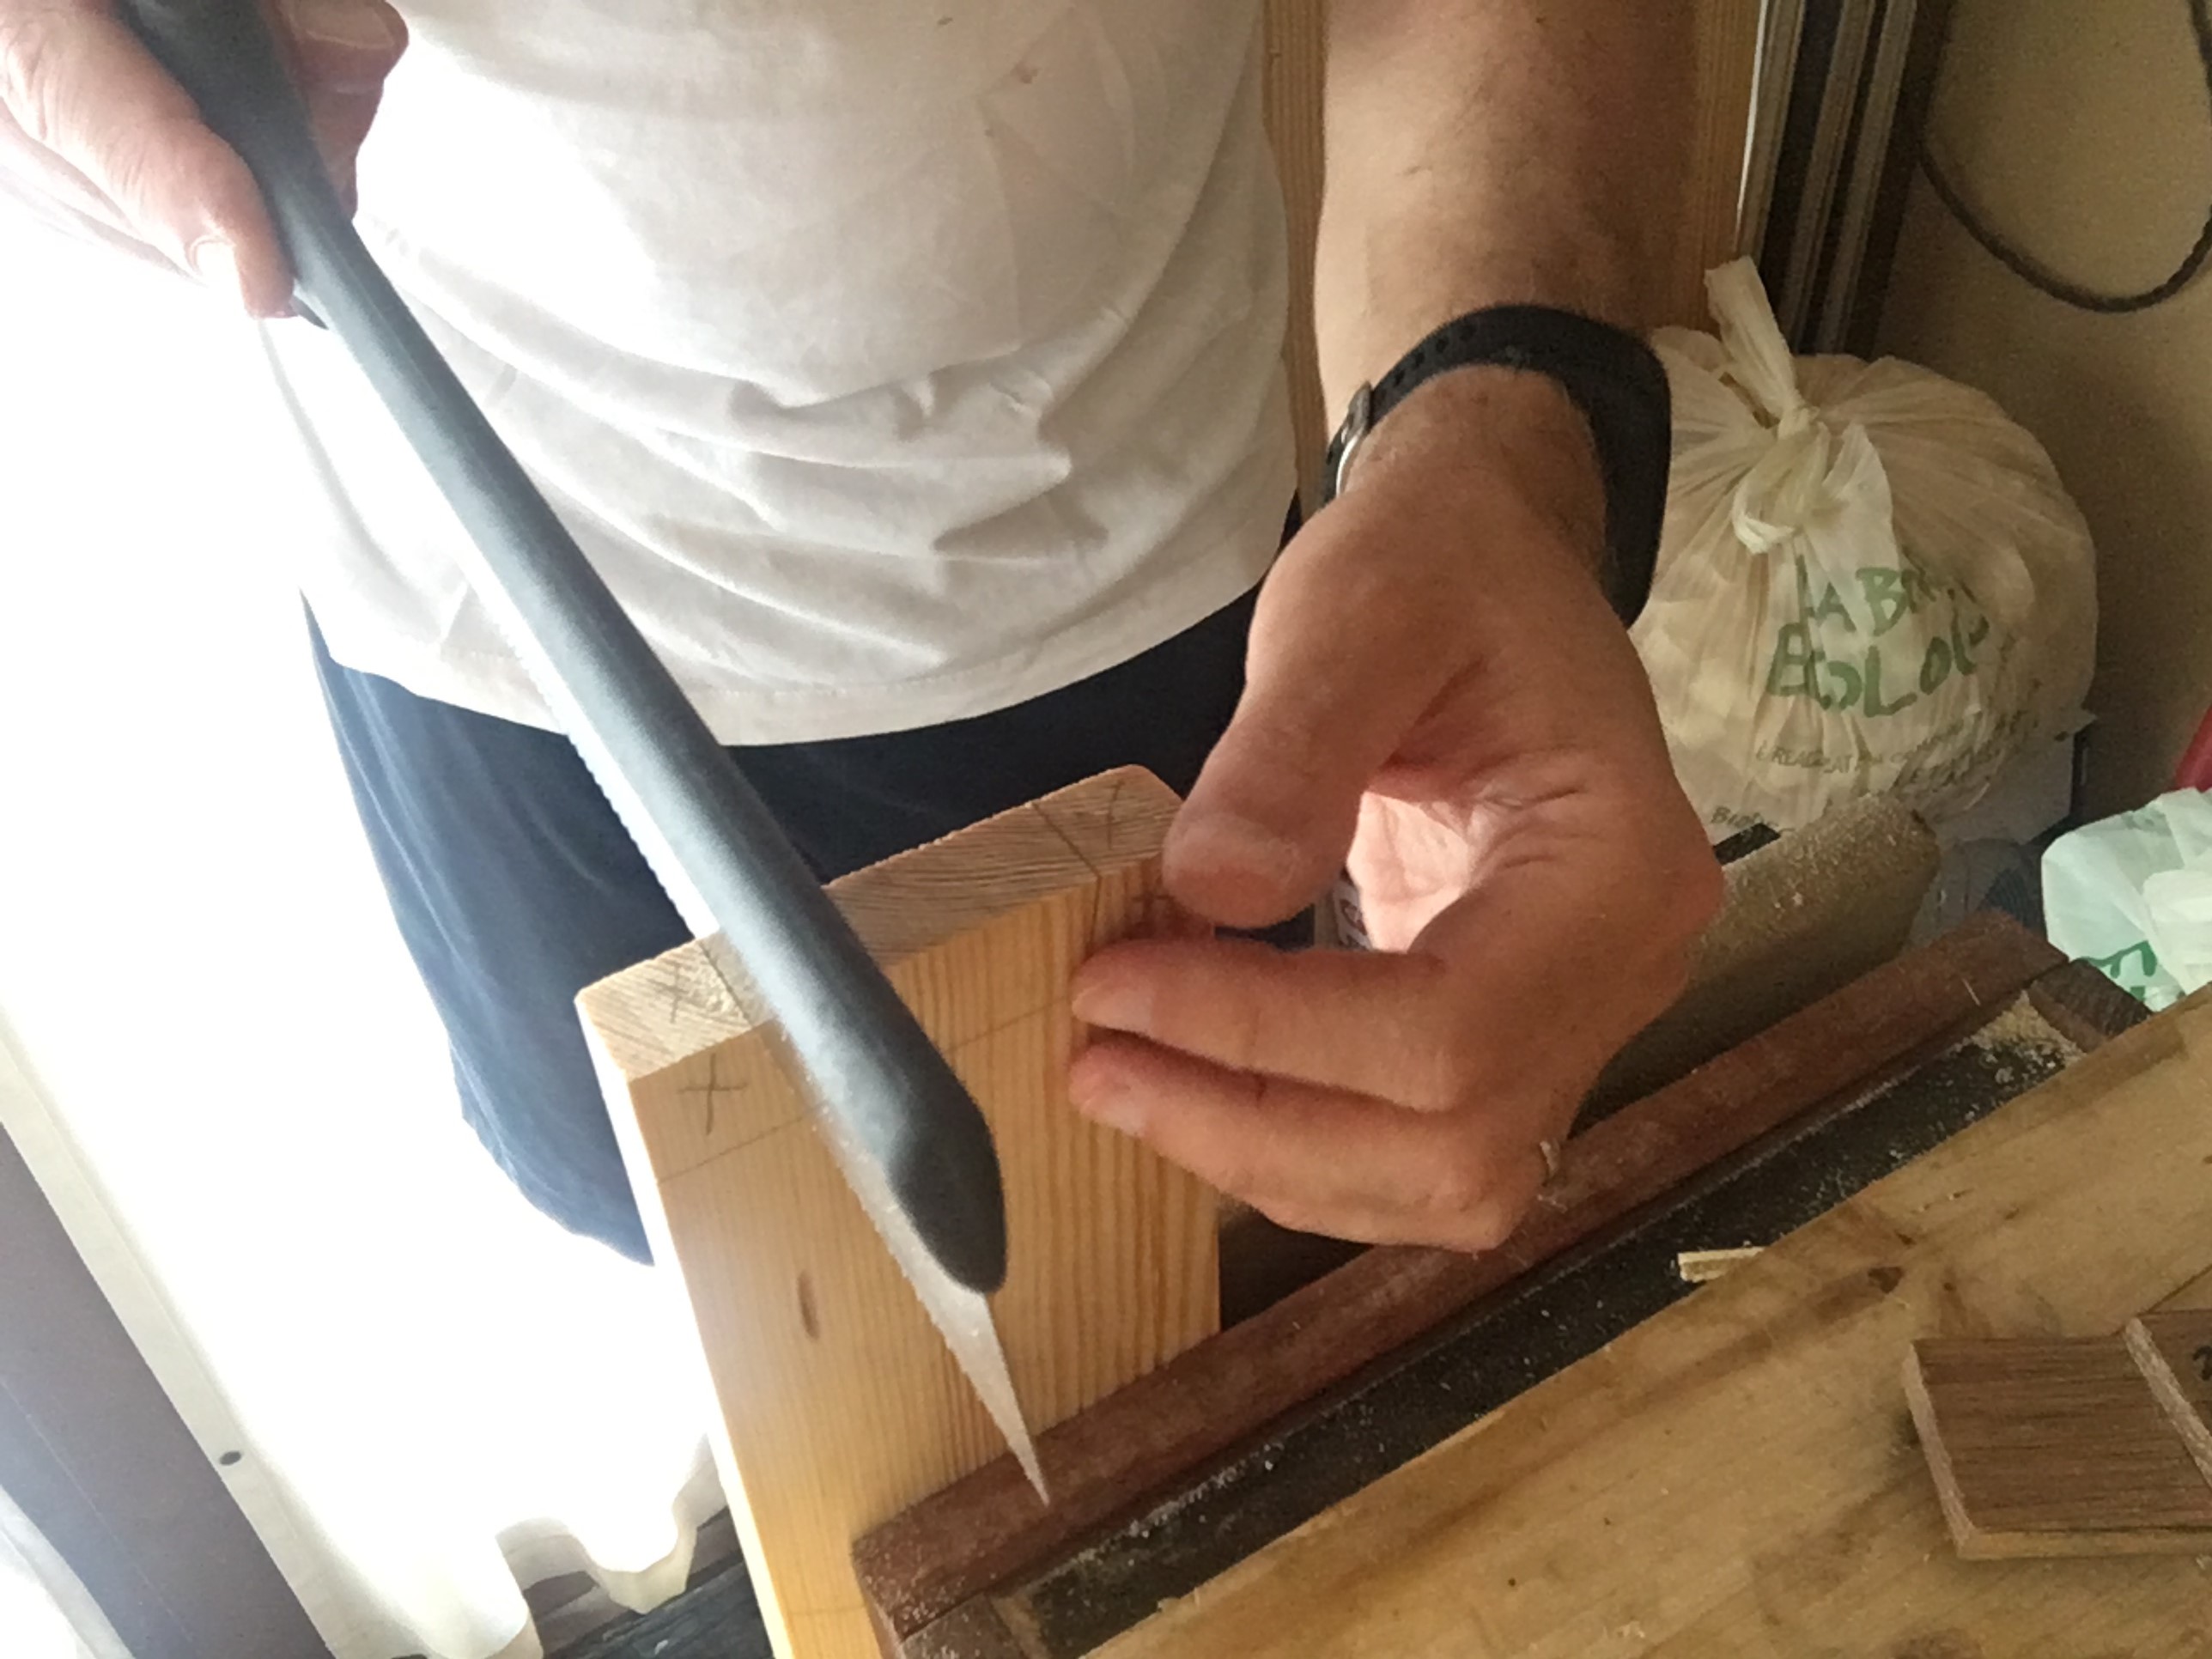
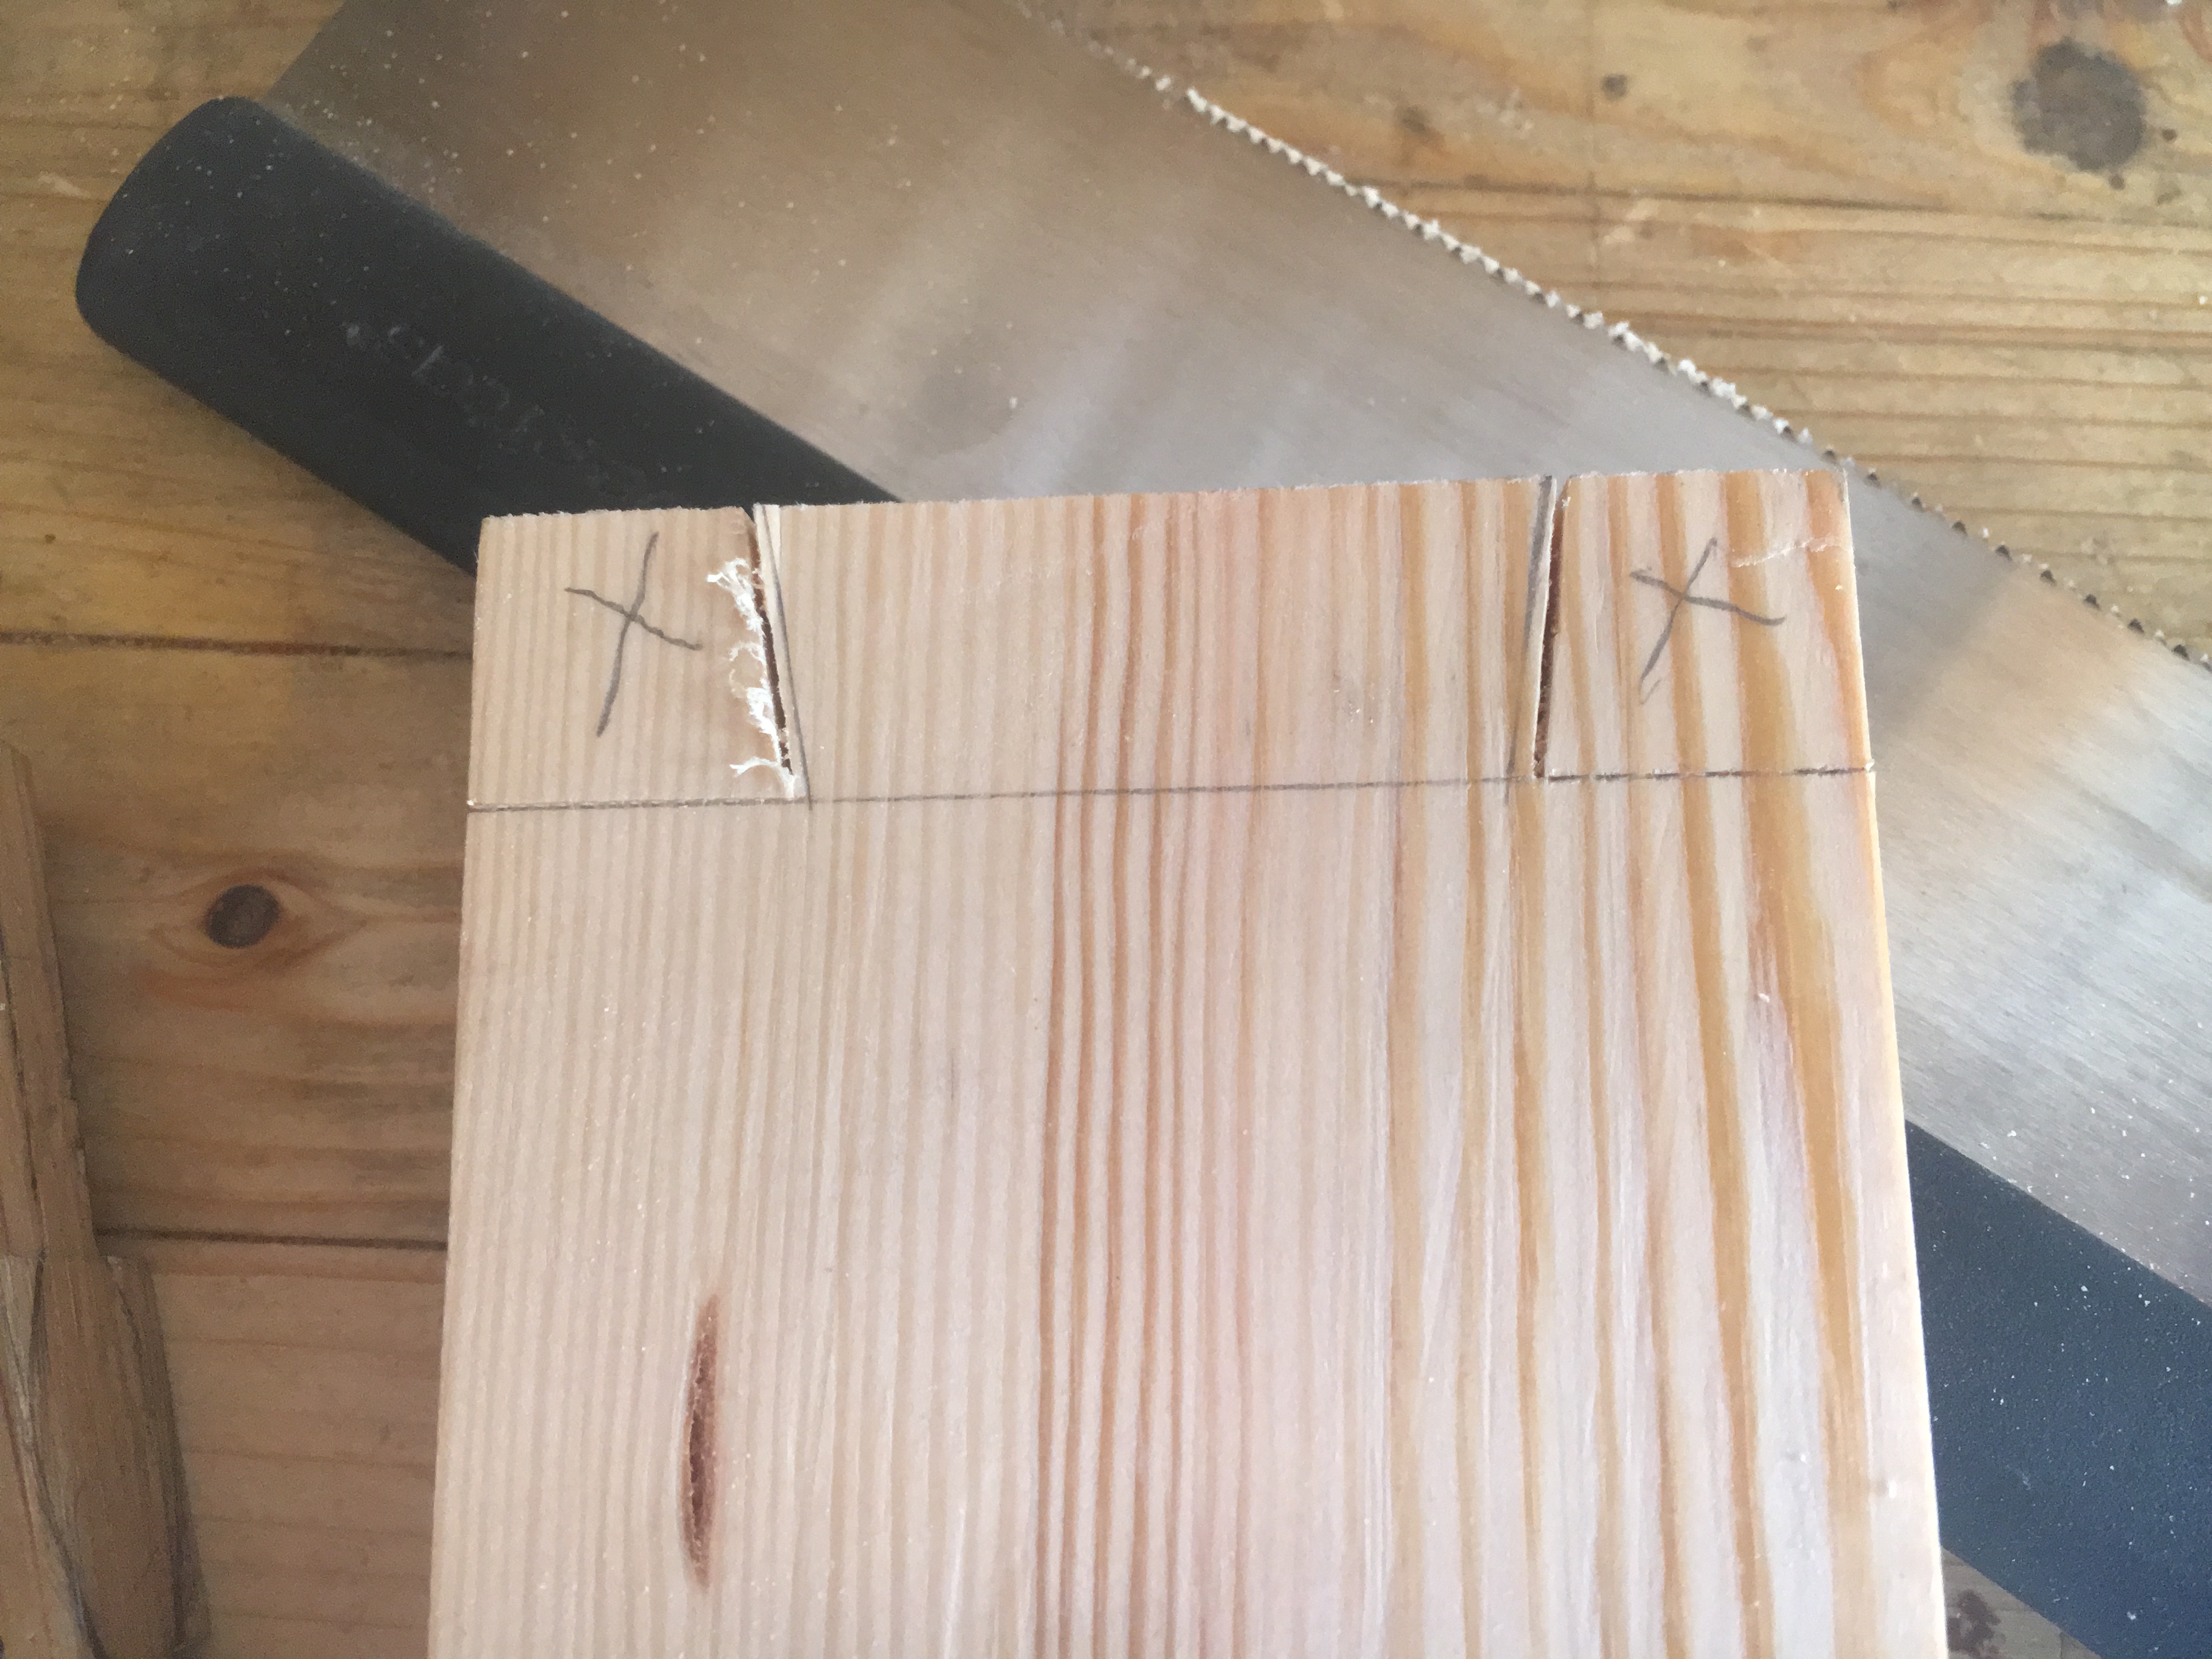
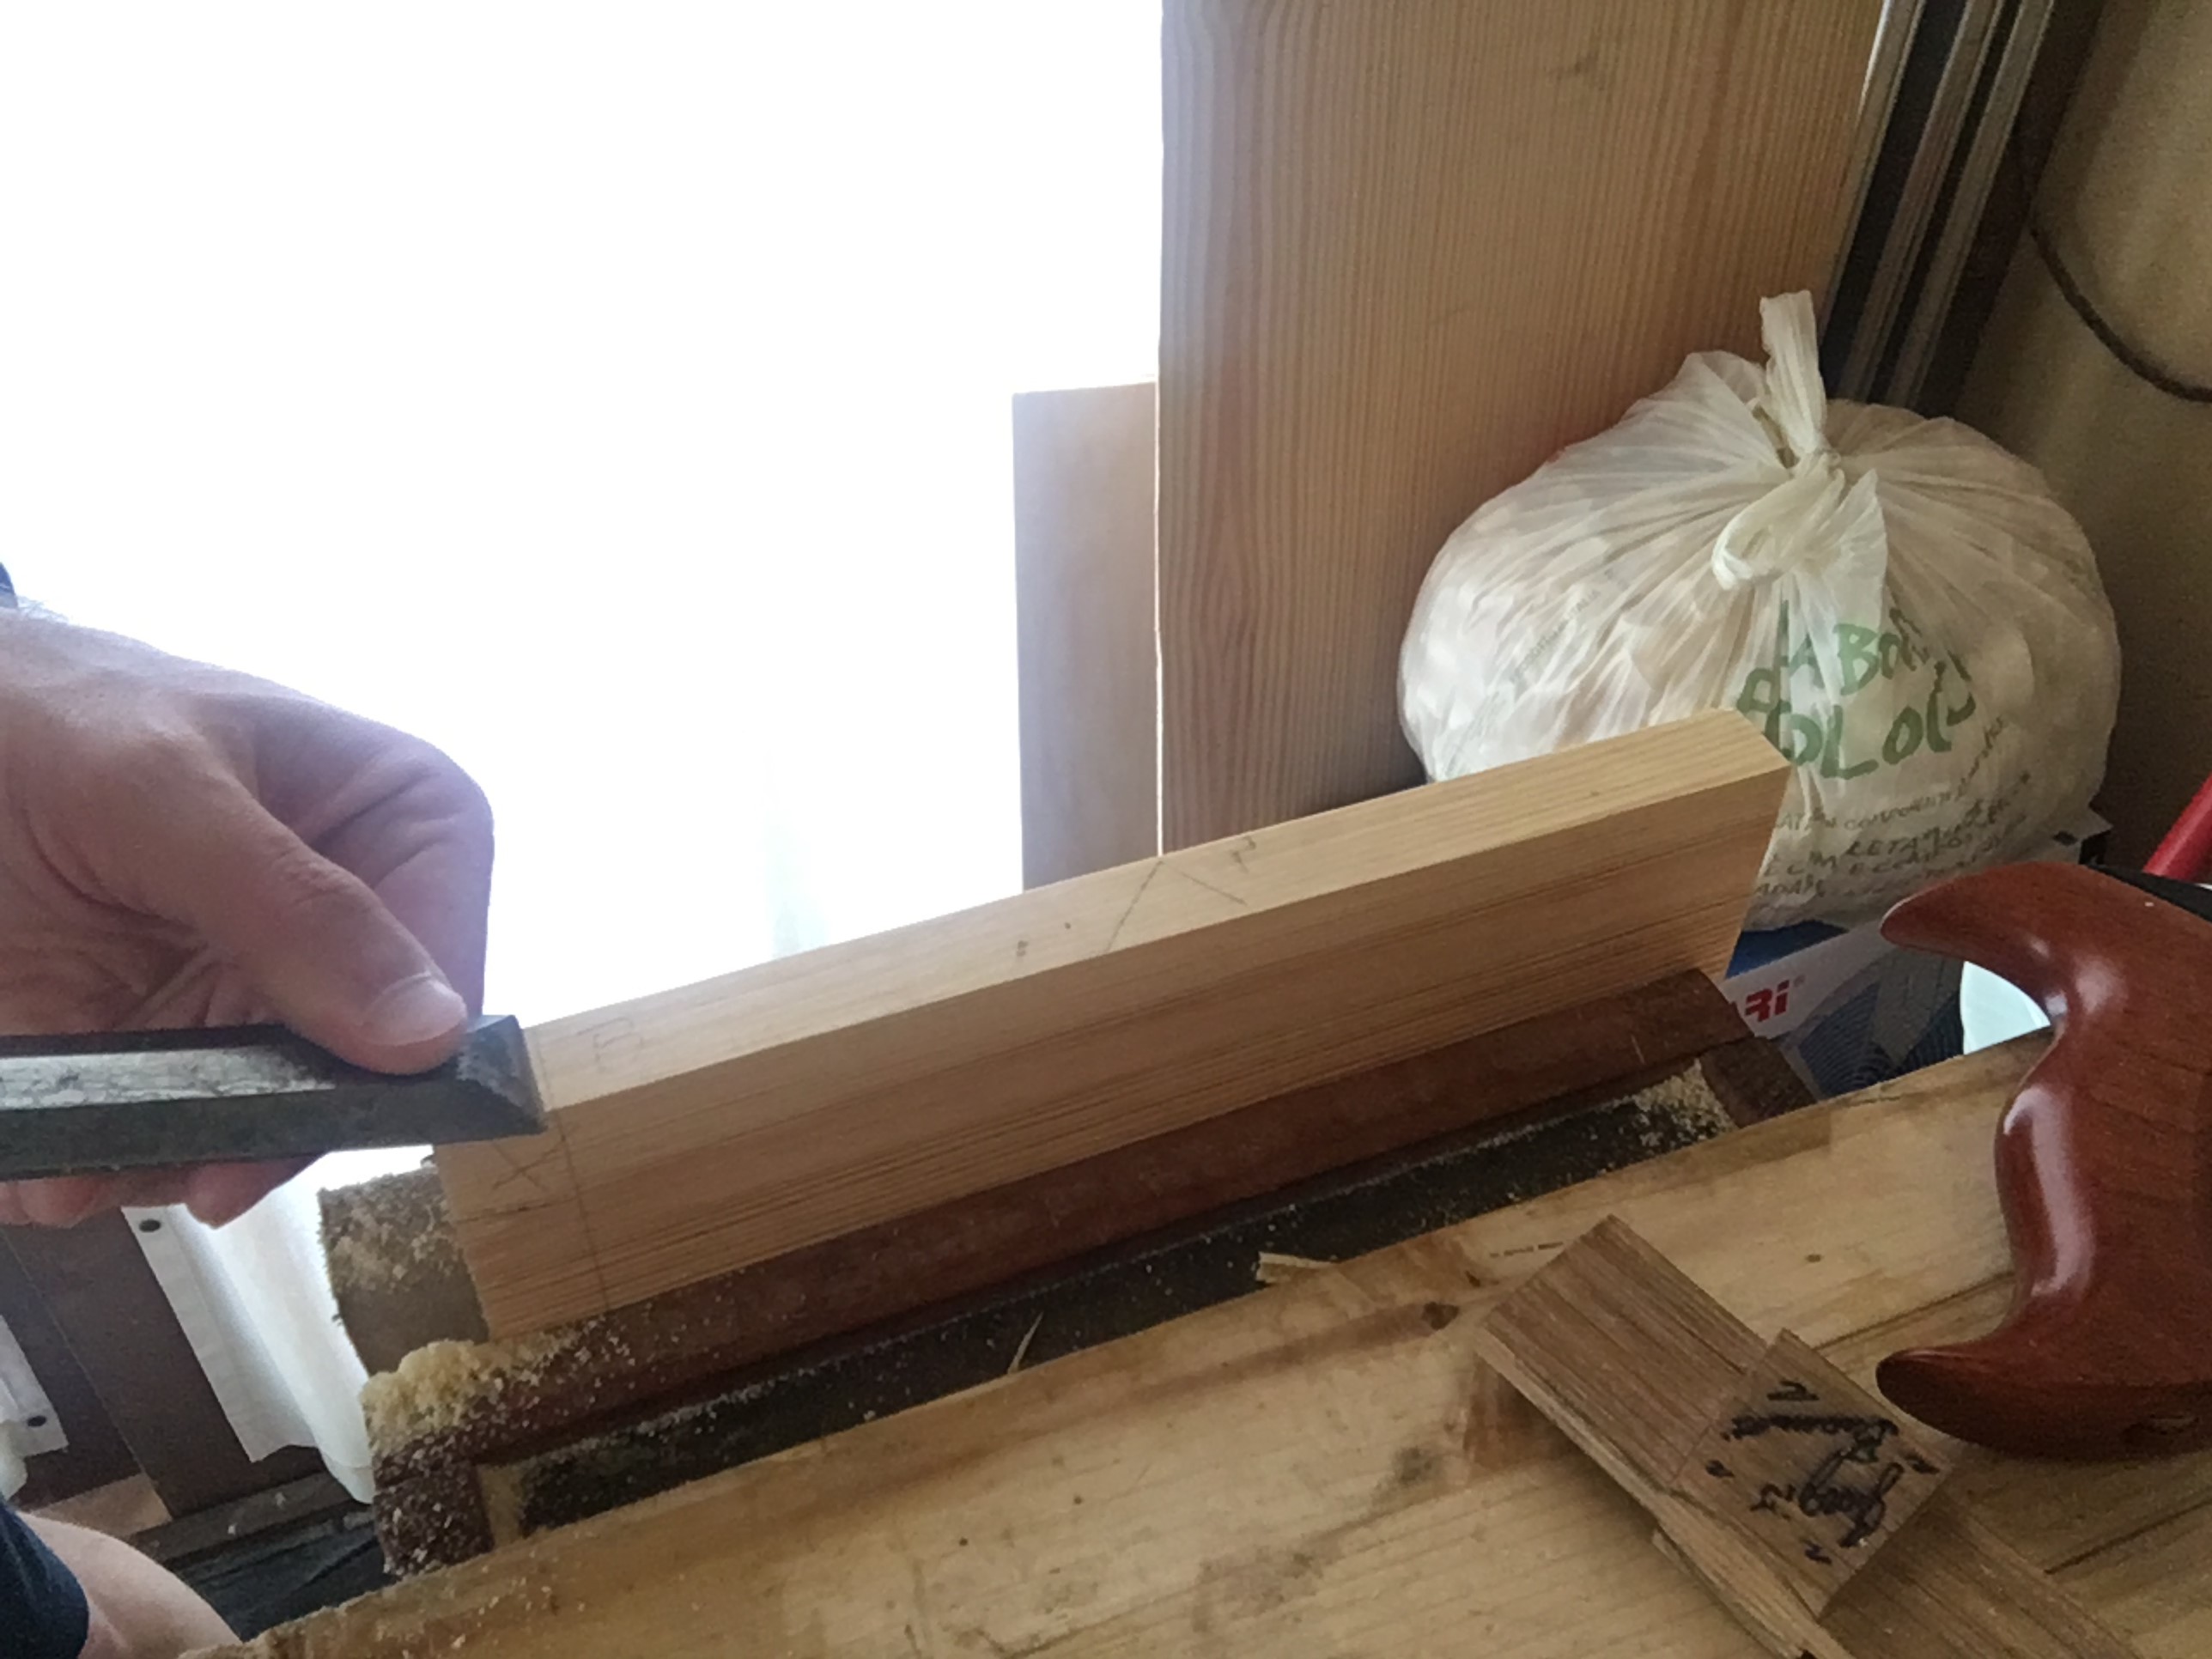
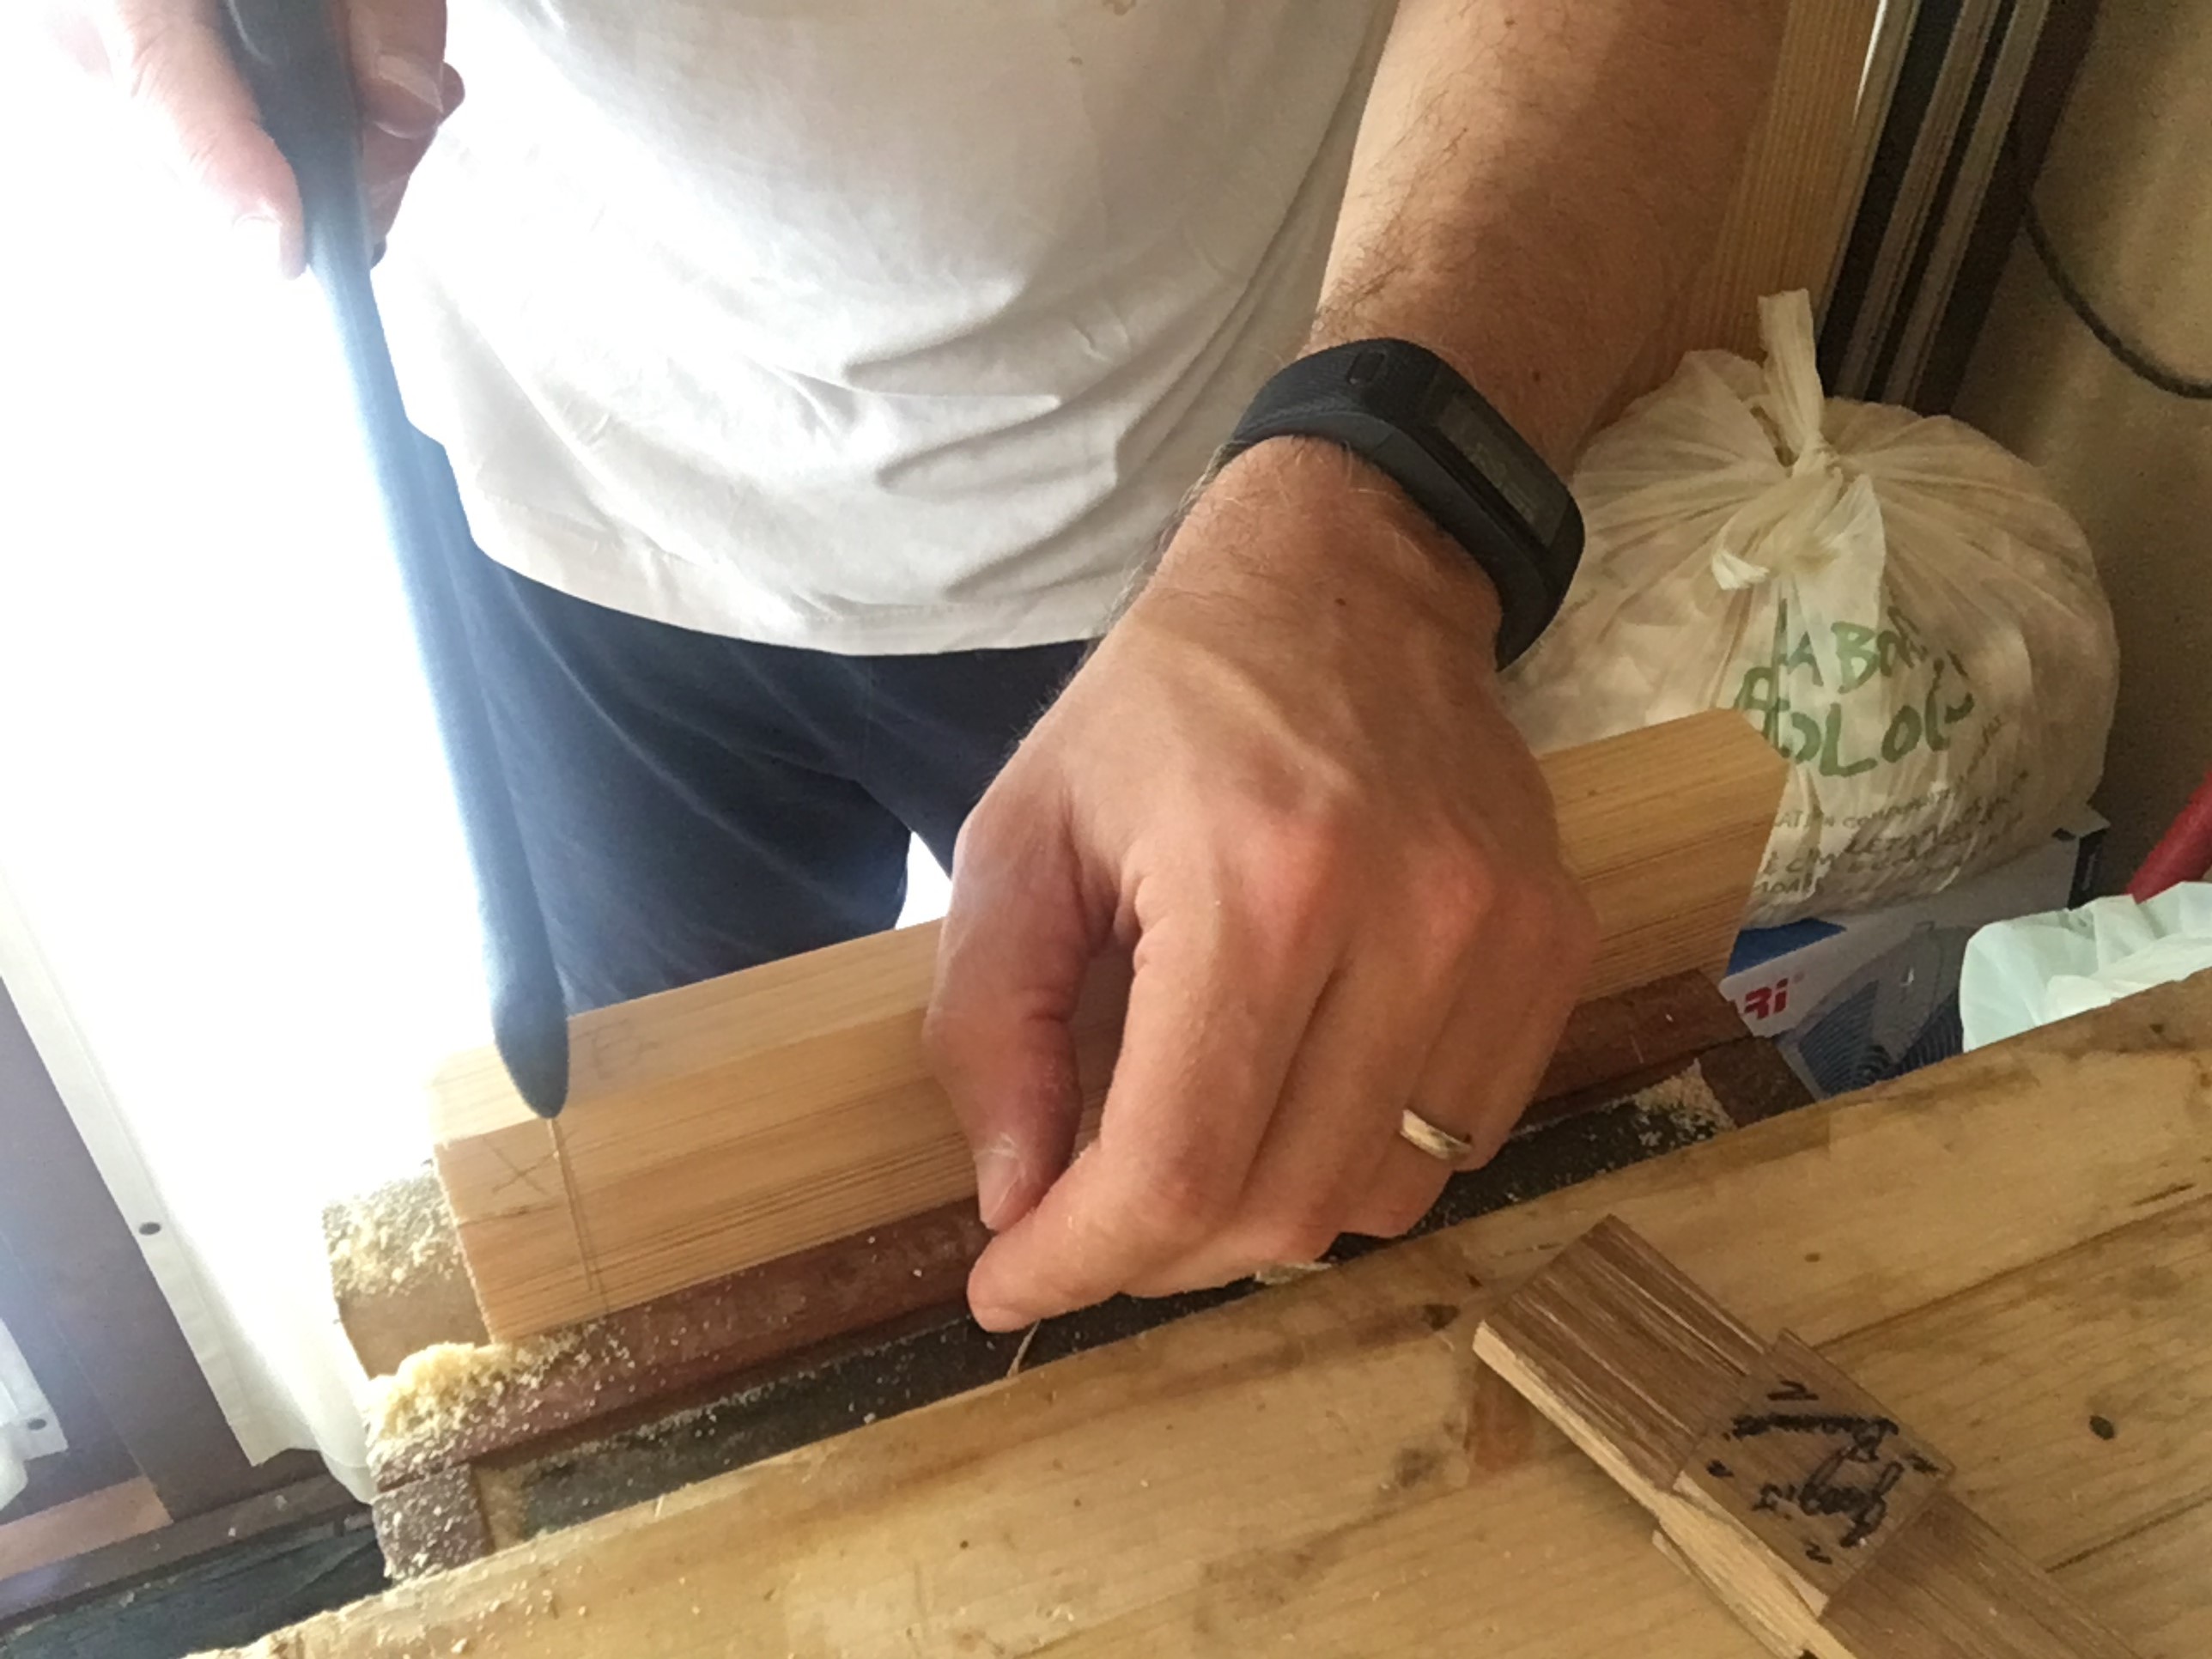
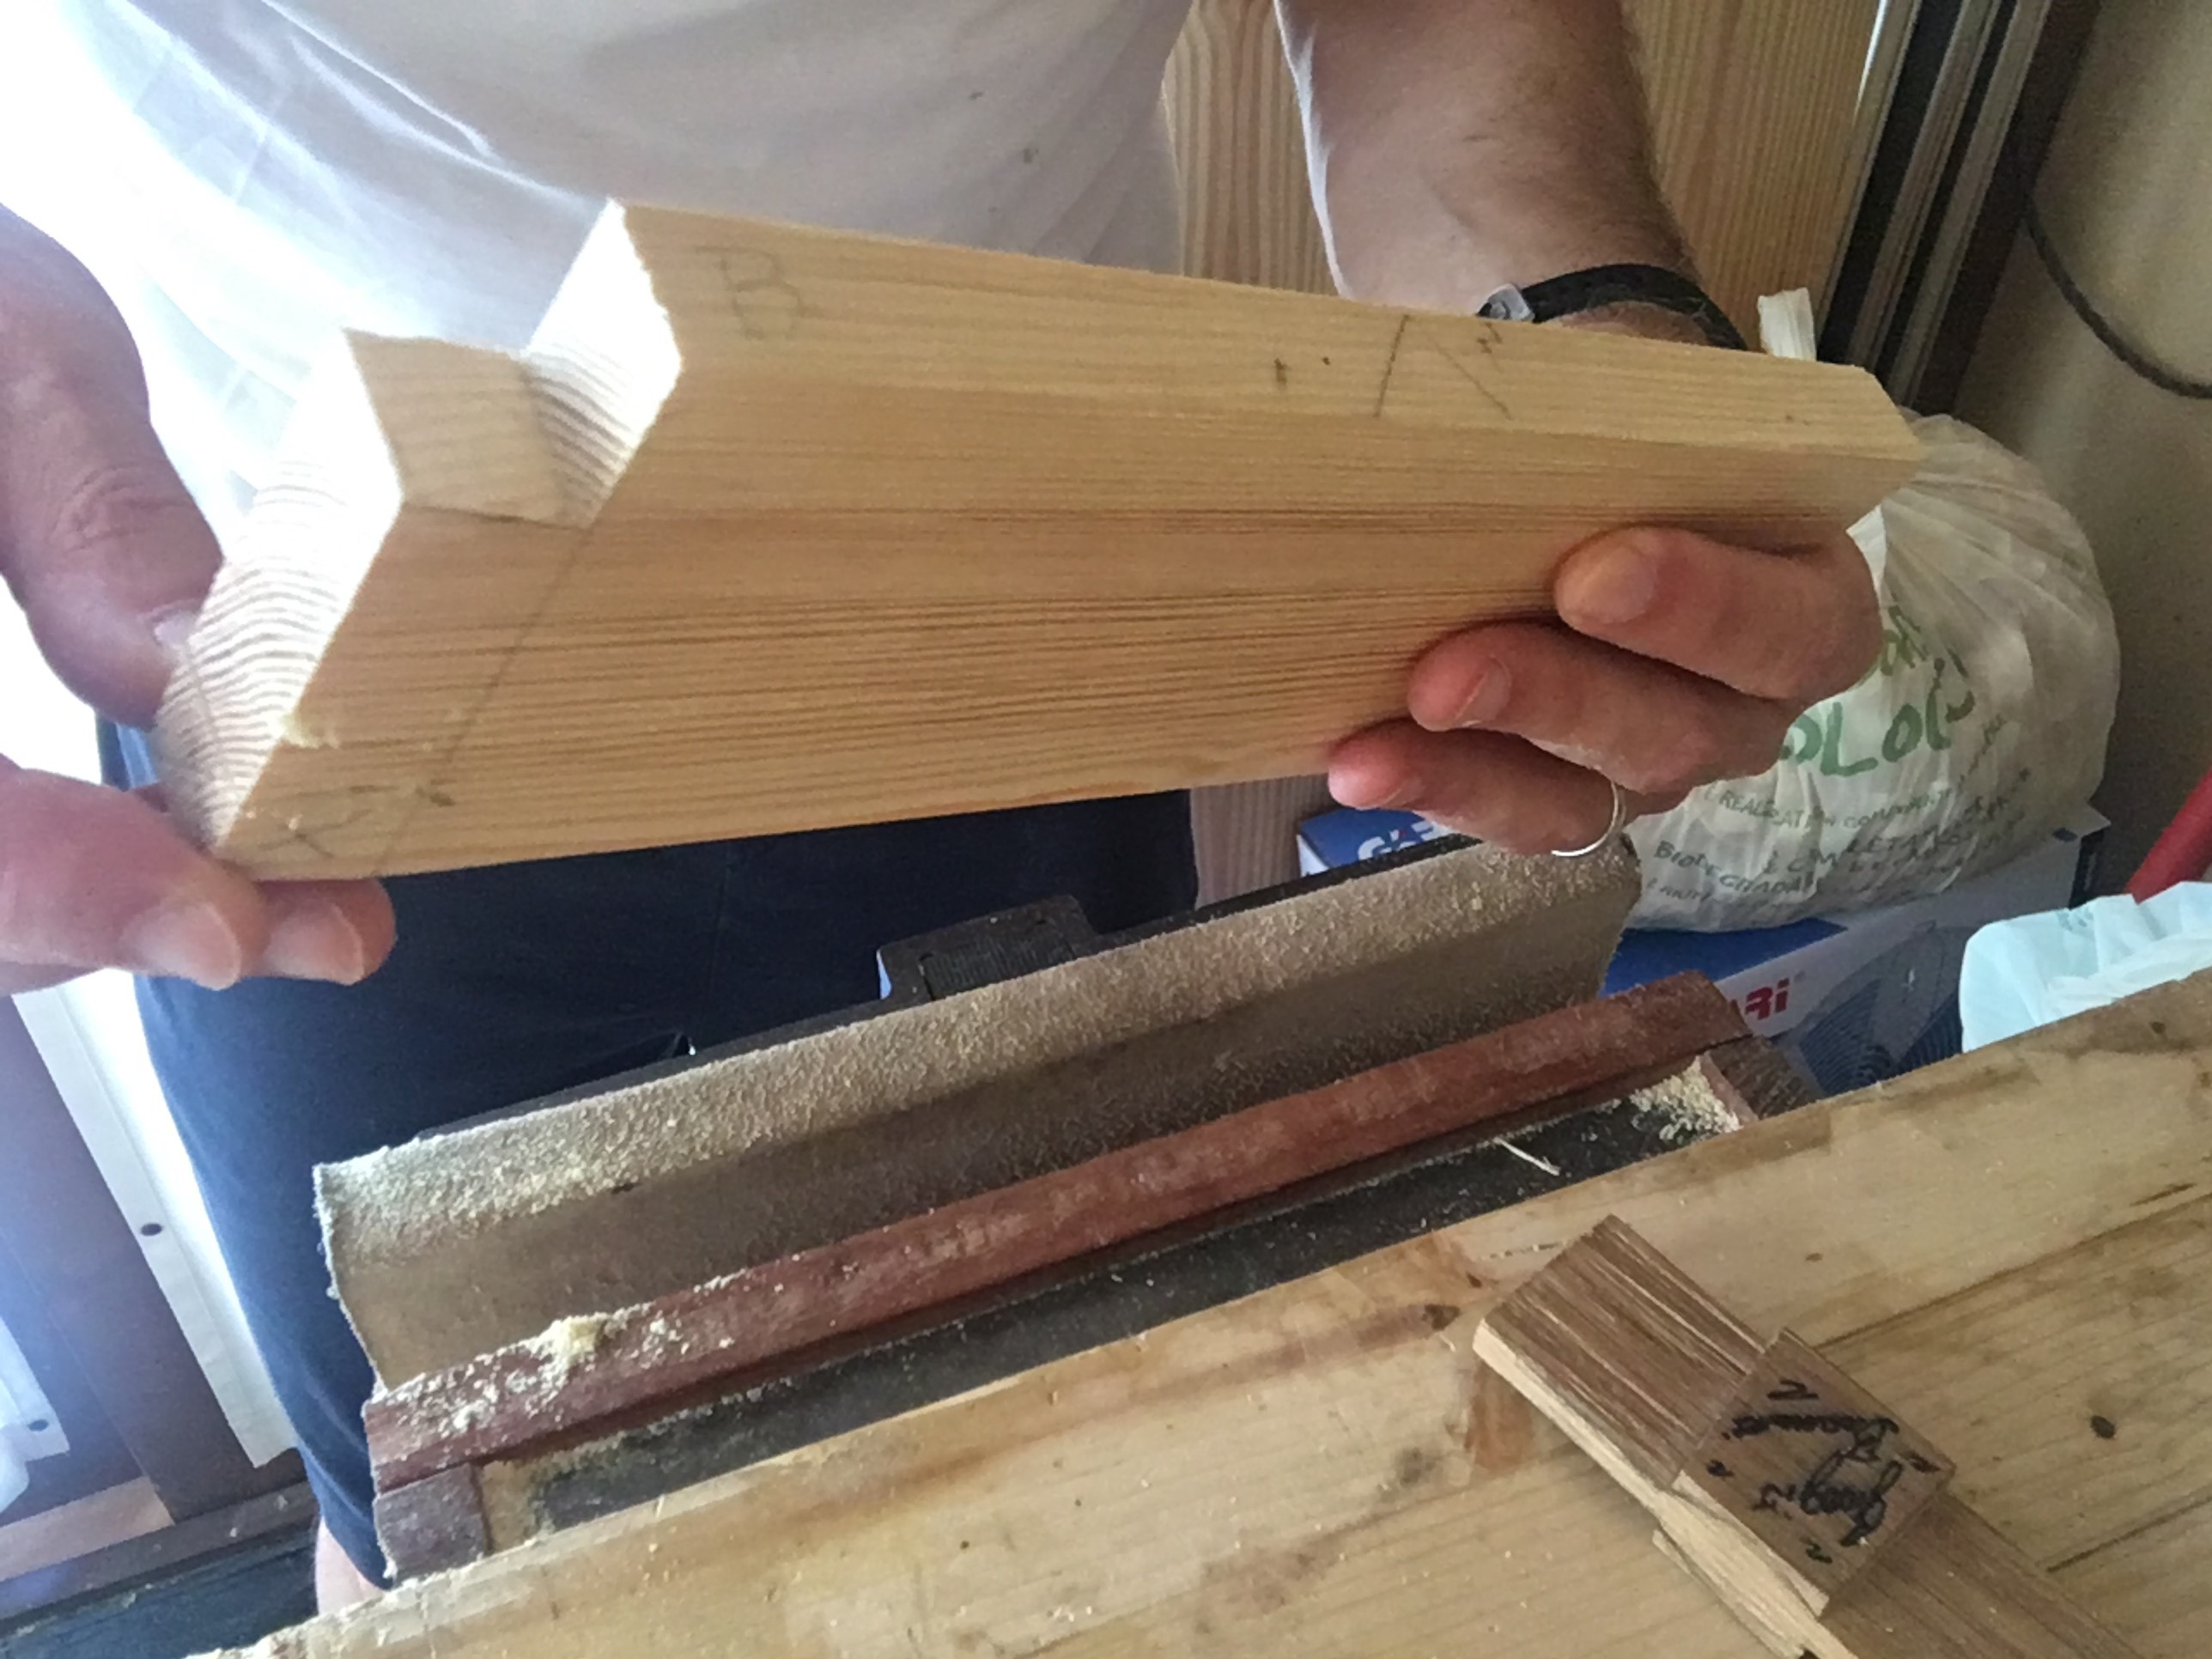
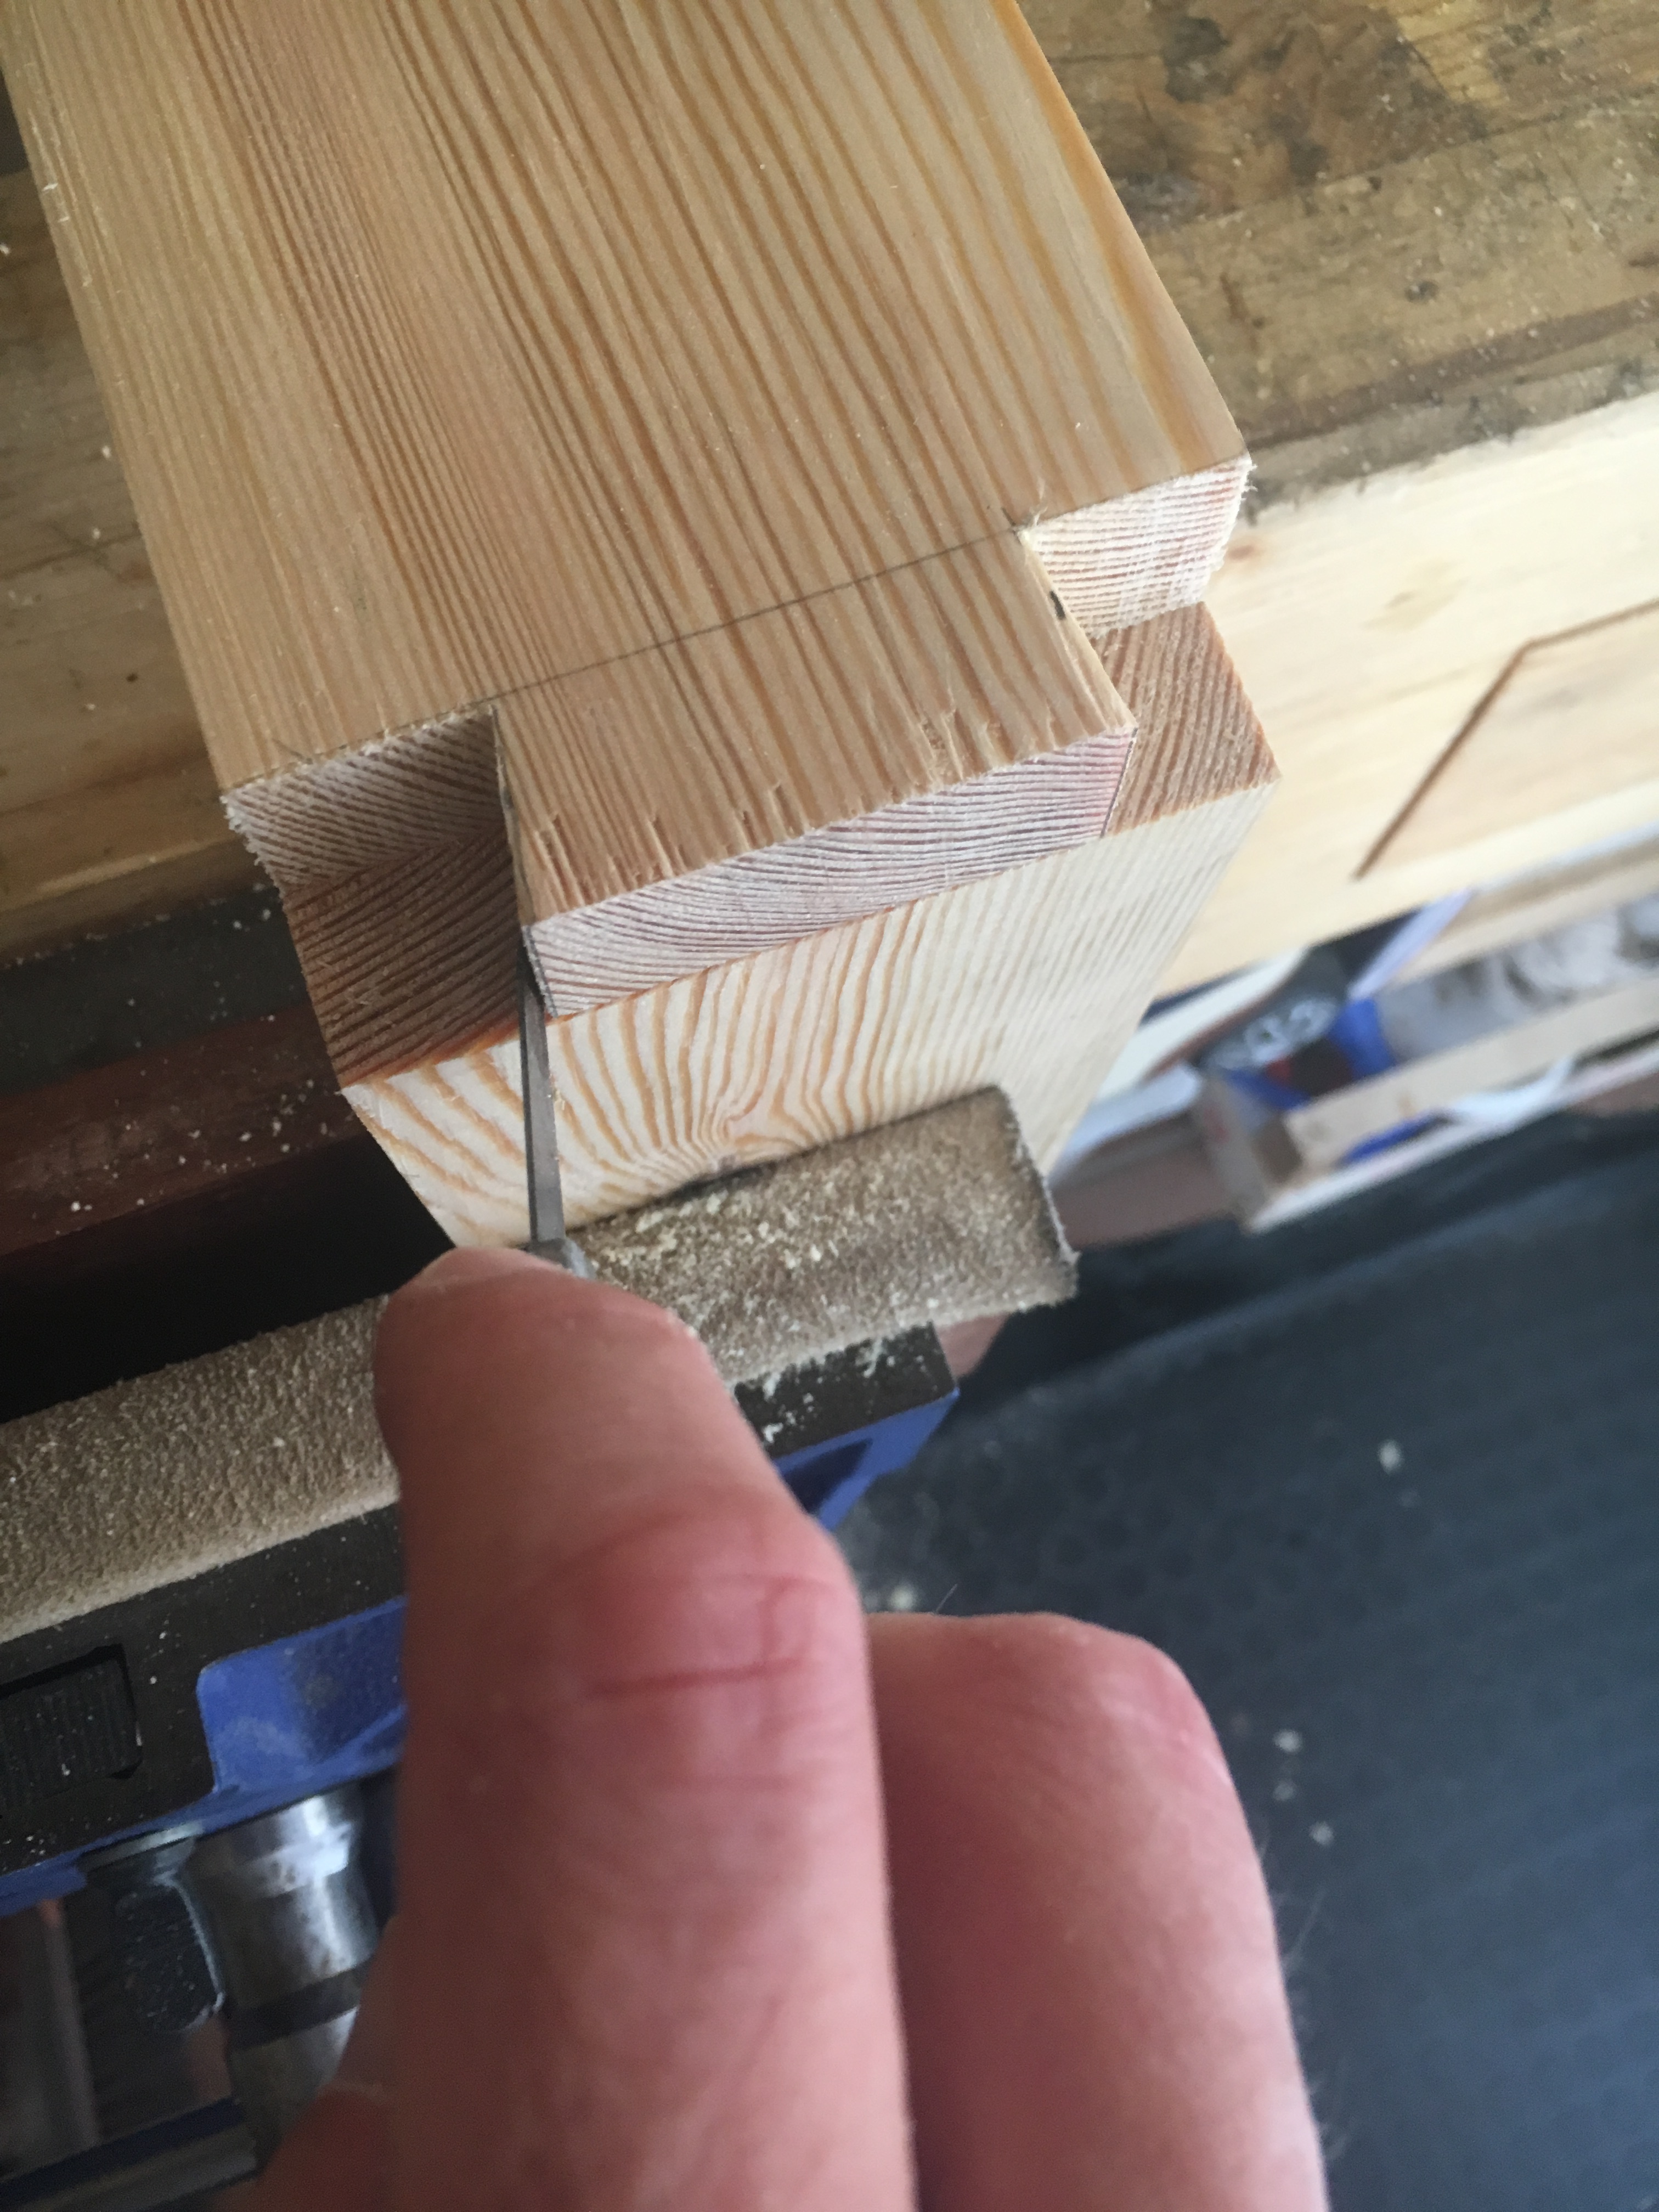
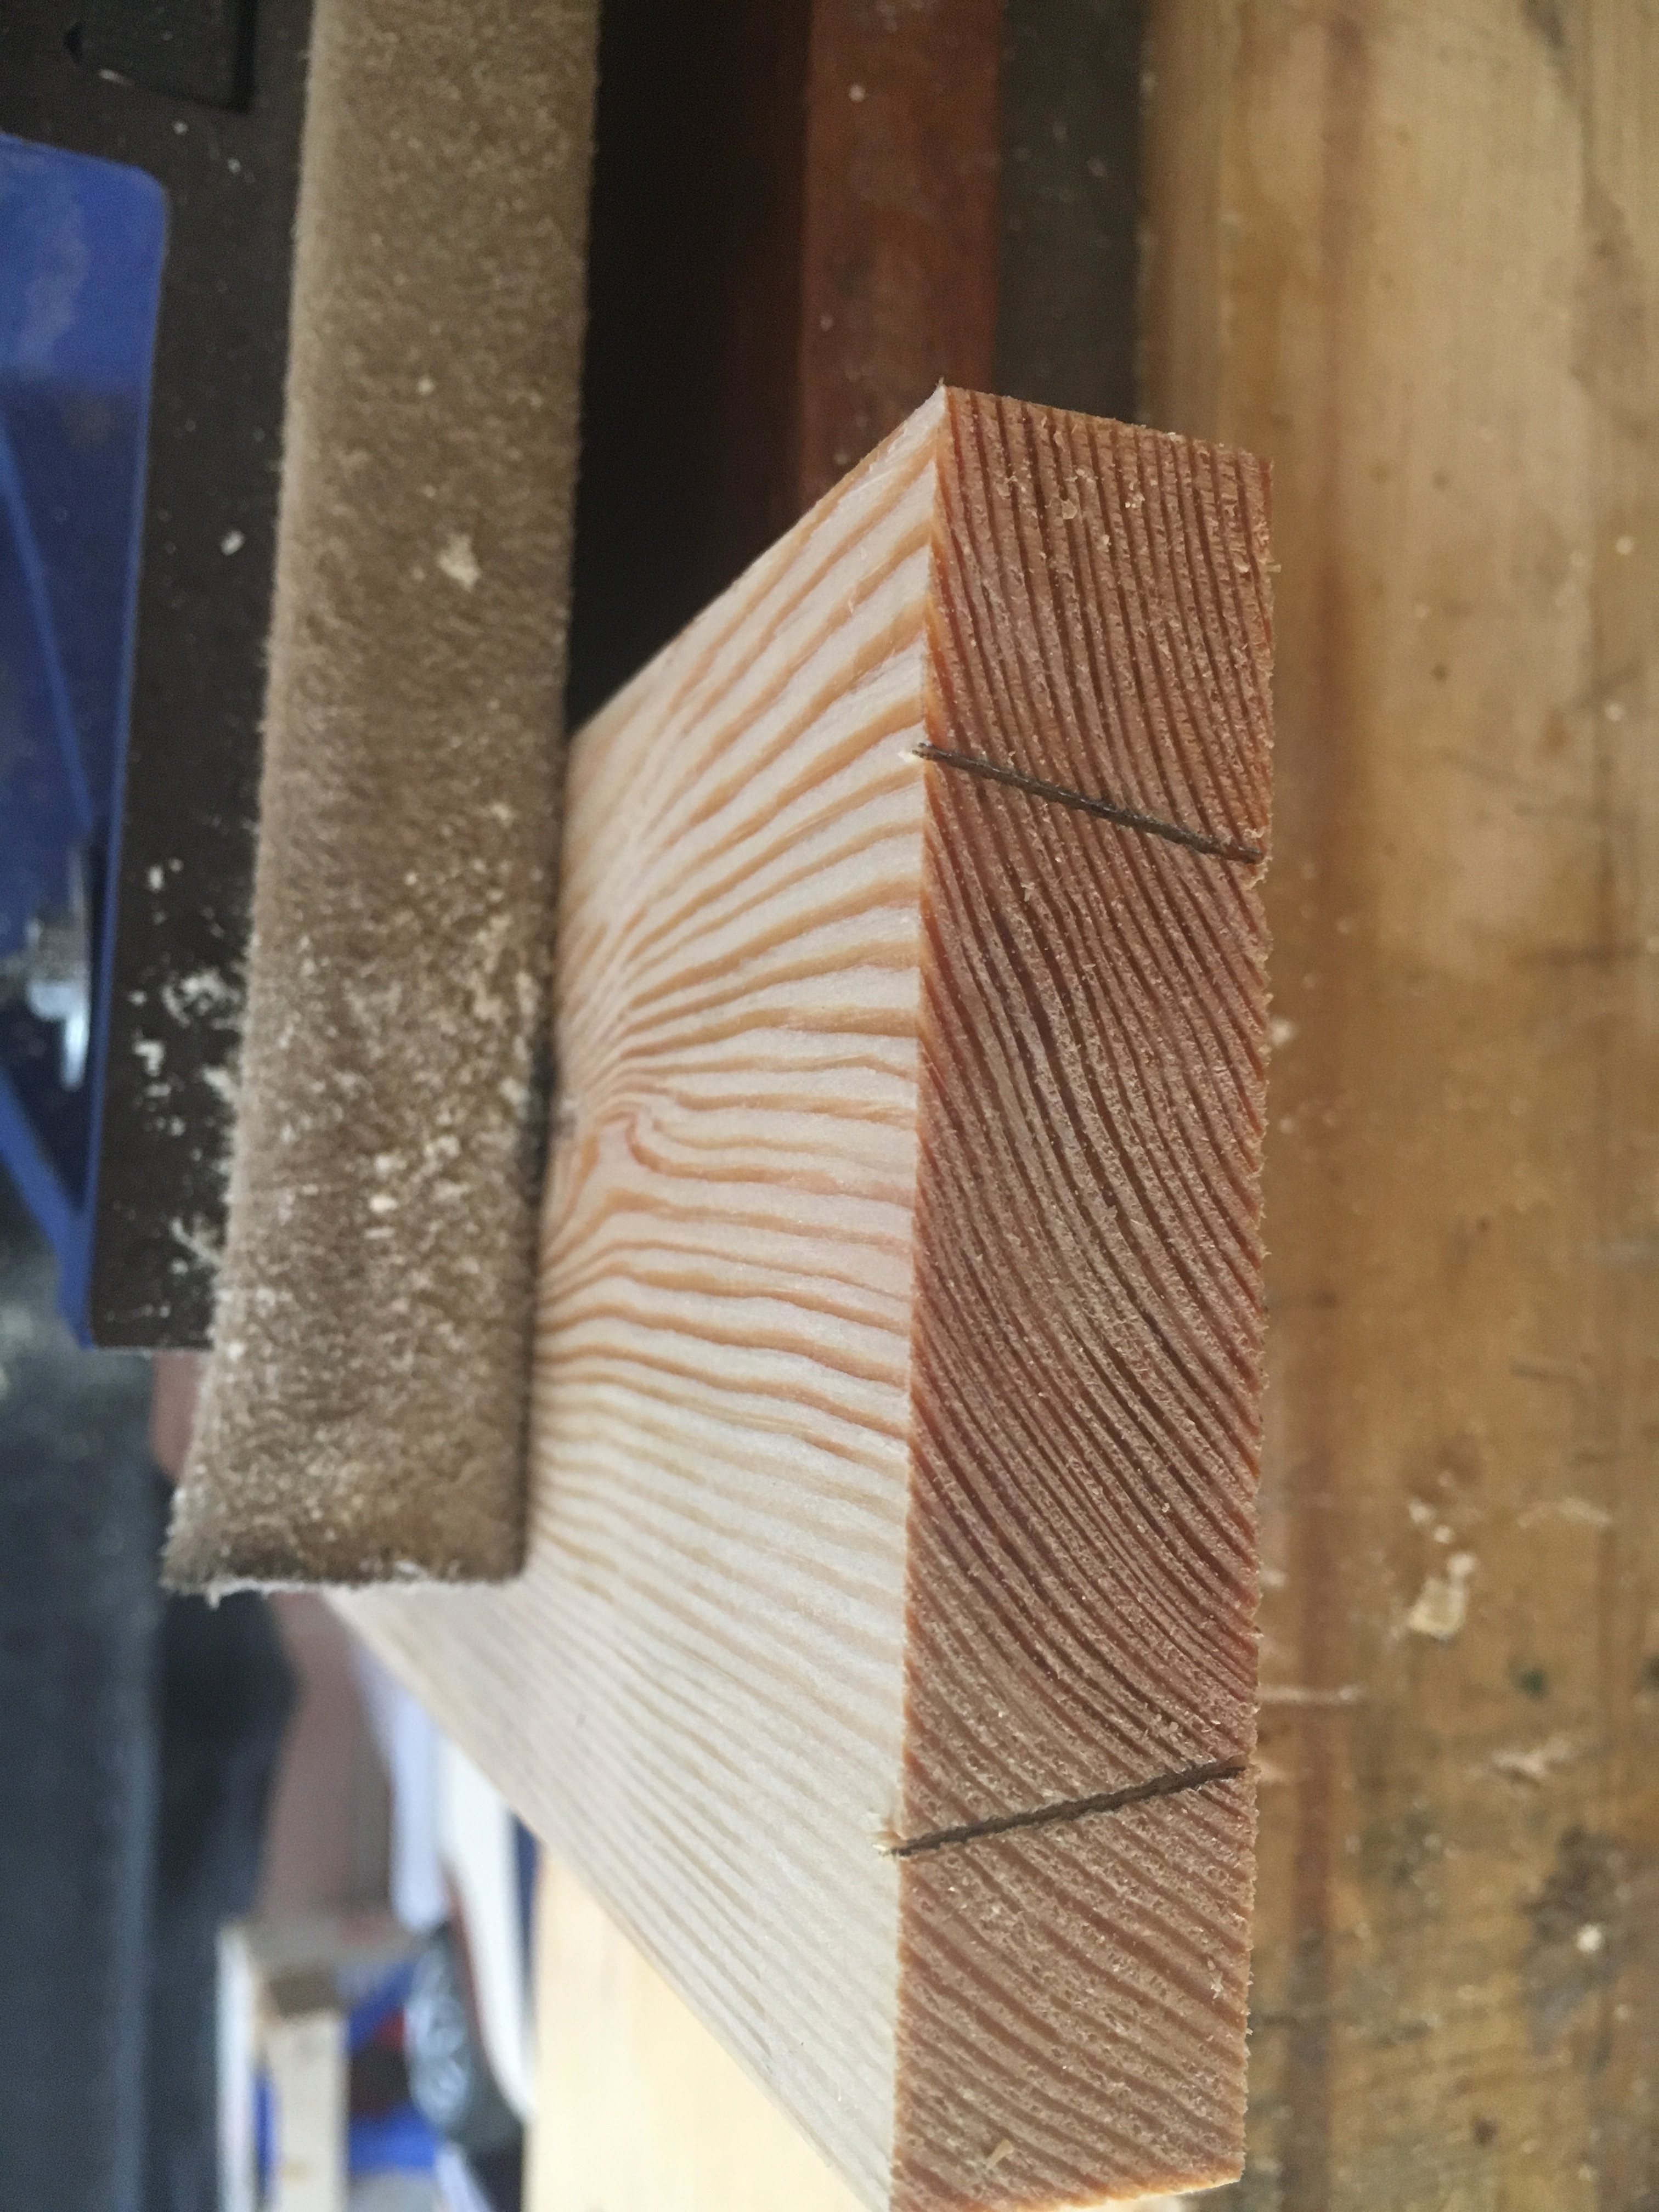
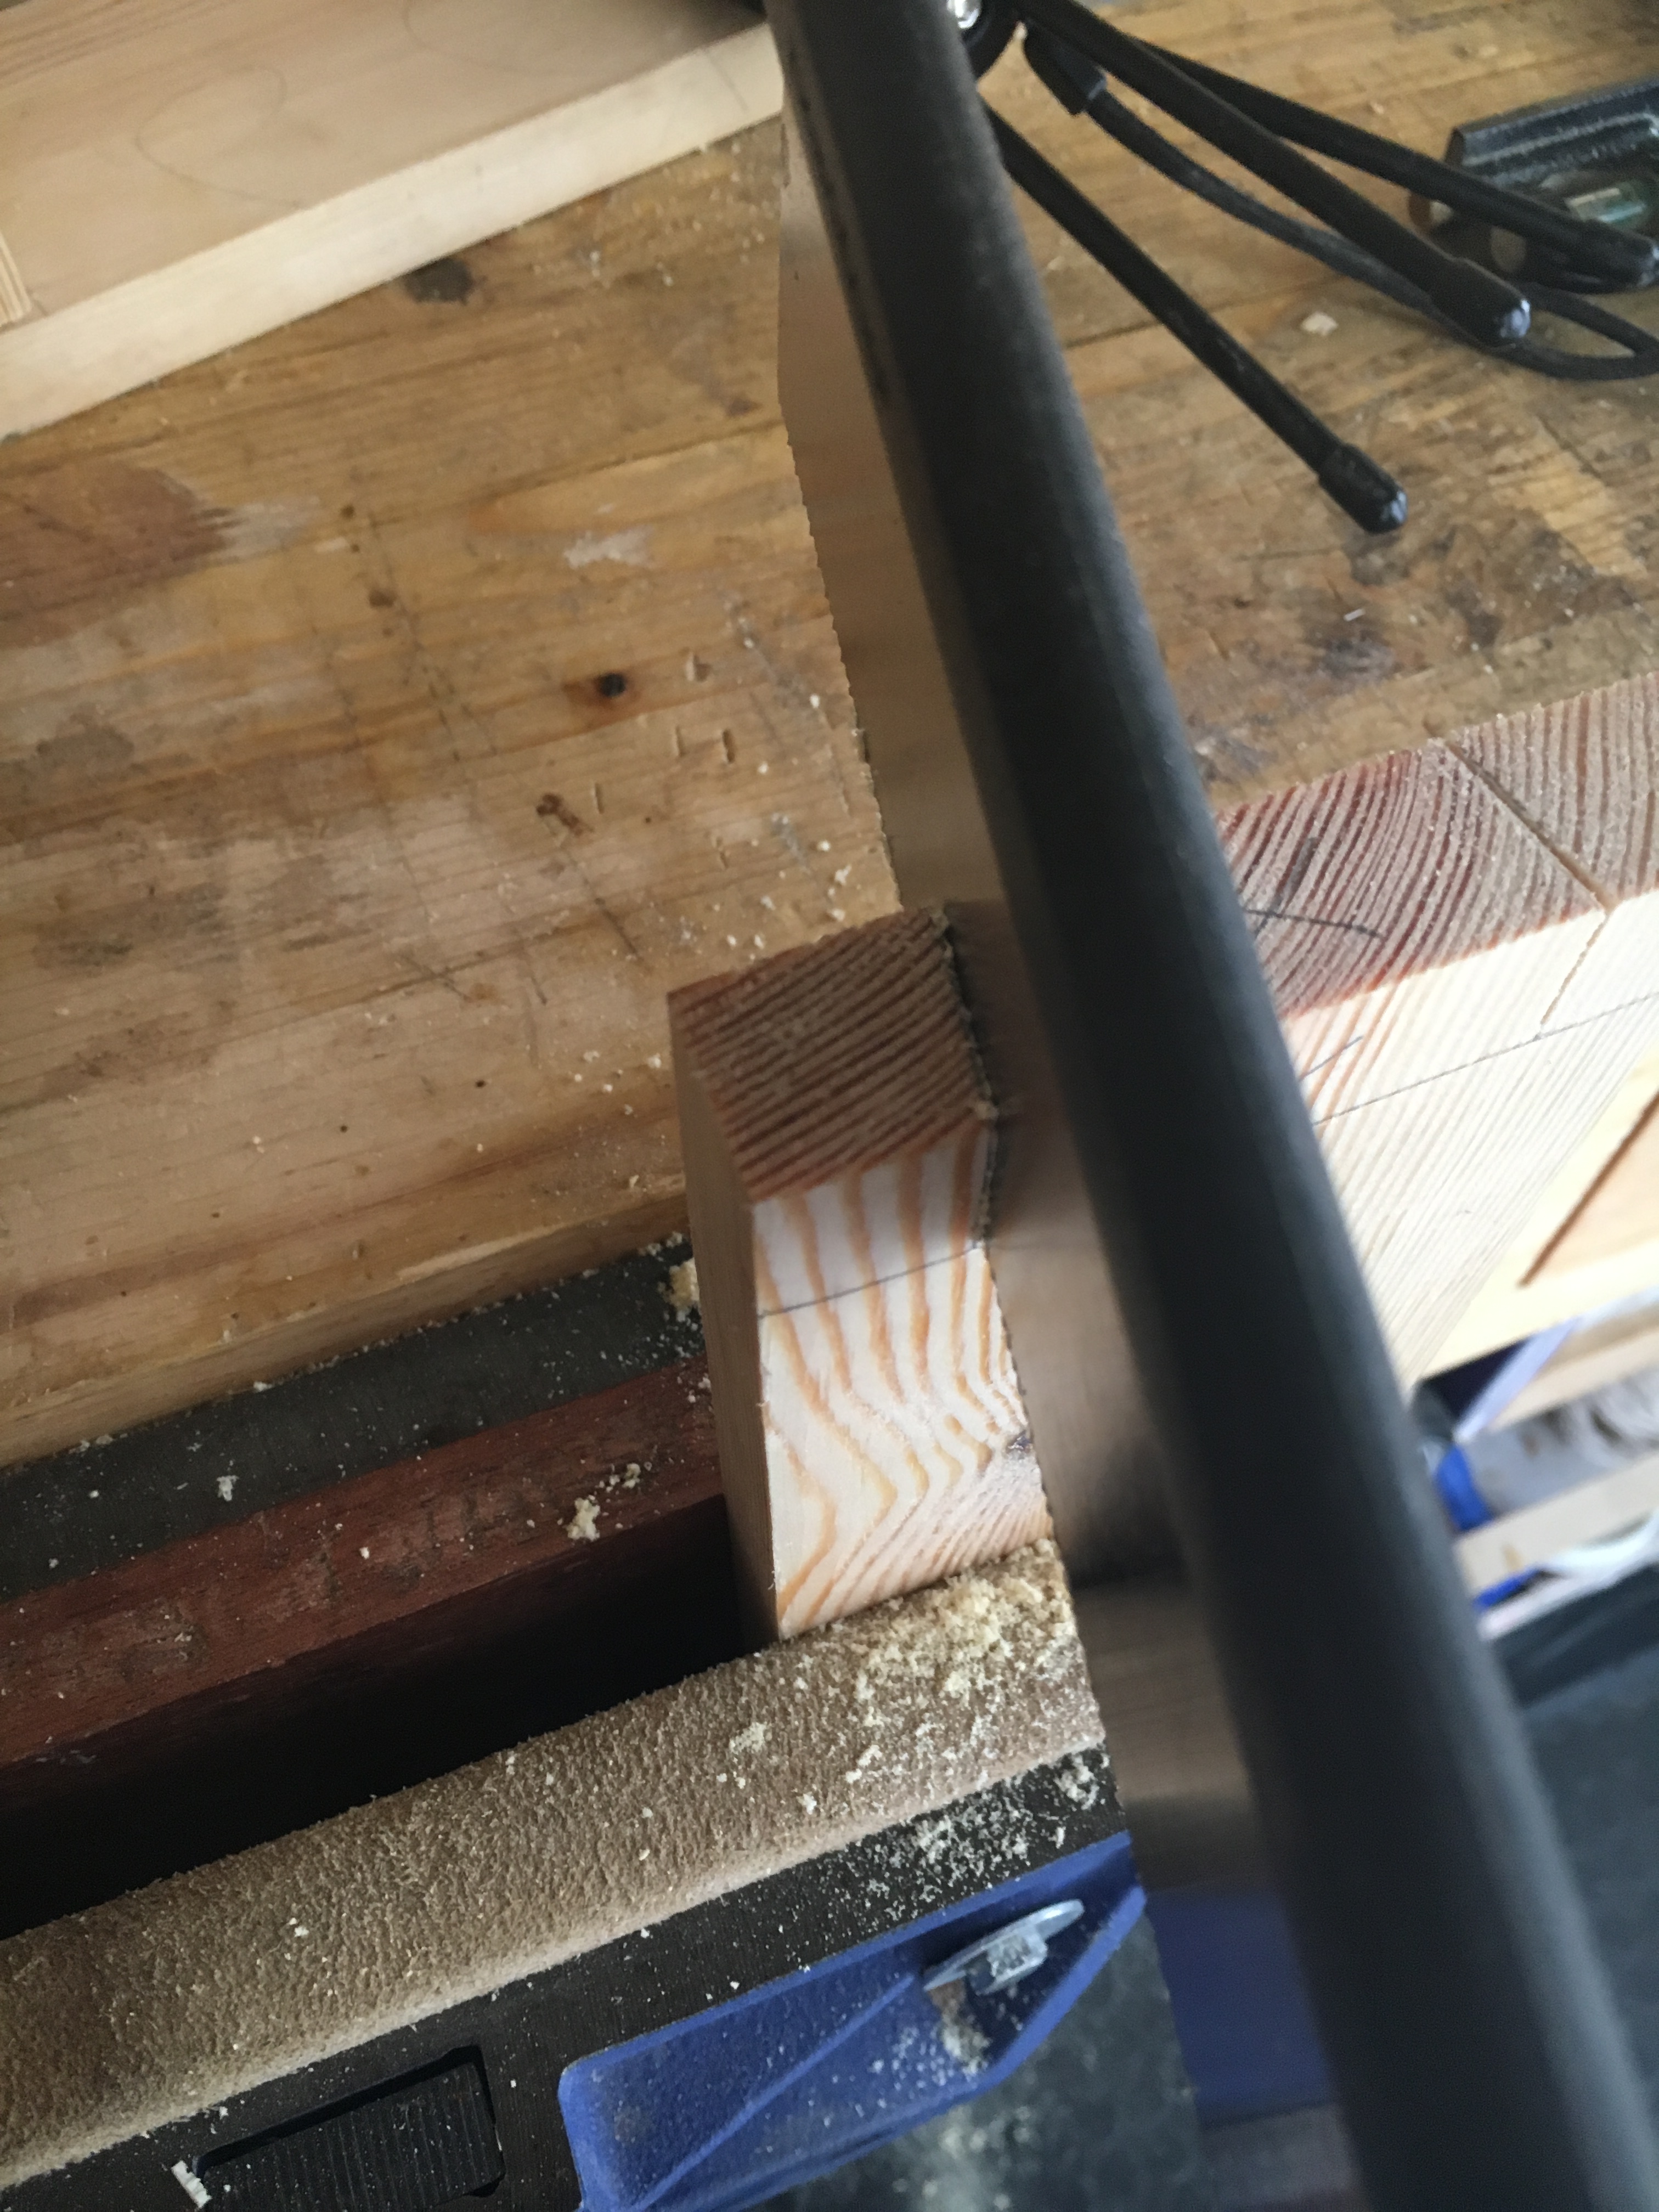
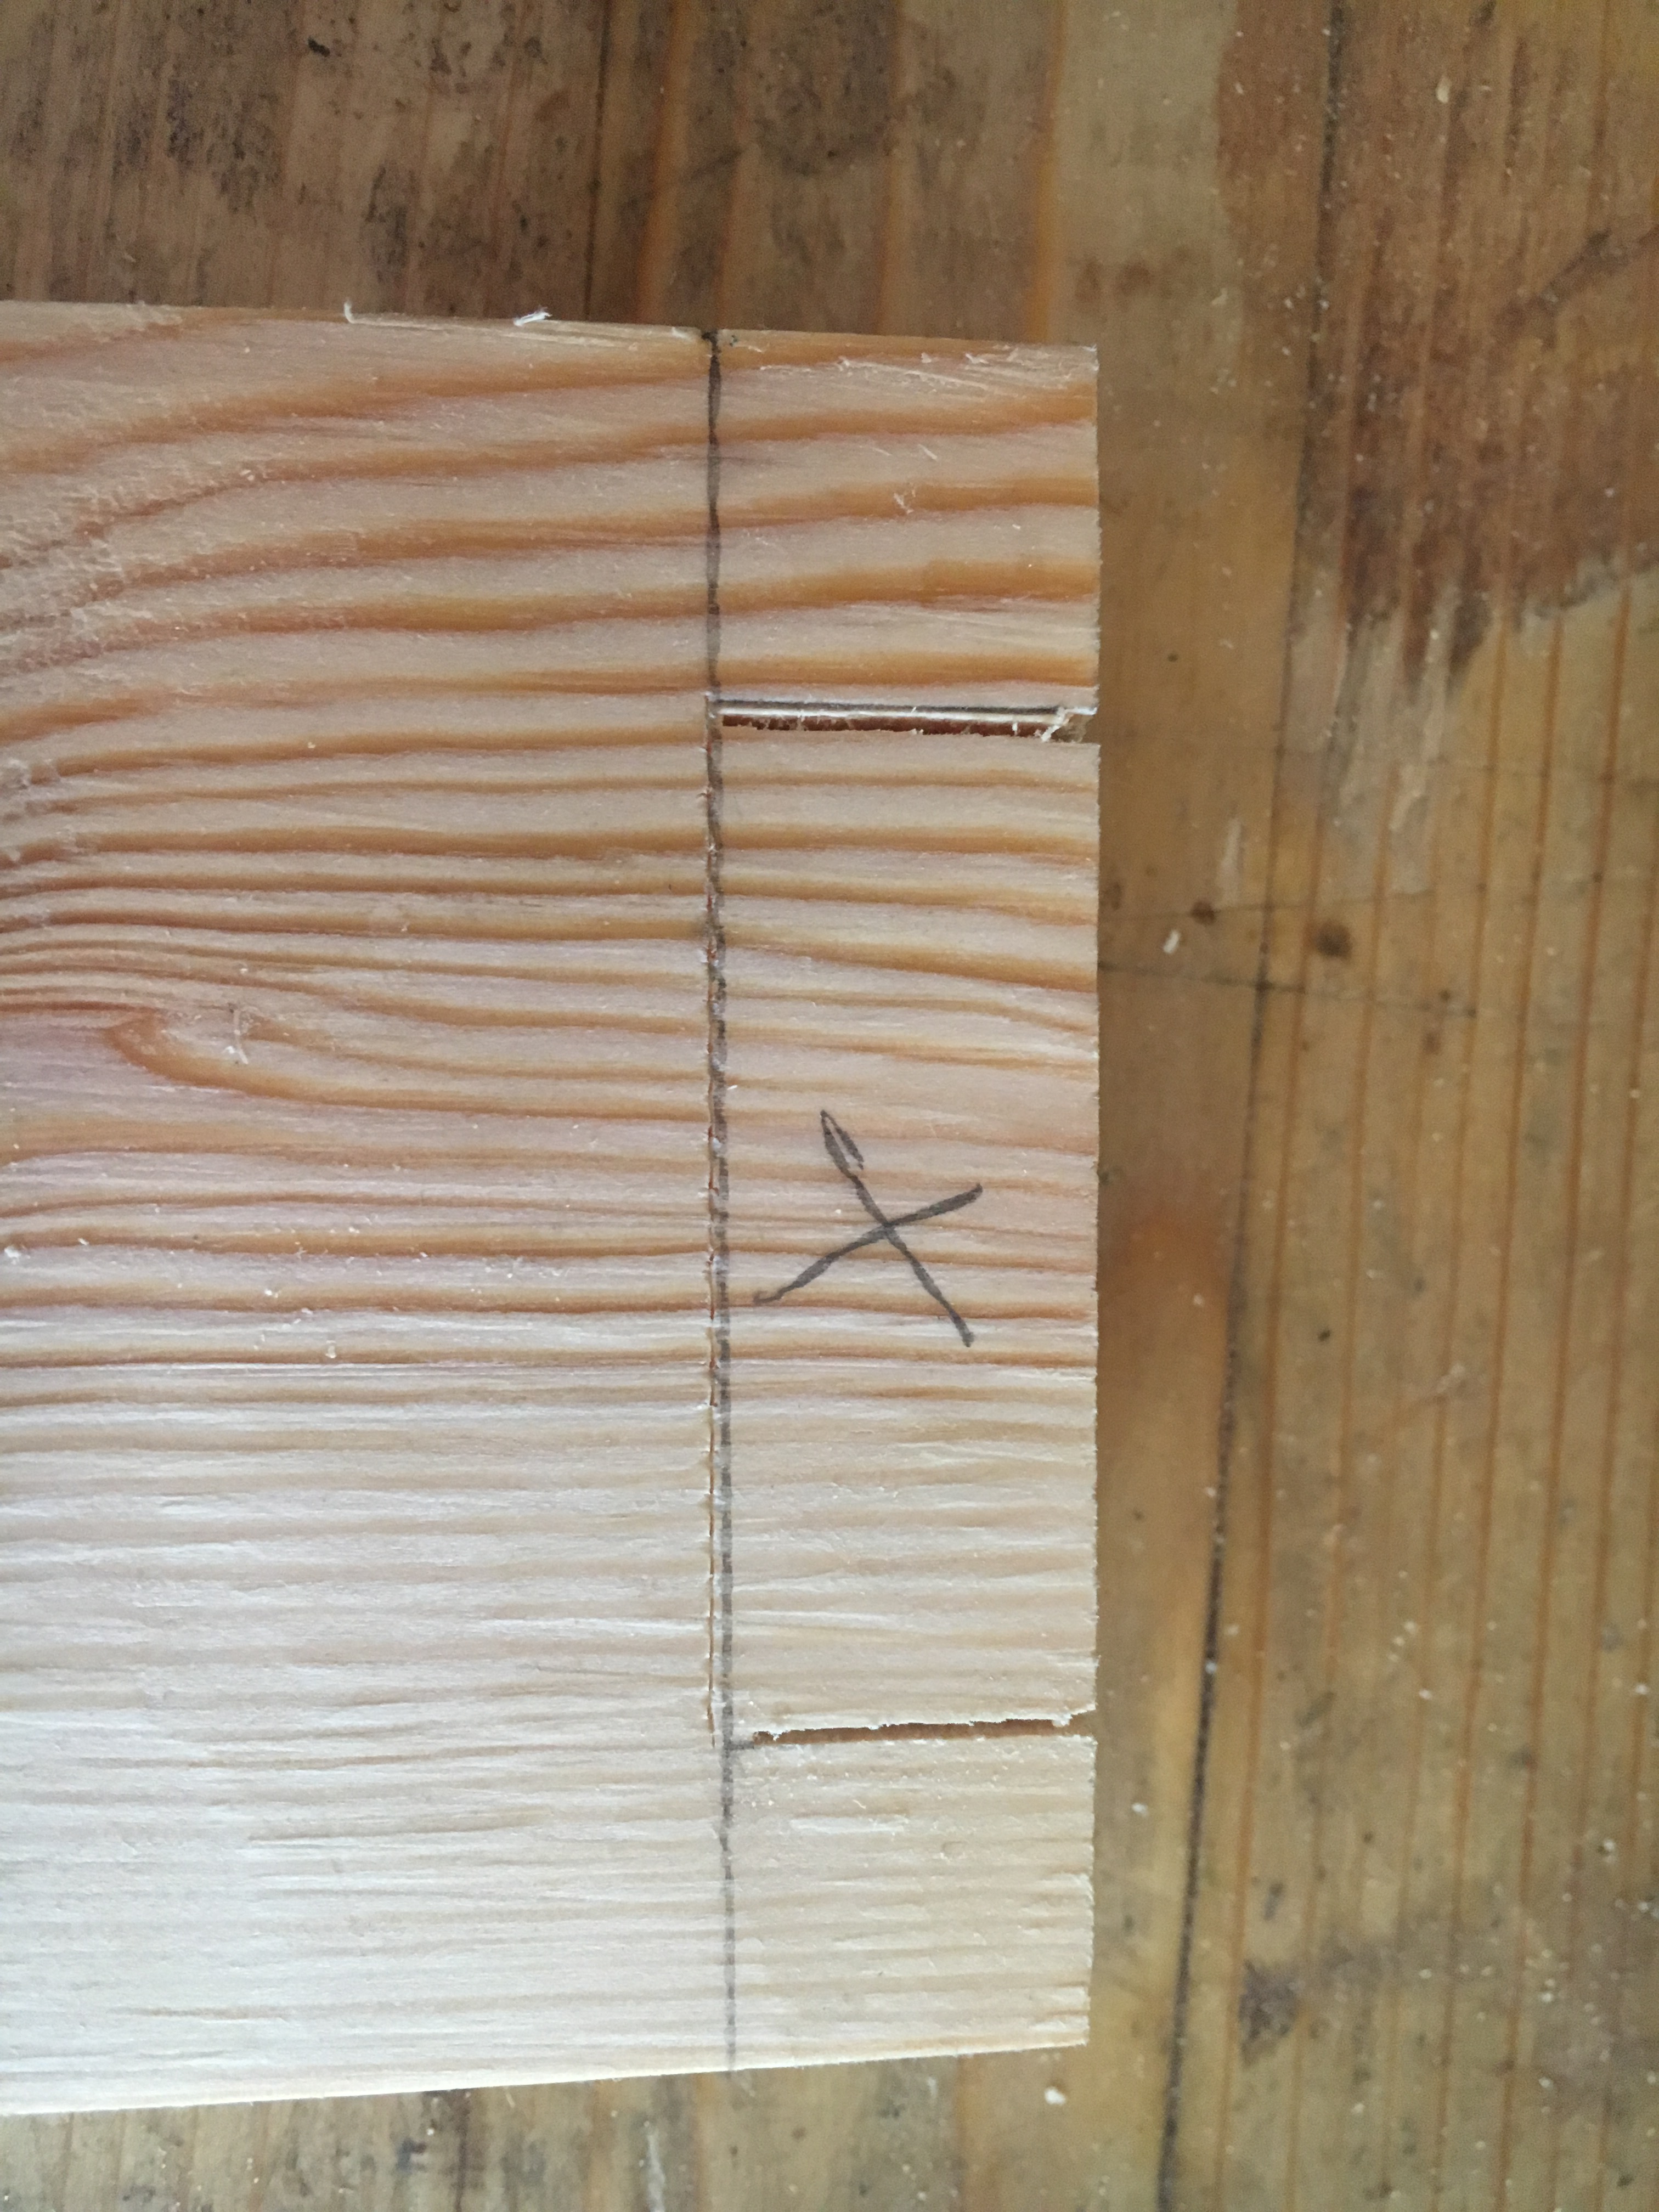
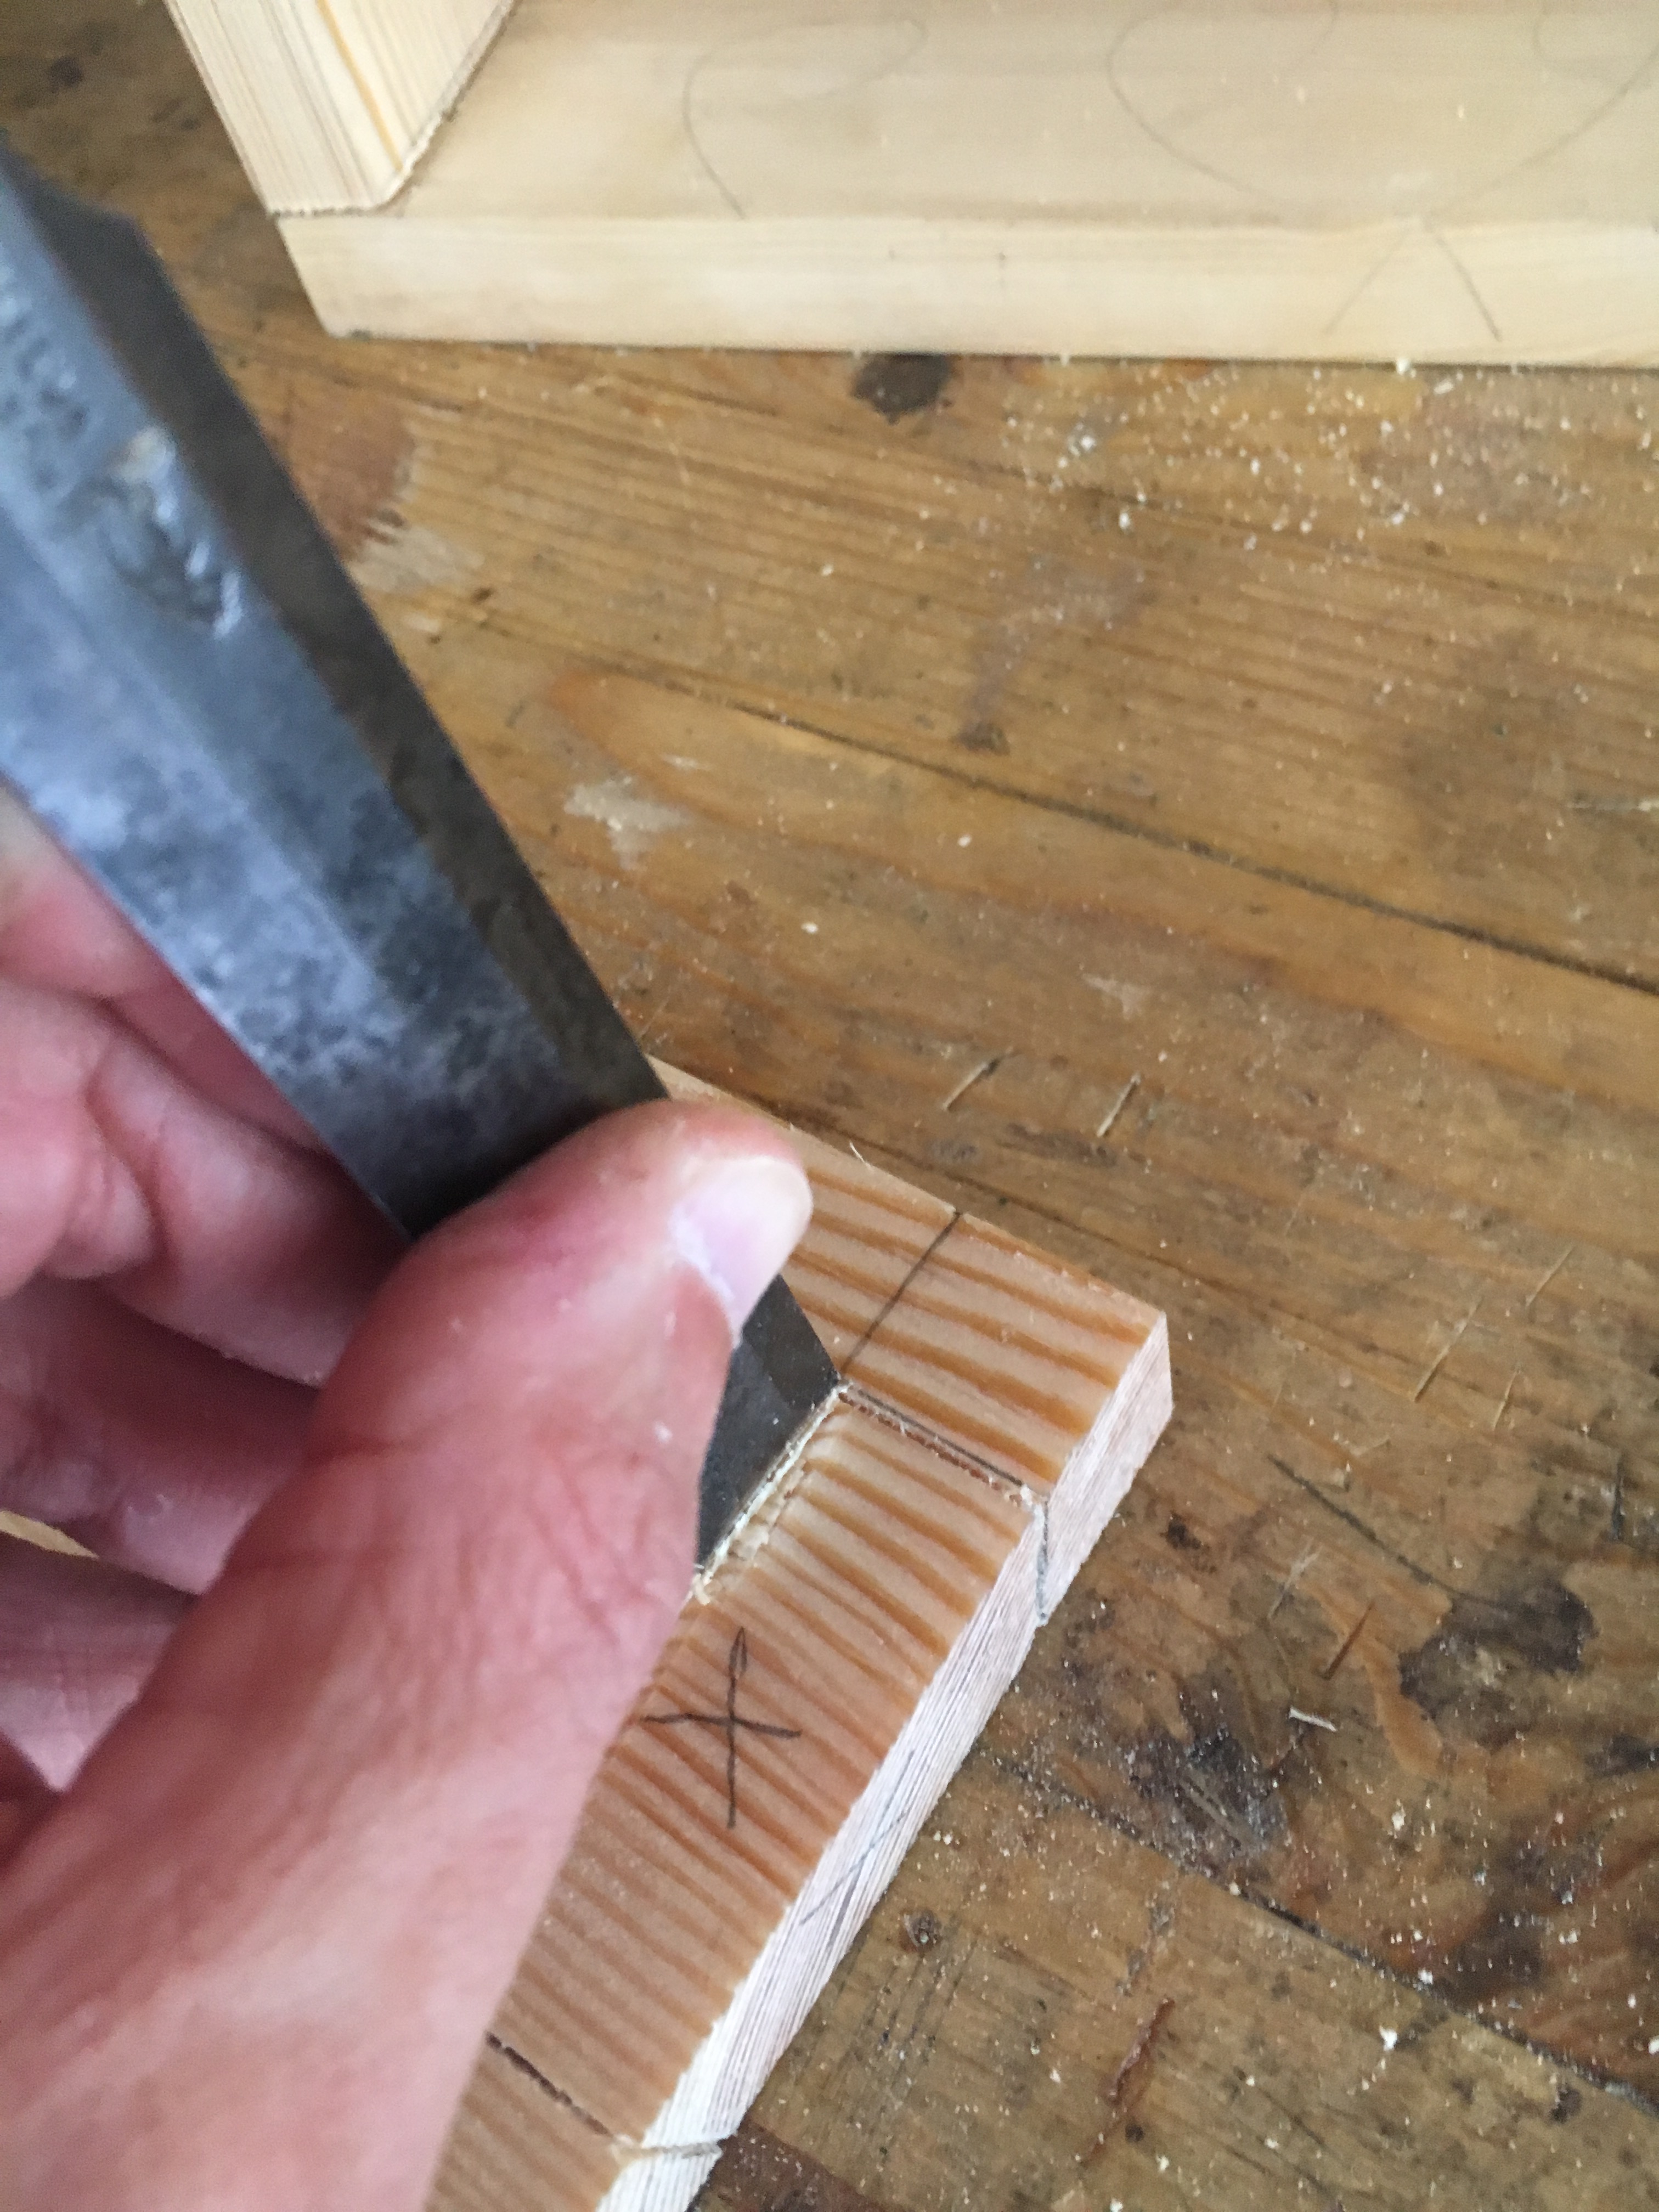
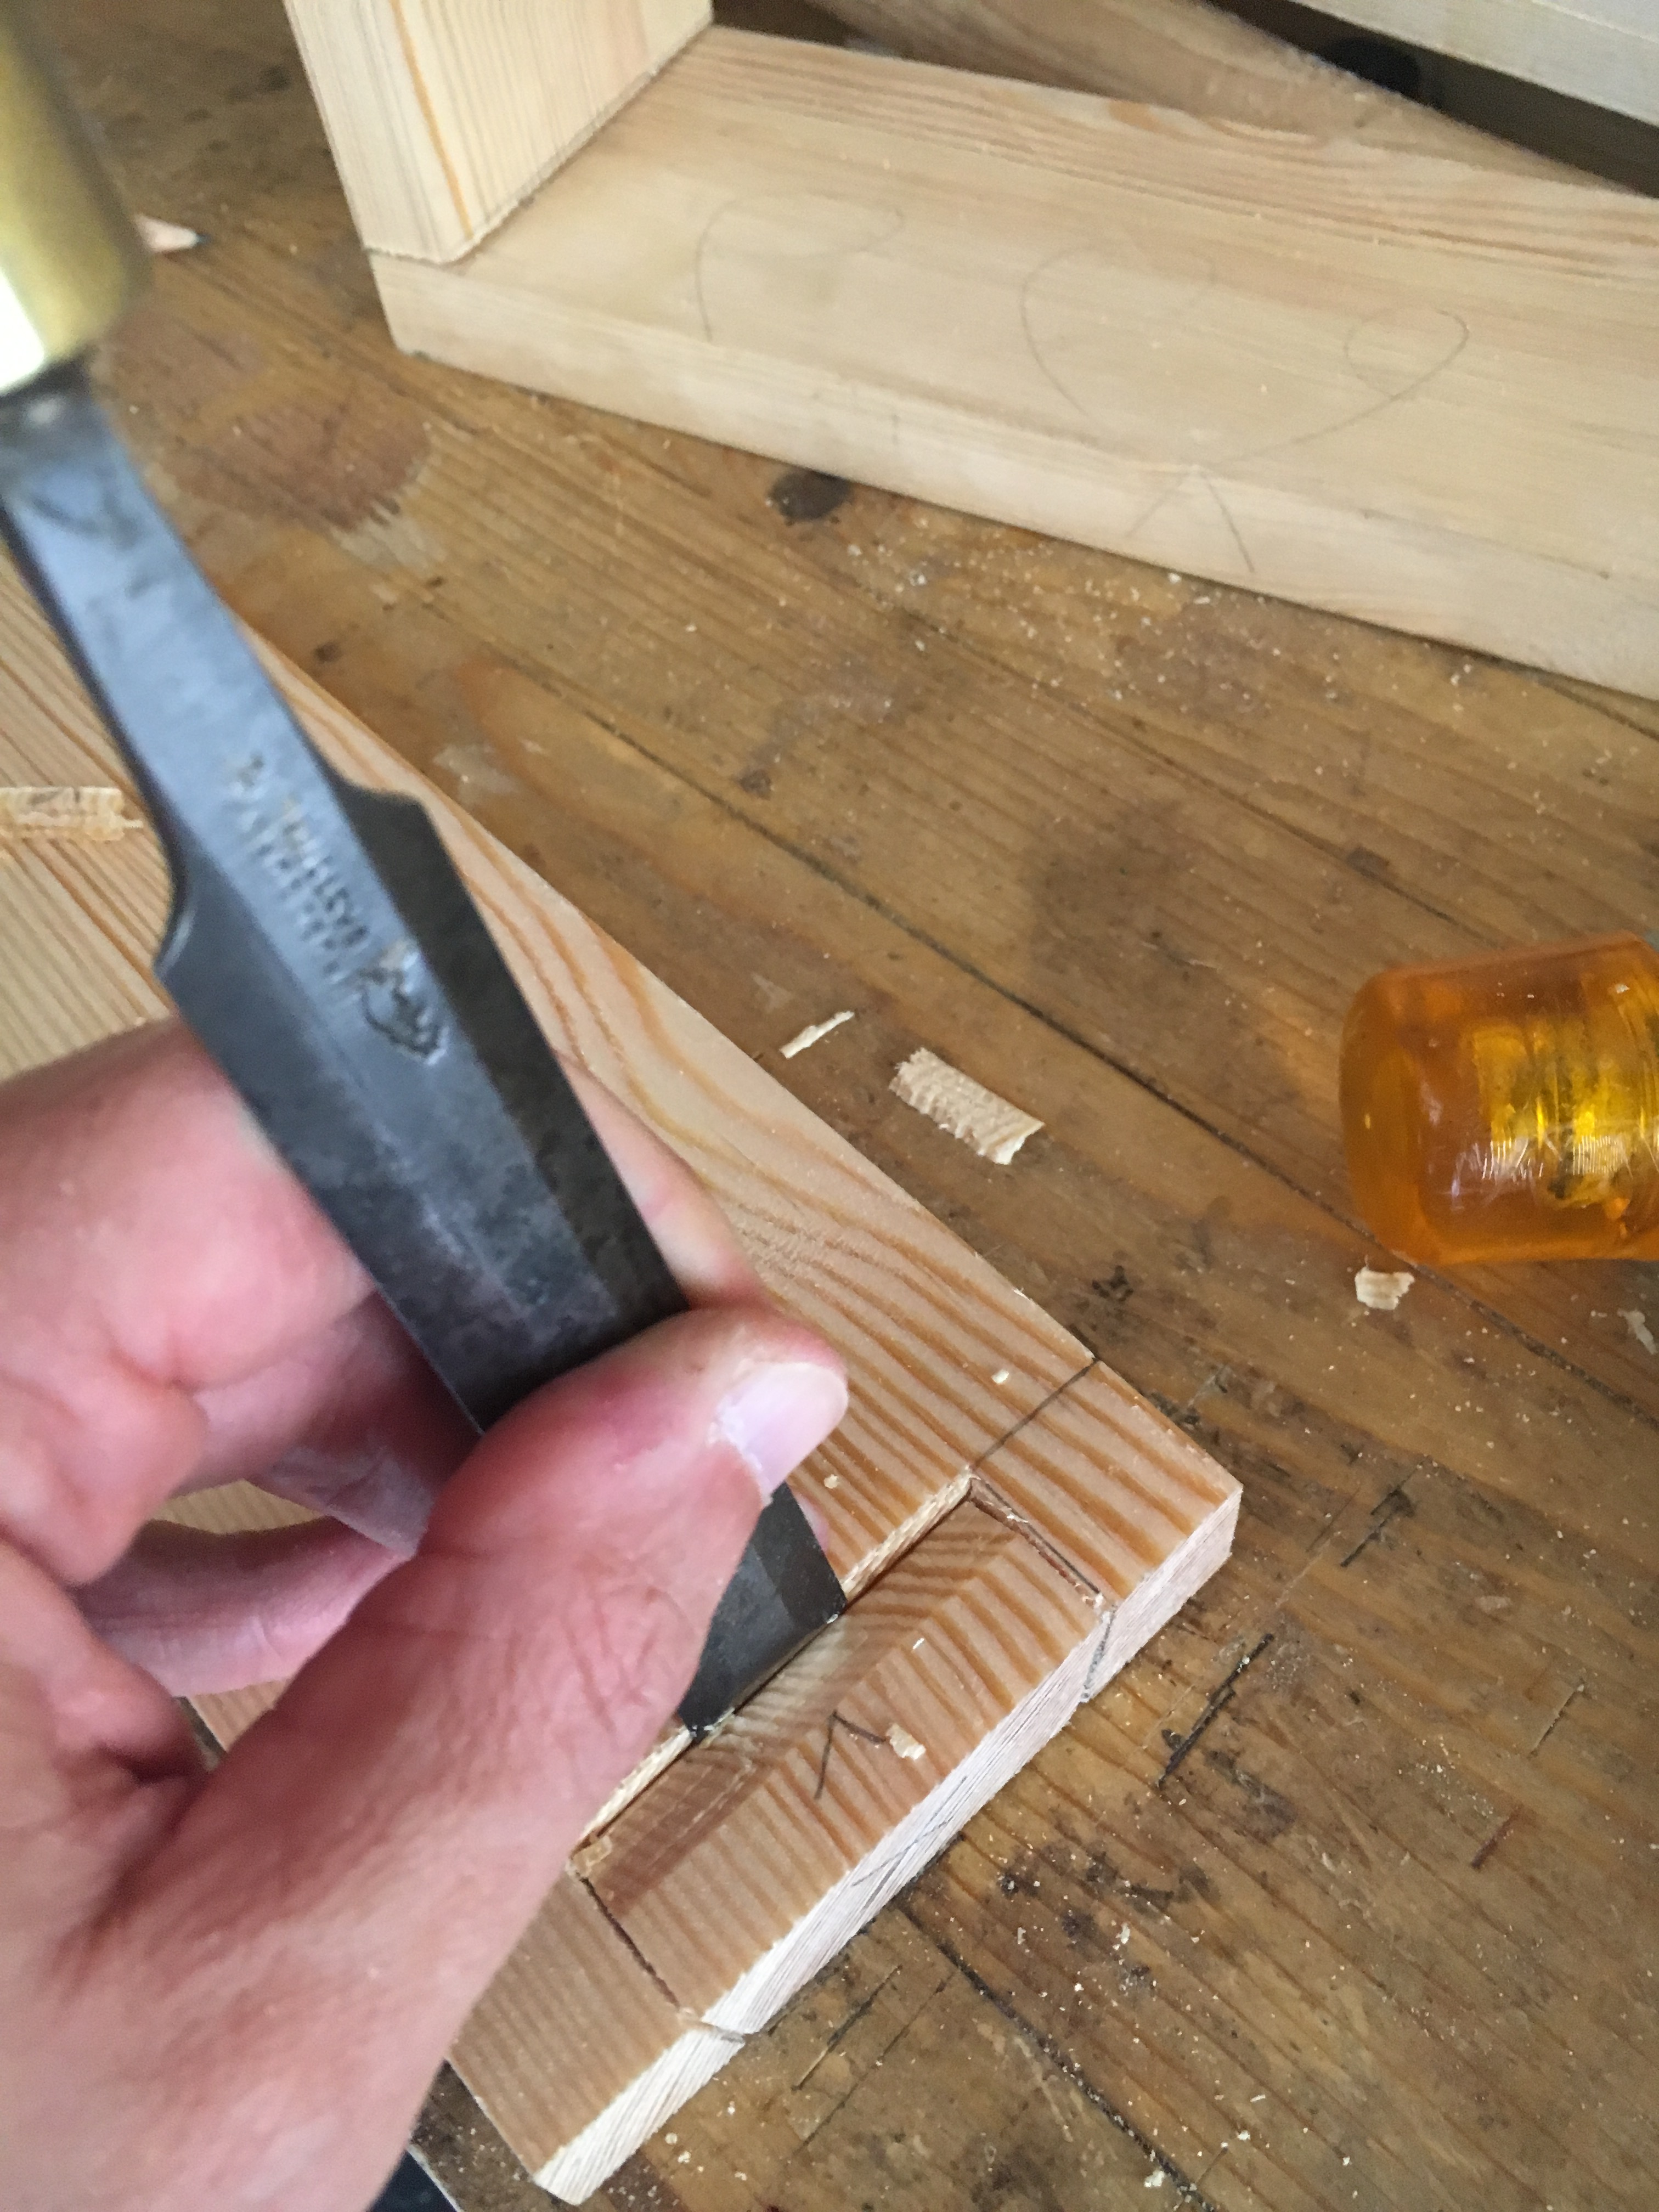
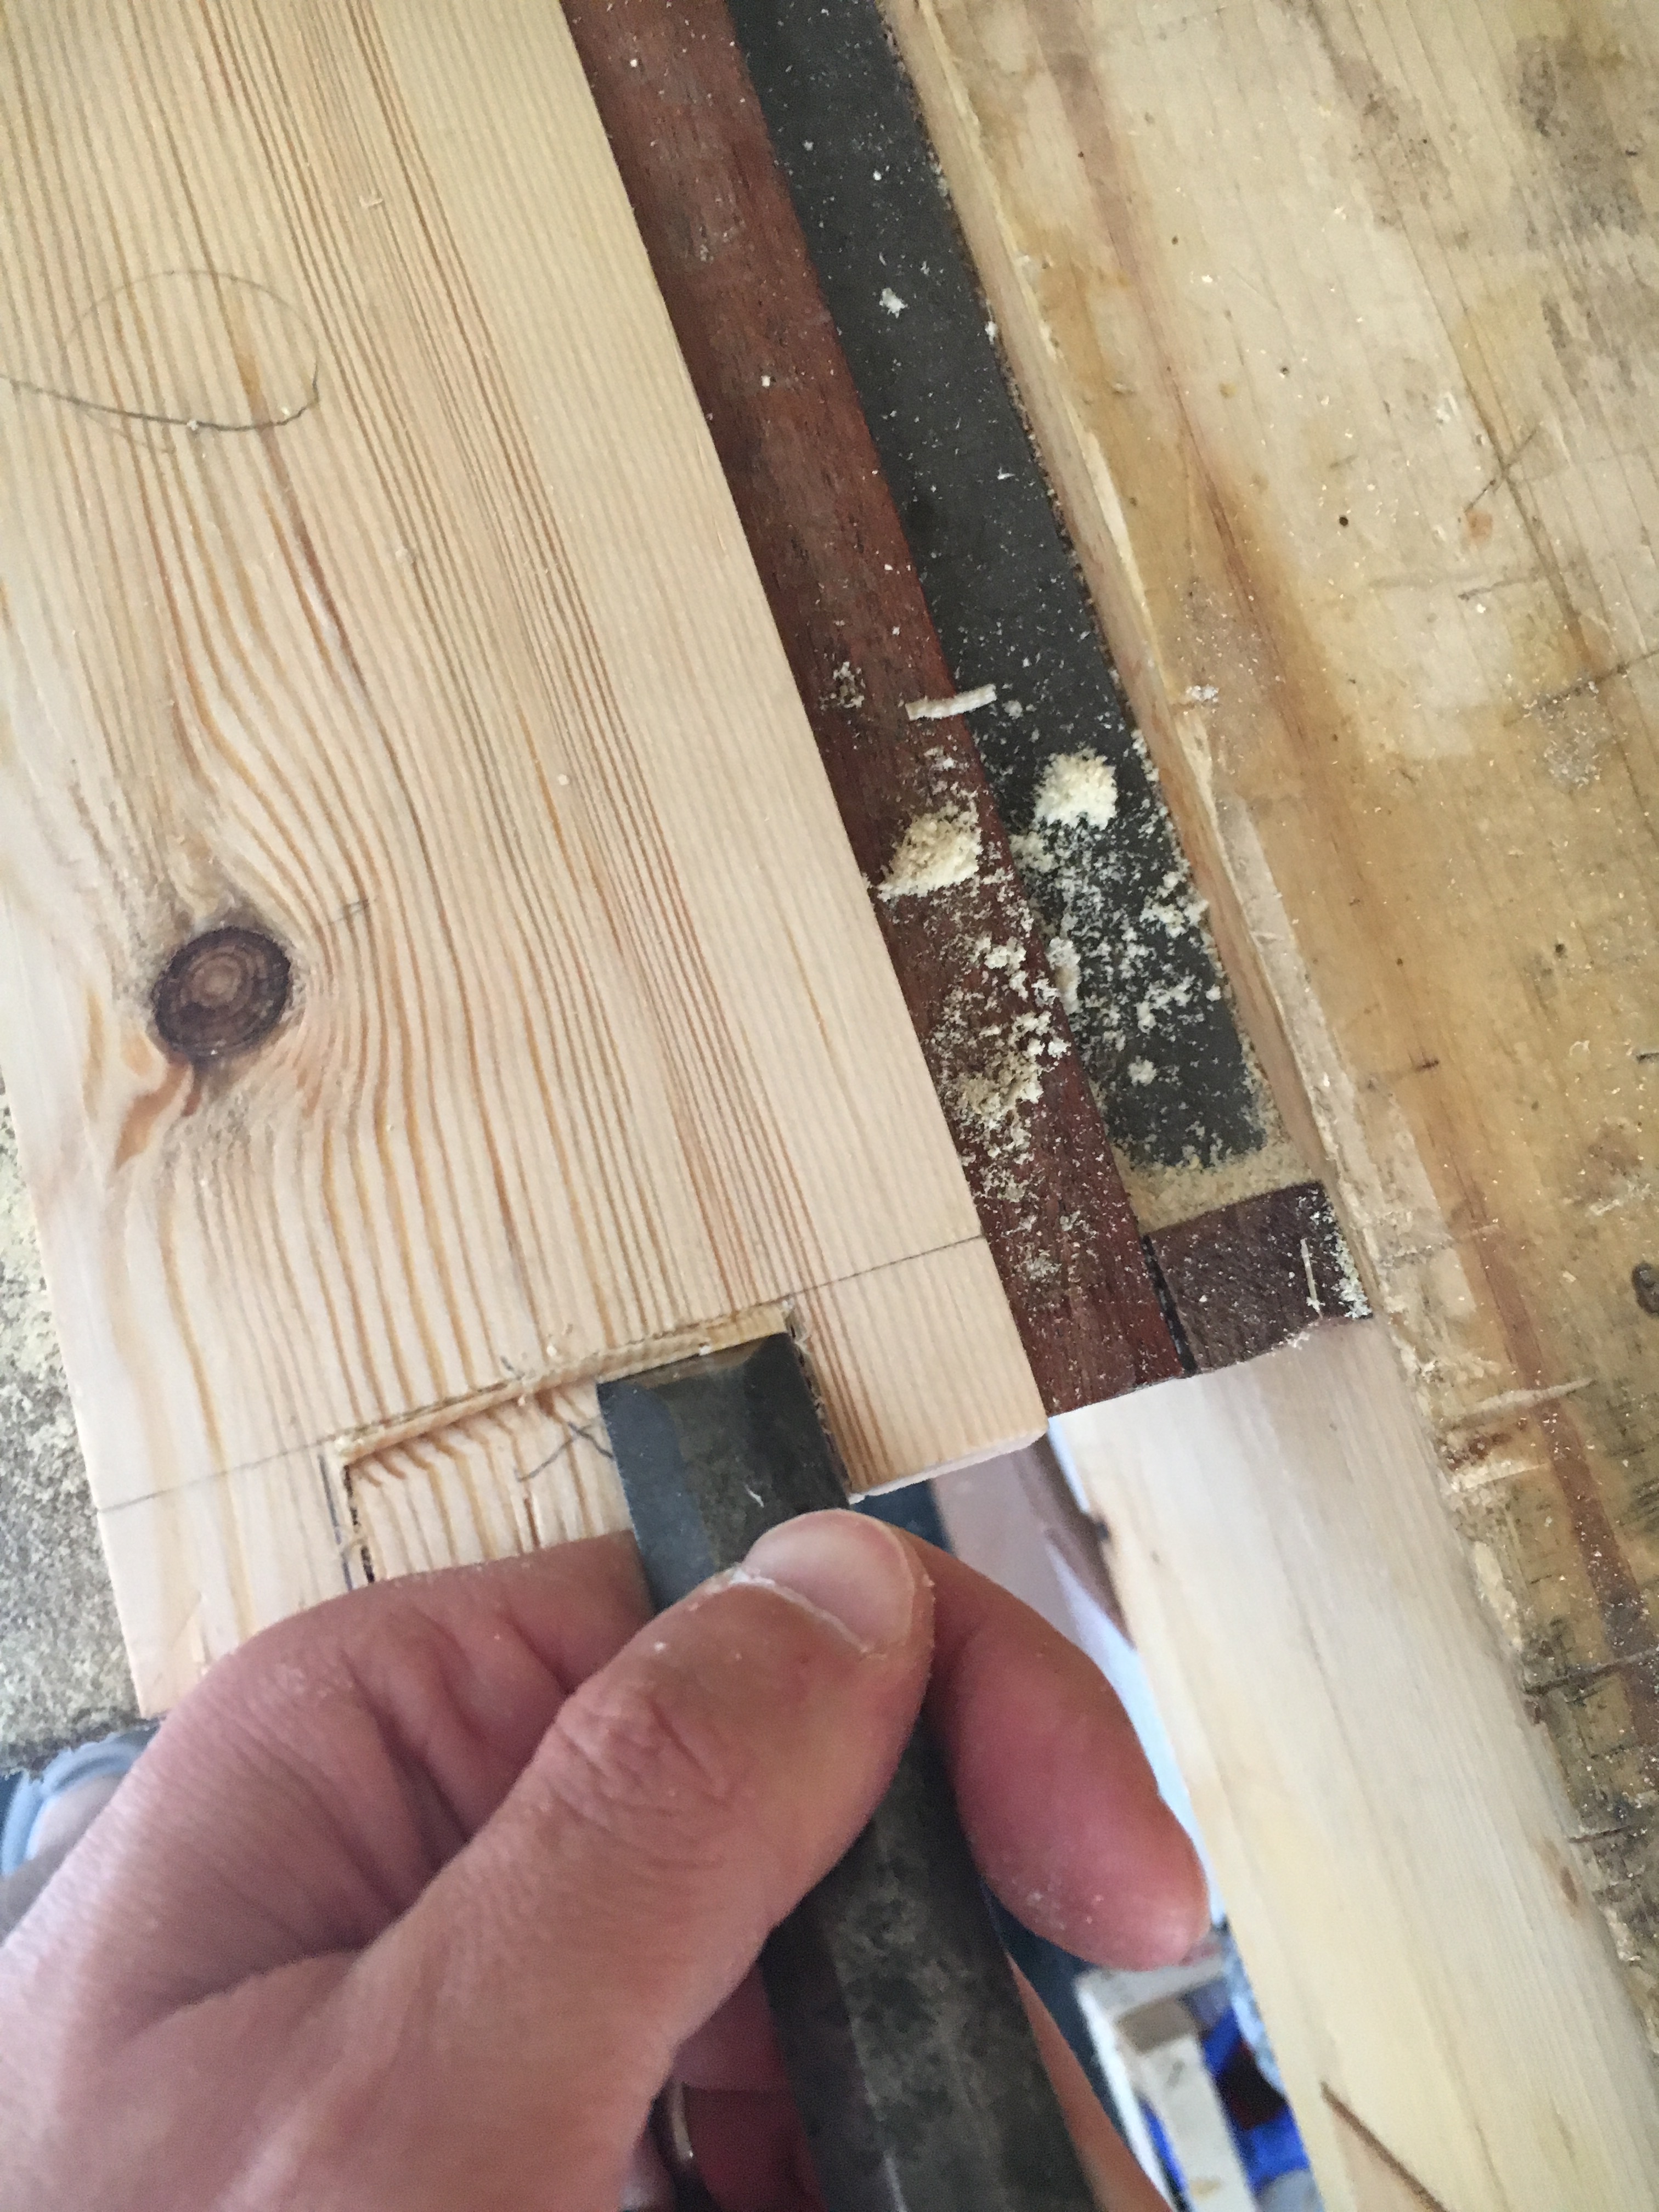
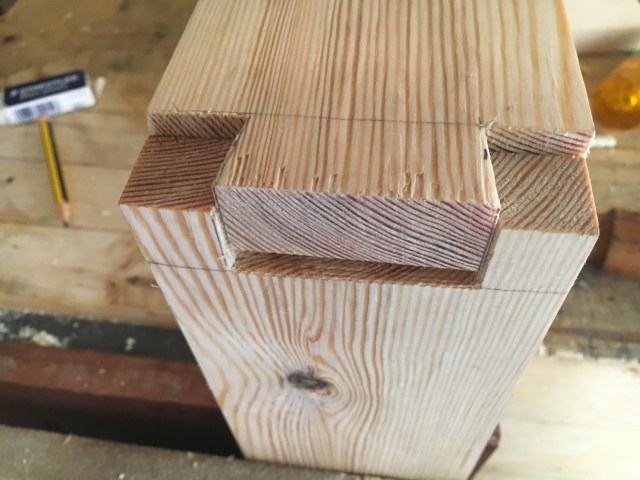
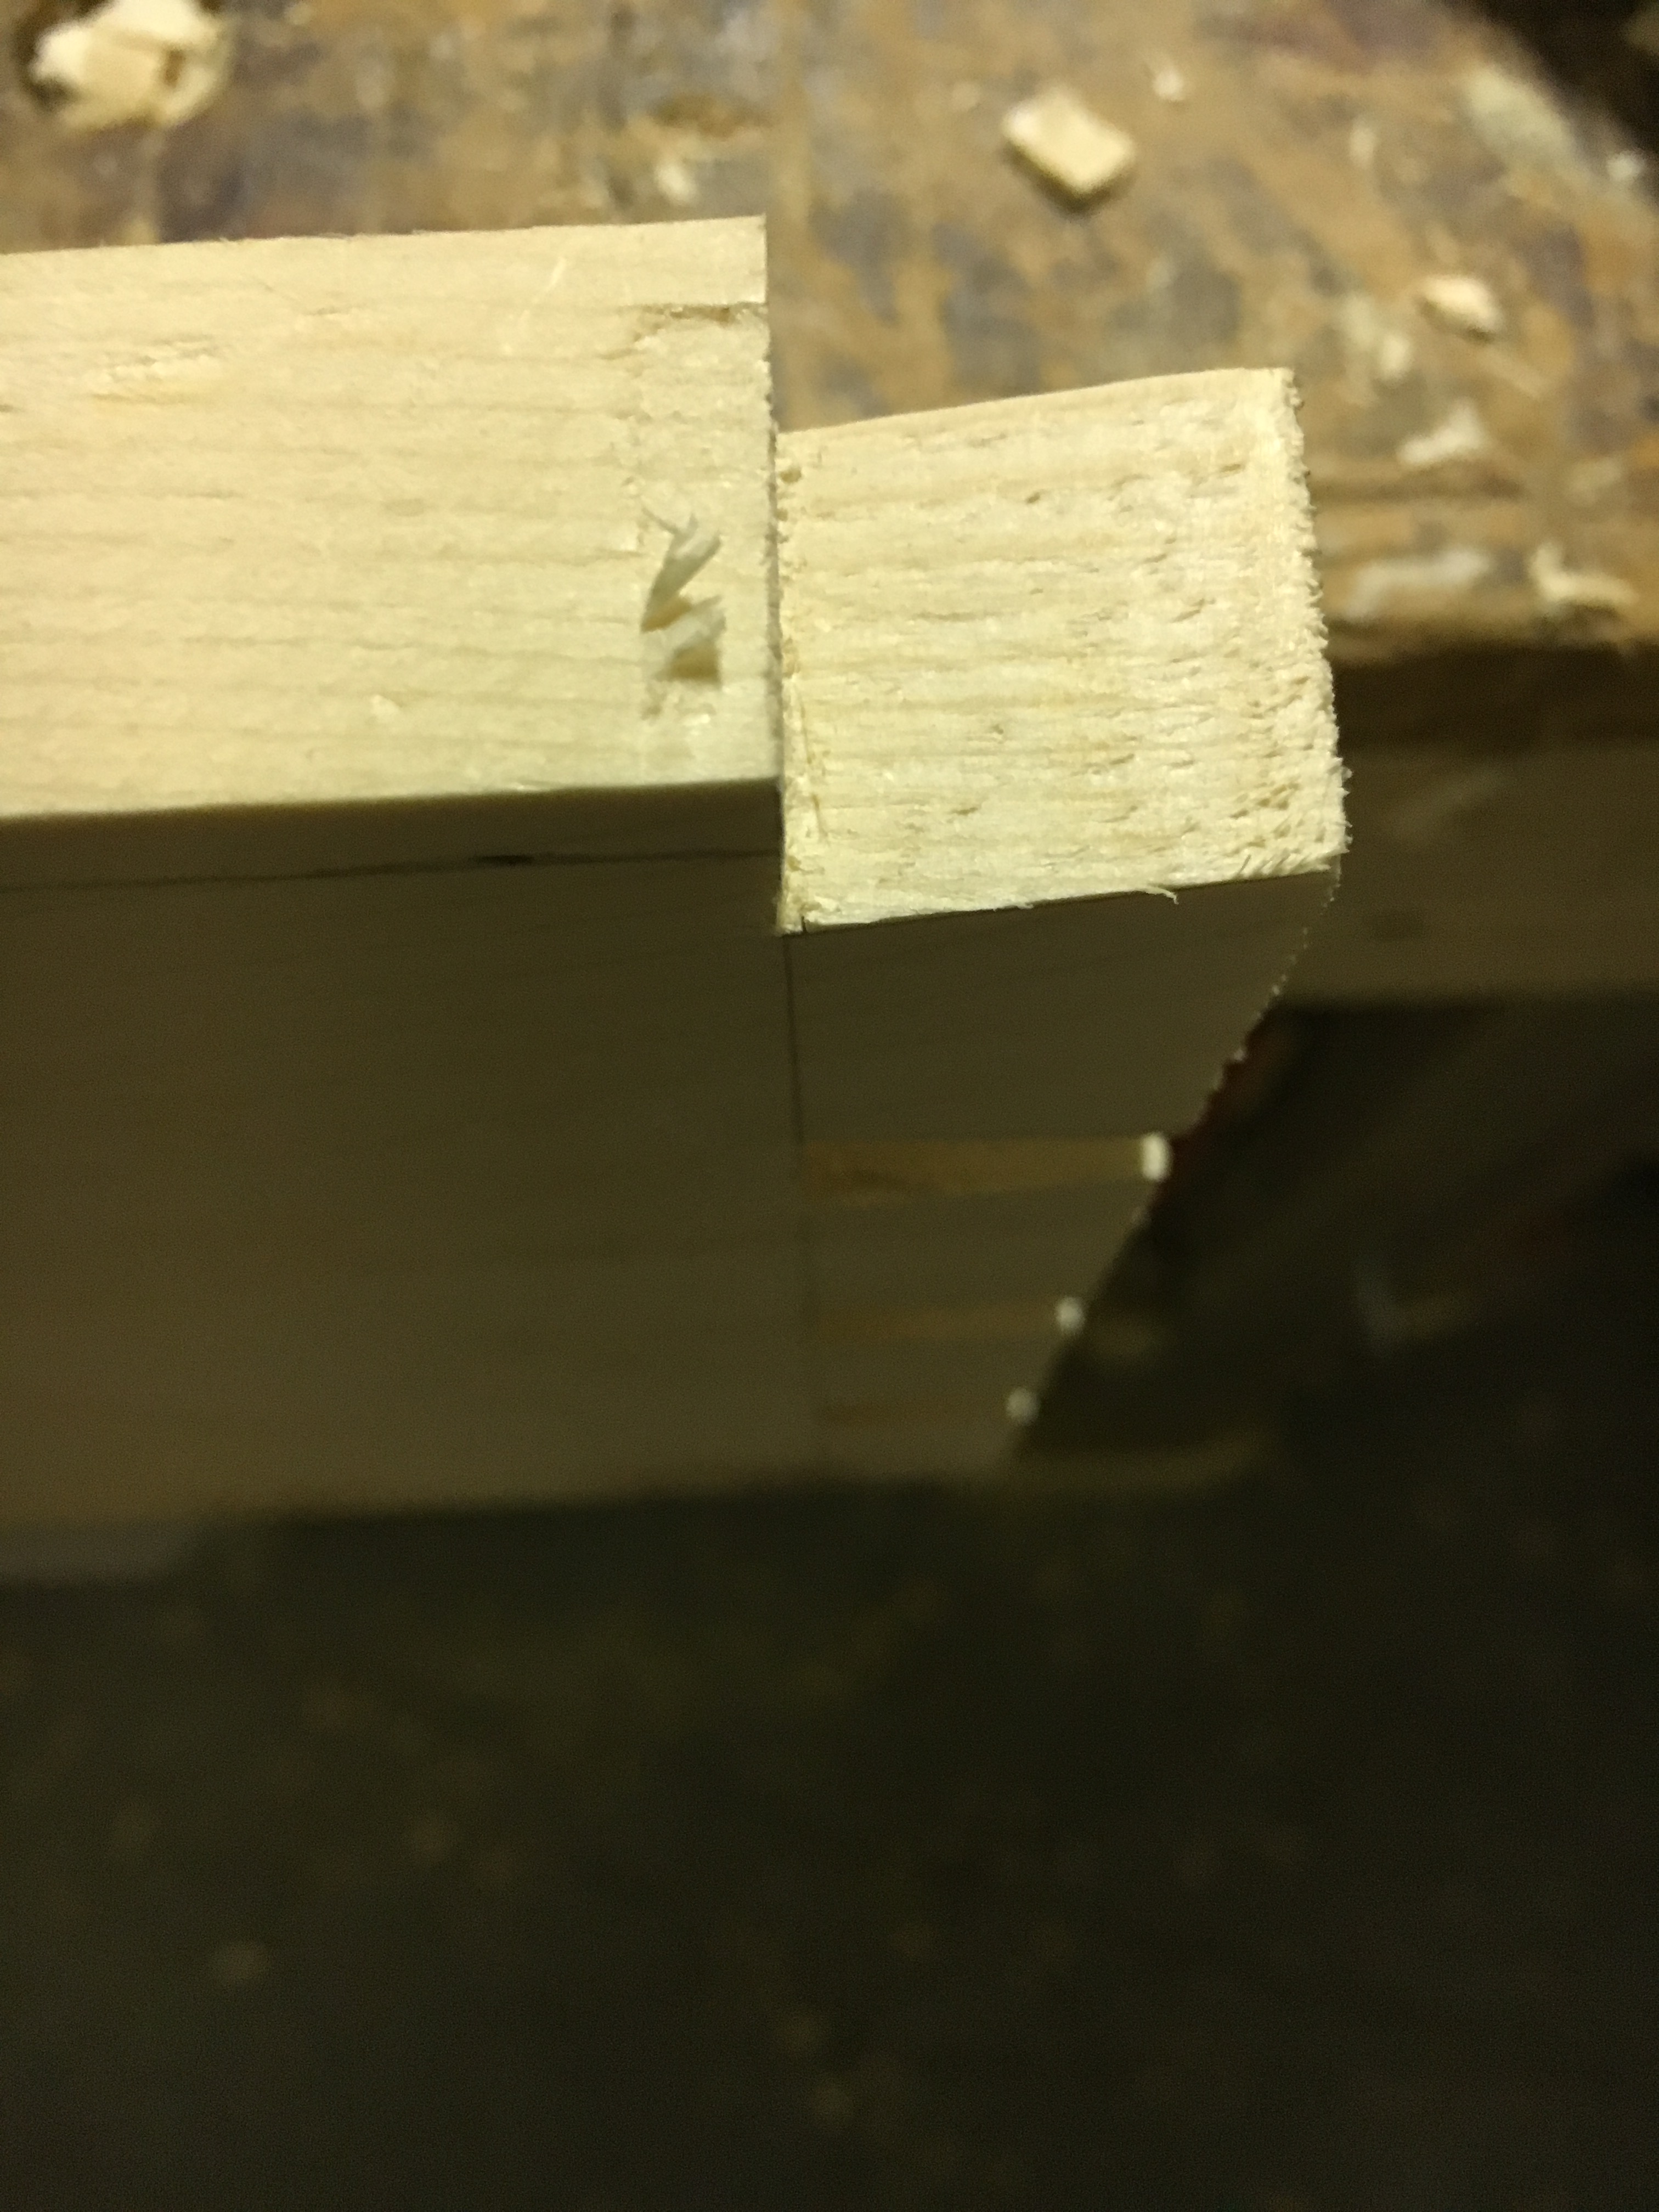
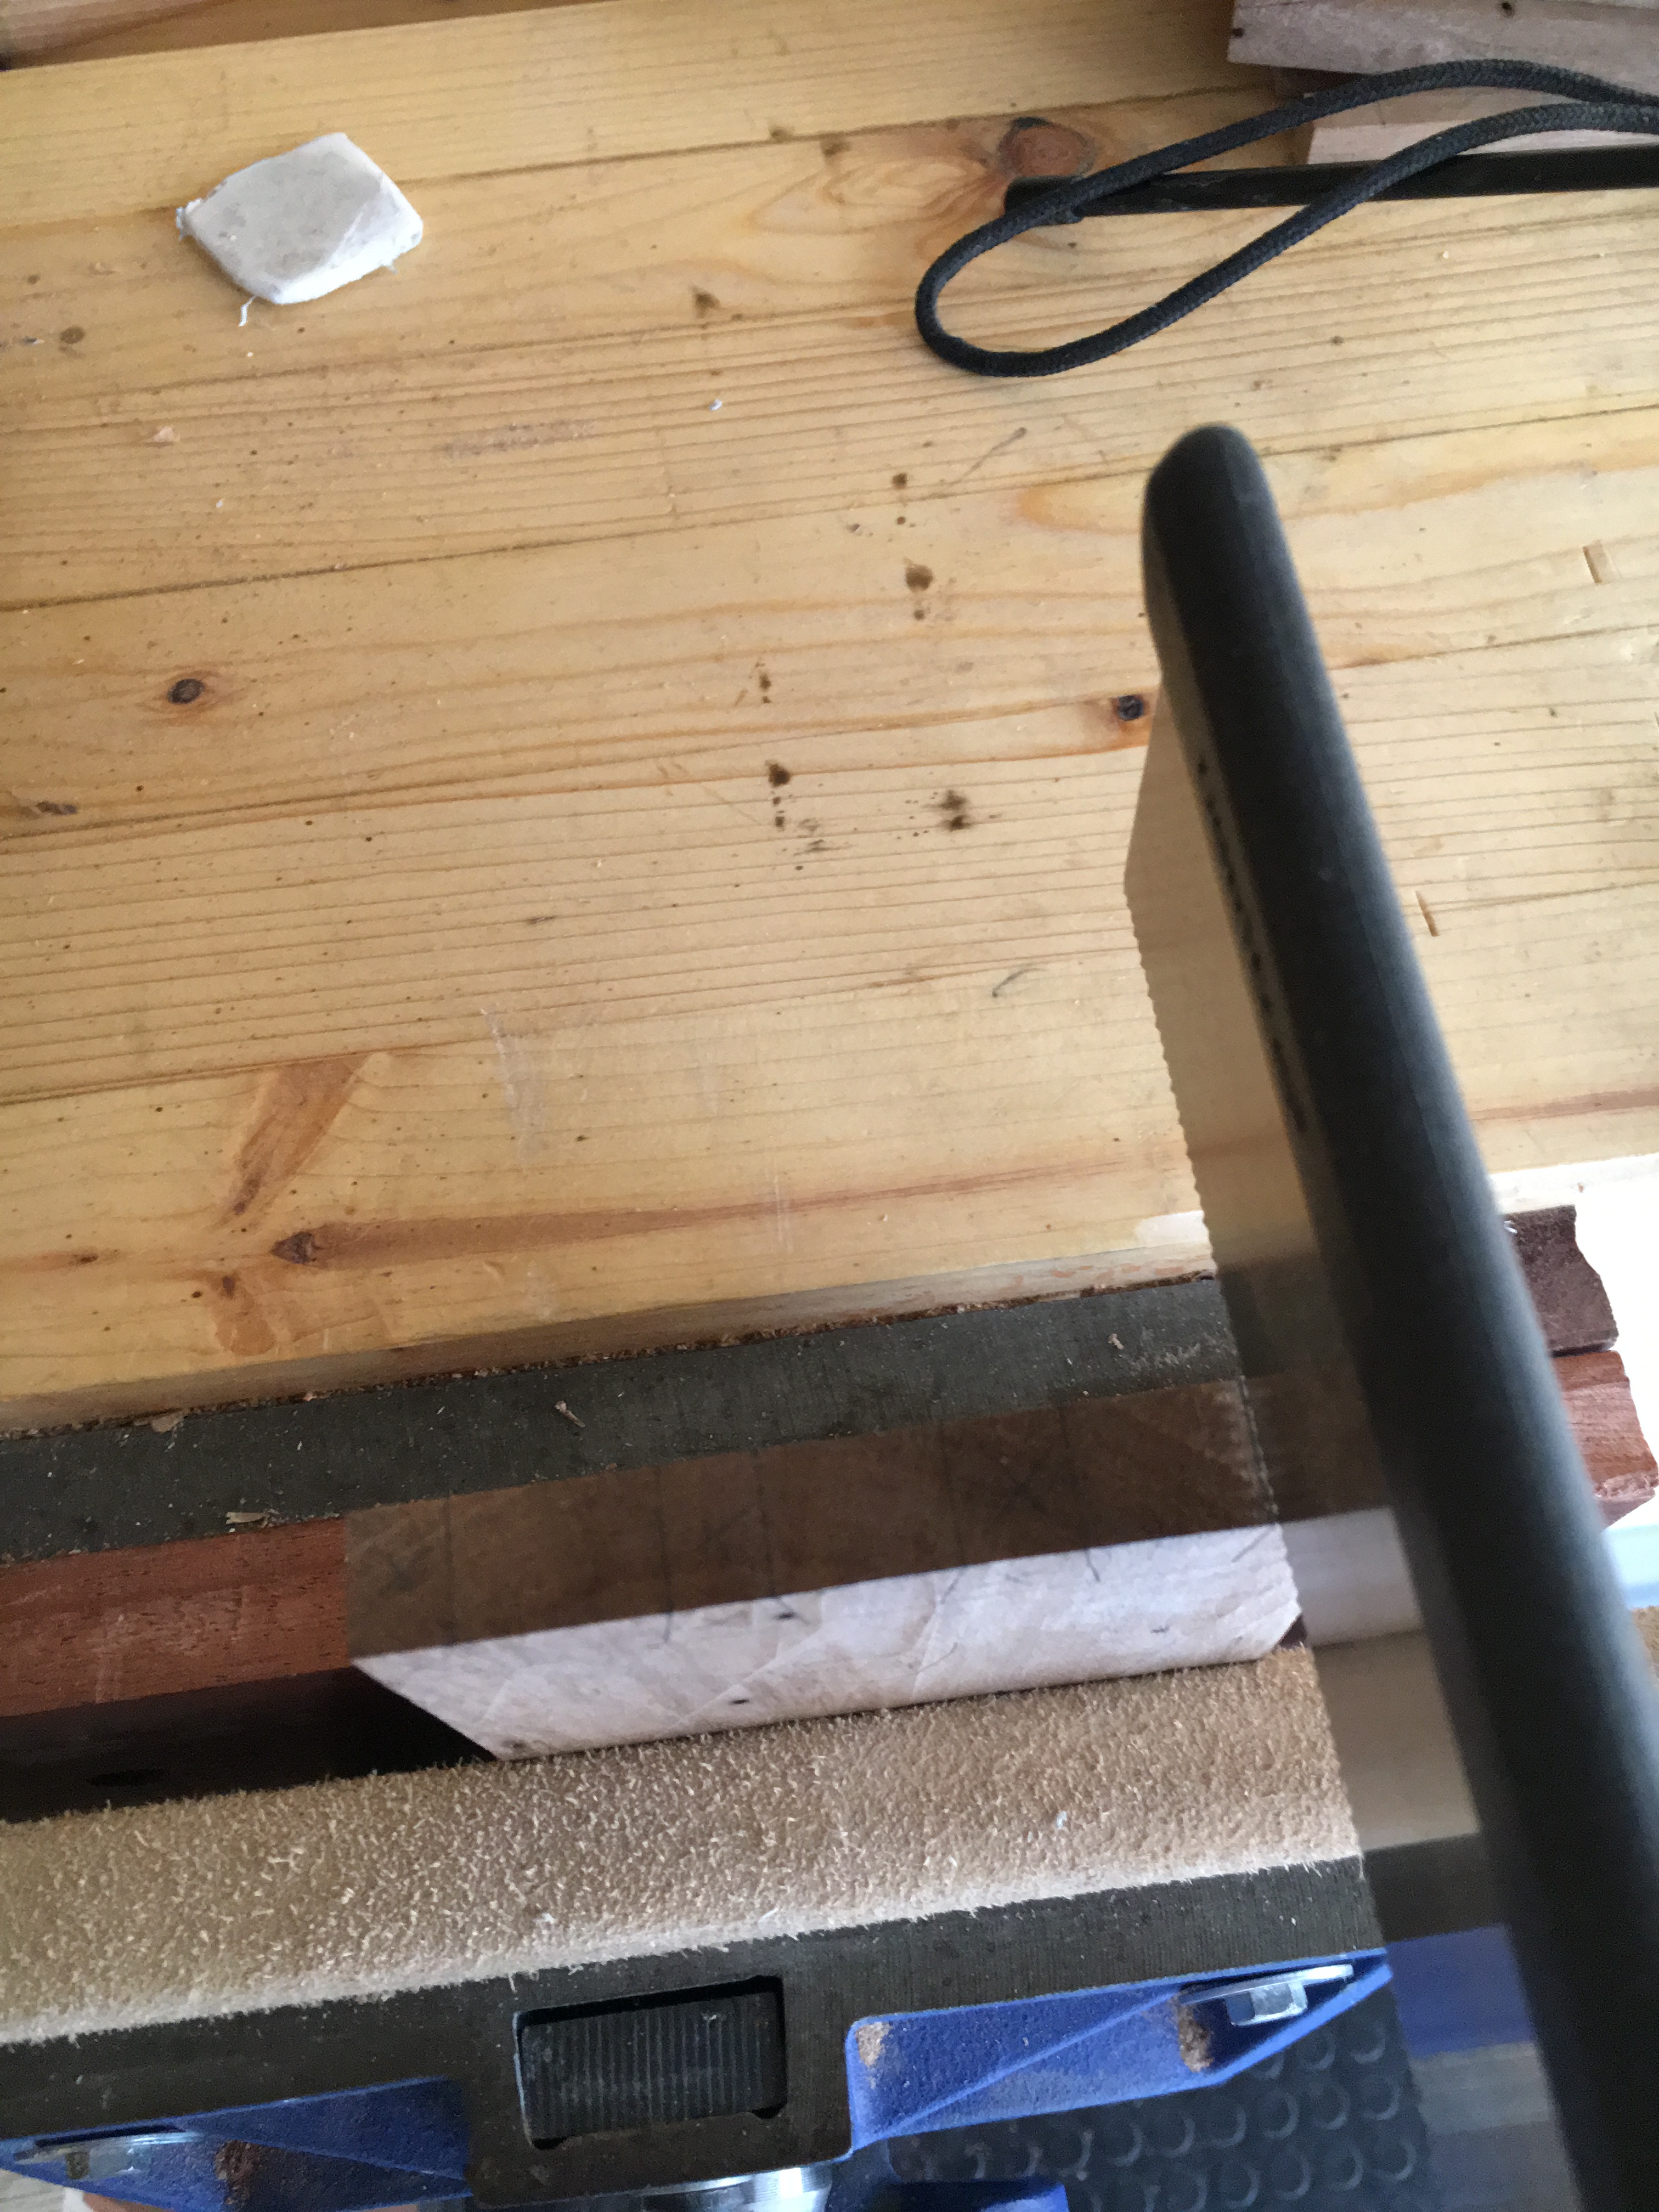
Dopo tutte queste premesse vediamo adesso nello specifico come realizzare un incastro a coda di rondine aperta. La descrizione è inserita direttamente nelle foto, come fatto anche nei precedenti post sull’argomento. Alla fine vedremo altre specifiche, riguardo soprattutto la tracciatura delle code.


prezzo. Keep on deepen removing material with the chisel, working from both sides of the piece.
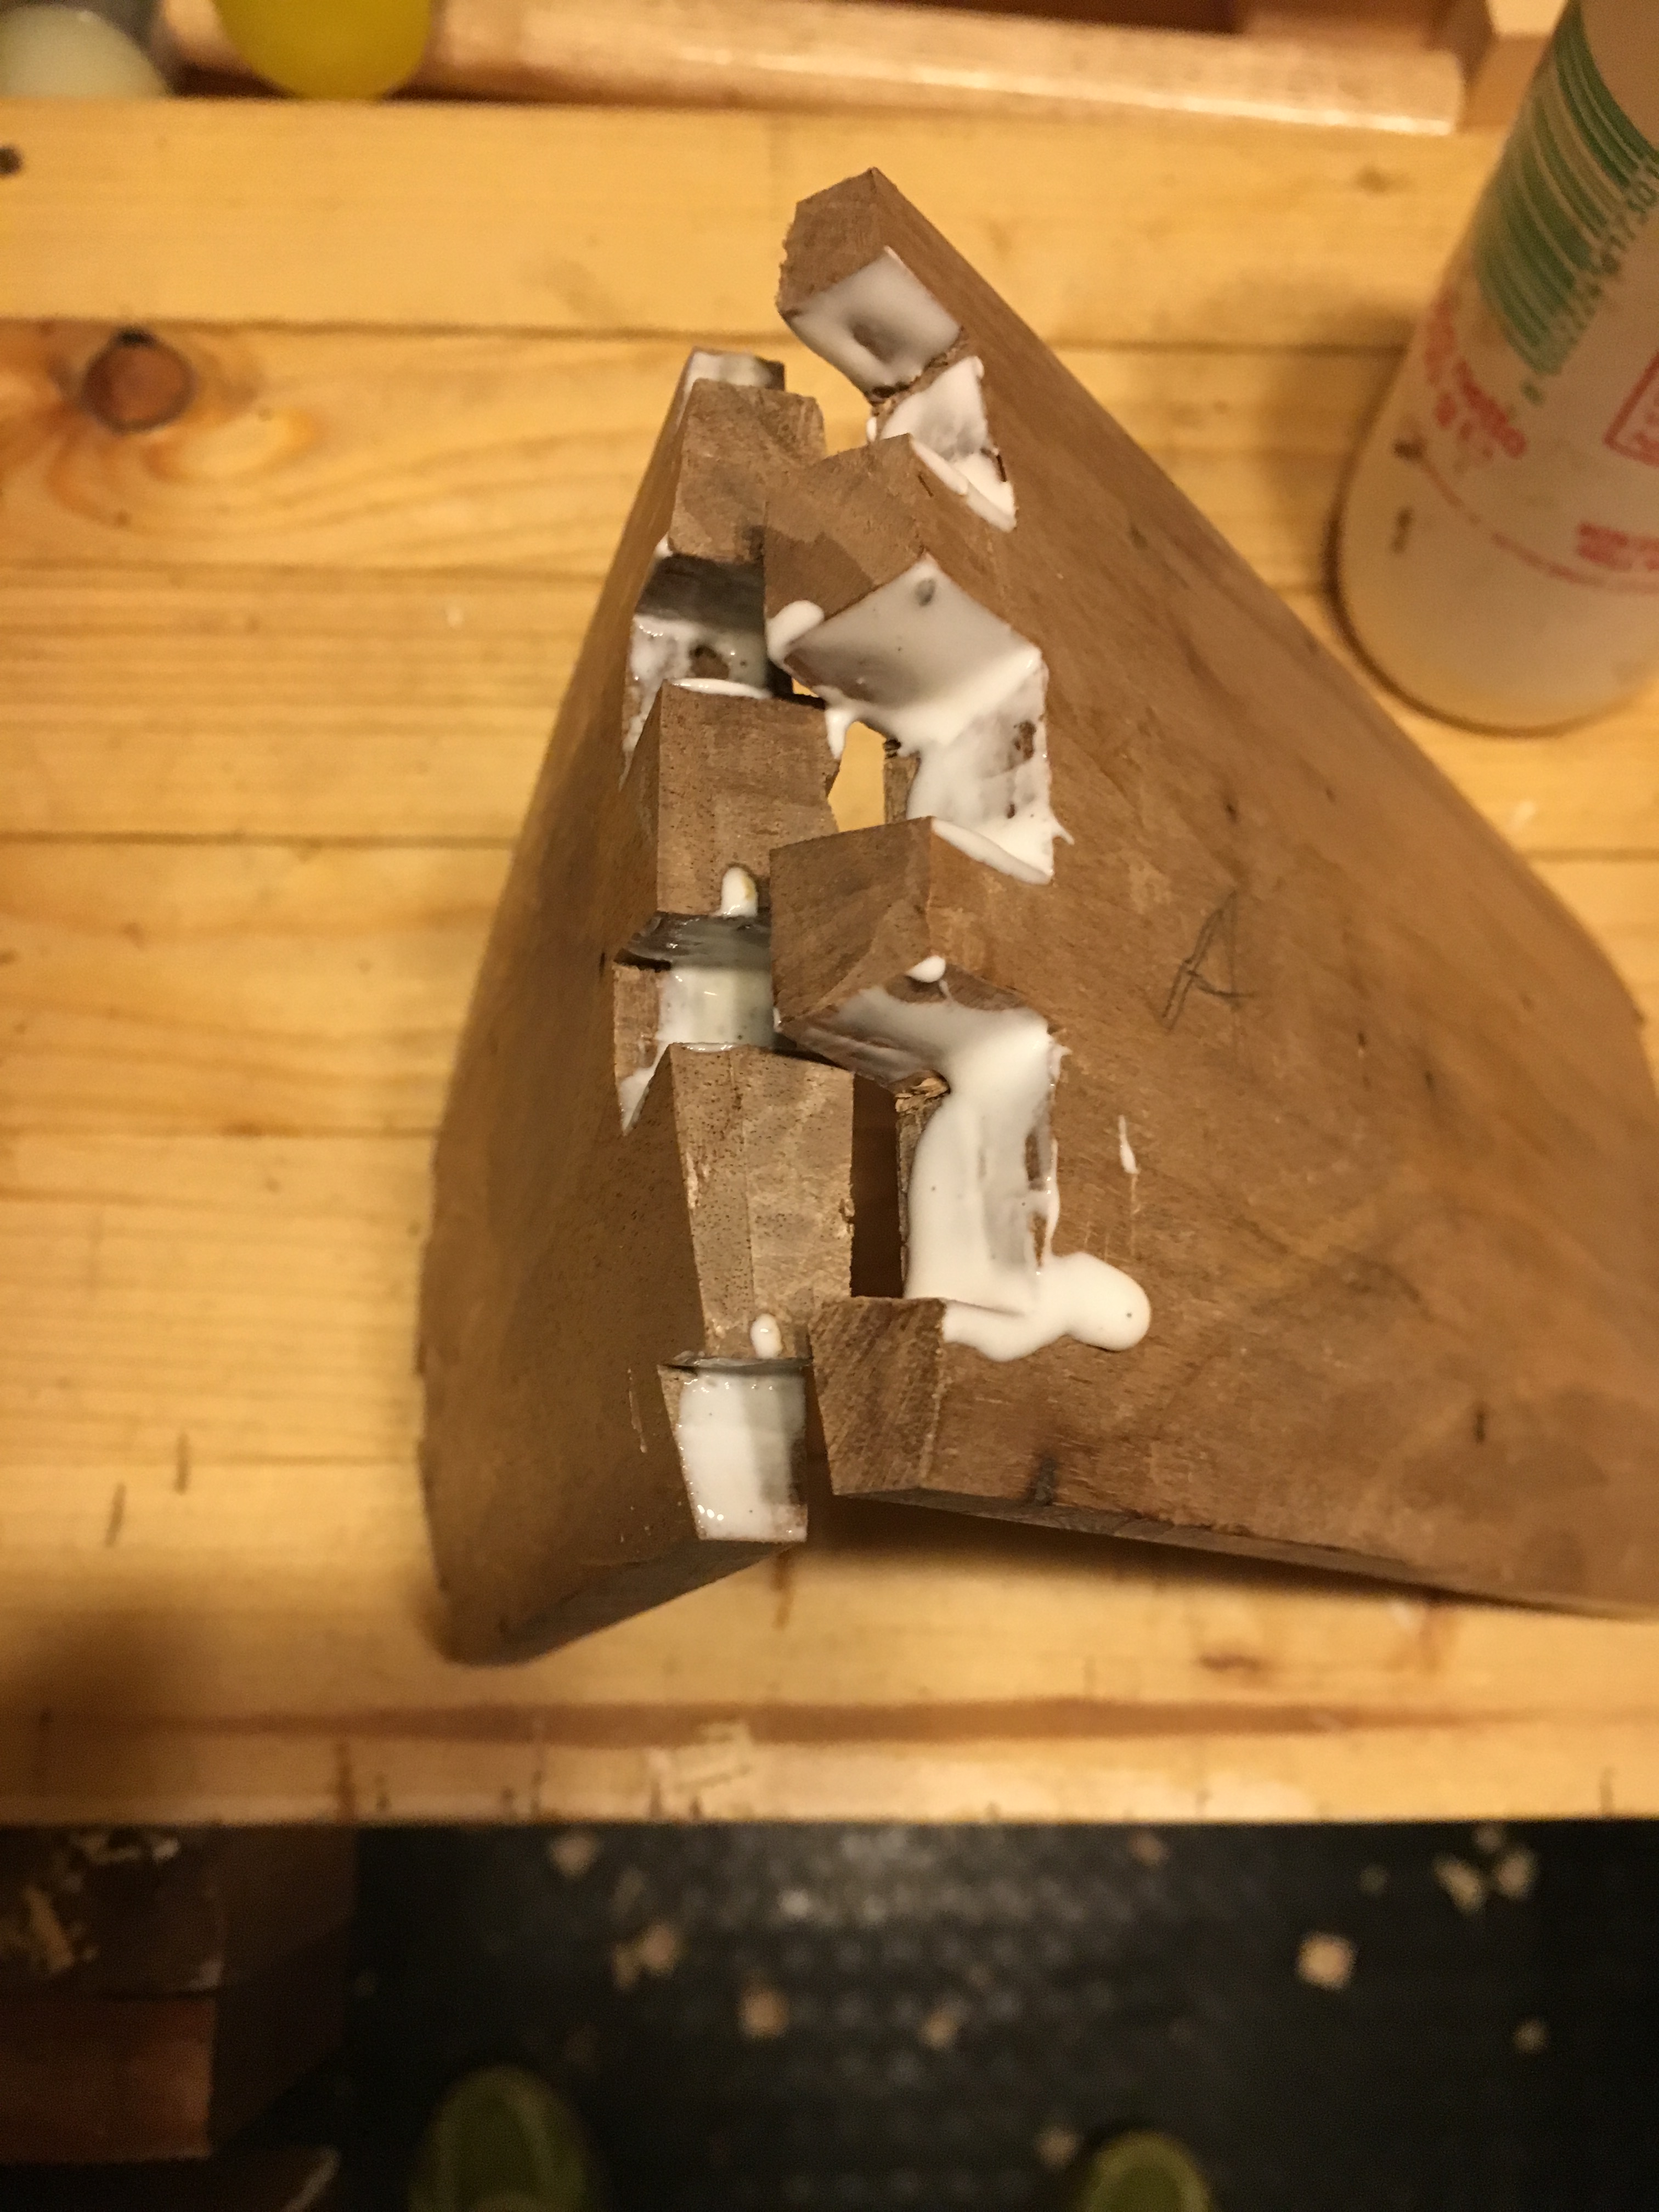
Gli incastri prevedono sempre di essere successivamente incollati per garantirne la tenuta nel tempo e le code di rondine non fanno eccezione. La fase di incollaggio può risultare però un pò complessa, specialmente se le code di rondine sono tante in quanto, essendo il tempo di presa della colla molto breve, se qualche coda non dovesse incastrarsi bene risulterebbe complicato riuscire a recuperare la situazione in così poco tempo. La morsettatura delle code di rondine prevederebbe l’utilizzo di un’apposita maschera che vada a serrare proprio in corrispondenza delle code. La morsettatura classica andrà comunque bene.
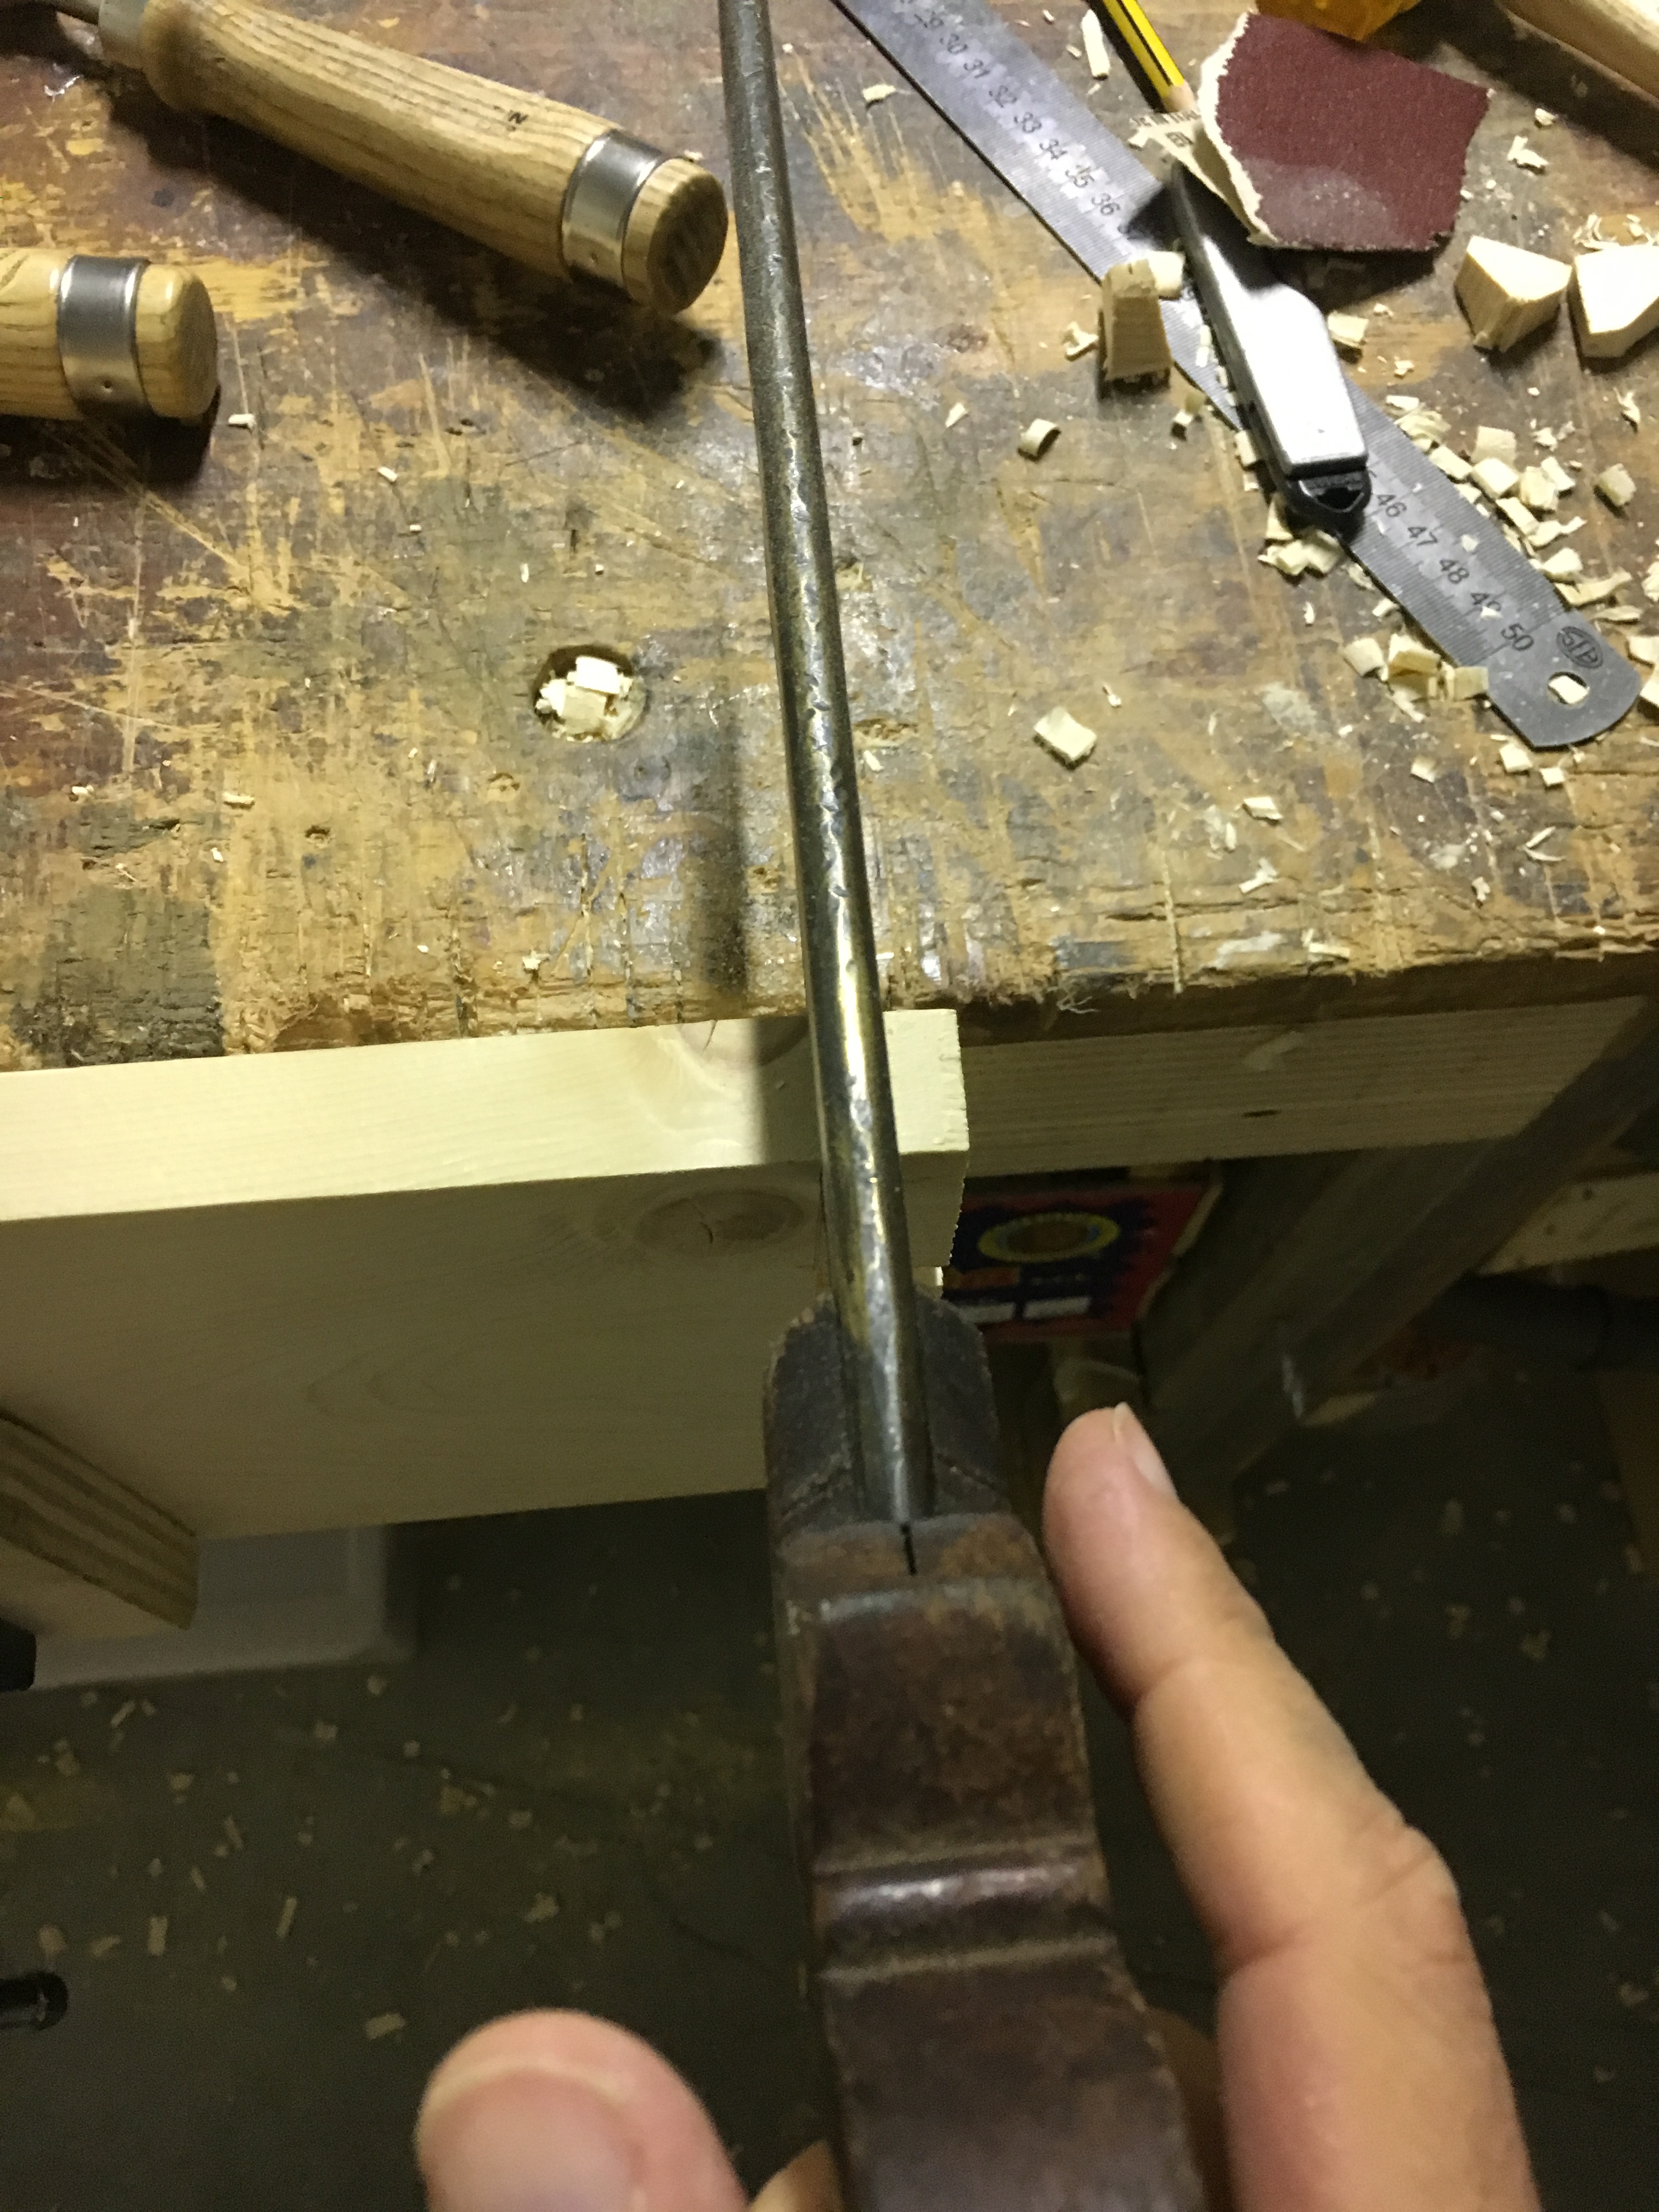
La mortasa può essere ricavata anche con la sega ad archetto. È sicuramente un metodo pratico per rimuovere il materiale velocemente ma allo stesso tempo poco preciso. Il taglio infatti non sarà mai perfetto e richiederà sempre un successivo intervento di pulitura della mortasa con lo scalpello. Meglio allora utilizzare fin da subito gli scalpelli bevel edge. La lavorazione sarà sicuramente più lenta e laboriosa ma otterremo un risultato preciso, pulito e più vicino a quello desiderato.
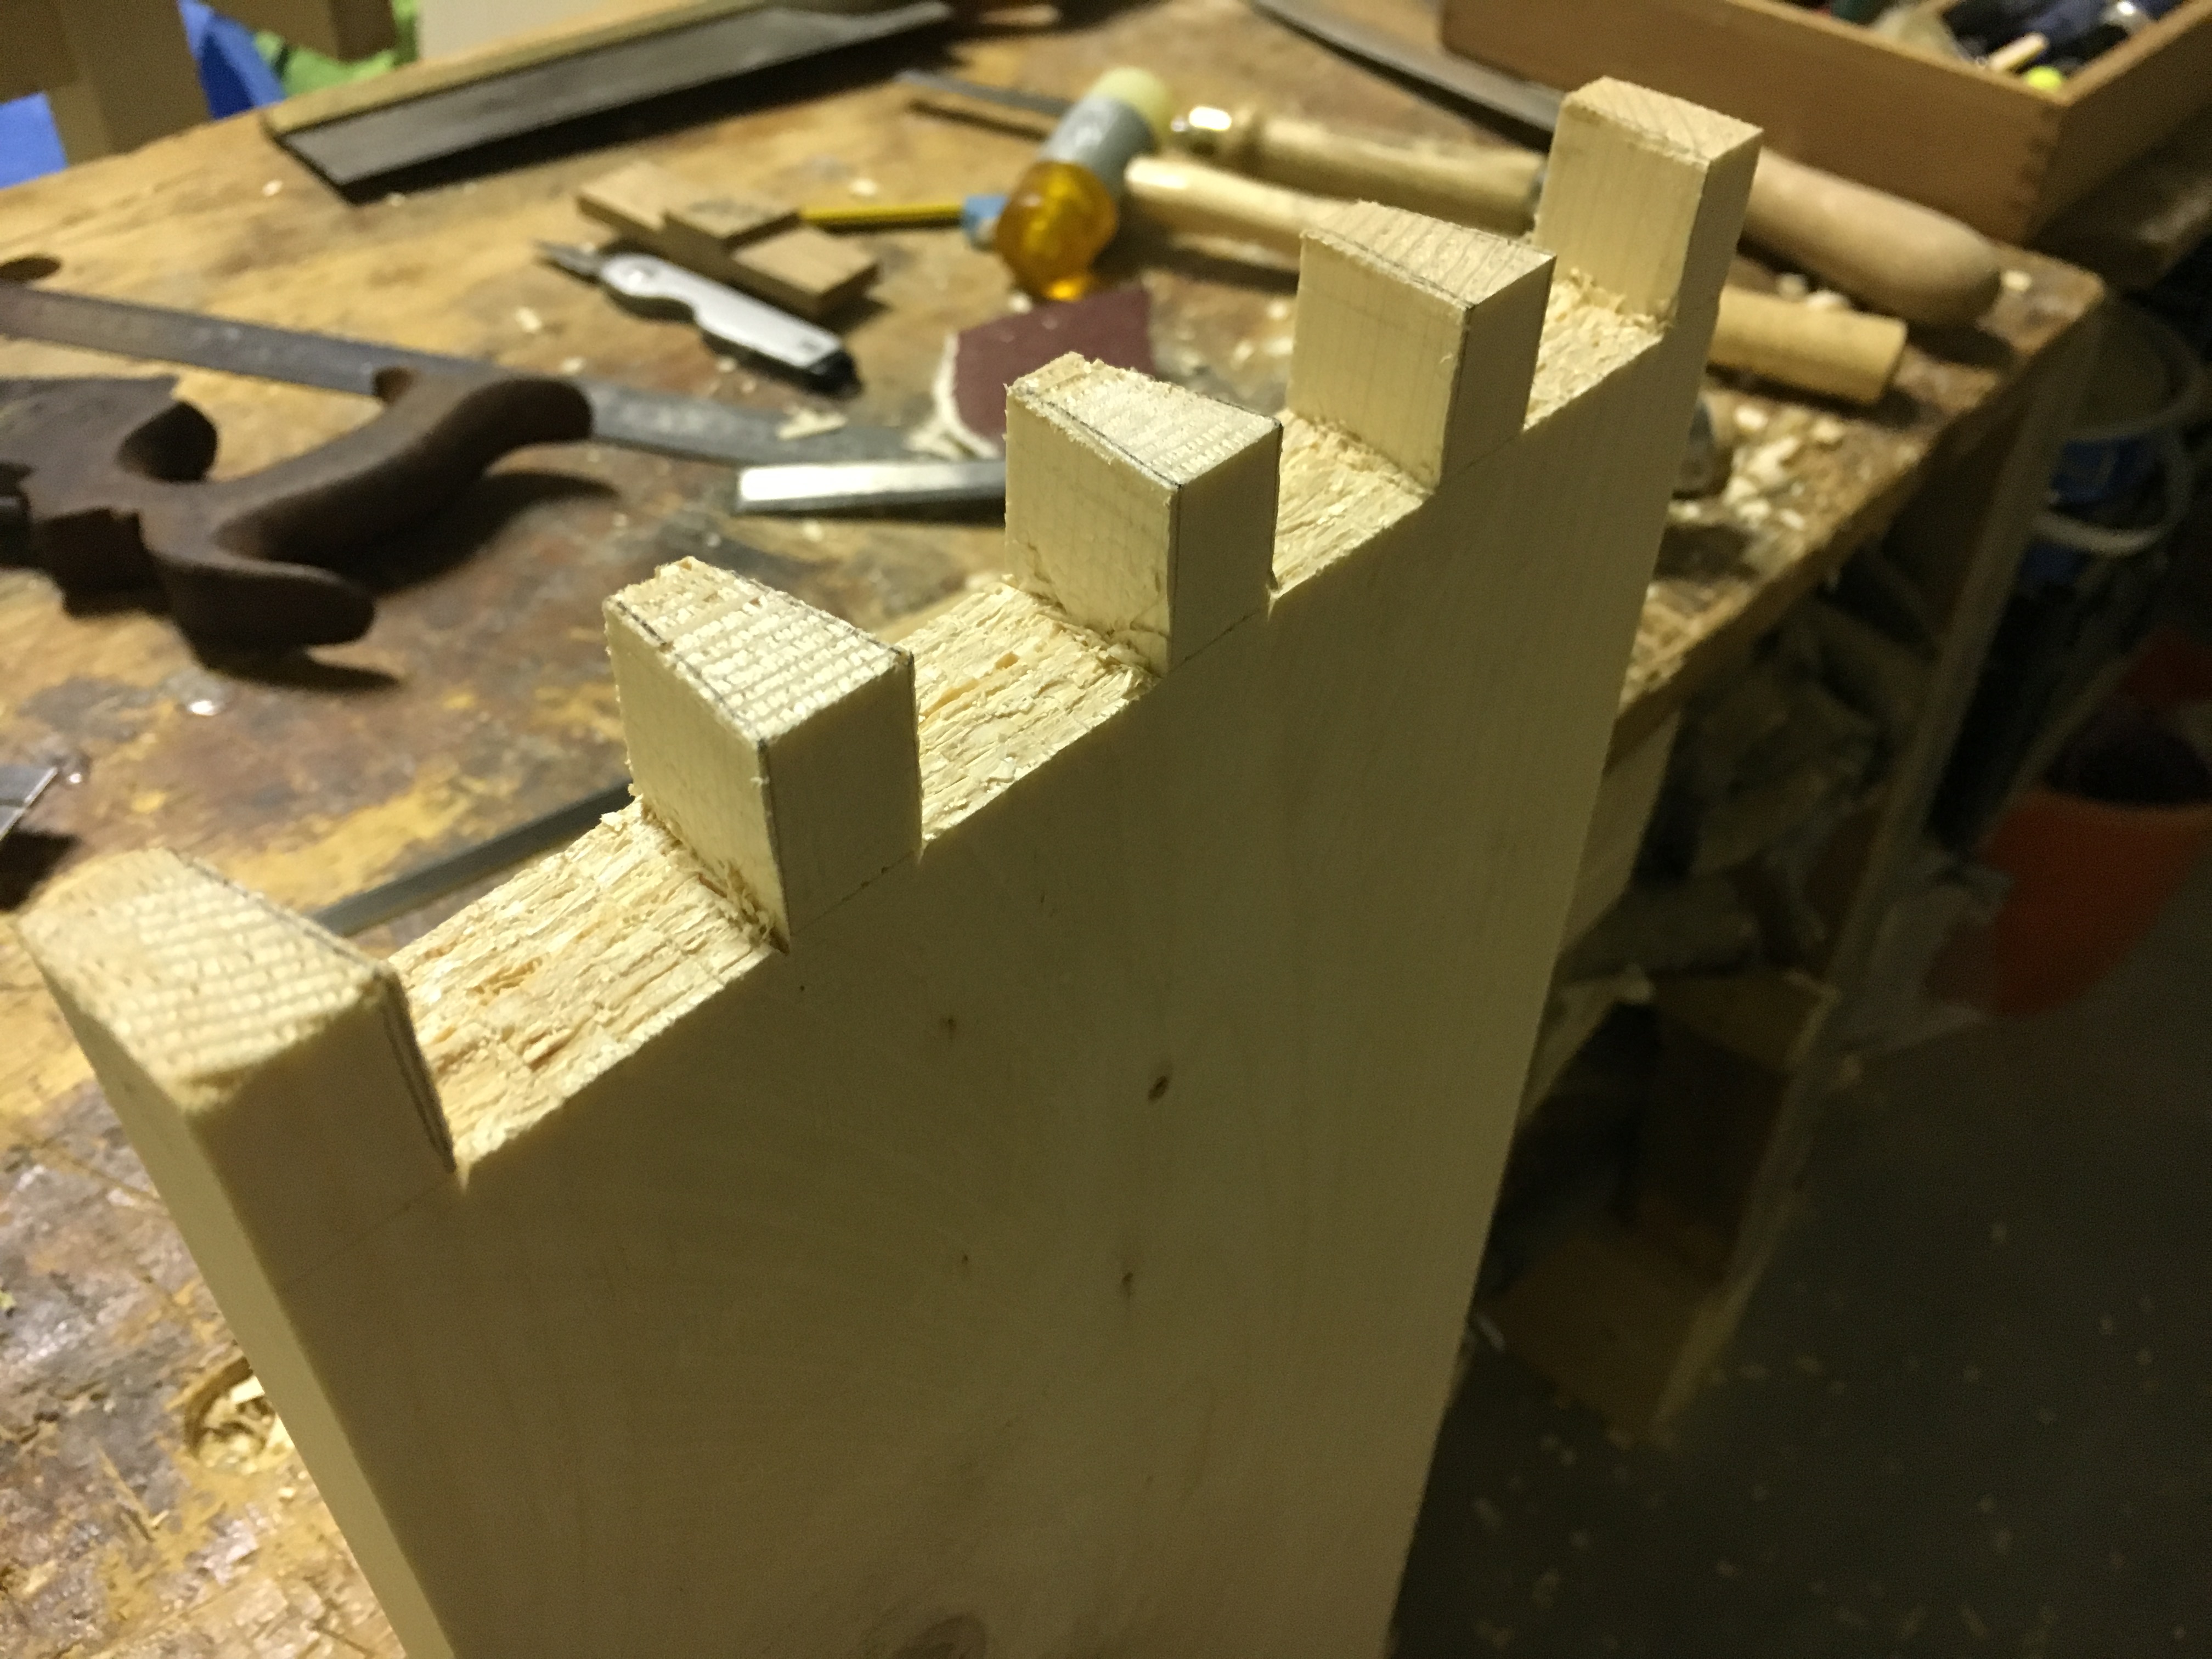
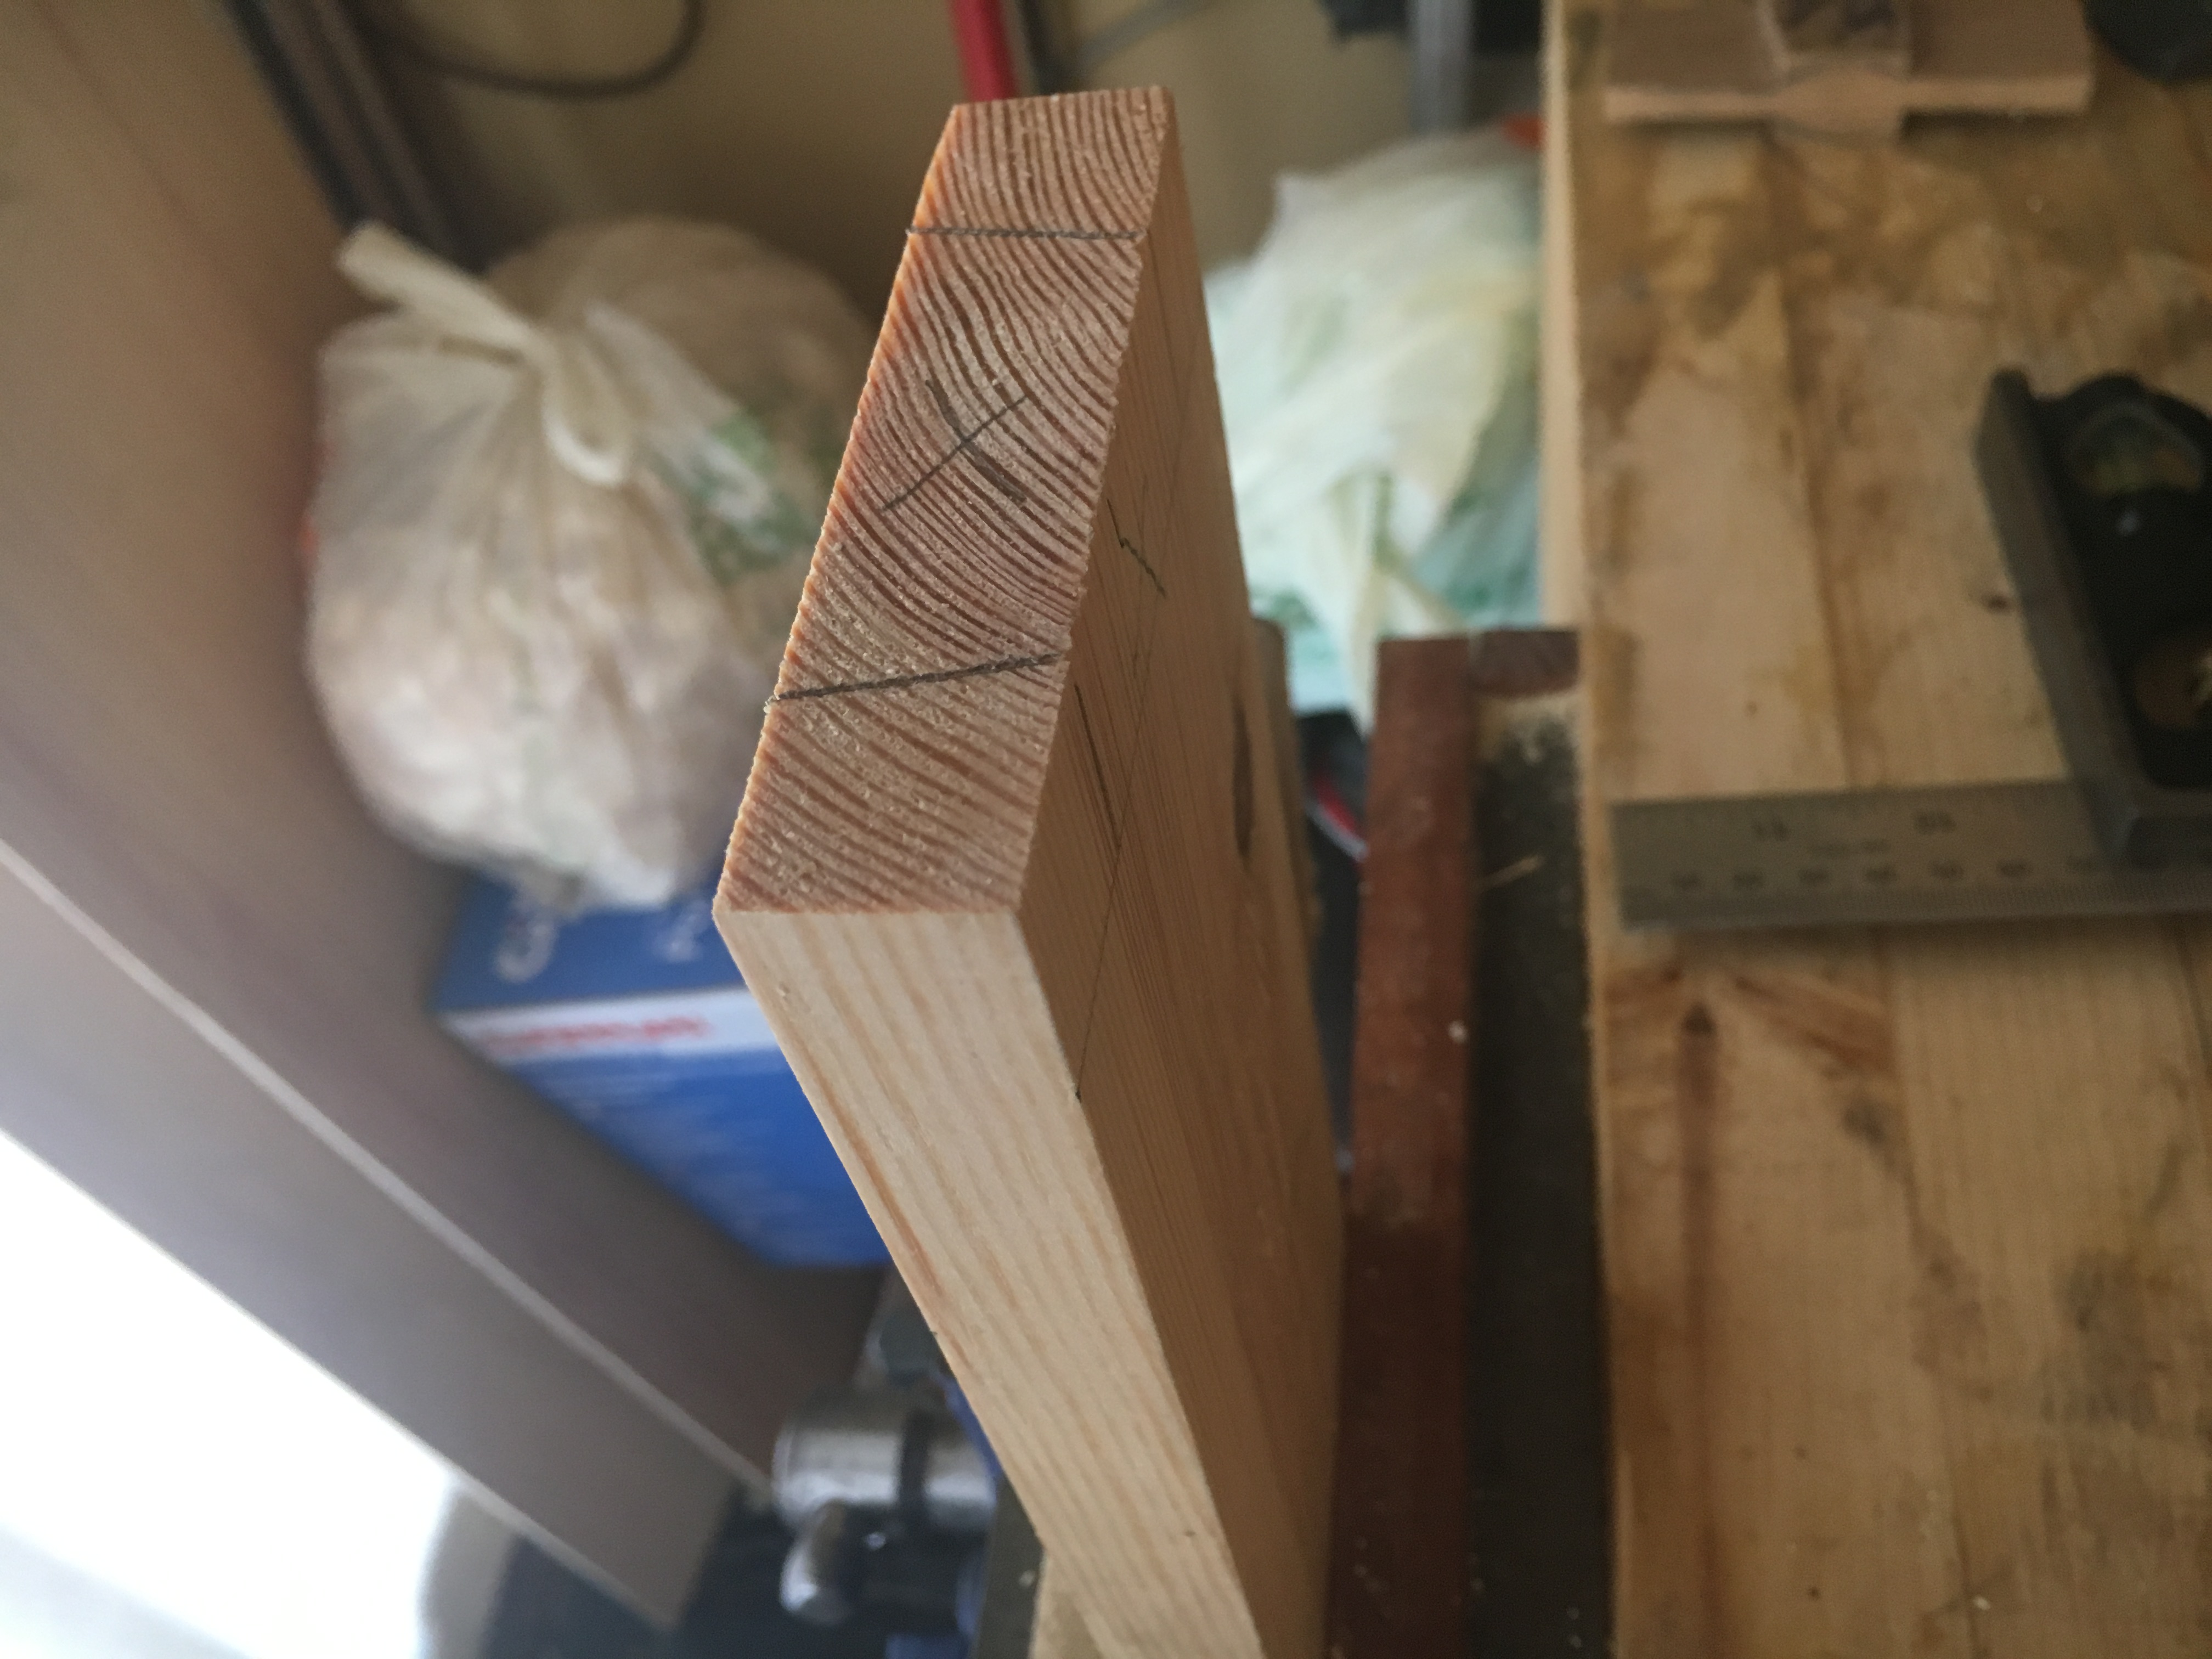
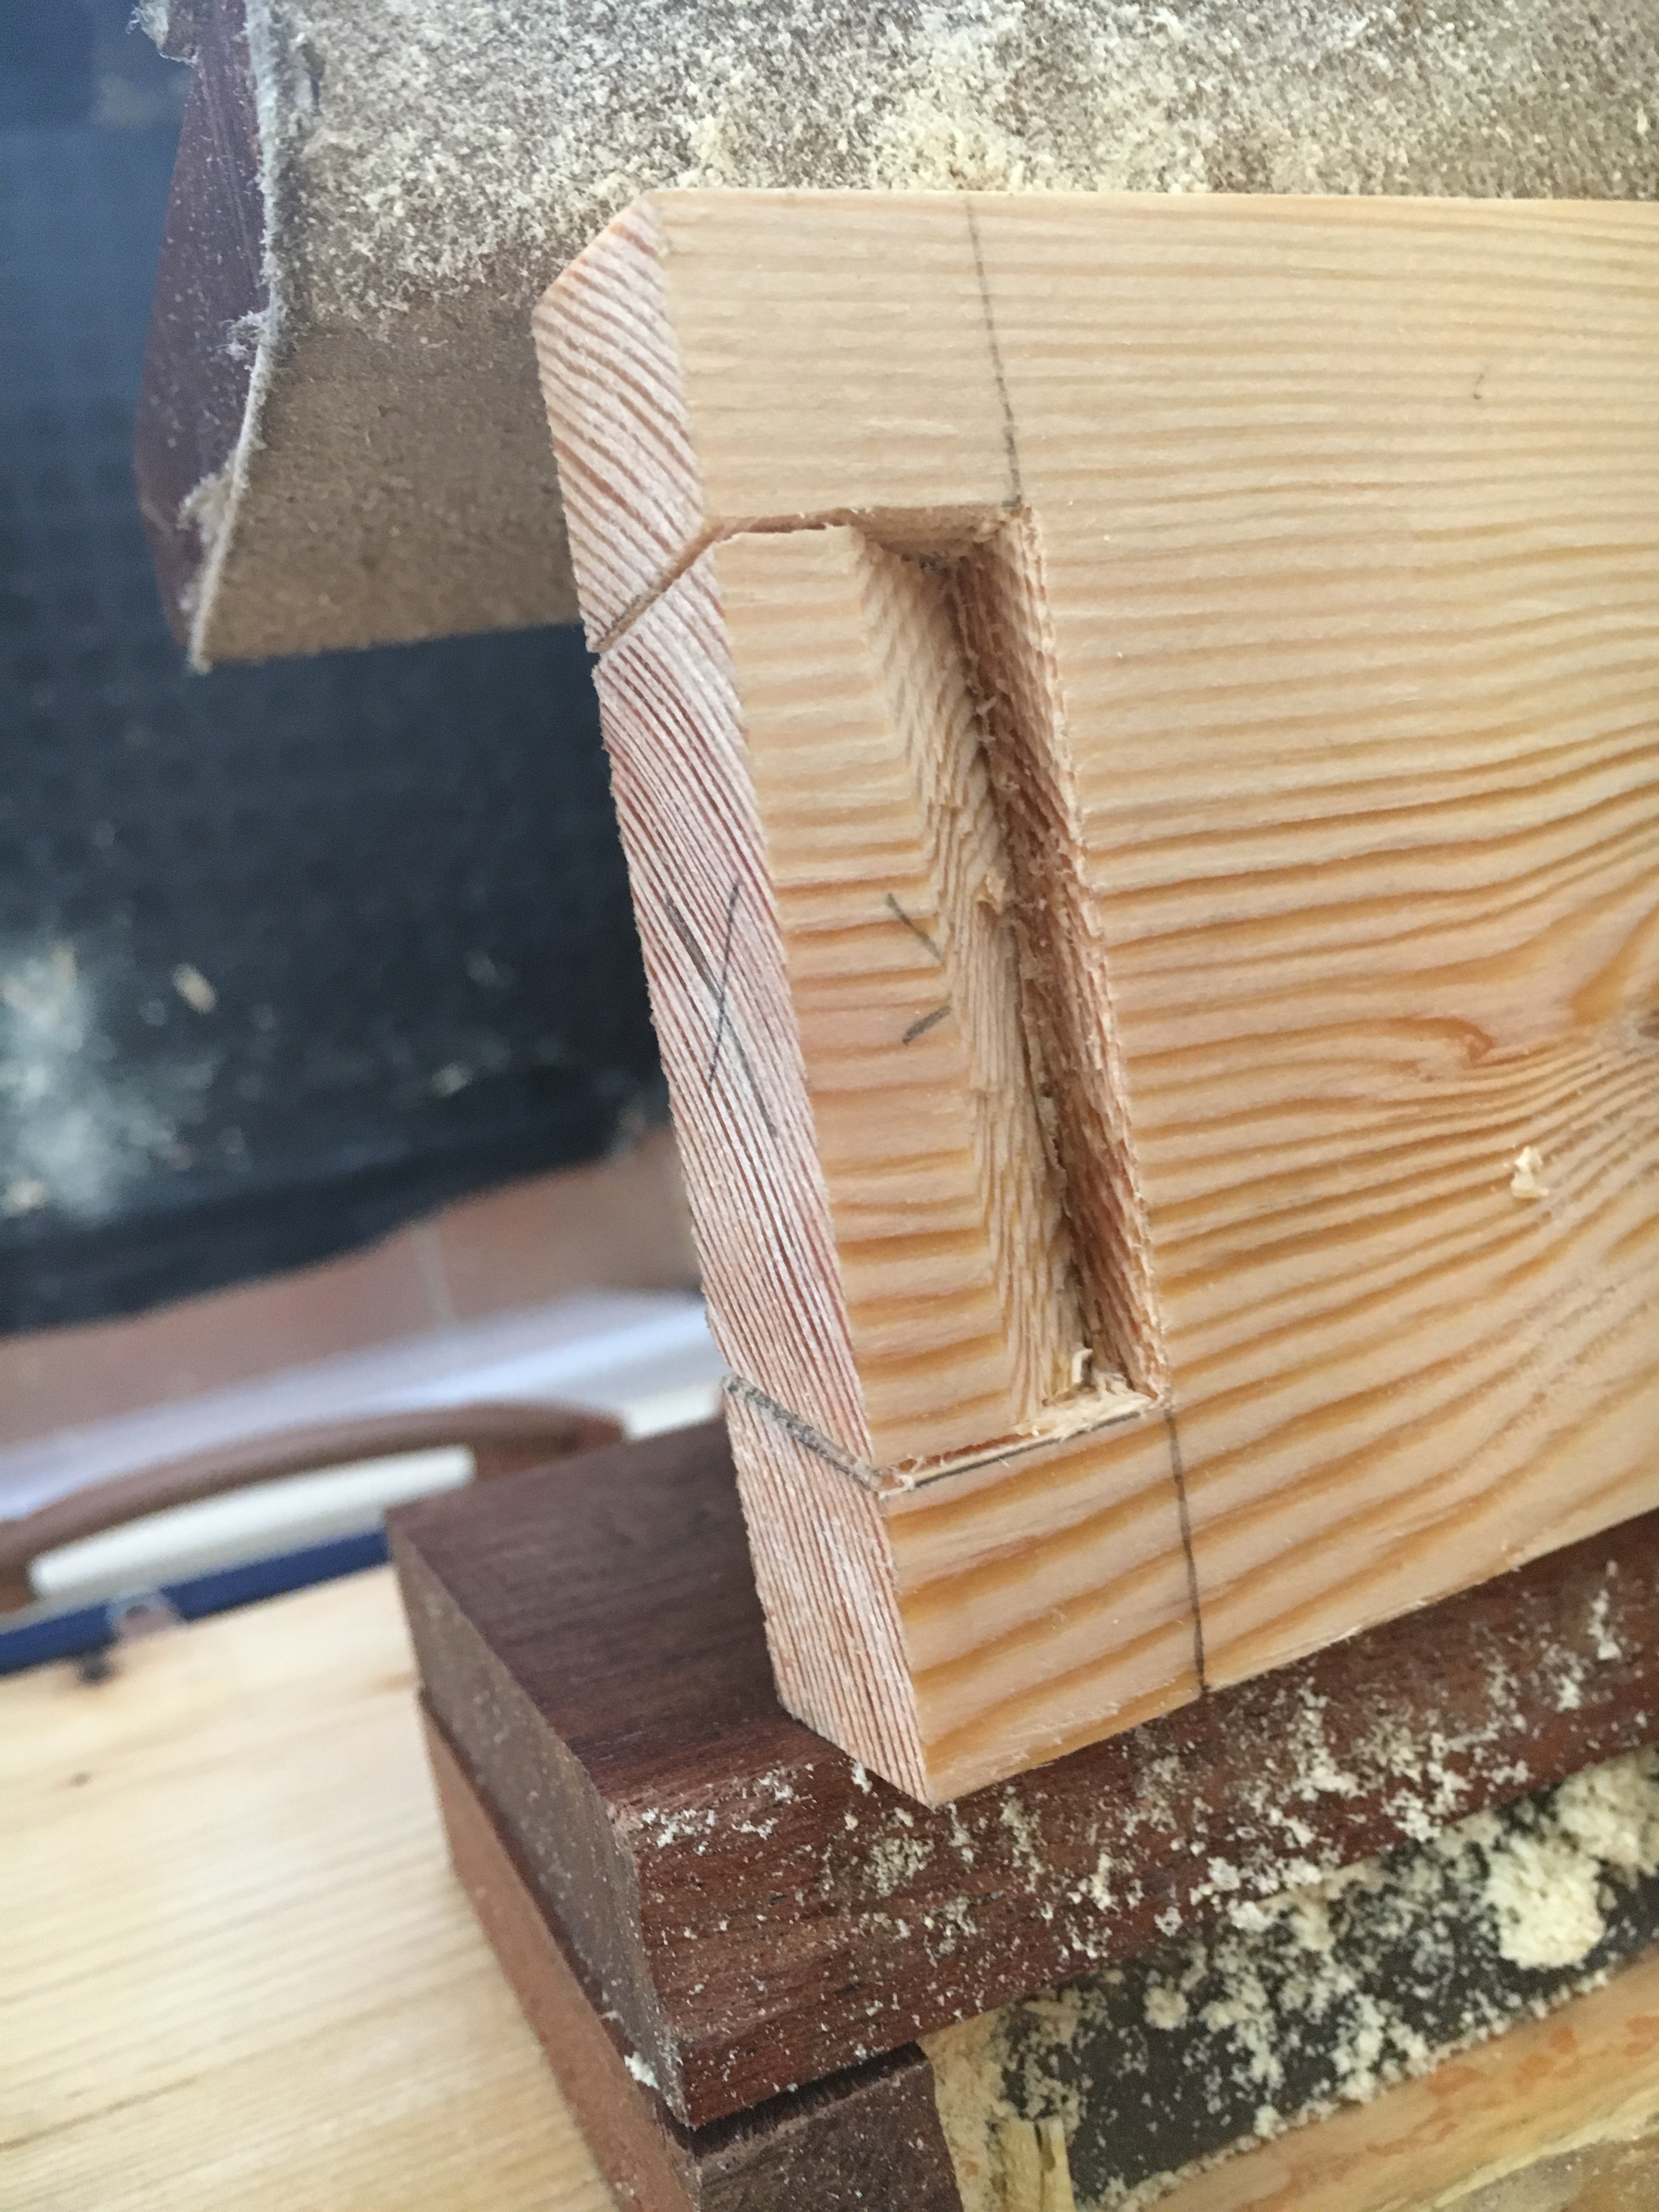
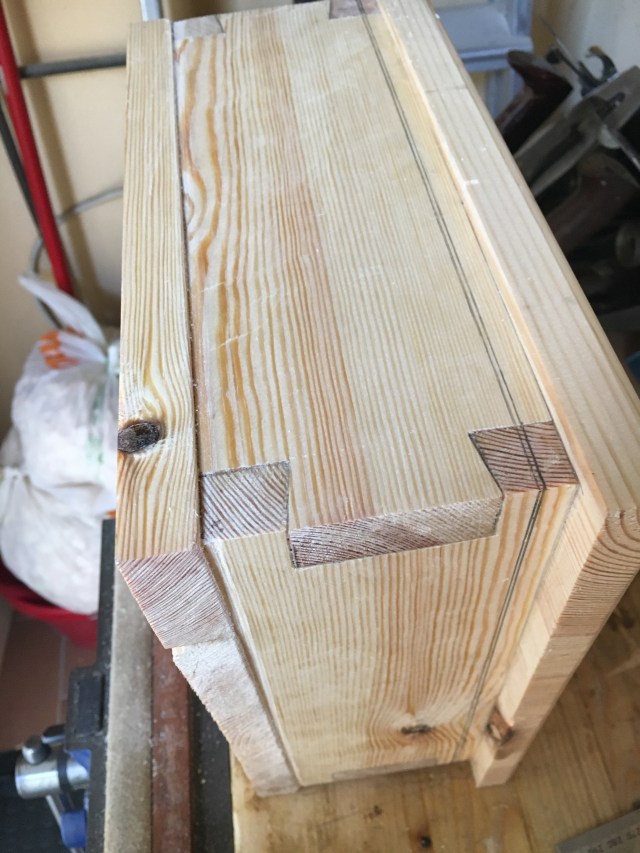
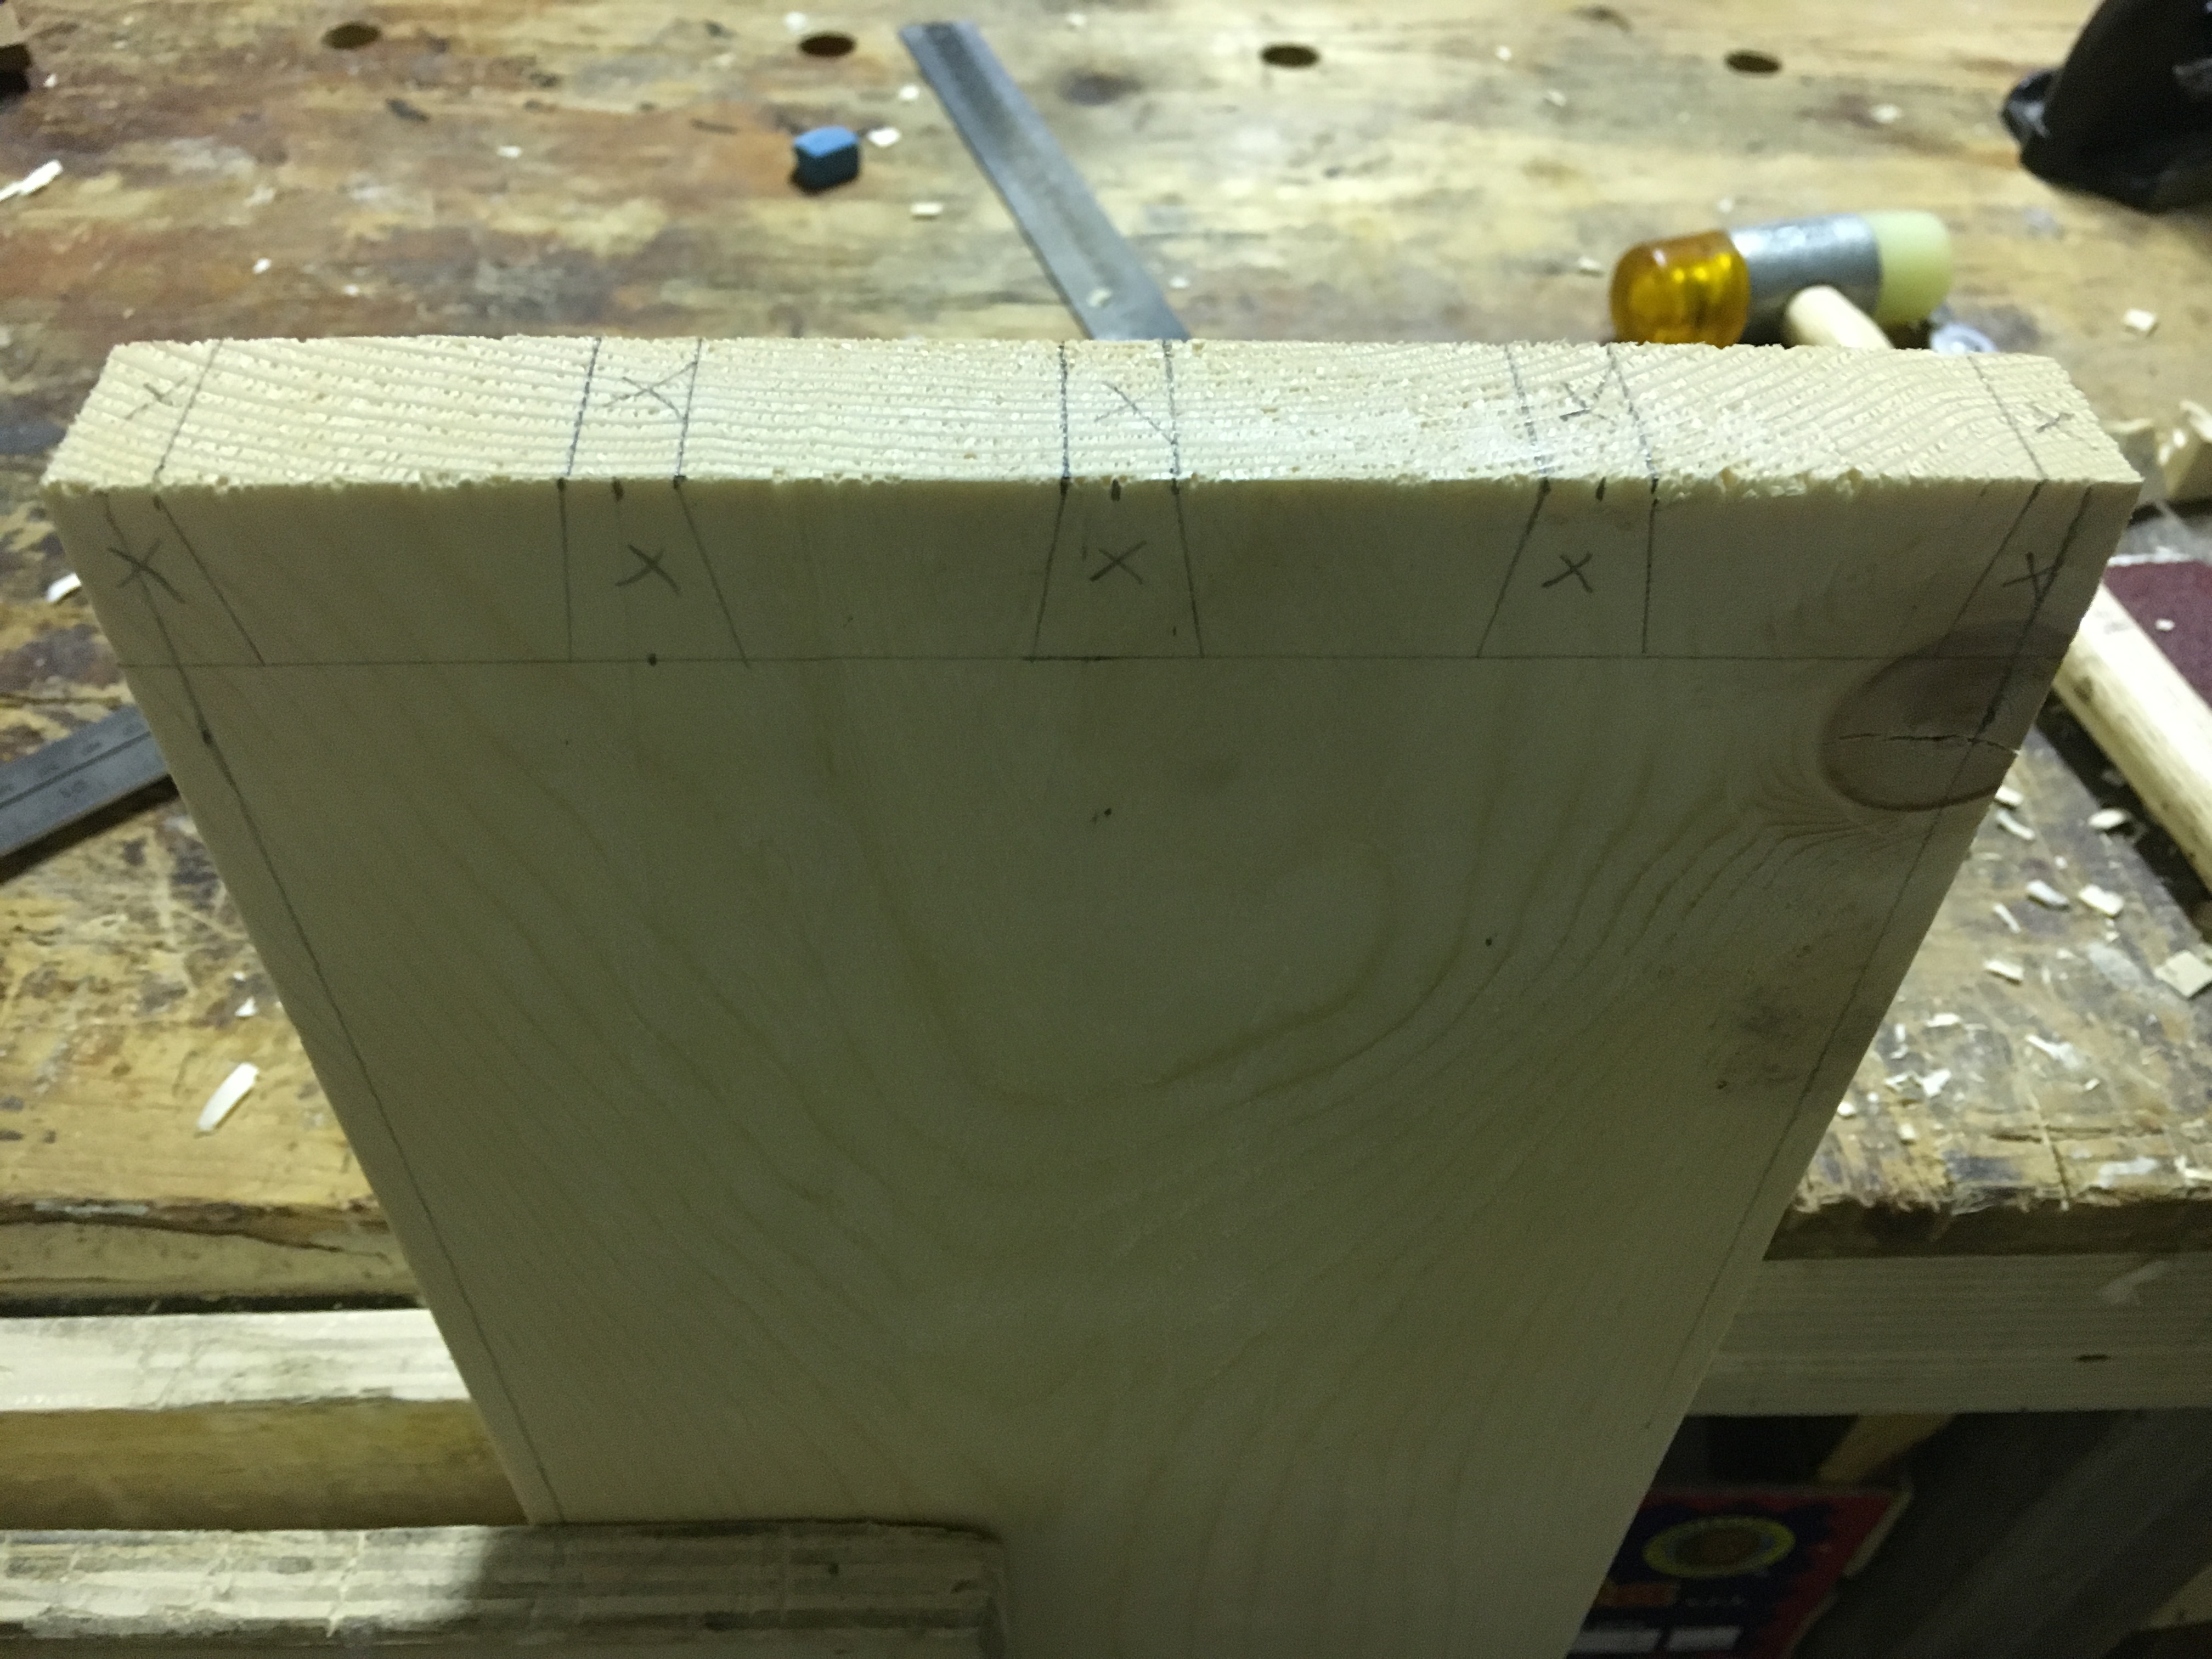
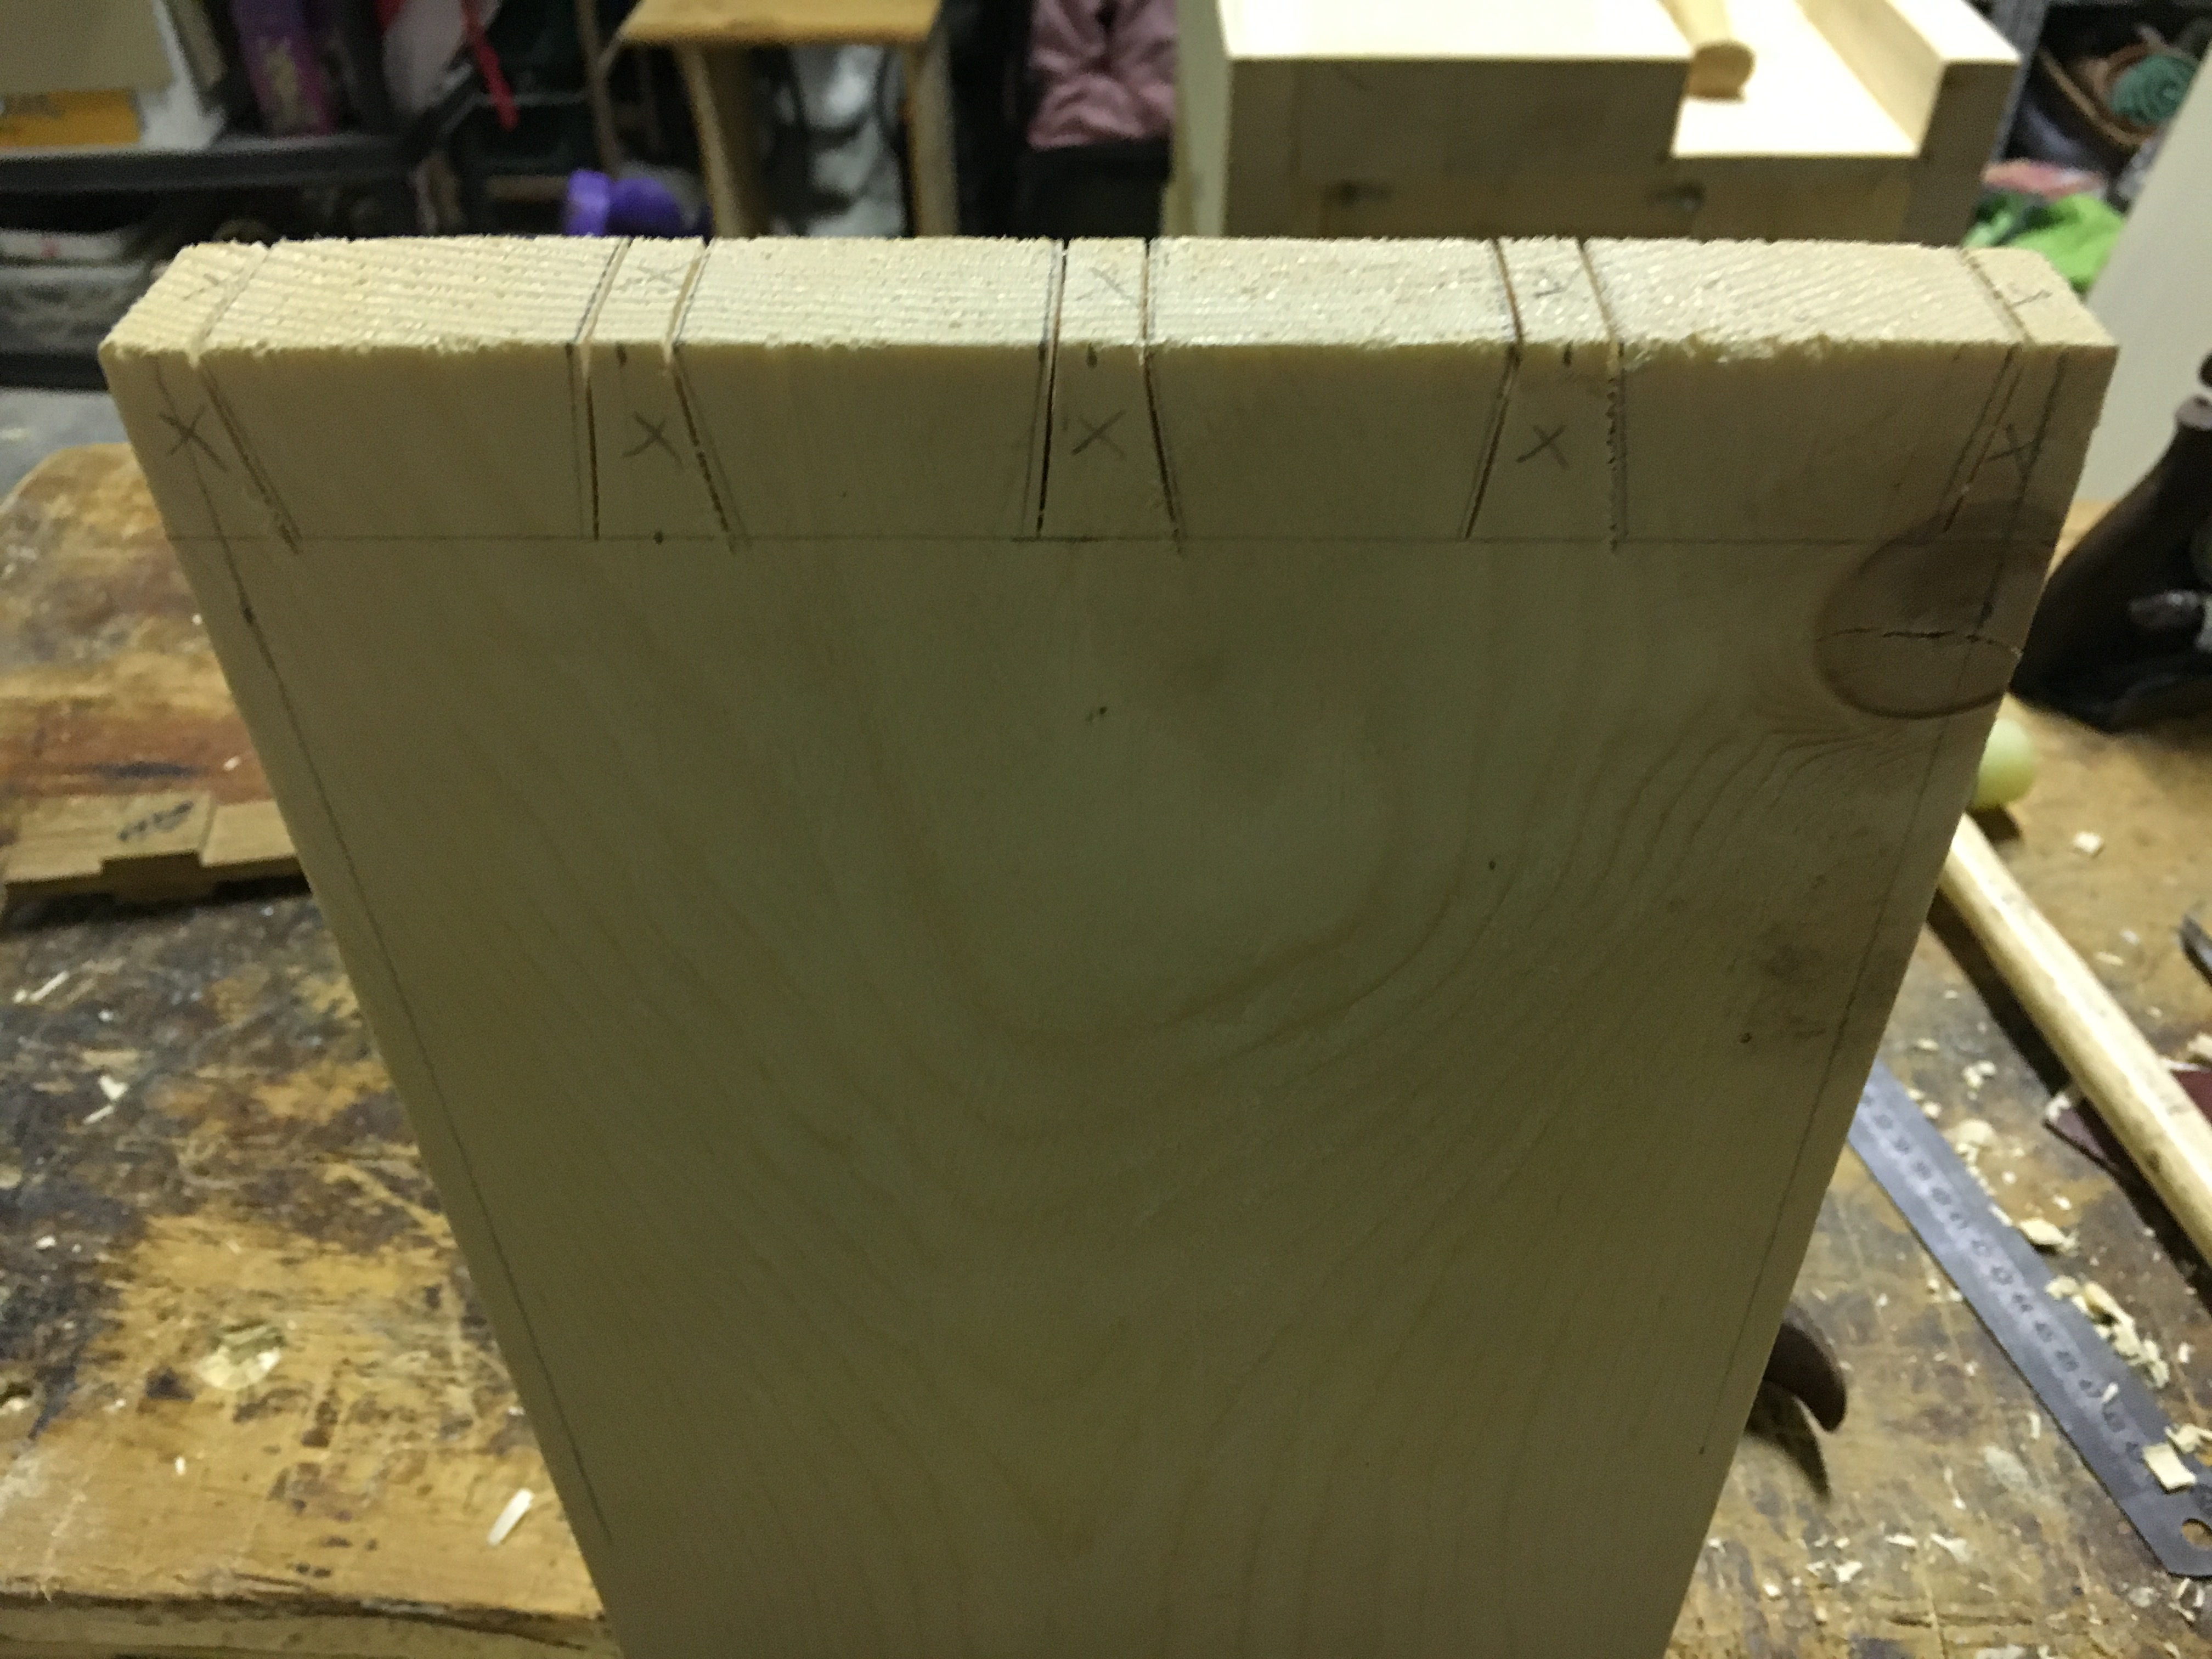
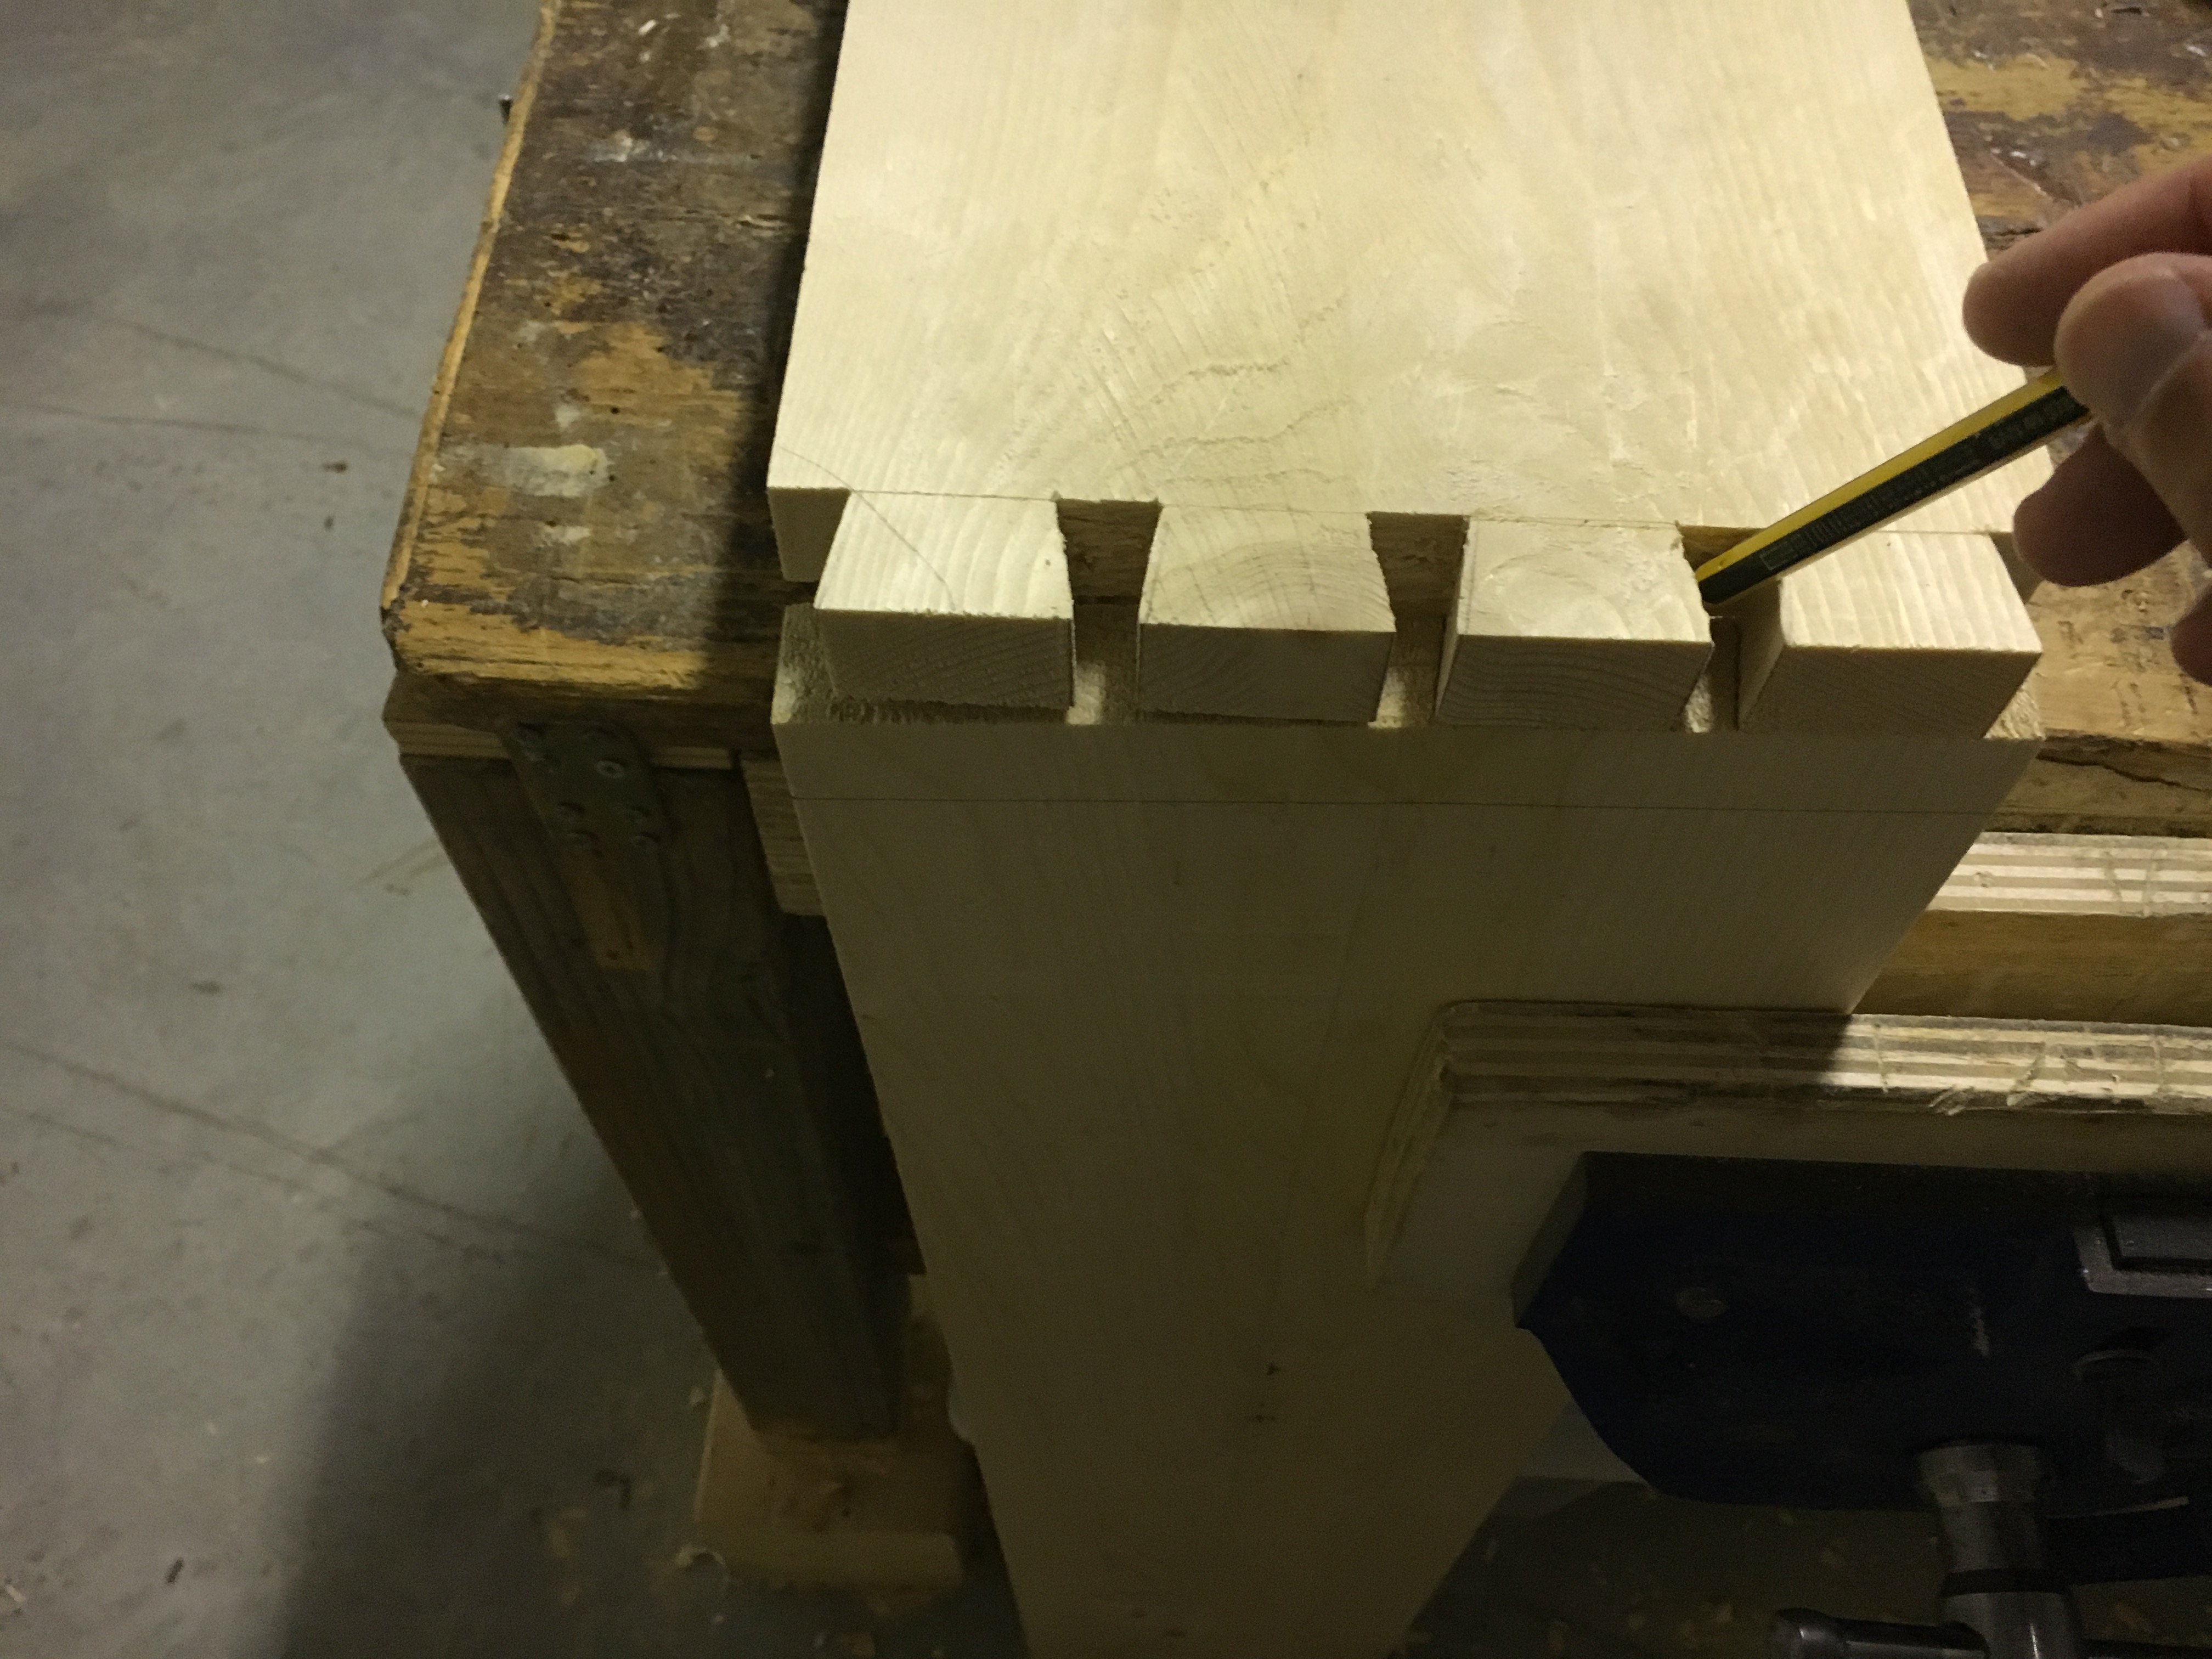
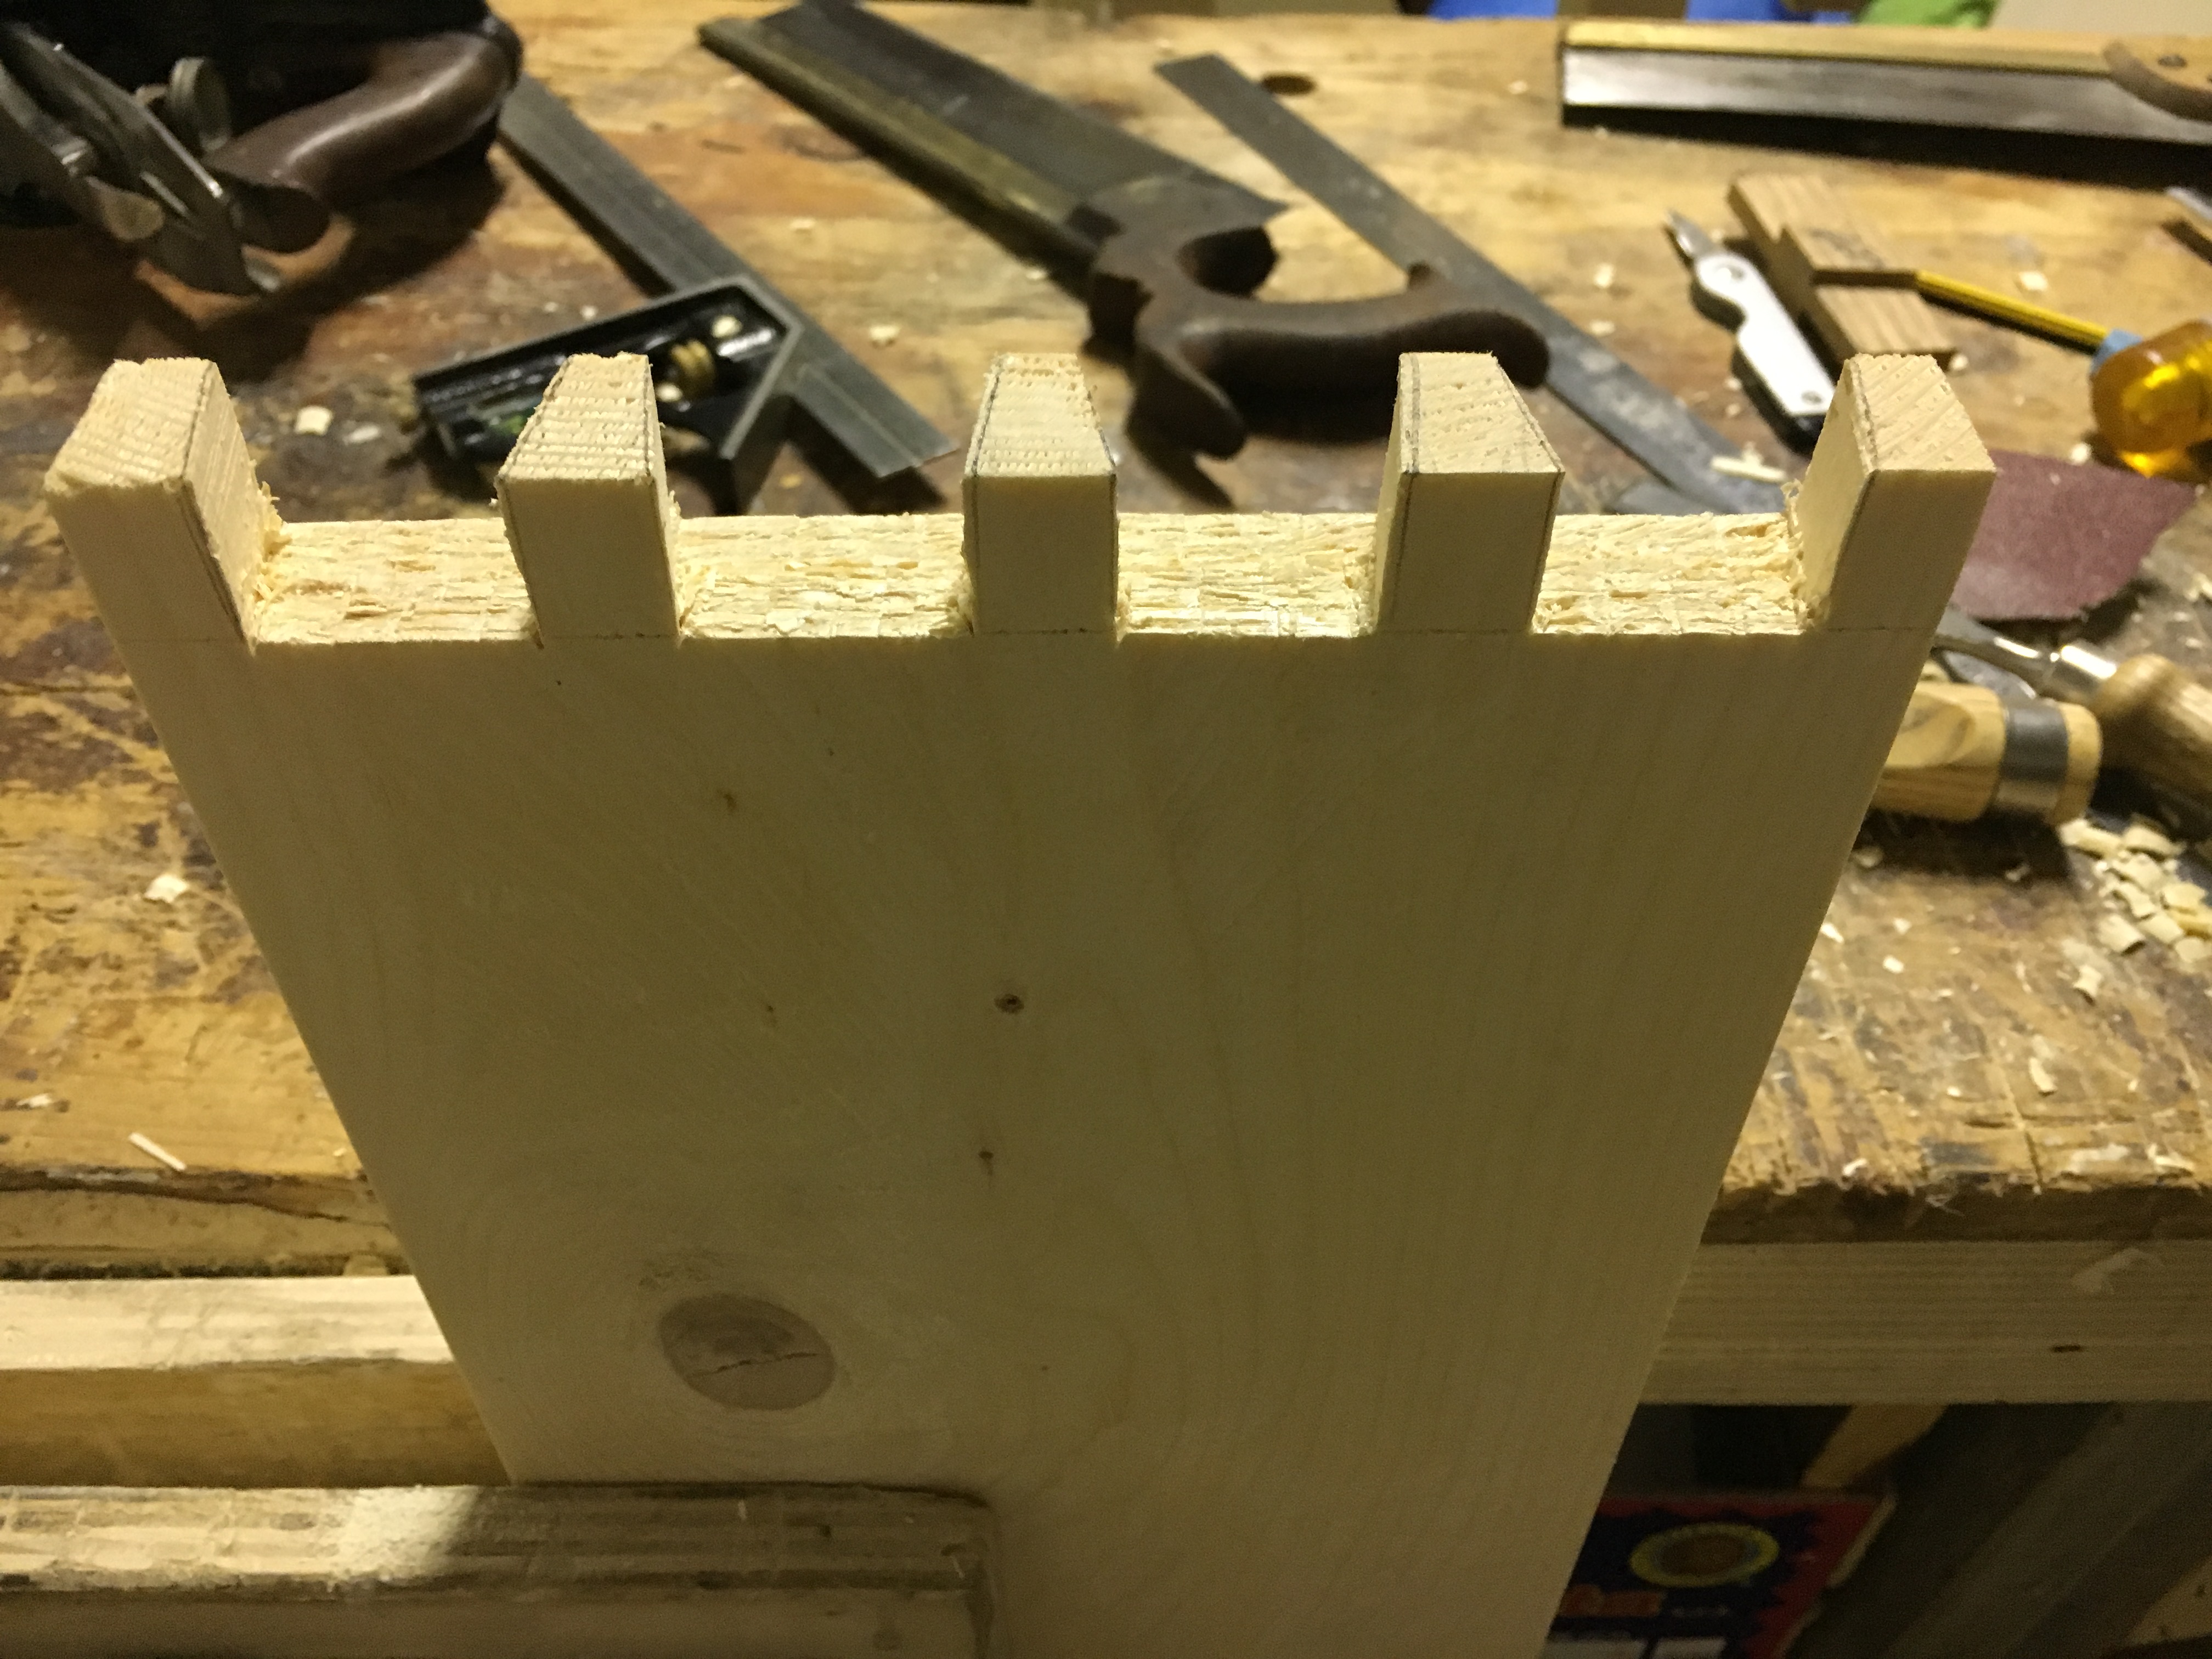
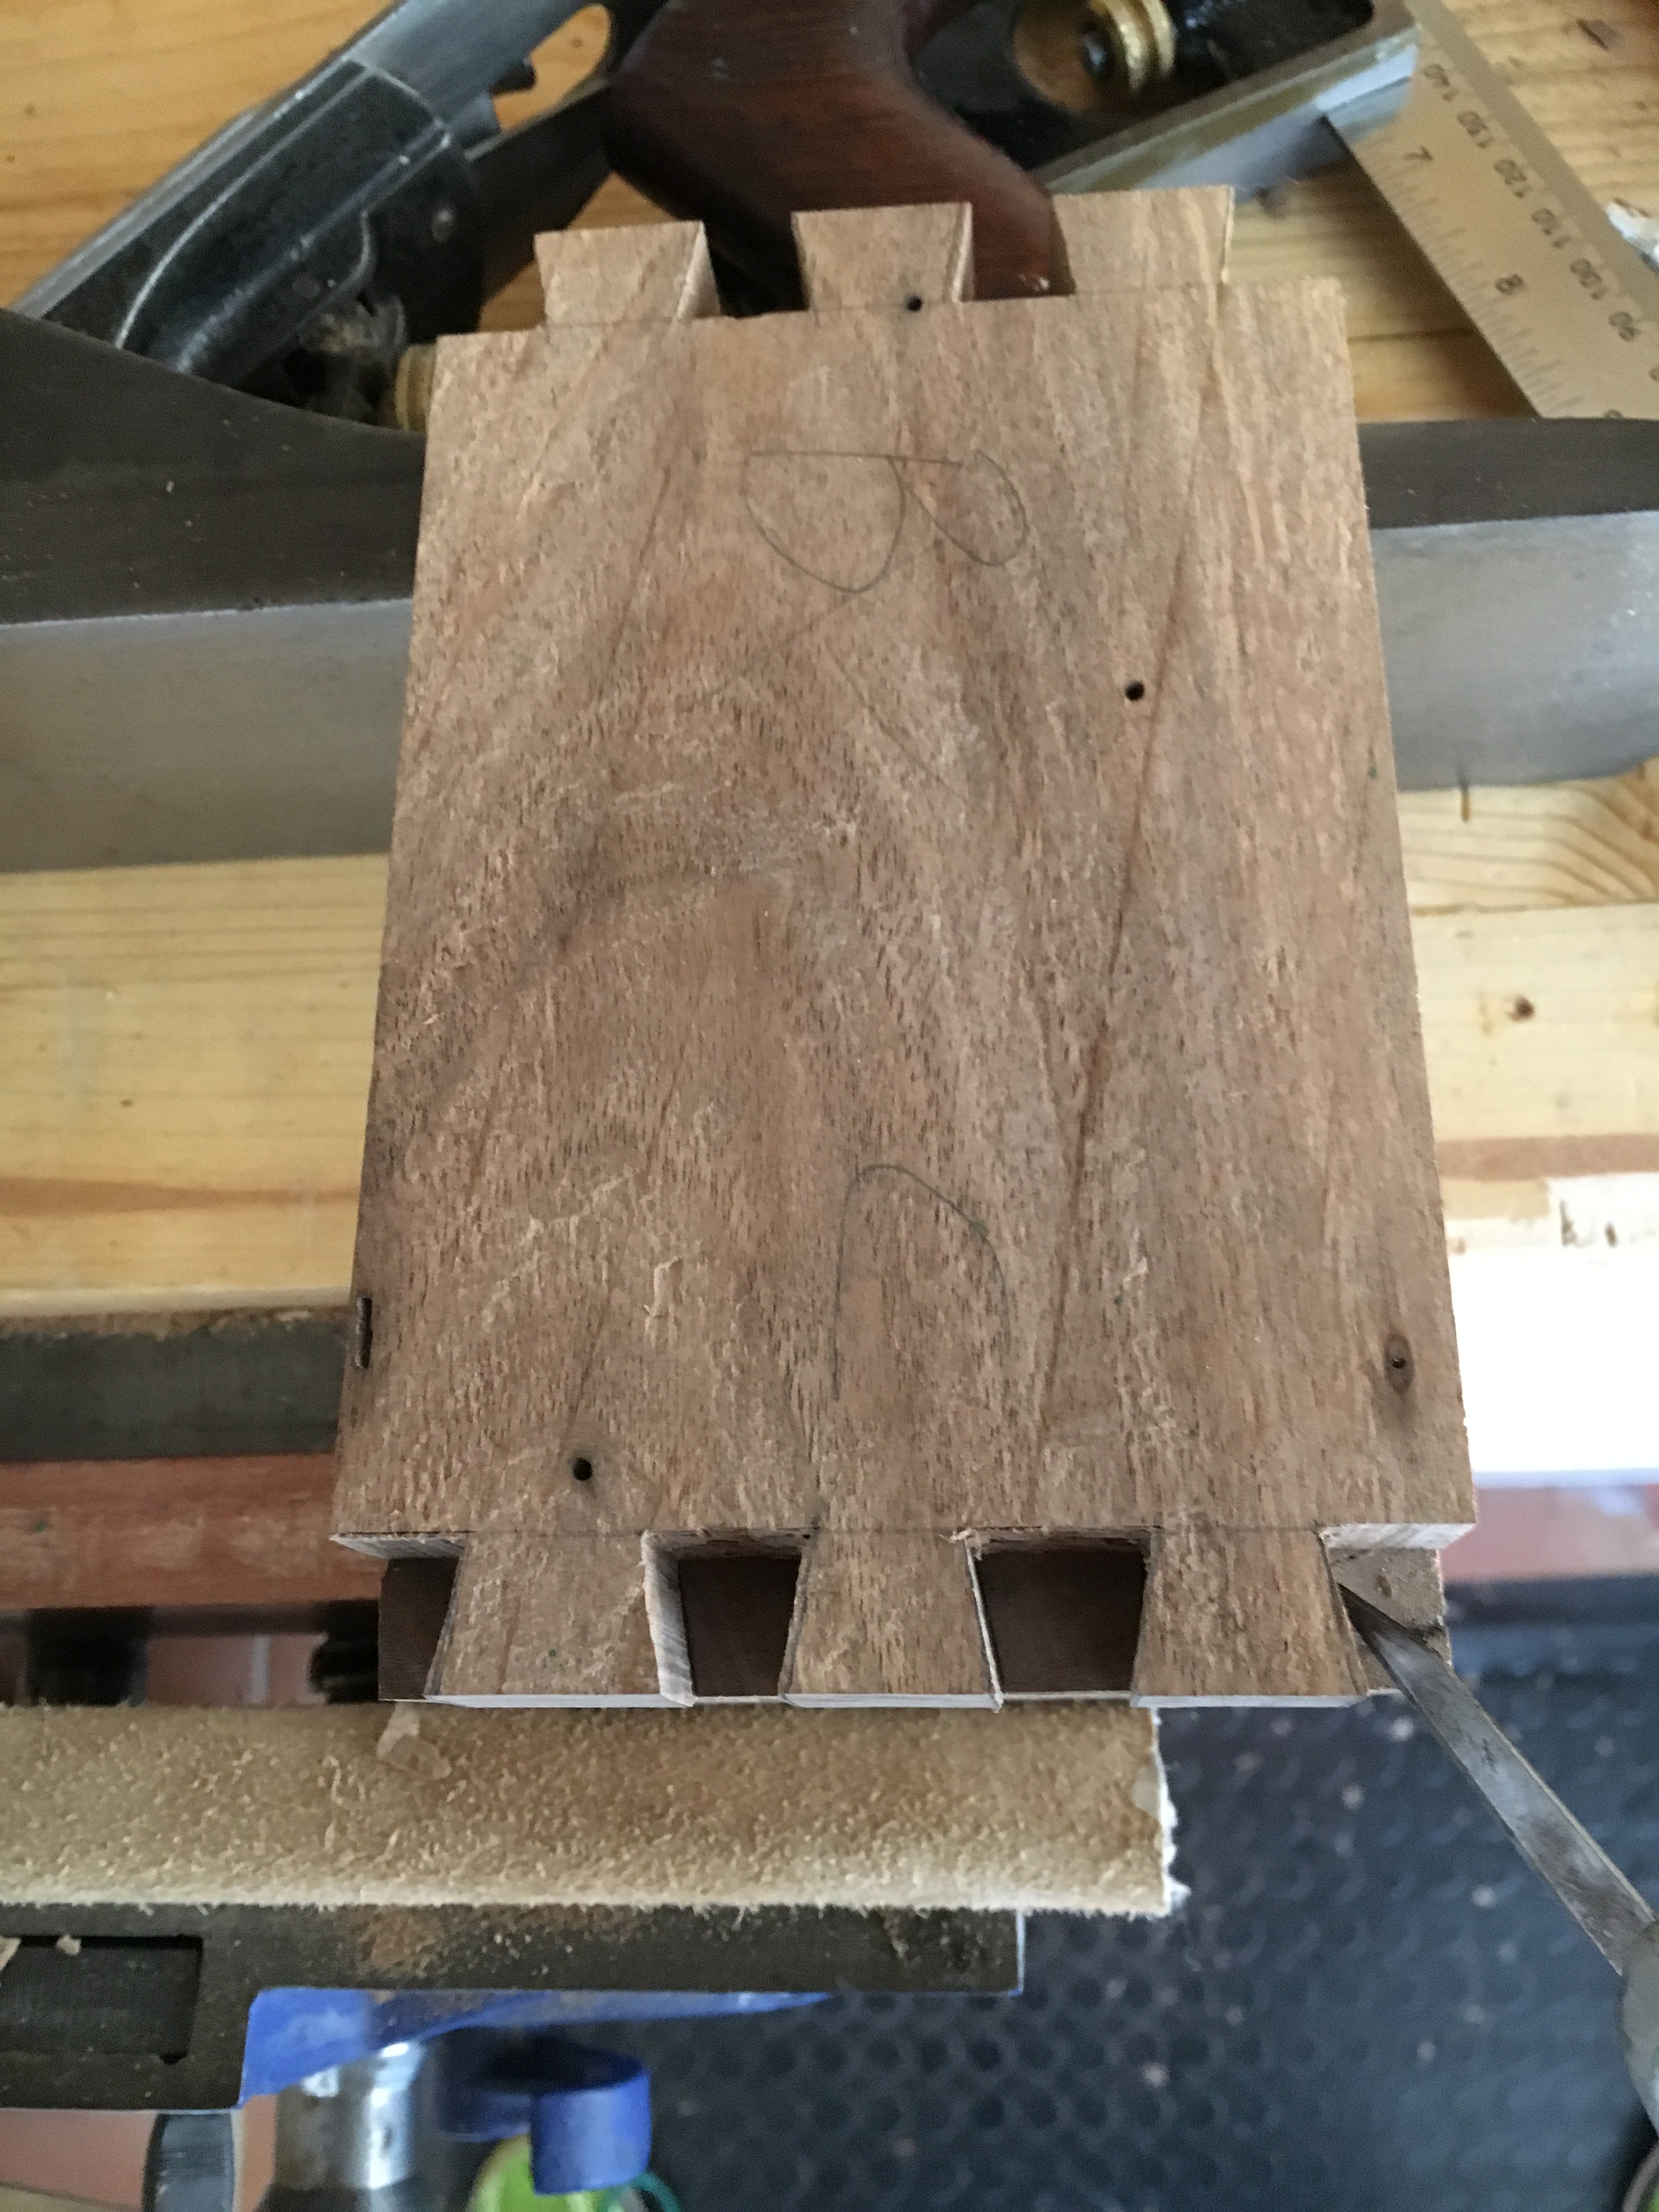
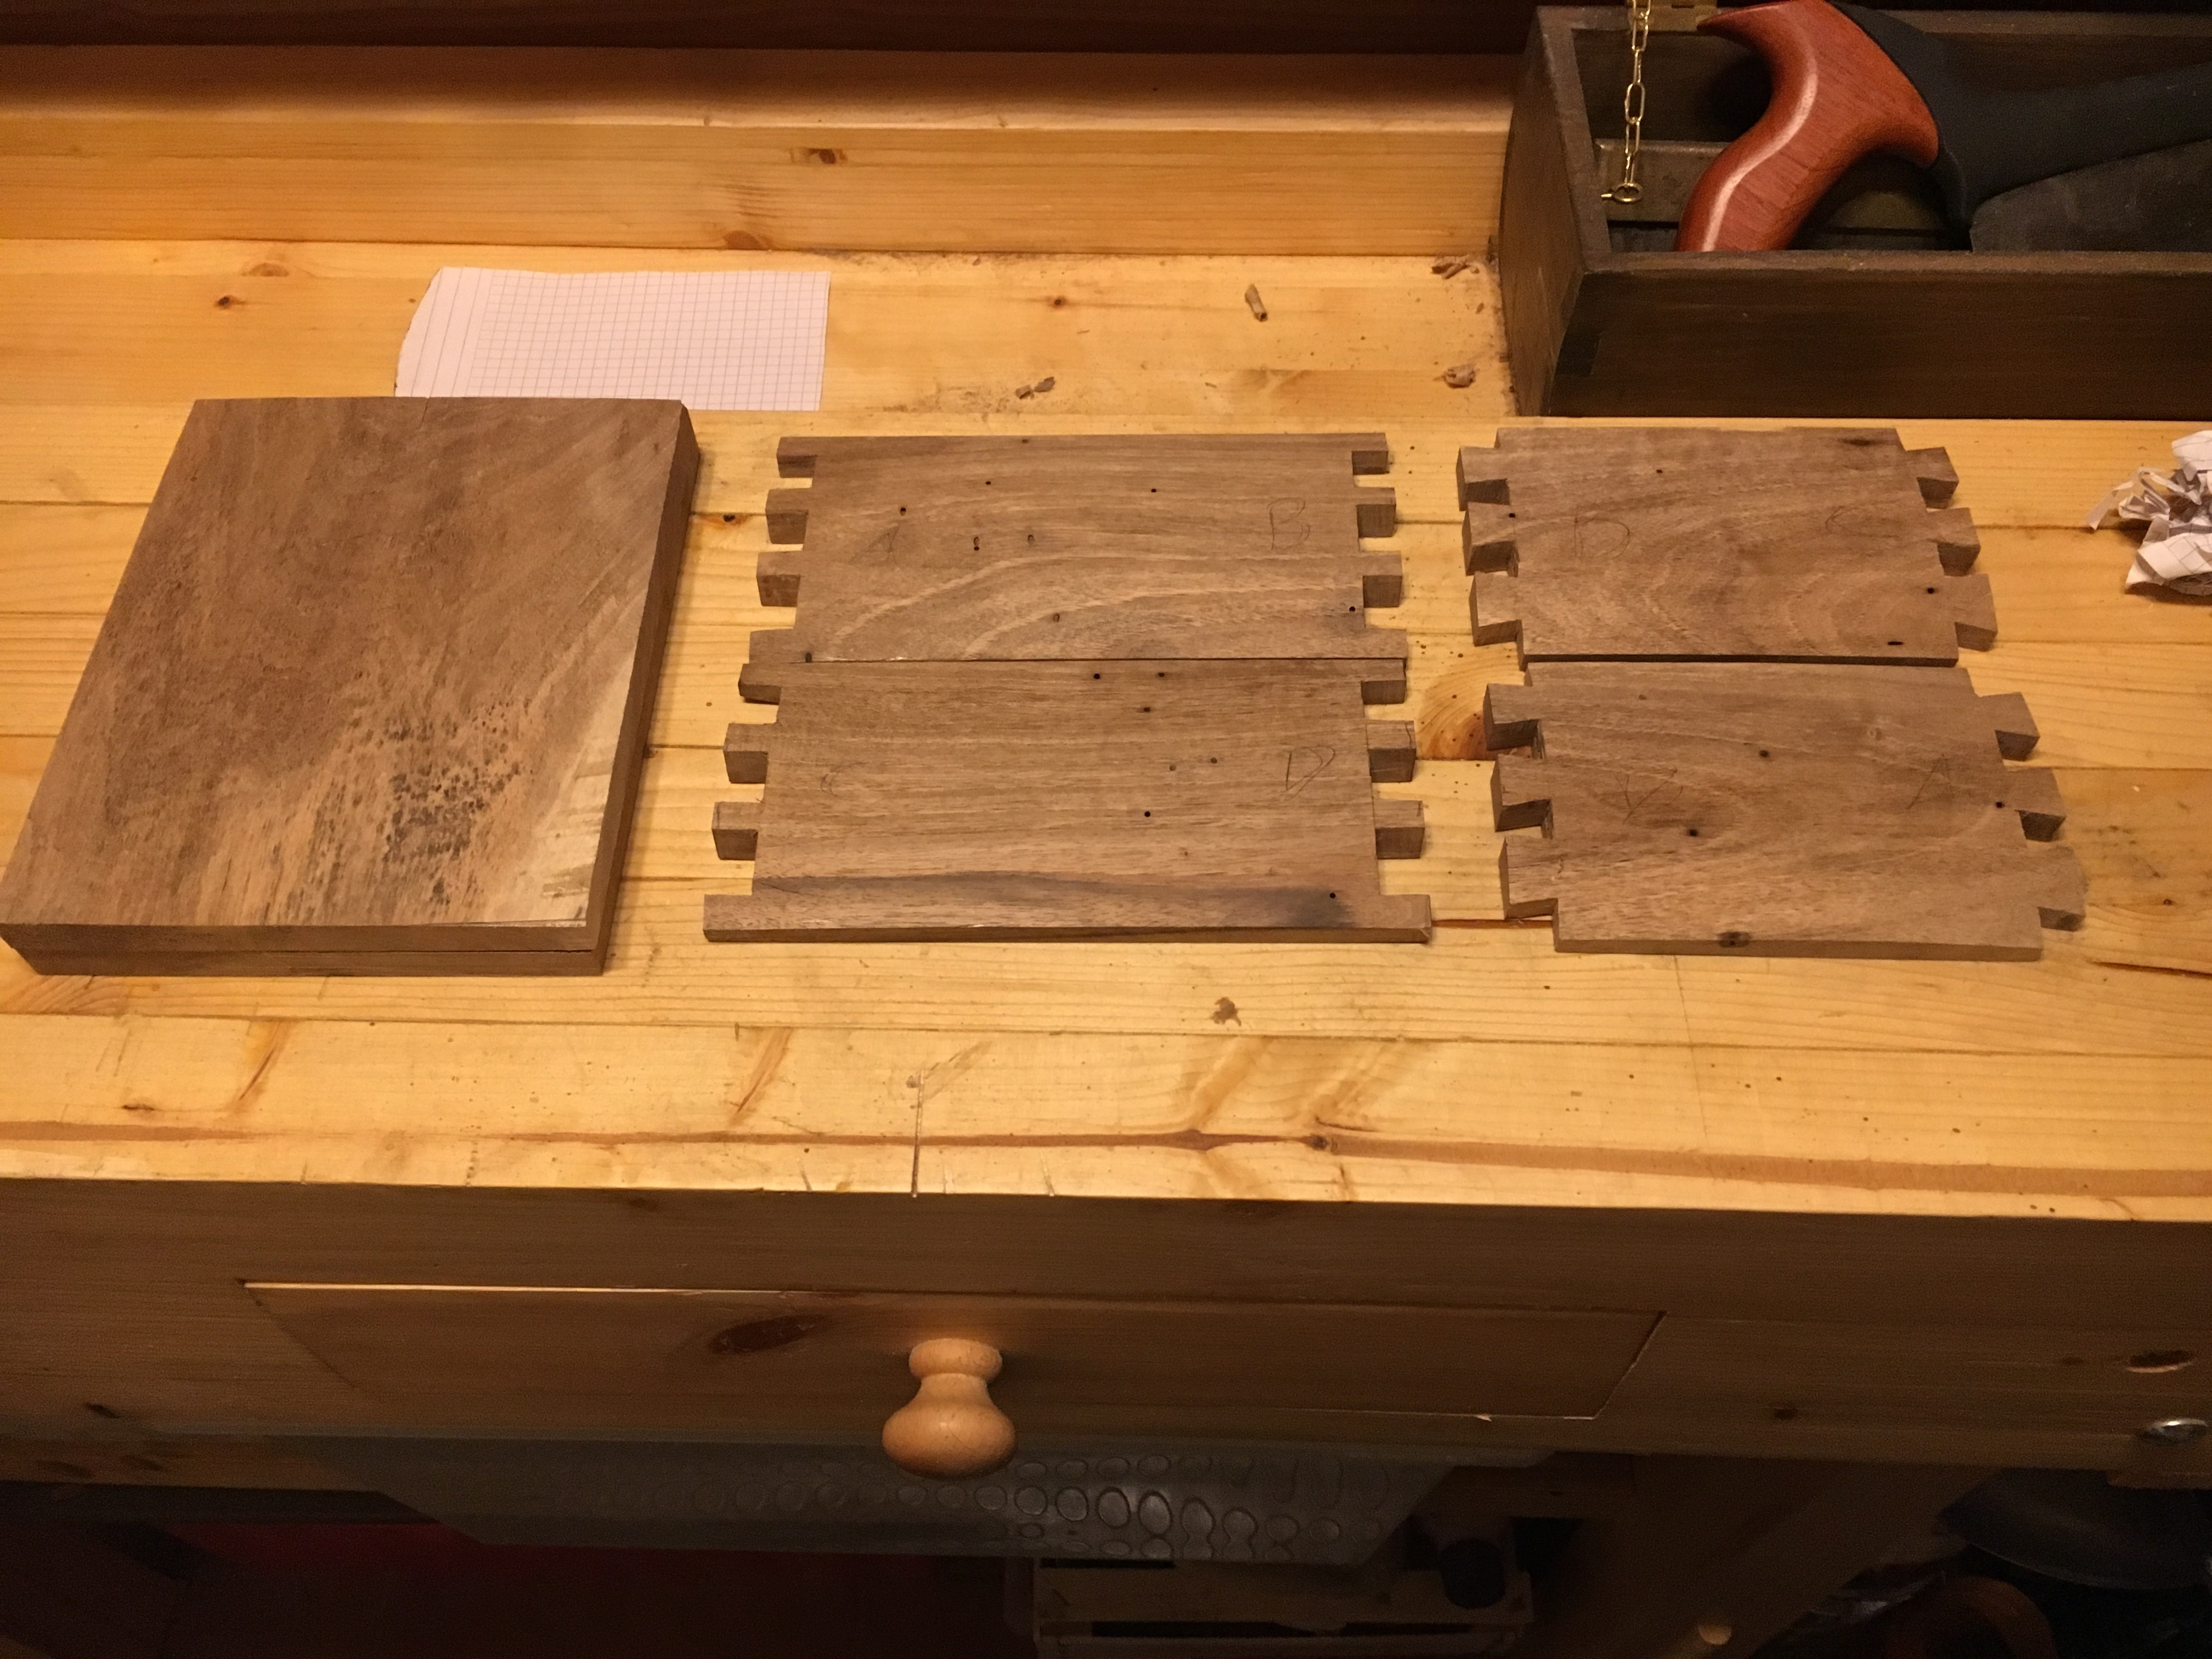
Il numero e la grandezza delle code è un scelta personale dettata perlopiù dall’estetica. Normalmente peró più il pezzo è grande più code di rondine dovremmo fare. Nella procedura che abbiamo appena visto la coda di rondine era soltanto una. Normalmente però le code di rondine che compongono un incastro sono più di una, come ad esempio nella composizione di una carcassa di un mobile. Sotto riporto alcune foto fatte durante una lavorazione. La procedura è del tutto identica, cambia solo il numero delle code.

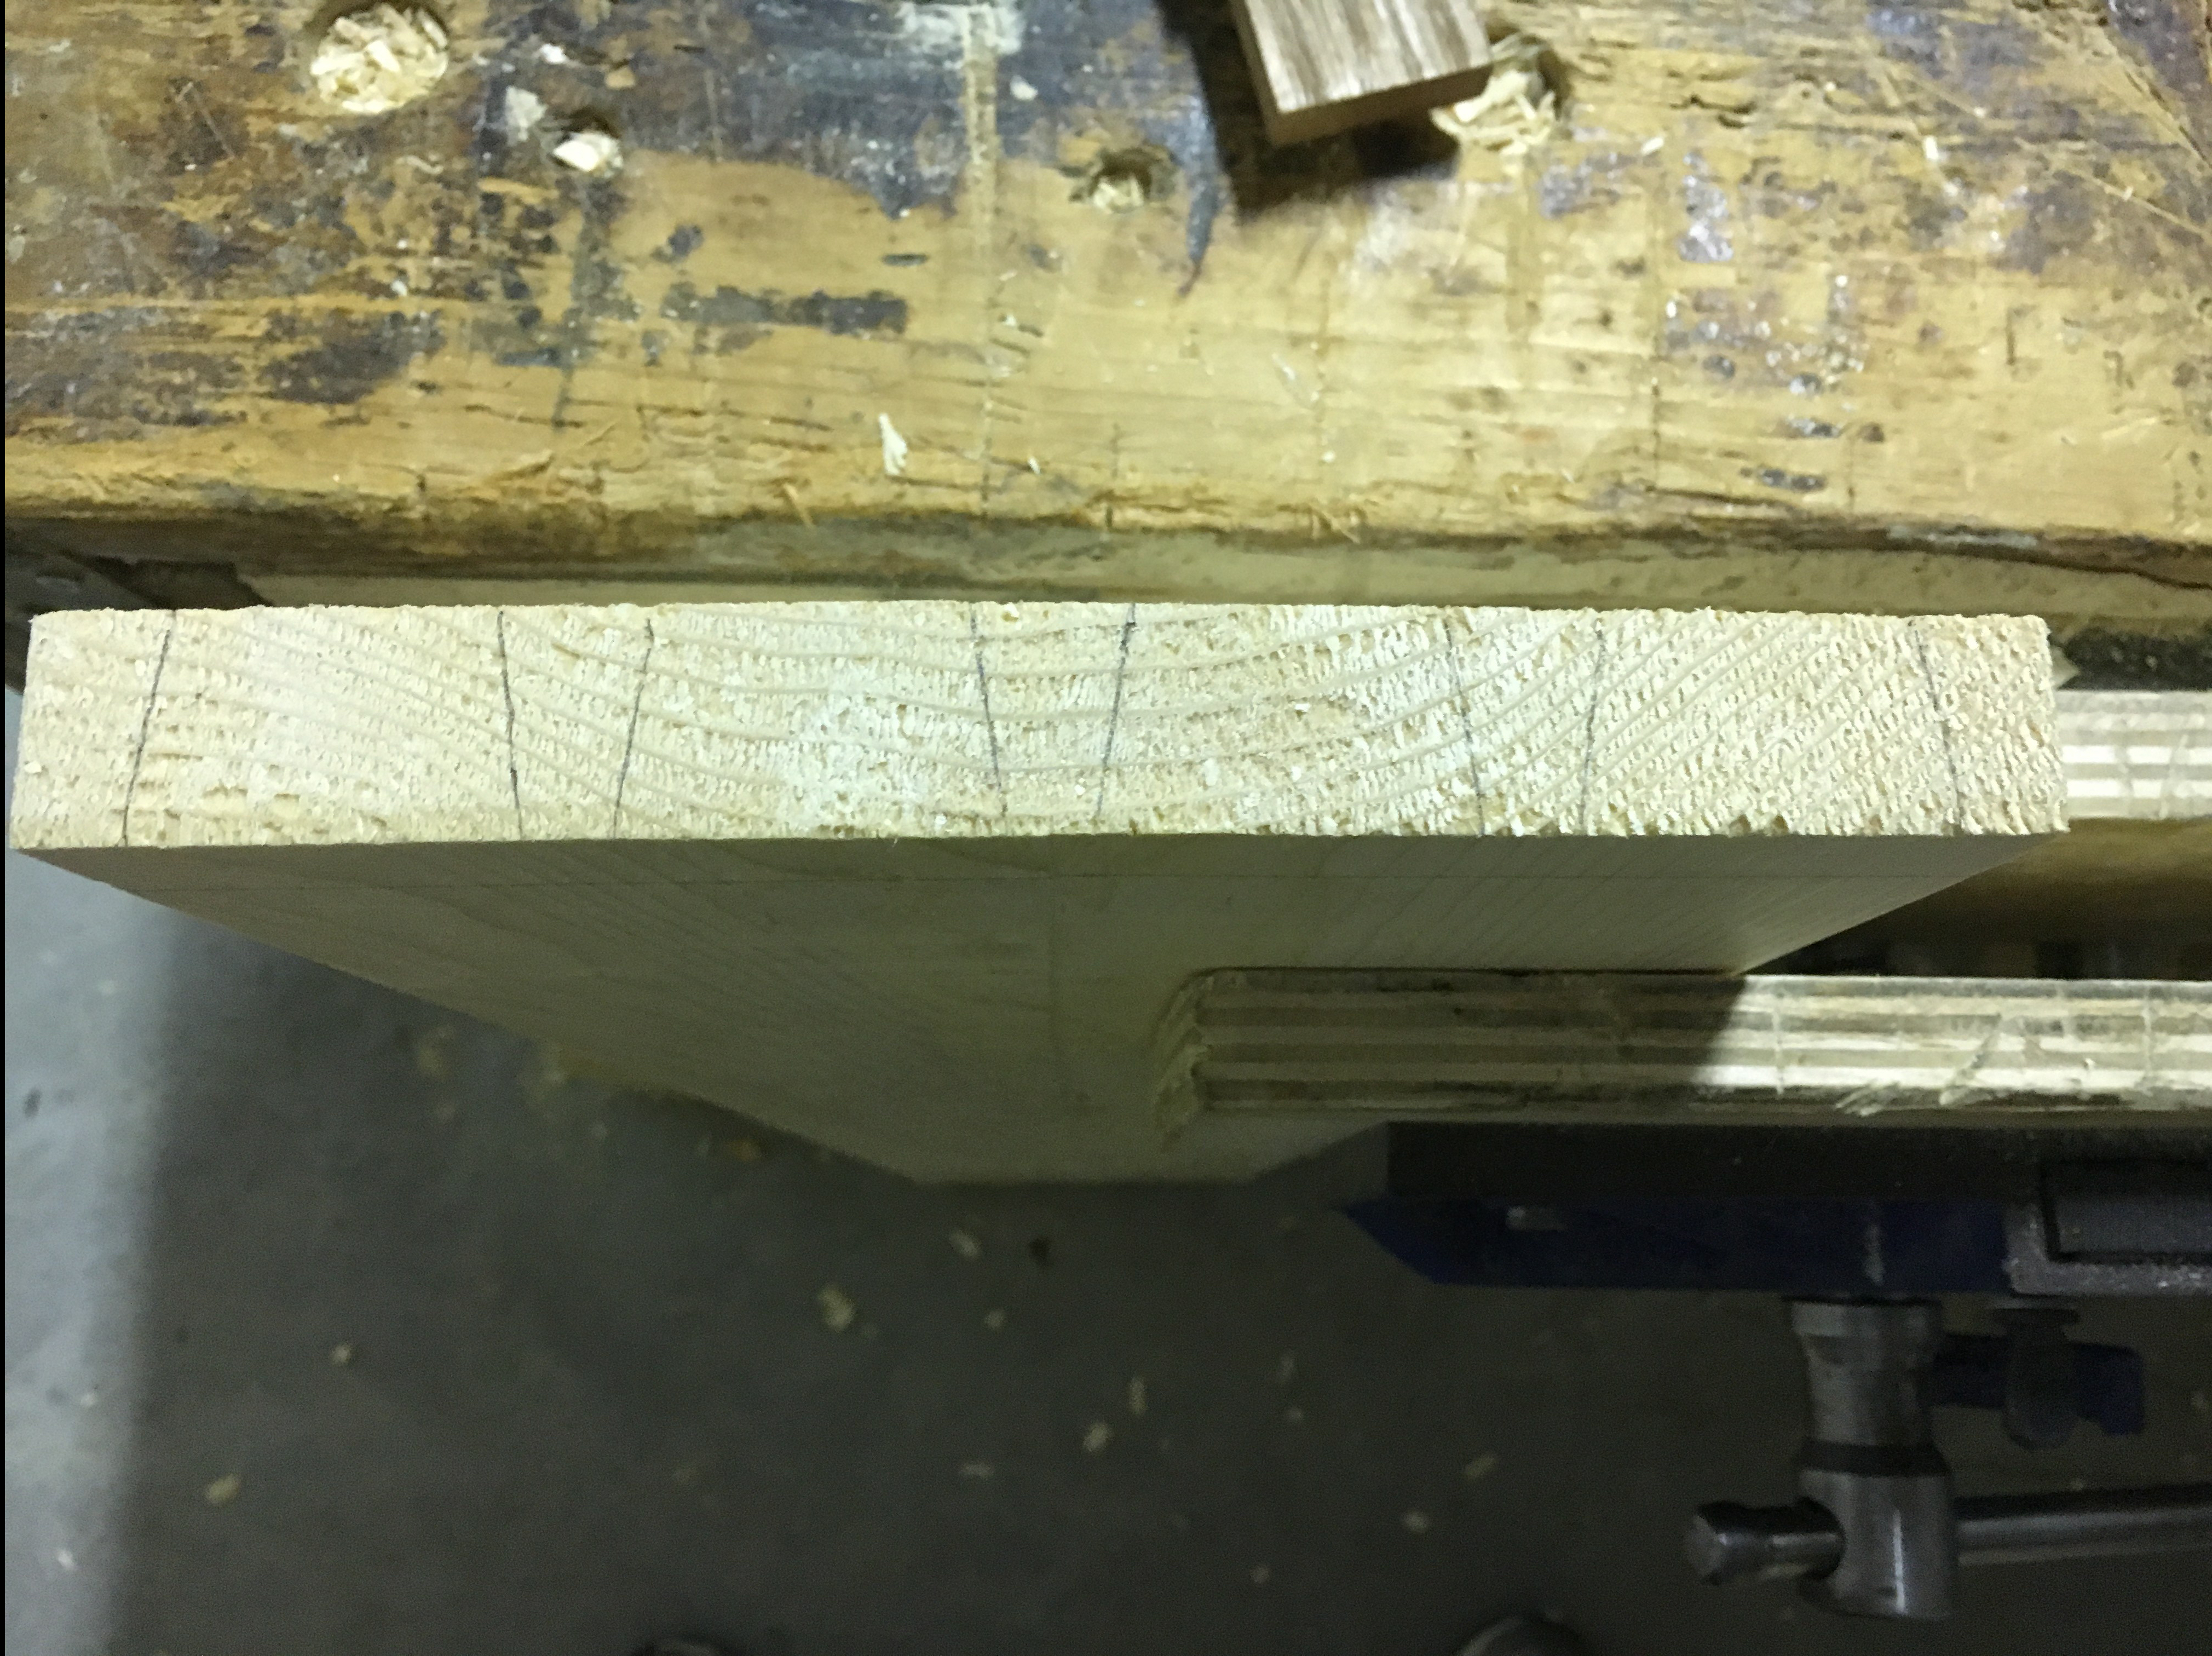

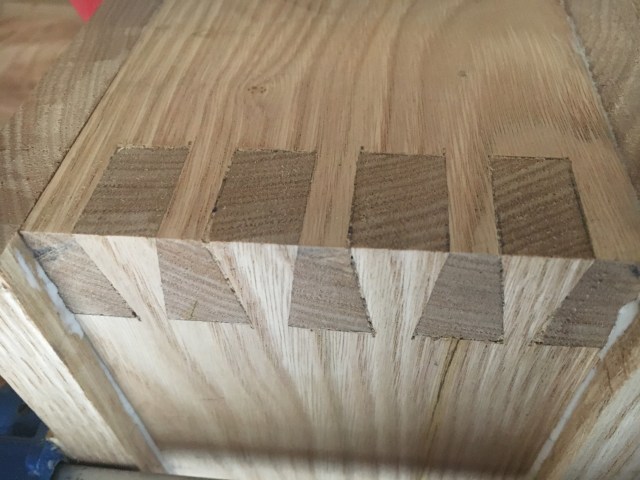
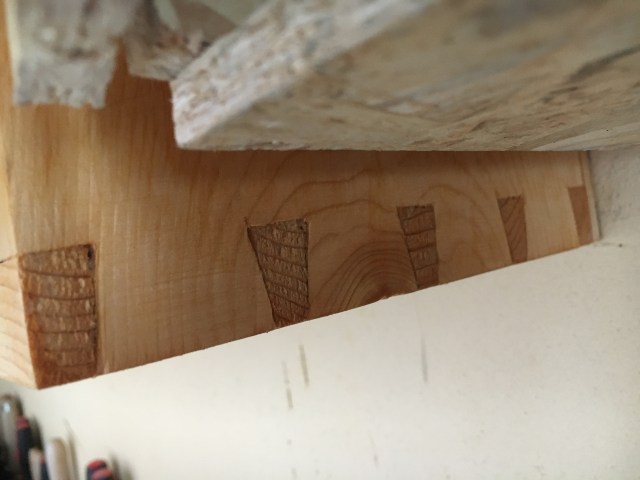
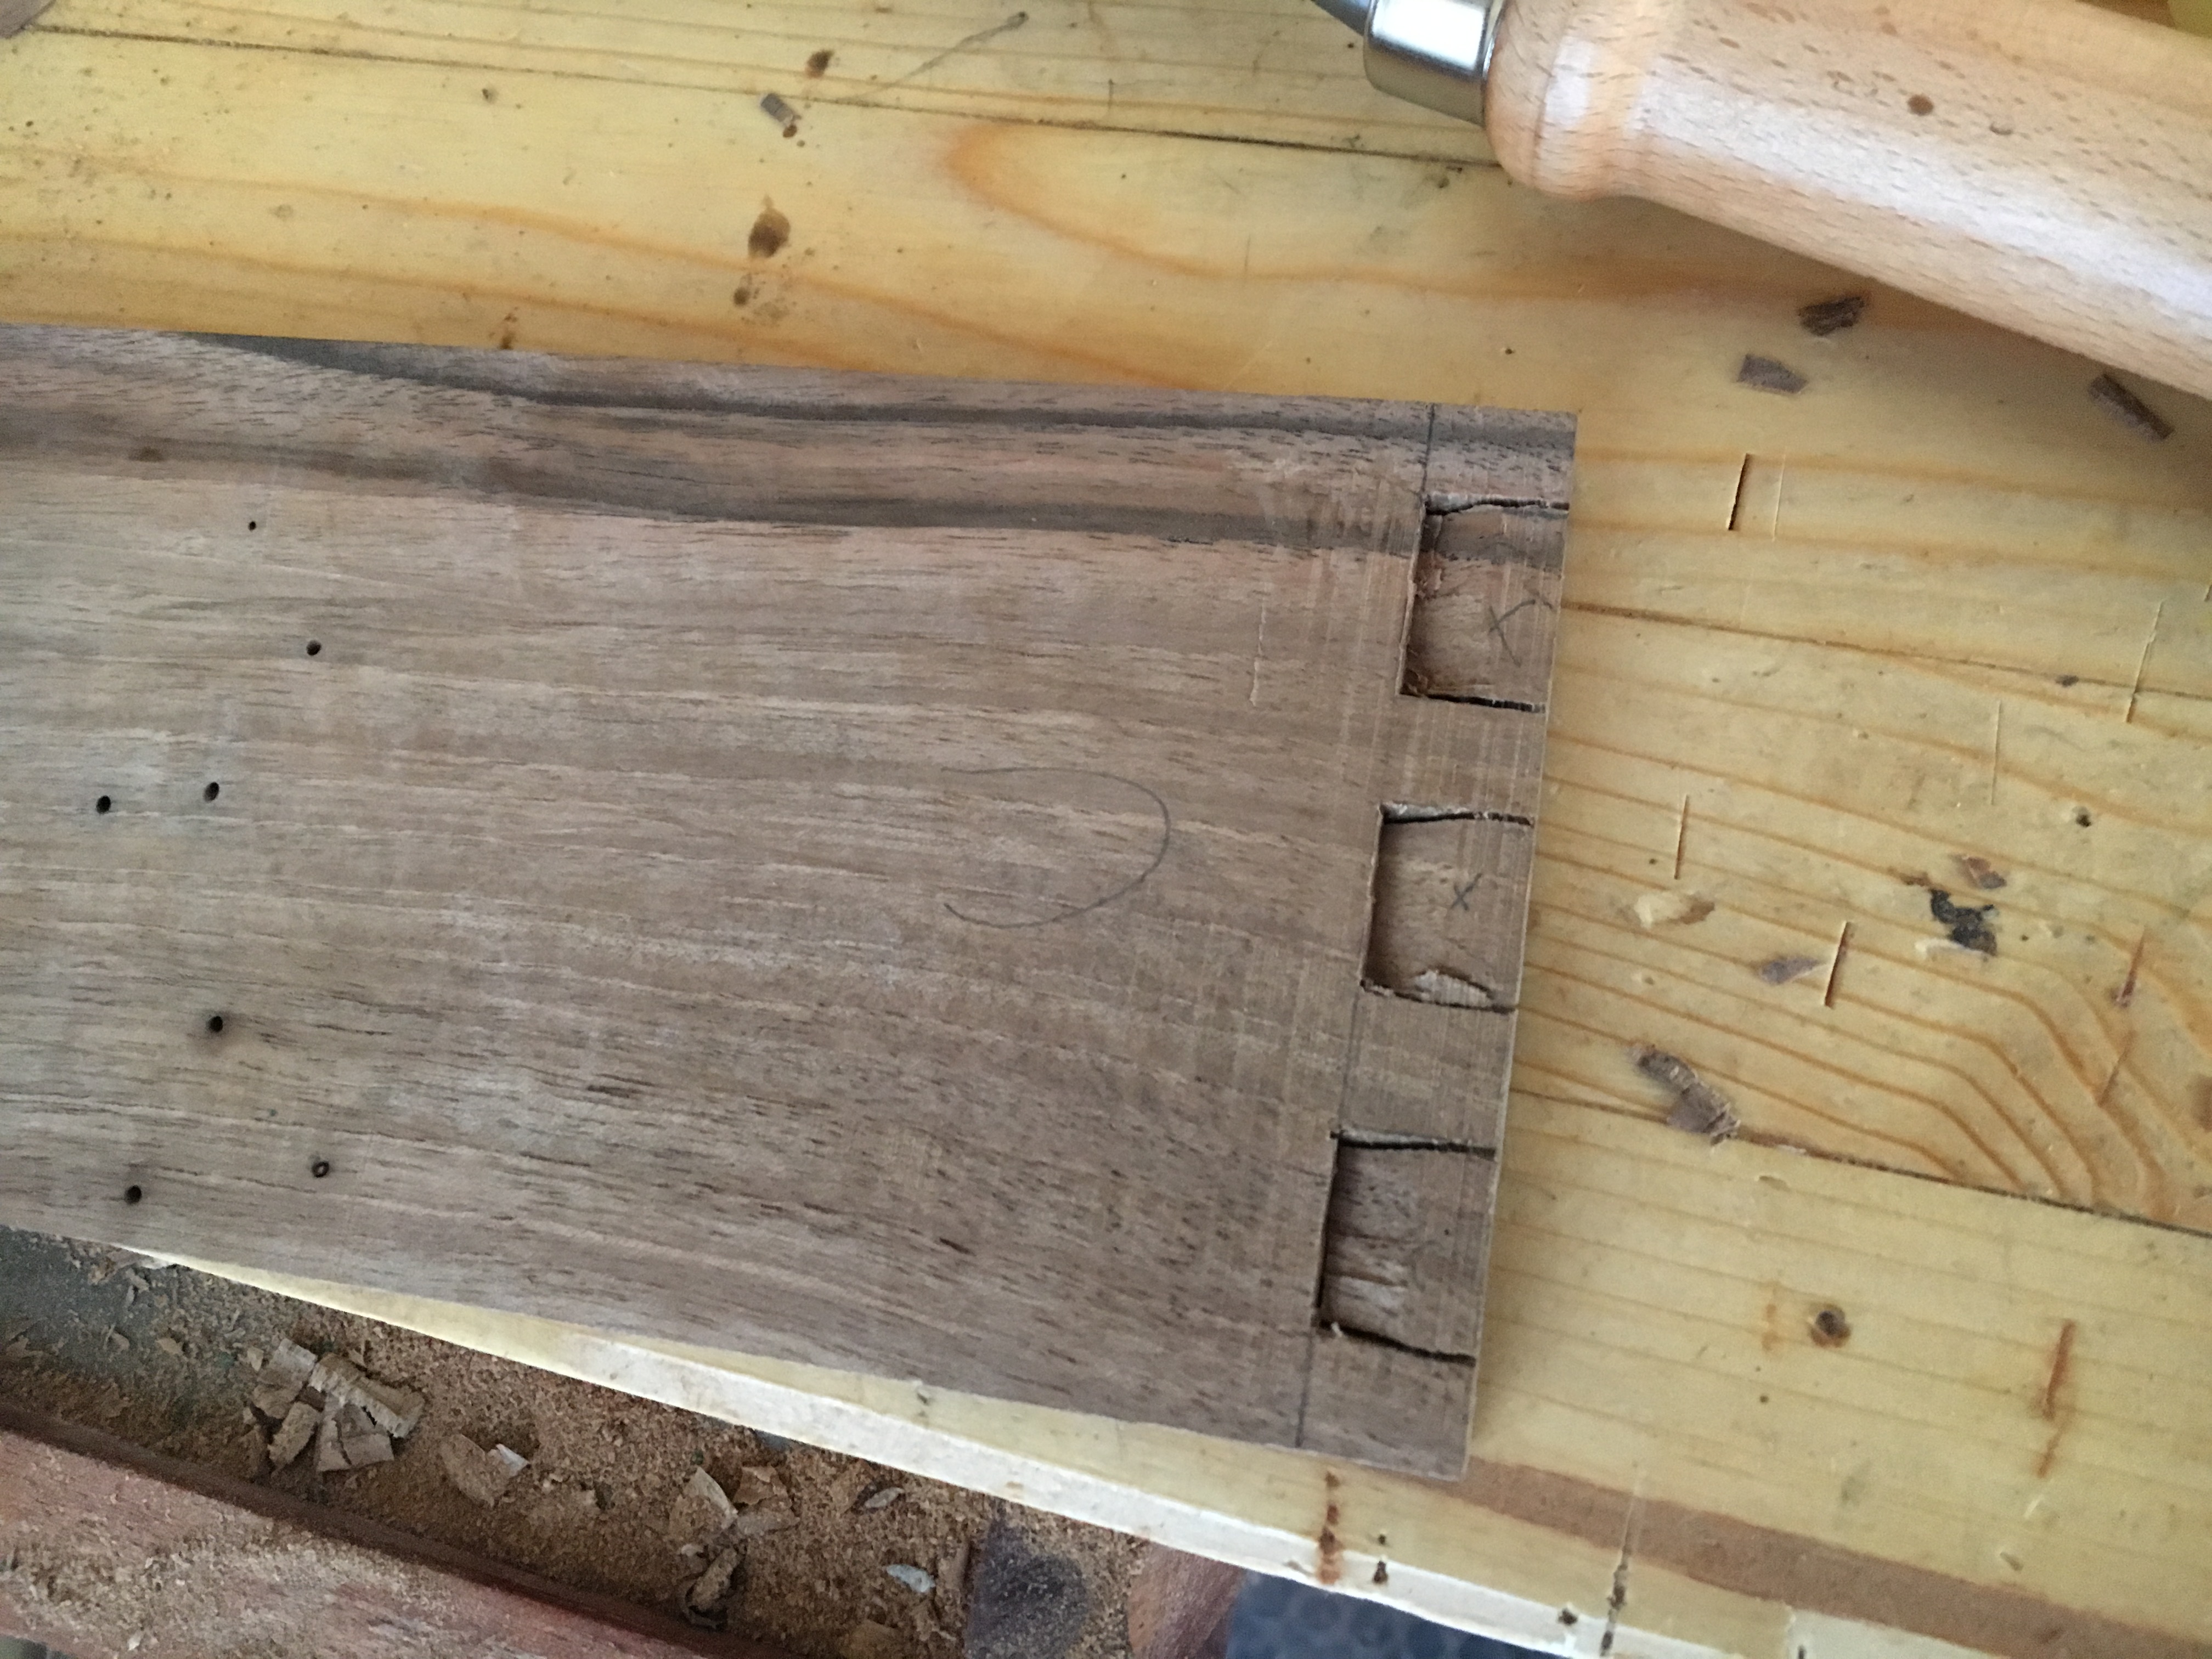
 La procedura non cambia se lavoriamo legni duri come ad esempio il noce. Di seguito alcune foto a titolo esemplificativo.
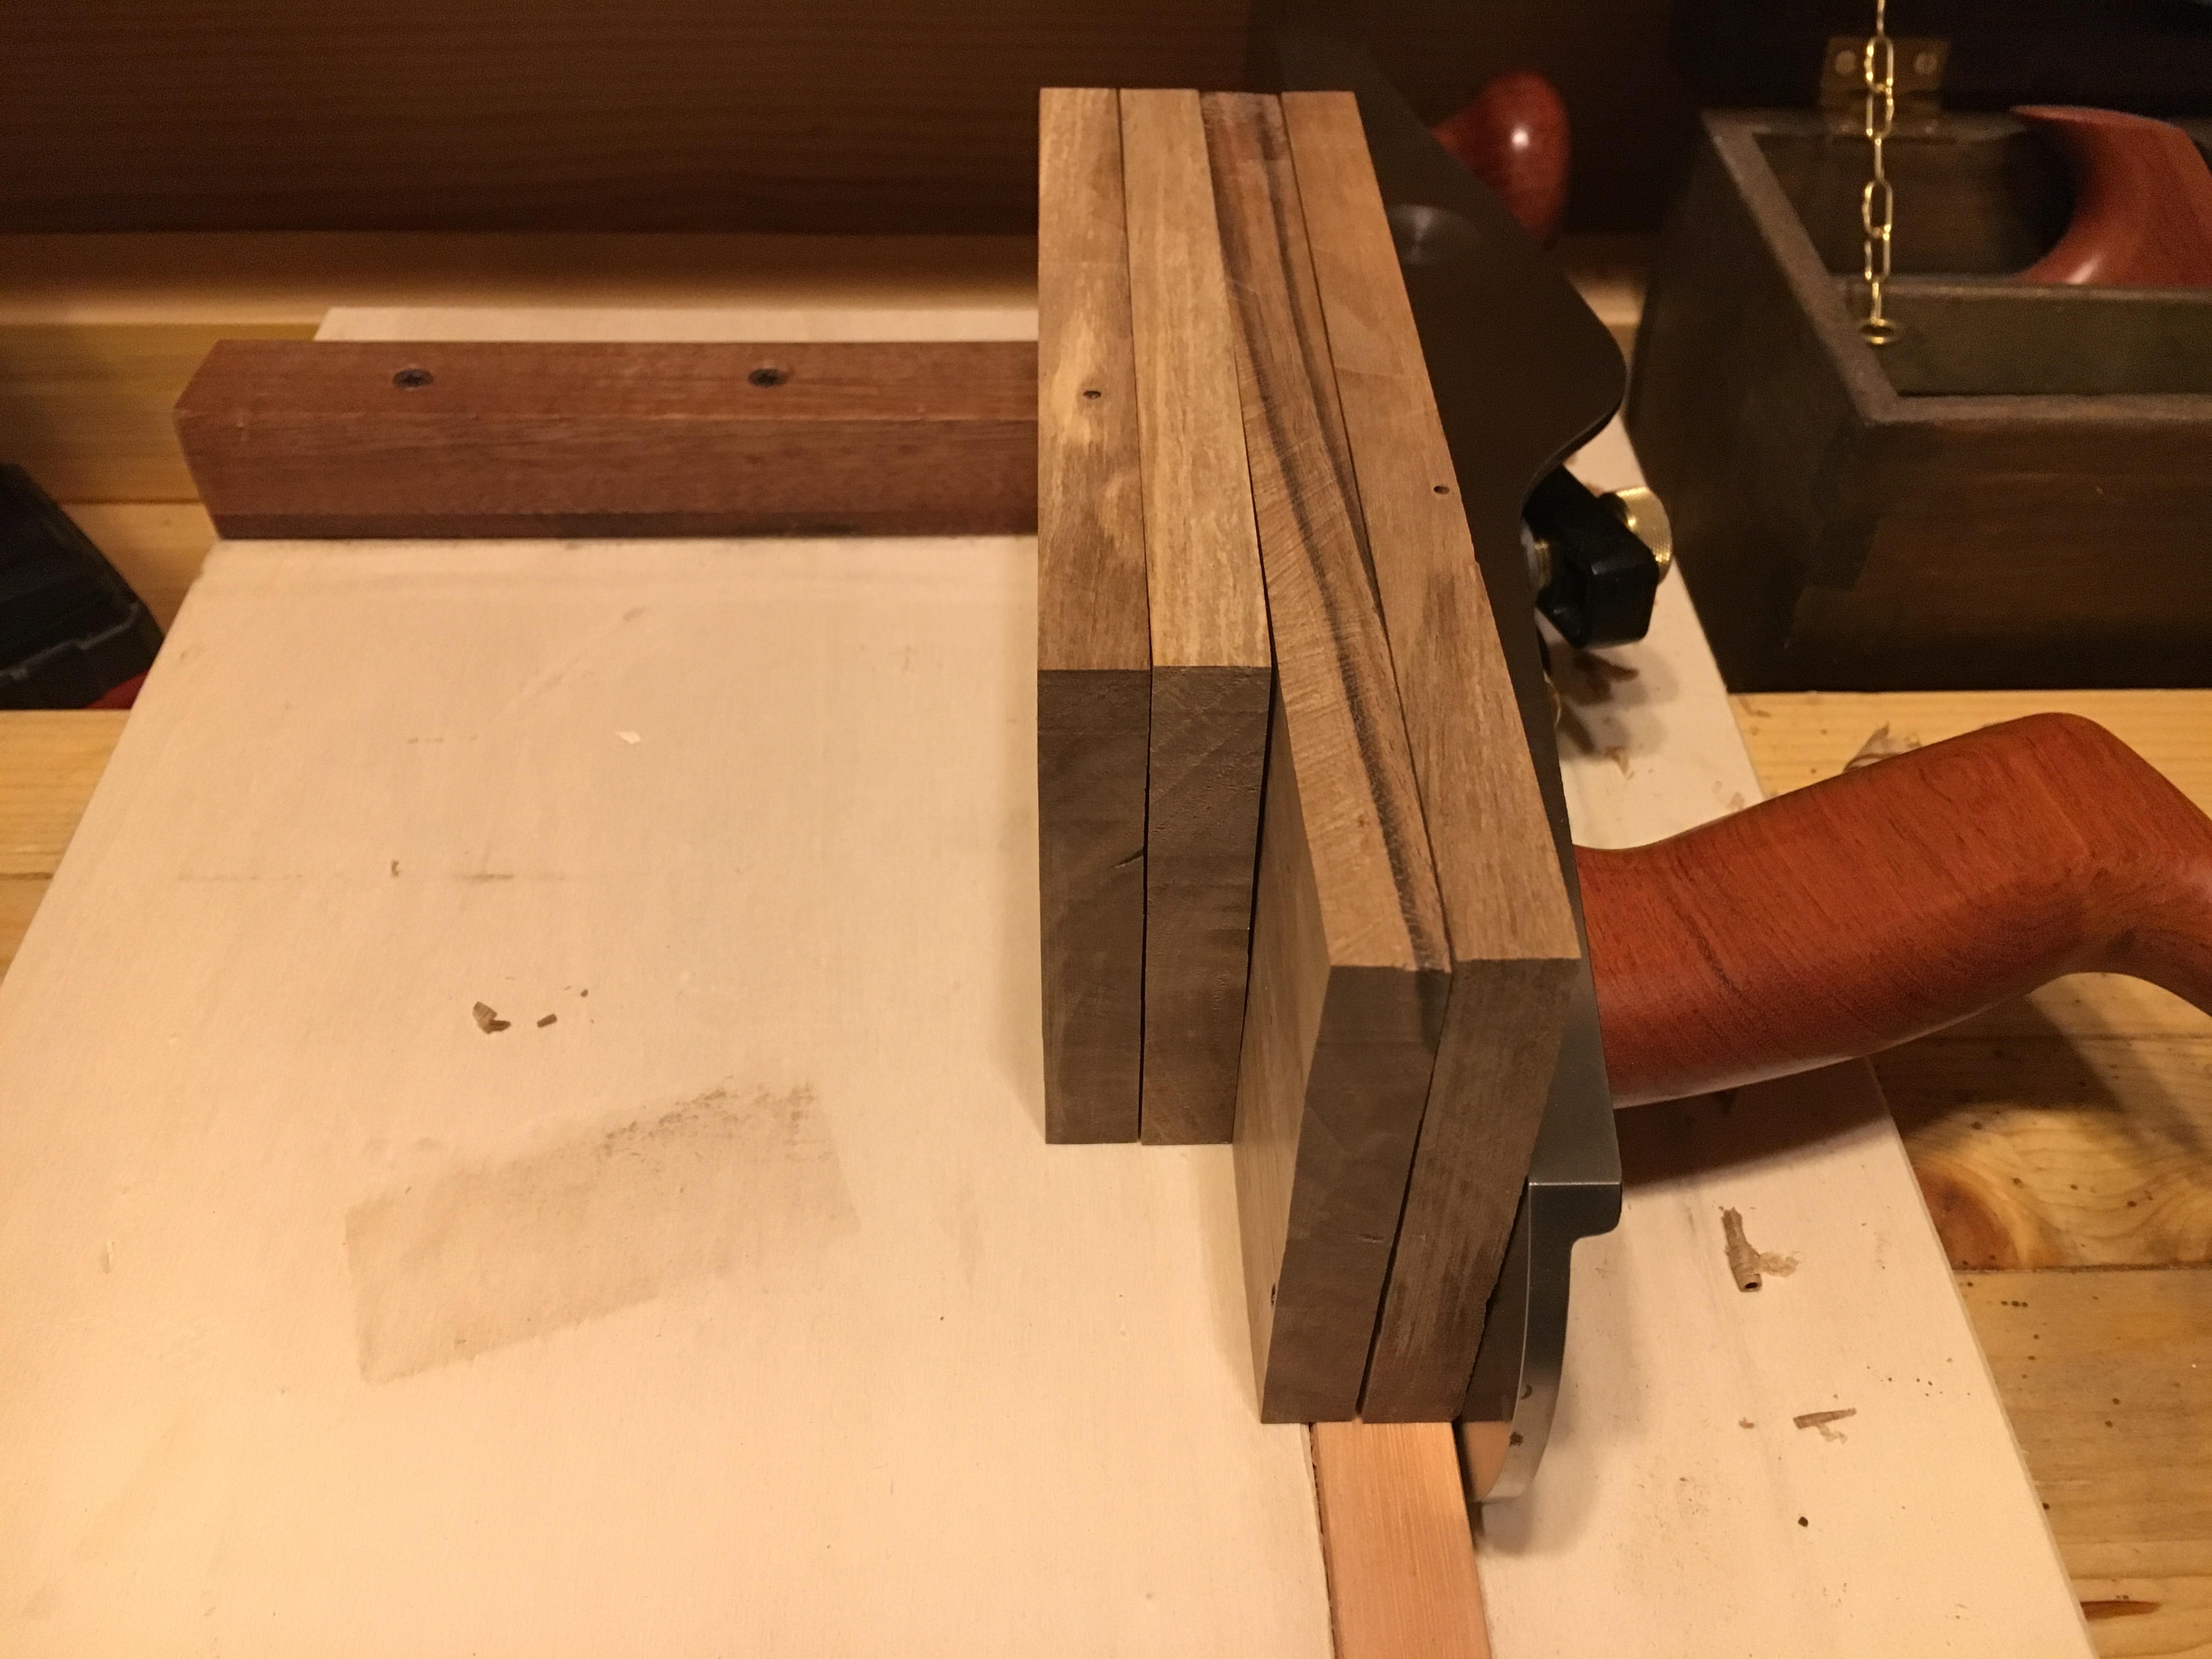

 Sui legni teneri come il pino e l’abete si usa solitamente un angolo di inclinazione della coda (pitch) in un rapporto di 1:6; sui legni duri come il noce ed il rovere si usa un rapporto di inclinazione della coda di 1:8. Un buon compromesso per tutti i legni è quindi quello di utilizzare un rapporto di 1:7.
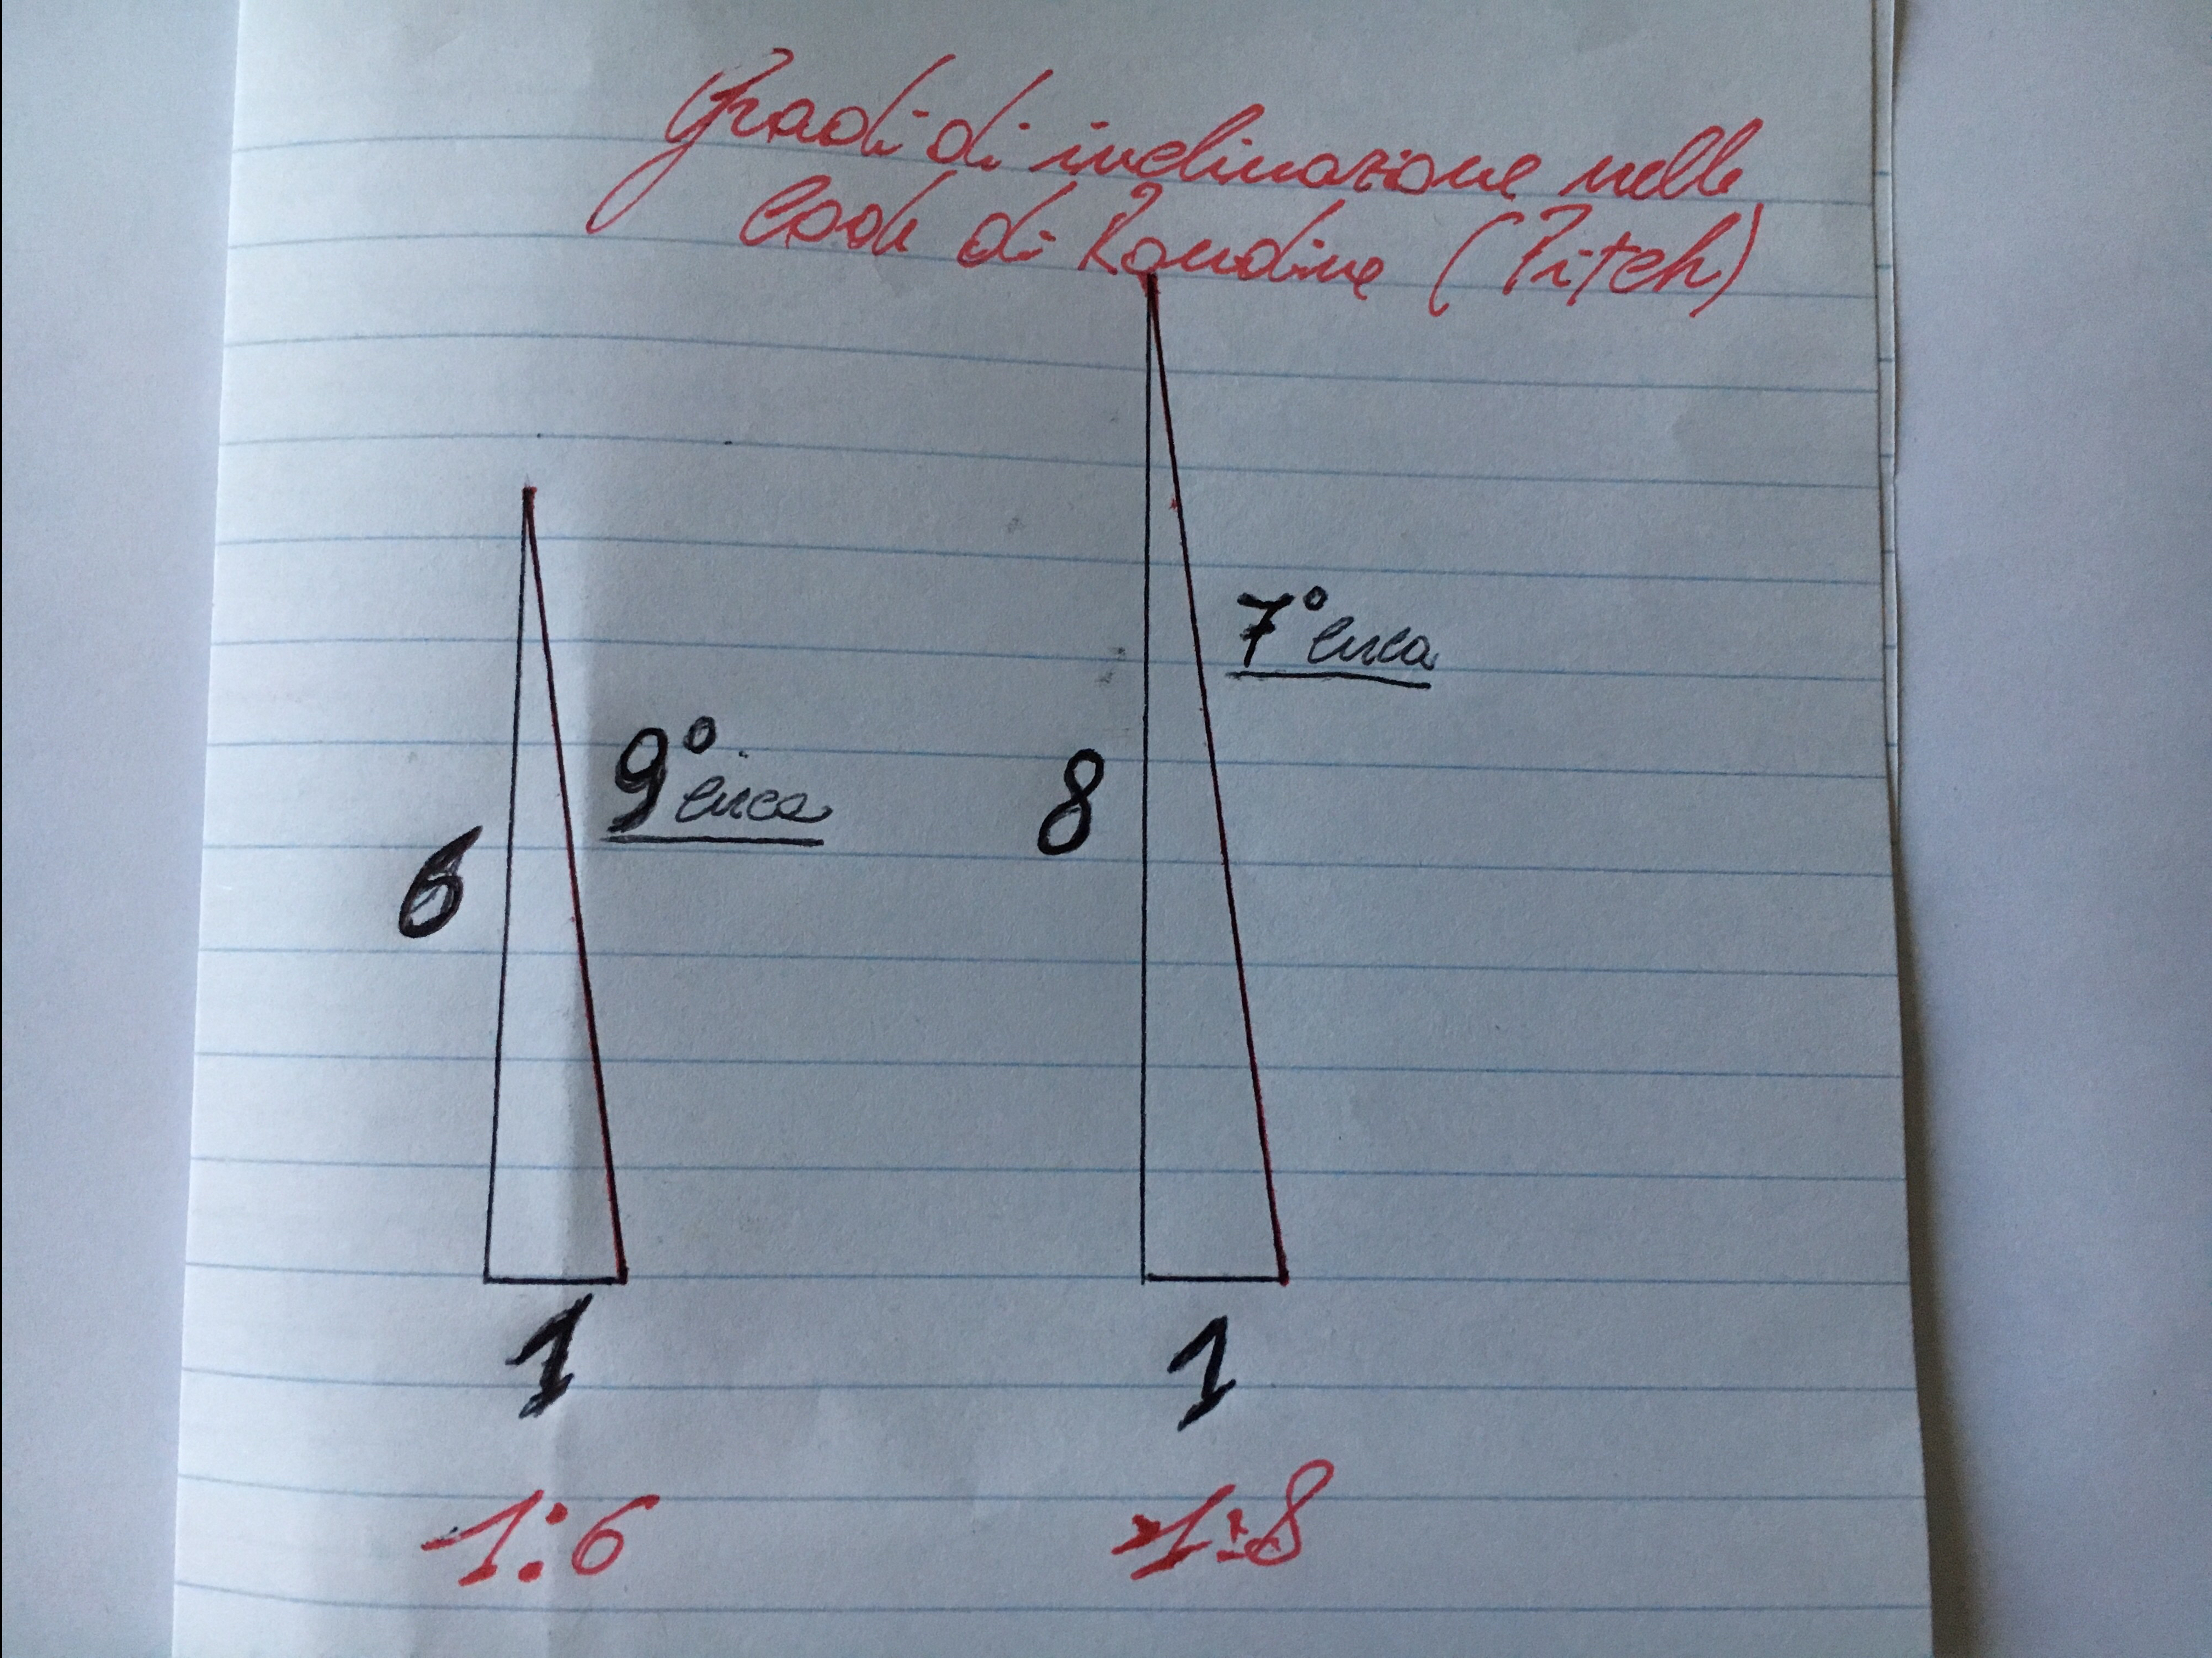
Cosa indica questo rapporto e come si trasforma in angoli? Semplificando al massimo è l’angolo che crea l’ipotenusa rispetto alla base ipotizzando ad esempio la base di 1 cm. e l’altezza di 6 o 8 cm. Questo rapporto genera un angolo di circa 9 gradi nel rapporto 1:6 per i legni morbidi e di circa 7 gradi nel rapporto 1:8 per i legni duri. Questo angolo viene ripreso con la falsa squadra ed utilizzato per le code di rondine.Generalmente per i legni teneri si usa un angolo più ripido perché le fibre di questi legni si comprimono di più rispetto a quelle dei legni duri.
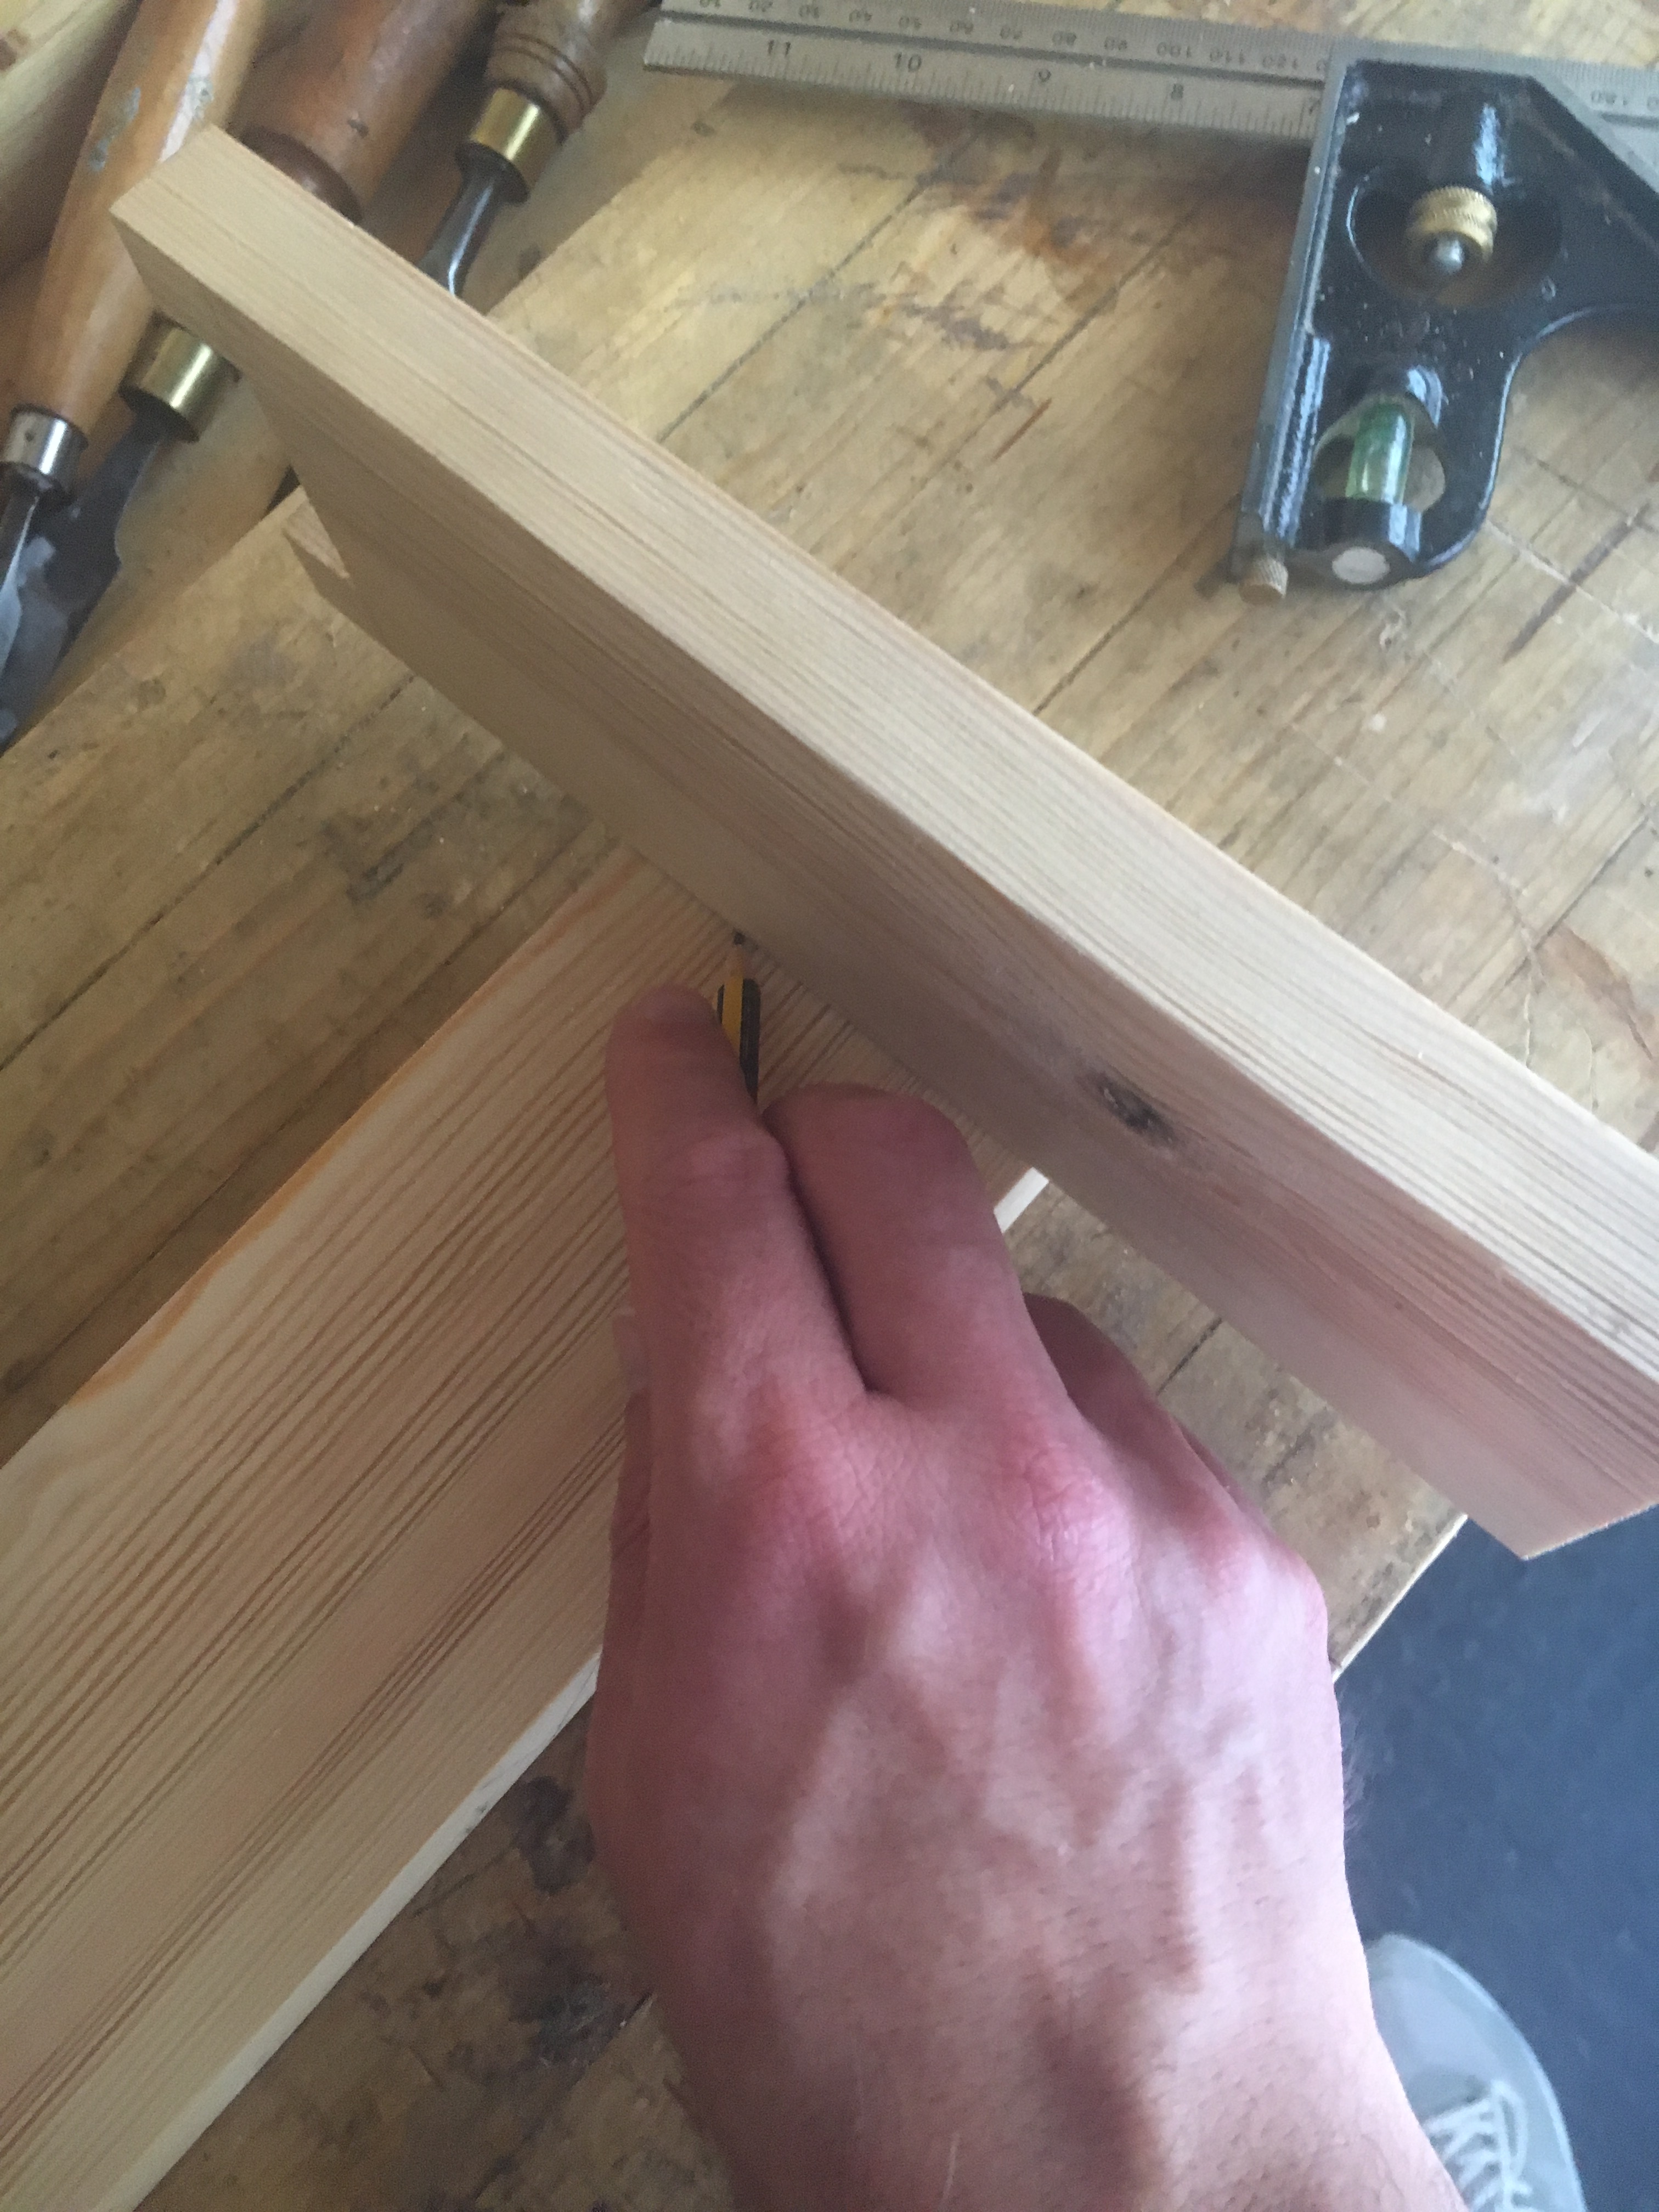
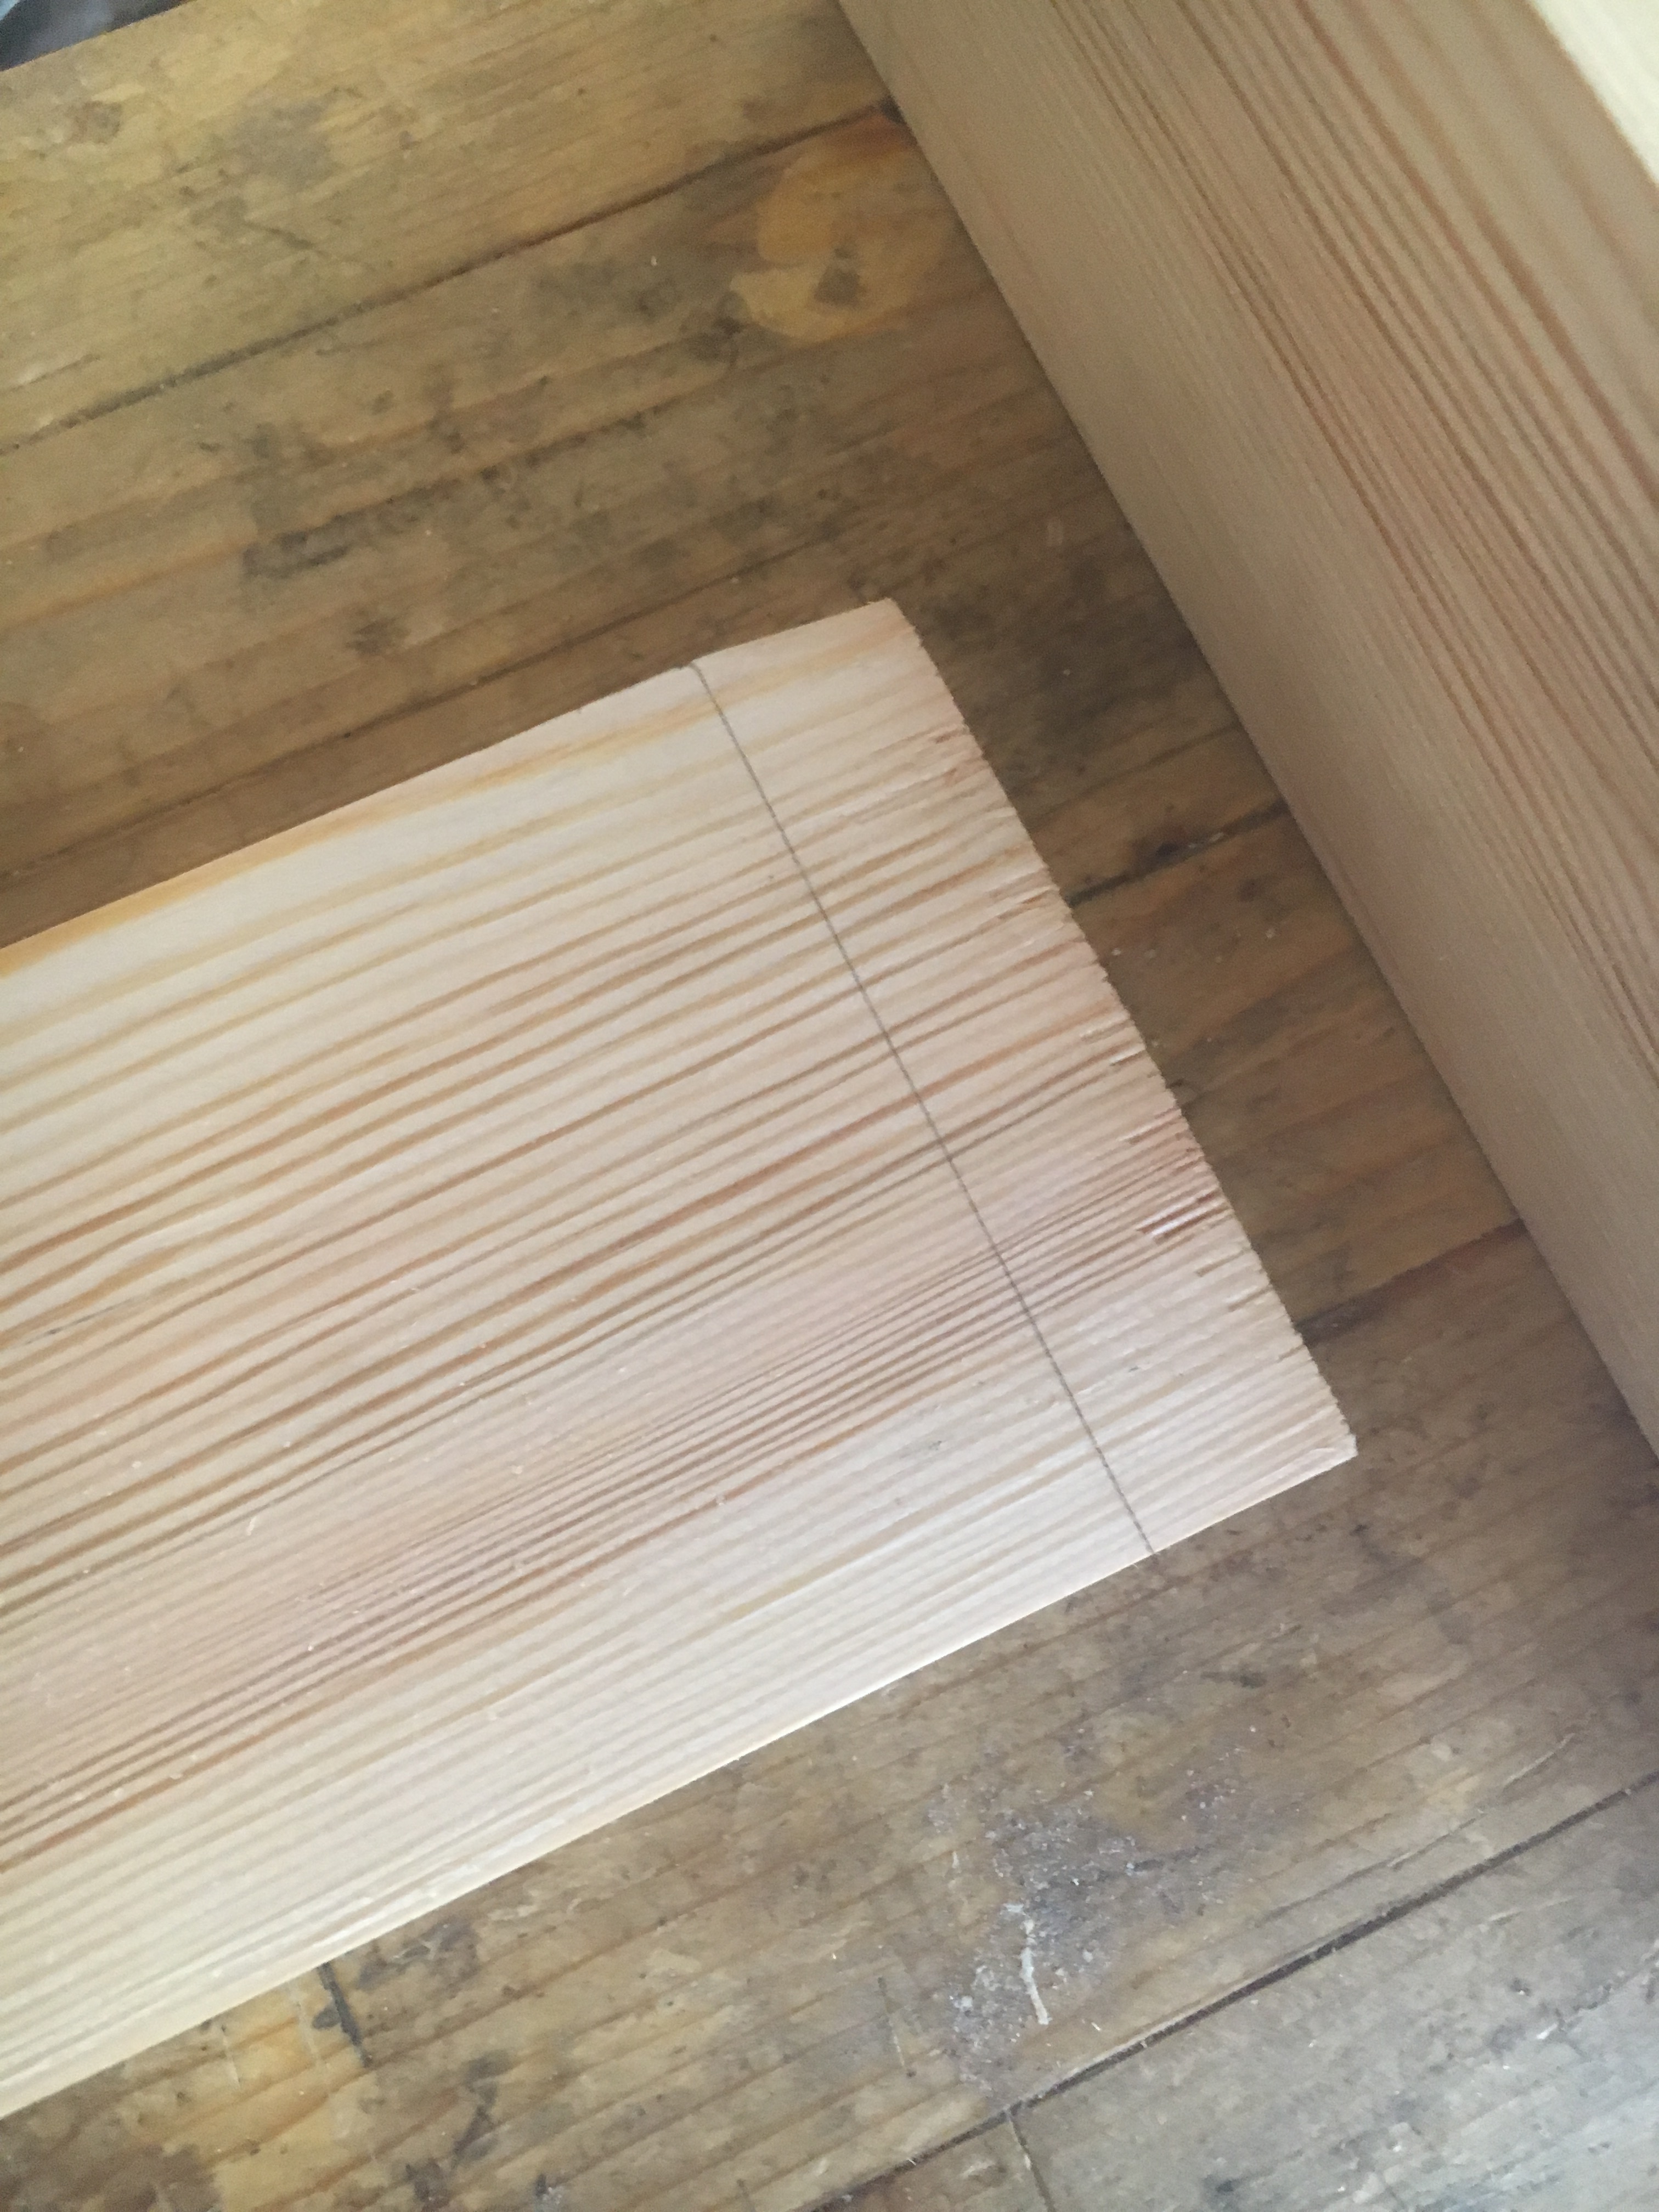
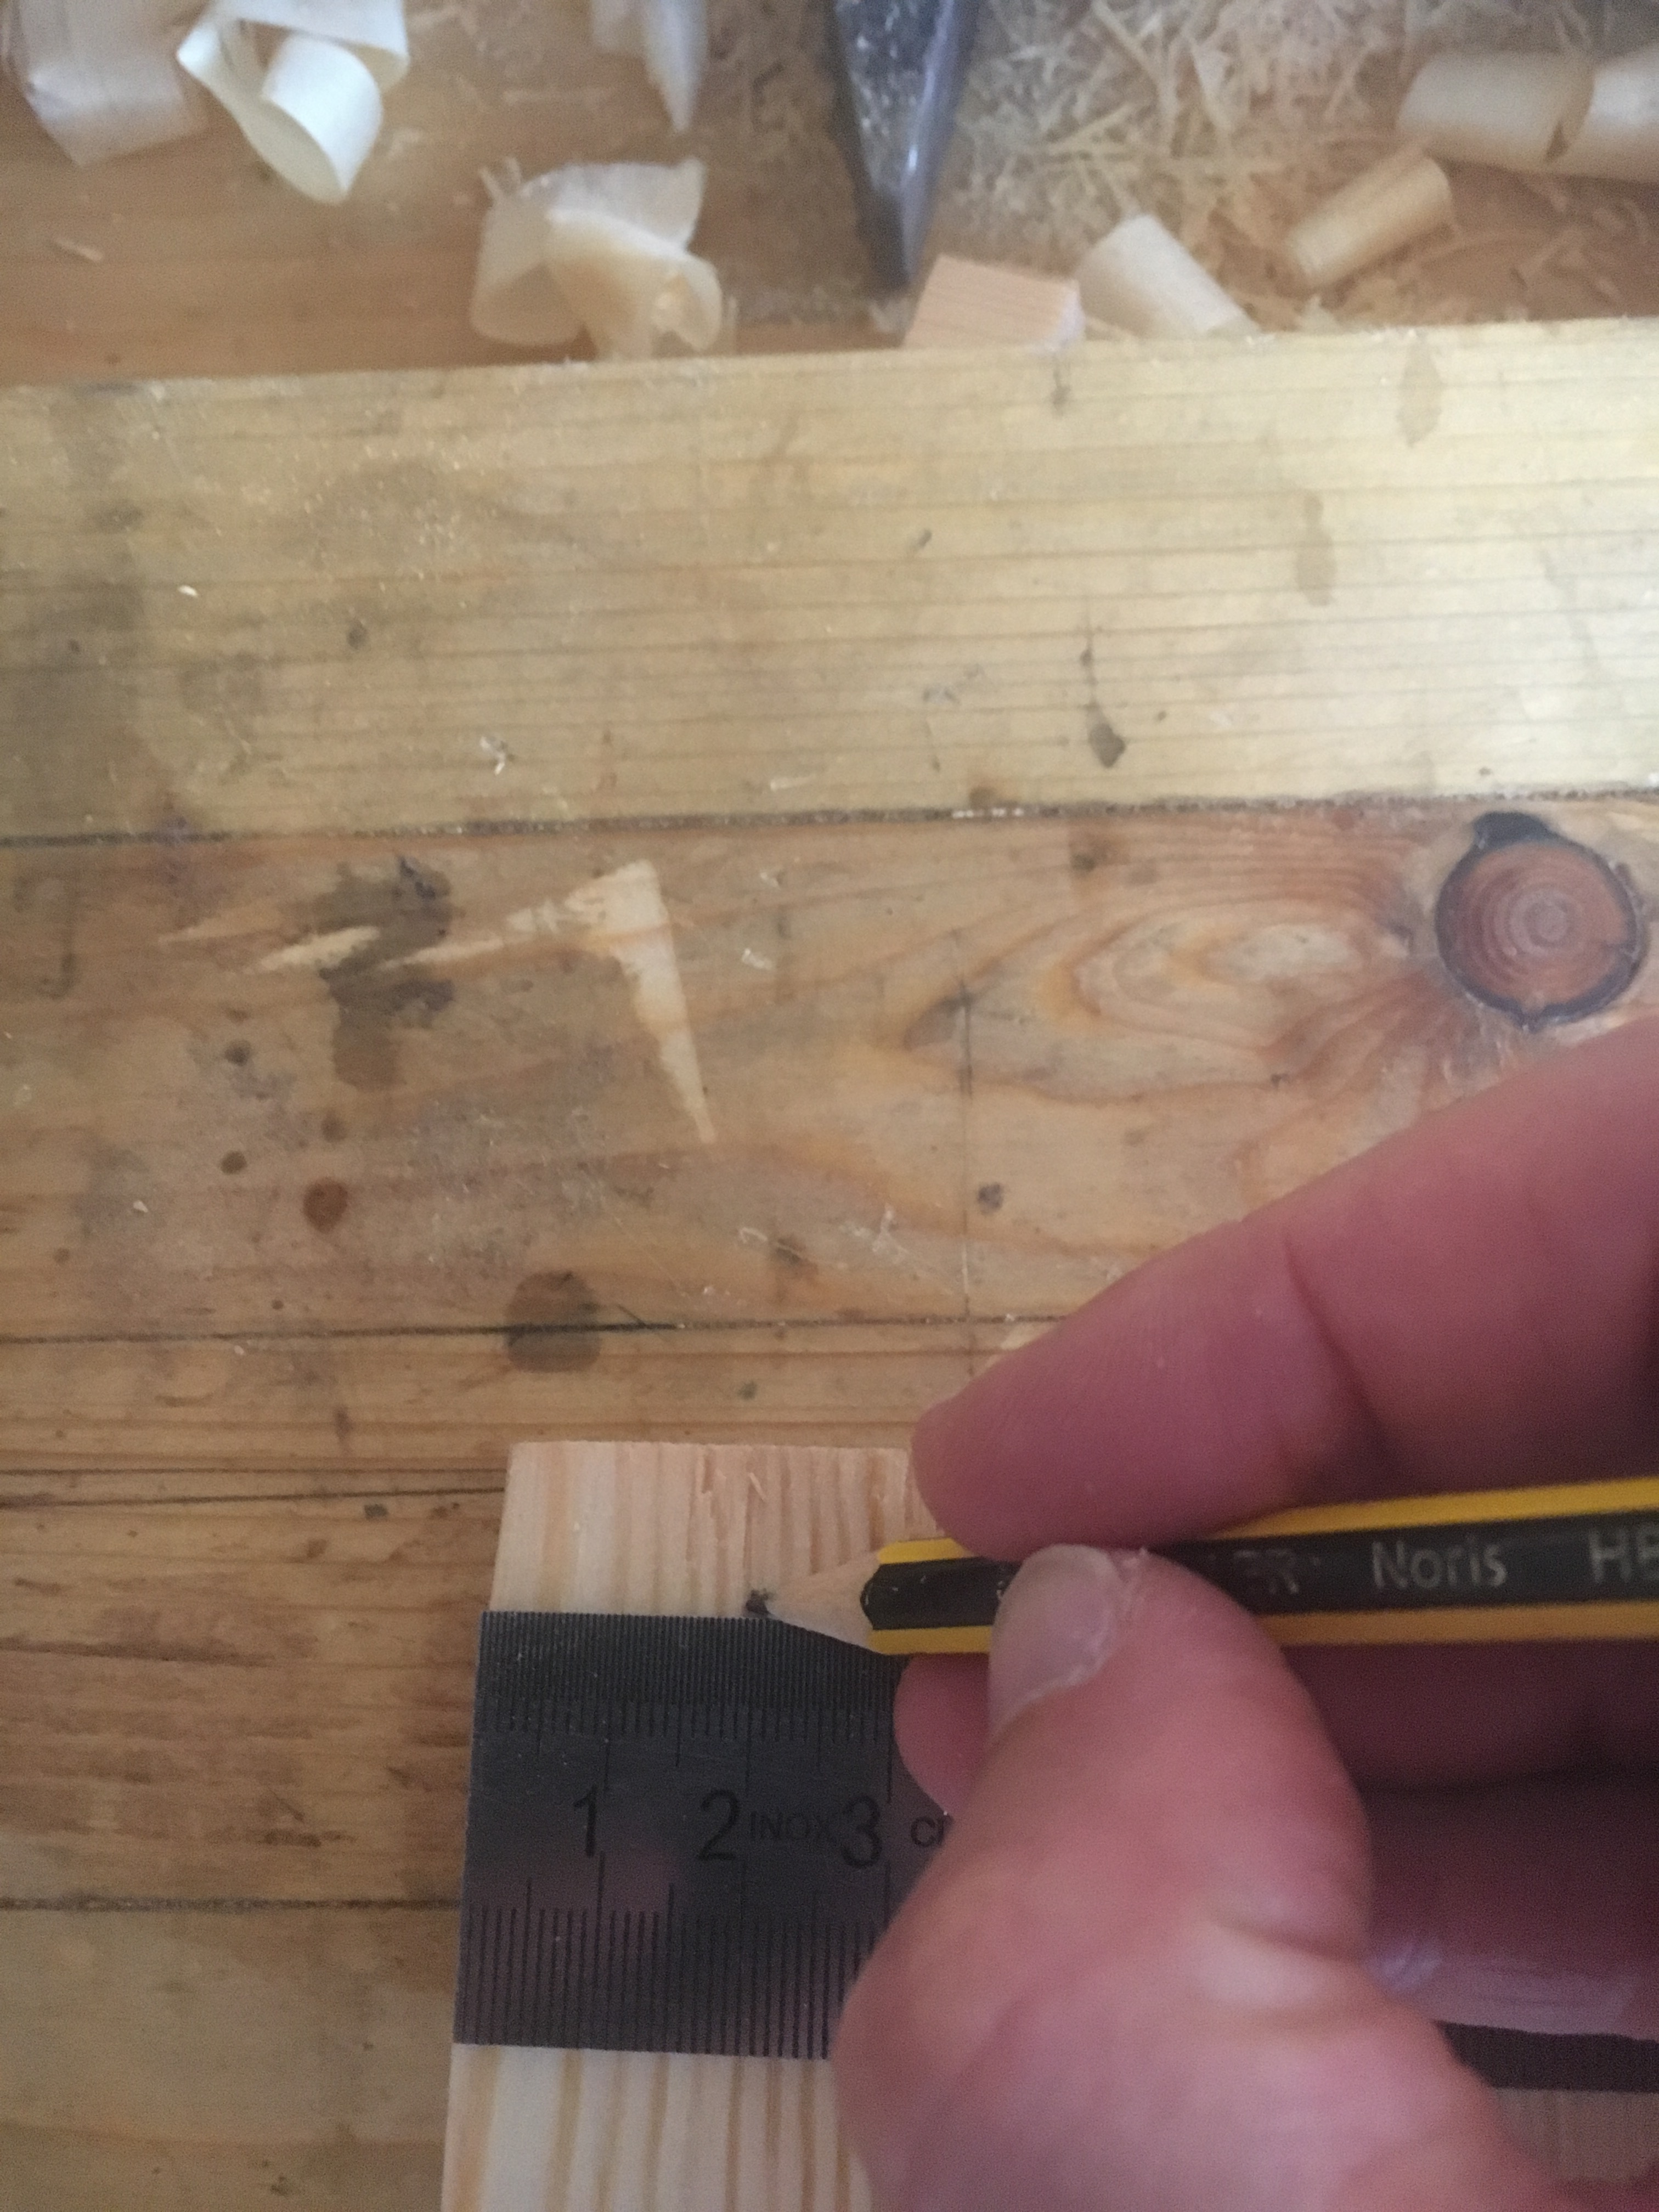
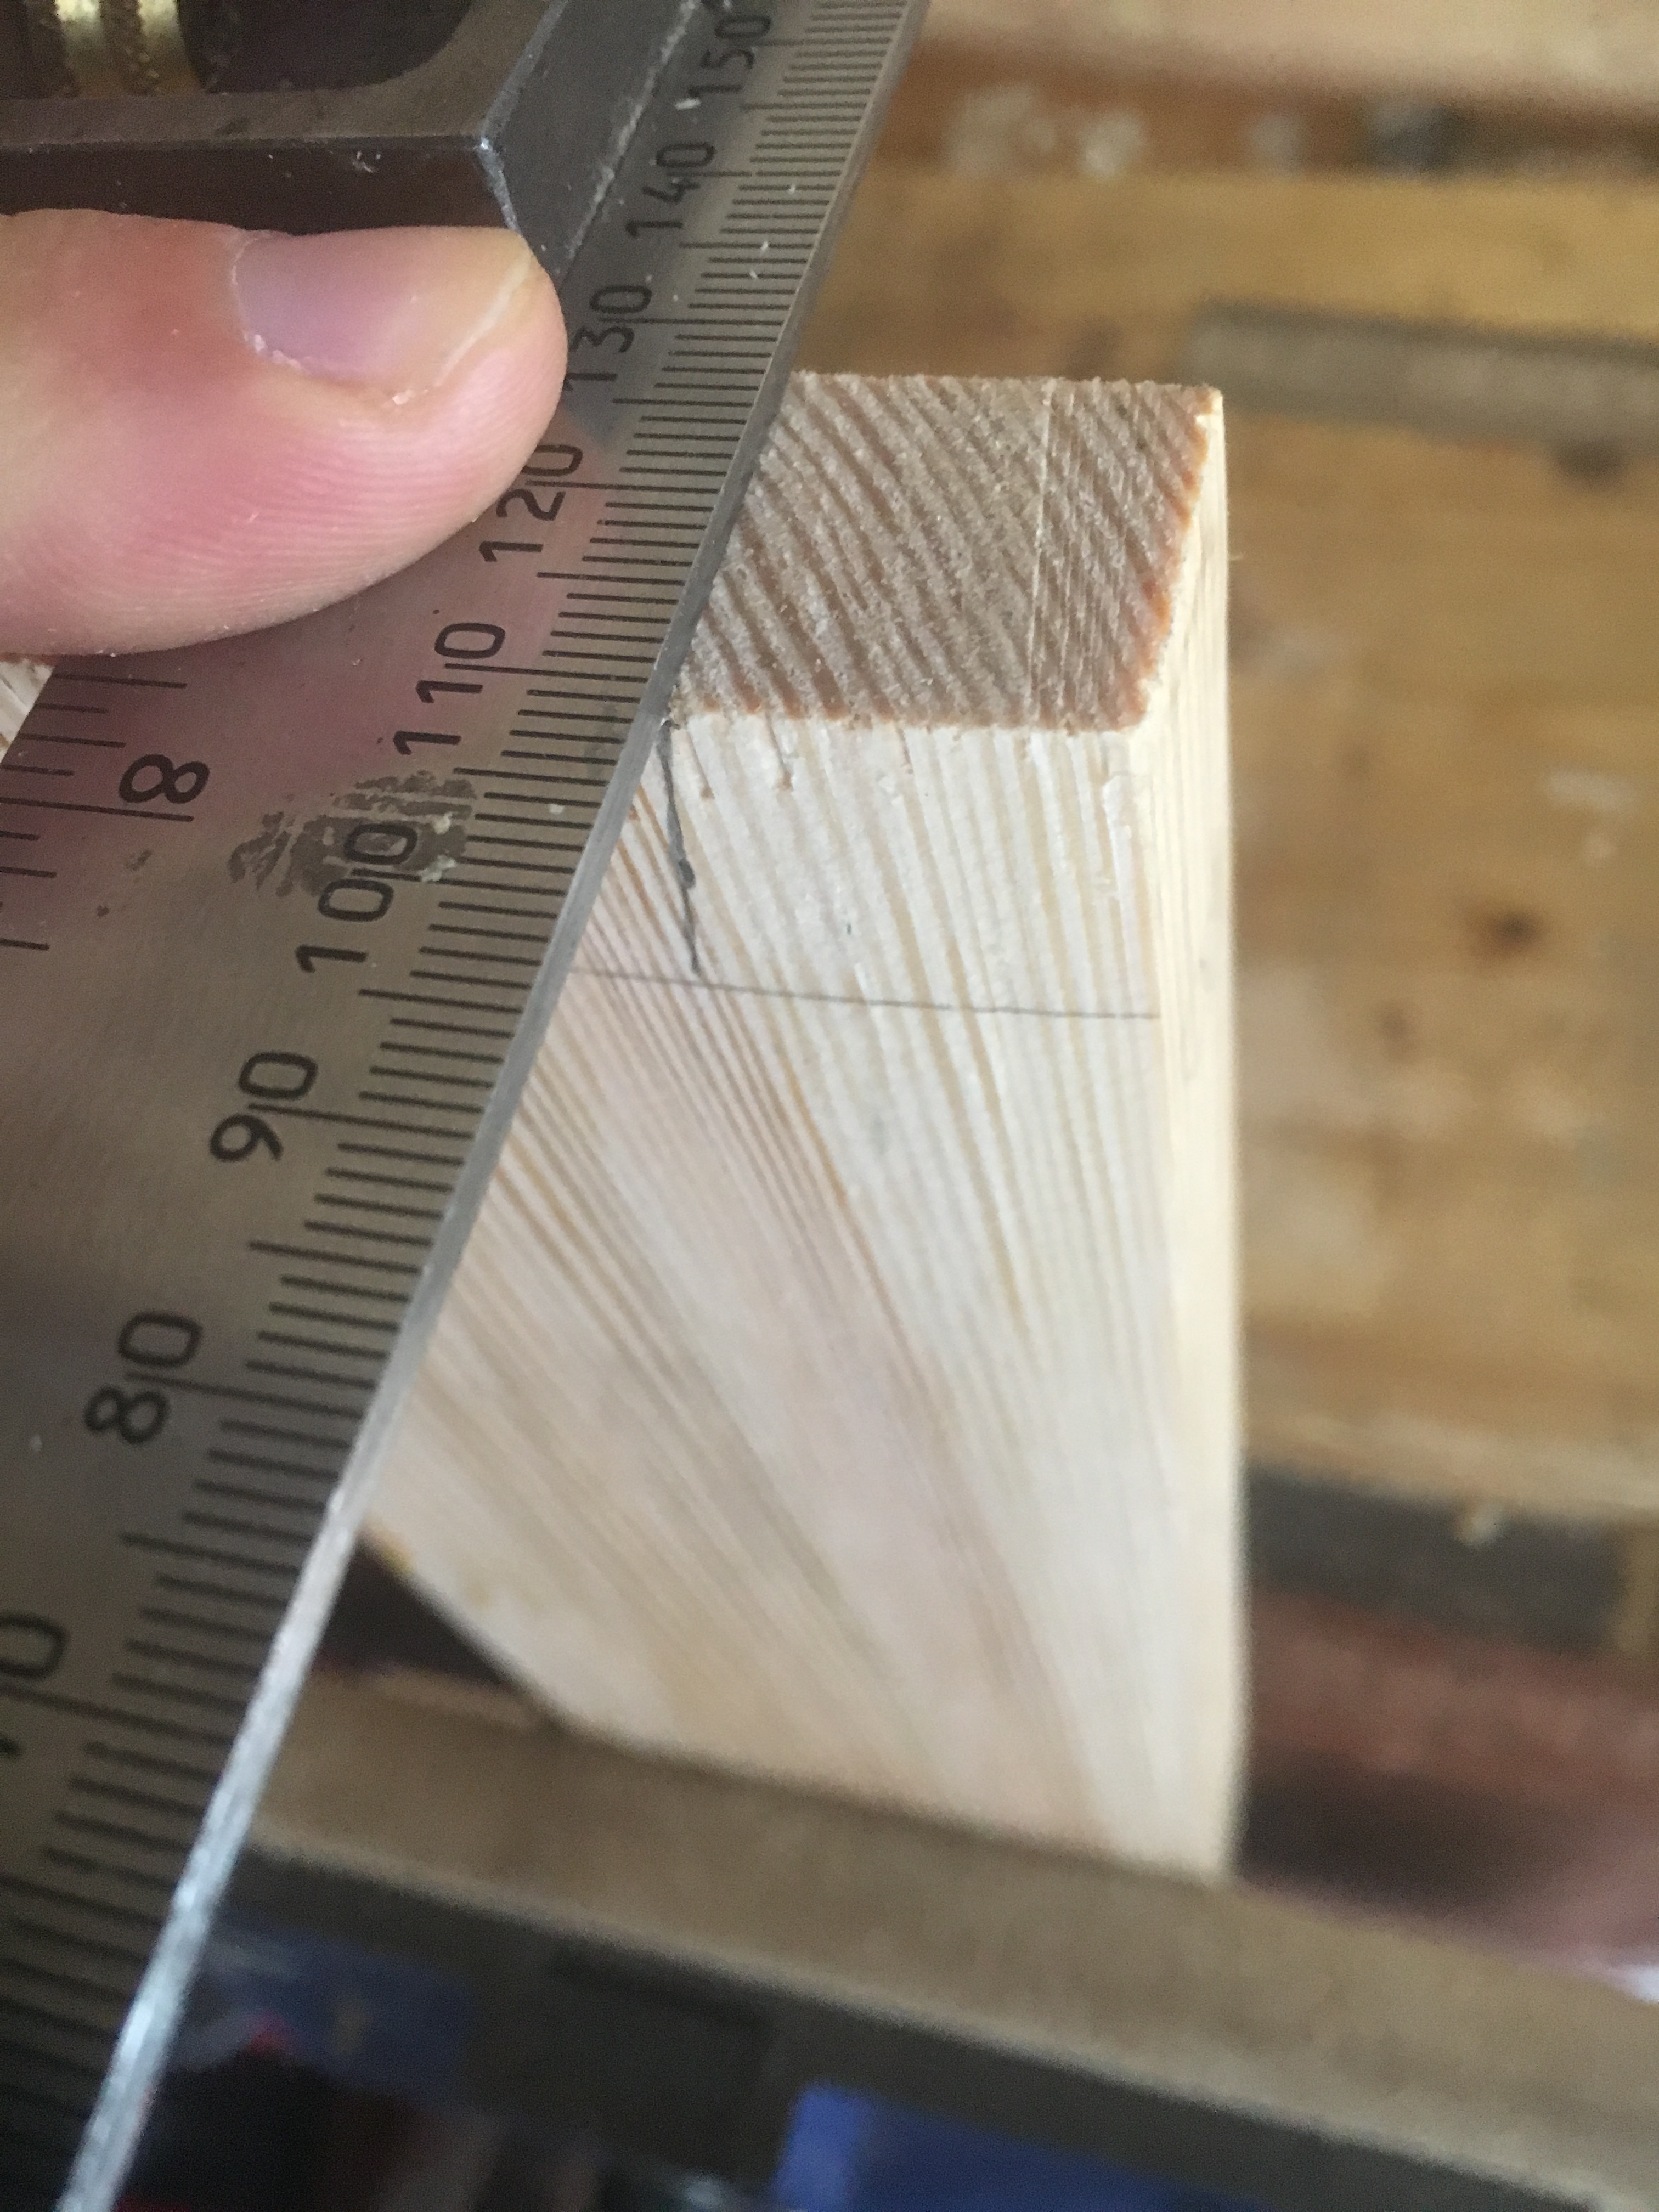
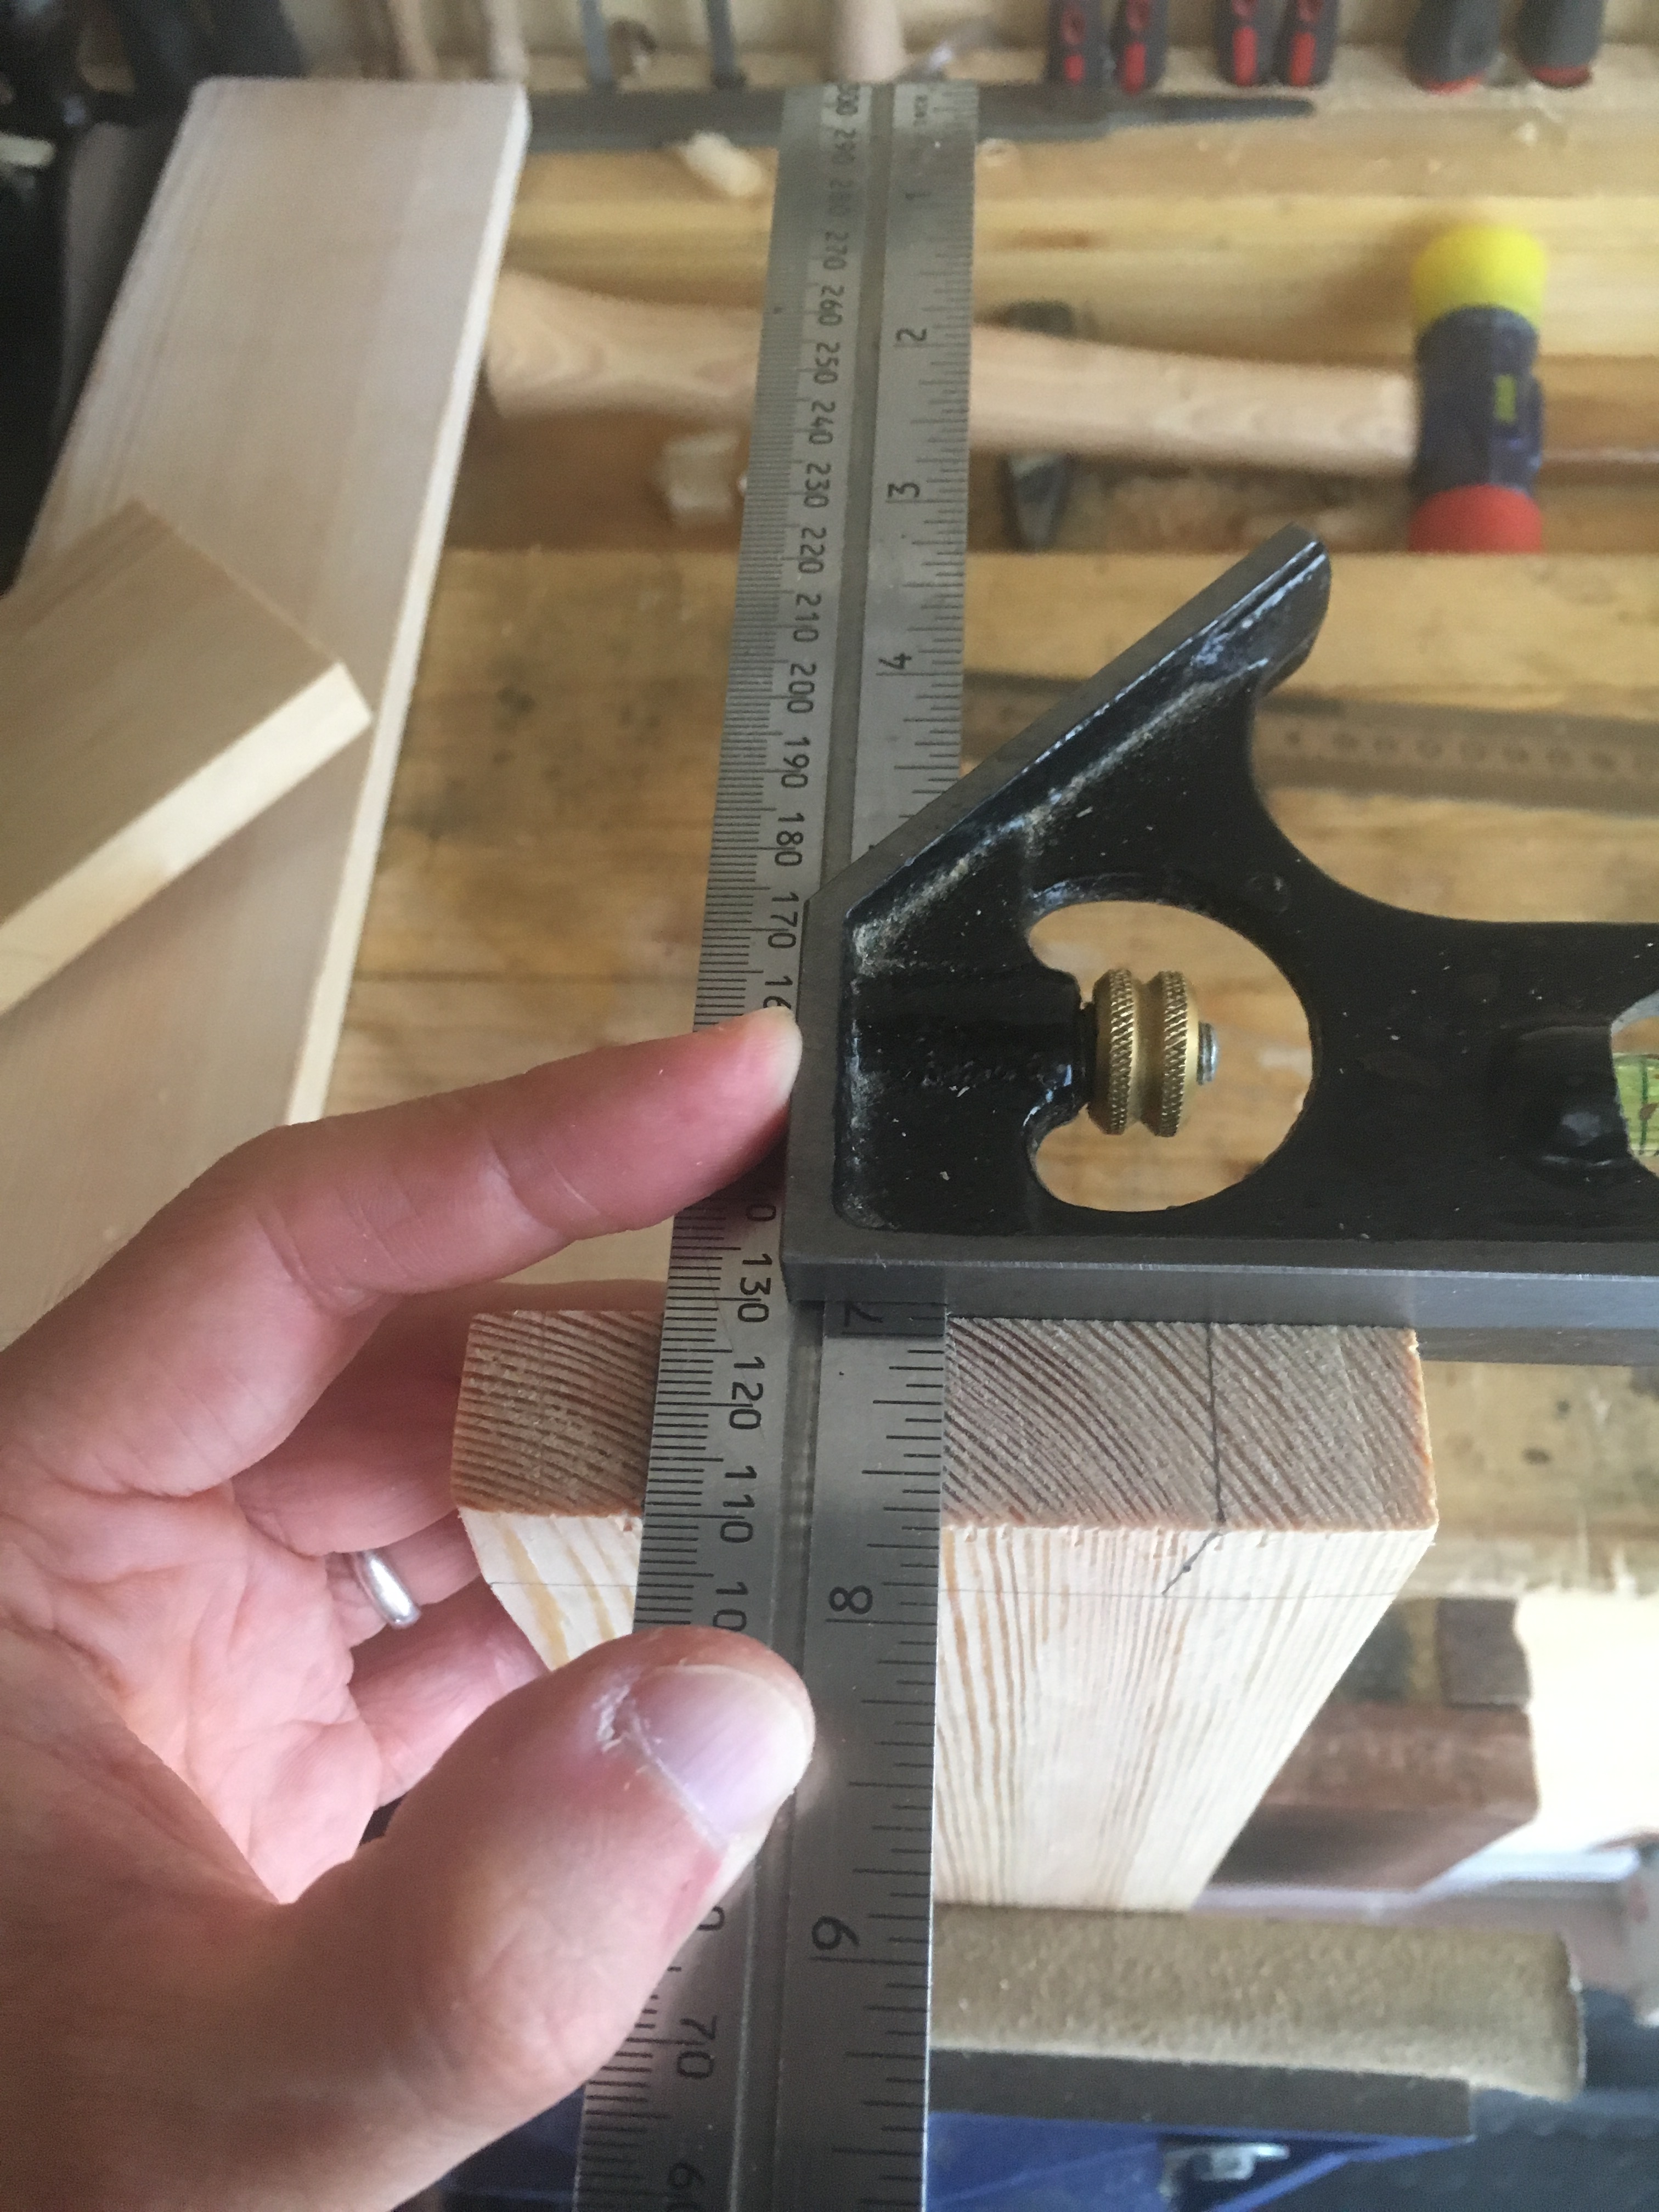
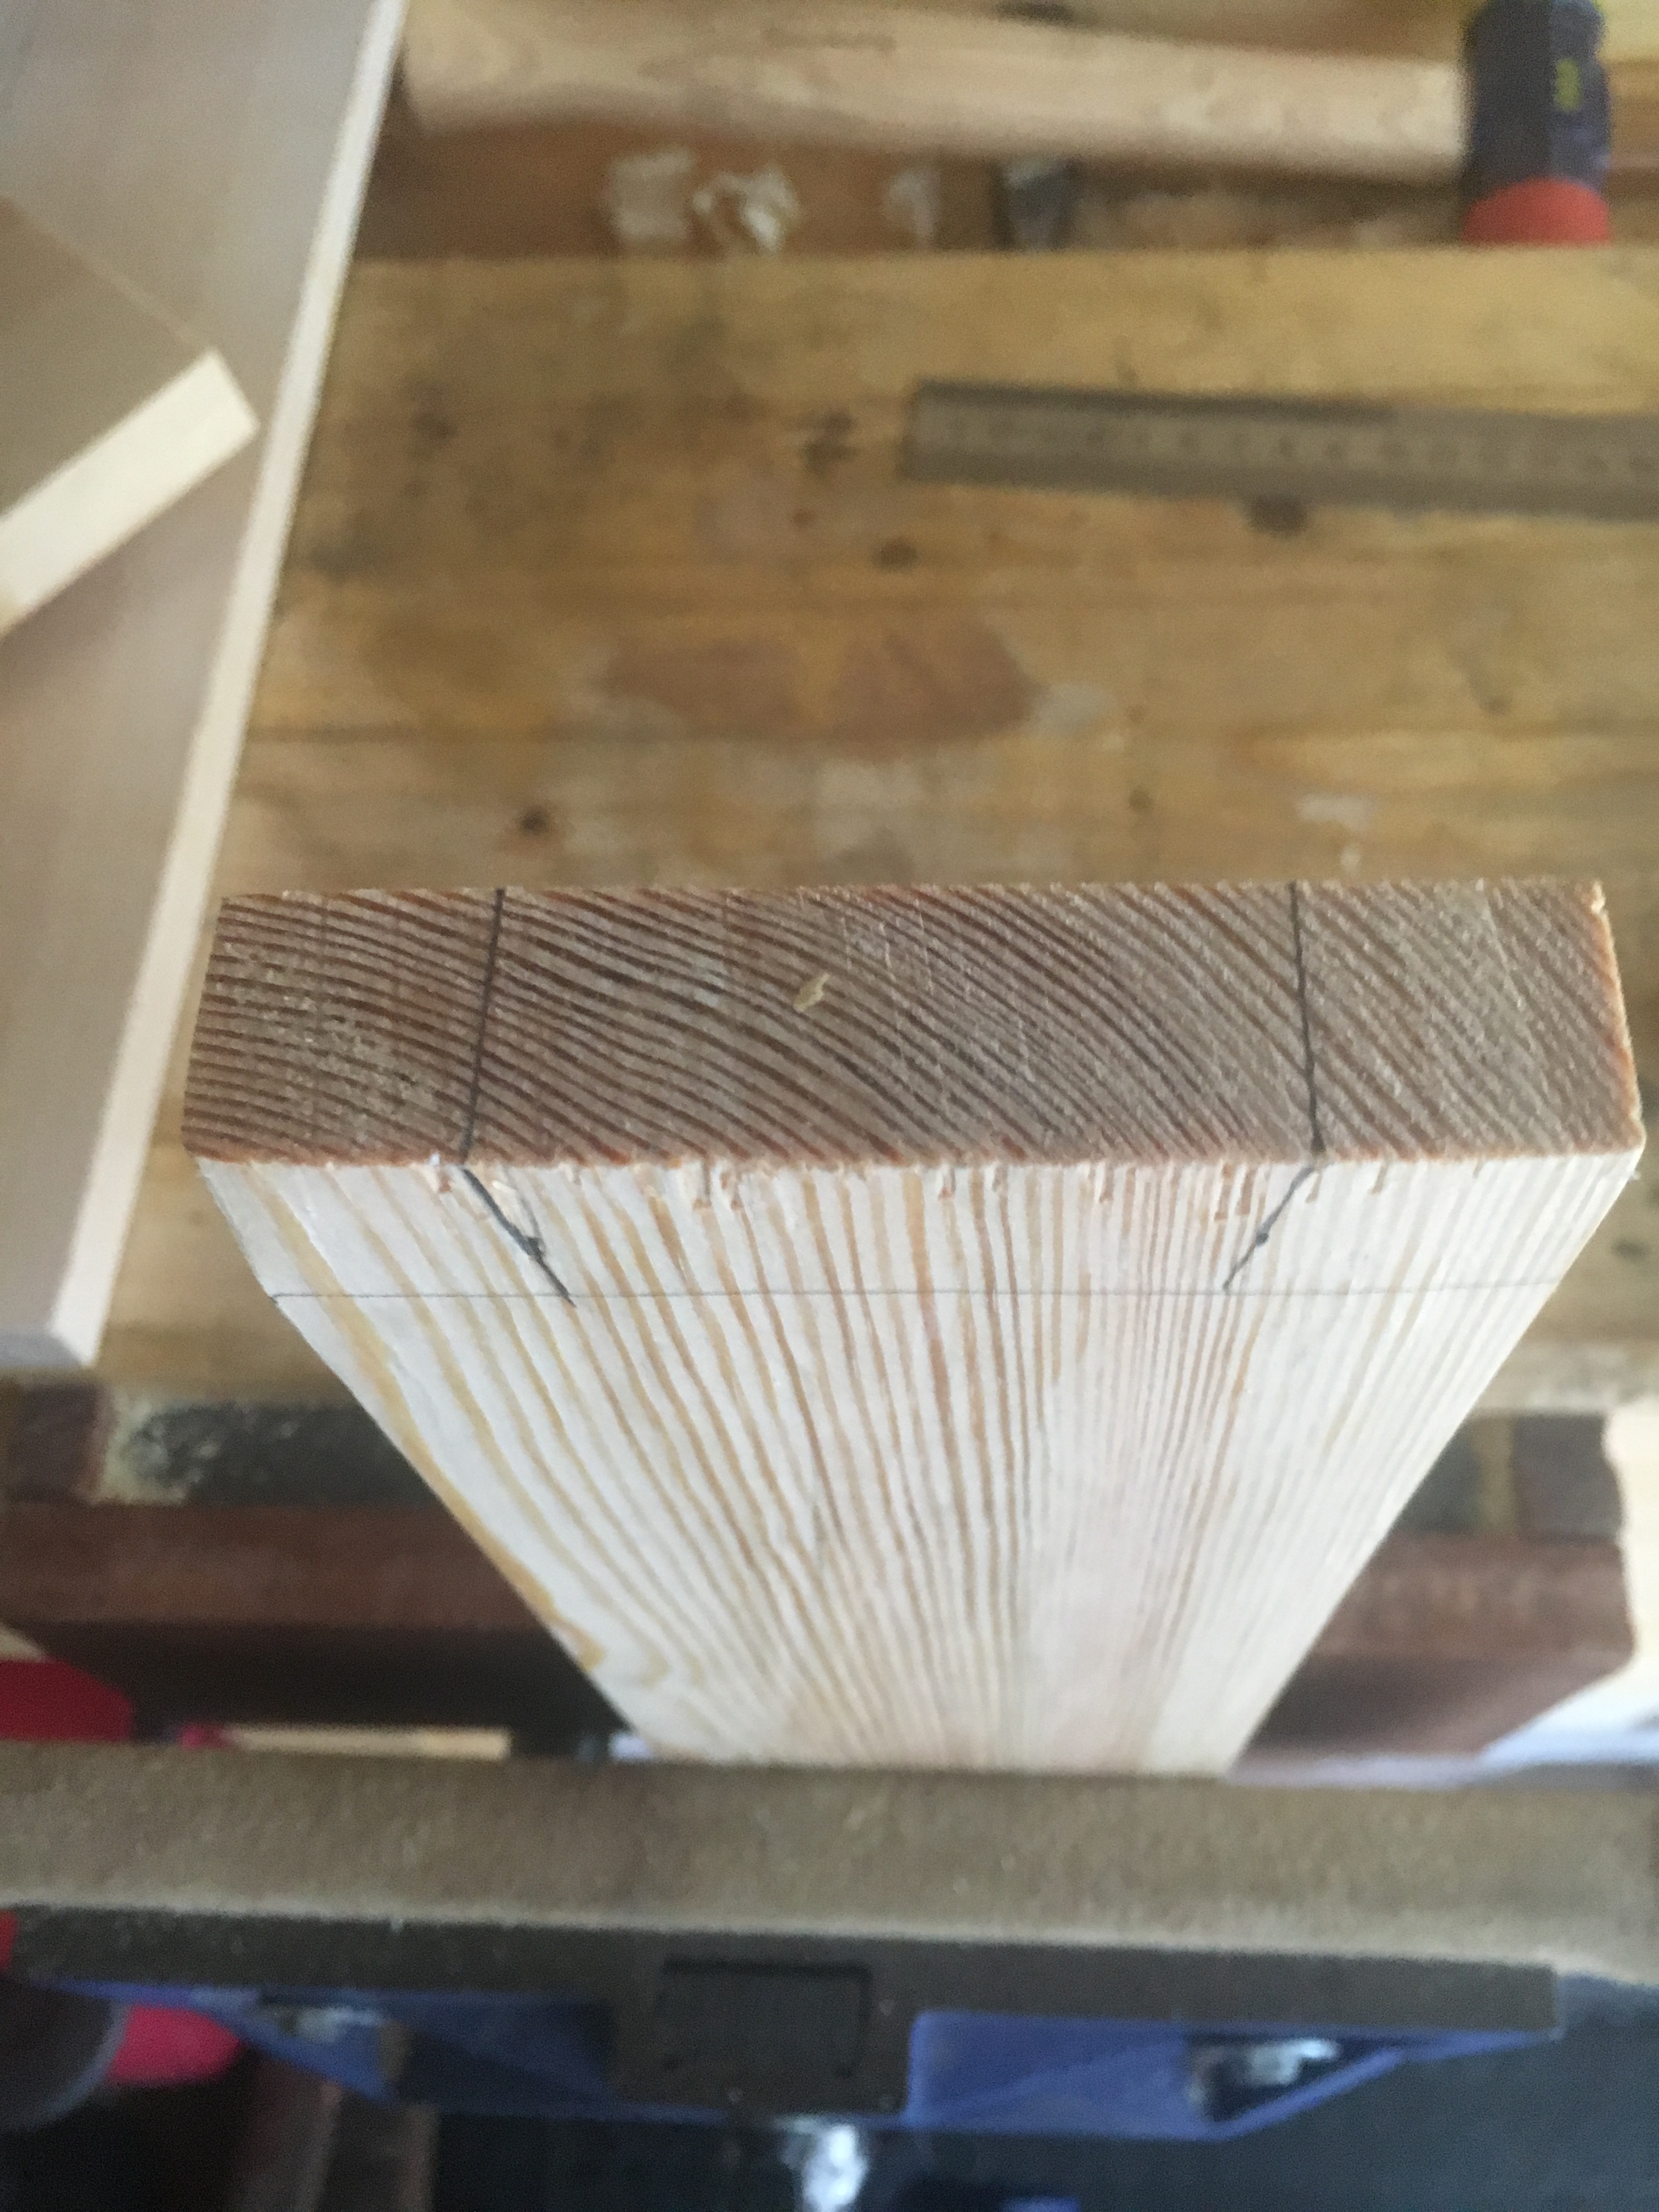
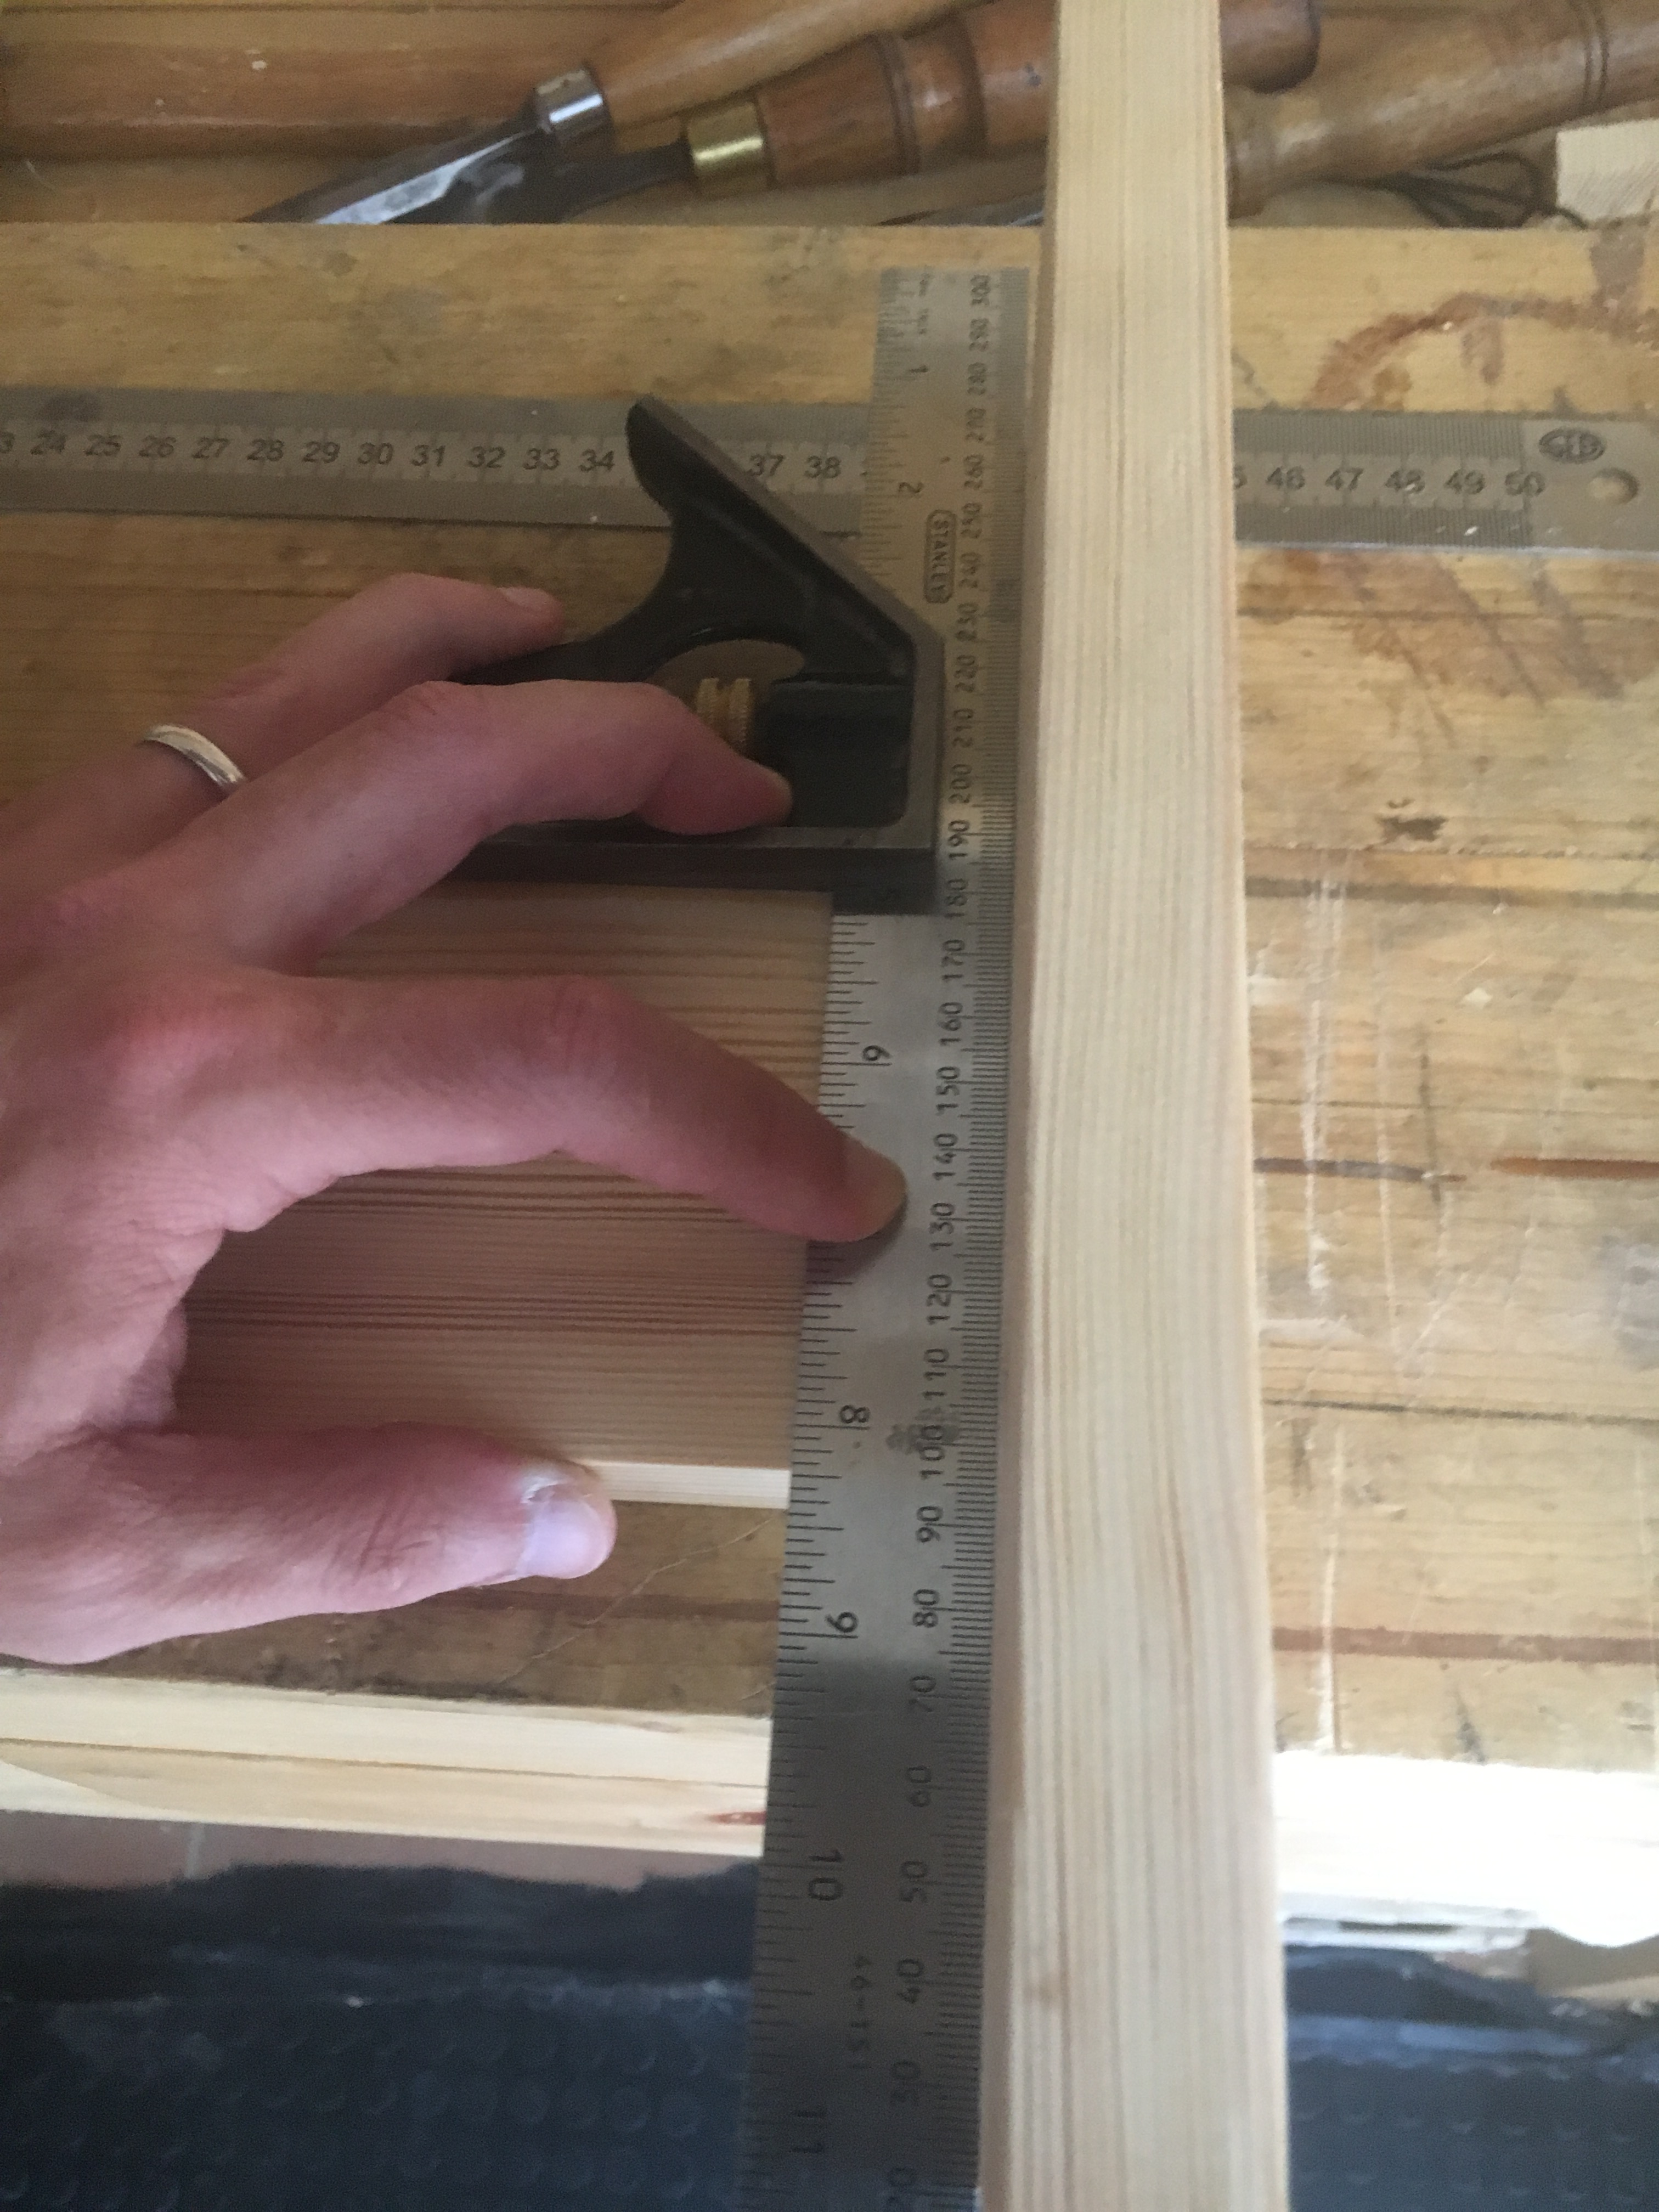
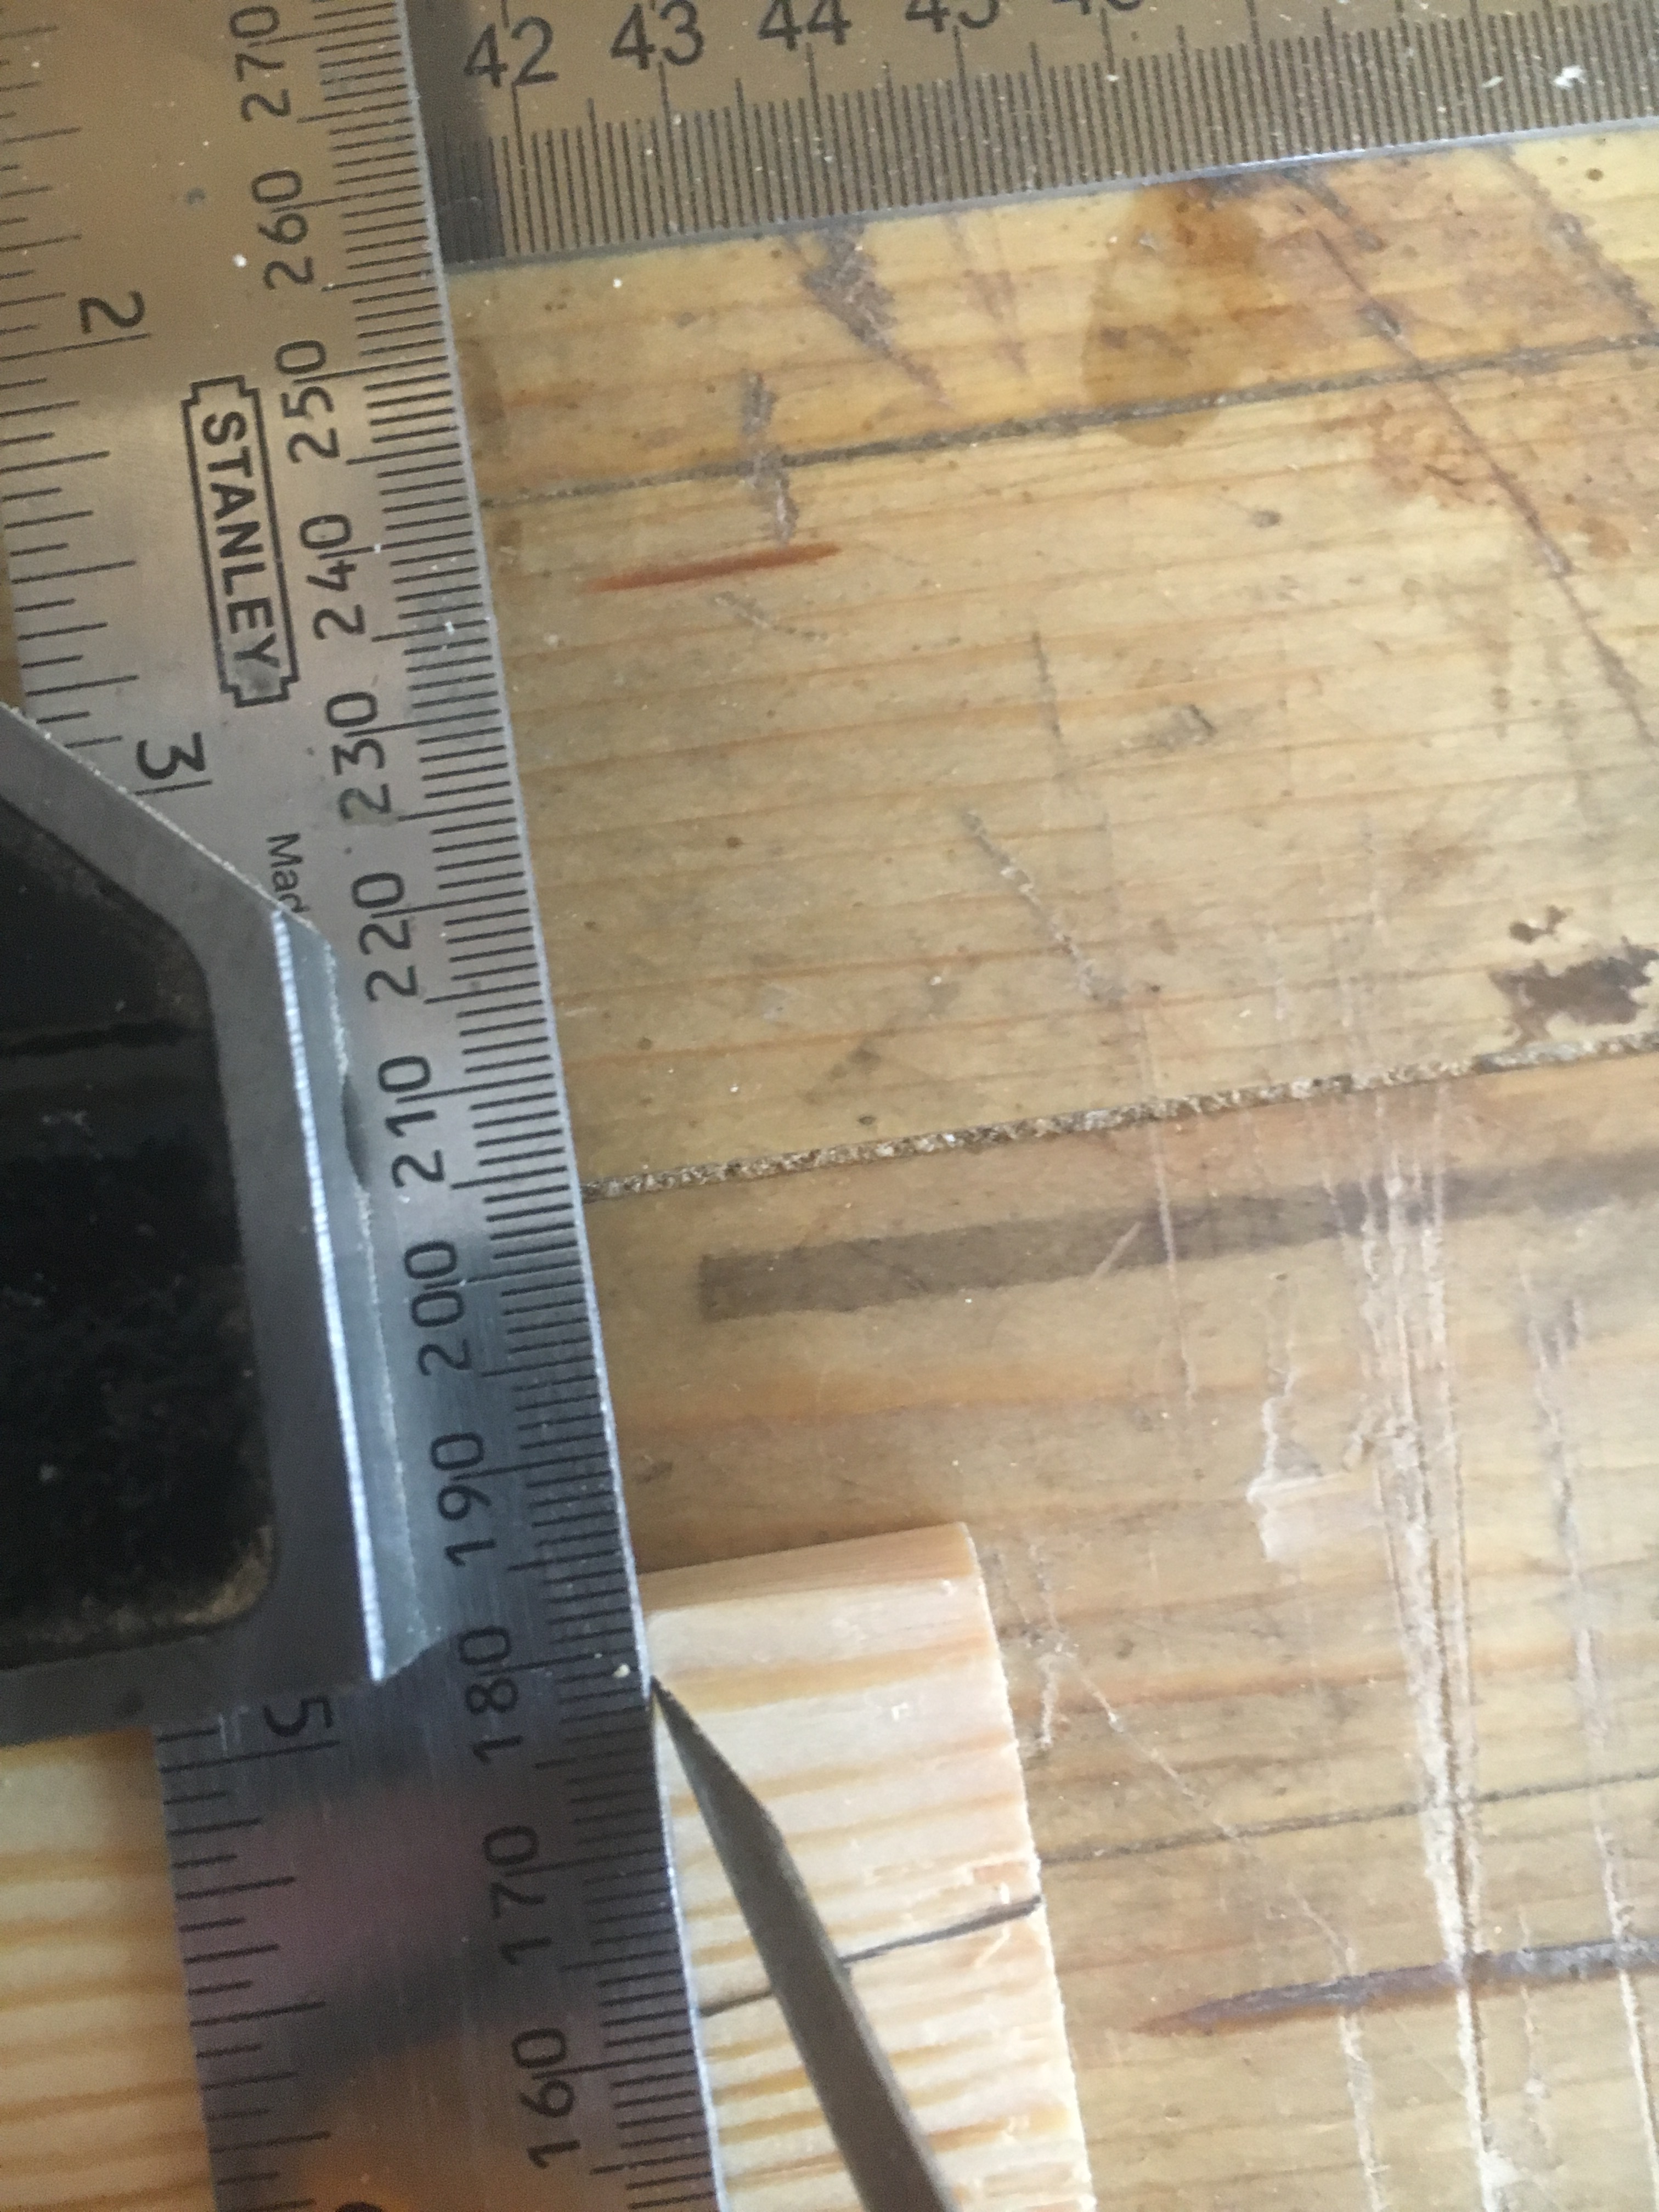
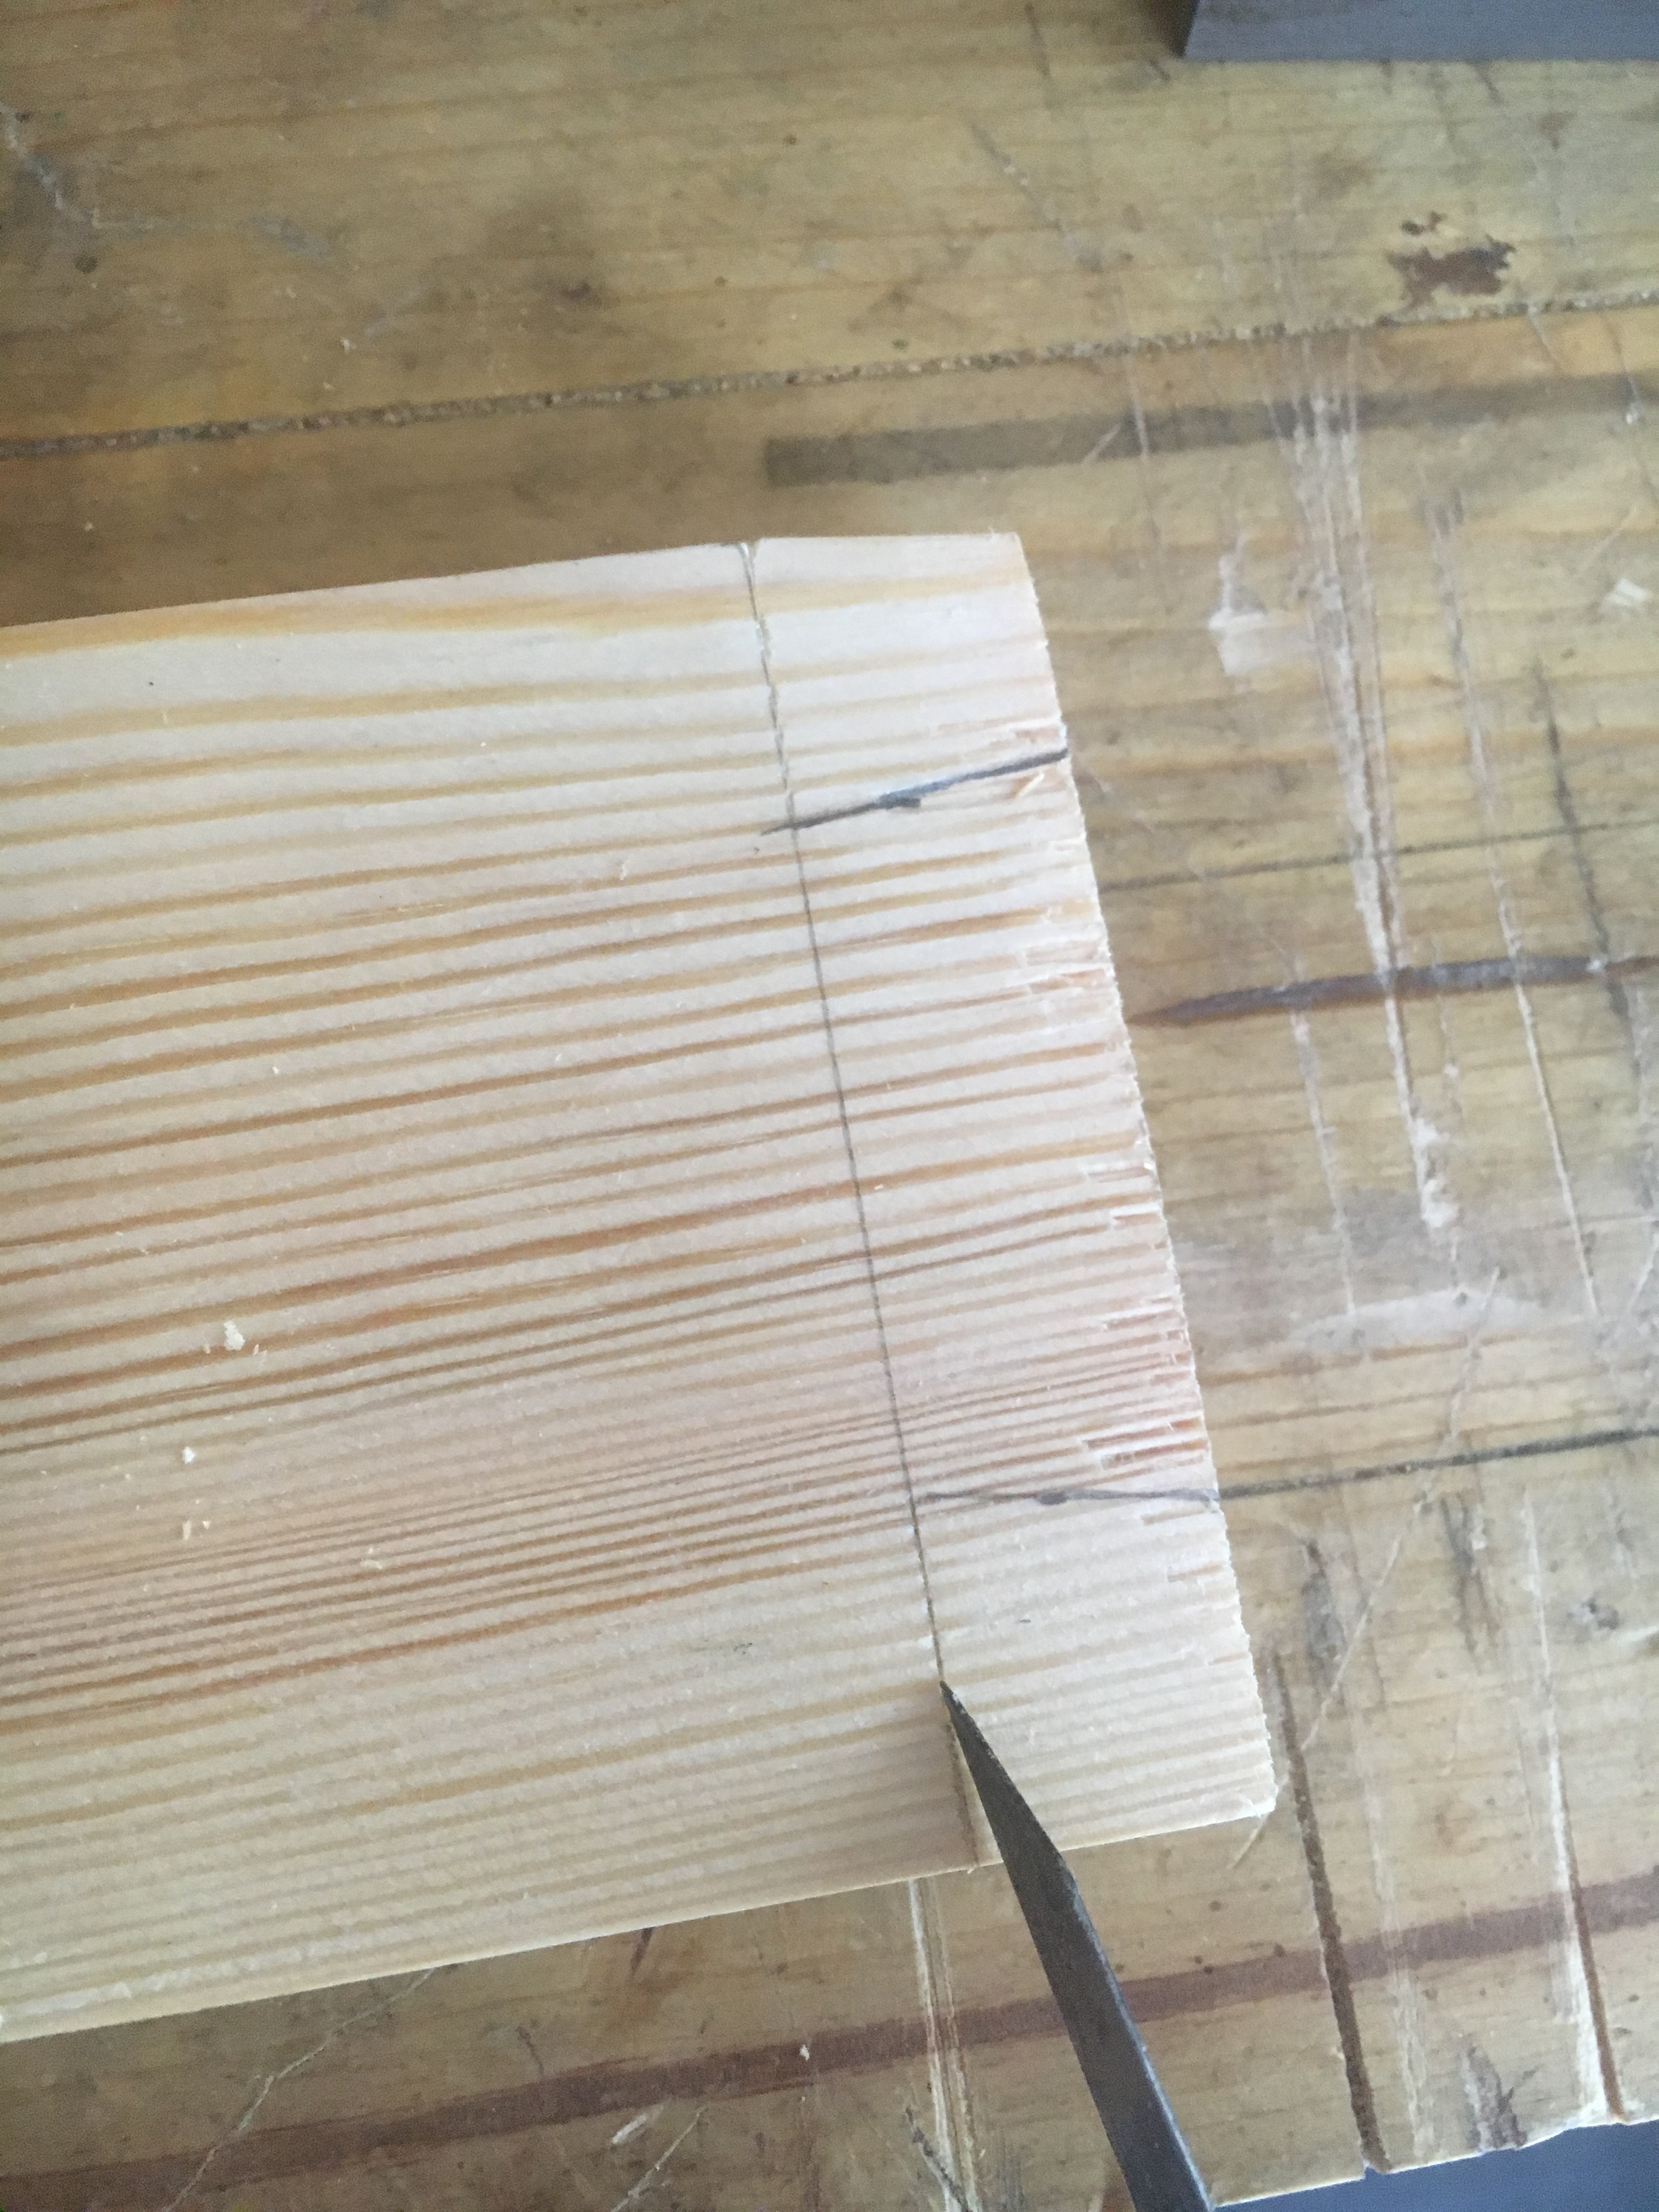
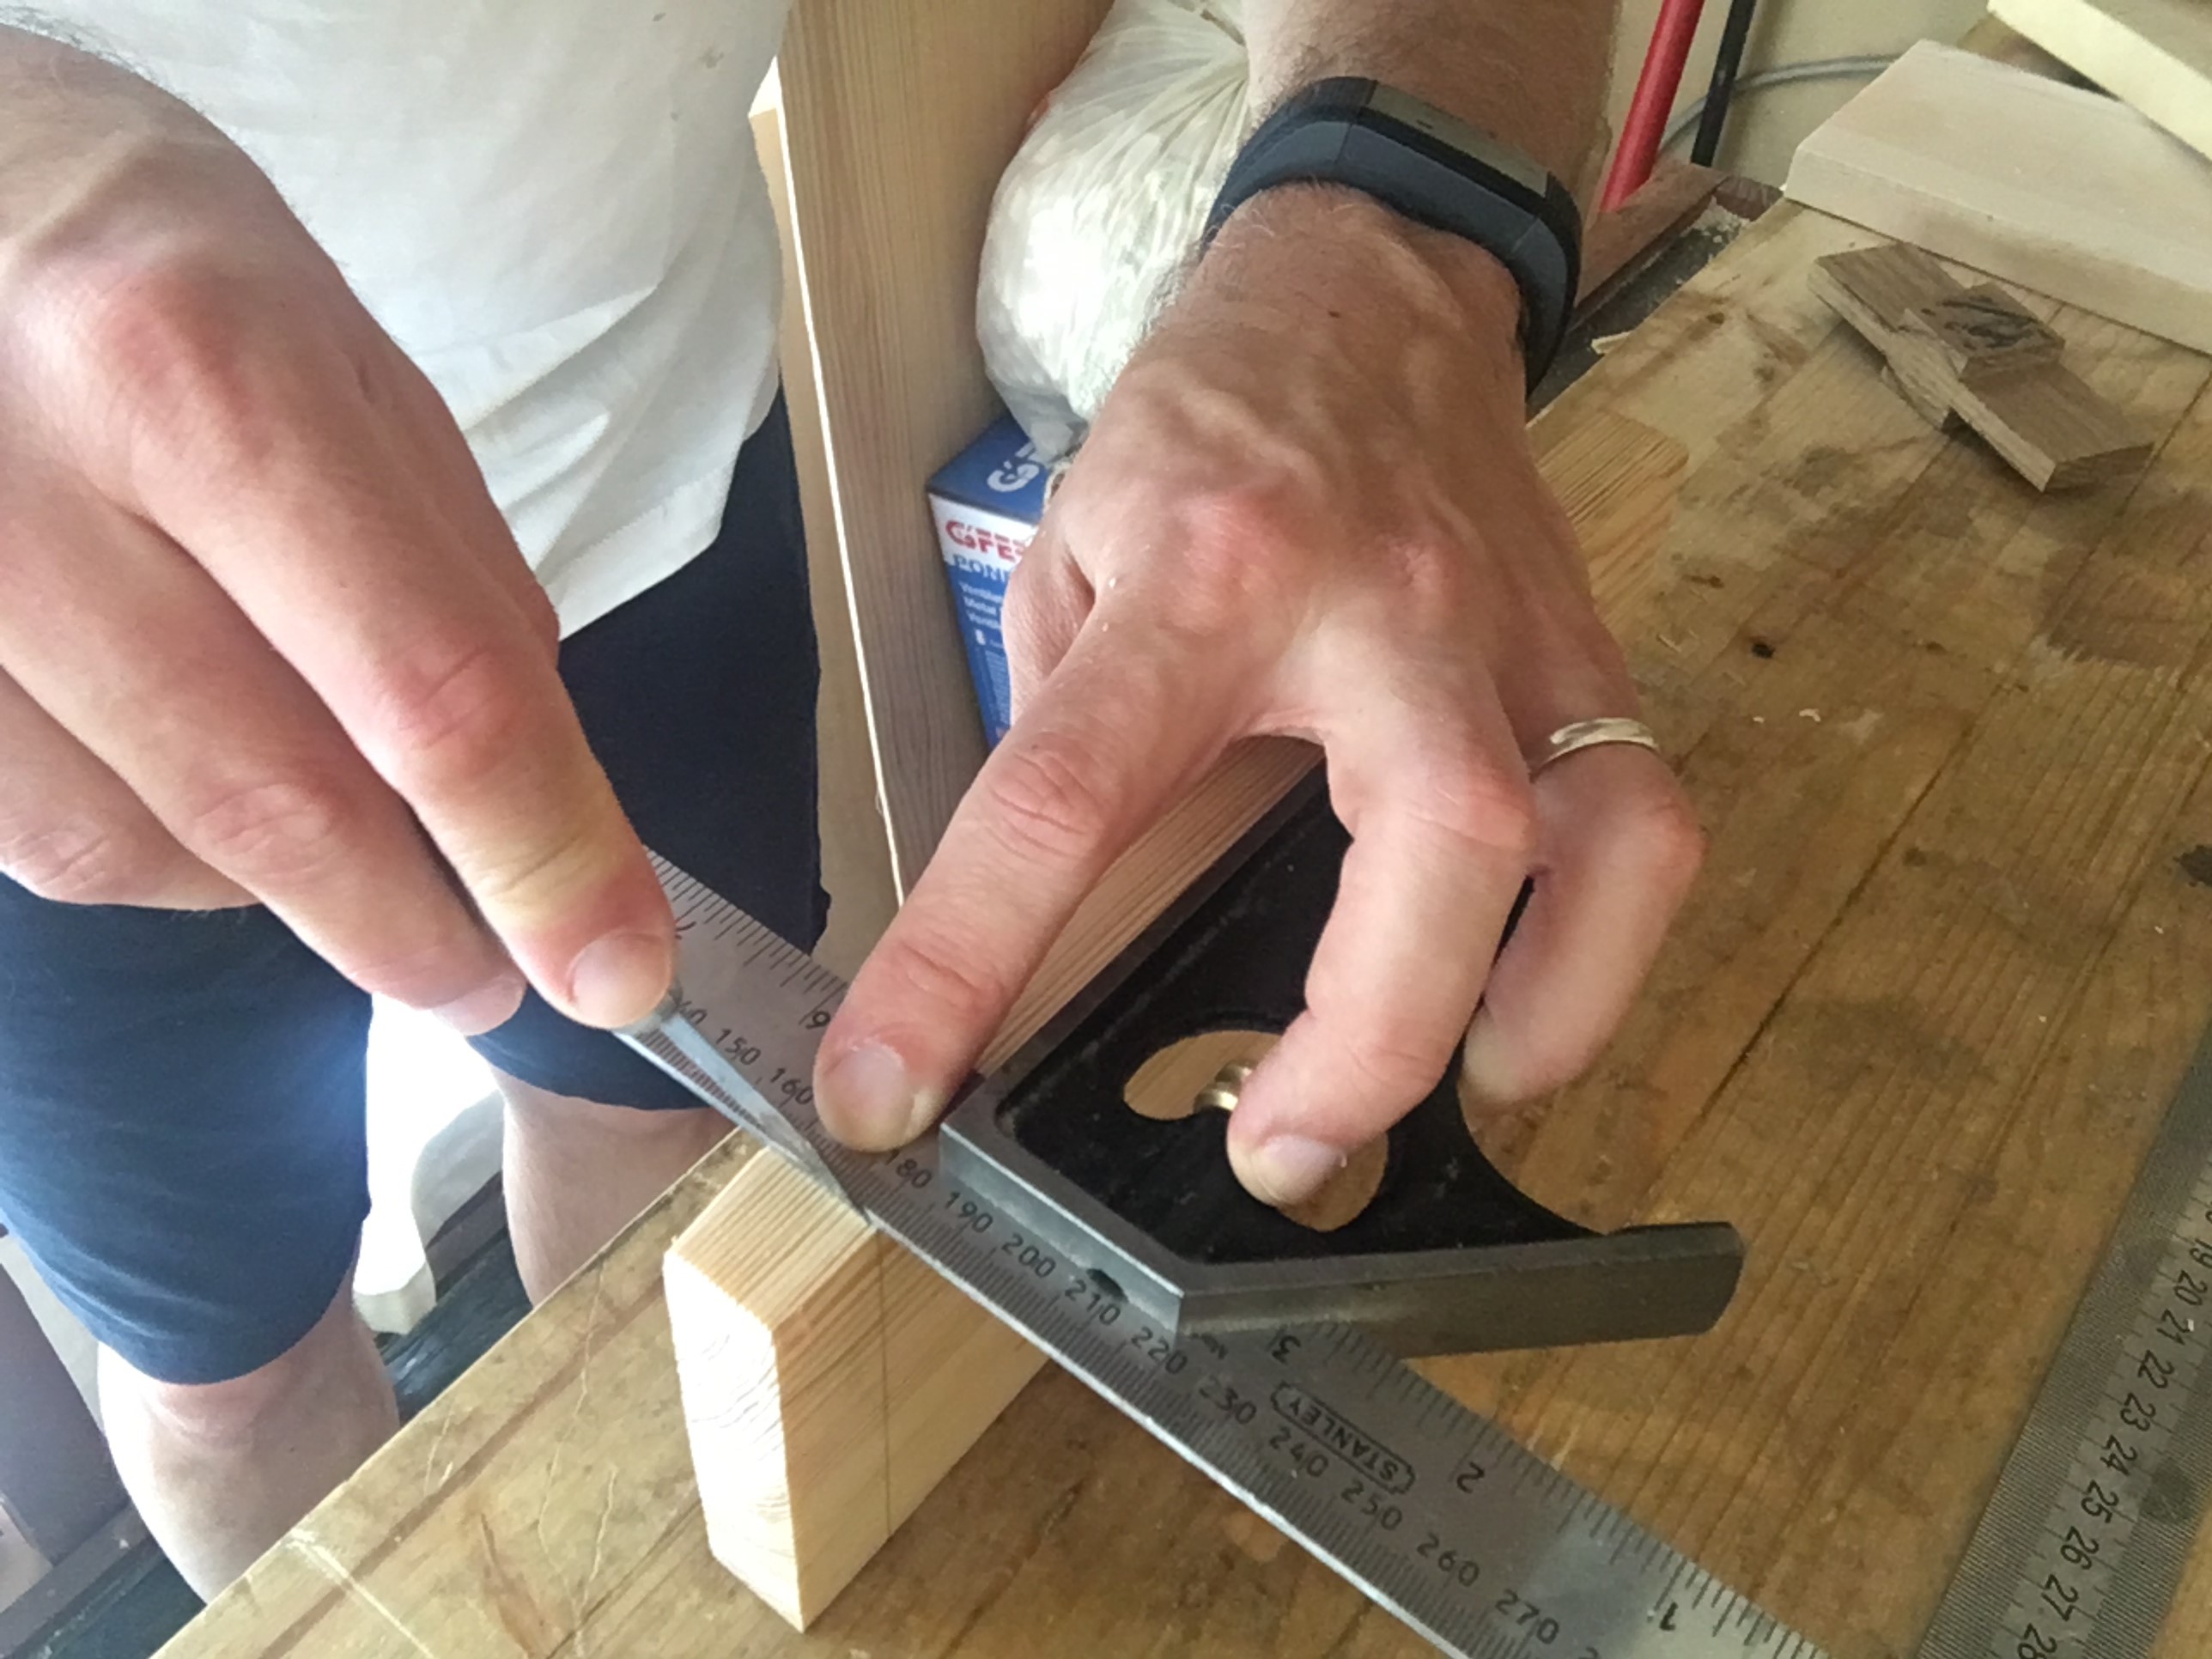
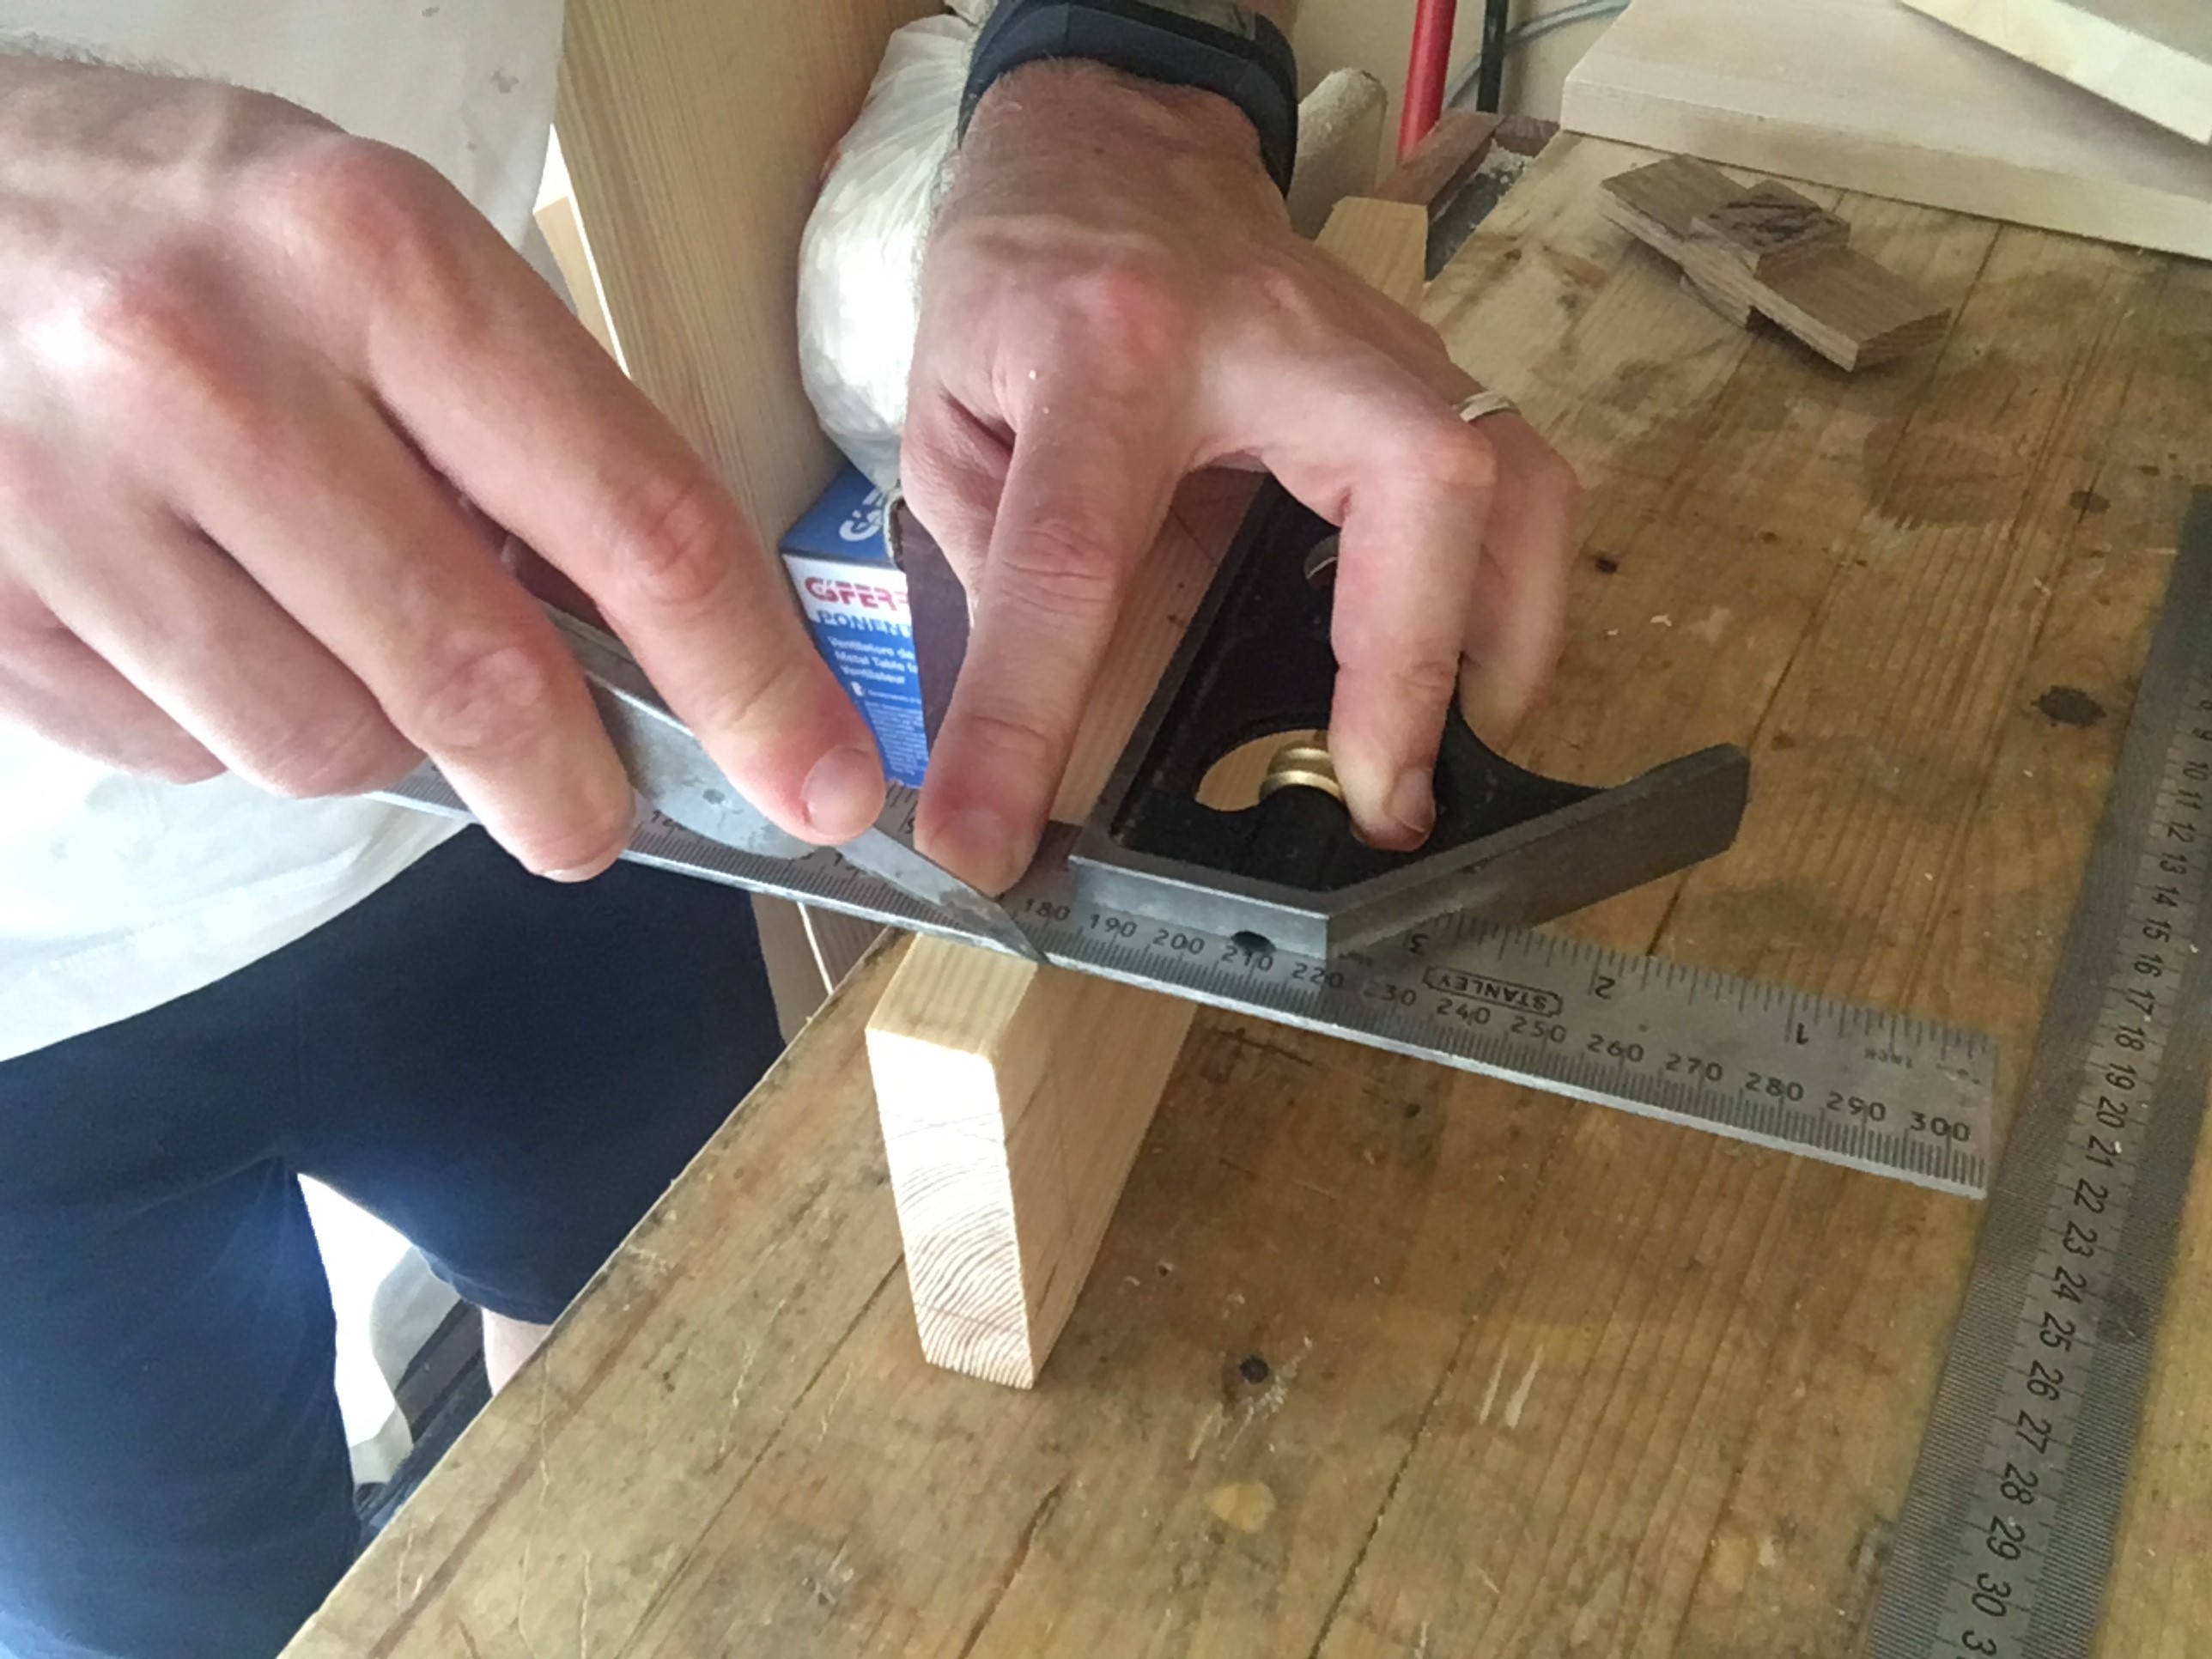
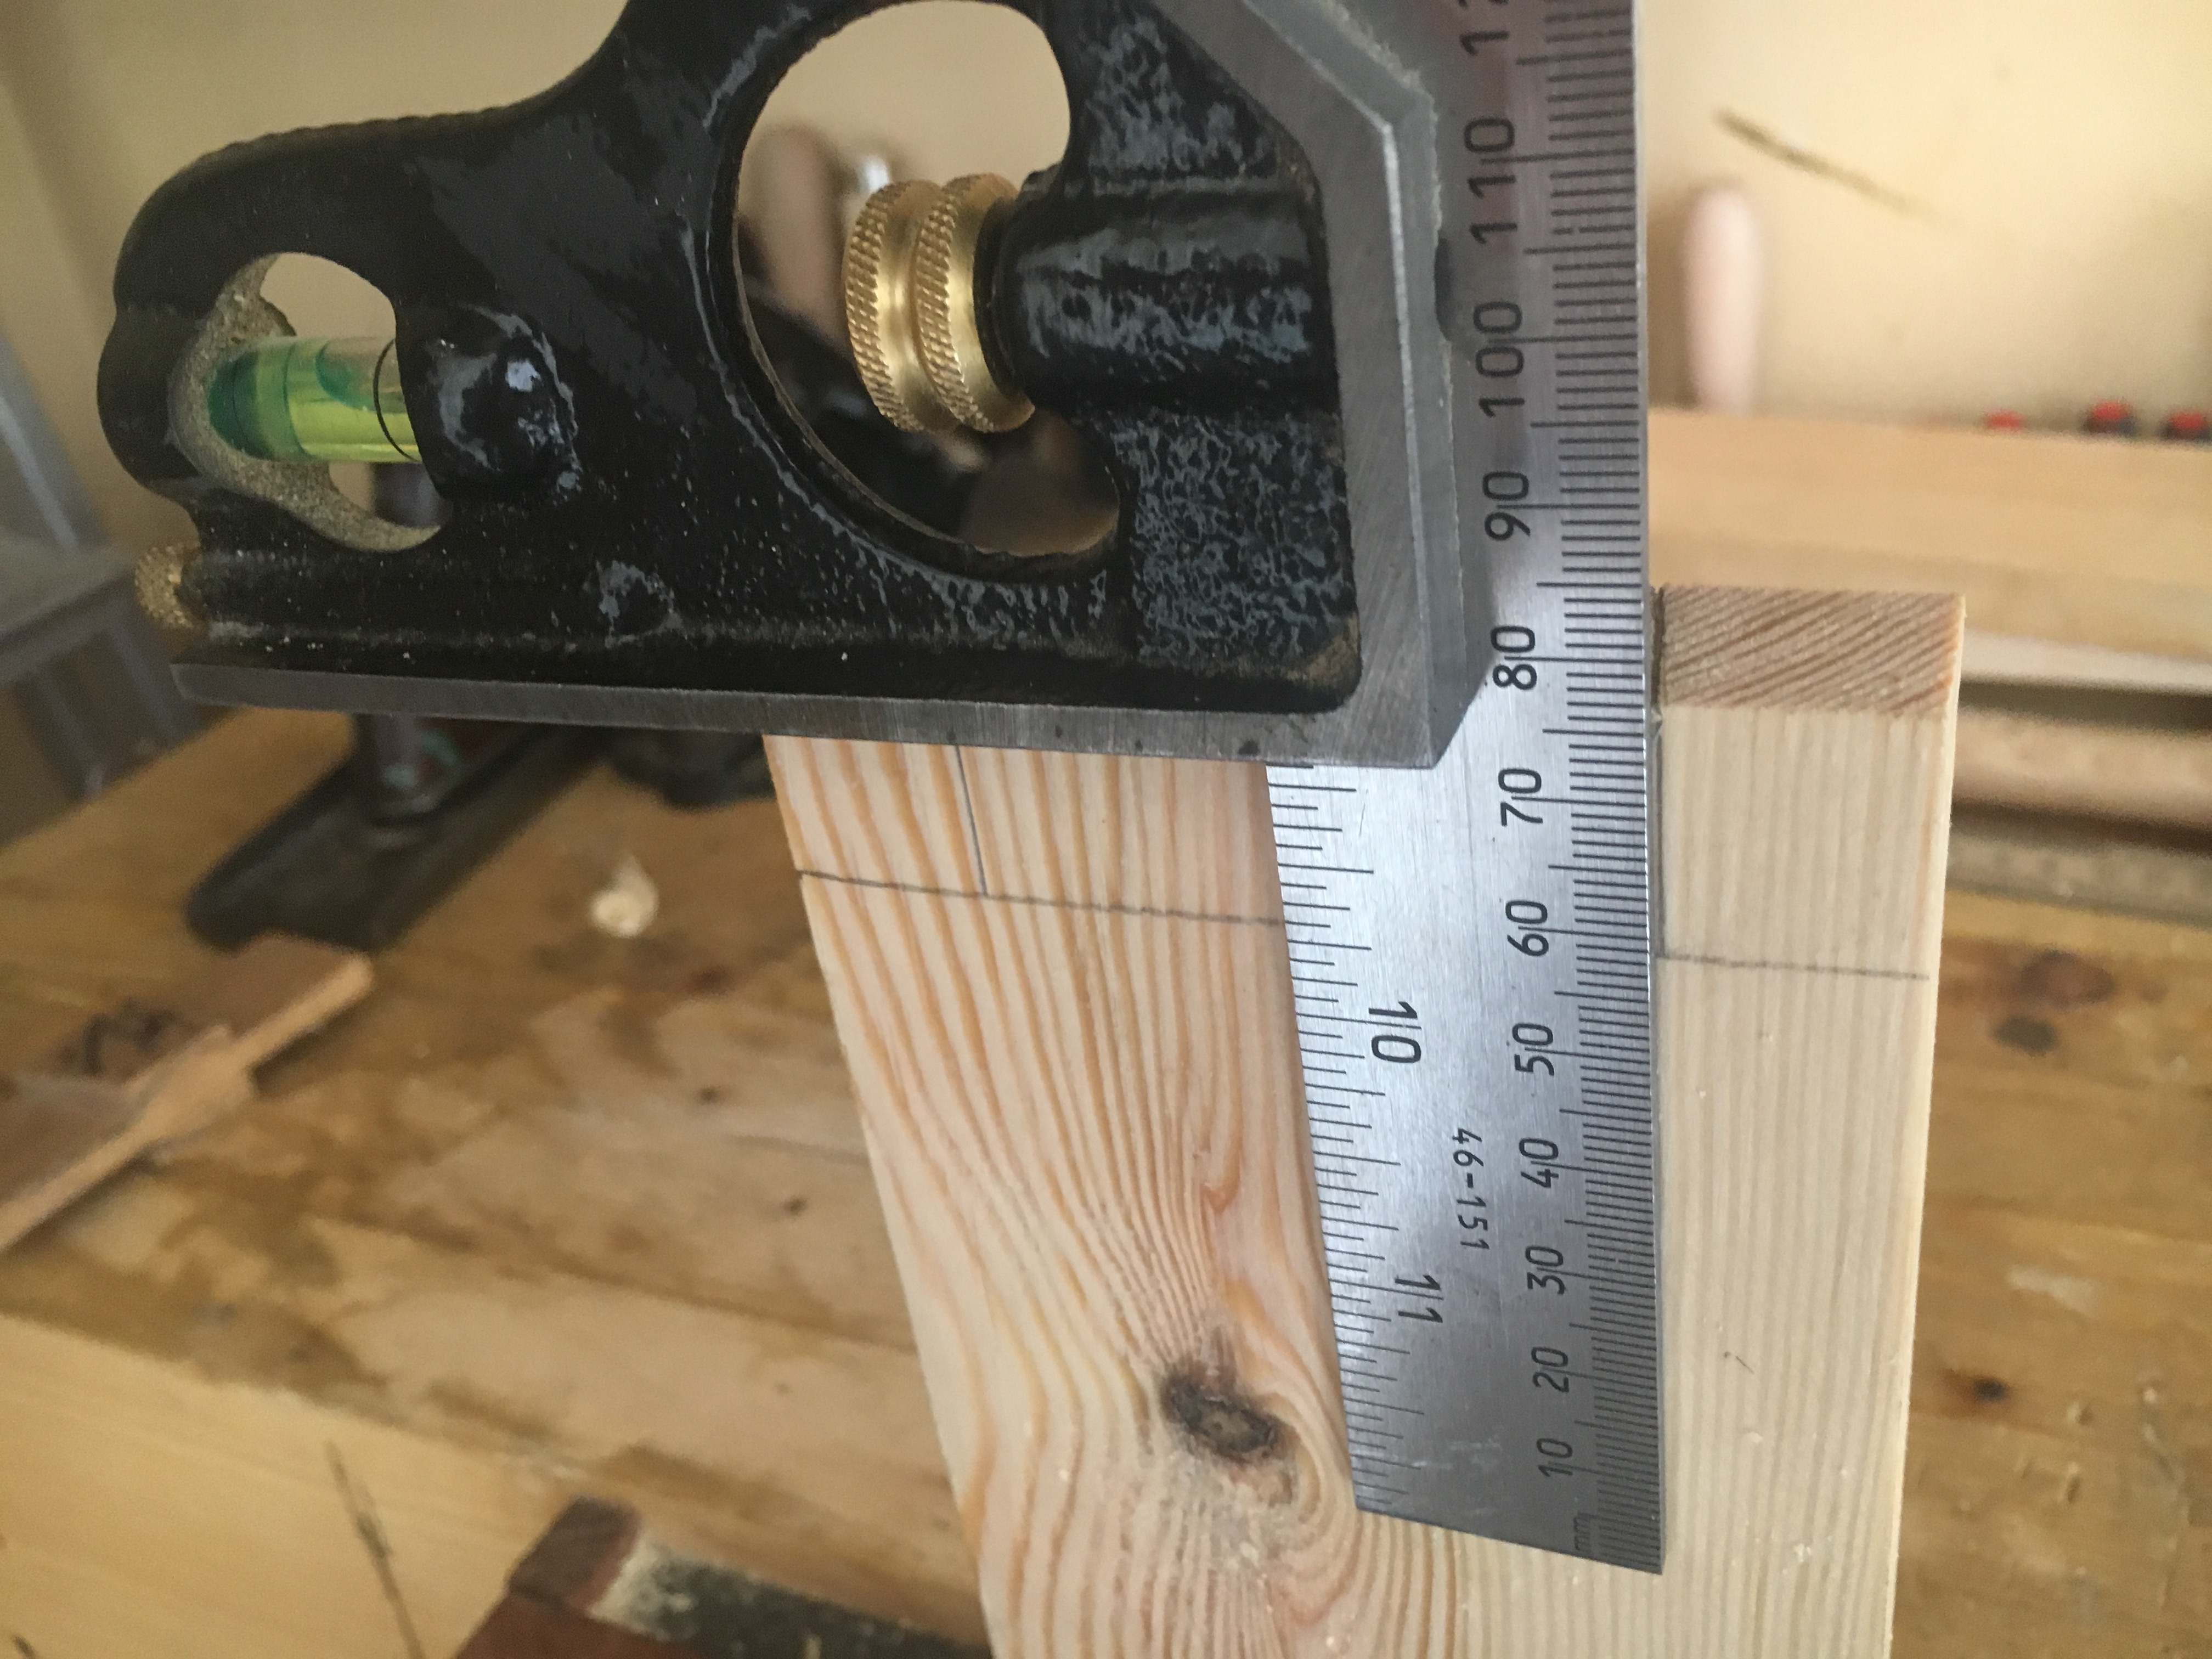
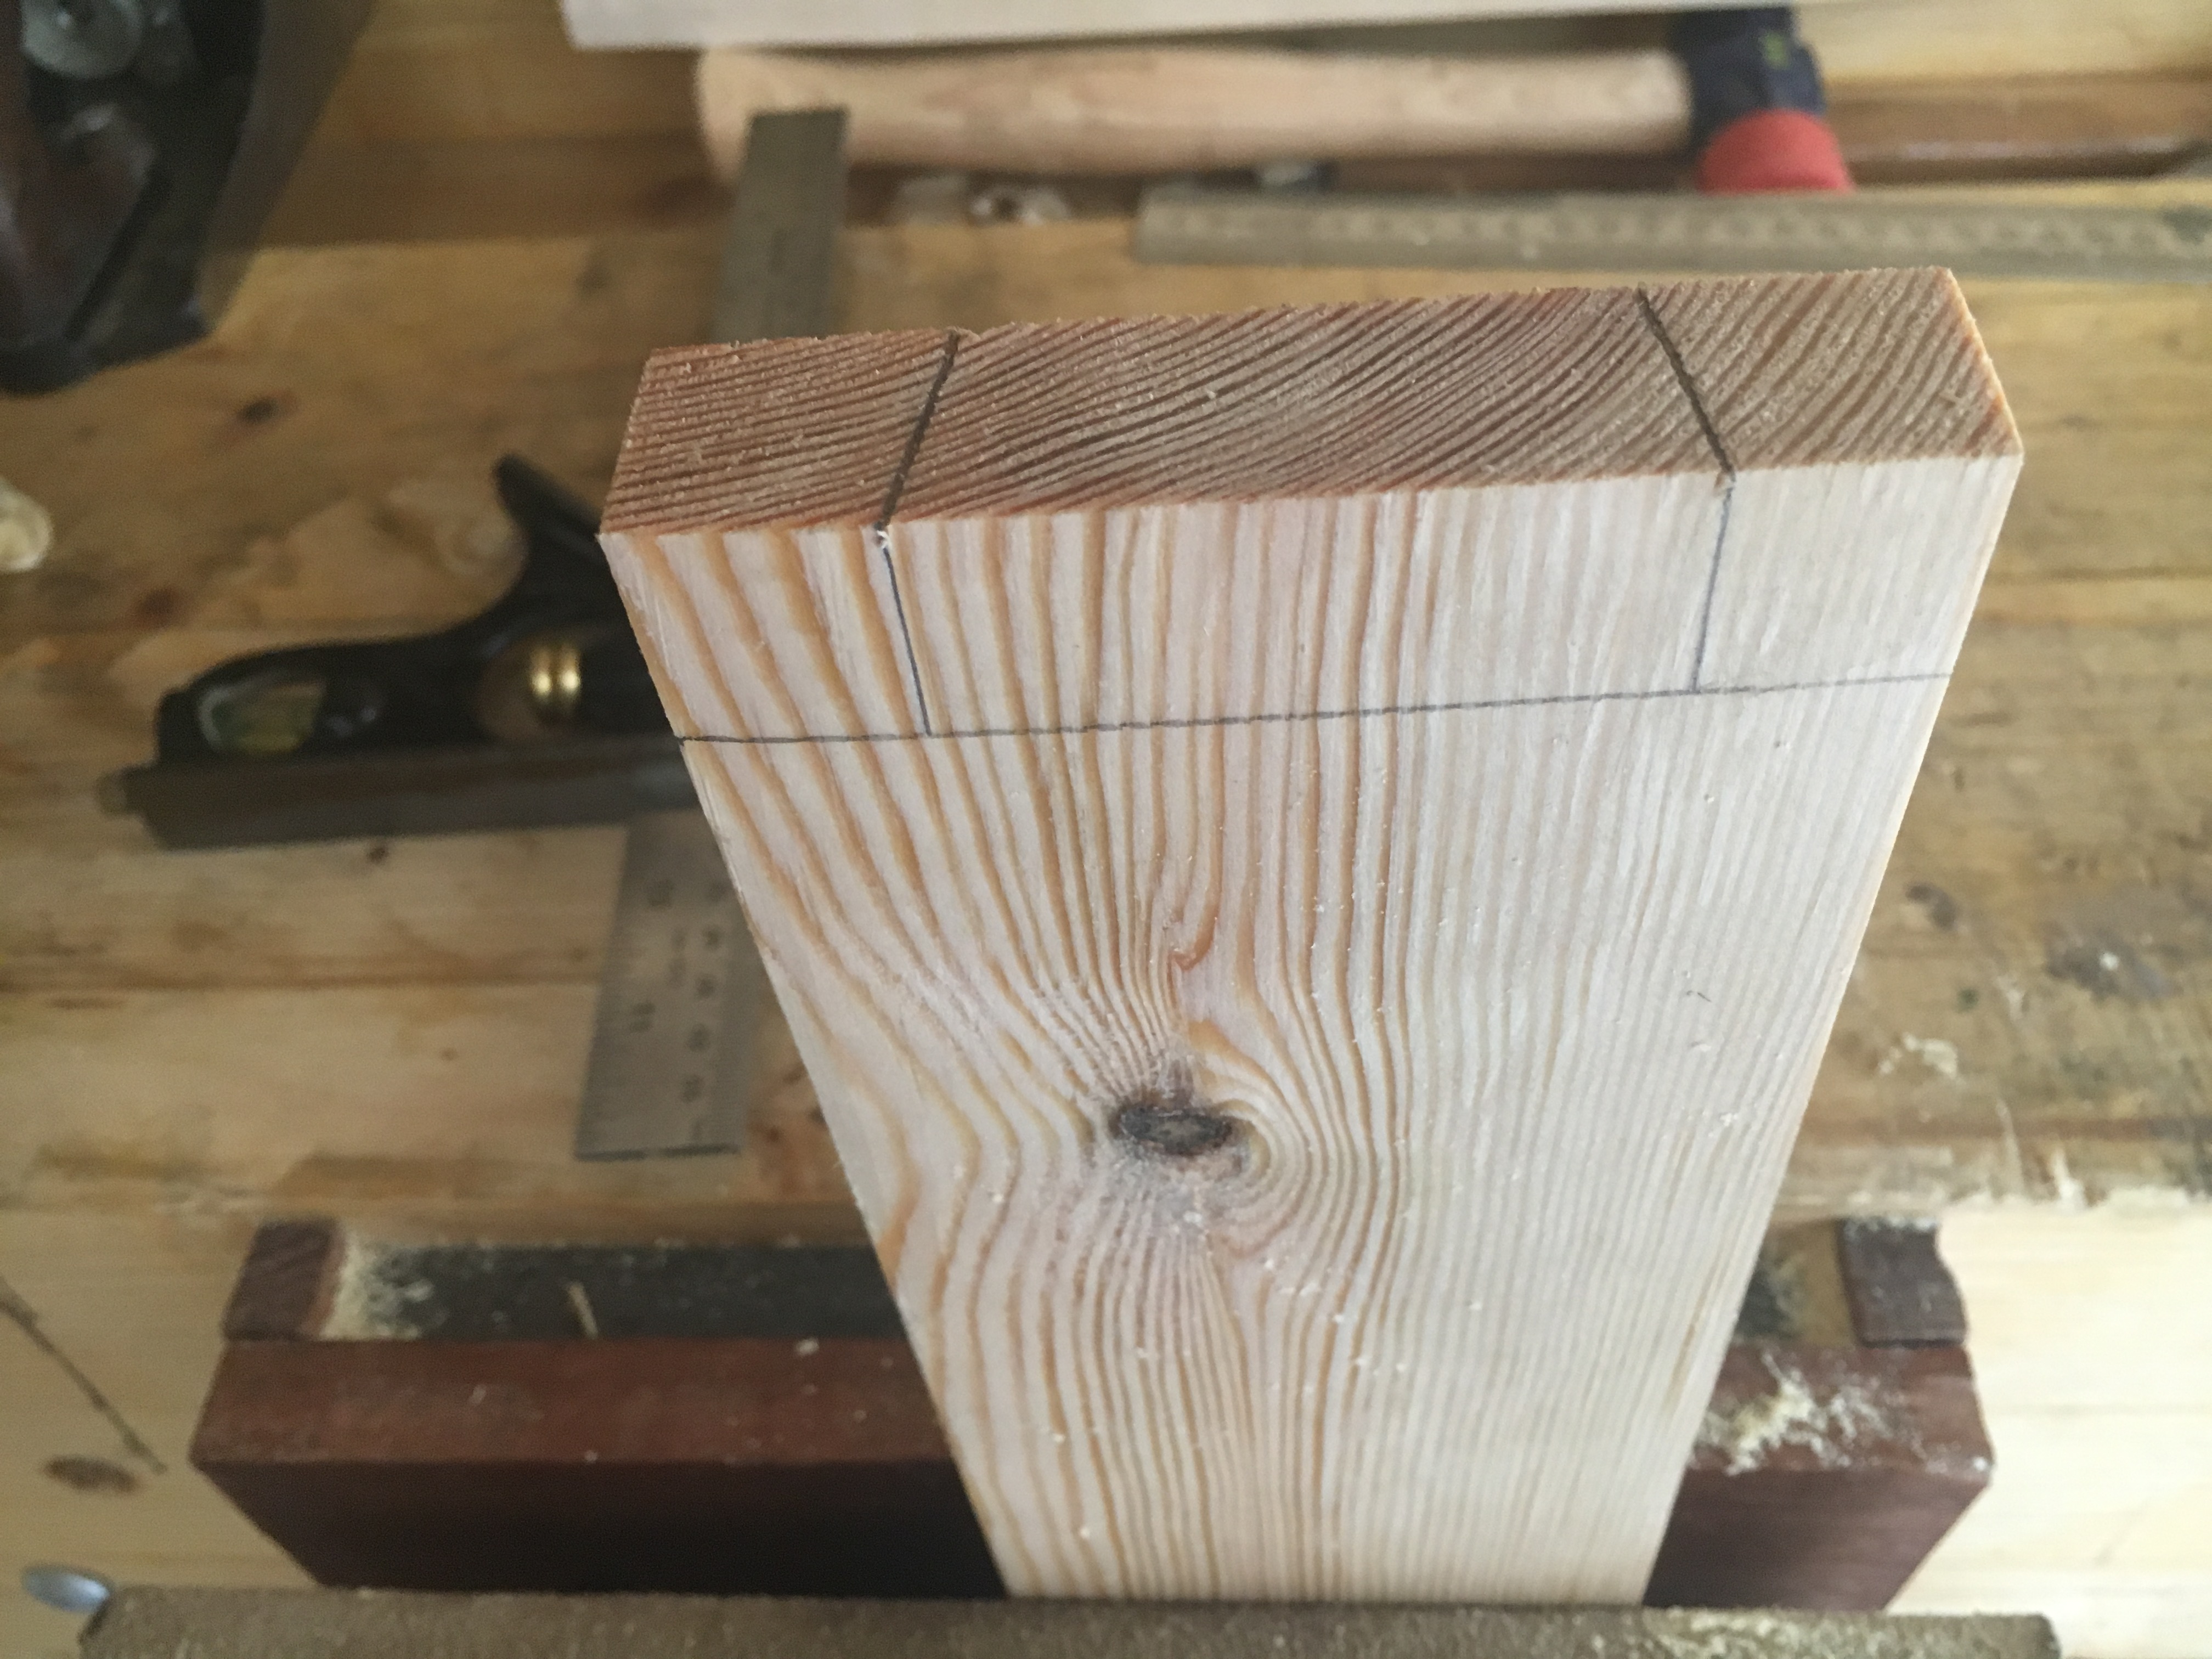
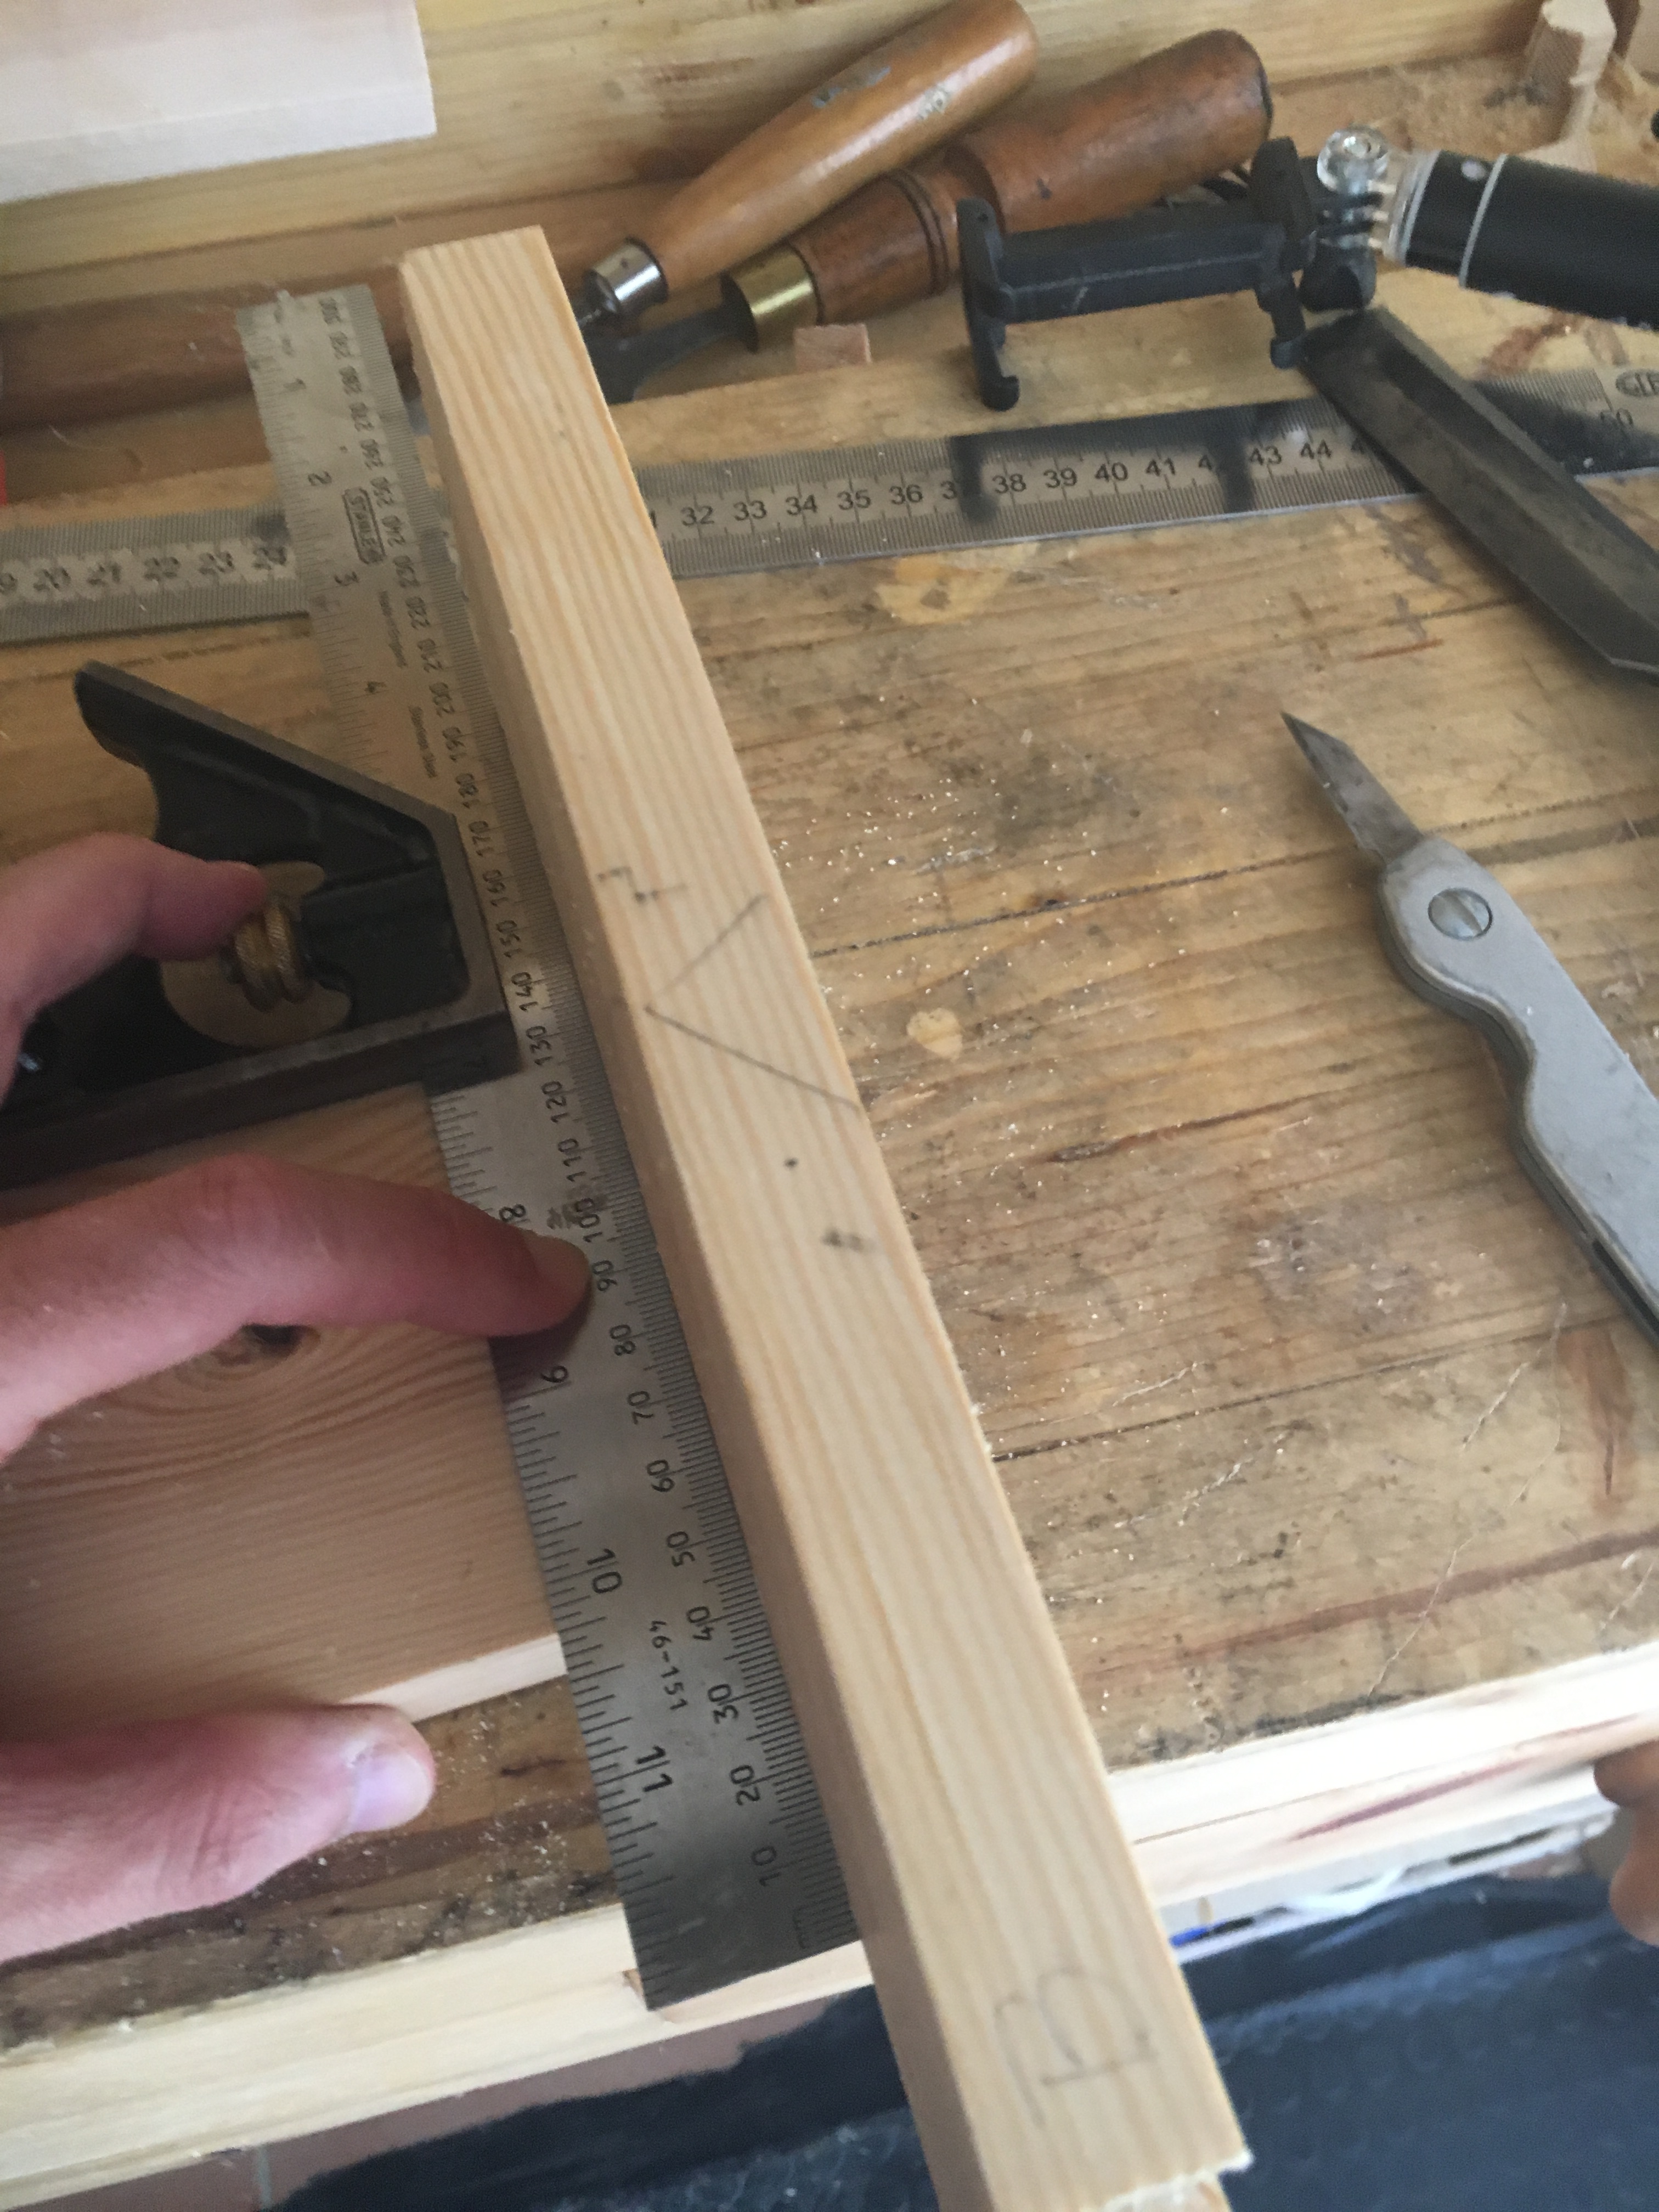
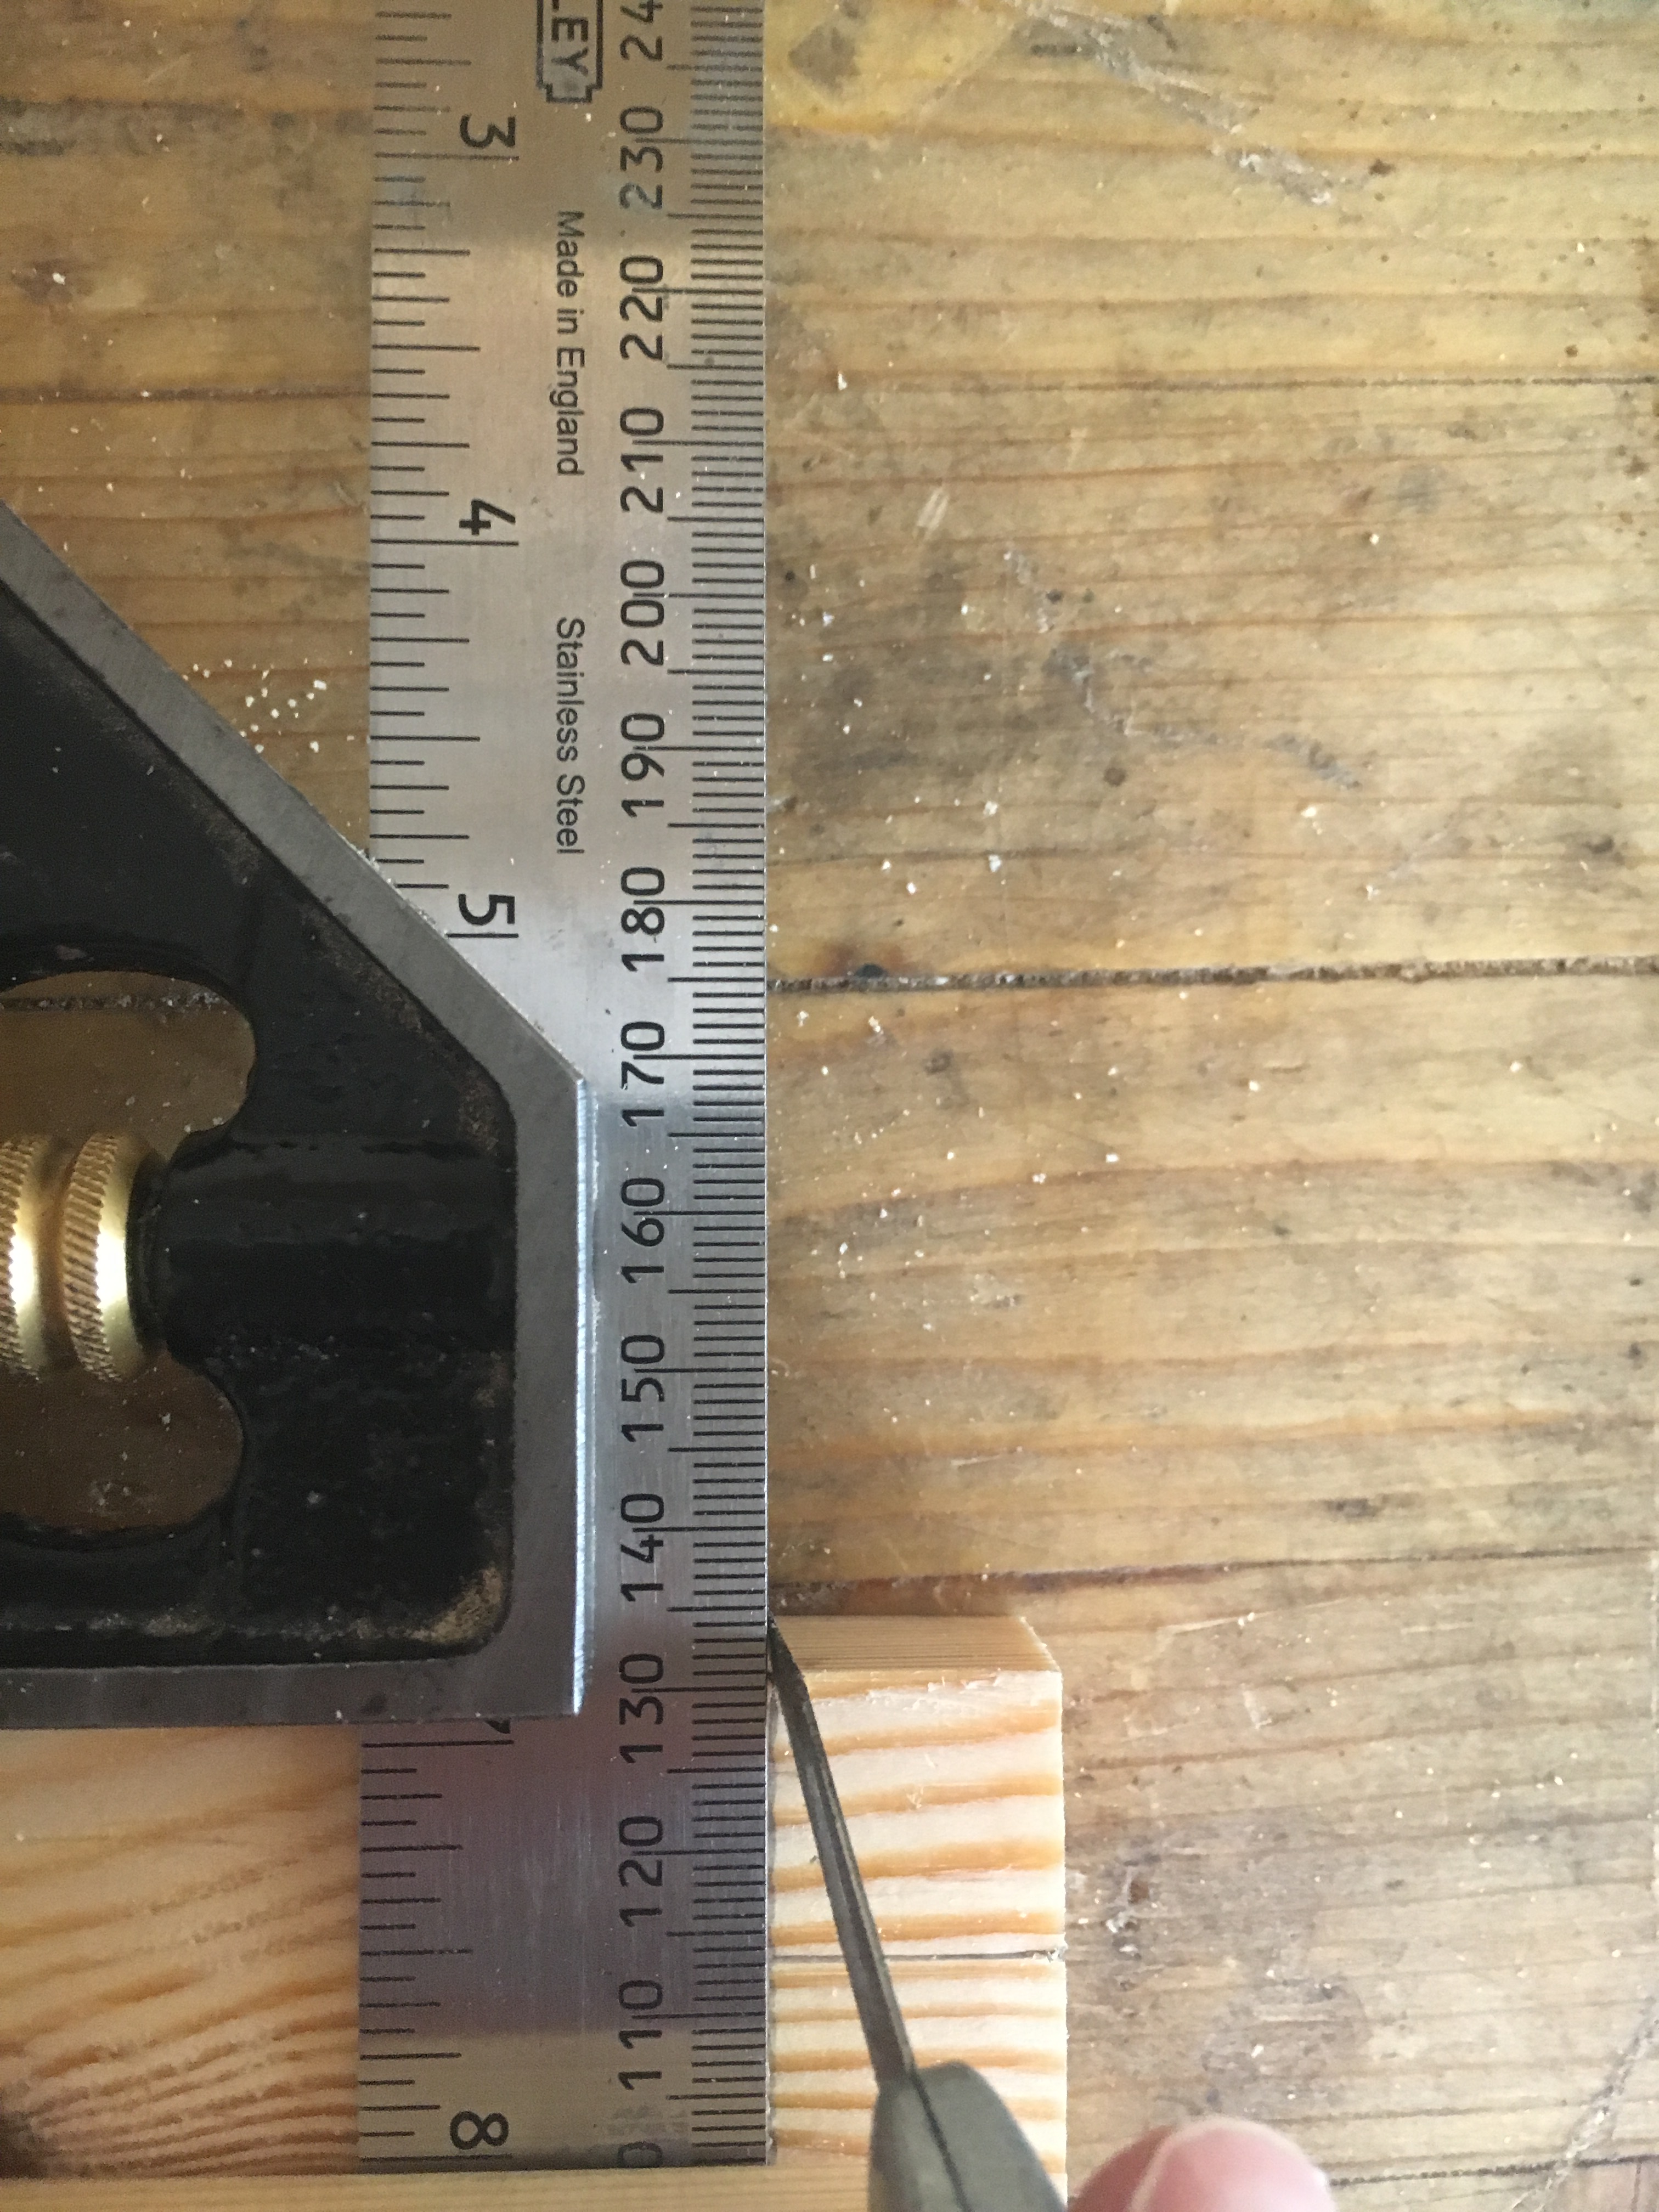
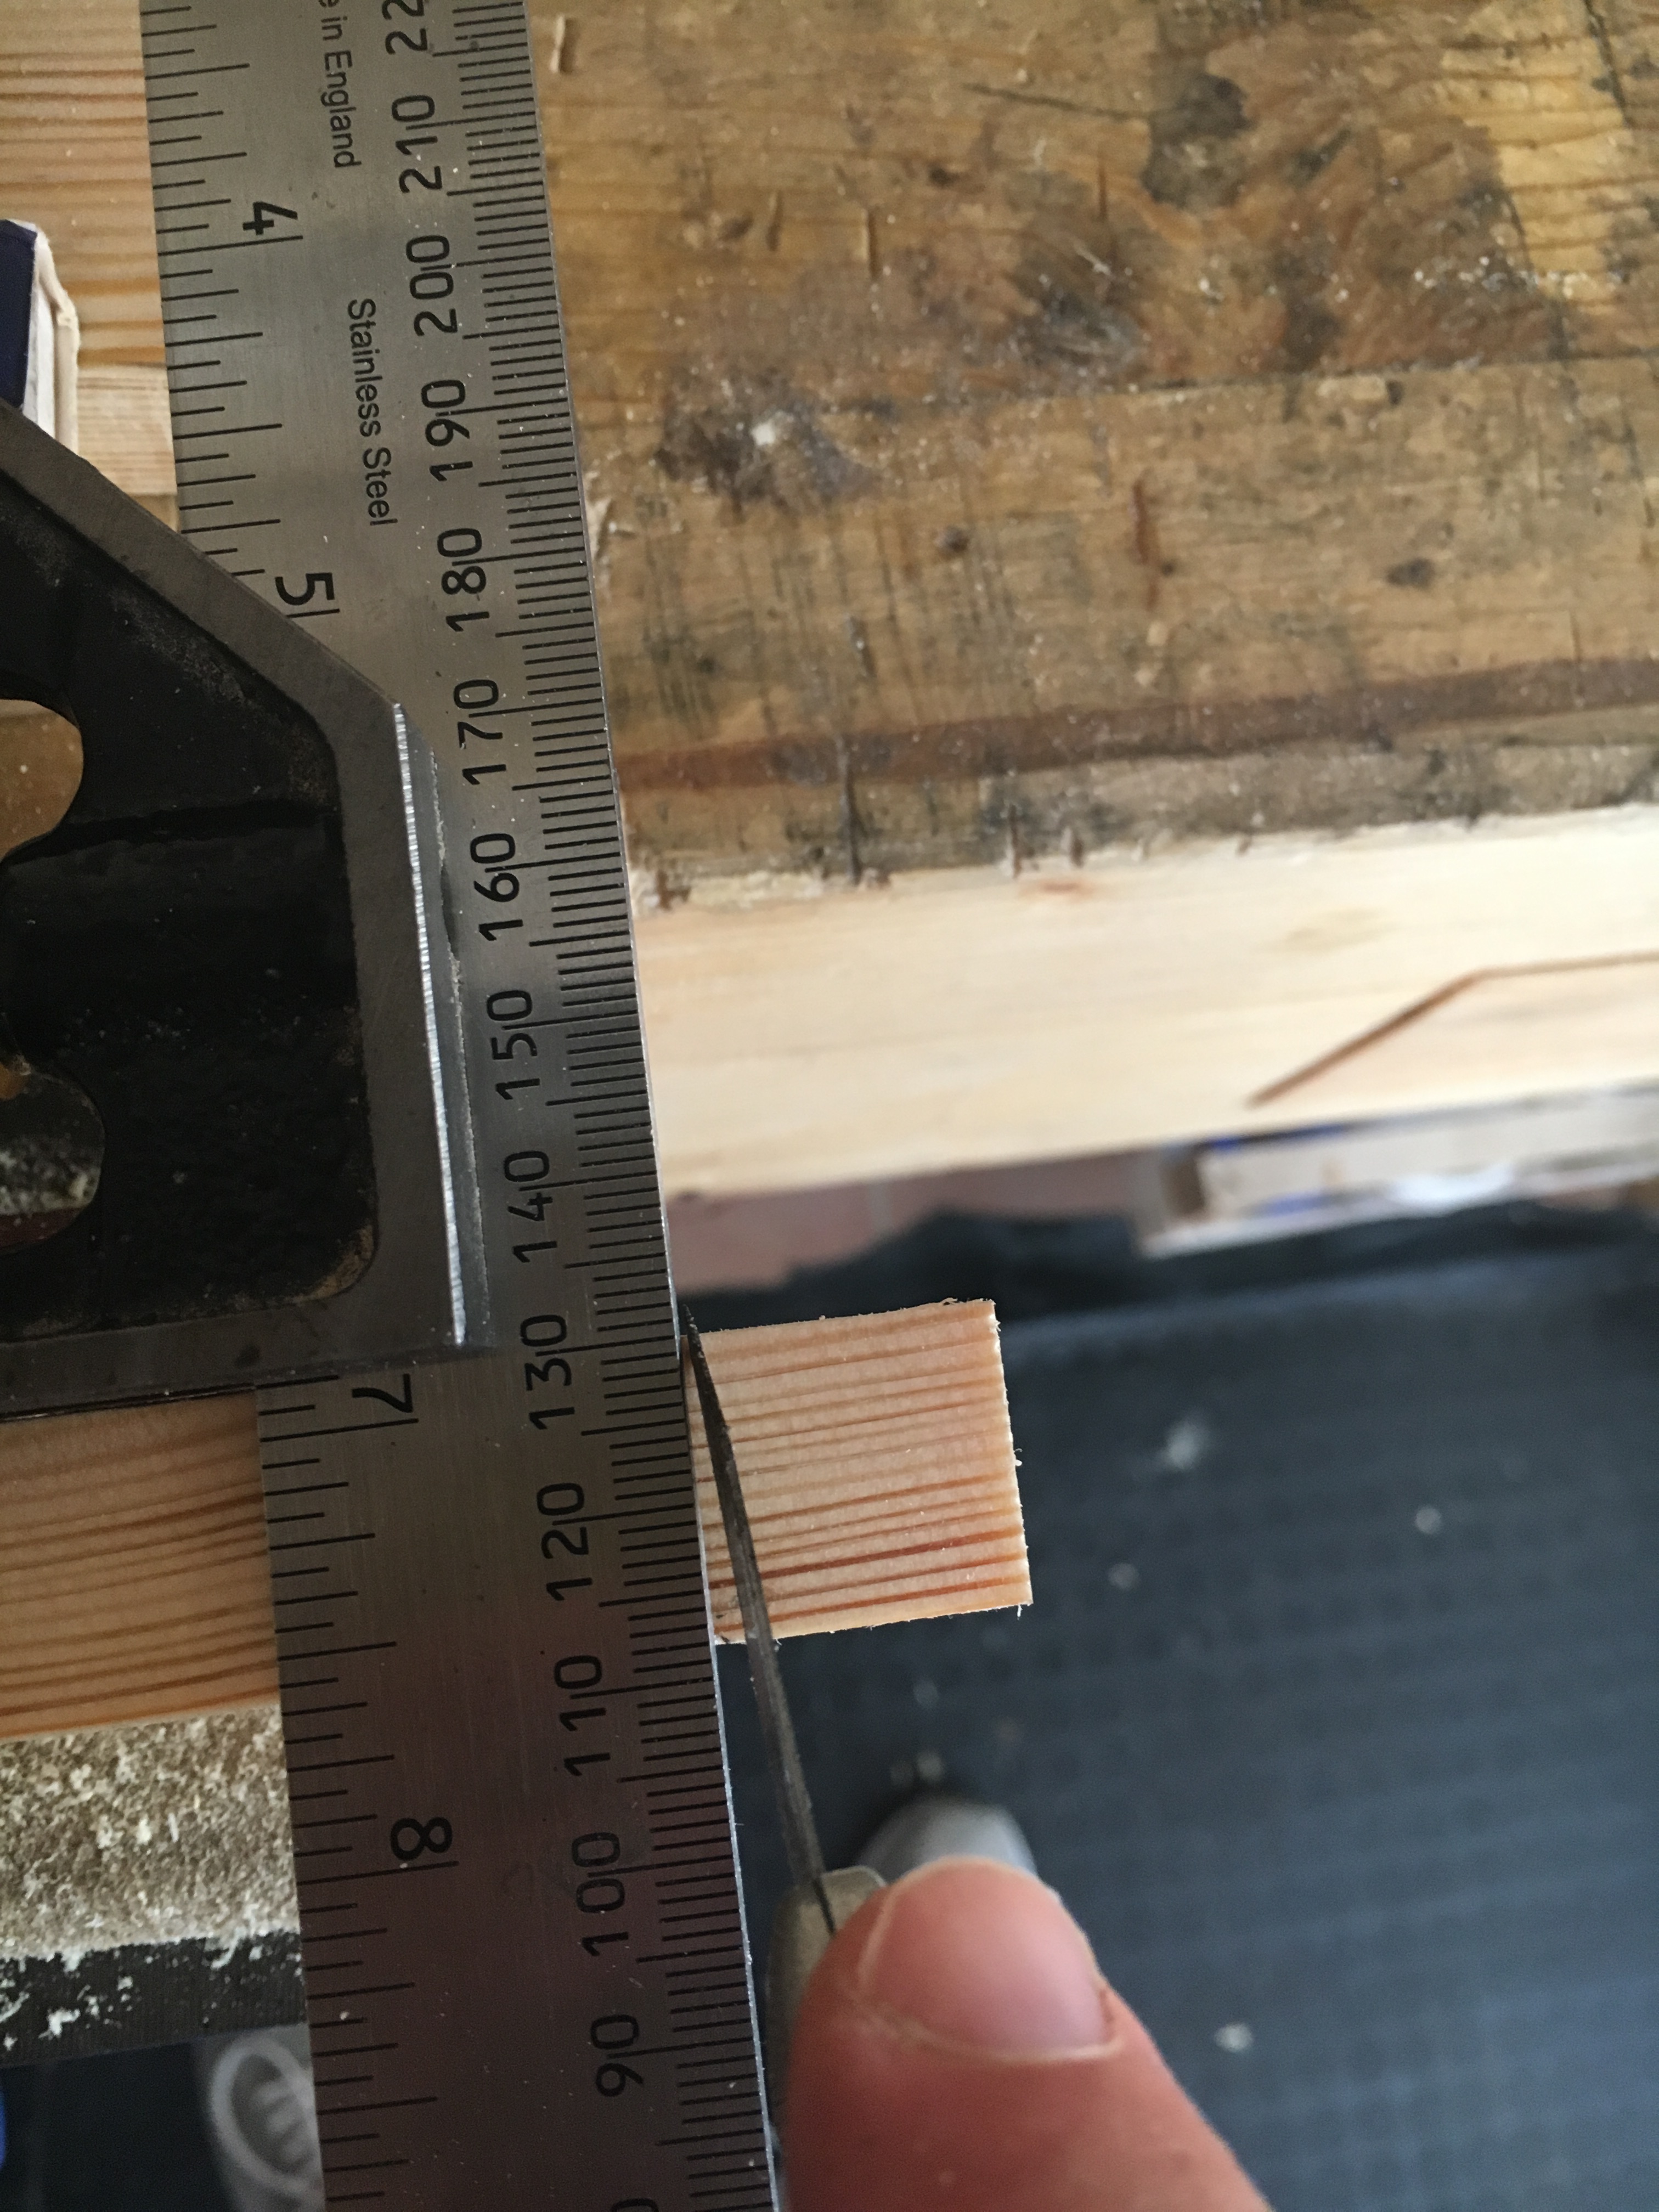
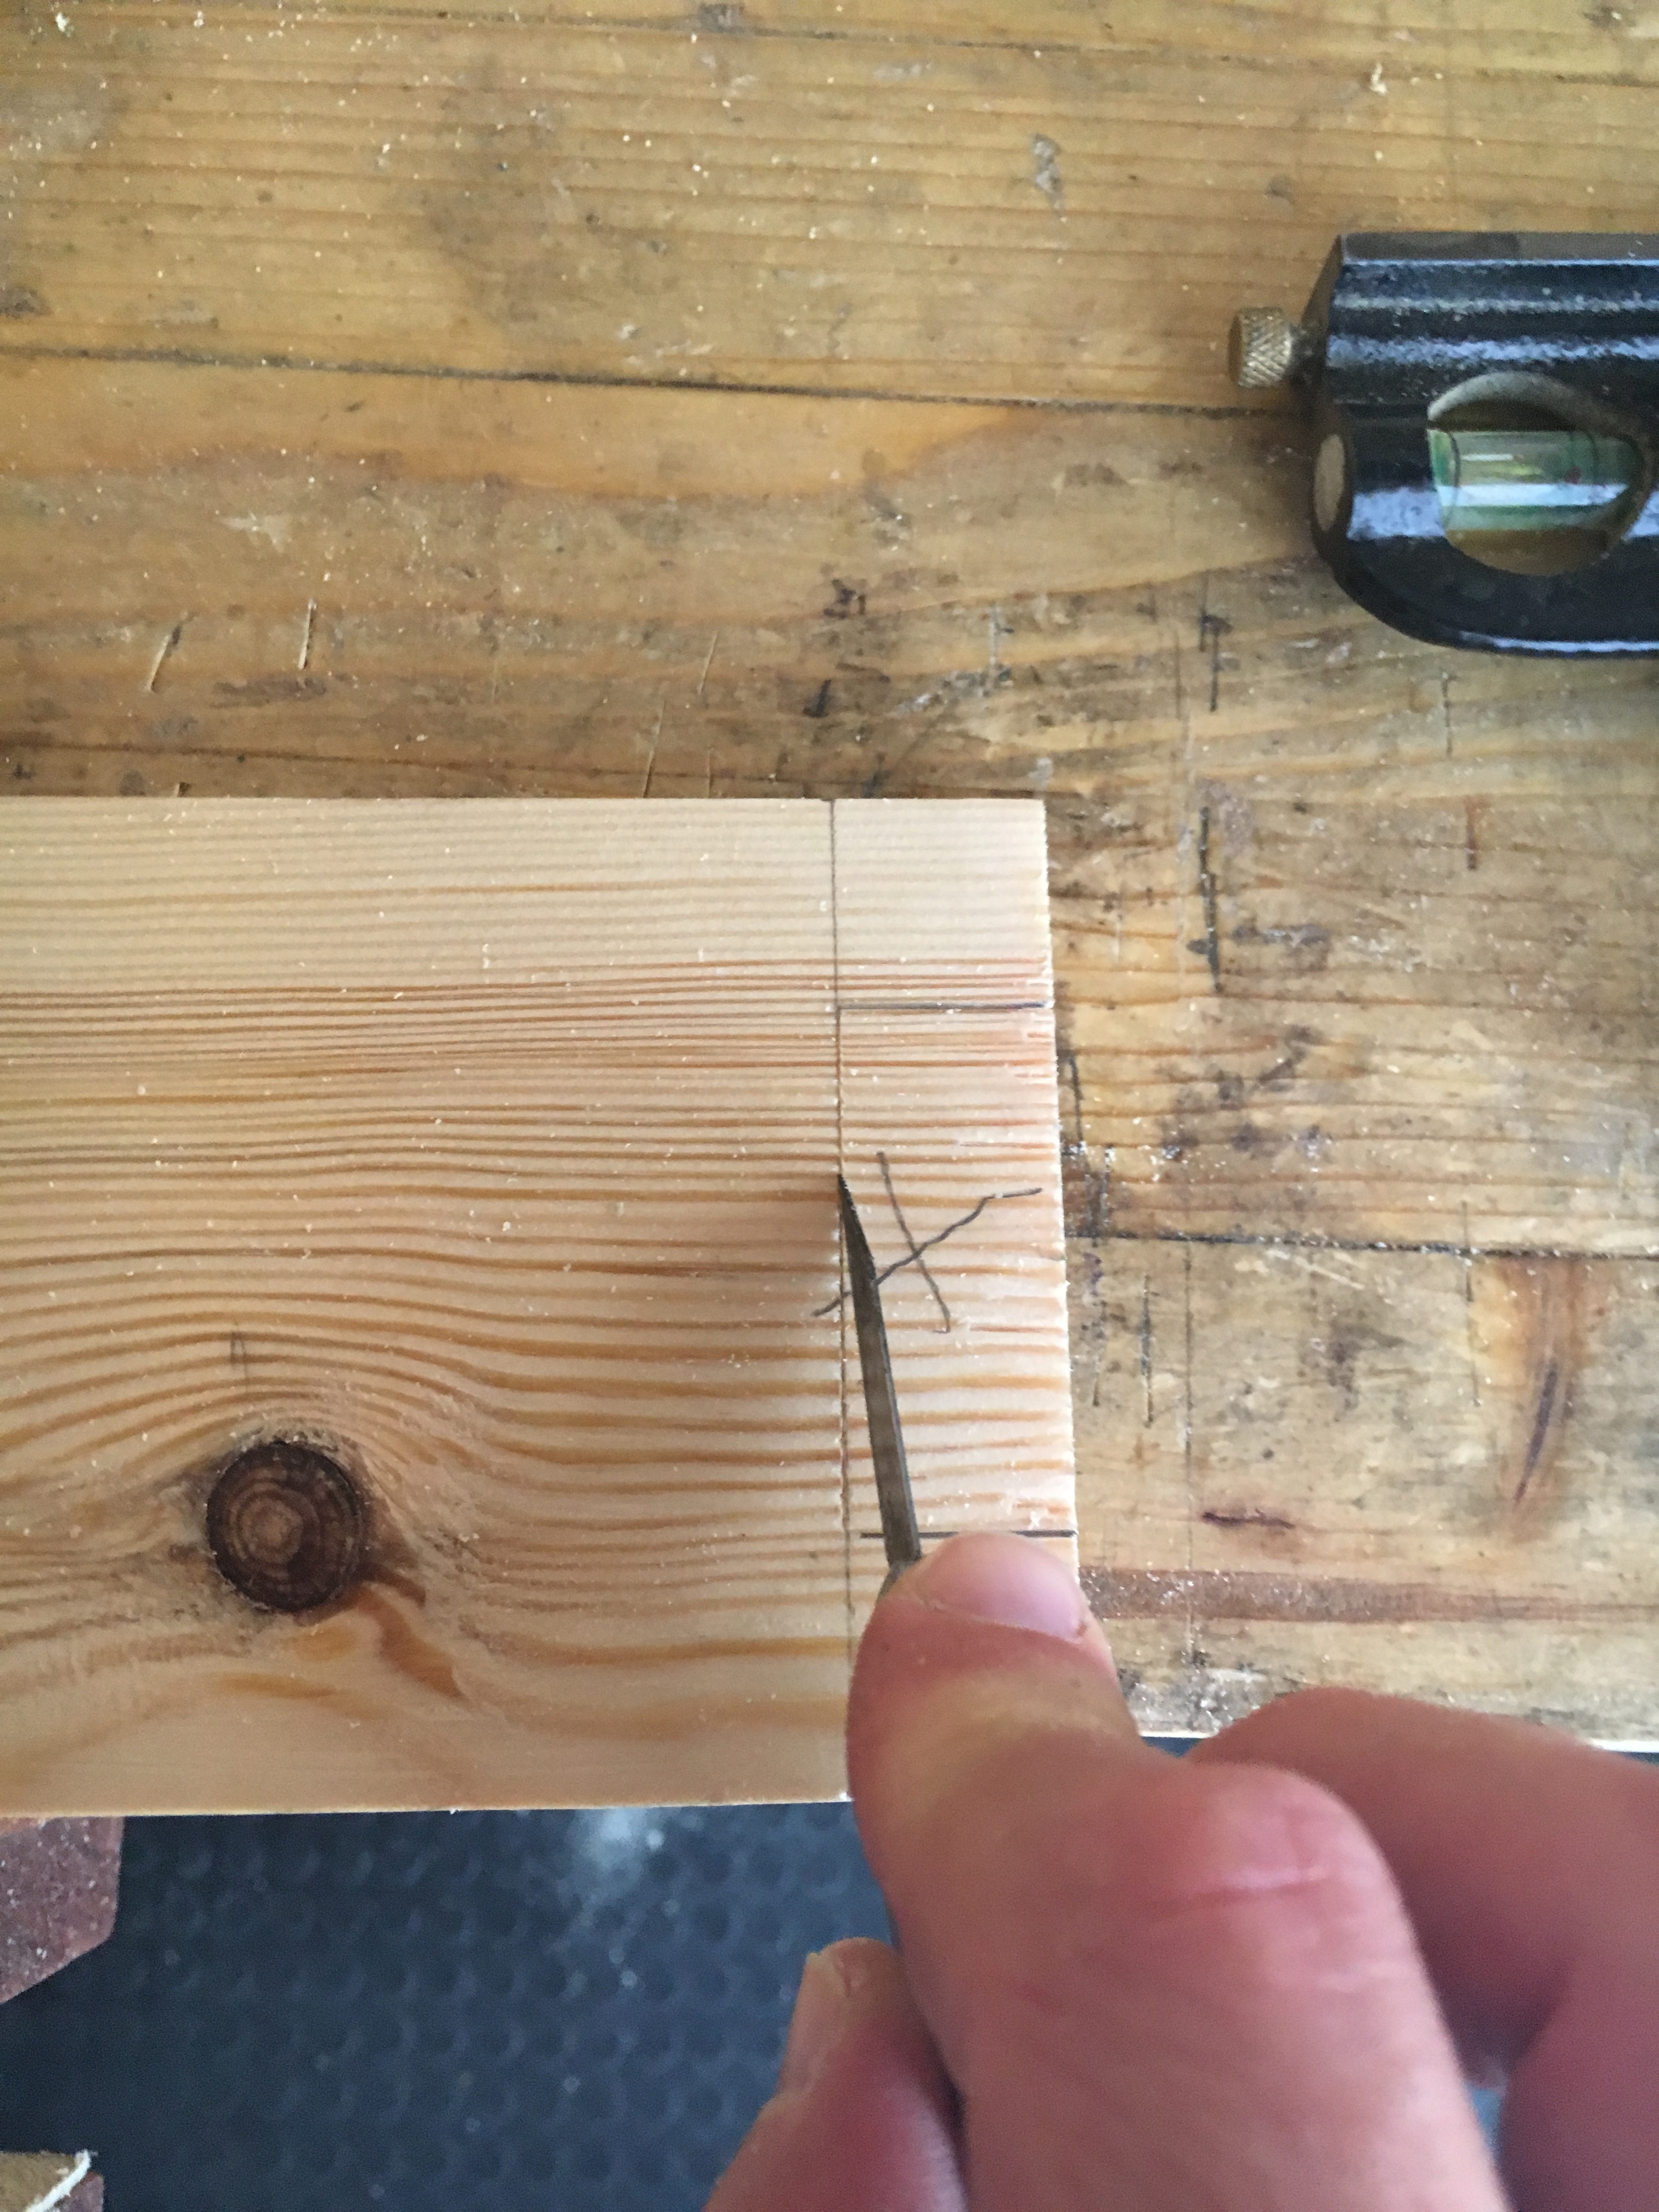
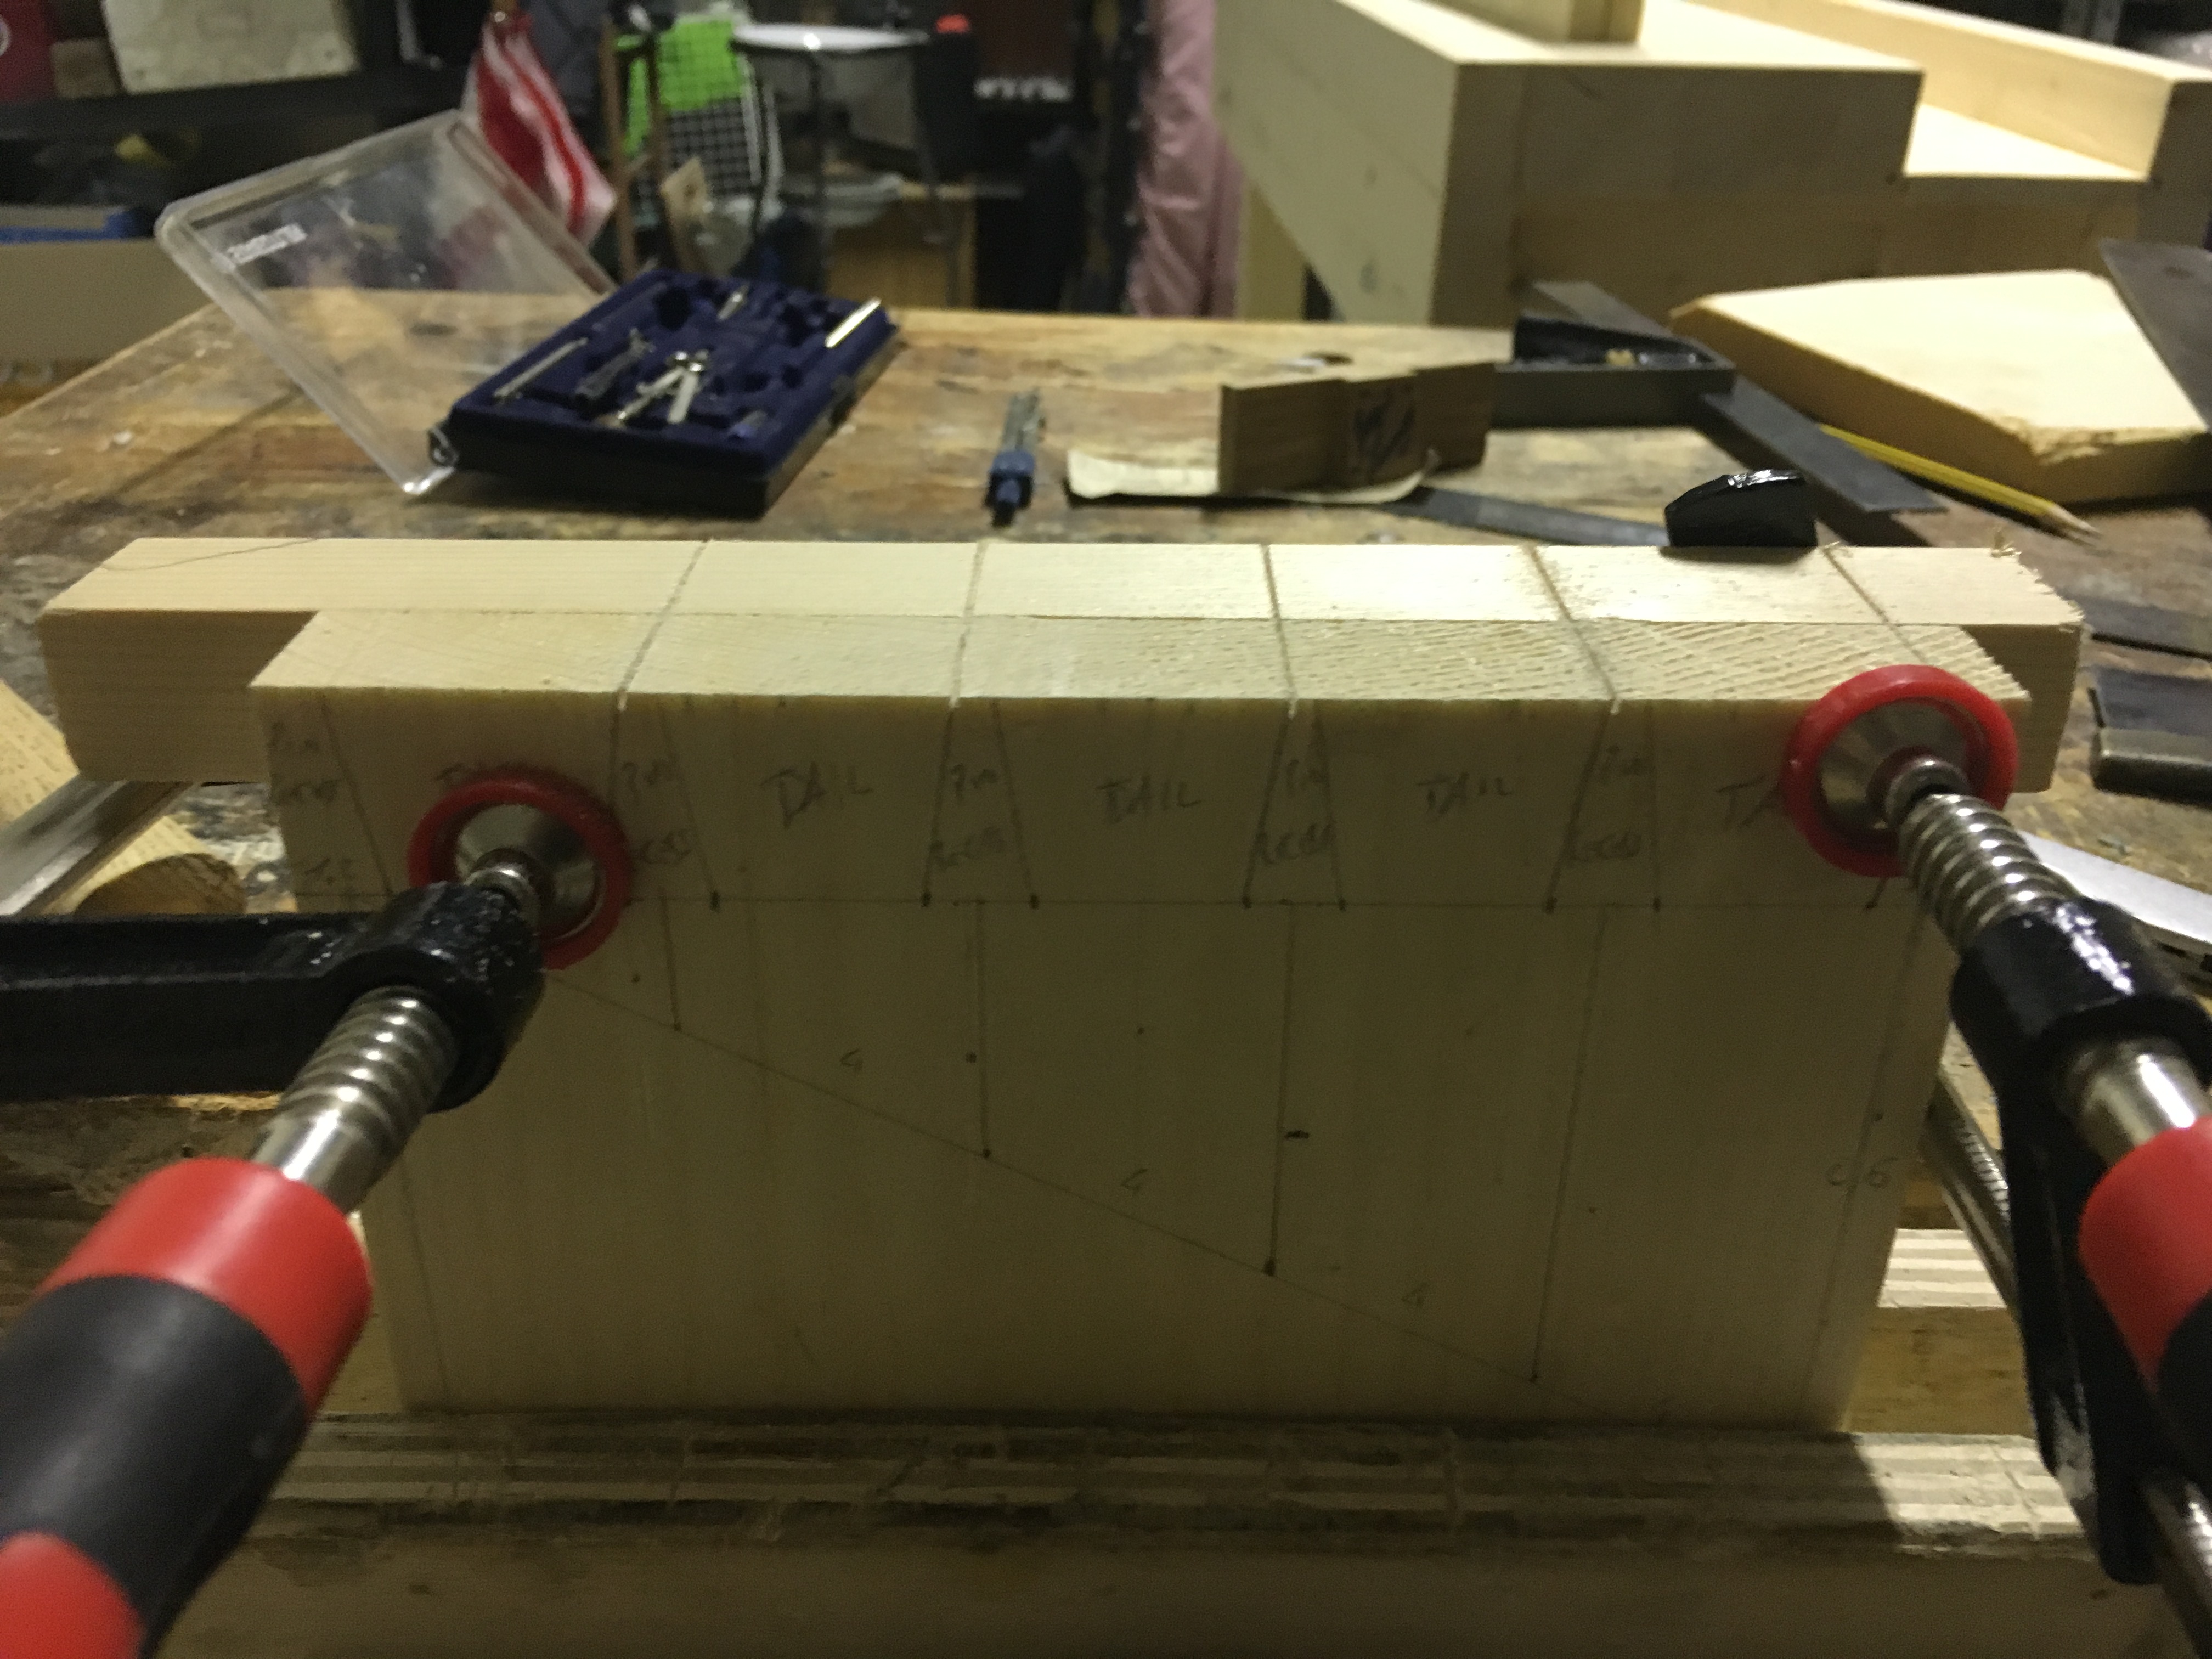
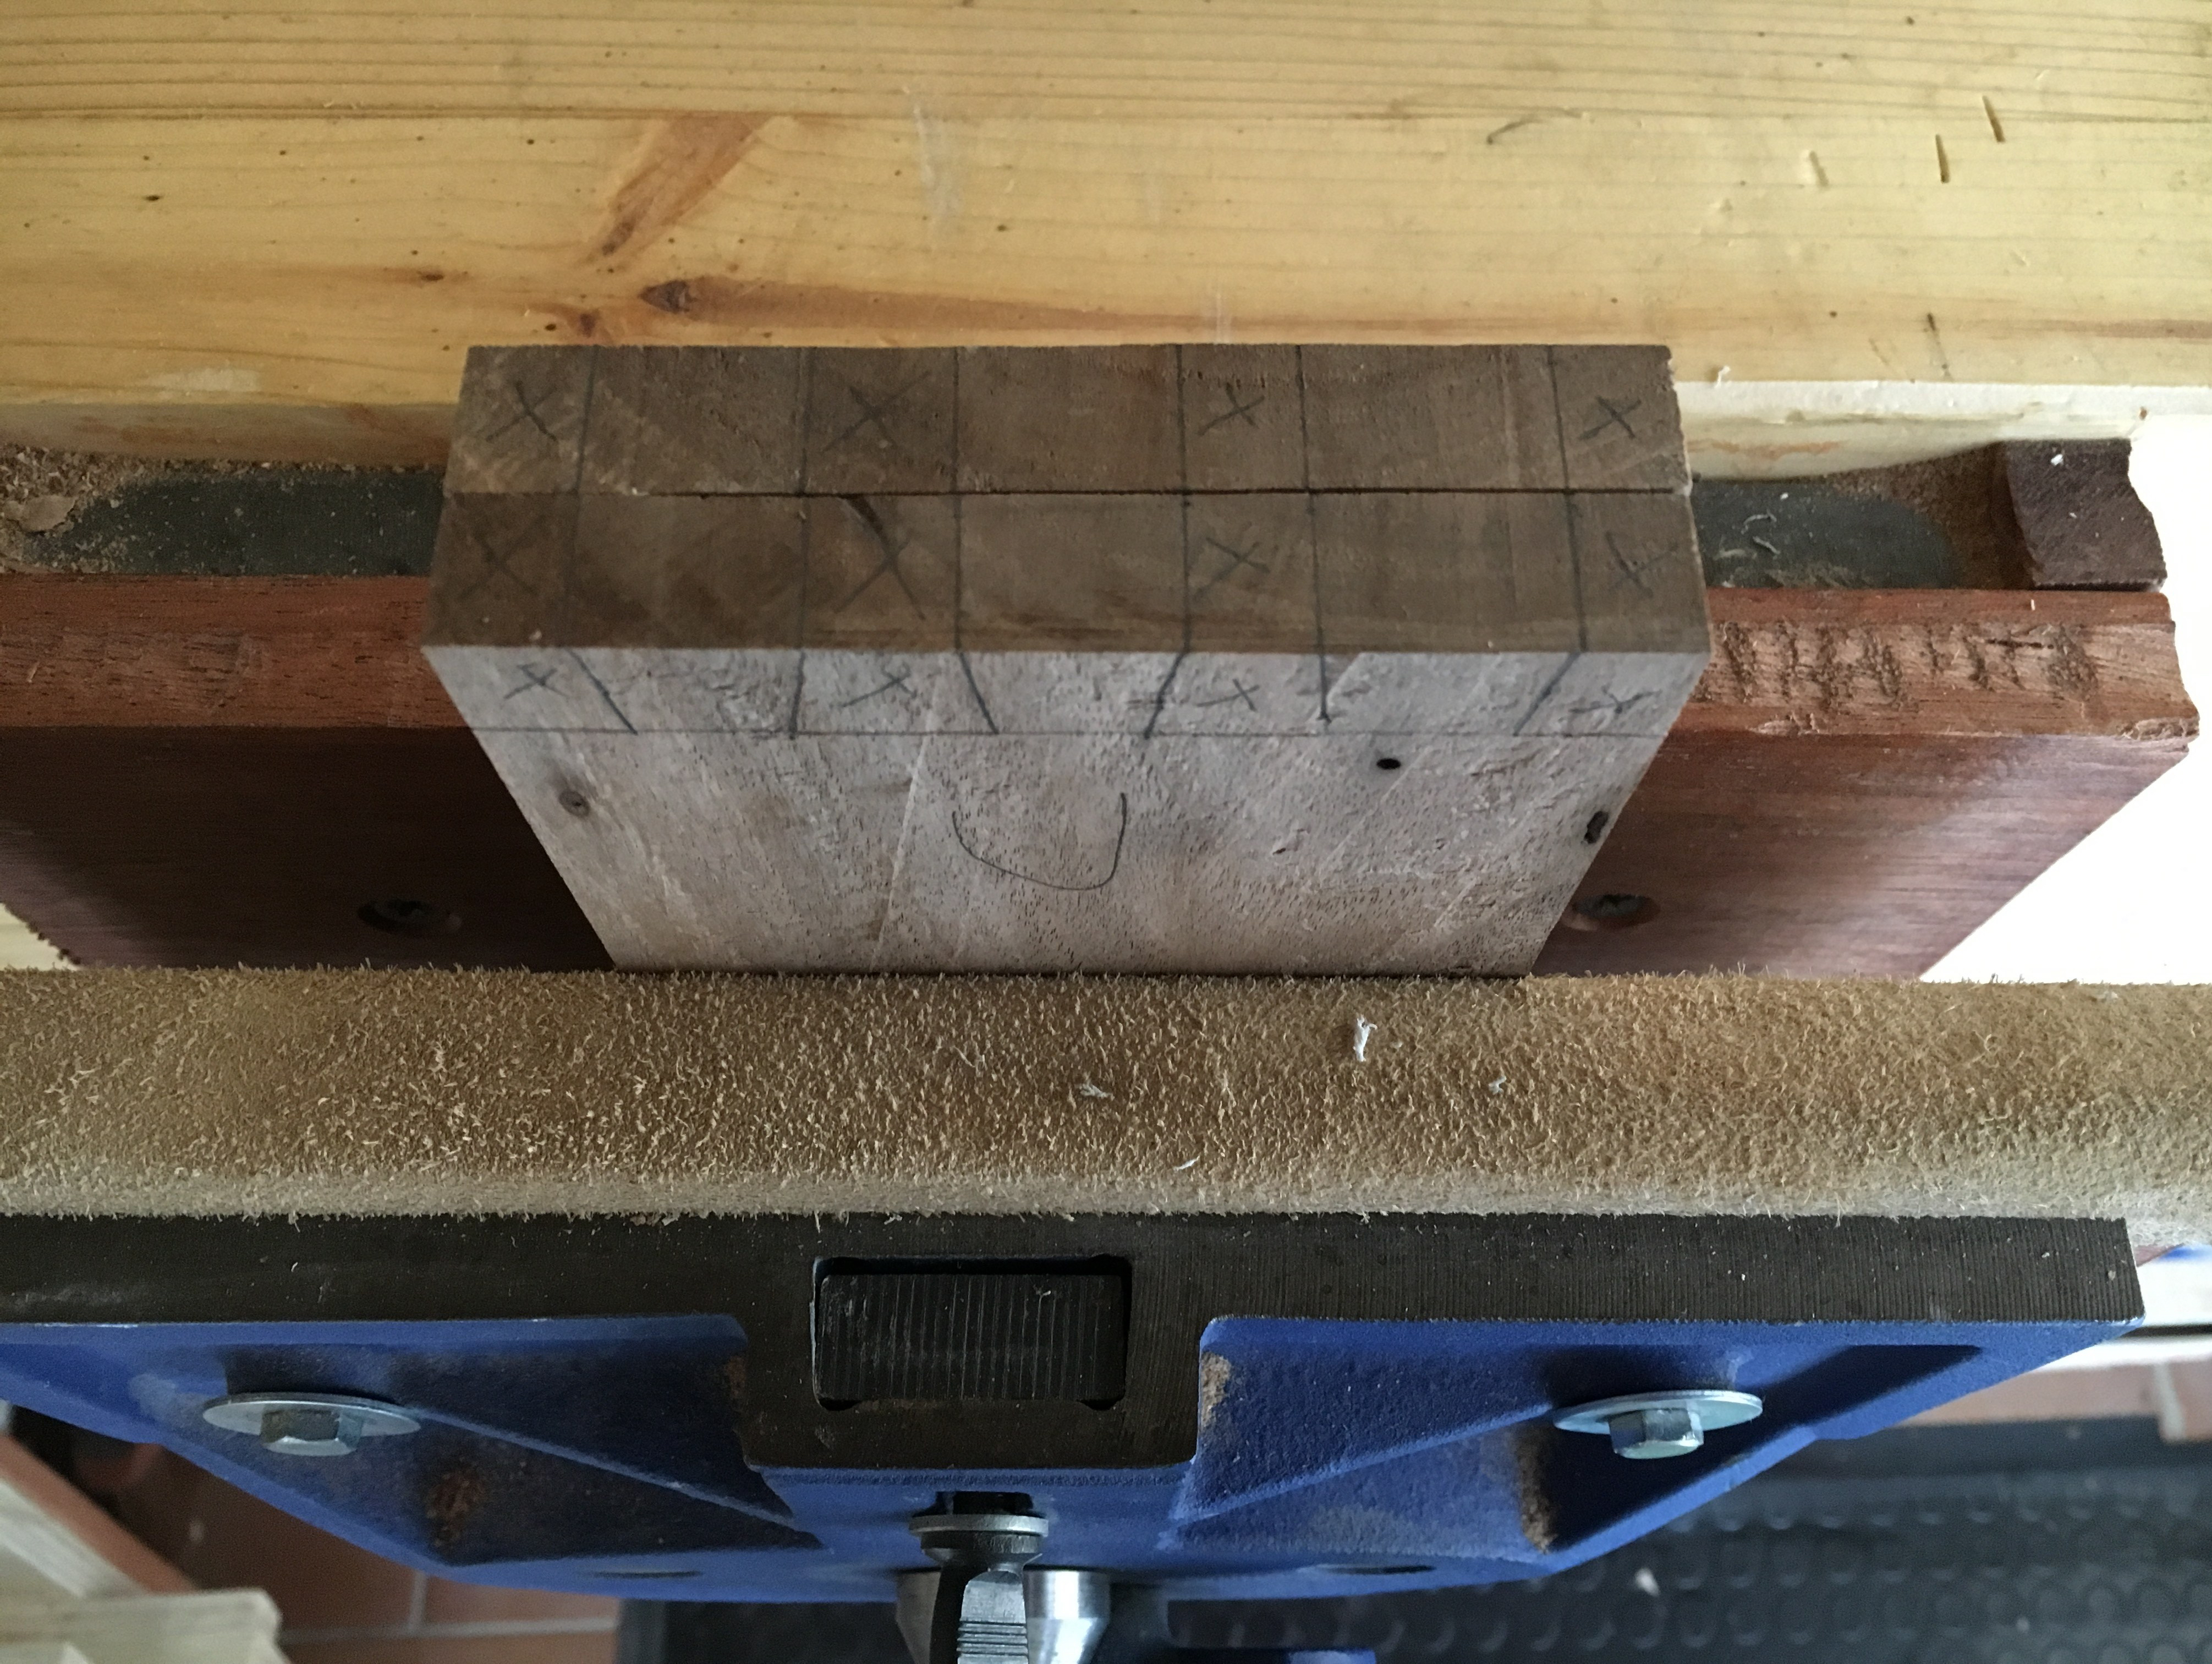
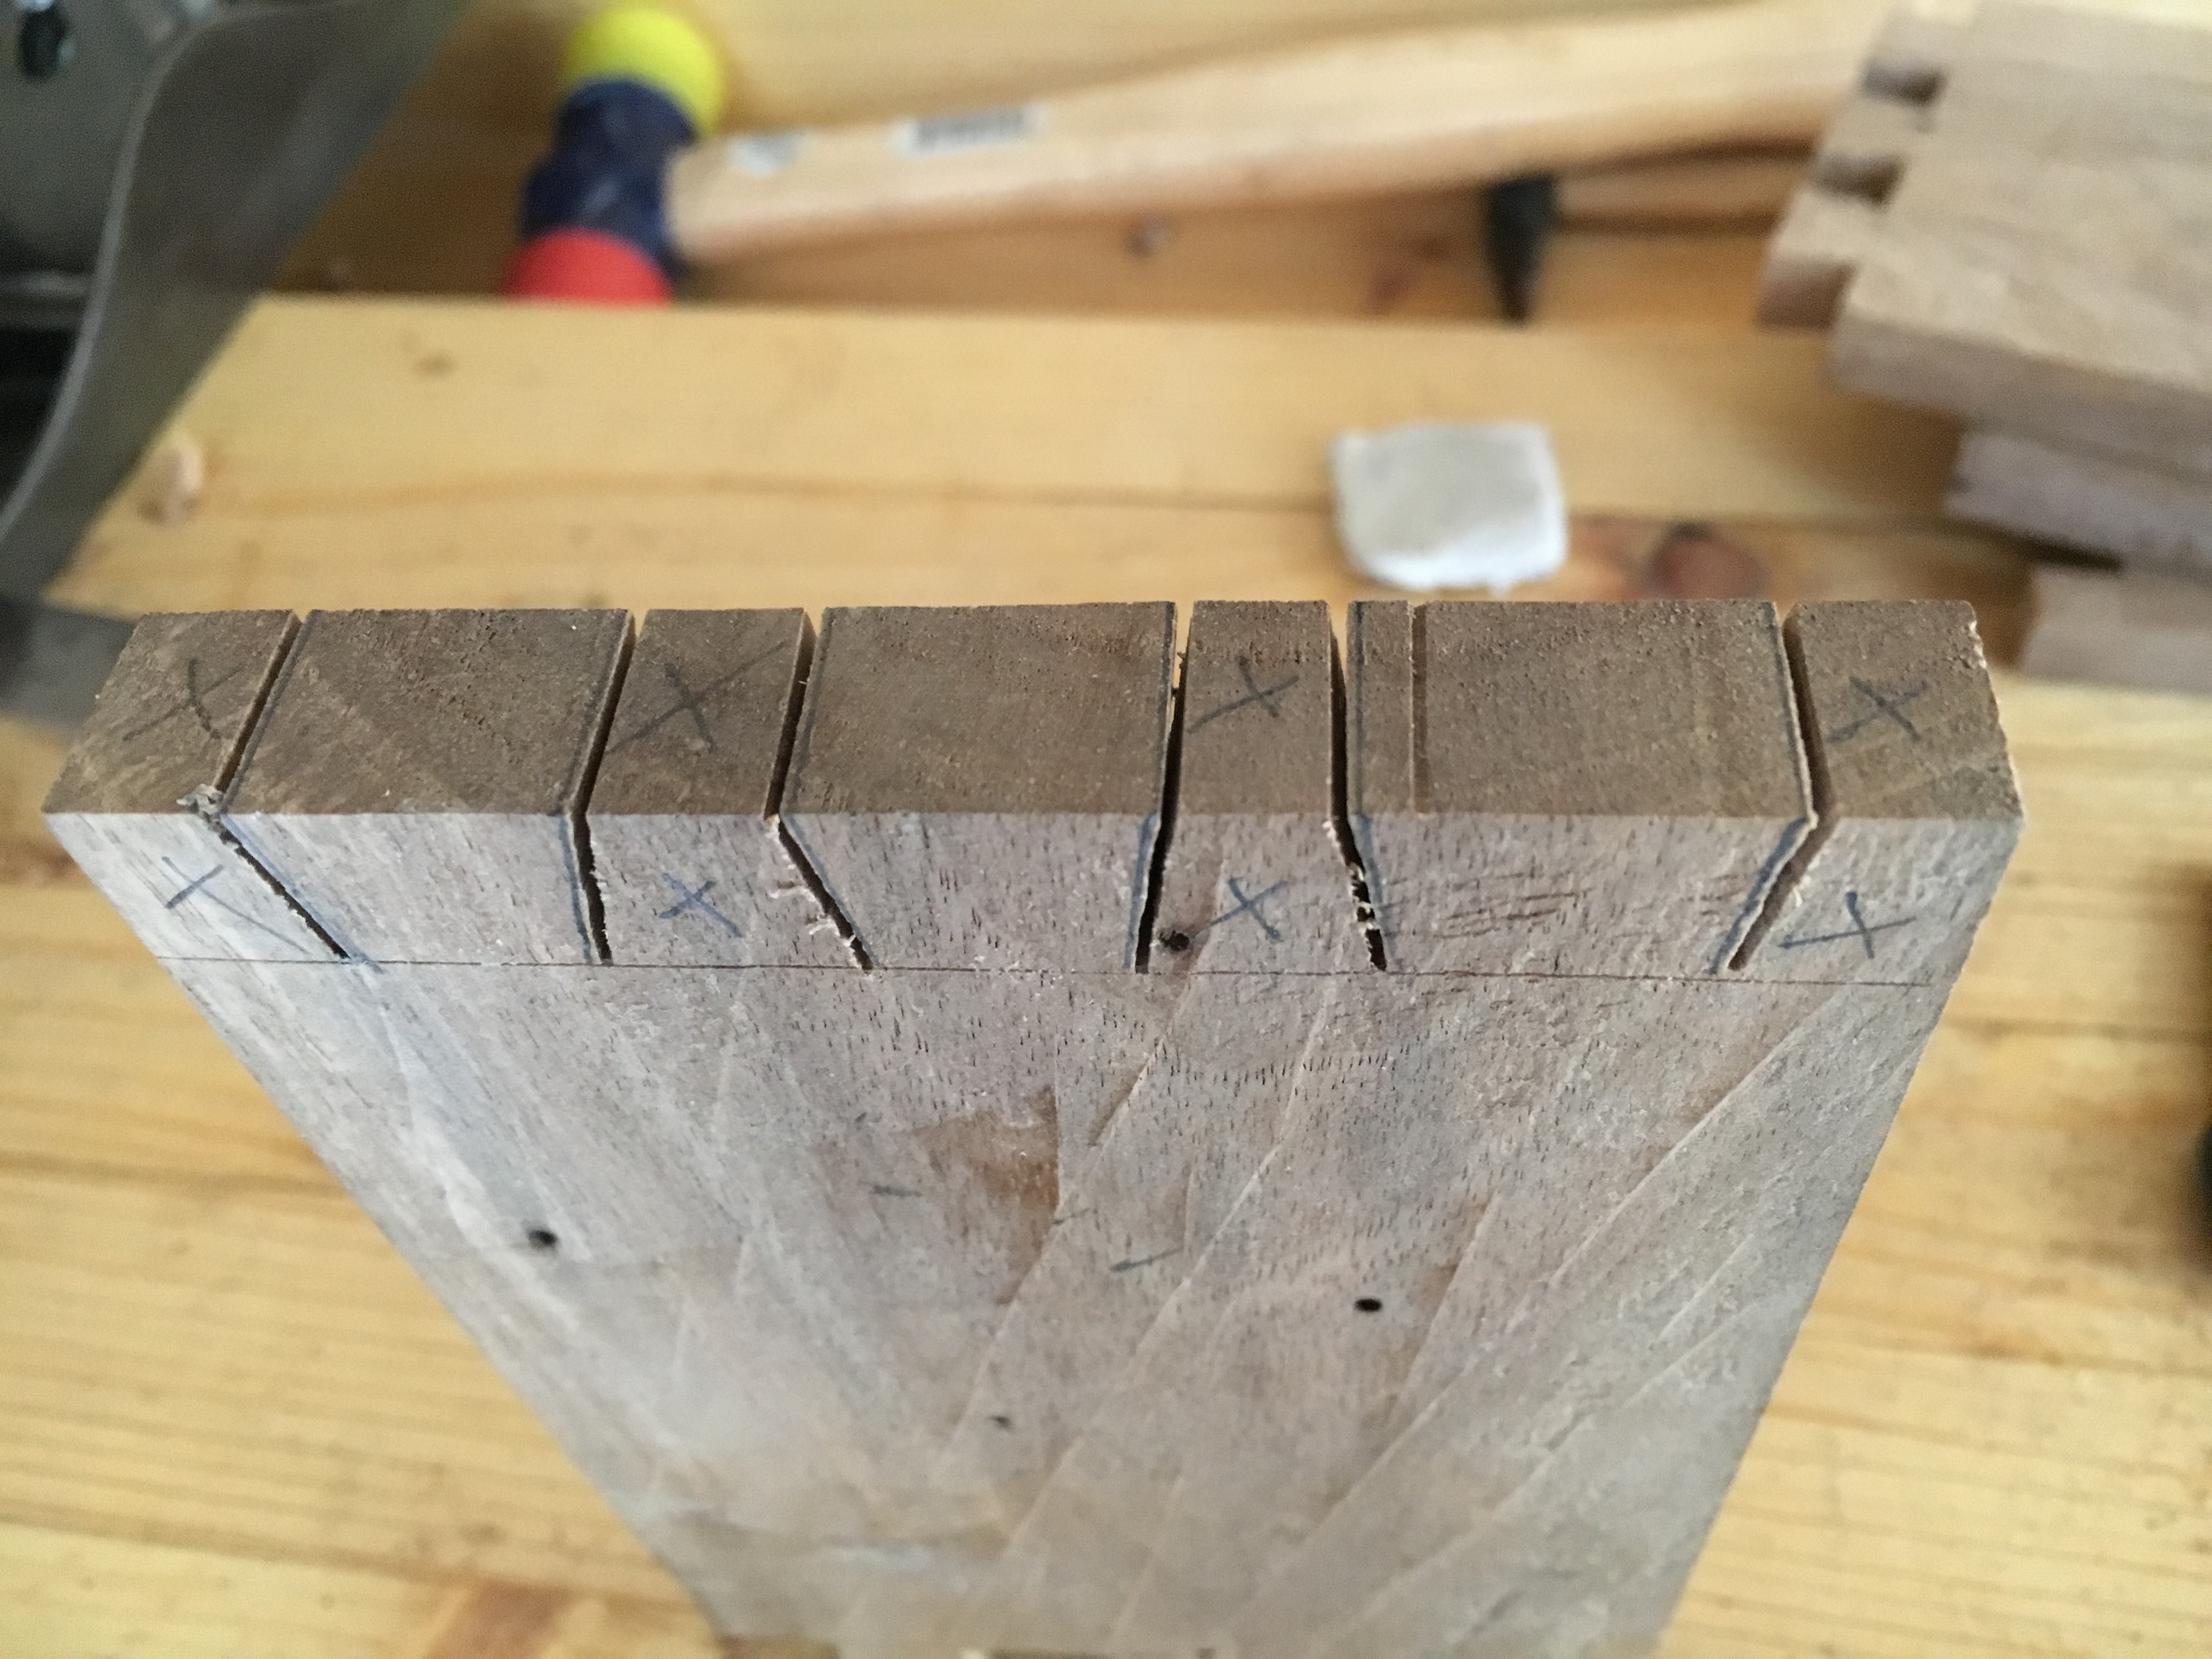
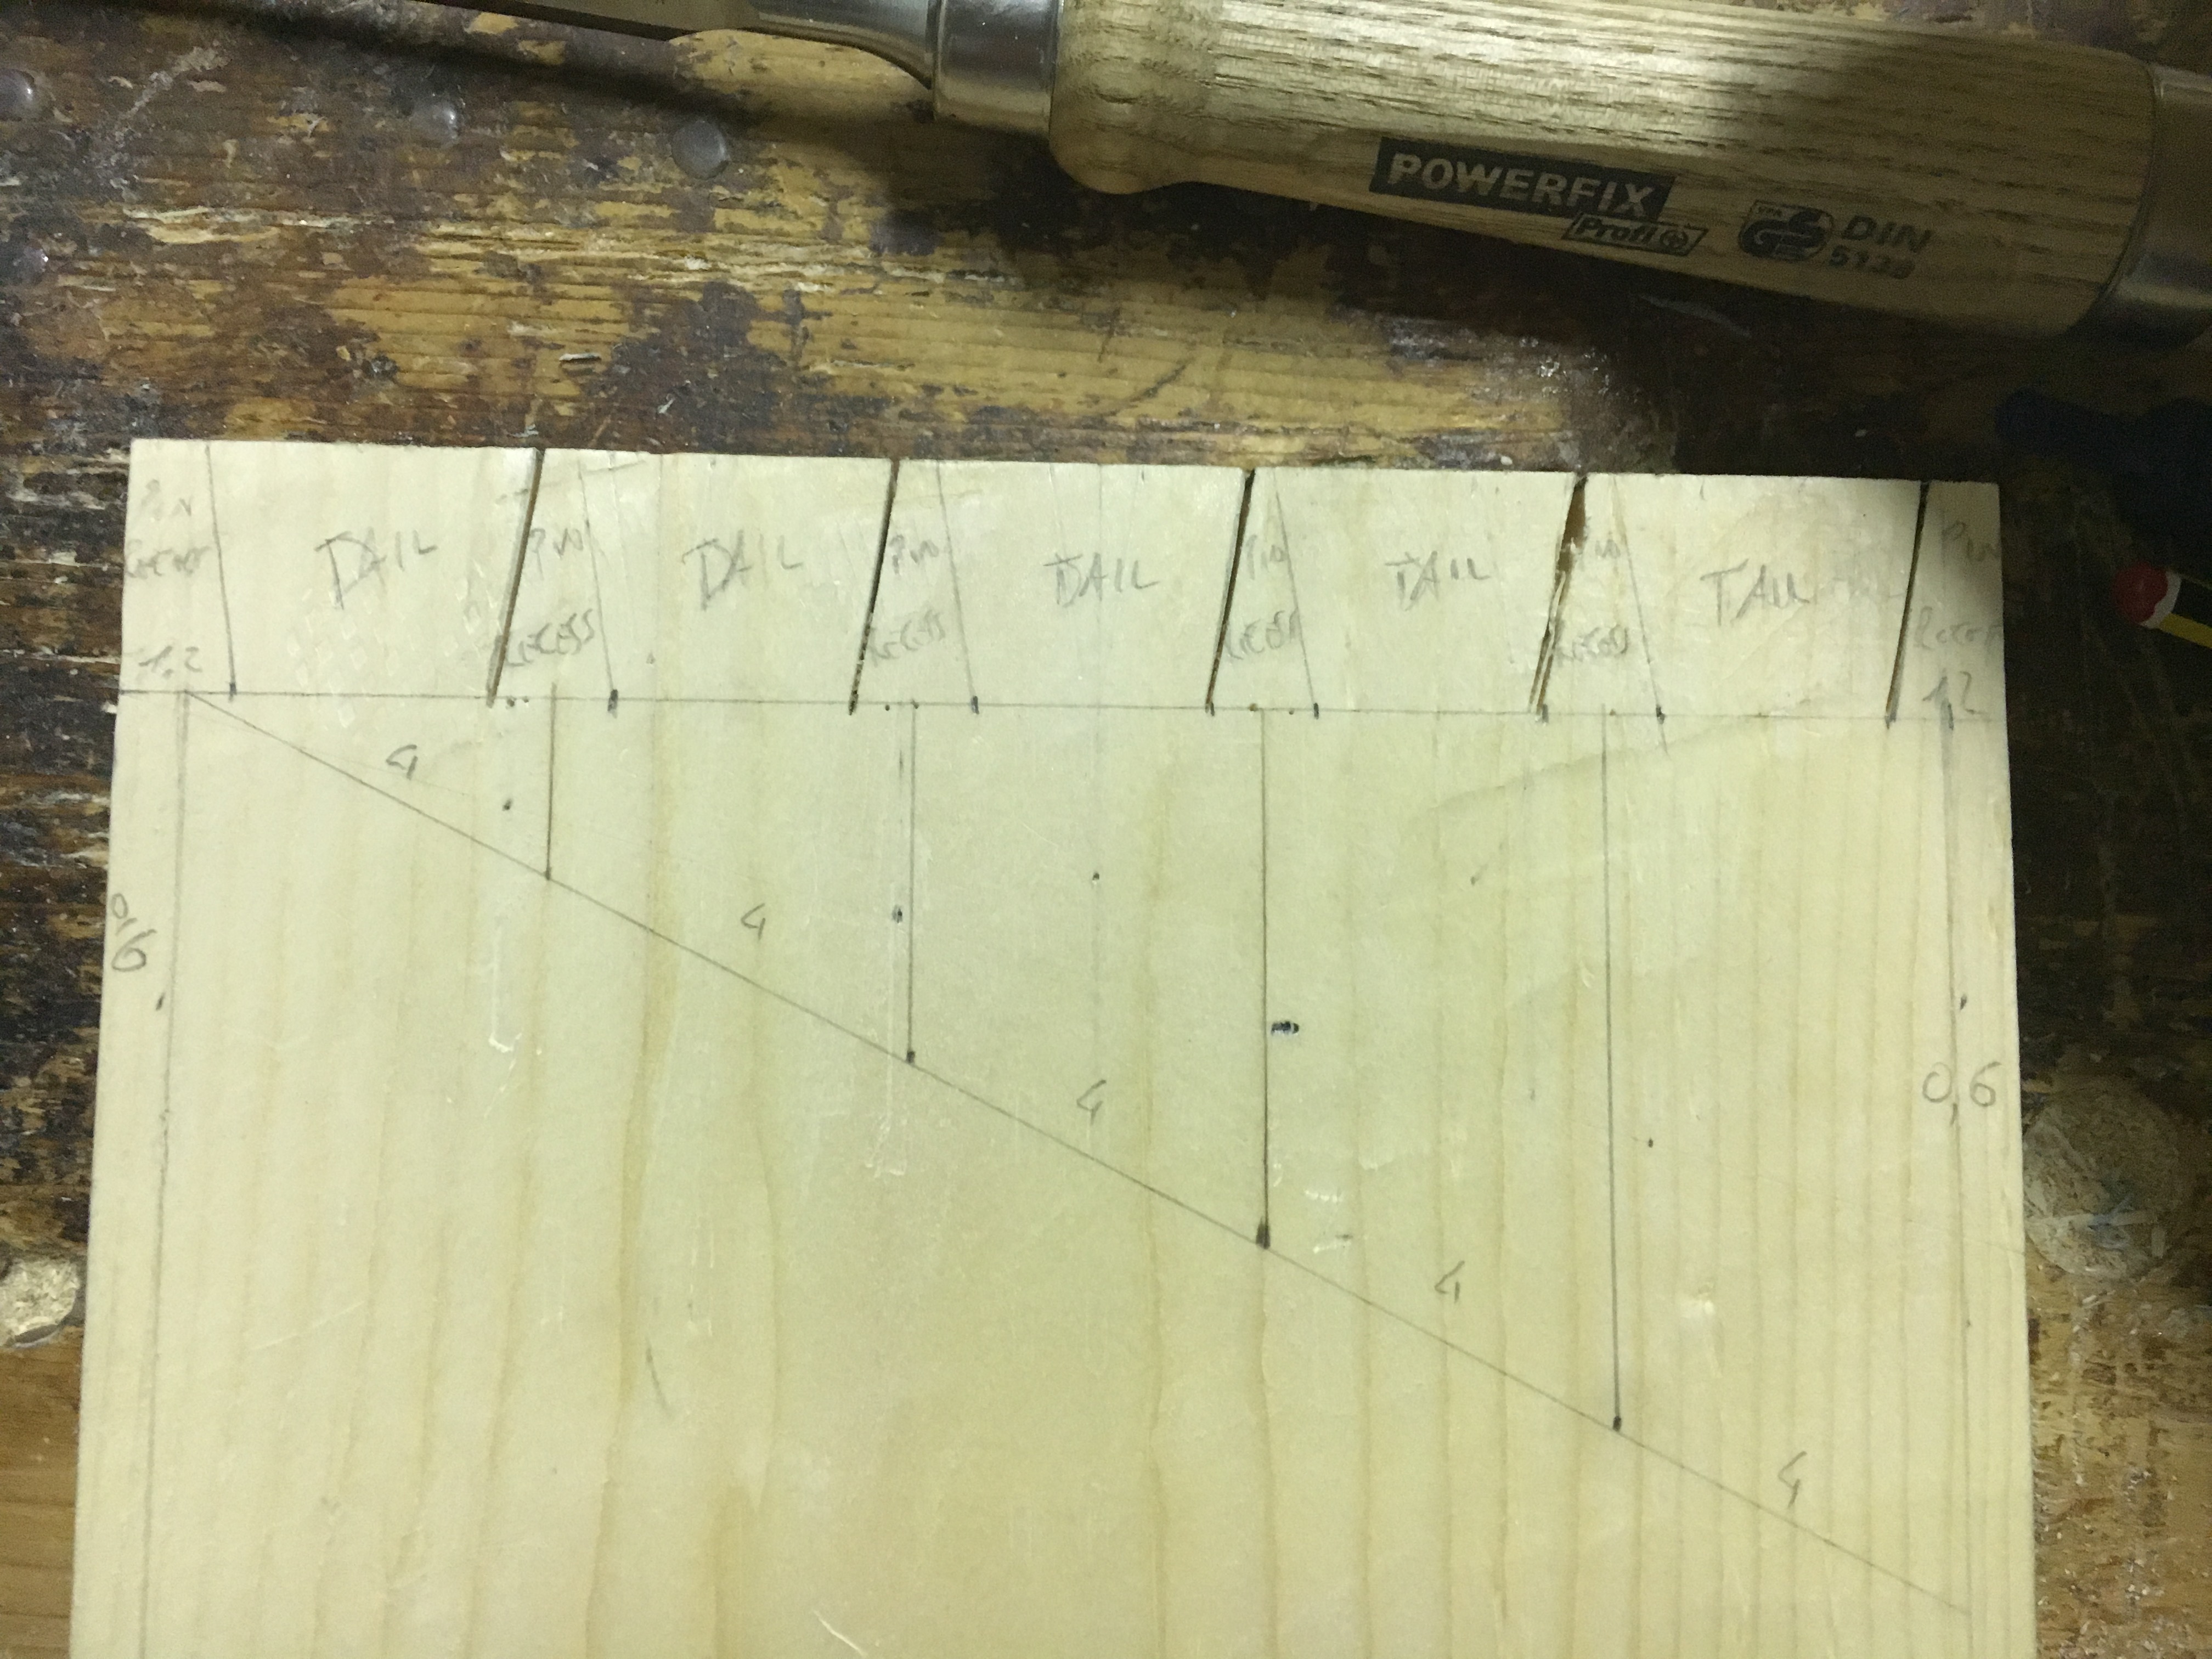 Il metodo di tracciatura delle code di rondine che utilizzo è quello tradizionale. Per capirlo facciamo riferimento alla foto sopra. Sul pezzo perfettamente squadrato ho tracciato a matita una linea per tutta la larghezza del pezzo ad una distanza dalla testa pari allo spessore del pezzo da unire. Quindi ho tracciato una linea a 6 mm. di distanza da ambedue i bordi. Con un righello metallico posto in posizione diagonale ho unito le due linee e segnato dei punti alla distanza di 4 cm. l’uno dall’altro così da dividere lo spazio in 5 sezioni uguali. Il numero delle sezioni sarà uguale al numero delle code che vogliamo ottenere. Ho trasferito i punti tracciando delle linee parallele fino alla linea tracciata in alto (linea di spessore). Dai punti di intersezione di queste linee con la linea di spessore ho misurato 6 mm. per parte ricavando così la larghezza dei pins recess. Da quest’ultime misure ho tracciato, con il jig per le code di rondine (ma si può usare anche la falsa squadra come detto sopra) le spalle delle code di rondine avendo l’accortezza di ricordare che le tracce delle spalle più esterne delle code devono essere orientate verso l’interno. Avremo ottenuto così le tails (code) tutte della stessa grandezza ed i pins (denti) tutti della stessa grandezza.
Su youtube ho inserito un video in cui faccio vedere come fare le code di rondine con un metodo classico. Di seguito il link.
L’argomento è sicuramente da approfondire. Penso che non mancherà occasione..
_______________________________________________________________________________________________________
The dovetail joint between all types of joints is the one that most strikes the collective imagination. It has always been synonymous with amanuensis tradition and craftsmanship. When we see this type of joint in furniture, we usually think that we are dealing with an ancient piece of value and excellent workmanship. This was certainly true in the past, when the machines didn’t exist. Nowadays the machines and templates used are able to create perfect dovetails, of any shape and size. And perhaps, this perfection, if found on a new furniture, should make us think that those dovetails are not necessarily made by hand, as is done once, but with electric machines. I say this because the true skill of a craftsman can be seen only in woodworking by hand, creating this type of joint.
The dovetail joint, among the three main types I mentioned in my previous posts, is surely the one that guarantees the greatest strength, as well as being aesthetically beautiful, especially if emphasized by the union of woods of different species and colors. It is also the most difficult to do as it requires technique and precision. If well done, the final result will be absolutely satisfying and of sure effect. For an overview of the joints that we have talked about so far, I refer you to the past posts of this blog.
The dovetail joint is mainly used in the construction of furniture carcasses, where particular strength is required, but also in making boxes and drawers. It finds application almost predominantly as a corner union of two pieces of wood: in the first piece, tails are made which will be inserted into mortises obtained in the second piece to be joined. The size, shape and number of dovetails that can be made is highly customizable but necessarily dependent on the width of the pieces and the objective possibility of being able to work with hand tools.
There are mainly two types of dovetail joints. The open dovetail and the half lap dovetail. The other types of dovetails can be considered variants of the two just mentioned. In the open dovetails the tails are visible on both pieces joined together (it is mainly used in the construction of furniture carcasses but also in making boxes). In the half-lap dovetail instead the dovetails are visible only on a piece as on the other piece remain hidden by the thickness of the wood (such as in the construction of the drawers).
As with all work, even for dovetails there is not a single construction technique. What I will illustrate below is certainly the most traditional, used for hundreds of years by generations of woodworkers. The tools to be used are the following:
– Dovetail saw from 14 to 16 PPI;
– Bevel edge chisels of various sizes;
– Rubber mallet or wooden mallet;
– Knife;
– Combination square;
– Metal ruler;
– Sliding bevel or dovetail template;
– Pencil, fine marking pen, eraser;
– Files, rasps and abrasive paper;
– Clamps and glue;
– Divider (optional).
To remove the wood between the tails and for mortises, many people use the coping saw. In my case the wood will be removed with chisels.
Some recommendations on the listed tools:
– It is better to use a western saw, a dovetail saw, than a Japanese saw, as it is more rigid while cutting and therefore more controllable. The approach with the wood will be more difficult but it is better than the Japanese who, despite having a softer start, then tend to “wander” in the wood. Using a good quality, well sharpened saw with a number of teeth between 14 and 16 PPI guarantees the best cutting quality and the dovetail saws, sharpened in ripsaw configuration, are perfect for this type of joint.
– Use only bevel edge chisels, that are with beveled sides, as they are perfect for working in this type of joint, to finish the corners of the tails and clean the bottoms of mortises. Equip yourself with various sizes to adapt to the size of the tails and make sure they are well sharpened. It would be better to have two types. A type with an angle of about 20 degrees to clean the bottoms of mortises and one of about 30 degrees to dig the tails and mortises. However you can do everything even with normal chisels, with a 30 degree bevel.
– The pencil must always be well tempered and the knife must be sharp.
– Finally, one last recommendation about the sliding bevel. This will be fine but you will soon feel the need to have a dovetailtemplate. We can build it, as I did, or buy one.The pieces to be joined must be of equal thickness. Having said that, it is essential that these are perfectly square and with their sides absolutely parallel to each other. So let’s take the time to prepare the pieces. If the pieces are not in square it will be impossible to get a satisfying fit and we will have wasted only our time, considering that this type of joint already requires enough, in addition to a good dose of calm and precision.
After all these premises we now see specifically how to make an open dovetail joint. The description is inserted directly in the photos, as also done in the previous posts on the subject. In the end we will see other specifications, especially concerning the layout of dovetails.
The joints must be glued to guarantee the hold over time and the dovetails are no exception. However, the gluing phase can be a bit complex, especially if the dovetails are so many, since the glue taking time is very short, if some tail does not fit well it would be difficult to recover the situation in such a short time . The clamping of the dovetails would need a special mask that will tighten just in correspondence with the tails. The classic clamping will still be good.
The mortise can also be made with the coping saw. It is certainly a practical method to remove the material quickly but at the same time not very precise. The cut will never be perfect and will always require a subsequent cleaning of the mortise with the chisel. Better then use bevel edge chisels right away. The processing will certainly be slower and laborious but we will obtain a precise, clean and closer to the desired result.
The number and size of the dovetails is a personal choice mostly dictated by aesthetics. Normally, however, the larger the piece, the more dovetails we should make. In the procedure we have just seen, the dovetail was only one. Normally, however, the dovetails are more than one, as for example in a carcass of a piece of furniture. Below are some photos taken during a project. The procedure is completely identical, only the number of dovetails changes.
The procedure does not change if we work hard woods such as walnut. Below are some examples.
On soft woods such as pine and fir, a pitch angle is usually used in a ratio of 1: 6; on hard woods such as walnut and oak, a 1: 8 ratio is used. A good compromise for all woods is therefore to use a ratio of 1: 7.
What does this relationship mean and how does it turn into corners? Simplifying to the maximum is the angle that creates the hypotenuse with respect to the base assuming for example the base of 1 cm. and the height of 6 or 8 cm. This ratio generates an angle of about 9 degrees in the 1: 6 ratio for soft woods and about 7 degrees in a 1: 8 ratio for hard woods. This angle is taken up with the sliding bevel and used for dovetails. Generally, for soft woods a steeper angle is used because the fibers of these woods compress more than those of hardwoods.
The method of tracing dovetails that I use is the traditional one. To understand this we refer to the photo above. On a squared piece I drawn a pencil line for the entire width of the piece at a distance from the head equal to the thickness of the piece to be joined. So I drew a 6 mm line. away from both edges. With a metal ruler placed in a diagonal position, I joined the two lines and scored points at a distance of 4 cm. one from the other so as to divide the space into 5 equal sections. The number of sections will be equal to the number of tails we want to get. I transferred the points by drawing parallel lines up to the line drawn at the top (thickness line). From the intersection points of these lines with the thickness line I measured 6 mm. for each part obtaining the width of the recess pins. From these last measures I have traced, with dovetail template (but you can also use the sliding bevel as mentioned above) the shoulders of the dovetails keeping in mind that the traces of the outermost shoulders of the tails must be oriented inwards. We will have obtained the tails all of the same size and the pins all of the same size.
The subject is certainly to be explored. I think you will not miss opportunity ..

Scrivi una risposta a Come fare una scatola di legno. Prima parte. | CreaRobi Cancella risposta