Una finitura che mi piace. La finitura ad olio / A finish I like. Finishing with oil
English translation at the end of the article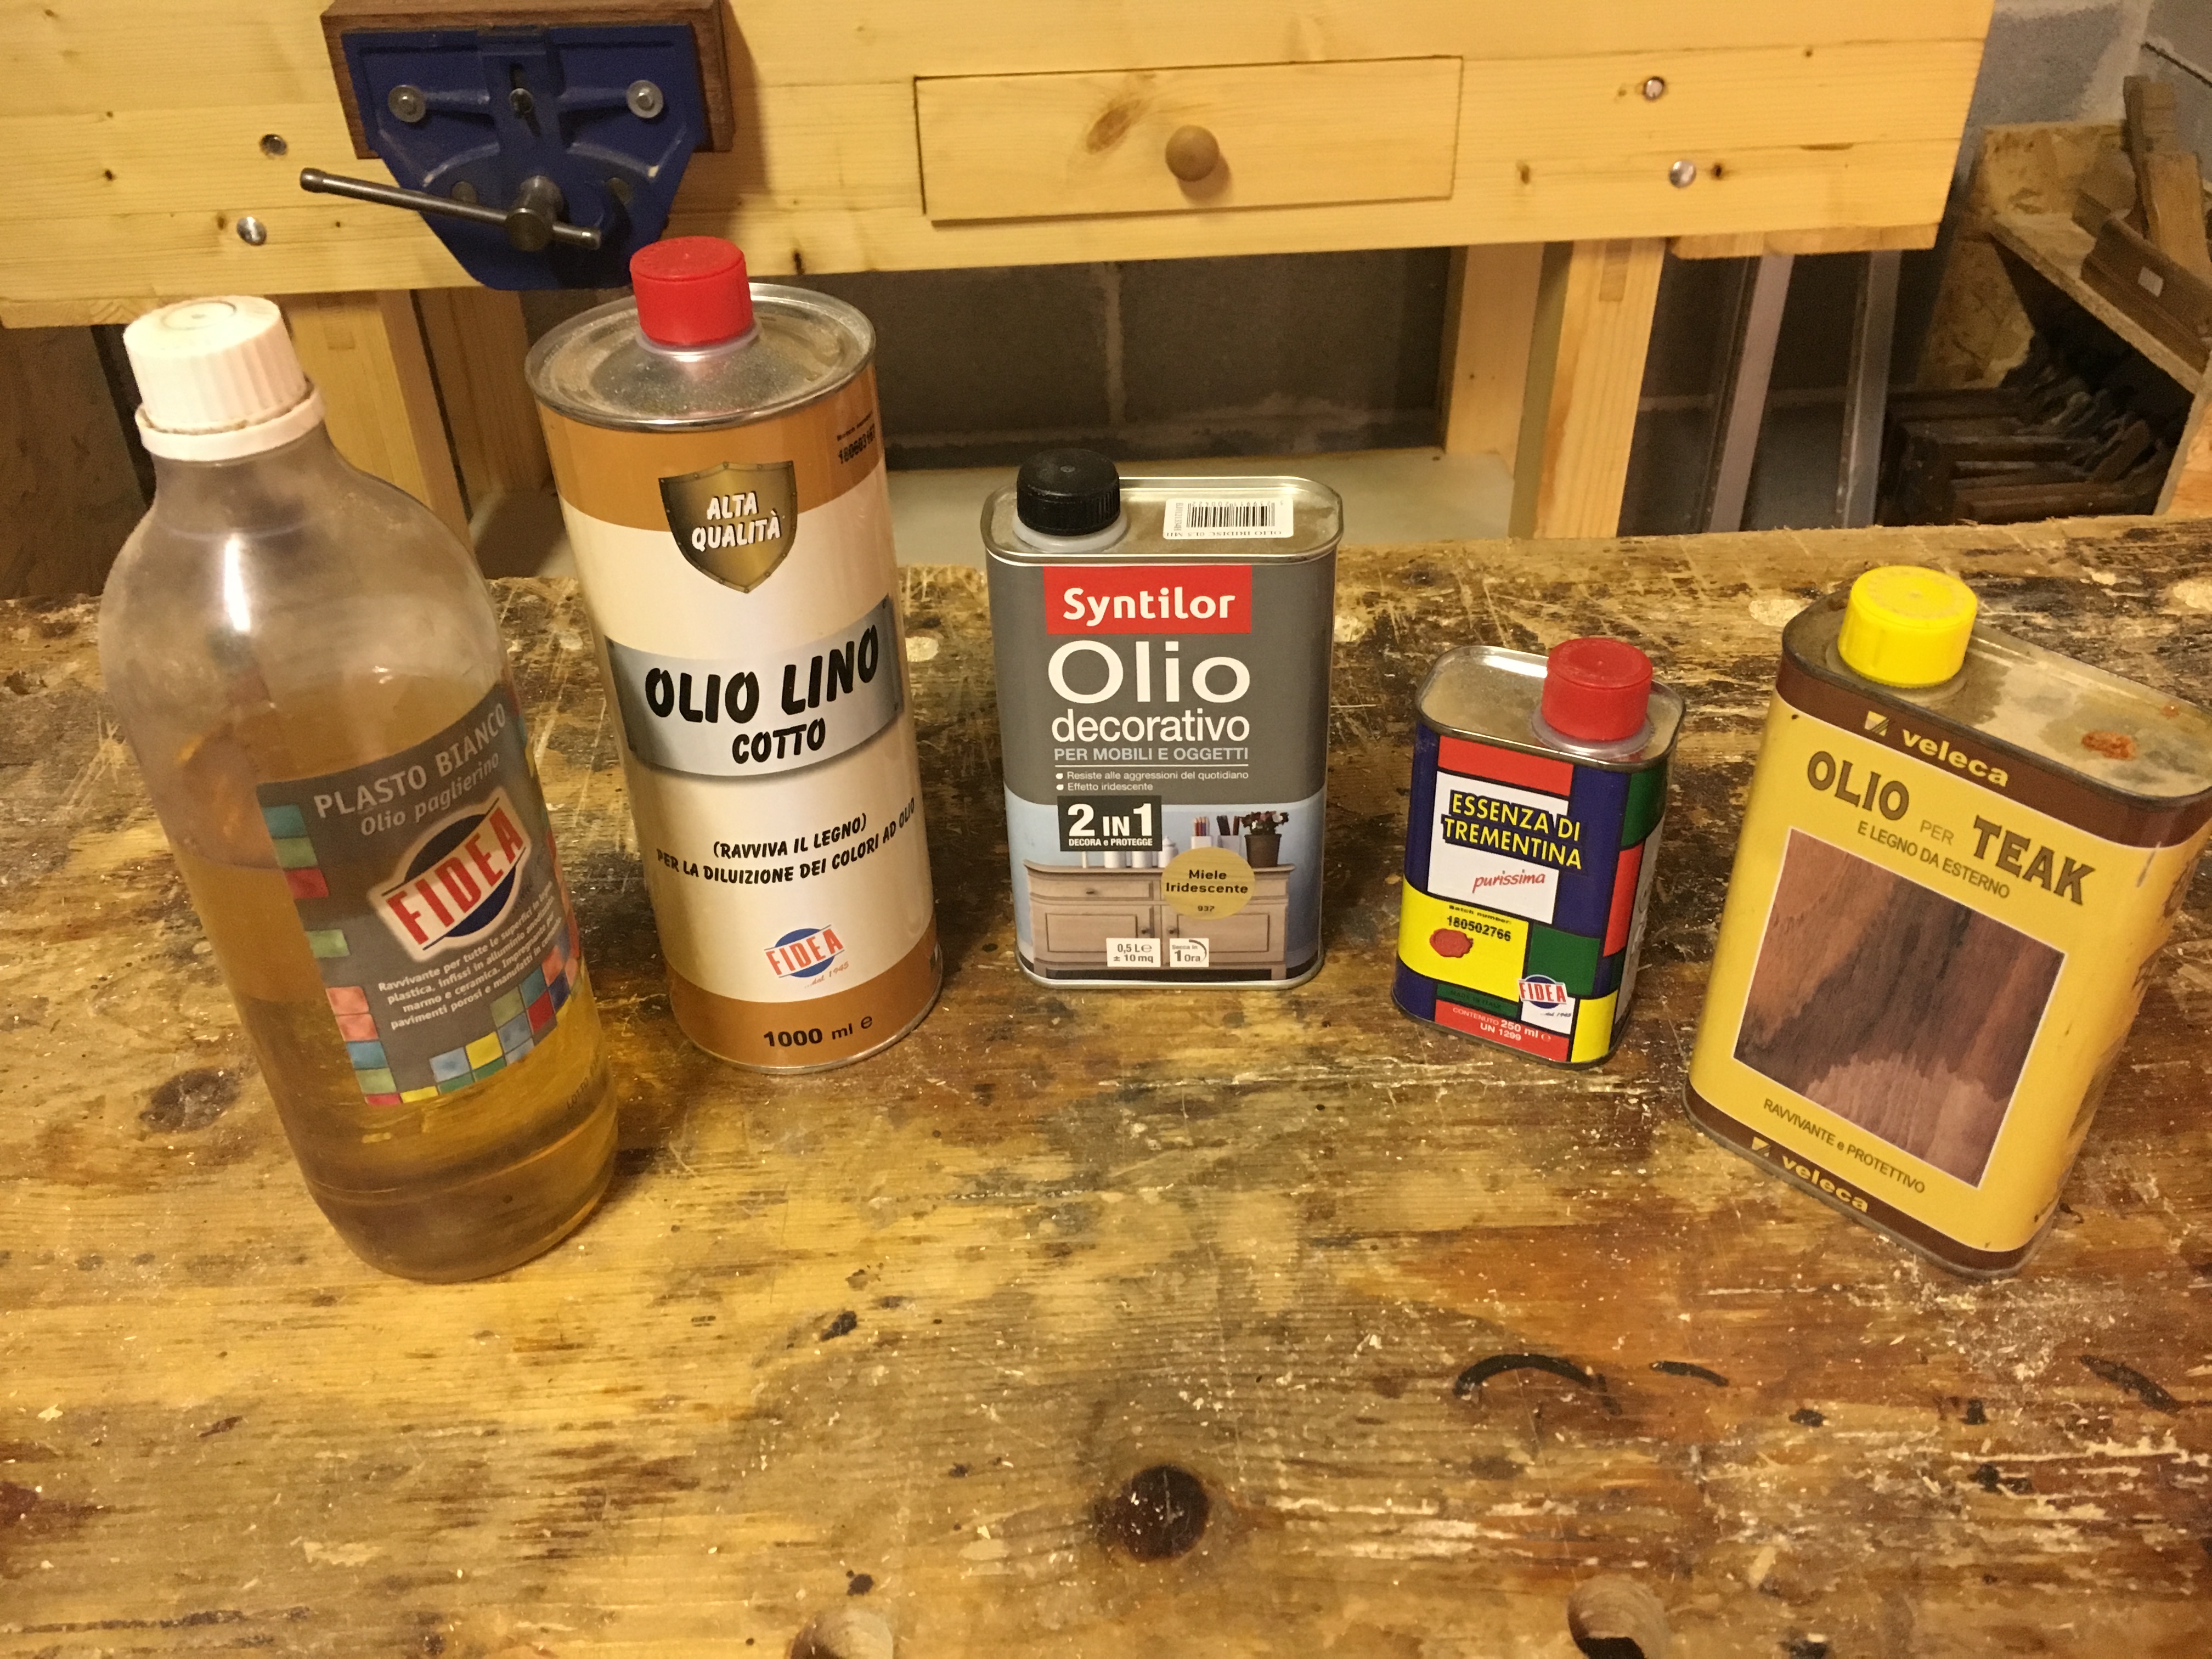
Per finitura di un manufatto si intende tutta una serie di operazioni destinate, per l’appunto, a finire il prodotto. Rientrano in questa fase la levigatura (di cui ho parlato in un precedente post La finitura del legno: levigatura / Wood finishing: sanding) e la verniciatura.
Il panorama della verniciatura è ampissimo esistendo innumerevoli procedimenti di finitura ed una moltitudine di prodotti utilizzabili in commercio.
Un tempo i manufatti venivano rifiniti principalmente a gommalacca e ad olio e le vernici erano pressoché sconosciute. In questo post vorrei parlare sommariamente della finitura ad olio, cercando di semplificare al massimo l’argomento. Spesso infatti si corre il rischio, specialmente quando si parla di finitura, di inserire troppi particolari e tecnicismi che non fanno altro che complicare inutilmente il procedimento.
Per la stesura ad olio è fondamentale anzitutto che il manufatto sia ben levigato. Se è stato piallato a mano è quasi come se fosse stato levigato con una grana 250. Se è allo stato grezzo e non piallato lo si può levigare cominciando ad esempio da una carta abrasiva di grana 80 e salire gradualmente passando per le grane 140, 250, 320 per terminare con una grana 400. Alla grana 400 il manufatto risulterà molto liscio al tatto e pronto a ricevere la finitura. In linea di massima ed estremizzando molto si può dire che per i legni teneri (come ad esempio il pino e l’abete) basta levigare fino ad una grana 250. Per i legni duri (come ad esempio il rovere ed il noce) è consigliabile invece arrivare fino alla grana 400 e oltre. Inoltre, sempre a grandi linee, più il manufatto è levigato e più è in grado di assorbire la finitura. Di conseguenza la velocità di coloritura sarà maggiore su un legno levigato poco rispetto ad un legno levigato maggiormente in quanto il colore nel primo caso rimarrà più in superficie rispetto ad un manufatto maggiormente levigato in grado di far meglio penetrare la finitura.
Fatta questa breve premessa riporto sotto, in estrema sintesi, il procedimento che ho adottato su alcuni manufatti per finire ad olio.
1) Scartavetrare il legno grezzo utilizzando carte abrasive a partire dalla grana 80 (si può partire dalla grana 250 se si è preventivamente piallato bene a mano). Alla fine della levigatura spazzolare bene la superficie con una spazzola a setole morbide e successivamente strofinare con un panno morbido e pulito. È importante non lasciare tracce di particelle abrasive e polvere sulla superficie da finire.
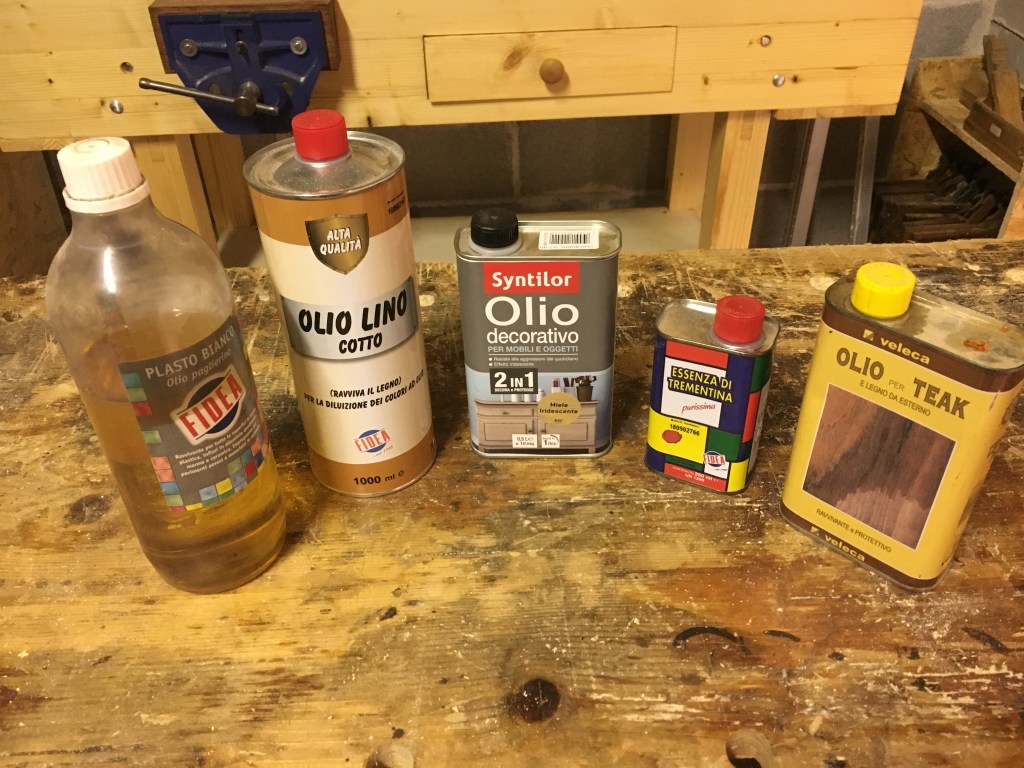
2) Miscelare in un contenitore ed in proporzione 1/1 olio di lino cotto, olio paglierino, un prodotto ad olio già preparato (come ad esempio il Syntilor color miele o un prodotto Veleca) ed un 20% di essenza di trementina (diluente). È opportuno aggiungere il diluente almeno nella prima mano per facilitare la penetrazione nelle fibre.
3) Dopo aver indossato dei guanti in lattice, applicare una modesta quantità di prodotto direttamente sul manufatto o imbevendo uno straccio di cotone oppure applicare con un pennello a setole morbide (seguendo sempre la venatura del legno).
4) Dopo circa 15/20 minuti (il tempo di asciugatura dipende molto dalle condizioni climatiche), rimuovere l’olio in eccesso strofinando energicamente con un panno di cotone pulito, avendo l’accortezza di rimuovere tutti gli eventuali eccessi di olio che, seccandosi, potrebbero con il tempo raggrinzire.
5) Dopo la prima mano lasciare asciugare per almeno 24 ore o comunque attendere la completa asciugatura.
6) Ripetere i passaggi dal punto 1) al punto 5) effettuando almeno tre mani di finitura.
Tra una mano e l’altra non è necessario scartavetrare in quanto l’olio, a differenza delle vernici ad acqua, non fa “alzare il pelo” del legno (quindi il legno non diventa nuovamente ruvido al tatto costringendo ad intervenire con la carta abrasiva a grana fine), ma è importante comunque rispettare i tempi di asciugatura. L’olio di lino cotto (a differenza di quello crudo e di quello paglierino, ad esempio) asciuga più velocemente e lascia una sottile pellicola protettiva.
Il procedimento sopra descritto può essere ampiamente personalizzato. Ad esempio è possibile utilizzare soltanto un tipo di olio per effettuare tutto il procedimento come l’olio di lino cotto o crudo, l’olio paglierino, oppure l’olio di tung o di teak o l’olio di vaselina ecologico (particolarmente indicato per manufatti destinati ad uso alimentare, come ad esempio posate in legno e taglieri) o addirittura del normale olio alimentare (in quest’ultimo caso bisogna prestare attenzione all’irrancidimento).
Anche le quantità da miscelare possono variare a seconda che si voglia una maggiore diluizione (aggiungendo più essenza di trementina) oppure intervenendo sulle proporzioni degli oli utilizzati. Io ho usato una miscela di oli perché così facendo ho ottenuto un buon compromesso tra coloritura, protezione e penetrazione nei pori.
Il risultato finale che otterremo sarà un manufatto dall’aspetto gradevole, dal colore leggermente mielato e con tonalità calde, lucido e liscio al tatto, che lascia trasparire le venature del legno alterando solo minimamente (scurendolo) il colore originale. Inoltre, trattandosi di olio, possiede ottime qualità idrorepellenti.
Ovviamente più mani si applicano e più si ottiene l’effetto di scurire il legno tenendo conto comunque che con il tempo l’olio tenderà a scurire naturalmente. Occorre inoltre tener presente che se il nostro intento fosse quello di far diventare color noce un manufatto in legno di pino (quindi di colore chiaro) attraverso la finitura ad olio, ciò non sarebbe possibile. Per scurire significativamente un legno bisogna intraprendere altre strade impiegando apposite vernici scurenti (all’acqua o ad alcol) o al limite prodotti ad olio specifici in grado di scurire il legno come ad esempio il Danish Oil pigmentato scuro. Il problema di utilizzare questi oli colorati (così come le vernici scure all’acqua) su legni teneri come il pino e l’abete sarà semmai quello di riuscire ad ottenere una finitura uniforme. Infatti il diverso grado di assorbimento tipico di questi tipi di legno fa sì che le vernici (ad acqua) e gli oli scuri creino una poco gradevole finitura “a chiazze” (anche se in commercio esistono comunque vernici cosiddette uniformanti in grado di contrastarne l’effetto).
In linea di massima il consiglio che posso dare è quello di rispettare il più possibile il colore originale del legno grezzo. Quindi se stiamo lavorando un legno tenero e chiaro (mi riferisco sempre al pino e all’abete perché sono quelli più diffusi), è preferibile finirlo ad olio o comunque con vernici trasparenti o satinate evitando quelle troppo scurenti correndo il rischio di ottenere una finitura non uniforme e snaturalizzare il colore originale del legno.
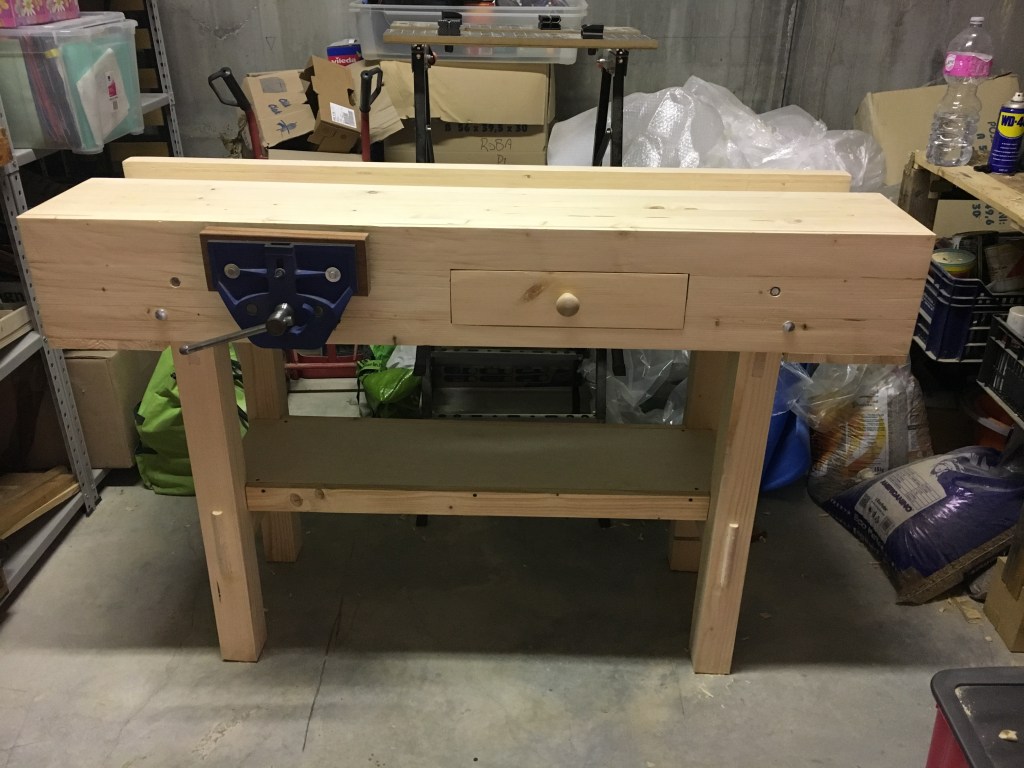
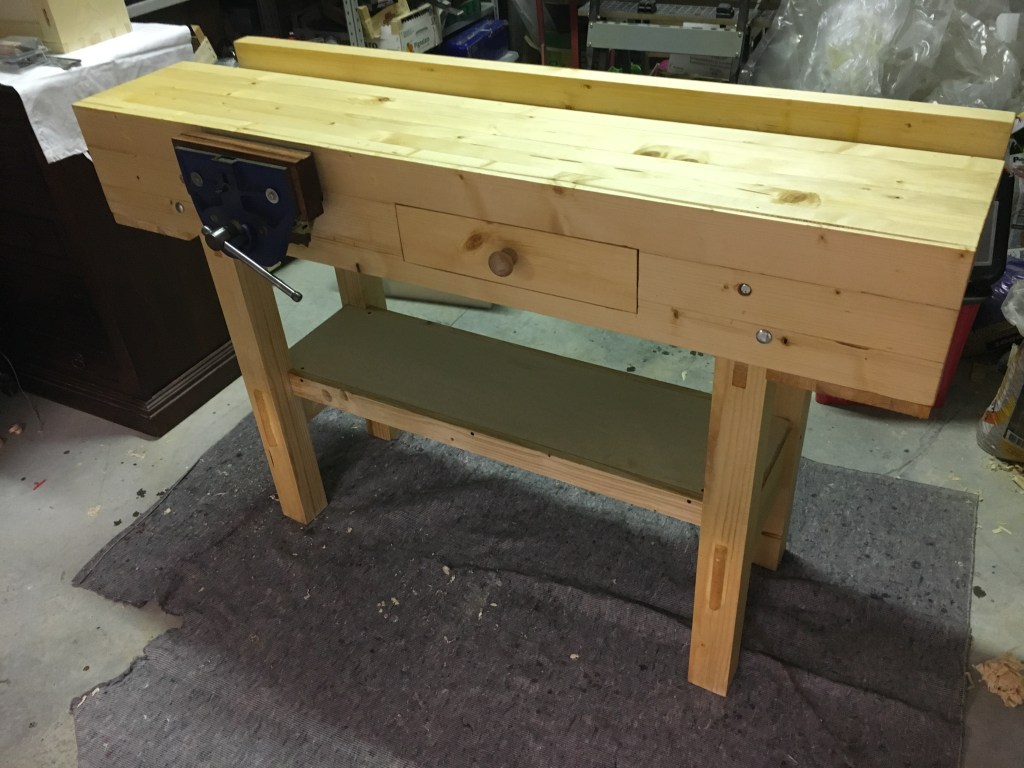
A sinistra il banco in legno di abete allo stato grezzo. A destra dopo la finitura ad olio.
Una superficie trattata ad olio (come nel mio caso il banco da falegname) è più facilmente riparabile rispetto ad una superficie trattata con le vernici. È comunque consigliabile intervenire periodicamente (almeno una volta all’anno) al fine di ravvivare la superficie e rinnovare la protezione.
Infine ricordiamoci sempre di indossare dei guanti in lattice durante l’applicazione e di lavare i pennelli e bagnare gli stracci utilizzati. Specialmente per gli stracci è sempre elevato il rischio di autocombustione.
———————————————————————————————————————————-
Finishing a product means a whole series of operations intended, in fact, to finish the workpiece. This phase includes the sanding (of which I spoke in a previous post The wood finish: sanding / Wood finishing: sanding) and varnishing. The panorama of varnishing is very large, there are countless finishing processes and a multitude of products that can be used on the market. At one time the works were finished mainly with shellac and oil and varnishes were almost unknown. In this post I would like to speak briefly about the oil finish, trying to simplify the topic as much as possible. Often in fact we run the risk, especially when we talk about finishing, to insert too many details and technicalities that complicate the procedure unnecessarily. For the oil application it is essential first of all that the product is well sanded. If it has been planed by hand it is almost as if it had been sanded with a 250 grit. If it is rough and not planed it can be sanded starting, for example, from an 80 grit abrasive paper and gradually going through the 140, 250 , 320 grits to finish with a 400 grit. At the 400 grit the product will be very smooth to the touch and ready to receive the finish. In general it can be said that for soft woods (such as pine and fir) it is sufficient to sand up to a 250 grit. For hard woods (such as oak and walnut) it is advisable to instead get up to the 400 grit and over. Moreover, the more the article is polished and the more it is able to absorb the finish. As a consequence, the coloring speed will be greater on a little sanded wood than a more sanded wood since the color in the first case will remain more on the surface compared to a more polished product able to better penetrate the finish. Having made this brief premise I report below, in a nutshell, the procedure I have adopted on some products to finish with oil.
1) sand the rough wood using abrasive papers starting from 80 grit (starting from 250 grit if it has been previously planed by hand). At the end of the sanding, brush the surface with a soft bristle brush and then wipe with a soft and clean cloth. It is important not to leave traces of abrasive particles and dust on the surface to be finished. 2) Mix in a container and in proportion 1/1 boiled linseed oil, straw oil, an oil product already prepared (such as Syntilor honey color or a Veleca product) and a 20% essence of turpentine (diluent) . The diluent should be added at least in the first coat to facilitate penetration into the fibers. 3) After wearing latex gloves, apply a small amount of product directly on the product or soaking a cotton cloth or apply with a soft bristle brush (always following the grain of the wood). 4) After about 15/20 minutes (drying time depends heavily on weather conditions), remove excess oil by rubbing hard with a clean cotton cloth, making sure to remove any excess oil which, drying out , could with time shrink. 5) After the first coat, allow to dry for at least 24 hours or in any case wait for complete drying. 6) Repeat the steps from point 1) to point 5) making at least three finishing coats.
Between one coat and the other it is not necessary to sand down because the oil, unlike water paints, does not “raise the grain” of the wood (so the wood does not become rough again to the touch forcing to intervene with the fine abrasive paper), but it is important to respect drying times. Boiled linseed oil (unlike the raw and straw-colored ones, for example) dries faster and leaves a thin protective film. The procedure described above can be widely customized. For example, it is possible to use only one type of oil to carry out the whole process such as boiled or raw linseed oil, straw-colored oil, or tung or teak oil or ecological vaseline oil (particularly suitable for products intended for food use, such as cutlery and chopping boards) or even normal vegeratable oil (in this case, attention must be paid to rancidity). Also the quantities to be mixed can vary depending on whether a greater dilution is desired (adding more essence of turpentine) or intervening on the proportions of the oils used. I used a mixture of oils because in doing so I got a good compromise between coloring, protection and penetration into the pores. The final result we will obtain will be a pleasant looking product, with a slightly honeyed color and warm, glossy and smooth to the touch, which leaves the grain of the wood transparent, only slightly altering (darkening) the original color. Moreover, since it is oil, it has excellent water-repellent qualities. Obviously more hands are applied and the more the effect of darkening the wood is obtained taking into account that over time the oil will tend to naturally darken. Keep in mind that if our intent was to make a pine wood product (therefore of light color) become walnut color through the oil finish, this would not be possible. To significantly darken a wood it is necessary to take other roads using special darkening varnishes (water or alcohol) or, at the limit, specific oil products able to darken the wood, such as the Danish oil walnut color. The problem of using these colored oils (as well as the dark water-based varnishes) on soft woods such as pine and fir will be able to achieve a uniform finish. In fact, the different degree of absorption typical of these types of wood means that the varnishes (water) and the dark oils create an unattractive “patchy” finish (even if in the market there are however so-called uniforming varnishes able to counteract the effect). In principle the advice I can give is to respect as much as possible the original color of the raw wood. So if we are working a soft and clear wood (I always refer to pine and fir because they are the most common), it is preferable to finish it with oil or in any case with transparent or satin varnishes avoiding those too dark and running the risk of obtaining a not uniform finish and unnaturalise the original color of the wood. A surface treated with oil (as in my case the woodwork bench) is more easily repairable than a surface treated with varnishes. It is however advisable to intervene periodically (at least once a year) in order to revive the surface and renew the protection. Finally, always remember to wear some latex gloves during application and to wash the brushes and wet the used rags. The risk of self-combustion is always high for rags.

Lascia un commento