Gli incastri. Come fare l’incastro dente e canale / The joints. How to make a housing dado joint.
Gli incastri. Come fare l’incastro dente e canale / The joints. How to make a housing dado joint.
In un articolo di qualche tempo fa avevo scritto riguardo agli incastri (trovate qua il post), parlandone a grandi linee e rimandando la trattazione della loro effettiva realizzazione a specifici articoli.
In questo post vorrei far vedere come realizzare l’incastro dente e canale, probabilmente il più semplice tra i tre fondamentali tipi di incastro sin qui descritti. La procedura seguita è tradizionale e molto comune.
Some time ago I wrote an article about the joints (see the link above), talking generally about them and postponing their making to specific posts. So in this post I would like to show how to make the housing dado joint, probably the easier of the three basic types of joints. The procedure described is traditional and very common.
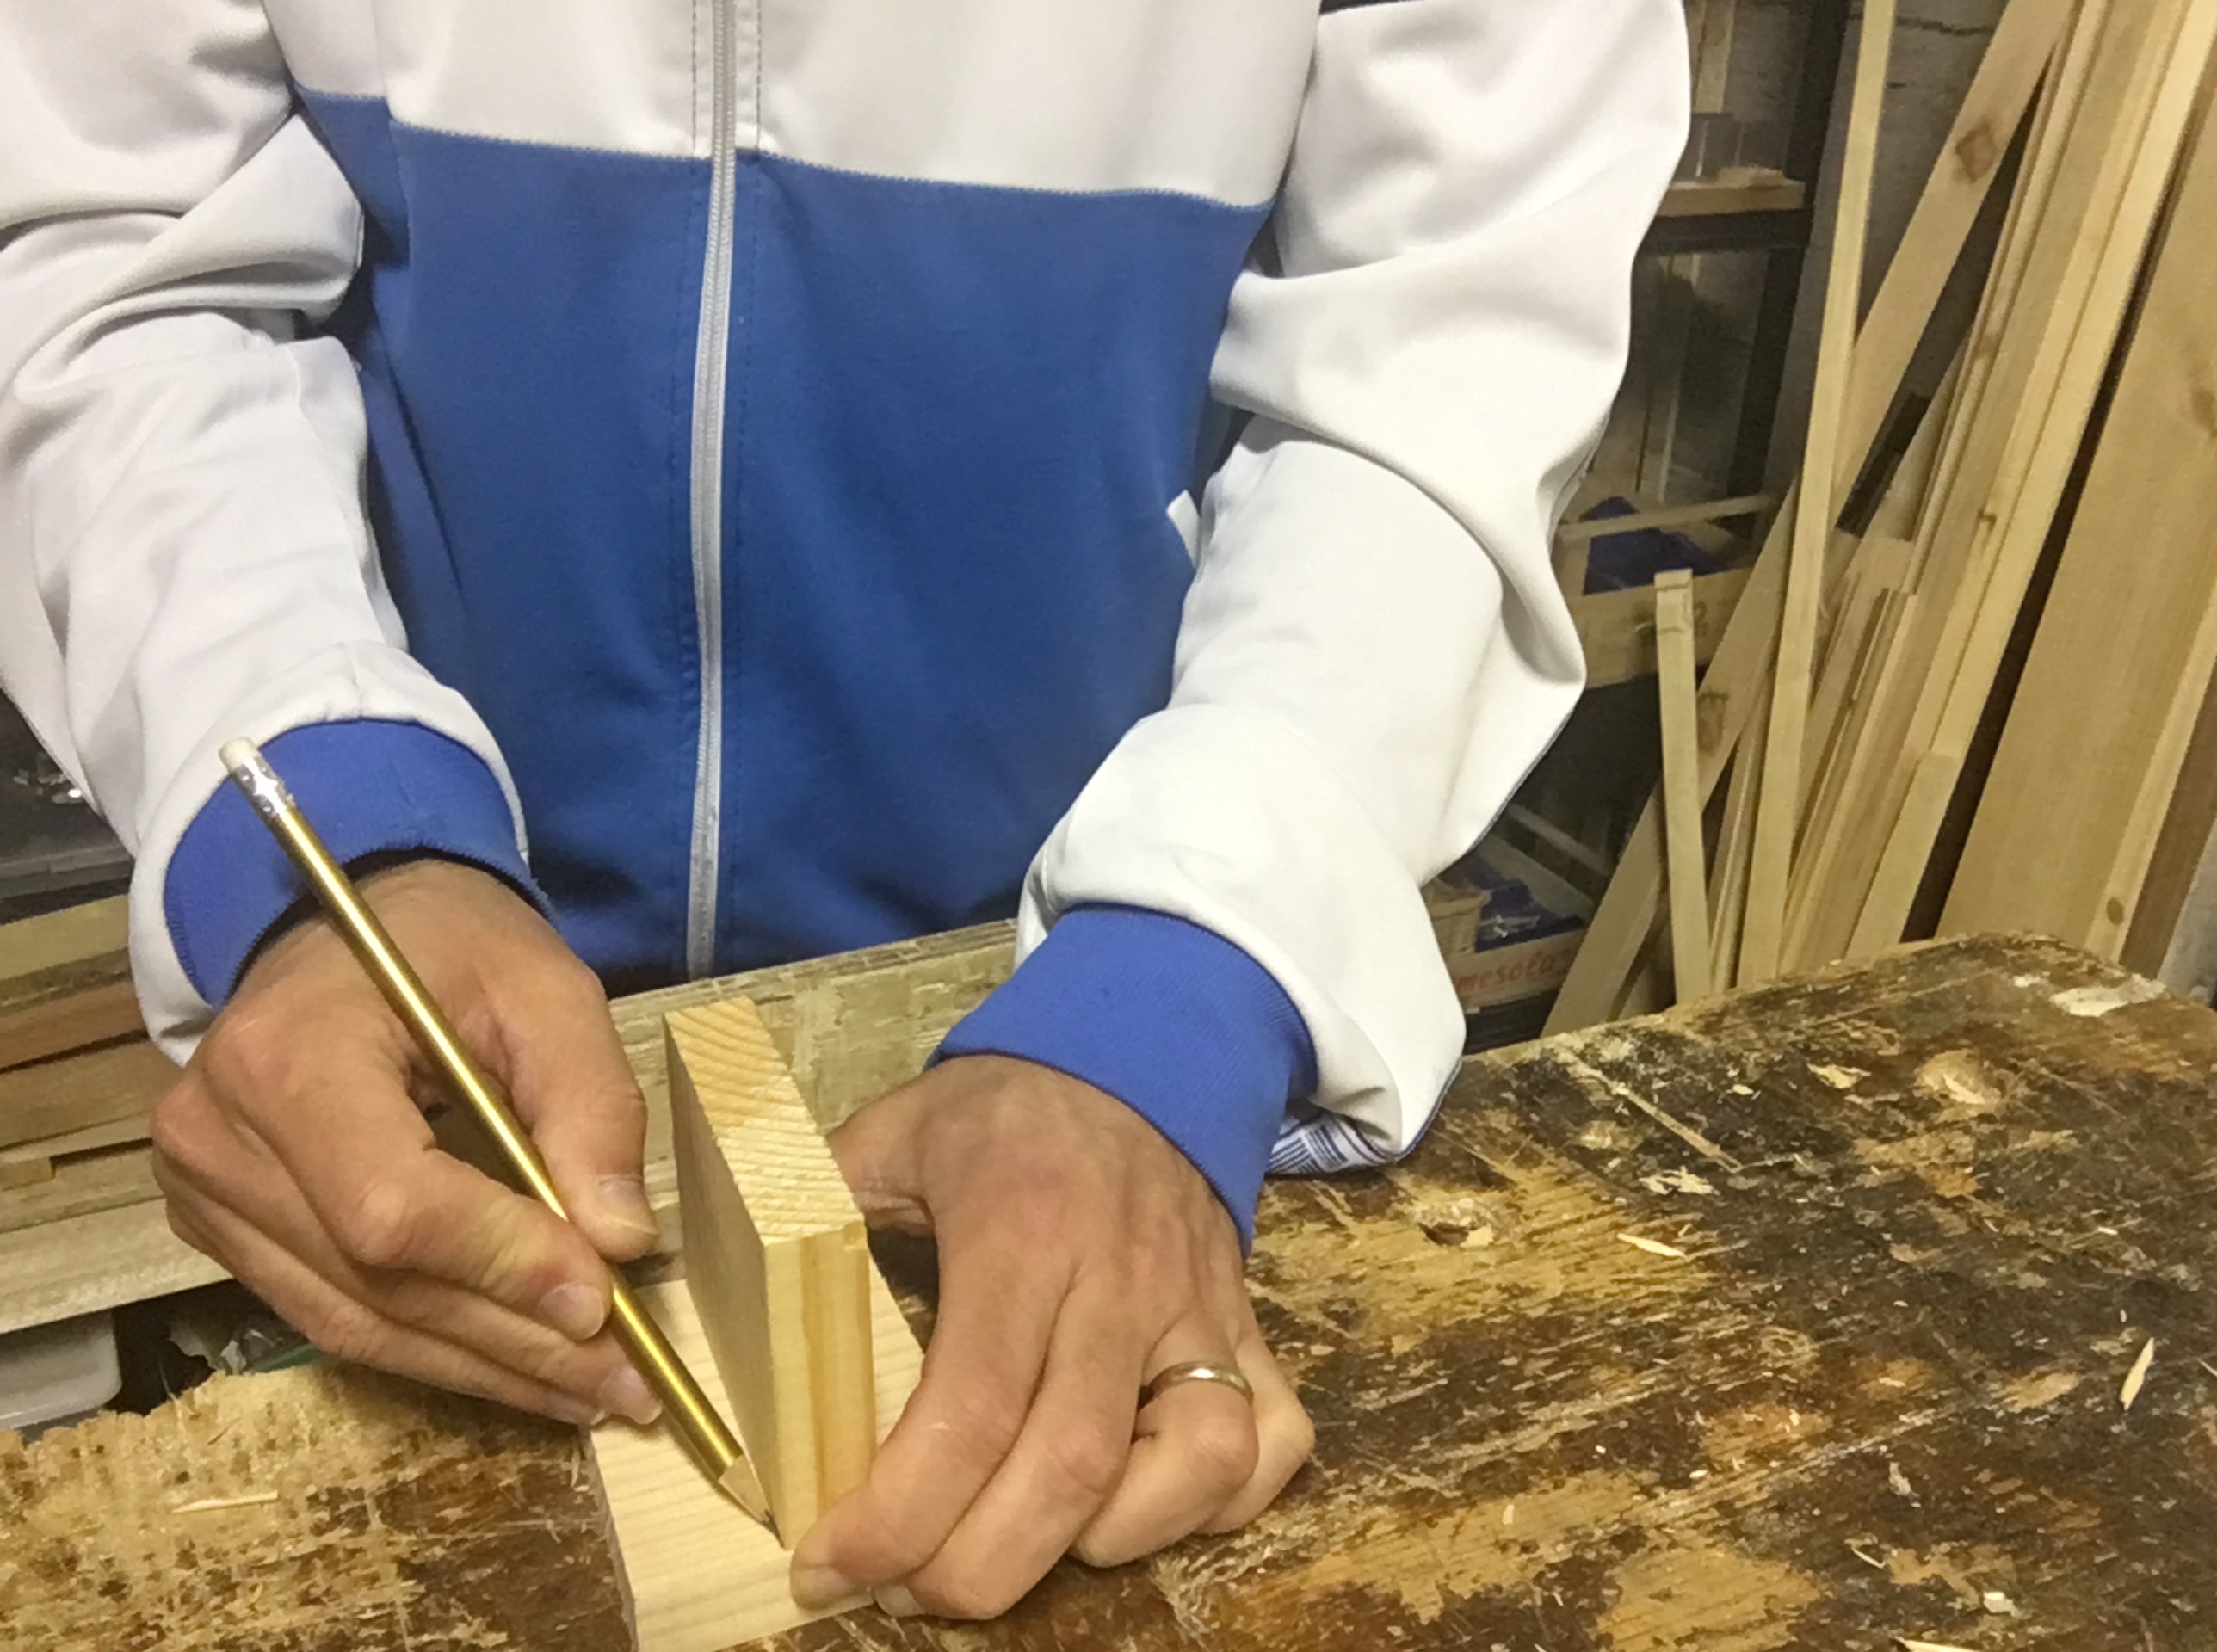
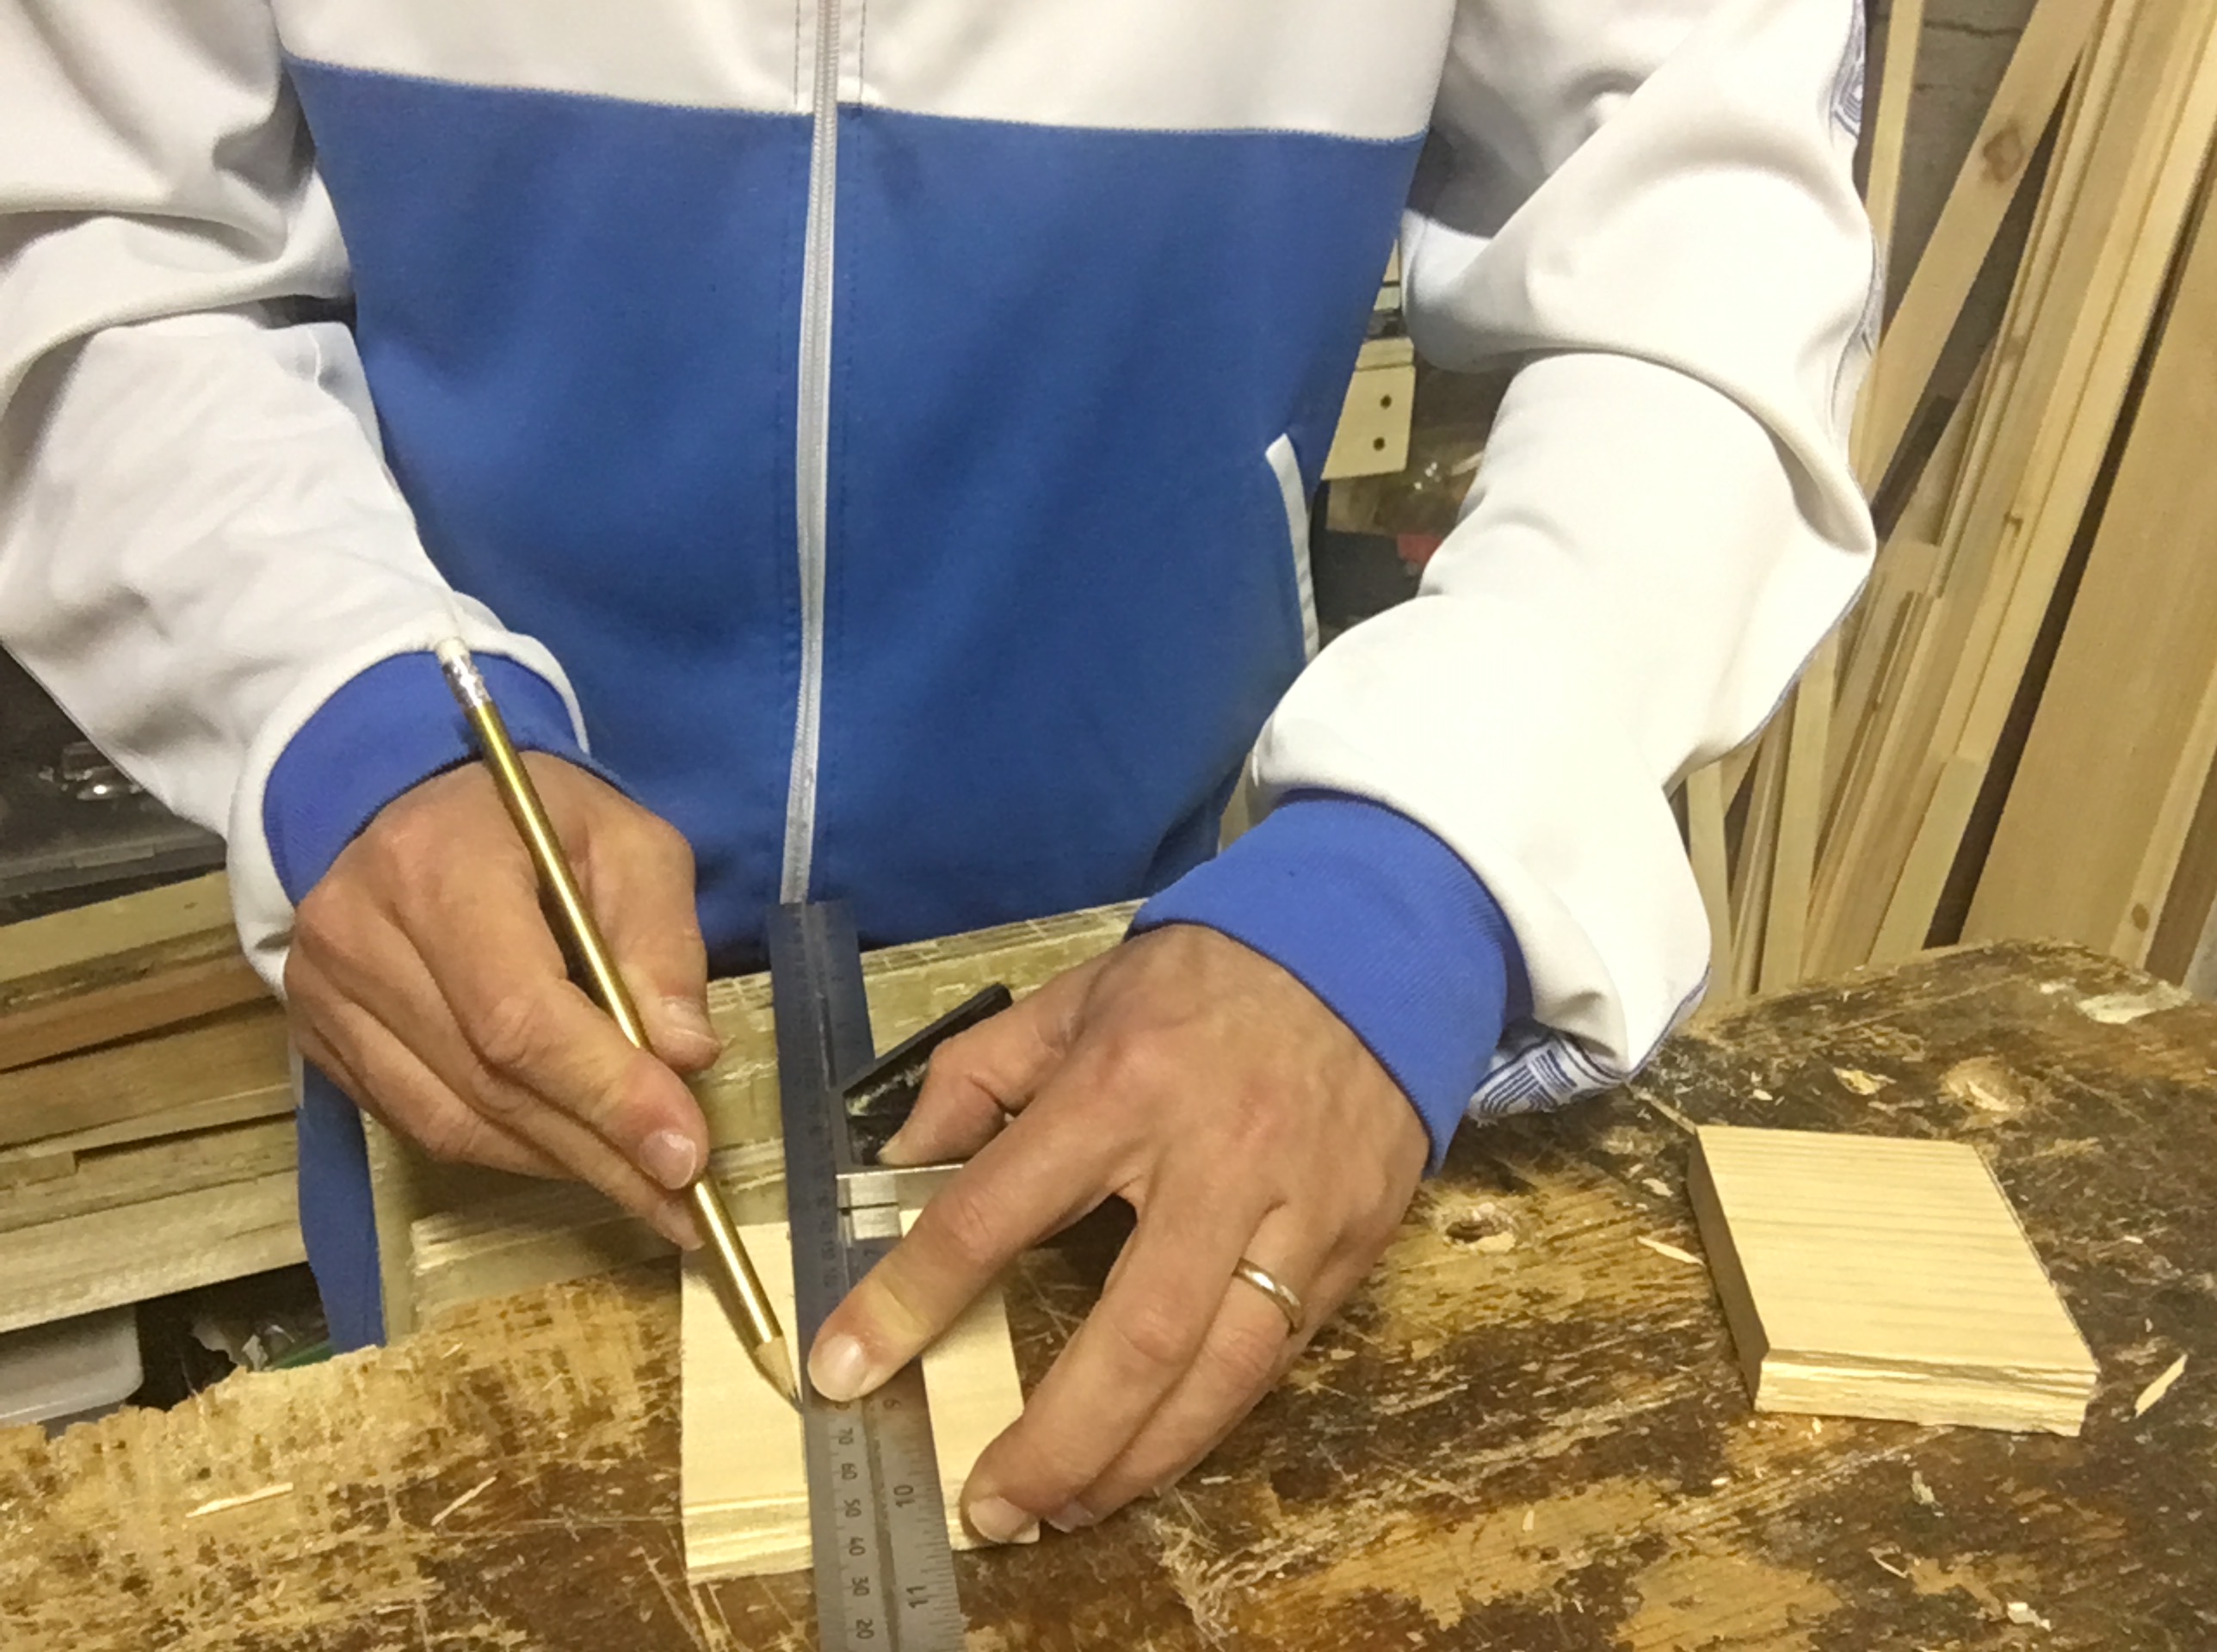
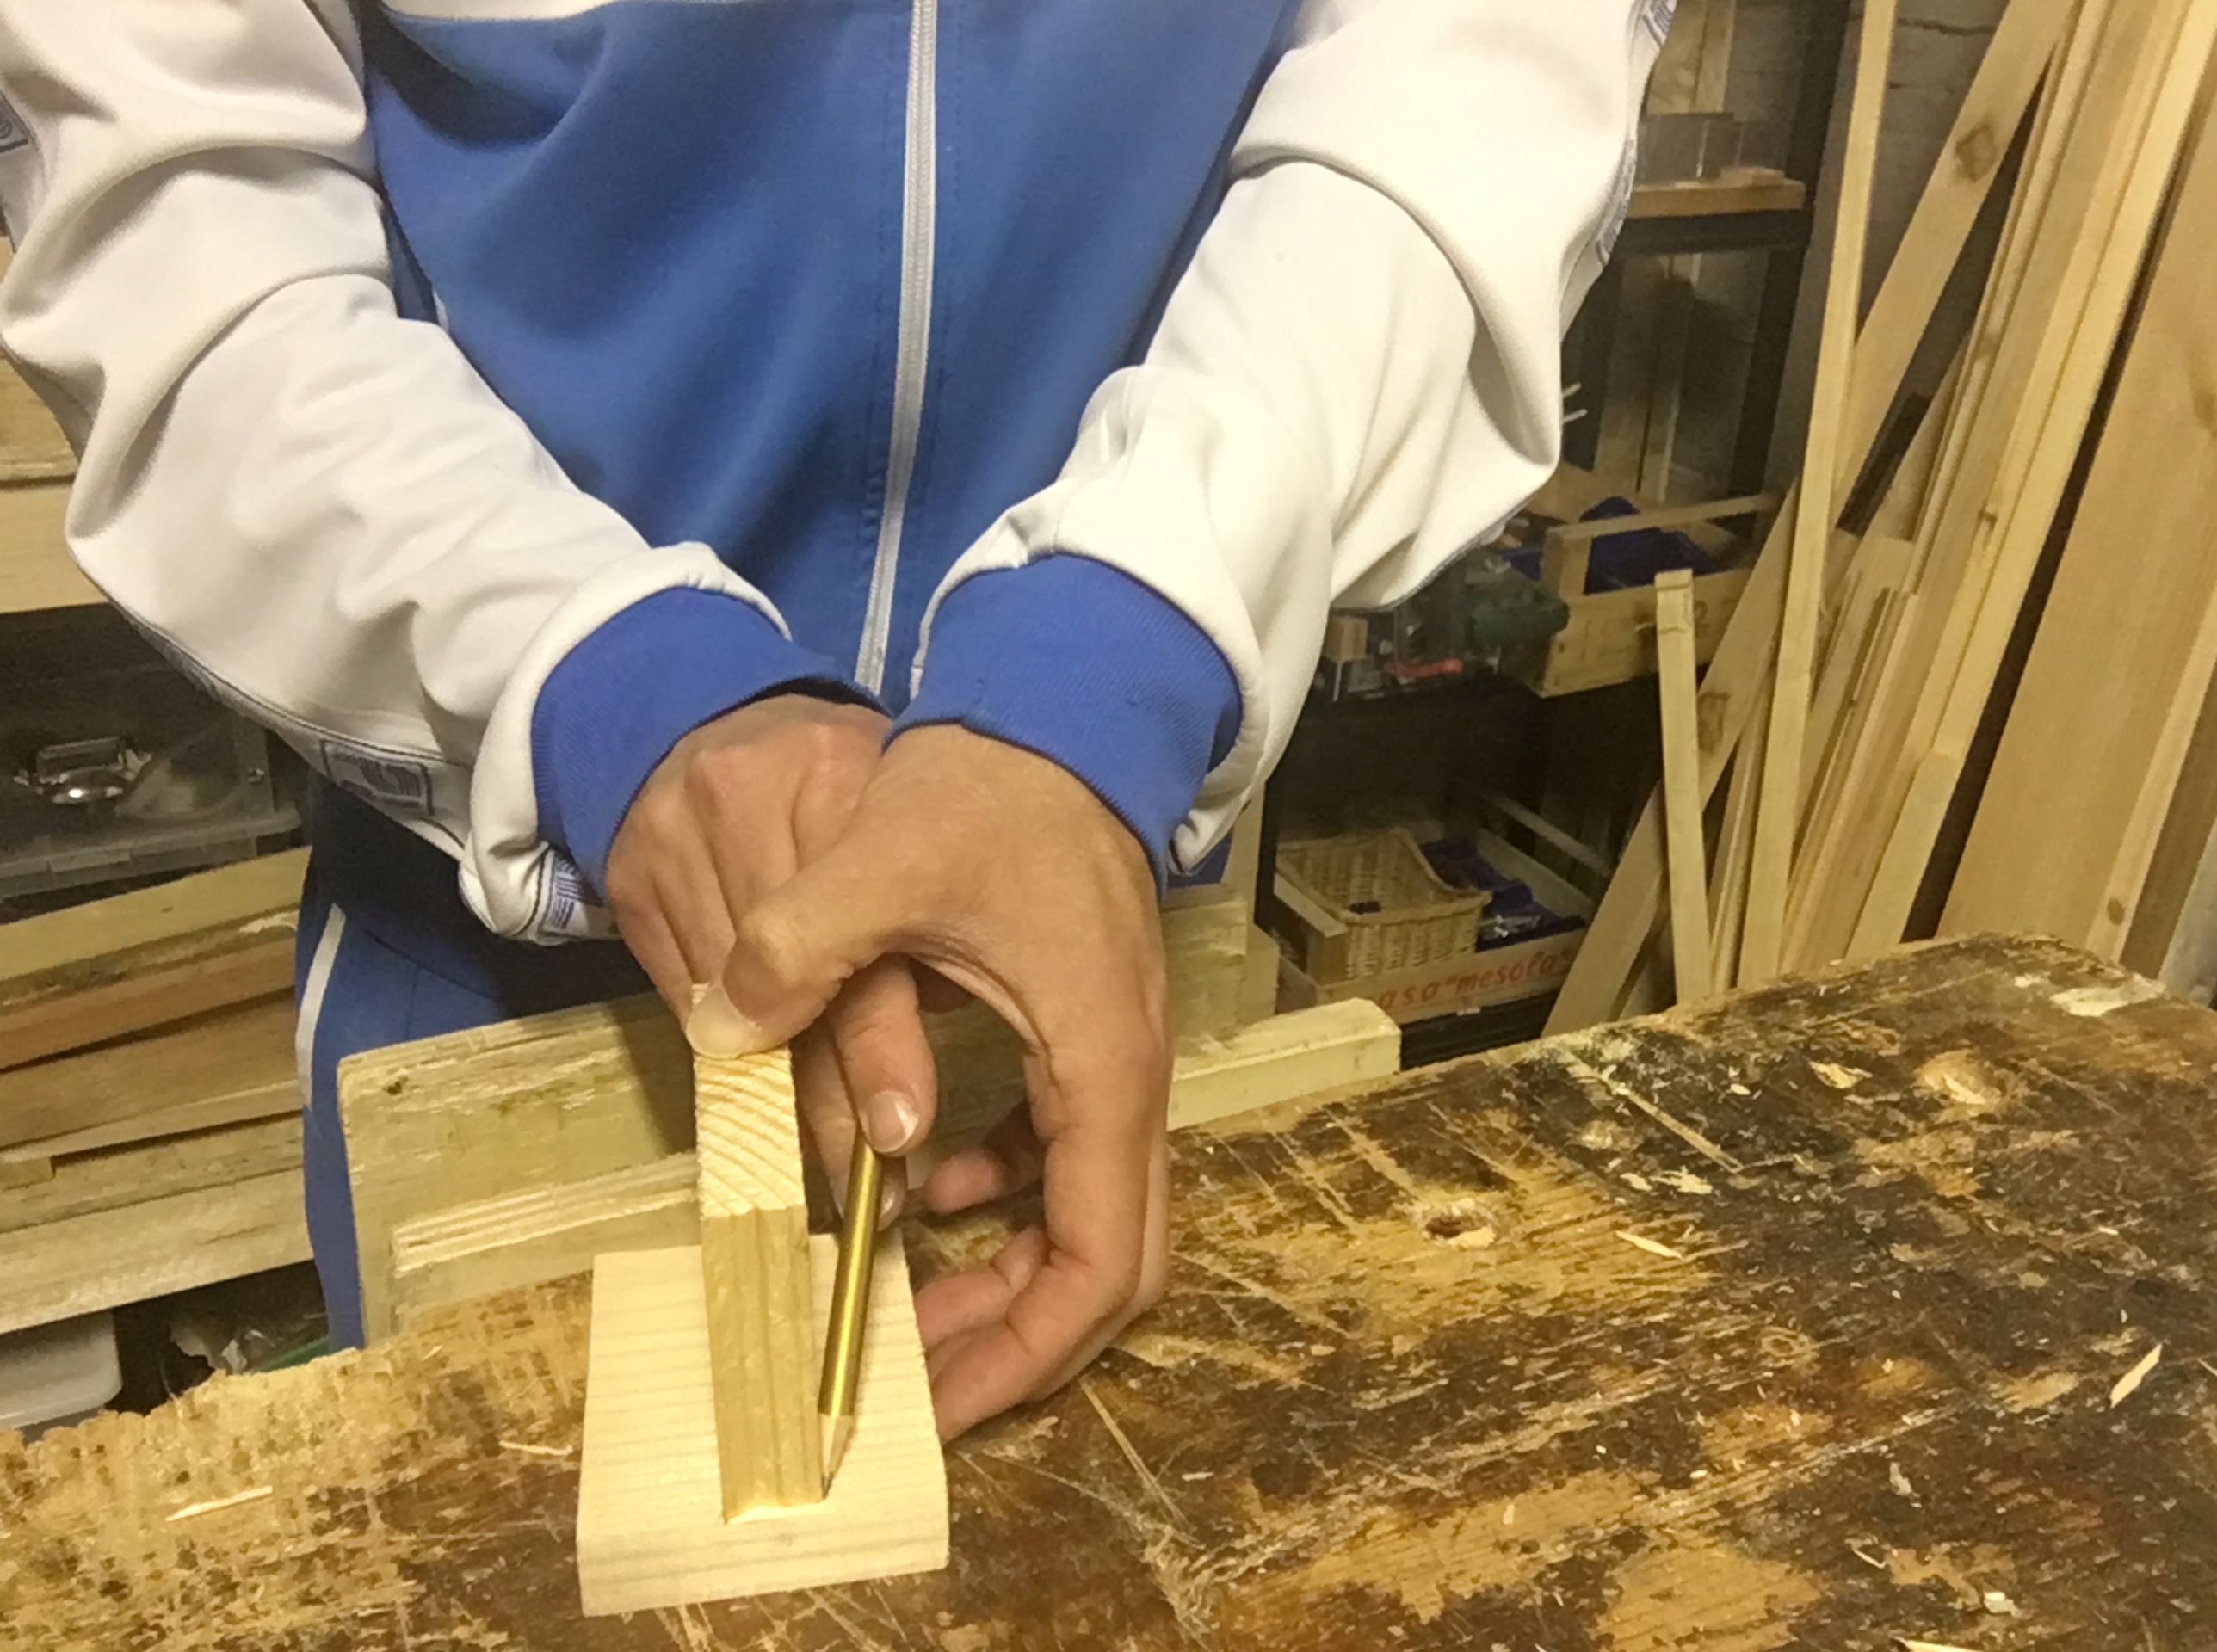
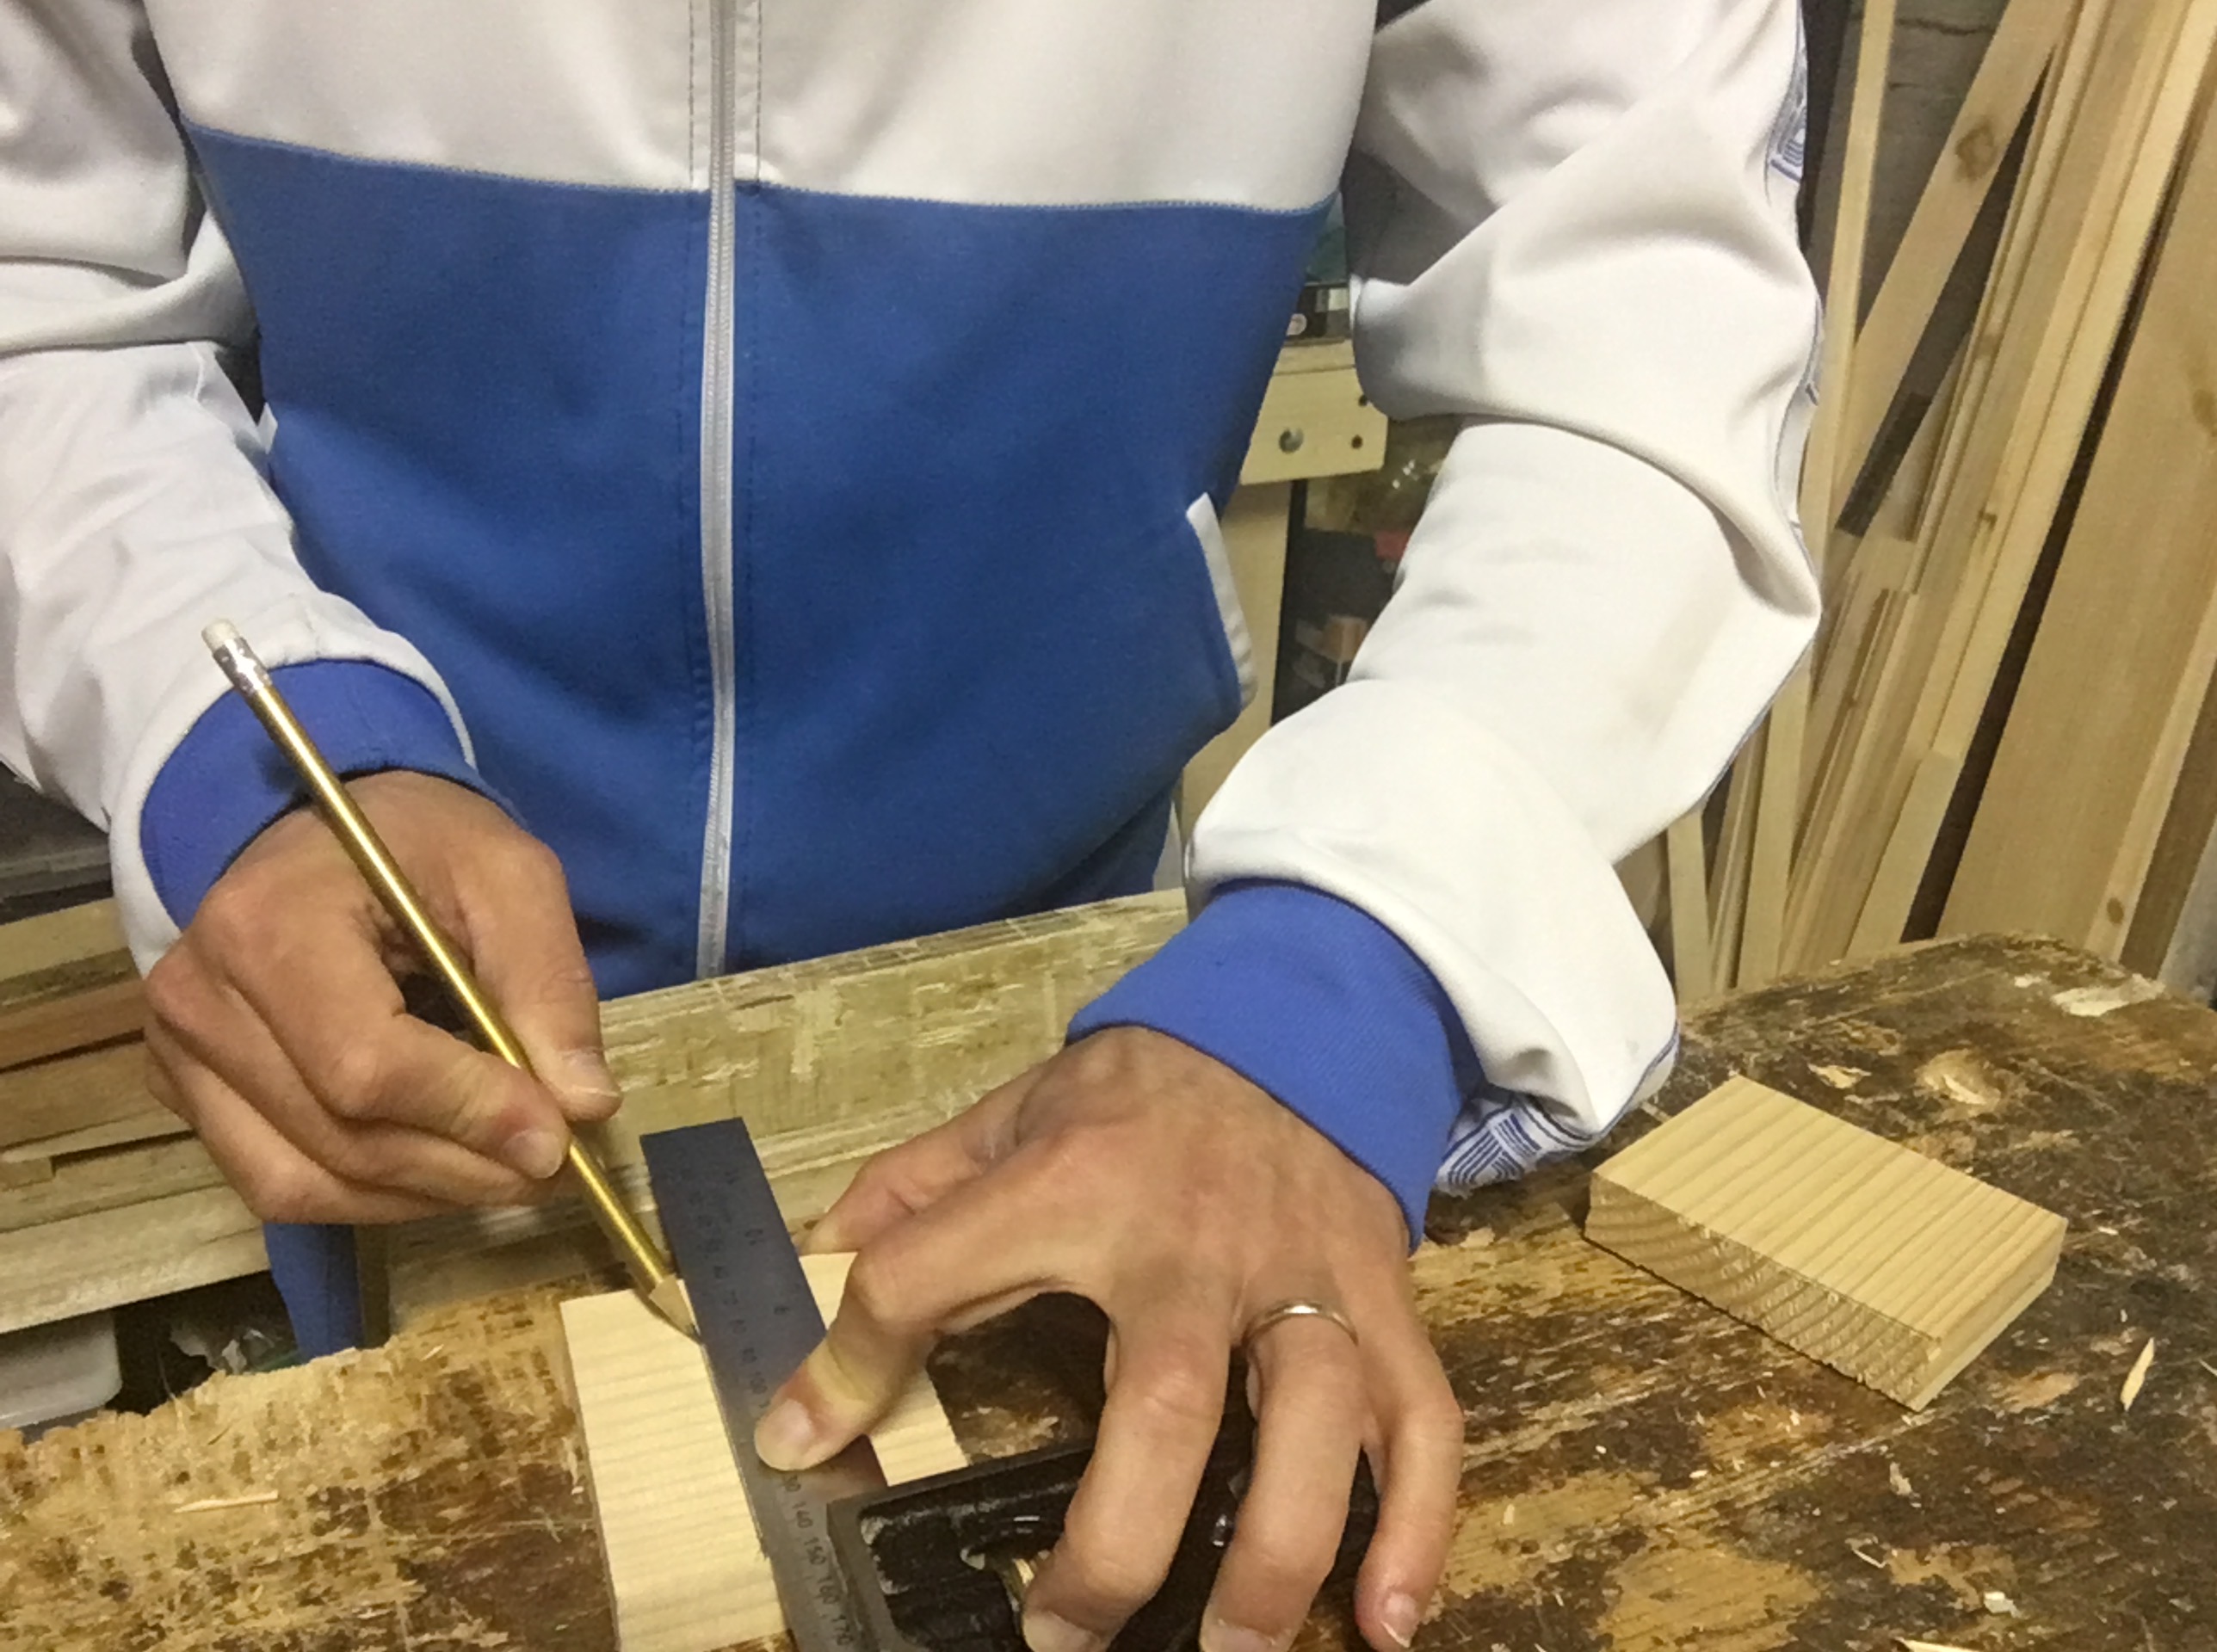
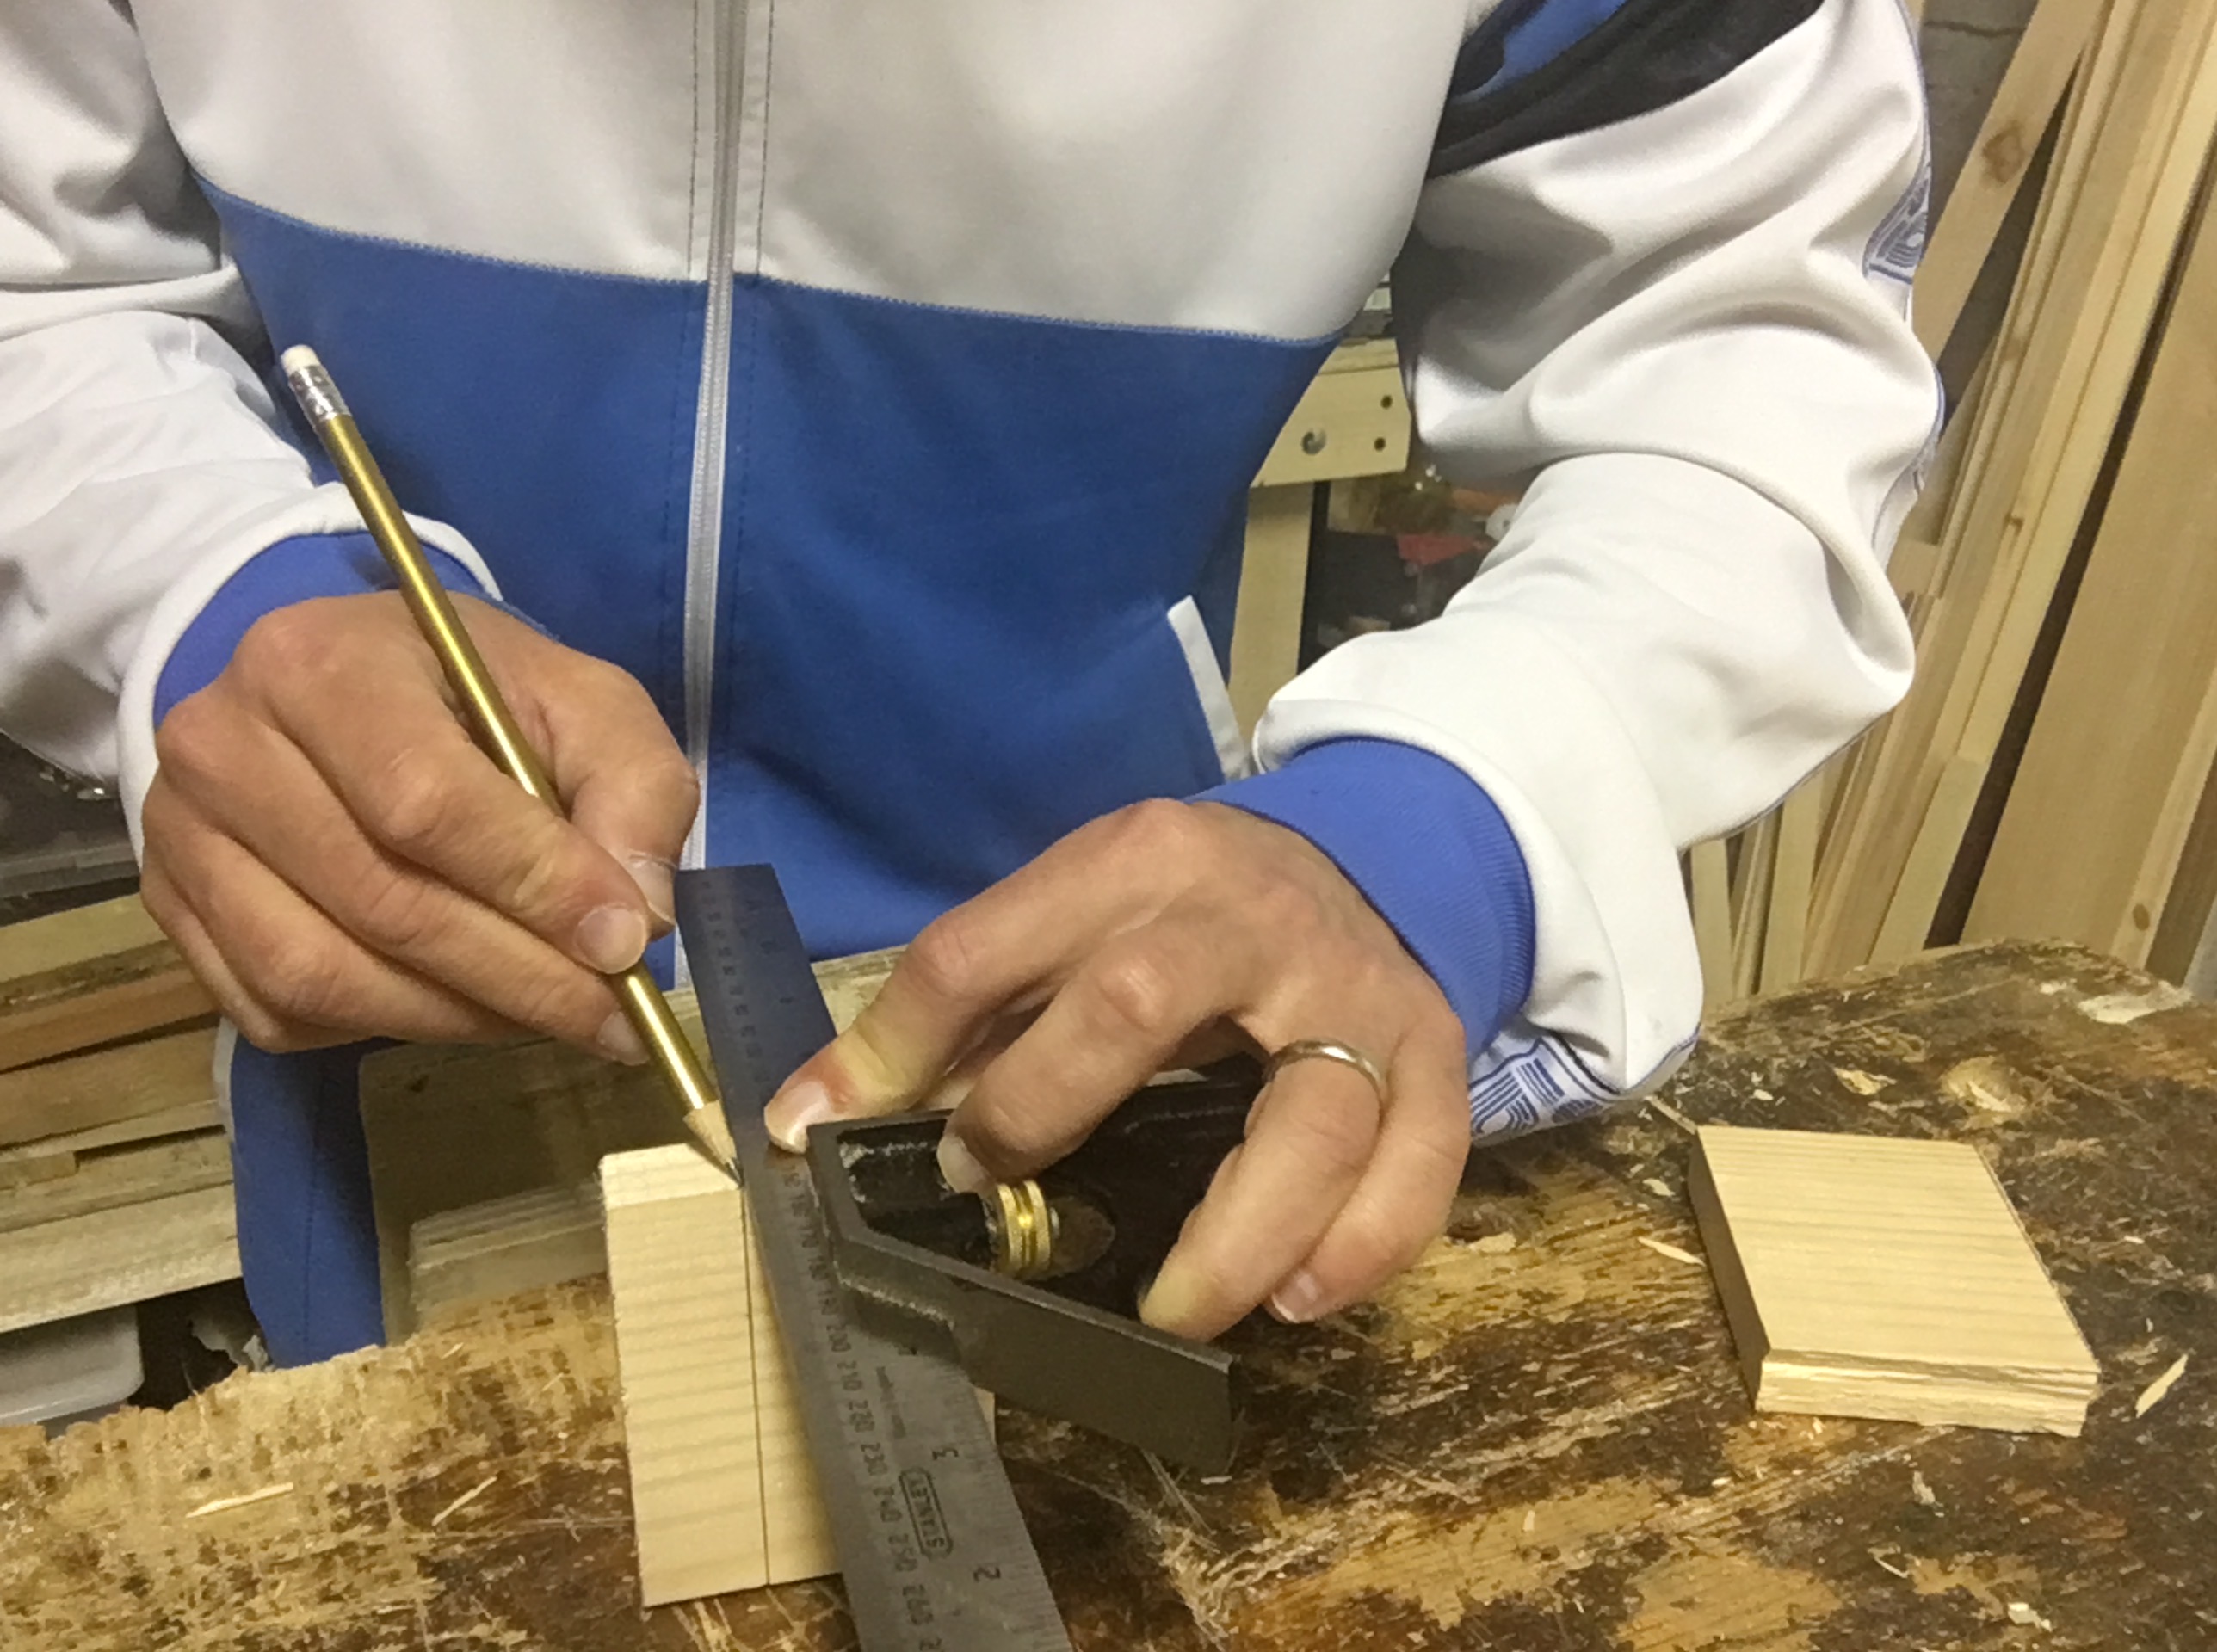
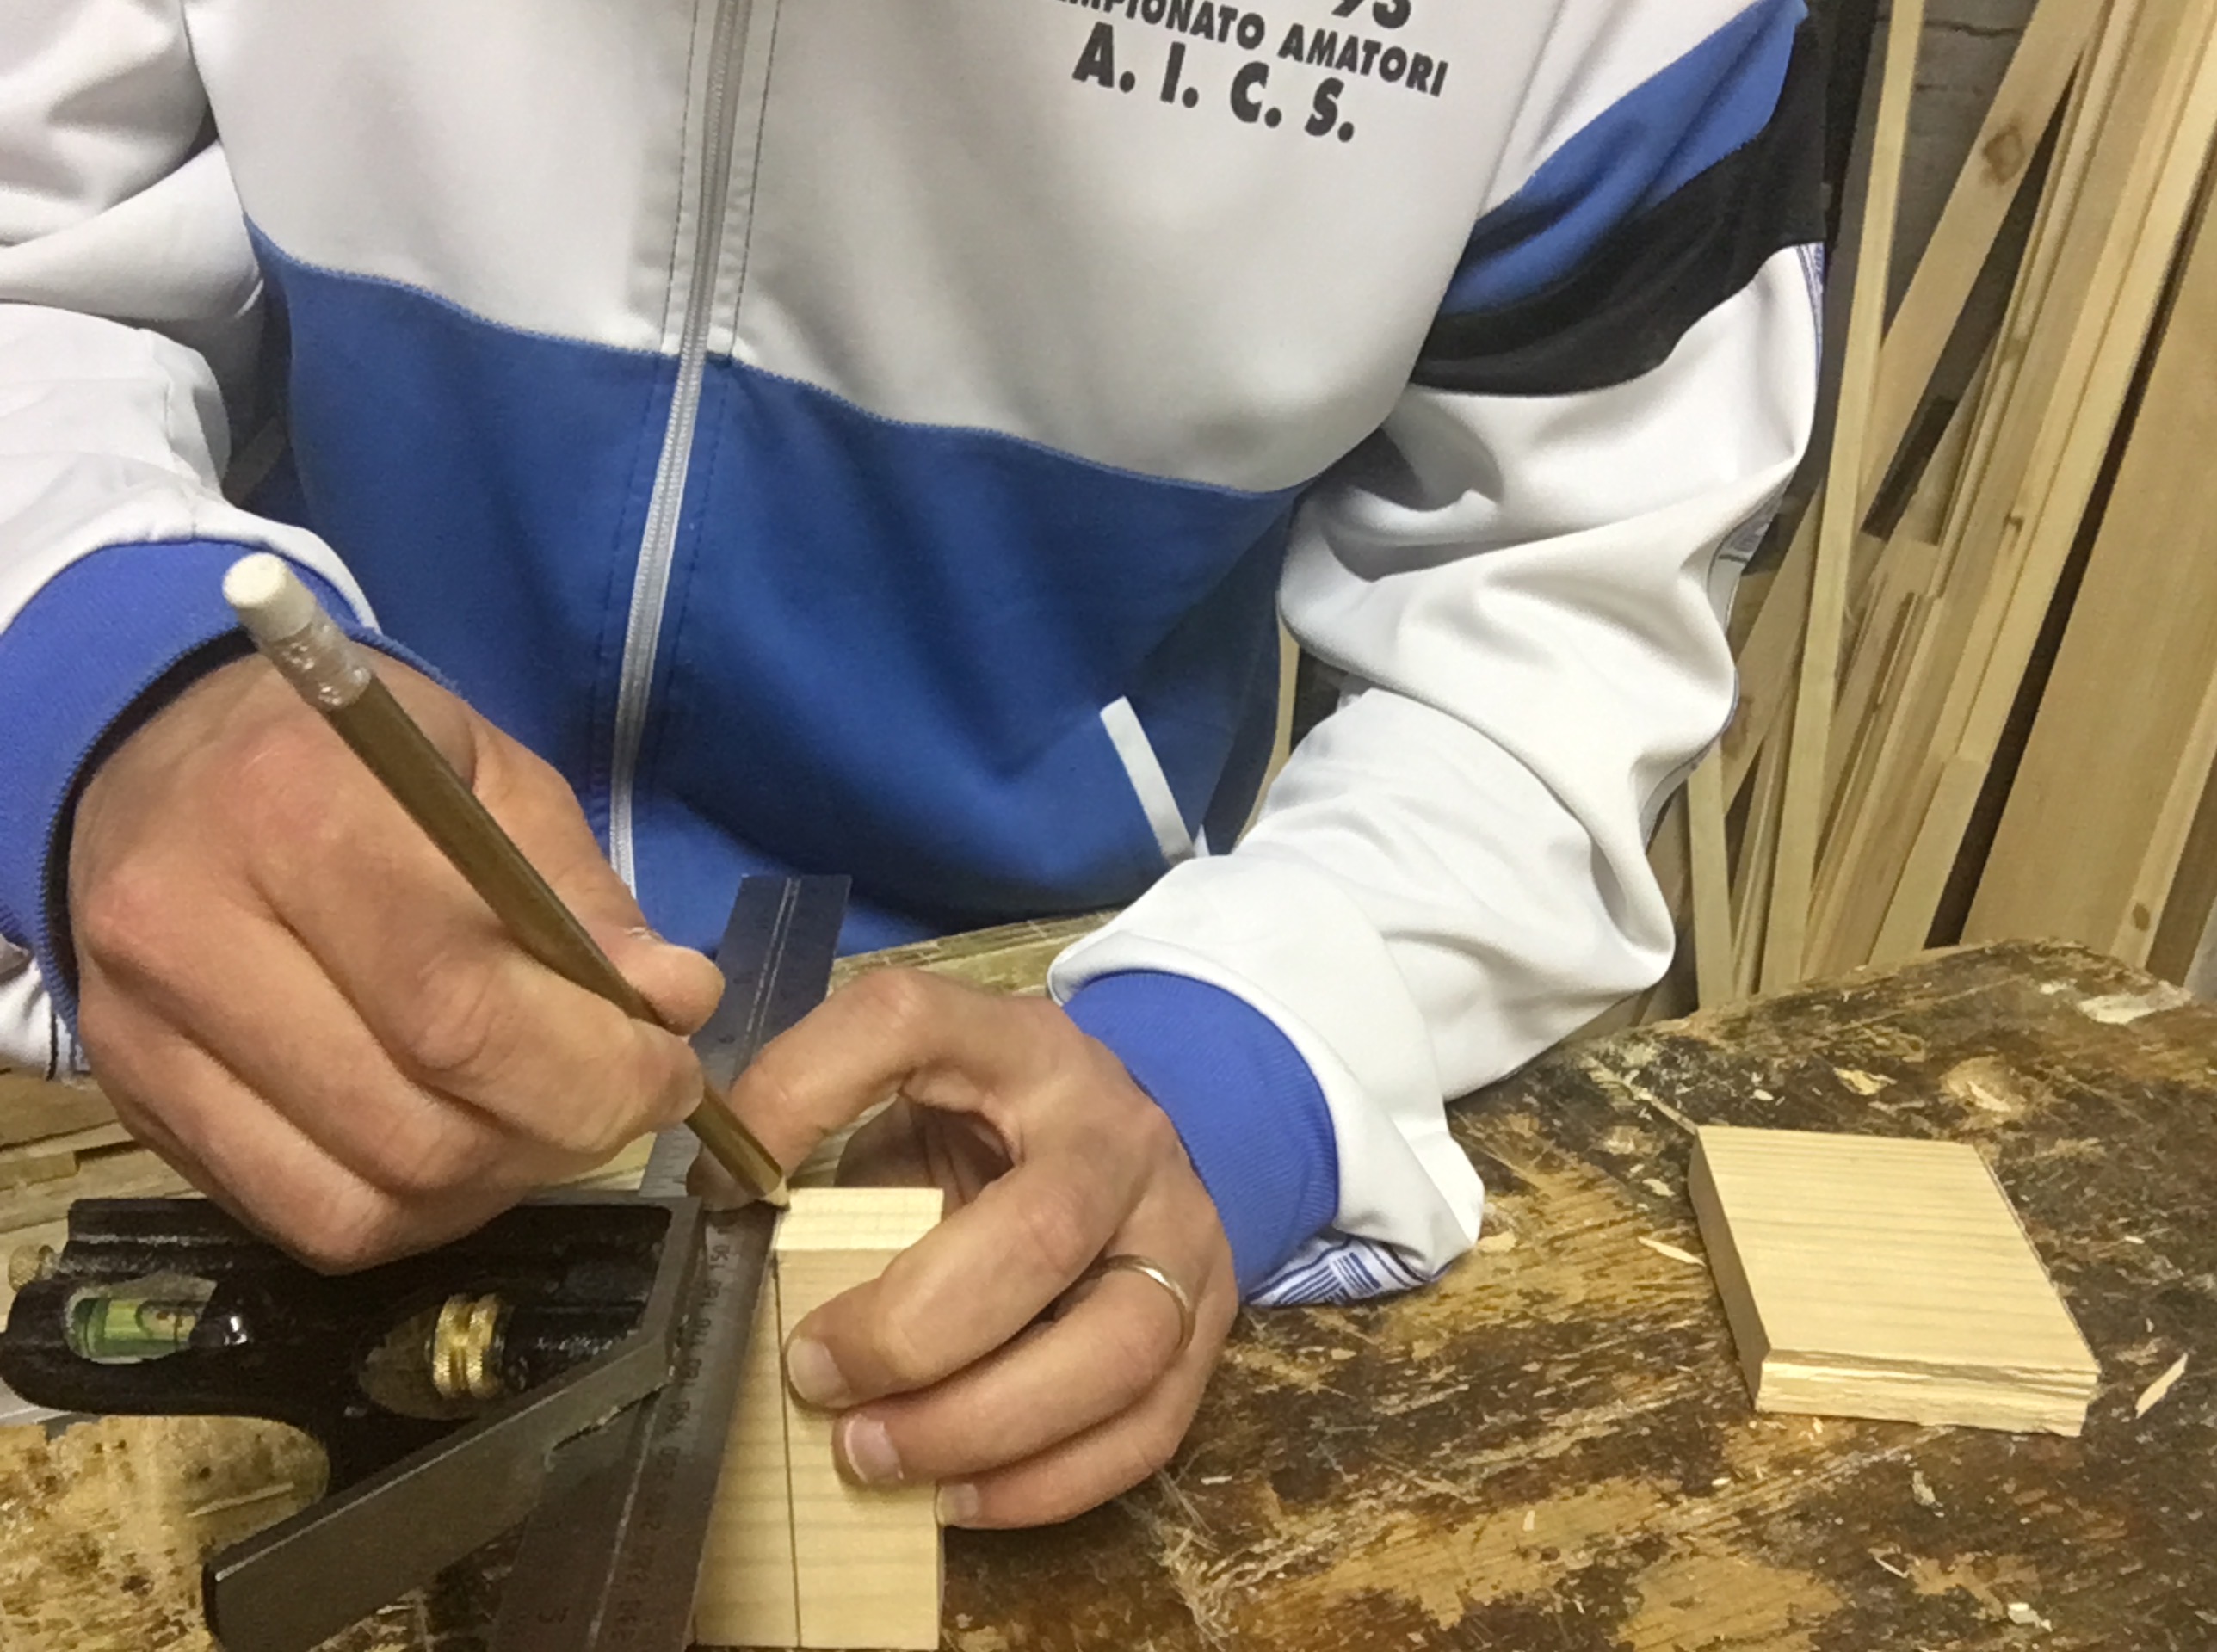
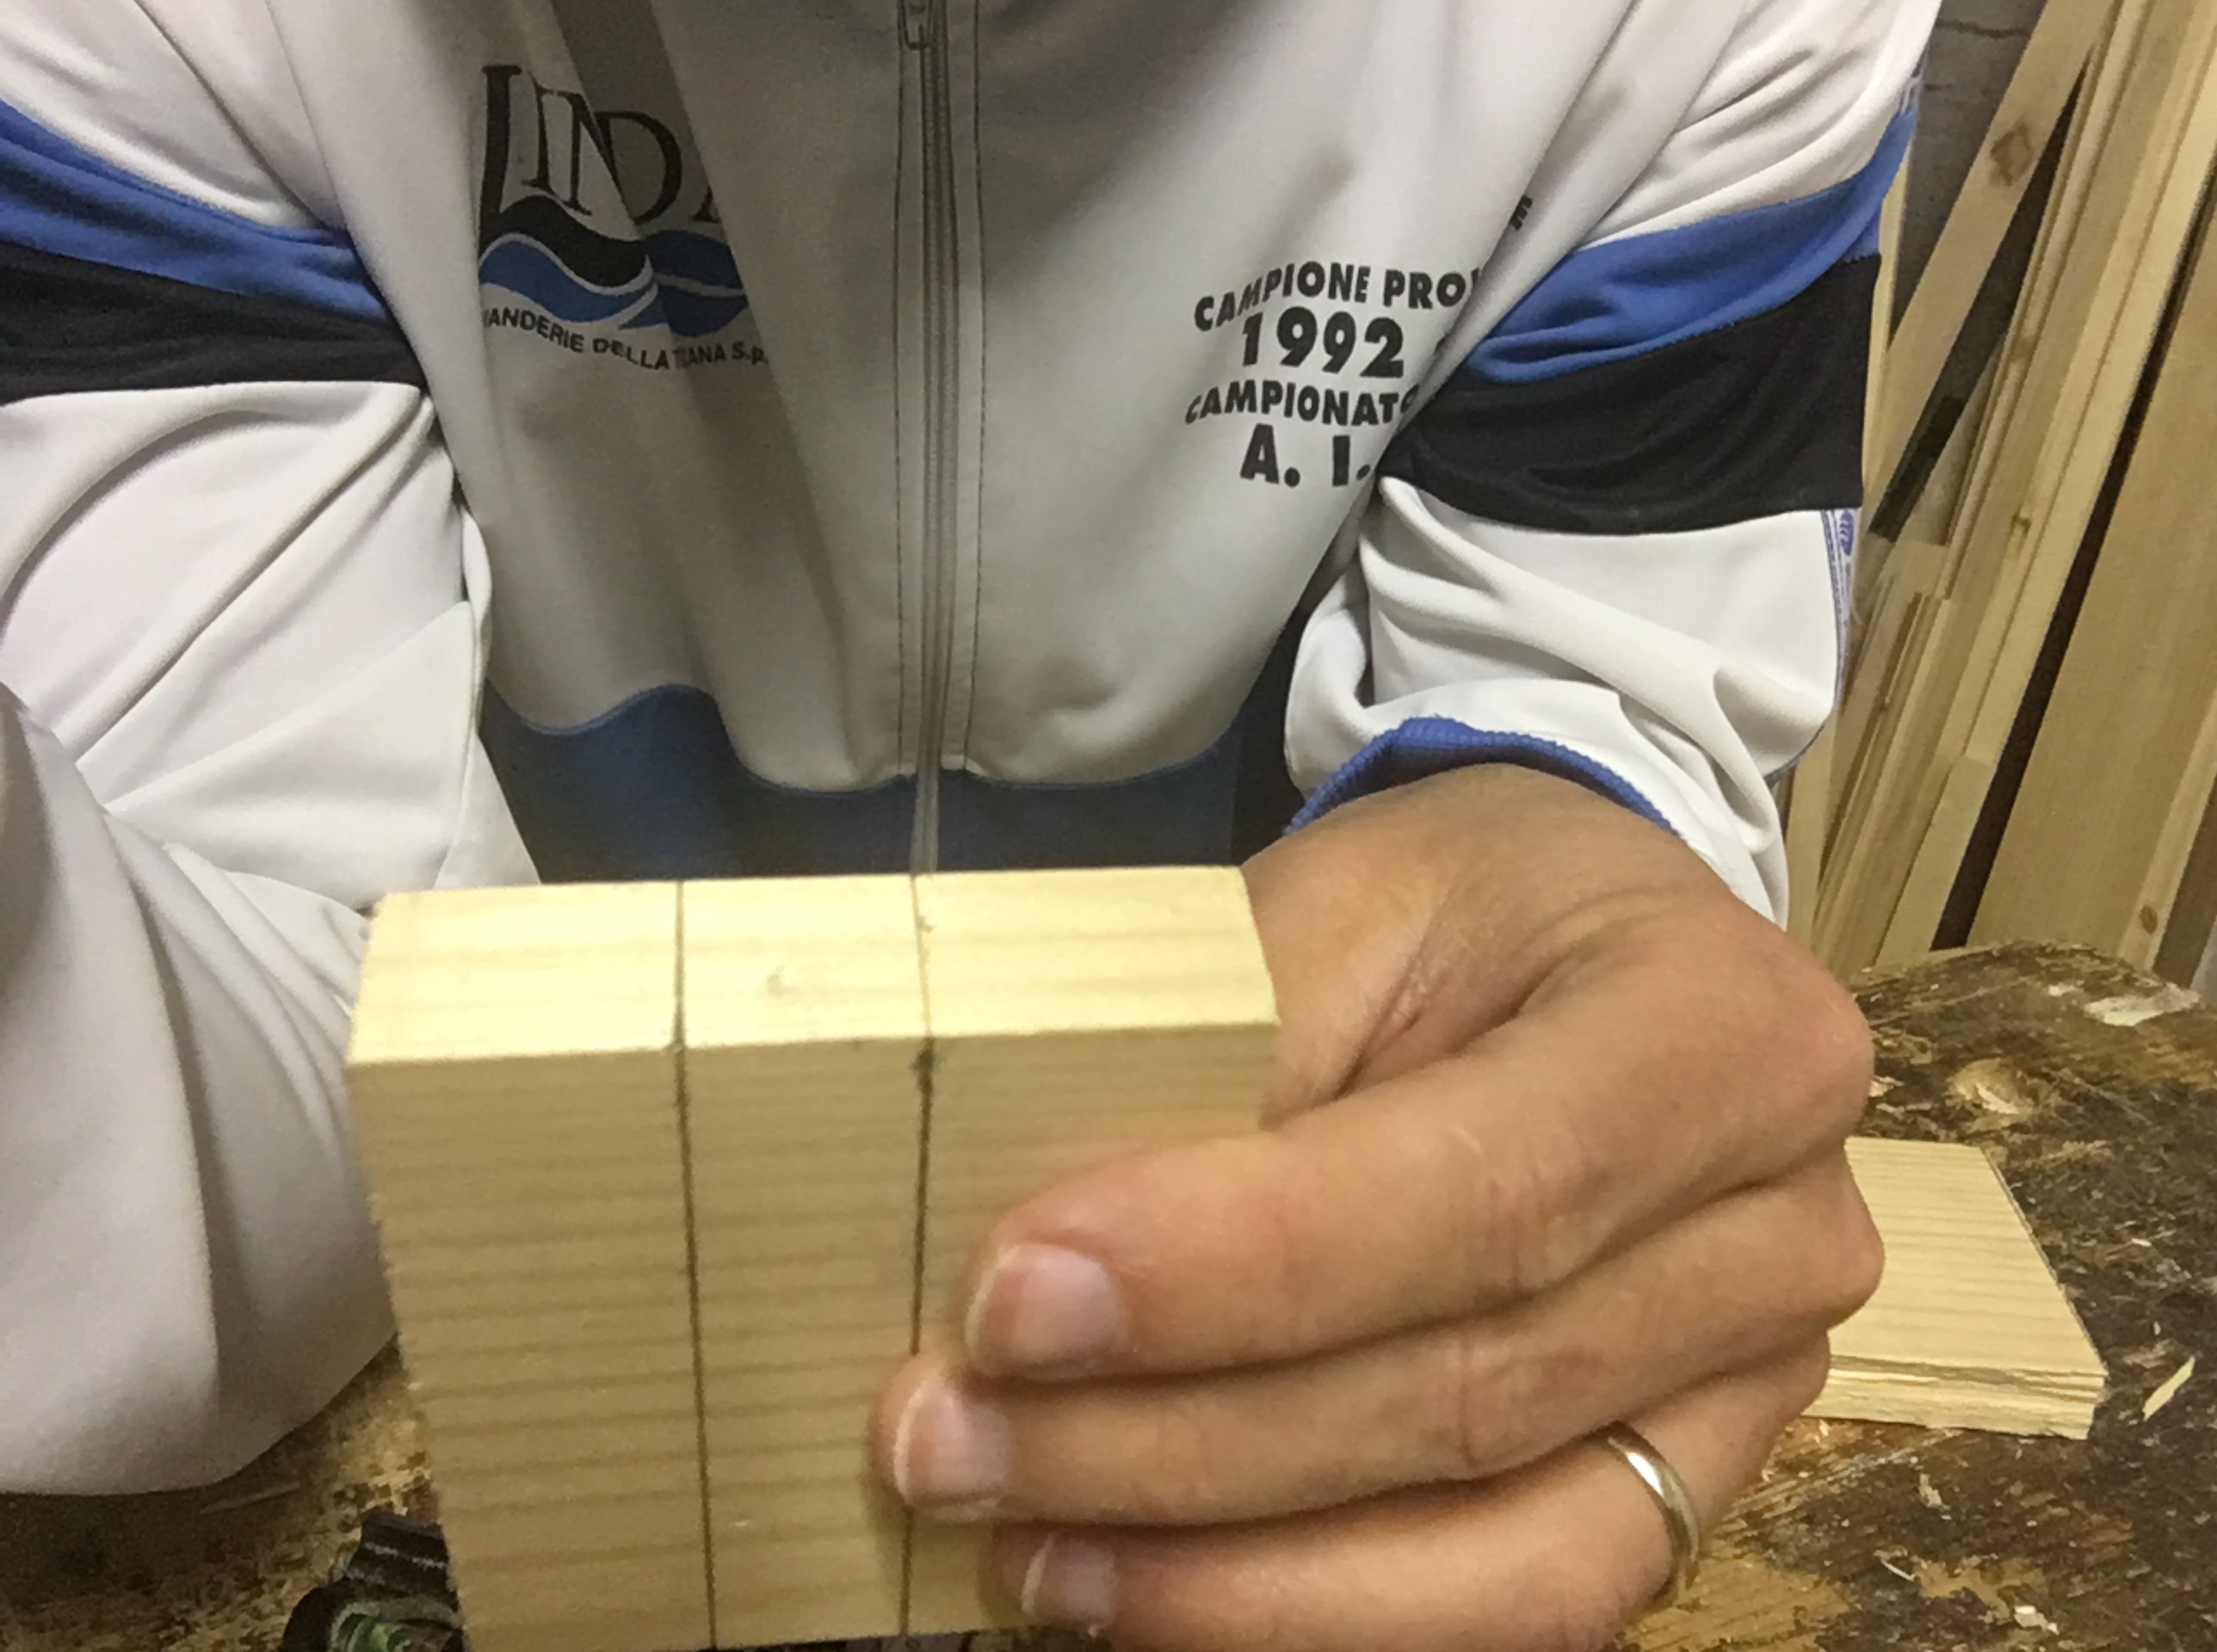
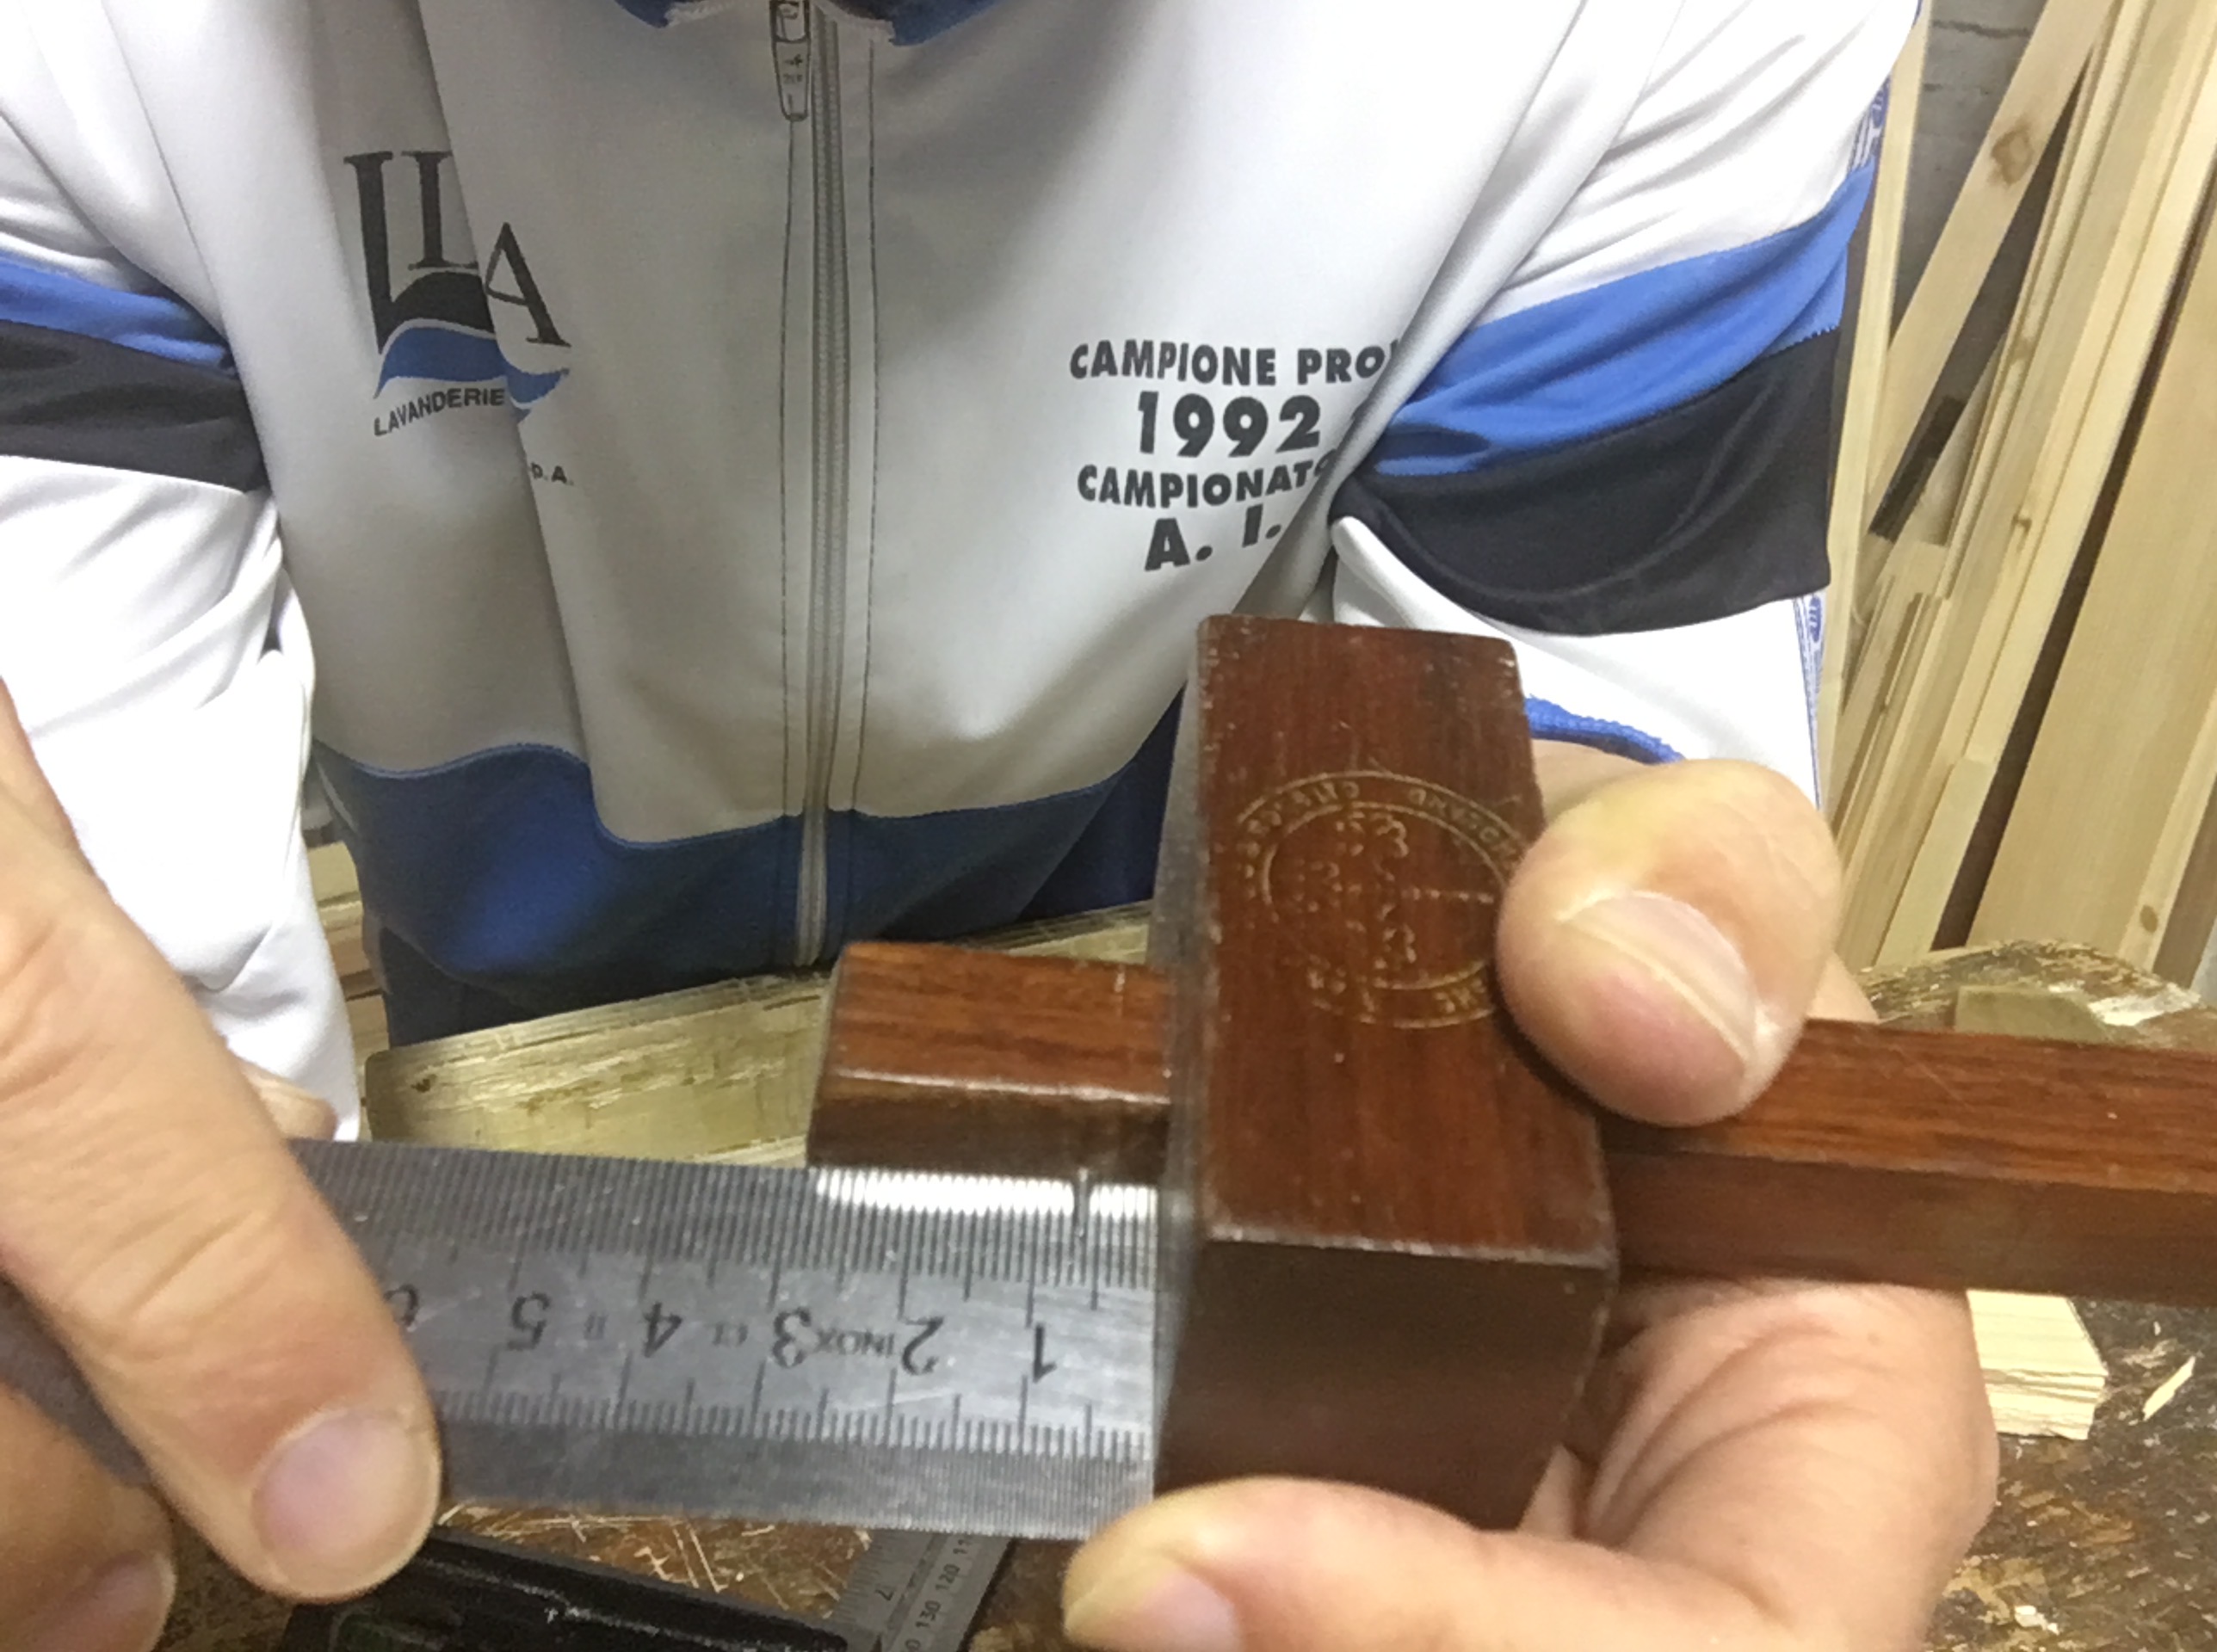
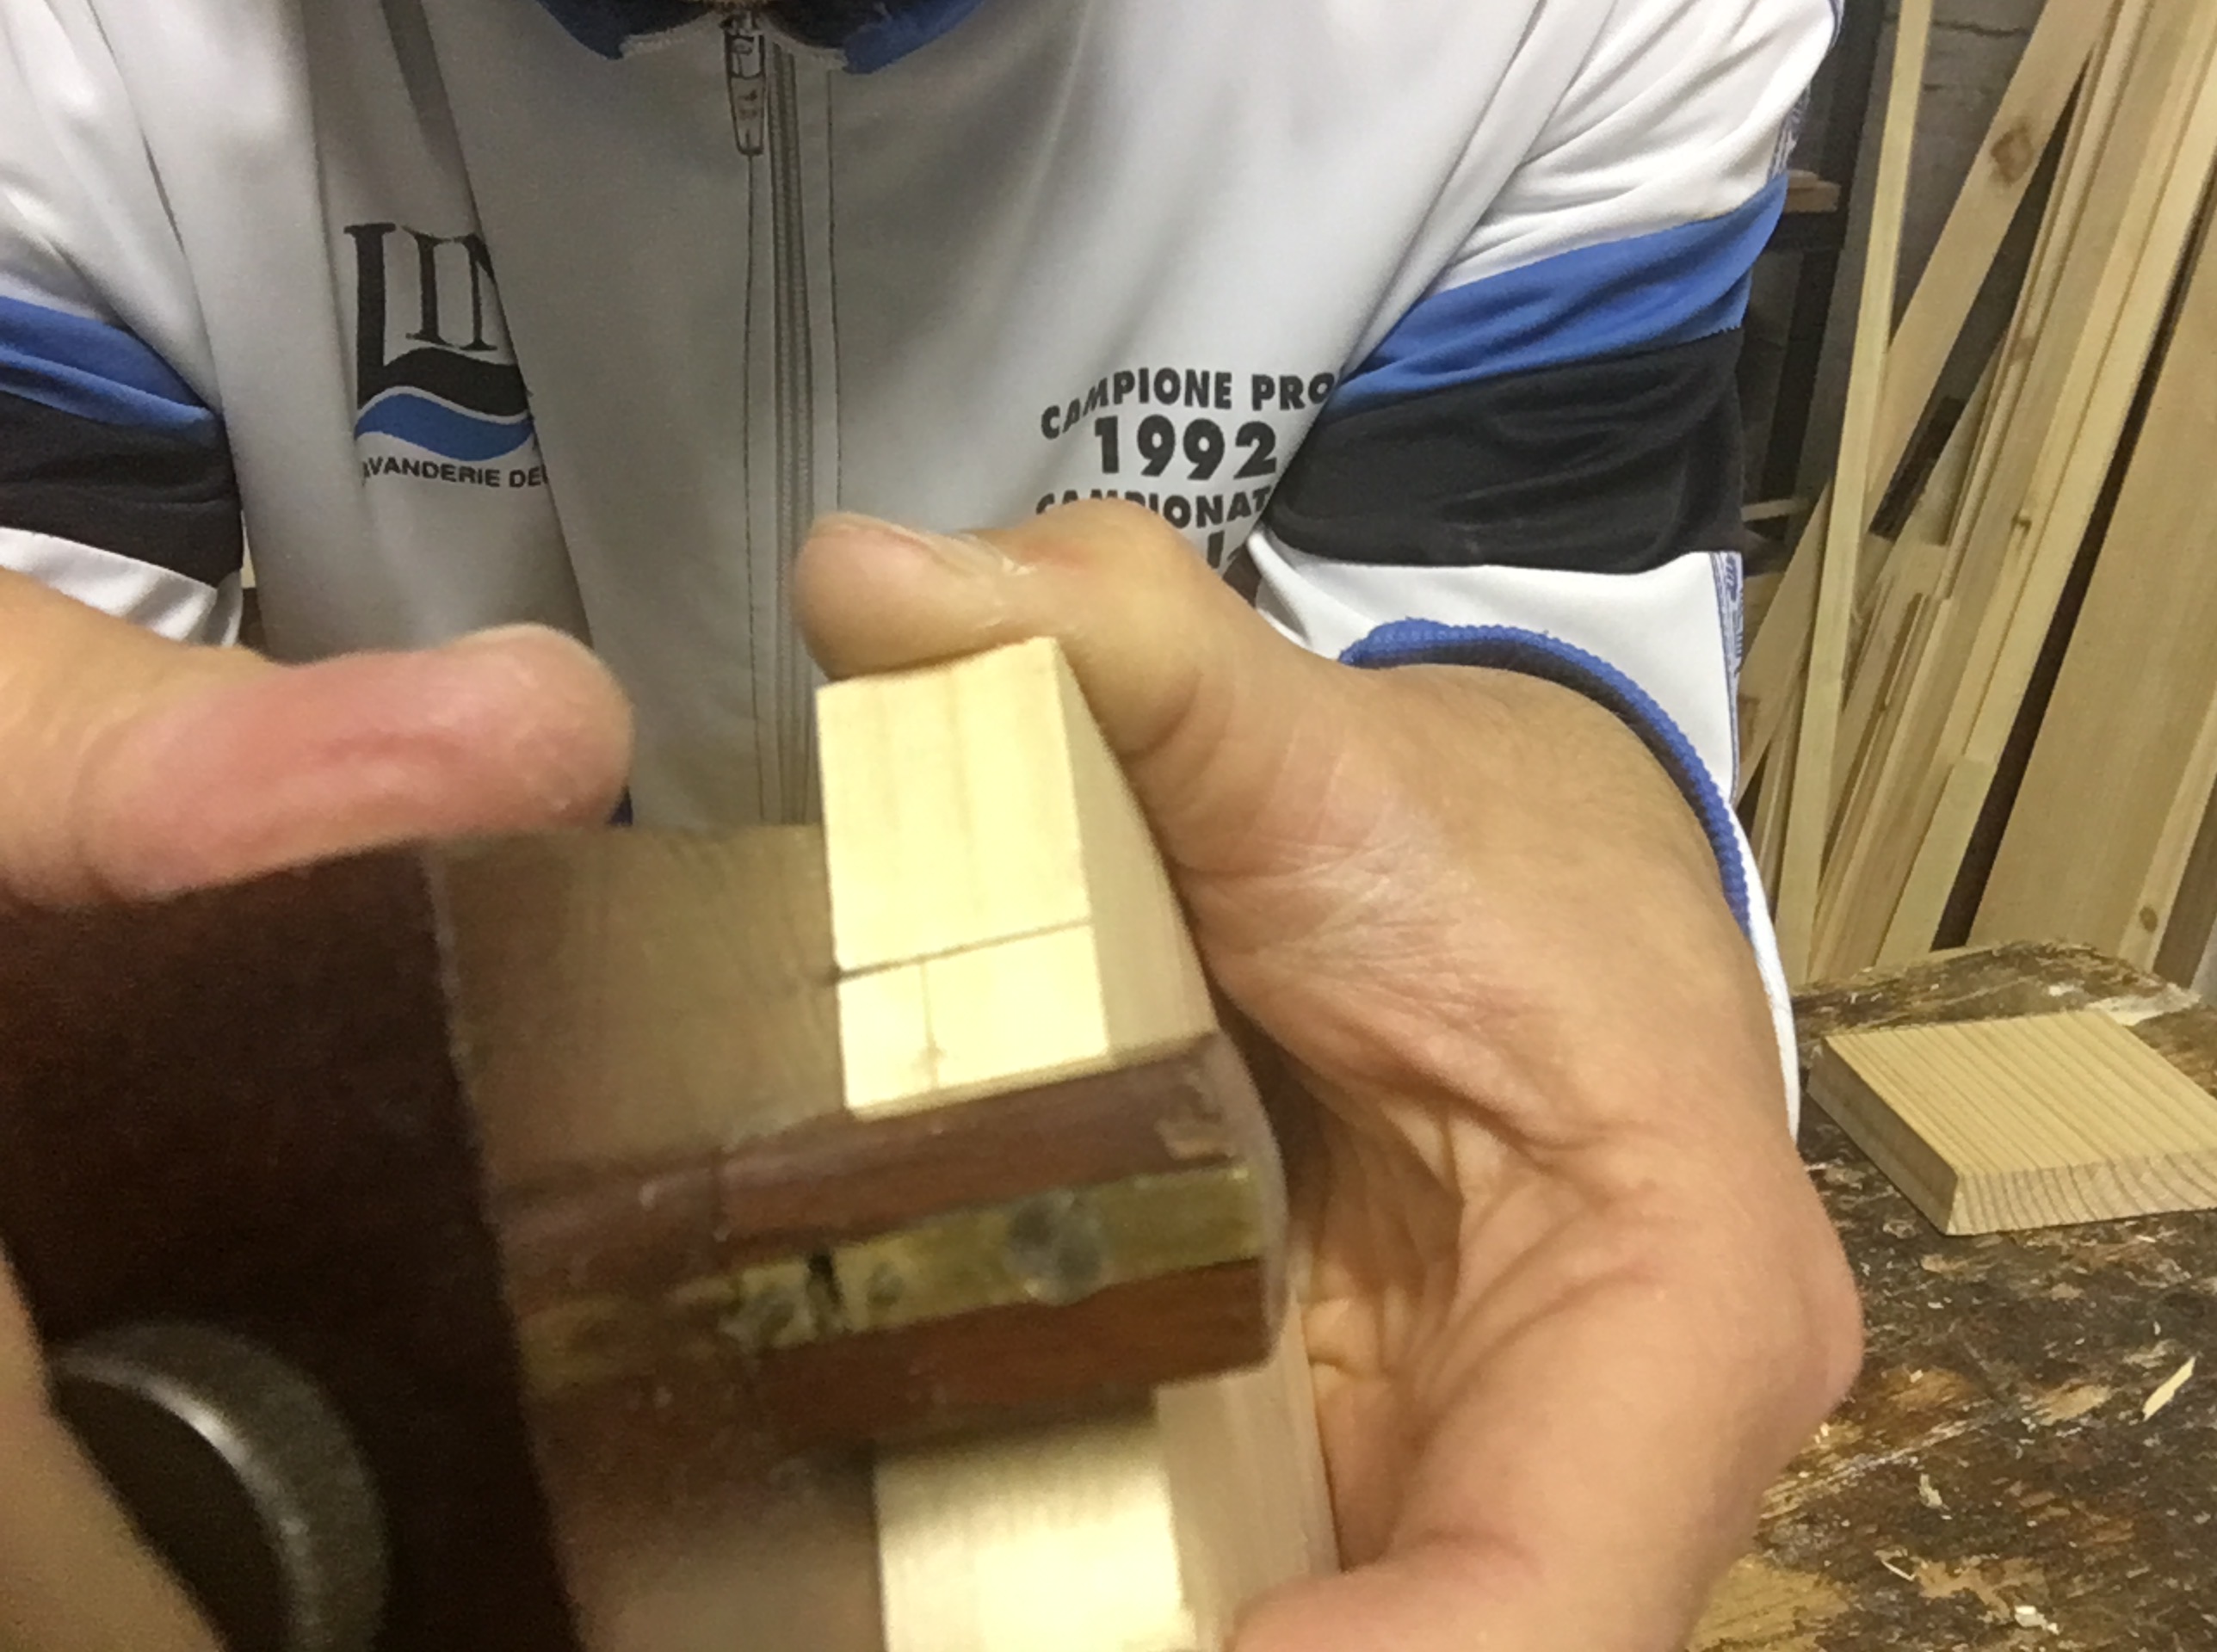
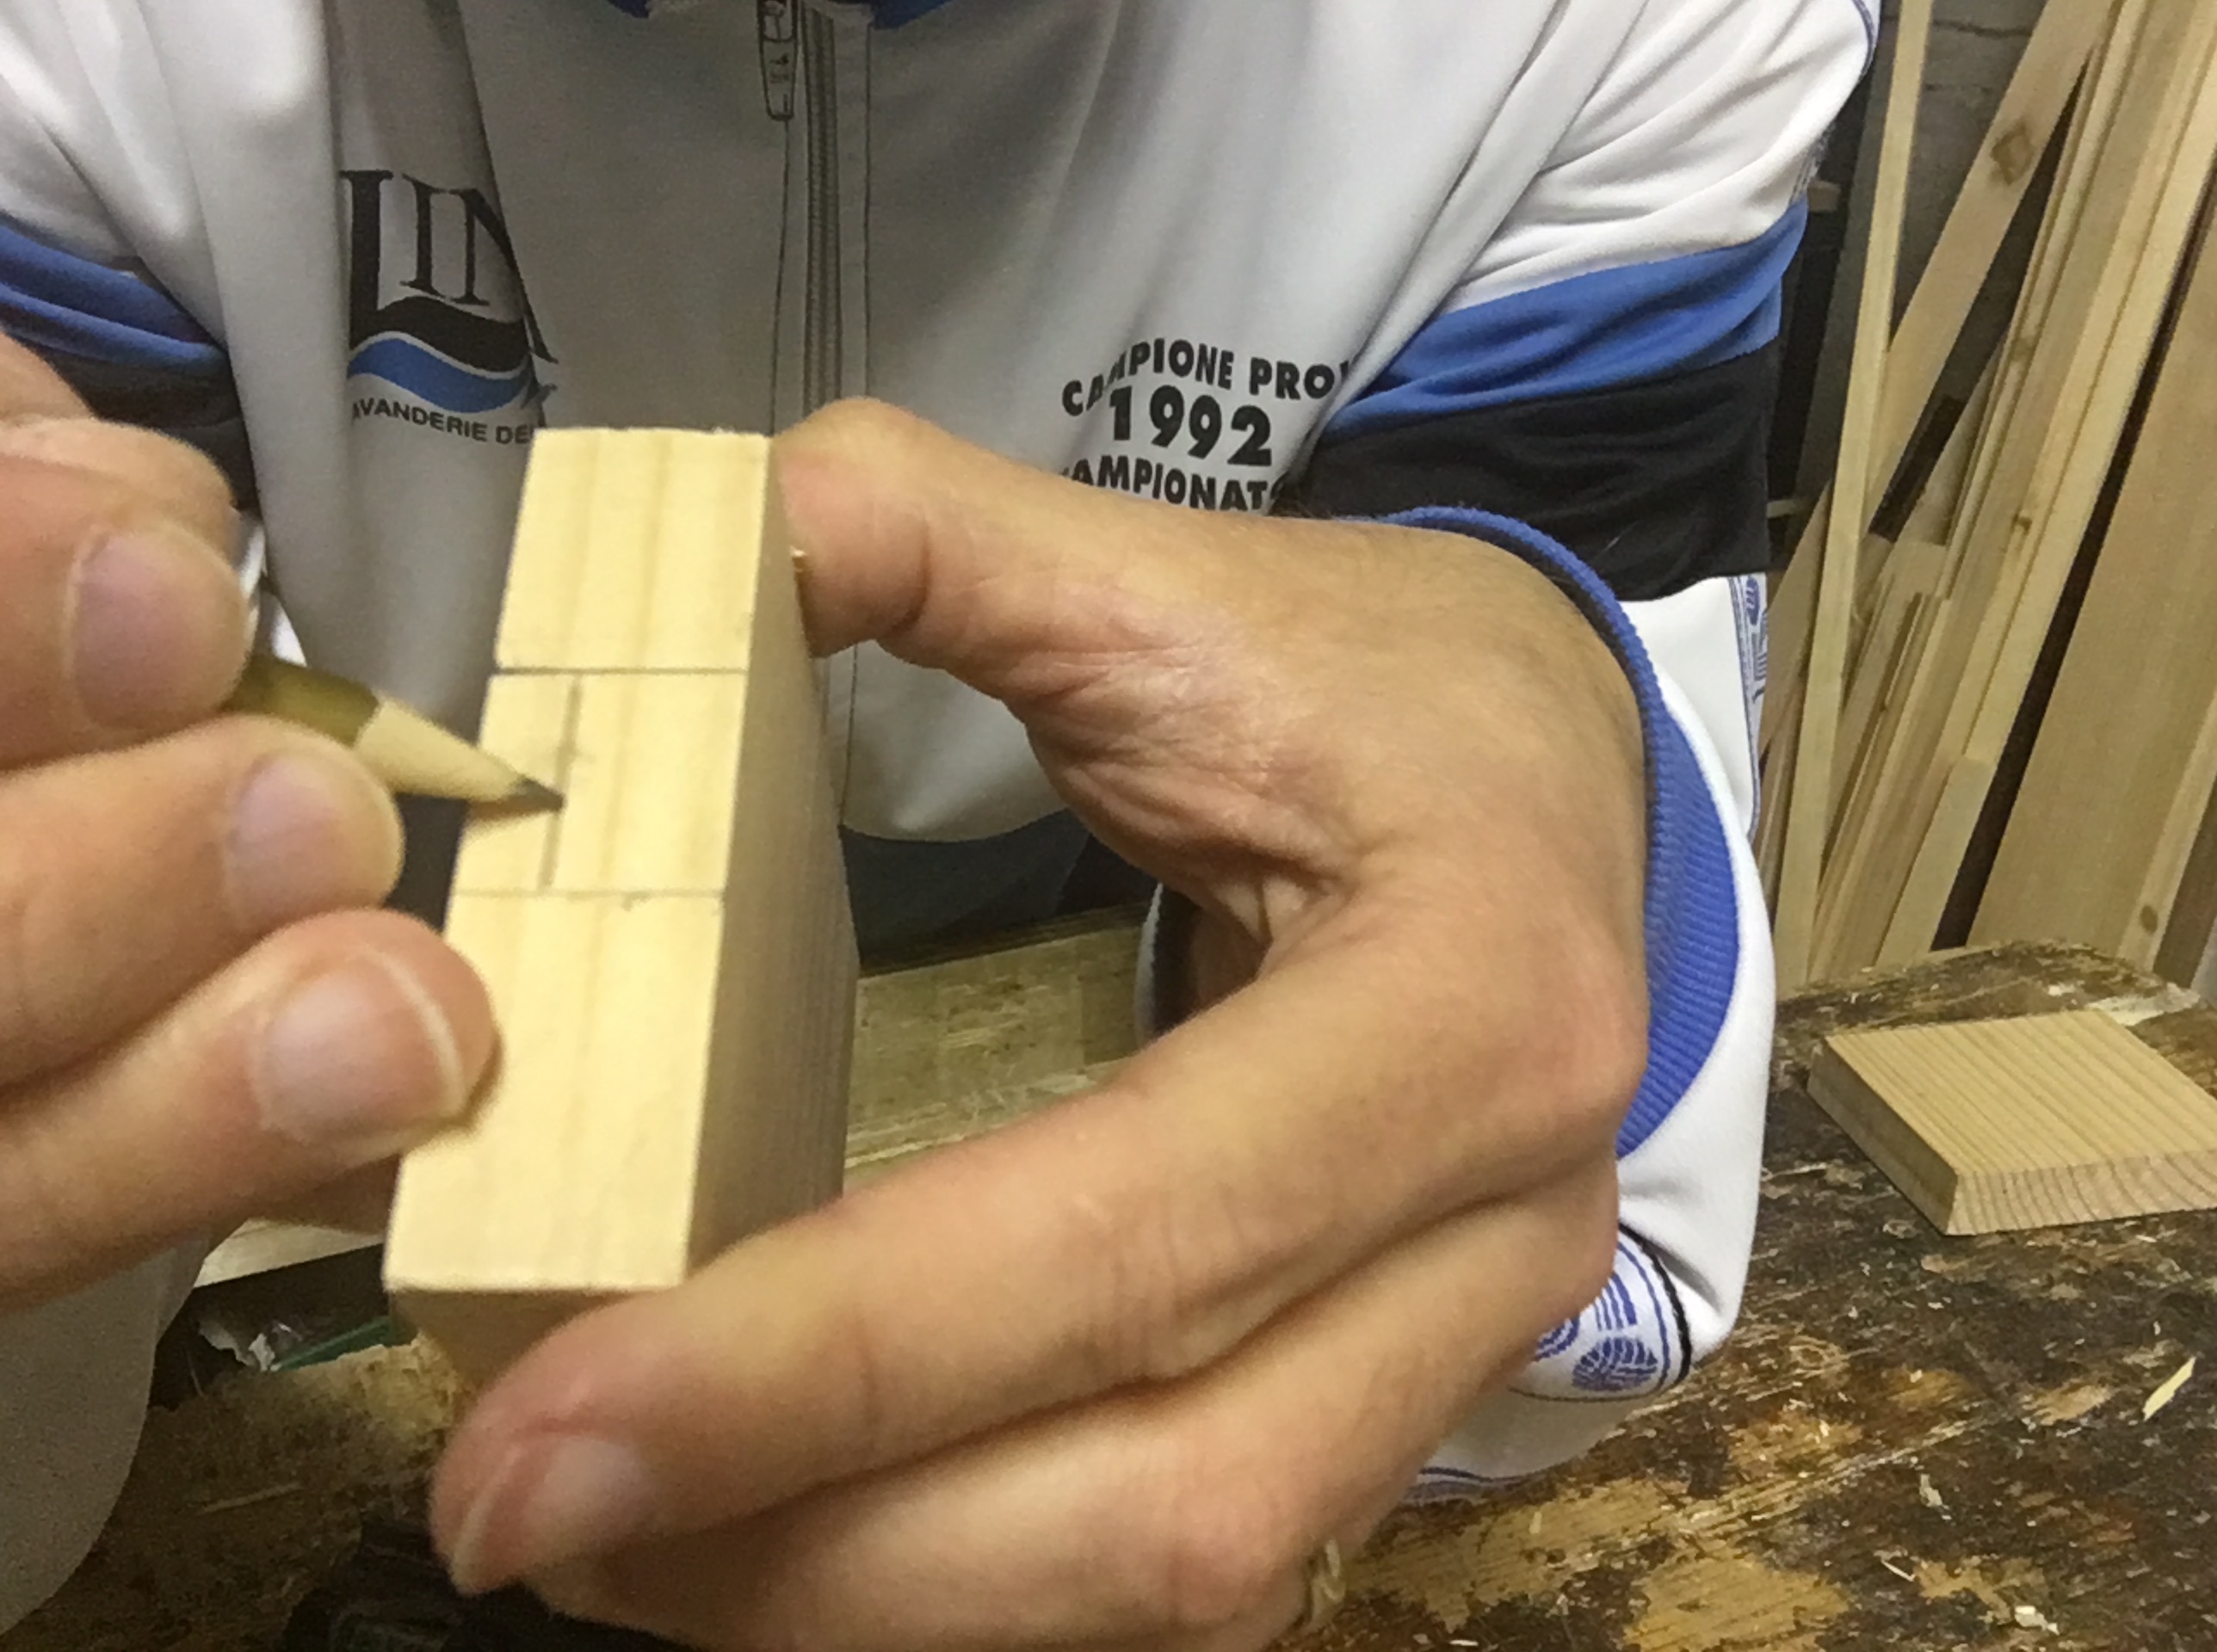
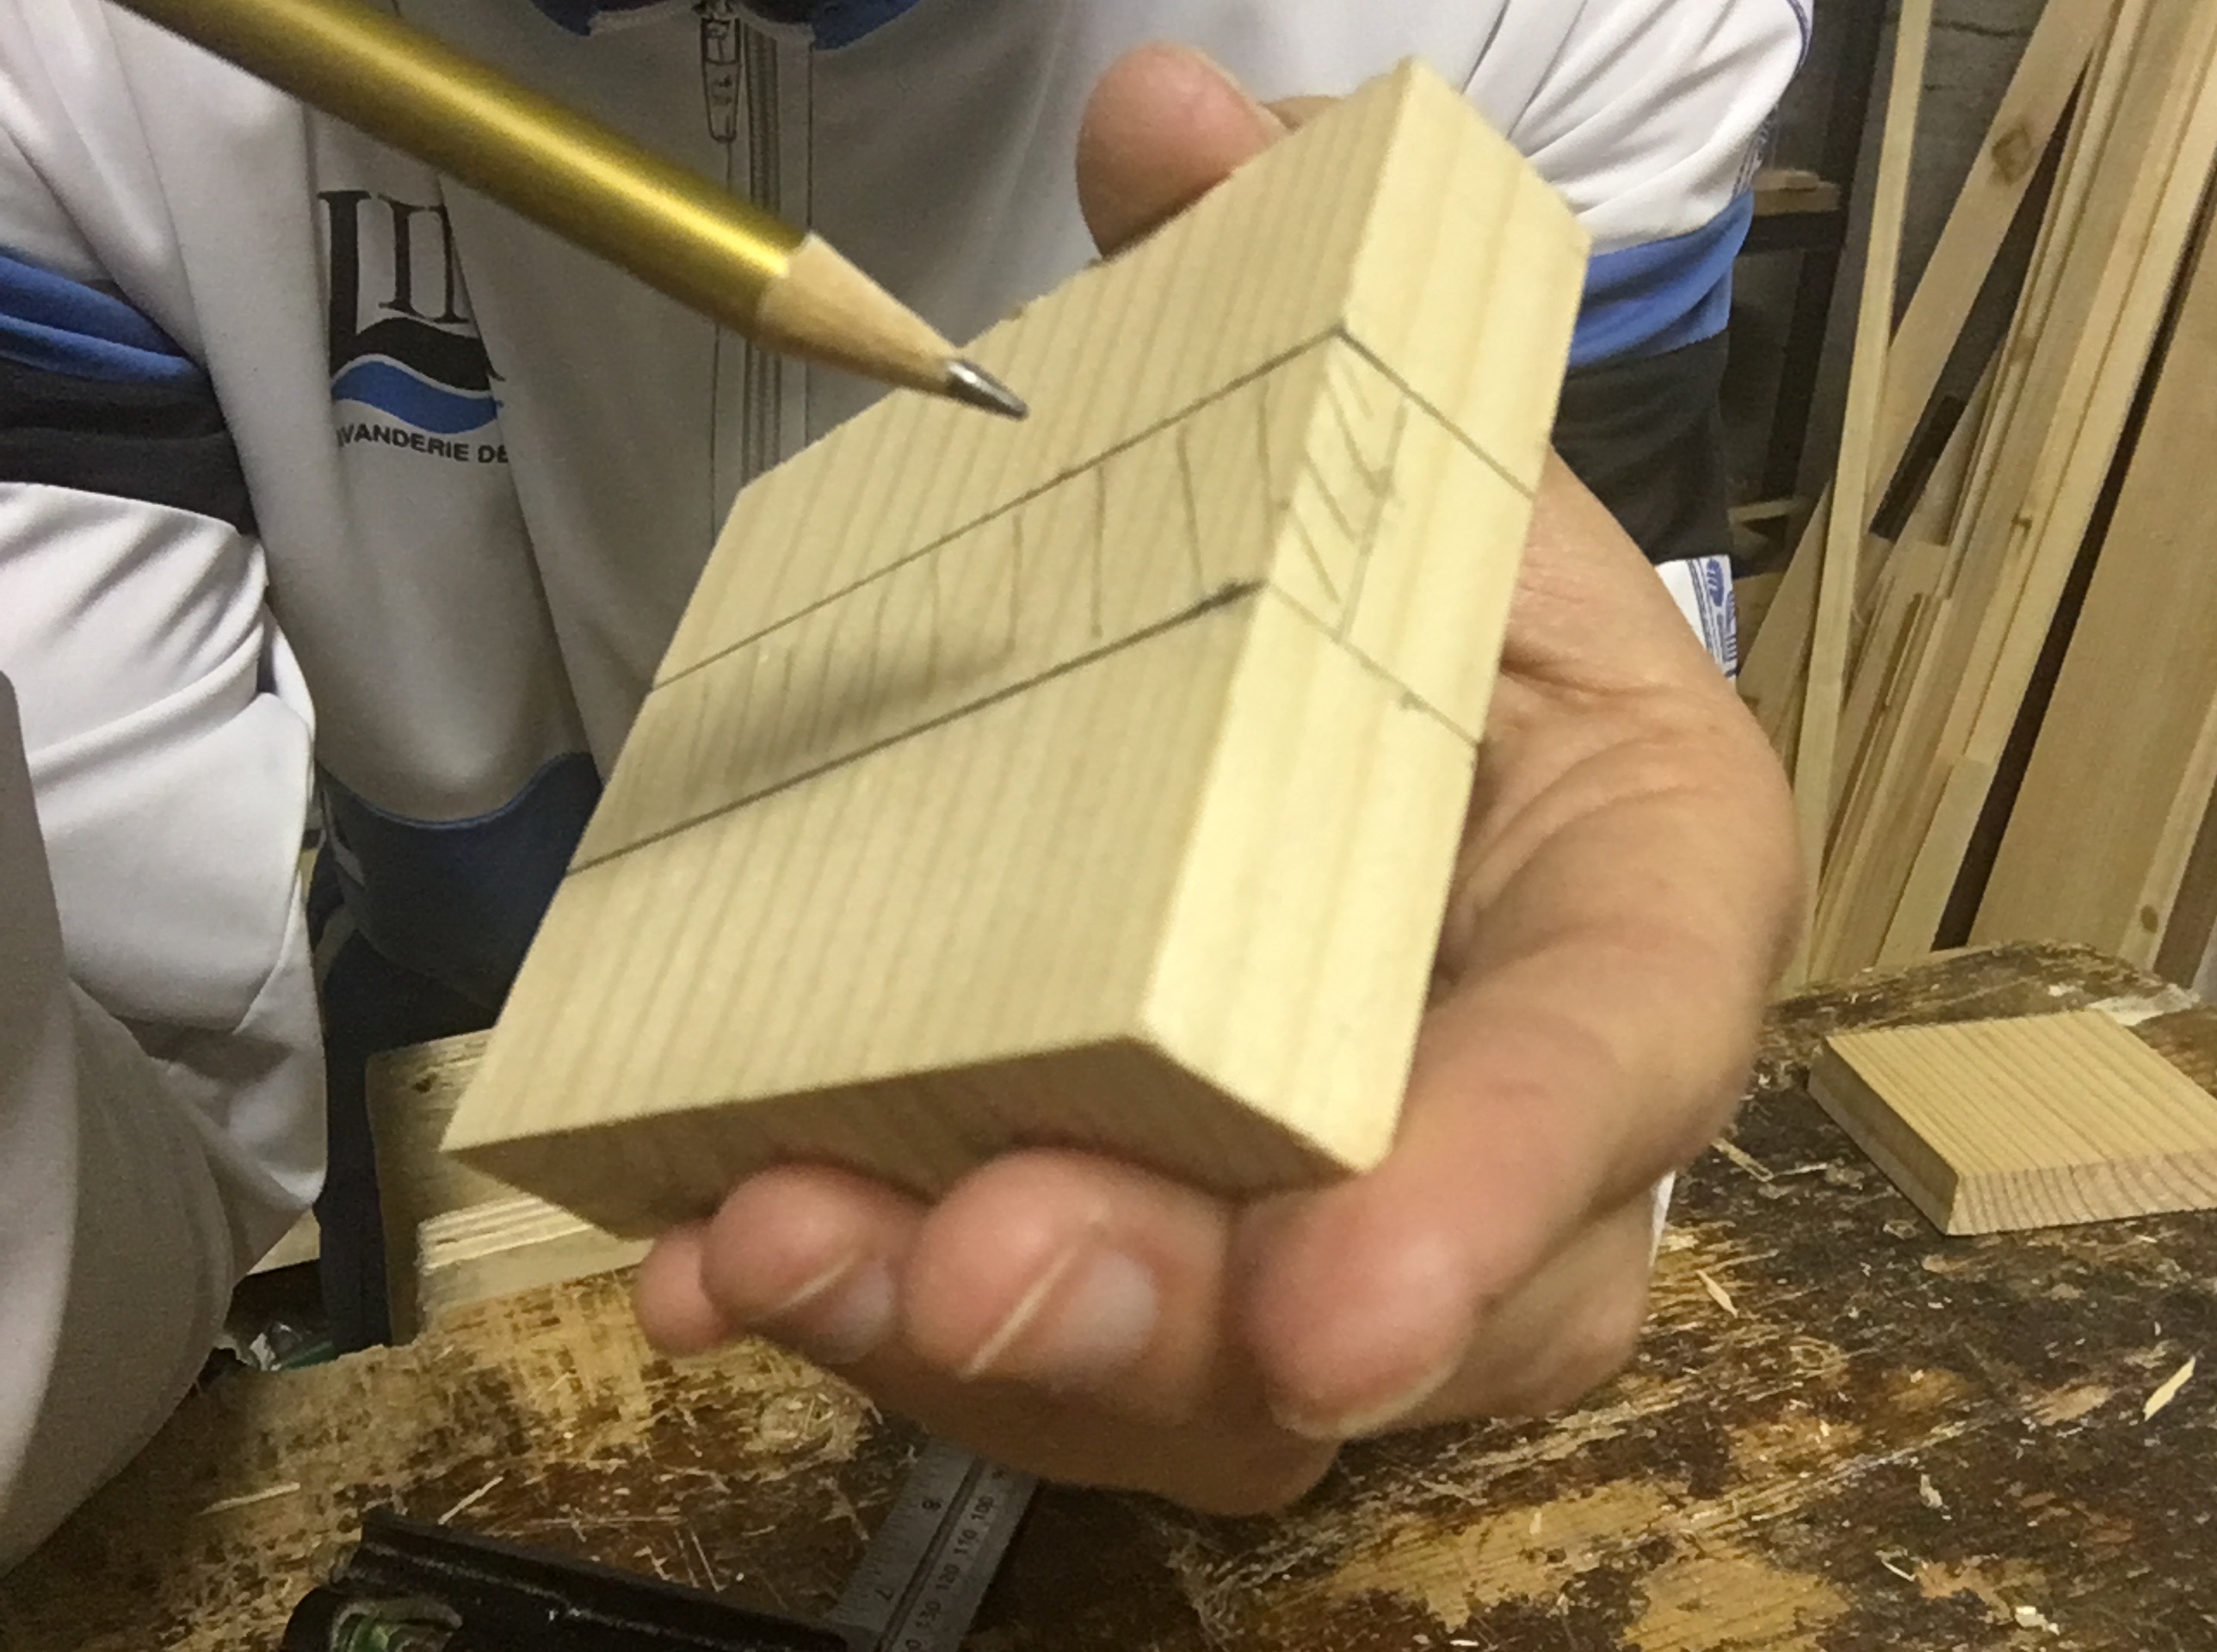
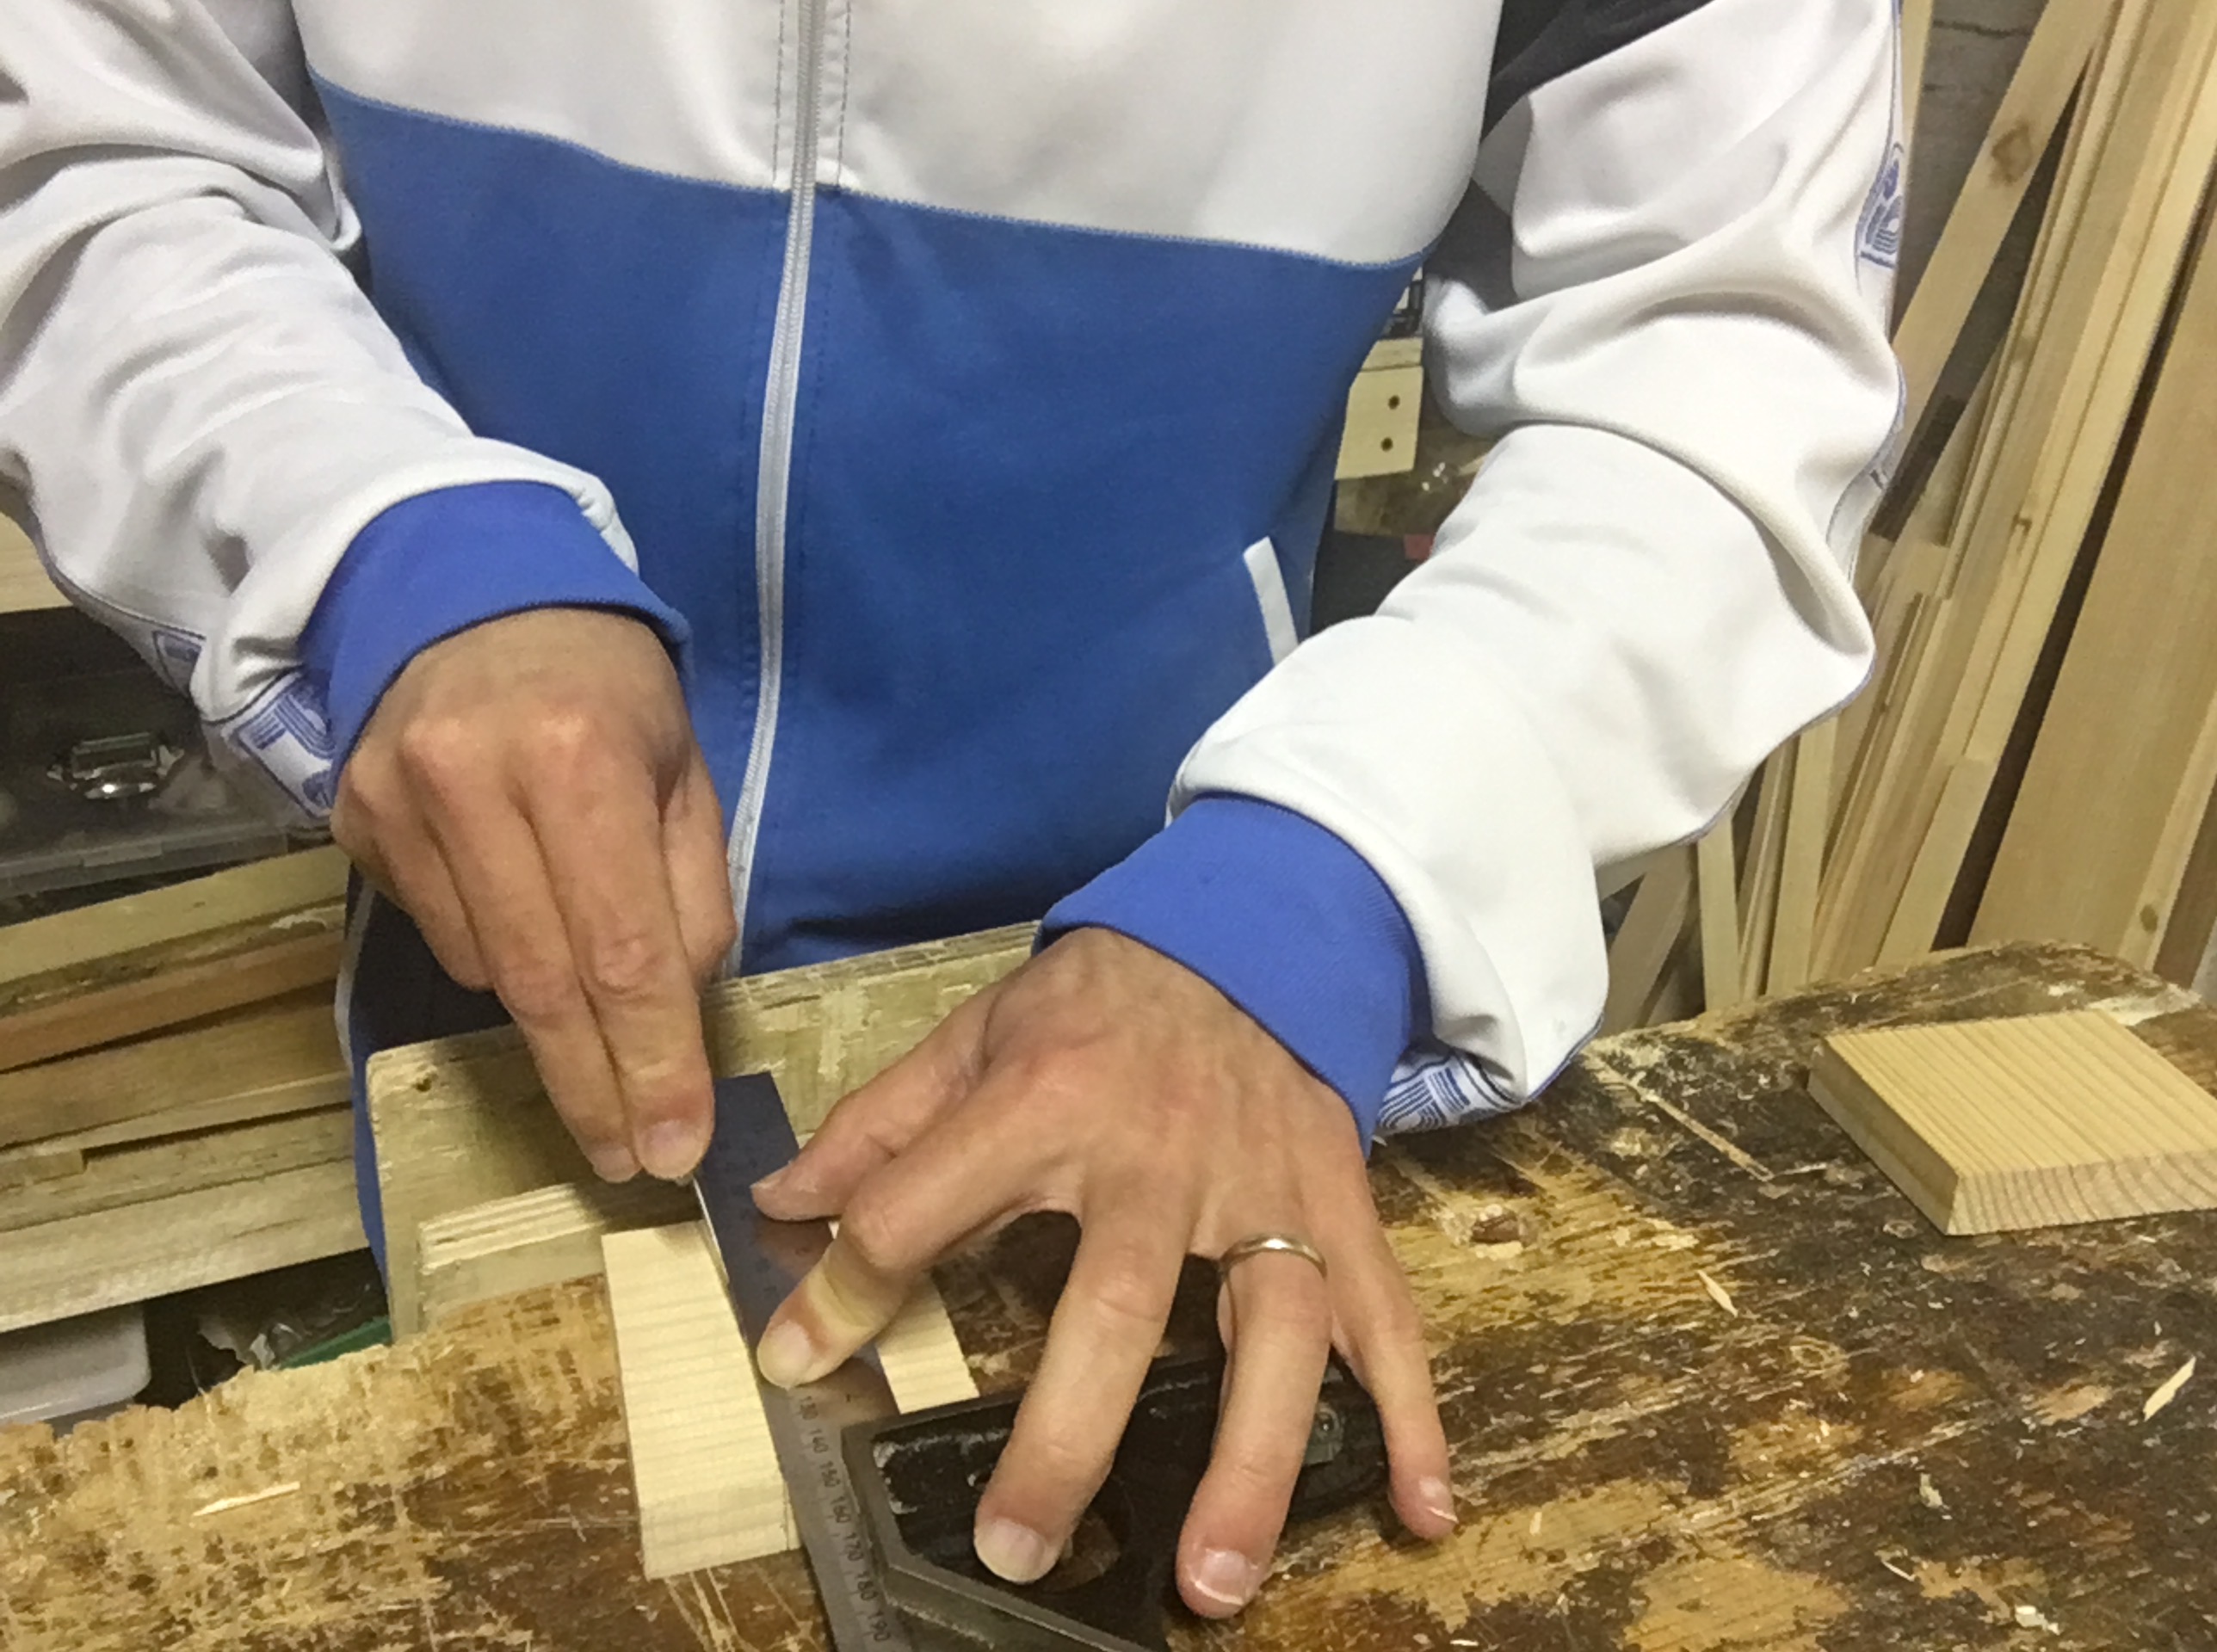
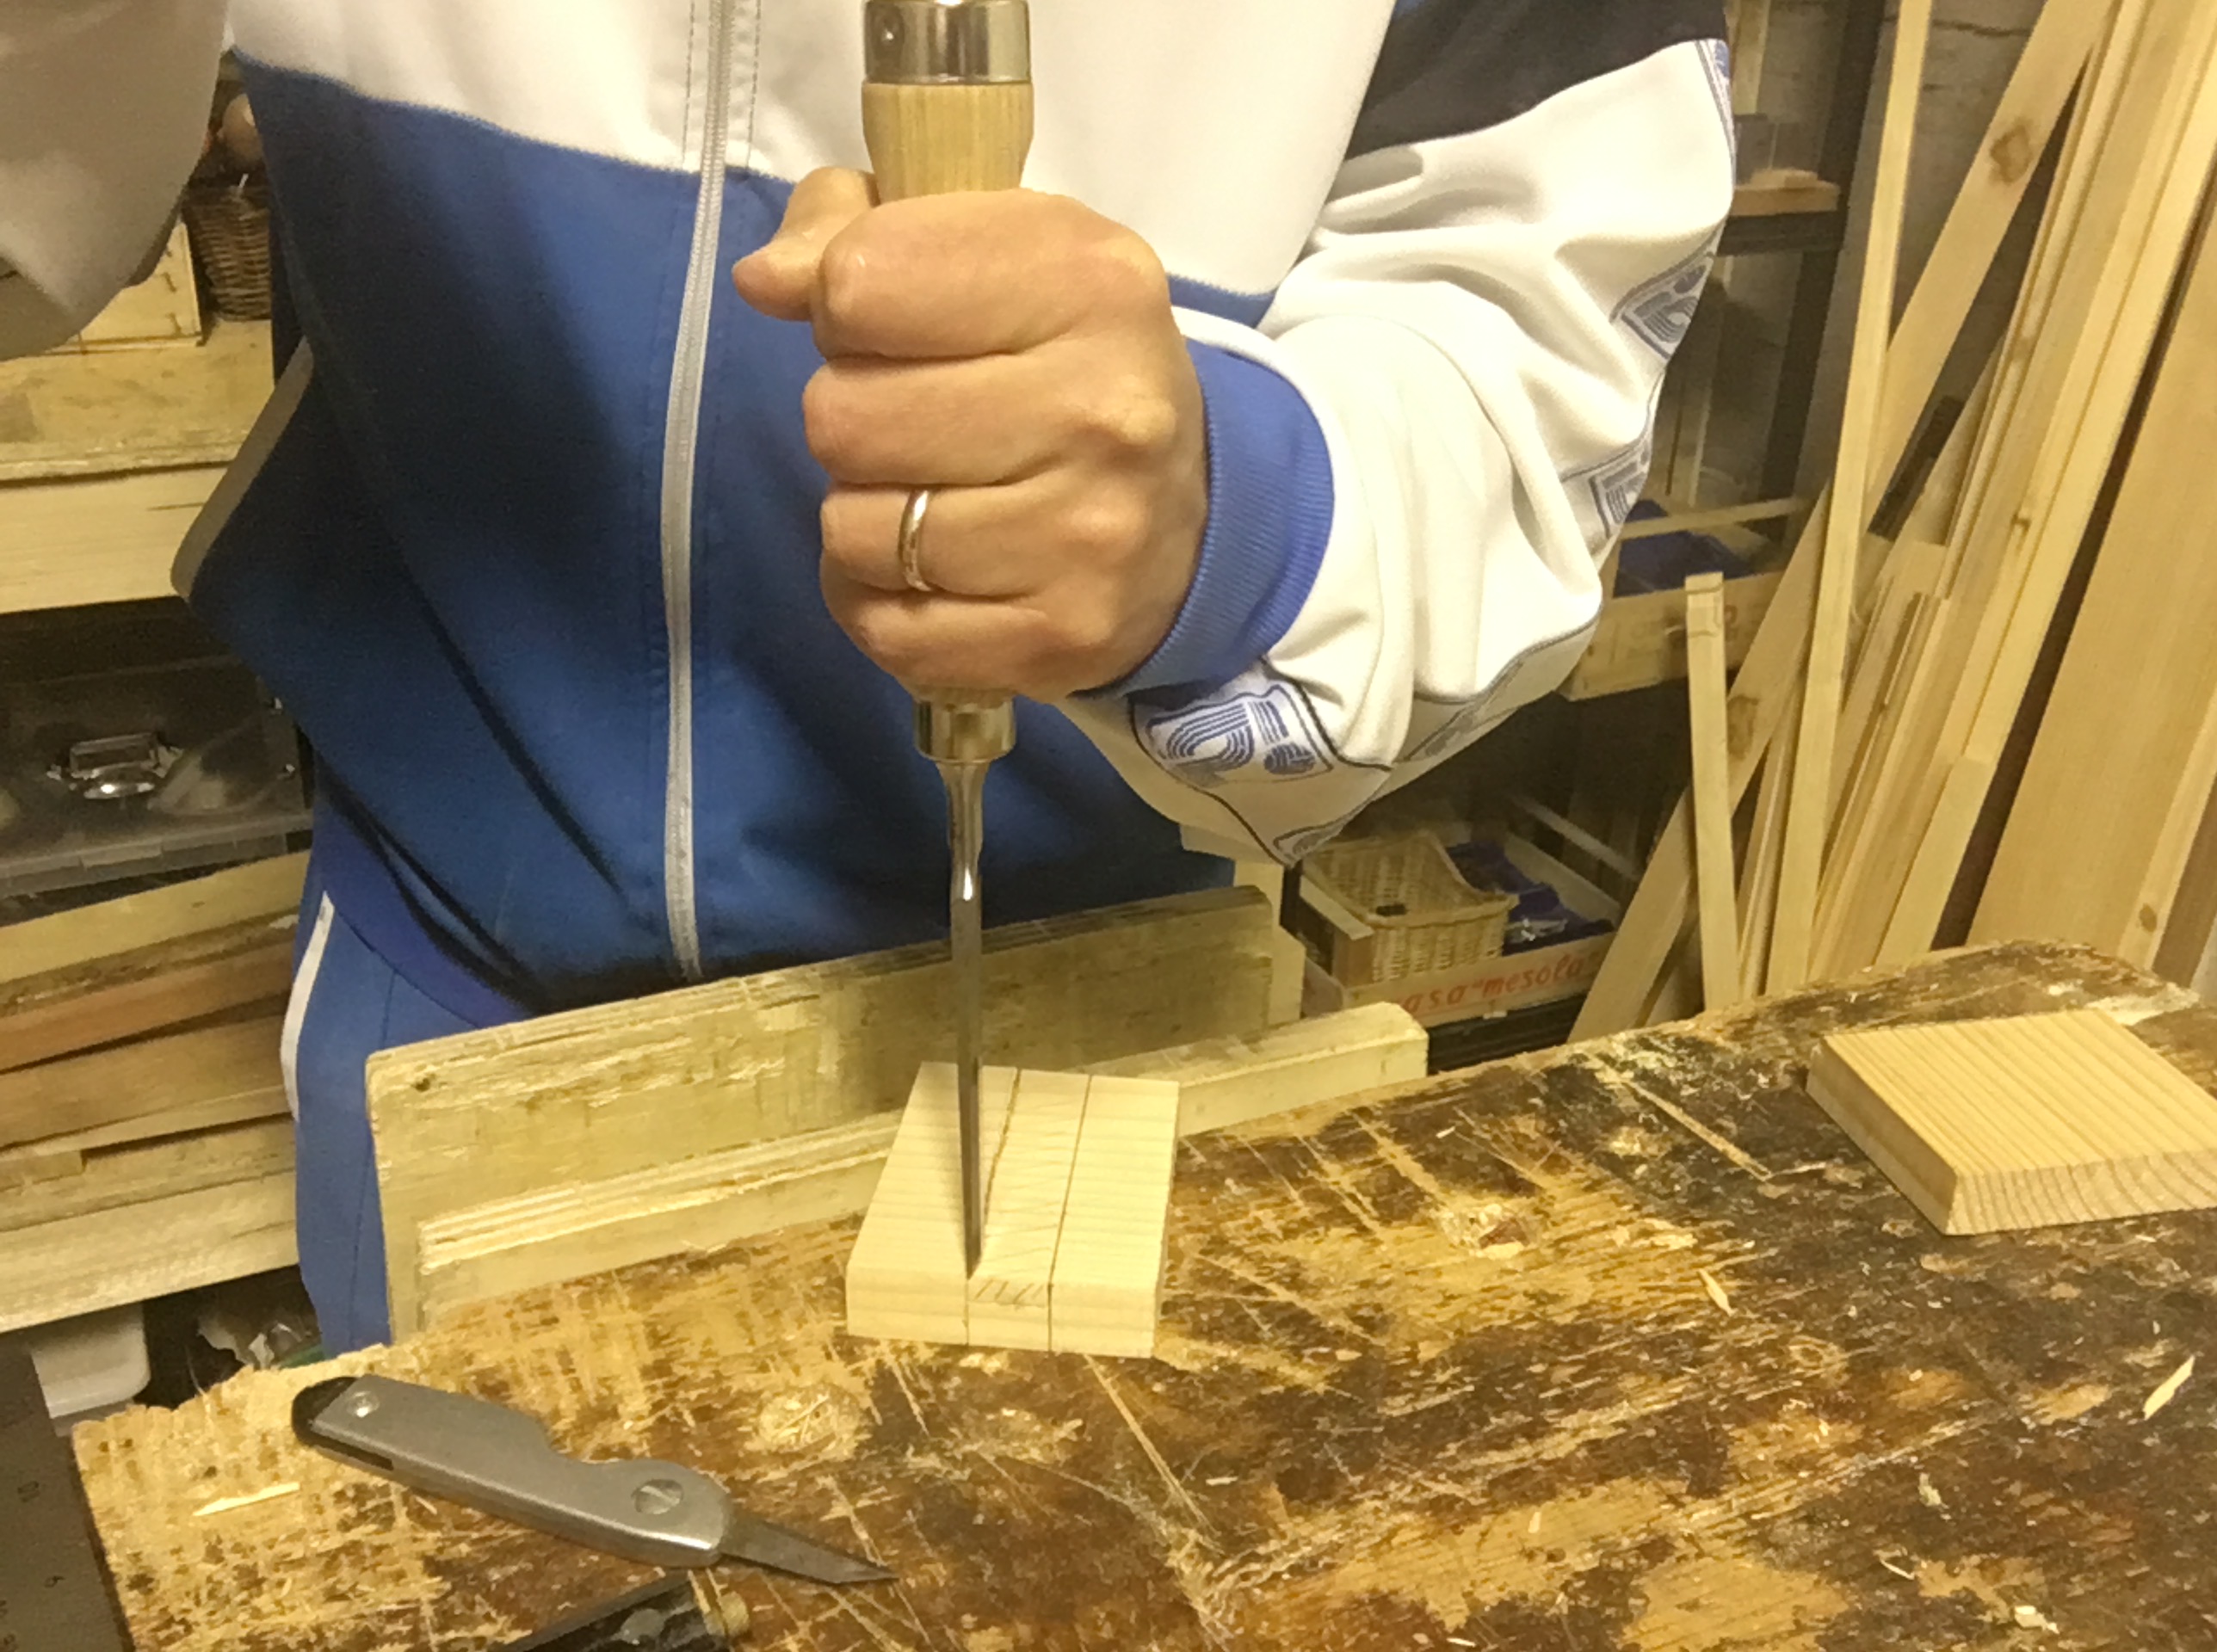
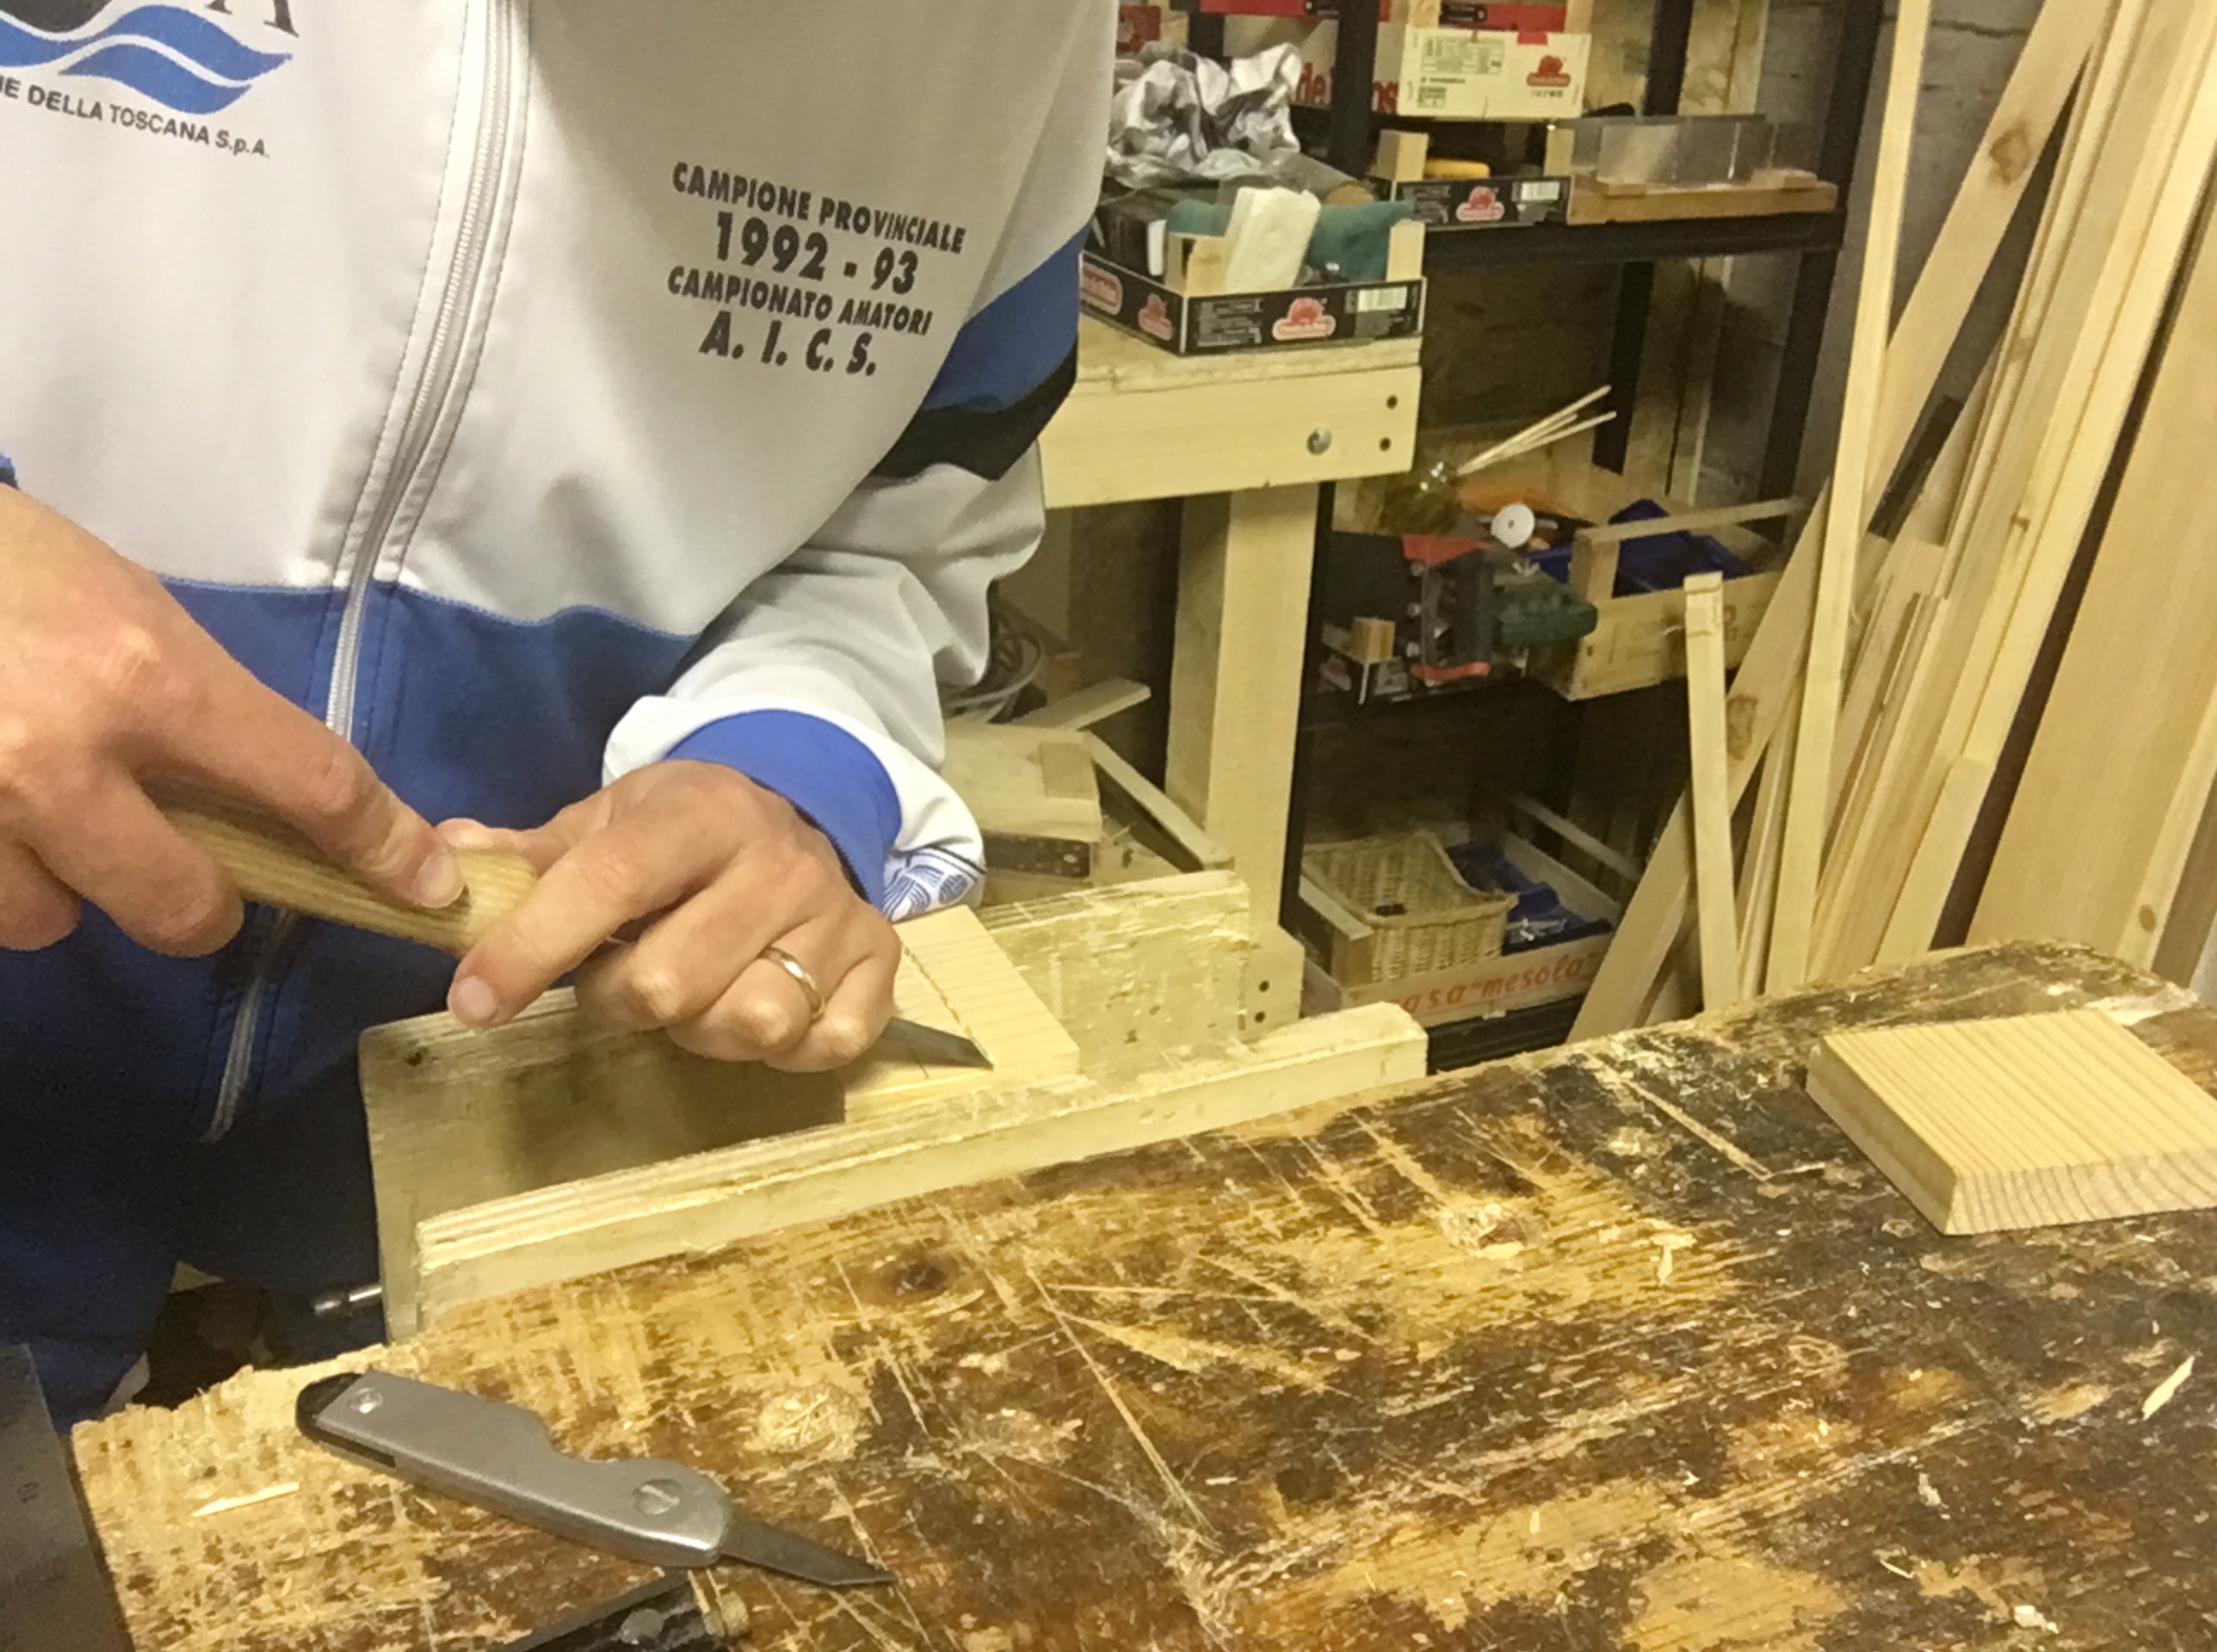
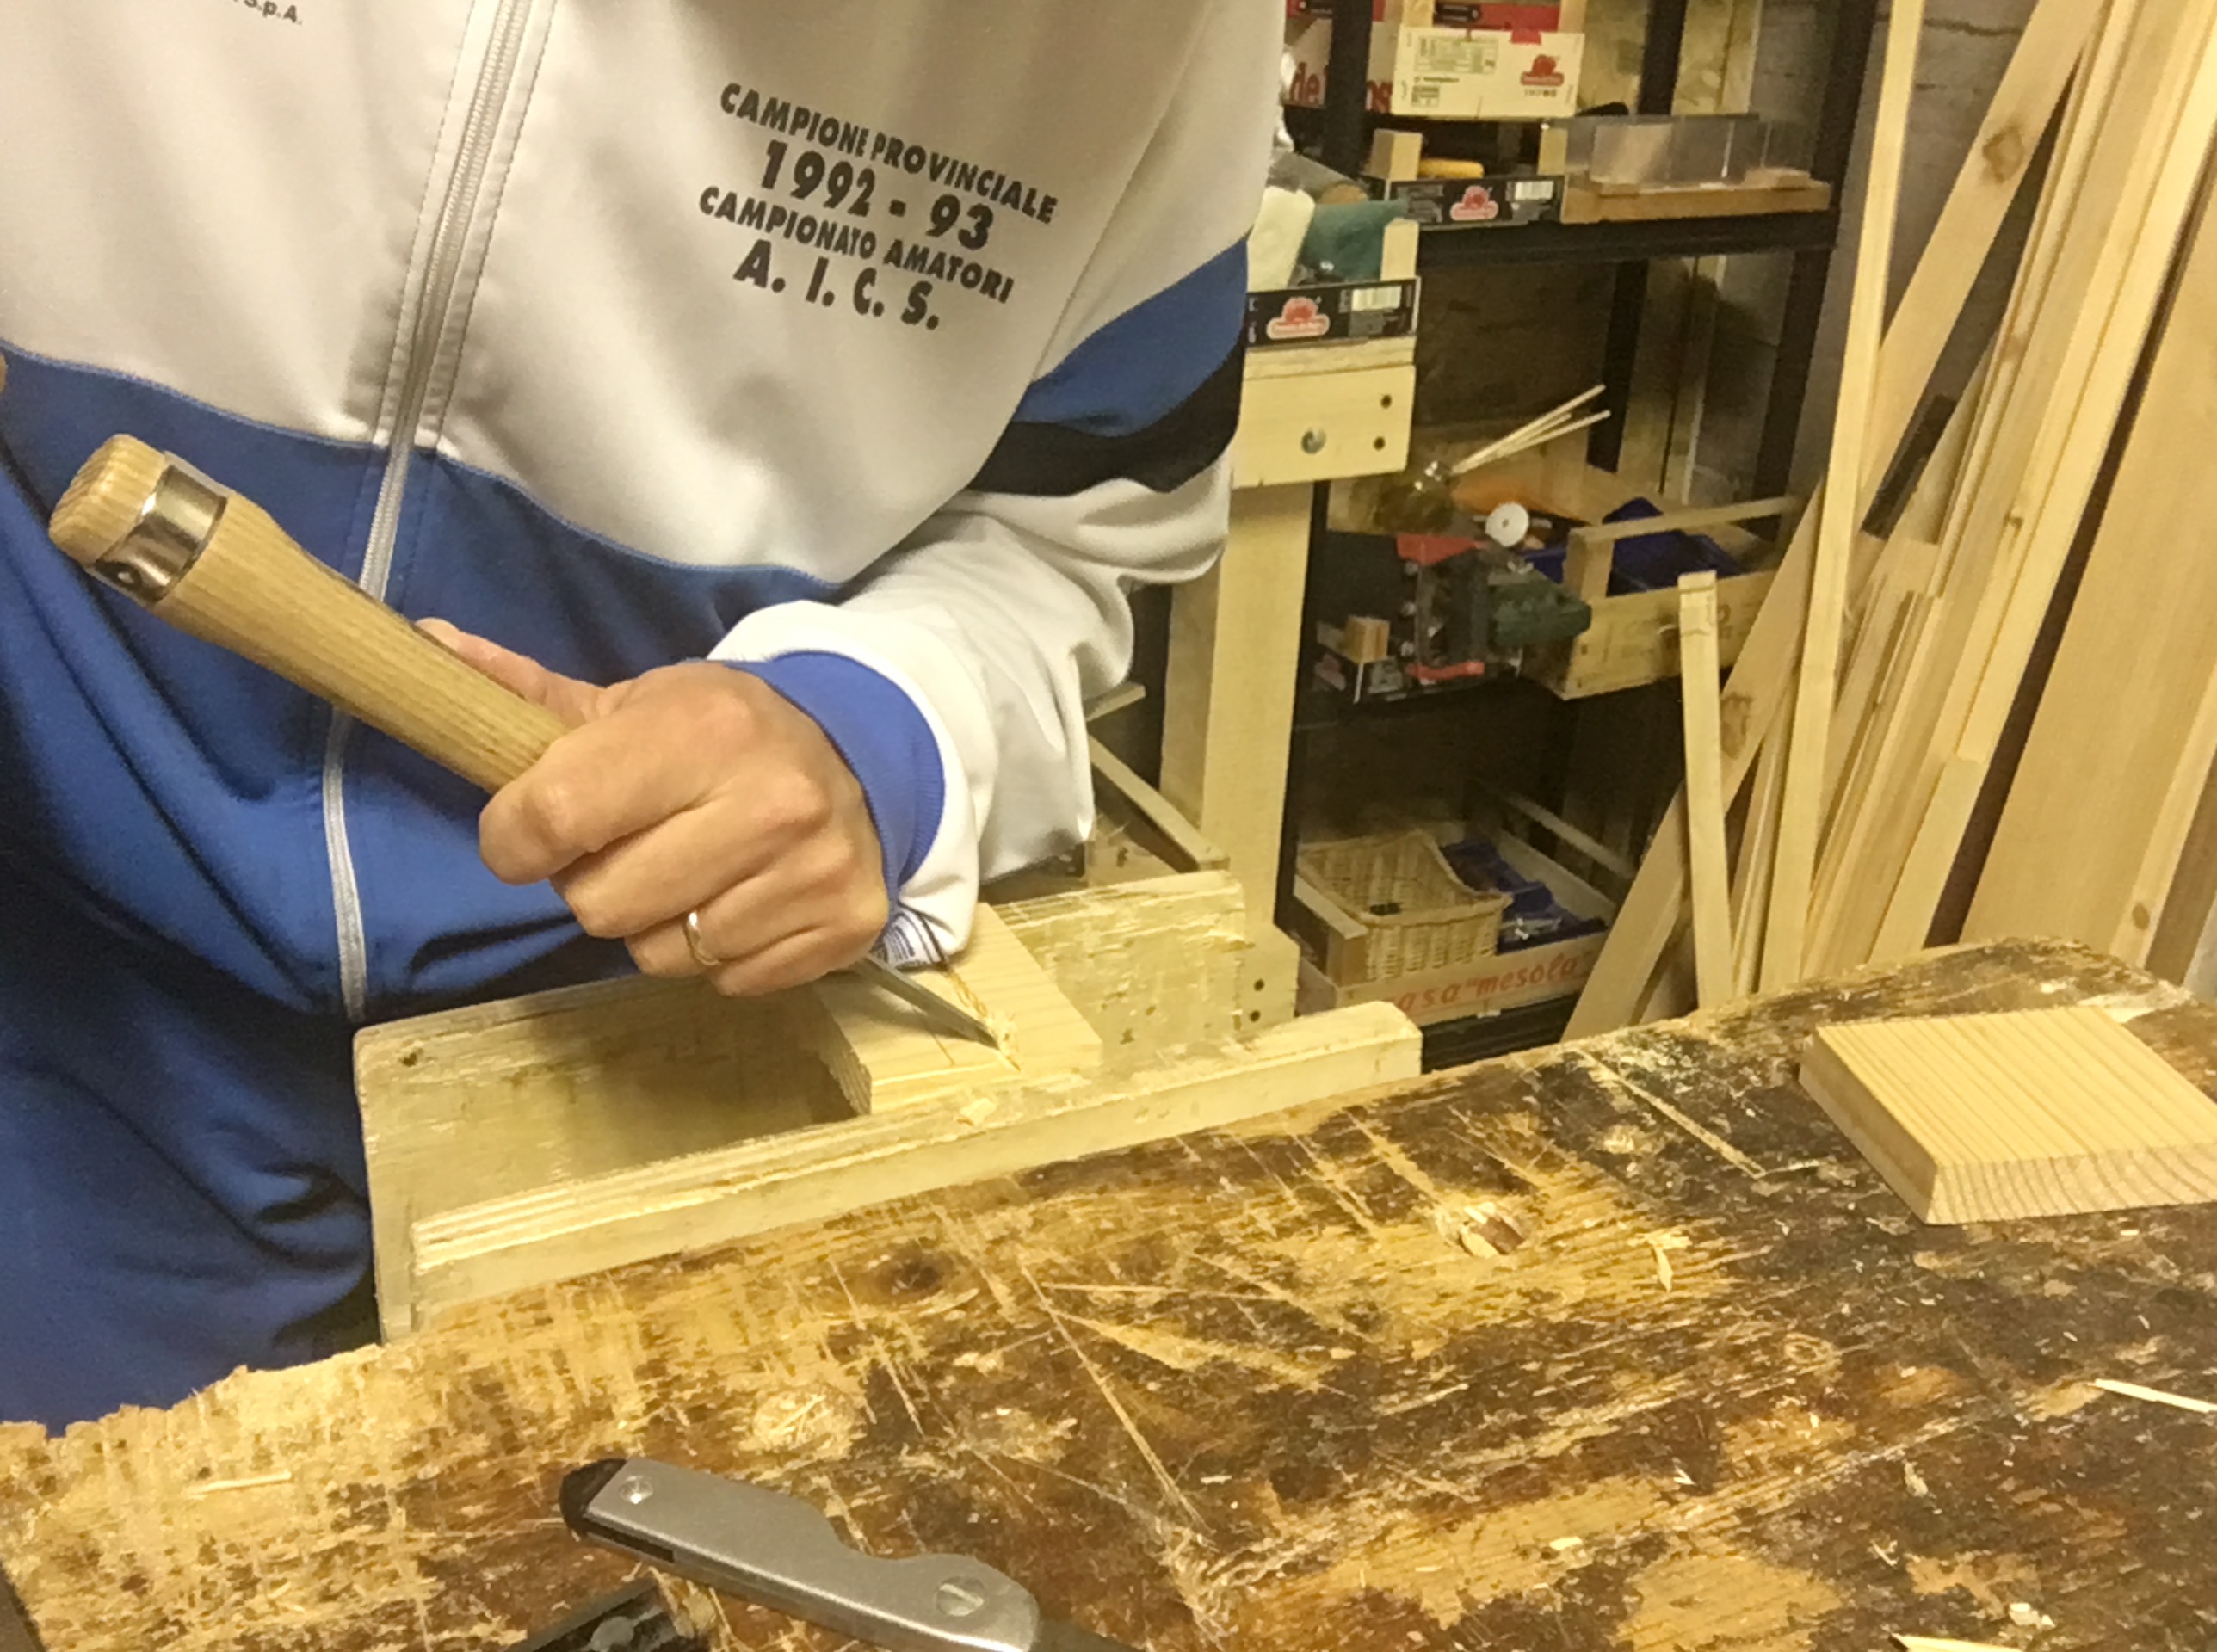
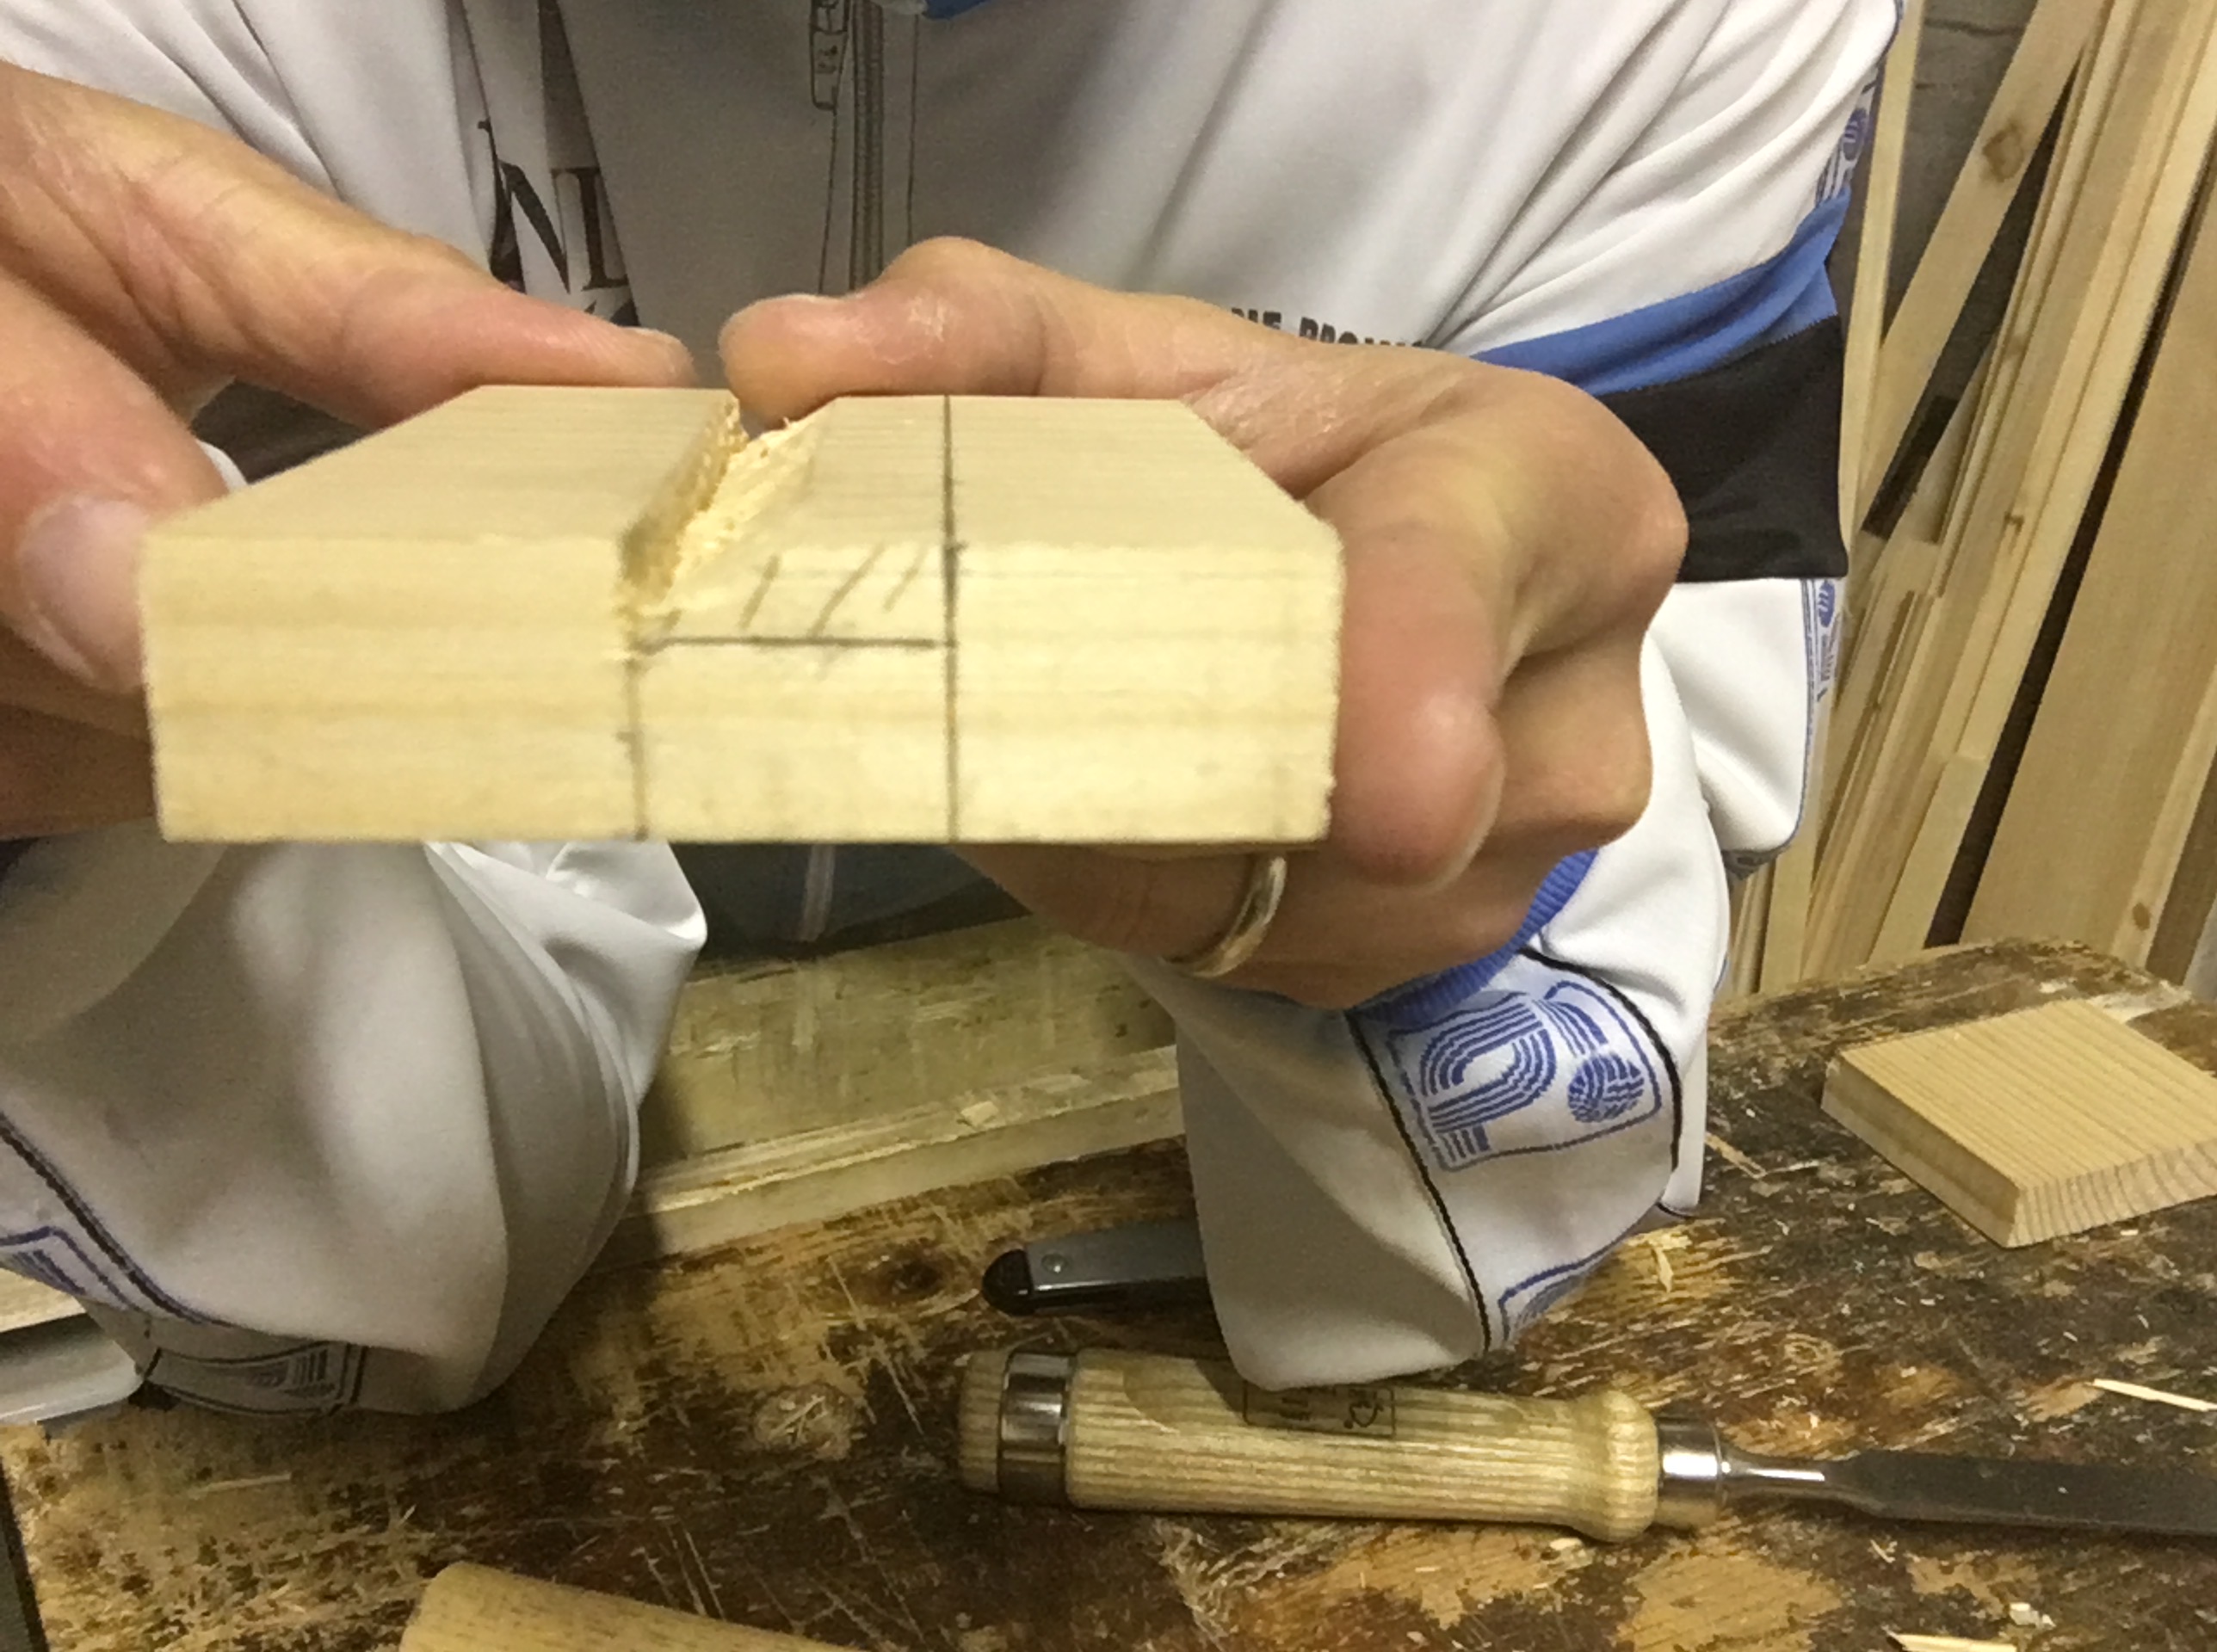
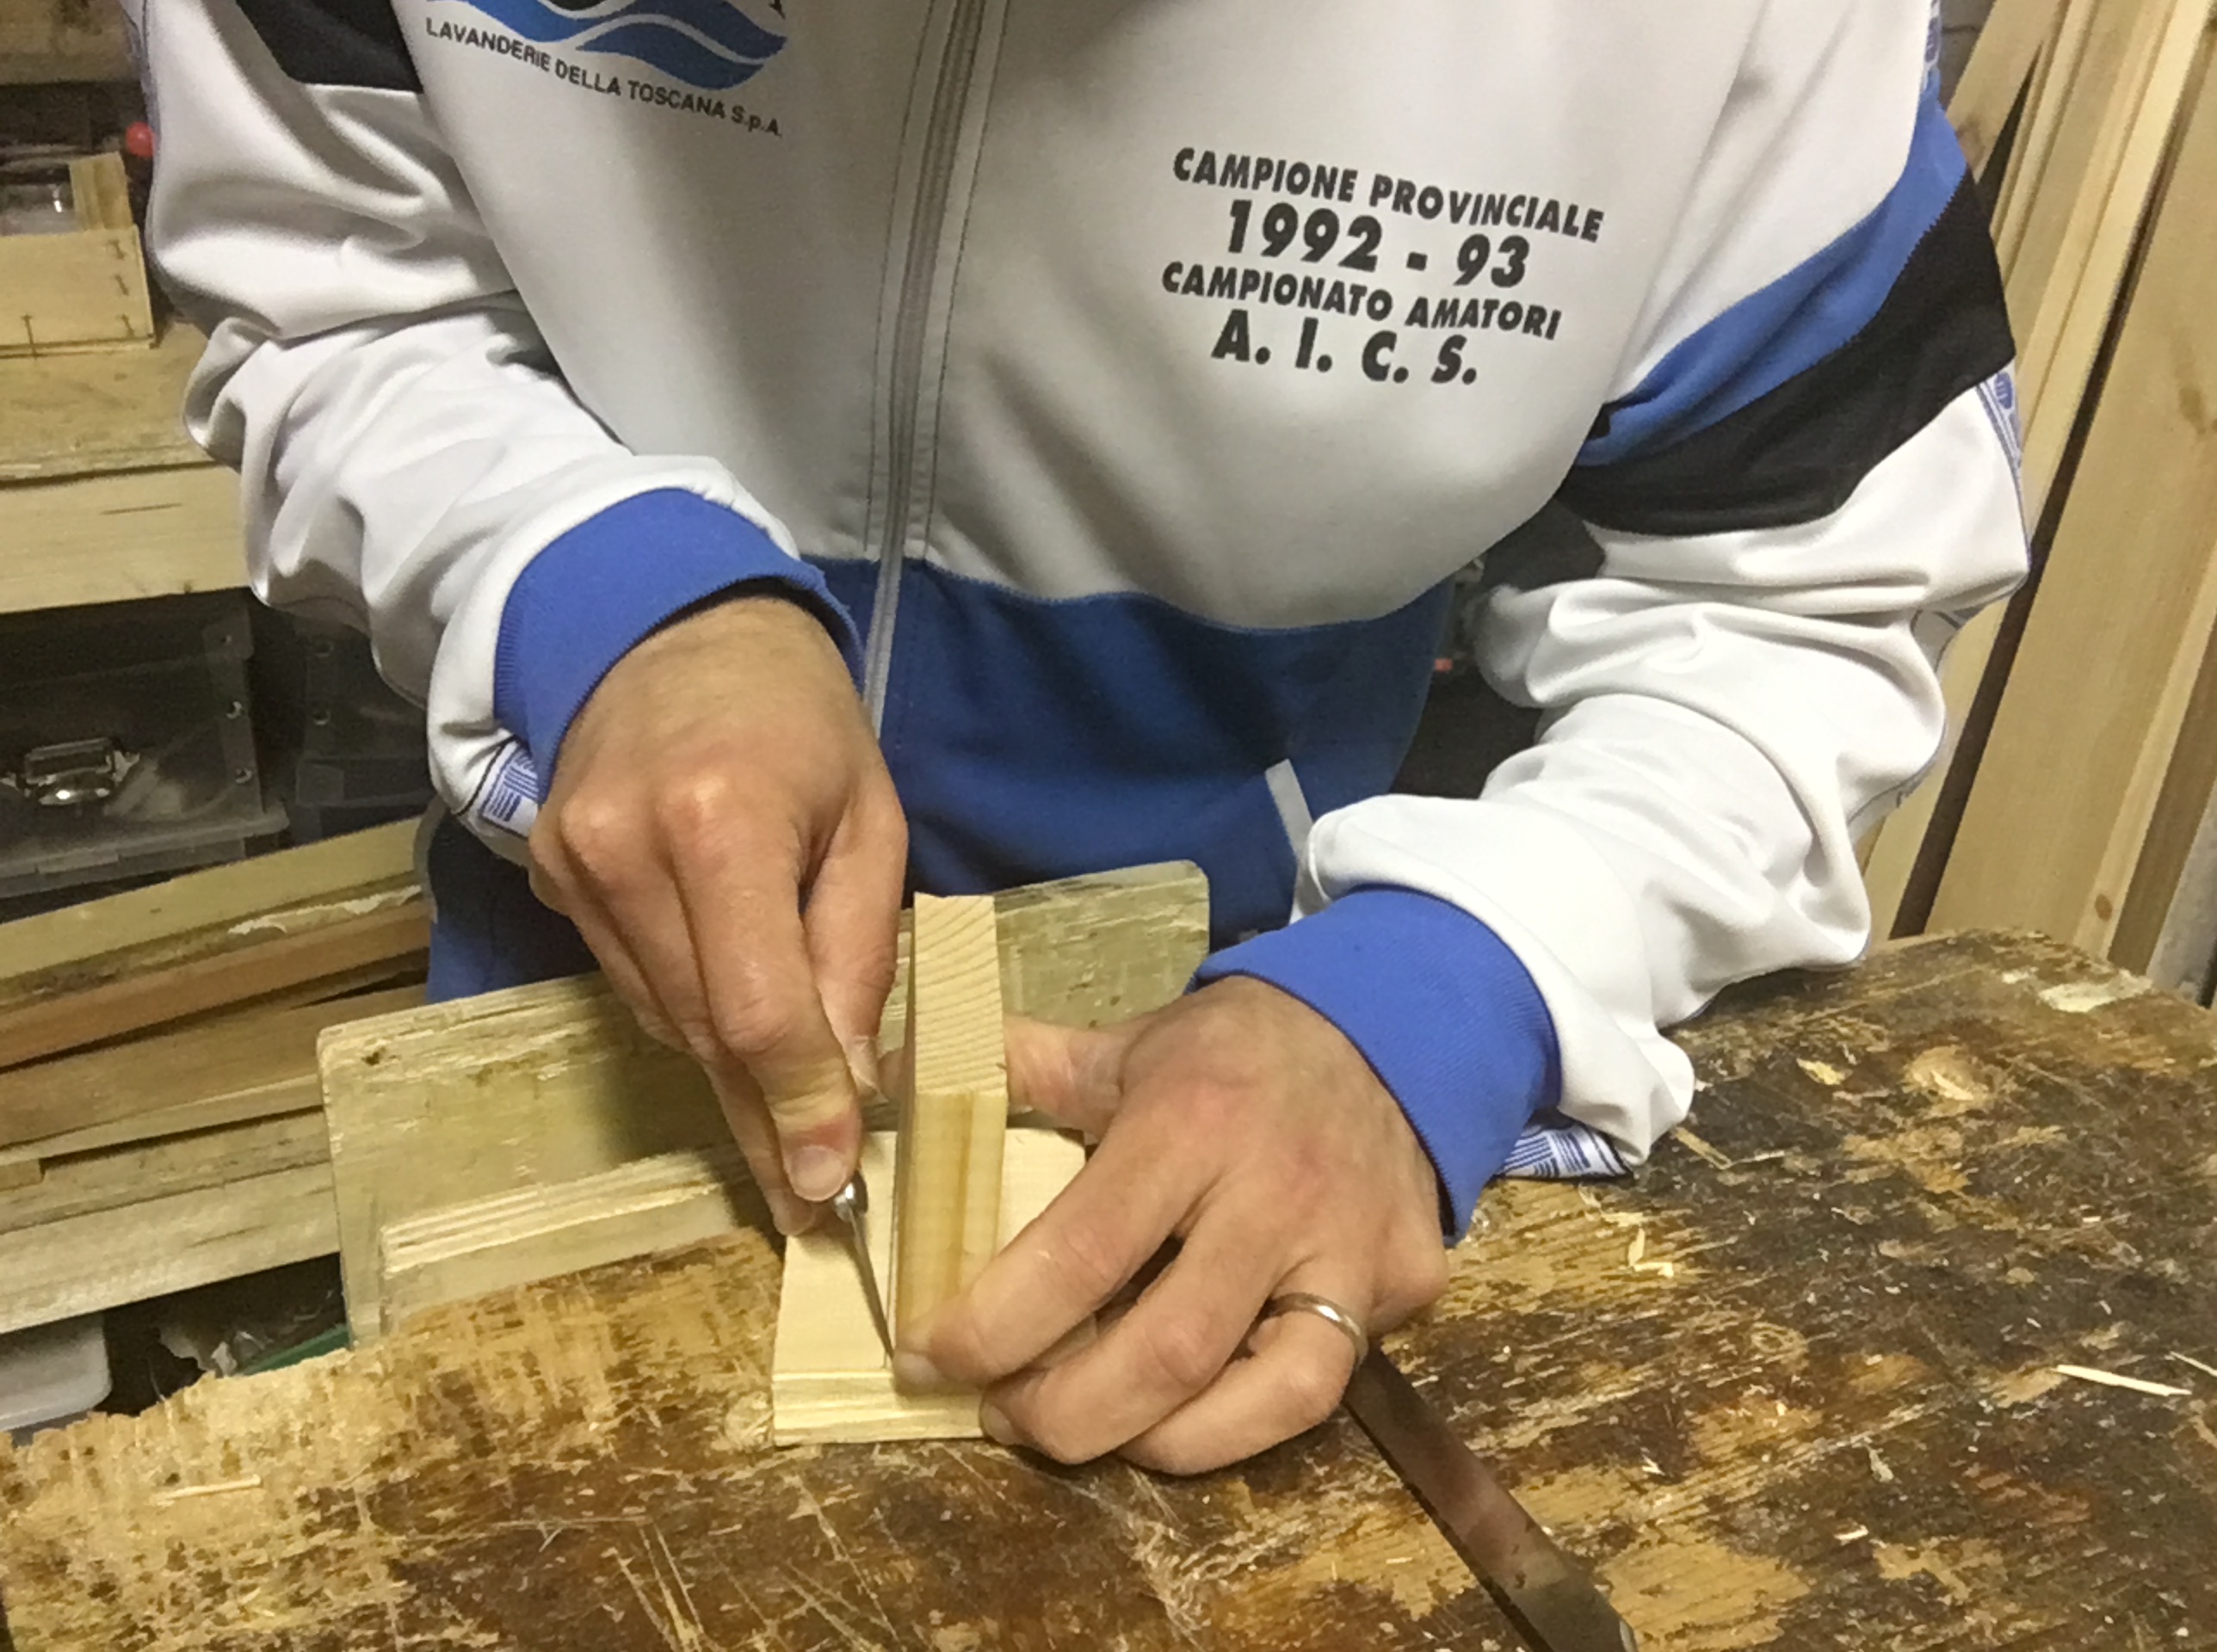
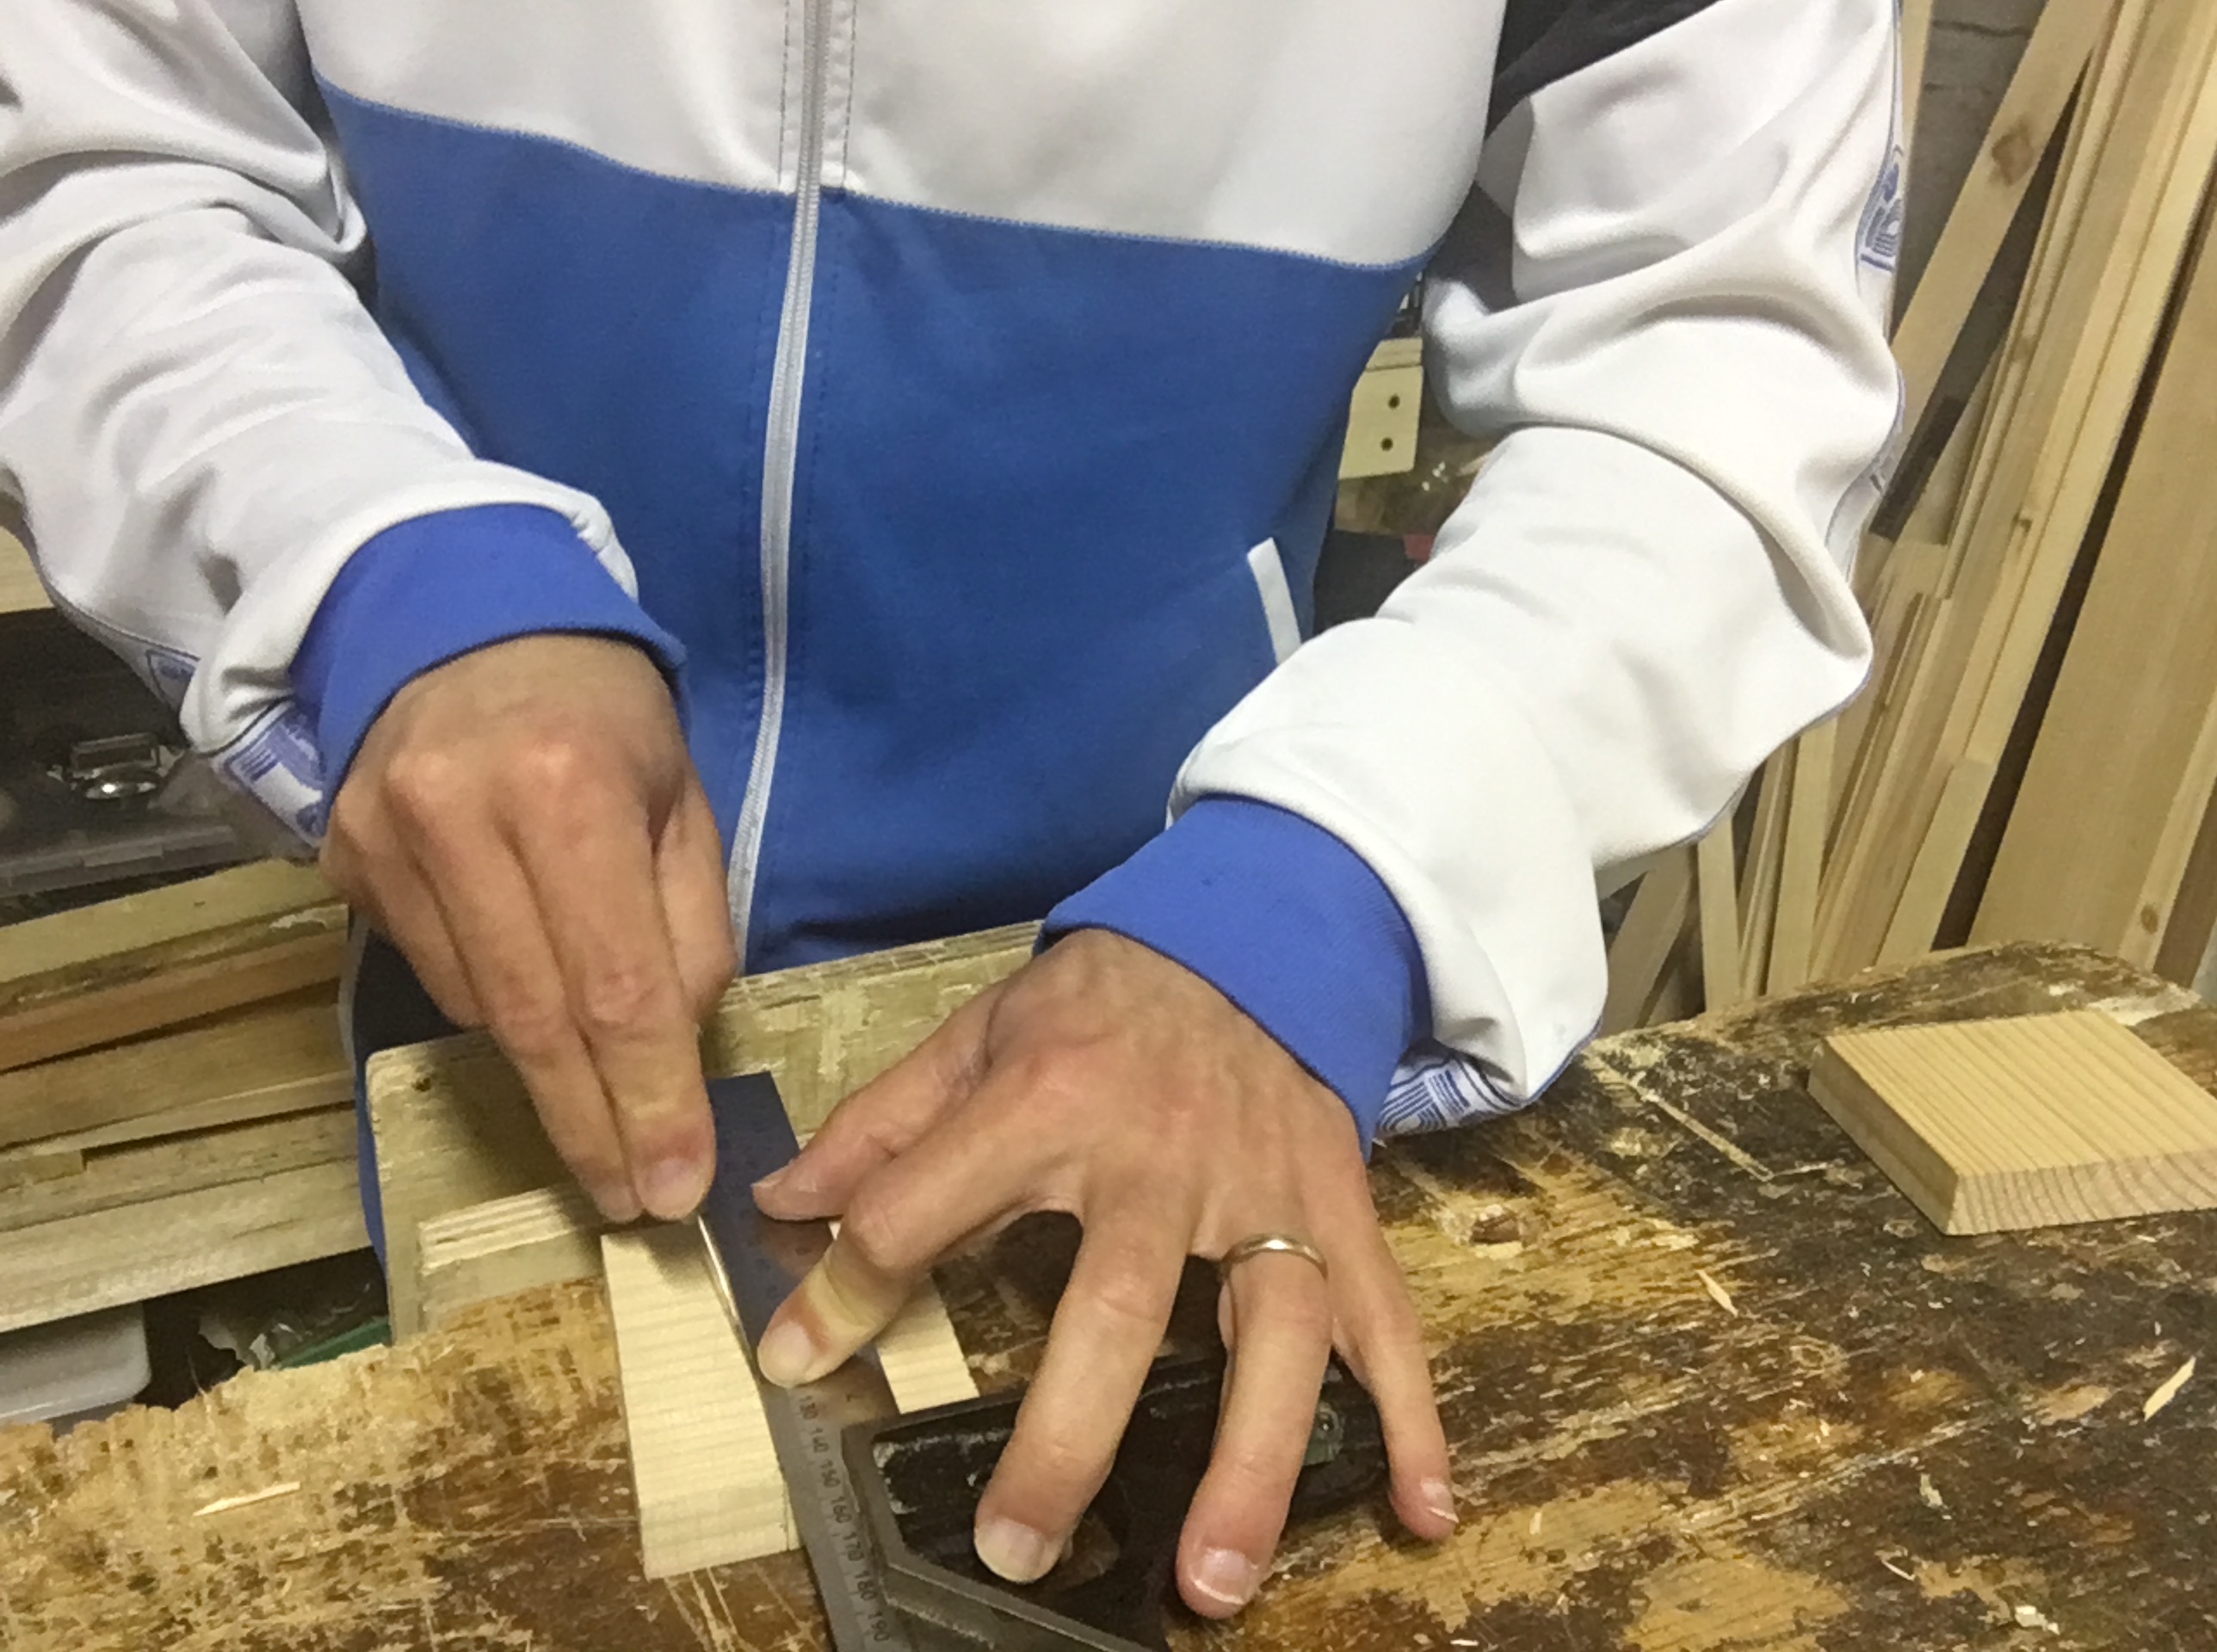
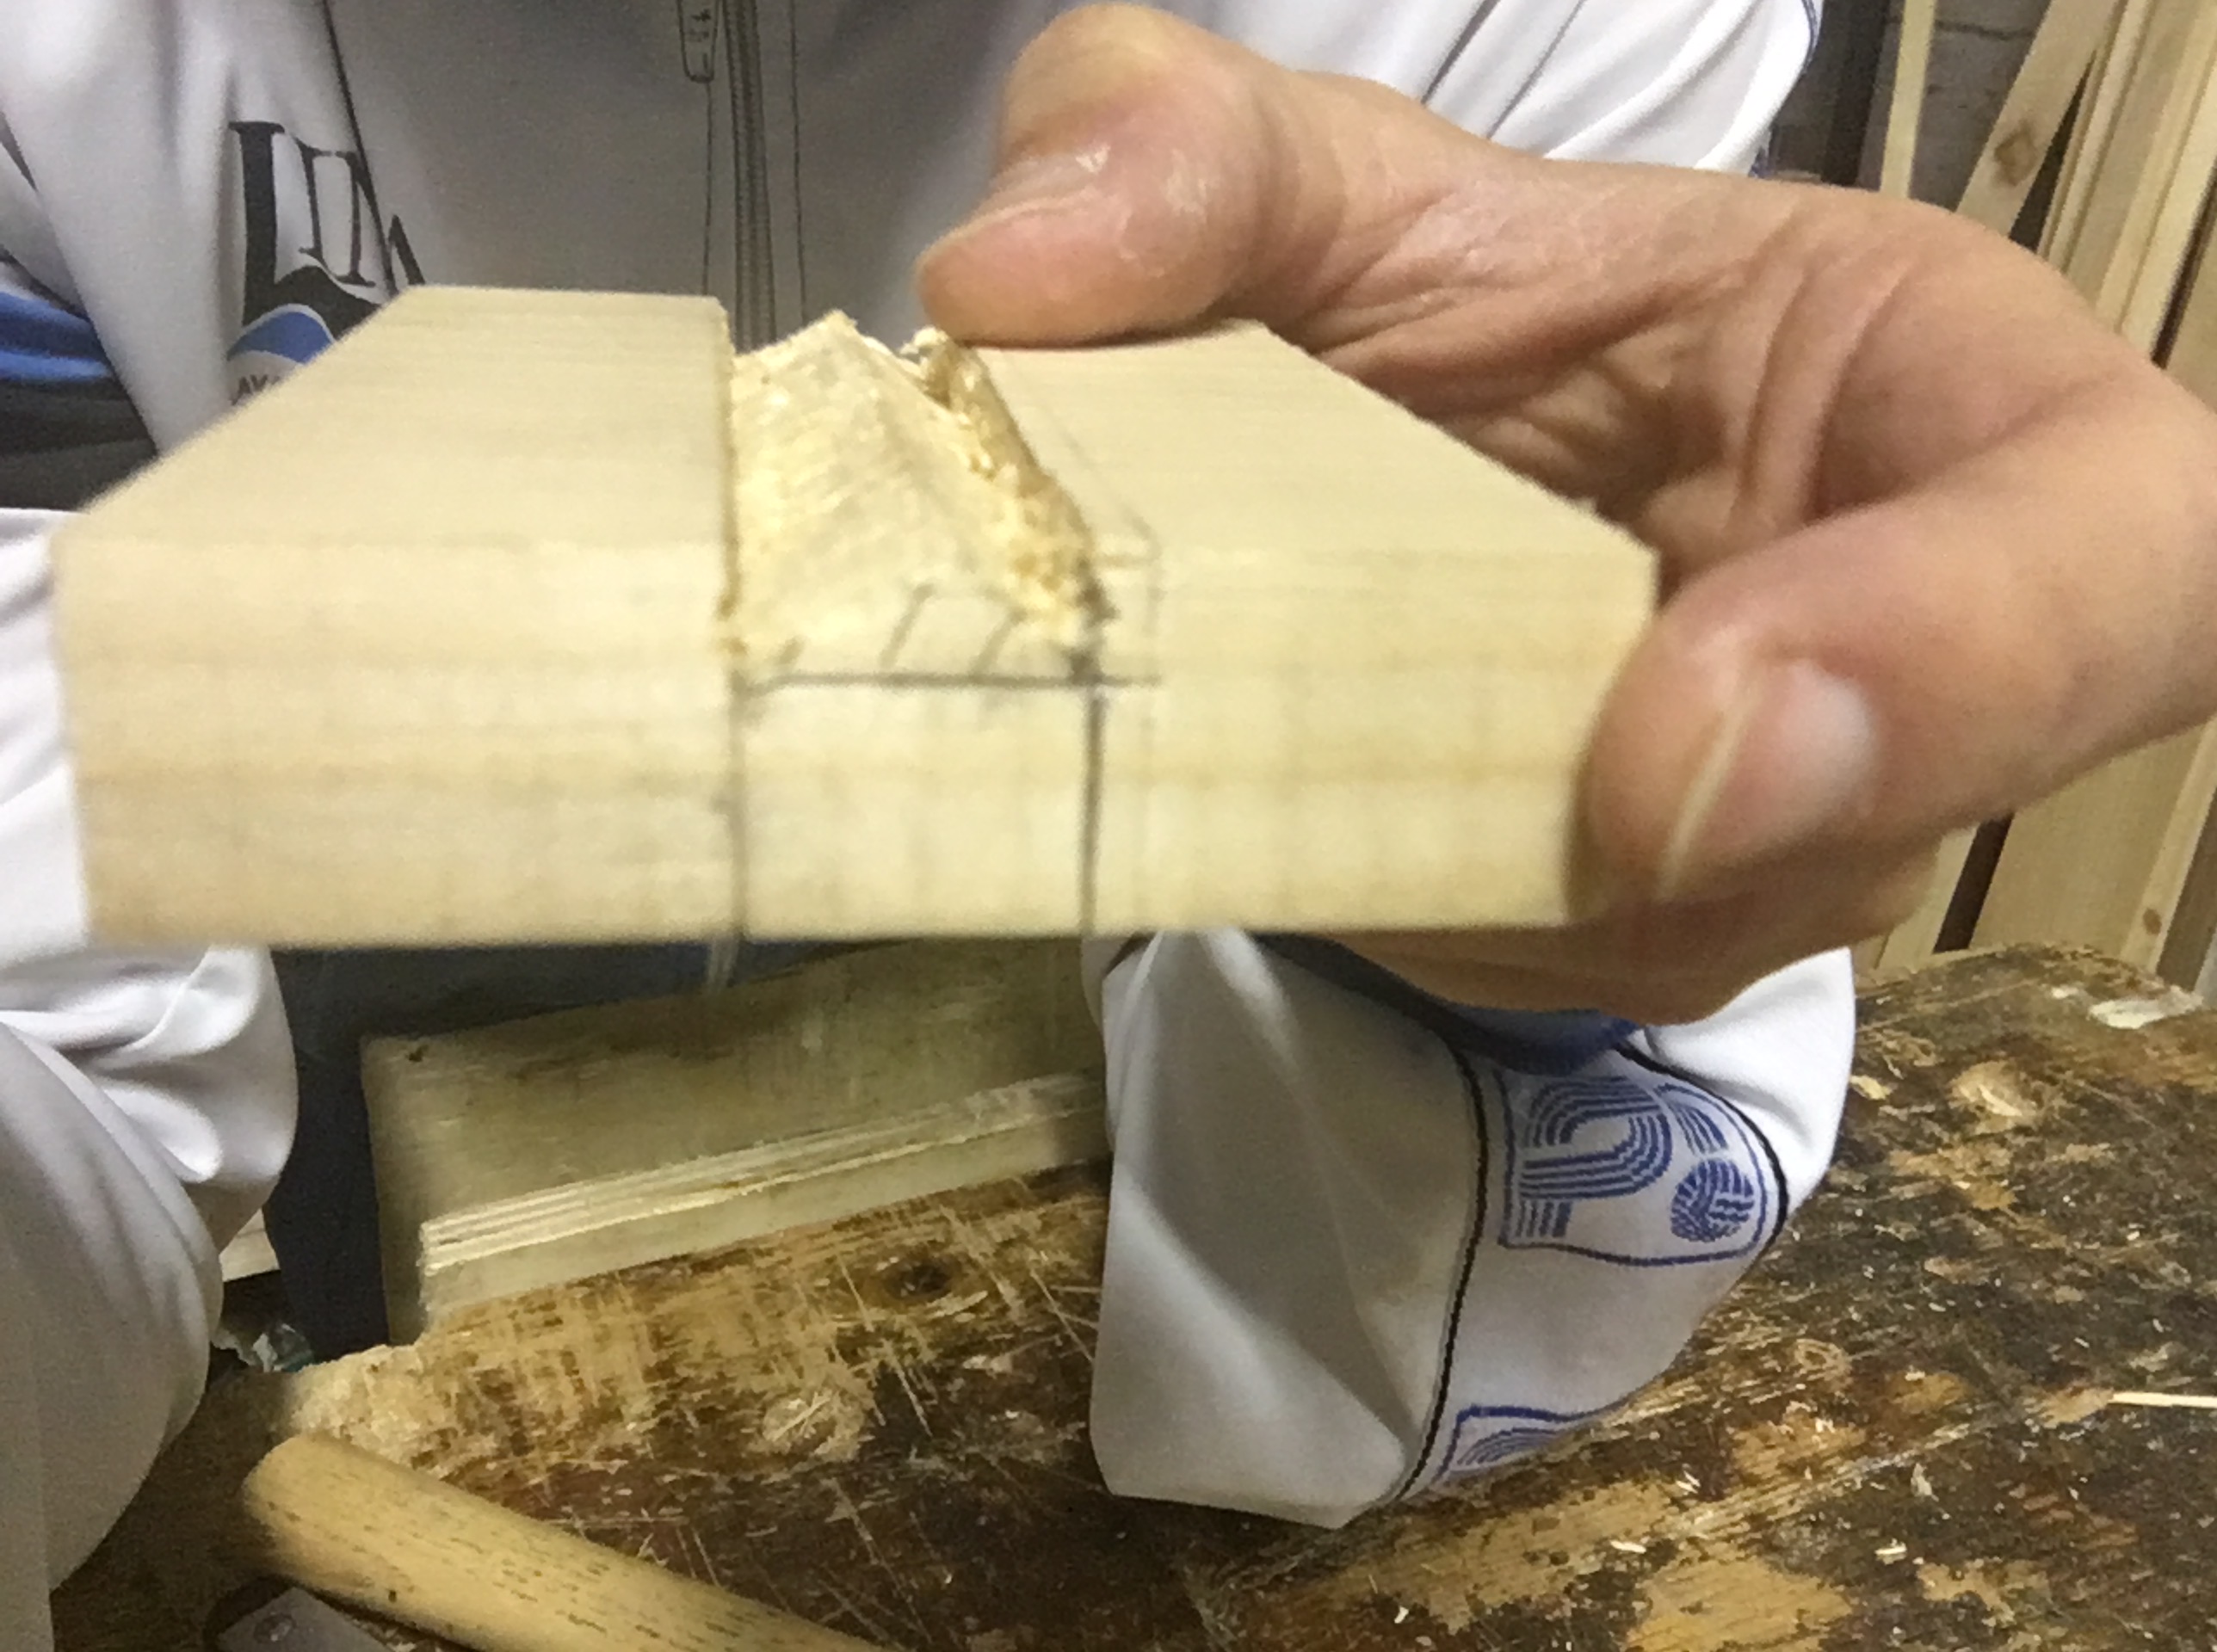
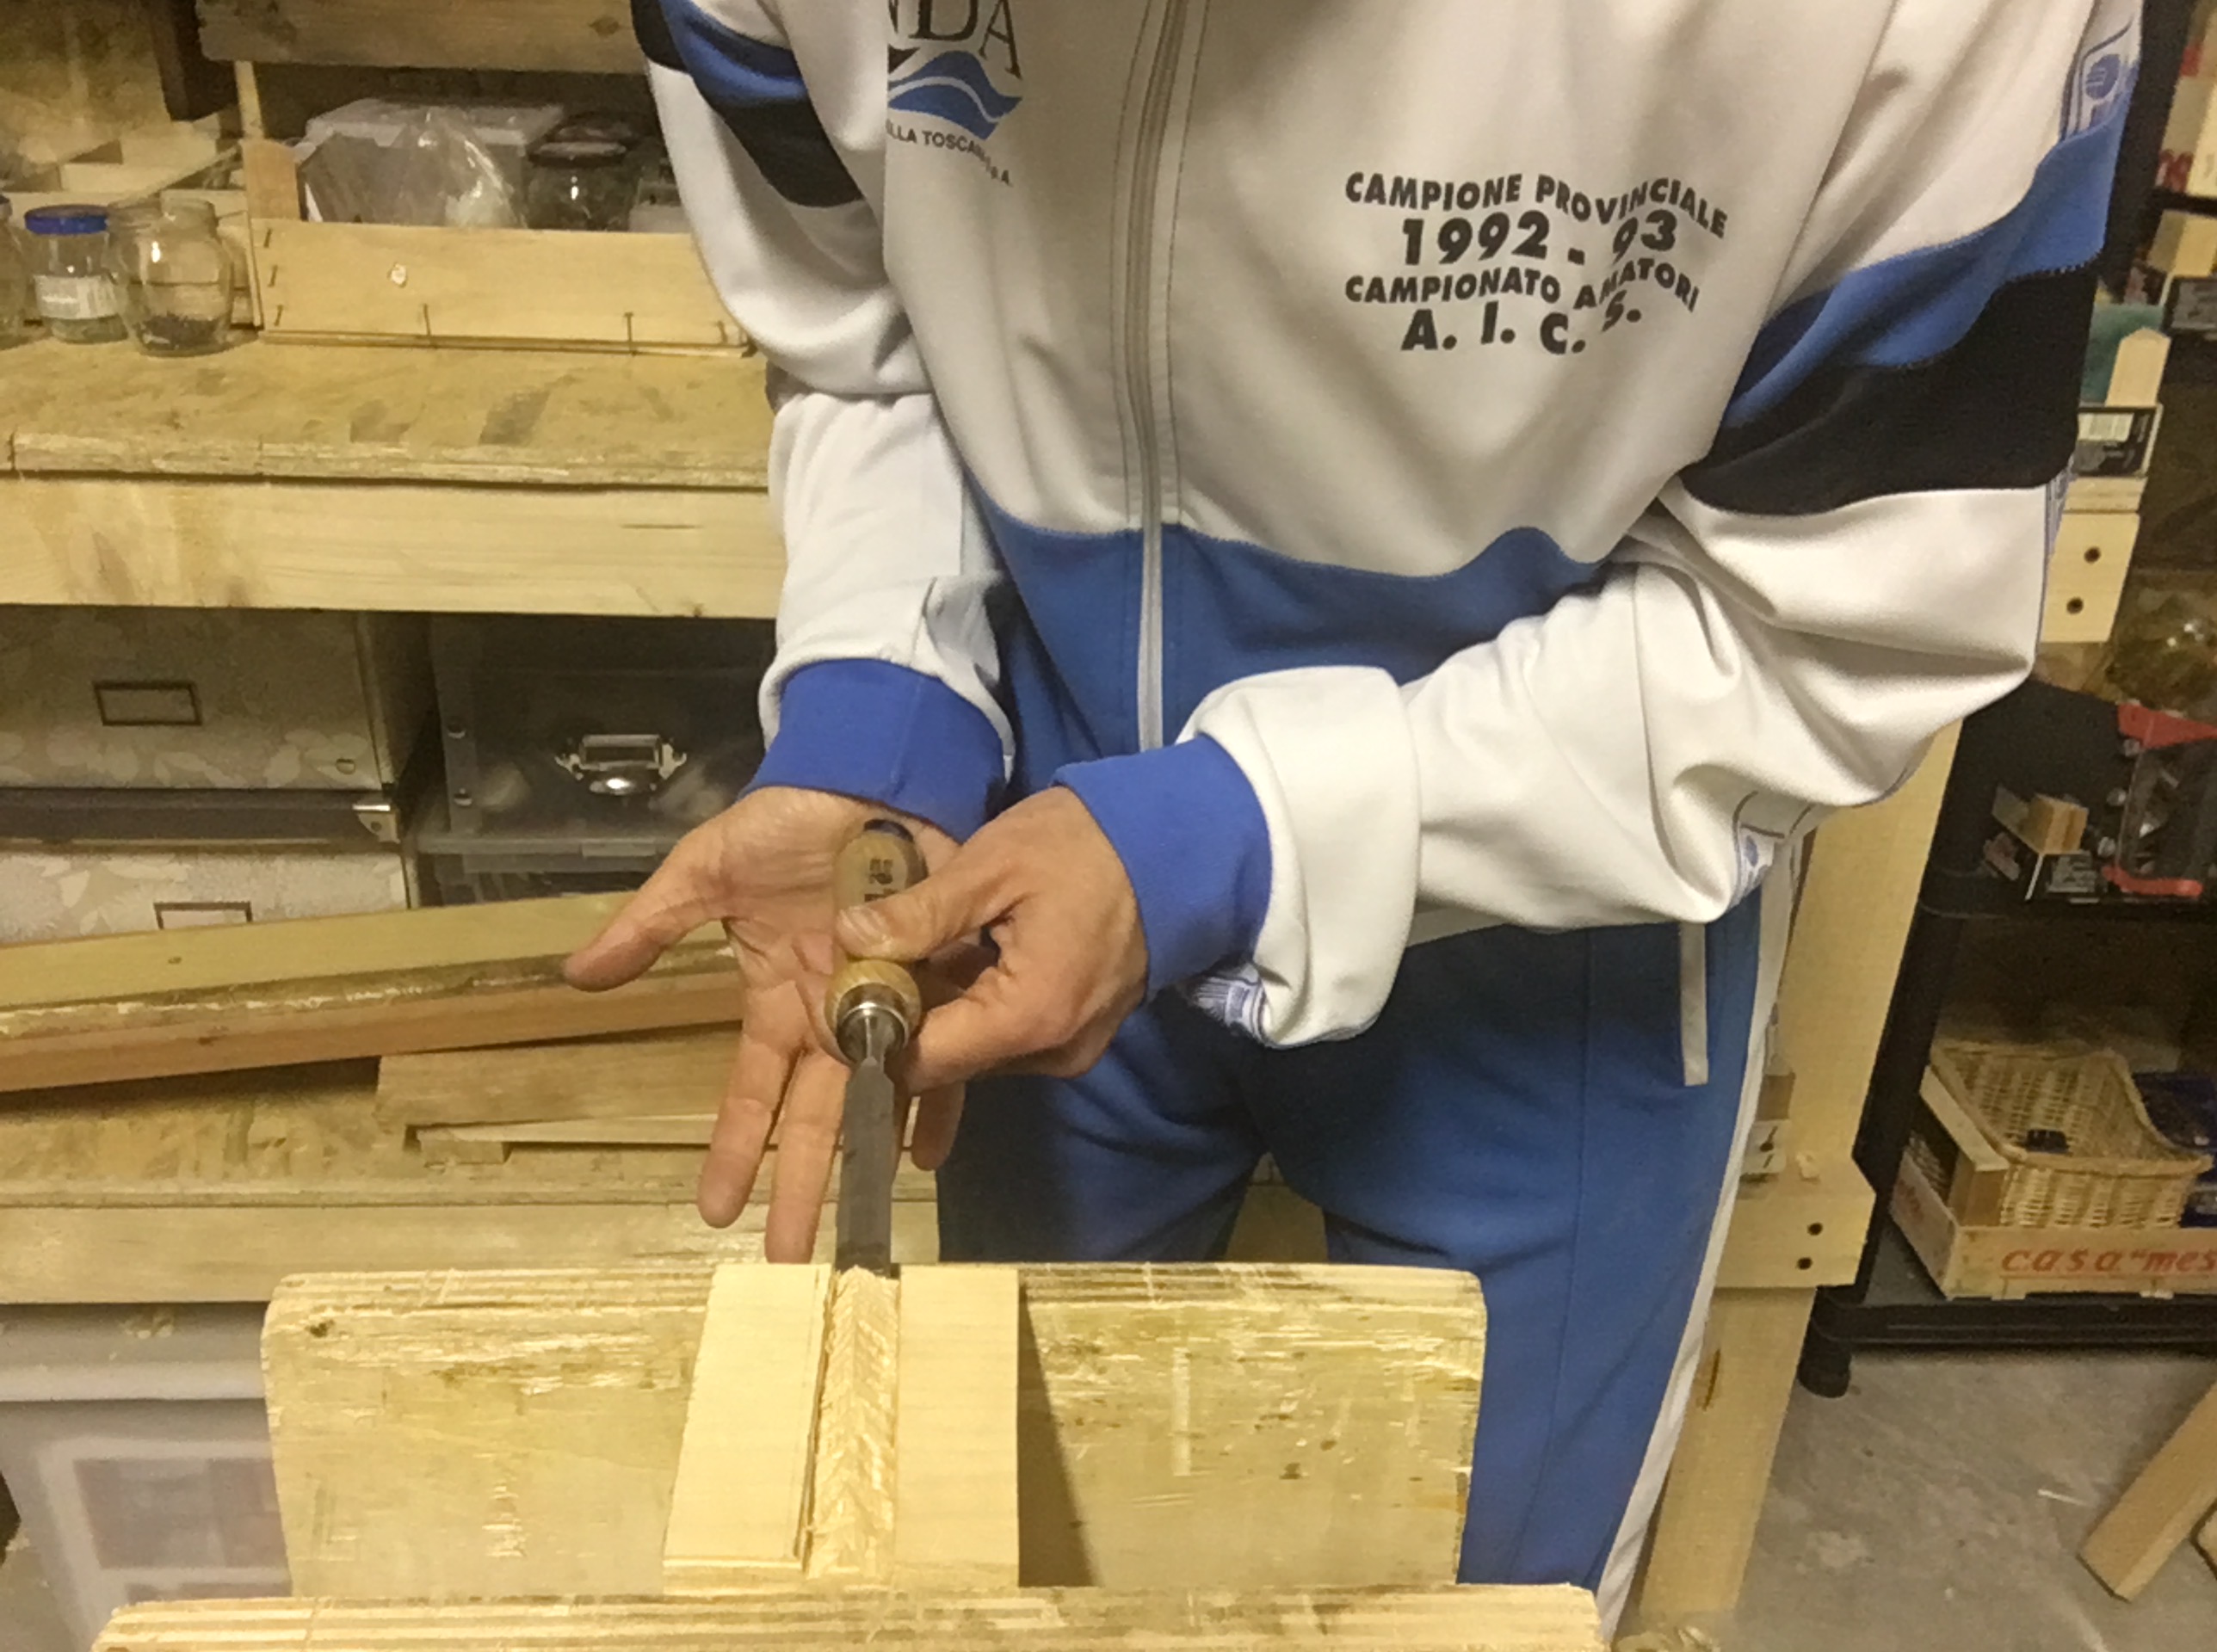
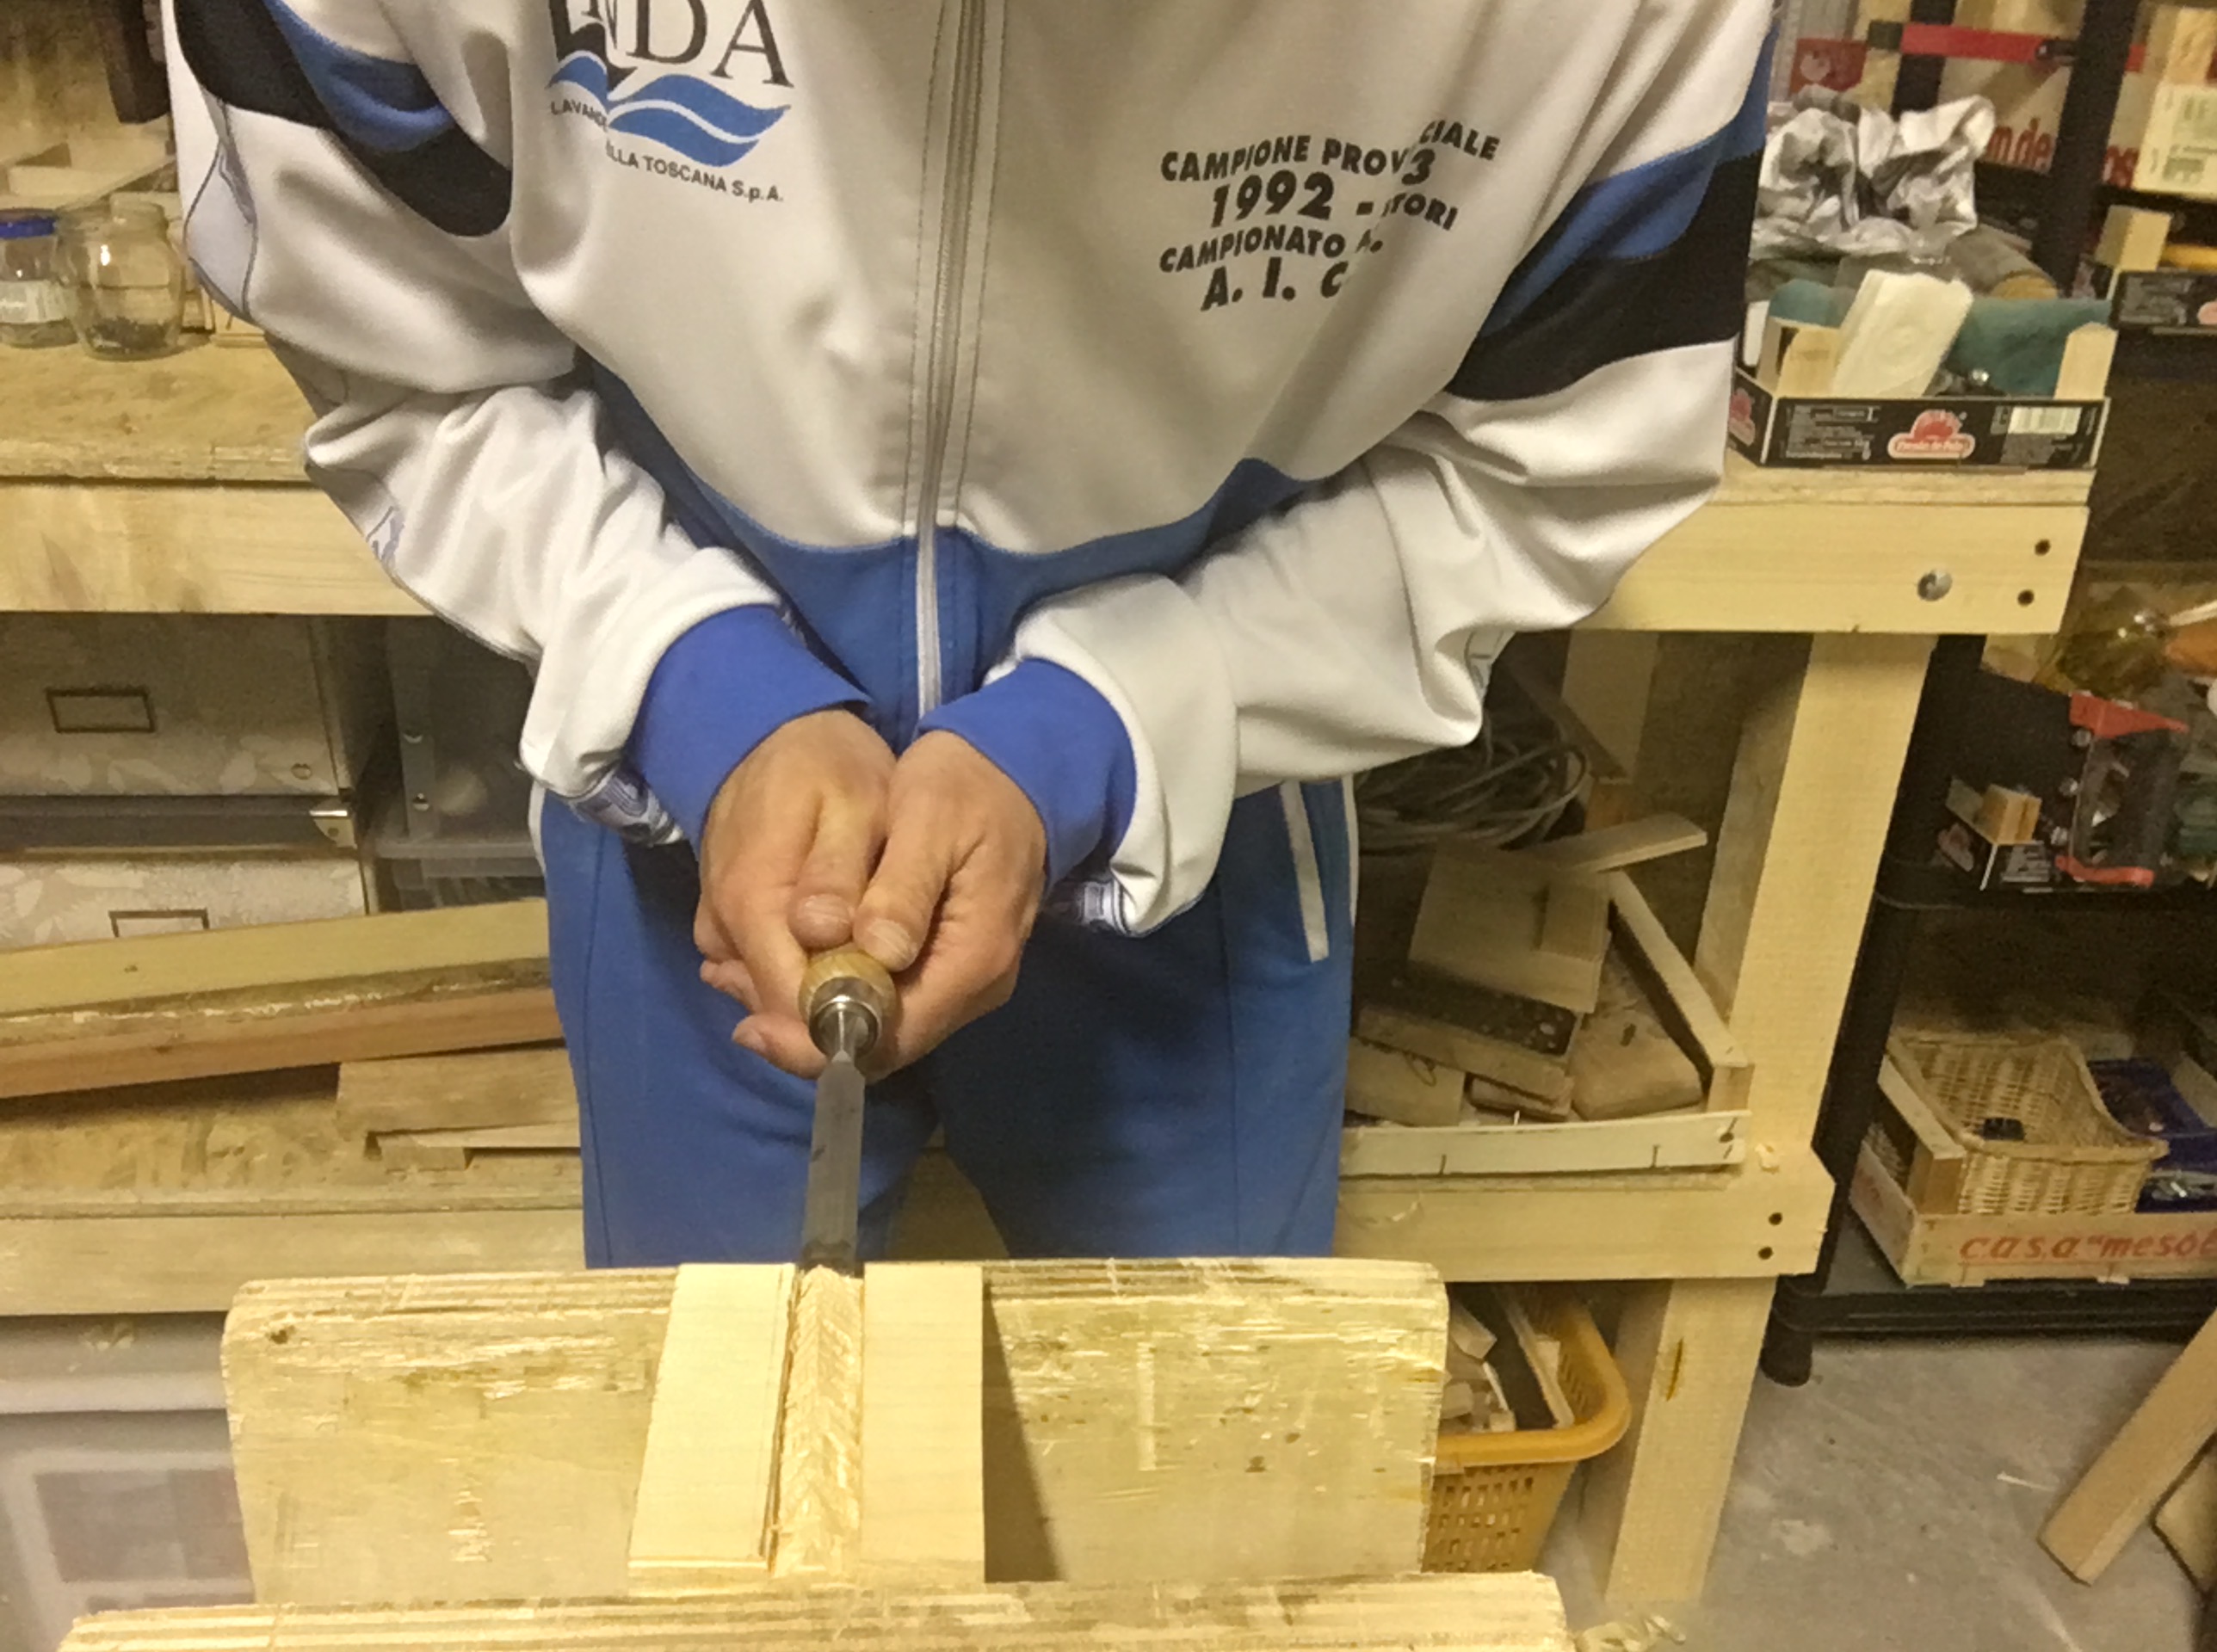
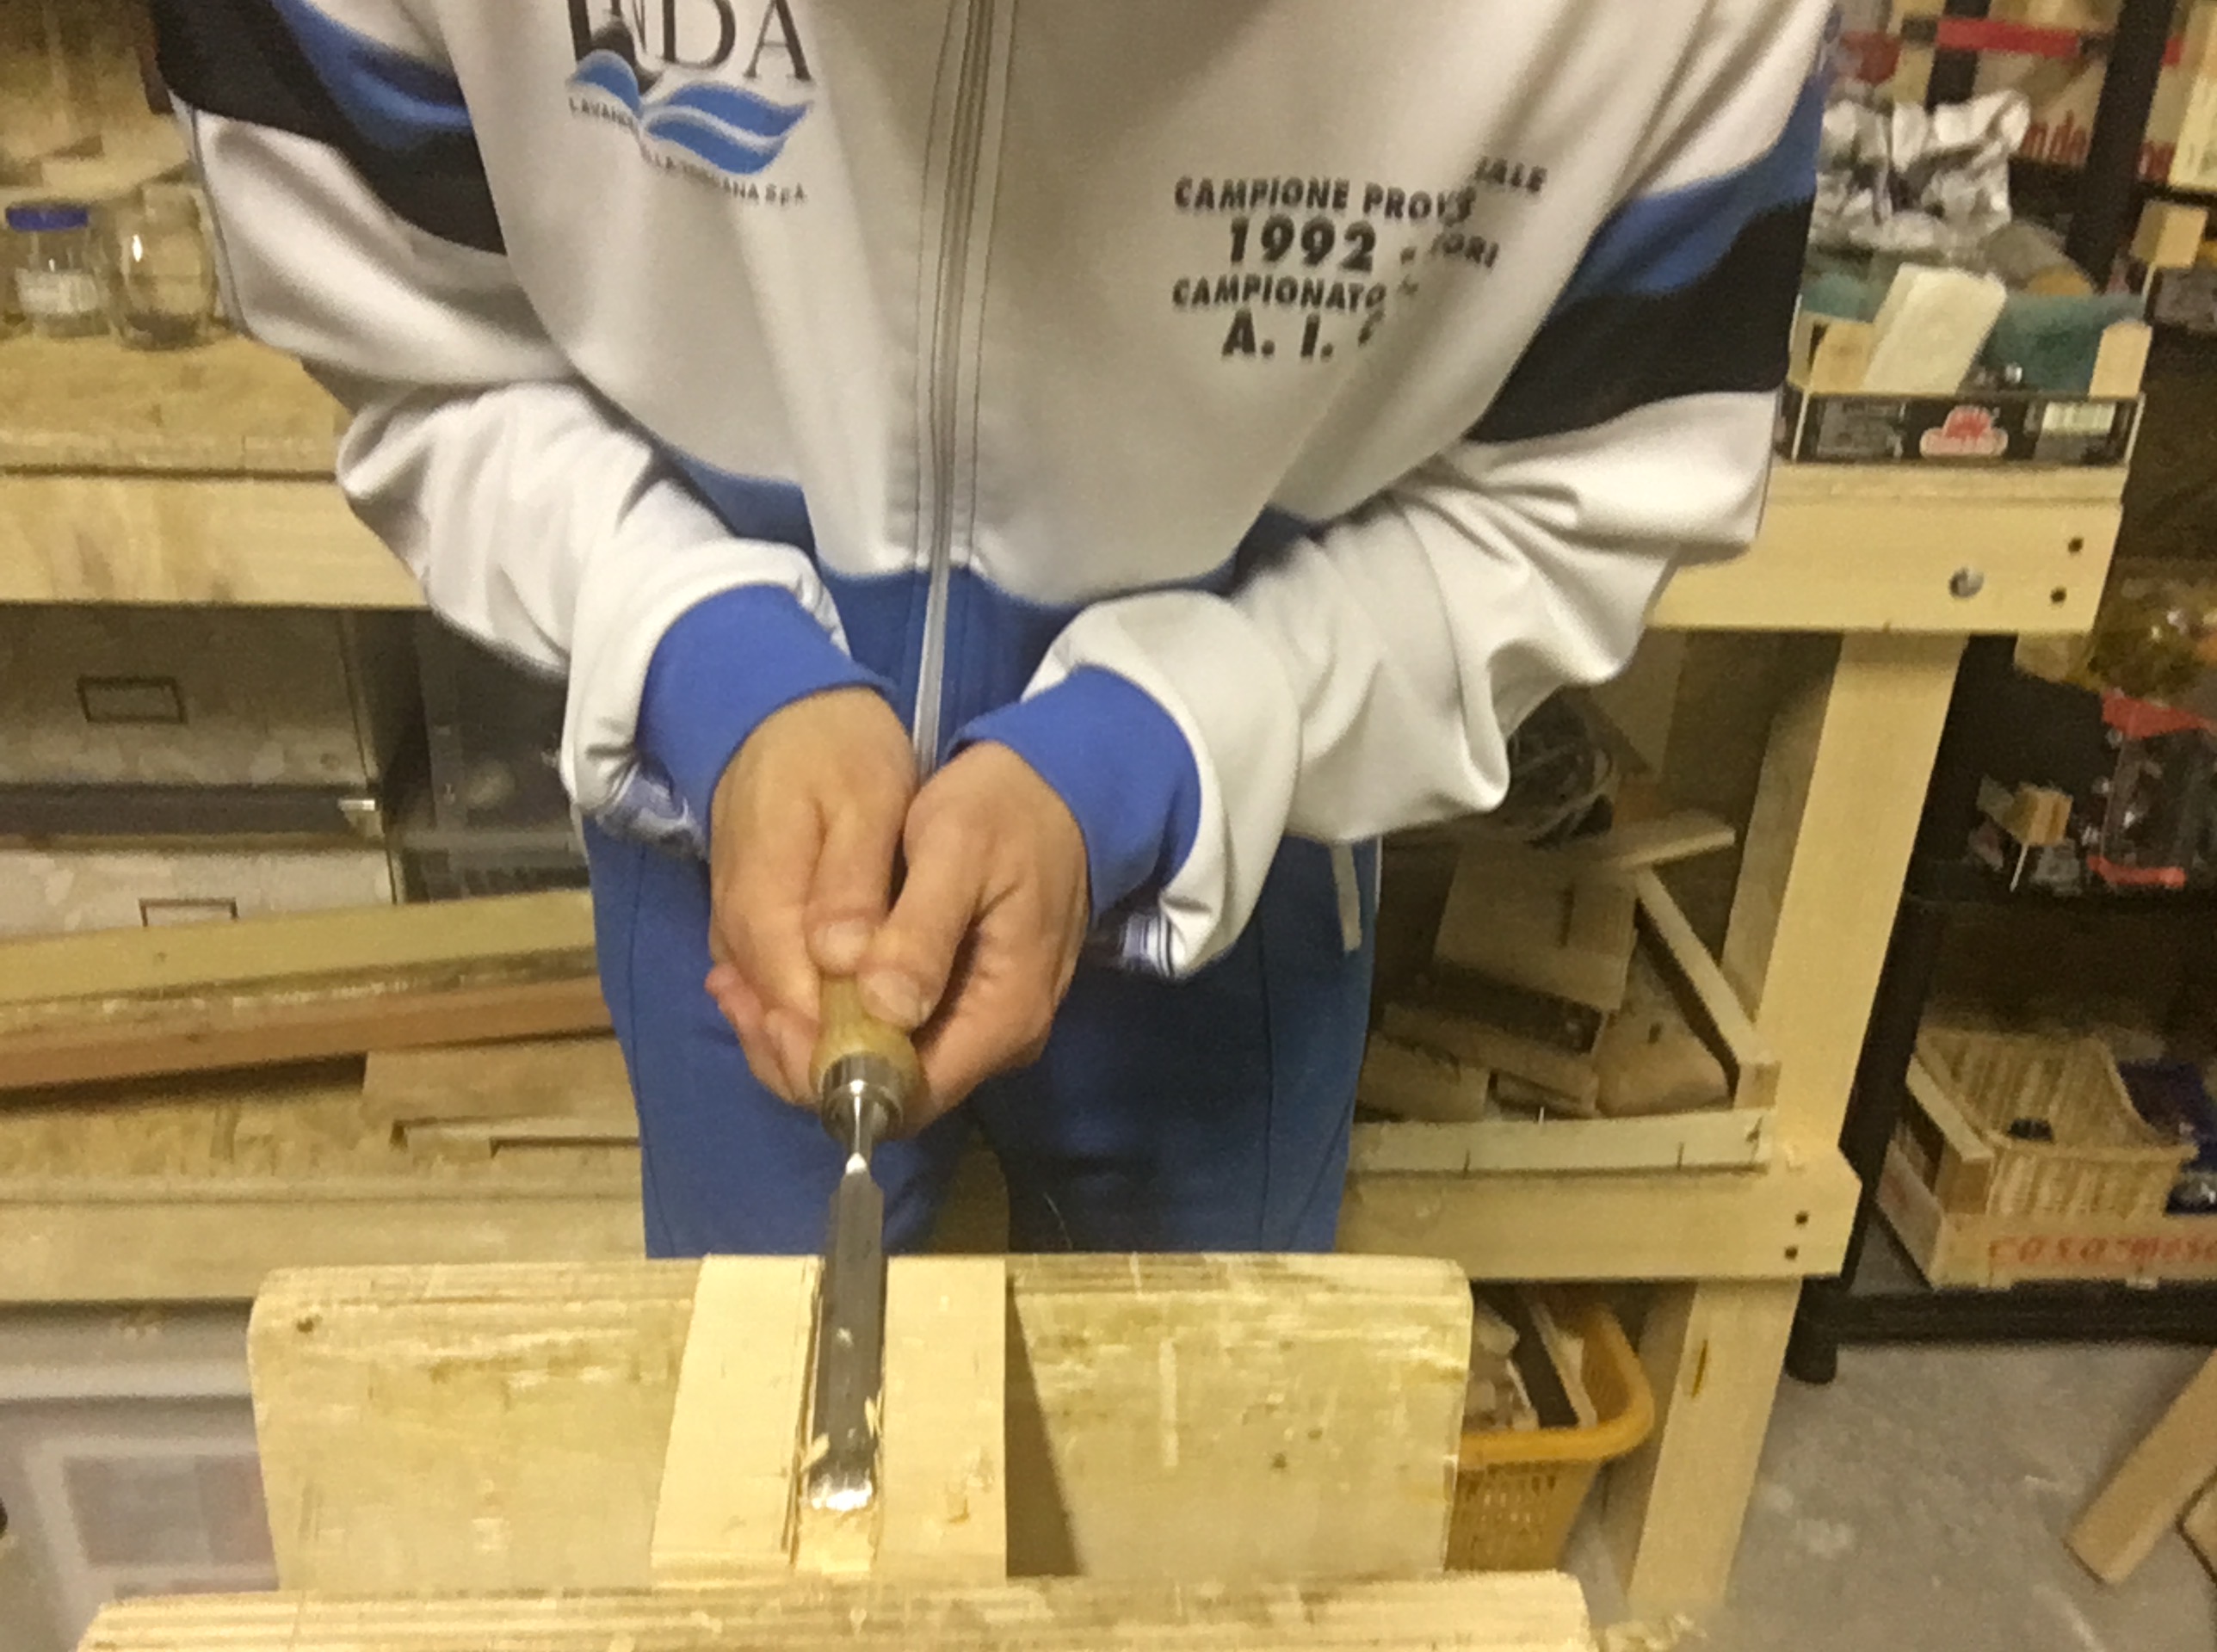
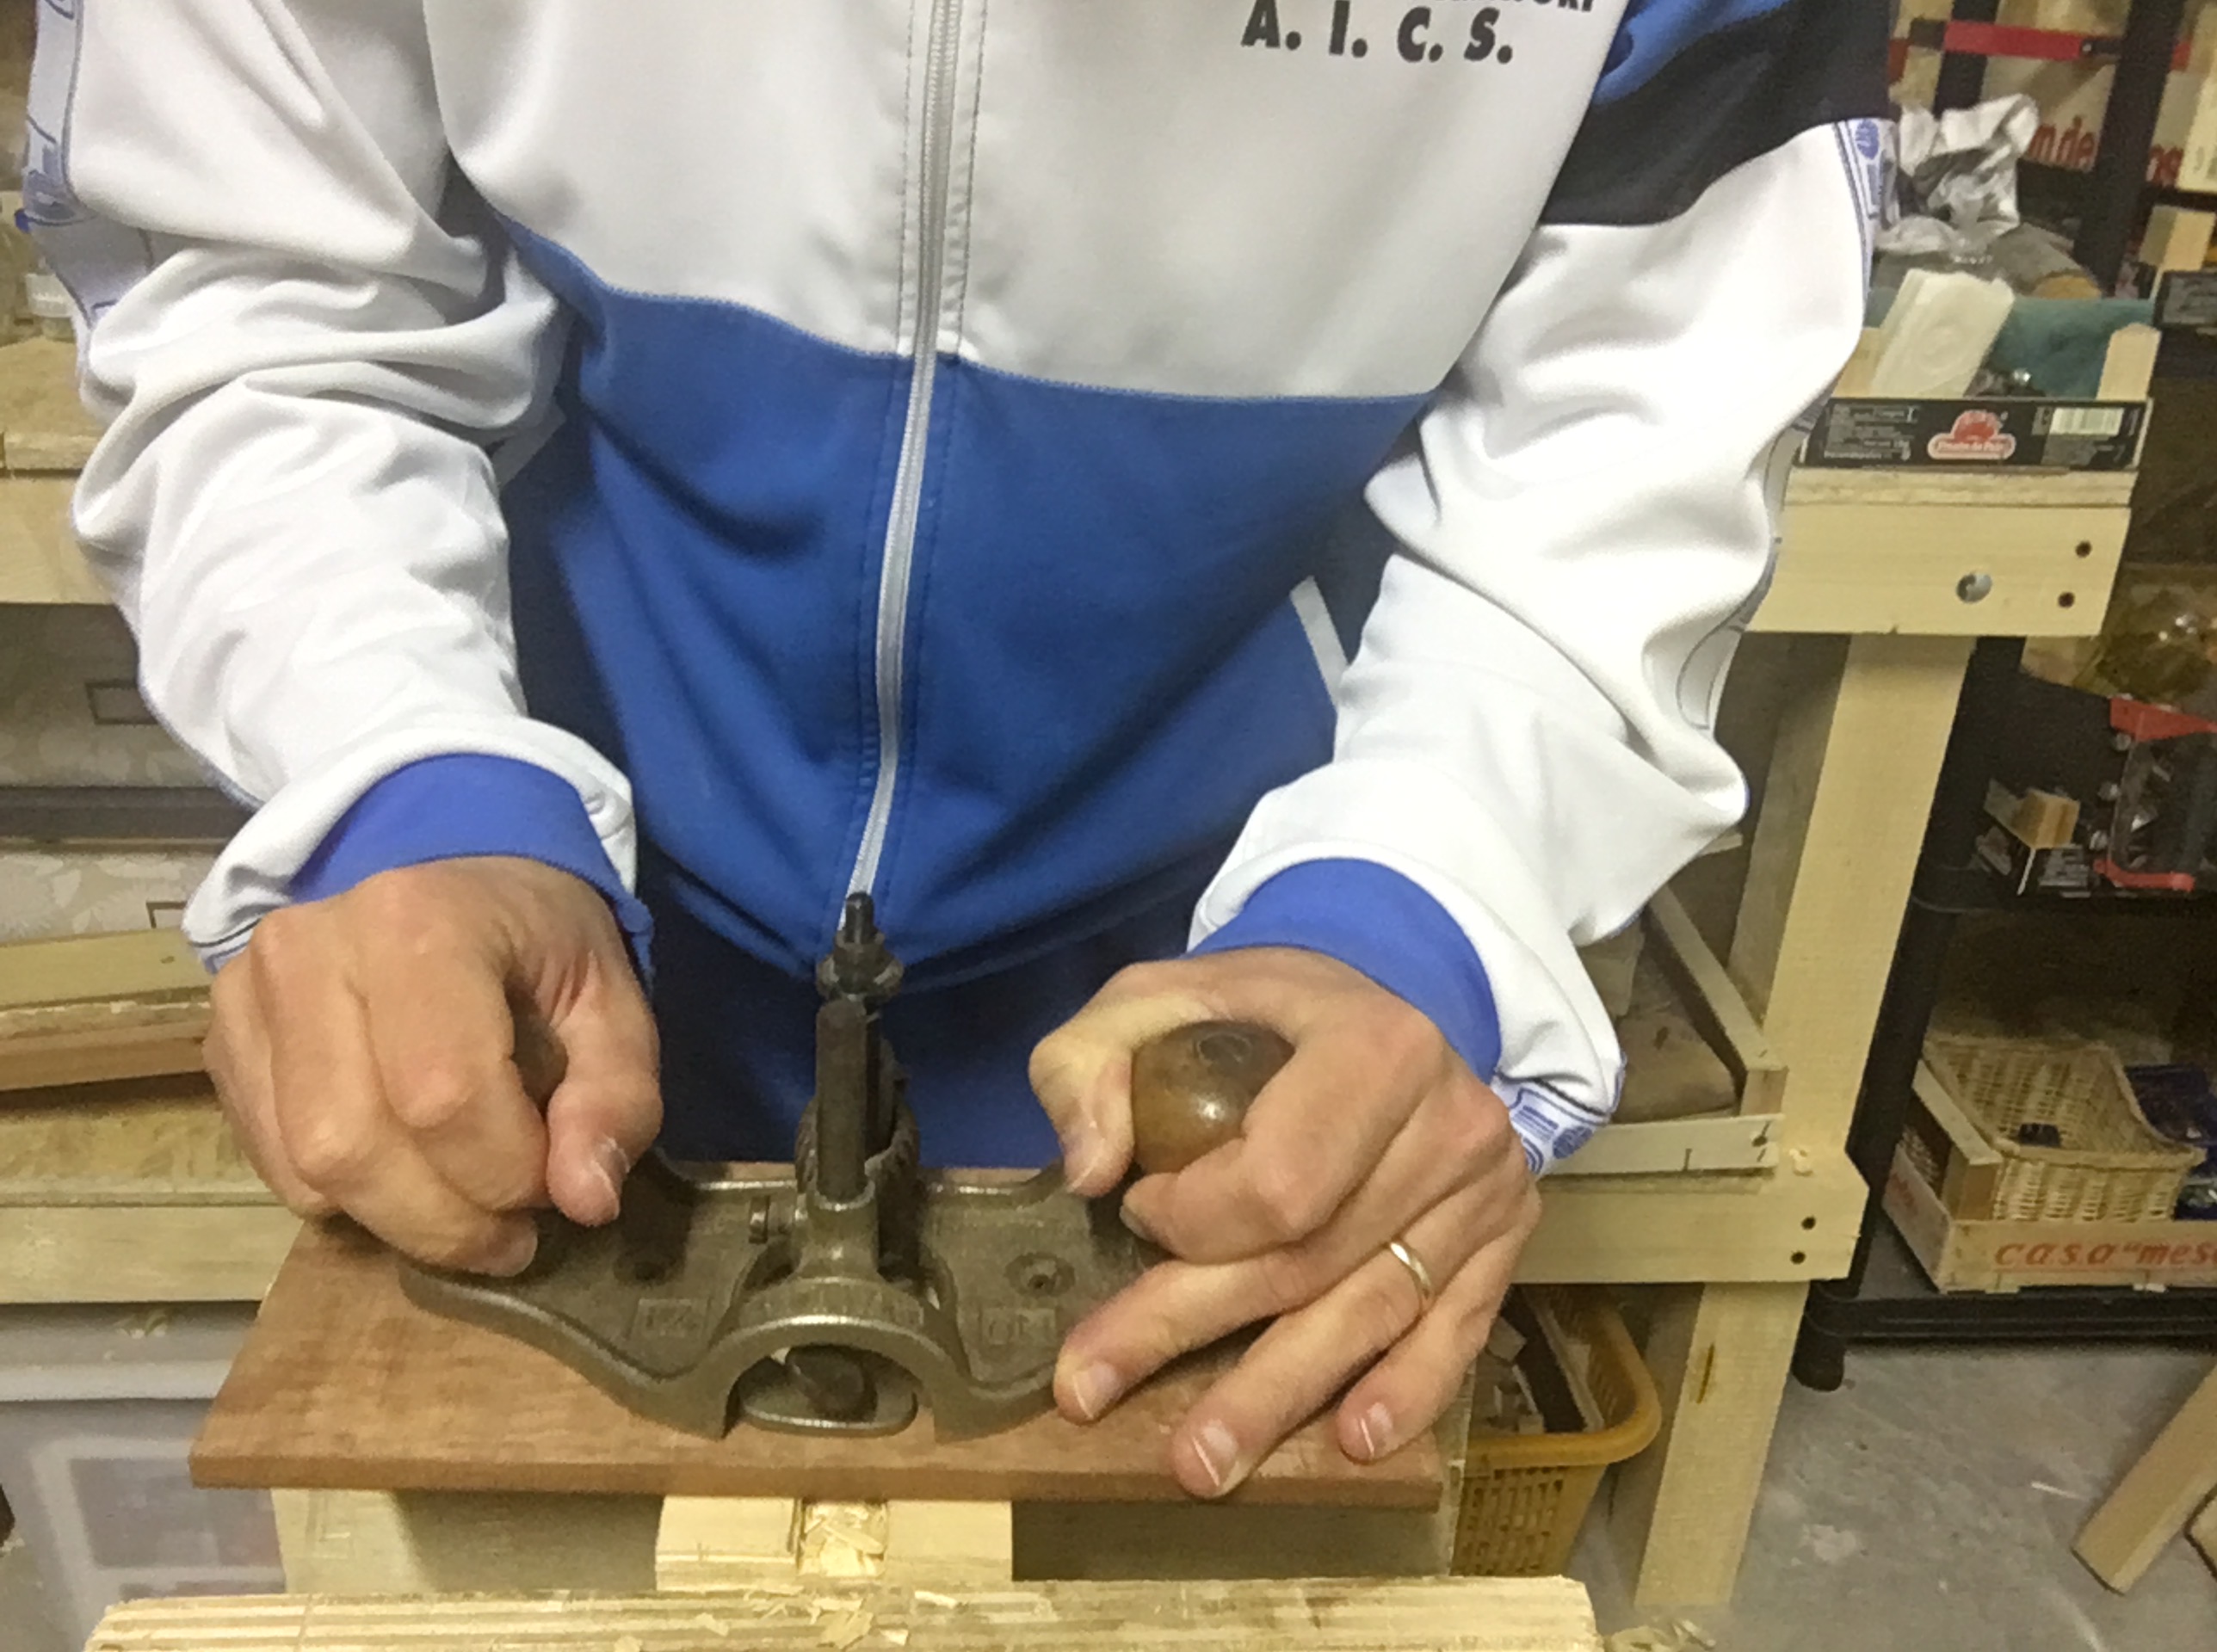
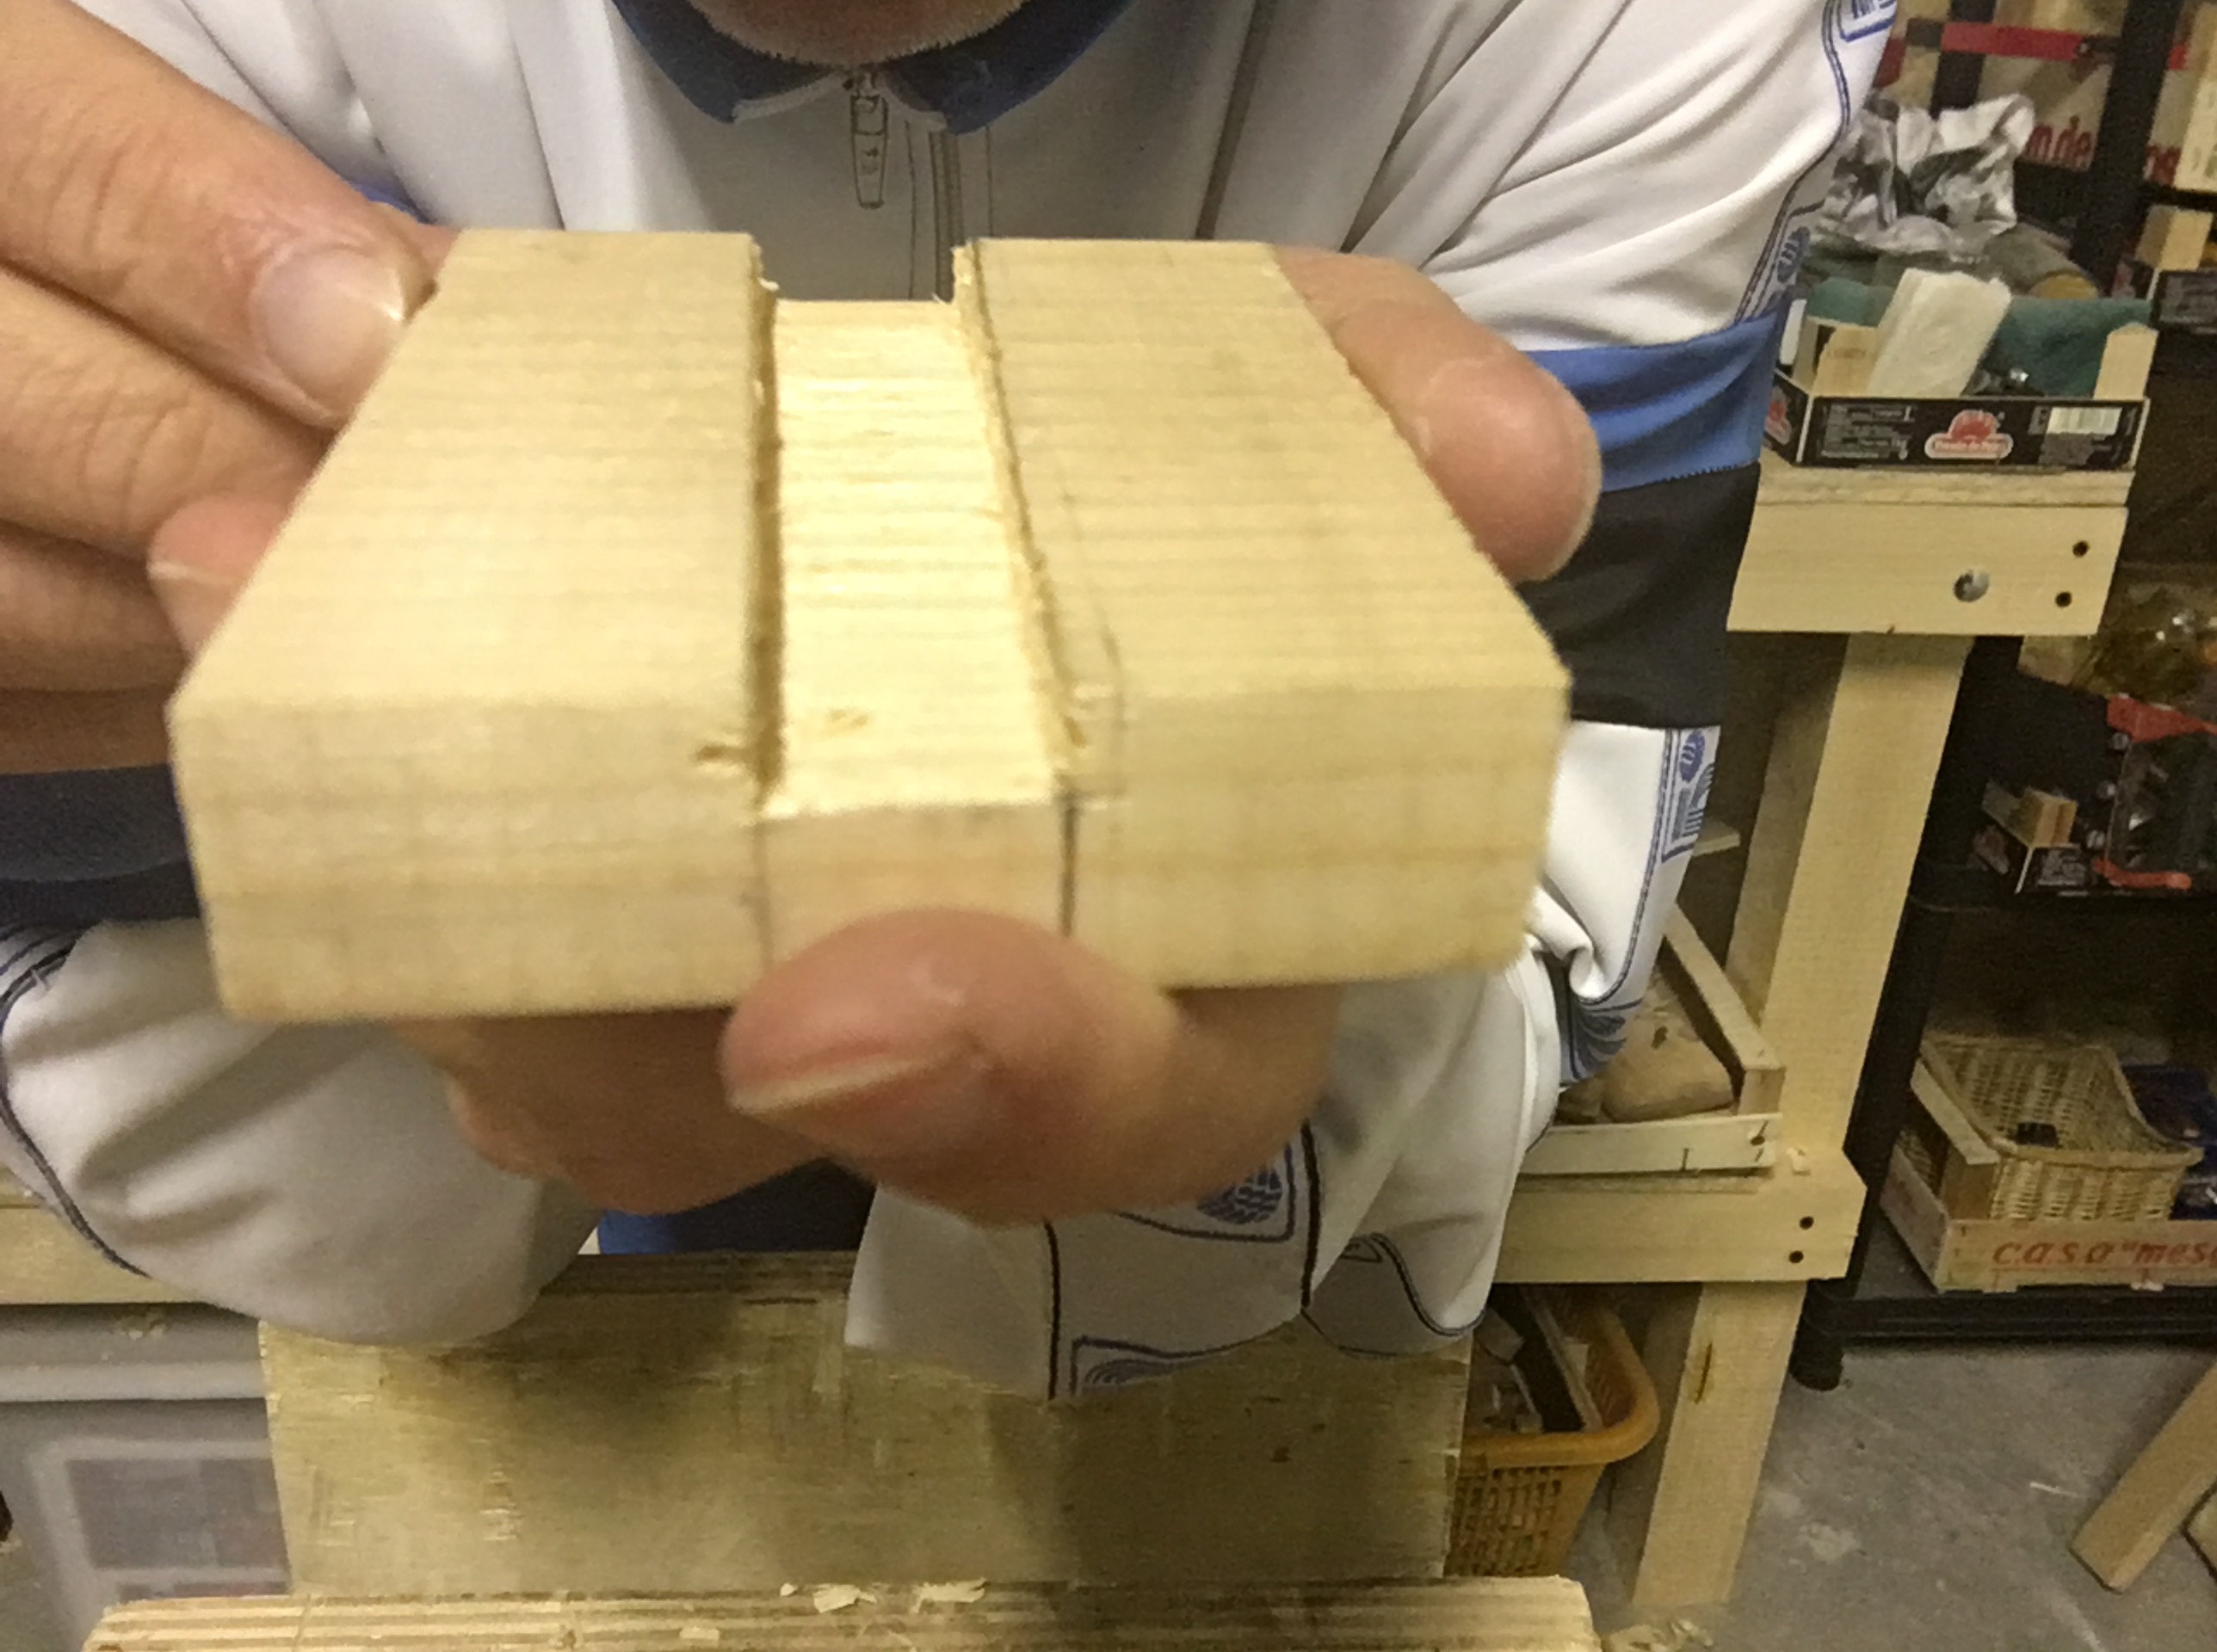
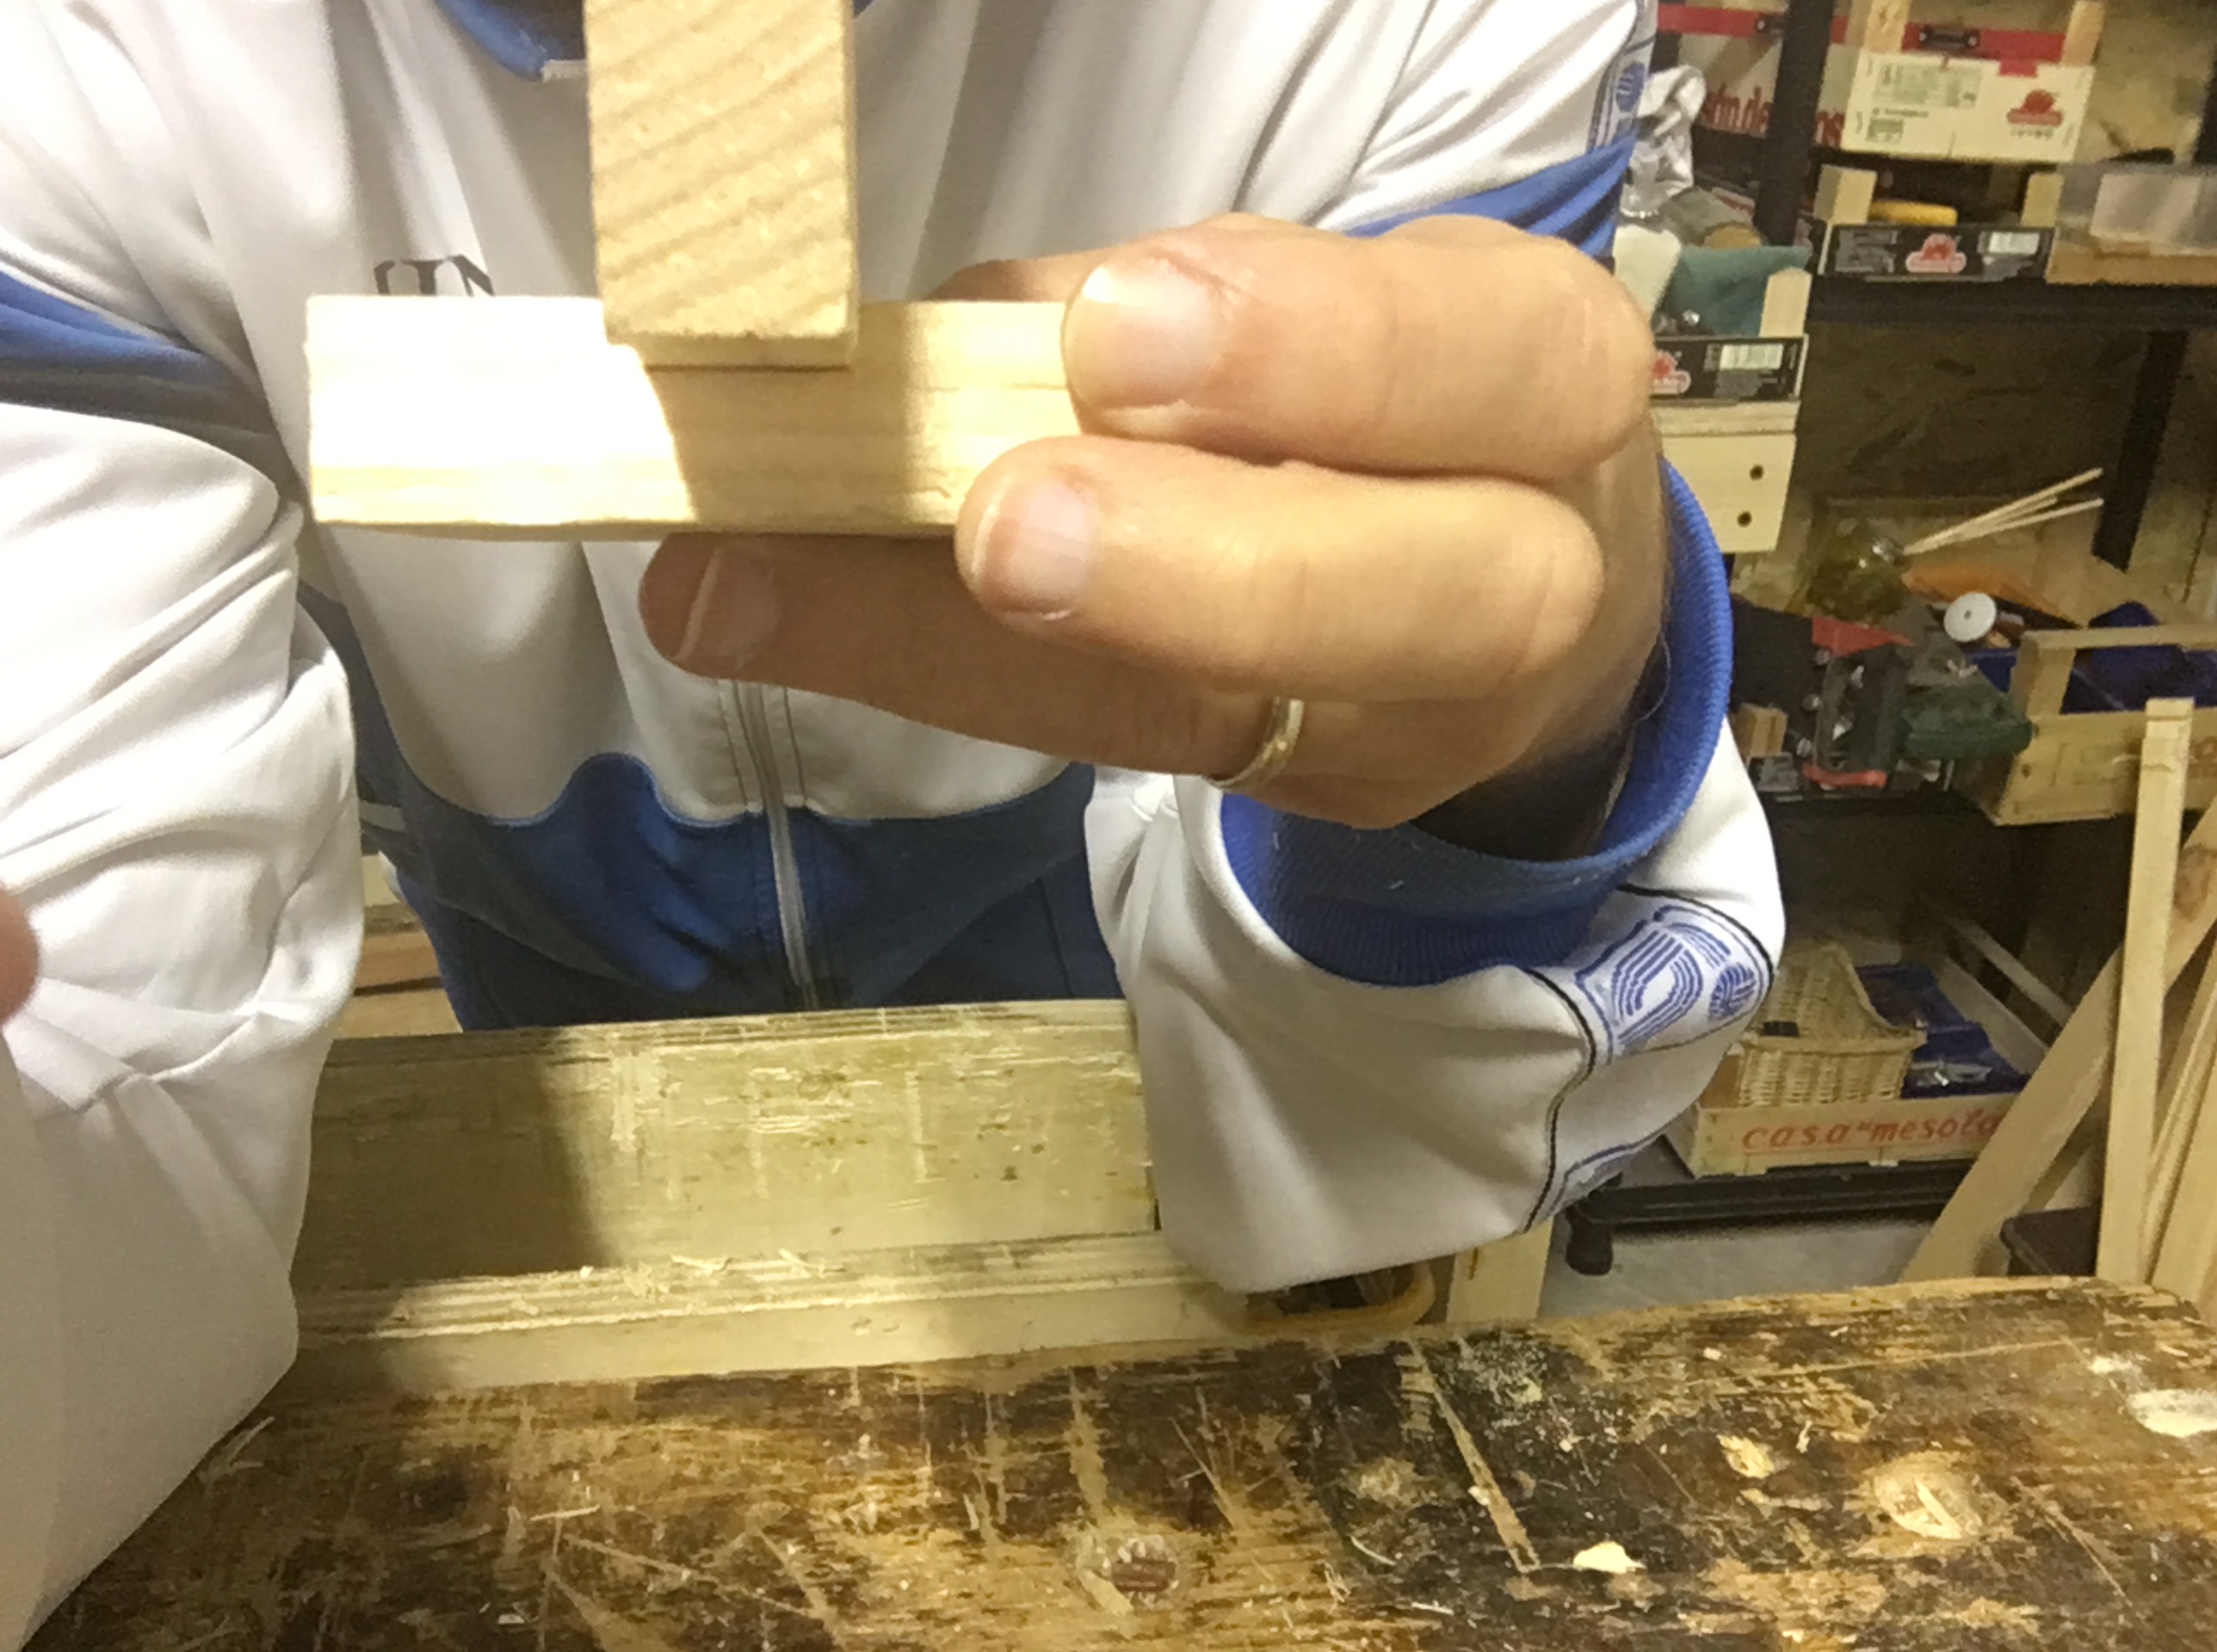
Poniamo i due pezzi da unire nella posizione nella quale vorremo effettuare l’incastro e, con una matita ben appuntita, tracciamo un piccolo segno. E’ importante che i pezzi da unire siano con i lati perfettamente in squadra tra loro e con la superficie piallata. Place the two pieces to be joined in the position in which we want to make the joint and, with a sharp pencil, trace a small sign. It is important for the pieces to be joined to be perfectly square with each other and with a planed surface.Partendo dal segno precedentemente fatto, con l’ausilio di una squadra, tracciamo una prima linea sul pezzo nel quale dovremo ricavare il canale che riceverà l’altro pezzo. Starting from the sign previously made, with the help of a combination square, we trace a first line on the piece in which we create the groove that will receive the other piece.Allineiamo il secondo pezzo alla traccia precedentemente effettuata e tracciamo un secondo segno. Questo ci permetterà di avere un riscontro visivo di dove effettuare lo scavo. We align the second piece to the previously made line and trace a second sign. This will allow us to have a visual confirmation of where to make the groove.Sempre a matita e con l’aiuto della squadra prolunghiamo il segno fatto, al fine di ottenere una linea parallela alla prima. Le due linee saranno i margini del nostro incastro. Always with a pencil and with the help of the combination square we extend the sign made, in order to obtain a parallele line to the first. These two lines will be the edges of our joint.Riportiamo sul fianco del pezzo la prima linea tracciata… We transfer the first line on one side of the piece of wood……e facciamo lo stesso per la seconda linea tracciata. …and we make the same with the second line.Ecco come dovrebbe presentarsi il pezzo dopo la tracciatura. La tracciatura a matita è una marcatura temporanea ed approssimativa che serve unicamente per avere un primo riscontro visivo di dove dobbiamo lavorare. Here’s how the piece should look like after tracing. Pencil tracing is always a temporary and approximate marking used to have an initial visual confirmation of where we have to work.Con l’ausilio di un truschino (o graffietto) e di un righello in metallo settiamo sul truschino stesso la misura della profondità del canale da realizzare. Solitamente la profondità dell’ incastro è un terzo dello spessore del pezzo da unire. In questo caso 6 mm. With a marking gauge and a steel ruler, we set the measurement of the depth of the groove to be made on the marking gauge itself. Usually the depth of the joint is one third of the thickness of the piece to be joined. In this case 6 mm.Con la punta del truschino tracciamo la profondità sullo spessore del pezzo nel quale dovremo realizzare il canale, avendo cura di non oltrepassare le linee tracciate a matita. With the pin of the marking gauge we trace the depth on the thickness of the piece in which we will make the groove, taking care not to go beyond the lines drawn with the pencil.Segnamo con la matita la traccia appena fatta con il truschino così da avere una migliore visuale di dove dovremo fermarci in fase di scavo. We make a mark with the pencil to define the trace just made with the marking gauge so to obtain a better view of where we will have to stop during the making of the groove.Le linee tratteggiate indicano la parte di legno da rimuovere. Le linee parallele sono le spalle del canale mentre la traccia sullo spessore indica lo stop di profondità del canale. The dotted lines indicate the part of wood to be removed. The parallel lines are the shoulders of the groove while the trace on the thickness indicates the depth stop of the groove.Con il coltellino da tracciatura e la squadra combinata tracciamo una prima volta con mano leggera e successivamente più forte (tre passate basteranno) sulla prima linea segnata a matita. Questa tracciatura effettuata con il coltellino (c.d. knifewall, termine ideato da P. Sellers) serve per stabilire un primo limite nel legno, un solco nel quale inserire lo scalpello per il successivo scavo. With the knife and the combination square we make a first light pass and then successive stronger passes (three passes will be sufficient to well define and deepen the trace) on the first line traced with the pencil. This tracing, ca out with the knife (the so called knifewall, term used by P. Sellers) serves to establish a first limit in the wood, a groove in which to insert the chisel for the subsequent excavation.Con lo scalpello mantenuto in posizione perpendicolare battiamo leggermente con il martello nella traccia precedentemente fatta con il coltellino. È importante battere leggermente in questa prima fase così da non far muovere la traccia e discostarsi da essa. With the chisel held in a perpendicular position, lightly tap with the hammer on the chisel right on the trace previously made with the knife. It is important to tap lightly in this first phase so as not to move the knifewall and deviate from it.Con lo scalpello in posizione obliqua e con la forza delle mani spingiamo la lama nel solco appena definito fermandoci al muro creato dal coltellino. Creiamo così un primo solco nel quale inserire successivamente lo scalpello. With the chisel in an oblique position and with the strength of our hands, we push the blade into the newly defined trace, stopping at the wall created by the knife. We so create a first groove in which we will insert the chisel.Da adesso in avanti la lavorazione diventa ripetitiva. Infatti per lo scavo del canale si procede definendo la parete con lo scalpello ed il martello, lavorando al di fuori della morsa del banco, alternando il lavoro di scavo con lo scalpello ed il martello (nella posizione come indicata in foto) con il pezzo questa volta serrato nella morsa del banco. Si procede in questo modo sino a quando non si arriverà appena sopra la linea di profondità tracciata con il truschino. From now the work will become repetitive. In fact, for the making of the groove we proceed by defining the wall with the chisel and the hammer, working inside and outside of the bench vice, alternating with the grooving work with the chisel and the hammer (in the position as shown in the picture) with the piece tightened in the vice of the bench. Proceed in this way until you arrive just above the depth line traced with the marking gauge.Alla fine della prima fase della lavorazione la scanalatura dovrebbe apparire pressappoco come indicato in foto. At the end of the first phase of our work the groove should appear roughly as shown in the photo.La seconda fase della lavorazione inizia ponendo il secondo pezzo direttamente all’interno dello scavo così come indicato nella foto precedente. Il pezzo deve essere posto ben adesso alla parete dello scavo ed il pezzo nella posizione più perpendicolare possibile. Così facendo saremo in grado di tracciare con il coltellino il segno della seconda parete, nel modo più preciso possibile. The second phase of our work begins by placing the second piece directly inside the groove as indicated in the previous photo. The piece must now be placed on the groove as close as possible to the shoulder and the piece itself in the most possible perpendicular position. In this way we will be able to trace with the knife the sign of the second knifewall, as accurate as possible.Prolunghiamo il segno fatto in precedenza, sempre con l’ausilio del coltellino da tracciatura e della squadra combinata. Otterremo la tracciatura della seconda parete che, di solito, differisce, seppur in misura minima, dalla precedente tracciatura fatta a matita. Ricordiamo sempre che la tracciatura a matita è di solito meno accurata e reversibile. La tracciatura del coltellino è più precisa e definitiva, solcando il legno in modo permanente. We elongate the sign previously made, always with the aid of the tracing knife and the combination square. We will obtain the tracing of the second knifewall which, usually, differs, even if in a minimal measure, from the previous trace made with the pencil. Remember that pencil lines are usually less accurate and reversible. The tracing of the knife is more precise and definitive, cutting the wood permanently.Procediamo così come indicato per la prima fase della lavorazione. Si effettua dapprima l’approfondimento della tracciatura effettuata con l’ausilio del martello e dello scalpello, martellando delicatamente per non far muovere la linea tracciata con il coltellino e lavorando fuori dalla morsa del banco. Successivamente, con il pezzo serrato in morsa, si procede, dapprima con lo scalpello guidato dalle sole mani, a ricavare un piccolo scavo in prossimità della parete, creando così lo spazio necessario alla lama dello scalpello di penetrare nel legno. Successivamente si può lavorare con più forza usando sempre martello e scalpello, sia per la definizione della profondità della parete che per lo scavo del canale vero e proprio. We now proceed as shown for the first phase of the work. First of all the deepening of the knifewall carried out with the aid of the hammer and the chisel, tapping gently so as not to move the line traced with the knife and working out of the bench vice. Subsequently, with the piece clamped in the vice, we proceed with the chisel used by the hands only, to make a small recess near the wall, so to create the space allowing the chisel blade to deepen into the wood. Later you can work heavier using hammer and chisel, both for the definition of the shoulders depth and for the deepening of the groove.Ecco come dovrebbe presentarsi il pezzo al termine della seconda fase della lavorazione. Here is how the piece should appear at the end of the second processing phase.La terza fase della lavorazione dell’incastro è quella della rifinitura. Con uno scalpello di misura di poco inferiore alla larghezza del canale si procede a rimuovere la parte di legno in eccesso. Dapprima si inserisce lo scalpello appena sopra al limite di profondità tracciato e e con lo scalpello leggermente puntato verso l’altro, si da un colpetto con il palmo della mano per togliere il primo pezzetto di legno. In the third phase we refine the groove. With a chisel measuring just under the width of the groove, the excess wood is removed. First of all, insert the chisel just above the marked depth limit and with the chisel pointing slightly to the sky, tap with the palm of the hand to remove the first piece of wood to create a soft start.Successivamente si impugna lo scalpello a due mani e, sempre puntandolo leggermente verso l’alto si procede a spianare il canale il più possibile. Using the chisel with the two-handed method we point slightly upwards, so to remove as much wood as possible.Particolare attenzione deve essere posta quando si arriva al lato opposto del canale. Occorre lavorare con cautela per evitare che il legno si strappi in uscita. Particolar attention must be paid when arriving at the opposite side of the groove. Care must be taken to prevent the wood from tearing out.Con la router plane si procede alla fase di finitura del canale, arrivando alla profondità voluta. Se si è lavorato bene sino a questo momento basterà regolare la router plane affinchè la lama entri direttamente nel solco tracciato dal truschino e lavorare con calma e precisione da ambo i lati del pezzo, sempre per evitare strappi del legno in uscita. With the router plane we proceed to the finishing phase of the groove, reaching the desired depth. If you have worked well right now just adjust the router plane so that the blade enters directly into the groove traced by the marking gauge and work gently and accurately on both sides of the piece, again to avoid tearing of the wood.Ed ecco come dovrebbe presentarsi il canale alla fine della lavorazione. Le pareti dovrebbero essere perfettamente parallele tra loro e perpendicolari al solco. Il solco dovrebbe essere perfettamente piano e senza inclinazioni. Here is how the groove should appear at the end of our work. The shoulders should be perfectly parallel to each other and perpendicular to the groove. The groove should be perfectly flat.La prova finale di tenuta. Un buon incastro non dovrebbe essere nè troppo stretto, per non forzare troppo sulle pareti, correndo il rischio di romperle, nè troppo lasco, quindi non in grado di tenere. Il pezzo dovrebbe entrare con la sola forza delle mani o con leggeri colpi di martello. L’intero incastro dovrebbe sostenersi da solo una volta sollevato. The final test. A good joint should not be too tight, not to force too much on the shoulders, running the risk of breaking them, nor too loose, so not able to hold. The piece should fit only with the force of our hands or with light taps of the hammer. The joint should be self supported when lifted.L’incastro dente canale terminato. Un perfetto incastro non dovrebbe mostrare aperture nei vari punti di giunzione. The housing dado joint is finished. A perfect joint should show no gaps.
[…] L’incastro dente e canale è probabilmente il più semplice da realizzare ma anche quello che restituisce meno solidità e stabilità. Viene utilizzato per realizzare ripiani nelle scaffalature e nelle librerie ma anche nelle credenze, nel retro dei cassetti o in semplici scatole. […]
[…] incastri. I tre incastri fondamentali del legno / The joints. The three essential joints in wood Gli incastri. Come fare l’incastro dente e canale / The joints. How to make a housing dado joint. Gli incastri. Come fare l’incastro tenone e mortasa / The joints. How to make the mortise and […]


Lascia un commento