
Parliamo di Pialle / Let’s talk about Planes
English translation at the end of the article
Come già detto in precedenza in una falegnameria amanuense tra i tanti utensili presenti ve ne sono alcuni che sono più utilizzati di altri. Oltre alle seghe e agli scalpelli che sono assolutamente fondamentali
c’è un altro utensile altrettanto indispensabile sul quale così come per le seghe si sono scritti interi libri. Sto parlando dell’universo delle pialle. Ed effettivamente l’argomento pialle e’ talmente vasto che risulta difficile condensarlo in poche righe. Non disponendo comunque della vastita’ di informazioni presente nei libri dedicati e non volendo in ogni caso creare un inutile doppione, mi limiterò a fornire quelle poche nozioni certe che possiedo e che ho potuto verificare “sul campo”.
A cosa servono quindi le pialle? Dicendo un’ovvietà e volendo sintetizzare al massimo, le pialle piallano, ovvero spianano e levigano una superficie di legno. Cerco di rendere l’idea con un esempio pratico. Partendo da una tavola di legno grezzo la prima lavorazione da fare sara’ sgrossarla, (cioè spianarla), utilizzando dapprima una pialla denominata sbozzino (una pialla con una bocca più larga del normale e provvista di una lama solitamente più stretta e smussata sui lati del tagliente, con un diverso grado di affilatura tale da poter sostenere un lavoro particolarmente gravoso), ed utilizzando in seguito le pialle da finitura le c.d. bench planes o le c.d. block planes o altri tipi di pialla. Queste ultime pialle effettuano per l’appunto un lavoro di finitura e sono spesso specifiche per il tipo di lavorazione da effettuare a seconda cioè che si debba spianare una tavola o rifilare un legno di costa o lavorare superfici di testa o smussare dei profili ed altro ancora.

Nel tempo si sono costruite pialle sempre più specifiche ed adatte alle diverse lavorazioni, variandole in forma, dimensioni e materiali utilizzati. A prescindere da queste differenze le pialle si possono comunque dividere in due grandi categorie: le pialle in legno e le pialle in metallo (pur esistendo anche pialle costruite sia in legno che in metallo). Generalmente le pialle in legno sono quelle più antiche e quelle in metallo le più moderne ma anche qui non è una regola in quanto anche al giorno d’oggi vengono realizzate pialle in legno, peraltro di ottima fattura.

Le pialle si possono a loro volta suddividere in alcune per così dire sottocategorie a seconda del tipo di lavorazione alle quali sono destinate. Sotto un elenco delle principali categorie di pialla realizzate fino ad oggi.
1) Scrub planes. Sono pialle da sgrossatura come lo è ad esempio lo sbozzino.
2) Bench planes. In italiano pialle da banco. Sono le più utilizzate in falegnameria per la loro versatilità e generalità di utilizzo. Sono usate per la finitura e levigatura del legno.
Tra queste possiamo ulteriormente distinguere:
a) Smoothing planes. Pialle da finitura normalmente individuate nella numerazione dalla 1 alla 4 1/2. Le pialle con numerazione dalla 1 alla 3 sono relativamente piccole e trovano scarsa applicazione.
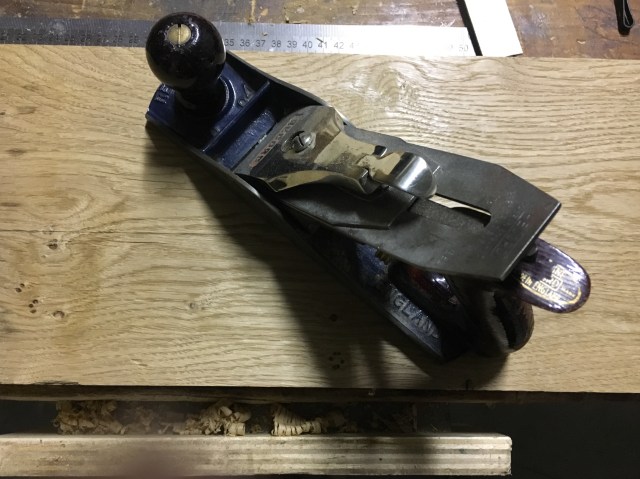
b) Jack planes. Pialle da finitura normalmente individuate nella numerazione dalla 5 alla 5 1/2.
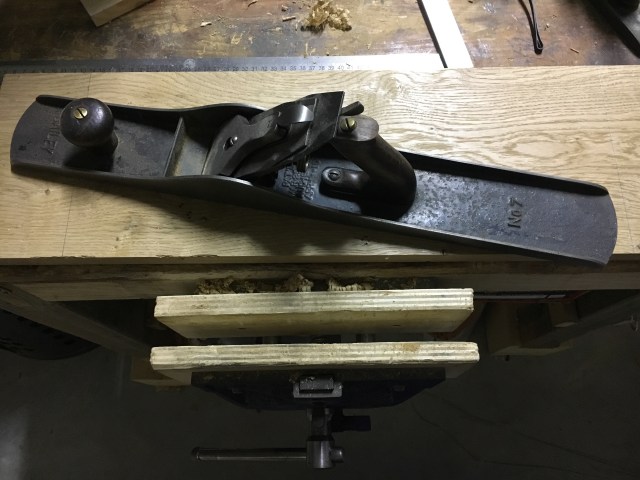
c) Jointer planes o Try planes. Pialle da finitura normalmente individuate nella numerazione dalla 6 alla 8.
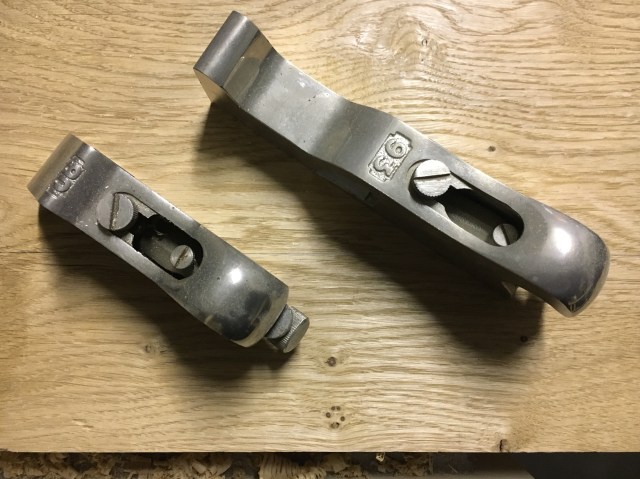
3) Block planes. Pialle di piccole dimensioni utilizzate su pezzi di ridotta misura o per lavorare il legno di testa.

4) Spokeshaves. In italiano Vastringhe. Particolare tipo di pialla adatta a lavorare su superfici curve. Ne esistono di due tipi: round soled (con suola curva e meno utilizzata) e flat soled (suola piatta, la più utilizzata).
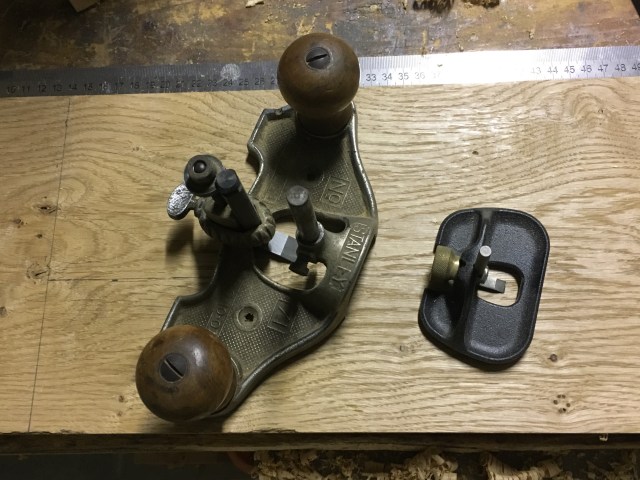
5) Router planes. Adatte per pareggiare scavi e canali effettuati nel legno.
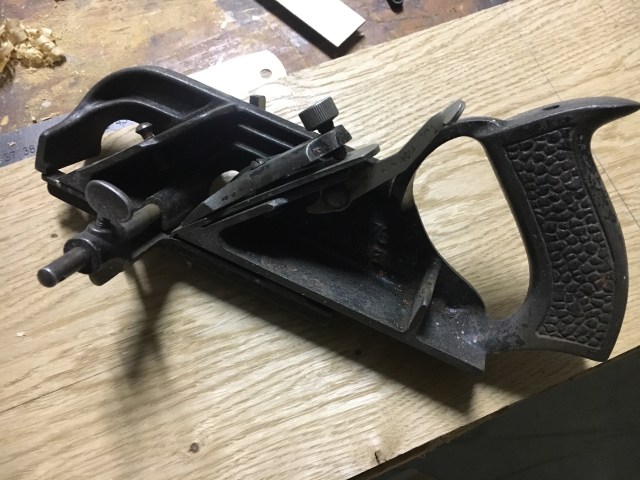
6) Plough planes. Adatte a creare canali e scanalature.
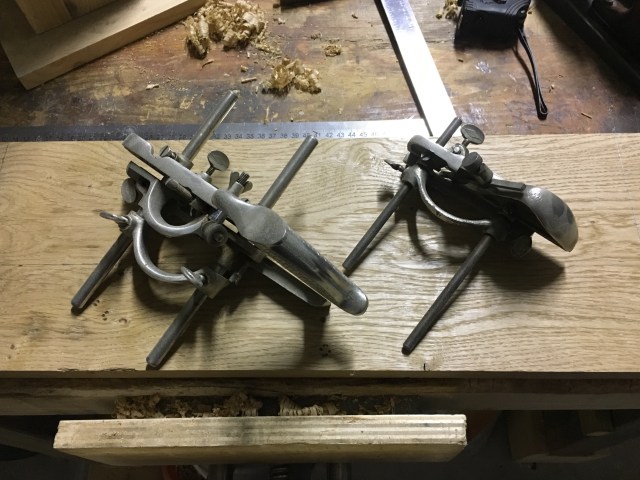
7) Shoulder planes. Per lavorare e rifinire fianchi di scanalature ed altro ancora.
La lista di cui sopra non è esaustiva esistendo altre tipologie di pialle, seppur di minor importanza e con ridotto campo di applicazione.

I numeri assegnati ai vari modelli delle bench planes aumentano all’aumentare delle dimensioni della pialla. I modelli con il 1/2 hanno la stessa lunghezza ma sono più larghe. Per esempio la Stanley n. 4 e la Stanley n. 4 1/2 hanno la stessa lunghezza ma la 4 1/2 e’ più larga. Entrambe sono più lunghe della Stanley n. 3 ma più corte della Stanley n. 5.
Una marca di pialla in metallo che ha fatto la storia e per la quale sicuramente potrei suggerirne l’acquisto e’ l’ineguagliabile Stanley con sistema di regolazione Bailey. Altri marchi storici sono Record, Sargent, Miller Falls, Woden, I Sorby, solo per citarne alcuni. Cercando su Ebay.co.uk si possono reperire ottimi esemplari vintage ad un prezzo relativamente contenuto.
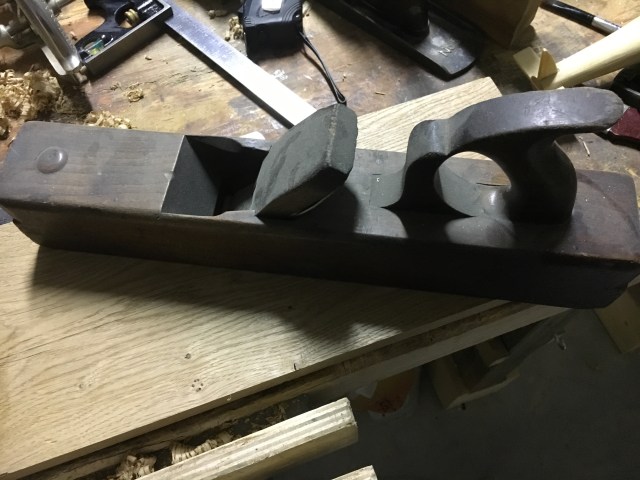
Le pialle in legno sono strutturalmente più semplici di quelle in metallo. Sono composte da un corpo in legno, da un manico posteriore, da una lama, (talvolta abbinata al controferro) ed un cuneo sempre in legno che viene inserito nella cavità centrale della pialla e blocca, mediante pressione ed incastro, la lama nella seduta della pialla. Negli sbozzini e’ presente un manico frontale, una sorta di “corno” ed e’ assente il manico posteriore
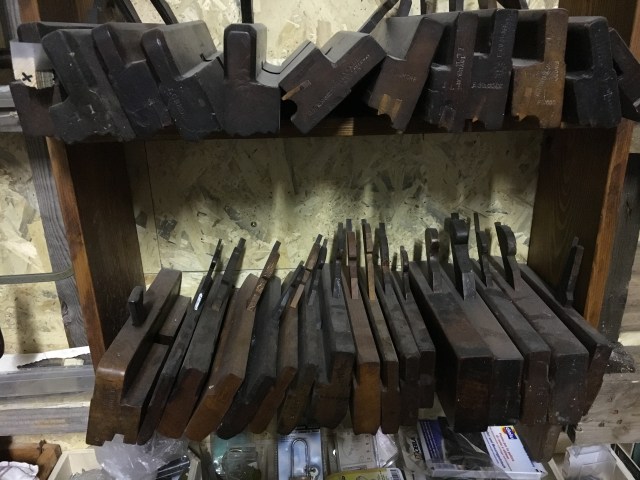
Tra le pialle in legno spiccano, per la loro particolarità di utilizzo, il già citato sbozzino che viene utilizzato per il lavoro gravoso di sgrosso di tavole grezze e le c.d. moulding planes, molto utilizzate in passato e dotate di lame con forme particolari utilizzate per modanare il legno, ovvero per creare ornamenti nel legno o per fare cornici. Ne parleremo approfonditamente in seguito.
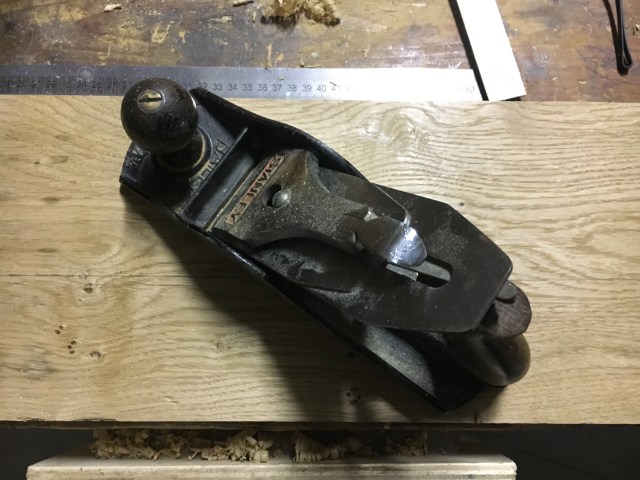
Le pialle in acciaio funzionano come quelle in legno ma vengono adoperate in modo leggermente diverso e presentano una struttura più complessa. Sono formate da una base e dei fianchi sagomati in metallo sulla quale base è montato un frog (seduta) sul quale a sua volta poggiano la lama ed il controferro, tenuti in posizione mediante il serraggio del lever cap. Lo spostamento o arretramento della lama è governato da una rotella posta sul retro del frog. Lo stesso frog può essere spostato in avanti o indietro per aumentare la grandezza della bocca dalla quale far fuoriuscire la lama. Lo spostamento del tagliente della lama verso destra o sinistra è regolato da una leva posta sul frog della pialla.

Personalmente sono più abituato ad utilizzare le pialle in metallo, forse perché risulta più semplice per me regolare l’impostazione della lama mediante la rotella di settaggio profondità. Difatti nelle pialle in legno l’avanzamento della lama avviene mediante l’assestamento di piccoli colpi dati con il martello sulla testa della lama stessa per farla avanzare o agendo sul cuneo di legno per rilasciarla e farla arretrare. Questa regolazione richiede maggiore pratica e sensibilità, sforzo ripagato comunque dal loro loro utilizzo sul legno che risulta estremamente gradevole, forse anche più delle pialle in acciaio.
Di seguito un elenco delle parti di una pialla in metallo Stanley pattern Bailey e le sue caratteristiche principali. Altri tipi di pialla possono differire leggermente.
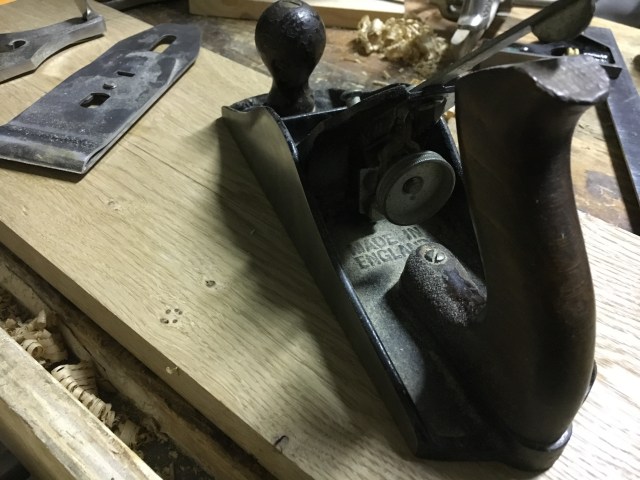
A) Base (o suola) e fianchi. In metallo costituiscono il corpo principale di una pialla. In essa sono inseriti direttamente quasi tutti gli altri elementi della pialla. E’ la parte che entra in contatto, assieme al tagliente della lama, con il legno da lavorare. La base ed i fianchi dovrebbero essere assolutamente piani e perpendicolari tra di loro. Nella base è ricavata un’apertura, la cosiddetta bocca, dalla quale fuoriesce la lama provvista di tagliente che favorisce il passaggio e l’espulsione dei trucioli prodotti durante la lavorazione. In particolari modelli di pialle smoothing la base si presenta corrugata anziché liscia (c.d. corrugated planes).
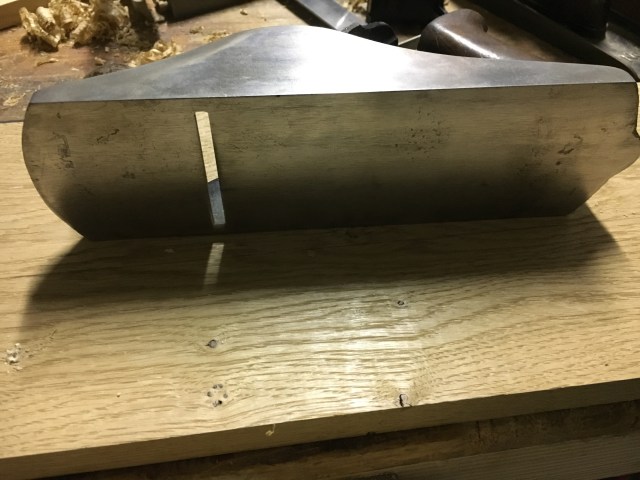
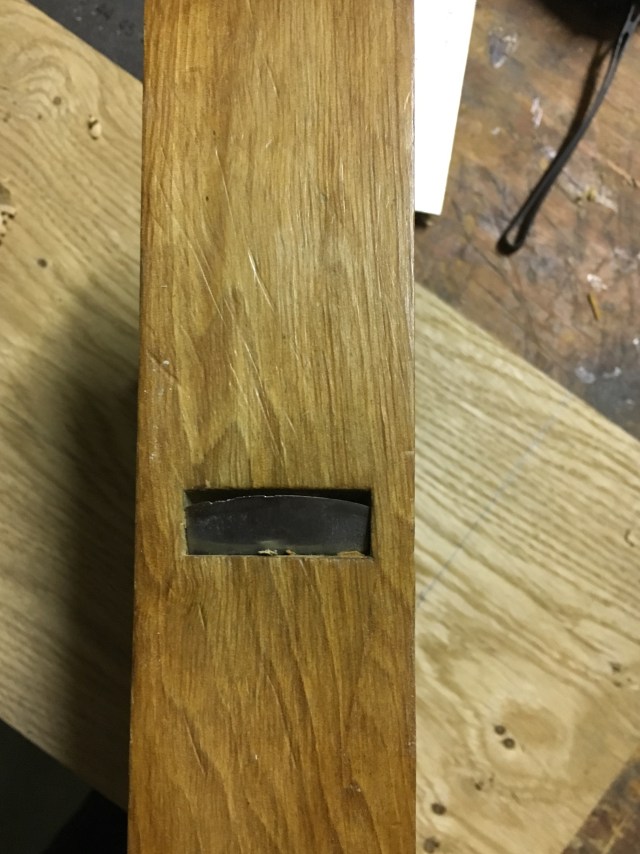
B) Bocca. Apertura più o meno grande ricavata nella base della suola dalla quale fuoriesce la lama provvista di tagliente. Dalla bocca entrano ed escono i trucioli prodotti nella lavorazione. La zona vicino alla bocca deve essere perfettamente spianata.
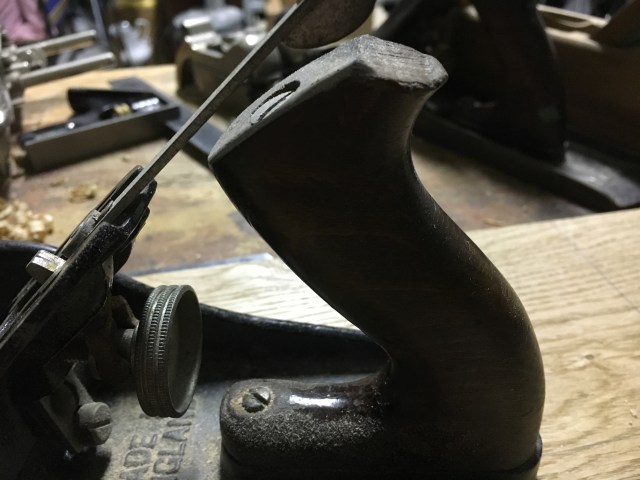
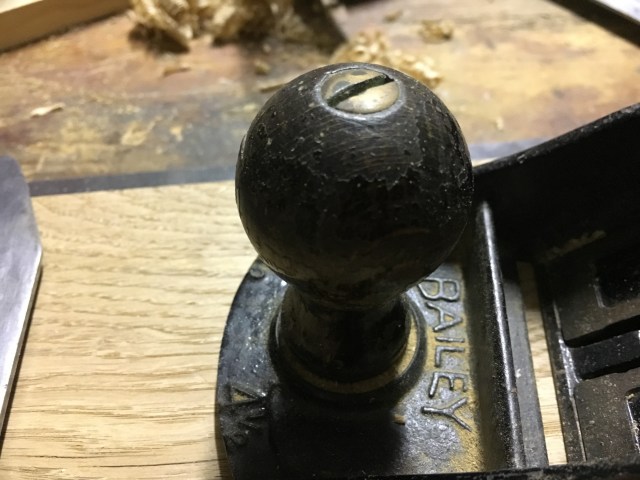
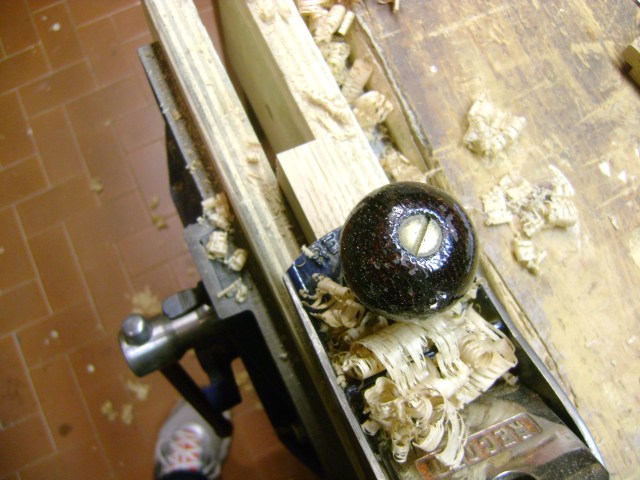
C) Manico posteriore e pomello anteriore. Il manico posteriore ed il pomello anteriore, fatti solitamente in legno come ad esempio il palissandro ma anche il faggio, servono per l’impugnatura e l’ utilizzo della pialla stessa. Sono fissati alla suola per mezzo di un’asta filettata alle estremità’ ed una vite superiore. La forma del manico posteriore è sagomata in modo da poter accogliere l’impugnatura della mano mentre il pomello anteriore è di forma pressoché sferica. La mano che impugna il manico posteriore fornisce la spinta mentre l’altra mano, posta sul pomello anteriore, guida la pialla ed esercita la pressione necessaria per mantenere la pialla adesa al pezzo da lavorare. In alcuni tipi di pialle in legno, come ad esempio gli sbozzini, il manico posteriore non esiste e la spinta avviene ponendo la mano sul retro del corpo pialla. Il pomello anteriore è sostituito da una specie di “corno”. In altre pialle di legno come le moulding planes (comunemente chiamate “bastoni”), utilizzate per le modanature, è assente anche il pomello anteriore.
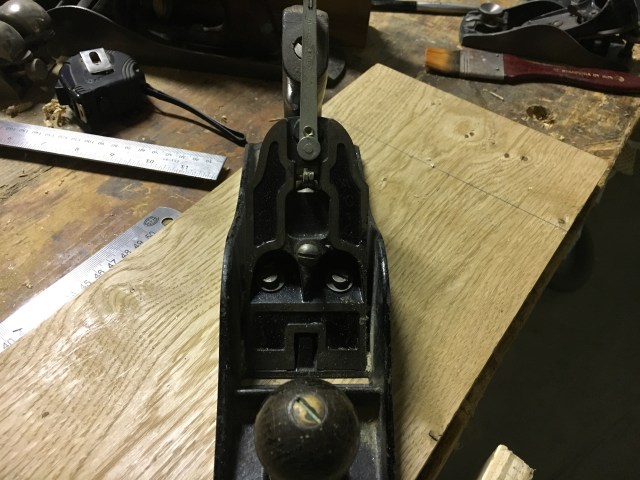
D) Frog: Il frog (o seduta) è presente solo nelle pialle in acciaio. E’ un supporto montato sulla base mediante due viti e sul quale poggiano e sono inseriti la rotella di regolazione profondità della lama, la leva di regolazione laterale, la lama, il controferro ed il lever cap. Il frog presenta un’angolazione fissa di 45 gradi rispetto alla base e può essere spostato avanti o dietro agendo sulla vite posta sul retro. In questo modo si riesce ad aumentare o diminuire l’apertura utile della bocca della pialla.

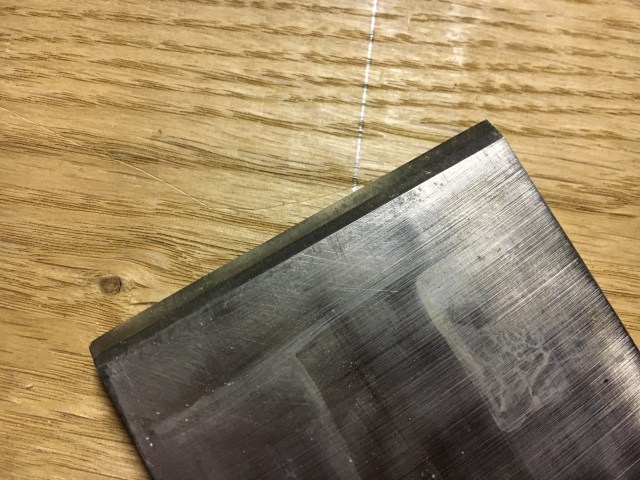
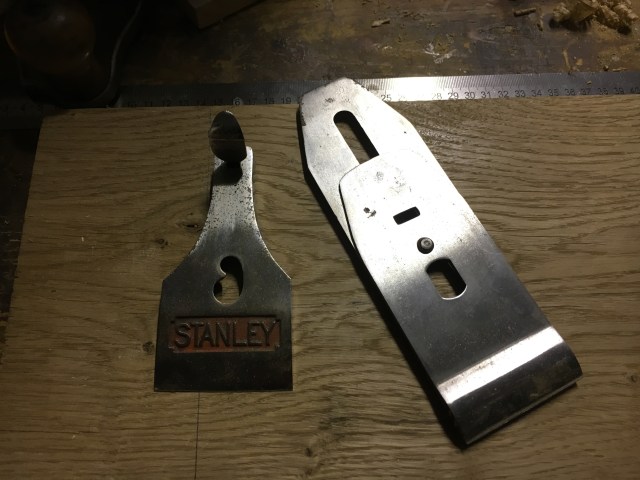
E) Lama o ferro: E’ posta direttamente sul frog e fuoriesce dalla bocca della pialla con il tagliente. Esistono vari modelli di lame variando la durezza e lo spessore dell’acciaio di cui sono composte. La profondità di protrusione della lama dalla bocca è regolata tramite la rotella posta sul retro del frog, così come l’angolo di presentazione della lama può essere variato spostando la leva di regolazione laterale.
F) Tagliente. Il tagliente è la parte finale della lama, quello che effettivamente pialla il legno producendo i trucioli. Solitamente è affilato a 25 gradi (bevel) ma spesso viene creato un bevel secondario (microbevel) a 30 gradi. Comunemente il tagliente e’ rivolto verso il basso (bevel down) ma, su taluni tipi di pialla, il tagliente e’ rivolto verso l’alto (bevel up). Approfondiremo l’argomento parlando dell’affilatura.
G) Controferro. Il controferro (cap iron) è fatto di un metallo meno duro di quello usato per la lama. La sua principale funzione e’ quella di rompitruciolo ma funge anche da sostegno alla lama stessa dando rigidita’ in fase di taglio. Viene montato sulla lama mediante una vite e presenta un’ apertura che permette l’inserimento di una forcella che governa, mediante la rotella posta sul retro, la regolazione in altezza di tutto il gruppo di taglio. Solitamente il controferro viene posto a pochi millimetri dal tagliente della lama. La sua regolazione, così come l’affilatura del tagliente e la regolazione del frog, varia a seconda del lavoro da fare e delle preferenze personali.

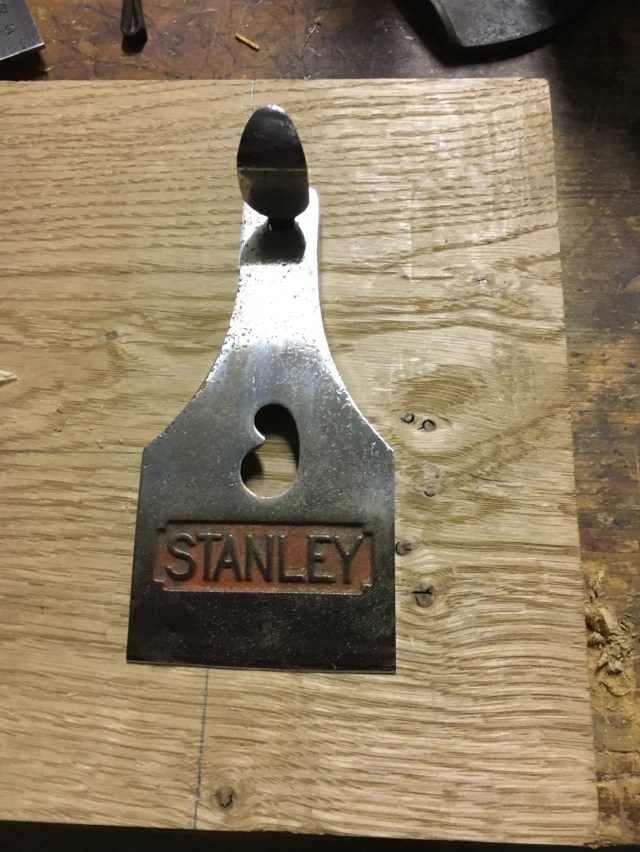
H) Lever cap. Il lever cap, composto da una piastra metallica opportunamente sagomata, è il sistema di blocco che, una volta inserito nella vite centrale che fuoriesce dal frog, permette, attraverso il sistema di chiusura posto sulla sua testa, di bloccare sul frog la lama ed il controferro. La chiusura del lever cap non dovrebbe risultare né troppo debole né troppo forzata. La sua regolazione avviene mediante la vite posta nella parte centrale del frog.
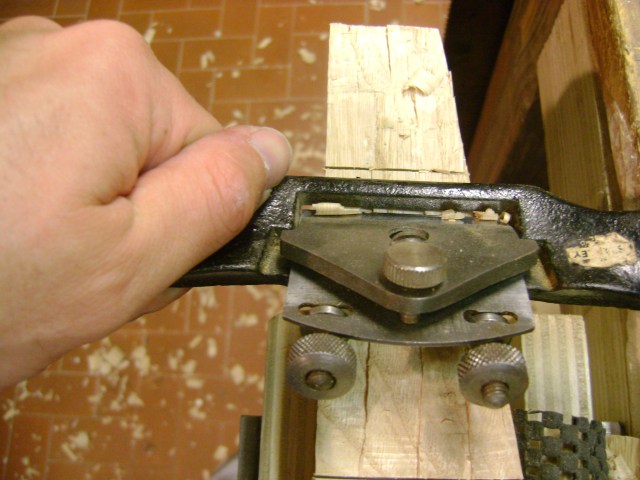
I) Leva di regolazione laterale. E’ la leva mediante la quale è possibile regolare l’angolo di presentazione del tagliente sul pezzo da lavorare, allineando il tagliente alla base della pialla. Serve anche a compensare piccole imprecisioni in fase di affilatura del tagliente o difetti della pialla stessa.
L) Rotella di regolazione profondità della lama. Posta sul retro del frog è fatta in ferro o in ottone zigrinato. Serve a regolare la profondità di taglio. Ruotata in senso orario la lama avanza fuoriuscendo dalla bocca della pialla. Viceversa, ruotata in senso antiorario, la lama arretra.
Le caratteristiche evidenziate sopra sono comuni a quasi tutte le tipologie di pialla. Ve ne sono però alcune che, pur facendo parte della stessa famiglia, differiscono segnatamente nella forma e nel tipo di lavorazione alle quali sono deputate come ad esempio le spokeshaves (Vastringhe ), le router planes, le scraper planes ed altre ancora.
Posso consigliare di dotarsi all’inizio almeno di una pialla n. 4 o n. 5. Con il tempo si sentirà sicuramente la necessità di allargare il proprio parco utensili come d’altronde è successo a me. Ma l’acquisto andrà valutato sempre alla luce delle reali necessità senza farsi prendere troppo la mano. Le pialle che servono realmente sono poche, circa una decina. Il mio consiglio per l’acquisto e’ quello di andare sul vastissimo mercato di ebay inglese all’indirizzo http://www.ebay.co.uk e cercare un modello usato delle marche suddette. Niente in contrario rispetto alle pialle moderne, alcune sicuramente validissime, ma personalmente subisco il fascino del vissuto e provo molta soddisfazione nel poter sistemare un usato. Di seguito un elenco di alcune pialle che utilizzo e che penso siano sufficienti a coprire la quasi totalità delle lavorazioni.
Record n. 4; Stanley n. 4 1/2; Stanley n. 5; Stanley n. 7; Sbozzino in legno; Vastringa o Spokeshave Stanley 151; Router plane Stanley n. 71; Scraper plane; Block plane Record 60 1/2; Shoulder plane Stanley 93.
L’ approfondimento della conoscenza delle più diffuse tipologie di pialla, il loro utilizzo e la loro affilatura sarà argomento di futuri articoli.
Consigli per l’acquisto di una pialla
In woodworking by hand there are many tools but some are more used than others. Besides the saws and chisels that are very important, there is another very important tool that has written so much about. I’m talking about the world of the planes. It’s very difficult to talk about this argument in few lines. However, because of the lack of information I have on this argument compared to those dedicated books and wanting not to put in this article many boring information I will only provide the few notions I have and tested by myself.
What are the planes for? In a very few words the planes do what the name says, so they plan a wooden surface. Just an example. Starting from a rough wooden board, the first work to be done will be to scrub the surface with a tool called scrub plane (a plane with a wider mouth and usually a narrower iron sharpened to a different degree to make heavy works), and then using some bench planes or block planes or other types of planes. Many of these planes perform specific tasks depending on the work we have to do such as planing a board, trimming the edge of a board or planing head surfaces and many more. During the decades more and more specific planes has been built suitable for different works, varying in shape, materials and so on. However, we could divide the planes into two categories. Wooden planes and metal planes (but do exist wood and metal planes together). Wooden planes are often the oldest and the metal planes the modern ones but that’s not a rule, because nowadays many producers built good wooden planes. The planes can also be divided in some so-called subcategories depending on the type of work they are intended for. Below you will find a list of the main categories of planes produced till now.
1) Scrub planes. They scrub the rough surface of a wooden board.
2) Bench planes. They are the most used in woodworking because of their versatility and usability. They are used for finishing the wood.
Among the bench planes we can also find:
a) Smoothing planes. Finish and smooth the wood. Identified in the numbering from 1 to 4 1/2. Planes numbered from 1 to 3 are relatively small and rarely used.
b) Jack planes. Finish and smooth the wood. Identified in the numbering from 5 to 5 1 / 2.
c) Jointer planes or Try planes. Finish and smooth the wood. Identified in the numbering from 6 to 8.
3) Block planes. Small planes used on small pieces or for working the end grain.
4) Spokeshaves. A special type of plane suitable for working on curved surfaces. There are two types: round soled and flat soled. The flat soled are the most used.
5) Router planes. Used to smooth and plane recesses in joinery.
6) Plough planes. Used for creating grooves and in the wood.
7) Shoulder planes. To work and finish grooves in the wood and more. The list above is not comprehensive with all the types of planes. The are many more but with less applications.
The numbers of the models of the smoothing planes vary to the increasing of plane dimensions. Models with 1/2 have the same length but are wider. For example Stanley no. 4 and Stanley n. 4 1/2 have the same length but 4 1/2 is wider. Both are longer than Stanley n. 3 but shorter than Stanley n. 5.
There are very good metal planes. A plane that I definitely suggest is the Stanley with the Bailey pattern. Very similar and good quality planes are Record, Sargent, Miller Falls, Woden, I Sorby, just to name a few. Looking at http://www.ebay.co.uk you can find great used planes at a relatively low price.
The wooden planes are built in a simpler form than the metal ones. Generally they are made with a wooden body, a rear handle, a blade (sometimes coupled to the cap iron), and a wooden wedge always inserted in the center throath of the plane and locks, by pressure and engagement, the blade in the seat of the plane. In the scrub plane there is a front handle, a kind of “horn”, and the rear handle is missing.
Among the wooden planes there are two types of plane that are a little peculiar. The above mentioned scrub plane and the moulding planes, very used in the past and equipped with shaped blades used to mould the wood, or to create ornaments in wood or to make picture frames. We will talk about them in future posts. Metal planes work like wooden ones but are slightly different and have a more complex structure. They are formed by a metal base and sides in which a frog is mounted and on which the blade and the cap iron are held in place by the clamping of the lever cap. The blade protruding or retraction can be adjusted by a wheel placed on the back of the frog. The same frog can be moved forward or backward to increase the size of the mouth from which the blade protrudes. The position of the blade to the right or to the left is adjusted by a lever placed on the frog.
I am more used to using metal planes, perhaps because it is easier for me to adjust the blade setting using the setting wheel depth. In fact, on the wooden planes, the adjustment of the blade is made by tapping with a little hammer small on the head of the blade to protrude the iron or by tapping on the wooden wedge to release it and retract it. This operation requires more practice and sensitivity, but however, is paid back by an extremely pleasing sensation, perhaps even more than the steel planes.
Below a list of the parts of a Stanley n. 4 ½ with a Bailey pattern. Other types of planes may slightly differ.
A) Sole and hips of the plane. Made by metal material is the main body of a plane. Almost all parts of the plane are directly inserted in it. It’s the part that comes in contact, together with the cutting edge, to the wood we have to work. The sole and sides should be absolutely flat and perpendicular to each other. In the sole there is an opening, the mouth, from which the sharp blade comes out allowing the passage and expulsion of the shavings produced during the planing. In some particular smoothing planes the base is corrugated instead of smooth (corrugated planes).
B) Mouth. Large opening made in the sole of the plane from which the cutting edge comes out. From the mouth enter and exit the shavings produced during the planing. The area near the mouth must be perfectly flat.
C) Rear handle and front knob. The rear handle and the front knob, usually made in wood, such as rosewood, but also beech, are used to take and guide the plane. They are fixed to the sole by a threaded rod at the ends and a top screw. The shape of the rear handle is shaped to accommodate the handle of the hand while the front knob is almost in spherical shape. The hand that holds the rear handle provides the push while the other hand, placed on the front knob, guides the plane and put the pressure to keep the plane flat to the piece of wood. In some types of wooden planes, such as the scrub planes, the rear handle does not exist and the pushing action is done by placing the hand on the back of the flat body. The front knob is replaced by a kind of “horn”. On other wooden planes such as moulding planes used for mouldings, the front knob is also missing.
D) Frog: The frog is inserted only on metal planes. It is a metal support secured to the base of the plane by two screws and on which is mounted also the wheel that moves the cutting iron, and the lateral lever. Is fixed at 45 degrees from the sole and can be moved forward or backward by rotating the screw at the back of the frog. In this way you can increase or decrease the useful opening of the mouth.
E) Blade: It is placed directly (usually with the cap iron) on the frog and comes out of the plane’s mouth with the cutting edge. Various models of blades exist, varying the hardness and thickness of the steel they are made of. The blade protrusion depth from the mouth is adjusted by the wheel placed on the back of the frog, as well as the blade presentation angle can be varied by shifting the lateral adjustment lever.
F) Cutting edge. The cutting edge is the end of the blade, which actually planes the wood by producing the shavings. It is usually sharpened to 25 degrees (bevel) but often a 30 degree (microbevel) bevel is created. Commonly, the cutting edge is bevel down but, on certain types of plane, the cutting edge is bevel up. We will talk about that on future posts.
G) Cap iron. The cap iron is made of a less hard metal than the one used for the blade. Its main function is as chipbreaker but it also gives rigidity and straightness to the blade. It is mounted on the blade by a screw and has an opening that allows the insertion of a fork that controls the depth of the cutting iron by the wheel. Usually the cap iron is placed a few millimeters from the cutting edge. Its adjustment, as well as the sharpening and frog position, varies depending on work to be done and personal preferences.
H) Lever cap. The cap lever, made of shaped metal plate, is the locking system that, once putted into the center screw that comes out of the frog, allows, by the locking system placed on its head, to lock the blade on the frog. Closure of the lever cap should not be too weak or too strong. Its adjustment is made with the screw placed in the central part of the frog.
I) Lateral adjustment lever. It is the lever that you can use to adjust the cutting angle of the cutting edge to the piece of wood by aligning the cutting edge at the sole of the plane. It is also used to compensate for small inaccuracies in the cutting edge sharpening or some vices of the plane itself.
H) Depth adjustment wheel. Placed on the back of the frog is made of knotted iron or brass. It is used to adjust the cutting depth of the iron. Turning clockwise the blade moves out of the flat mouth. otherwise, rotating counterclockwise, the blade retracts.
The features above are common to almost all types of planes. However, there are some planes that may differ in the form and type of work they are dedicated to, such as spokeshaves, router planes, scraper planes and many more.
I suggest to buy at least a n. 4 or n. 5 plane. By the time you will definitely feel the need to enlarge your tools equipment as it happened to me. But the purchase will always be valued in the light of real needs without getting too handy. The planes that really need are a few, about a dozen. My purchase advice is to go to the large ebay market at http://www.ebay.co.uk and look for an used plane of the above mentioned brands. Nothing wrong with modern planes, some of them are really good, but in my own experience I like used tools and I am very happy to settle them in new and working order. Below is a list of some planes I use mostly and which I think are sufficient to cover almost all of the working needs.
Record n. 4; Stanley n. 4 1/2; Stanley n. 5; Stanley n. 7; Scrub plane; Spokeshave Stanley 151; Router plane Stanley n. 71; Scraper plane Stanley 080; Block plane Record 60 1/2; Shoulder plane Stanley 93.
More information to come about the most common types of planes, their use and sharpening.

Lascia un commento