
COME MONTARE LE CERNIERE PIANE A LIBRO / HOW TO INSTALL MORTISE BUTT HINGES
English translation at the end of the article
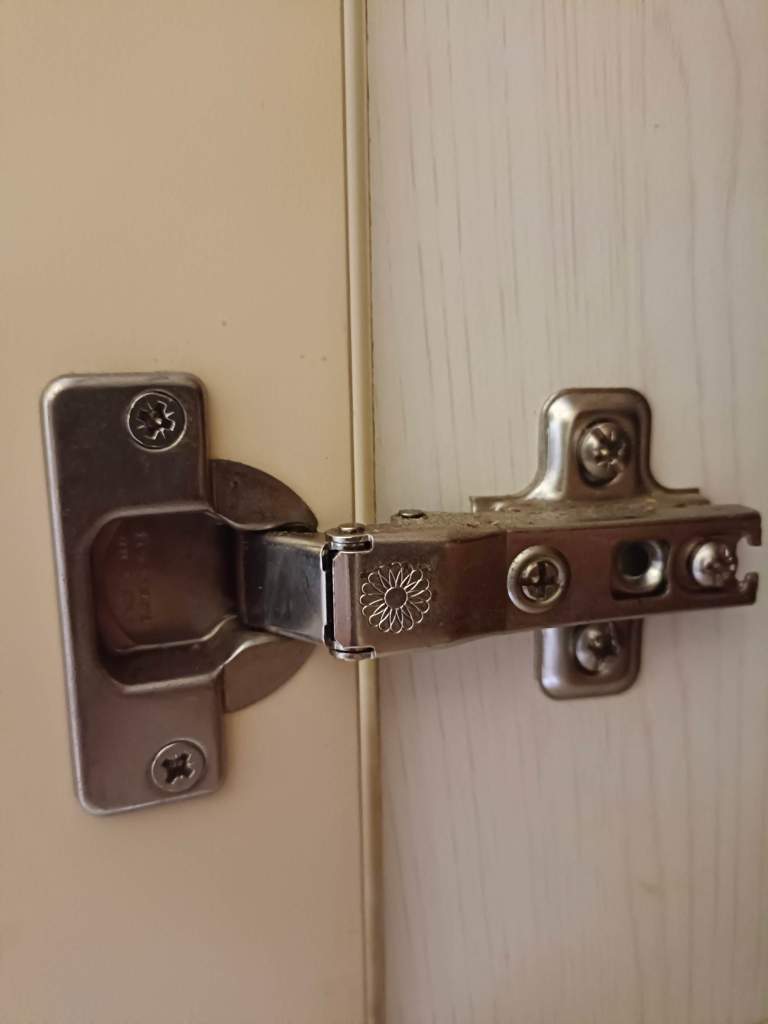
In commercio esistono svariati tipi di cerniere. Le più comuni oggigiorno sono probabilmente le cerniere a scodellino, ammortizzate o meno, ovvero quelle utilizzate di solito per sorreggere le ante dei pensili delle cucine o dei mobili degli uffici. Questo perché sono facilmente regolabili attraverso delle viti che permettono di aggiustare l’anta nel caso perda la perpendicolarità a causa del suo stesso peso e dell’utilizzo intensivo.
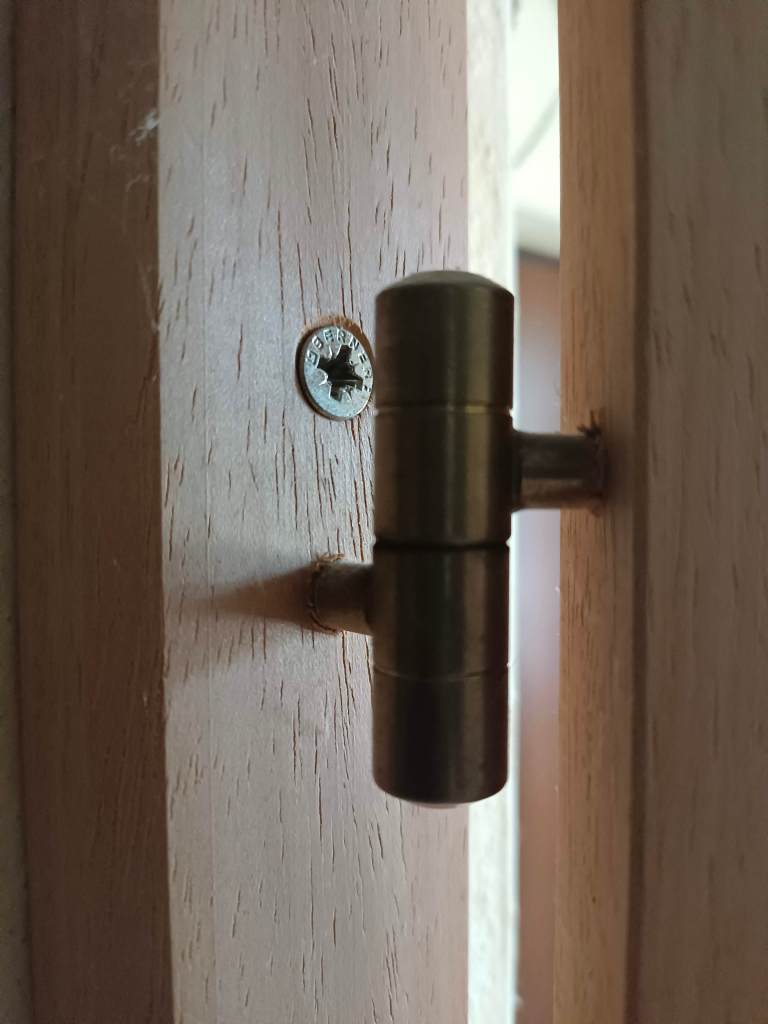
Un altro tipo di cerniere molto utilizzate sono quelle di tipo anuba. Le troviamo spesso utilizzate come cardini per le porte interne delle nostre case ma anche inserite su ante di un certo peso che devono stare all’esterno.

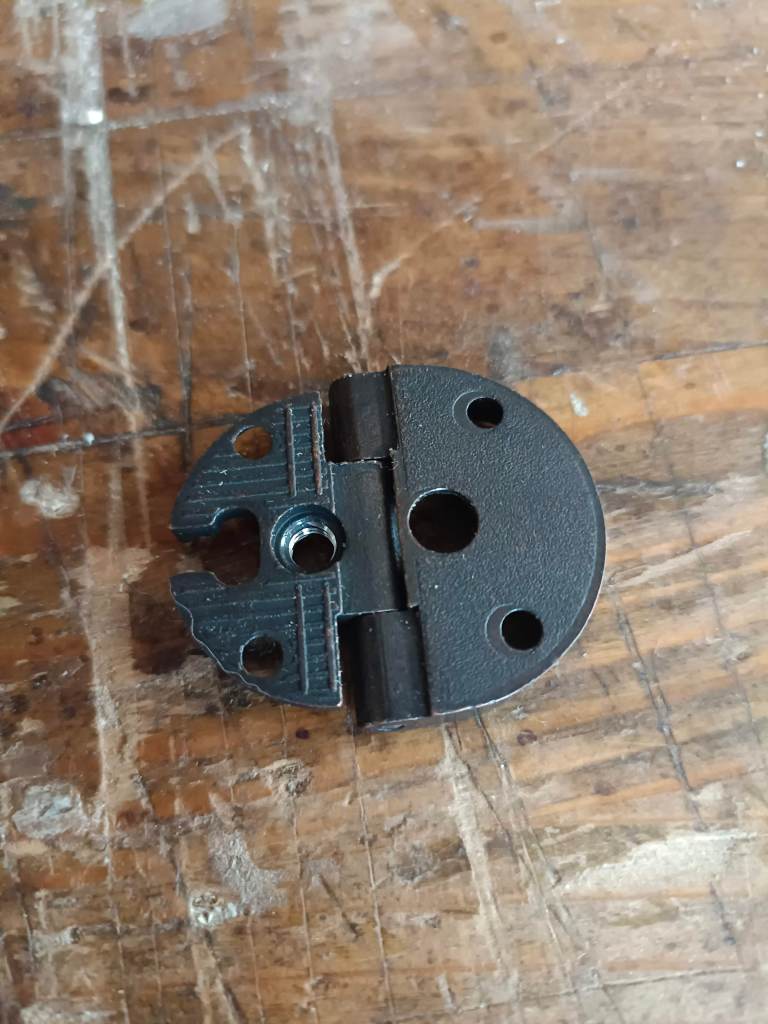
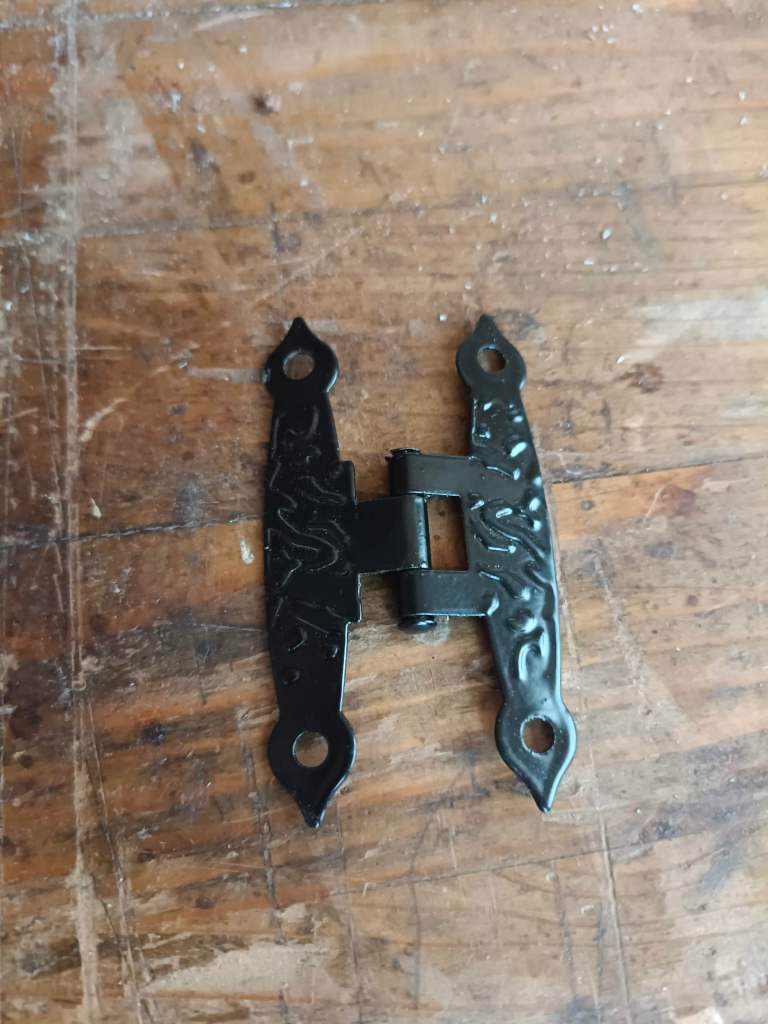
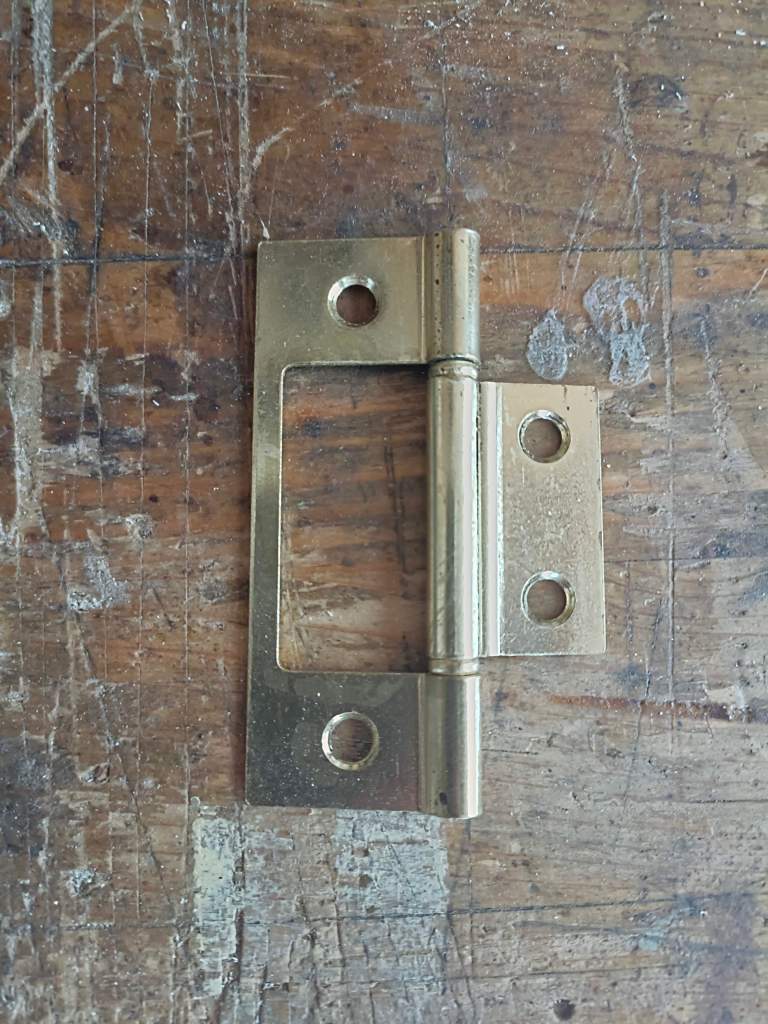
Ci sono poi le cerniere sbalzate, quelle forgiate con forme particolari, le cerniere c.d. invisibili che si inseriscono totalmente nel legno e molte altre ancora con forme e misure particolari che sarebbe inutile elencare qui.
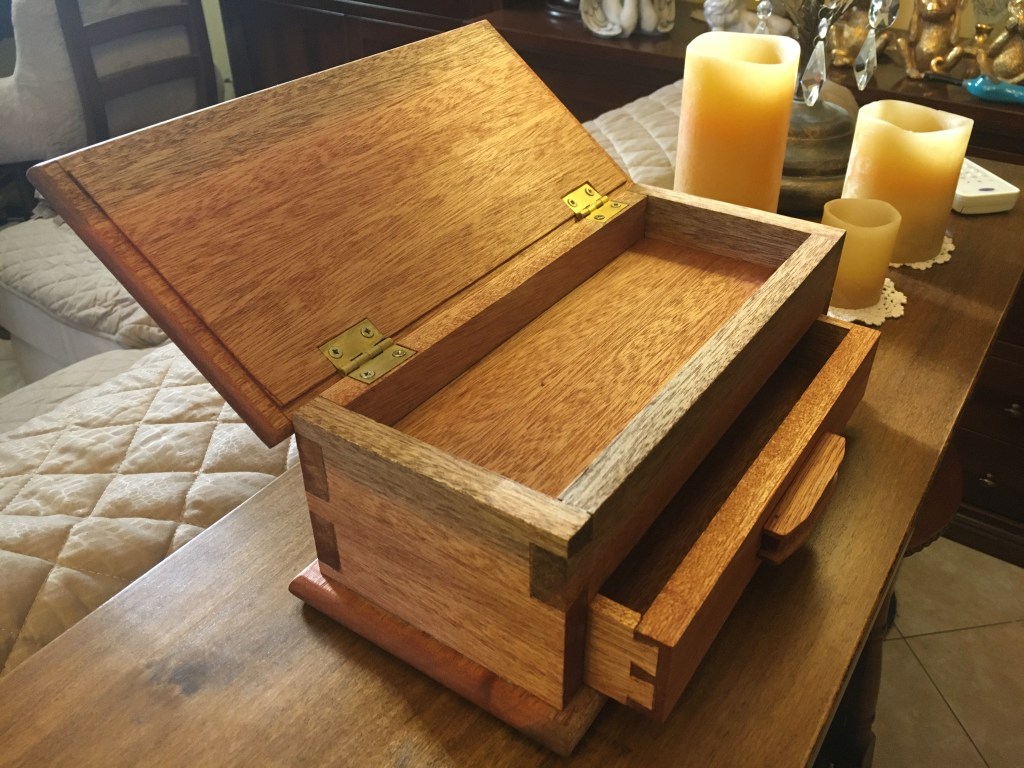
Tutte queste cerniere possono essere fatte in acciaio, in ottone oppure in ferro battuto. Le cerniere di cui parleremo in questo articolo sono però quelle piane a libro utilizzate per sorreggere pesi non eccessivi e quindi particolarmente adatte ad esempio a sostenere i coperchi delle scatole in legno.
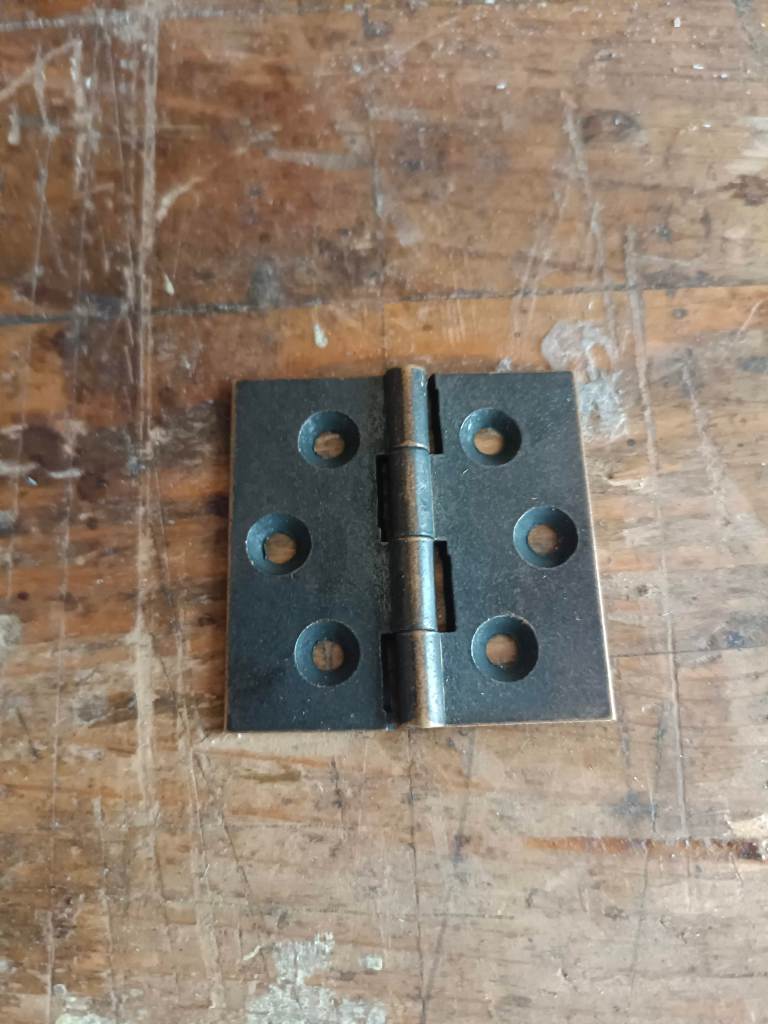
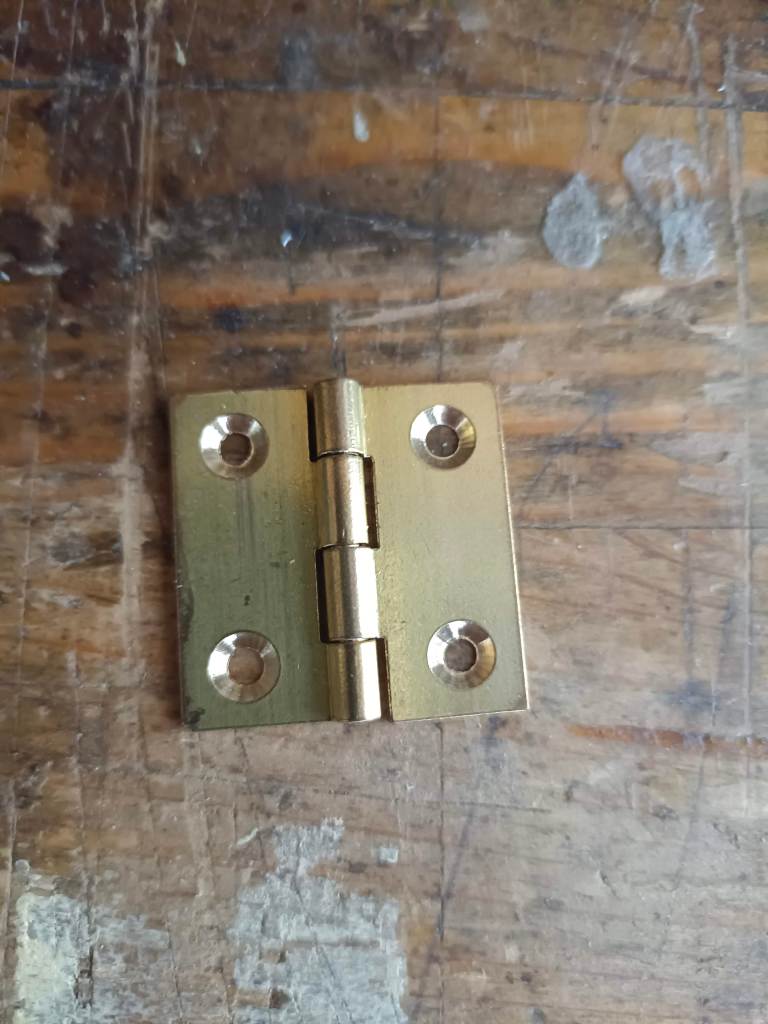

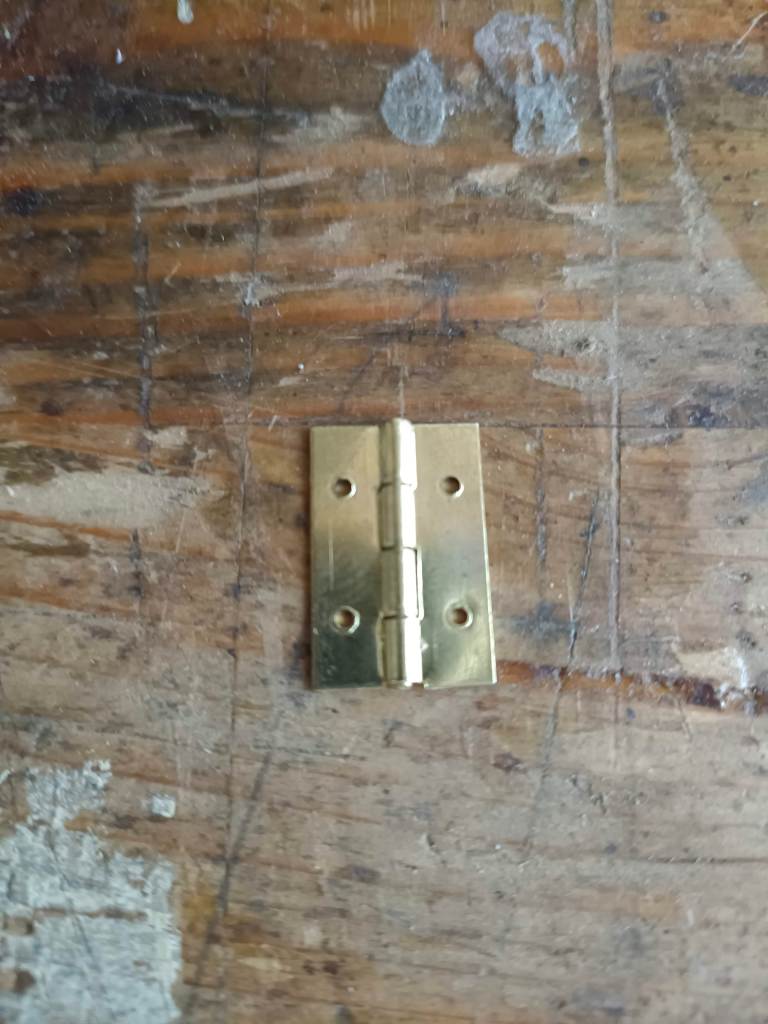
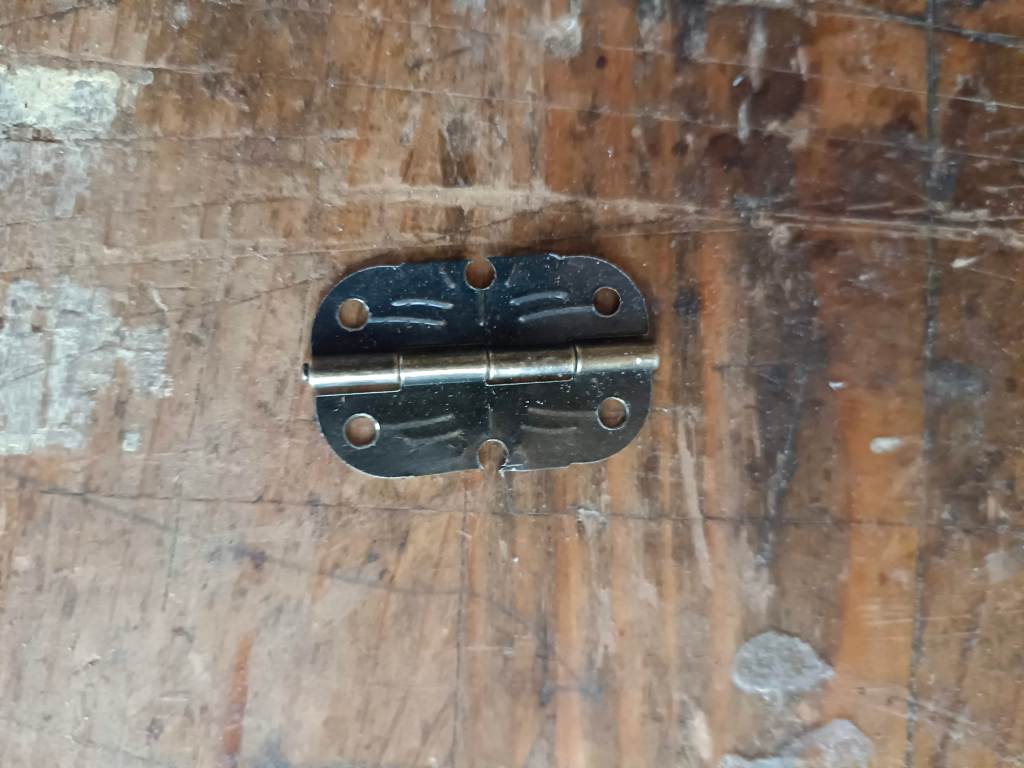
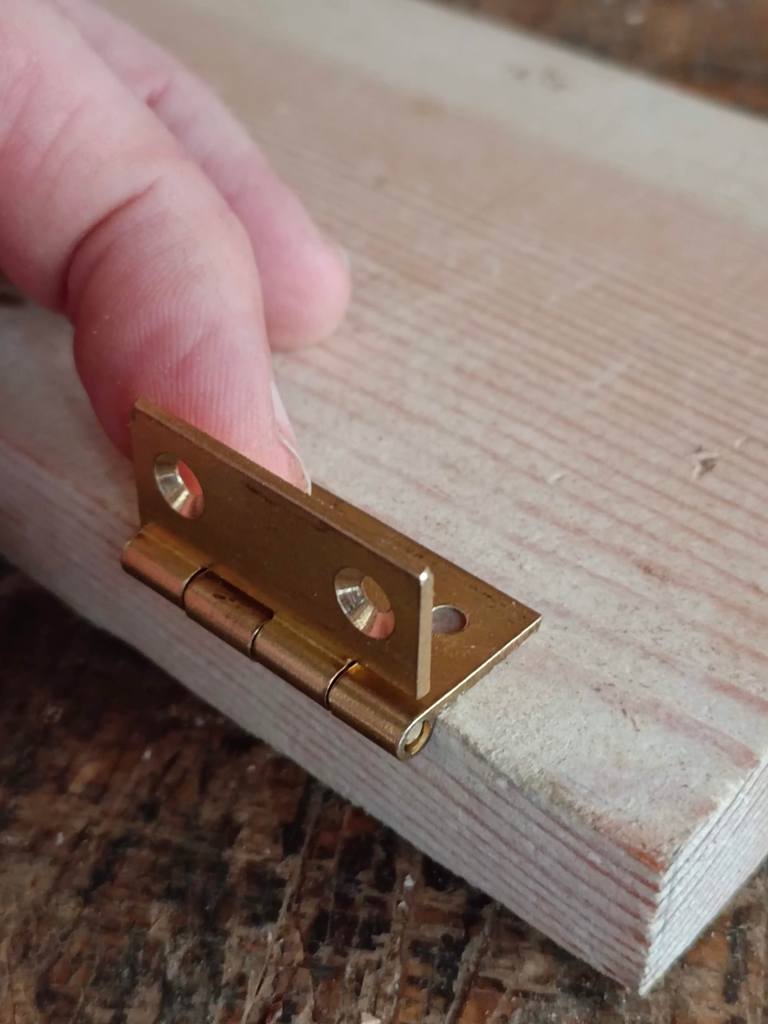
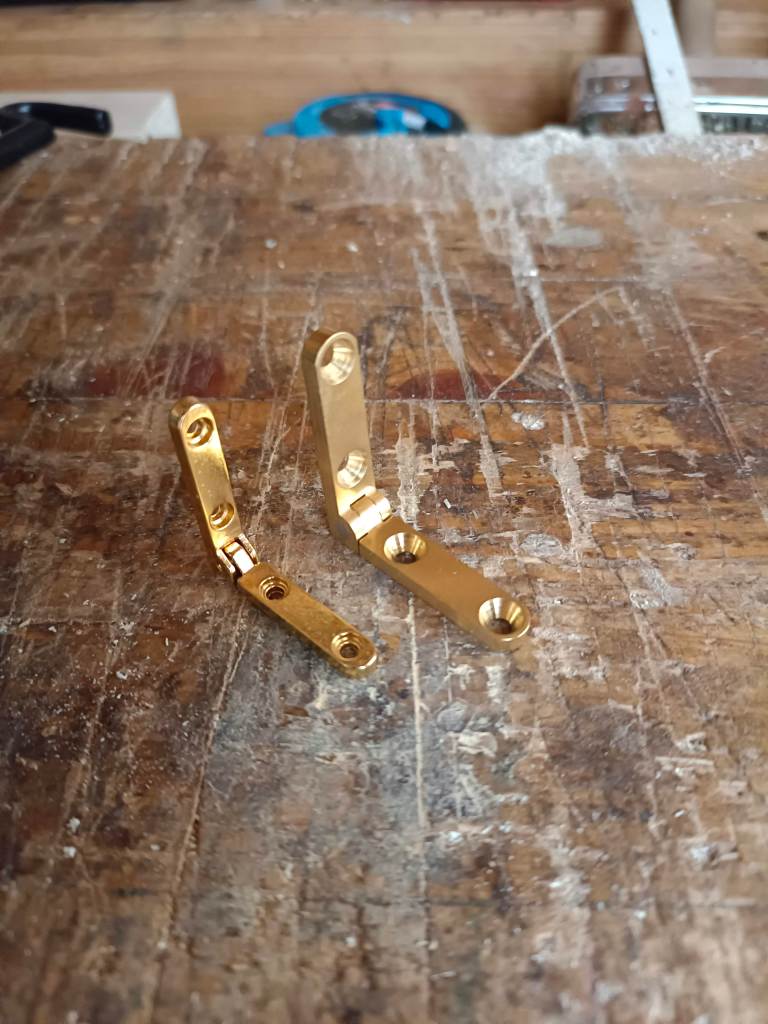
Le cerniere a libro piane sono composte da due parti mobili (le cerniere vere e proprie) che sono collegate tra loro da un corpo centrale (perno) che ne permette il movimento di apertura a libro. Talvolta non hanno uno spessore uniforme ma sono leggermente rastremate verso l’estremità. A seconda del peso che dovranno sostenere potremo decidere di acquistare piccolissime cerniere per cofanetto che si applicano con dei minuscoli chiodini oppure le classiche cerniere a due buchi di media grandezza o quelle più grandi a tre buchi.
Se non abbiamo particolari esigenze estetiche possiamo acquistare le cerniere zincate mentre quelle in ottone sono maggiormente impiegate per le scatole in legno. Lo spessore delle cerniere, la distanza tra le stesse una volta ripiegate e la grandezza complessiva della cerniera condizioneranno le scelte che faremo in merito all’esecuzione dello scavo che dovrà riceverle. Questo tipo di cerniere infatti possono essere installate in due modi diversi. Il primo e più semplice metodo é quello esterno, particolarmente utilizzato con cerniere apprezzabili dal punto di vista estetico. In questo caso la cerniera viene semplicemente avvitata esternamente al legno e tutto il peso verrà sostenuto dalle viti stesse.

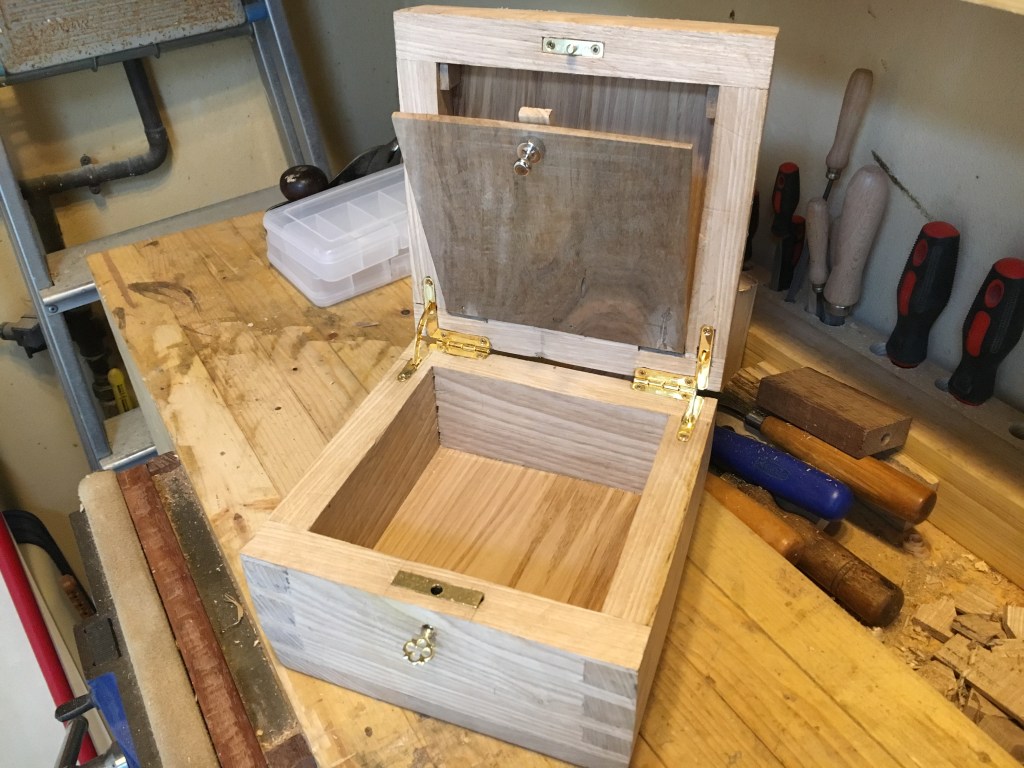
Il metodo classico, invece, utilizzato su elementi di un certo pregio e più complesso da realizzare, è quello interno, dove le cerniere vengono inserite nel legno previa esecuzione di uno scasso che le accoglie lasciandone fuori solo il perno centrale. In questo caso lo scasso, oltre ad essere apprezzabile esteticamente e a denotare una certa manualità, aumenterà anche la tenuta della cerniera. Vediamo adesso nello specifico come procedere all’ inserimento di una cerniera piatta a libro in ottone con scasso seguendo il metodo classico di realizzazione con gli utensili manuali.
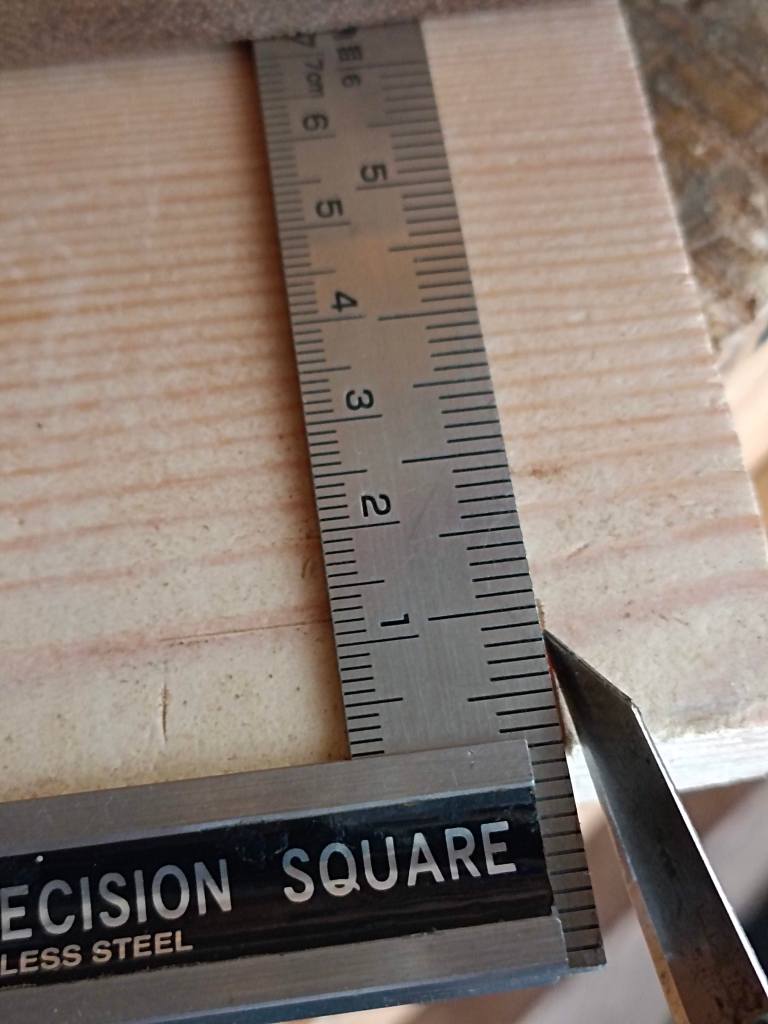
La prima cosa da fare é stabilire quante cerniere vogliamo mettere. Solitamente due cerniere posizionate a circa 2 centimetri da ogni bordo sono sufficienti per pesi fino a circa 5 kg ma potremmo decidere di aggiungerne altre (una in più per ogni 5 kg di peso aggiuntivo). Verifichiamo poi che le cerniere che andremo ad inserire siano effettivamente della stessa misura in quanto non di rado quelle di bassa qualità possono differire tra loro anche se ad occhio non sembrava. Iniziamo quindi inserendo le cerniere sul pezzo più leggero in quanto poi sarà più semplice movimentarlo quando andremo a riportare le tracce sull’altro pezzo.

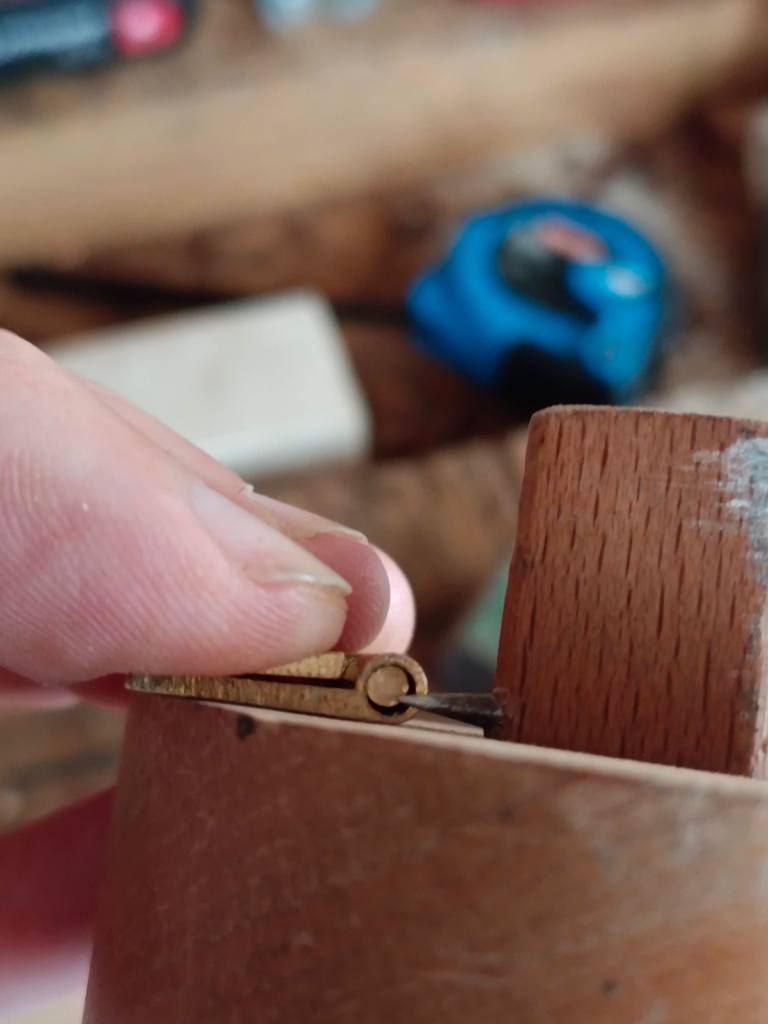
Posizioniamo la cerniera mandando in battuta il perno contro il legno e con il coltellino da tracciatura segniamo leggermente le due estremità della cerniera ed anche la parte lunga frontale della cerniera.
Rimuoviamo la cerniera e con l’aiuto di una squadretta riportiamo le tracce dei laterali della cerniera sino all’angolo del pezzo premendo anche sull’angolo stesso del pezzo in modo da riportarlo sul fianco.
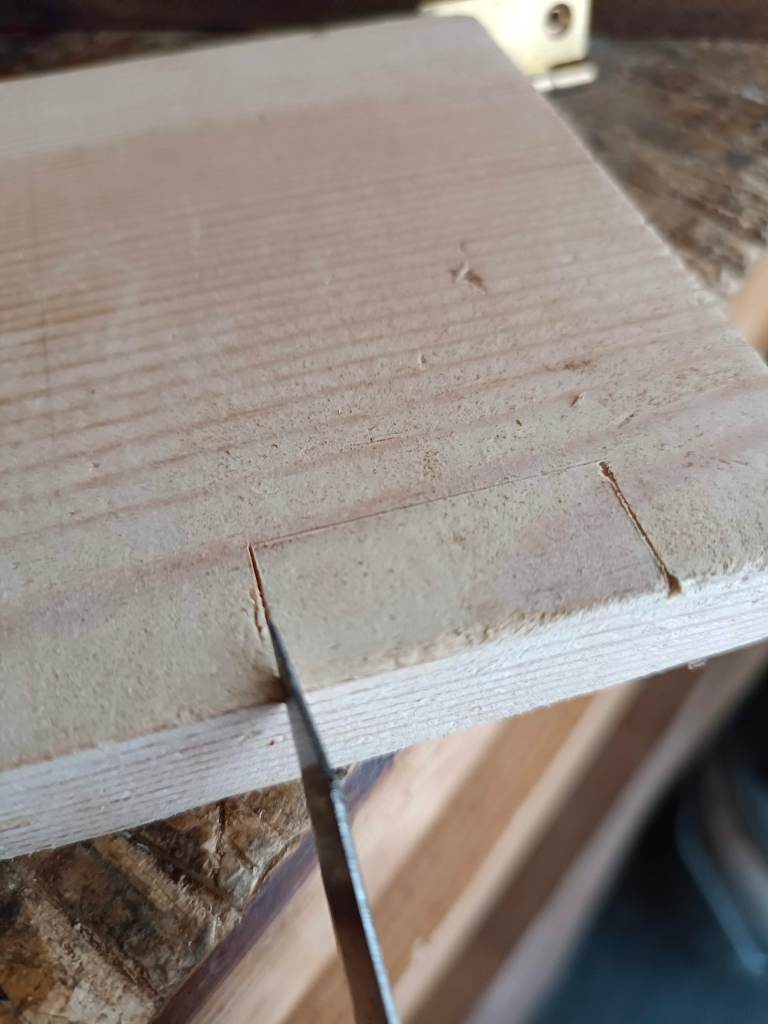
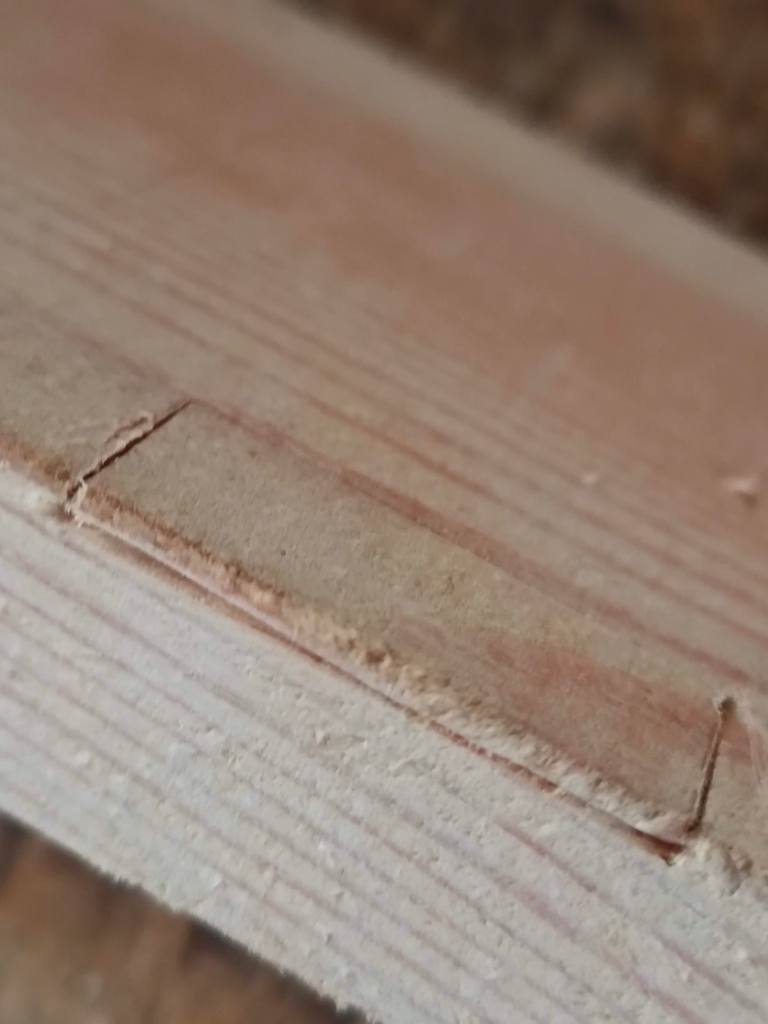
Riposizioniamo la cerniera aiutandoci con il coltellino per ritrovare l’esatta posizione e definiamo la traccia frontale ottenendo così tutto il perimetro della cerniera.
Per tracciare la profondità della cerniera, ovvero la profondità dello scasso da fare, usando il truschino potremmo prendere a riferimento lo spessore della cerniera stessa così da inserirla a filo del legno.
Io preferisco invece posizionare la cerniera sul truschino in modo tale che la punta del truschino sia posizionata appena sotto la metà dello spessore del perno. Questo mi permetterà di inserire la cerniera non proprio a filo del legno ma leggermente sotto.

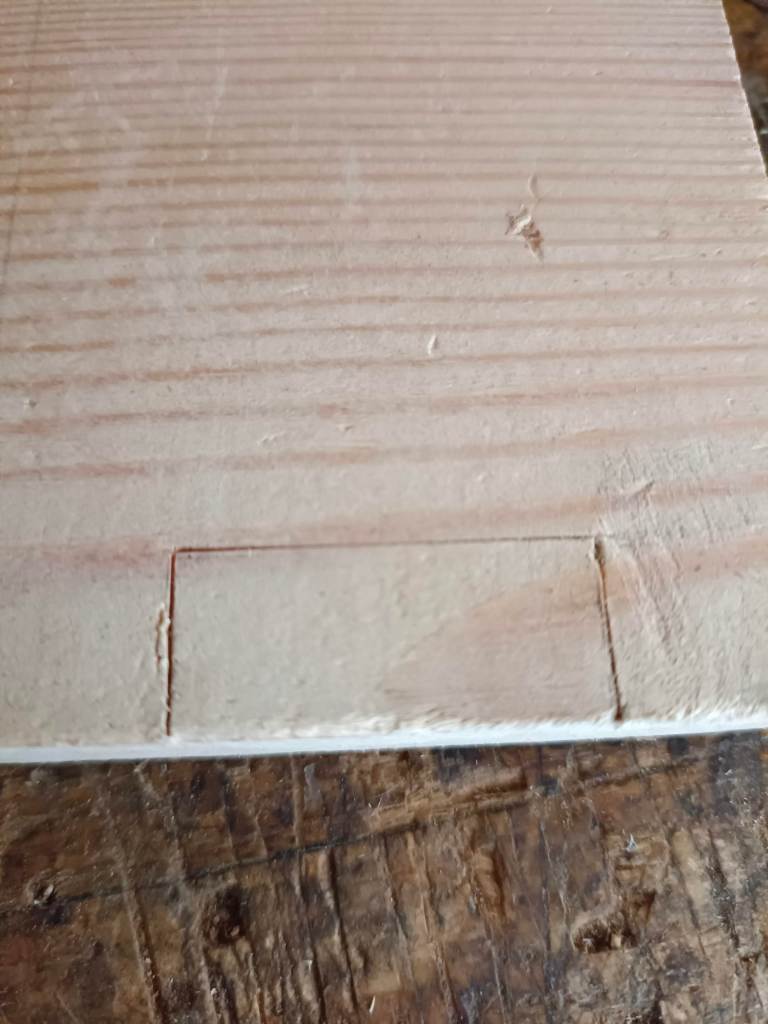
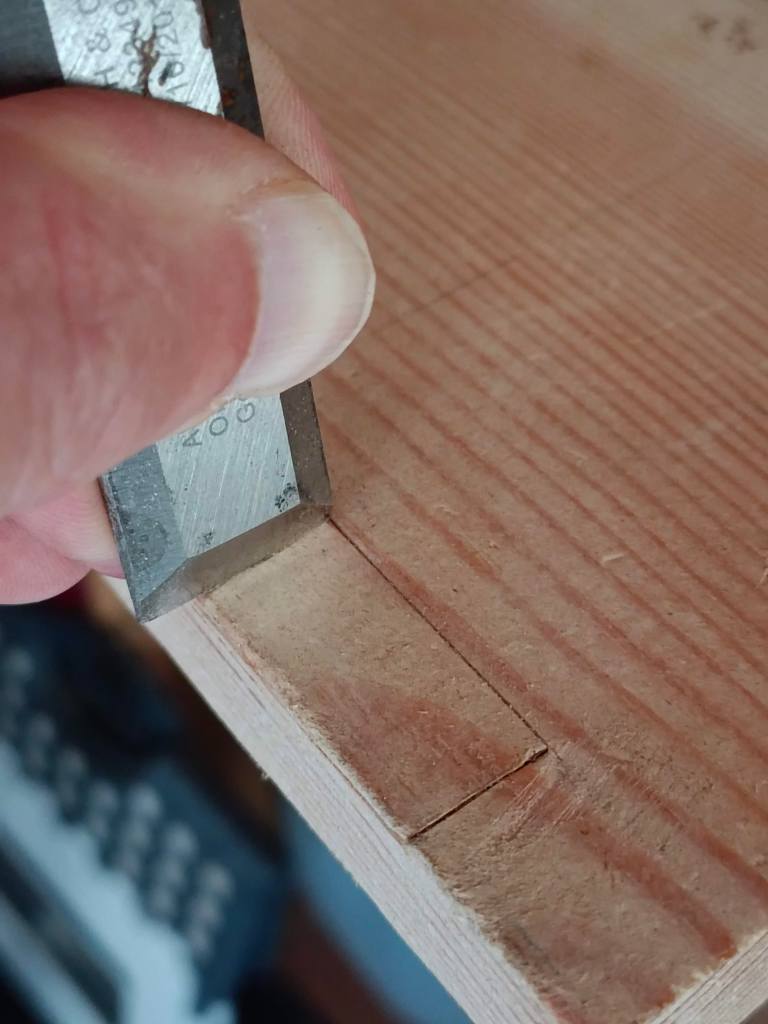
Blocchiamo il truschino in tale posizione e tracciamo la linea di profondità dello scasso sul fianco del pezzo di legno facendo attenzione a non andare oltre le misure laterali già tracciate. Per ricavare lo scasso e rimuovere il materiale utilizziamo uno scalpello leggermente più largo dello scasso da praticare. Non cominciamo dalla traccia fatta ma un millimetro più avanti così da non spostare la linea di demarcazione.
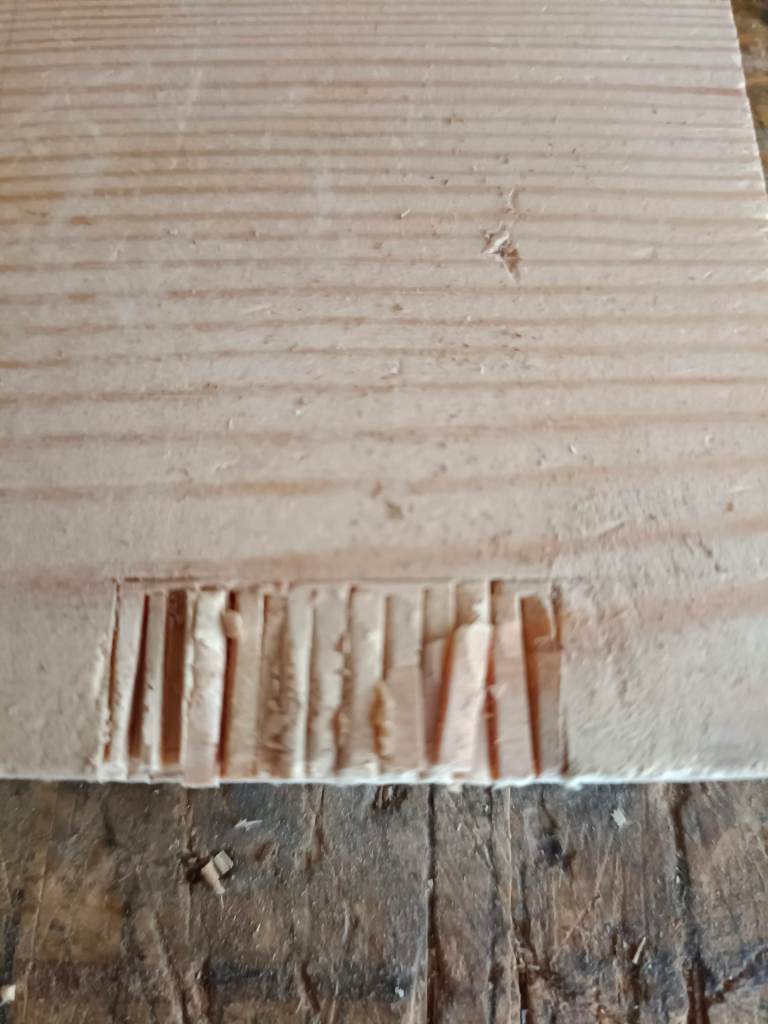
Con martello e scalpello lavoriamo per tutta la lunghezza dello scasso cercando di arrivare alla traccia di profondità e procedendo rimuovendo poco materiale per volta. Teniamo sempre lo scalpello con il bisello rivolto nella direzione in cui ci stiamo muovendo e facciamo attenzione a non superare mai la linea di profondità. Facciamo anche attenzione, durante questa fase, a non superare la traccia frontale di delimitazione e fermiamoci a circa un millimetro dal bordo.

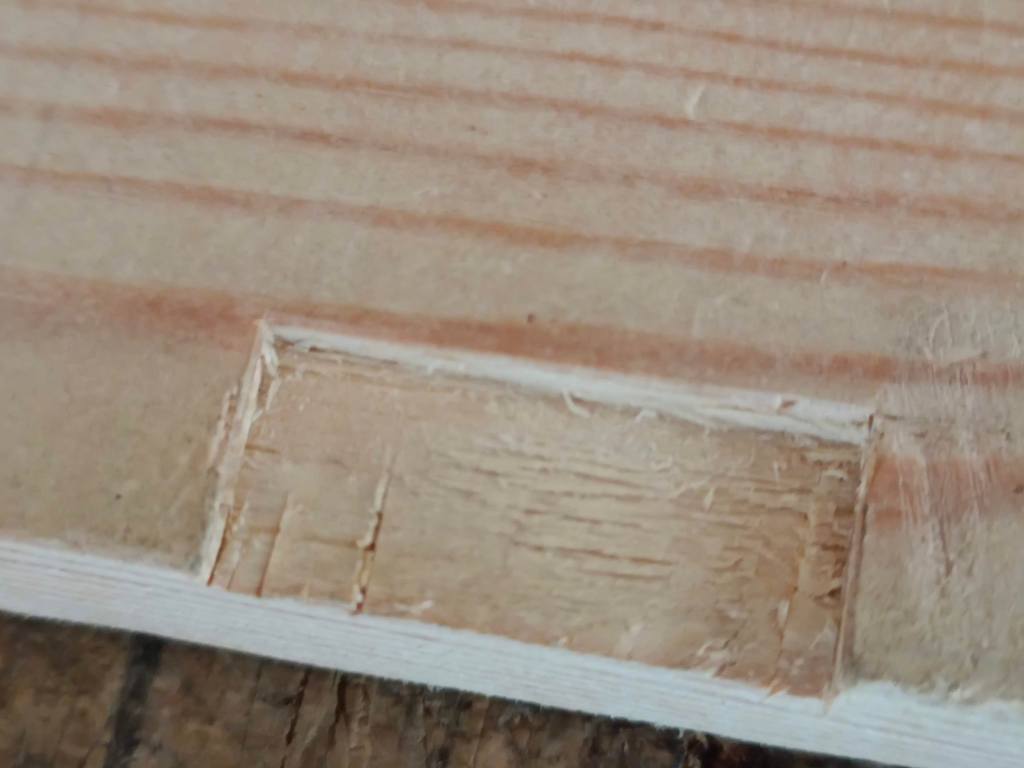
A questo punto eliminiamo il materiale che abbiamo allentato posizionando lo scalpello sulla traccia di profondità ed orientandolo leggermente verso l’alto partendo dal centro dello scasso e procedendo verso le estremità. Mentre eliminiamo il materiale facciamo attenzione a non sfondare la parete lunga della cerniera e se sentiamo che il legno non si stacca, opponendo resistenza, ripassiamo leggermente con lo scalpello definendo meglio lo scavo. Il legno in questa zona ha poco sostegno ed è facile rovinare i fianchi degli scassi. Rifiniamo infine il perimetro dello scasso posizionando lo scalpello direttamente nelle tracce fatte con il coltellino eliminando gli ultimi decimi di millimetro di legno rimasti. Possiamo eventualmente anche utilizzare una mini router plane per livellare lo scasso. Durante tutta questa fase é fondamentale procedere delicatamente e senza fretta perché é estremamente facile rovinare i bordi dello scasso e recuperare il danno sarebbe problematico.
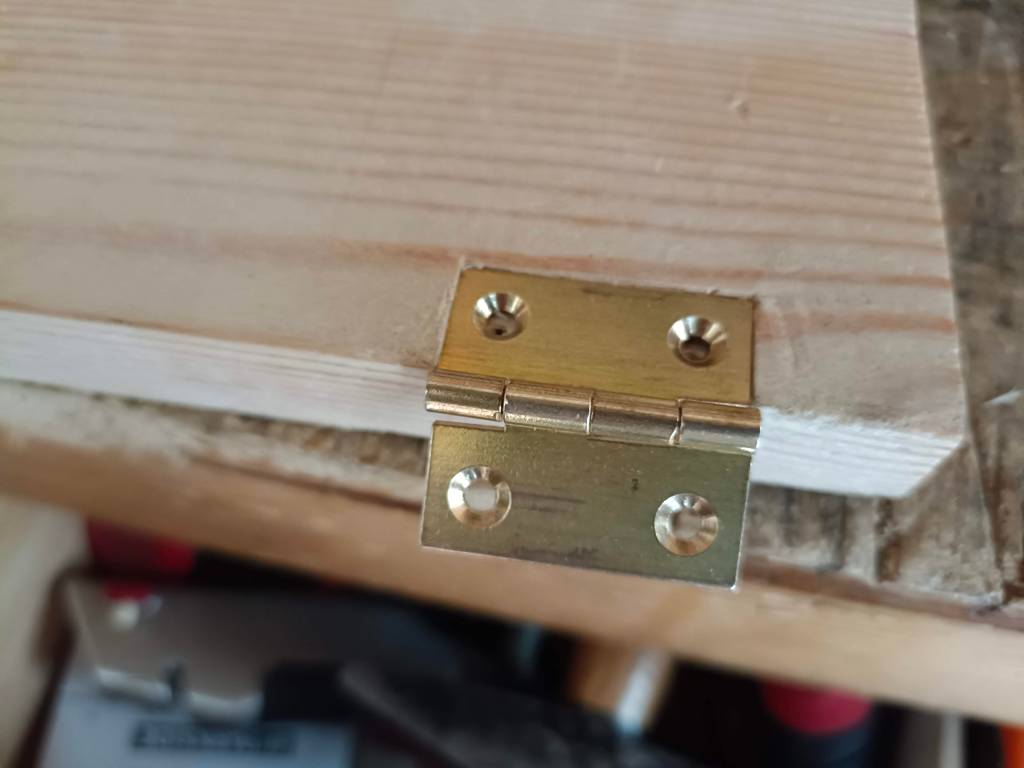
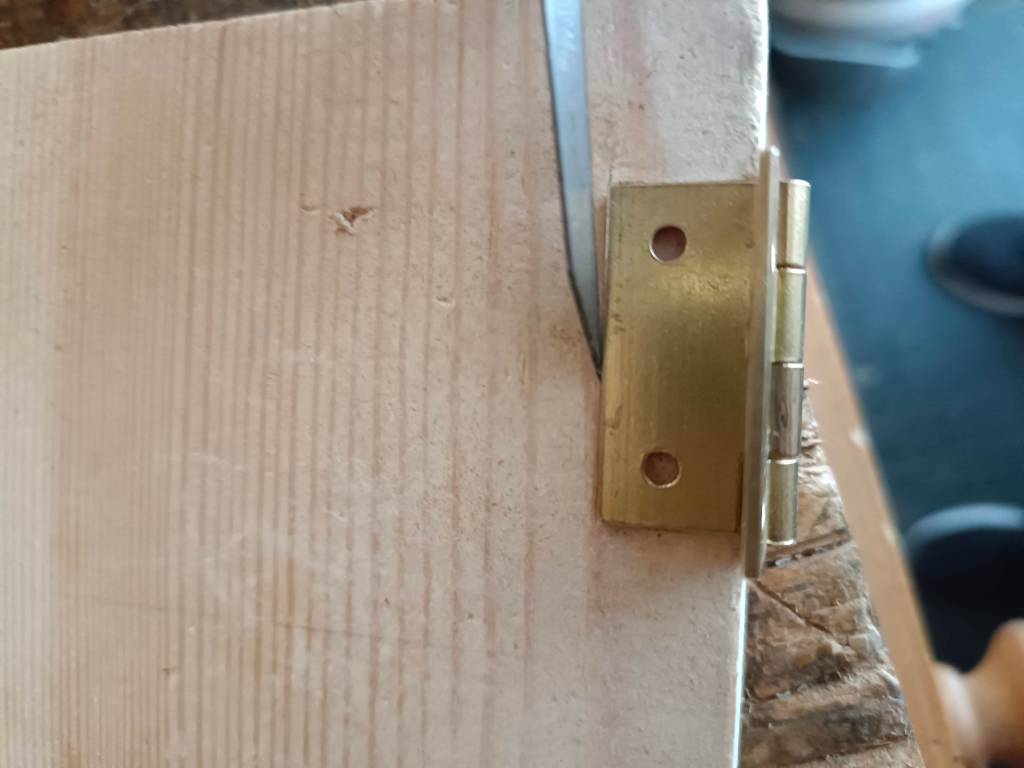
Una volta terminato inseriamo la cerniera che dovrebbe entrare perfettamente nello scasso senza forzare o lasciare spazi vuoti.
Con un punteruolo, meglio se a punta quadra, facciamo dei buchi di invito per le viti. Cerchiamo di fare i prefori leggermente fuori centro e verso la parete interna dello scasso in modo che le viti tendano a serrare bene la cerniera contro la parte interna. Non esageriamo con il fuori centro o le viti andranno ad avvitarsi sul bordo dell’asola.
Se stiamo utilizzando cerniere e quindi viti in ottone una buona pratica, oltre al preforo con il trapano, é anche quella di mettere un poco di cera sulla punta della vite. Le viti in ottone sono più fragili di quelle in acciaio e questo ne faciliterà l’inserimento nel legno. Un’alternativa alla cera é quella di avvitare prima una vite in acciaio dello stesso diametro così da preparare il foro per la vite in ottone. Cerchiamo alla fine di allineare la posizione dei tagli delle viti, siano queste a taglio o a stella, in modo da ottenere un’estetica soddisfacente.

Una volta posizionate le cerniere nel coperchio o nella porta allineiamo il componente incernierato in posizione sull’altro pezzo da incernierare ed utilizziamo il coltellino da tracciatura per contrassegnare la posizione esatta di entrambe le cerniere sul bordo esterno del pezzo da incernierare. Infine seguiamo esattamente la procedura descritta sopra anche per il secondo elemento.
Se stiamo mettendo le cerniere ad una scatola in legno la prova finale della bontà del nostro lavoro sarà la corretta chiusura del coperchio sulla base. Dando per scontato che la scatola sia stata ben livellata tra coperchio e base, se il coperchio non appoggia perfettamente sulla base della scatola allora dovremo intervenire in vari modi.
Se siamo fortunati ed il difetto è di lieve entità si tratterà solo di stringere o allentare le viti delle cerniere.
Se il problema è più grave bisogna capire come intervenire. Se il coperchio sporge in avanti rispetto alla base dovremo arretrare la cerniera della base stessa oppure portare avanti la cerniera del coperchio. Dovremo fare le operazioni opposte se il coperchio rimane arretrato rispetto alla base. E’ sempre consigliabile intervenire sul pezzo dove la cerniera va spostata in avanti in quanto si tratterà di rimuovere materiale invece di lasciare spazi vuoti lasciati dalla cerniera arretrata. Sposteremo la cerniera della stessa misura della sporgenza che abbiamo rilevato aiutandoci con il truschino per prendere e riportare l’esatta misura.
Se il coperchio rimane storto rispetto alla base dovremo invece controllare l’allineamento della cerniera rispetto al bordo della scatola ed intervenire sul perimetro dello scasso e/o agire sulle viti.
Può anche accadere che il coperchio chiuda solo sul retro e rimanga sospeso sul davanti o viceversa. In questi casi bisogna controllare la profondità dello scasso e alzare con uno spessore lo/gli scassi se il coperchio rimane aperto sul davanti oppure abbassare lo/gli scassi se il coperchio chiude frontalmente ma lascia spazio sul retro della scatola.
In tutti questi casi sarà probabilmente necessario riempire i fori precedentemente fatti nel legno e praticare nuovi fori.
Tutta la fase di inserimento di questo tipo di cerniere è stata approfondita nel mio libro, sviluppato in due volumi, intitolato “Il legno e la sua Lavorazione Manuale”.
Avendo fatto svariate scatole e cofanetti in legno mi sono reso conto di quanto sia importante l’inserimento delle cerniere. Se ci pensiamo un attimo, quando si apre una scatola, specialmente se di colore scuro, le cerniere in ottone sono le prime che balzano all’occhio e se queste sono state inserite male o anche solo le viti sono disallineate, l’effetto non sarà gradevole.
Molto spesso la buona riuscita dell’inserimento di questo tipo di cerniere non dipende dalla nostra imperizia ma dalla qualità mediocre delle cerniere. Anche per questo suggerisco di acquistare cerniere di buona qualità, con uno spessore adeguato e che non abbiano gioco sul perno centrale (ovvero che abbiano uno spazio minimo tra il perno centrale e le aperture ma che ne permetta comunque il movimento senza inceppamenti).
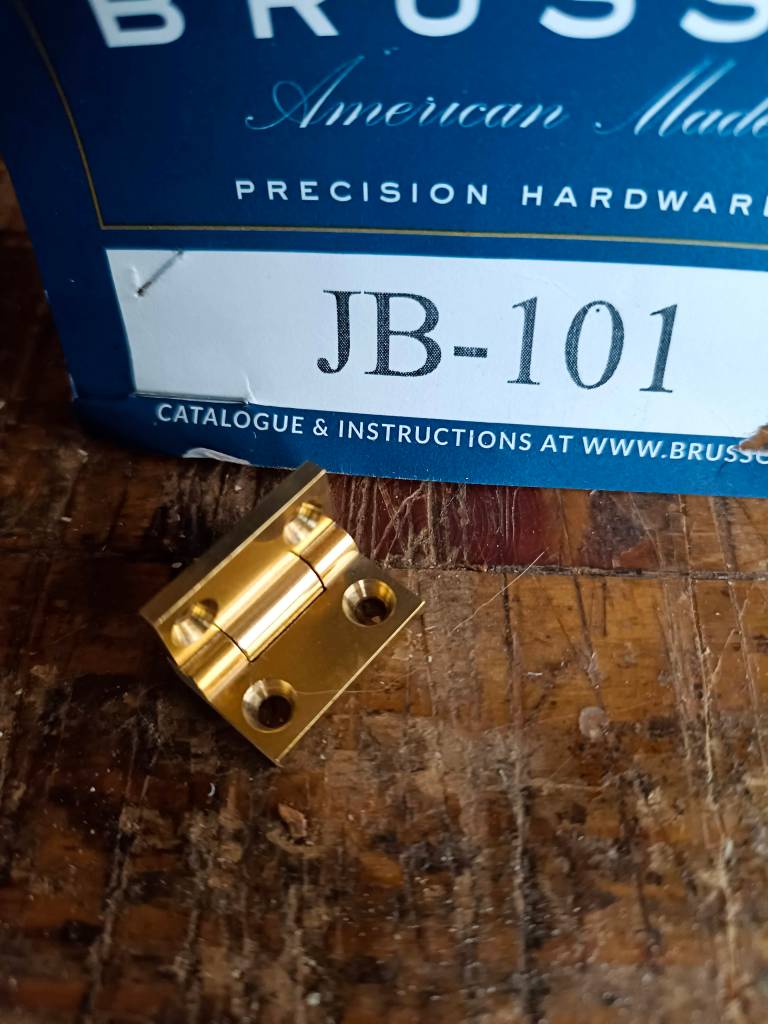
Una Ditta che produce ferramenta di ottima fattura (tra cui le cerniere di cui ho parlato) è la Brusso Hardware che ha sede in USA ma che, per meglio servire il mercato europeo, ha da poco aperto anche in Olanda. I prezzi sono oggettivamente elevati ma la robustezza e la qualità dei prodotti offerti penso non abbiano eguali. Lascio di seguito il link della casa produttrice.
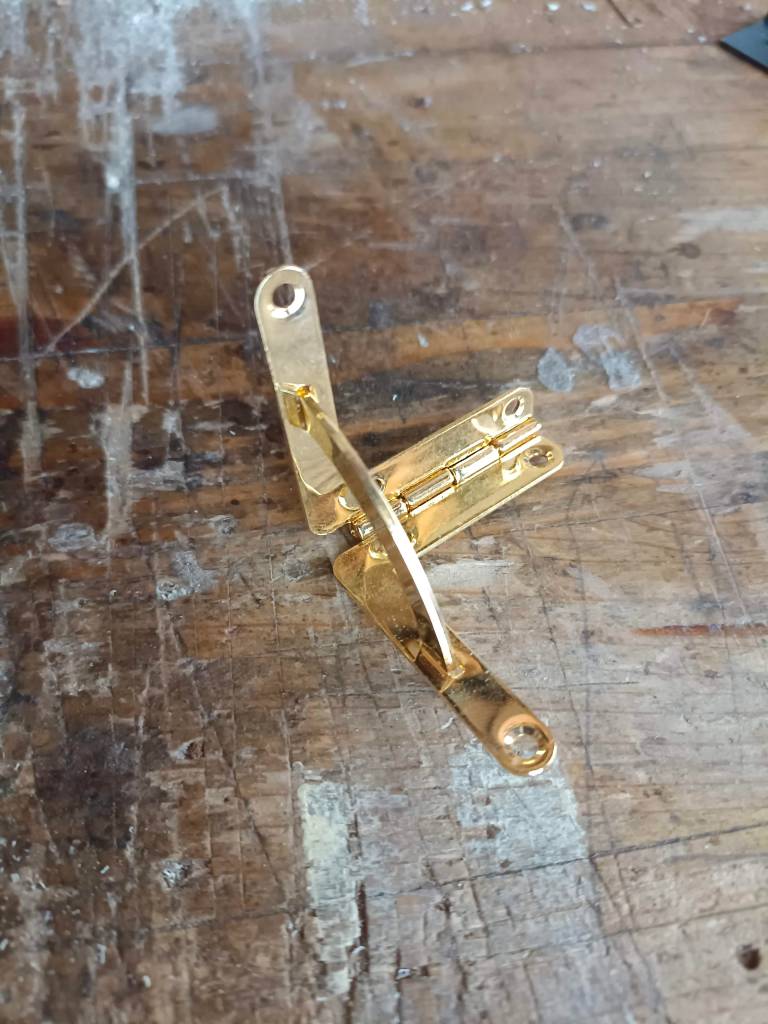
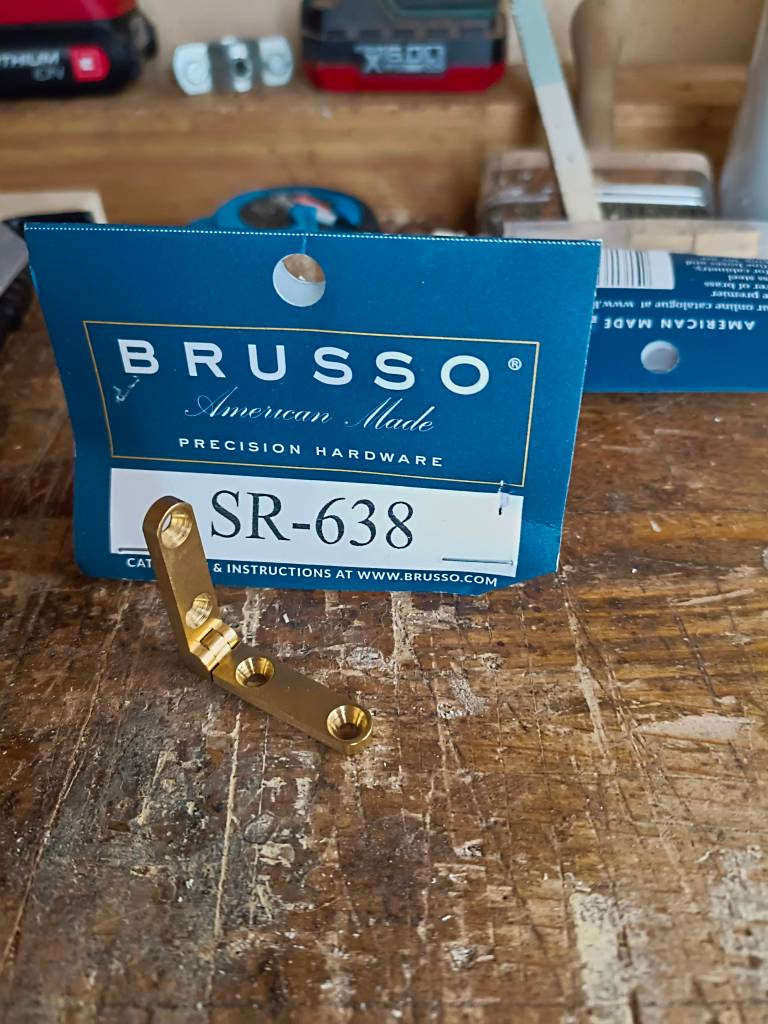
Se pensiamo di fare scatole in legno, come spesso capita a me, posso consigliare di acquistare cerniere piane con lo stop di apertura (antiribaltamento) che, limitando l’apertura a qualche grado oltre i 90 gradi, consentirà di mantenere aperto il coperchio della scatola senza dover inserire la classica catenella laterale.
_________________________________________________________
There are various types of hinges on the market. The most common nowadays are probably the caninet hinges, cushioned or not, i.e. those usually used to support the doors of kitchen cabinets or office furniture. This is because they are easily adjustable using screws that allow you to adjust the door if it loses perpendicularity due to its own weight and intensive use.
Another type of hinges that are widely used are the anuba type. We often find them used as hinges for the internal doors of our houses but also inserted on doors of a certain weight that must be on the outside.
Then there are the embossed hinges, those forged with particular shapes, the so-called invisible hinges that fit completely into the wood and many others with particular shapes and sizes that it would be pointless to list here.
All these hinges can be made of steel, brass or iron. The hinges we will discuss in this article, however, are the flat book-like ones used to support not excessive weights and therefore particularly suitable, for example, for supporting the lids of wooden boxes.
The butt hinges are made up of two mobile parts (the leaves) which are connected to each other by a central body (pin) which allows the folding opening movement. Sometimes they are not uniform in thickness but are slightly tapered towards the tip. Depending on the weight they will have to support, we can decide to buy very small hinges for small jewelry boxes that are applied with tiny nails or the classic medium-sized two-hole hinges or the larger three-hole ones.
If we don’t have particular aesthetic needs we can buy steel hinges while the brass ones are mostly used for wooden boxes. The thickness of the leaves, the distance between them once folded and the overall size of the hinge will condition the choices we will make regarding the execution of the mortise that will receive them. In fact, this type of hinges can be installed in two different ways. The first and simplest method is the external one, particularly used with hinges that are appreciable from an aesthetic point of view. In this case the hinge is simply screwed externally to the wood and all the weight will be supported by the screws themselves.
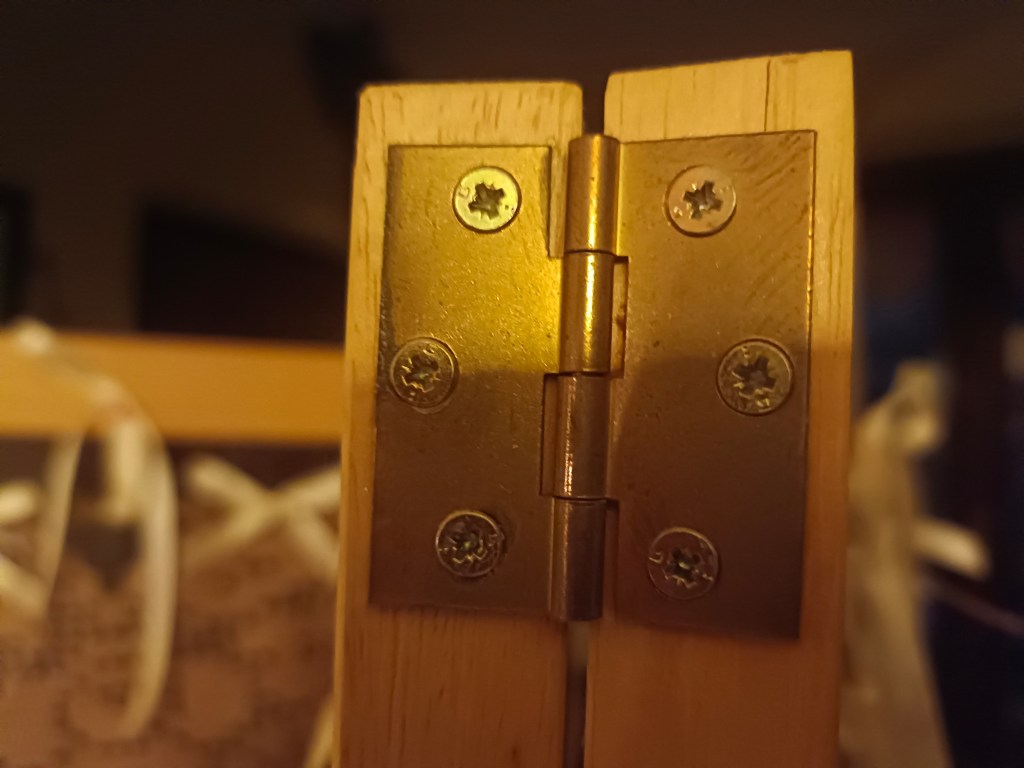
The classic method, on the other hand, used on elements of a certain value and more complex to make, is the internal one, where the hinges are inserted into the wood after making a mortise leaving only the central pin outside. In this case the morticed hinges in addition to being aesthetically appreciable and denoting a certain skill, will also increase the strenght of the hinge. Now let’s see specifically how to proceed with the making of a morticed butt hinge following the classic method using hand tools.
The first thing to do is establish how many hinges we want to put. Usually two hinges positioned about 2 centimeters from each edge are sufficient for weights up to about 5 kg but we could decide to add more (one more for every 5 kg of additional weight). We then verify that the hinges that we are going to insert are actually of the same size as low quality ones can often differ from each other even if it did not seem to the eye. So let’s start by inserting the hinges on the lighter piece as it will then be easier to move it when we go to bring the traces back to the other piece.
We position the hinge by hitting the pin against the wood and with the tracing knife we lightly mark the two ends of the hinge and also the long front part of the hinge.
We remove the hinge and with the help of a square, we bring the traces of the sides of the hinge back to the corner of the piece, also pressing on the corner of the piece itself so as to bring it back to the side.
We reposition the hinge with the help of the small knife to find the exact position and we define the front trace thus obtaining the entire perimeter of the hinge.
To trace the depth of the hinge, i.e. the depth of the mortise to be made, using the gauge we could take the thickness of the leaf as a reference so as to insert it flush with the wood.
Instead, I prefer to place the hinge on the gauge so that the tip of the gauge is positioned just under half the thickness of the pin. This will allow me to insert the hinge not quite flush with the wood but slightly below.
We lock the gauge in this position and trace the depth line of the mortise on the side of the piece of wood, being careful not to go beyond the lateral measurements already traced. To obtain the mortise and remove the material, we use a slightly wider chisel than the mortise to be made. Let’s not start from the trace made but a millimeter ahead so as not to move the line.
With a hammer and chisel we work along the entire length of the mortise trying to reach the depth trace and proceeding by removing a little material at a time. Always hold the chisel with the bevel pointing in the direction we are moving and be careful never to go beyond the depth line. Let’s also be careful, during this phase, not to go beyond the frontal trace and let’s stop about a millimeter from the edge.
At this point we remove the material that we have loosened by positioning the chisel on the depth trace and orienting it slightly upwards starting from the center of the mortise and proceeding towards the ends. While removing the material, be careful not to break through the long wall of the hinge and if we feel that the wood does not come off, resisting, we go over lightly with the chisel, deepening the mortise. The wood in this area has little support and it is easy to damagr the sides of the mortise. Finally, we refine the perimeter of the mortise by positioning the chisel directly in the traces made with the knife, removing the last tenths of a millimeter of wood left. We can possibly also use a mini router plane to level the mortise. During this entire phase it is essential to proceed delicately and without haste because, as said, it is extremely easy to damage the edges of the mortise and recovering the damage would be problematic.
Once finished we insert the hinge which should fit perfectly into the mortise without forcing or leaving empty spaces.
With an a square awl we make invitation holes for the screws. We try to make the pre-holes slightly off center and towards the inside wall of the mortise so that the screws tend to tighten the hinge well against the inside. Do not exaggerate with the off-center or the screws will screw into the edge of the slot.
If we are using hinges and therefore brass screws, a good practice, in addition to pre-drilling, is also to put a little wax on the tip of the screw. Brass screws are more fragile than steel screws and this will make it easier to drive them into the wood. An alternative to wax is to first screw in a steel screw of the same diameter so as to prepare the hole for the brass screw. Finally, we try to align the position of the cuts of the screws, whether slotted or star-shaped, in order to obtain a satisfactory aesthetic.
Once the hinges are in place in the lid or door we align the hinged component in position on the other hinge piece and use the knife to mark the exact position of both hinges on the outer edge of the hinge piece. Finally we follow exactly the procedure described above also for the second element.
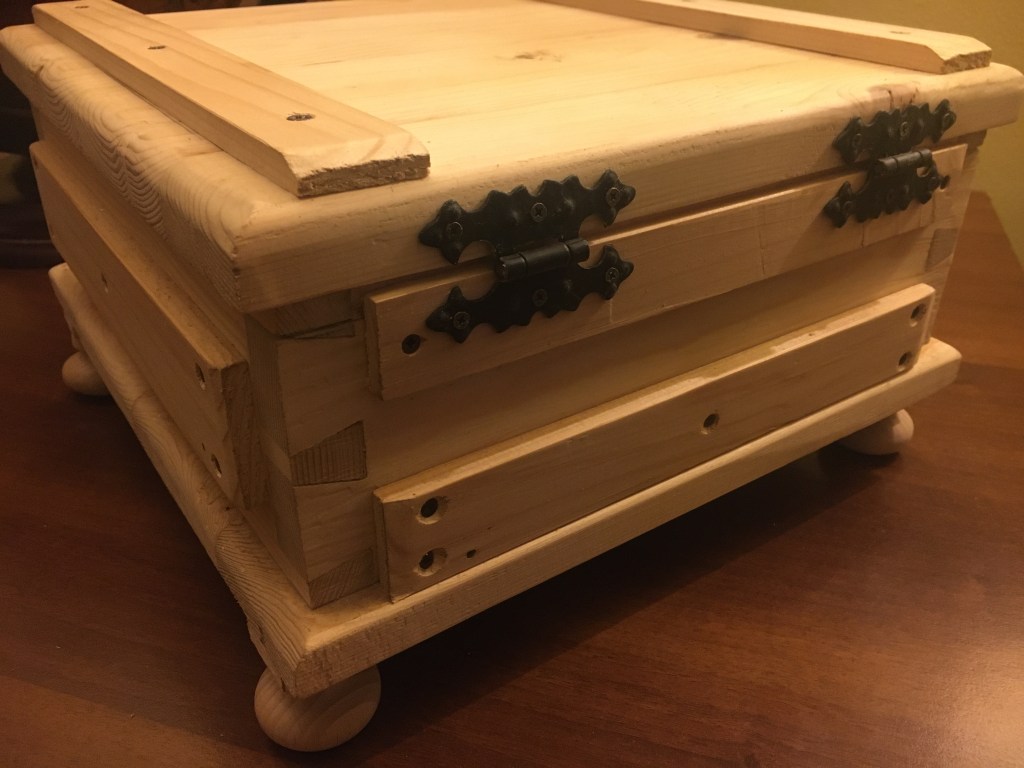
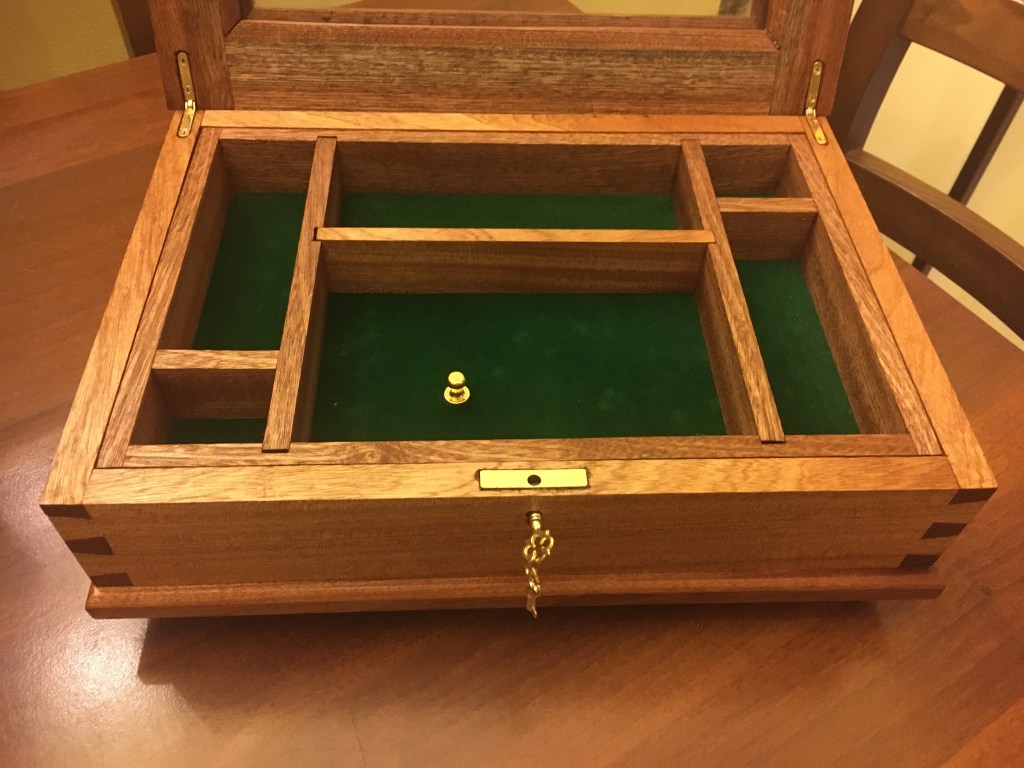
If we are putting the hinges on a wooden box, the final proof of the goodness of our work will be the correct closure of the lid on the base. Assuming that the box has been well leveled between the lid and the base, if the lid does not rest perfectly on the base of the box then we will have to intervene in various ways.
If we are lucky and the defect is minor, it will only be a question of tightening or loosening the screws of the hinges.
If the problem is more serious, you need to figure out how to intervene. If the lid protrudes forward with respect to the base, we will have to retract the hinge of the base itself or bring the hinge of the lid forward. We will have to do the opposite operations if the lid remains set back from the base. It is always advisable to intervene on the piece where the hinge is moved forward as it will be a question of removing material instead of leaving empty spaces left by the backward hinge. We will move the hinge the same amount as the protrusion we found, helping with a gauge to take the measure.
If the lid remains crooked with respect to the base, we will instead have to check the alignment of the hinge with respect to the edge of the box and intervene on the perimeter of the mortise and/or act on the screws.
It may also happen that the lid only closes at the back and remains suspended at the front or vice versa. In these cases it is necessary to check the depth of the opening and raise the mortise with a thickness if the opening/s if the lid remains open on the front or lower the mortise if the lid closes at the front but leaves space on the back of the box.
In all of these cases it will probably be necessary to fill the holes previously made in the wood and drill new holes.
Having made various wooden boxes, I realized how important the insertion of hinges is. If we think about it for a moment, when a box is opened, especially if it is dark coloured, the brass hinges are the first that catch the eye and if these have been inserted incorrectly or even just the screws are misaligned, the effect will not be agreeable.
Very often the successful insertion of this type of hinge does not depend on our inexperience but on the mediocre quality of the hinges. Also for this reason I suggest buying good quality hinges, with an adequate thickness and which do not have play on the central pin (i.e. which have a minimum space between the central pin and the openings but which still allows movement without jamming).
A company that produces well-made hardware (including the hinges I mentioned) is Brusso Hardware which is based in the USA but which, to better serve the European market, has also recently opened in the Netherlands. The prices are objectively high but I think the strength and quality of the products offered are unmatched. I leave above the link of the manufacturer.
If we plan to make wooden boxes, as often happens to me, I can recommend buying flat stop hinges with an opening stop which, by limiting the opening to a few degrees beyond 90 degrees, will allow the lid of the box to be kept open without having to insert the classic side chain.

Lascia un commento