APPORTARE VARIAZIONI AL BANCO DA FALEGNAME / IMPROVING THE WORKBENCH
English translation at the end of the article
Il banco da falegname è estremamente importante per chi pratica la falegnameria amanuense. Ne abbiamo già parlato in questo vecchio articolo Come costruire un banco da falegname / How to build a woodworking workbench. Specialmente un tempo, quando non esistevano i macchinari, era praticamente l’unico piano di lavoro dove avvenivano tutte le lavorazioni.
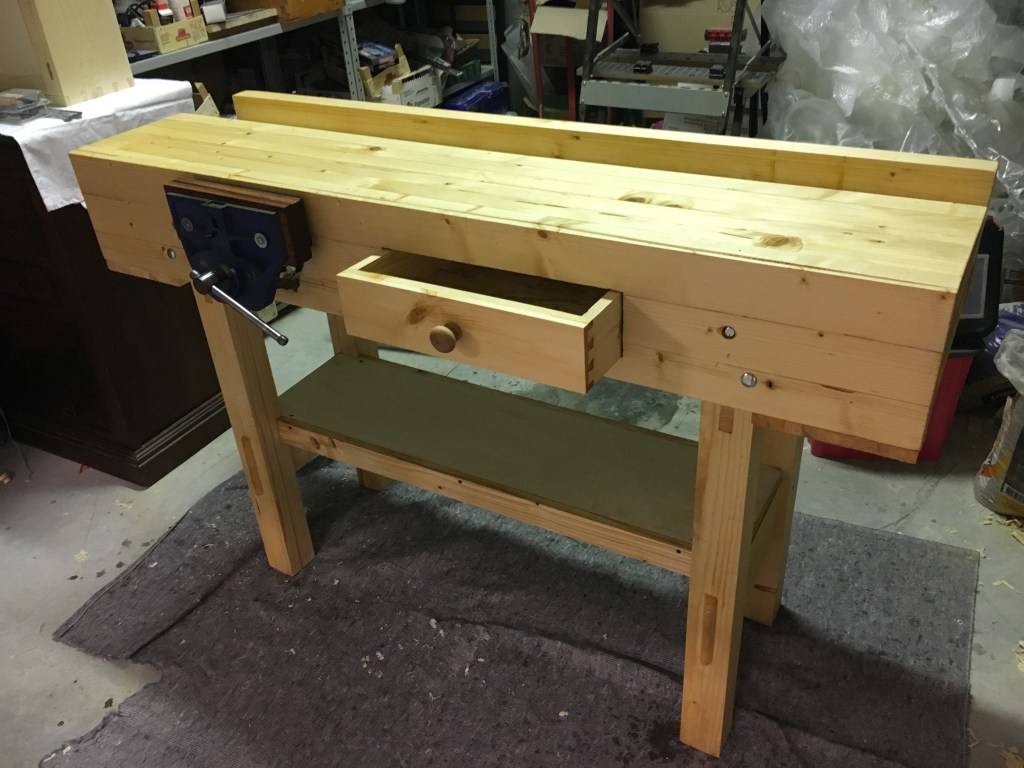
Il banco di lavoro è altamente personalizzabile ed è quindi preferibile costruirselo così da poterlo adattare alle personali esigenze di lavorazione. Il mio banco è la fedele riproduzione di quello realizzato da Paul Sellers, seppure con misure più contenute. Ed anche le migliorie, o forse sarebbe meglio parlare di variazioni che ho apportato, sono le stesse che ha inserito lui sul suo banco.

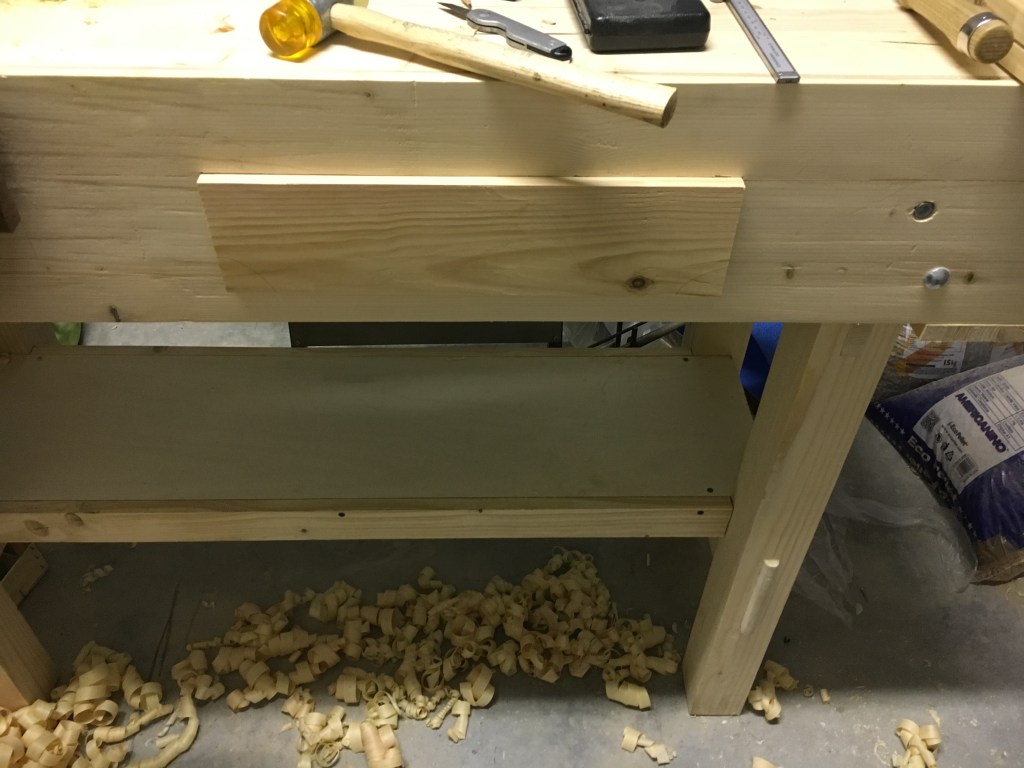
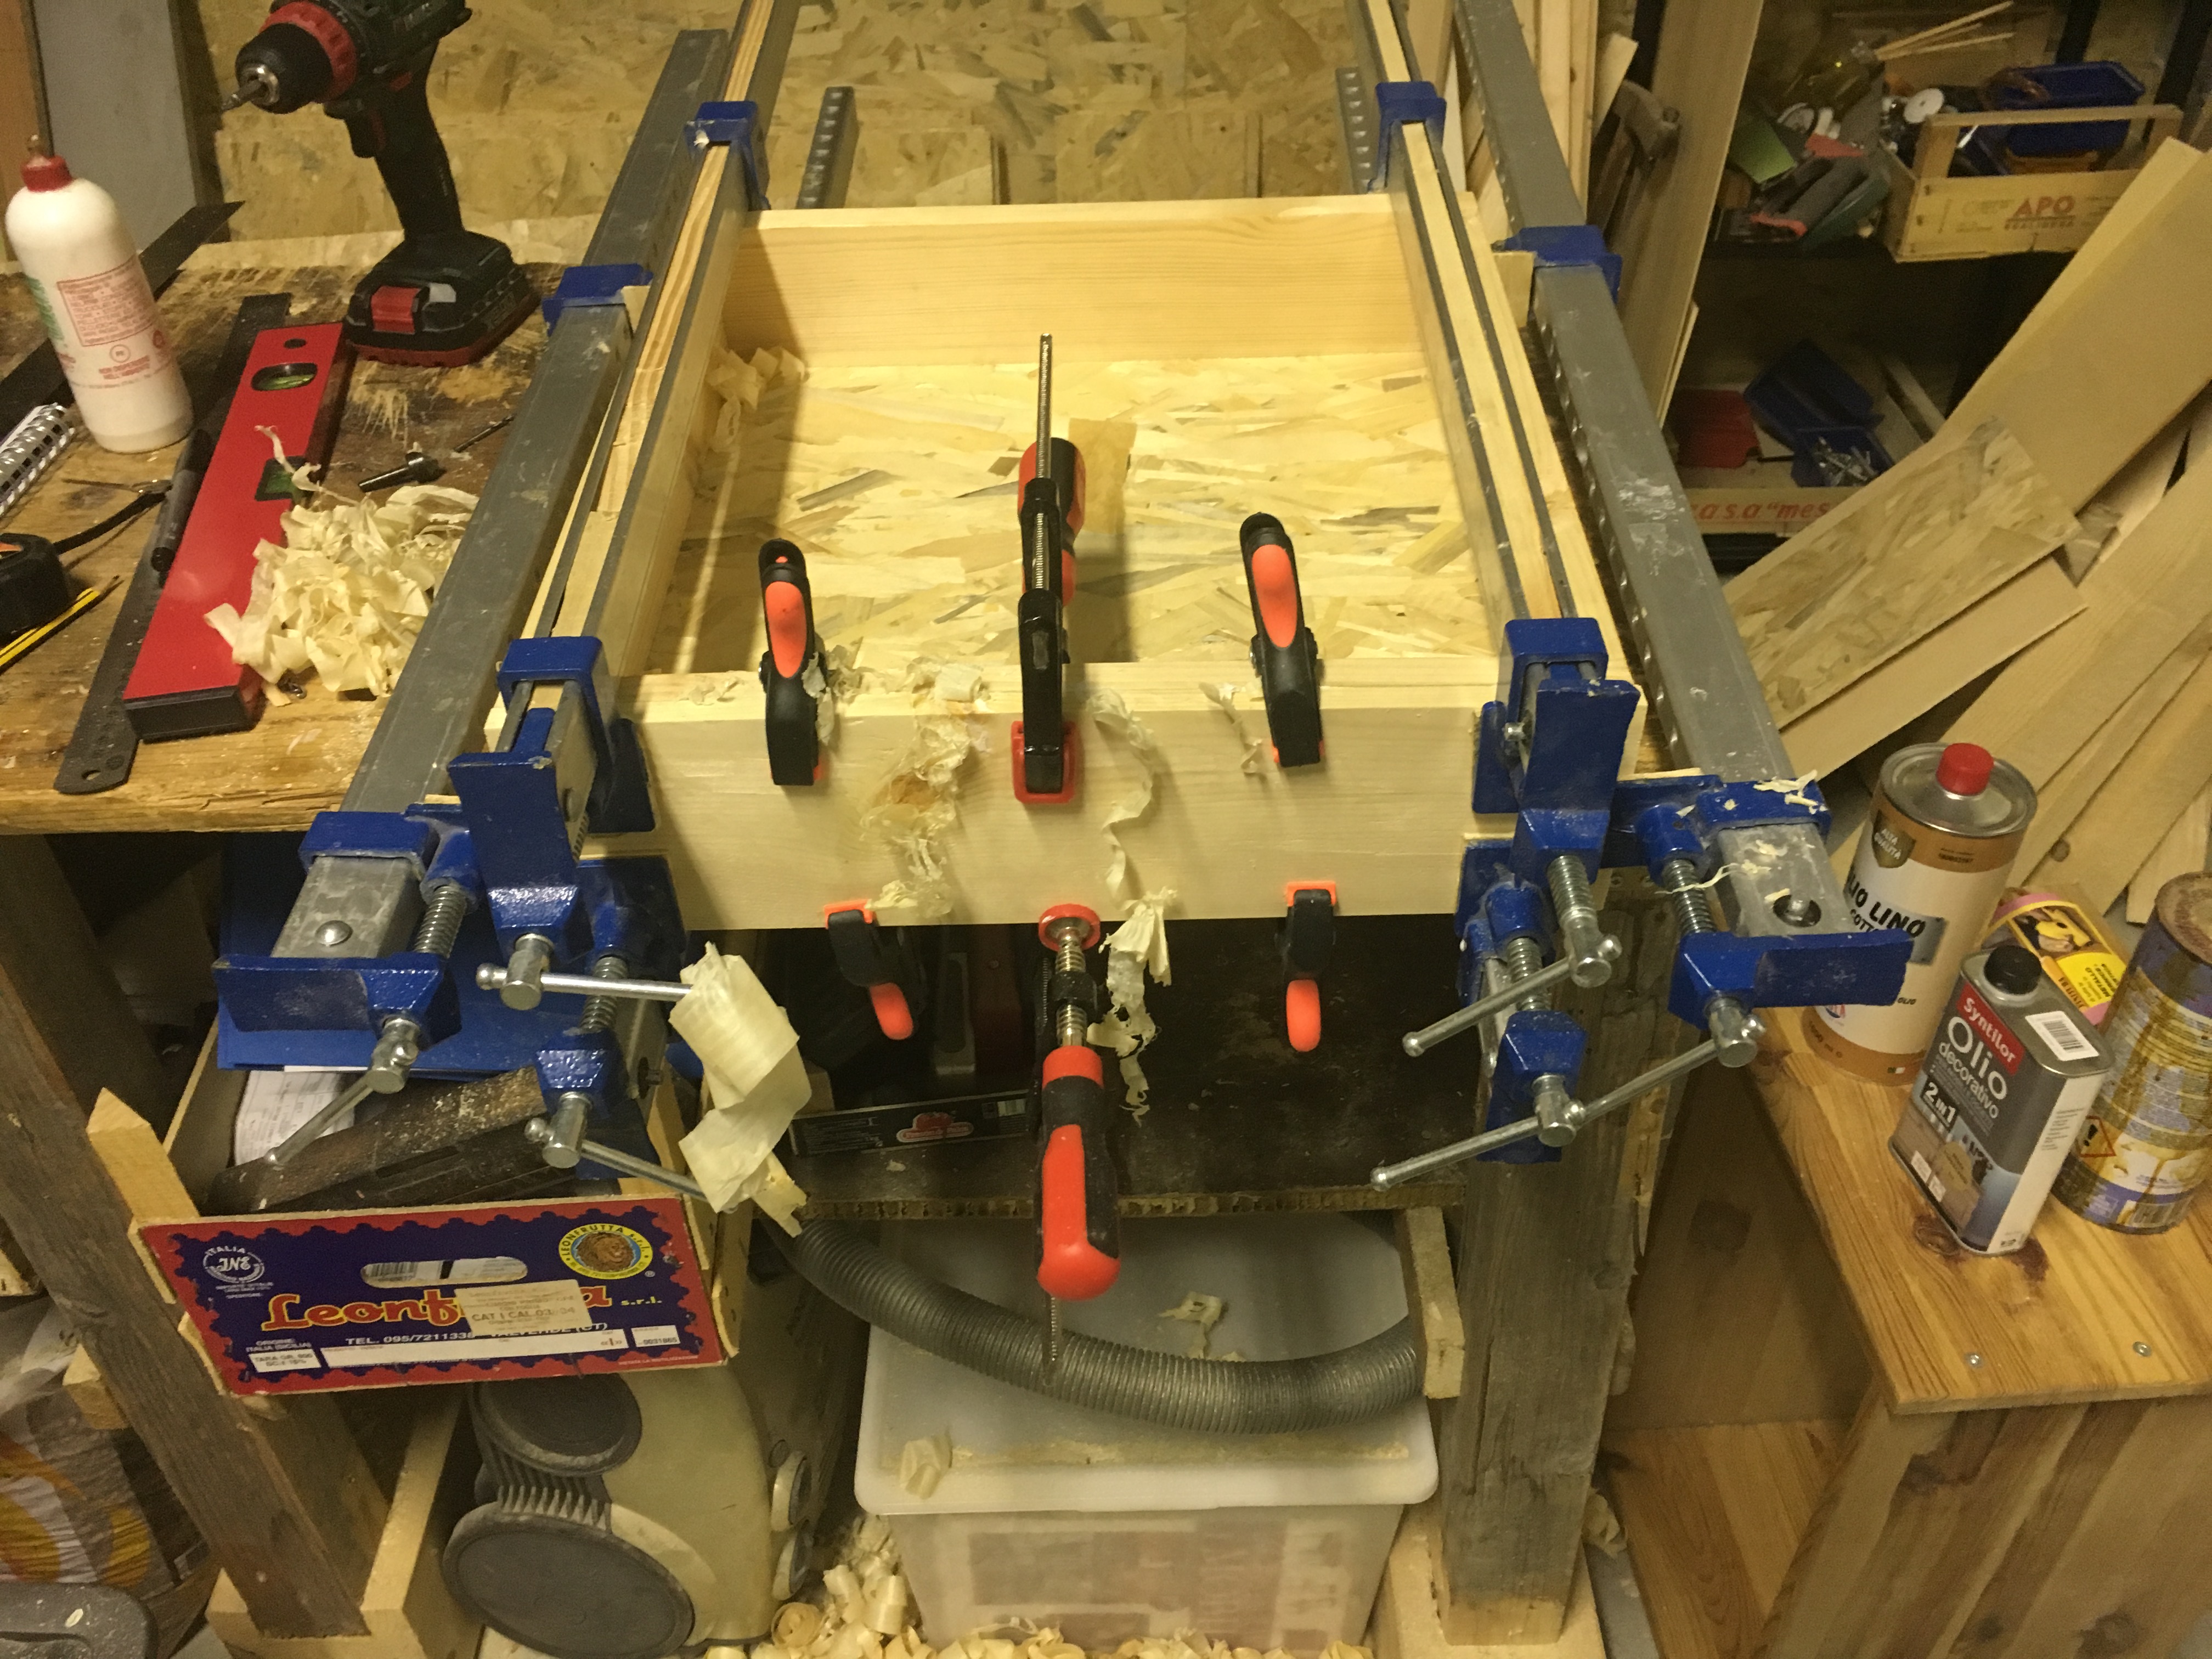
La prima e più importante variazione è stata l’inserimento nel banco di un cassetto frontale. Per realizzarlo ho dapprima segnato a matita la sagoma del frontale, avendo cura che l’ingombro del cassetto non andasse ad interferire con il funzionamento della morsa.
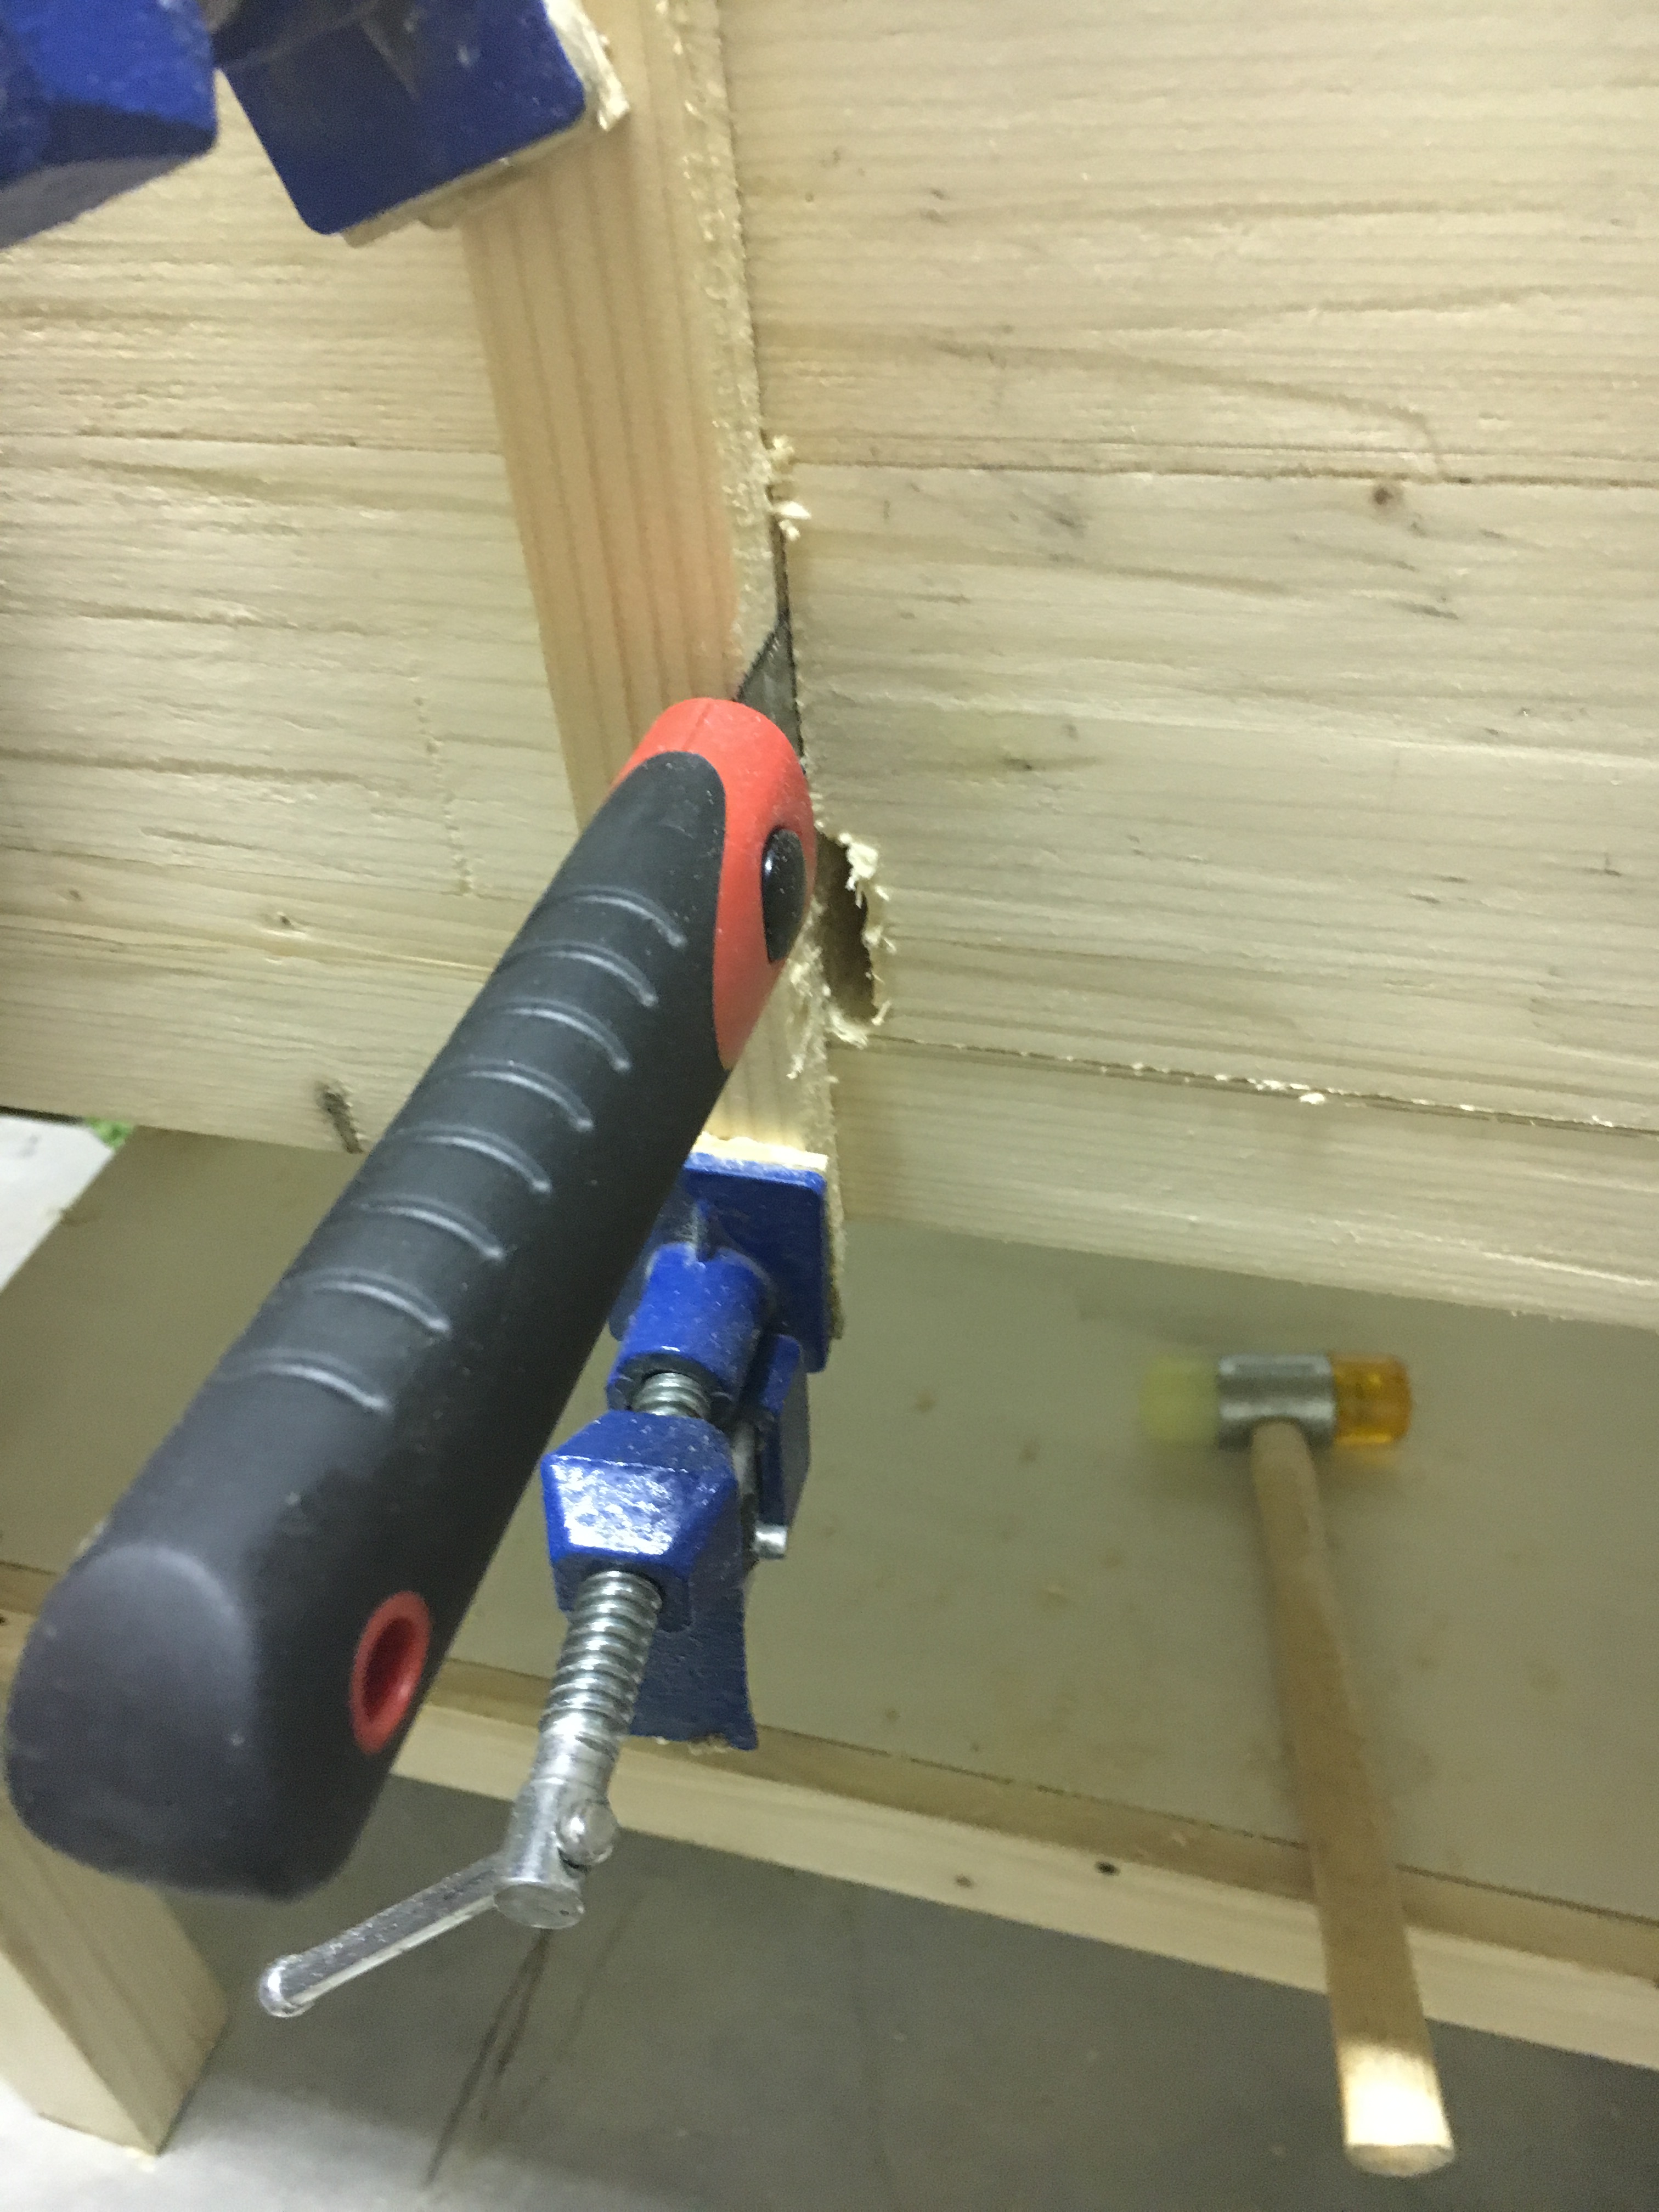

Con l’aiuto di una guida in legno, fissata con dei morsetti, ho dapprima segato con una sega giapponese tutto il perimetro tracciato a matita ricavando così l’apertura frontale del cassetto.
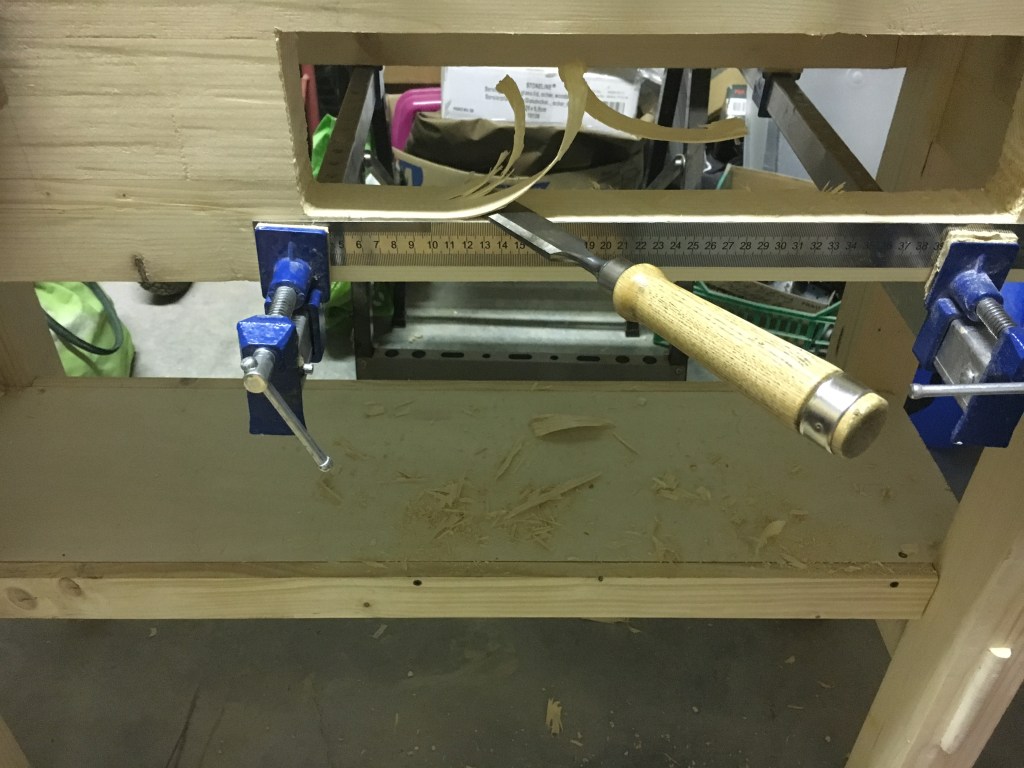
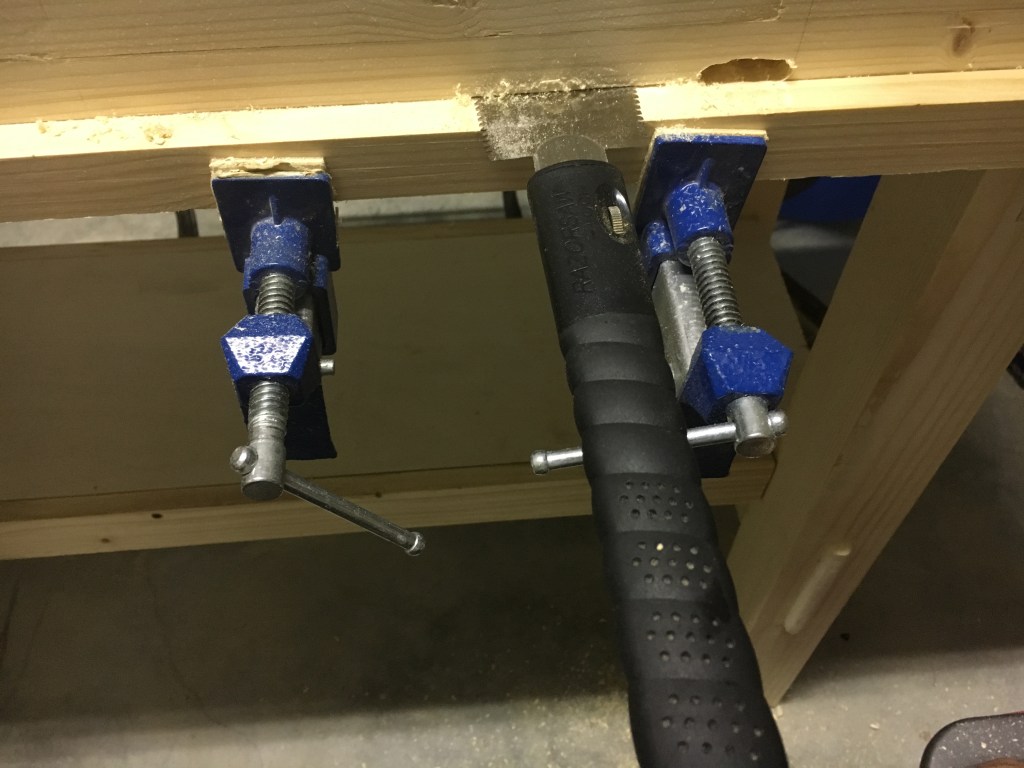
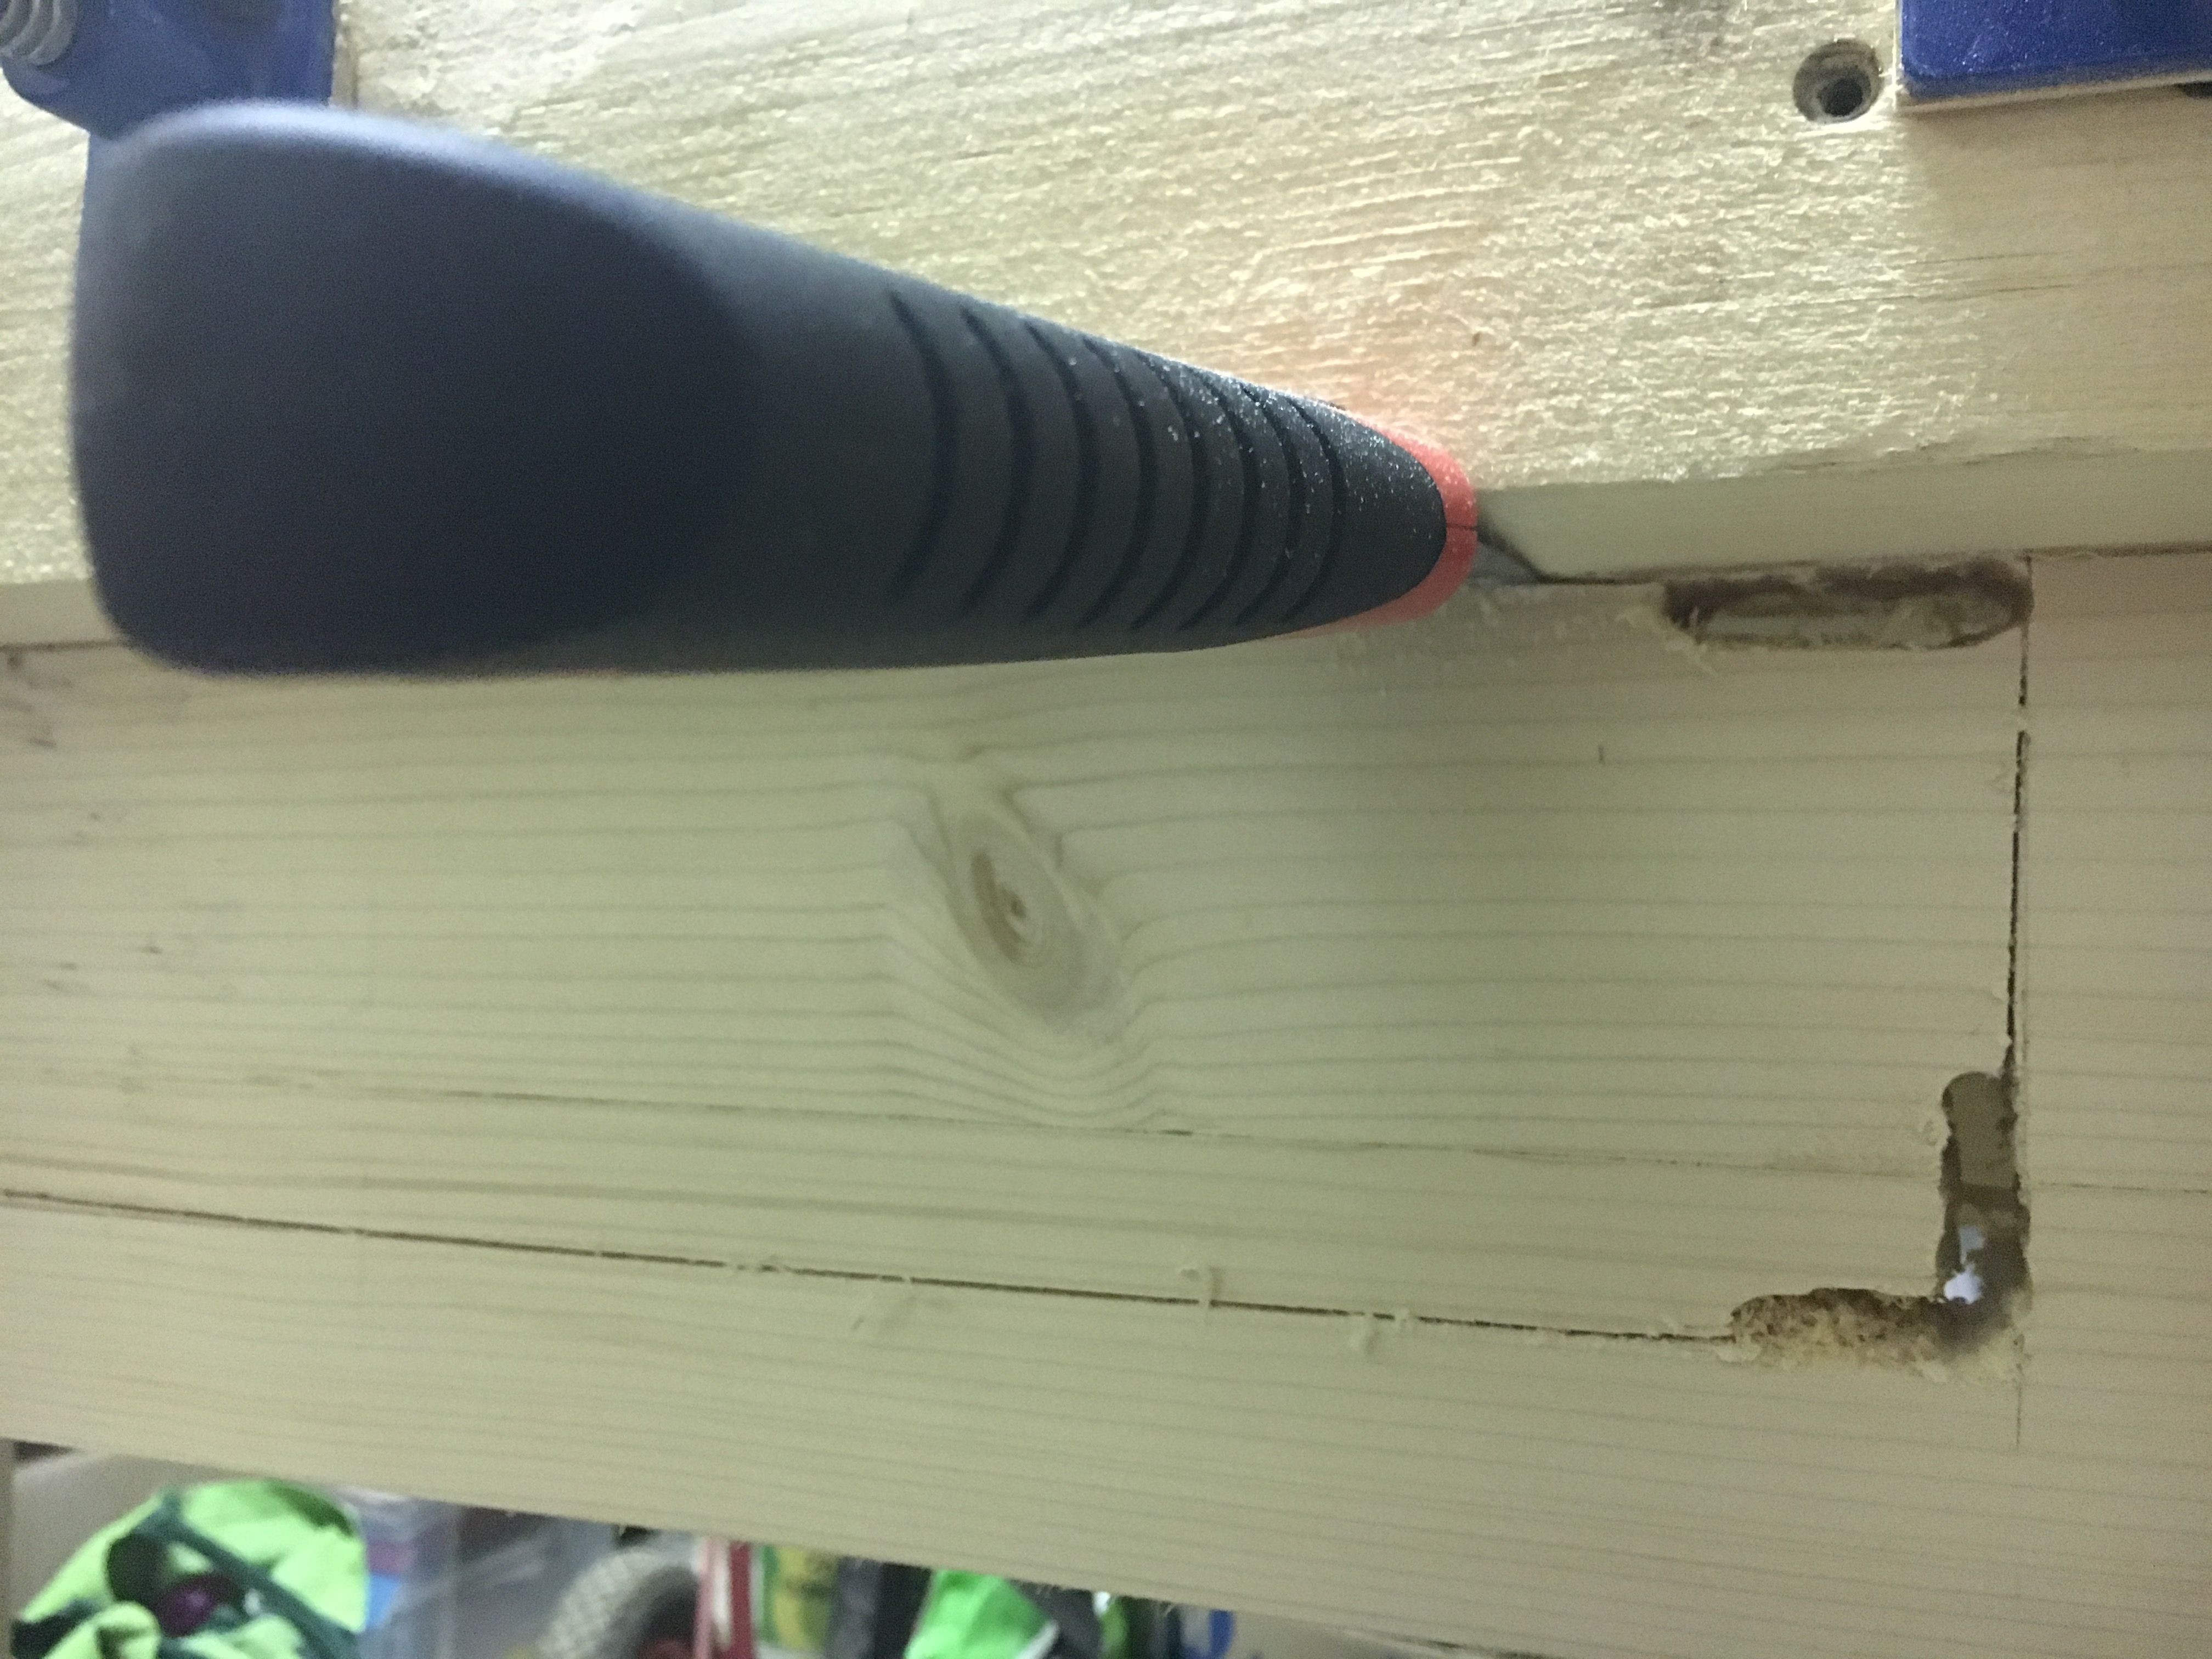
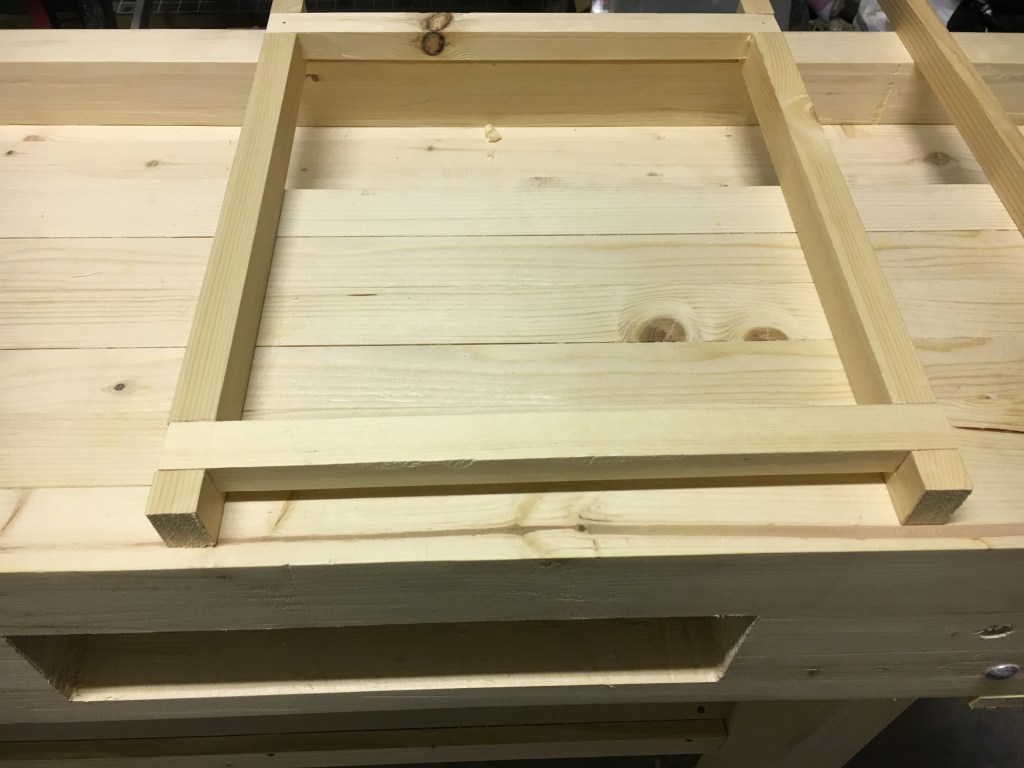
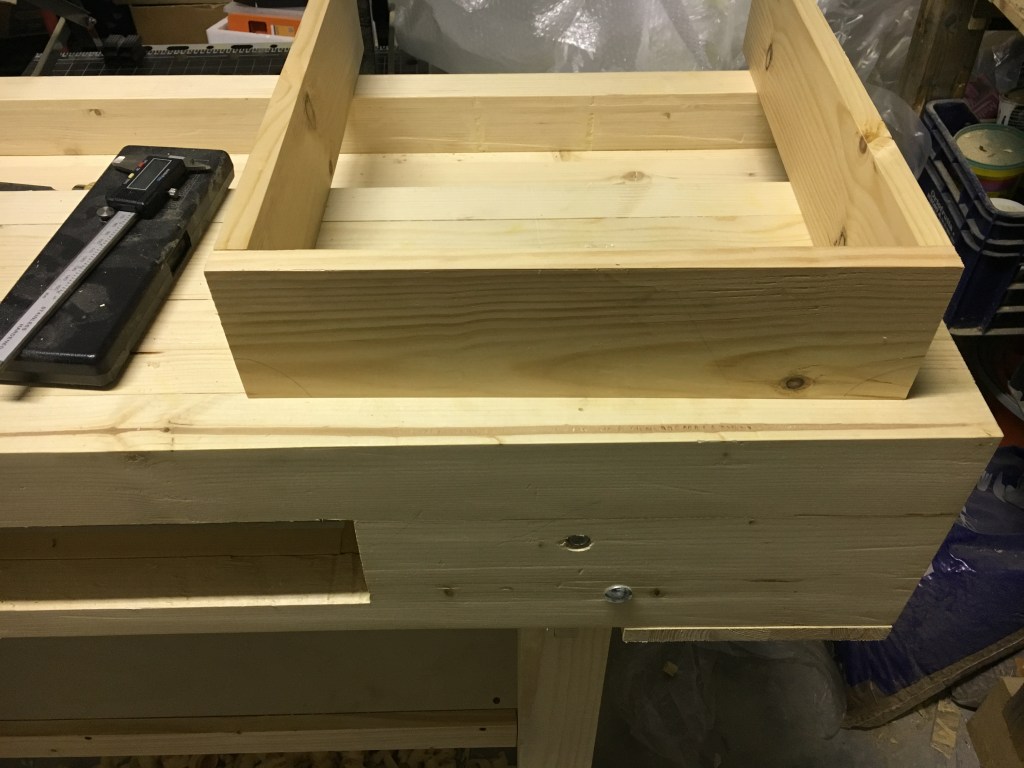
Mi sono avvicinato il più possibile alla traccia utilizzando successivamente scalpelli e raspe. In seguito ho costruito, con incastri a mezzo spessore, la struttura inferiore interna che avrebbe dovuto sostenere tutto il cassetto e le due guide laterali (fissate alla stessa struttura) che impediranno al cassetto di deviare lateralmente. A loro volta la struttura e le guide sono state fissate sotto al banco per mezzo di viti.
Ho quindi ricavato il frontale del cassetto provandolo a più riprese nell’apertura frontale del banco.
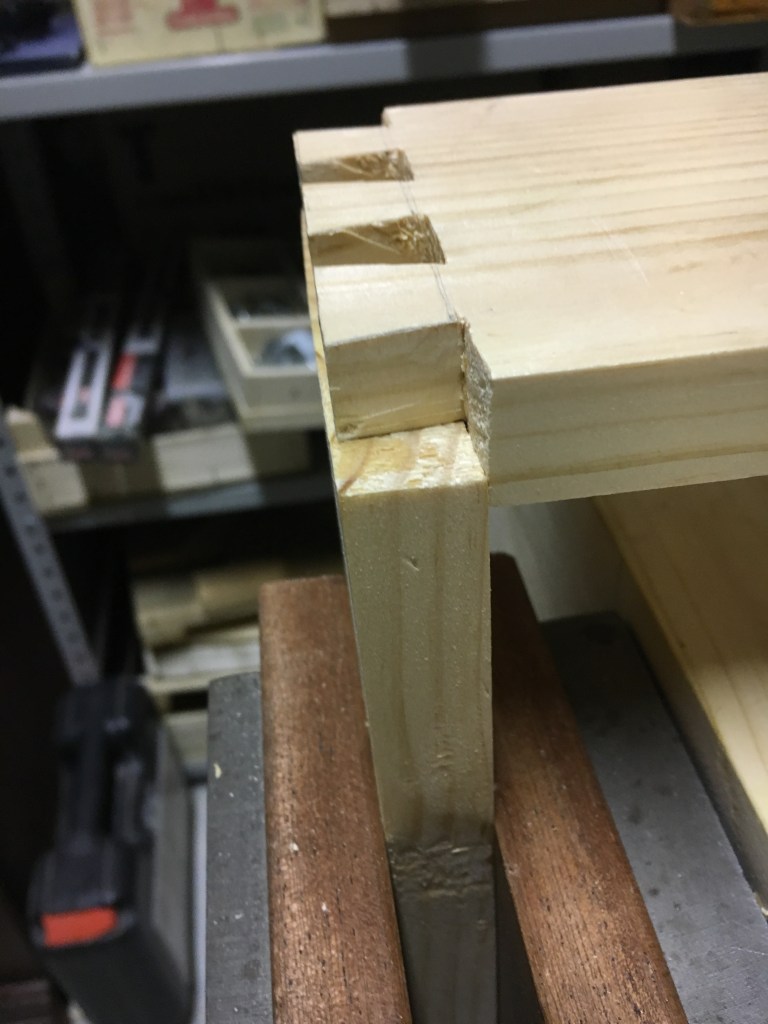
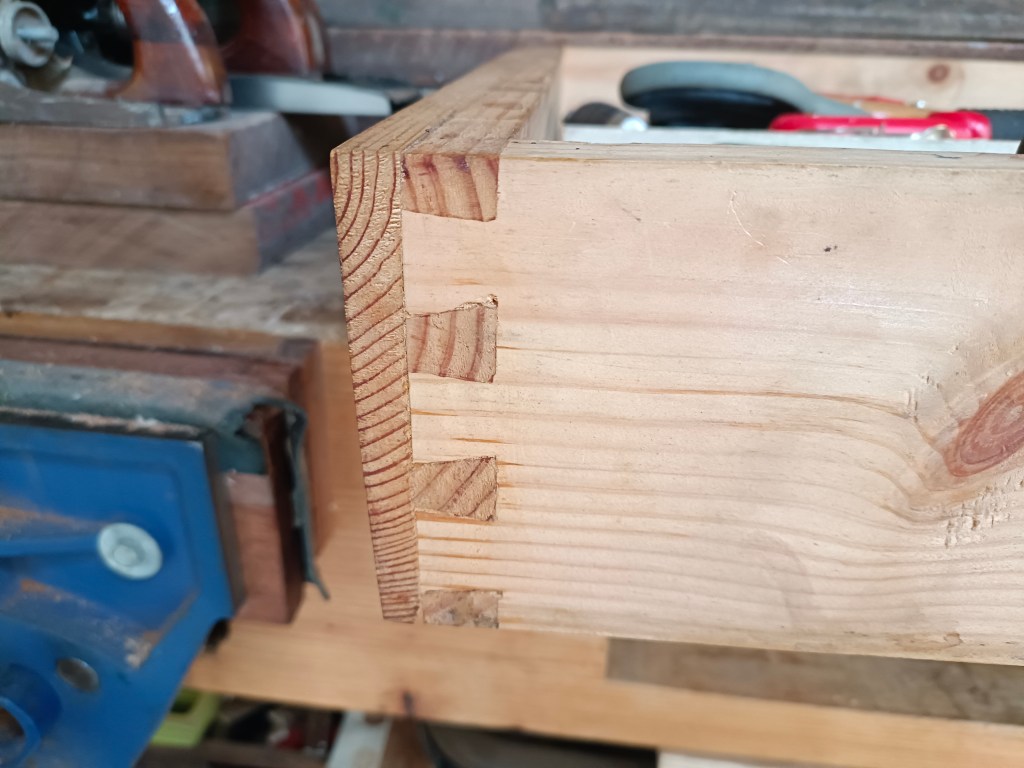
Una volta adattatosi perfettamente, ho tagliato i due pezzi laterali e quello posteriore, tenendo conto per le loro misure anche dello spessore stesso dei pezzi ed ho realizzato quindi gli incastri a coda di rondine solo per il frontale del cassetto.
Ho poi realizzato un’ulteriore pannello frontale fissandolo al frontale del cassetto per mezzo di viti.
Il pannello posteriore del cassetto è fissato ai laterali con delle viti mentre il fondo del cassetto, in OSB, é stato inserito nella scanalatura ricavata negli elementi del cassetto. Una volta realizzato il cassetto ho piallato il frontale ed i laterali fino a che lo stesso potesse scorrere liberamente e senza intoppi.

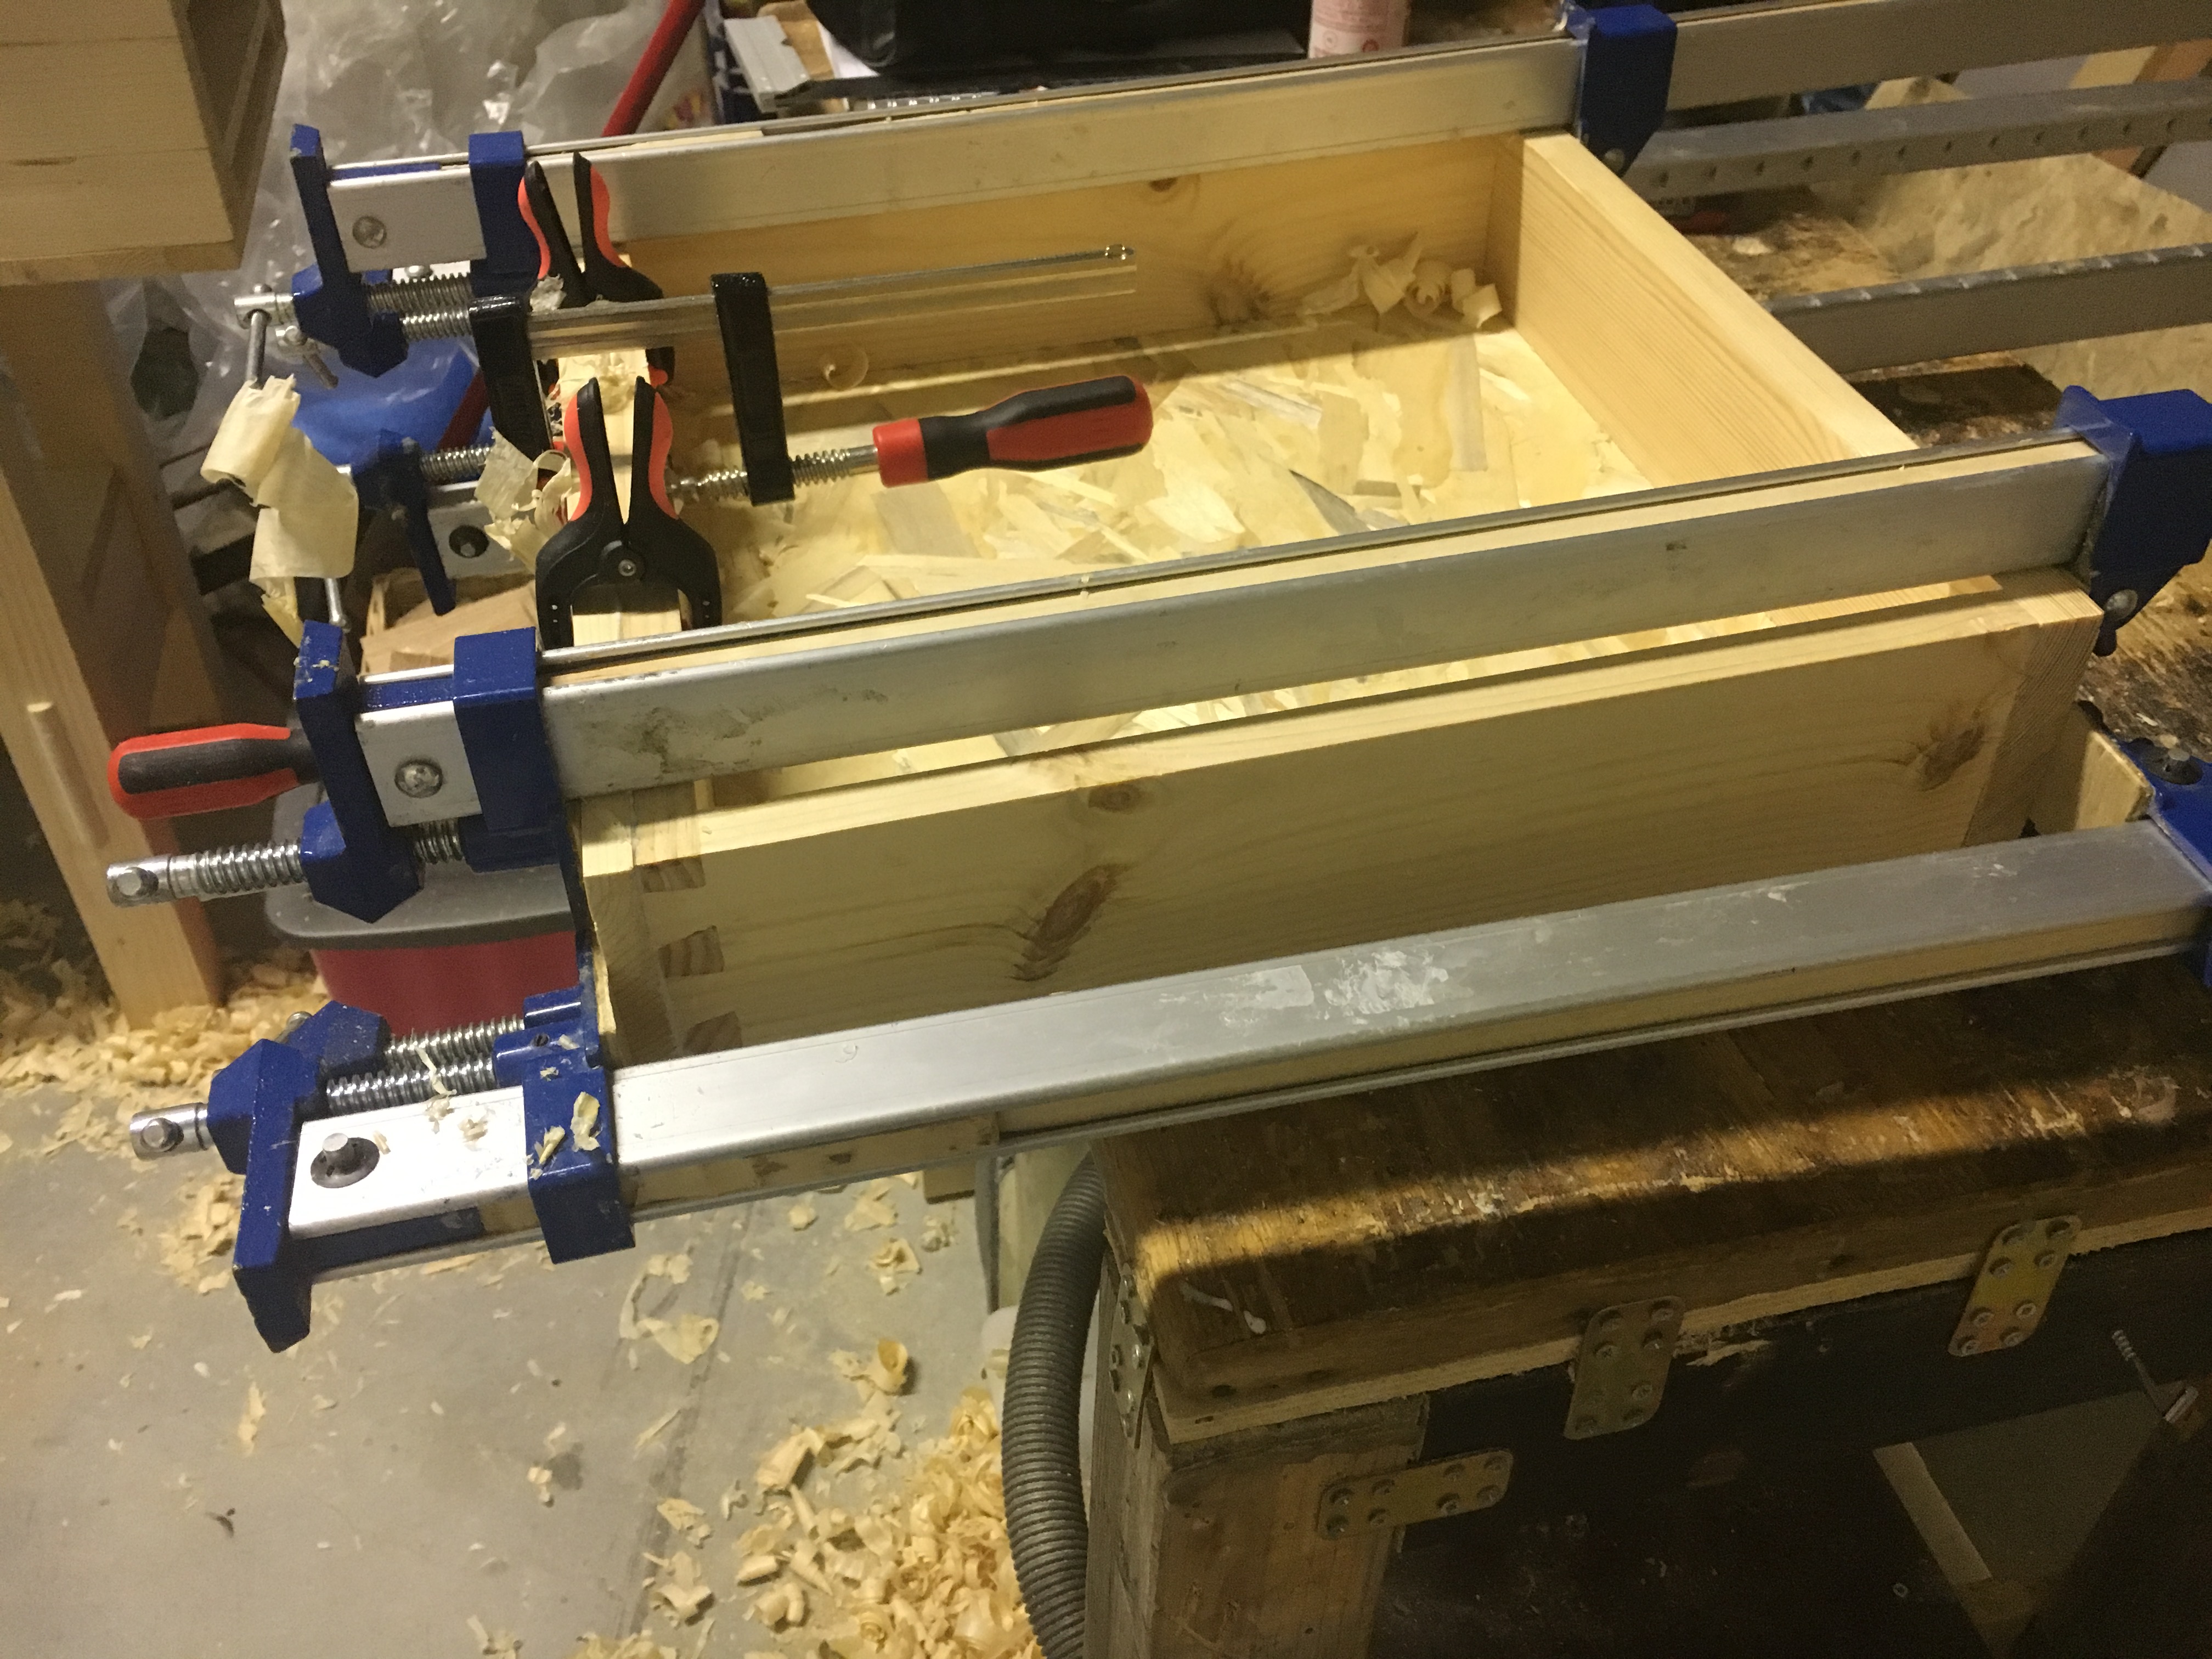
Per finire ho inserito delle gomme antiurto sul retro ed un pomello frontale. Quello che più mi premeva del cassetto era che fosse il più grande e capiente possibile. Il massimo che ho potuto fare é stato 40 cm. X 40 cm. X 10 cm. Prevedendo inoltre il peso che sarebbe andato a sostenere ed il suo intenso utilizzo ho preferito praticare l’ incastro a coda di rondine tra il frontale ed i laterali, ovvero nella parte più sollecitata dallo sforzo.

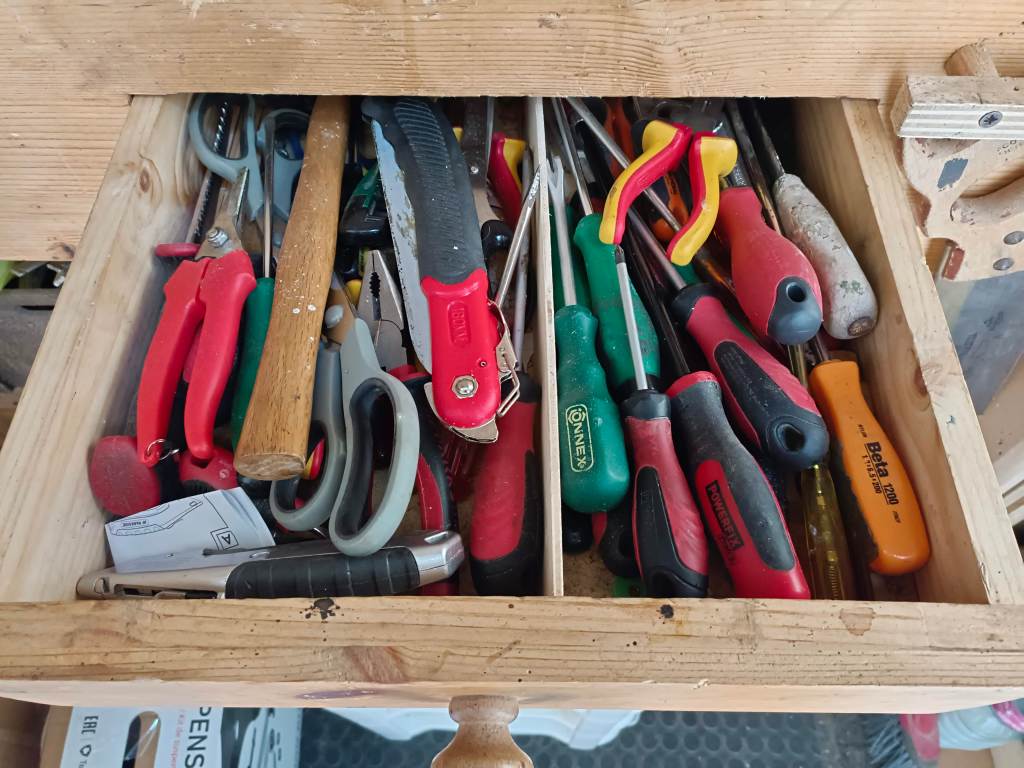
Come si vede dalla foto il cassetto é veramente pieno e sono contento che, a distanza di 5 anni dalla sua realizzazione, non abbia mostrato alcun tipo di cedimento. Se interessati a vedere la fase di realizzazione di un cassetto vi rimando a questo link Cassetti tradizionali e code di rondine seminascoste / Traditional drawers and half lap dovetails.
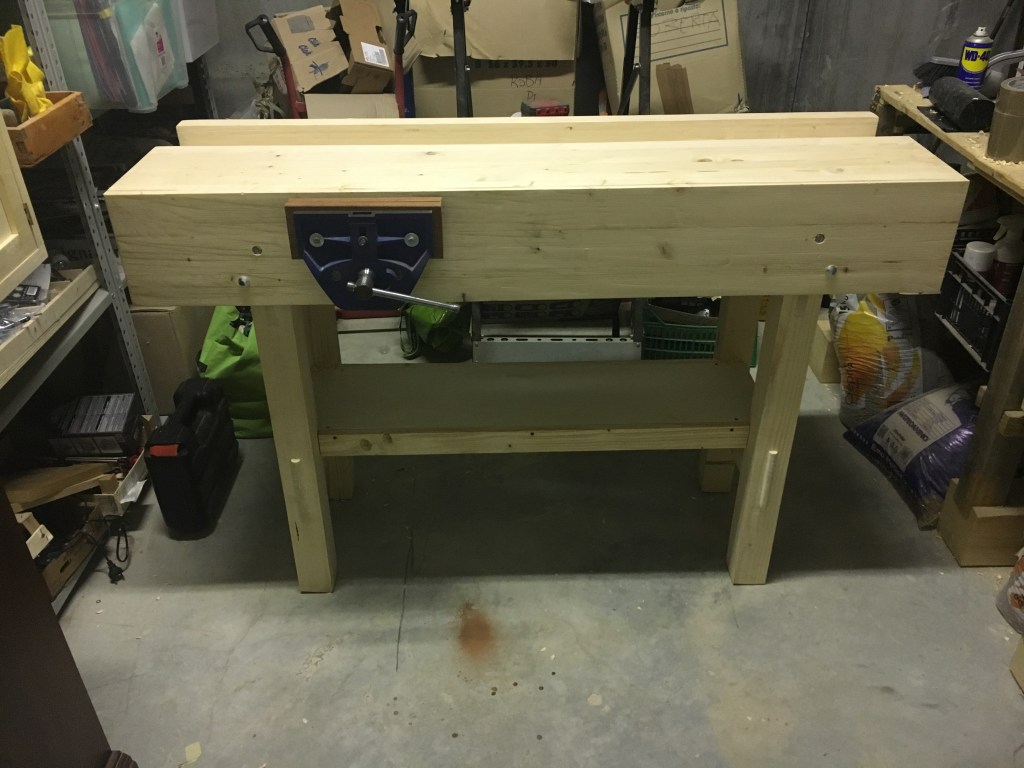
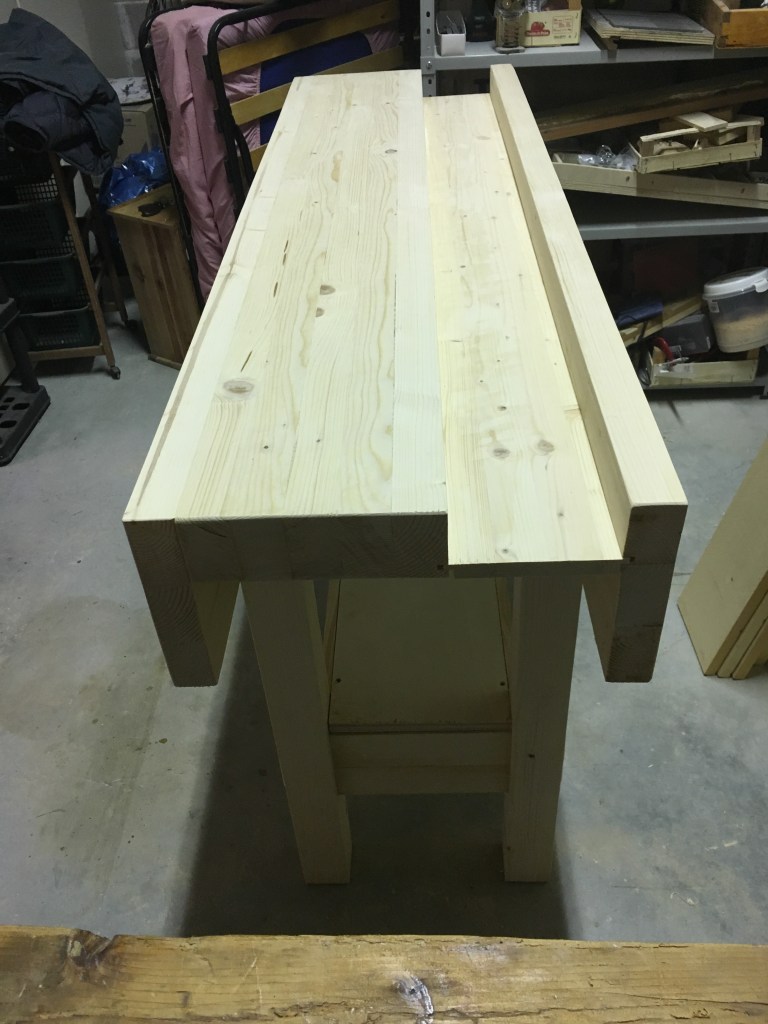
La seconda variazione è stata l’inserimento di un ripiano sotto il banco. Il ripiano può essere utilizzato per poggiare il legname oppure degli elettroutensili oppure, come nel mio caso, ospita vari pezzi di scarto raccolti in un contenitore ed una scatola con tutti i morsetti. Il ripiano offre il duplice vantaggio di conferire maggiore rigidità al banco e al contempo appesantirlo grazie al peso degli oggetti che é chiamato a sostenere. Il mio ripiano é stato realizzato con multistrato di 2 cm. di spessore (quindi molto robusto) ed è stato racchiuso in una cornice che a sua volta poggia ed é fissata per mezzo di viti ai traversi delle gambe del banco. Posso assicurare che il ripiano, nonostante i grossi carichi, si è comportato benissimo fino ad oggi non mostrando alcun cedimento.
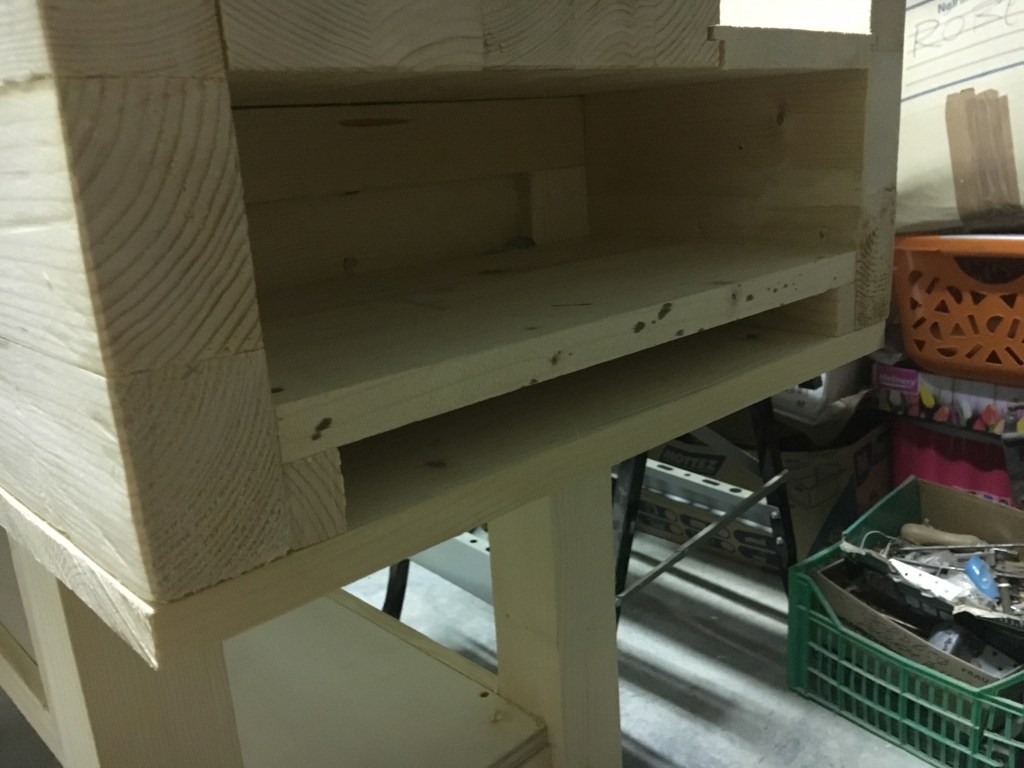
Un’ulteriore variazione fatta al banco consiste nell’inserimento di alcuni ripiani ai lati del banco. I ripiani, posti sia sul lato destro che su quello sinistro, creano dei vani dove è possibile alloggiare tutto il necessario per l’affilatura, quindi pietre, carta abrasiva, strop, guide, ecc. così da averle sempre a portata di mano. Nulla vieta comunque di utilizzare tali spazi anche per altre riporre altre cose, come ad esempio trapani a batteria, ferramenta varia, ecc. Il posizionamento dei ripiani è semplicissimo, basta ricavare dapprima i pezzi delle giuste dimensioni e successivamente avvitarli alla parte inferiore dei frontali del banco, eventualmente inserendo dei distanziatori tra un ripiano e l’altro.
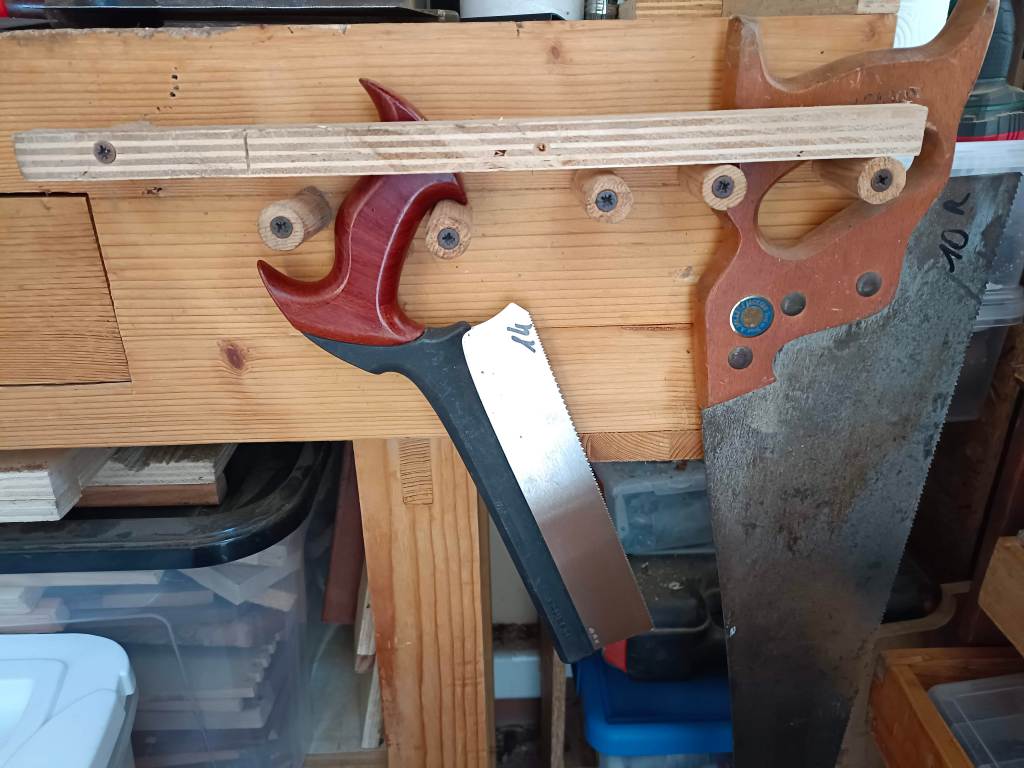
Un’altra variazione consiste nell’inserimento di alcuni supporti sul frontale del banco nei quali poter riporre le seghe che utilizziamo maggiormente. L’ideale sarebbe metterci seghe piccole come le tenon saw e le dovetail saw ma niente vieta di metterci anche una sega più grande, come una panel saw, a patto che non crei intralcio durante la lavorazione. I supporti che ho realizzato sono dei semplici cilindri di legno nei quali ho praticato centralmente un foro ed inserito delle viti che li vincolano al banco. Una stecca frontale alzabile evita che le seghe possano scivolare via dai supporti. Avrei potuto anche sagomare i supporti così da adattarli precisamente alla misura del manico delle seghe, così come fatto da Paul Sellers, ma volevo un qualcosa di più generico ed adattabile alle mie necessità e questi cilindri mi sono sembrati un buon compromesso.
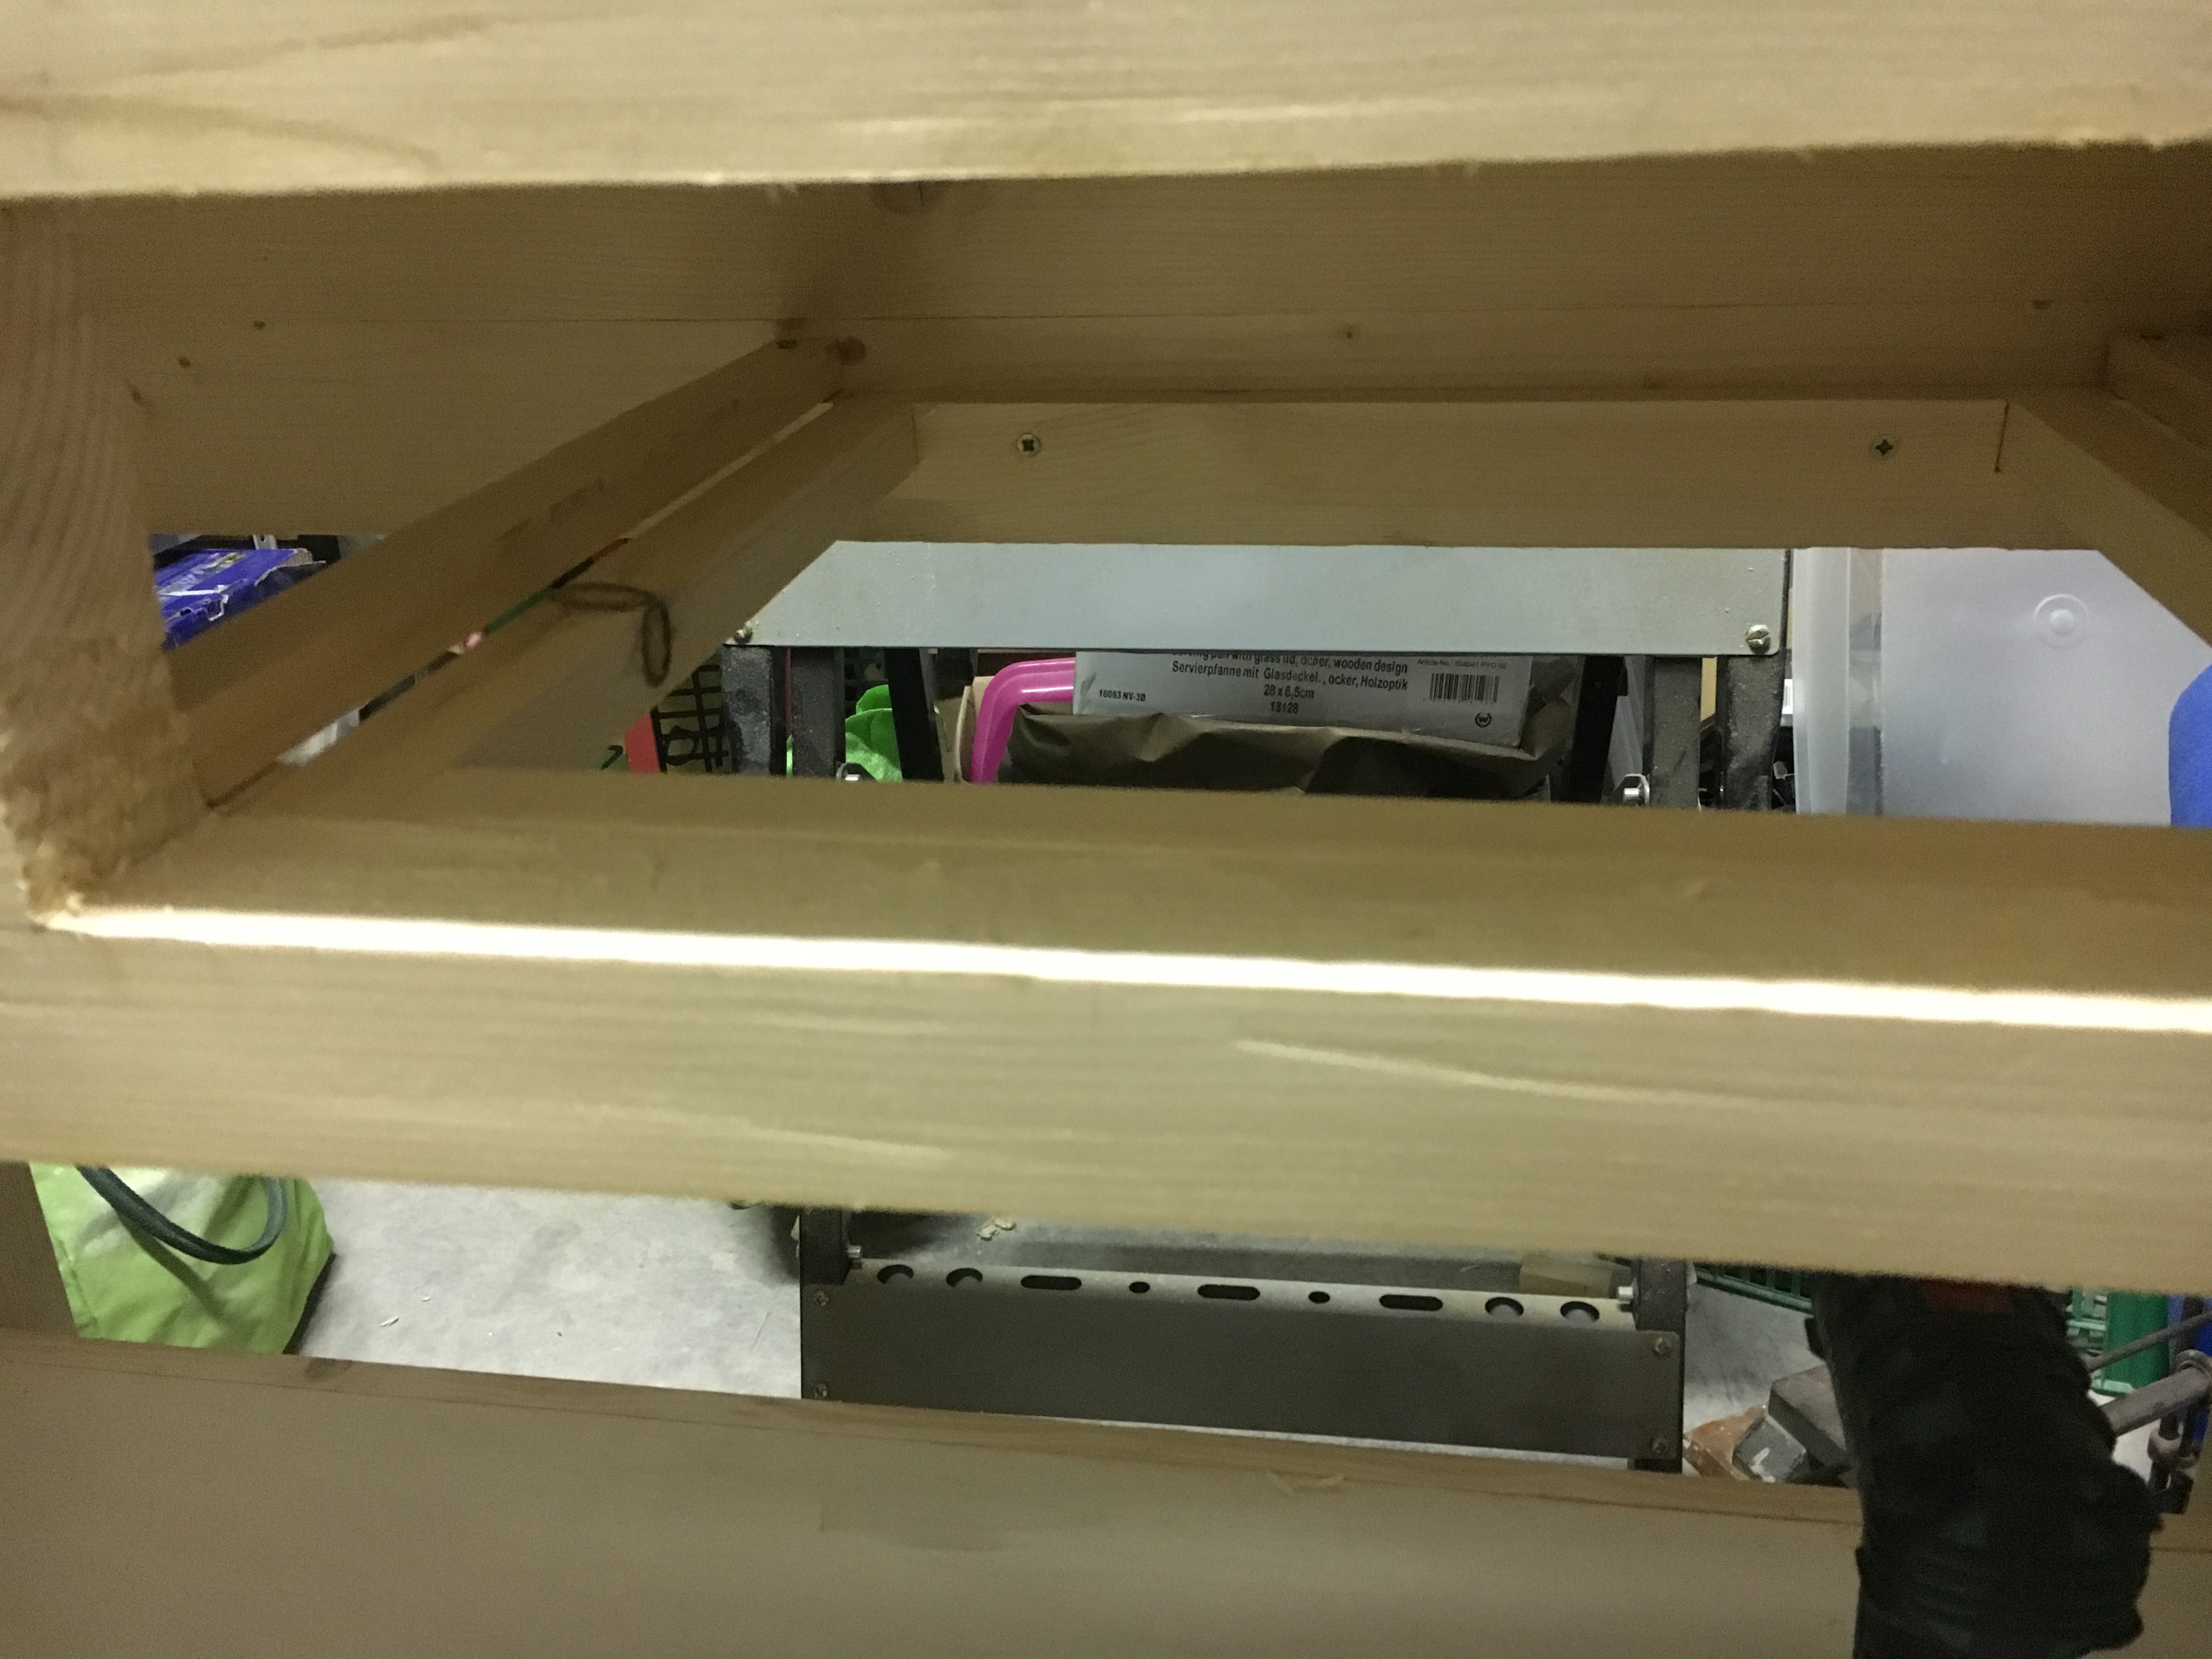
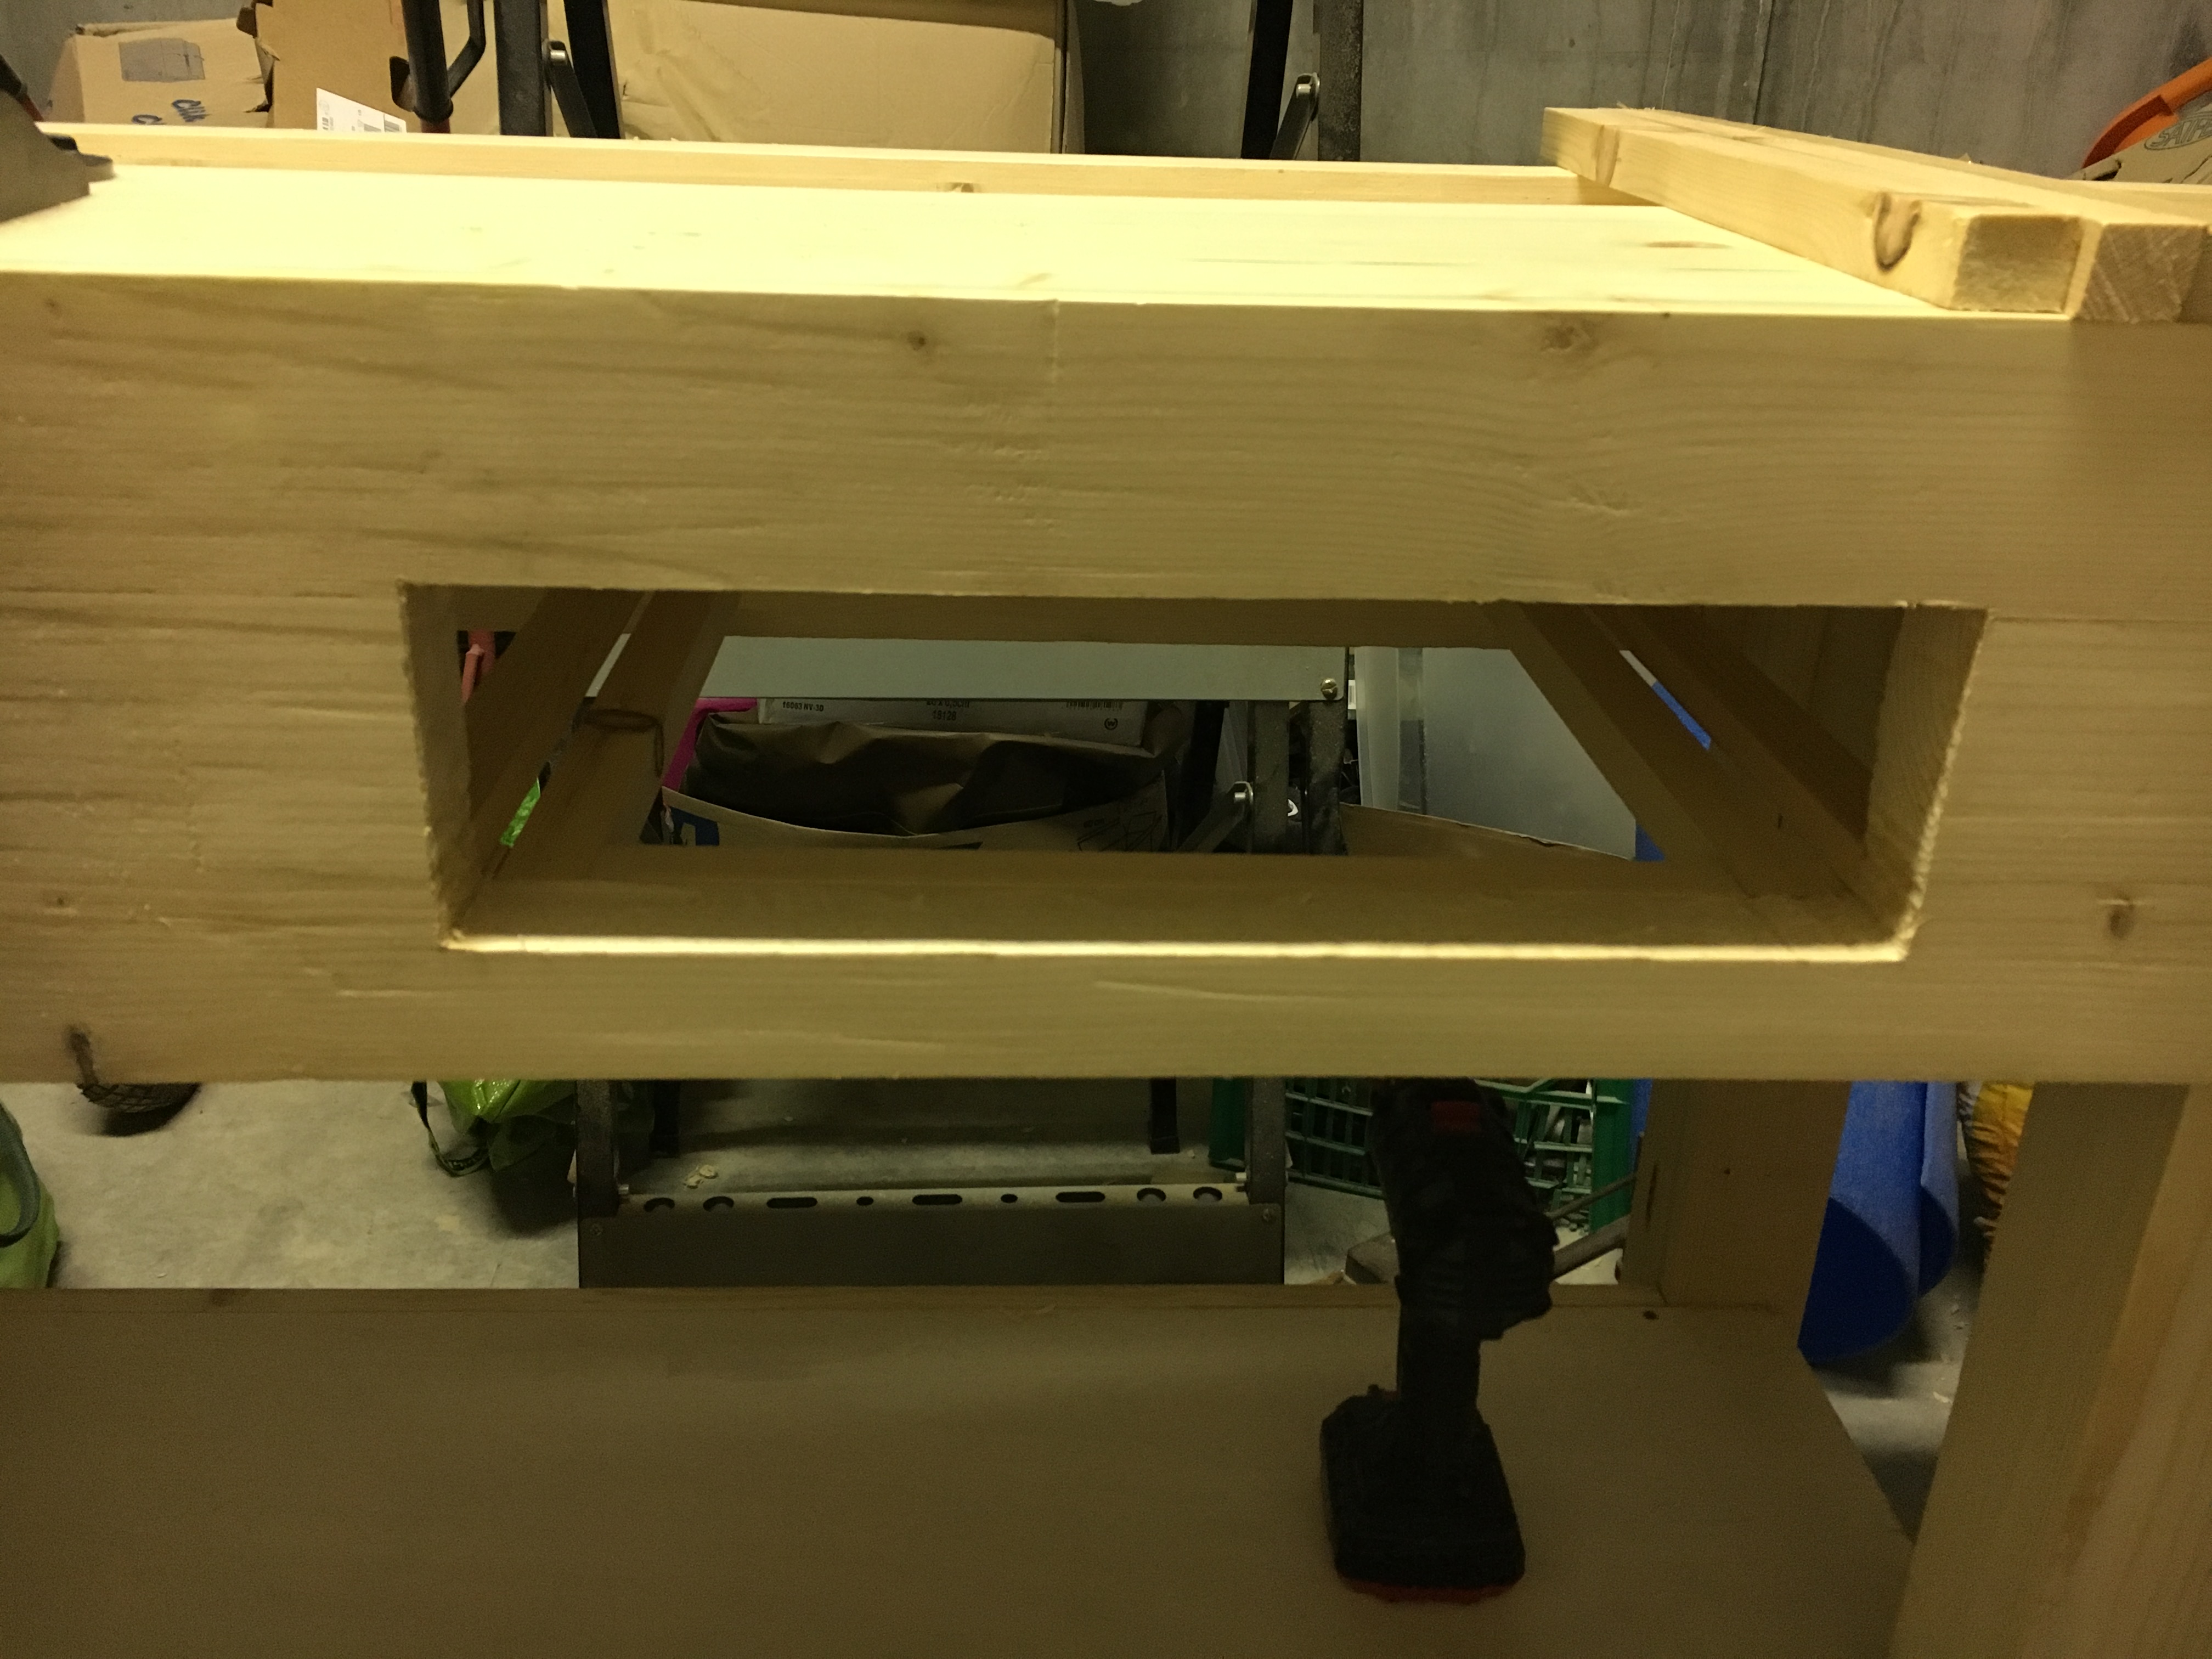
La vasca centrale del banco di solito ospita gli utensili che al momento non stiamo utilizzando e che, stando al di sotto del piano del banco, non possano intralciare durante la lavorazione evitando al contempo che possano cadere a terra. Volendo, potremmo utilizzare questo ulteriore spazio anche per inserire delle pialle oppure delle scatole con dentro gli scalpelli che utilizziamo maggiormente. Ovviamente il posizionamento di tali utensili o scatole va fatto il più possibile lontano da noi, in modo da lasciare più spazio per la lavorazione.
Quelle viste sopra sono solo le variazioni che ho fatto al mio banco da falegname ma é possibile farne molte altre e tutte diverse a seconda del banco che possediamo e soprattutto delle necessità di lavorazione che abbiamo.
_________________________________________________________
The workbench is extremely important for those who practice woodworking by hand. We have already talked about this in the above linked old article. Especially in the past, when there were no machinery, it was practically the only work surface where all the work took place.
The workbench is highly customizable and it is therefore preferable to build it yourself so as to be able to adapt it to personal processing needs. My bench is the faithful reproduction of the one made by Paul Sellers, albeit with smaller dimensions. And also the improvements, or perhaps it would be better to speak of variations that I have made, are the same ones that he has made on his workbench.
The first and most important change was the addition of a front drawer to the apron. To make it, I first marked the shape of the front in pencil, taking care that the size of the drawer did not interfere with the functioning of the vice.
With the help of a wooden guide, fixed with clamps, I first sawed the whole perimeter traced in pencil with a Japanese saw, thus obtaining the front opening of the drawer.
I got as close as possible to the track using successively chisels and rasps. I then built, with half-thickness joints, the lower internal structure that was supposed to support the whole drawer and the two side guides (fixed to the same structure) that will prevent the drawer from deviating laterally. In turn, the structure and the guides were fixed under the bench by screws.
I then obtained the front of the drawer by trying it several times in the front opening of the apron.
Once it fit perfectly, I cut the two side pieces and the back one, taking into account the thickness of the pieces for their measurements and I then made the dovetail joints only for the front of the drawer.
I then made another front panel by fixing it to the front of the drawer by screws.
The rear panel of the drawer is fixed to the sides with screws while the bottom of the drawer, in OSB, has been inserted into the groove obtained in the elements of the drawer. Once the drawer was made, I planed the front and sides until it could slide freely and smoothly.
Finally I inserted some shockproof rubbers on the back and a front knob. What was most important to me about the drawer was that it was as large and roomy as possible. The maximum I could do was 40 cm. x 40cm. x 10cm. Furthermore, foreseeing the weight it would support and its intense use, I preferred to practice the dovetail joint between the front and the sides, or in the part most stressed by the effort.
As you can see from the photo above, the drawer is really full and I’m happy that, 5 years after its creation, it hasn’t shown any type of sagging. If you are interested in seeing the construction phase of a drawer, I refer you to the above link.
The second change was to insert a shelf under the bench. The shelf can be used to place wood or power tools or, as in my case, it houses various pieces of waste collected in a container and a box with all the clamps. The shelf offers the double advantage of making the workbench more rigid and at the same time weighing it down thanks to the weight of the objects it is called upon to support. My shelf was made with 2 cm plywood. thick (therefore very robust) and was enclosed in a frame which in turn rests and is fixed by means of screws to the crosspieces of the bench legs. I can assure you that the shelf, despite the heavy loads, has behaved very well up to now, showing no sagging.
A further variation made at the workbench consists in inserting some shelves on the sides of the bench. The shelves, located on both the right and left sides, create compartments where everything needed for sharpening can be housed, therefore stones, abrasive paper, strops, guides, etc. so you always have them at hand. However, nothing prevents you from using these spaces also for storing other things, such as cordless drills, various hardware, etc. The positioning of the shelves is very simple, just first made the pieces of the right dimensions and then screw them to the lower part of the fronts of the bench, possibly inserting spacers between one shelf and another.
Another variation consists in inserting some supports on the front of the bench in which to store the saws we use most. The ideal would be to put small saws such as tenon saws and dovetail saws but nothing prevents you from also putting a larger saw, such as a panel saw, as long as it does not create an obstacle during processing. The supports I made are simple wooden cylinders in which I drilled a hole in the center and inserted screws that secure them to the bench. A liftable front slat prevents the saws from slipping off the supports. I could also have shaped the supports so as to adapt them precisely to the size of the handle of the saws, as done by Paul Sellers, but I wanted something more generic and adaptable to my needs and these cylinders seemed to me a good compromise.
The tool tray of the bench usually houses the tools that we are not currently using and which, being below the bench top, cannot get in the way during processing while preventing them from falling to the ground. If desired, we could also use this additional space to insert planes or boxes containing the chisels we use most. Obviously the positioning of these tools or boxes must be done as far away as possible from us, in order to leave more space for processing.
Those seen above are just the variations I made to my workbench but it is possible to make many others and all different depending on the bench we own and above all the processing needs we have.

Lascia un commento