GUIDA PER FORATURA STANLEY N. 59 DOWEL JIG / STANLEY N. 59 DOWEL JIG
English translation at the end of the article
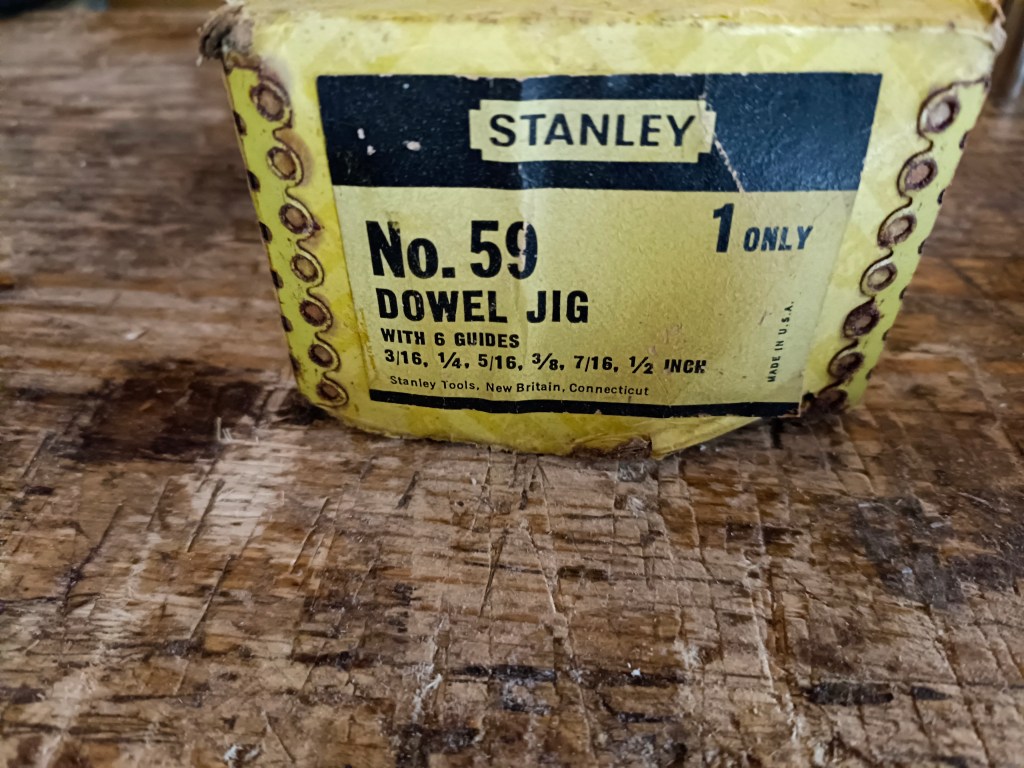
La Stanley n. 59 dowel jig é una guida per aiutare l’operazione di foratura del legno. Permette di praticare fori nella posizione precisa e soprattutto perfettamente perpendicolari. É l’antenata delle moderne guide per foratura che é possibile acquistare a prezzi economici nei magazzini del fai da te.
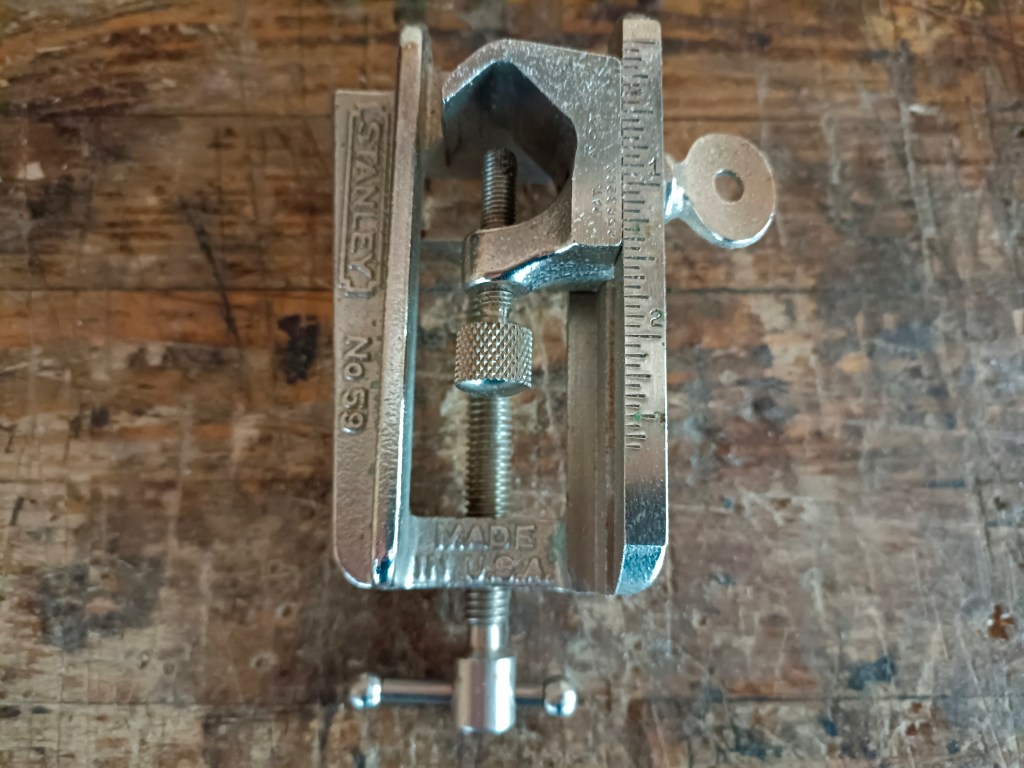
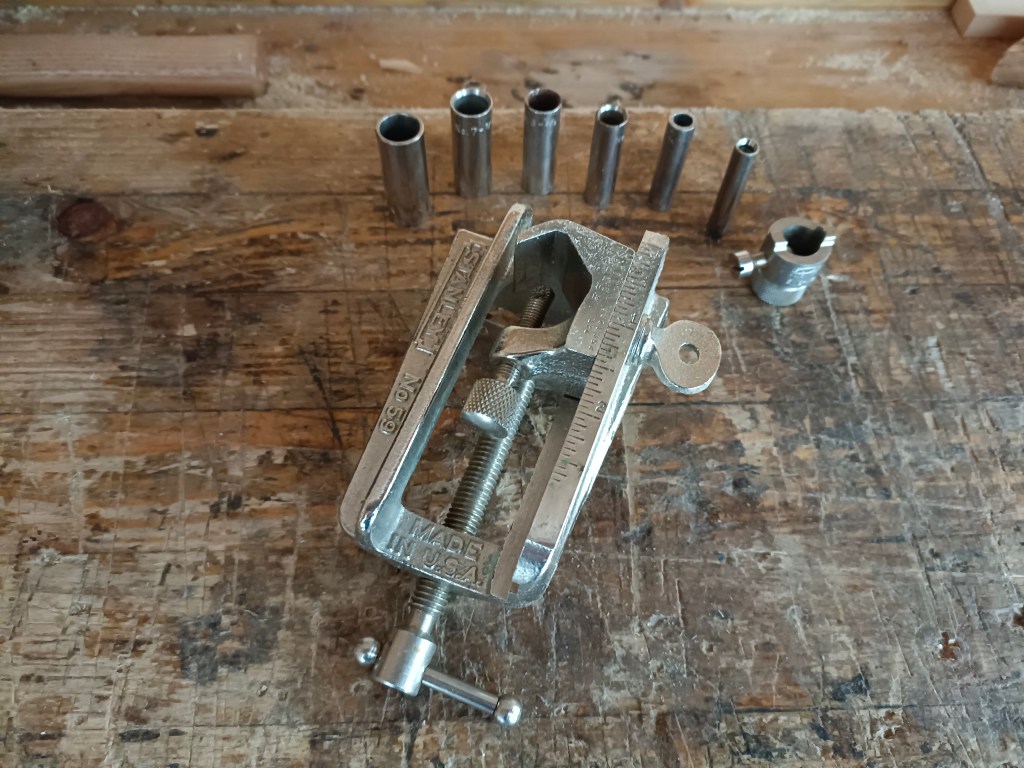
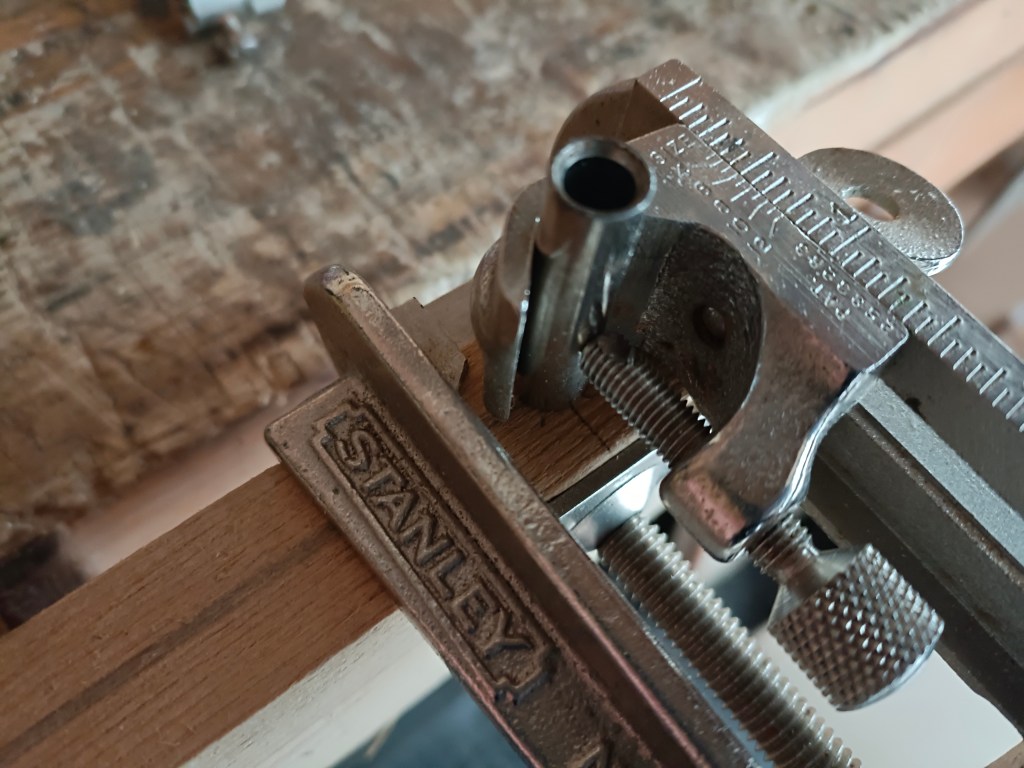
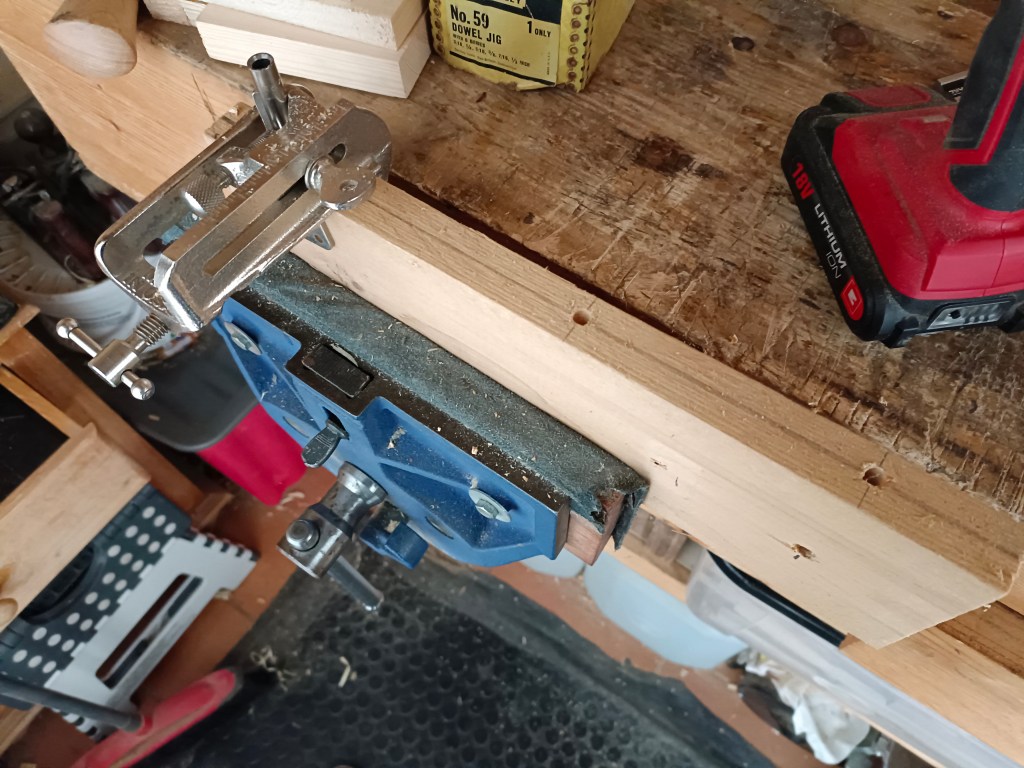
La Stanley n. 59 è composta da un corpo principale in ghisa ed alcuni accessori. Il corpo principale è dotato di un morsetto inferiore che permette di bloccare la guida al pezzo. Nella parte superiore é presente un’apertura dove inserire i cilindri guida punta e un inserto scorrevole che li blocca in posizione. Un laterale scorrevole permette di regolare sulla dima la posizione di foratura desiderata. Sul corpo della dima sono incisi i numeri dei cilindri corrispondenti alle misure dei diametri dei cilindri e una scala di misurazione, purtroppo il tutto indicato solo in pollici. Posizionando il laterale scorrevole alla misura desiderata (misura dello spessore del legno) e facendolo coincidere con la misura del cilindro guida che abbiamo inserito avremo settato la dima per la foratura. Ad esempio, per praticare un foro di circa 1 cm. in posizione centrata in uno spessore del legno di circa 2,5 cm. (1 pollice) dovremo far coincidere la tacca n. 6 (relativa alla misura del cilindro guida 3/8 pollice) con la tacca 1/2 pollice (perché foriamo a metà dello spessore) dello scorrevole laterale.
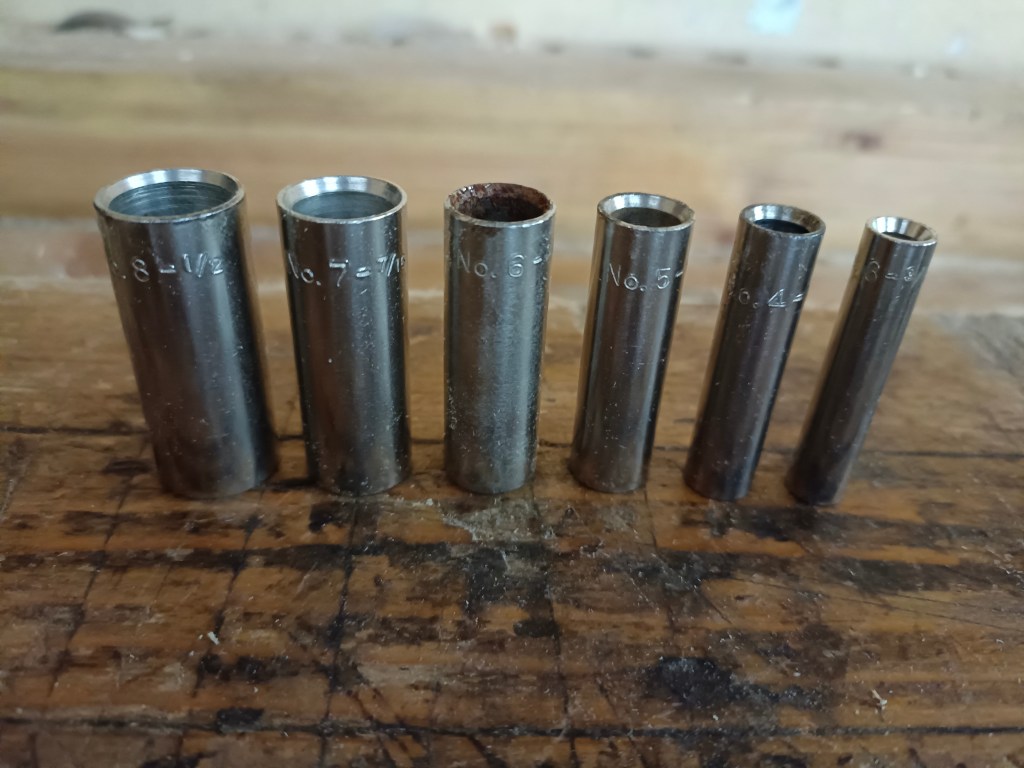
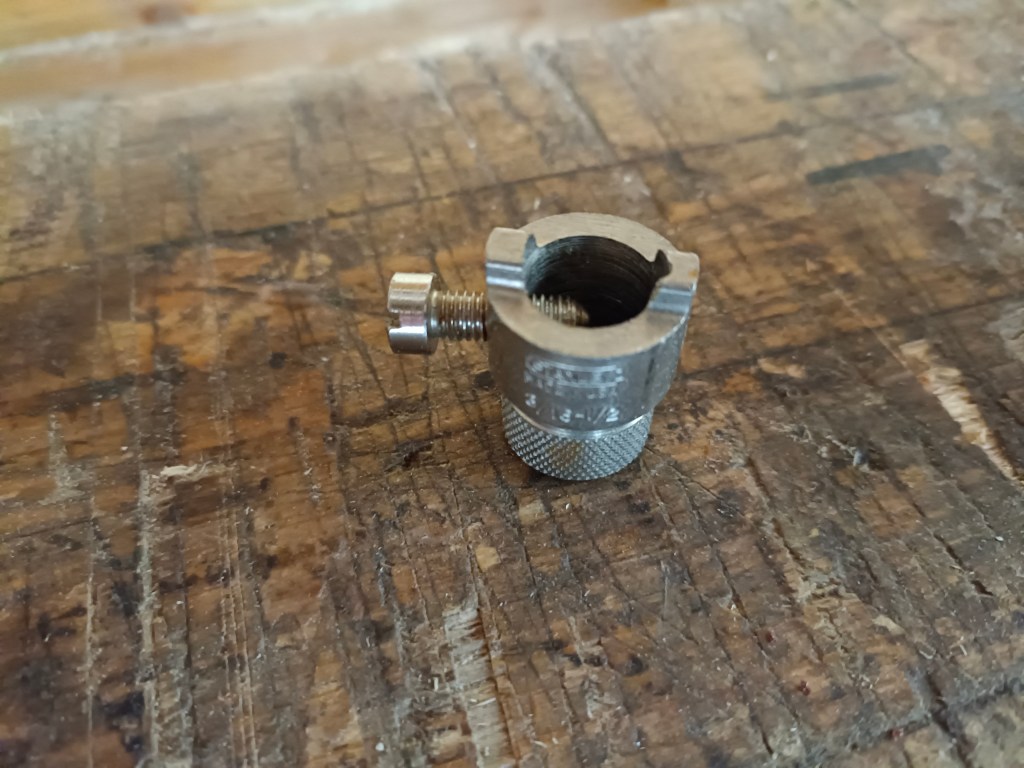
I cilindri portapunta in dotazione sono solitamente 6, sono di vario diametro e si adattano alle più comuni misure di punte per trapano (n. 3, 3/16 – n. 4, 1/4 – n. 5, 5/16 – n. 6, 3/8 – n. 7, 7/16 e n. 8, 1/2 di pollice). Infine, viene fornito un collare da inserire sul codolo della punta del trapano e che serve da limitatore di profondità. Vediamo adesso nello specifico come preparare ed impiegare la nostra dima per i suoi due utilizzi principali, ovvero la giunzione a mezzo spine di legno e lo scavo delle mortase.
L’utilizzo principale della Stanley n. 59 è quello di foratura per le giunzioni a mezzo spine di legno. In questo caso non sarebbe corretto parlare di incastro ma di semplice unione. Un esempio pratico di tale unione é quando dobbiamo incollare di costa delle tavole di legno così da formare un piano, oppure per le giunzioni a 45 gradi delle cornici o per le unioni d’angolo. Le spine in tal caso hanno la duplice funzione di mantenere in posizione le tavole durante l’incollaggio e di fornire una seppur minima solidità alla struttura. La procedura di settaggio della dima, valida sia se vogliamo inserire le spine di legno che se vogliamo scavare mortase, è abbastanza semplice.
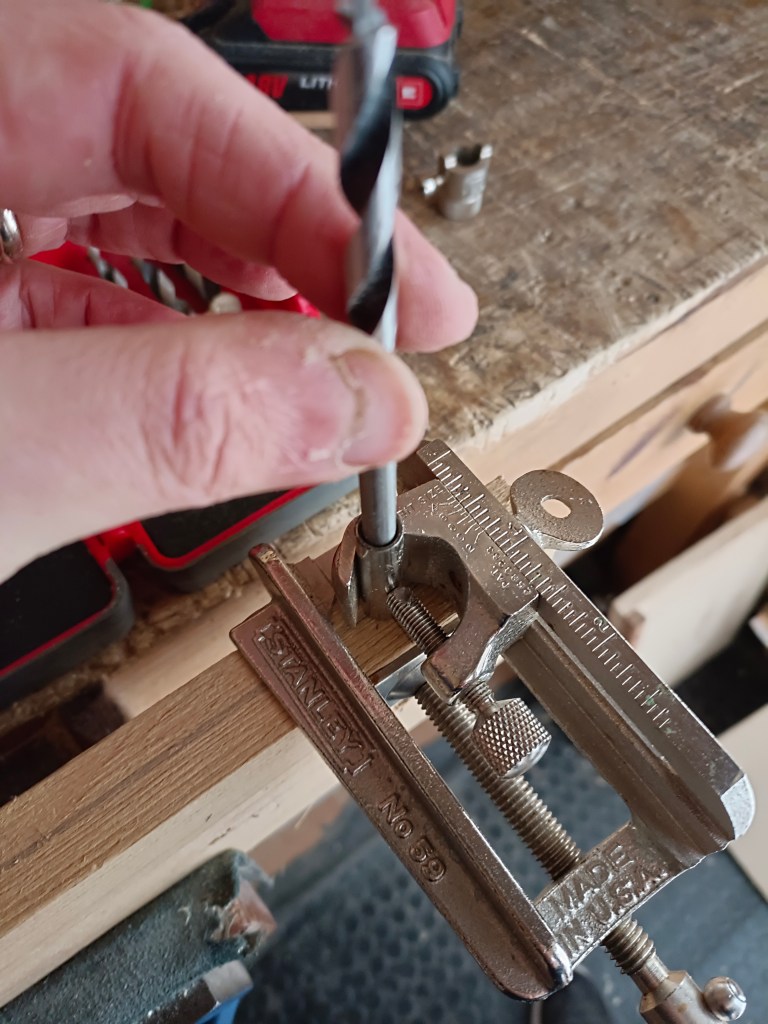
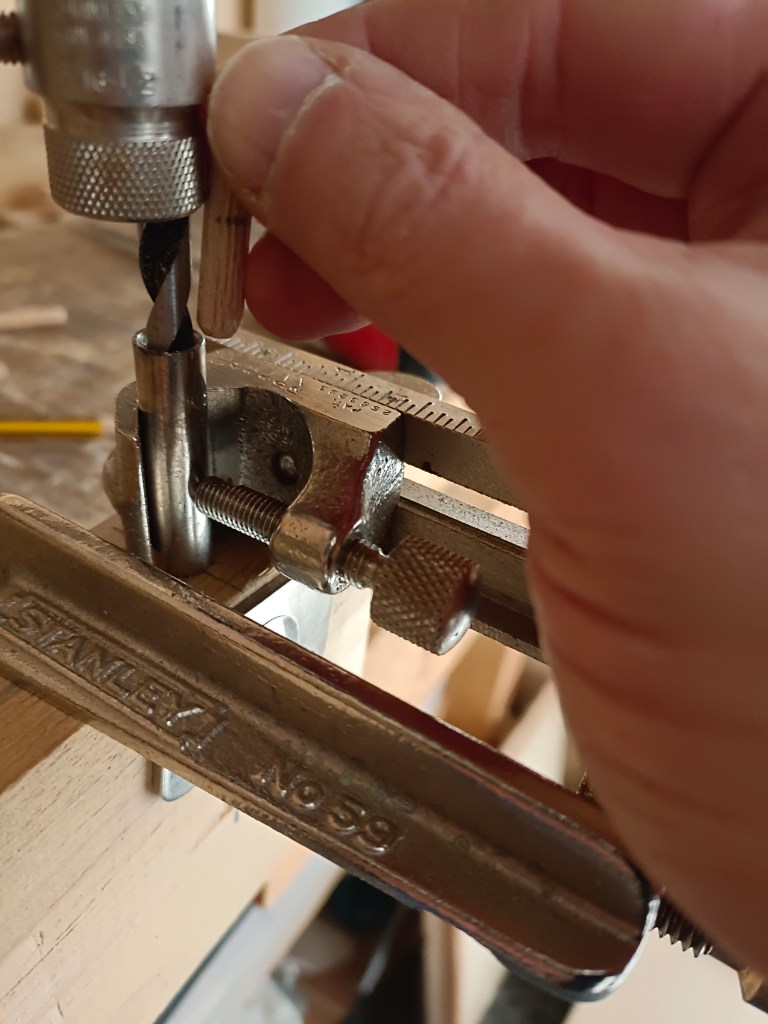
Segniamo i punti dove vogliamo praticare i fori, scegliamo una punta della dimensione adeguata al cilindro utilizzato e che vada bene anche per il successivo inserimento delle spine di legno (nel caso di unione di due pezzi). Inseriamo il cilindro nella guida facendolo scorrere fino a che non tocca il pezzo e quindi serriamolo in posizione per mezzo della vite che stringe lo scorrevole.
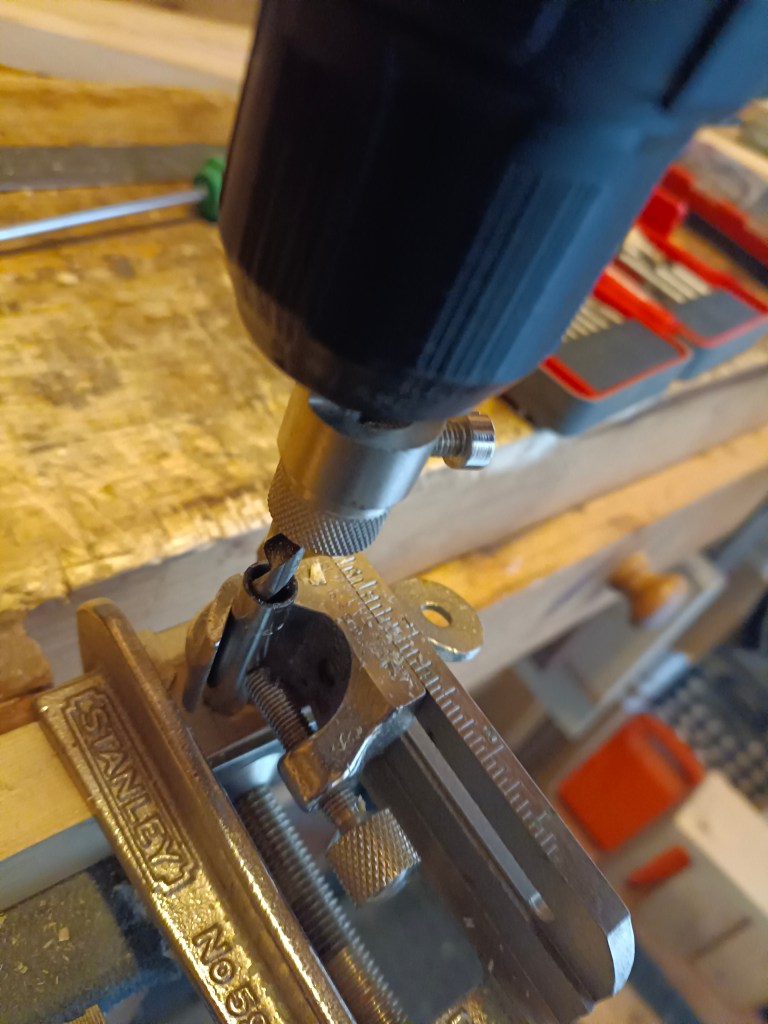
Spostiamo la guida sul pezzo facendo corrispondere la tacca frontale della guida stessa con il riferimento che abbiamo tracciato sul pezzo. Serriamo la guida con il morsetto a vite e infine foriamo.
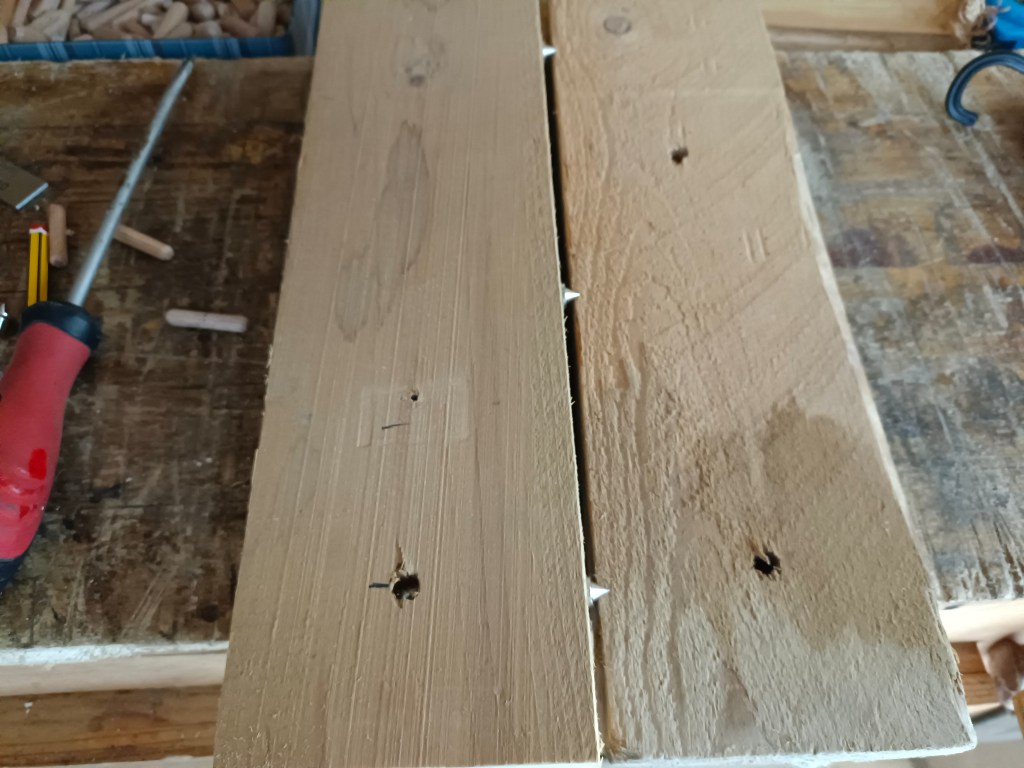
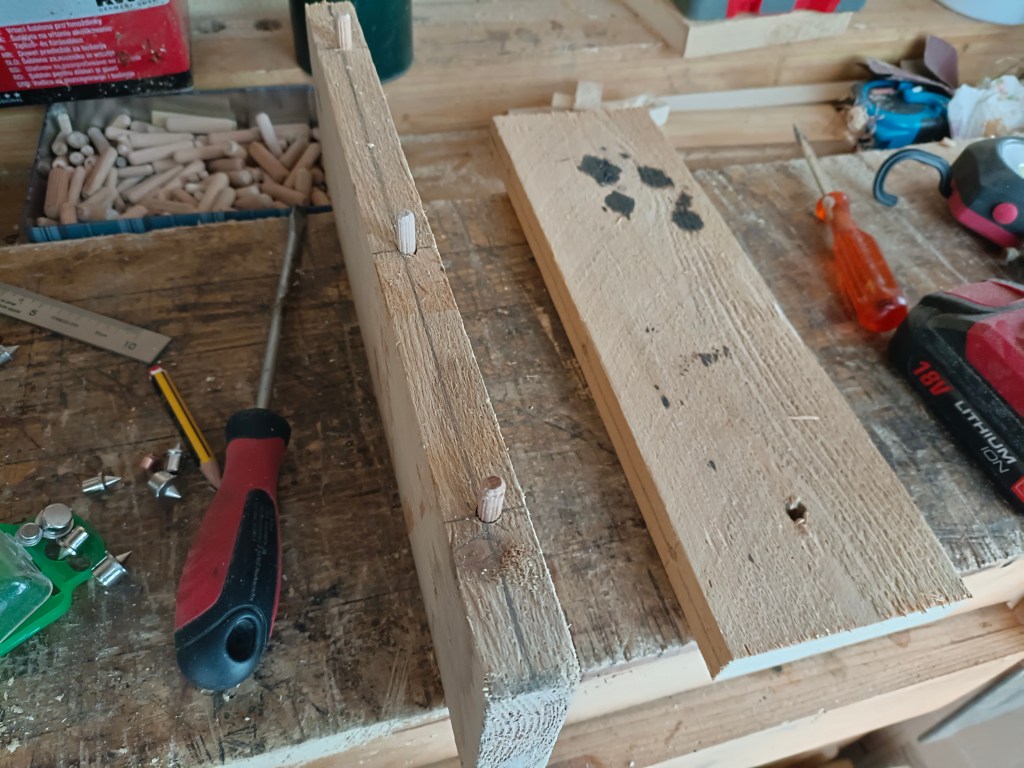

Se dobbiamo fare un’ unione di pezzi è sempre preferibile usare dei marcatori per riportare la misura sul secondo pezzo da forare. Fatto questo, ripetiamo la procedura di foratura sul secondo pezzo, inseriamo le spine ed uniamo i pezzi.
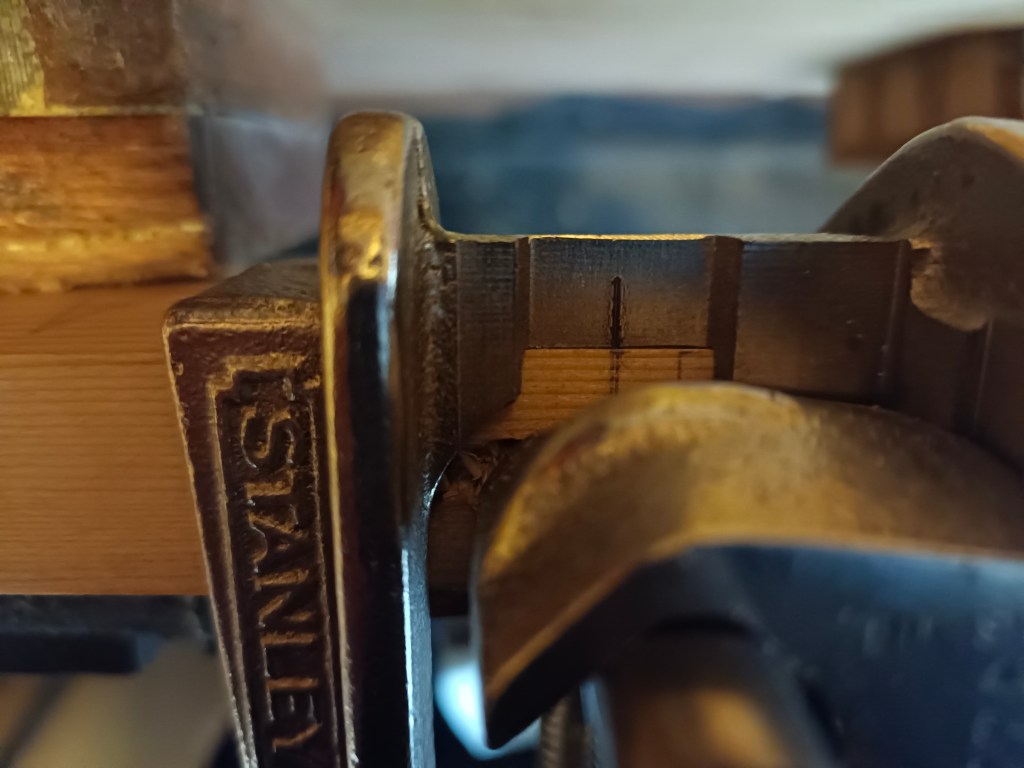
L’impiego visto sopra é sicuramente il più conosciuto ma non era quello che mi ha spinto all’acquisto della guida Stanley n. 59. Quello che più mi interessava era la possibilità di poter praticare una serie continua di fori perpendicolari e perfettamente ripetibili su pezzi diversi così da ricavare in modo veloce una mortasa. Tale mortasa, così ottenuta, andrà comunque successivamente rifinita nelle pareti a mezzo di scalpelli in modo tale da ottenere la classica forma squadrata in grado di ricevere il tenone. Il vantaggio è che praticando la mortasa in questo modo velocizzeremo il procedimento di scavo altrimenti da fare interamente con il metodo classico mediante gli scalpelli.

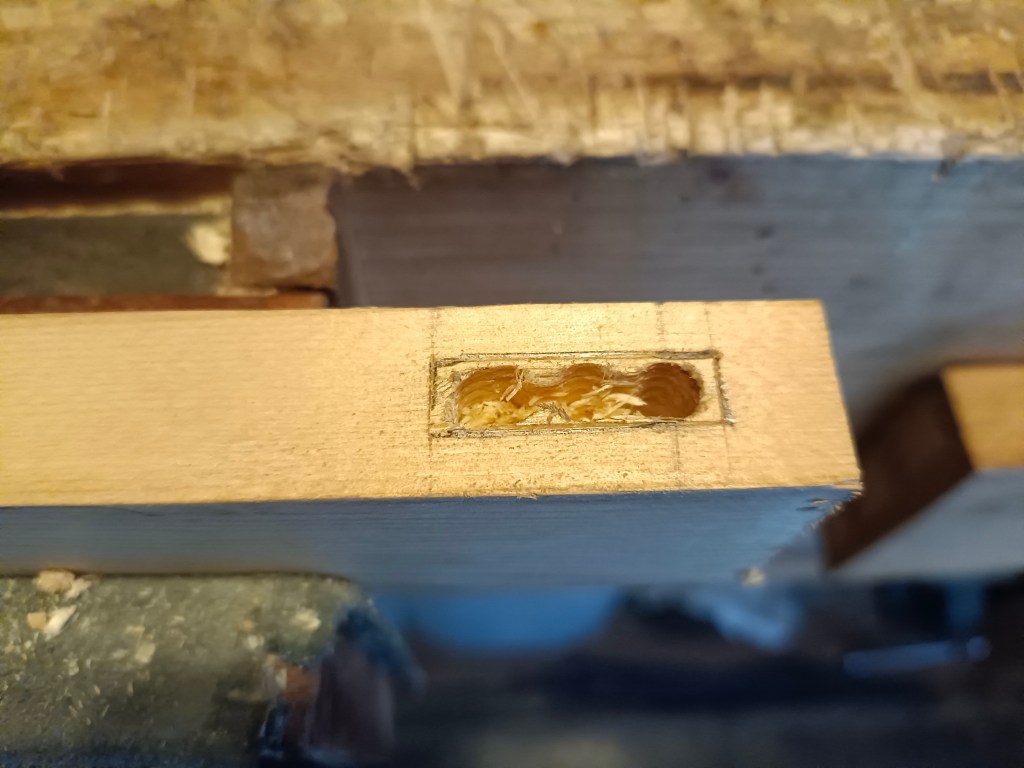
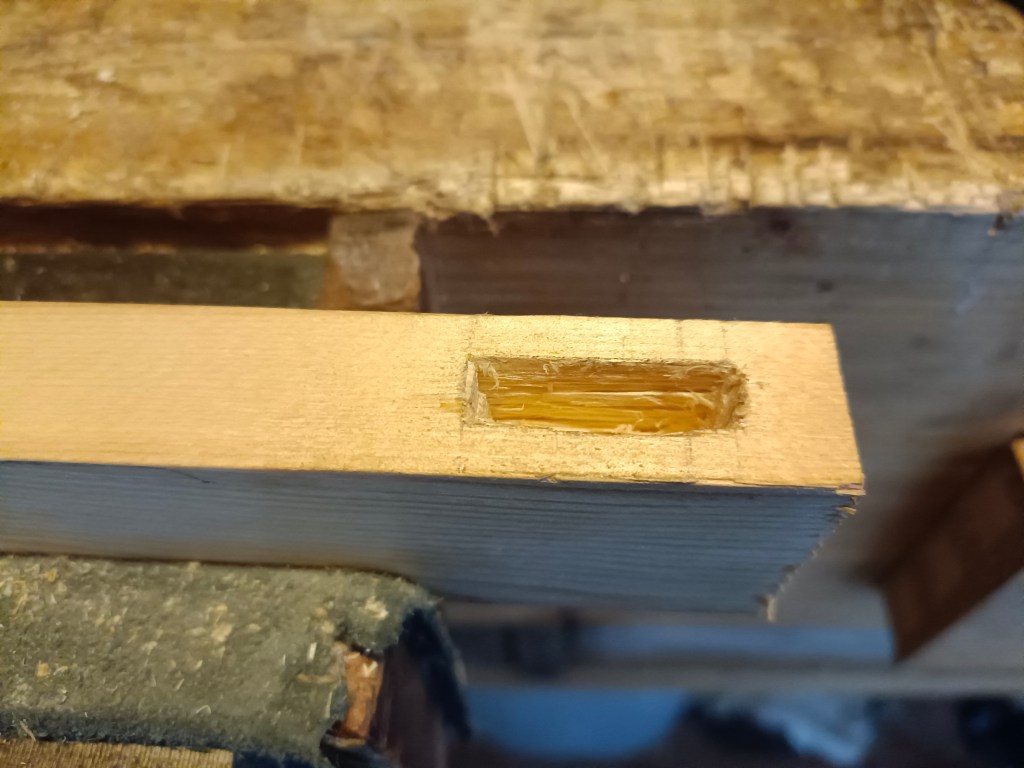
La preparazione della guida è identica a quella vista sopra. Scegliamo una punta che si adatti il più possibile alla larghezza della mortasa. Quindi settiamo la profondità di foratura della punta del trapano, che ci darà la profondità della mortasa, tenendo sempre conto della lunghezza del cilindro guida e aiutandoci con il collare in dotazione o con altro sistema (nastro adesivo o traccia apposta direttamente sulla punta del trapano). Facciamo sempre attenzione a non superare i limiti esterni tracciati della mortasa. Pratichiamo una serie di fori per la lunghezza della mortasa e rimuoviamo il materiale rimasto in eccesso con gli scalpelli. Infine rifiniamo le pareti della mortasa con uno scalpello adatto.
L’innegabile vantaggio di questo sistema è la velocità. Quando dobbiamo realizzare molte mortase oppure praticare mortase di grosse dimensioni basta settare una sola volta la guida e poi forare. Ovviamente dovremo poi rifinire con gli scalpelli ma sarà un lavoro minimo. Uno svantaggio invece é che questa guida riporta solo misurazioni in pollici e quindi dovremo conoscere la loro corrispondenza in millimetri. Problema comunque superabile in quanto la guida è di facile utilizzo anche senza usare i riferimenti in pollici ricavati sul corpo della guida. La guida è fatta molto bene, è solida e precisa, ed anche il sistema di foratura utilizzato per praticare le mortase è un’ottima soluzione, specialmente se abbiamo problemi di vicinato che non sopportano il rumore di lunghe sessioni di martello e scalpello. Il metodo classico di scavo delle mortase di cui ho parlato in un vecchio post rimane comunque sempre il mio preferito.
_________________________________________________________
The Stanley n. 59 dowel jig is a guide to aid your wood drilling operation. It allows you to drill holes in the precise position and above all perfectly perpendicular. It is the ancestor of the modern drilling guides that can be purchased at low prices in DIY stores.
The Stanley n. 59 consists of a main body in cast iron and some accessories. The main body is equipped with a lower clamp which allows the guide to be locked to the piece. In the upper part there is an opening where to insert the dowels and a sliding insert which blocks them in position. A sliding side allows you to adjust the desired drilling position on the guide. On the body of the guide are engraved the measurements of the guides and a measurement scale, unfortunately indicated only in inches. By positioning the sliding side to the desired size and making it coincide with the size of the guide that we have inserted, we will have set the doweling guide for drilling. For example for a 3/8 hole in the centre of a 1 inch we adjust the n.6 guide with the 1/2 line.
The guides supplied are usually 6 of various diameters and adapt to the most common drill bit sizes (n. 3, 3/16 – n. 4, 1/4 – n. 5, 5/16 – n- 6 , 3/8 – #7, 7/16 and #8, 1/2 inch). Finally, a depth gauge is supplied to be inserted into the shank of the drill bit and which serves as a depth stop. Now let’s see specifically how to set and use our doweling jig for its two main uses, boring holes for doweled joints and the mortising.
The main use of the Stanley 59 is for boring holes to joints pieces of wood with dowels. In this case it would not be correct to speak of a joint but of a simple union. A practical example of this union is when we have to glue wooden boards sideways so as to form a larger plane, or for 45-degree joints (mitre joints) of frames or corner joints. In this case, the dowels have the dual function of keeping the boards in position during gluing and providing a minimal solidity to the structure. The dowels guide setting procedure, valid both if we want to insert the dowels and if we want to mortises, is quite simple.
We mark the points where we want to drill the holes, we choose drill bit of the appropriate size for the guides used and which is also suitable for the subsequent insertion of the dowels (in the case of joining two pieces). We insert the guide into the doweling guide by sliding it until it touches the piece of wood and then tighten it in position by means of the screw.
We move the guide on the piece by matching the front notch of the guide itself with the reference we have traced on the piece. We tighten the rail with the screw clamp and finally drill.
If we have to make a doweled joint it is always preferable to use markers to report the measurement on the second piece to be drilled. Once this is done, we repeat the drilling procedure on the second piece, insert the dowels and join the pieces.
The use seen above is certainly the best known but it was not the one that prompted me to purchase the Stanley 59 guide. What interested me most was the possibility of being able to drill a series of perpendicular and perfectly repeatable holes so as to obtain fast a mortise. This mortise, thus obtained, will in any case be subsequently finished on the walls by means of chisels in such a way as to obtain the classic squared shape capable of receiving the tenon. The advantage is that by practicing the mortise in this way we will speed up the mortising procedure otherwise to be done entirely with the classic method using chisels.
The preparation of the guide is identical to that seen above. We choose a bit that fits as much as possible into the width of the mortise. Then we set the drilling depth of the drill bit, which will give us the depth of the mortise, always taking into account the length of the guides and helping us with the depth gauge supplied or with another system (adhesive tape or trace affixed directly to the drill bit). We always pay attention not to pass the limits of the mortise. We drill a series of holes the length of the mortise and remove excess material with chisels. Finally we finish the walls of the mortise with a suitable chisel.
The undeniable advantage of this system is speed. When we have to make many mortises or practice large mortises, it is enough to set the guide only once and then drill. Obviously we will then have to finish with chisels but it will be minimal work. However, a disadvantage is that this guide only shows measurements in inches and therefore we will need to know their correspondence in millimeters. However, this problem can be overcome as the guide is easy to use even without using the inch references engravef on the body of the guide. The dowel guide is made very well, it is solid and precise, and the drilling system used to drill the mortises is also an excellent solution, especially if we have neighborhood problems that cannot stand the noise of long hammer and chisel sessions. But the classic method of mortising that I talked about in an old article is still my favorite.

Lascia un commento