COME FARE LE CODE DI RONDINE A MANO. VARIANTE CON SEGHETTO A COPIARE / HOW TO MAKE DOVETAILS BY HAND. COPING SAW VARIATION
English translation at the end of the article

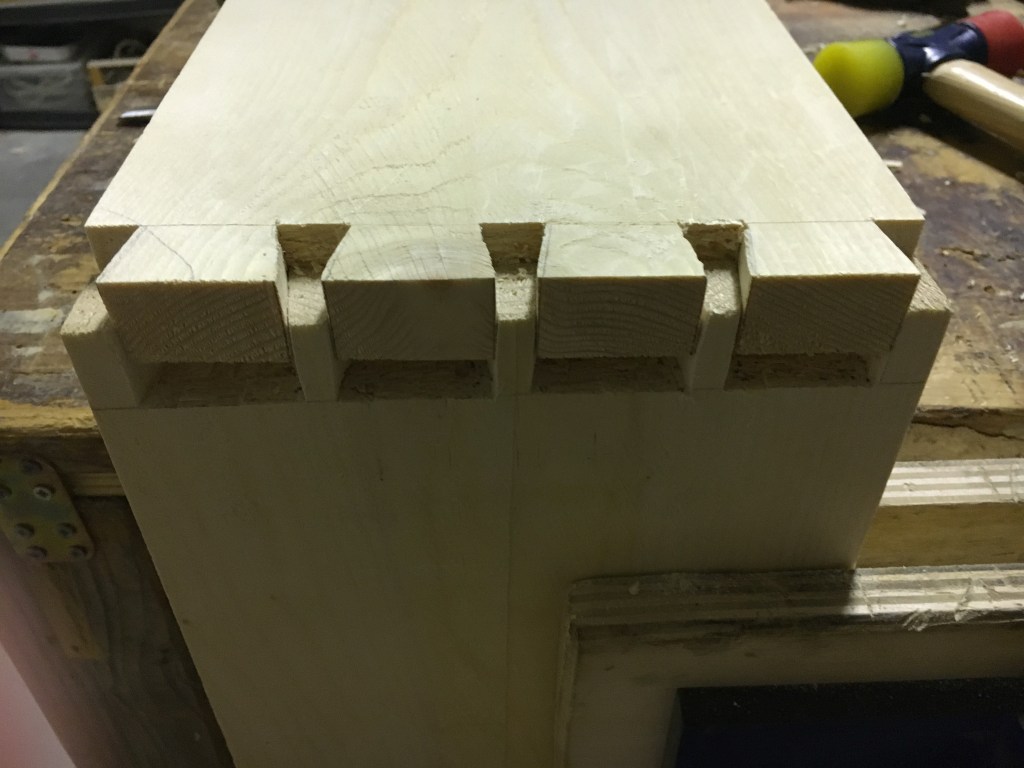
Realizzare le code di rondine in un incastro é una delle sfide più affascinanti della falegnameria amanuense. Nei mobili di pregio e di vecchia datazione sono sempre presenti nella carcassa del manufatto o in qualche cassetto e sono sinonimo di artigianalità e qualità dell’opera.
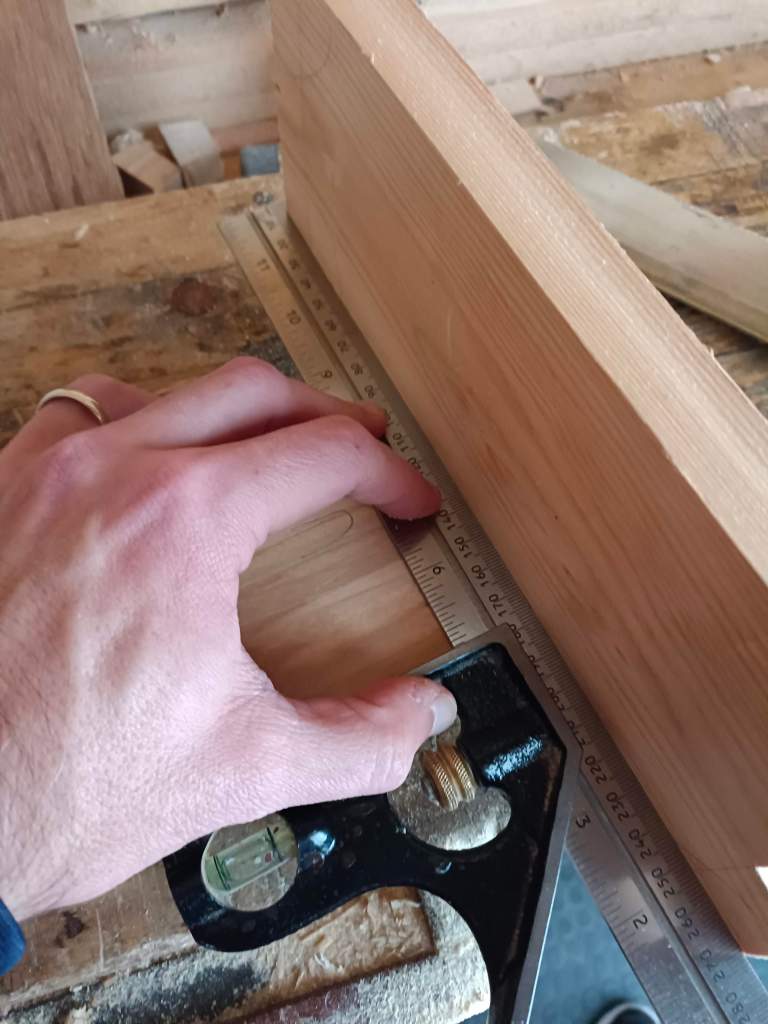
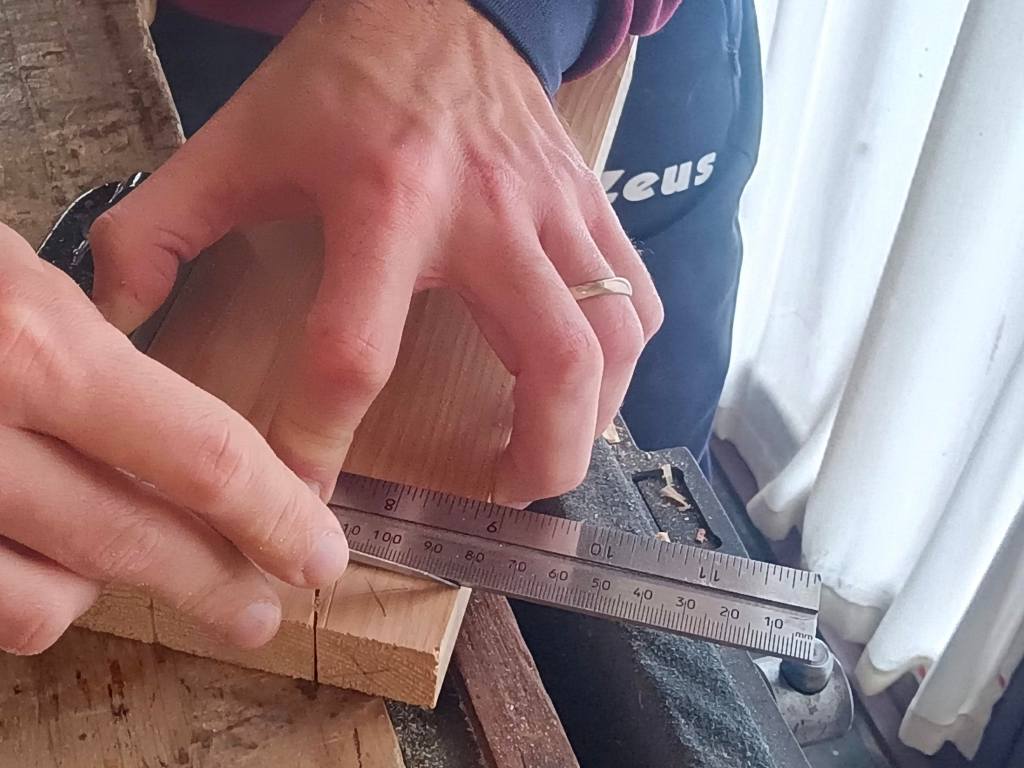
In quasi tutto ciò che realizzo cerco di inserire le code di rondine, ove possibile. Oltre ad essere un esercizio di stile le trovo belle esteticamente e sicuramente il più robusto incastro praticabile. La loro buona riuscita dipende però da tanti fattori, come ad esempio il tipo di legno utilizzato ed il suo spessore, una misurazione precisa, una tracciatura accurata, l’utilizzo di utensili affilati e di buona qualità e soprattutto tanta pratica.
Nonostante le inserisca praticamente ovunque difficilmente mi riescono tutte perfette in un singolo manufatto: un taglio poco preciso, una non perfetta finitura dell’alloggio della coda, code troppo strette e troppo lasche che lasciano intravedere piccoli spazi vuoti, ecc. Un non addetto ai lavori le giudicherebbe ben fatte ma l’occhio critico di un esperto o dello stesso autore noterà subito i piccoli difetti.

In un vecchio articolo ho parlato diffusamente delle code di rondine. Il metodo che illustrai era il metodo tradizionale così come è stato eseguito per centinaia di anni. Lo reputo ancora adesso il metodo più preciso per ottenere code di rondine le più pulite possibile. Esiste però un altro metodo per fare le code di rondine. Forse non è corretto definirlo come diverso metodo, in quanto in realtà è del tutto simile, fatta eccezione per la rimozione del materiale tra le code di rondine sul pezzo maschio e del materiale tra i piedi (zoccoli) del pezzo femmina. Esistono varie terminologie per definire queste sezioni di legno. In questo articolo chiamerò alloggio la sezione di legno tra le code di rondine e tra i piedi.
In effetti rimuovere la sezione di legno tra le code con gli scalpelli, lavorando alternativamente da ambedue i lati del pezzo, ci permette di arrivare praticamente alla base dell’alloggio per poi intervenire con gli scalpelli da pareggio fino alla linea tracciata. Il risultato è un fondo pulito e ben livellato. É però un metodo piuttosto lento, ma sicuramente perfetto per quando dobbiamo fare poche code di rondine.

Se però dobbiamo fare molte code di rondine, come potrebbe accadere se dobbiamo realizzare la carcassa di un mobile grande come ad esempio una credenza, una cassapanca oppure molti cassetti che prevedono le code di rondine seminascoste, al fine di velocizzare la fase di creazione degli alloggi per le code e per i piedi, che é quella che richiede più tempo, potremmo utilizzare un seghetto a copiare invece di scalpello e martello.
Oltre al vantaggio della velocità di esecuzione, faremo anche meno rumore. Infatti, uno dei grandi vantaggi della falegnameria fatta con soli utensili manuali é quello di fare poco rumore, sempre se rapportato a quello prodotto dai macchinari. Tra tutte le fonti di rumore possibili il rumore del martello che percuote lo scalpello é probabilmente quello più fastidioso e rumoroso. Se abbiamo la fortuna di lavorare in un luogo lontano da altre abitazioni il problema non si porrà ma se abitiamo ad esempio in un condominio il fatto potrebbe non essere di poco rilievo. Un conto infatti é realizzare una decina di code di rondine per una scatoletta di poco spessore, un altro realizzarne un centinaio per un mobile con cassetti. Se l’ambiente dove lavoriamo non è ben insonorizzato il rumore si propagherà attraverso il banco ed i muri e con il tramite dell’aria sino alle orecchie del nostro vicino che non ne sarà di certo entusiasta.
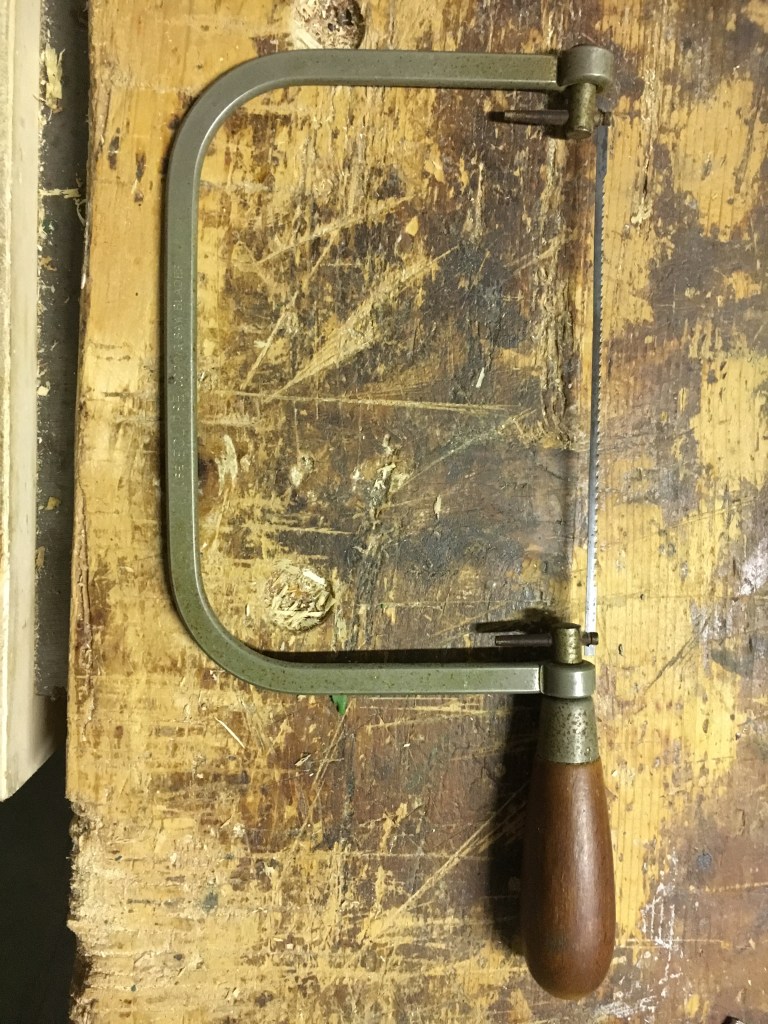
Fatta questa piccola parentesi vediamo quindi come rimuovere la sezione di legno tra le code con un seghetto a copiare. Abbiamo già visto in un precedente post cos’è e come funziona un seghetto a copiare (possiamo utilizzare a questo scopo anche un seghetto ad archetto o un seghetto per gioiellieri, sebbene quest’ultimo si adatti meglio a lavori più fini). La particolarità di questo utensile è quella di essere fornito di una lama molto sottile e con un alto numero di denti per pollice. Questo gli consente di infilarsi in spazi ridotti e di praticare curve molto strette nel legno. É quindi perfetto per inserirsi nello stretto solco fatto con una sega per code di rondine e ruotare nello spazio creato da questa.
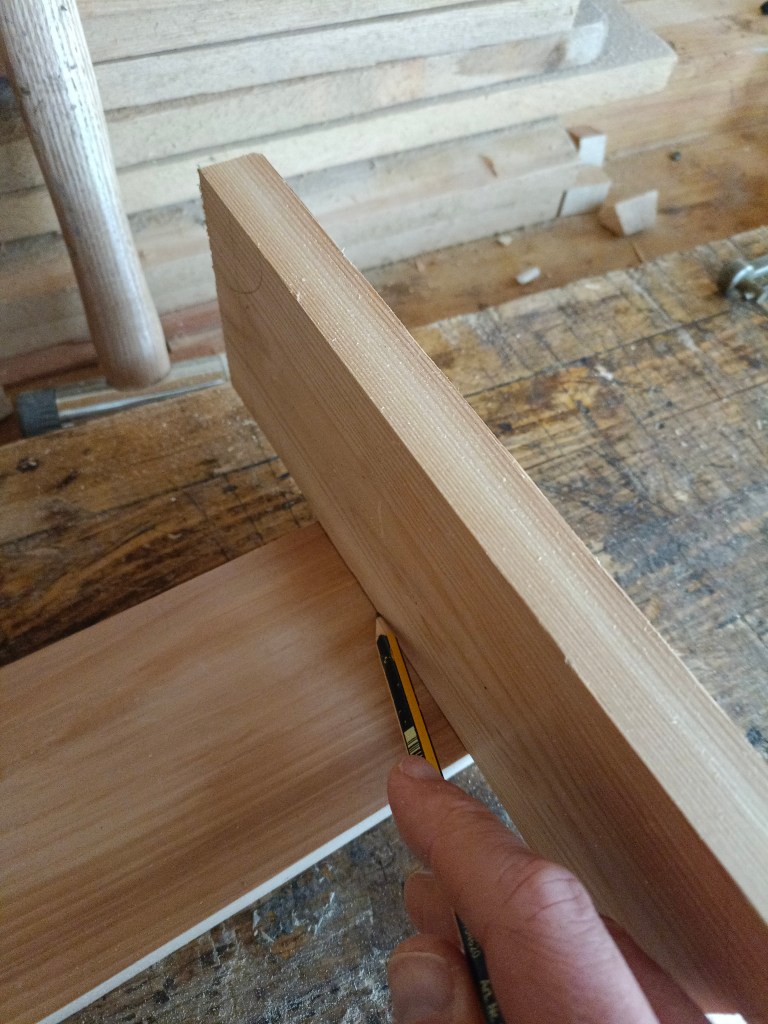
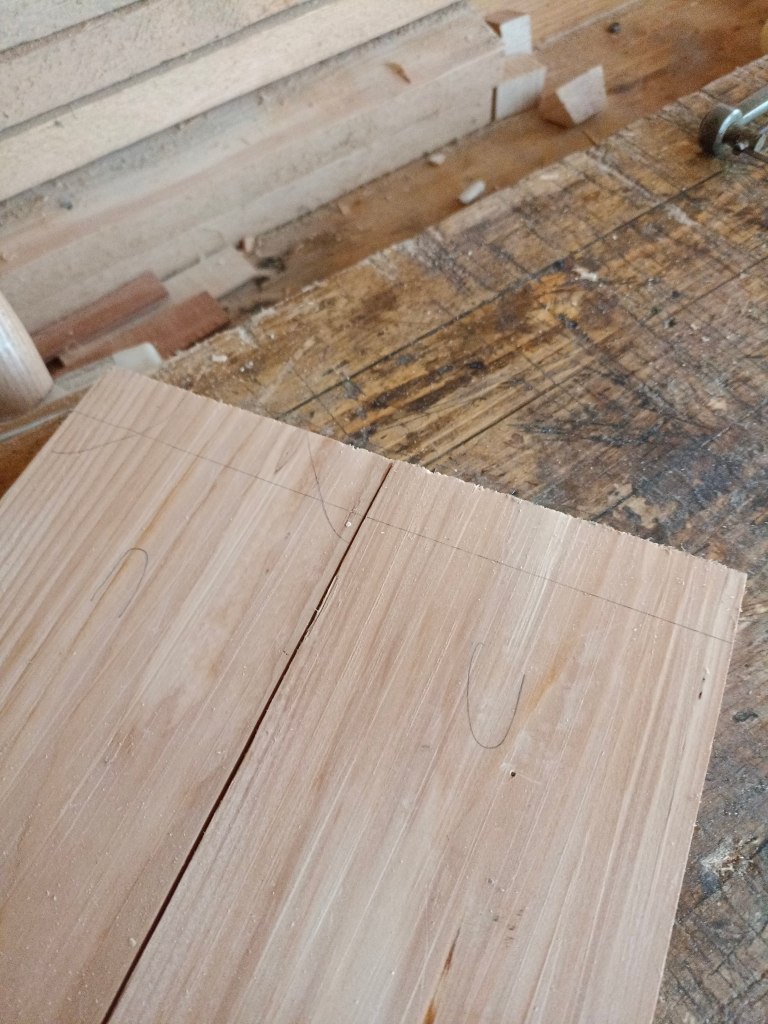
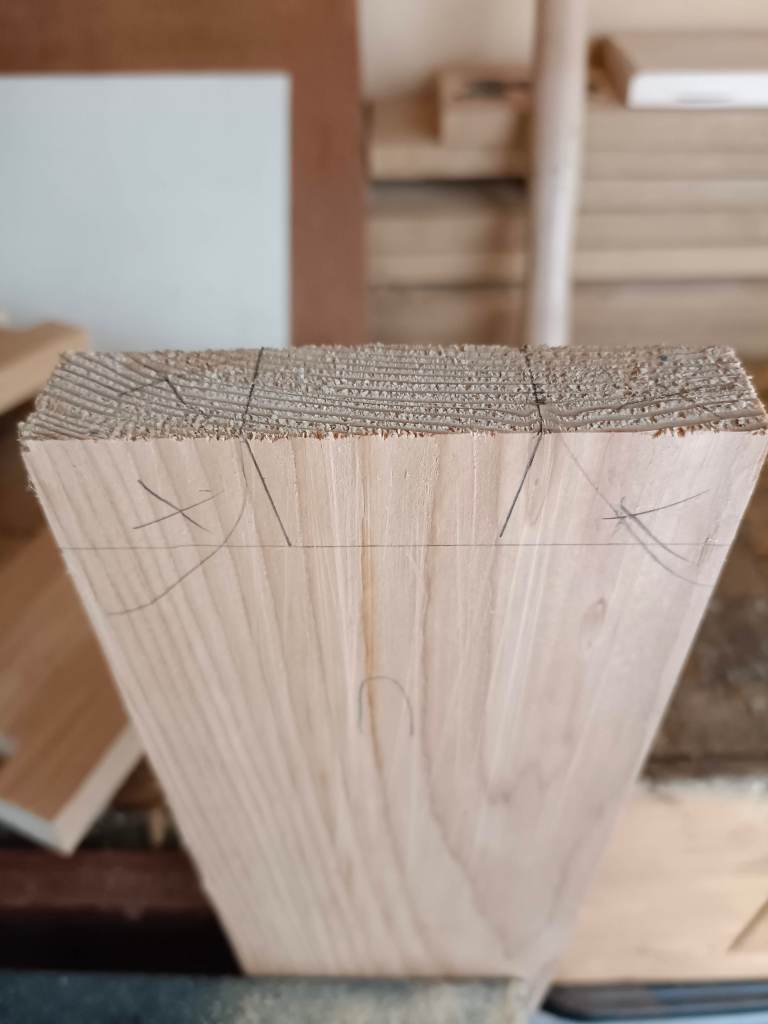
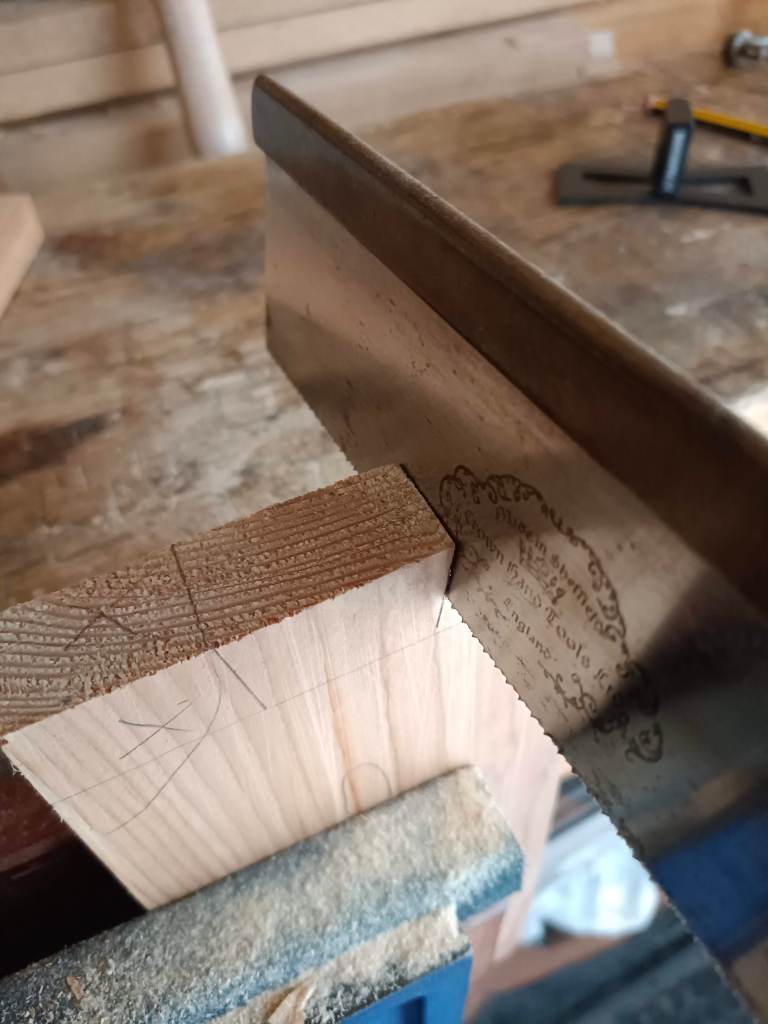
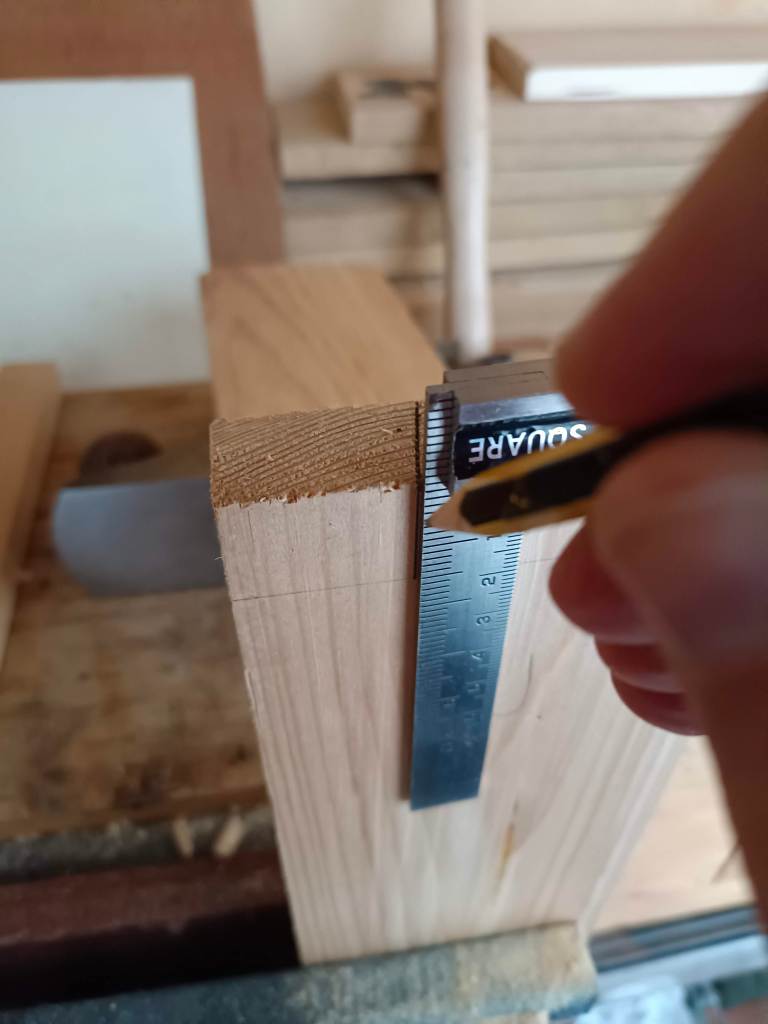
Come anticipato, tutta la procedura di tracciatura e taglio rimane pressoché invariata eccetto che per la rimozione del legno tra le code ed i piedi. Per comodità inserisco di seguito le foto di tutto il procedimento che potete comunque trovare descritto nel dettaglio al seguente link.
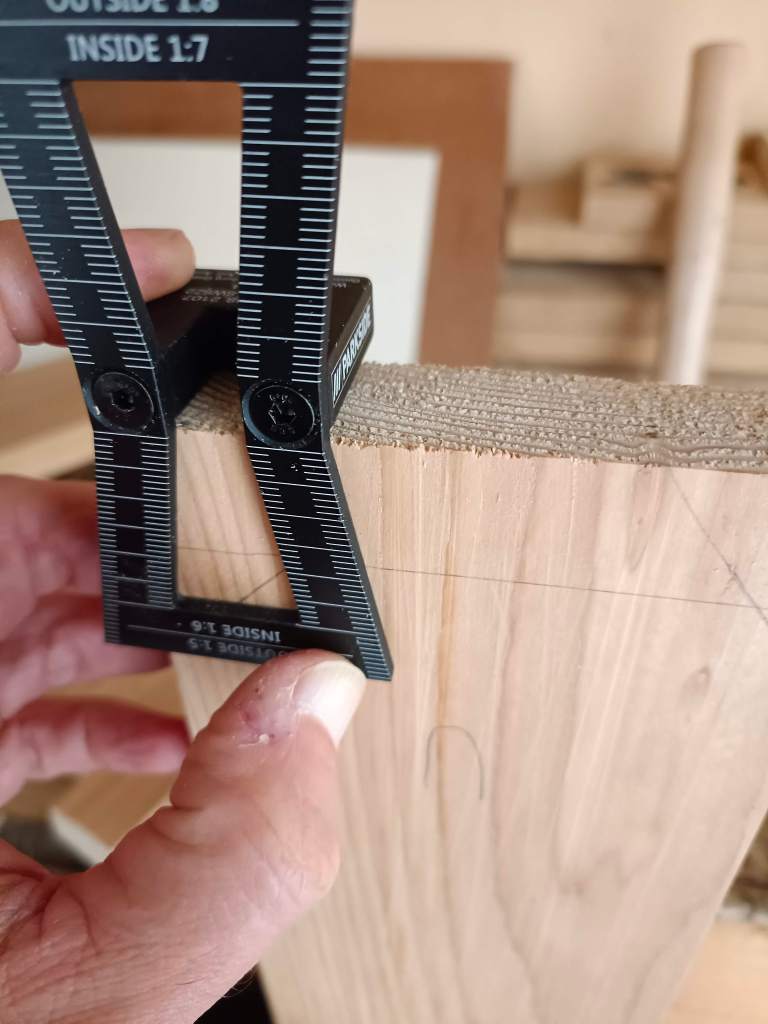
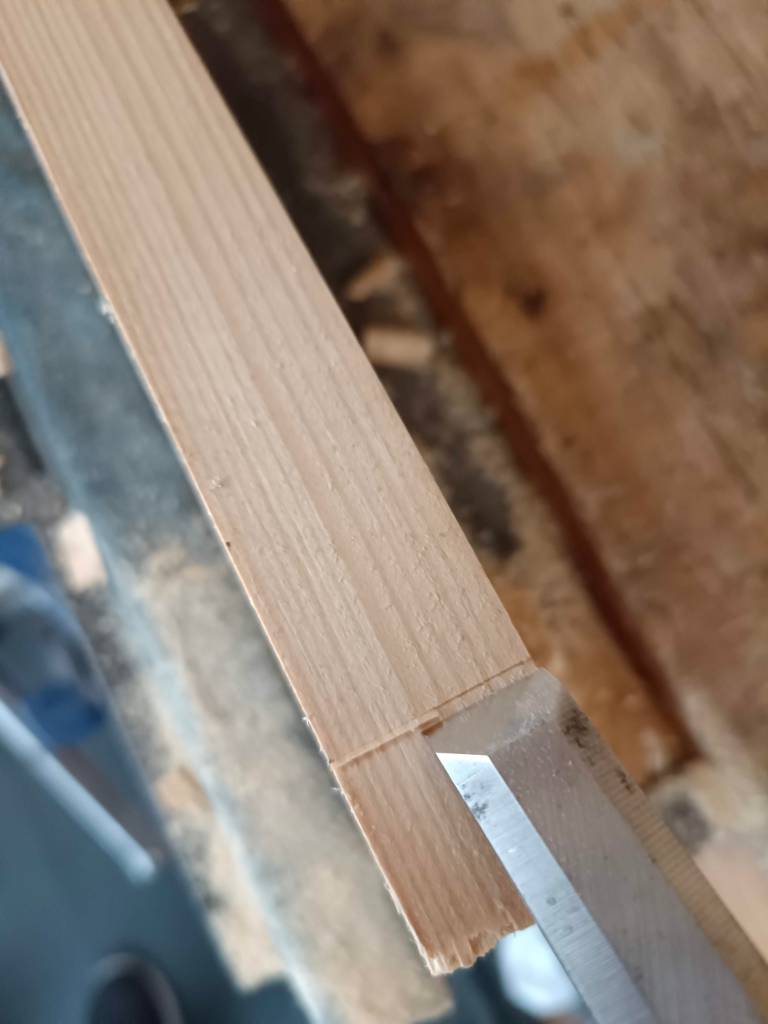
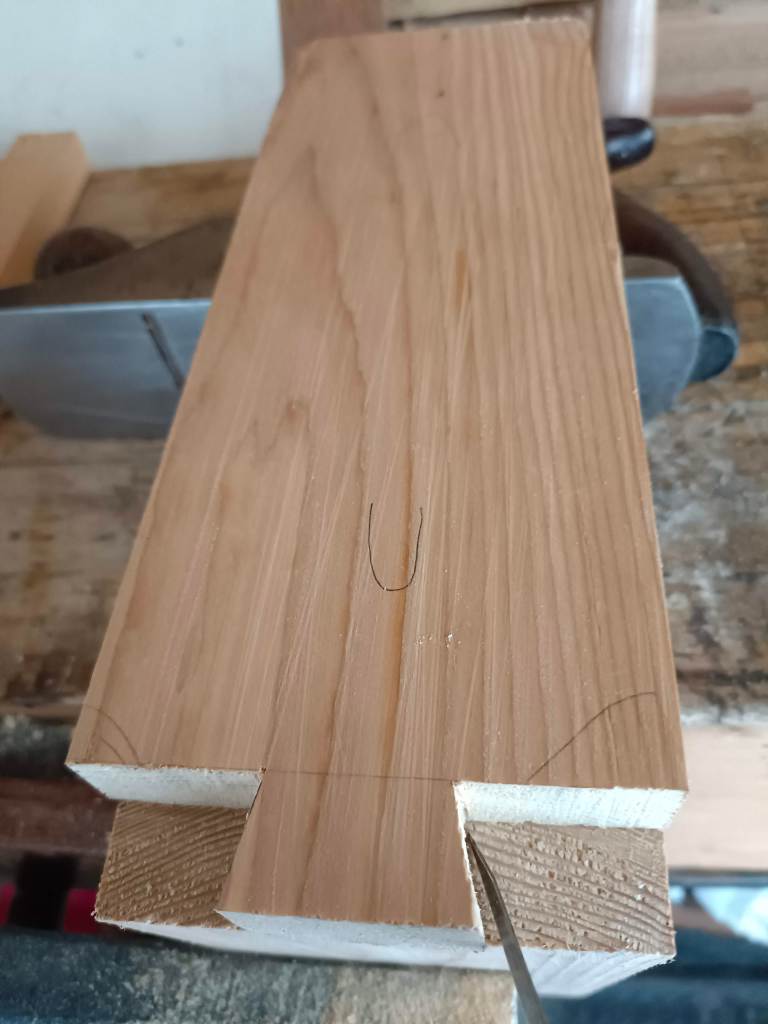

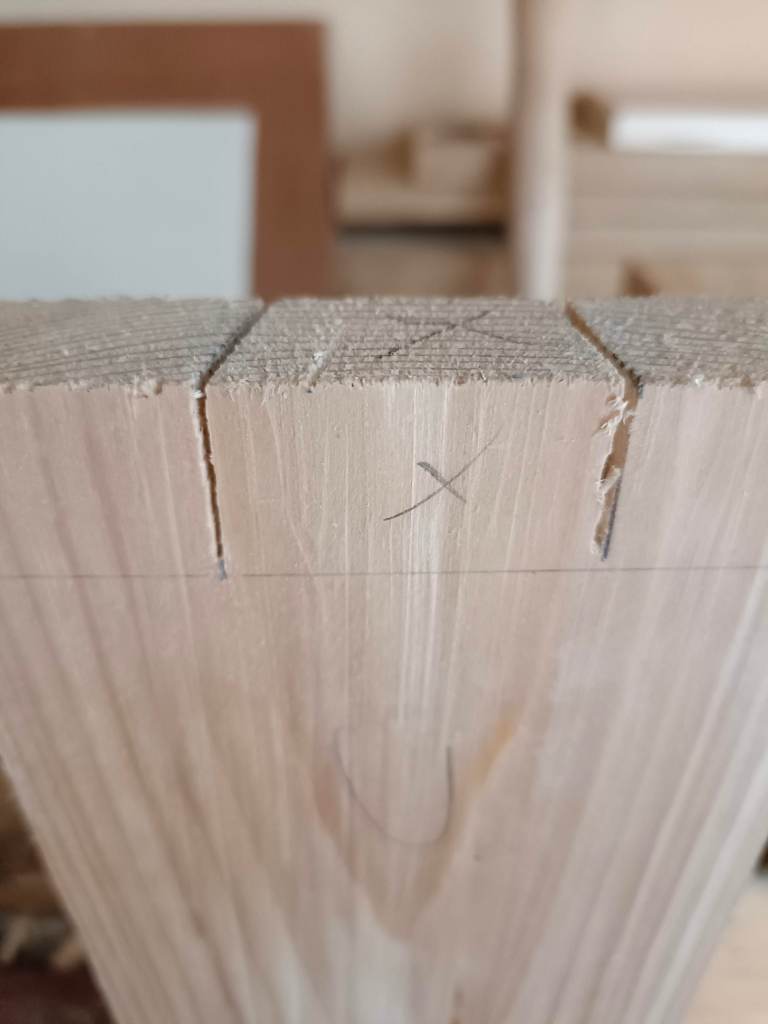
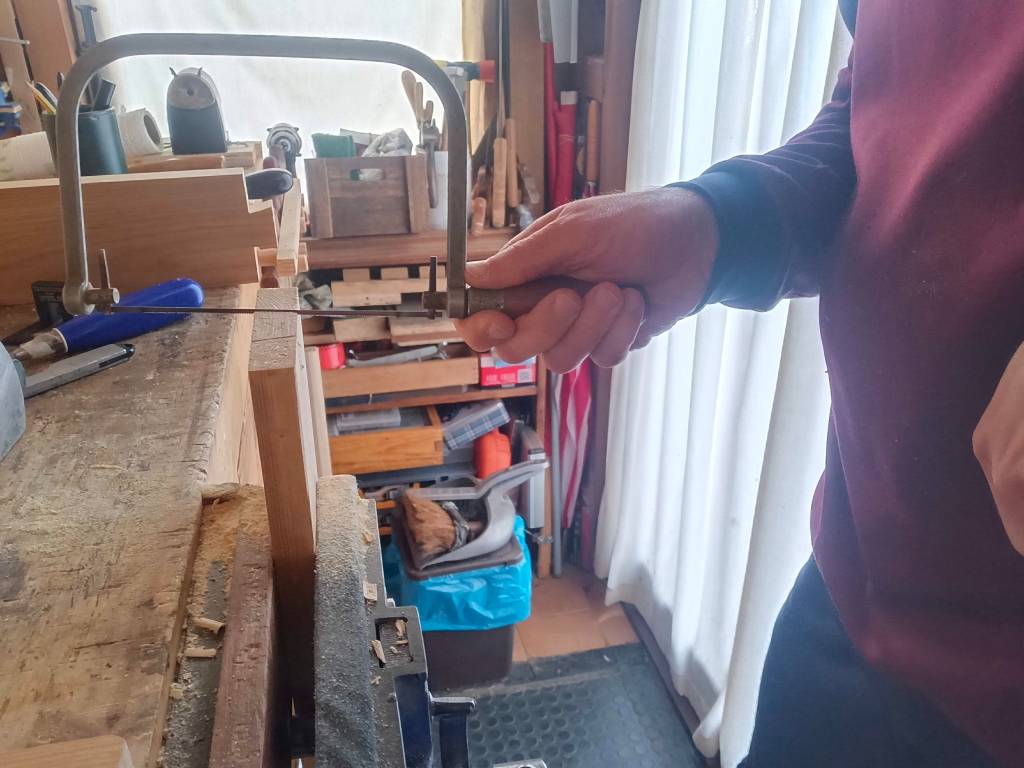
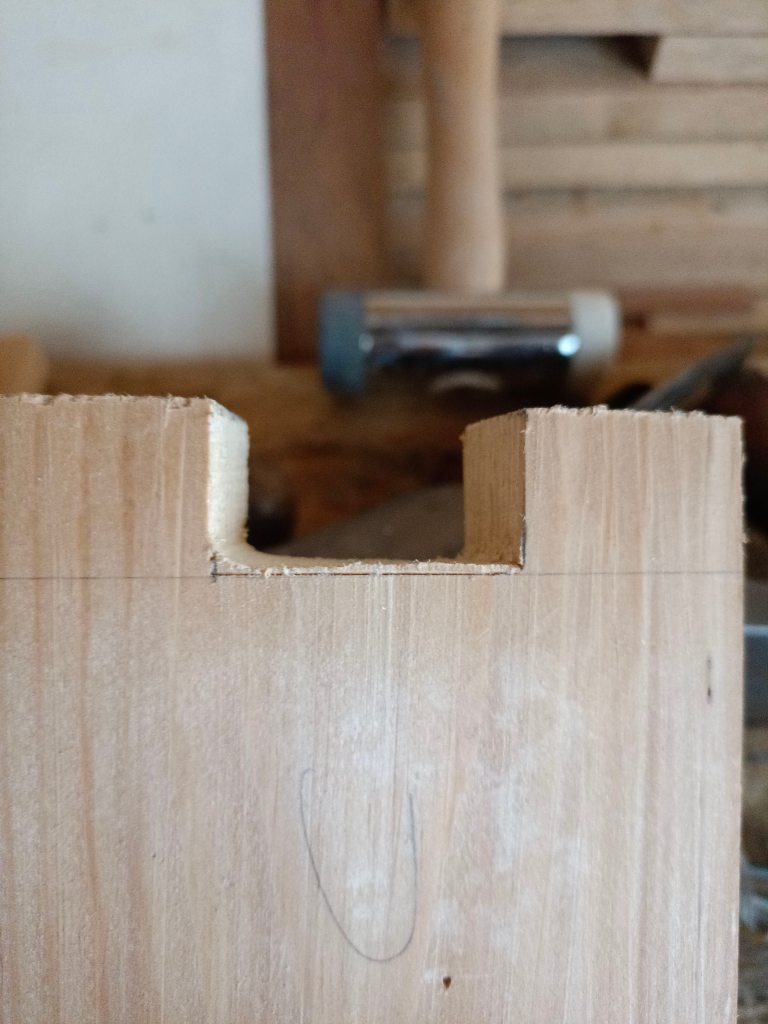
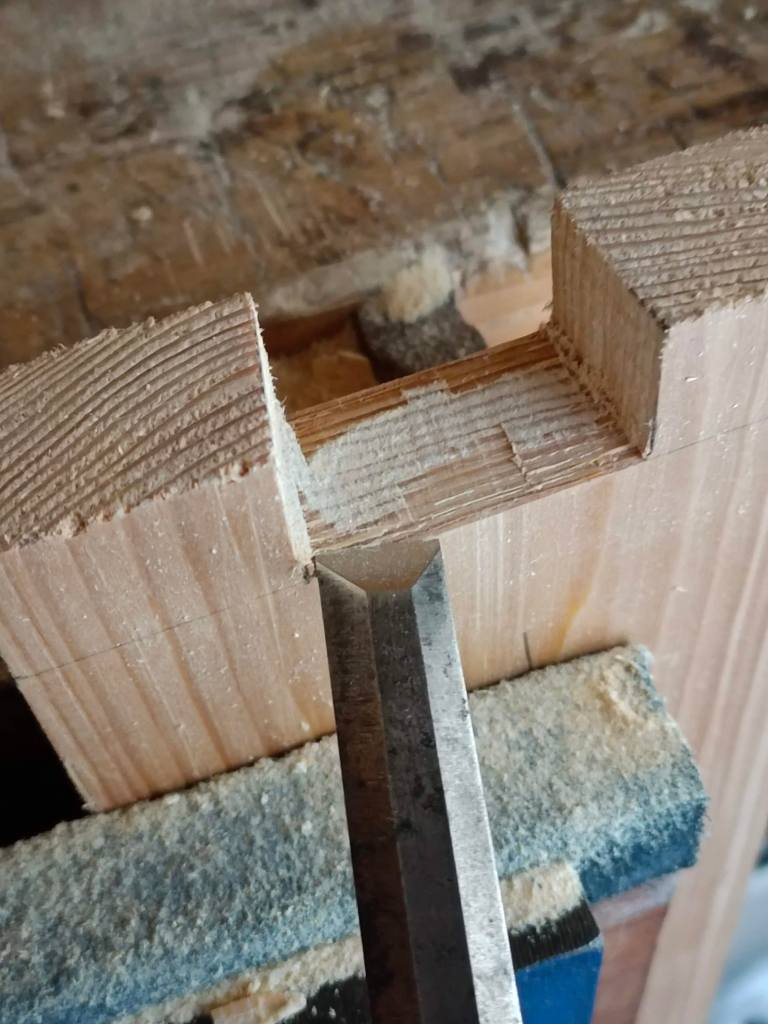
Inseriamo la lama del seghetto nel solco lasciato dalla sega. Portiamoci a circa un millimetro di distanza dal fondo dell’alloggio, in modo da garantirci lo spazio per curvare la lama, afferriamo il manico con ambedue le mani e cominciamo a segare cercando di praticare una curva in grado di portarci con la lama in posizione parallela rispetto alla base.
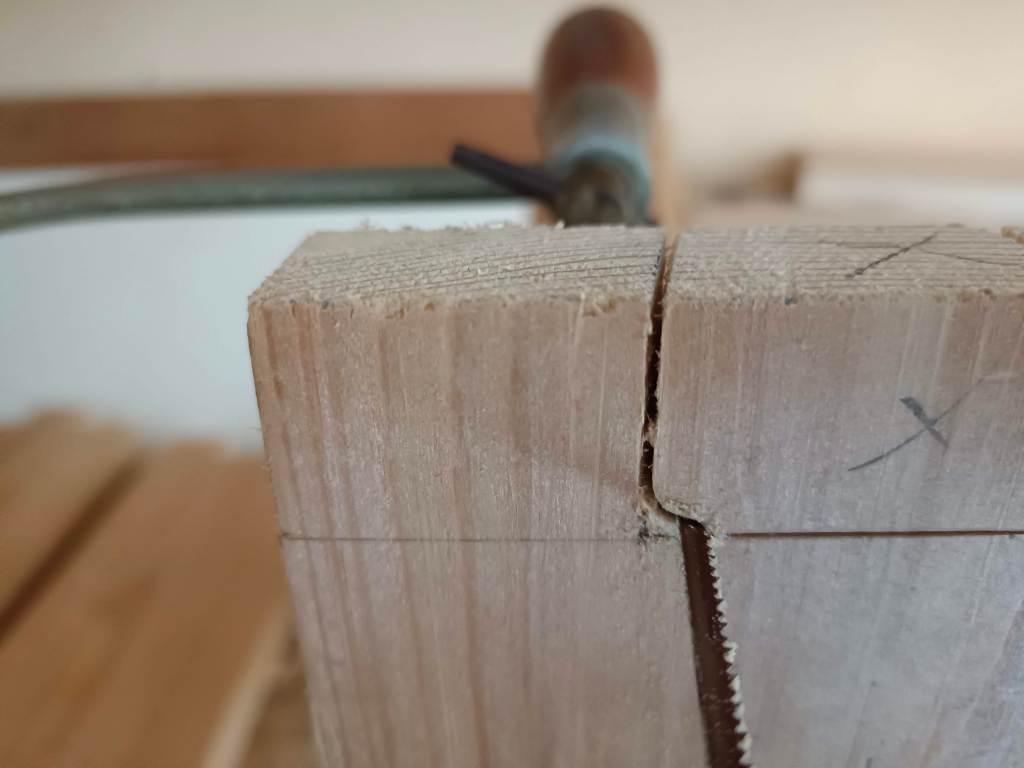
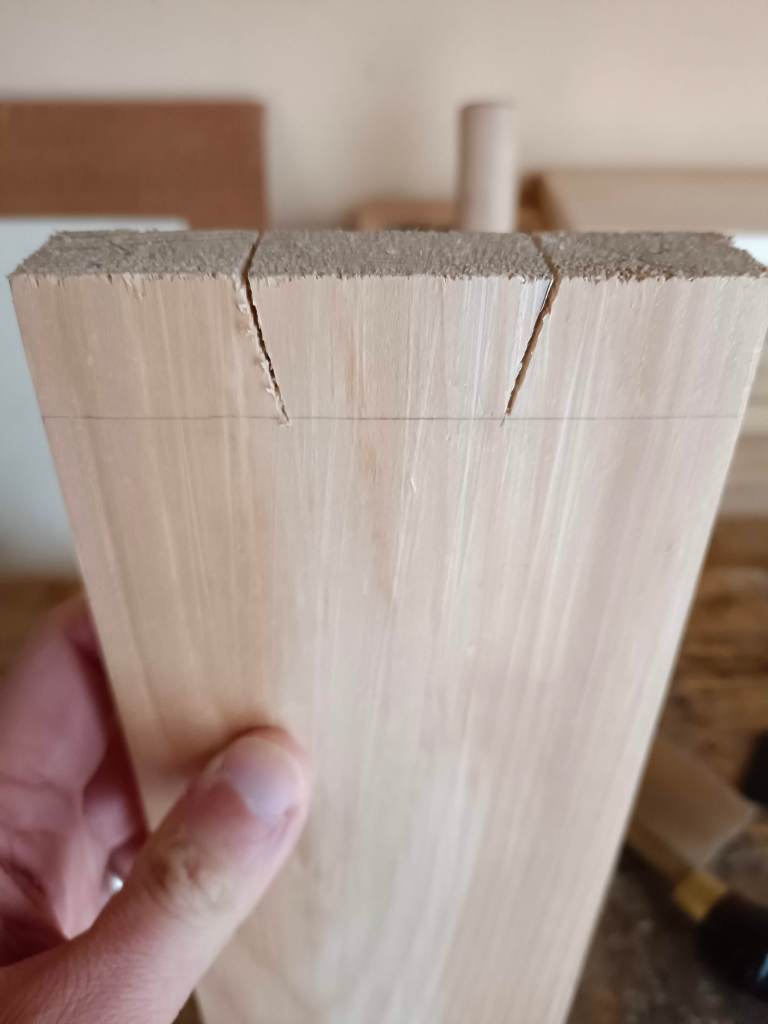
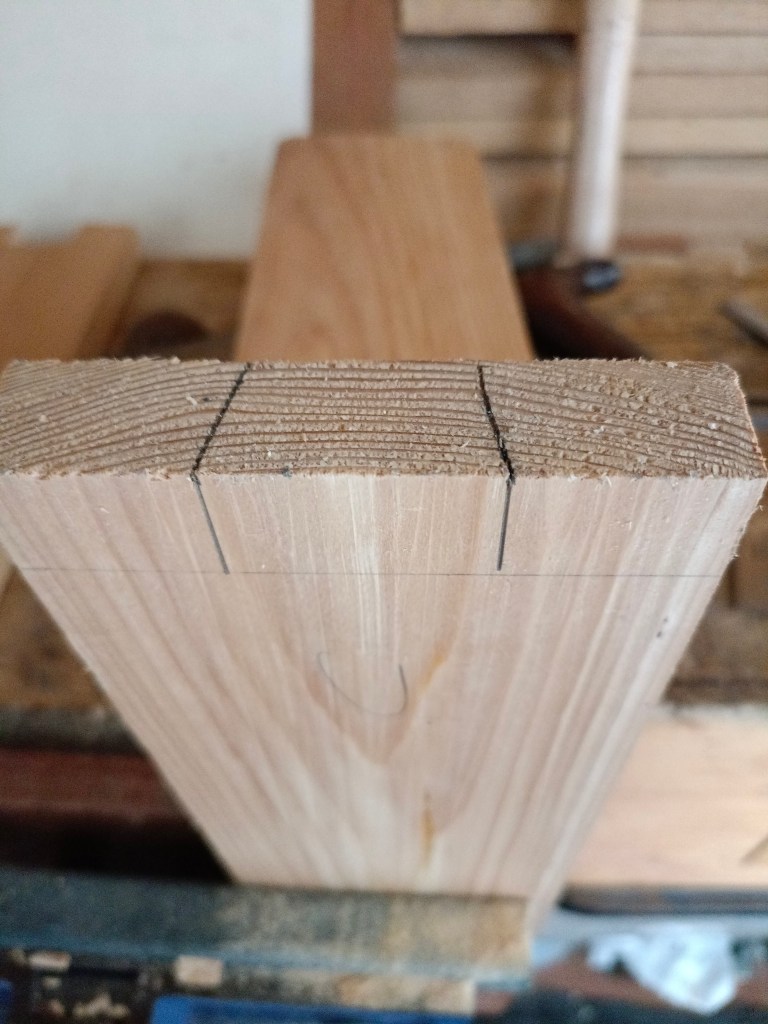
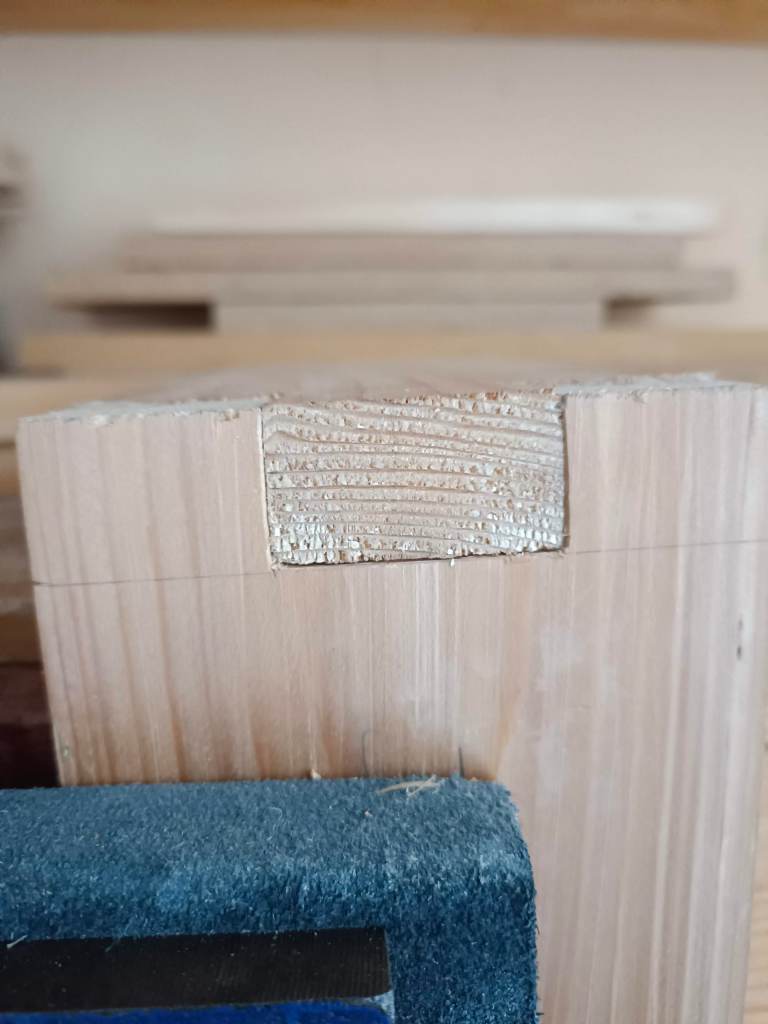
Quindi seghiamo da un solco all’altro cercando di rimanere il più parallelo possibile al fondo. L’ideale sarebbe segare a qualche decimo di millimetro dalla base lasciando meno legno possibile da rimuovere successivamente con lo scalpello. L’importante però é non oltrepassare mai la traccia della base. Meglio quindi rimanere più alti che rischiare di oltrepassare tale limite e rovinare tutto il lavoro.
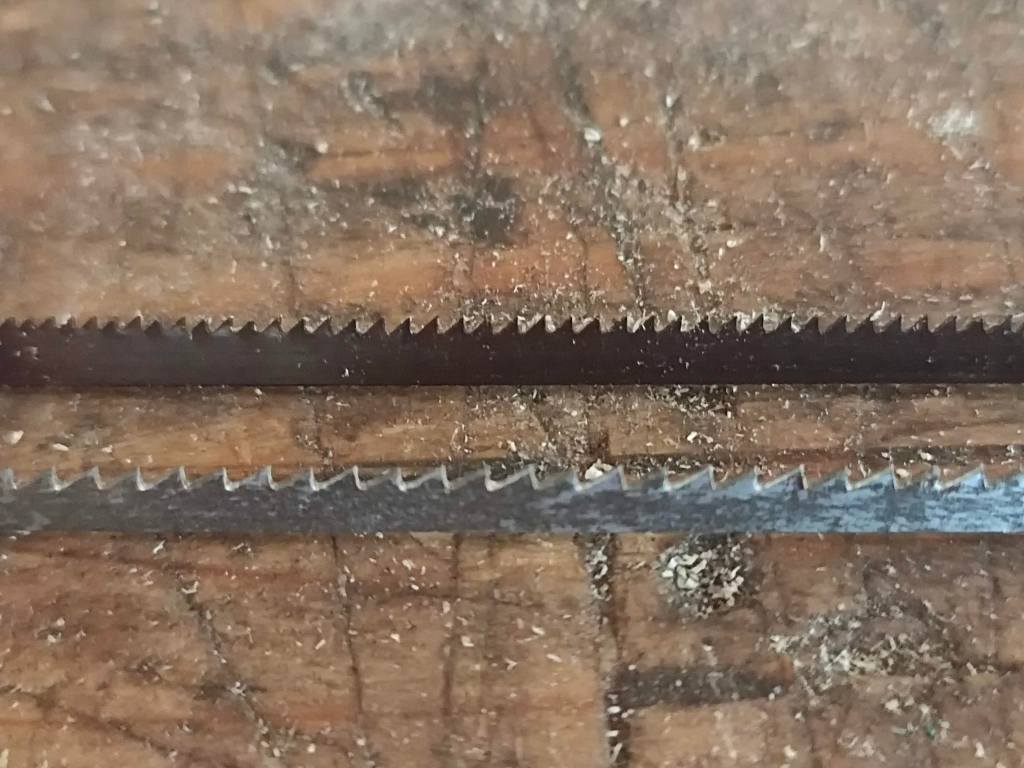
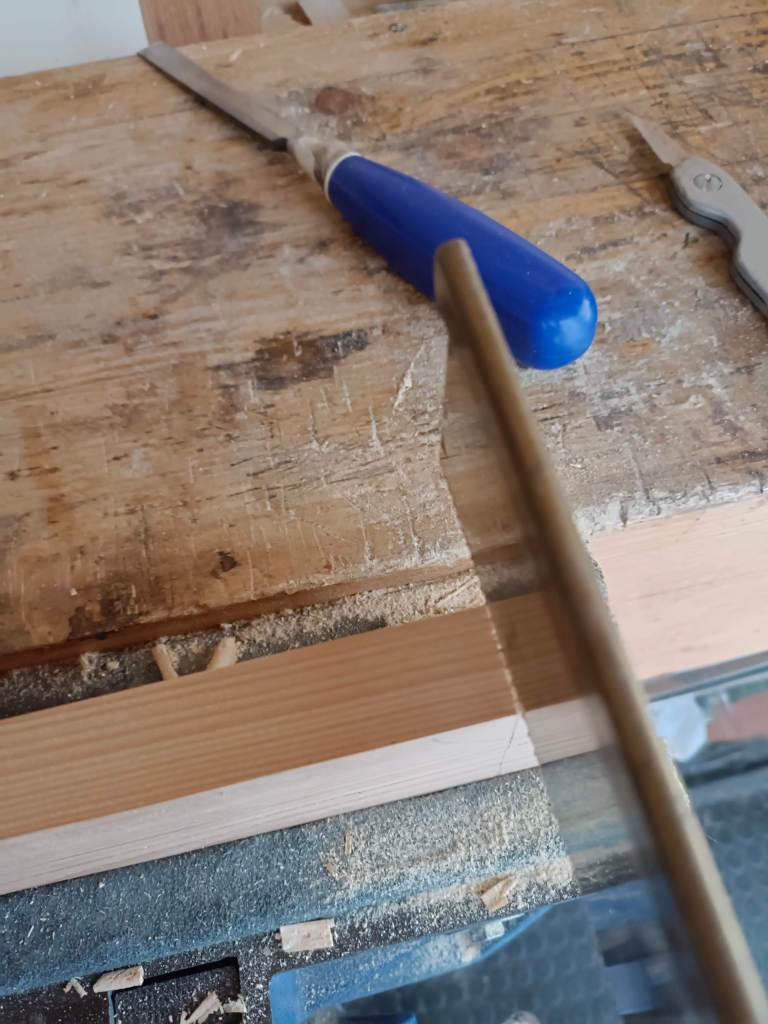
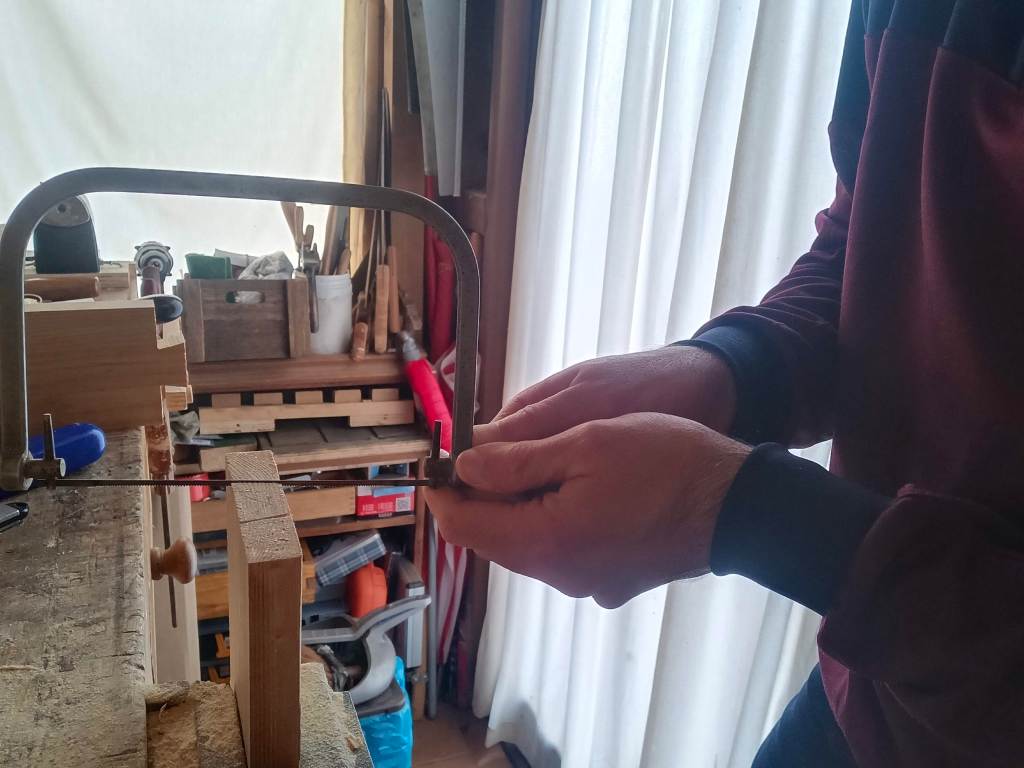
La difficoltà maggiore di questa pratica è forse quella di riuscire a ruotare correttamente la lama del seghetto nel legno. Il mio consiglio è di dotarsi di una lama stretta e con molti denti per pollice e di impostare la lama già leggermente ruotata nella direzione di taglio (nella foto sopra, in alto una lama da 14 TPI e sotto una lama da 24 TPI, usata per illustrare questo articolo). Inoltre, facciamo movimenti brevi e veloci mentre la lama effettua la curvatura al fine di evitare che questa si blocchi nel legno. Cerchiamo anche di non forzare mai troppo la lama in fase di taglio. Effettuata la curva, agiamo sui perni dell’archetto in modo da impostare la lama in posizione parallela. Adesso dovremo solo segare dritto mantenendo il taglio parallelo alla base.

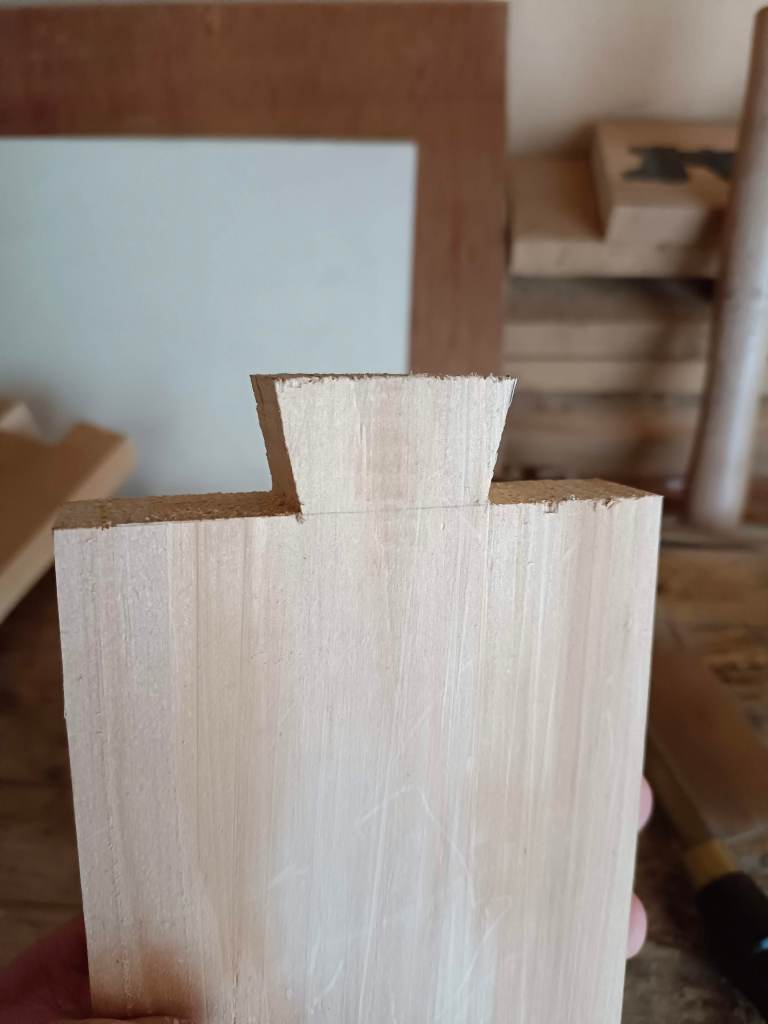
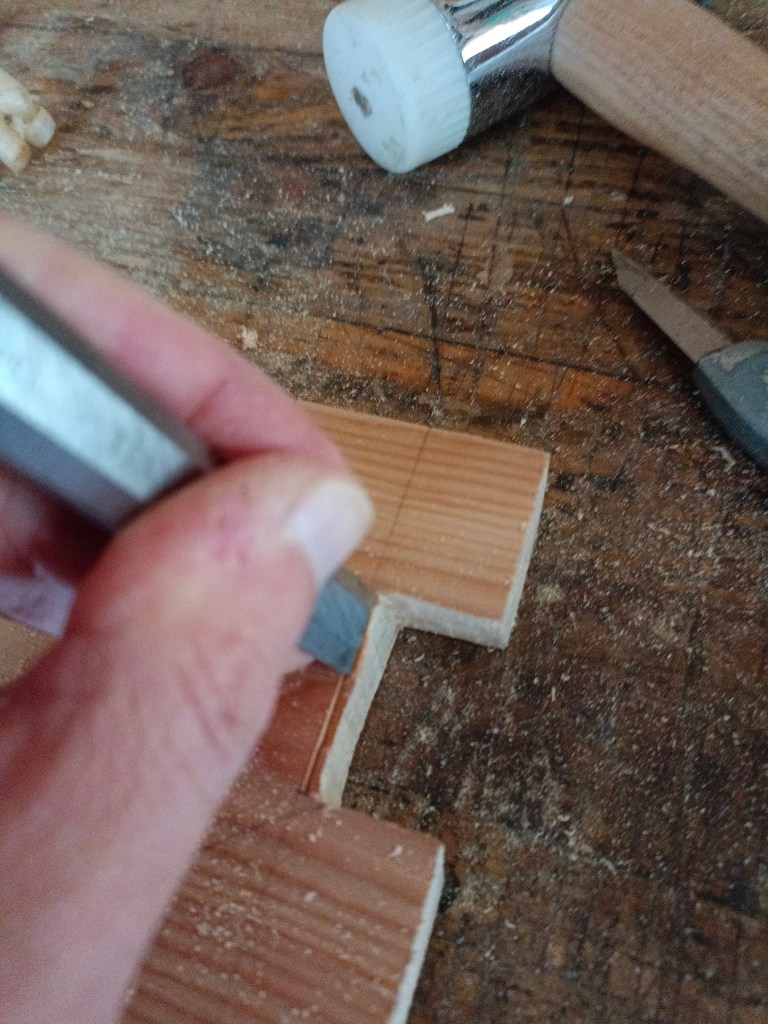
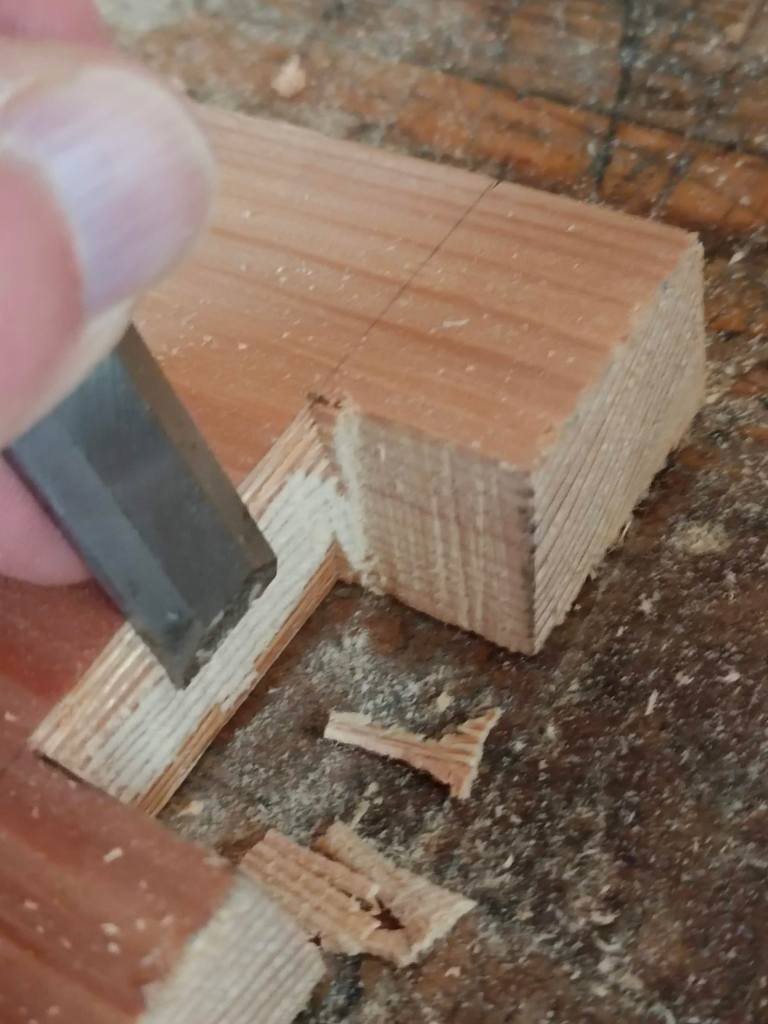
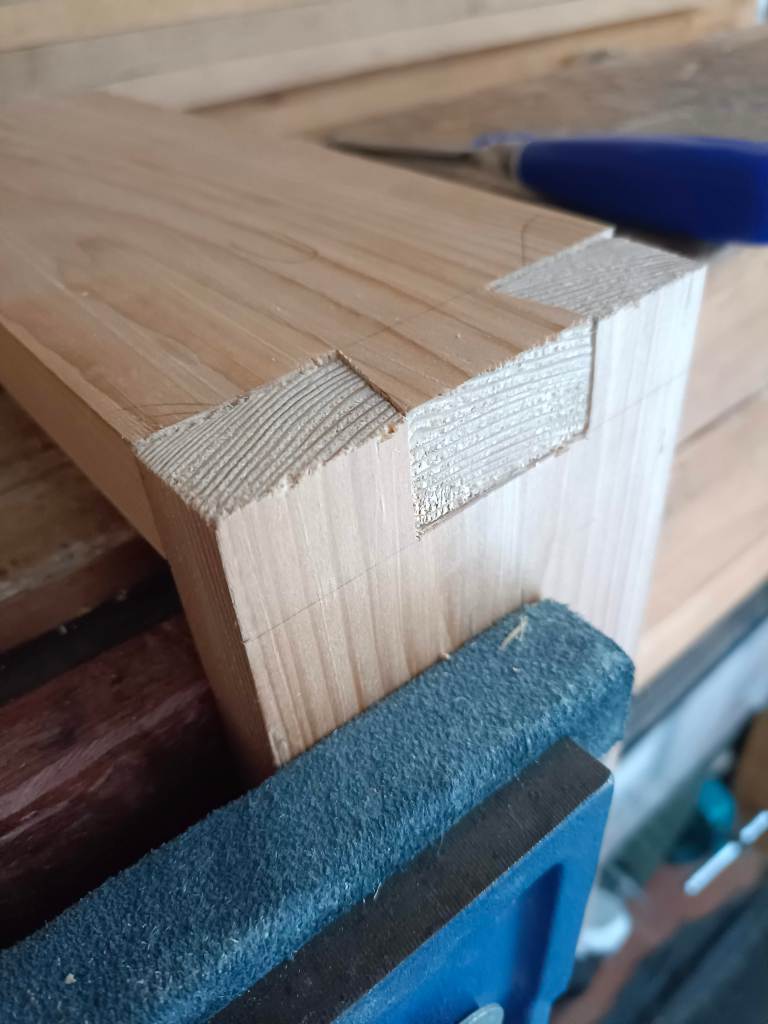
Una volta rimosso il legno, dovremo pareggiare il fondo dell’alloggio con gli scalpelli. A seconda di quanto legno avremo lasciato decideremo se porre lo scalpello direttamente nella traccia finale (se abbiamo lasciato pochissimo legno) e pareggiare lavorando da ambo le parti del pezzo e fermandosi sempre a metà per evitare scheggiature oppure, se rimasto troppo legno, procedere in più passaggi rimuovendo poco legno per volta. Possiamo scalpellare appoggiando il pezzo direttamente sul banco, utilizzando uno scalpello della dimensione simile a quella dell’alloggio e successivamente livellare la base dell’alloggio ponendo il pezzo in posizione verticale nella morsa del banco.
Una volta rifinito il fondo dell’alloggio proviamo l’incastro. Le superfici andranno successivamente piallate per portare tutto allo stesso livello.
Sul mercato è possibile trovare molti modelli di seghetti a copiare. Io mi trovo bene con il seghetto a copiare Eclipse n. 7 CP, un utensile vintage prodotto dalla Eclipse, ma ne esistono molti altri, forse migliori, come ad esempio quello prodotto dalla Ditta Knew Concepts, di cui ho letto ottime recensioni, che però costa veramente tanto. Se non pensiamo di farne un uso intensivo il mio consiglio è di acquistare un seghetto a copiare o ad archetto di tipo economico ma non troppo, come quelli indicati sotto (indico anche quello della Knew Concepts).
https://www.dictum.com/en/manufacturer-knew-concepts
https://www.utensiliprofessionali.com/grobet-laubsaege.html

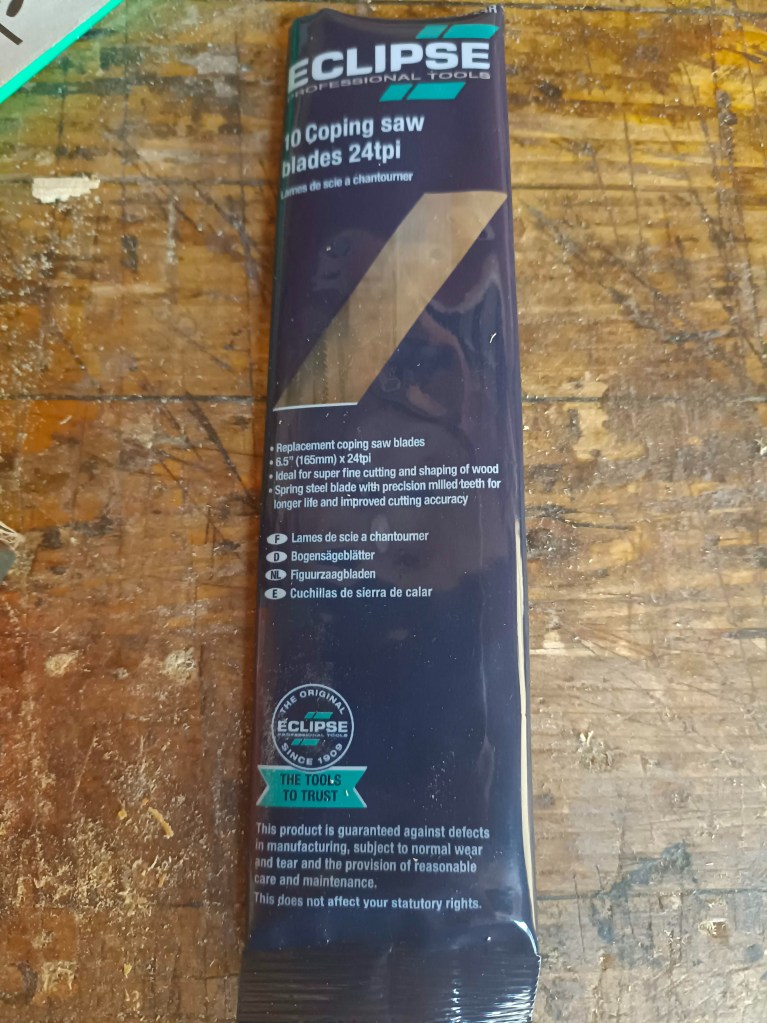
Per quanto riguarda la scelta delle lame, come accennavo, meglio dotarsi di lame strette e con molti denti per pollice. Questo perché le lame con meno TPI ruotano con più difficoltà nel legno. Meglio quindi utilizzare lame con almeno 18 TPI fino a 24 TPI. Di seguito indico due tipi di lame reperibili sul mercato, anche se ne esistono di molteplici misure e fatture e con diversi sistemi di affilatura. Le lame Pegas godono di buona fama.
https://www.utensiliprofessionali.com/pegas-laubsaegeblaetter.html
https://www.amazon.it/gp/aw/d/B004QN7N3Y?psc=1&ref=ppx_pop_mob_b_asin_title
In un prossimo articolo mi riprometto di parlare di un metodo alternativo, ma sempre tradizionale, per realizzare le mortase nell’incastro tenone e mortasa.
__________________________________________________________________________________
Making dovetails in a joint is one of the most fascinating challenges in woodworking by hand. In fine and old-fashioned furniture they are always present in the carcass of the artifact or in some drawer and are synonymous with craftsmanship and quality of the work.
In almost everything I do, I try to include dovetails wherever possible. In addition to being an exercise in style, I find them aesthetically beautiful and certainly the most solid practicable joint. Their success, however, depends on many factors, such as the type of wood used and its thickness, precise measurement, accurate tracing, the use of sharp and good quality tools and above all a lot of practice.
Although I insert them practically everywhere, I find it difficult to find them all perfect in a single work: an imprecise cut, an imperfect finish of the tail housing, tails that are too narrow and too loose that allow small empty spaces to be glimpsed, etc. A non expert person would judge them well done but the critical eye of an expert or the artisan himself will immediately notice the small defects.
In an old article I spoke extensively about dovetails. The method I illustrated was the traditional method as it has been done for hundreds of years. I still consider it the most accurate method to get the cleanest dovetails possible. However, there is another method of making dovetails. Perhaps it is incorrect to define it as a different method, as it is actually quite similar, except for the removal of the material between the tails and the material between the pins.
In fact, removing the section of wood between the tails with the chisels, working alternately from both sides of the piece, allows us to practically reach the trace of the housing and then work with the paring chisels up to the traced line. The result is a clean and well-leveled socket. However, it is a rather slow method, but certainly perfect when we have to do a only a few dovetails.
However, if we have to make a lot of dovetails, how could it happen if we have to make the carcass of a large piece of furniture such as a chest or many drawers that include half-lapped dovetails, in order to speed up the process of creating the sockets for the tails and for the pins, which is the most time-consuming, we could use a coping saw instead of a chisel and hammer.
In addition to the speed advantage, we will also make less noise. In fact, one of the great advantages of woodworking by hand is that it makes little noise, always when compared to that produced by the machinery. Of all the possible sources of noise, the noise of the hammer striking the chisel is probably the most annoying and noisy. If we are lucky enough to work in a place far from the others, the problem will not arise but if we are, for example, in an apartment, the fact may not be of little importance. In fact, it is one thing to make a dozen dovetails for a small box, another to make a hundred for a piece of furniture with drawers. If the lab where we work is not well soundproofed, the noise will spread through the bench and the walls and through the air to the ears of our neighbor who will certainly not be enthusiastic about it.
After this small parenthesis, let’s see how to remove the section of wood between the tails with a coping saw. We have already seen in a previous post what a copyng saw is and how it works (we can also use a fret saw or a jewelers saw for this purpose, although the latter is better suited to finer works). The peculiarity of this tool is that it has a very thin blade with a high number of teeth per inch. This allows it to get into tight spaces and make very tight curves in the wood. It is therefore perfect to insert into the narrow cut made with a dovetail saw and rotate in the space created by this.
As anticipated, the whole tracing and cutting procedure remains almost unchanged except for the removal of the wood between the tails and between the pins. For convenience I insert above the photos of the whole procedure that you can still find described in detail at the above link.
We insert the coping saw blade into the cut left by the saw. Let’s move about a millimeter away from the bottom of the housing, in order to guarantee ourselves the space to rotate the blade, grab the handle with both hands and start sawing trying to make a curve capable of taking us with the blade in a parallel position with the bottom.
Then we saw from one cut to the other trying to stay as parallel as possible to the bottom. The ideal would be to saw a few tenths of a millimeter from the bottom, leaving as little wood as possible to be removed later with the chisel. The important thing, however, is never to go beyond the gauge line. It is therefore better to stay higher than to risk exceeding this limit and ruining all the work.
The greatest difficulty of this practice is perhaps that of being able to correctly rotate the saw blade in the wood. My advice is to equip yourself with a narrow blade with many teeth per inch and to set the blade already slightly rotated in the cutting direction (in the photo above, above a 14 TPI blade and below a 24 TPI blade, used for illustrate this article). Also, we make short, quick movements as the blade curves to prevent it from getting stuck in the wood. We also try not to force the blade too much during the cutting. Once the curve has been made, we act on the pins of the coping saw in order to set the blade in a parallel position. Now we will just have to saw straight while keeping the cut parallel to the bottom.
Once the wood has been removed, we will have to pare the bottom of the socket with the chisels. Depending on how much wood we have left, we will decide whether to place the chisel directly in the gauge line (if we have very little wood left) and pare by working on both sides of the piece and always stopping halfway to avoid breaking wood or, if too much wood remains, proceed in further steps by removing a little wood at a time. We can chisel by placing the piece directly on the bench, using a chisel of the size similar to that of the housing and then level the bottom of the socket by placing the piece in a vertical position in the bench vice.
On the market you can find many models of coping saws. I am happy with the Eclipse n. 7 CP, a vintage tool produced by Eclipse, but there are many others, perhaps better ones, such as the one produced by the company Knew Concepts, of which I have read excellent reviews, which however costs a lot. If we do not plan to make an intensive use of it, my advice is to buy a coping or fret saw of an economic type but not too much, like those indicated above (I also indicate the one produced by Knew Concepts).
As for the choice of blades, as I mentioned, it is better to have narrow blades with many teeth per inch. This is because blades with less TPI rotate more difficult in wood. It is therefore better to use blades with at least 18 TPI up to 24 TPI. Above I indicate two types of blades available on the market, even if there are many sizes and models and with different sharpening systems. Pegas blades enjoy a good reputation.
In a future article I will talk about an alternative, but always traditional, method to make the mortise and tenon joint.

Lascia un commento