COME RIFORMARE I DENTI DI UNA SEGA MANUALE / RECUTTING AND RESIZING HANDSAW TEETH
English translation at the end of the article

Rifare, o per meglio dire, riformare i denti di una sega manuale é un’operazione che viene fatta raramente. Consiste nel rimuovere tutti i denti di una sega per crearne di nuovi, eventualmente cambiando il numero di TPI e il rake. Essendo un intervento drastico, viene fatto quando abbiamo a che fare con seghe particolarmente rovinate da precedenti affilature sbagliate tali da non poter essere recuperate con una normale affilatura.
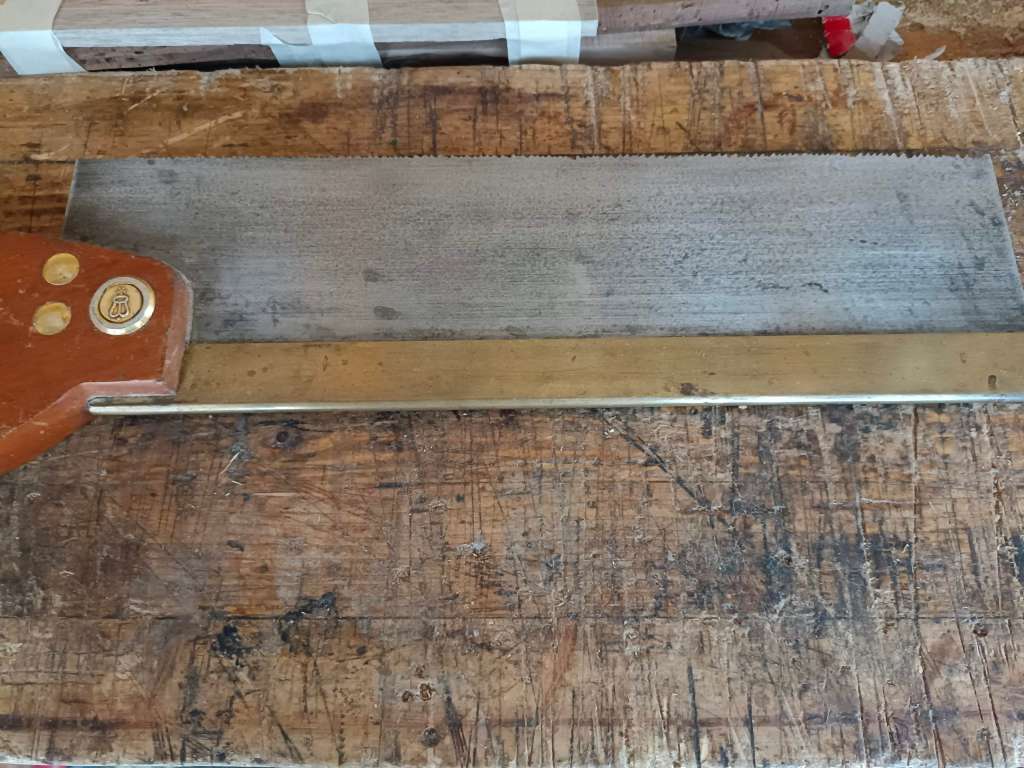
Tempo fa ho acquistato su Ebay una sega per tenoni 12 TPI pagata molto poco perché particolarmente malandata. Seguendo un tutorial di Paul Sellers ho voluto provare a rifare tutto il procedimento di rimozione dei vecchi denti e formazione dei nuovi. Il risultato non è stato troppo soddisfacente e per tale motivo ci ho pensato un po’ prima di decidere se pubblicare il post o meno. Trattandosi però di un’ operazione abbastanza lunga e che si fa raramente non valeva la pena rifare tutto apposta per scrivere l’articolo. Mi sono infine convinto che le difficoltà che ho incontrato potessero essere utili a chi legge al fine di evitare i miei stessi errori. Vediamo di seguito il procedimento seguito per rifare i denti ad una sega per tenoni volendo ricreare lo stesso passo originale di 12 TPI.


Come prima cosa poniamo la sega nella morsa del banco aiutandoci con un ausilio autocostruito o con l’ apposita morsa per seghe. Per comodità possiamo anche rimuovere il manico della sega. Con una lima a faccia piatta facciamo molte passate dal manico verso la punta fino a quando non avremo rimosso tutti i denti. Cerchiamo di mantenere parallela la lima durante tutte le passate. Se abbiamo dimestichezza con la mola la si può utilizzare per accelerare il procedimento. Nel mio caso, trattandosi di denti piccoli, non si è reso necessario.
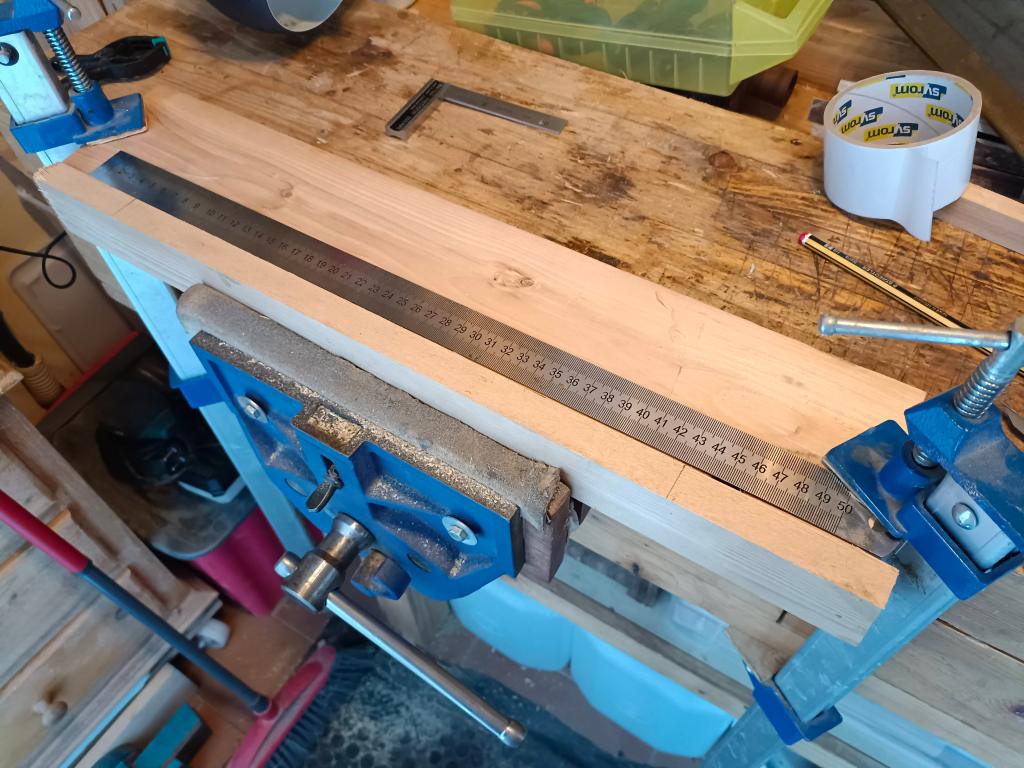
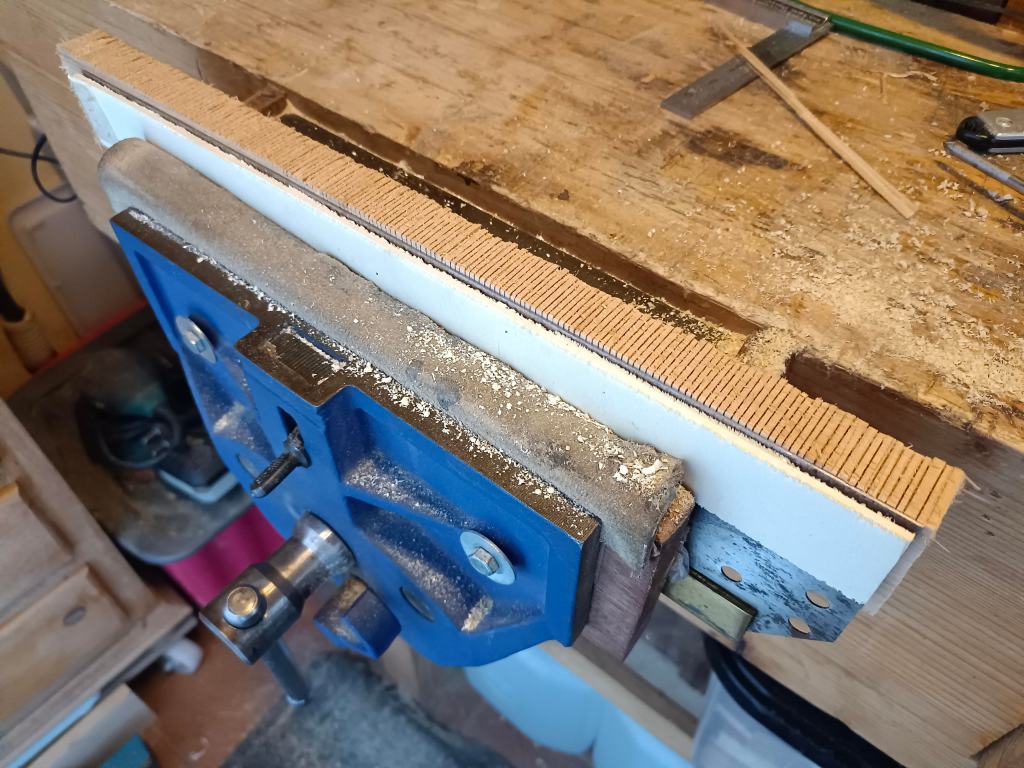
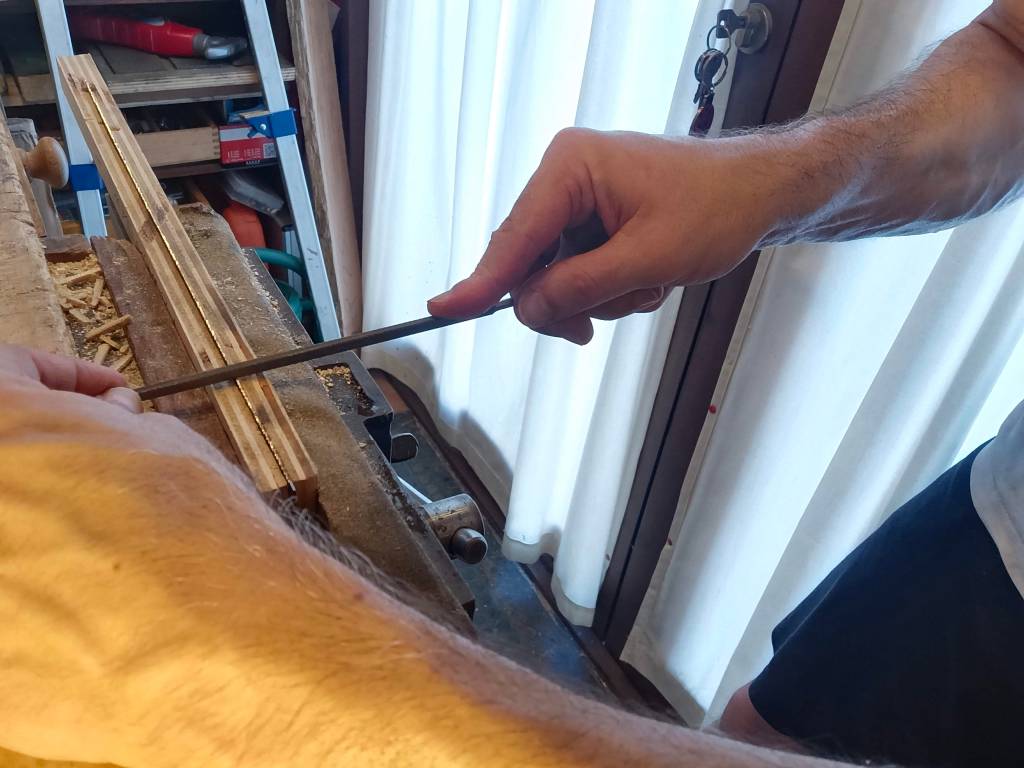
Recuperiamo un listello di legno duro (non utilizzate legno tenero tipo abete o simili sennò avrete i problemi che vi dirò tra poco) di lunghezza almeno uguale a quella della lama e inseriamolo nella morsa del banco. Quindi poniamo a filo del listello una tavola in grado accogliere un righello di acciaio di almeno 30 cm. Blocchiamo il righello sulla tavola con del nastro biadesivo in modo che il listello di legno e il righello si trovino alla stessa altezza. Blocchiamo la tavola al banco con i morsetti. La situazione dovrebbe apparire come quella nella foto sopra.

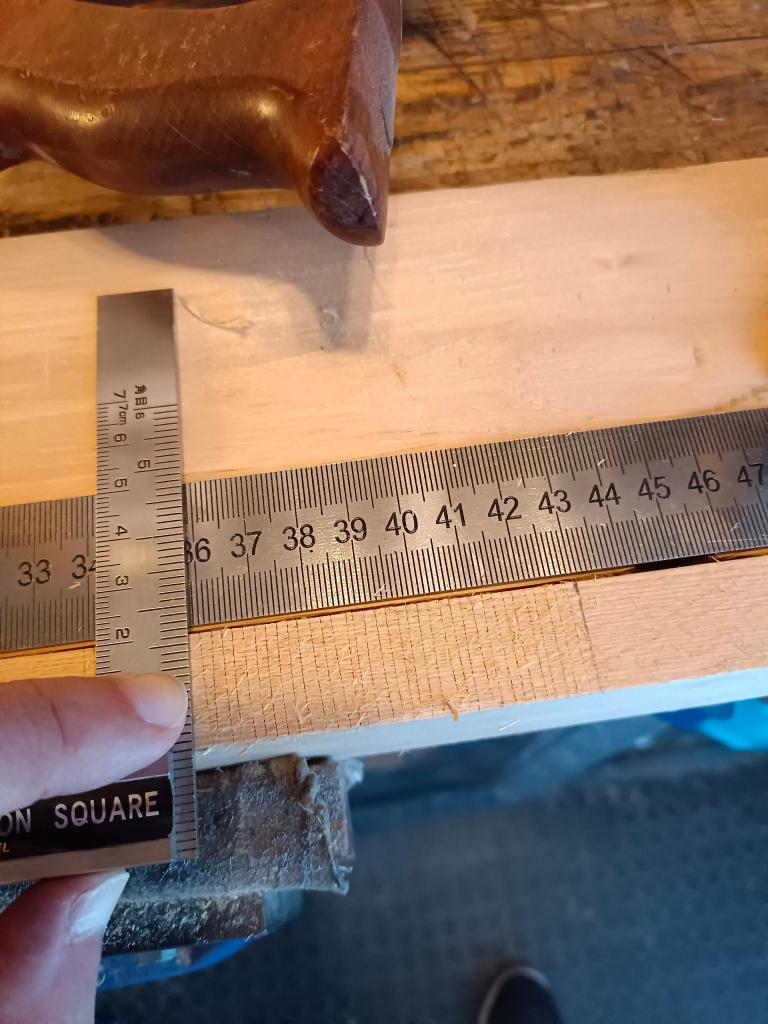
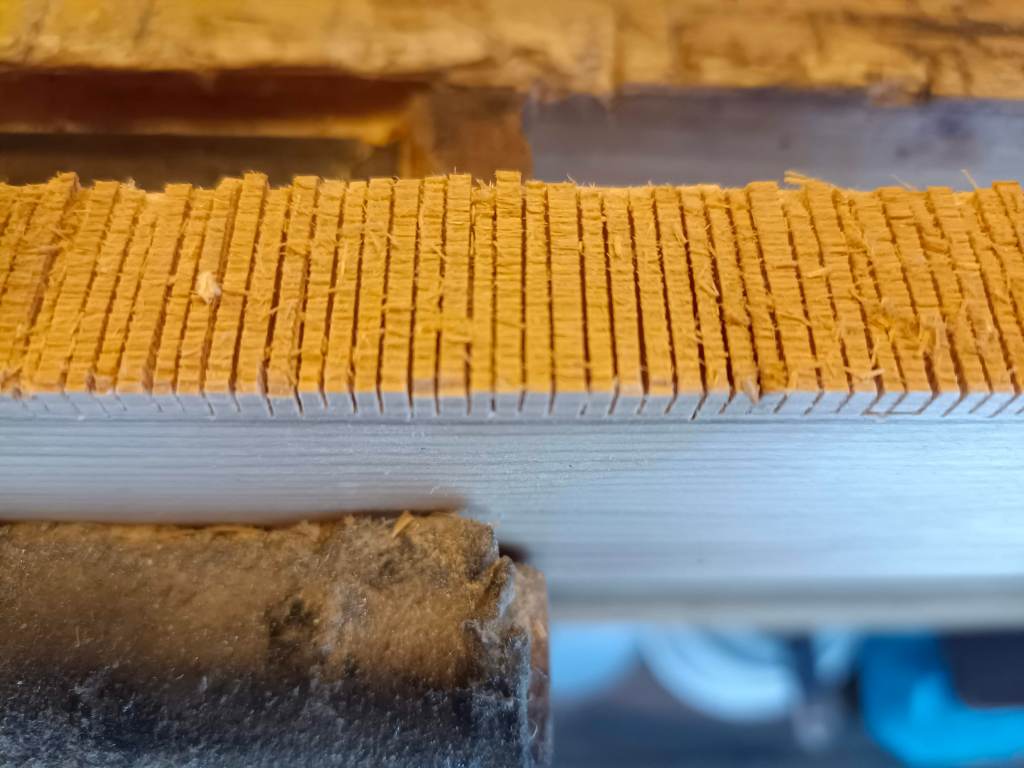
Con una squadretta ed un coltellino da tracciatura segniamo delle tracce sul listello di legno ogni due mm. che corrispondono grosso modo ad un passo della sega di 12 TPI fino a coprire tutta la lunghezza della lama della sega. Cerchiamo di essere precisi in questa fase perché i segni che facciamo adesso saranno trasferiti sulla lama della sega ed è importante che siano tutti alla stessa distanza. Potremmo anche tracciare solo per qualche centimetro e poi segare il listello utilizzando solo questa porzione di guida, ma ciò ci costringerebbe a spostarla spesso quando in seguito dovremo trasferire i segni sulla lama della sega. Fatto tutte le tracce possiamo definire i solchi appena creati con uno scalpello per creare un minimo di spazio per la sega. Ho provato a farlo ma su un legno tenero é stato impossibile in quanto non sosteneva la pressione dello scalpello (secondo motivo per il quale dovete usare un listello di legno duro).

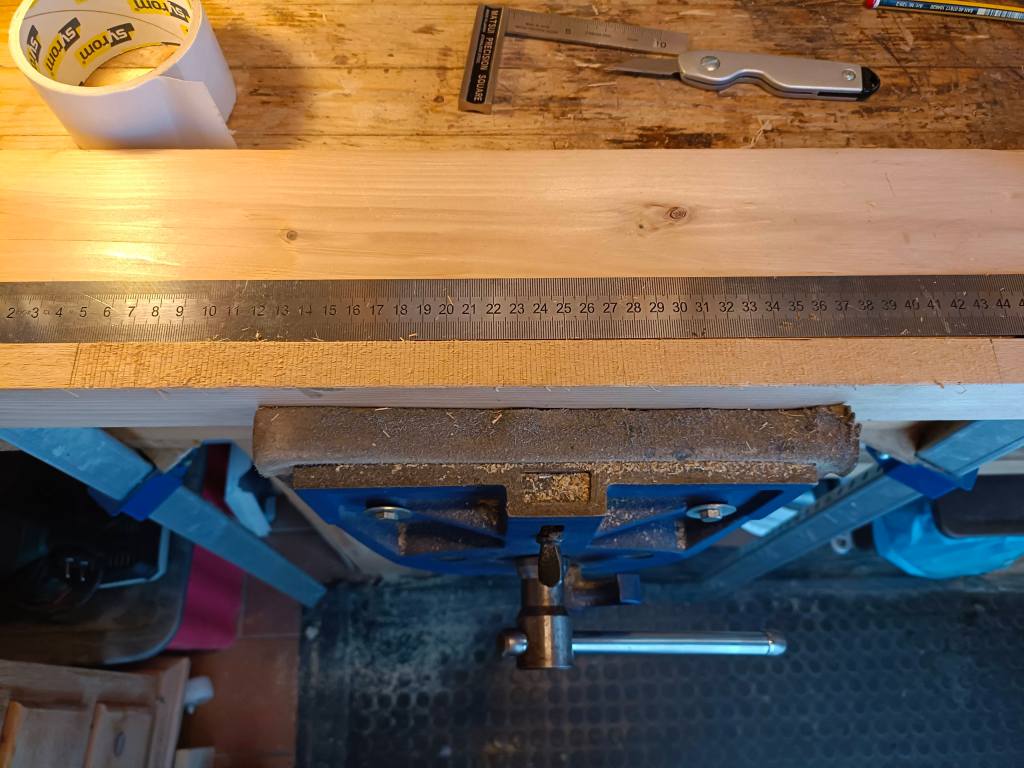
Rimuoviamo tutto e lasciamo nella morsa il solo listello di legno che ci servirà da guida per trasferire alla giusta distanza le tacche dei denti da formare sulla lama della sega. Con una sega per tagli fini, come una dovetail saw, seghiamo per circa un millimetro di profondità. Lo scopo è quello di definire il solco che farà da guida per trasferire le tacche sulla lama. Per segare tutto alla stessa profondità possiamo aiutarci segnando a matita sul fianco della guida in legno il limite massimo di taglio.
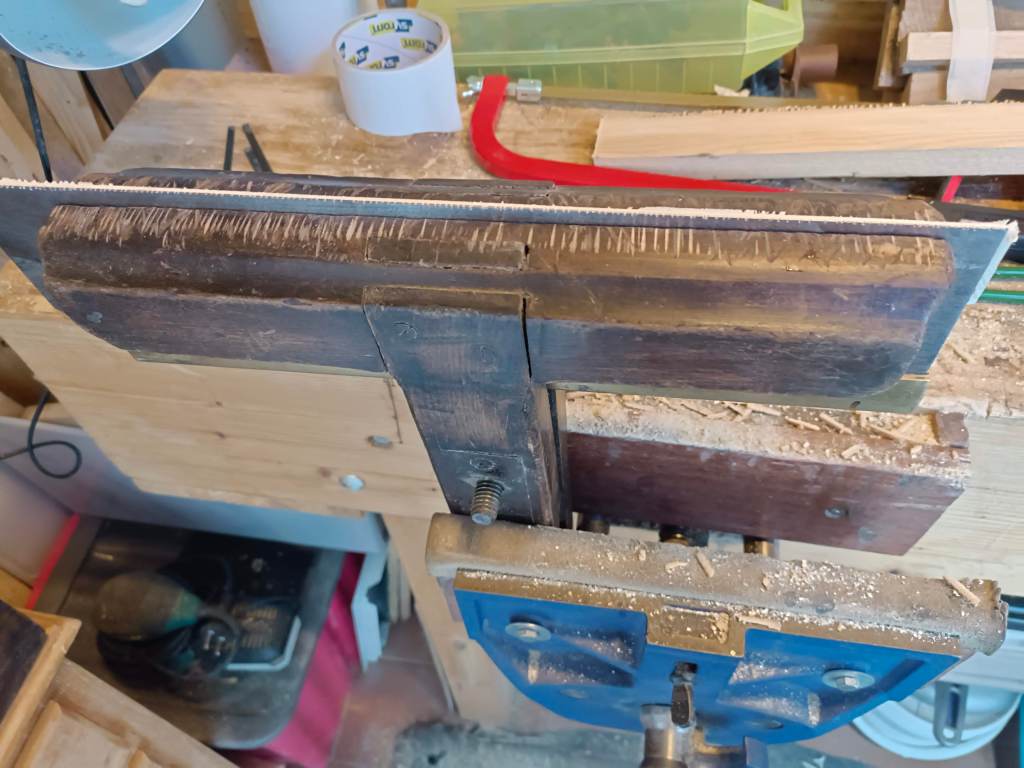
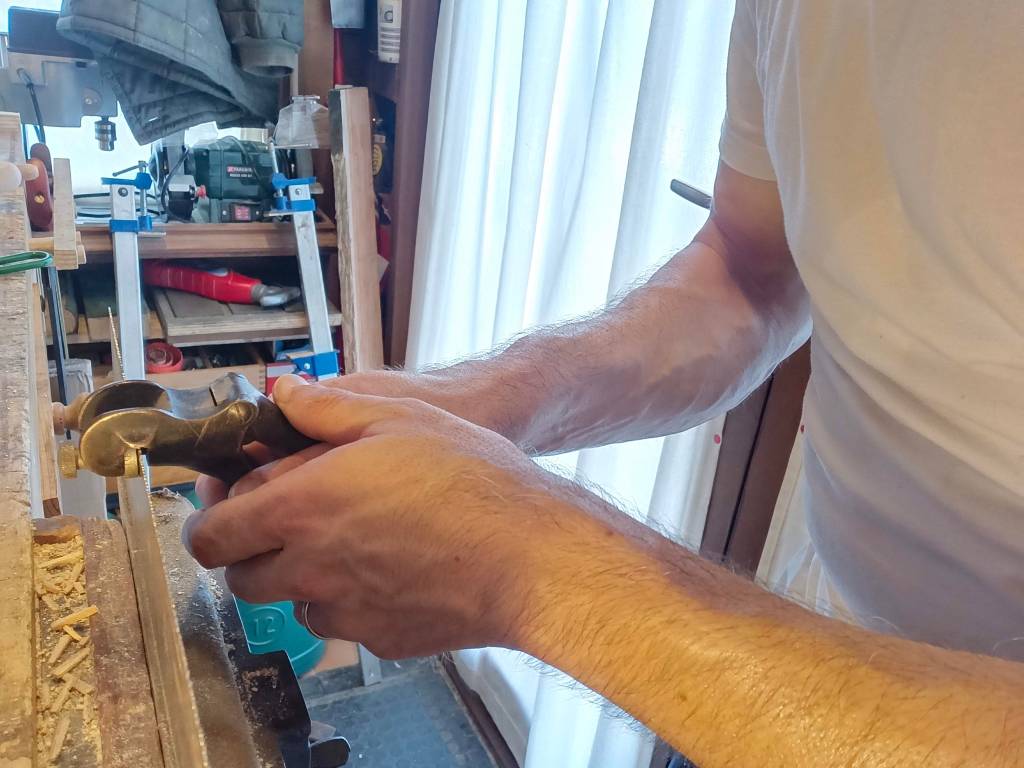
Una volta definiti tutti i tagli guida, inseriamo la guida in legno, la sega e uno spessore in multistrato, fissato con biadesivo alla lama per permettere di bloccare tutto nella morsa (lo spessore in multistrato non servirebbe se abbiamo rimosso preventivamente il manico della sega). Allineiamo il tutto come mostrato nella foto sopra ovvero ponendo più vicino a noi la lama e dietro la guida. Con un seghetto per ferro poniamoci nelle tracce della guida e trasferiamole sulla lama. Un paio di passate basteranno per trasferire la traccia dalla guida alla lama.
Il seghetto in ferro é estremamente importante. Deve avere una lama molto fine ed affilata in grado di inserirsi agevolmente nel solco e occorre che almeno la prima parte della lama sia leggermente spuntata, picchiettandola da ambo i lati con un martello in ferro o con l’aiuto di una mola. Questo garantirà un attacco soft del seghetto in acciaio sulla lama della sega. Un altro errore che ho fatto in questa fase è stato quello di sottovalutare l’importanza del seghetto in ferro e di non non aver spuntato leggermente la parte della lama del seghetto che attacca la lama della sega. Non avendo lame perfettamente performanti e non avendole arrotate nella parte iniziale l’approccio del taglio della lama é risultato molto difficoltoso. Unito al fatto che la guida in legno era in legno tenero, il risultato è stato che le tracce praticate sulla guida in legno saltavano ad ogni passaggio rendendo poco preciso il trasferimento delle tracce. Inoltre, alcune tracce che sembravano precise sulla guida in legno non lo erano se trasposte sulla lama in ferro, con il risultato che alcune non sono state riportate precisamente alla stessa distanza. Ciò significa che in fase di formazione dei denti avremo alcuni denti più distanti tra loro ed altri più vicini. In sostanza un’affilatura non omogenea.
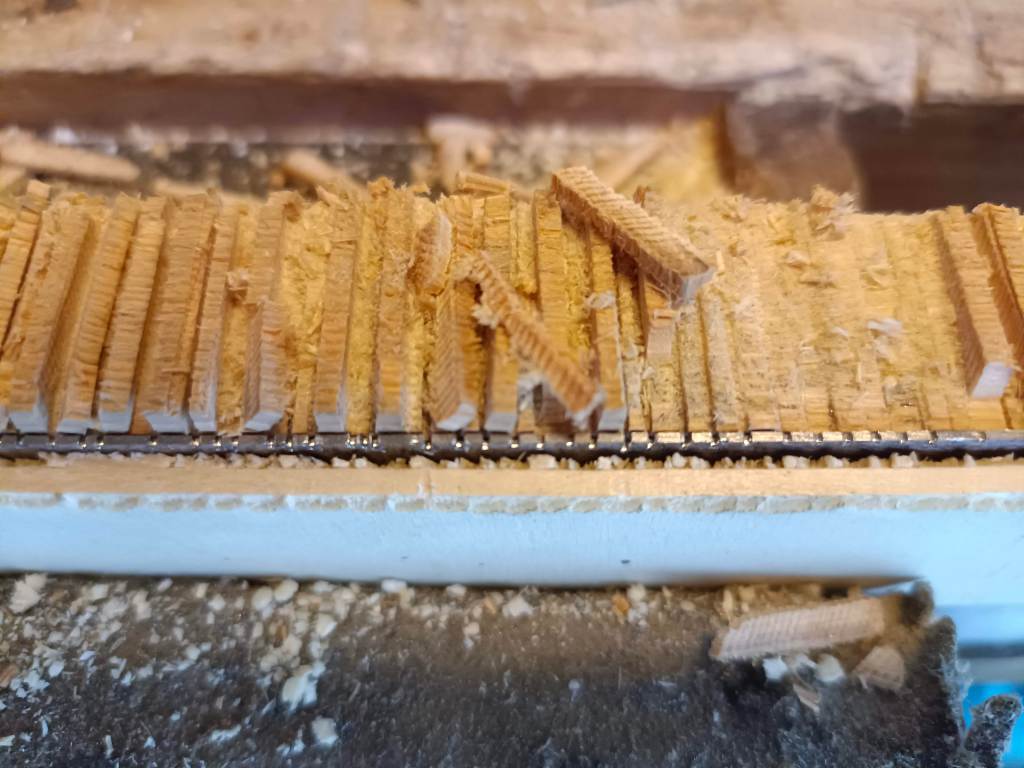
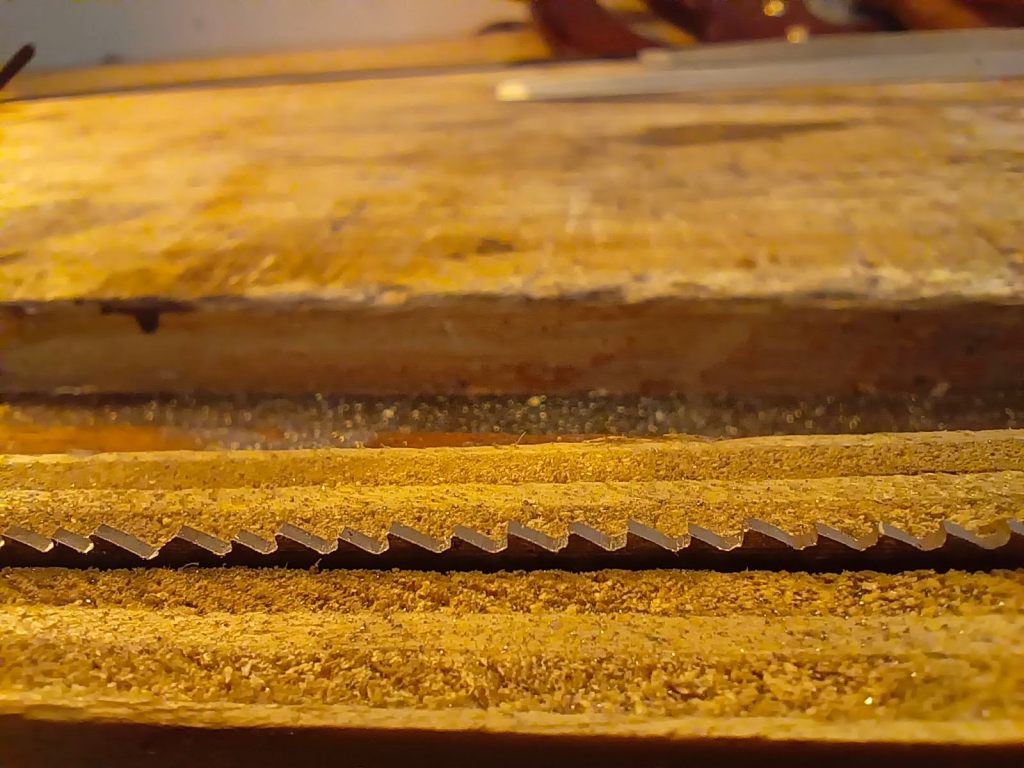
La parte finale é un’operazione di cui abbiamo già parlato in altri articoli. Con una lima triangolare di grandezza di poco superiore a quella dei denti da formare cominciamo a creare i denti ponendola nei solchi appena praticati. Saranno necessarie svariate passate al fine di dare la forma necessaria. Per ultimo effettuiamo la stradatura della sega.

Il risultato finale è stato una sega sicuramente migliore di quando l’ho acquistata e ben affilata ma con qualche dente di dimensione diversa e ad una distanza non precisa.
___________________________________________________________________________________
Recutting and resizing the teeth of a hand saw is an operation that is rarely done. It consists of removing all the teeth of a saw to create new ones, eventually changing the number of TPI and the rake. Being a drastic intervention, it is done when we are dealing with saws particularly damaged by previous wrong sharpening such that they cannot be recovered with a normal sharpening.
Some time ago I bought a 12 TPI tenon saw on Ebay, paid very little because it was in very poor condition. Following a tutorial by Paul Sellers I wanted to make the whole procedure of removing the old teeth and forming the new ones. The result was not too satisfying and for this reason I thought about it a bit before deciding whether to publish the post or not. However, since this is a fairly long operation and that is rarely done, it was not worth doing everything on purpose to write the article. Finally, I became convinced that the difficulties I encountered could be useful to the reader in order to avoid my own mistakes. We see below the procedure followed to remake the teeth to a tenon saw wanting to recreate the same original pitch of 12 TPI.
First we place the saw in the bench vice with the help of a self-built aid or with the special saw vice. For convenience we can also remove the saw handle. With a flat-faced file we make several passes from the handle to the tip until we have removed all the teeth. We try to keep the file parallel during all passes. If we are familiar with the grinding wheel, it can be used to speed up the process. In my case, being small teeth, it was not necessary.
We take a hard wood strip (do not use soft wood such as fir or similar because you will have the problems that I will tell you shortly) of at least equal length to that of the blade and insert it in the bench vice. Then we place a piece of wood that can accommodate a steel ruler of at least 30 cm flush with the strip. We block the ruler on the board with double-sided tape so that the wooden strip and the ruler are at the same height. We clamp the board to the bench with clamps. The situation should look like the one pictured above.
With a square and a marking knife we mark traces on the wooden strip every two mm. which roughly corresponds to a 12 TPI saw pitch to cover the entire length of the saw blade. We try to be precise at this stage because the marks we make now will be transferred to the saw blade and it is important that they are all at the same distance. We could also trace only a few centimeters and then saw the strip using only this portion of guide, but that would force us to move it often when we later have to transfer the marks on the saw blade. Once all the traces are done, we can define the grooves just created with a chisel to create a minimum of space for the saw. I tried to do this but on soft wood it was impossible as it did not support the pressure of the chisel (second reason why you have to use a hard wood strip).
We remove everything and leave only the wooden strip in the vice that will serve as a guide to transfer the traces of the teeth to be formed on the saw blade at the right distance. With a fine-cut saw, such as a dovetail saw, we saw about a millimeter deep. The aim is to define the groove that will act as a guide for transferring the traces on the blade. To saw everything at the same depth, we can help ourselves by marking the maximum cutting limit in pencil on the side of the wooden guide.
Once all the guide cuts have been defined, we insert the wooden guide, the saw and a plywood shim, fixed with double-sided adhesive tape to the blade to allow you to lock everything in the vice (the plywood shim would not be needed if we have previously removed the handle of the saw) . We align everything as shown in the photo above, by placing the blade closer to us and behind the guide. With a hacksaw, let’s put ourselves in the tracks of the guide and transfer them to the blade. A couple of passes will be enough to transfer the track from the guide to the blade.
The iron hacksaw is extremely important. It must have a very fine and sharp blade able to fit easily into the groove and at least the first part of the blade must be slightly blunt, tapping it on both sides with an iron hammer or with the help of a grinding wheel. This will ensure a soft attachment of the steel hacksaw to the saw blade. Another mistake I made at this stage was underestimating the importance of the iron hacksaw and not having slightly blunt the part of the hacksaw blade that attaches the saw blade. Not having perfectly performing blades and not having them sharpened in the initial part, the blade cutting approach was very difficult. Combined with the fact that the wooden guide was made of soft wood, the result was that the traces made on the wooden guide jumped at every step making the transfer of the traces inaccurate. In addition, some traces that seemed accurate on the wooden guide were not when transposed onto the saw blade, with the result that some were not reported precisely at the same distance. This means that during the formation of the teeth we will have some teeth more distant from each other and others closer. Basically an uneven sharpening.
The final part is an operation that we have already talked about in other articles. With a triangular file slightly larger than that of the teeth to be formed, we begin to create the teeth by placing it in the grooves just made. Several passes will be required in order to give the necessary shape. Finally, let’s set the saw.
The end result was a definitely better saw than when I bought it and well sharpened but with a few teeth of a different size and at an inaccurate distance.

Lascia un commento