PIALLARE IL LEGNO. PIALLATURA DI COSTA / PLANING WOOD. EDGE PLANING
English translation at the end of the article
Dopo aver visto la piallatura lungovena e la piallatura di testa l’ultima tipologia di cui parlare è la piallatura di costa. Per costa di una tavola si intende normalmente il fianco più stretto e lungo del pezzo. Piallare la costa, rettificandola come si dice in gergo, portandola a 90 gradi rispetto alle facce adiacenti é un’operazione che ci permette di ottenere tavole perfettamente squadrate pronte per essere assemblate con incastri e colla o solo con colla come spesso accade per la costruzione di pannelli formati da più tavole. La piallatura di una costa non è un’operazione difficile ma occorre porre attenzione ad alcuni particolari.
Se acquistiamo una tavola già piallata e rifilata probabilmente la costa sarà già rettificata e dovremo intervenire solo minimamente ma se la nostra tavola è stata segata lungovena con una sega manuale molto probabilmente la costa presenterà zone più alte ed altre più basse e i fianchi saranno fuori squadro rispetto alle facce adiacenti.
Procediamo per gradi spianando dapprima i rilievi per tutta la lunghezza del pezzo al fine di ottenere una superficie livellata e solo successivamente concentriamoci sul fuori squadro. Lo scopo sarà quello di livellare tutte queste zone con le pialle cercando di ottenere una costa la più dritta possibile e in squadra con le facce adiacenti.
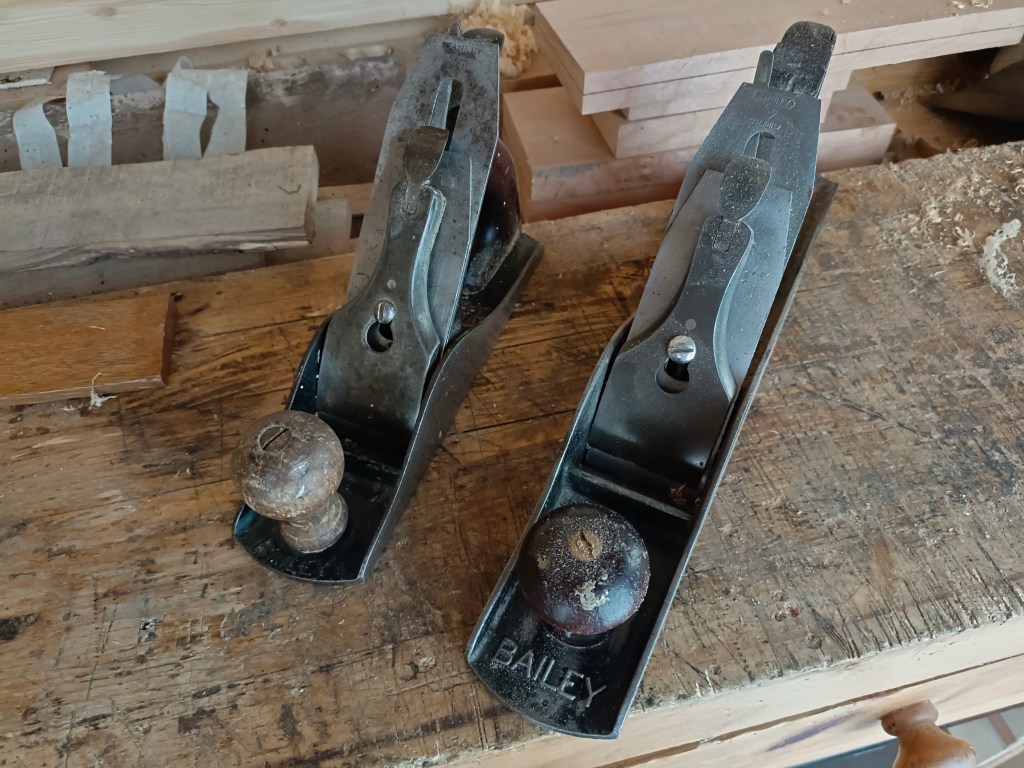
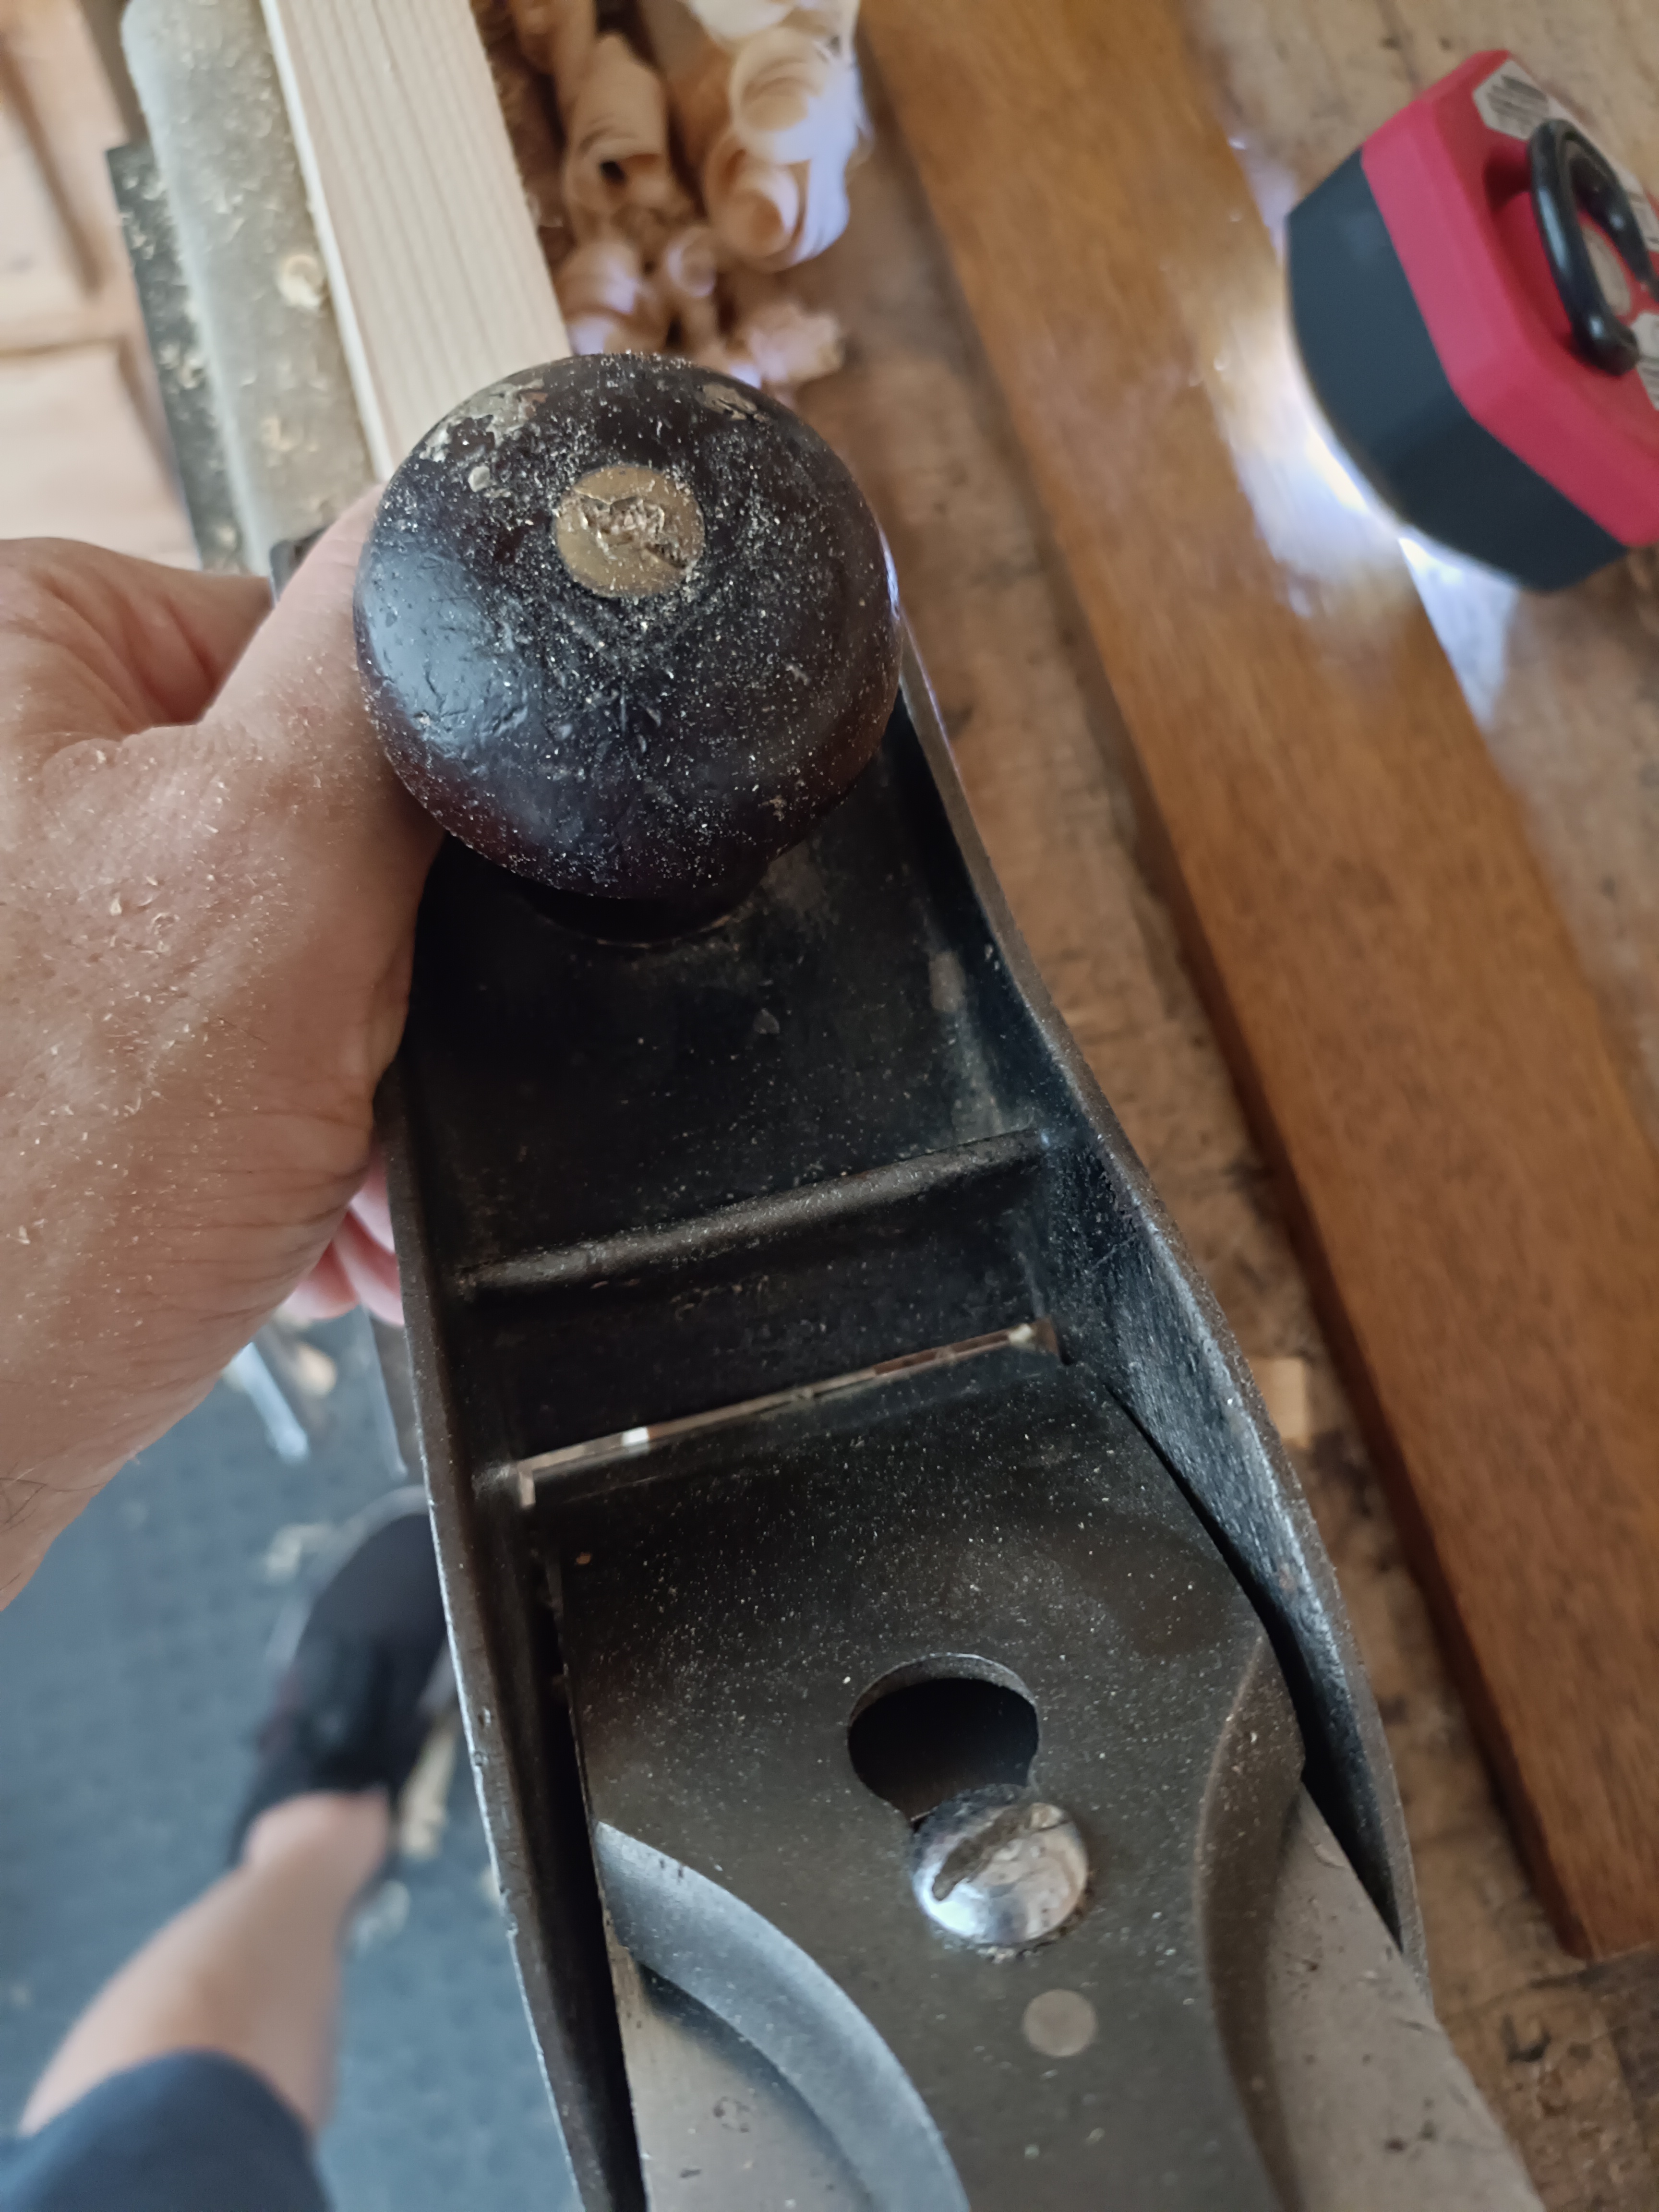
Per ottenere tali risultati dobbiamo dotarci di due tipi di pialla. Una pialla con suola corta come ad esempio una n. 4 e una pialla con una suola più lunga come una n. 5 o oltre. Il motivo di questa scelta risiede nel fatto che dapprima dovremo utilizzare la pialla a suola corta per lavorare limitatamente alle zone più alte e solo quando avremo livellato a sufficienza queste zone potremo utilizzare la pialla a suola lunga che, poggiando sui punti più alti già lavorati con la pialla piccola, li spianerà contemporaneamente livellandoli con lunghe passate finali.
Se utilizzassimo da subito la pialla lunga, a causa della dimensione della suola, questa otterrebbe l’effetto di seguire le altezze presenti, cavalcandole e rimuovendo solo poco materiale per volta. La pialla a suola corta invece, proprio perchè più piccola, risulta più performante concentrando l’azione di piallatura nelle aree specifiche, spianandole con maggiore efficacia e velocità.
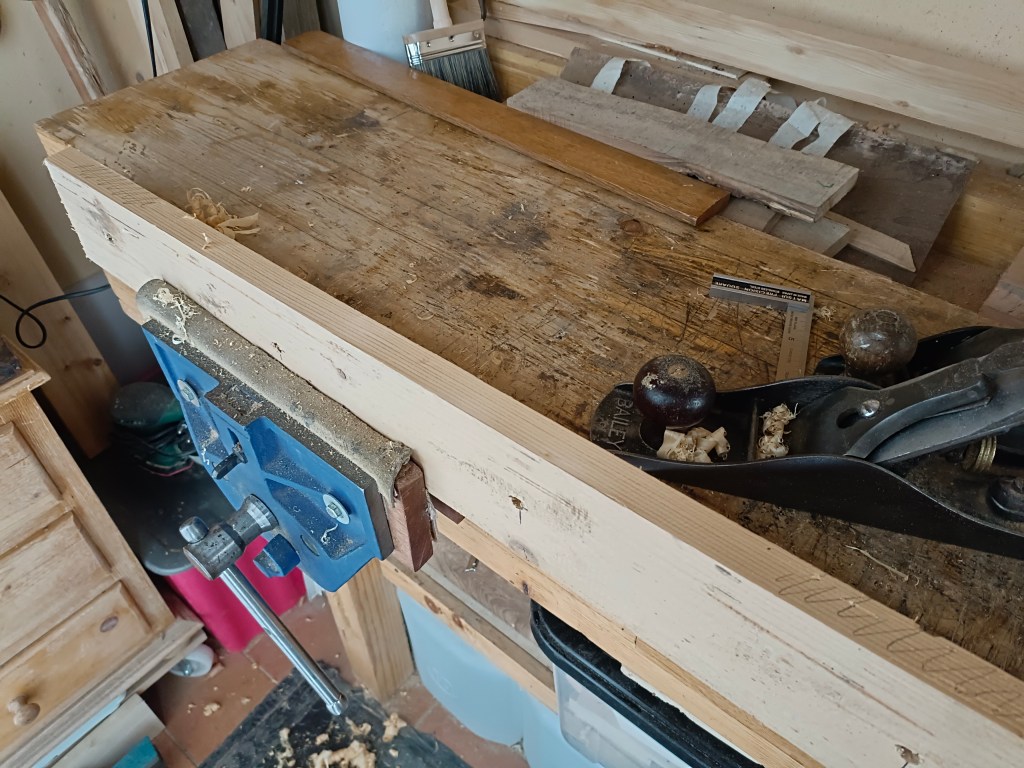
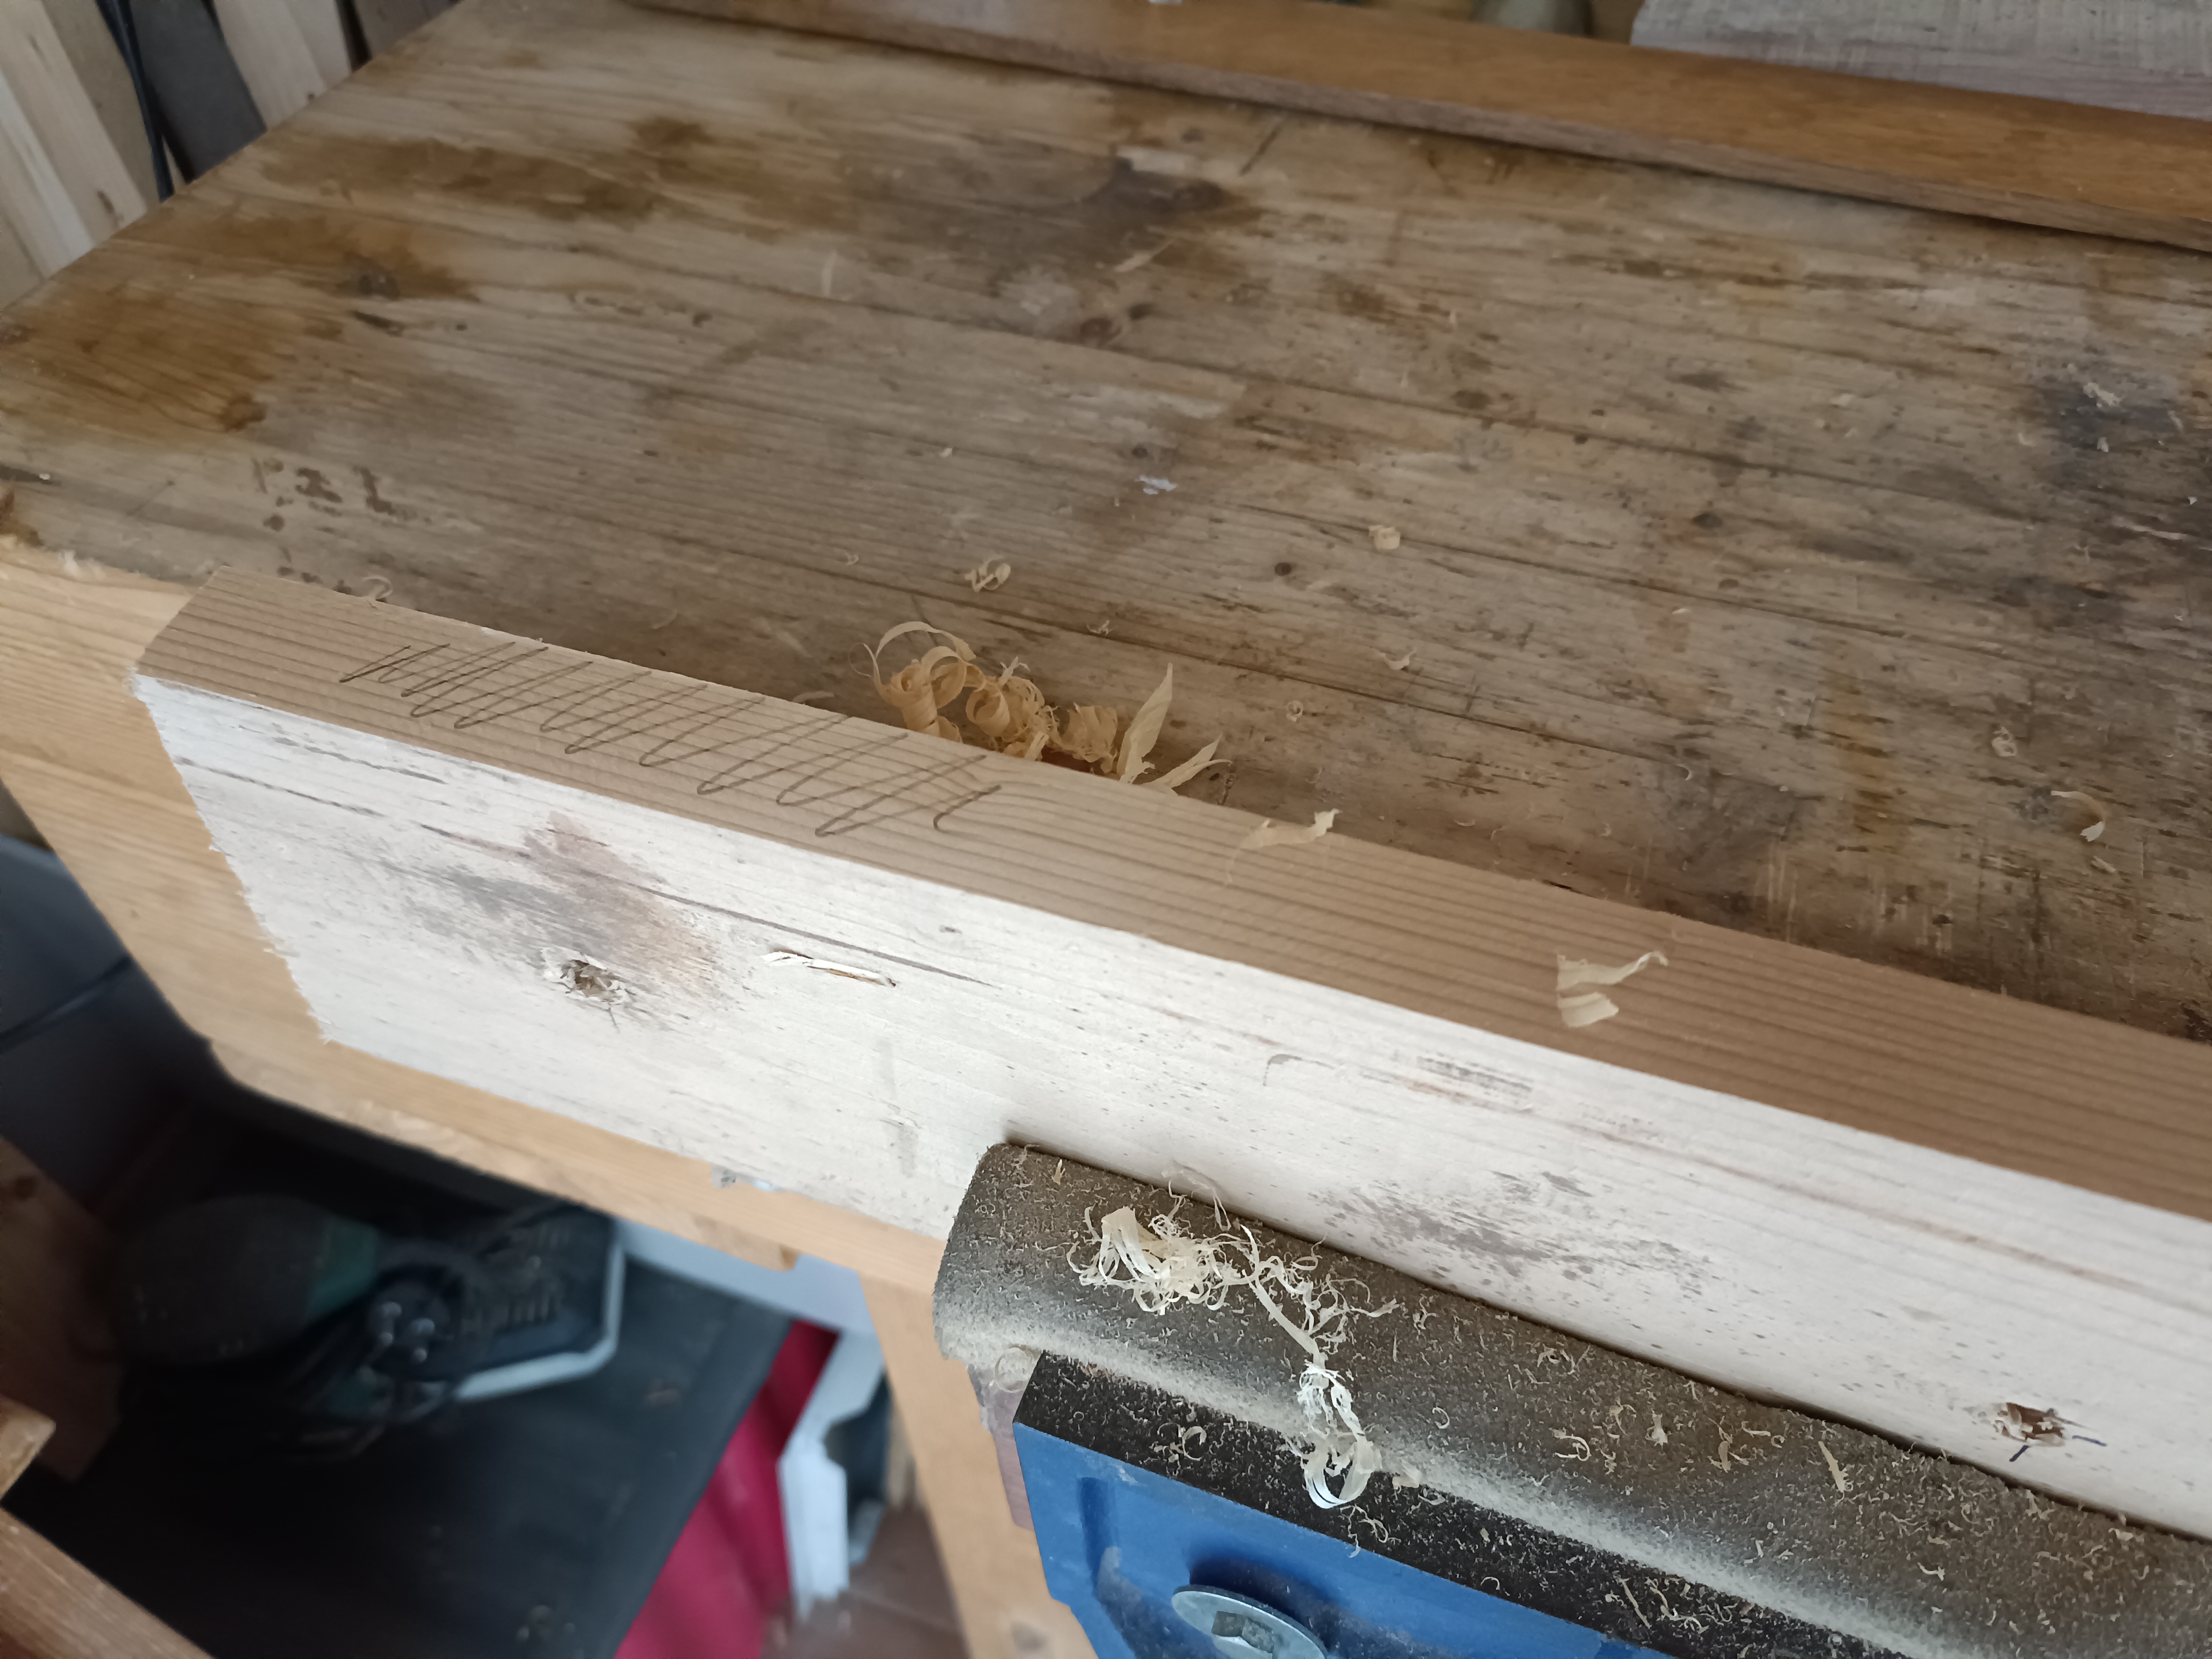
Quindi agiremo come di seguito indicato. Inseriamo il pezzo nella morsa, buttando prima sempre un occhio alla direzione della venatura e, con la pialla n. 4, cominciamo a piallare nelle zone che abbiamo individuato essere più alte. Per questa operazione possiamo aiutarci traguardando dapprima la tavola per la sua lunghezza oppure passare da capo a capo la pialla più lunga che toccherà solo le zone più alte. Segniamo con una matita queste aree più alte e concentriamoci con la pialla a suola corta solo su queste zone fino a renderle livellate con il resto della superficie.

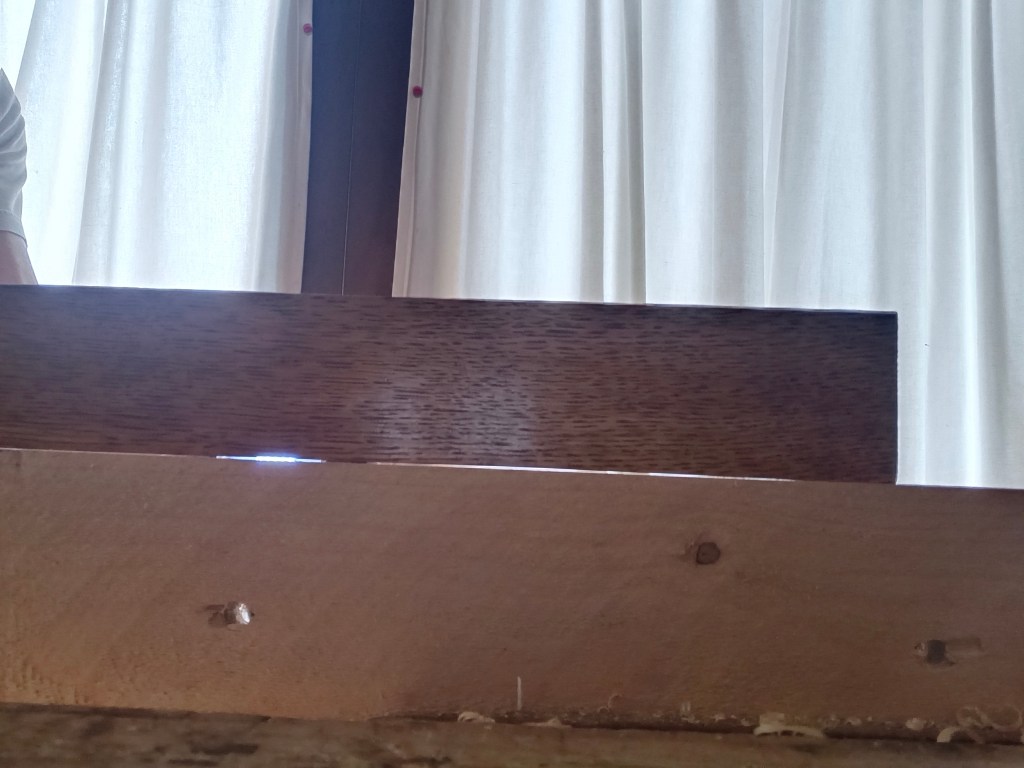
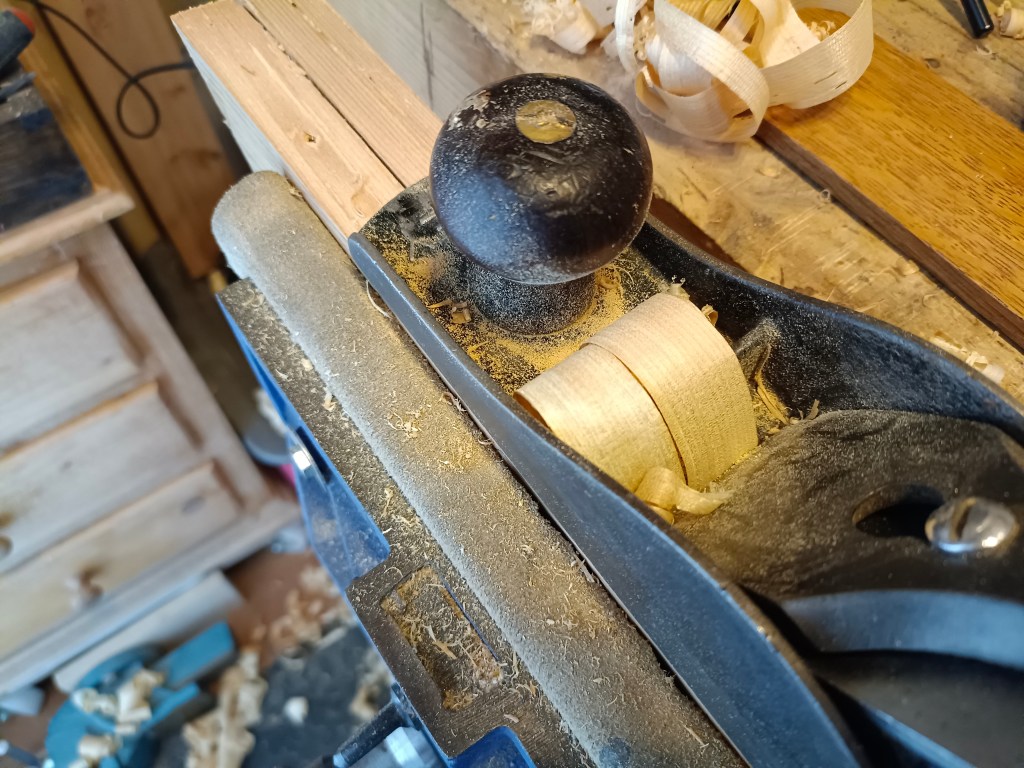
Quando noteremo che la pialla comincia ad asportare dei trucioli più lunghi e continui allora passiamo alla pialla più grande facendo lunghe passate da capo a capo del pezzo, avendo l’accortezza di dare poca lama al fine di ottenere trucioli sottili, lunghi e continui.

Per verificare il lavoro effettuato poniamo sulla costa un riscontro dritto come ad esempio una winding stick, un righello in ferro o il profilo della suola della pialla. Ponendoci controluce o con l’ausilio di una luce artificiale verifichiamo che tra il riscontro e la costa non siano rimasti spazi vuoti anche se, nella piallatura a mano, non é cosi semplice raggiungere un risultato perfetto, specialmente sui pezzi lunghi.

Non distraiamoci durante la piallatura e rimaniamo sempre concentrati su quello che stiamo facendo. La pialla dovrà rimanere sempre ben adesa al pezzo e soprattutto condotta dritta e ben centrata. Anche la lama va opportunamente affilata e settata con la leva di spostamento laterale in modo tale che il tagliente fuoriesca parallelo alla bocca della suola così da rimuovere poco materiale in maniera uniforme.

Teniamo di conto che se abbiamo affilato a mano il tagliente questo potrebbe presentare una minima curvatura (camber) in grado di asportare più materiale al centro, cosa non riscontrabile in un tagliente dritto affilato con una guida. Cerchiamo anche di non imprimere troppa forza verso il basso e di non premere troppo su un fianco per non andare fuori squadro.
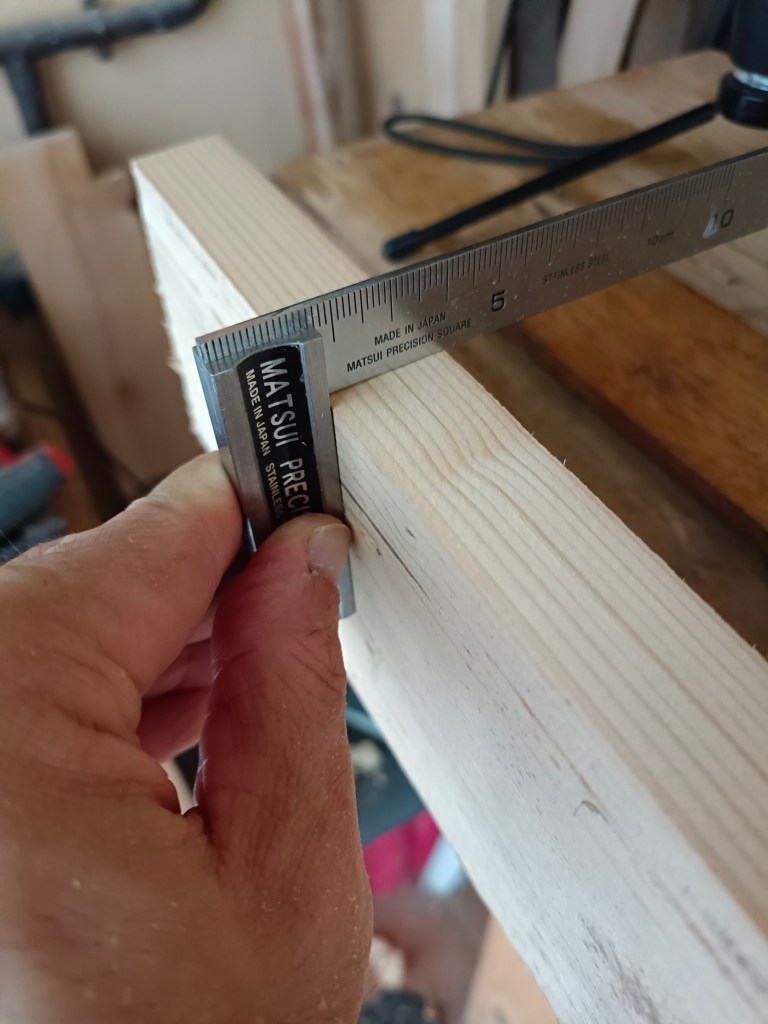
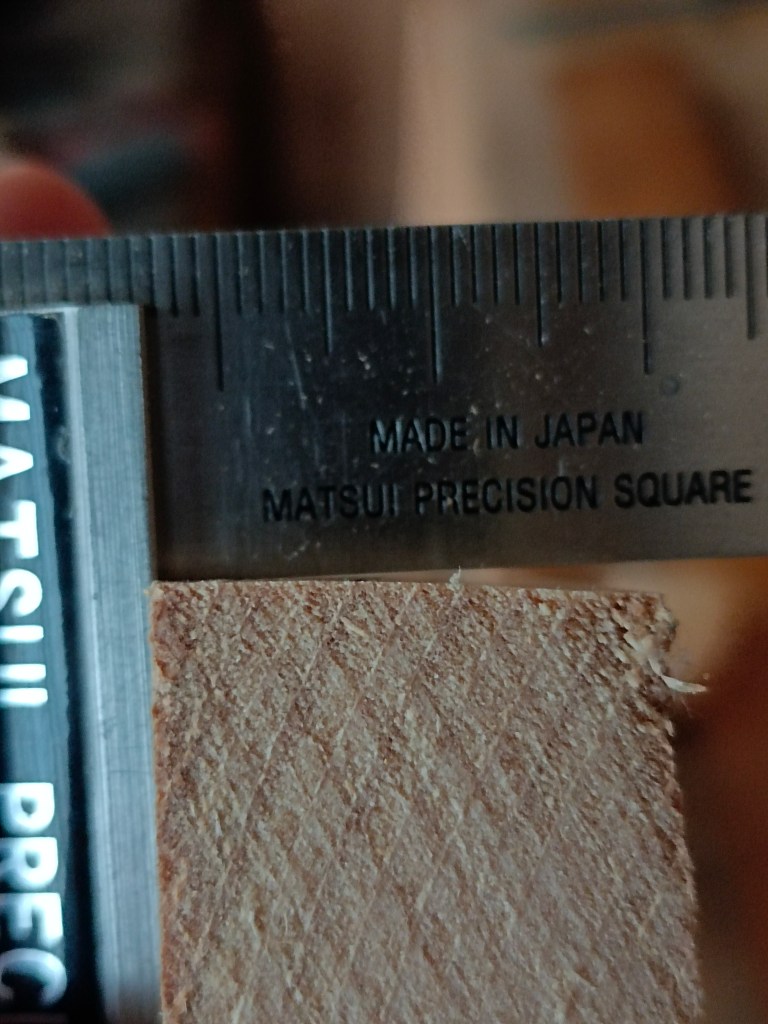
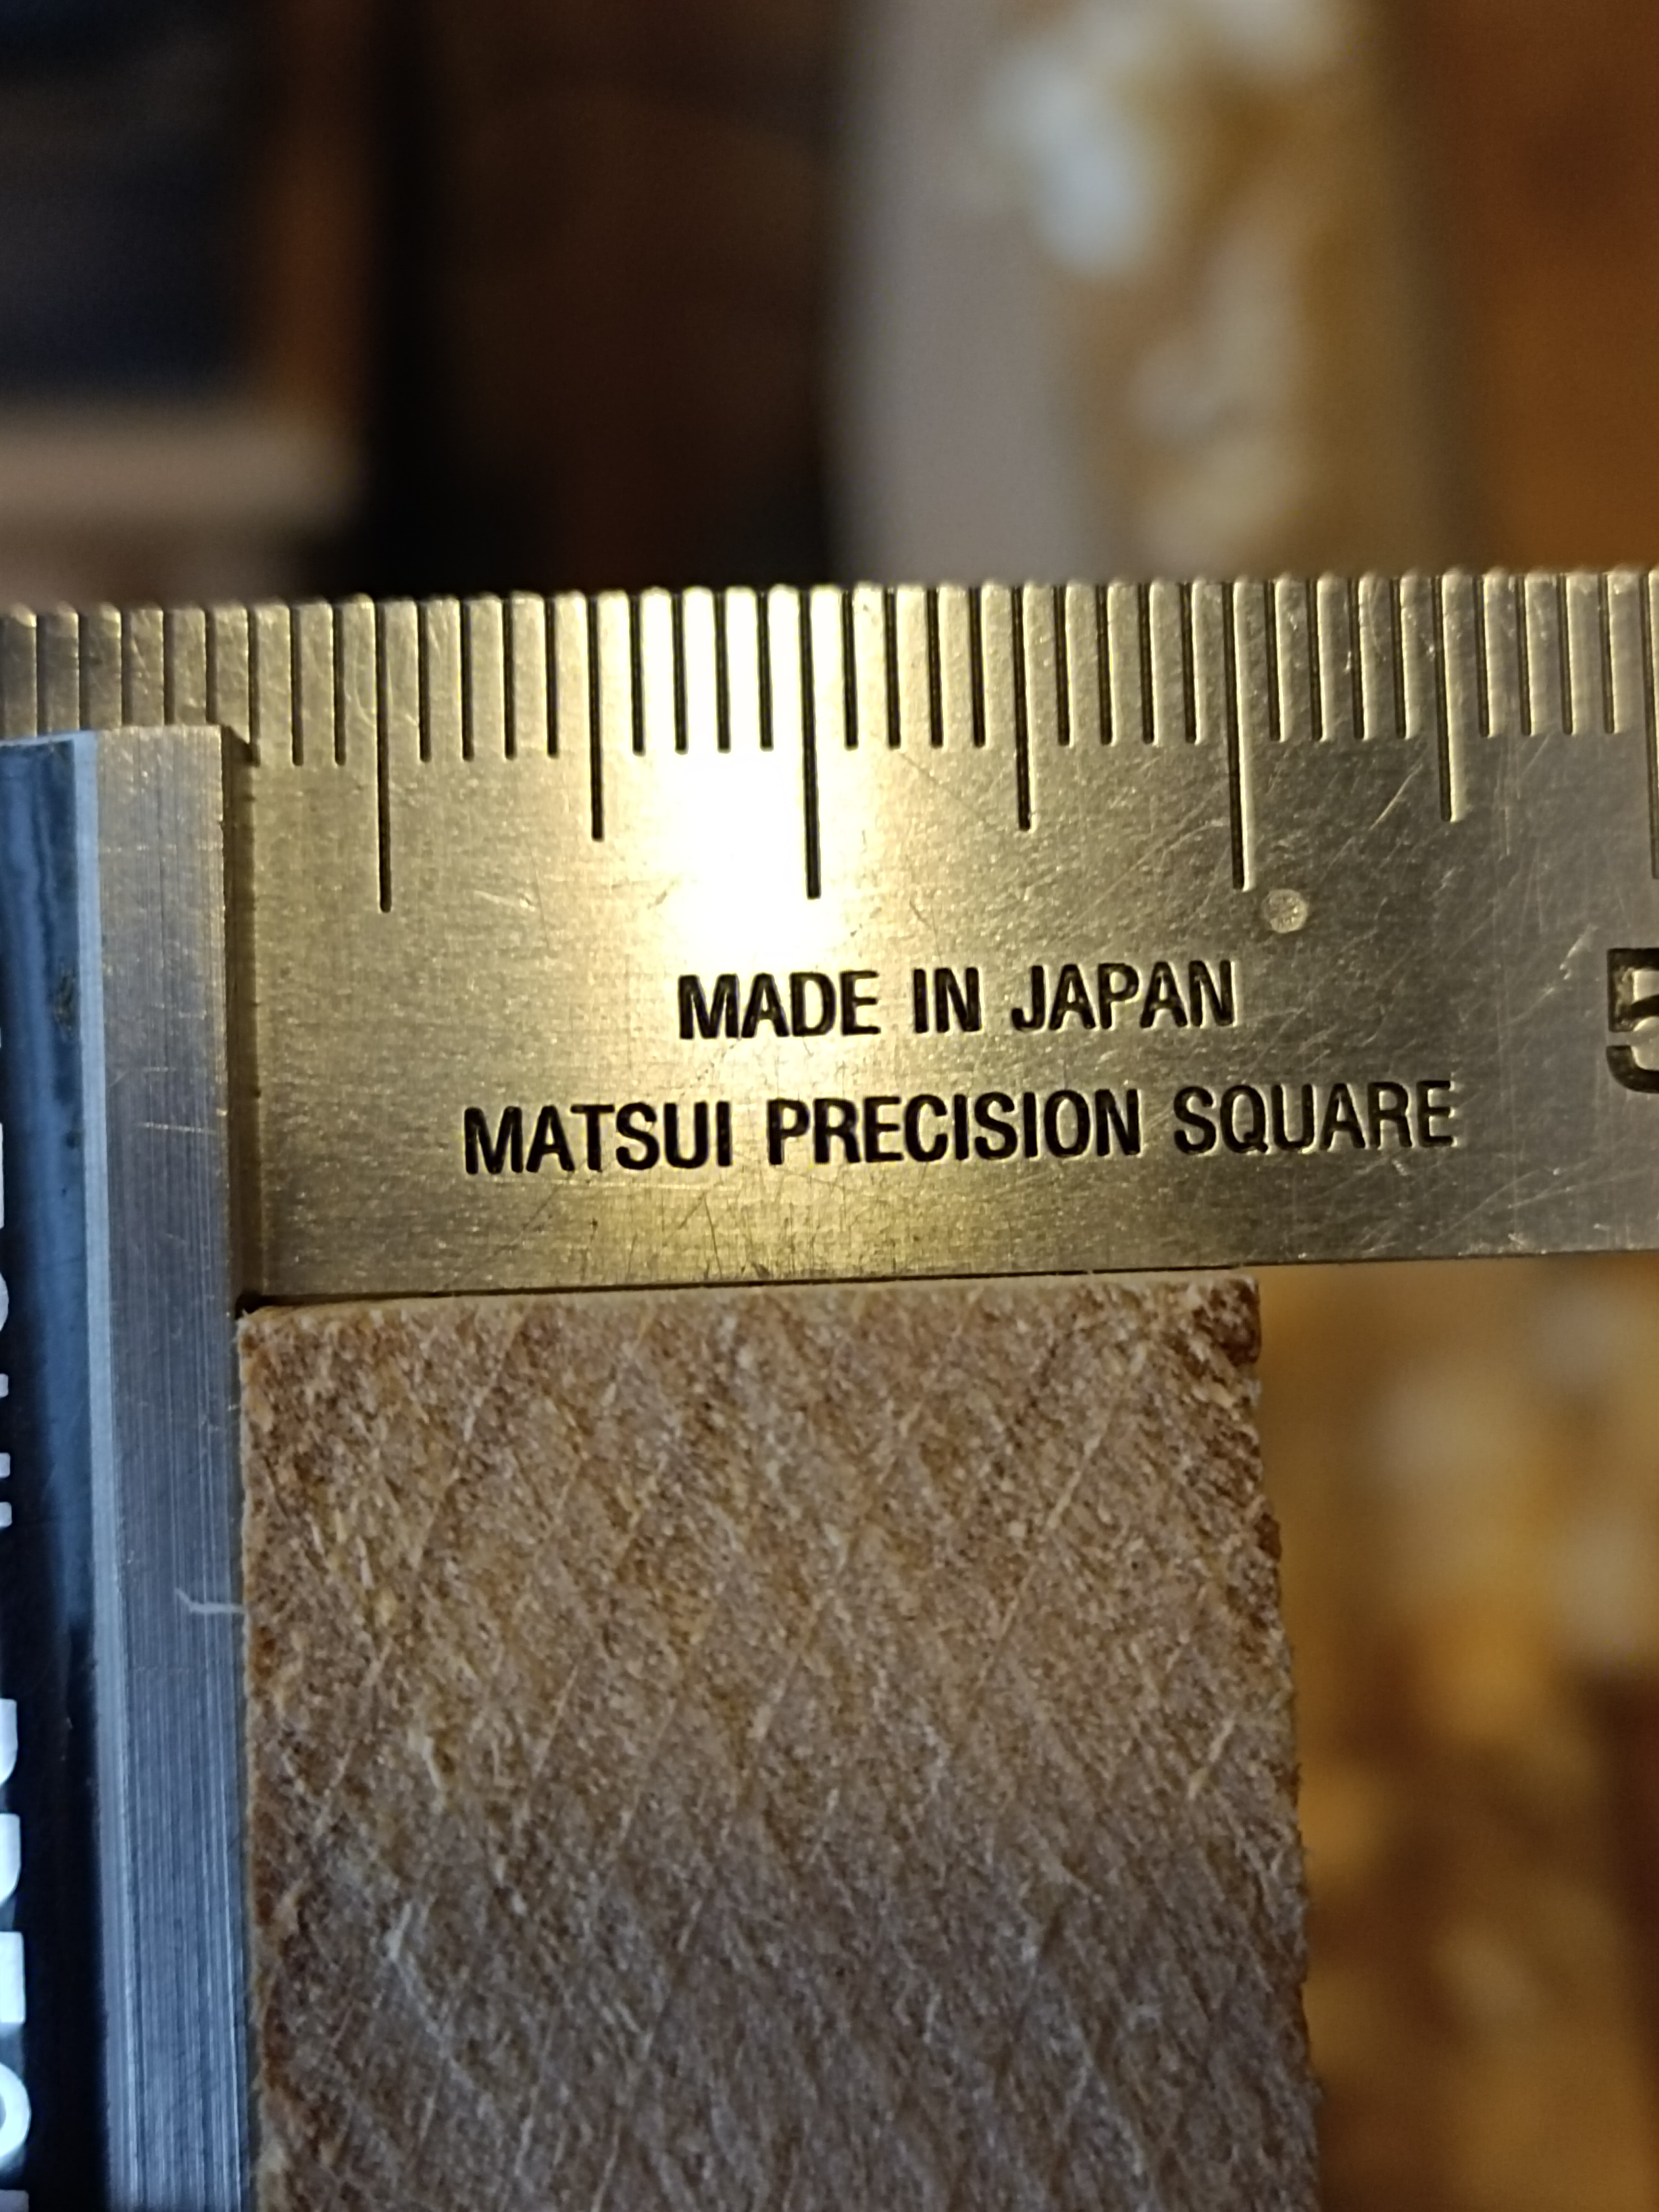
Controlliamo anche, ogni tre o quattro passate, con un squadretta se stiamo piallando a 90 gradi rispetto alla faccia vicina. Il truciolo che fuoriesce é di solito un ottimo indicatore della qualità del lavoro. Se otteniamo trucioli lunghi, continui e che appaiono di spessore uniforme probabilmente stiamo procedendo bene. Il modo migliore per controllare l’ortogonalità rimane comunque quello di utilizzare la squadretta, ponendola ad inizio tavola, in un paio di punti intermedi ed alla fine del pezzo.
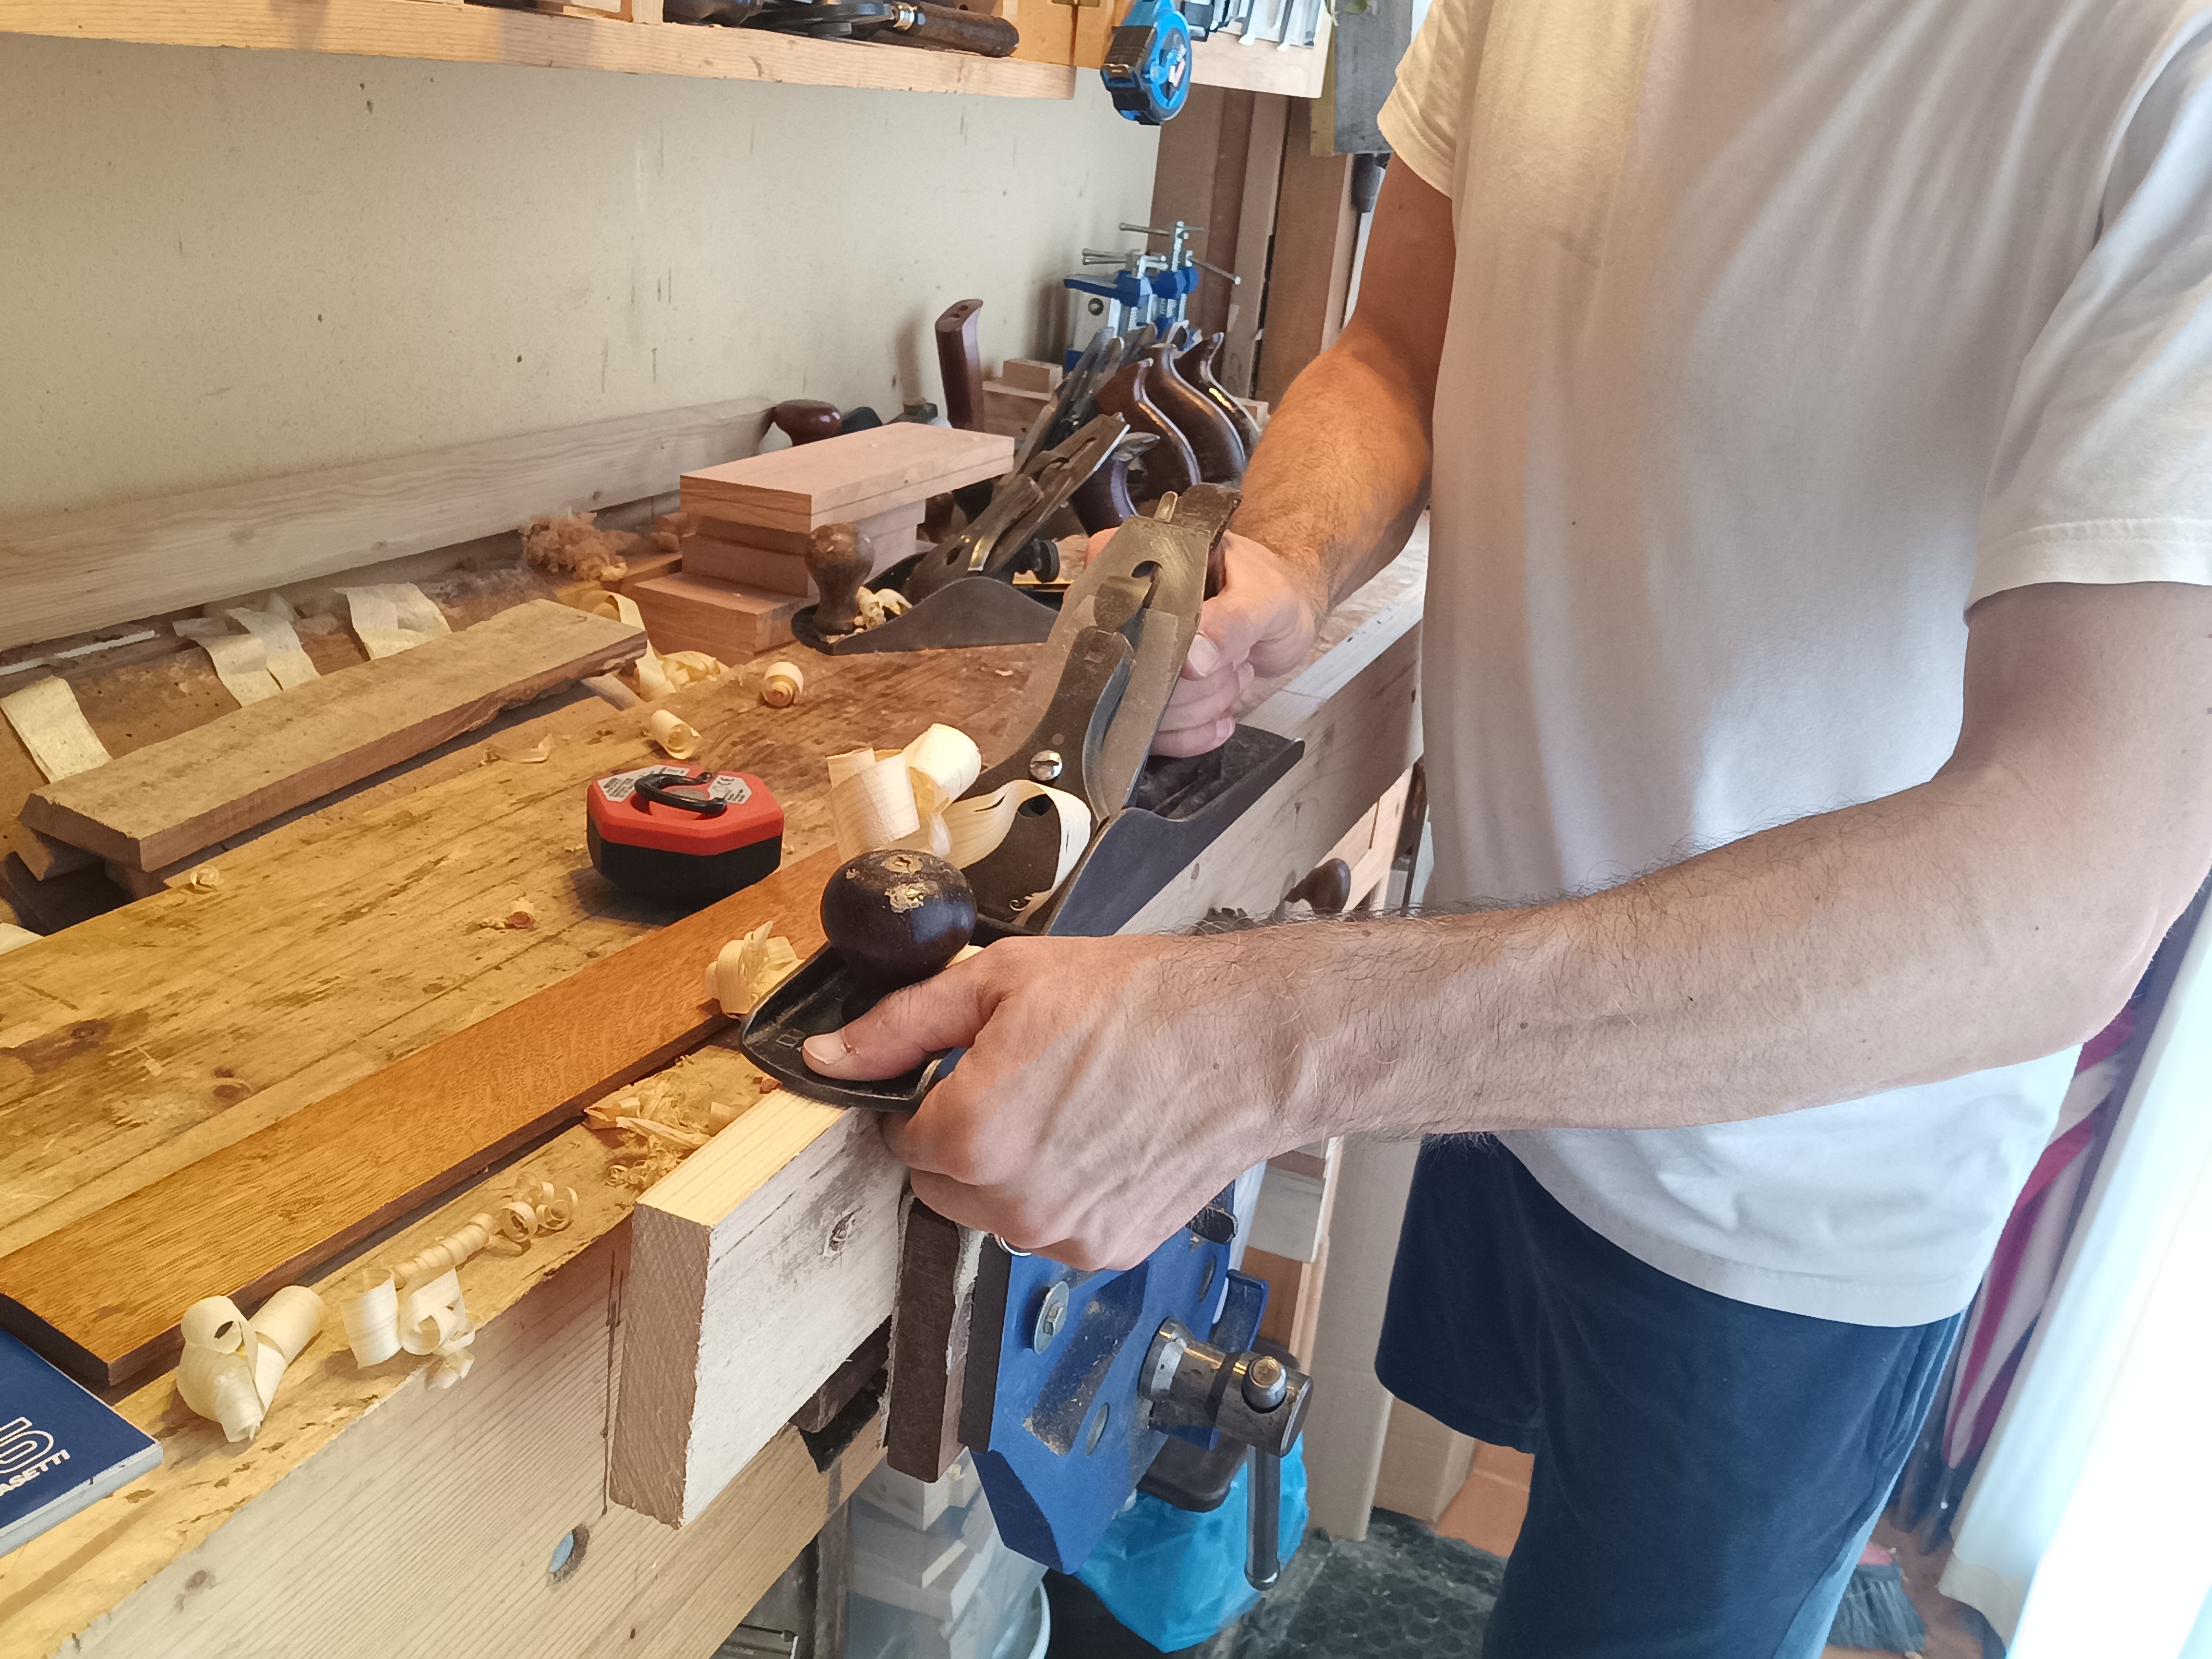
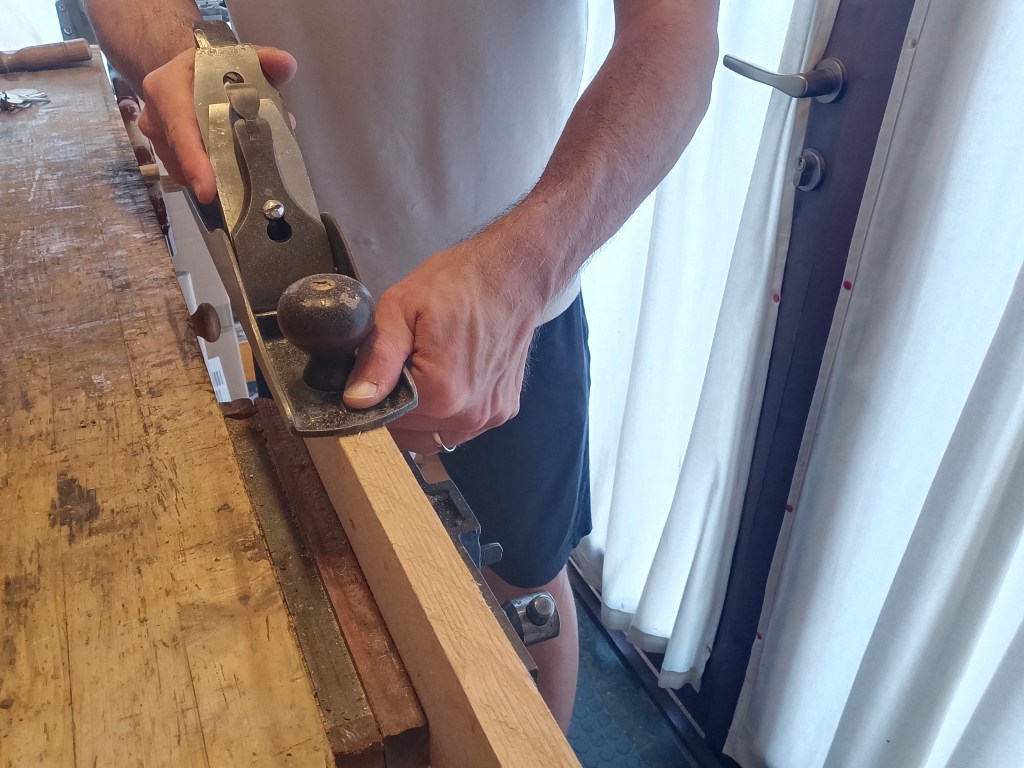
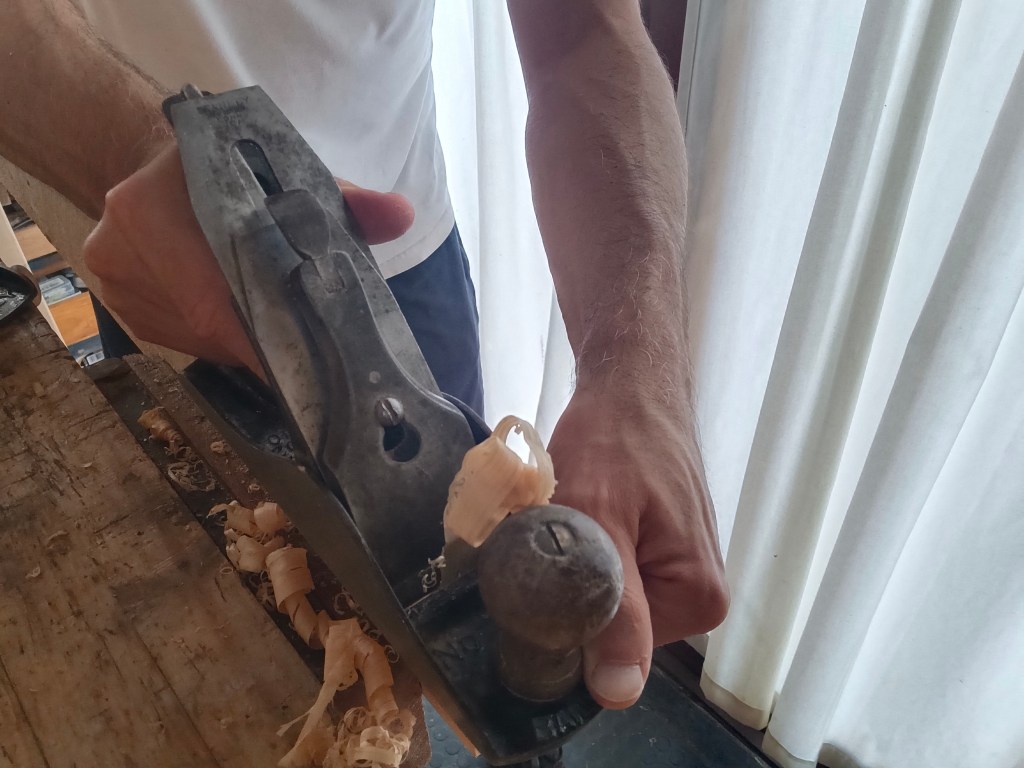
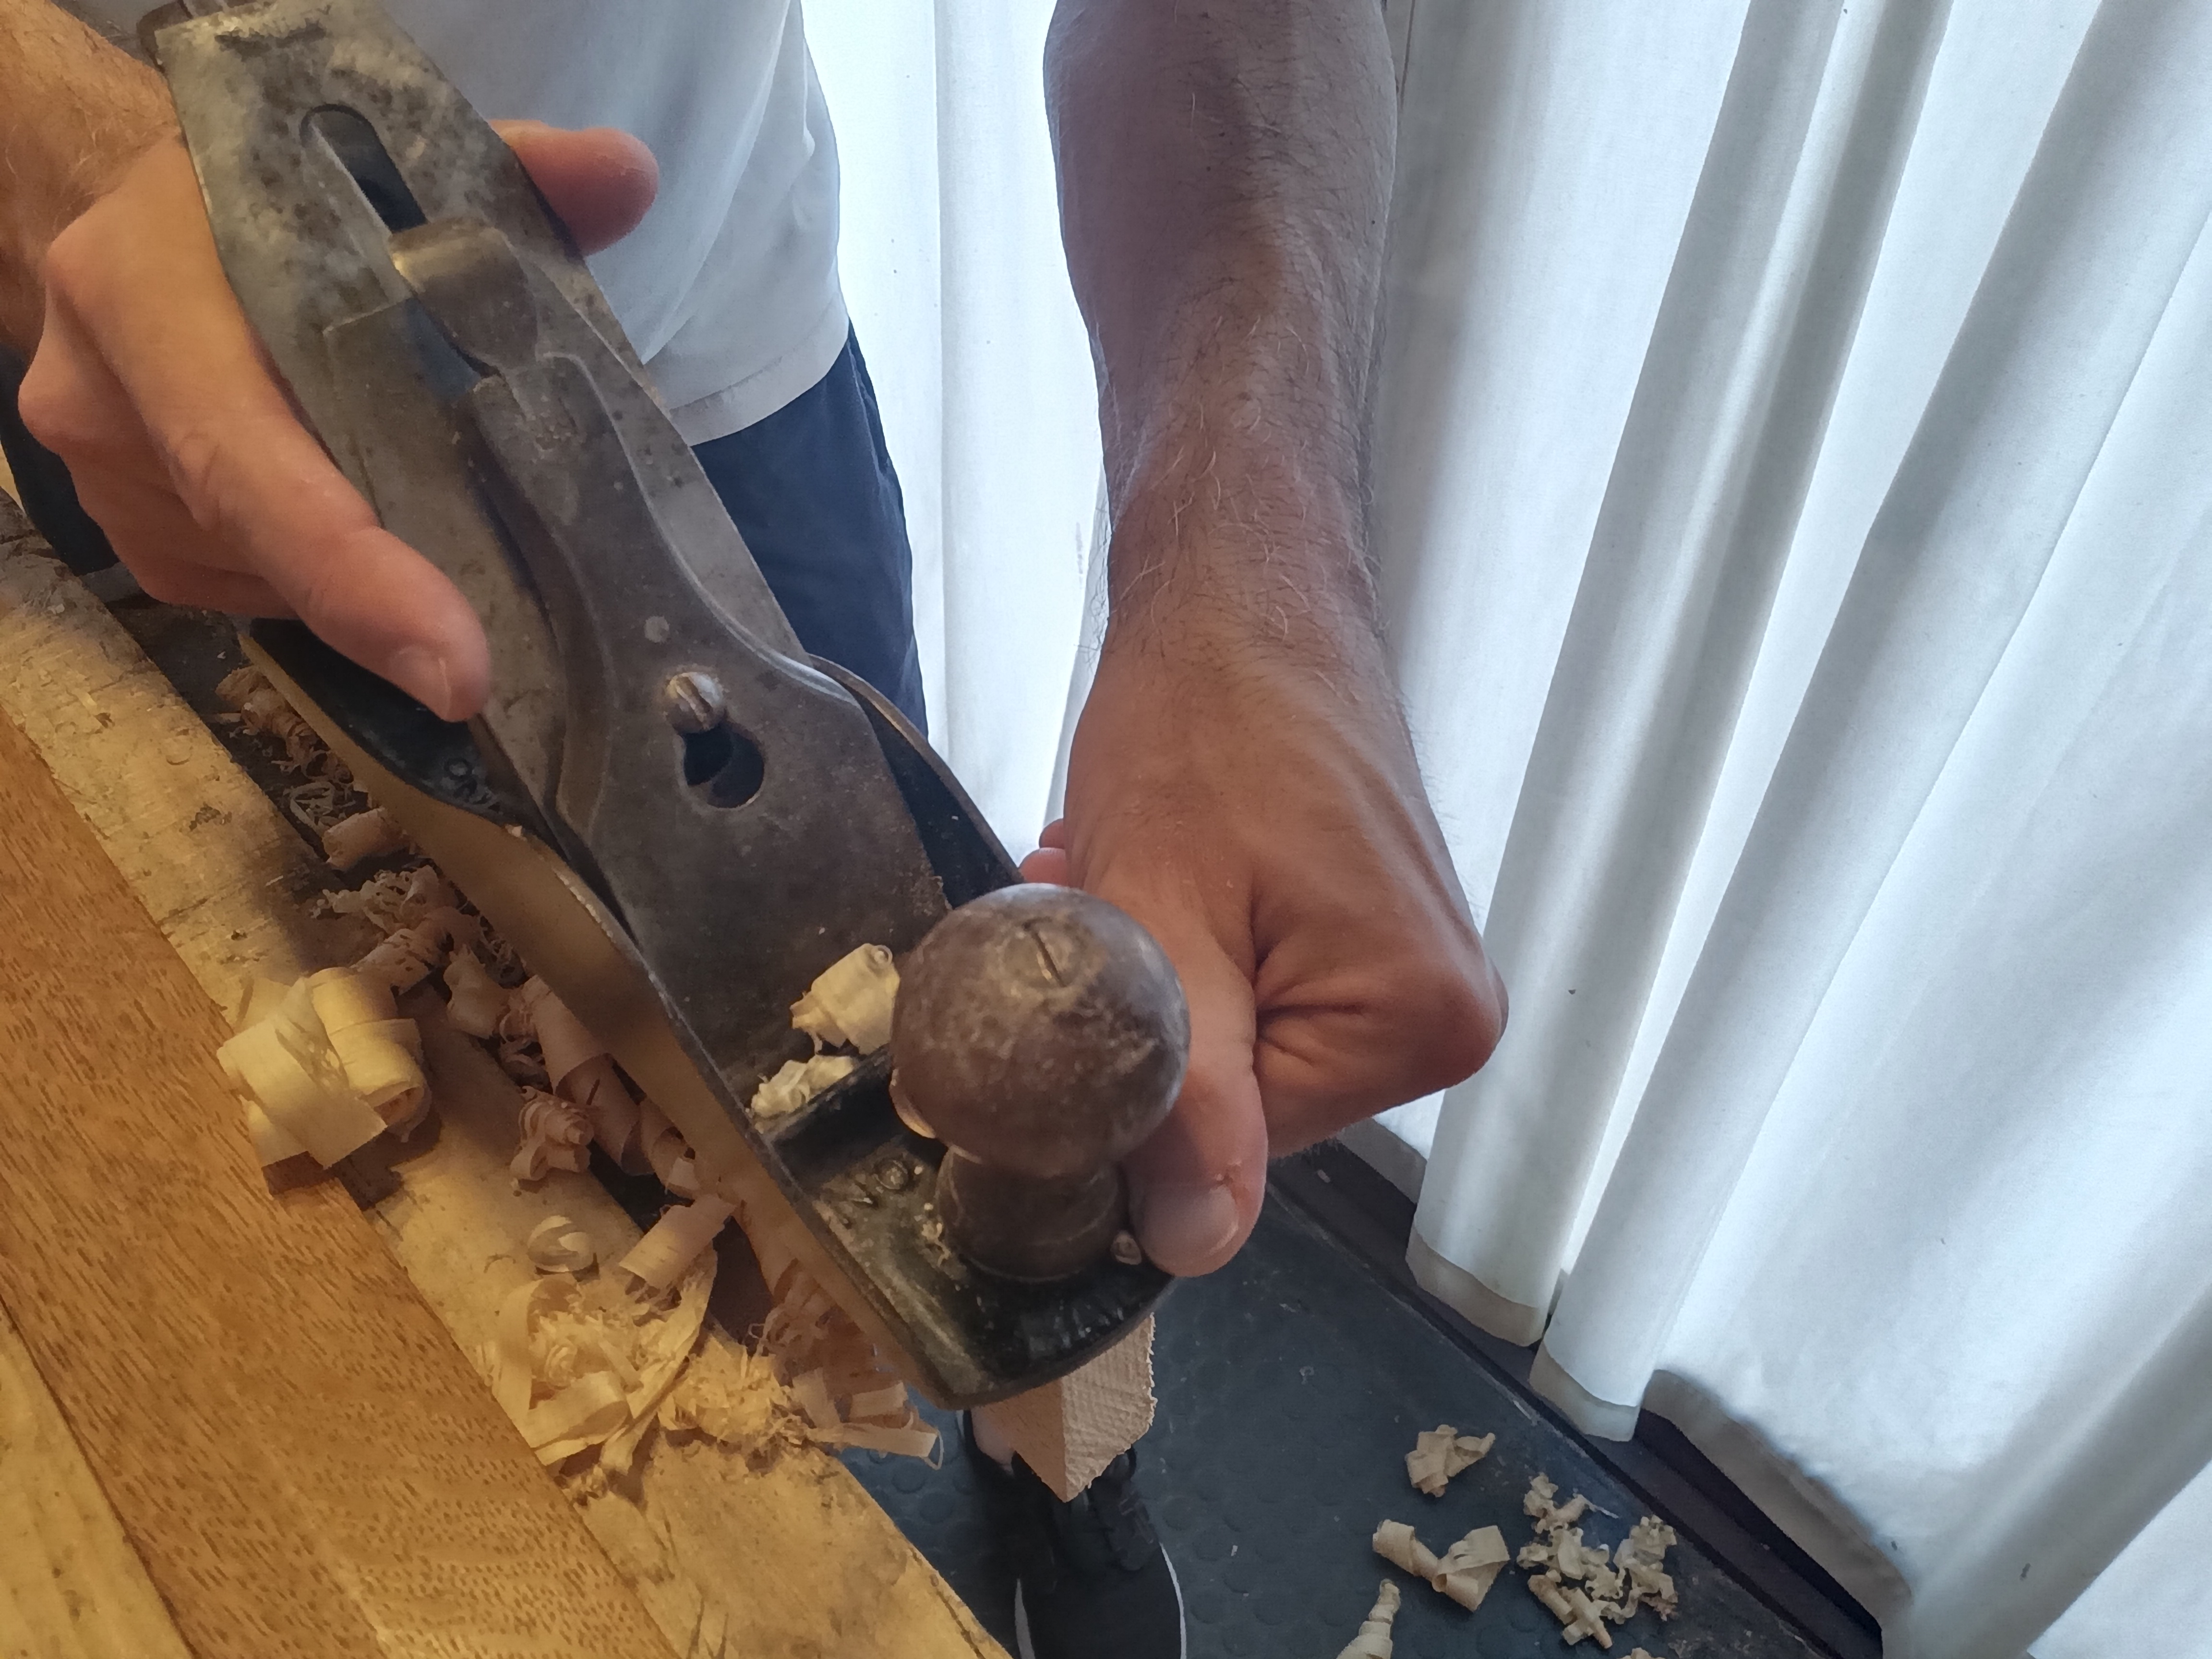
Condurre la pialla durante la piallatura di costa comporta una particolare impostazione delle mani. La mano dominante afferra il manico posteriore e spinge l’utensile mentre l’altra mano mantiene con il pollice la parte anteriore della suola vicino al pomello ben adesa al pezzo. Al contempo l’indice si pone sotto la suola andando in battuta al fianco del pezzo facendo così da guida per l’azione di piallatura mentre le restanti dita rimangono sotto a sostegno e prevenzione di ribaltamenti. Le dita poste sotto la pialla hanno anche un’altra funzione, spesso sottostimata. Permettono di mantenere la pialla sempre alla stessa distanza, fattore importante se consideriamo che il tagliente di una lama affilata con un camber rimuove più materiale al centro rispetto agli estremi.

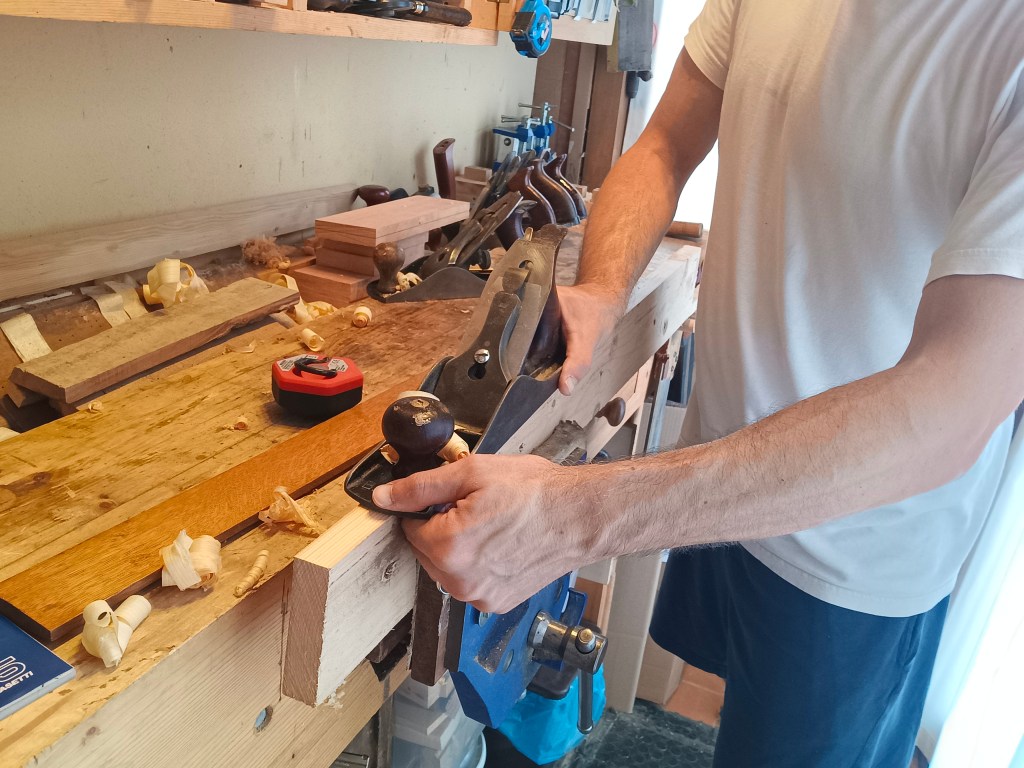
Un altro modo di piallare prevede la classica posizione di piallatura, ovvero afferrando normalmente il manico ed il pomello della pialla oppure tenendo la mano dominante dietro al manico posteriore in posizione bassa e l’altra mano posta davanti al pomello anteriore a contatto della suola.
Nella piallatura di costa si tende spesso a rimuovere più materiale ad inizio e a fine tavola rispetto al centro del pezzo. Per tale motivo, su pezzi di una certa lunghezza, una buona pratica potrebbe consistere nel fare prima qualche passata con la pialla corta al centro della tavola sino a quando la pialla cesserà di produrre trucioli. In seguito, con la pialla lunga, facciamo lunghe passate da capo a capo del pezzo sino a quando non otterremo una piallatura uniforme per tutta la lunghezza della costa.
Se non abbiamo centrato bene la lama o se non abbiamo piallato dritto oppure abbiamo fatto troppa forza su un fianco potremmo ottenere una costa più alta da una parte rispetto all’altra. Se si verifica questo inconveniente non dobbiamo intervenire sulla leva di regolazione laterale per spostare la lama bensì spostare la suola della pialla ponendola per metà fuori dal pezzo in modo tale che la sezione centrale del tagliente poggi sulla parte più alta. Facciamo qualche passata al fine di livellare la zona e controlliamo sempre con la squadretta il risultato ottenuto. Se la costa é molto disomogenea e presenta zone più alte sui fianchi, qua e là per tutta la lunghezza del pezzo, possiamo traslare diagonalmente la pialla sulla costa durante l’azione di piallatura in modo da spianare solo le zone più alte.
La piallatura di costa risulta agevole se praticata con il pezzo in morsa per spessori superiori al centimetro. Per pezzi più sottili risulta difficile mantenere la pialla in posizione ortogonale e quindi è più indicato l’utilizzo della shooting board.
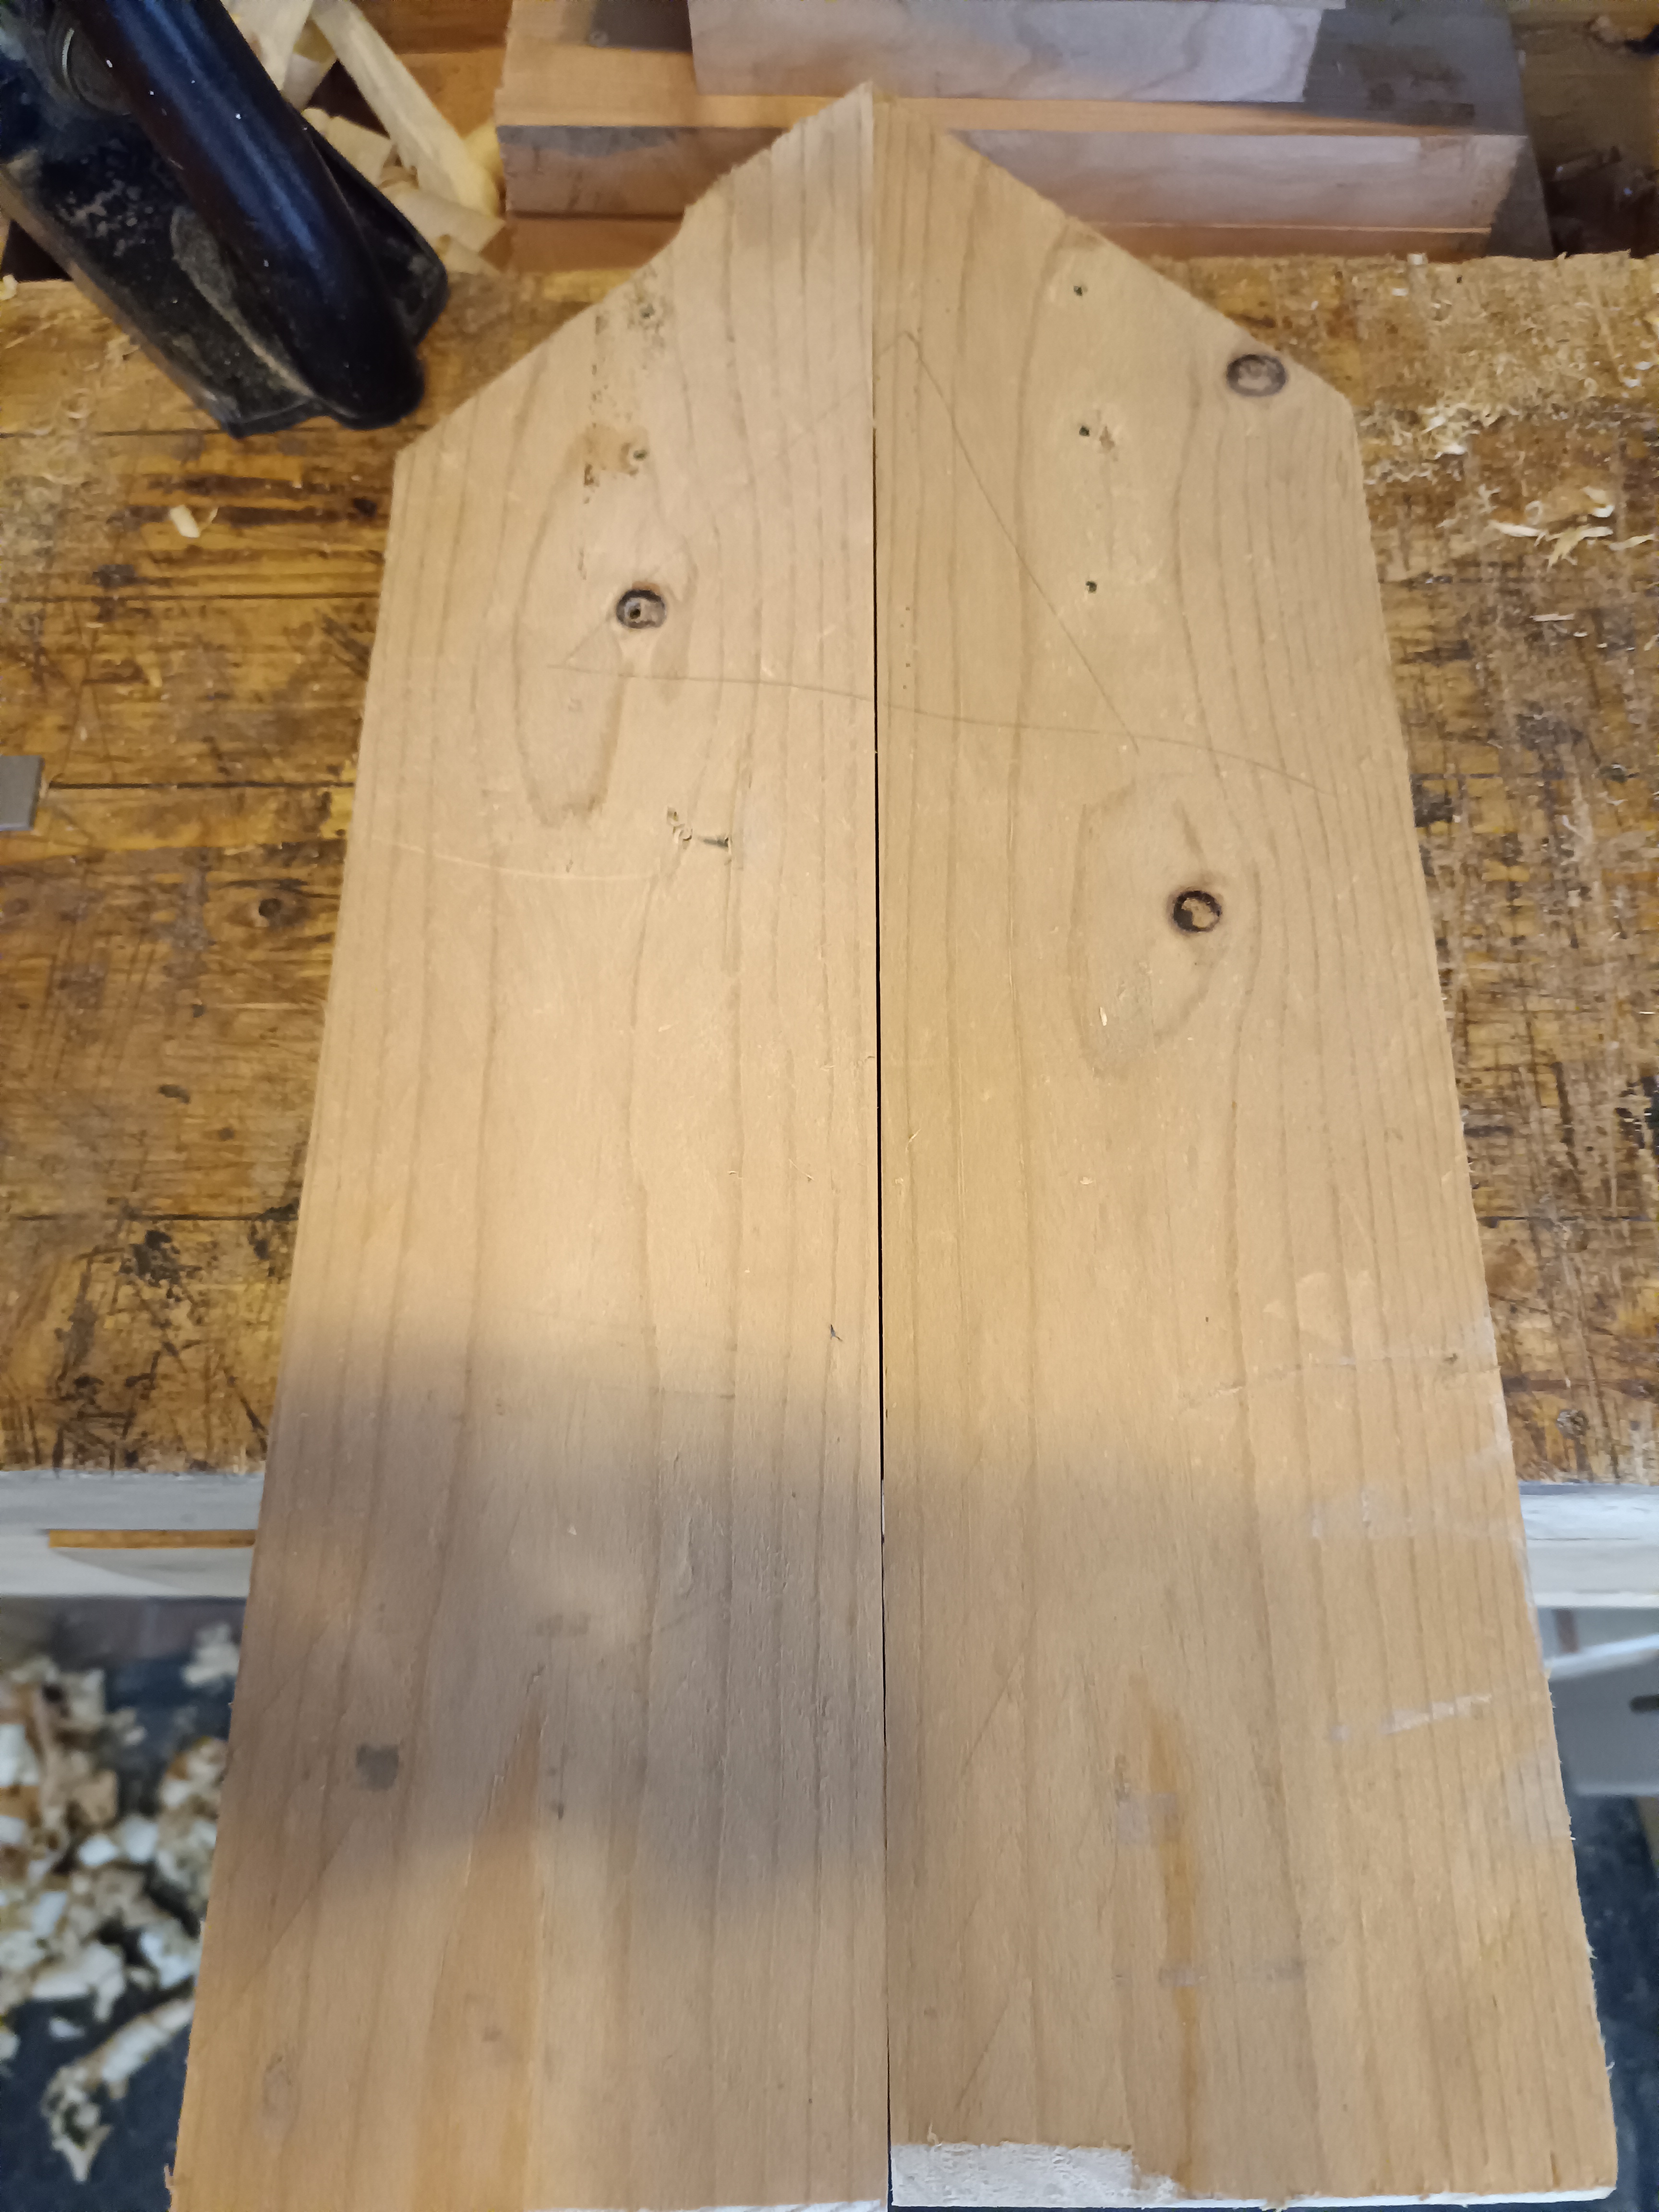
Piallare una costa perfettamente a 90 gradi è importante quando dobbiamo assemblare dei pannelli. In questo caso le due tavole che devono essere incollate di costa devono combaciare perfettamente. Non ci devono essere zone che consentano alle tavole di ruotare oppure, se poste una sull’altra, queste non stiano perfettamente in asse.
Una buona pratica è quella di piallare assieme nella morsa del banco le coste delle tavole da unire. In questo caso, anche se non riuscissimo a piallare a squadro ma andassimo storti, gli angoli si andrebbero a compensare in fase di accoppiamento delle tavole, perché speculari. Sempre quando dobbiamo incollare tavole di costa è ammesso e talvolta consigliabile mantenere un filo di spazio al centro delle tavole. Questa pratica favorisce l’unione, mentre assolutamente da evitare é incollare di costa due tavole che presentino gli estremi non combacianti proprio perché sono gli estremi le zone più soggette a ritiro e distacco.
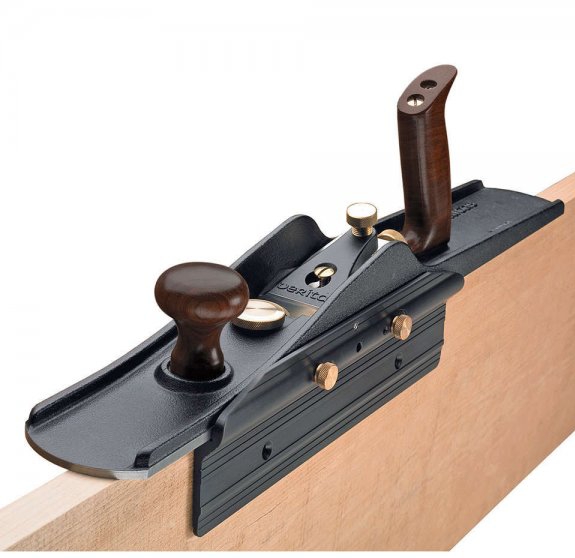
La piallatura di costa è un’operazione che può essere fatta anche con una sola pialla, se stiamo lavorando su lunghezze di qualche decina di centimetri. Una n. 4 o una n. 5 basteranno. Una pialla più lunga, come una n. 5 e oltre, sarà invece necessaria se abbiamo a che fare con tavole di un metro e più. In commercio esistono pialle con guida laterale, come il modello della Veritas, ma costano molto e francamente penso che, con un un po’ di pratica, anche con le pialle tradizionali riusciremo ad ottenere ottimi risultati.
___________________________________________________________________________________
After having seen the long grain planing and the end grain planing, the last type to talk about is the edge planing. The edge of a board usually refers to the narrowest and longest side of the piece. Planing the edge, rectifying it, bringing it to 90 degrees with respect to the adjacent faces is an operation that allows us to obtain perfectly squared boards ready to be assembled with joints and glue or only with glue as often happens for construction of panels made up of several boards. The edge planing is not a difficult operation but it is necessary to pay attention to some details.
If we buy a board that has already been planed and trimmed, the edge will probably already be rectified and we will have to intervene only minimally but if our board has been sawed along the grain with a handsaw, the edge will most likely have higher and other lower areas and the sides will be out of square. to adjacent faces.
Let’s proceed step by step by first leveling the reliefs along the entire length of the piece in order to obtain a level surface and only then let’s concentrate on the out of square. The aim will be to level all these areas with the planes trying to get an edge as straight as possible and squared with the adjacent faces.
To obtain these results we need two types of plane. A plane with a short sole such as a No. 4 and a plane with a longer sole such as a No. 5 or more. The reason for this choice lies in the fact that at first we will have to use the short sole plane to work limited to the highest areas and only when we have leveled these areas sufficiently can we use the long sole plane which, resting on the highest points already worked with the small plane will level them at the same time leveling them with long final passes.
If we used the long plane immediately, due to the size of the sole, this would have the effect of following the present heights, riding them and removing only a little material at a time. The short-sole plane instead, precisely because it is smaller, is more performing by concentrating the planing action in specific areas, leveling them with greater effectiveness and speed.
Then we will act as indicated below. We put the piece in the vice, first checking the direction of the grain and, with the n. 4 plane, we begin to plane in the areas that we have identified to be higher. For this operation we can help ourselves by first sighting the board for its length or passing the longest plane from end to end, which will only touch the highest areas. We mark these higher areas with a pencil and concentrate with the short sole plane only on these areas until they are leveled with the rest of the surface.
When we notice that the plane begins to remove longer and continuous shavings then we move on to the larger plane making long passes from end to end of the piece, giving just a little cutting edge in order to obtain thin, long and continuous shavings.
To check the work, we place a straight edge on the edge such as a winding stick, an iron ruler or the profile of the plane sole. With a light check that there are no empty spaces in between even if, in hand planing, it is not so easy to achieve a perfect result, especially on long pieces.
Try not get distracted while planing and always stay focused on what we are doing. The plane must always remain firmly attached to the piece and above all conducted straight and well centered. The blade must also be suitably sharpened and set with the lateral adjustment lever in such a way that the cutting edge comes out parallel from the mouth of the sole so as to remove little material in a uniform way.
Keep in mind that if we have sharpened the cutting edge by hand this could have a minimum curvature (camber) able to remove more material in the center, which is not found in a straight cutting edge sharpened with a guide. We also try not to apply too much force downwards and not to press too much on the side so as not to go out of square.
We also check, every three or four passes, with a square if we are planing at 90 degrees with respect to the adiacent faces. The shaving that comes out is usually an excellent indicator of the quality of the work. If we get long, continuous shavings that appear of uniform thickness we are probably doing well. However, the best way to check the squareness is to use the square, placing it at the beginning of the board, in a couple of intermediate points and at the end of the piece.
Using the plane during edge planing involves a particular position of the hands. The dominant hand grasps the rear handle and pushes the tool, while the other hand holds with the thumb the front part of the sole close to the knob well attached to the piece. At the same time, the index finger is placed under the sole, against the side of the piece acting as a guide for the planing action, while the remaining fingers remain underneath to support and prevent tilting. The fingers placed under the plane also have another, often underestimated, function. They allow you to always keep the plane at the same distance, an important factor when we consider that the cutting edge of a sharp blade with a camber removes more material in the center than at the ends.
Another way of planing involves the classic planing position, i.e. by normally grasping the handle and the knob of the plane or holding the dominant hand behind the rear handle in a low position and the other hand placed in front of the front knob in contact with the sole.
In edge planing, there is often a tendency to remove more material at the beginning and at the end of the board than in the center of the piece. For this reason, on pieces of a certain length, a good practice could consist in first making a few passes with the short plane in the center of the table until the plane stops producing shavings. Then, with the long plane, we make long passes from end to end of the piece until we get a uniform planing along the entire length of the edge.
If we have not centered the blade well or if we have not planed straight or we have made too much force on one side we could get a higher edge on one side than the other. If this problem occurs, we must not intervene on the lateral adjustment lever to move the blade but rather move the sole of the plane by placing it halfway out of the piece so that the central section of the cutting edge rests on the highest part. We do a few passes in order to level the area and always check the result obtained with the square. If the edge is very uneven and has higher areas on the sides, here and there for the entire length of the piece, we can move the plane diagonally on the coast during the planing action in order to level only the highest areas.
Edge planing is easy if done with the piece in a vice for thicknesses more than one centimeter. For thinner pieces it is difficult to keep the plane in an orthogonal position and therefore the use of the shooting board is more suitable.
Planing a perfectly 90-degree edge is important when assembling panels. In this case the two boards that must be glued together must match perfectly. There must be no pivot points that allow the boards to rotate or, if placed one on top of the other, they do not stay perfectly aligned.
A good practice is to plane the edges of the boards to be joined together in the bench vice. In this case, even if we were unable to plane squarely but went wrong, the angles would be compensated during the jointing phase of the boards, because they are mirrored. Always when we have to glue edged boards it is allowed and sometimes advisable to keep a little space in the center of the boards. This practice favors the union, while absolutely to be avoided is to glue two boards on the edge that have the ends that do not match precisely because the ends are the areas most subject to withdrawal and detachment.
Edge planing is an operation that can also be done with a single plane, if we are working on lengths of a few tens of centimeters. One no. 4 or a n. 5 is all you need. A longer plane, such as a No. 5 and more, it will be necessary if we are dealing with boards of one meter and more. There are planes with lateral guide on the market, like the Veritas model, but they cost a lot and sincerely I think that, with a little practice, even with traditional planes we will be able to obtain excellent results.

Lascia un commento