PIALLARE IL LEGNO. PIALLATURA TRAVERSO VENA E DI TESTA / PLANING WOOD. PLANING END GRAIN
English translation at the end of the article
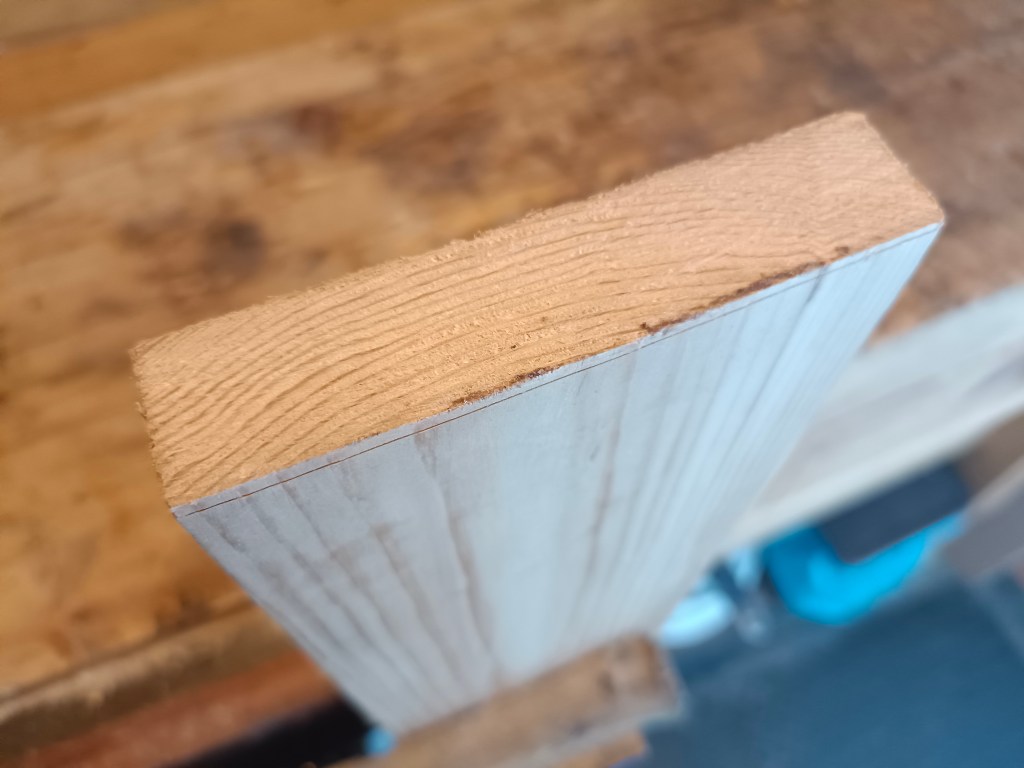
Dopo aver parlato, nel precedente articolo, della piallatura lungovena, vediamo adesso come effettuare la piallatura di testa. Quest’ultima definizione identifica bene il tipo di lavorazione da eseguire in quanto la piallatura viene praticata sulla costa del pezzo (legno di testa) dove le fibre sono disposte lateralmente rispetto alla venatura del legno.

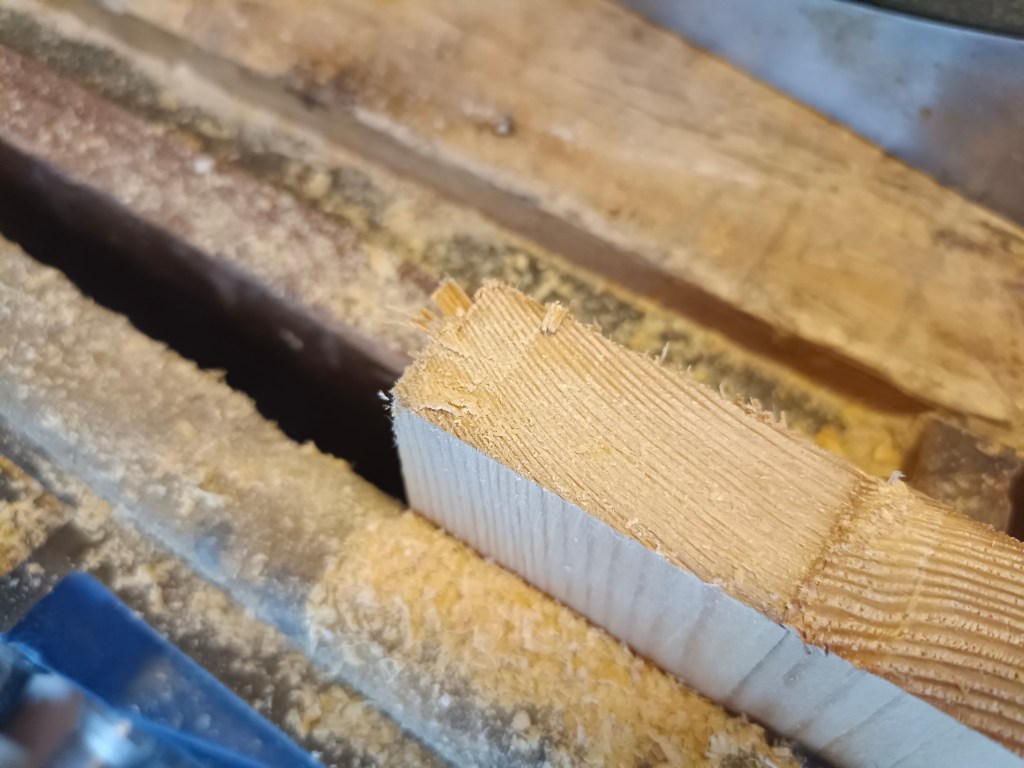
I canali del legno in questa zona risultano esposti, perché troncati, e la loro piallatura non è agevole perché è come se andassimo sempre controvena. Per questo motivo piallare il legno di testa implica l’impiego di determinati accorgimenti che, se non attuati, potrebbero compromettere la riuscita del nostro lavoro.
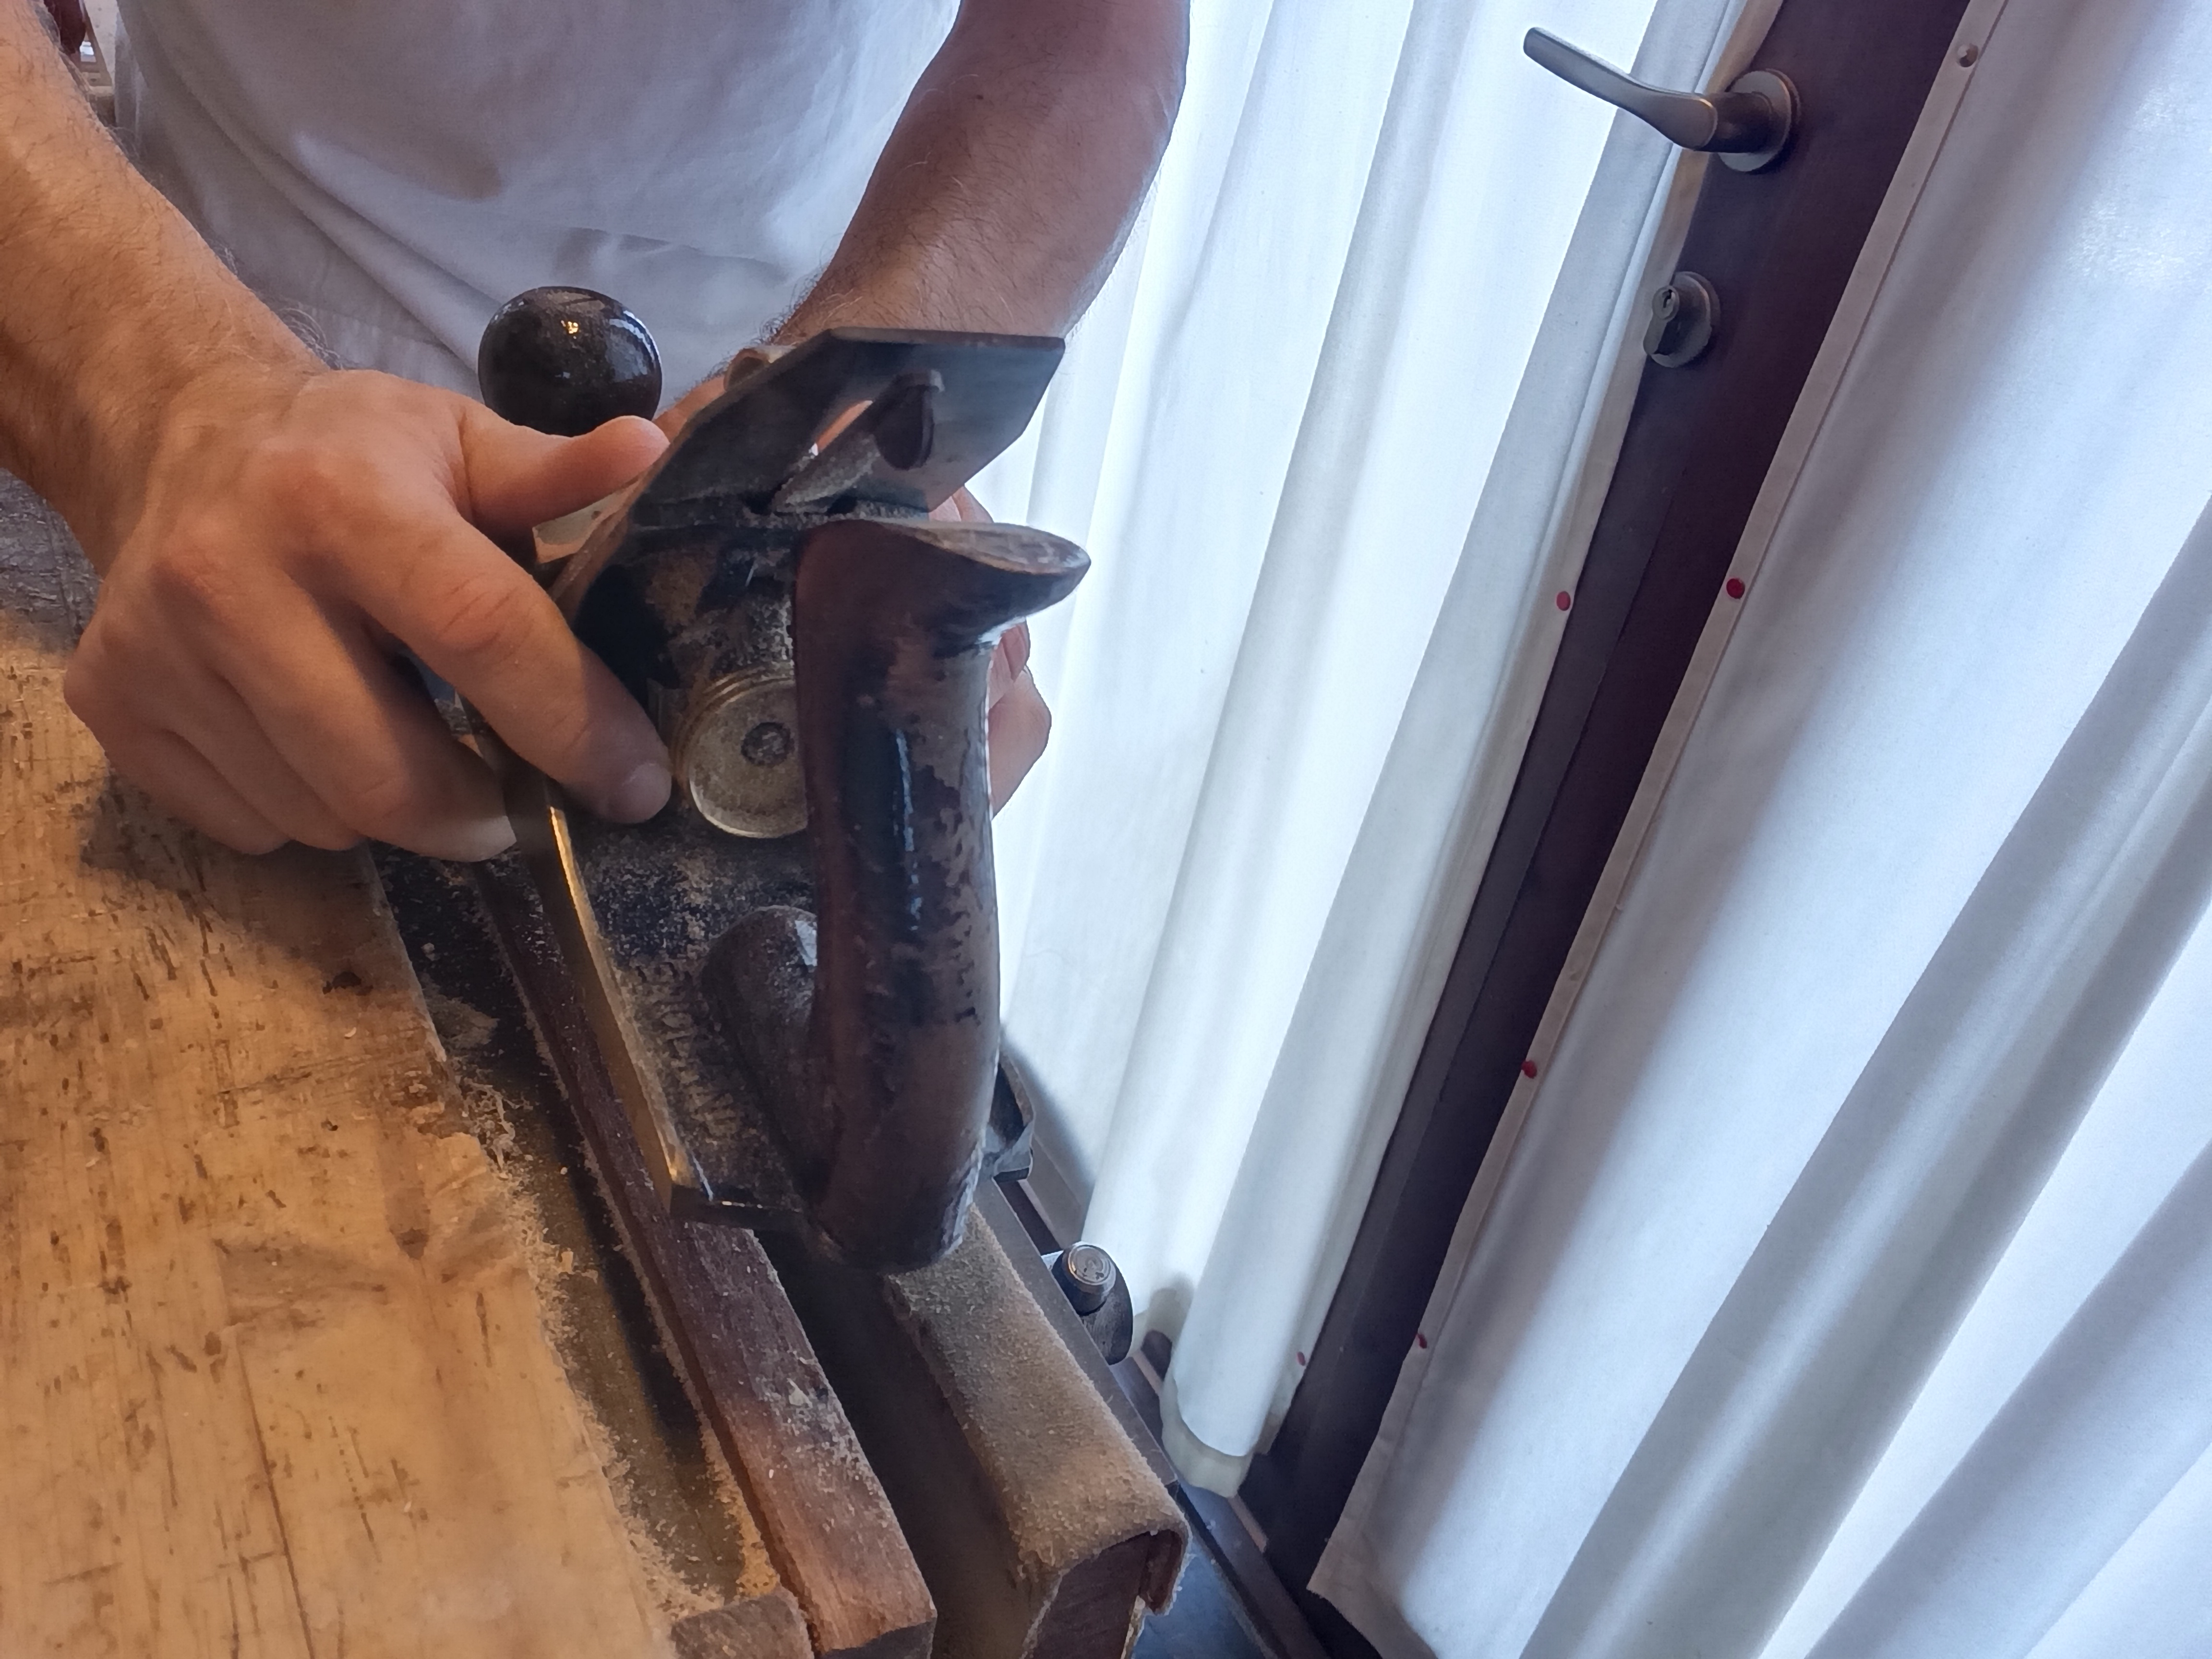
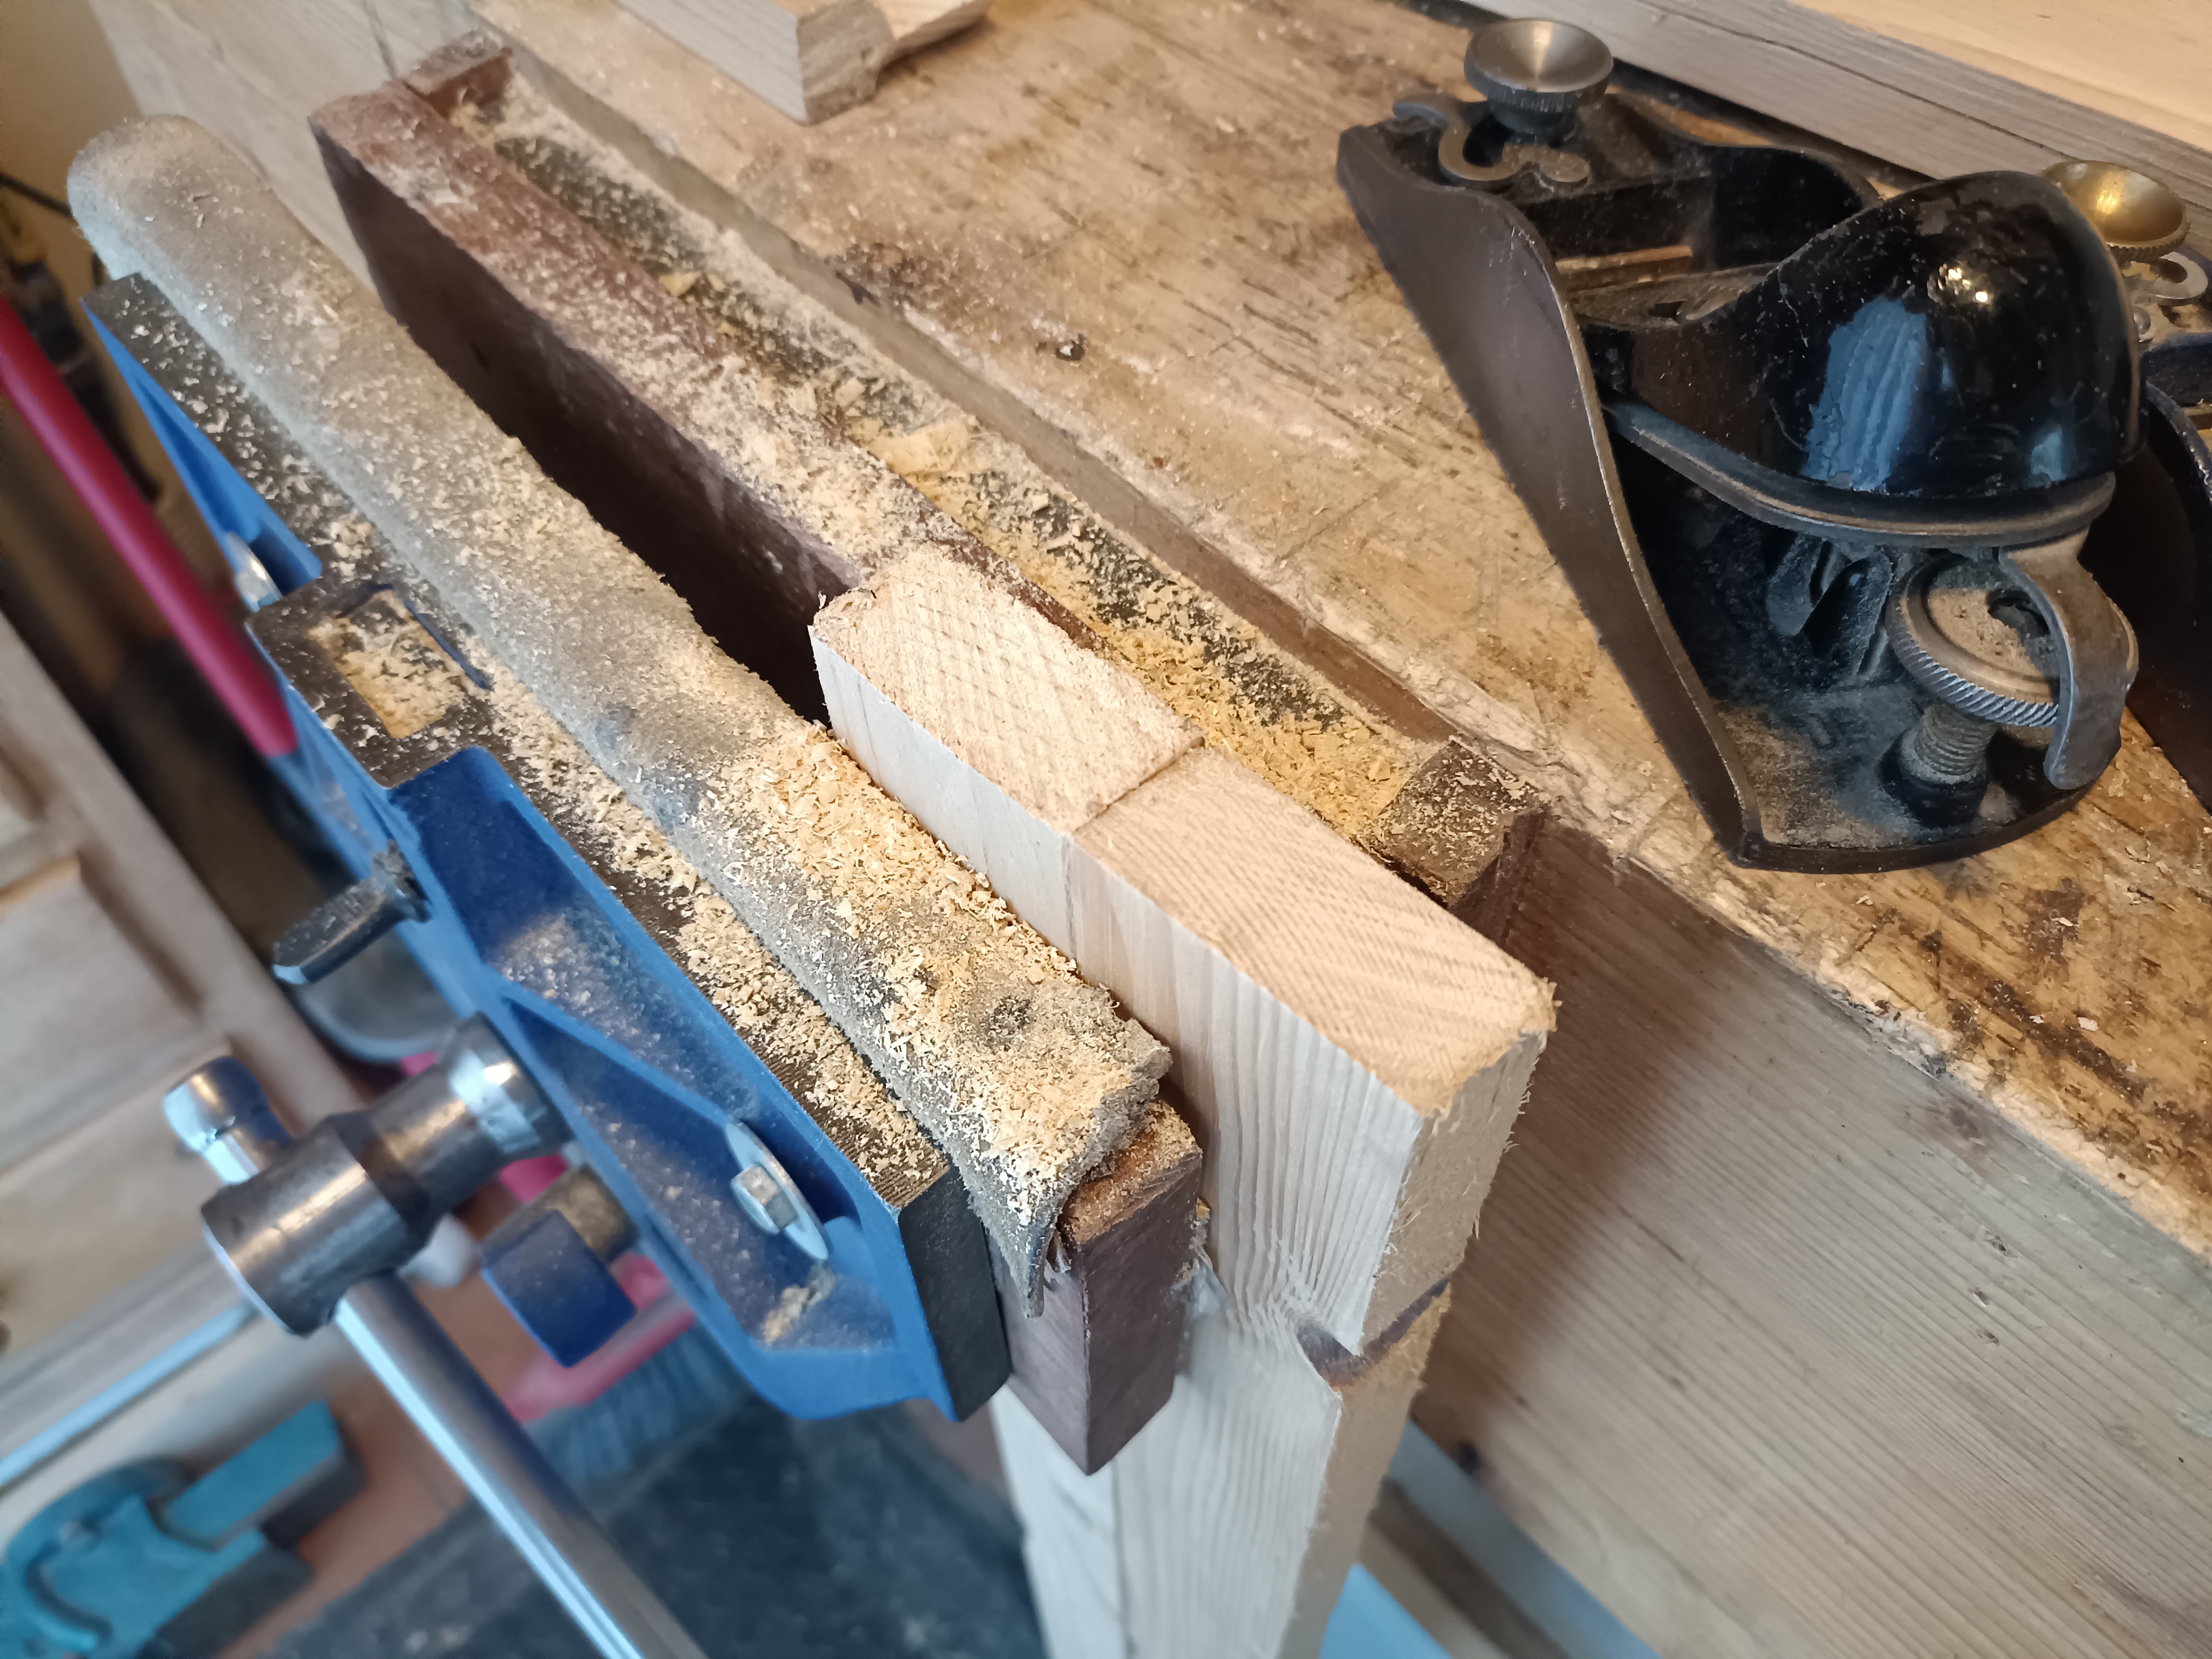
Come prima cosa tracciamo sulle quattro facce del pezzo la traccia alla quale dovremo fermarci. Quindi, blocchiamo saldamente il pezzo nella morsa del banco, meglio se non molto in alto, per evitare vibrazioni e slittamenti. Lubrifichiamo la suola con olio o cera o sapone e settiamo la lama affinché fuoriesca il meno possibile dalla bocca della suola. Con questi accorgimenti, e a patto che il tagliente sia molto affilato, dovremmo riuscire a produrre trucioli molto sottili o, nel caso peggiore, solo segatura.
UN SEGRETO IN ROVERE VI ASPETTA AL SALONE DEL LIBRO DI TORINO
Solo 20 copie speciali dei miei libri avranno questo gadget unico numerato
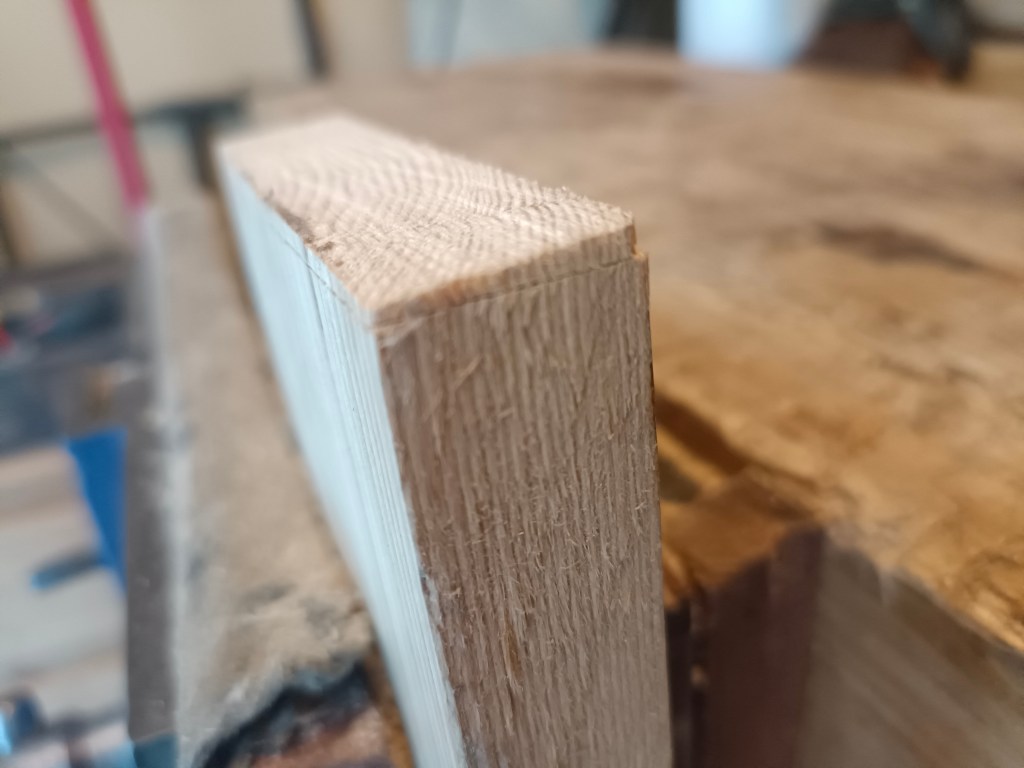
La piallatura di testa é fondamentalmente un’operazione di rifinitura che serve a squadrare il pezzo prima di poterlo giuntare. É quindi importante portarsi con il taglio fatto con la sega il più vicino possibile alla misura voluta e poi sistemare le differenze di pochi millimetri e gli eventuali fuori squadro con la pialla. Questo perché rimuovere anche un solo centimetro piallando di testa può diventare un lavoro lungo e faticoso (oltre a consumare inutilmente il tagliente), certamente non semplice come la piallatura di costa (che vedremo in un prossimo articolo).
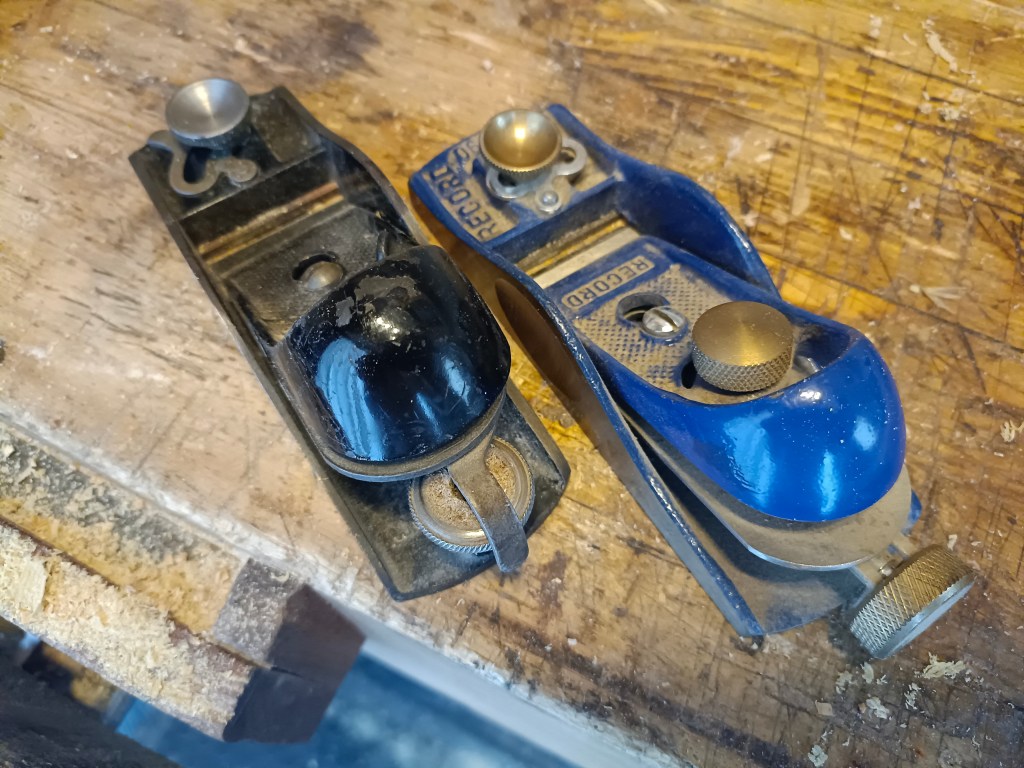
Le pialle che meglio si adattano a lavorare il legno di testa sono le pialle con basso angolo di taglio, le c.d. pialle bevel up, in particolar modo le block planes. Queste pialle, presentando un angolo di seduta di 12 gradi (quindi molto orizzontale rispetto alla superficie di lavoro) sono in grado di affrontare il legno in modo più dolce rispetto alle comuni pialle bevel down, che hanno un angolo di seduta maggiore (45 gradi). É comunque possibile ottenere un’ottima piallatura anche con una pialla bevel down, se ben affilata e se facciamo fuoriuscire poco tagliente.

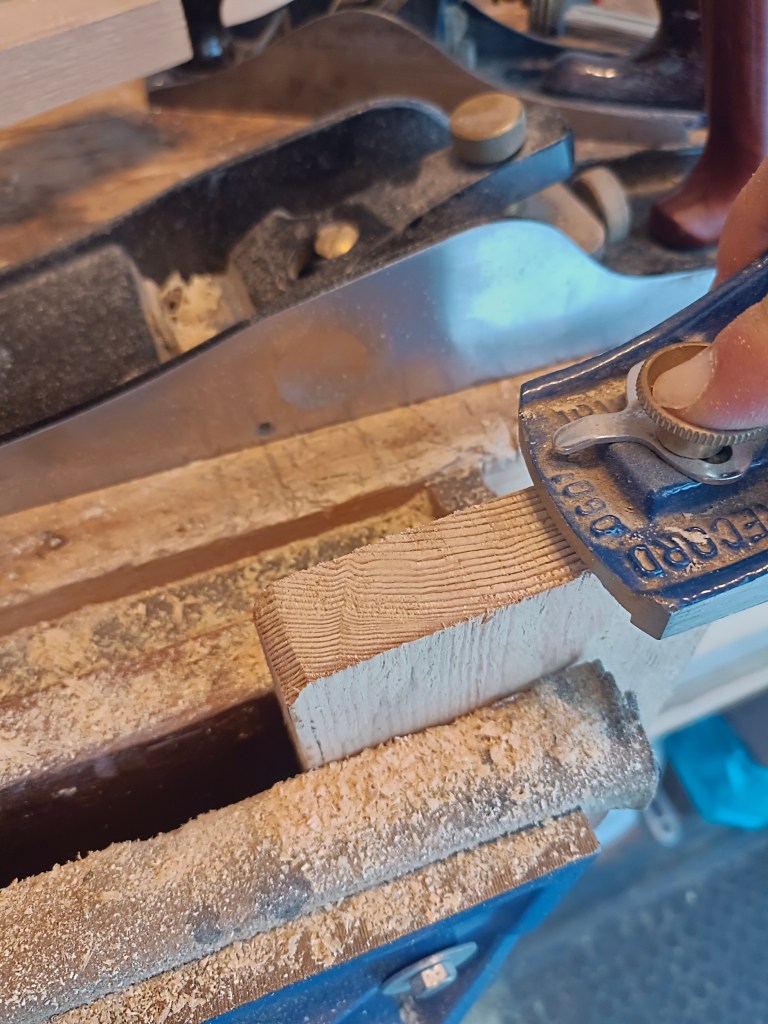
La maggiore problematica che si incontra nella piallatura del legno di testa é la sbeccatura del legno in uscita di piallatura. Questo accade in quanto la lama della pialla, in uscita dal pezzo, trascina con sé le fibre finali del legno che non sono supportate. Tale sbeccatura é certa se non mettiamo in pratica uno dei seguenti accorgimenti. Il più semplice (e probabilmente il migliore su pezzi larghi) é quello di piallare verso il centro del pezzo e fermandosi grosso modo a metà, lavorando alternativamente da ambedue i lati e ruotando il pezzo nella morsa oppure piallando manovrando la pialla verso di noi.
L’altro metodo è quello di praticare uno smusso su un angolo e piallare sempre verso tale smusso facendo particolare attenzione a non oltrepassare il limite nelle ultime passate.
Un altro metodo é quello di incollare o morsettare un pezzo di legno sacrificale di eguale spessore così da supportare le fibre del legno in uscita e fare in modo che a sbeccarsi sia il solo pezzo martire. Paul Sellers, infine, utilizza un metodo ancora diverso: effettua brevi movimenti circolari alzando leggermente di lato la pialla senza mai staccarla dal pezzo, lavorando alternativamente da ambo i lati del pezzo.
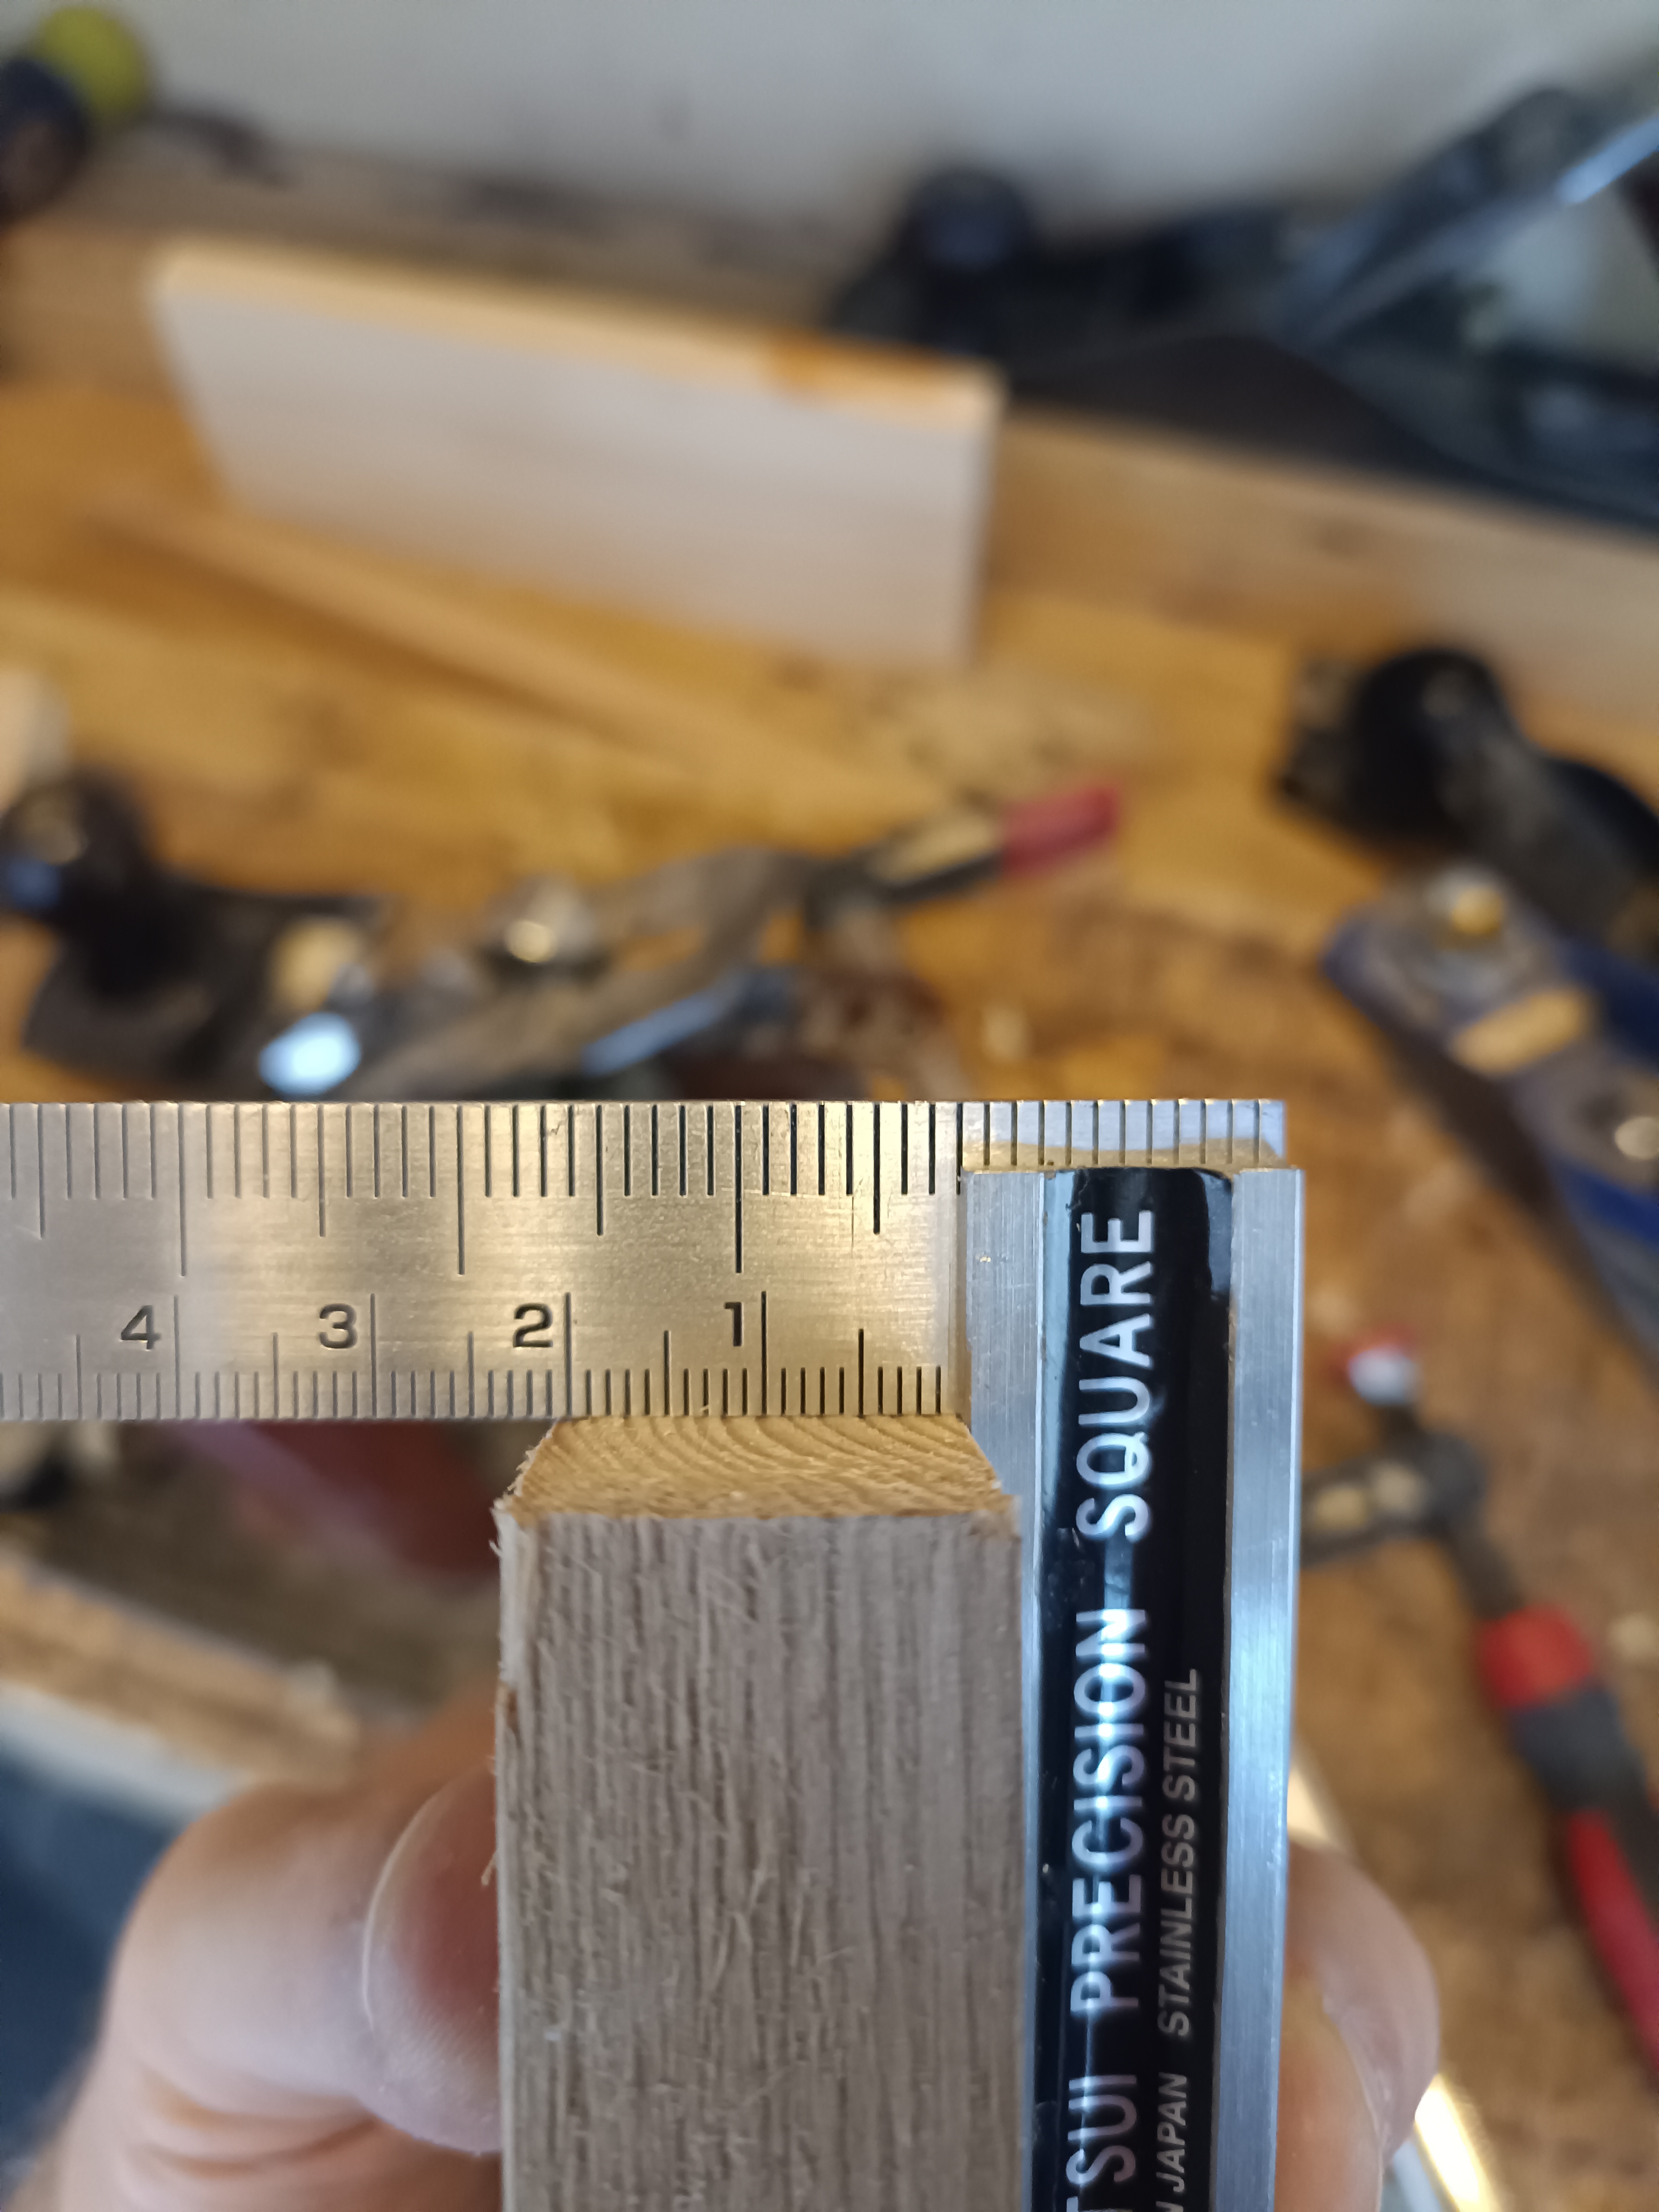
L’azione di piallatura é sempre la stessa e vista più volte. Appoggiamo la parte frontale della pialla sulla parte più vicina a noi e portiamola avanti fino a quando sentiremo la lama prendere il legno. Pratichiamo una pressione decisa sulla pialla cercando di mantenerla sempre ben adesa al pezzo, facendo al contempo passate ben livellate. Controlliamo spesso con una squadretta di stare piallando dritti ed eventualmente correggiamo il fuori squadra spostando la pialla verso il lato rimasto più alto. Pialliamo fino alla misura voluta, che abbiamo preventivamente segnato sui quattro lati del pezzo a matita o con il coltellino da tracciatura.
Talvolta il piallare frontalmente il legno di testa potrebbe rovinare le fibre lasciando il legno ruvido. Un metodo per ovviare al problema può essere quello di utilizzare la pialla leggermente di sbieco. Così facendo, oltre a fare meno sforzo, otterremo una superficie più liscia e pulita.
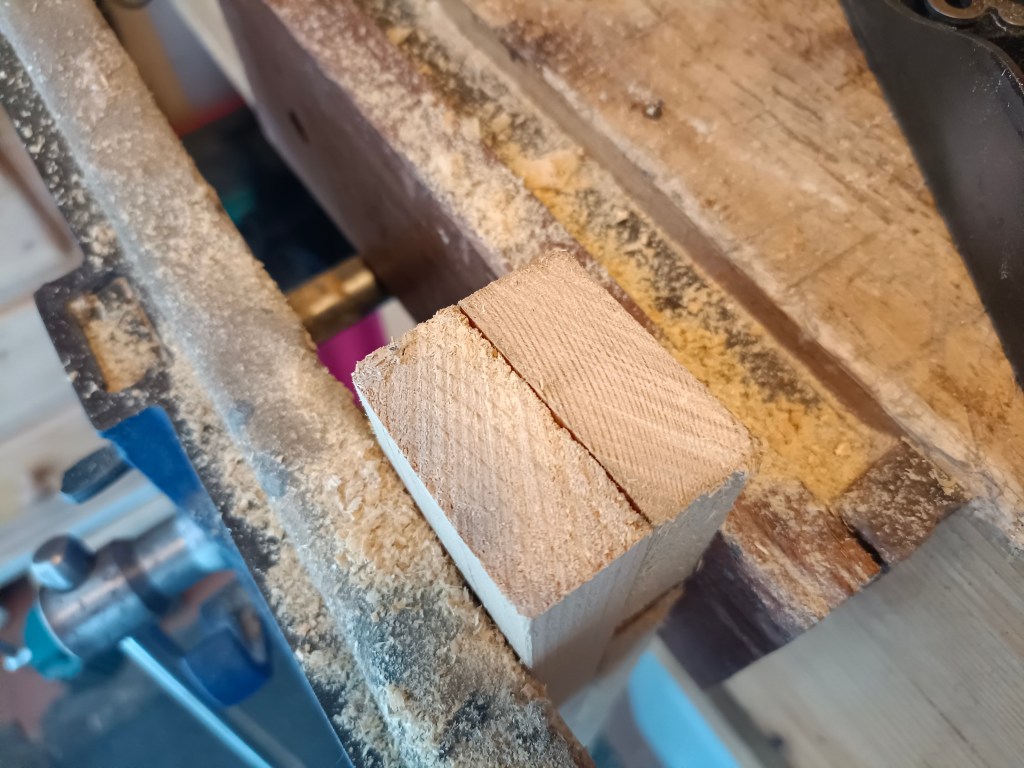
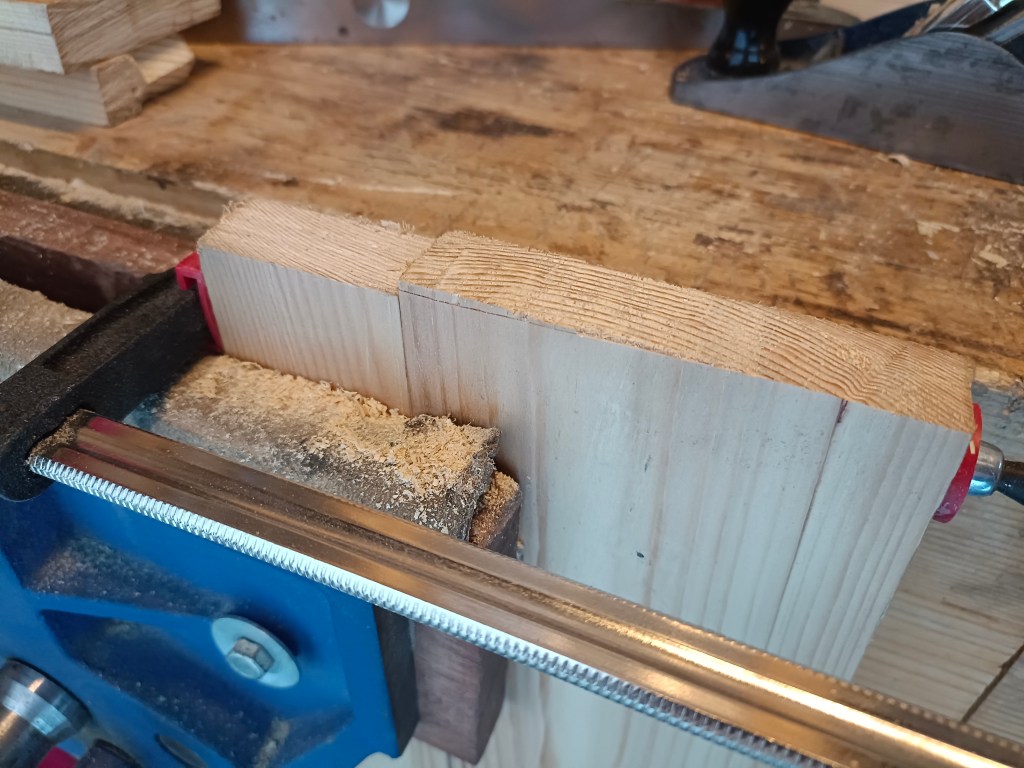
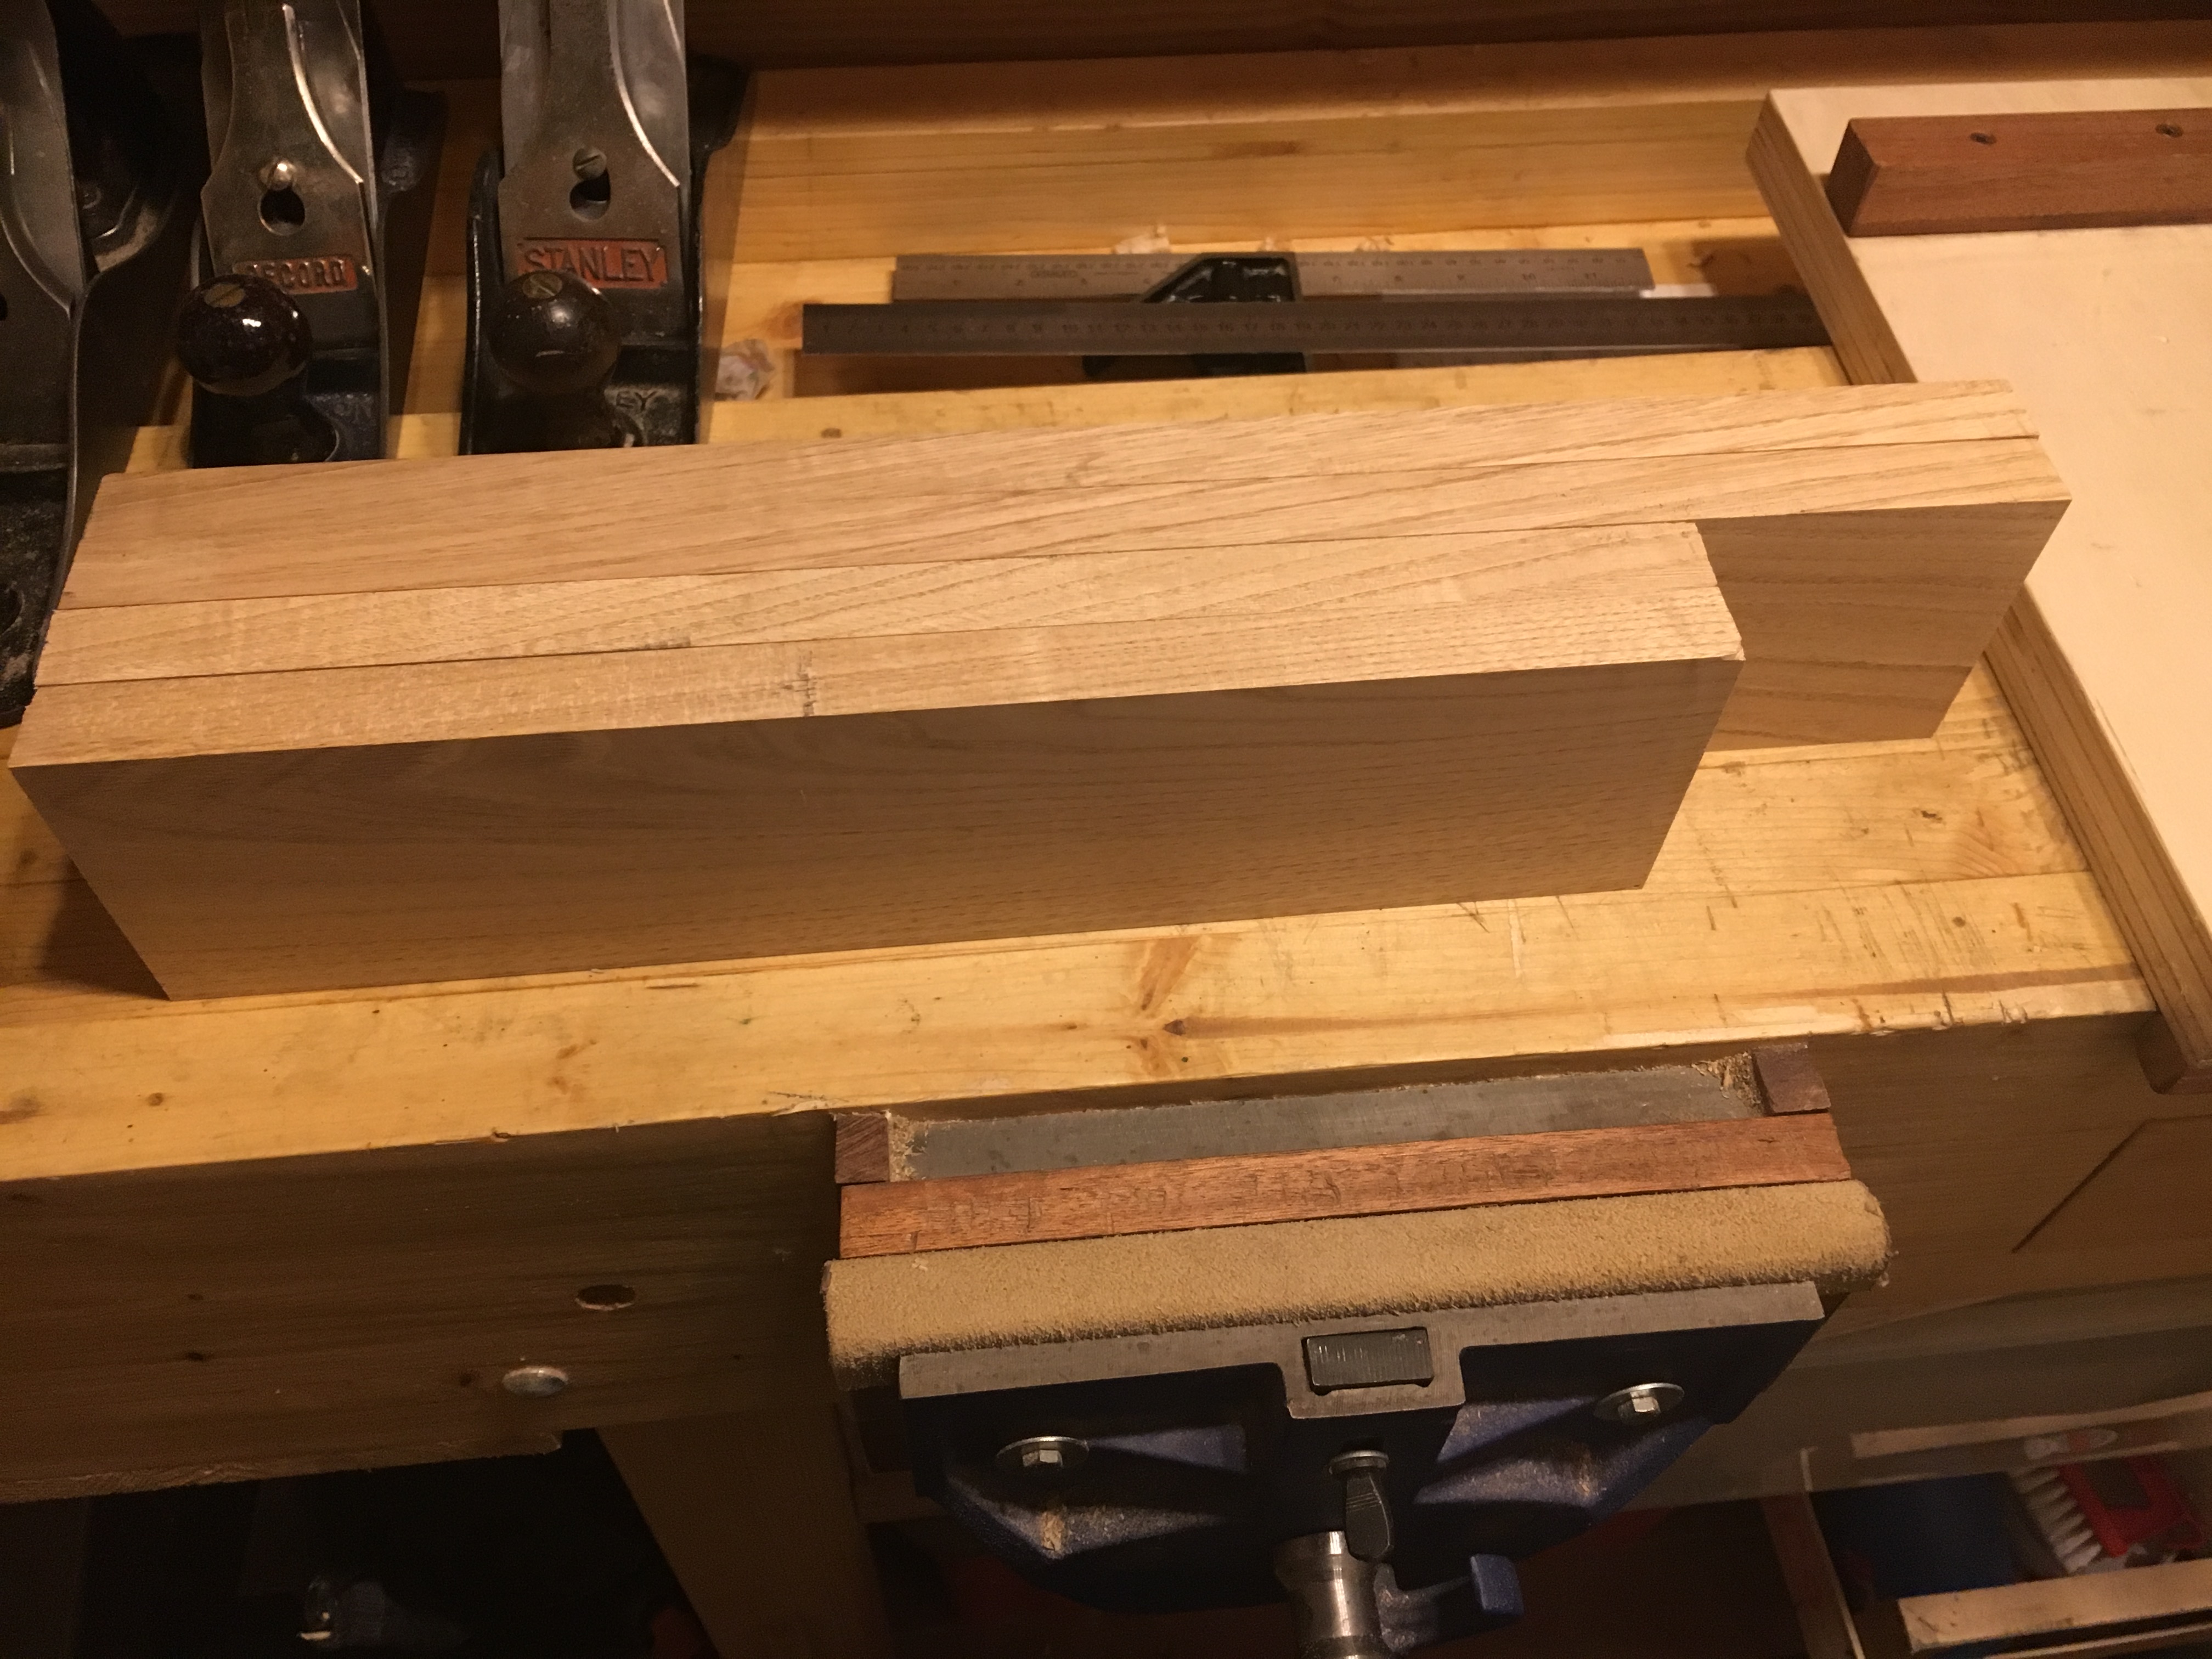
Se dobbiamo piallare di testa più tavole possiamo accoppiarle nella morsa, facendo molto attenzione a porle alla stessa altezza. Se accoppiate di faccia forniranno maggiore superficie di appoggio in larghezza mentre poste una dopo l’altra e morsettate assieme forniranno una maggiore lunghezza d’azione per le pialle più grandi.
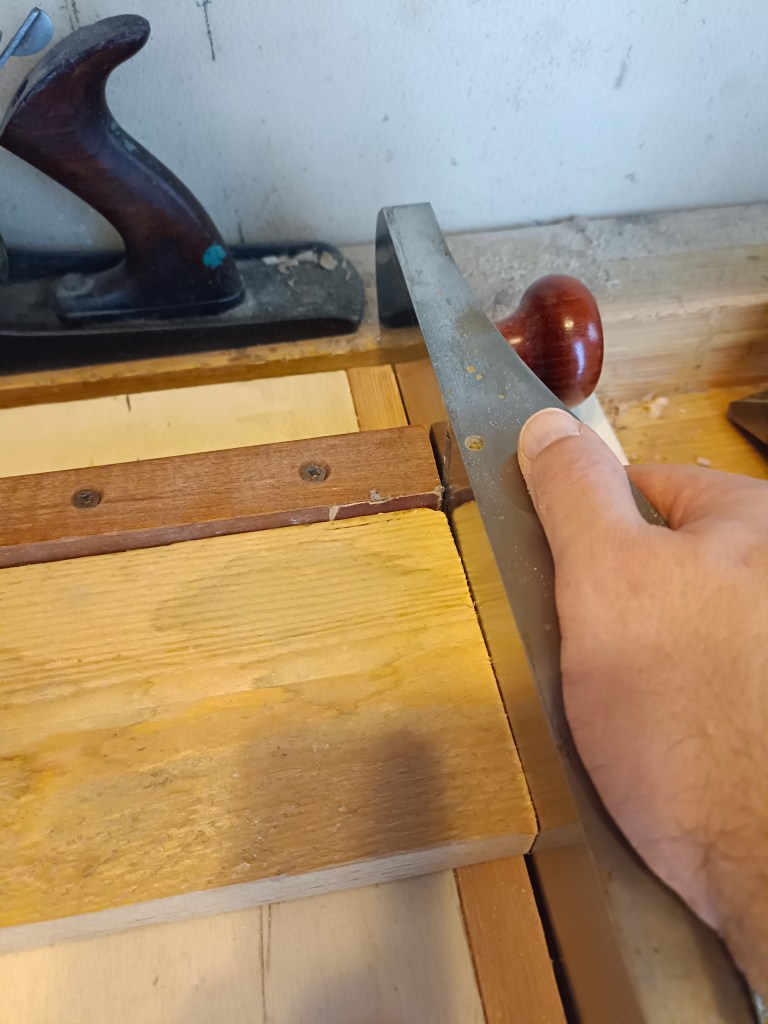
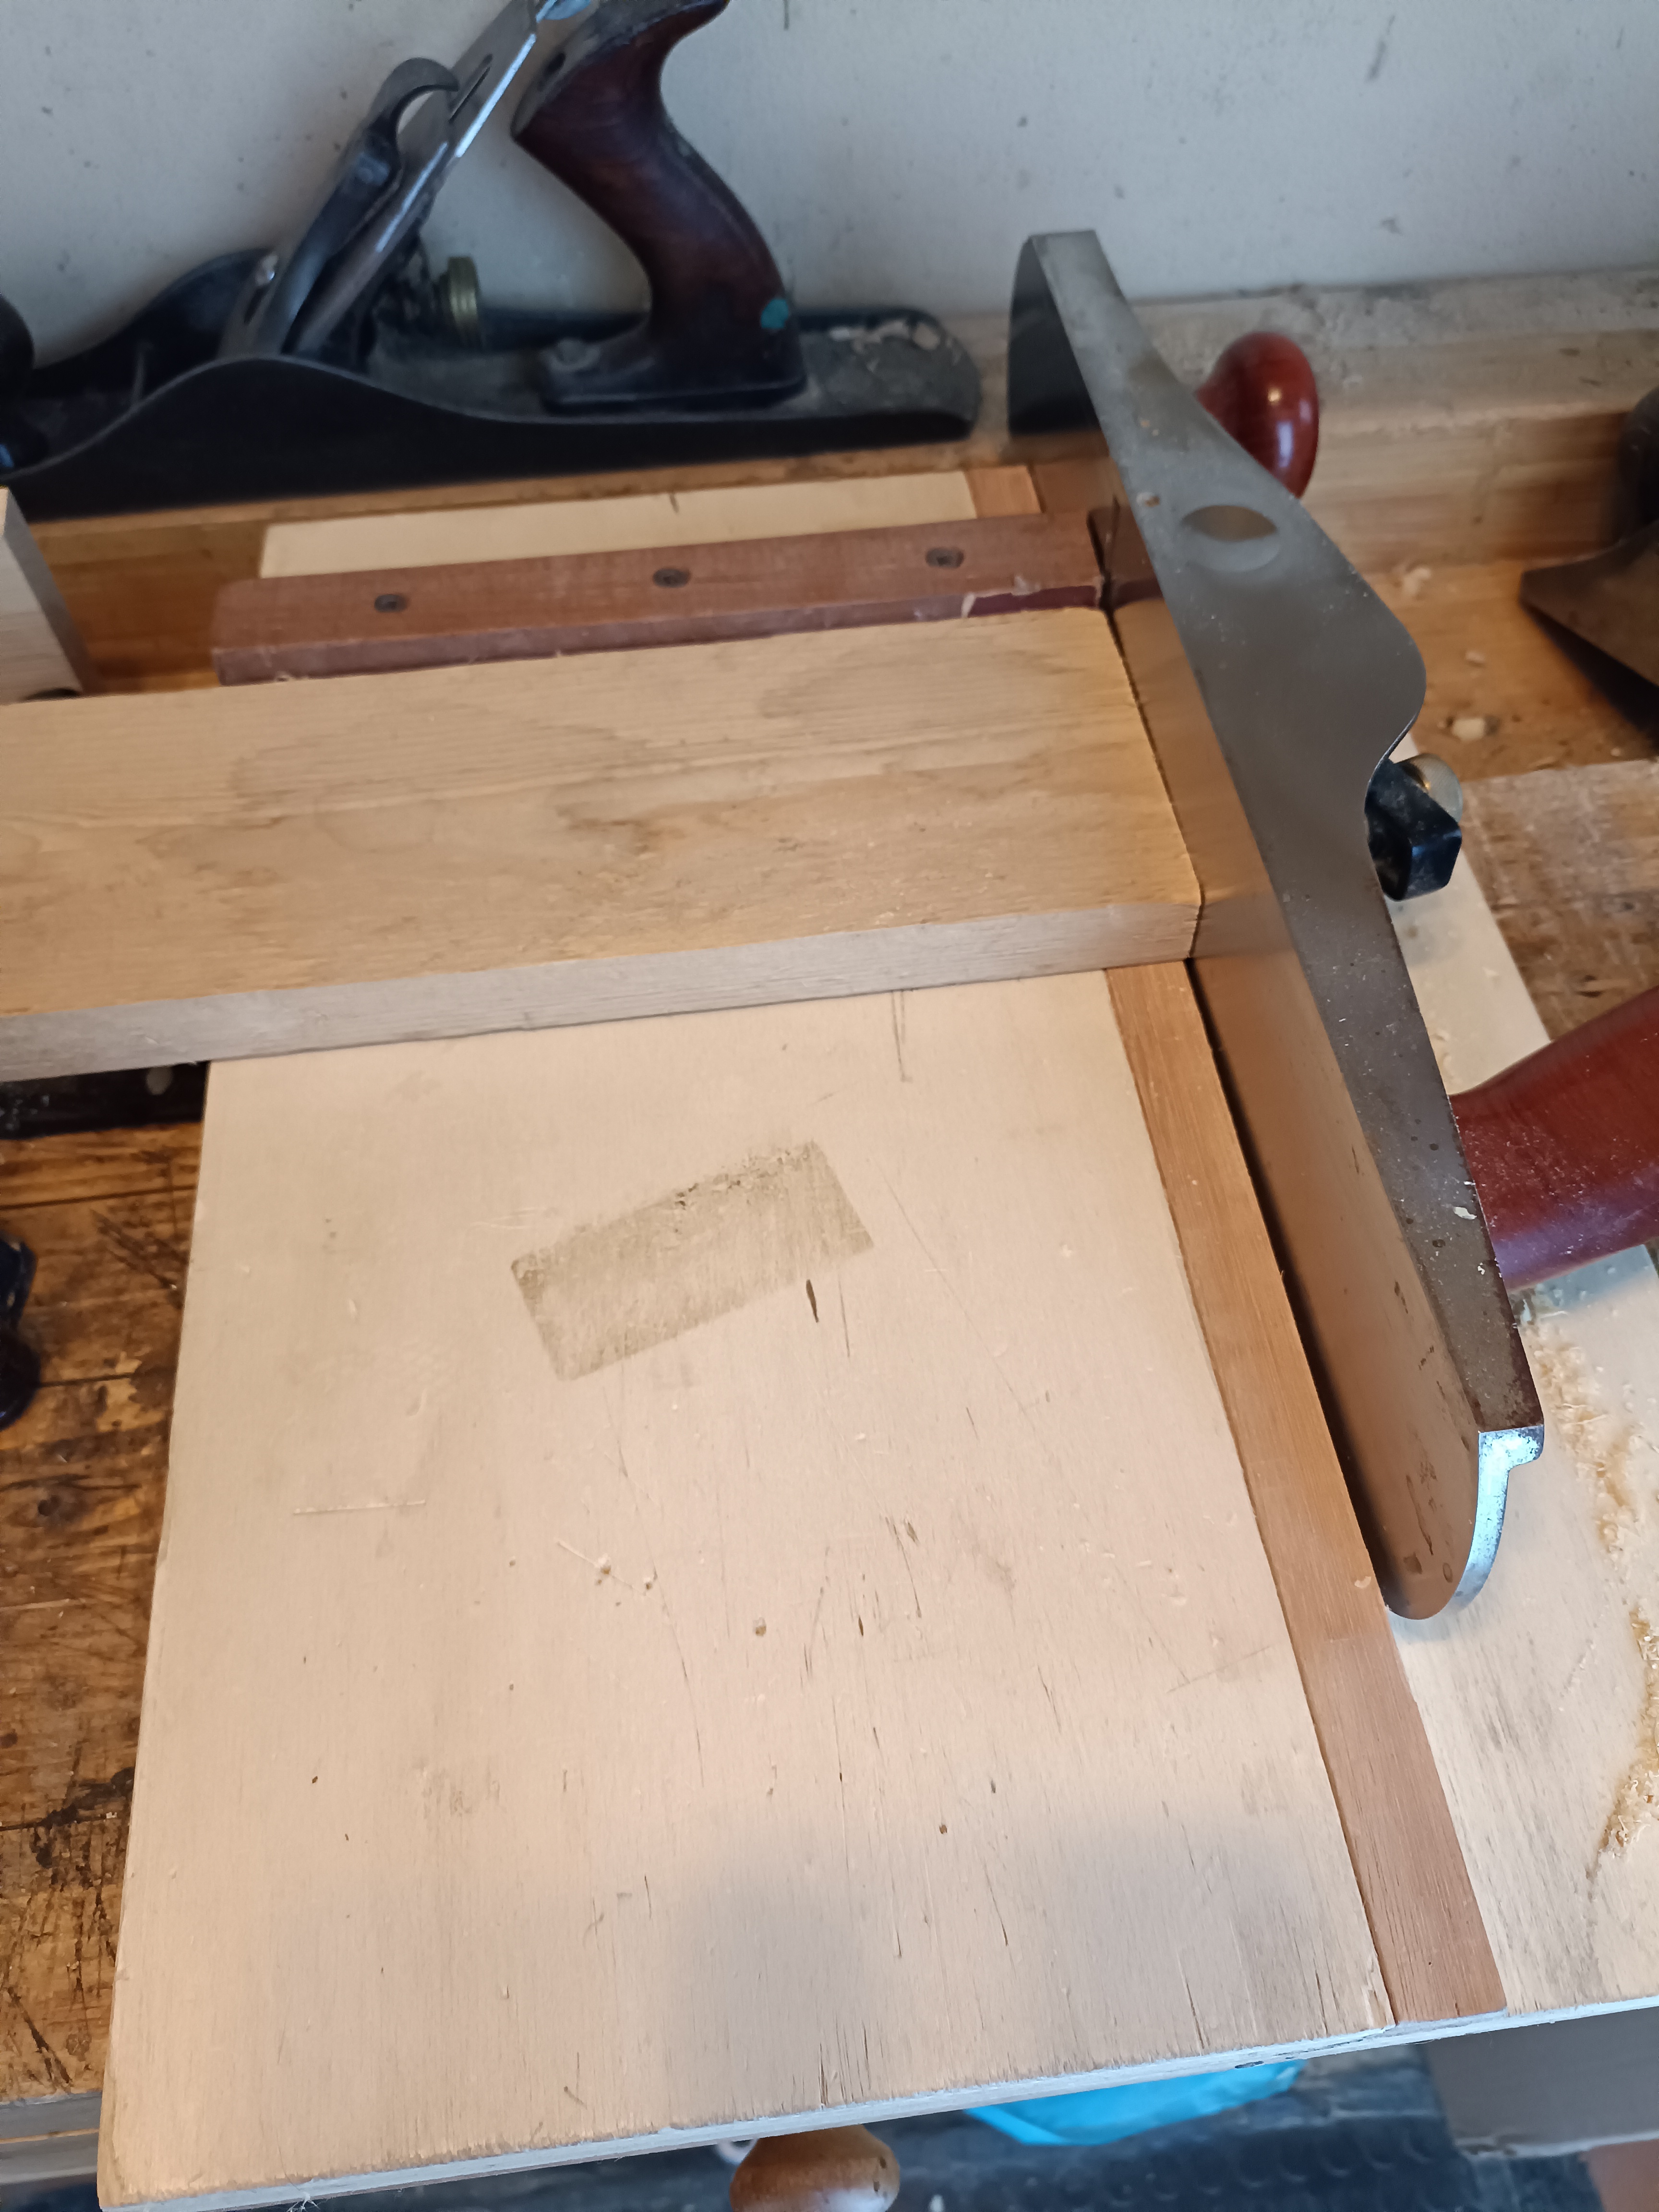
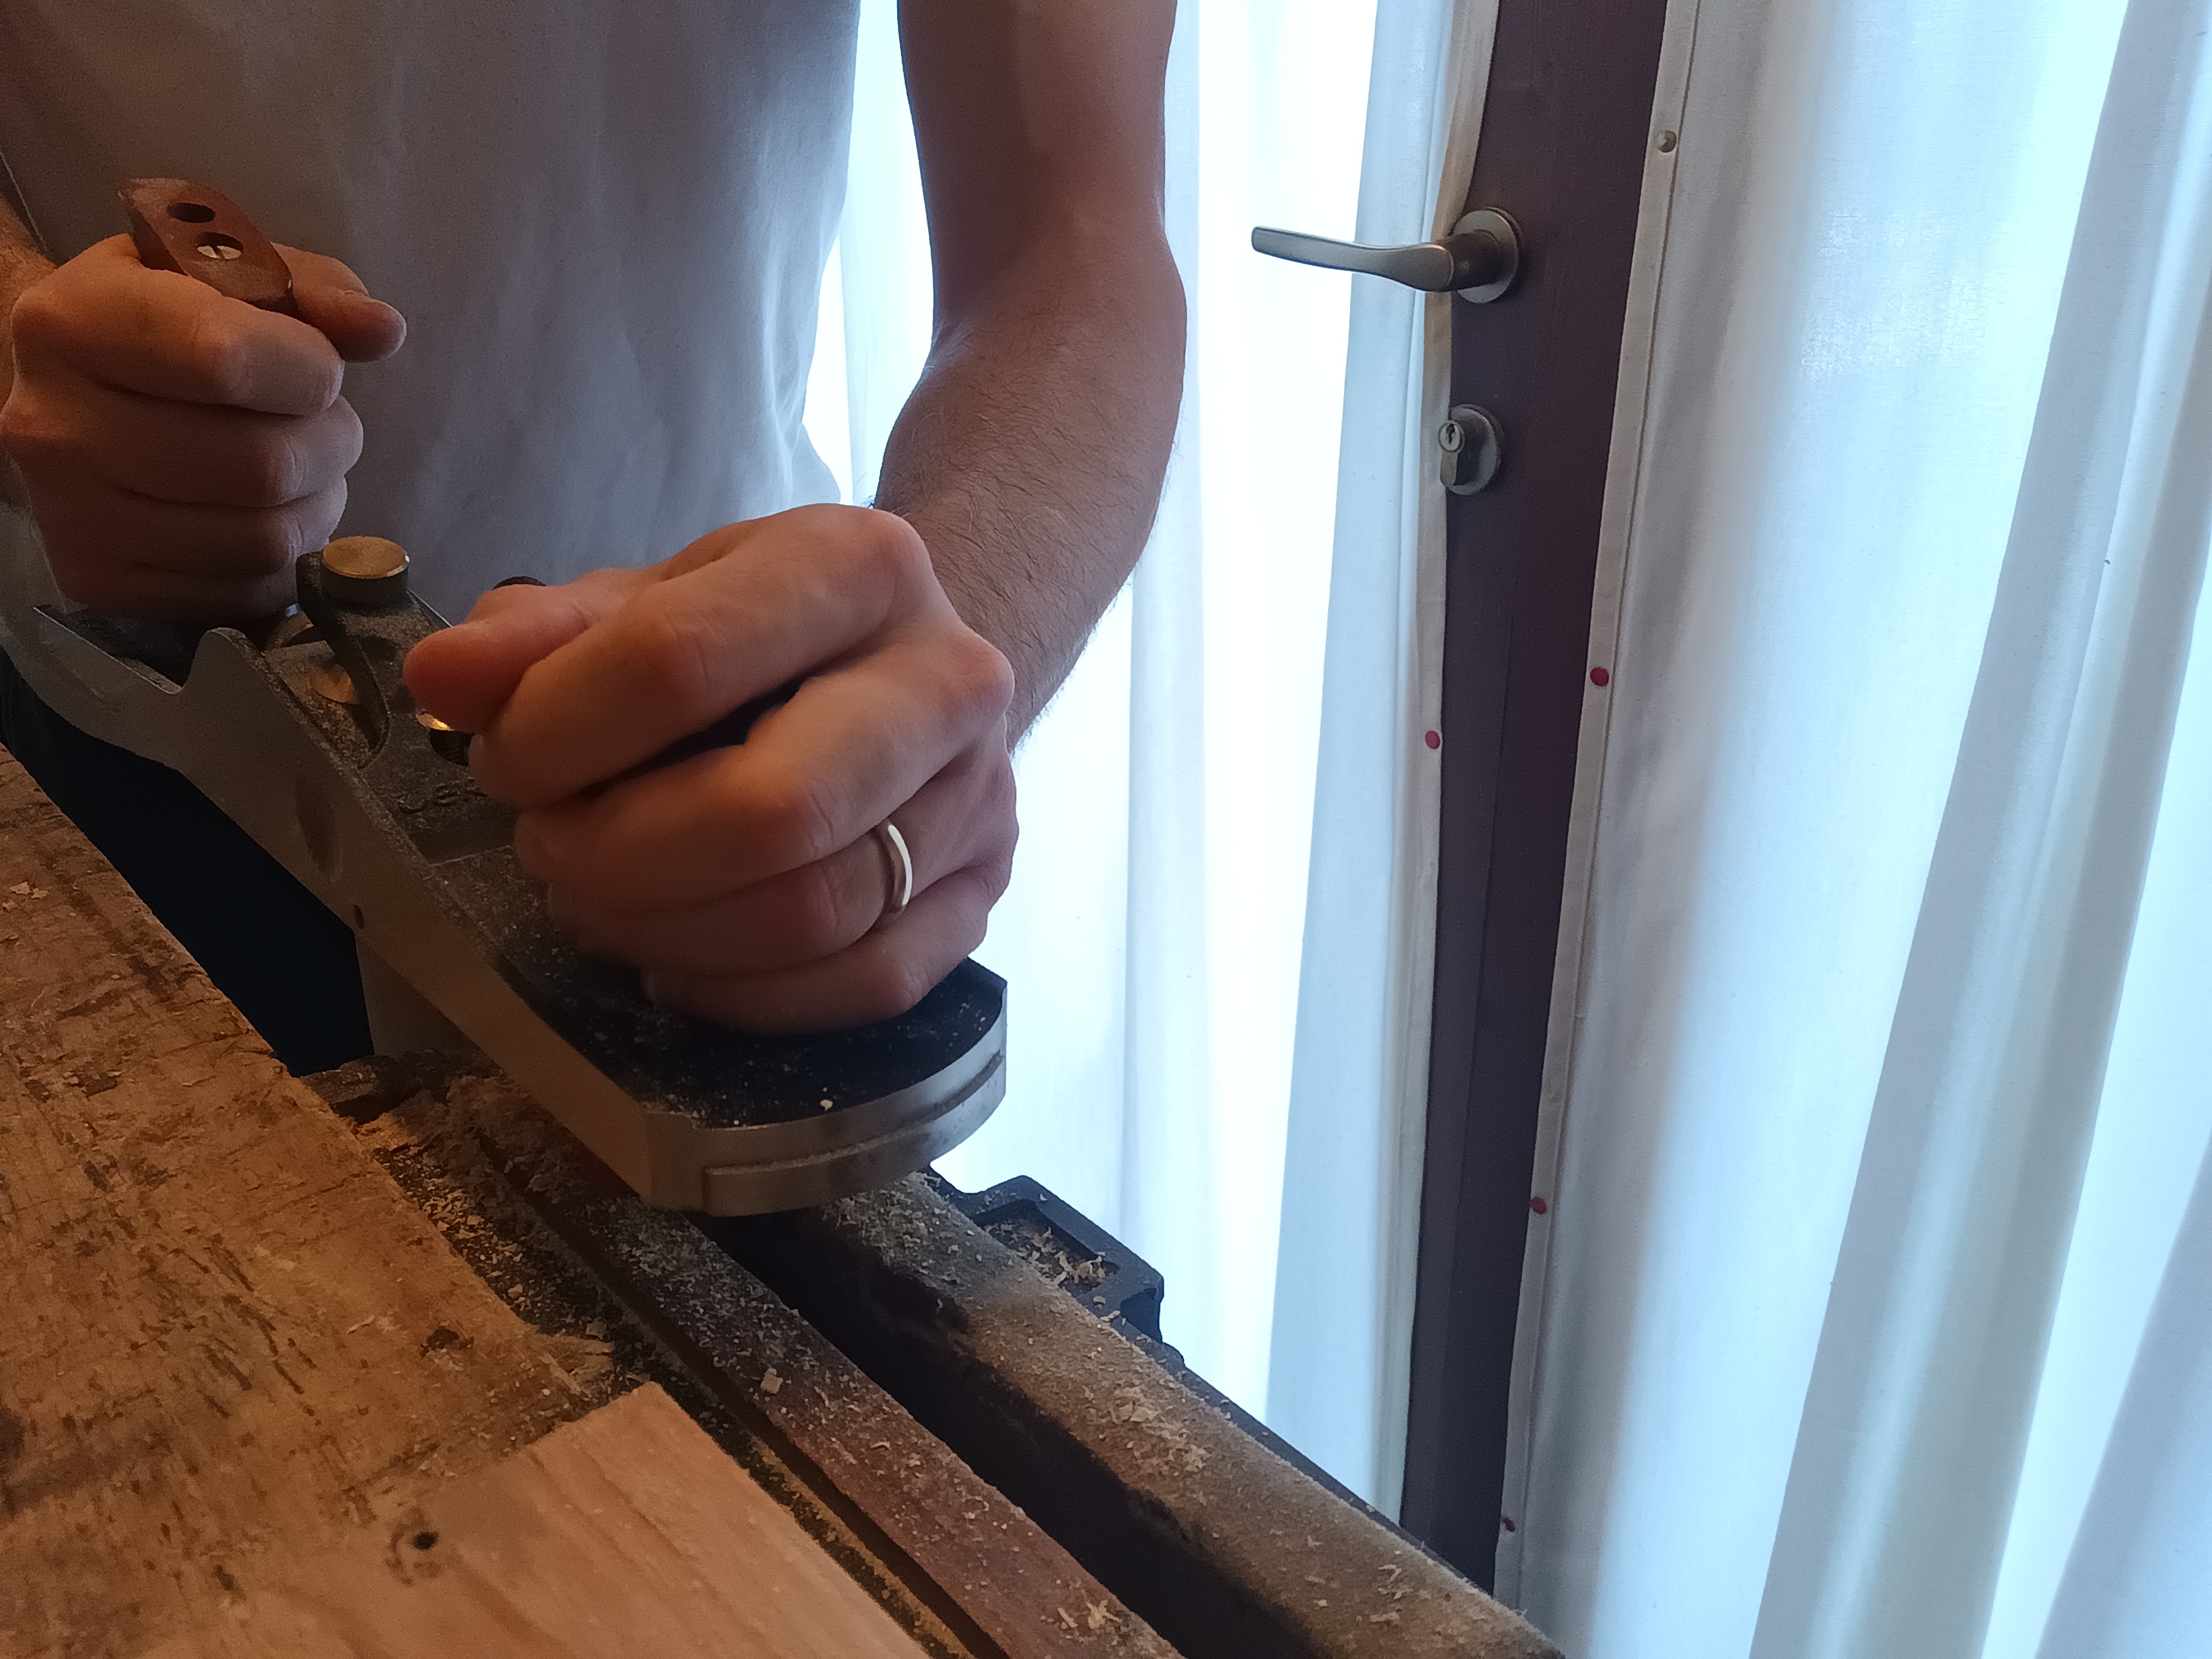
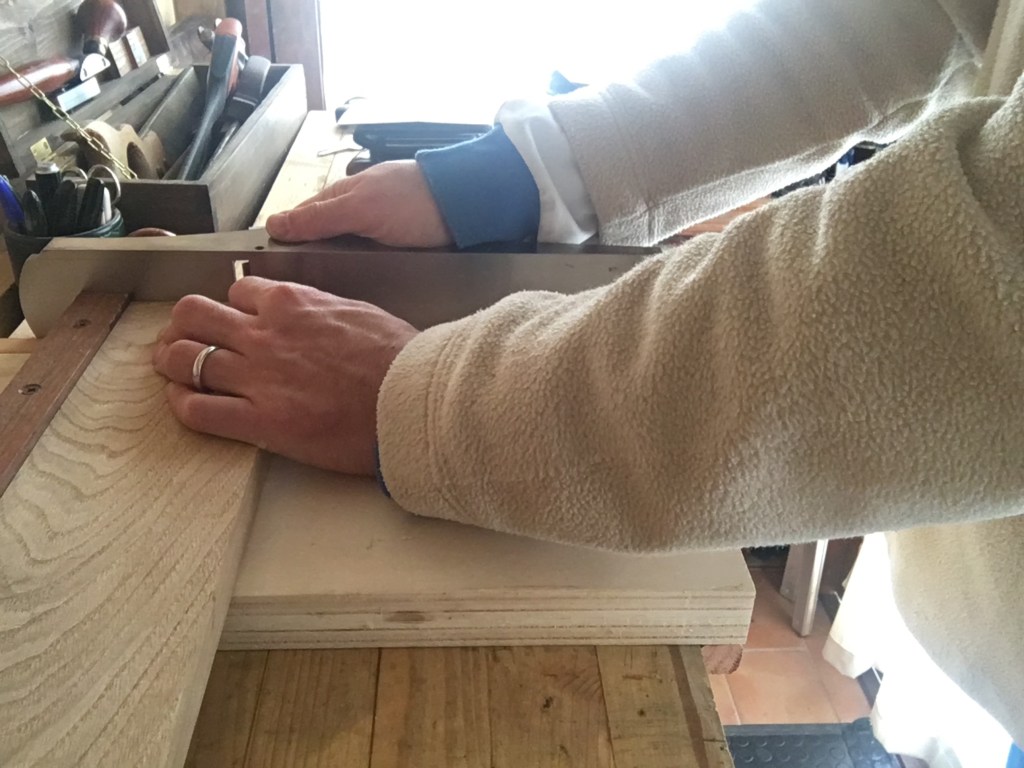
La piallatura di testa avviene spesso su pezzi che offrono una superficie di appoggio minimale. Per tale motivo vengono utilizzate normalmente le block planes che sono pialle di piccole dimensioni e con suola ridotta. Nonostante tali pialle e i molti accorgimenti visti, avere poca distanza dove far scivolare la suola rende l’azione particolarmente difficoltosa. Ecco allora che, per pezzi di ridotte dimensioni o se dobbiamo fare piccoli aggiustamenti, anche di alcuni decimi di millimetro, un ausilio particolarmente utile é la shooting board (di cui abbiamo già parlato in un vecchio post). Questo jig offre una superficie di appoggio maggiorata, viene utilizzato con pialle di maggiore lunghezza (spesso bevel up, ma non solo) e previene il problema della sbeccatura. Se costruito bene, permette di ottenere superfici di testa molto precise, fattore particolarmente importante se dobbiamo fare successive giunzioni di testa, come gli incastri tenone e mortasa o a coda di rondine.
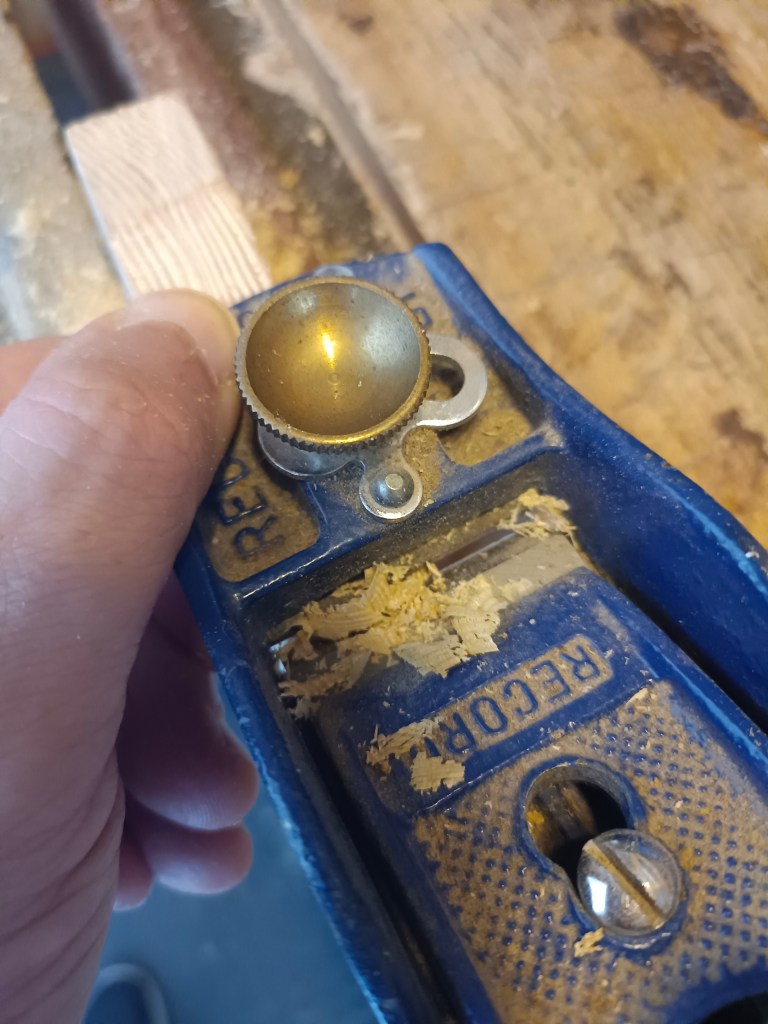
Piallare il legno di testa può non essere così agevole come piallare lungovena. Occorre maggiore forza, attenzione e qualche accorgimento in più. Personalmente utilizzo poco le block planes e anche per pezzi piccoli uso quasi sempre una pialla n.4 bevel down, ben affilata e dando poco tagliente. Questo per avvicinarmi il più possibile alla traccia. Poi mi affido alla shooting board, utilizzando una pialla Veritas bevel up, che mi porta esattamente alla misura desiderata.
La piallatura traverso vena consiste invece nel piallare una faccia di una tavola in maniera trasversale alla direzione delle fibre del legno. L’ esempio classico lo abbiamo quando dobbiamo sgrossare la faccia di una tavola di legno che presenta imbarcamenti e deformazioni. Per rimuovere velocemente materiale si pialla la faccia da costa a costa mantenendo la pialla leggermente inclinata alla direzione della venatura in modo tale da renderla più agevole ed efficace. Lo sbozzino é lo strumento solitamente usato per questo tipo di lavorazione.
———————————————————————-
After talking about long grain planing in the previous article, let’s now see how to perform end grain planing. This term clearly identifies the type of processing to be performed as the planing is carried out on the edge of the piece (end wood) where the fibers are arranged laterally with respect to the wood grain. The wood channels in this area are exposed, because they are truncated, and their planing is not easy because it is as if we were always going against the grain. For this reason, planing the end grain implies the use of certain precautions which, if not implemented, could compromise the success of our work.
First we trace on the four faces of the piece the trace at which we will have to stop. Then, we clamp the piece firmly in the bench vice, preferably not very high, to avoid vibrations and slipping. We lubricate the sole with oil or wax or soap and set the blade so that it comes out as little as possible from the mouth of the sole. With these precautions, and as long as the cutting edge is very sharp, we should be able to produce very fine shavings or, in the worst case, just sawdust.
The end grain planing is basically a finishing operation that serves to square the piece before being able to join it. It is therefore important to take the cut made with the saw as close as possible to the desired size and then adjust the differences of a few millimeters and any out of square with the plane. This is because removing even a single centimeter by planing the head can become a long and tiring job (in addition to unnecessarily consuming the cutting edge), certainly not as simple as planing the edge (which we will see in a future article).The planes that are best suited to working end grain are the planes with a low cutting angle, the so-called bevel up planes , especially the block planes. These planes, having a seat angle of 12 degrees (therefore very horizontal with respect to the work surface) are able to deal with the wood in a more gentle way than the common bevel down planes, which have a steaper seat angle (45 degrees). However, it is possible to obtain an excellent planing even with a bevel down plane, if well sharpened and if we let out a little cutting edge.
The main problem encountered in the planing of the end grain is the splitting of the wood coming out of planing. This happens because the blade of the plane, coming out of the piece, drags with it the final fibers of the wood that are not supported. This splitting is certain if we do not put into practice one of the following precautions. The simplest (and probably the best on large pieces) is to plane towards the center of the piece and stop roughly in the middle, alternately working from both sides and turning the piece in the vice or planing by maneuvering the plane towards us. The other method is to make a chamfer on a corner and always plane towards that chamfer, paying particular attention not to overstep the limit in the last few passes. Another method is to glue or clamp a sacrificial piece of wood of equal thickness so as to support the fibers of the outgoing wood and make sure that the only martyr piece is chipped. Finally, Paul Sellers uses a still different method: he makes short circular movements by slightly lifting the plane to the side without ever detaching it from the piece, working alternately on both sides of the piece.
The planing action is always the same and seen several times. We rest the front part of the plane on the part closest to us and carry it forward until we feel the blade take the wood. We apply firm pressure on the plane trying to always keep it well adhered to the piece, while making well-leveled passes. We often check with a square that we are planing straight and eventually correct the out of square by moving the plane towards the side that is higher. We plane up to the desired size, which we have previously marked on the four sides of the piece with a pencil or with the knife.
Sometimes planing the end grain from the front could ruin the fibers, leaving the wood rough. One way around this problem can be to use the plane slightly shifted sideways. By doing this, in addition to making less effort, we will obtain a smoother and cleaner surface. If we have to plane several boards from we can couple them in the vice, being very careful to place them at the same height. If coupled face-to-face they will provide greater width of support surface while placed one after the other and clamped together will provide greater length of action for larger planes. End grain planing often takes place on pieces that offer a minimal support surface. For this reason, block planes are normally used, because of their reduced sole. Despite these planes and the many tricks seen, having little distance to slide the sole makes the action particularly difficult. Here then, for small pieces or if we have to make small adjustments, even of a few thousands of a millimeter, a particularly useful aid is the shooting board (which we have already talked about in an old post). This jig offers a larger support surface, it is used with planes of greater length (often bevel up, but not only) and prevents the problem of splitting. If well built it allows to obtain very precise end grain surfaces, a particularly important element if we have to make subsequent head joints, such as mortise and tenone joints or dovetail joints.
Planing end grain may not be as easy as planing along the grain. More strength, attention and a few more tricks are needed. Personally, I use block planes very little and even for small pieces I almost always use a No. 4 bevel down plane , well sharpened and not very sharp. This is to get as close as possible to the track. Then I rely on the shooting board , using a Veritas bevel up plane, which takes me exactly to the desired size.
Cross-grain planing, on the other hand, consists of planing one face of a board transversally to the direction of the wood fibers. We have the classic example when we have to roughen the face of a wooden board that has warping and deformations. To quickly remove material, plane the face from edge to edge, keeping the plane slightly inclined towards the direction of the grain so as to make it easier and more effective. The scrub plane is the tool usually used for this type of processing.

Lascia un commento