PIALLARE IL LEGNO. PIALLATURA LUNGOVENA / PLANING WOOD. PLANING ALONG THE GRAIN
English translation at the end of the article

Negli ultimi due post abbiamo visto come si taglia manualmente il legno. Adesso passiamo alla lavorazione immediatamente successiva ovvero la piallatura. Ci riferiremo alla piallatura effettuata con le comuni pialle da finitura in metallo rimandando quella con le pialle speciali e in legno a futuri articoli.
La piallatura del legno si divide in tre grandi categorie. Piallatura lungo vena, piallatura traverso vena (o di testa) e piallatura di costa. Vediamo in questo articolo quella lungo vena.

La regola fondamentale è quella di piallare sempre in favore di vena e mai contro vena, al fine di evitare strappi delle fibre del legno. A tal fine, osservando la costa del pezzo di legno, è possibile individuare la direzione delle venature.
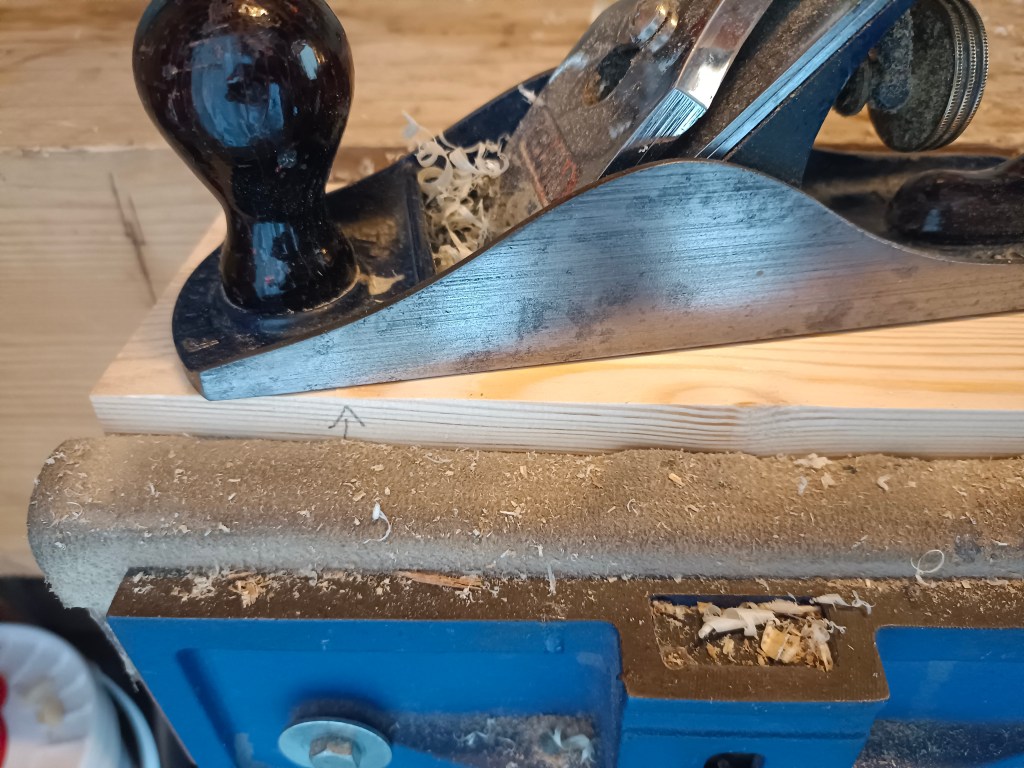
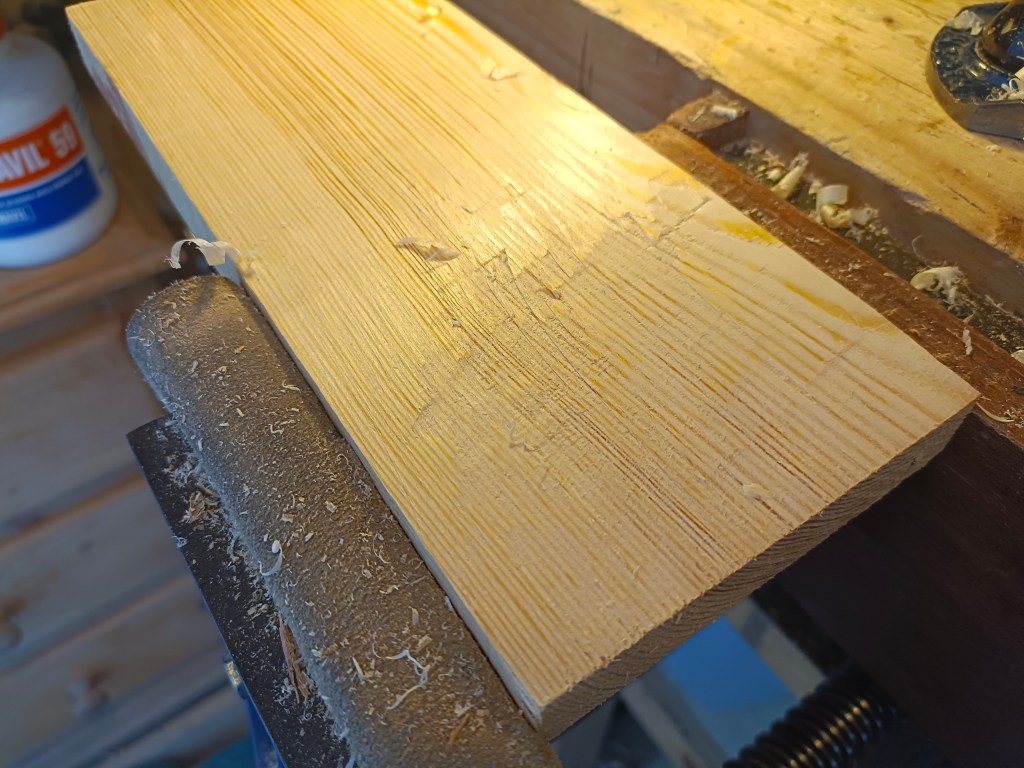
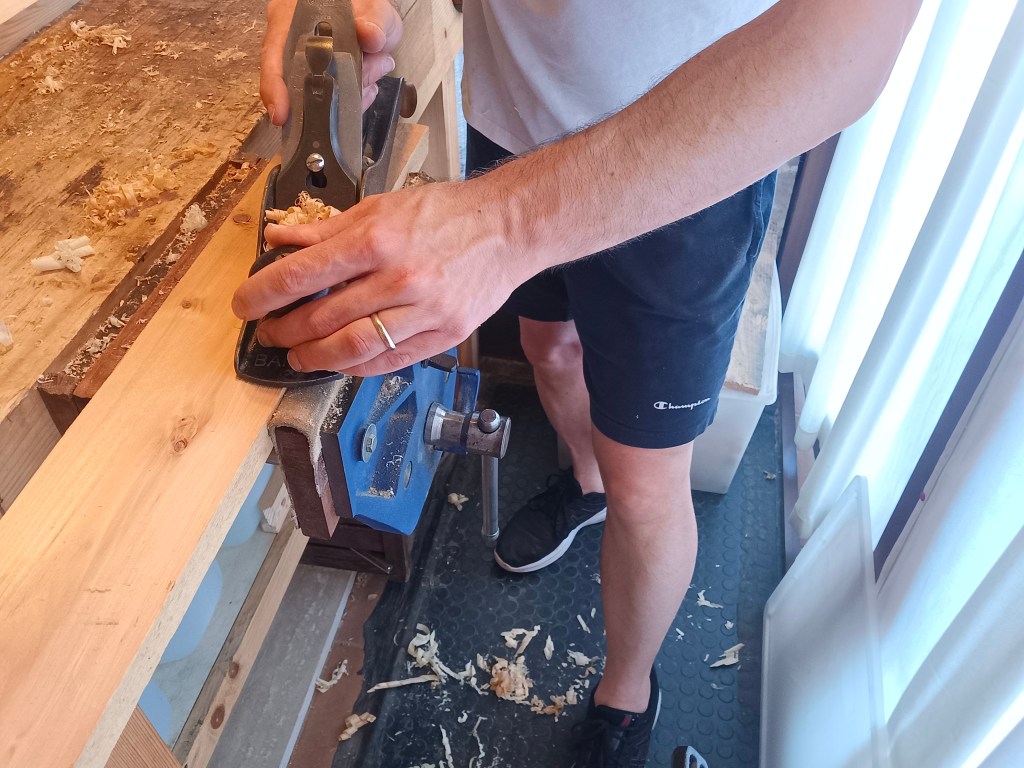
Essendo la piallatura un movimento a spingere il pezzo andrà inserito nella morsa del banco (o bloccato sul top del banco) in modo tale da mostrare le venature che salgono verso la superficie da piallare e che si allontanano da noi. L’azione a spingere della piallatura, assecondando tale direzione, risulterà scorrevole e renderà liscio il legno.

Al contrario, se piallassimo contro vena e quindi contro la direzione delle venature del legno, che in questo caso salgono verso di noi, l’azione di piallatura risulterà a scatti, con inceppamenti e conseguente rovina del legno. Se la direzione della venatura fosse invece sostanzialmente parallela alla superficie riusciremo a piallare senza difficoltà in ambedue le direzioni. Approfondiremo in un post dedicato come leggere la venatura del legno.
Saper piallare il legno è un’abilità che si apprende facendo tanta pratica. Questo perché sono molte le variabili da tenere in considerazione. Piallare un legno duro può essere più faticoso di piallare un legno morbido; alcuni tipi di legno presentano nodi, sacche di resina e cambi repentini di venatura difficili e talvolta impossibili da piallare; la pialla può presentare difetti strutturali o essere settata male; l’azione di piallatura può essere condotta in modo scorretto, ecc.
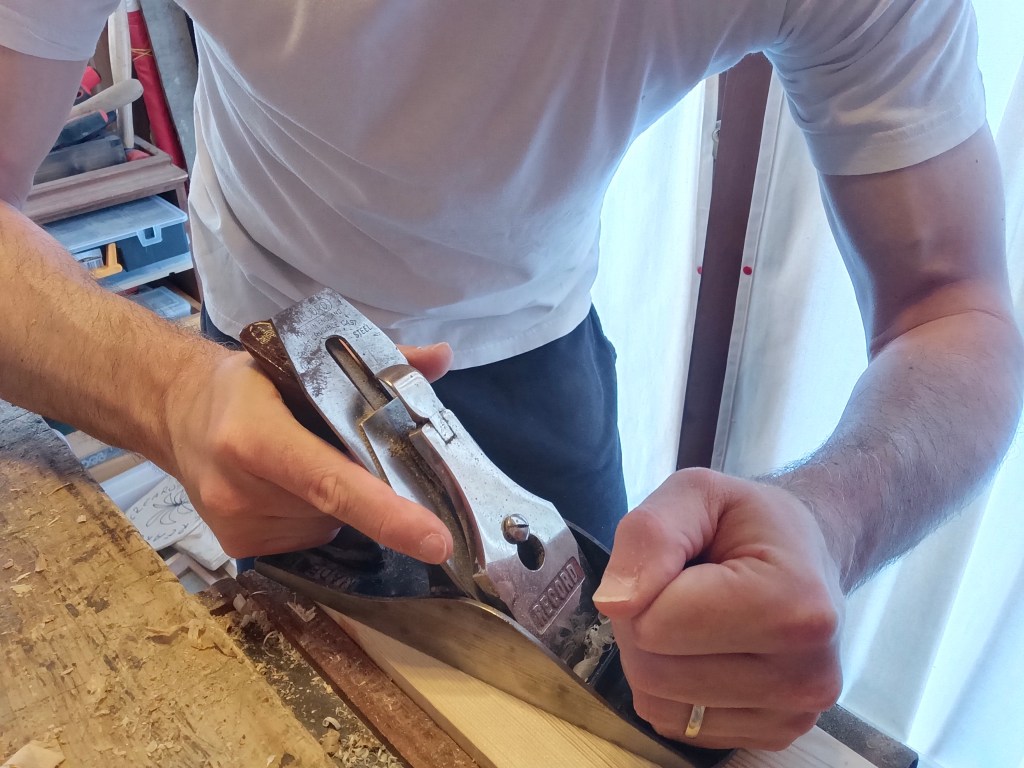
Prima di iniziare la piallatura dovremo settare la pialla. Diamo per scontato che la pialla non abbia problemi strutturali, la suola sia perfettamente spianata ed il tagliente sia affiliato a circa 25 gradi (l’angolo comunemente utilizzato nelle pialle da finitura bevel down in metallo). Ritraiamo la lama appena dentro la bocca della suola ruotando verso sinistra la rotella posta sul retro del frog. Facendo delle passate sul legno sentiremo che la pialla non produce trucioli. Solleviamo quindi la pialla dal legno e gradualmente ruotiamo verso destra la rotella di avanzamento della lama continuando in questa operazione di avanzamento della lama e prova di piallatura per tentativi sino a quando non sentiremo che la lama riuscirà a mordere il legno.
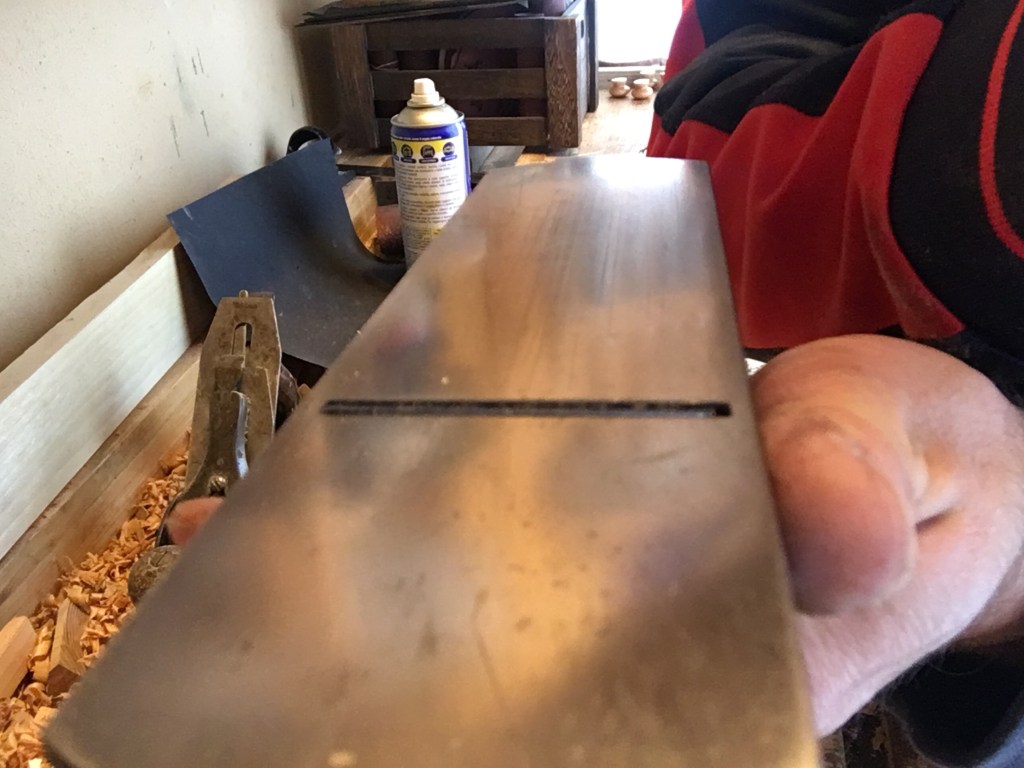
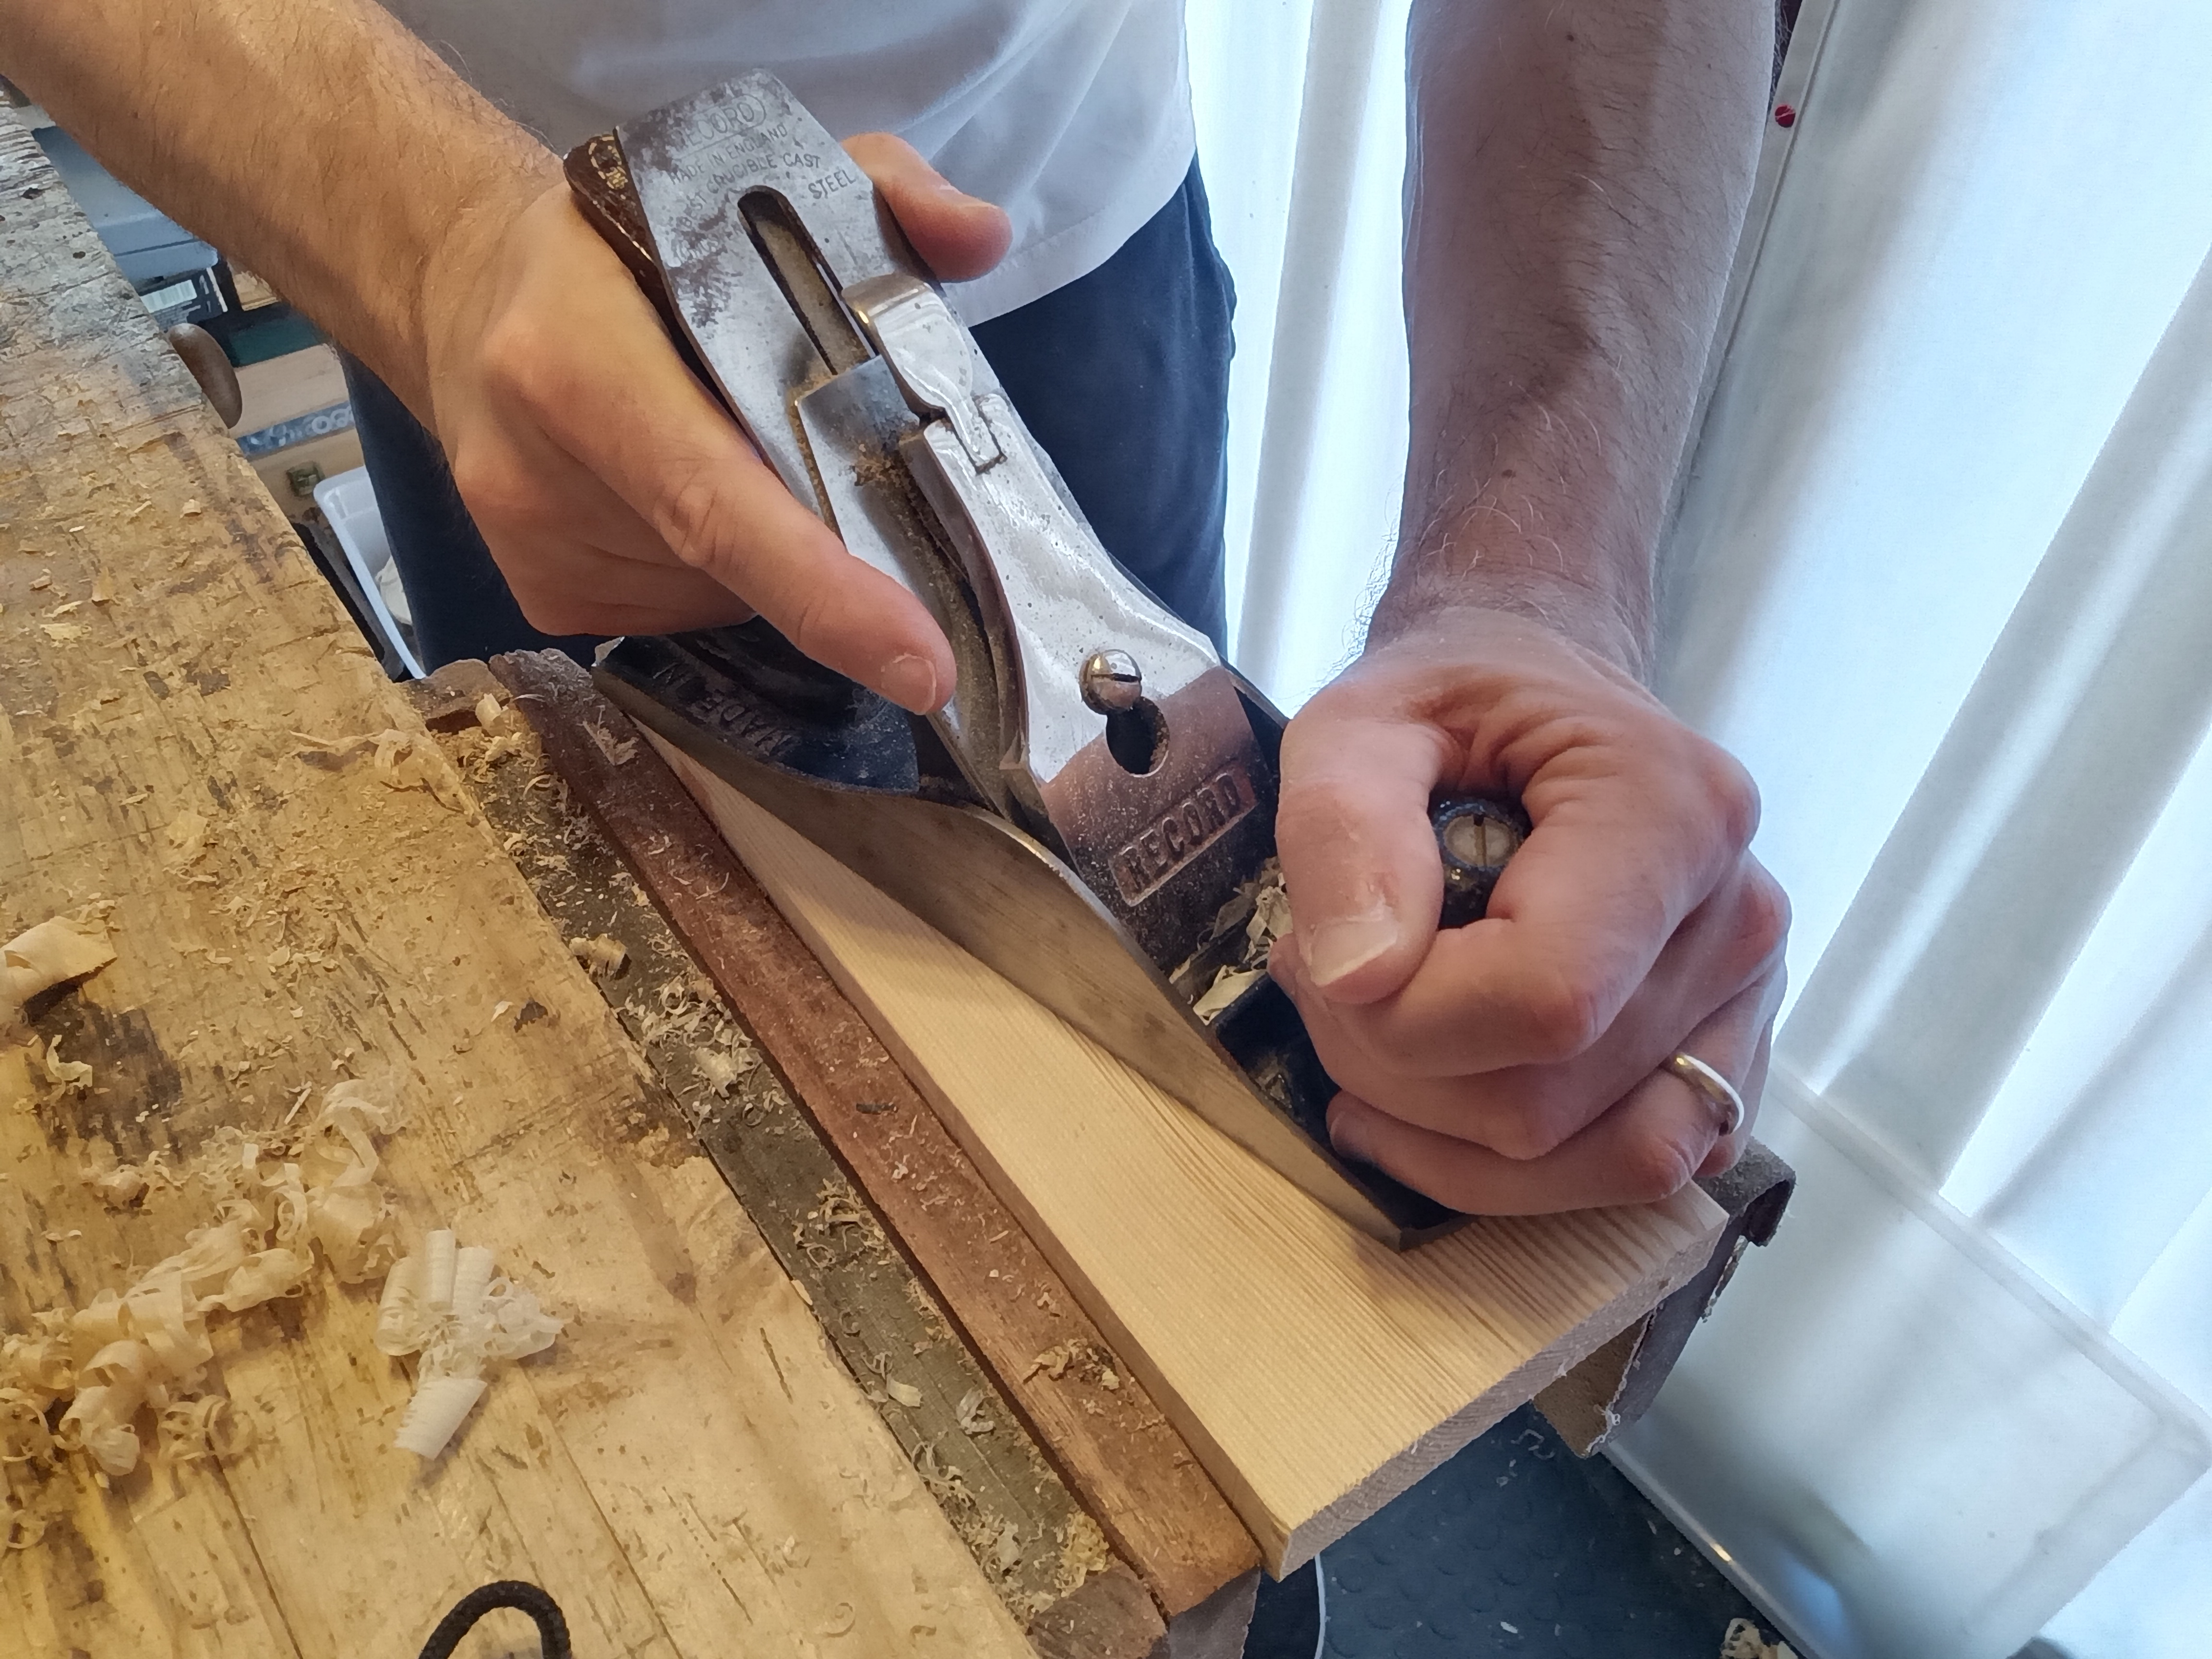
A questo punto sistemiamo il parallelismo della lama agendo sulla leva di aggiustamento laterale. Traguardando la suola della pialla il tagliente della lama dovrà apparire come una sottile linea nera uniforme per tutta la sua larghezza.
Durante tutti questi settaggi la rotella di scorrimento della lama e la leva laterale devono muoversi agevolmente. Se così non fosse agiamo sulla vite centrale che blocca il gruppo tagliente (composto da lama e contro ferro) al lever cap, allentandola o stringendola. La leva a camma che blocca il lever cap dovrà chiudersi senza sforzare troppo.

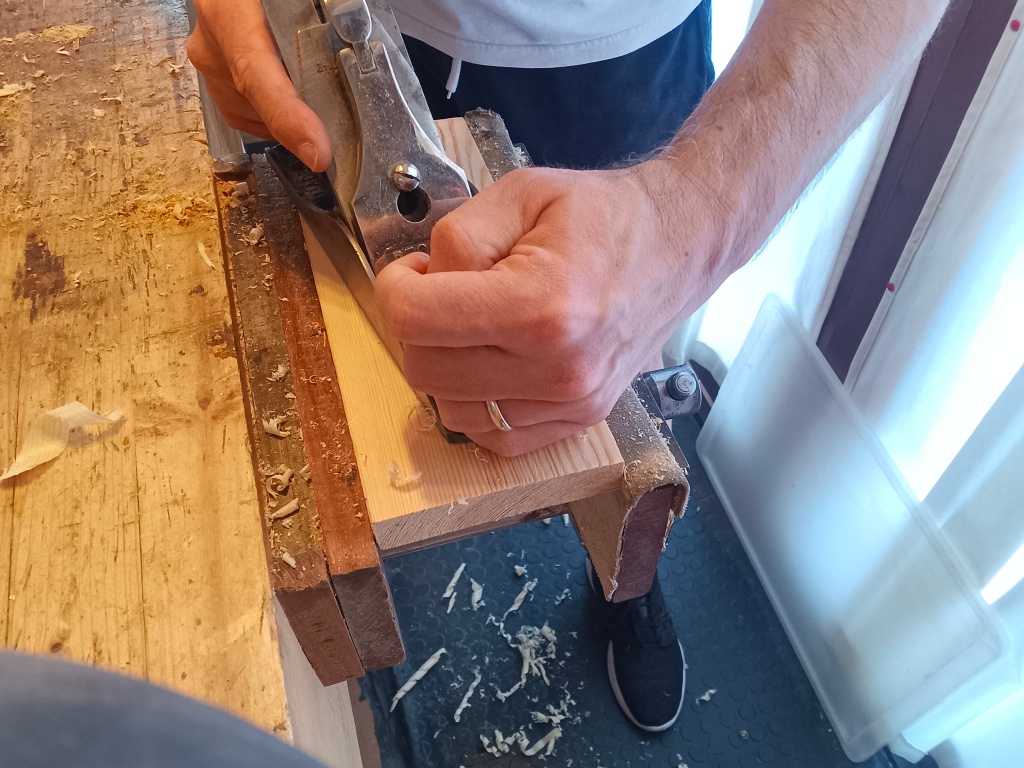
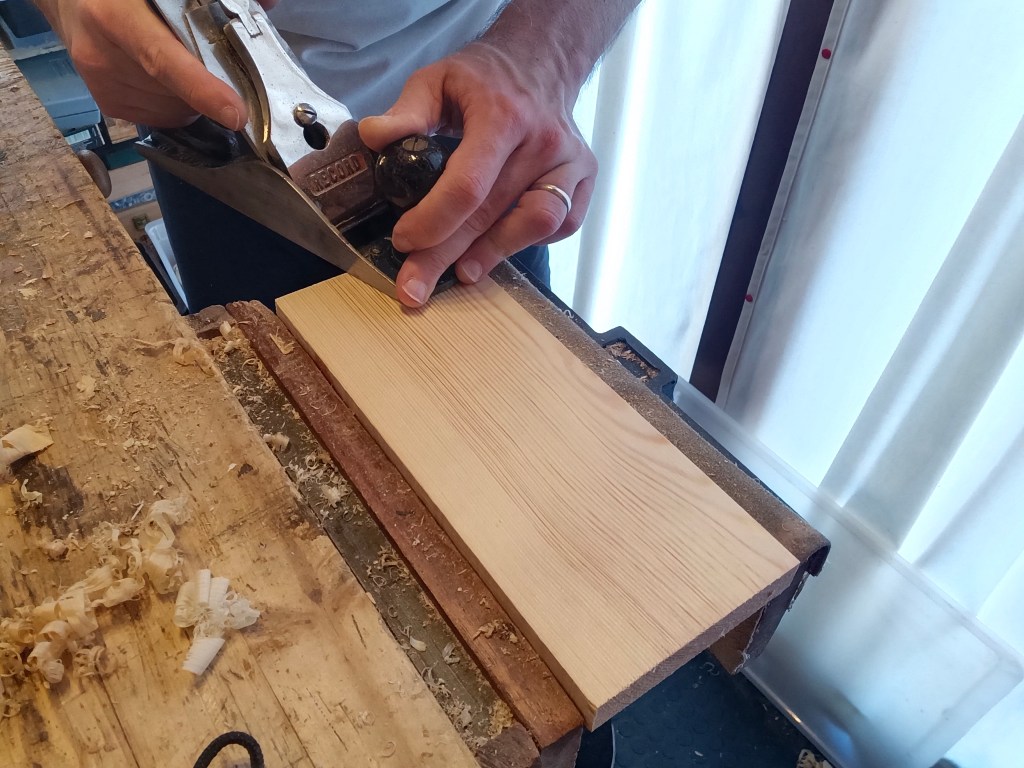
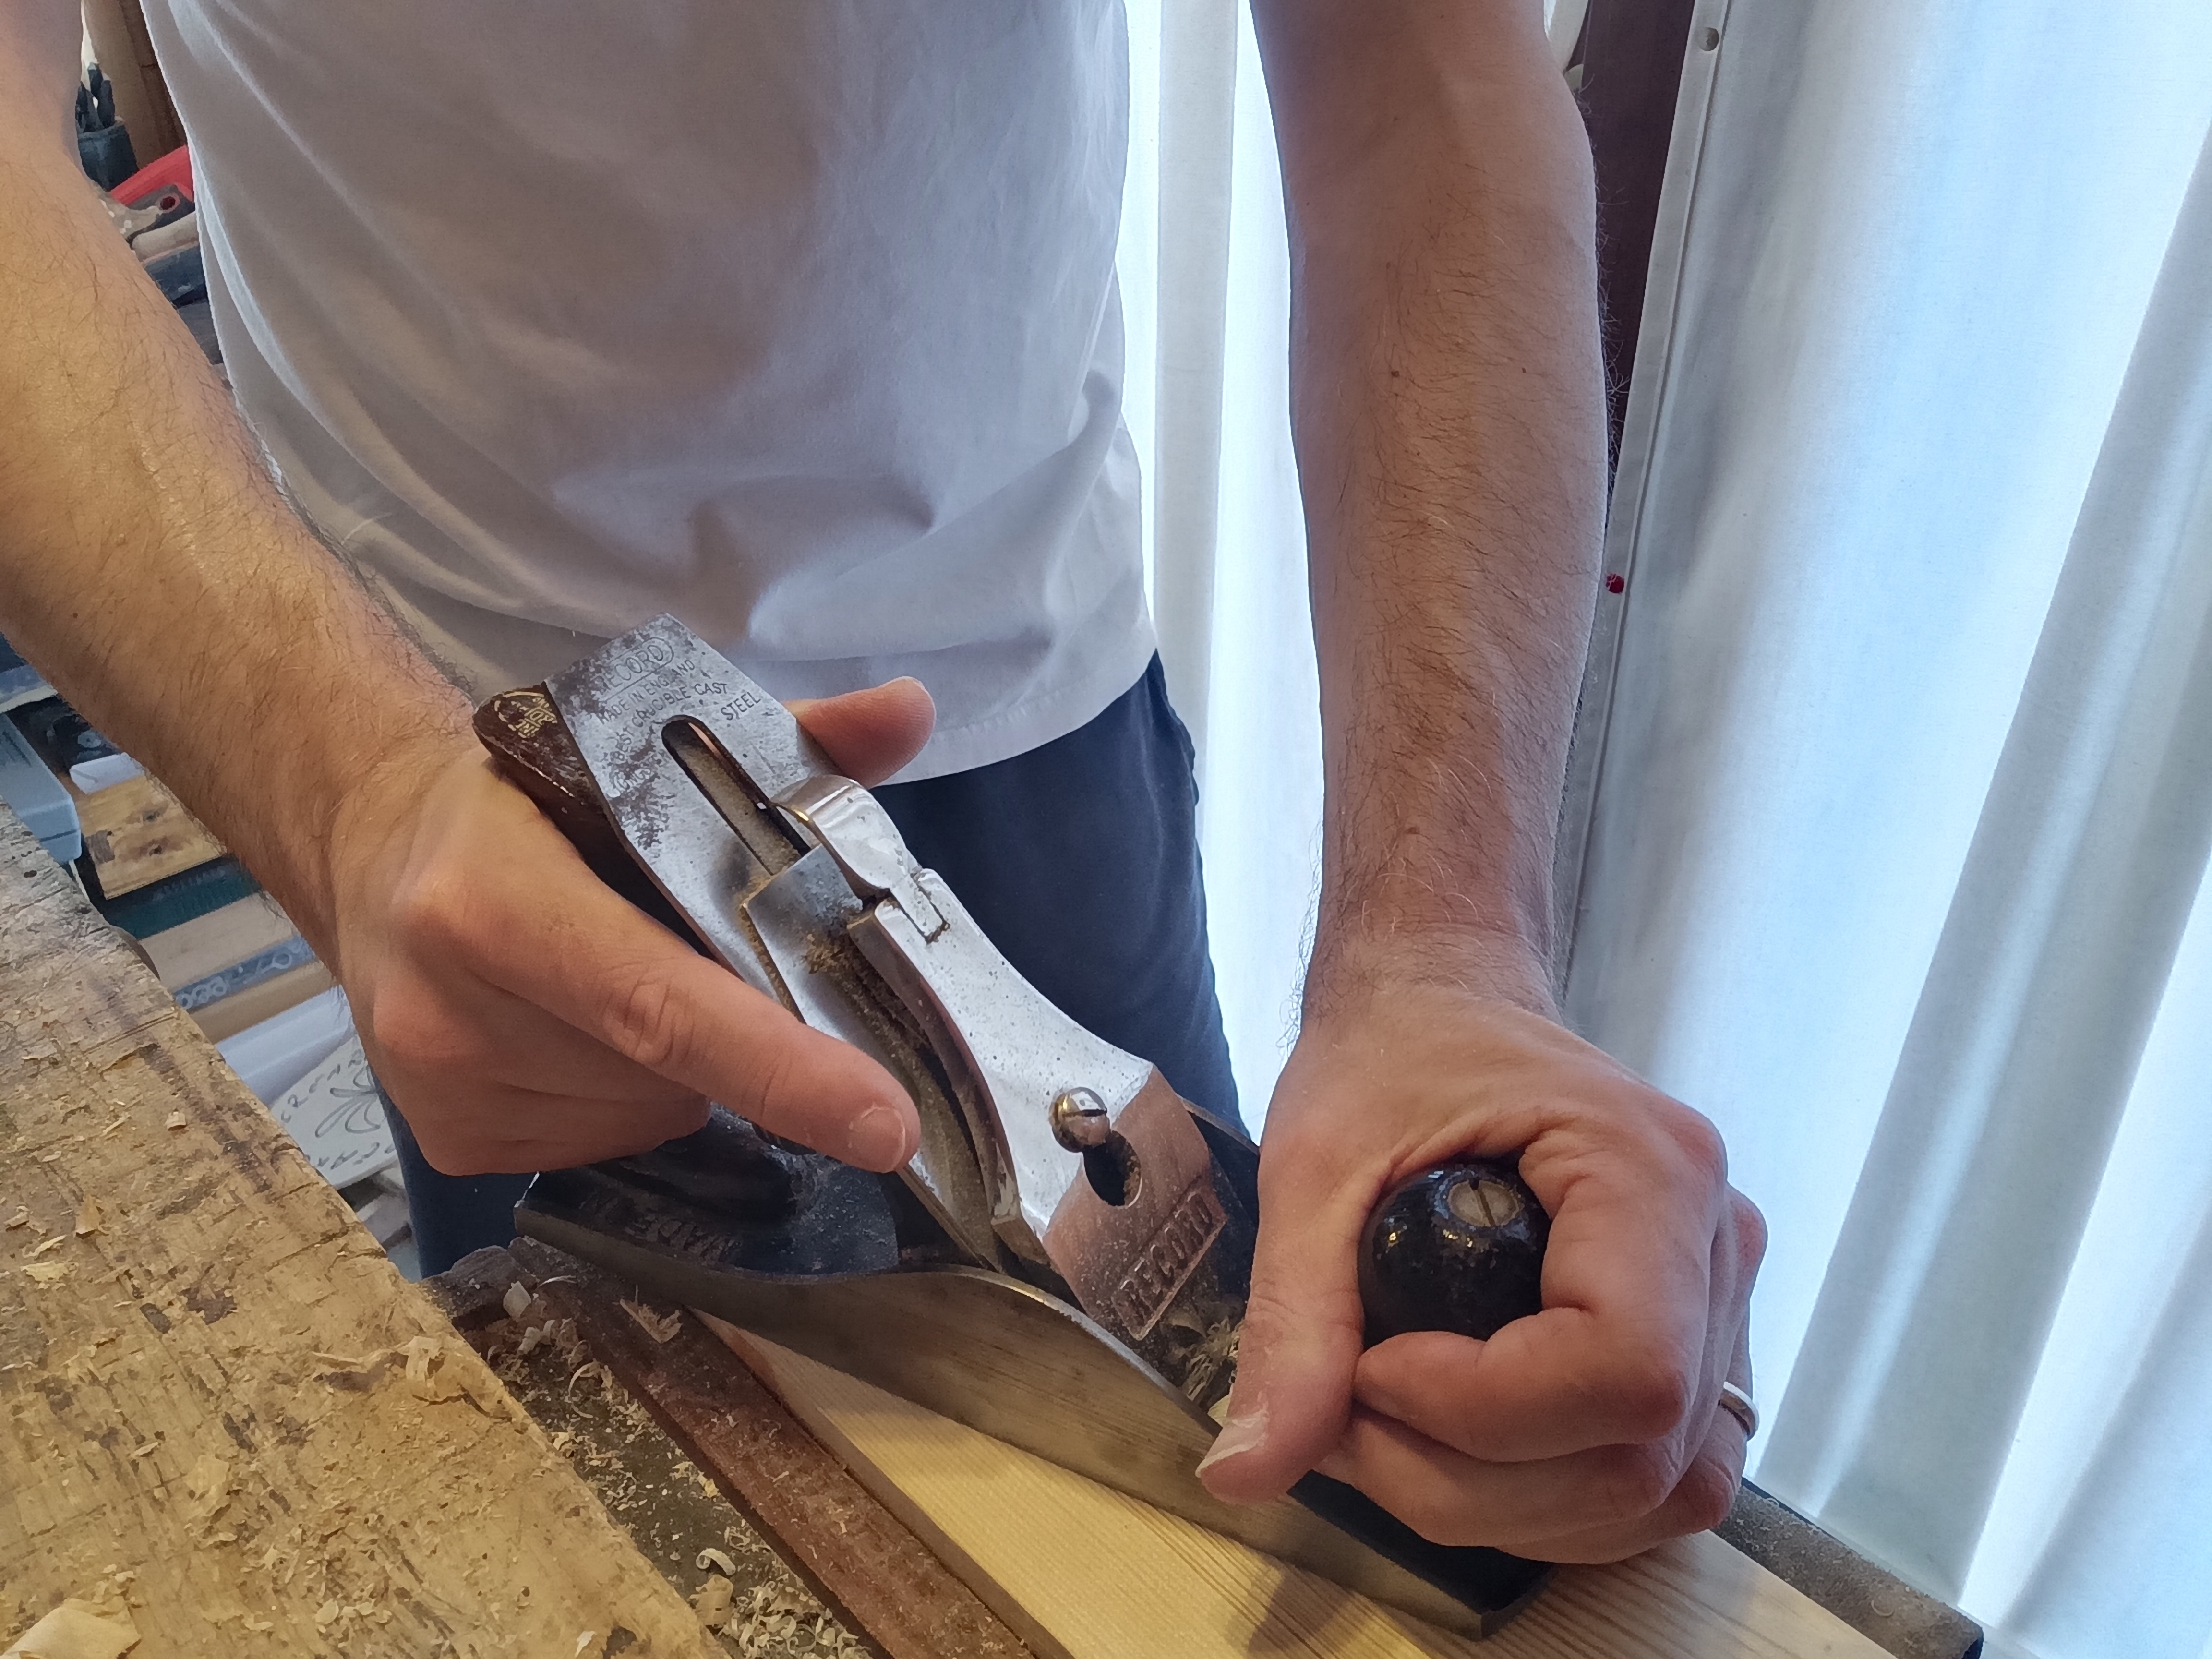
Come si pialla il legno? Abbiamo già detto che il movimento è a spingere. Questo avviene, nelle comuni pialle da finitura, afferrando con le mani il manico posteriore ed il pomello anteriore. Appoggiamo la parte anteriore della pialla, quella di fronte alla lama, all’inizio del pezzo di legno. Presentiamo la pialla leggermente di traverso rispetto al pezzo e manteniamola in tale posizione durante tutto il movimento (faciliterà l’azione di piallatura). In entrata facciamo più pressione sul pomello anteriore quindi, quando tutta la pialla sarà appoggiata sul pezzo, esercitiamo una pressione decisa ed uniforme su ambedue i manici ed infine, in uscita dal pezzo, esercitiamo più pressione sul manico posteriore. La pressione da esercitare sulla pialla deve essere sufficiente a mantenerla ben adesa al pezzo ma senza praticare troppa forza in quanto, se la lama è ben affilata, é questa che svolgerà tutto il lavoro.

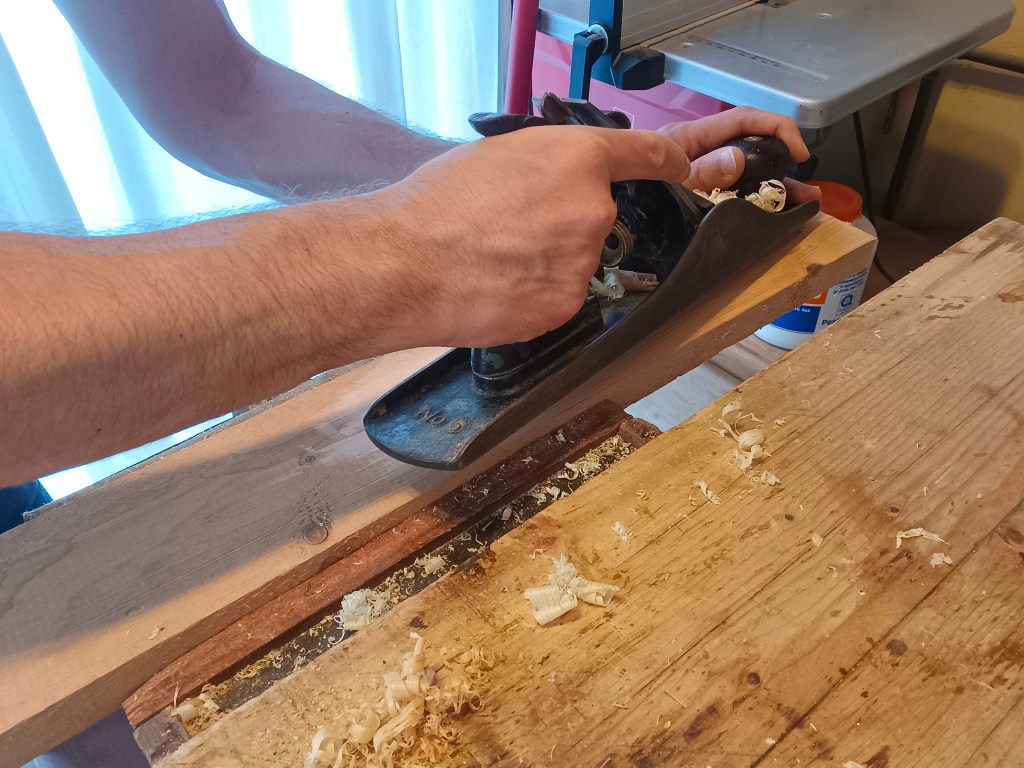
Nel movimento di ritorno non è consigliabile sollevare completamente la pialla dal legno. Molto meglio mantenerla sempre in contatto col pezzo trascinandola e alzando leggermente il tallone della suola oppure facendole toccare solo l’estremità anteriore. Questa pratica ci aiuterà a mantenere ritmo e coordinazione facendo al contempo meno fatica.
Durante la piallatura manteniamo avanti la gamba sinistra, non curviamoci sul pezzo e non forziamo troppo sulle braccia e sui manici. Il movimento deve risultare fluido e rilassato.
É importante anche bloccare saldamente i pezzi durante la piallatura e soprattutto lavorare su un piano di lavoro che sia alla giusta altezza e ci permetta di operare senza sforzi. Inutile dire che il banco stesso debba essere ben strutturato, solido e pesante così da essere in grado di resistere alle continue sollecitazioni della piallatura.
Le tecniche sopra riportate sono quelle comunemente descritte in tutti i libri di falegnameria amanuense. É chiaro però che con l’esperienza ognuno svilupperà una tecnica personale che potrà divergere anche in maniera significativa. Molto dipenderà anche dal tipo di tavola che si vuole spianare, se necessita solo di una leggera pulita o deve essere corretta da difetti di svergolamento, ecc.


La piallatura di una tavoletta di piccole dimensioni può essere fatta in un’unica passata e un unico movimento delle braccia senza spostare le gambe dalla posizione iniziale. La piallatura di una tavola lunga invece dovrebbe essere fatta non partendo dall’estremità più vicina a noi ma da quella più lontana e poi procedere a ritroso piallando per aree circoscritte. Per tavole con venatura difficile e presenza di nodi potremmo piallare prima le aree più alte vicino ai nodi e poi spianare tutto oppure piallare intervenendo da diverse direzioni. Per tavole grezze, svergolate e imbarcate possiamo prima piallare con lo sbozzino tutta la tavola in diagonale e poi rettificarla con lunghi movimenti in orizzontale con una lunga pialla da finitura.
Per ogni tipo di piallatura potremo / dovremo scegliere il modello di pialla che più si adatta. Generalmente per pezzi piccoli si usano pialle con suole ridotte e su pezzi lunghi pialle con suole più lunghe. Possiamo partire dagli sbozzini (scrub plane) se la tavola é molto grezza e difettosa passando poi dalle jack (n.5), e dalle jointer (n.6 e n.7) e finire con le smoothing (n.4 e n.4, 1/2). Ma niente vieta di utilizzare fin da subito una n.4, specialmente se dobbiamo lavorare su piccole aree, o fare tutto con una n.5 se abbiamo a che fare con pezzi più lunghi. Personalmente, se non devo sgrossare tavole, utilizzo soltanto una pialla n. 4 e una n.5.
Prima, durante e dopo la piallatura é, comunque, sempre opportuno verificare attentamente il pezzo. Quando pialliamo legno vecchio o riciclato controlliamo sempre che la tavola non nasconda chiodi che danneggerebbero seriamente la lama della pialla. Sempre al fine di evitare danni alla lama cerchiamo di piallare i punti vicino ai nodi offrendo poca lama. Rimaniamo reattivi con i nostri sensi ai segnali che la pialla continuamente ci trasferisce dal legno. Se incontriamo cambi di venatura e la piallatura diventa difficile proviamo a cambiare direzione offrendo una diversa inclinazione e/o a chiudere maggiormente la bocca della suola. Se dobbiamo asportare molto materiale proviamo invece ad aumentare la sporgenza della lama.
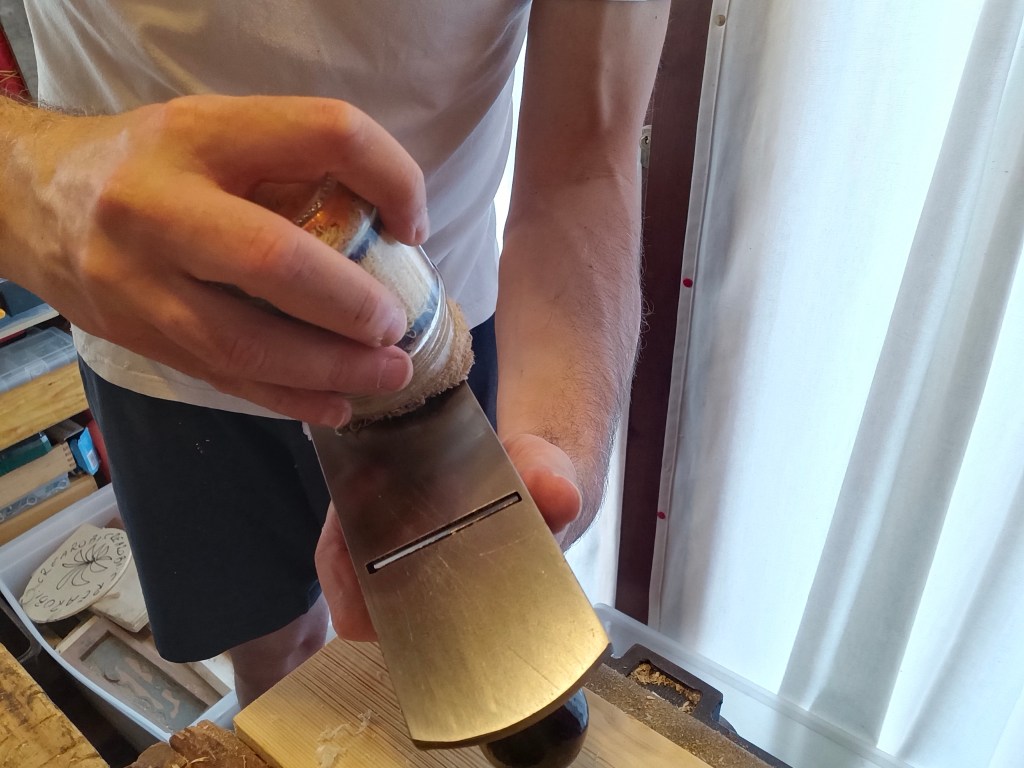
Se la piallatura diventa poco scorrevole lubrifichiamo la suola con della cera o del sapone di Marsiglia o altri lubrificanti (io uso l’olio). Specialmente durante le prolungate sessioni di lavoro e quando i legni sono più ostici e duri o particolarmente resinosi è consigliabile fermarsi periodicamente a riaffilare il tagliente: può sembrare una perdita di tempo ma ne guadagneremo in termini di efficacia e qualità del lavoro. Ricordiamoci sempre che durante la piallatura siamo noi che dobbiamo adattarci al legno e non viceversa.
L’argomento piallatura é vastissimo e impossibile da descrivere in un solo articolo senza creare confusione in chi legge. Nei prossimi post vedremo quindi le altre tipologie di piallatura, quella traverso vena e quella di costa. Per tanti altri aspetti generici, legati alle pialle e alla piallatura e già trattati in passato, vi rimando ai seguenti link.
Tecniche di piallatura / planing technique
Parliamo di Pialle / Let’s talk about Planes
Consigli per l’acquisto di una pialla / Suggestions about buying a plane
Affilare gli scalpelli e le lame delle pialle / Sharpening chisels and plane irons
Restauro e preparazione di una pialla / Restoring and setting a plane
___________________________________________________________________________________
In the last two posts we have seen how to hand saw the wood. Now we see the following processing of planing. We will refer to planing with common metal planes, postponing the planing with the special and wooden planes to future articles.
Wood planing is divided into three main categories. Long grain planing, end grain planing and edge planing. Let’s see in this article the long grain planing.
The basic rule is to always plan with the grain and never against the grain in order to avoid tearing the wood fibers. To this end, by observing the edge of the piece of wood, it is possible to identify the direction of the grain.
Since planing is a push movement the piece will be inserted in the bench vice (or blocked on the bench top) in such a way as to show the grain that rise towards the surface to be planed and move away from us. The pushing action of the planing, following this direction, will be smooth and smooth the wood.
On the contrary, if planing against the grain and therefore against the direction of the wood grain, which in this case rise towards us, the planing action will result in tear out of the fibers, with jams and consequent ruin of the wood. If the direction of the grain is instead substantially parallel to the surface, we will be able to plan without difficulty in both directions. We will learn more about how to read the wood grain in a dedicated post.
Knowing how to plan wood is a skill that is learned by doing a lot of practice. This is because there are many variables to take into consideration. Planing hard wood can be more tiring than planing soft wood; some types of wood have knots, pockets of resin and sudden changes of grain direction which are difficult and sometimes impossible to plan; the plane may have structural defects or be set incorrectly; the planing action can be carried out incorrectly, etc.
Before starting the planing we will have to set up the plane. We assume that the plane has no structural problems, the sole is perfectly level and the cutting edge is sharpened at about 25 degrees (the angle commonly used in metal bevel down smoothing planes ). We retract the blade just inside the mouth of the sole by turning the blade adjuster on the back of the frog to the left . By making passes on the wood we will feel that the plane does not produce shavings. We then lift the plane from the wood and gradually rotate the blade adjuster to the right, continuing with this operation of blade advancement and trial planing until we feel that the blade will be able to bite into the wood.
At this point we arrange the parallelism of the blade by acting on the lateral adjustment lever. Looking at the sole of the plane, the cutting edge of the blade should appear as a thin uniform black line across its entire width.
During all these settings, the blade adjuster and the lateral adjustment lever must move easily. If this is not the case, we act on the central screw that blocks the cutting unit (consisting of blade and cap iron) to the lever cap, loosening or tightening it. The cam lever that locks the lever cap will have to close without forcing too much.
How is wood planed? We have already said that is a push movement. This happens, in common smoothing planes, by grasping the rear handle and the front knob with the hands. We place the front part of the plane, the one in front of the blade, at the beginning of the piece of wood. We present the plane slightly crosswise with respect to the piece and keep it in this position throughout the movement (it will facilitate the planing action). At the entrance we put more pressure on the front knob then, when the whole plane is resting on the piece, we exert a firm and uniform pressure on both handles and finally, exiting the piece, we exert more pressure on the rear handle. The pressure to be exerted on the plane must be sufficient to keep it firmly attached to the piece but without exerting too much force as, if the blade is well sharpened, this will do all the work.
In the return movement it is not advisable to completely lift the plane from the wood. Much better to always keep it in contact with the piece by dragging it and slightly raising the heel of the sole or by making it touch only the front end. This practice will help us maintain rhythm and coordination while making less effort.
While planing we keep the left leg forward, do not bend over the piece and do not force too much on the arms and handles. Movement should be fluid and relaxed.
It is also important to firmly lock the pieces during planing and above all to work on a work surface that is at the right height and allows us to work without effort. The bench itself must be well structured, solid and heavy in order to be able to withstand the constant stresses of planing.
The above techniques are those commonly described in all woodworking by hand books. It is clear, however, that with experience everyone will develop a personal technique that can diverge even significantly. Much will also depend on the type of board you want to level, if it only needs a light cleaning or if it needs to be corrected for warping defects, etc.
Planing a small piece of wood can be done in a single pass and a single movement of the arms without moving the legs from the starting position. The planing of a long board, on the other hand, should be done not starting from the end closest to us but from the furthest one and then proceeding backwards, planing for limited areas. For boards with difficult grain and the presence of knots, we could first plane the highest areas near the knots and then level everything or plane from different directions. For rough, twisted and embossed boards we can first plan the whole board diagonally with the scrub plane and then level it with long horizontal movements with a long smoothing plane.
For each type of planing we can / will have to choose the plane model that best suits. Generally, planes with reduced soles are used for small pieces and planes with longer soles on long pieces. We can start from the scrub plane if the board is very rough and defective, then moving on to the jack plane and on the jointers and finish with the smoothing planes. But nothing prevents us from using a # 4 plane right away, especially if we have to work on small areas, or do everything with a # 5 plane if we are dealing with longer pieces. Personally, if I don’t have to rough boards, I only use a no. 4 and a no.5 plane.
Before, during and after planing , however, it is always advisable to carefully check the piece. When planing old or recycled wood we always check that the board does not hide nails that would seriously damage the plane blade. Also in order to avoid damage to the blade we try to plane the points near the knots offering little blade. We remain reactive with our senses to the signals that the plane continuously transfers us from the wood. If we encounter changes in grain direction and planing becomes difficult, we try to change direction by offering a different inclination and / or to close the sole mouth. If we have to remove a lot of material, we try to increase the protrusion of the blade instead.
If the planing becomes not very smooth, we lubricate the sole with wax or soap or other lubricants (I use oil). Especially during prolonged work sessions and when the woods are more difficult and hard or particularly resinous it is advisable to stop periodically to sharpen the cutting edge: it may seem like a waste of time but we will gain in terms of effectiveness and quality of the work. Always remember that during planing it is we who have to adapt to the wood and not vice versa.
The planing topic is vast and impossible to describe in a single article without creating confusion in the reader. In the next post we will therefore see the other types of planing, the end grain and the coast one. For many other generic aspects, related to planes and planing and already treated in the past, I refer you to the above links.

Lascia un commento