COME ORGANIZZARE UN PICCOLO LABORATORIO DI FALEGNAMERIA / HOW TO ORGANIZE A SMALL WOODWORKING SHED
English translation at the end of the article
Un laboratorio ben organizzato è il sogno di ogni hobbista. È innegabile che se viene mantenuto pulito e ordinato questo ci invoglierà a lavorare. D’altro canto un locale sporco e disordinato, seppure a qualcuno possa piacere, dovrebbe essere la normalità solo durante le fasi di lavorazione.

Personalmente non amo lasciare troppe cose in giro. Per questo a fine giornata mi piace pulire e riporre tutti gli utensili al proprio posto, così da poterli ritrovare subito pronti il giorno dopo. È una questione di praticità, di rigore lavorativo ma anche di igiene. Partendo comunque dal presupposto che ognuno lavora nelle condizioni che più gli aggradano e negli spazi che ha a disposizione è chiaro che in ogni caso il fattore determinante per organizzare al meglio un laboratorio sia proprio lo spazio.
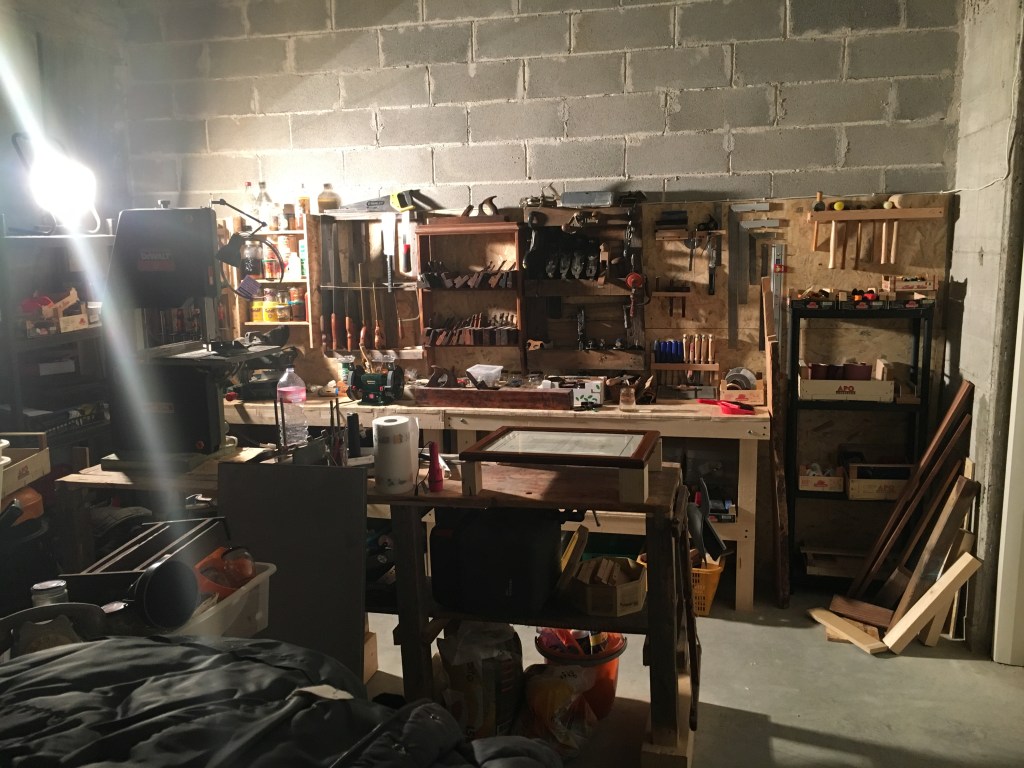
Se si hanno a disposizione locali molto ampi potremo permetterci il lusso di disseminare qua e là le macchine stazionarie, lasciando un congruo spazio per lavorarci intorno e dedicare una zona separata agli utensili manuali e all’affilatura. Ho avuto questa fortuna in passato, avendo posseduto un garage di circa 50 mq, quindi più che sufficiente ad ospitare le macchine più importanti per un lavoratore hobbista.
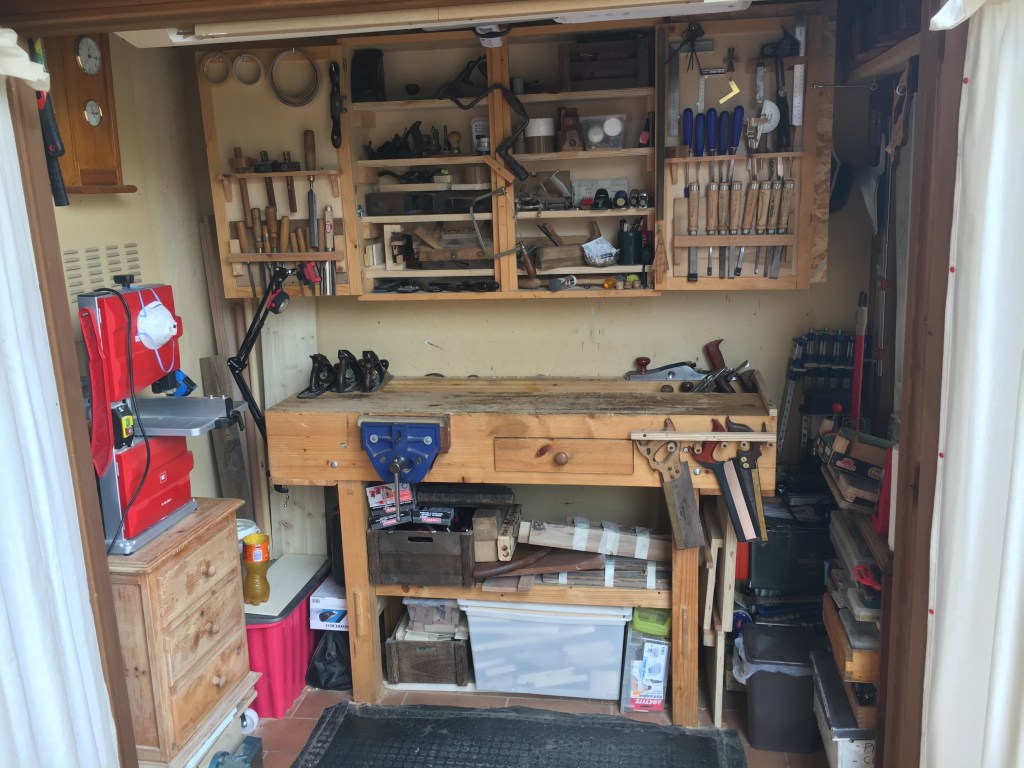
Avendo in seguito mutato il mio pensiero sul come lavorare il legno ed essendo approdato alla esclusiva lavorazione manuale, non è stato traumatico per me ritrovarmi in un laboratorio ricavato in una casetta di legno con misure di circa 250 cm. per 125 cm (avevo anticipato questo cambiamento parlandone in Cambiamenti/Changes). Ovviamente qualche metro in più non mi sarebbe dispiaciuto ma posso assicurare che anche in spazi così angusti è possibile creare lavori di una certa dimensione, sempre a condizione che si utilizzino solo utensili manuali.
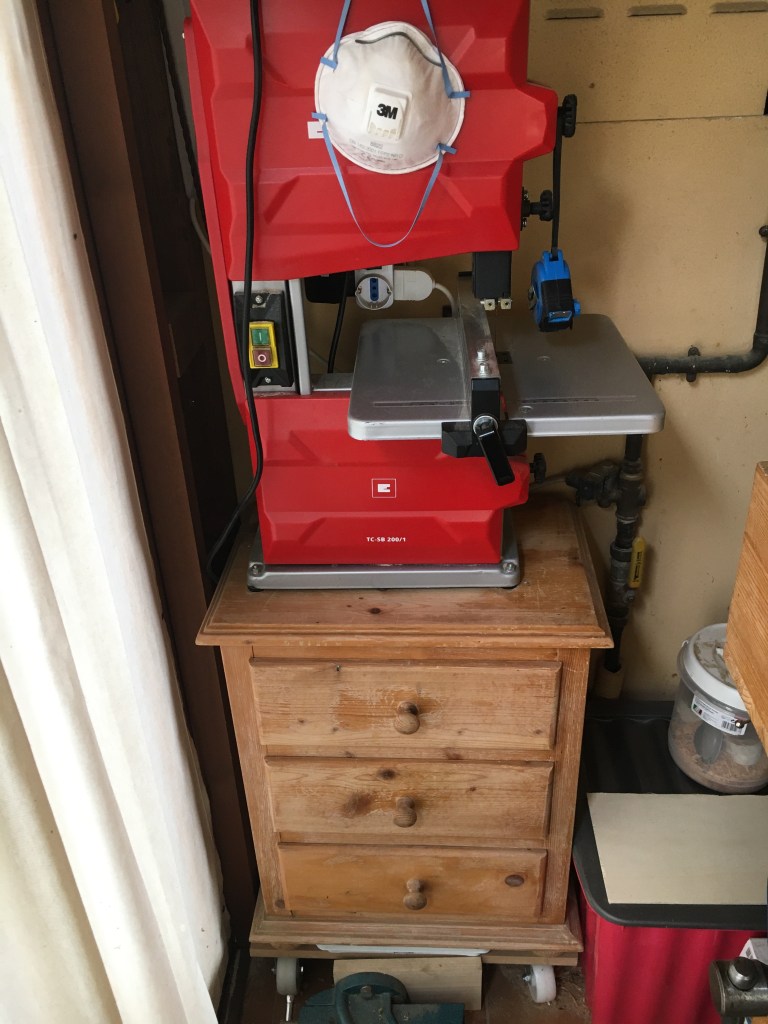
Nel mio piccolo spazio sono riuscito addirittura a far entrare una sega a nastro e un mini trapano a colonna (le uniche eccezioni elettriche che mi sono concesso), oltre a far entrare parecchie cose di casa. Questo è stato possibile in quanto per lavorare il legno in modo manuale bastano pochissimi utensili, circa una dozzina, ed ovviamente il legno. È ovvio poi che più si progredisce e più si necessita di nuovi utensili e lo spazio si riduca. Questo mi ha portato nel corso degli anni a rivoluzionare le posizioni dei vari utensili, anche se quelli fondamentali sono sempre rimasti nella loro posizione iniziale.
In uno spazio così ristretto è facile tenere tutto a portata di mano e allungando le braccia mi è possibile raggiungere comodamente qualsiasi utensile necessario.
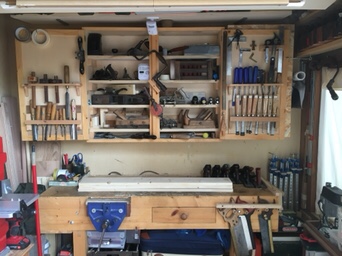
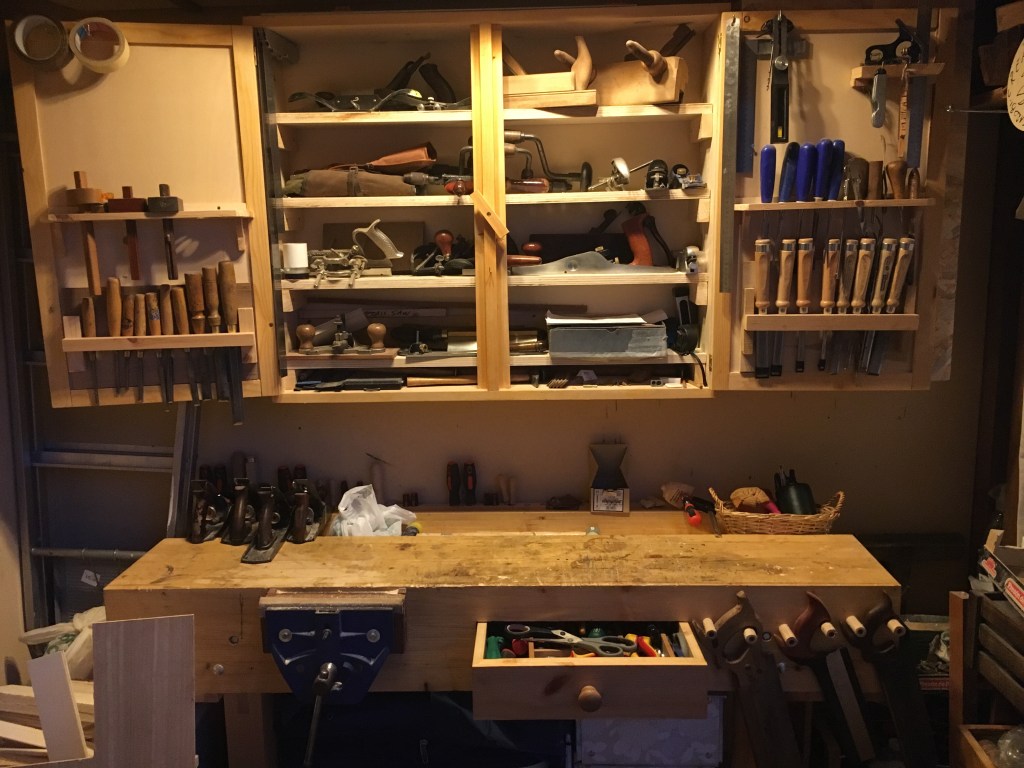
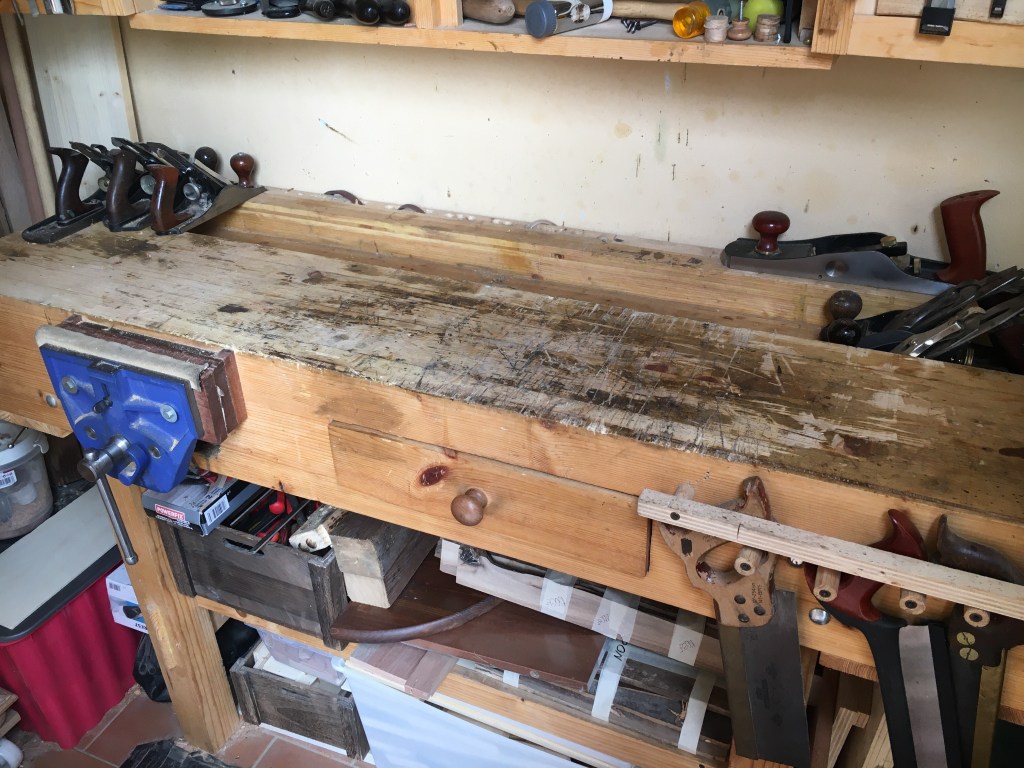
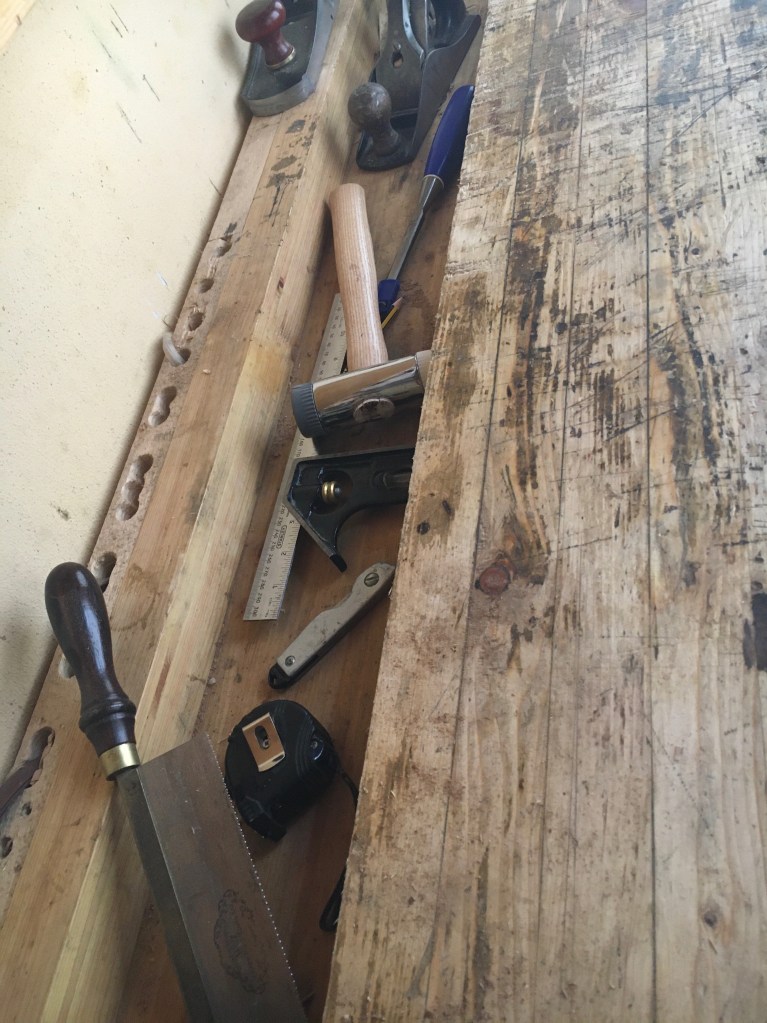
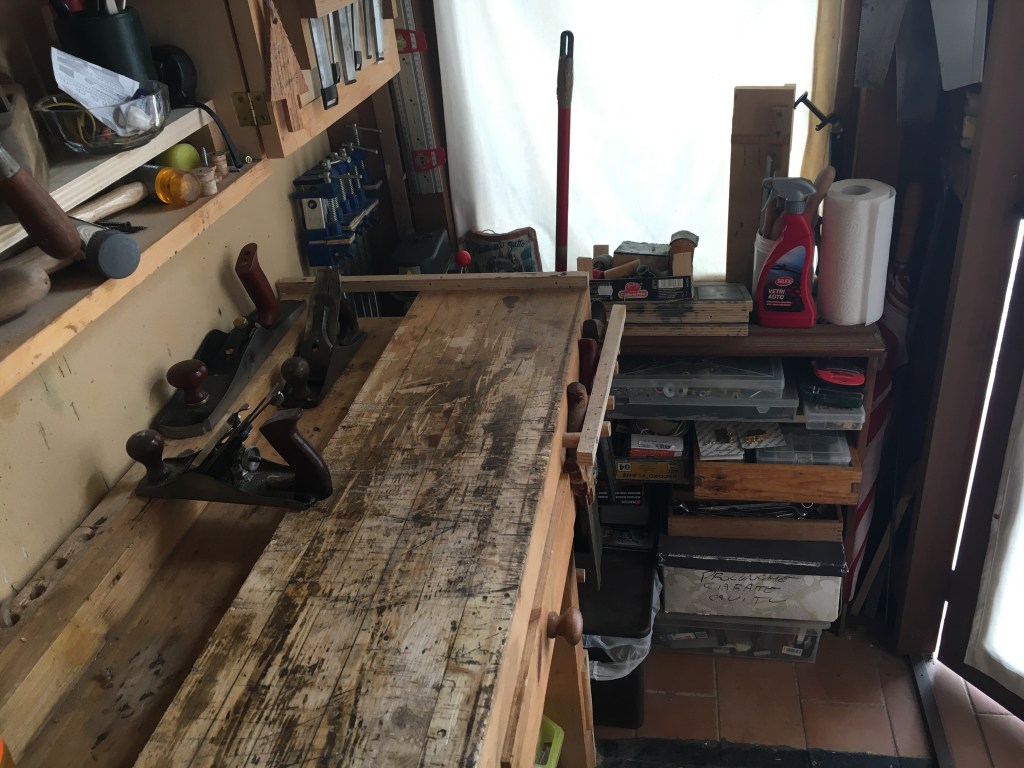
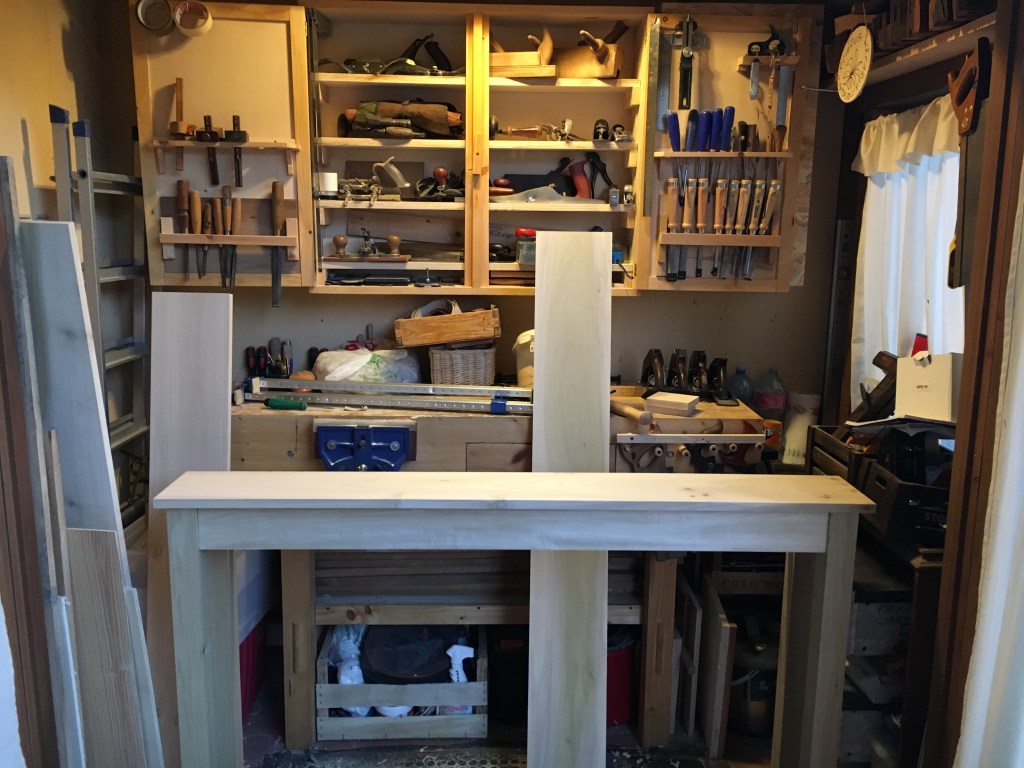
Il mio laboratorio consiste principalmente di un banco, sul quale si svolge la totalità del mio lavoro e dove tengo le pialle che utilizzo maggiormente, le c.d. bench planes, e un grande pensile dove ripongo gli utensili più importanti (pialle speciali, scalpelli, ecc.).
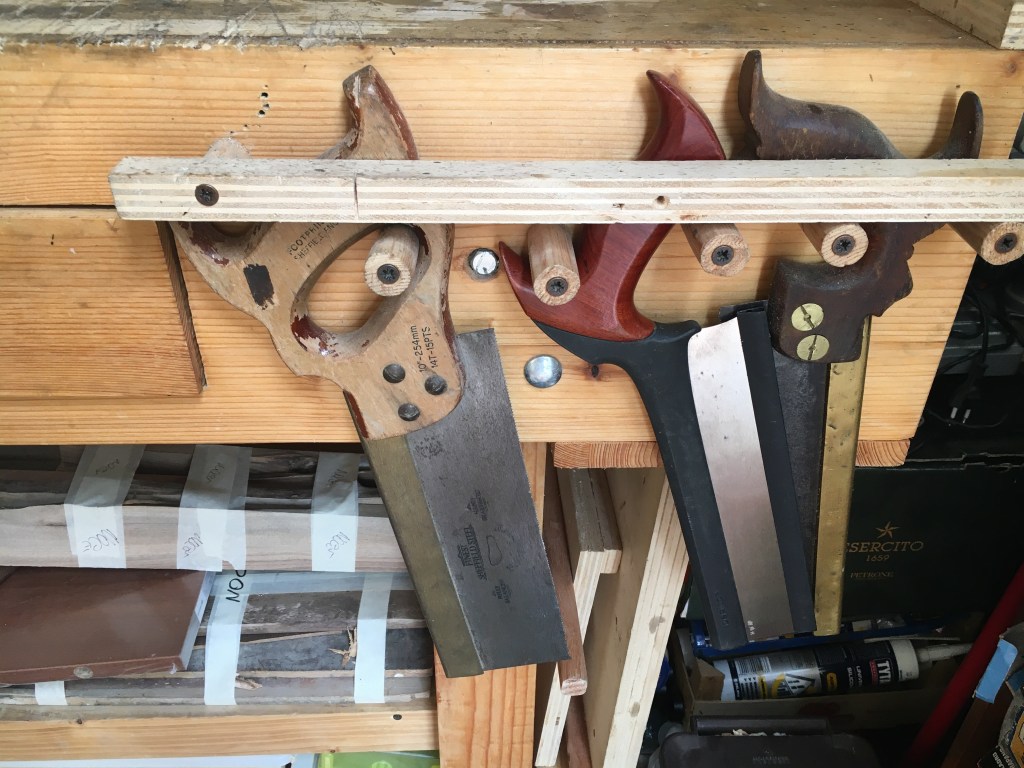
Al banco sono appese anche alcune seghe per i tenoni e le code di rondine. Le seghe più grandi (le c.d. panel saw) si trovano invece appese alla parete del laboratorio.
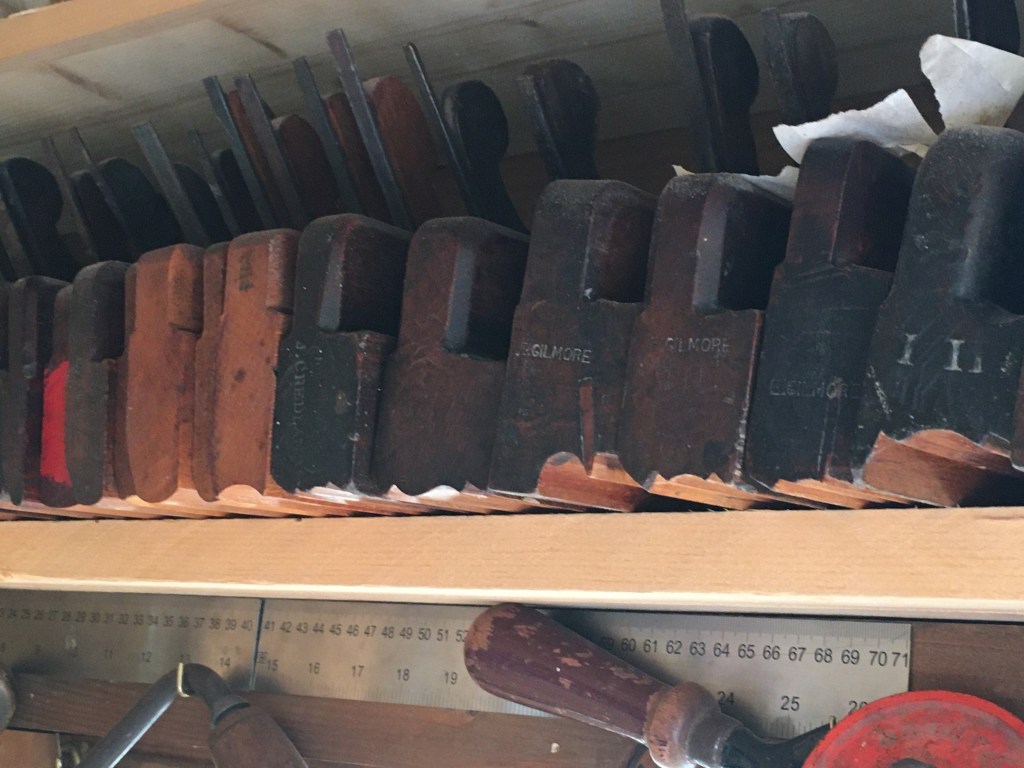
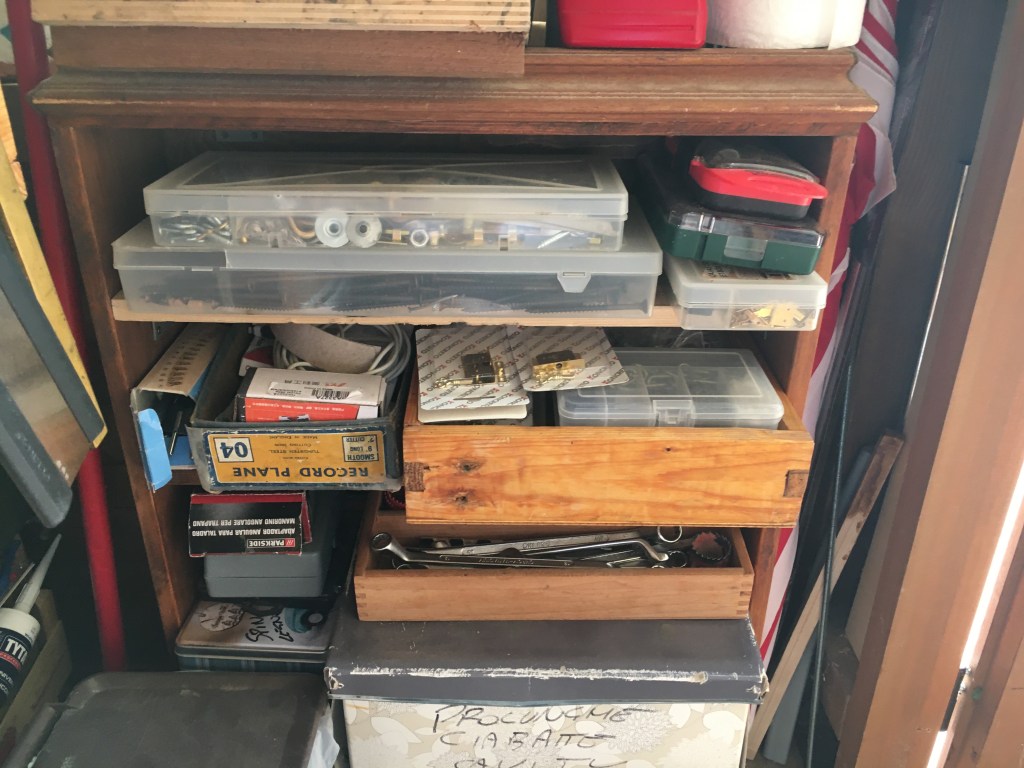
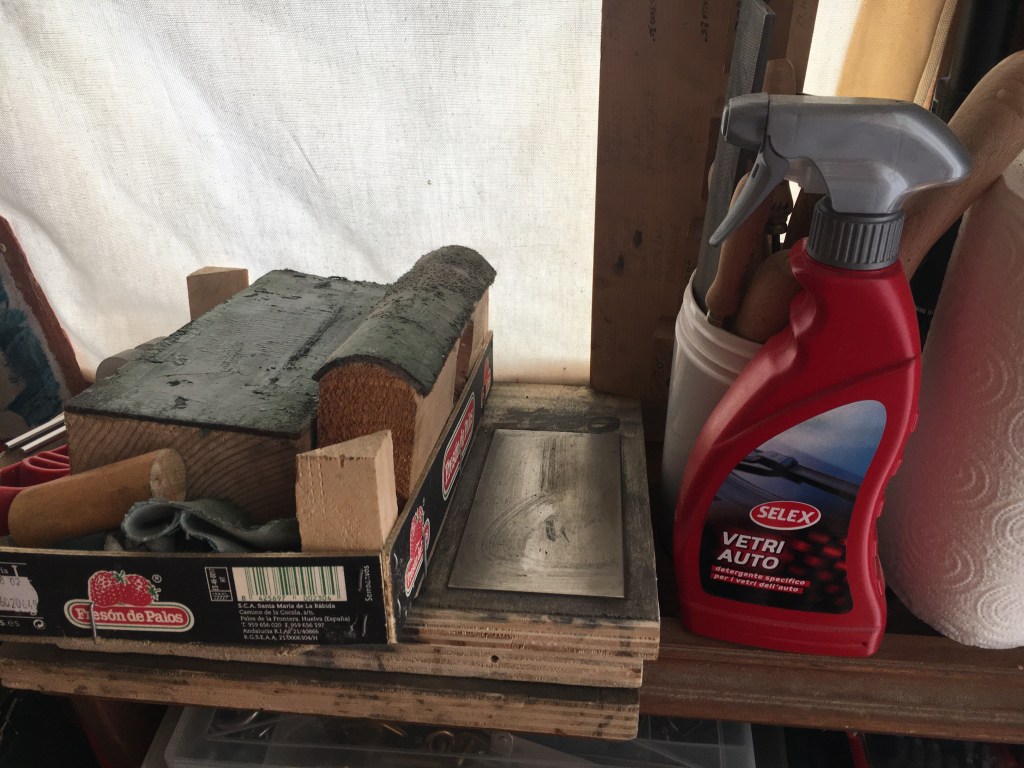
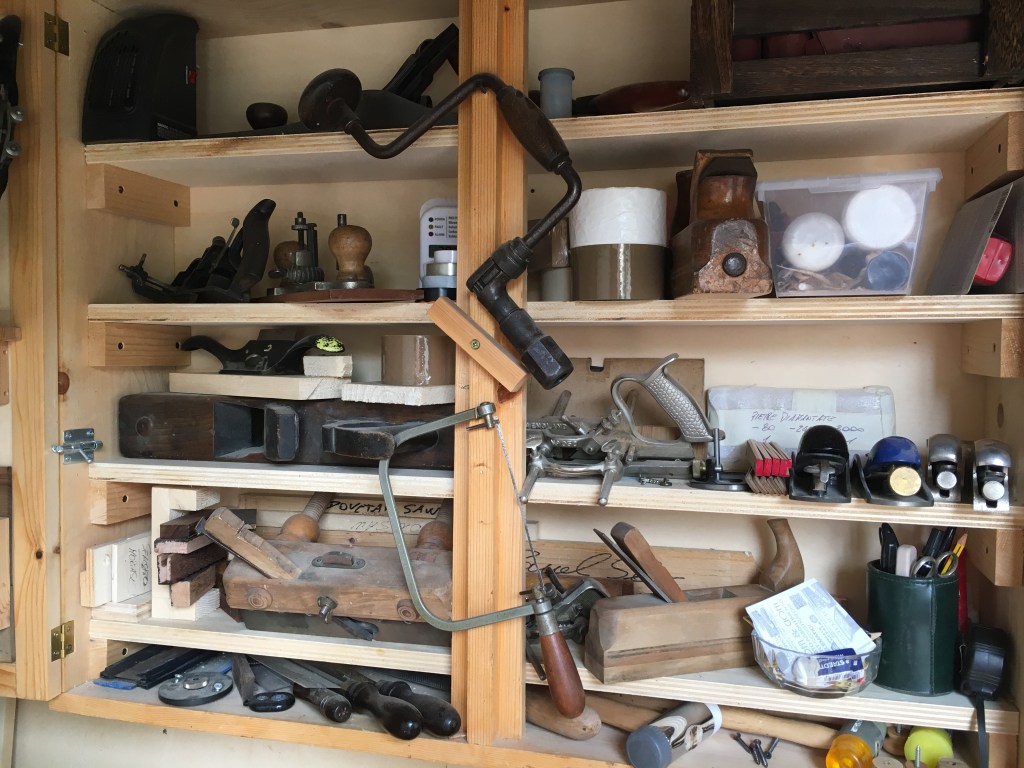
A fianco del mobile, nascosto da un’anta, c’è un armadietto dove tengo le vernici, le cere, i pennelli, ecc. In basso, un altro mobiletto per tutto il materiale di ferramenta e dove tengo il materiale da affilatura. Sotto al banco ed a fianco dello stesso si trova il legno che utilizzo. Le pialle per modanatura in legno sono riposte su una mensola in alto.

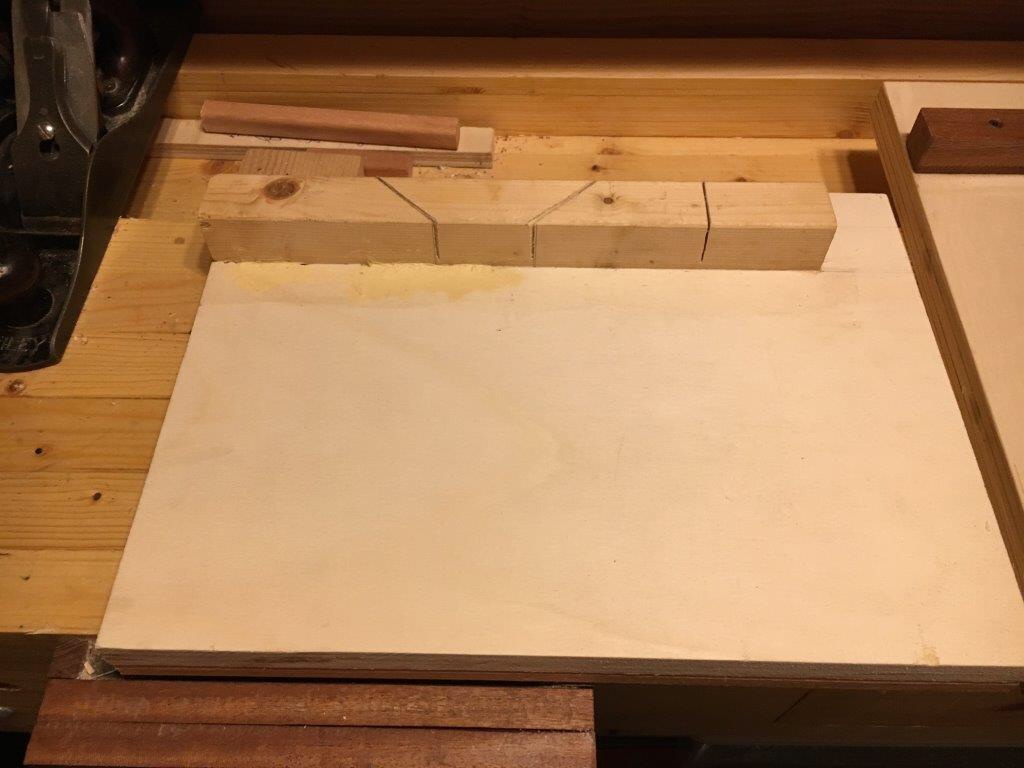
Viste le dimensioni del laboratorio è impossibile per me fare scorte di legname e pertanto sono obbligato ad acquistare di volta in volta il legno necessario al progetto che voglio realizzare. Lavorare in spazi stretti è difficoltoso più che altro quando si tratta di segare tavole di una certa lunghezza. Inutile dire che per i tagli traverso vena talvolta non mi basta lo spazio che sarebbe necessario al movimento del braccio e quindi opero con l’aiuto di una tavola che mi permette di tagliare direttamente sul banco oppure mi pongo parallelamente alla morsa.
Fortunatamente ho due grandi porte dietro di me che, una volta aperte, mi permettono di muovermi con maggiore agevolezza. Il lavorare da alcuni anni in uno spazio così ristretto mi ha permesso di sviluppare una certa esperienza sul come ottimizzare gli spazi.
Ad esempio, una dimensione spesso sottostimata, è l’altezza dell’ambiente di lavoro. Molte cose possono essere riposte in alto e, seppur essendo poco pratico ed accessibile, dobbiamo anche pensare a quanti utensili utilizziamo maggiormente tutti i giorni. Ci accorgeremo che quelli di uso quotidiano sono veramente pochi. I restanti quindi possono essere ubicati in alto ed il posto migliore dove riporli sono le mensole, che sono semplici da fare e da montare.

Possiamo riporli a vista o all’interno di contenitori, meglio se in legno, che sono anche più carini a vedersi. Certo, sono stuzzicanti quei video su internet dove vengono proposti mobiletti, pensili e pareti attrezzate, sicuramente gradevoli ma poco utili in termini di spazio, oltre ad essere poco adattabili alle nostre esigenze. Quando si ha poco spazio a disposizione bisogna badare all’essenziale ed io ho trovato essenziali solo due elementi. Il banco di lavoro (o banco da falegname) dotato di morsa ed il mobile portautensili (c.d. tool cabinet). Tutto il lavoro manuale ruota attorno a questi due elementi e tutto è riconducibile ad essi. Poi, se avanza spazio, possiamo valutare l’inserimento anche di altri elementi.
Al riguardo, nei miei due volumi sulla falegnameria manuale, ho dedicato un capitolo specifico.
Il banco da lavoro è il cuore e il motore del laboratorio. Come visto in un precedente post, Come costruire un banco da falegname / How to build a woodworking workbench vi consiglio di farlo il più grande e robusto possibile, dotandolo di una, o meglio ancora due morse, le più capaci possibile. Se potete, non risparmiate sul materiale per la sua costruzione perché la totalità del lavoro di un amanuense si svolge su di esso e, se ben costruito, vi durerà una vita.
Tenetelo sempre il più possibile sgombro da materiale non strettamente necessario alla lavorazione. Lasciate almeno due metri attorno al banco per poterlo raggiungere da tutte le parti. Se lo spazio fosse veramente poco allora addossatelo al muro ma non fissatelo, per permettere di assecondare i movimenti durante la piallatura. In ogni caso lasciate almeno un metro di distanza tra la morsa del banco e la parete dietro di voi, altrimenti segare in morsa traverso vena diventerà impossibile.
Ottimizzate il più possibile lo spazio sotto il banco sfruttando anche i suoi laterali, prevedendo ripiani con sportelli o cassetti. Il banco si appesantirà, diventerà ancora più stabile e guadagnerete spazio utile. Sempre sul banco prevedete, in fase di costruzione, l’inserimento di una vasca porta utensili. È più utile di quanto possiate immaginare. La vasca, più bassa del piano del banco, conterrà gli utensili, impedendo che intralcino e possano cadere dal banco durante il lavoro.
Nel banco consiglio vivamente di ricavare anche un cassetto molto profondo, utile per riporre gli utensili ritenuti più importanti, eventualmente protetto con una serratura. Sul fronte del banco si possono inserire dei sostegni per le seghe che utilizziamo maggiormente.
Il mobile portautensili è l’altro elemento fondamentale, sul quale quanto prima pubblicherò un post su come ho realizzato il mio. Se non potete appoggiarlo a terra, per ragioni di spazio, costruitelo come pensile e appendetelo vicino al banco da lavoro. Costruitelo con le ante, così da poter sfruttare anch’esse per appendere gli utensili di poco peso.
Nel pensile è preferibile inserire dei ripiani a diverse altezze e prevederli rimovibili così da poterli spostare secondo le necessità. Se lo spazio fosse veramente ridotto, il pensile può essere appeso alla parete, sopra il banco e distanziato da esso in altezza di almeno 50 cm. Non poniamolo troppo in basso o intralcerà il lavoro. Se dobbiamo ancora costruirlo, calcoliamo bene gli ingombri delle ante, quando aperte.
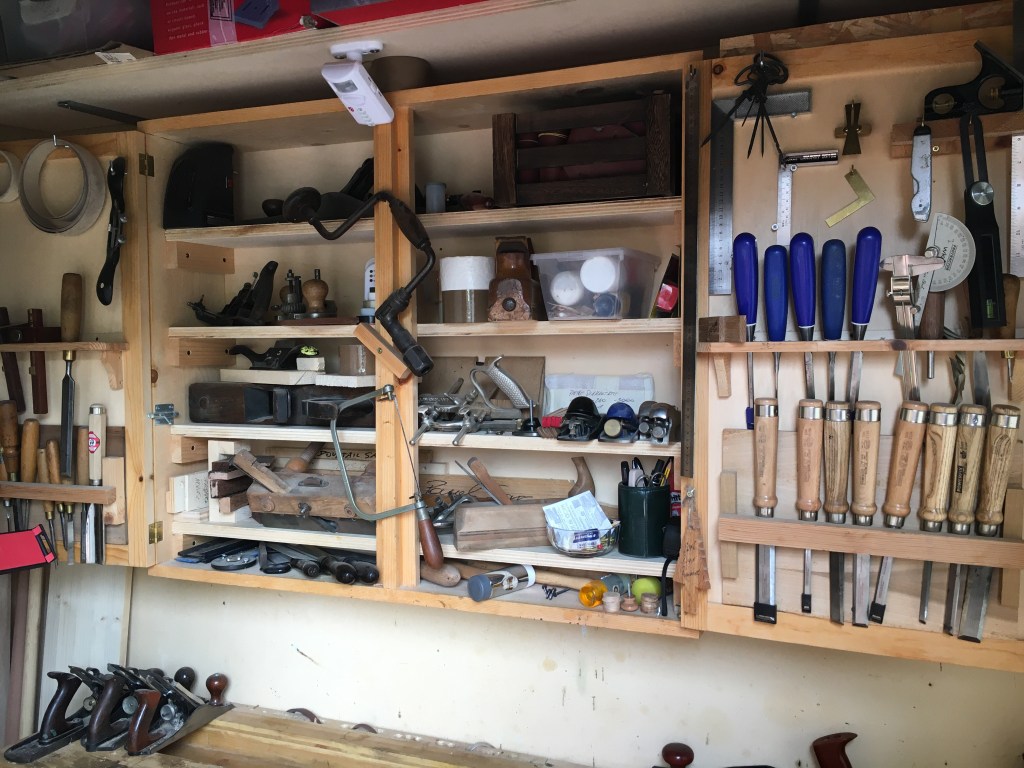
A me piace avere gli utensili in vista, quindi le ante del pensile sono sempre aperte. Se optiamo di arricchire le ante con dei supporti, come nel mio caso, poniamoli in modo tale che, una volta inseriti gli attrezzi, le ante possano ancora chiudersi senza andare a sbattere sui ripiani interni. Nel pensile possiamo riporre qualunque cosa, ovviamente di peso ragionevole. Meglio quindi non appesantirlo troppo se non vogliamo vederlo cadere.
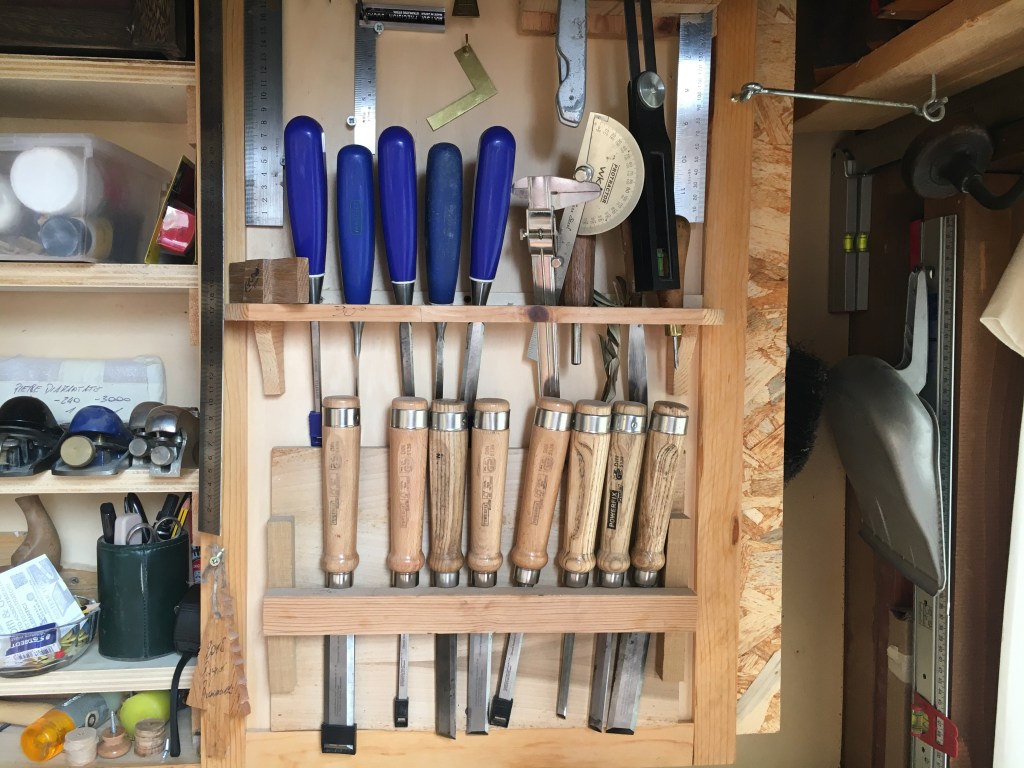
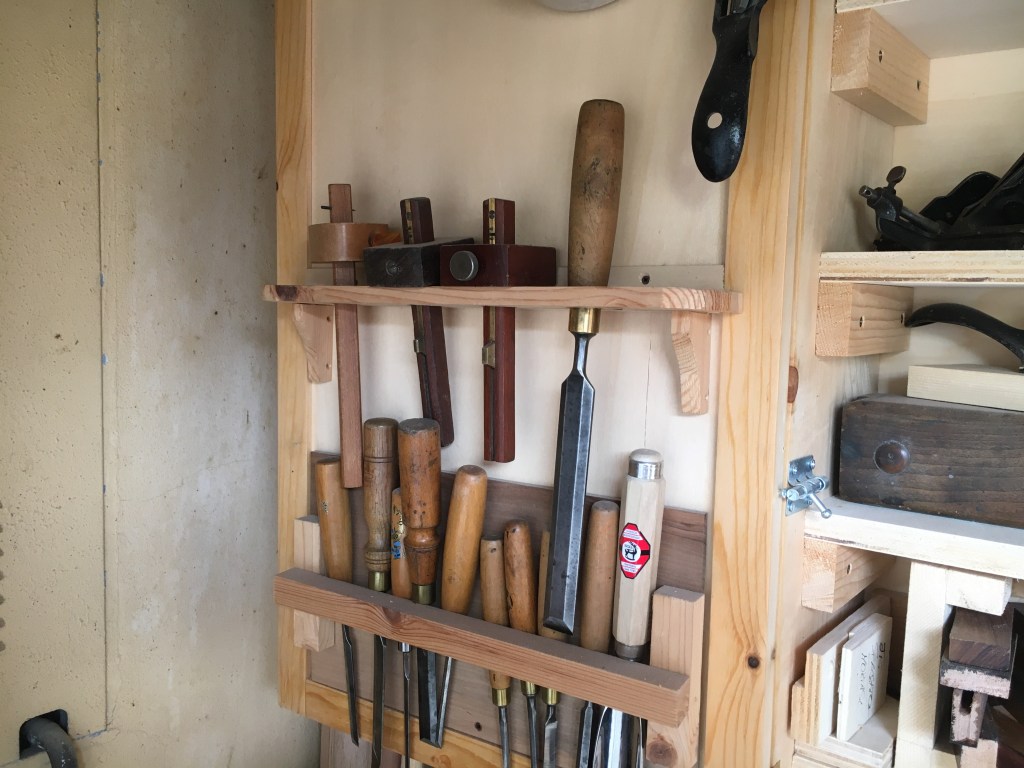
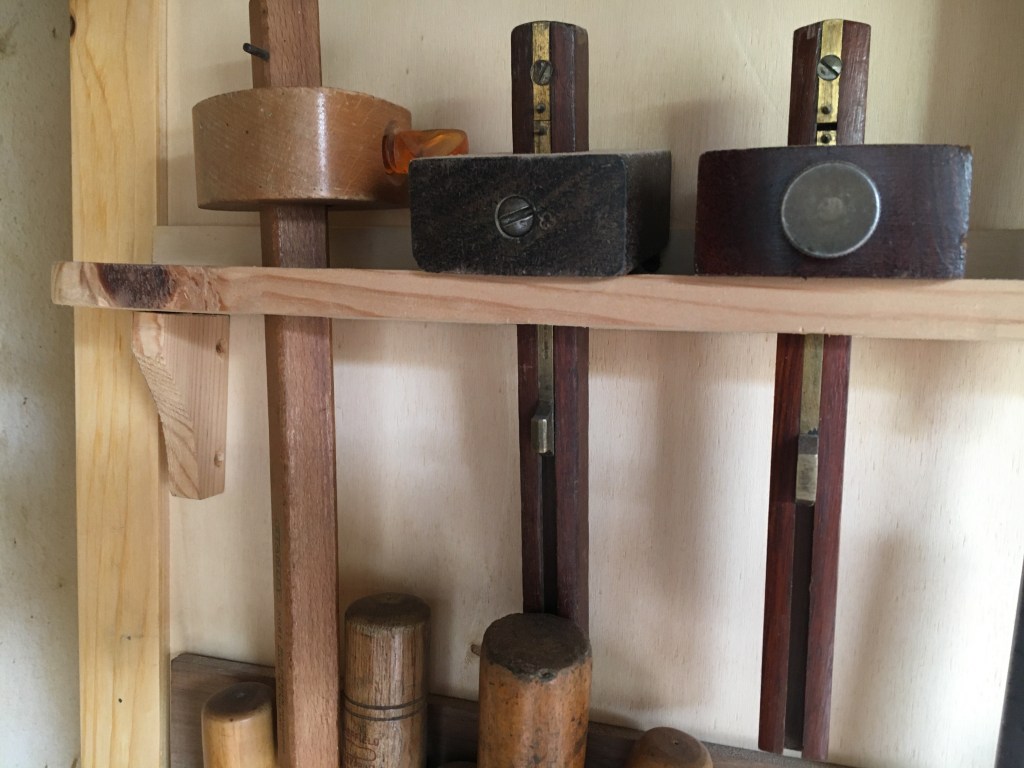
Nel mio caso, nel pensile trovano posto tutti quegli utensili che utilizzo maggiormente, quindi scalpelli, seghe, pialle (speciali e non), strumenti di misurazione e di tracciatura, ecc. Trovandoci posto la quasi totalità degli utensili manuali il mio consiglio è di farlo il più grande e capiente possibile.
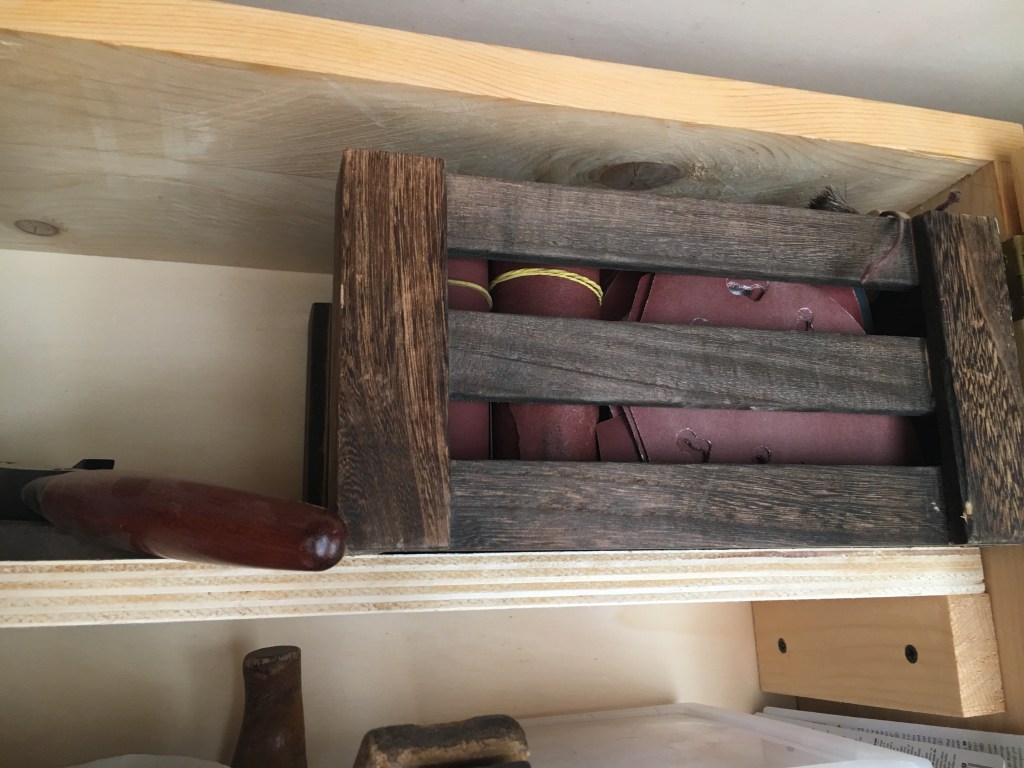
Se abbiamo molto spazio a disposizione potremo dedicare delle aree, con relativi mobiletti, ad ogni specifica lavorazione. Ad esempio, oltre al banco per le lavorazioni generiche, potremmo ricavare una stazione di affilatura, un banchetto per la verniciatura, un banco per i lavori di ferramenta dotato di morsa per il ferro, ecc. Se lo spazio è invece ridotto, come nel nostro caso, dovremo ricorrere a qualcosa di diverso. Come detto, sfruttiamo lo spazio a disposizione in altezza, creando ripiani dove potremo riporre vernici, smalti, pennelli, carta abrasiva, colle ed altro. Oppure, se possiamo, facciamo un piccolo mobiletto o un pensile dedicato ad accogliere tutto ciò che riguarda la finitura del legno.
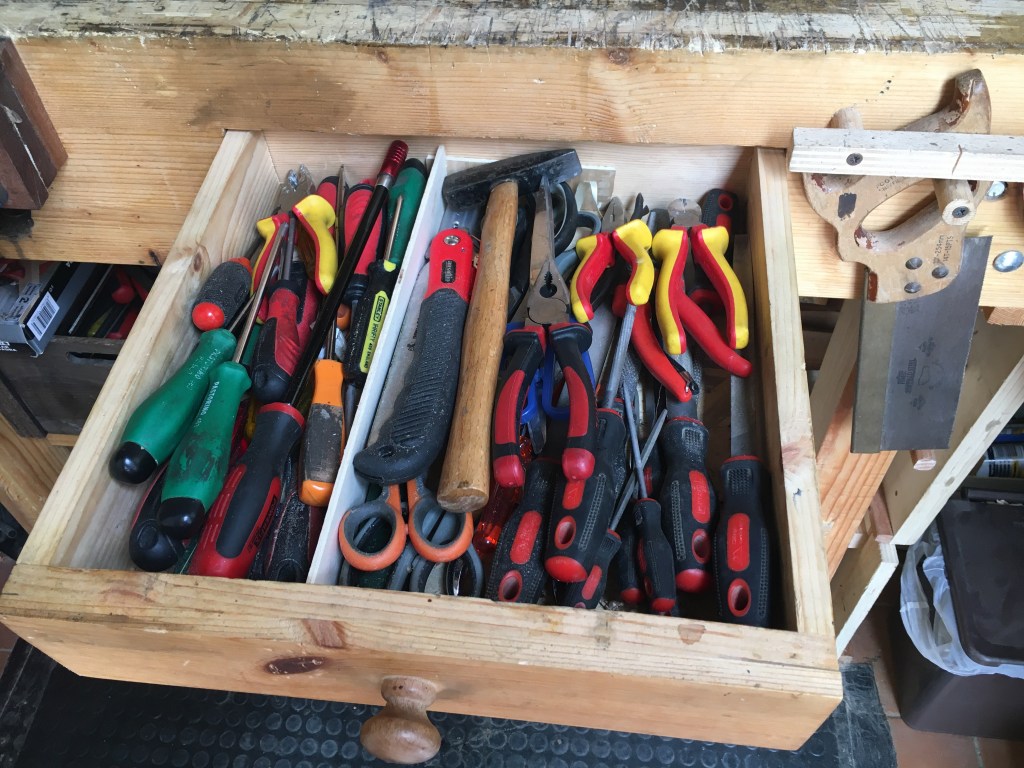
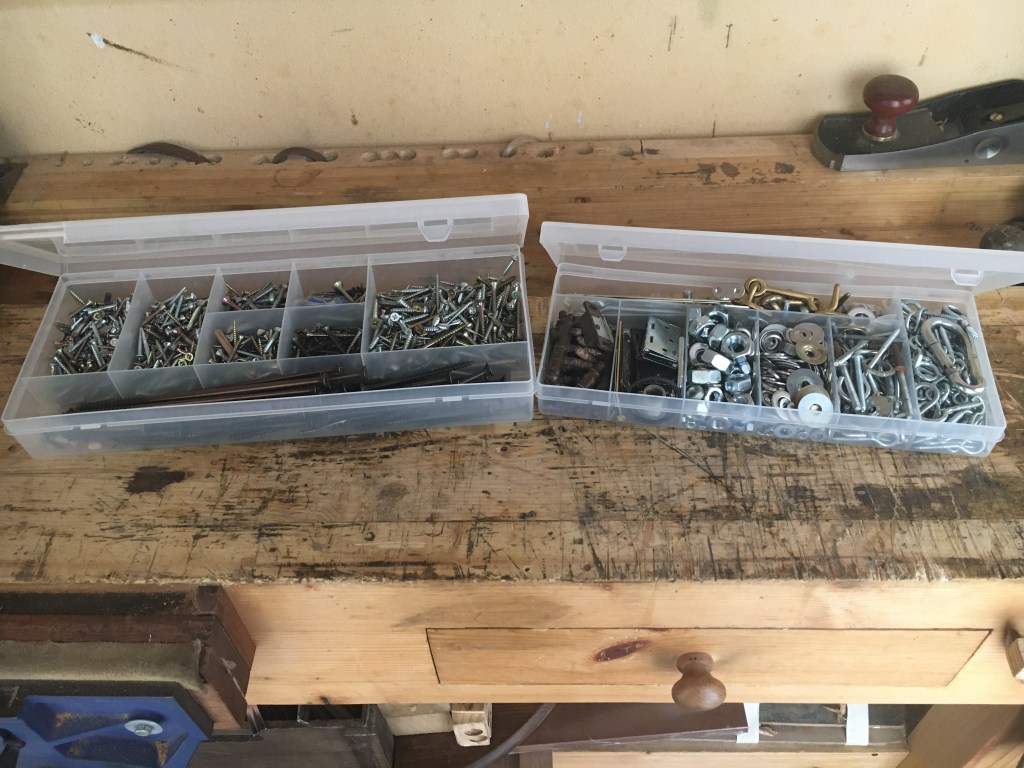
Per quanto riguarda i cacciaviti, pinze, martelli, viti, chiodi e ferramenta in genere, personalmente non amo le pareti attrezzate. Trovo che portino via molto spazio utile. Molto meglio allora dotarsi di contenitori in plastica oppure farsi delle scatole in legno dove riporre tutto il materiale di ferramenta. Anche gli scalpelli potrebbero trovare collocazione in scatole di legno, avendo cura di riporli in modo tale che i taglienti non tocchino le altre lame. Anche per le lime e le raspe trovo ottimale riporle in scatole di legno o nel cassetto del banco.
Per le seghe più grandi possiamo prevedere un semplice sostegno a muro dove poterle appendere.

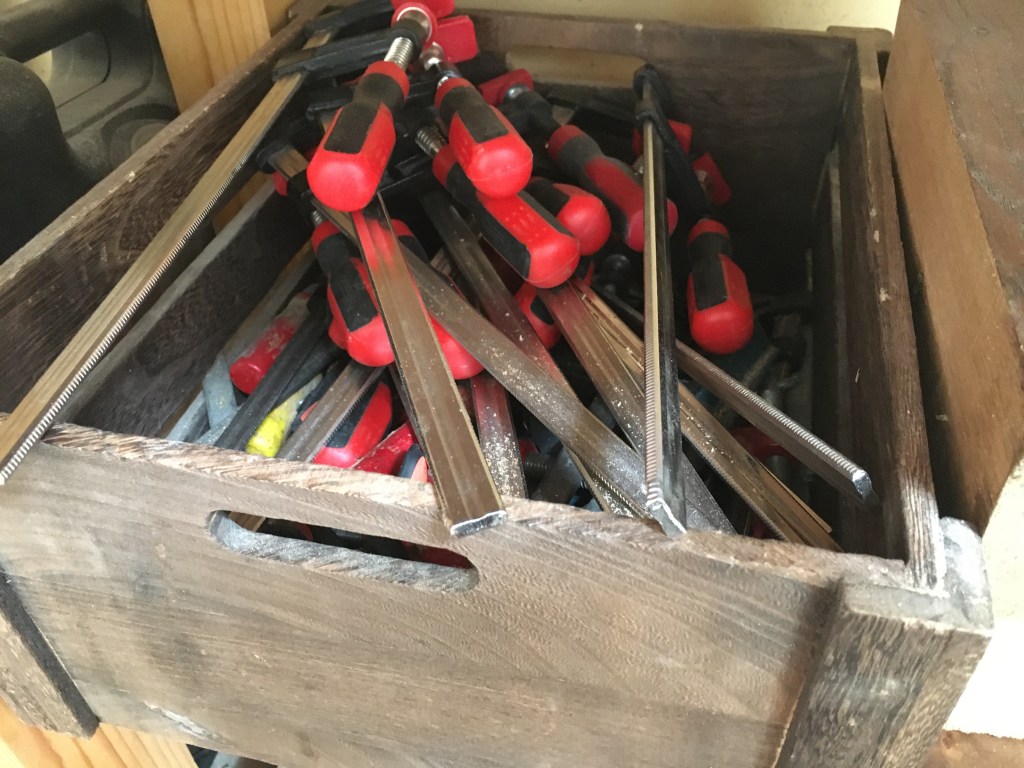
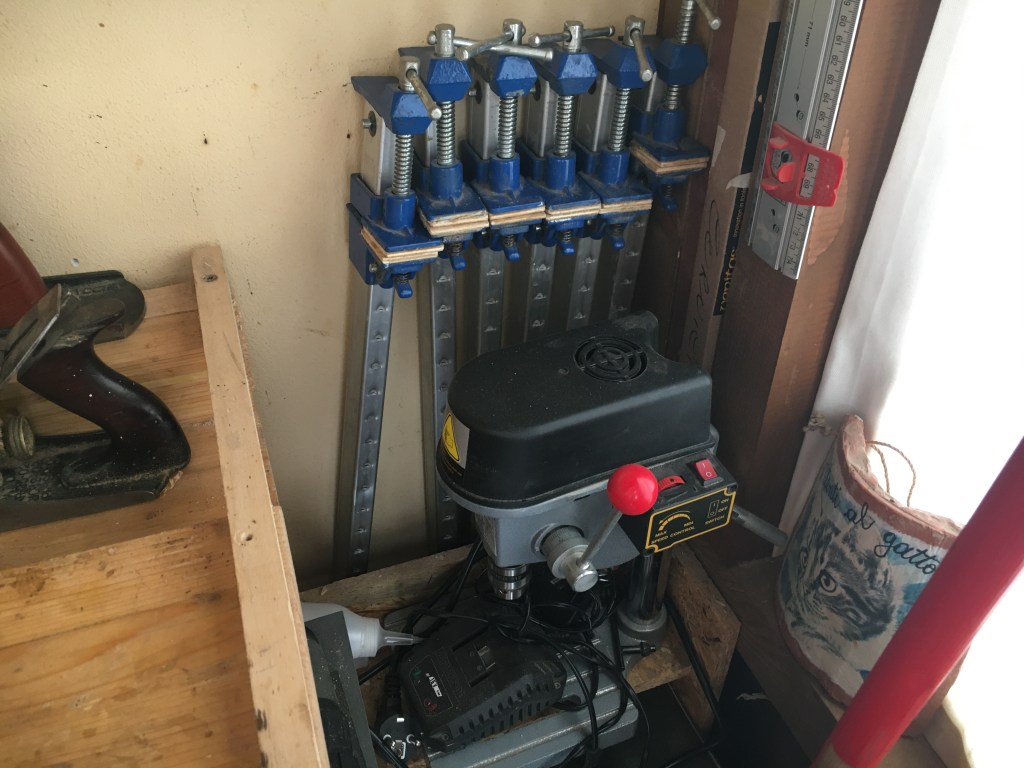
I morsetti più piccoli entrano comodamente nei contenitori di legno, dove occupano sicuramente meno spazio che appesi da qualche parte. Per quelli più lunghi invece possiamo creare una piccola rastrelliera a parete oppure più semplicemente stringerli a qualche supporto già presente in laboratorio.
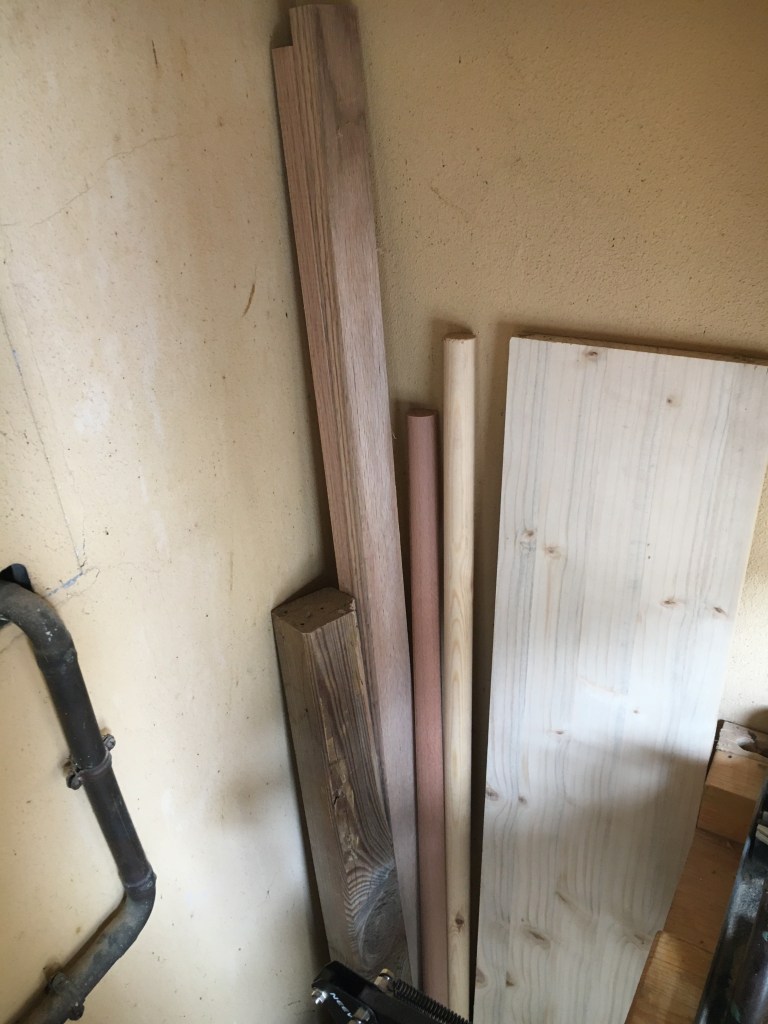
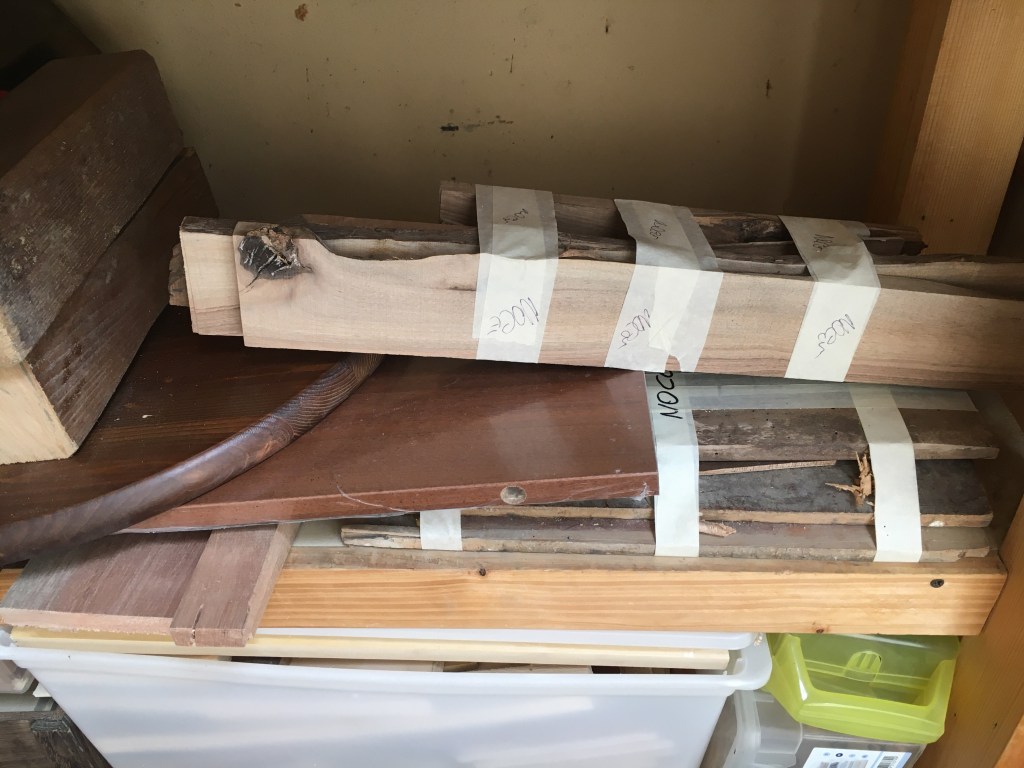
La problematica maggiore è probabilmente lo stoccaggio del legno. Se non abbiamo lo spazio per eventuali scorte dovremo giocoforza acquistare il legno strettamente necessario al lavoro che vogliamo fare. Anche per quel poco legno che acquisteremo vale la regola di non appoggiarlo mai a pareti esterne e non metterlo a terra pena il farlo imbarcare. Meglio quindi riporlo in posizione orizzontale, sotto al banco di lavoro o, se possibile, su dei ripiani fissati a muri interni.
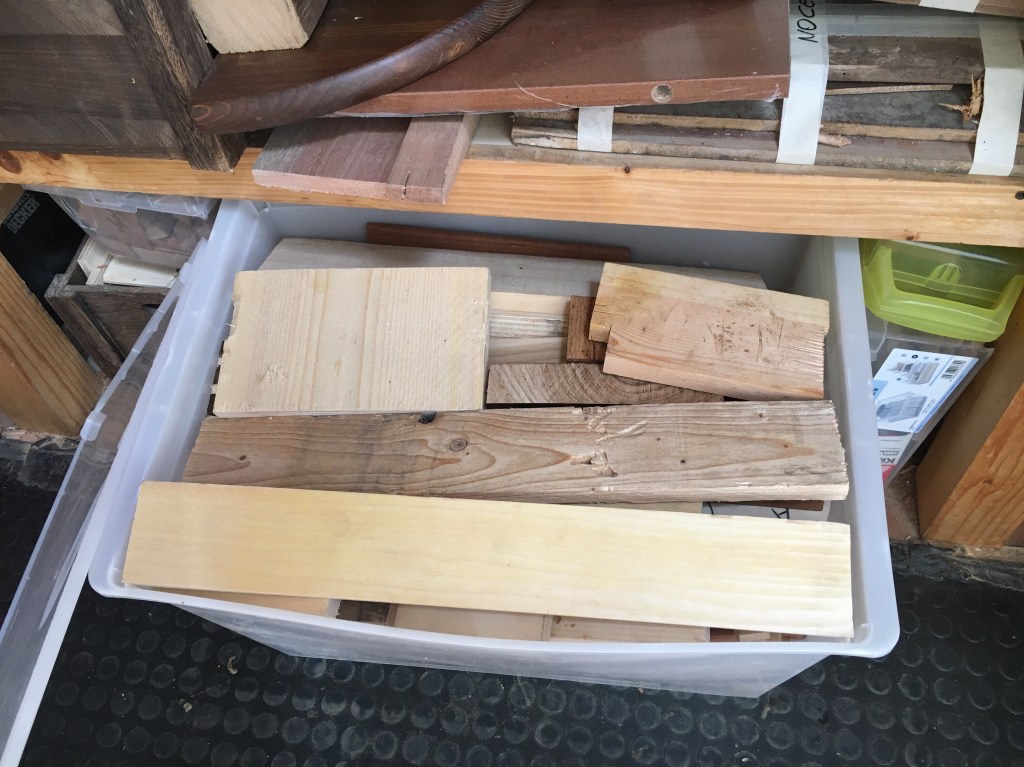
Non buttate via i piccoli pezzi di scarto delle lavorazioni. Riponeteli in contenitori suddividendoli per essenze. Vi torneranno sempre utili, così come la segatura avanzata che, unita con la colla, vi servirà come stucco.
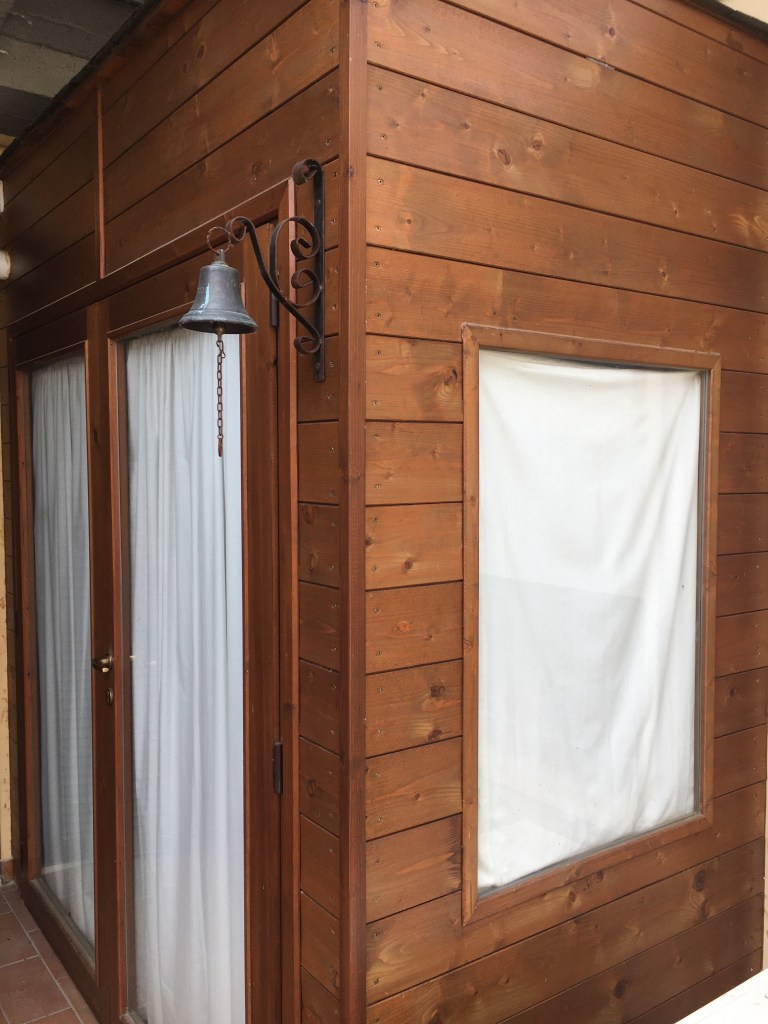
L’illuminazione, negli ambienti piccoli è fondamentale. Se dovete costruire una casetta in legno come laboratorio prediligete sempre la luce naturale, con grandi finestre, anche a costo di sacrificare lo spazio di una parete. Vi posso assicurare che la luce artificiale non è la stessa cosa.
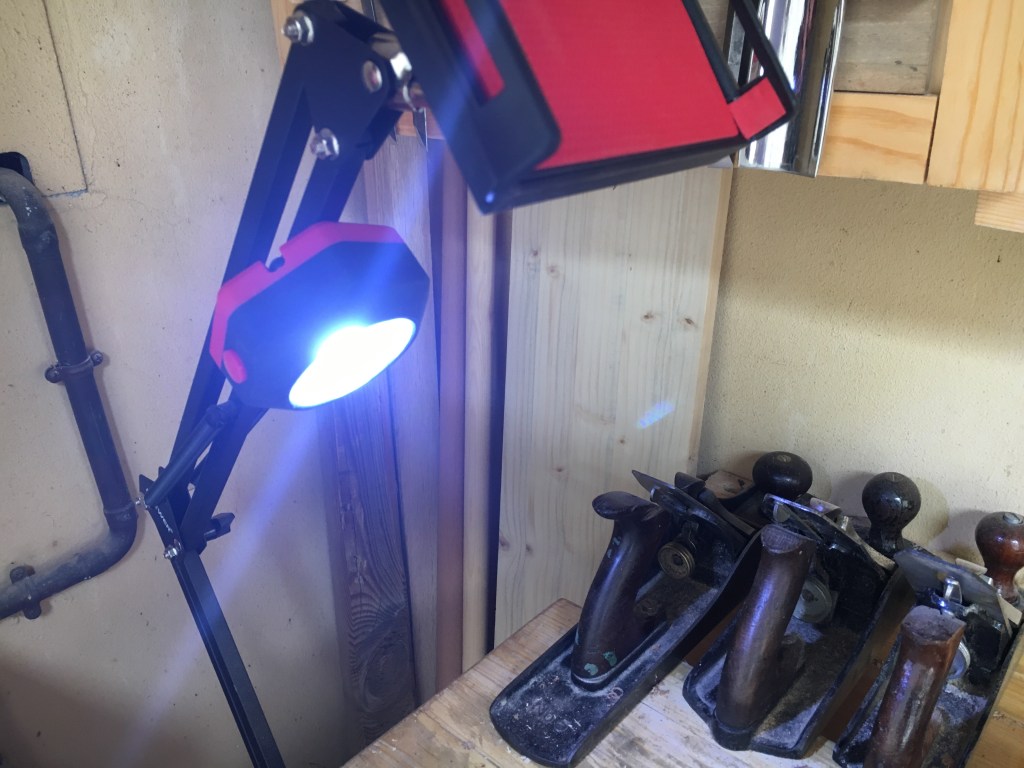
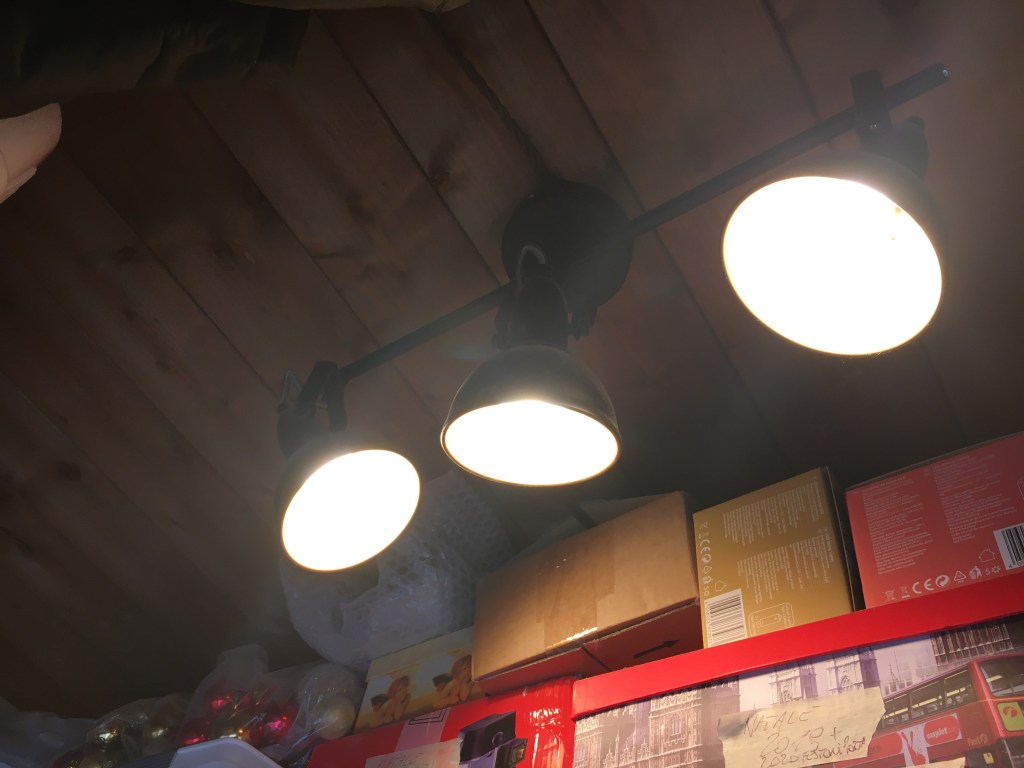
Quest’ultima è preferibile al led e con toni caldi, diffusa con lampade orientabili poste sul soffitto, ed evitando il crearsi di zone d’ombra. Queste lampade affaticano di meno la vista e creano un’atmosfera più intima. Se non dovessero bastare, un punto luce extra, meglio se a braccio mobile, sarebbe utile se posto a ridosso del banco di lavoro.
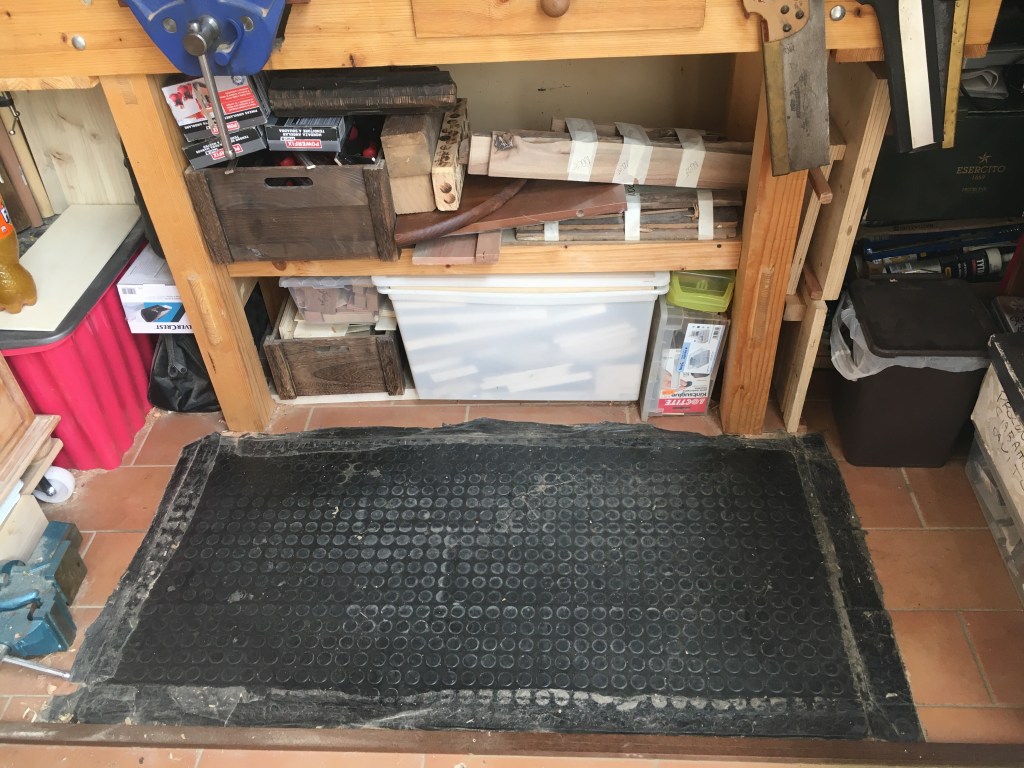
Se il pavimento è in cemento o in mattonelle è meglio riporre un materiale in gomma che è defaticante per le gambe, si pulisce bene e attutisce eventuali cadute di utensili. Prevedete sempre una ventola di aspirazione, anche se è preferibile tenere aperte le finestre, soprattutto quando levigate il legno. In questo caso, proprio perché ci troviamo in un ambiente piccolo, la polvere di legno si concentra particolarmente e sappiamo quanto può essere nociva per i nostri polmoni. Ecco perché, oltre alle mascherine, è indispensabile areare spesso il locale e pulire accuratamente tutte le superfici alla fine della sessione di lavoro.
Lavorare in un ambiente piccolo ha pochi vantaggi e molti svantaggi. Non possiamo acquistare cose ingombranti, non possiamo fare scorte di legname, è difficile muoversi con tavole di grosse dimensioni, dobbiamo sempre pensare ad ottimizzare gli spazi. Oltre al fatto che ovviamente non potremo realizzare progetti di grosse dimensioni, se non con parecchie difficoltà.
Tutto questo può essere frustrante, ma pensandoci bene può essere una risorsa. In un ambiente piccolo le grosse macchine stazionarie non trovano posto. Questo può indurci a riconsiderare la falegnameria sotto il suo aspetto più tradizionale, quello amanuense. Lo spazio ristretto diventa l’abito che ci siamo cuciti addosso, come la bottega del falegname di un tempo. Arriveremo ad un punto che potremo trovare gli utensili ad occhi chiusi e riconoscerli dal rumore che producono. Vedrete che le soddisfazioni non mancheranno.
____________________________________________________________________________________________________
A well-organized workshop is every hobbyist’s dream. It is undeniable that if it is kept clean and tidy it will entice us to work. On the other hand, a dirty and messy place, even if someone might like it, should be the norm only during the working phases.
Personally, I don’t like leaving too many things lying around. This is why at the end of the day I like to clean and put all the tools back in their place, so that I can find them ready the next day. It is a question of practicality, of working rigor but also of hygiene. However, starting from the assumption that everyone works in the conditions that they like best and in the spaces available to them, it is clear that in any case the decisive factor for organizing a woodworking workshop in the best possible way is the space itself. If you have very large rooms available, you will be able to afford the luxury of scattering stationary machines here and there, leaving adequate space to work around them and dedicate a separate area to hand tools and sharpening. I have had this luck in the past, having owned a garage of about 50 square meters, so more than enough to house the most important machines for a hobbyist woodworker.
Having later changed my thinking on how to work wood and having landed on the exclusive hand processing, it was not traumatic for me to find myself in a workshop housed in a shed with measures of about 250 cm. for 125 cm. Obviously a few more meters would not have minded me but I can assure you that even in such narrow spaces it is possible to create works of a certain size, always provided that only hand tools are used.
In my small space I even managed to get a band saw and a mini drill press (the only electrical exceptions that I have allowed myself), as well as to enter many things of the house. This was possible because very few tools, about a dozen, and obviously wood are enough to work the wood by hand. It is also obvious that the more you progress, the more you need new tools and the space is reduced. This has led me over the years to revolutionize the positions of the various tools, even if the fundamental ones have always remained in their initial position.
In such a small space it is easy to keep everything close at hand and by stretching my arms I can comfortably reach any hand tool I need.
My shed mainly consists of a bench, on which all of my work takes place and where I keep the planes I use most, the so-called bench planes , and a large tool cabinet where I store the most important tools (special planes, chisels, etc. ).
A few tenon and dovetails saws are also hung on the apron of the bench. The larger saws (the so-called panel saw ) are instead hung it on the shed wall.
Next to the cabinet, hidden by a door, there is a cabinet where I keep the paints, waxes, brushes, etc. Below, another cabinet for all the hardware and where I keep the sharpening material. Under the bench top and next to it is the wood I use. The wooden moulding planes are stored on a shelf at the top.
Given the size of the shed it is impossible for me to stock up on wood and therefore I am obliged to purchase the wood necessary for the project I want to carry out from time to time. Working in tight spaces is more difficult than anything else when it comes to sawing boards of a certain length. Needless to say, for cross-grain cuts, sometimes the space that would be necessary for the movement of the arm is not enough for me and therefore I work with the help of a cutting board that allows me to cut directly on the bench or I place myself parallel to the vice.
Fortunately, I have two large doors behind me which, once opened, allow me to move more easily. Working in such a small space for some years has allowed me to develop some experience on how to optimize spaces.
For example, an often underestimated dimension is the height of the workplace. Many things can be stored high and, although it is impractical and difficult to access, we must also think about how many tools we use most every day. We will realize that those of daily use are very few. The rest can therefore be placed at the top and the best place to store them is the shelves, which are simple to make and to assemble.
We can store them on sight or inside containers, preferably in wood, which are even more attractive to look at. Of course, those videos on the internet are tantalizing where cabinets, wall units and equipped walls are proposed, certainly pleasant but not very useful in terms of space, as well as being hardly adaptable to our needs. When you have little space available you have to pay attention to the essential and I found only two essential elements. The workbench (or woodworking bench) equipped with a vice and the tool cabinet. All hand work revolves around these two elements and everything can be traced back to them. Then, if there is more space, we can also evaluate the inclusion of other elements.
The workbench is the heart and engine of the laboratory. As seen in a previous post, I put the link above, I suggest you make it as big and sturdy as possible, equipping it with one, or better two clamps, the most capable possible. If you can, do not save on the material for its construction because all the work of an amanuensis takes place on it and, if well built, it will last you a lifetime.
Always keep it as free as possible from material not strictly necessary for working. Leave at least two meters around the bench to be able to reach it from all sides. If the space is very little then put it against the wall but do not fix it, to allow you to accommodate the movements during planing. In any case, leave at least one meter distance between the bench vice and the wall behind you, otherwise sawing in a cross-grain vice will become impossible.
Optimize the space under the bech as much as possible by also exploiting its sides, providing shelves with doors or drawers. The bench will get heavier, become even more stable and you will gain useful space. Always on the bench, during the construction phase, foresee the insertion of a tool tray. It is more useful than you can imagine. The tray, lower than the bench top, will contain the tools, preventing them from getting in the way and falling off the bench during work.
In the bench, I strongly recommend also obtaining a very deep drawer, useful for storing the tools considered most important, possibly protected with a lock. On the front of the bench you can insert supports for the saws that you use most.
The tool cabinet is the other fundamental element, on which I will publish a post on how I made mine as soon as possible. If you cannot place it on the ground, for reasons of space, build it as a wall unit and hang it near the workbench. Build it with doors, so you can also use them to hang low weight tools.
In the tool cabinet it is preferable to insert shelves at different heights and provide them with removable so that they can be moved as needed. If the space is really limited, the wall unit can be hung on the wall, above the bench and spaced from it in a height of at least 50 cm. Let’s not put it too low or it will get in the way of work. If we still have to build it, let’s calculate the dimensions of the doors well, when open.
I like to have hand tools in sight, so the cabinet doors are always open. If we opt to enrich the doors with supports, as in my case, let’s place them in such a way that, once the tools are inserted, the doors can still close without hitting the internal shelves. In the cabinet we can store anything, obviously of reasonable weight. So it’s better not to weigh it down too much if we don’t want to see it fall.
In my case, all the tools I use most are placed in the tool cabinet, such as chisels, saws, planes (special and not), measuring and marking tools, etc. Since almost all hand tools are placed there, my advice is to make it as large and capacious as possible.
If we have a lot of space available, we can dedicate areas, with relative cabinets, to each specific process. For example, in addition to the bench for generic processing, we could obtain a sharpening station, a painting stand, a bench for hardware work equipped with an iron vice, etc. If, on the other hand, space is limited, as in our case, we will have to resort to something different. As mentioned, we take advantage of the space available in height, creating shelves where we can store paints, enamels, brushes, abrasive paper, glues and more. Or, if we can, we make a small cabinet or a wall unit dedicated to everything related to the finish of the wood.
As for screwdrivers, pliers, hammers, screws, nails and hardware in general, I personally don’t like equipped walls. I find they take up a lot of useful space. Much better then to equip yourself with plastic containers or make wooden boxes to store all the hardware material. The chisels could also be placed in wooden boxes, taking care to store them in such a way that the cutting edges do not touch the other blades. I also find it optimal for files and rasps to store them in wooden boxes or in the counter drawer.
For larger saws we can provide a simple wall support where you can hang them.
Smaller clamps fit snugly into wooden boxes, where they definitely take up less space than hanging somewhere. For the longer ones instead we can create a small wall rack or more simply tighten them to some support already present in the shed.
The biggest problem is probably the storage of wood. If we do not have the space for any stocks we will have to buy the wood strictly necessary for the work we want to do. Even for the little wood that we will buy, it is worth never placing it on external walls and not putting it on the ground, under penalty of having it cupped or bowed. It is therefore better to store it in a horizontal position, under the workbench or, if possible, on shelves fixed to internal walls.
Do not throw away the small pieces of processing waste. Store them in boxes dividing them by essences. They will always come in handy, as well as leftover sawdust which, combined with glue, will serve as a filler.
Lighting in small shed is essential. If you have to build a shed as a woodworking workshop, always prefer natural light, with large windows, even at the cost of sacrificing the space of a wall. I can assure you that artificial light is not the same thing.
The latter is preferable to LED and with warm tones, diffused with adjustable lamps placed on the ceiling, and avoiding the creation of shaded areas. These lamps are less tiring for the eyes and create a more intimate atmosphere. If that weren’t enough, an extra light point, preferably with a movable arm, would be useful if placed close to the workbench.
If the floor is made of concrete or tiles, it is better to store a rubber material that is anti-fatigue for the legs, cleans well and softens any falling tools. Always have a suction fan, although it is preferable to keep the windows open, especially when sanding wood. In this case, precisely because we are in a small environment, the wood dust is particularly concentrated and we know how harmful it can be for our lungs. This is why, in addition to the masks, it is essential to ventilate the room often and carefully clean all the surfaces at the end of the work session.
Working in a small shed has few advantages and many disadvantages. We cannot buy bulky things, we cannot stock wood, it is difficult to move with large boards, we must always think about optimizing space. In addition to the fact that obviously we will not be able to carry out large projects, if not with many difficulties.
All of this can be frustrating, but when you think about it it can be an asset. In a small room, large stationary machines have no place. This can lead us to reconsider woodworking under its more traditional aspect, the amanuensis one. The confined space becomes the dress we sewed on ourselves, like the carpenter’s workshop of yore. We will come to a point where we can find tools with our eyes closed and recognize them by the noise they make. You will see that the satisfactions will not be lacking.

Lascia un commento