RESTAURO E PREPARAZIONE DI UNA PIALLA / RESTORING AND SETTING A PLANE
English translation at the end of the article

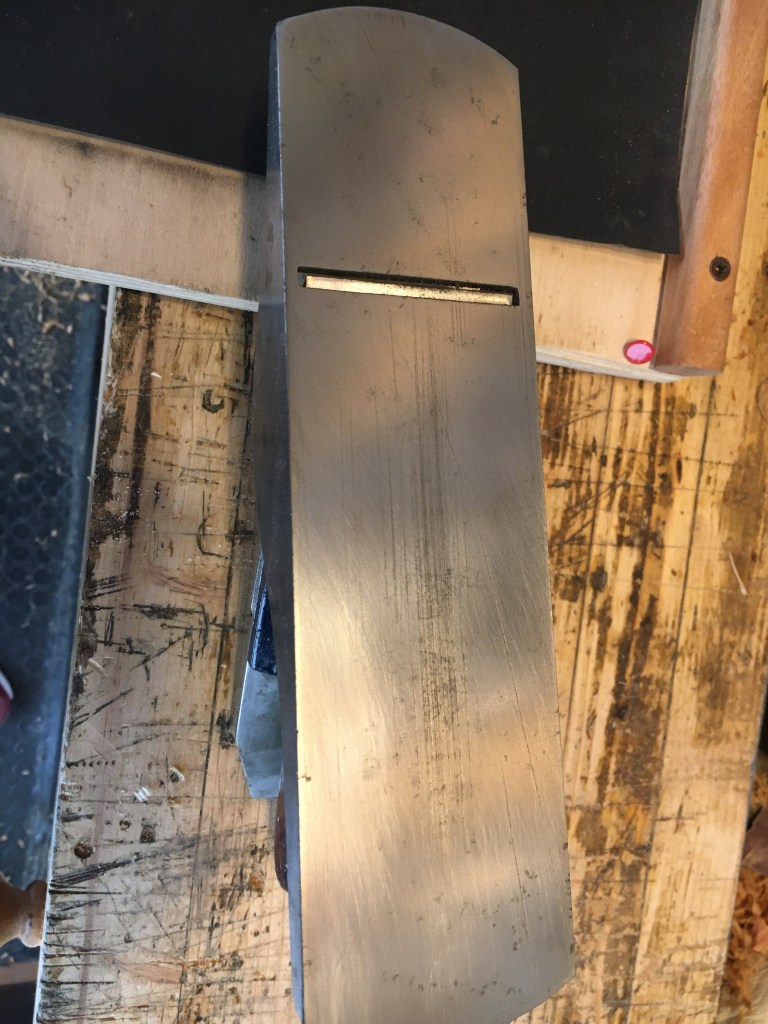
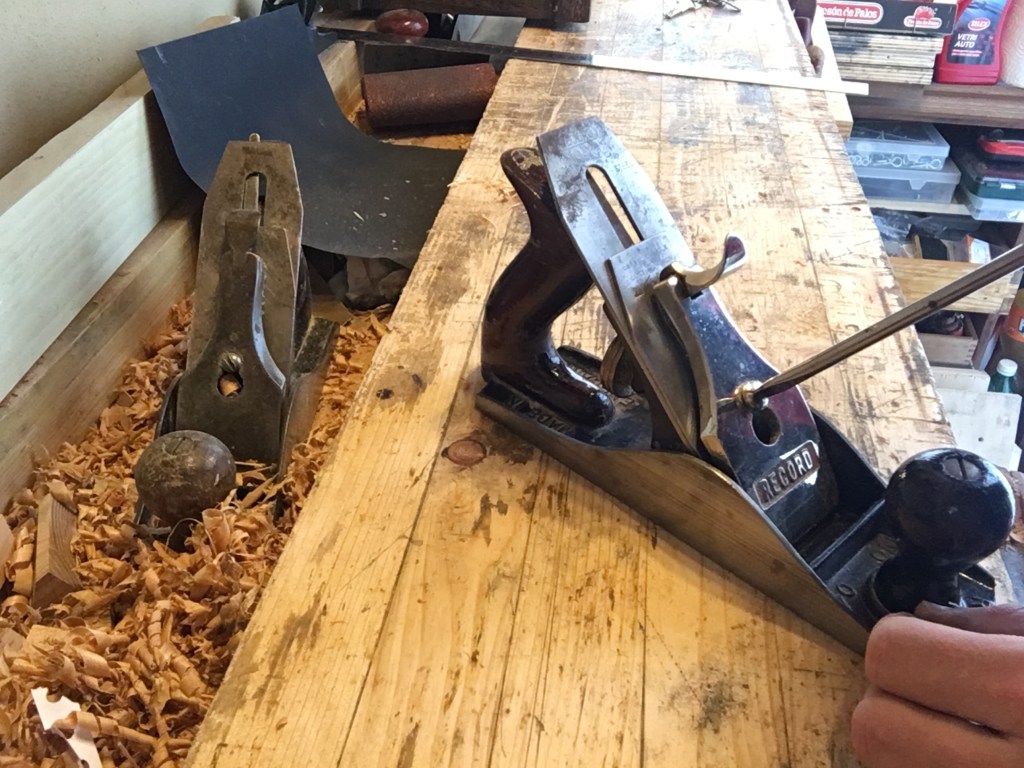
Per restauro e preparazione di una pialla mi riferisco a tutti quegli accorgimenti propedeutici al suo corretto funzionamento, quindi l’affilatura della lama (dorso e tagliente), la spianatura della suola e dei fianchi e l’assetto della pialla in generale affinché questa riesca a produrre trucioli. In questo articolo mi riferirò ad una classica Record n.4 stile Bailey ma le indicazioni possono adattarsi a quasi tutte le pialle da banco. Una pialla nuova di fabbrica normalmente non ha bisogno di rettifiche particolari, ad eccezione dell’affilatura della lama. Se invece abbiamo acquistato una pialla vintage è importante controllare svariate cose, tra cui la planarità della suola.
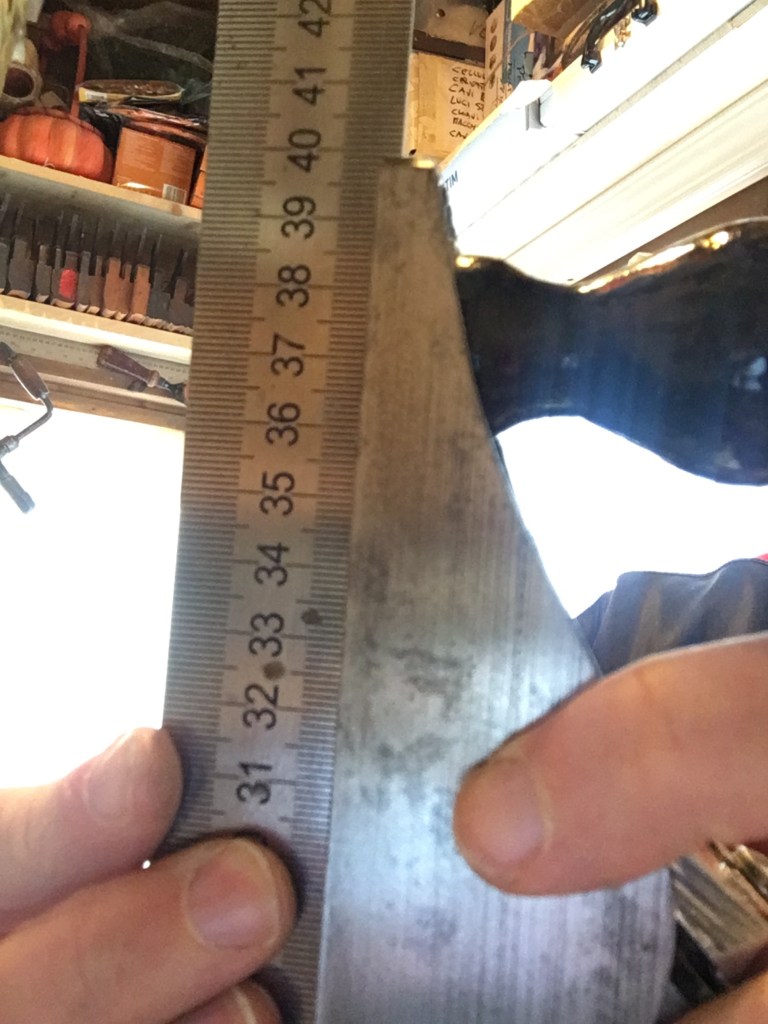
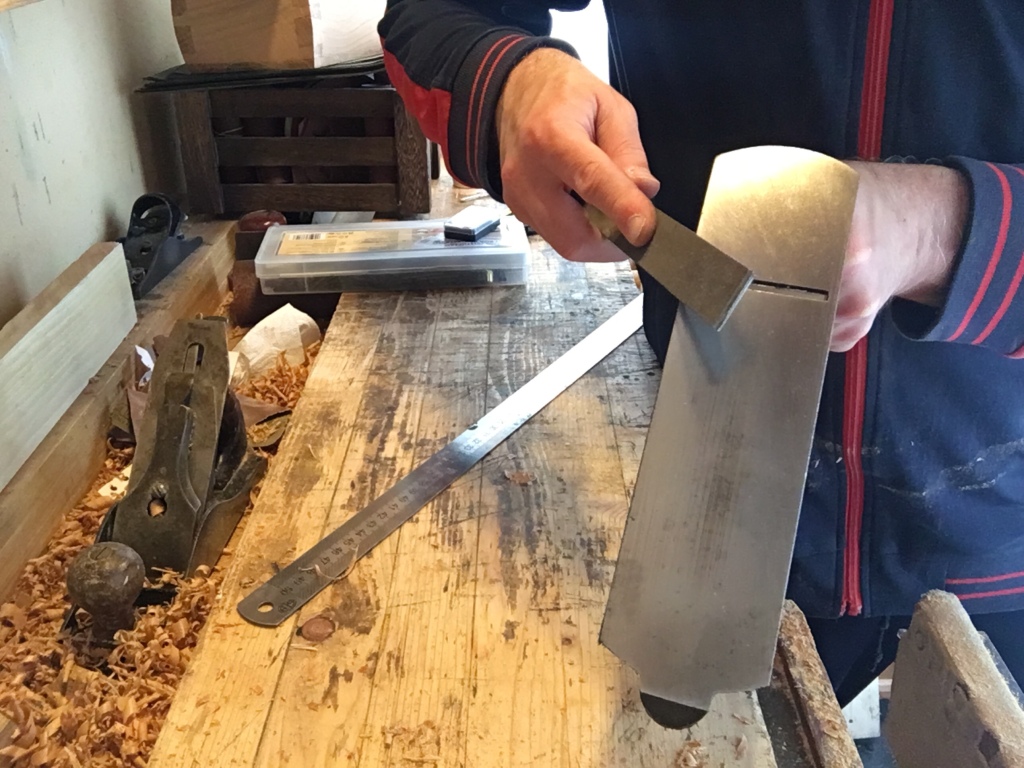
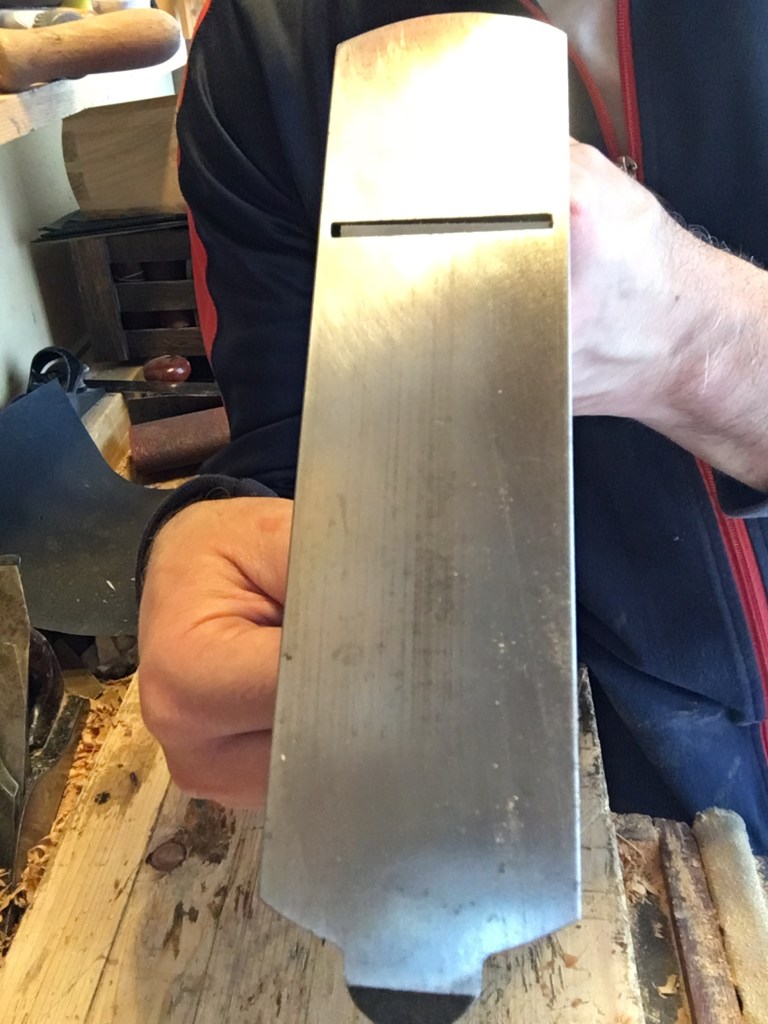
Aiutandoci con un righello in metallo verifichiamo se esistono concavità, soprattutto in prossimità della bocca. Se ci fossero dobbiamo eliminarle.
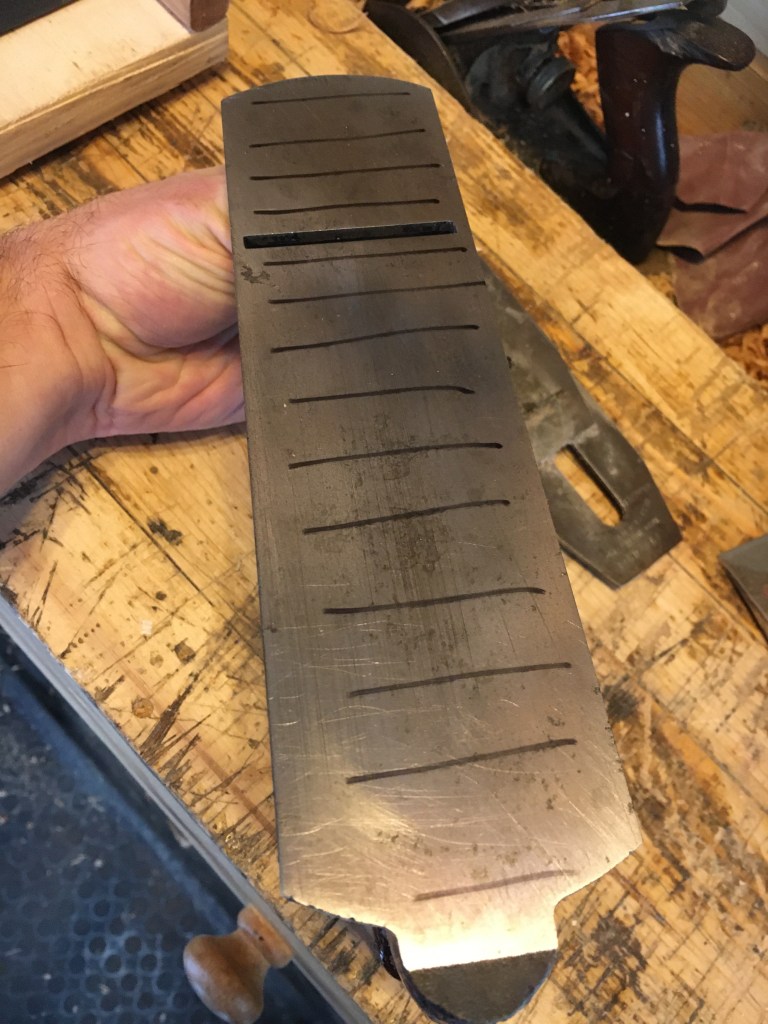
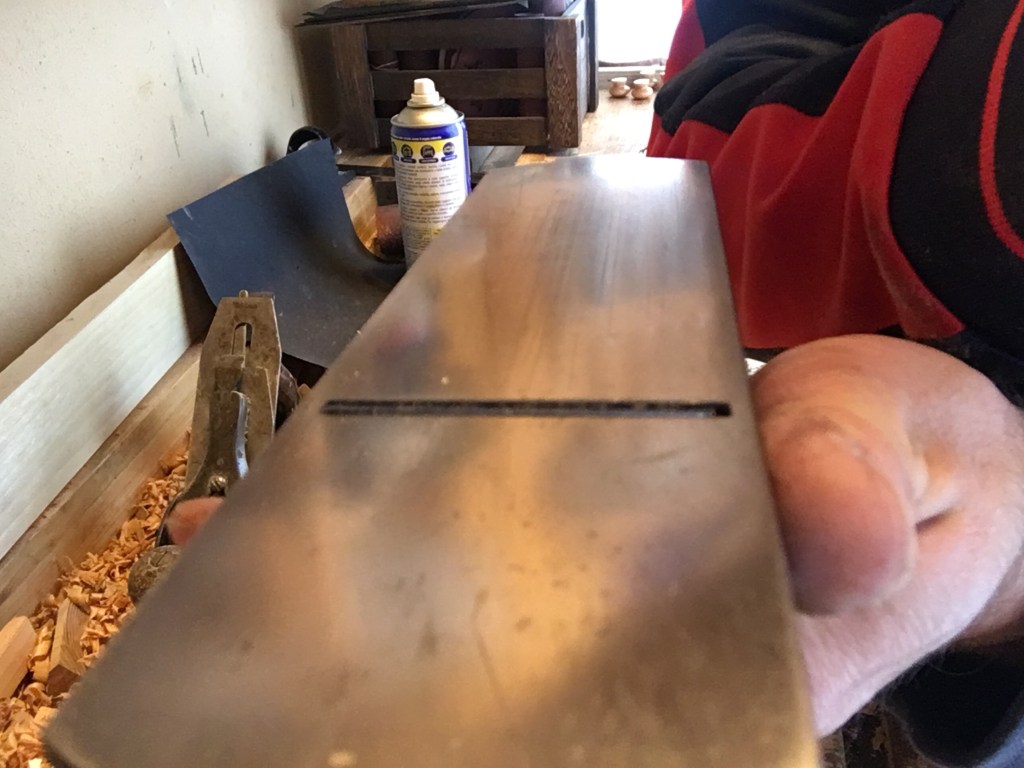
Lasciando montata la lama ma ritraendola al di sopra della bocca pratichiamo con un pennarello nero delle tracce parallele sulla suola della pialla e strofiniamola sulla carta abrasiva partendo da una grana 80 (potremmo partire anche da una grana superiore, dipende dalle condizioni della suola) e lavoriamo fino a quando le tracce non saranno scomparse o comunque poco visibili.

Non è fondamentale rimuoverle tutte e completamente, essendo sufficiente eliminare quelle più vicino alla bocca, garantendo così che in quella porzione di suola vi sia perfetta planarità.
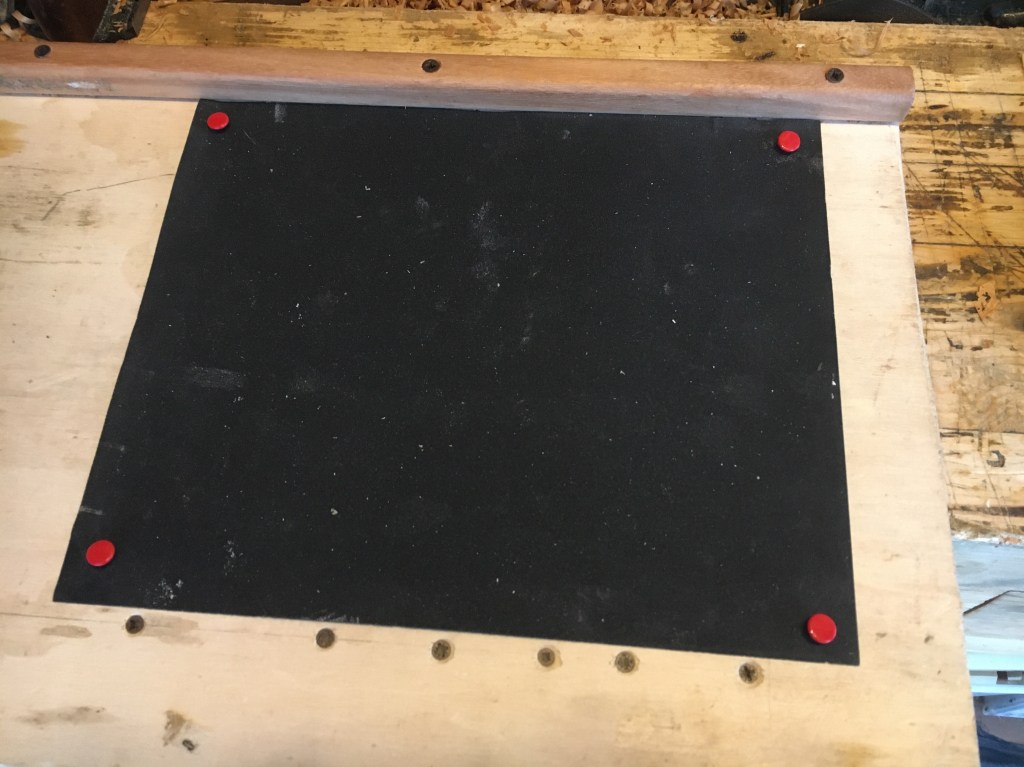
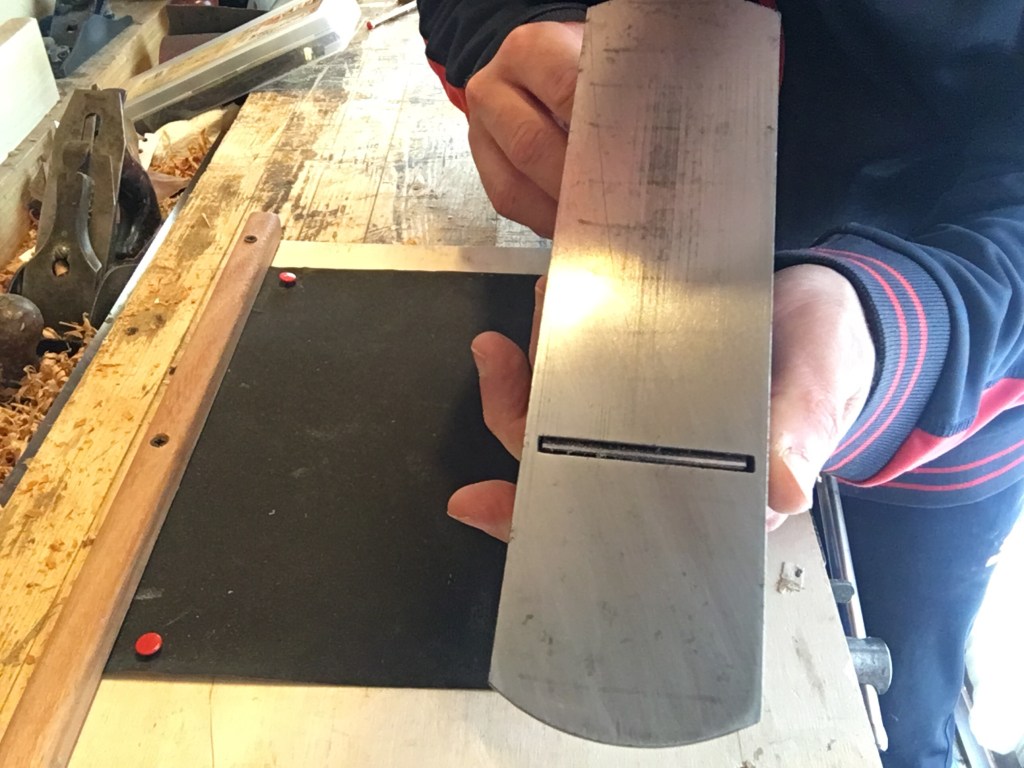
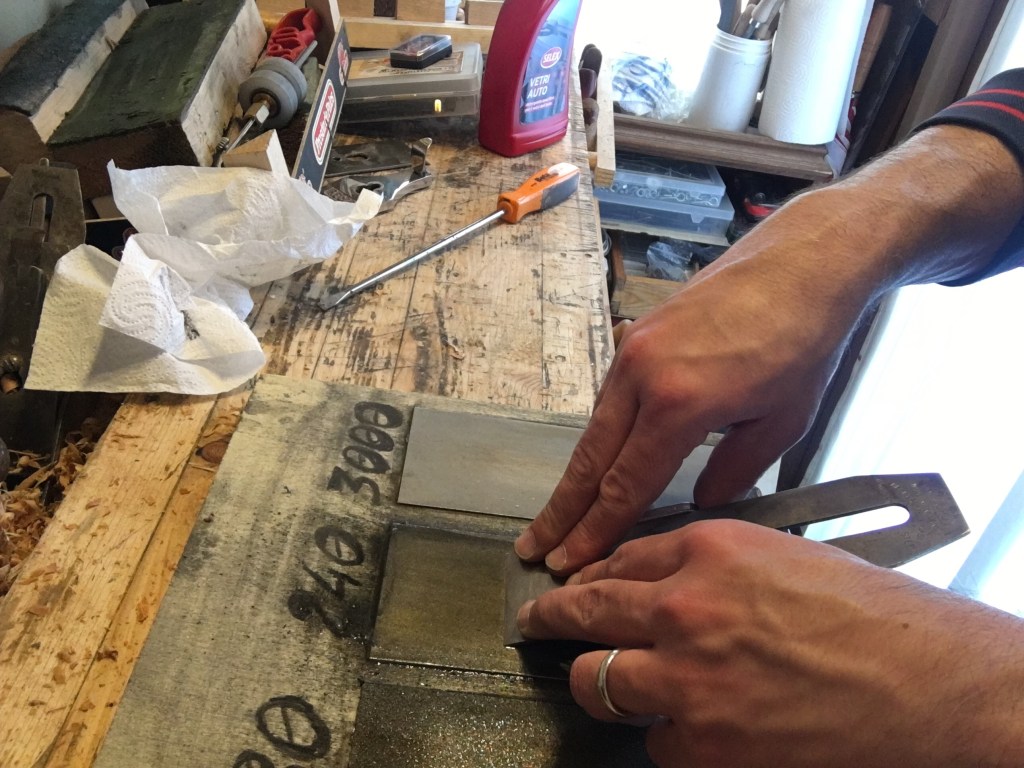
Assicuriamoci che la superficie dove apponiamo la carta sia piana e rigida (come un piano in vetro o in granito o del multistrato spesso). Passiamo quindi alle grane successive, arrivando almeno alla grana 250.
Poniamo quindi di lato la pialla e levighiamo anche i fianchi. La carta abrasiva si renderà utile anche per eliminare le eventuali tracce di ruggine presenti. Se la ruggine fosse eccessiva potremo fare alla pialla un preventivo bagno in aceto tenendola in ammollo almeno per una notte, per poi passare alla carta abrasiva o alla lana d’acciaio.

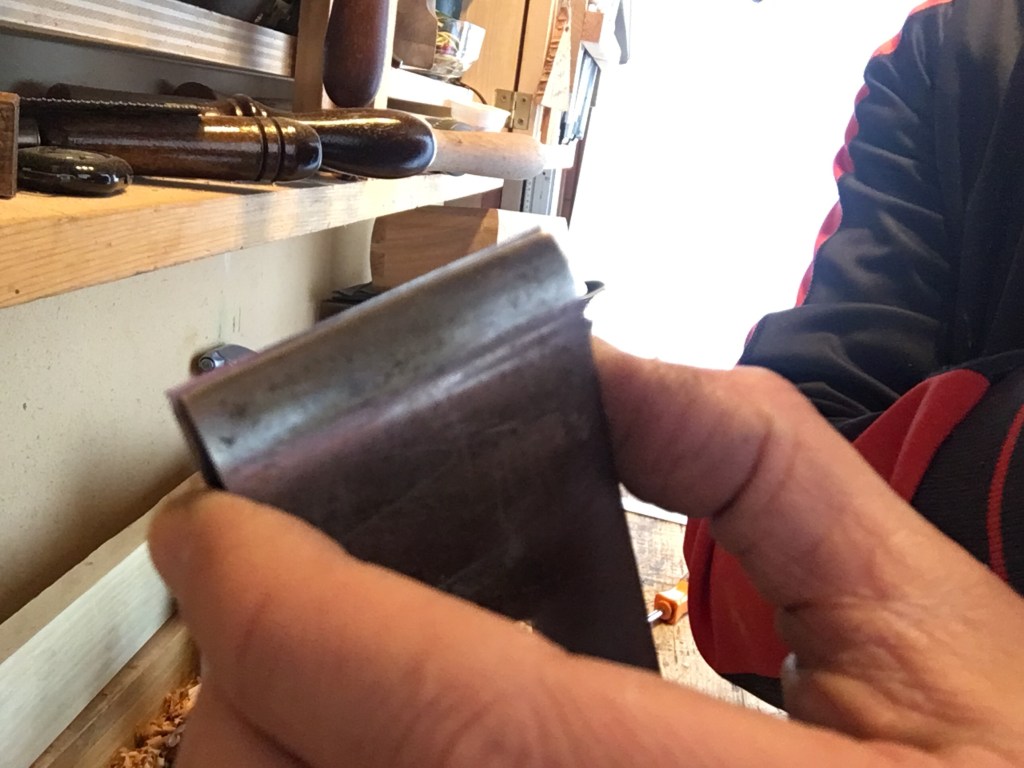
Con poche passate di lima arrotondiamo leggermente anche gli spigoli vivi del corpo pialla, in particolar modo tra la suola e i fianchi. Se vogliamo, possiamo rifinire successivamente anche con la carta abrasiva.

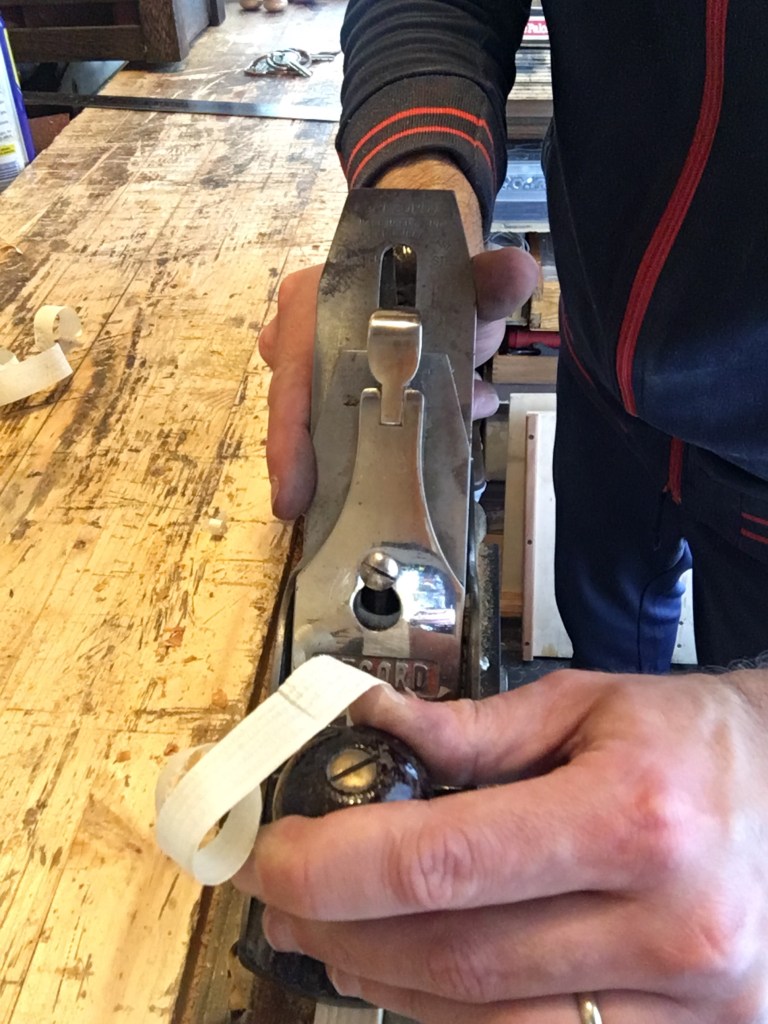
Infine, approfittiamone per pulire tutte le varie parti, quindi smontando il frog, lubrificando con olio o WD40 la leva di spostamento laterale, la rotella di avanzamento e arretramento della lama e tutte le varie viti. Controlliamo la robustezza dei manici eventualmente stringendo le viti, accorciandole o apponendo del materiale a spessore. Se i manici fossero in cattive condizioni potremo scartavetrarli e ripassarli con gommalacca e cera o addirittura ripararli o sostituirli. Se la vernice del corpo pialla si fosse staccata potremmo intervenire con nuova vernice (c.d. japanning).
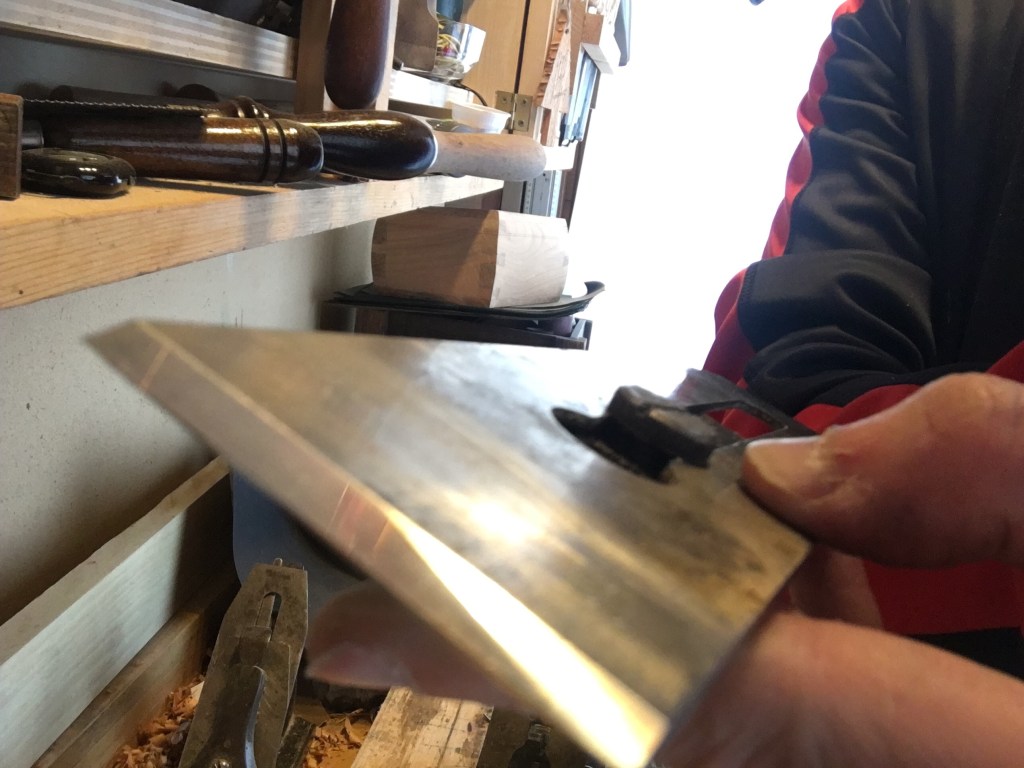
Personalmente non amo gli interventi troppo invasivi sulle pialle vintage. Mi piace mantenere alcuni difetti e quella patina depositata dal tempo che ne testimonia gli anni vissuti. Una volta affilata la lama e controllato il controferro (per questa operazione vi rimando al seguente link Affilare gli scalpelli e le lame delle pialle / Sharpening chisels and plane irons) accostiamoli ponendo il controferro ad una distanza compresa tra 1 e 2 mm. dal tagliente della lama e avendo cura di allineare bene i fianchi tra loro, facendo attenzione a non far toccare il tagliente affilato al controferro.
Il controferro va inserito sul dorso della lama e non dalla parte del bisello. Quindi serriamo lama e controferro per mezzo della vite centrale.
Poniamo la pialla sul banco e inseriamo il gruppo tagliente così formato usando come inserti la vite centrale e lo slot a forcella presente sul frog che va ad inserirsi nel foro superiore presente sul controferro.
Il gruppo va montato sul frog in modo tale che il bisello si trovi verso il basso (pialla in posizione bevel down). Quindi inseriamo il lever cap nella vite centrale e facciamolo scivolare verso il basso. Infine abbassiamo la leva del lever cap per bloccare il tutto in posizione.

Se la chiusura risultasse troppo difficoltosa allentiamo leggermente la vite centrale superiore con un cacciavite. Se invece non serrasse abbastanza stringiamo la vite. Procediamo per tentativi sino a quando non otterremo una chiusura che opponga un po’ di resistenza ma non così tanto da sforzare.
Una chiusura troppo rigida infatti renderà difficile ruotare agevolmente la rotella che comanda il movimento avanti e indietro della lama mentre una chiusura troppo debole non manterrà fermo in posizione il gruppo lama.
Arretriamo la lama facendo in modo che questa non esca dalla bocca, afferriamo la pialla capovolta, quindi con la suola rivolta verso l’alto, tenendola con il pomello anteriore nella mano sinistra mentre con la mano destra ruotiamo la rotella zigrinata che comanda il movimento della lama agendo verso destra fino a quando non vedremo fuoriuscire il tagliente dalla bocca della suola. Per questa operazione è consigliabile mettersi in favore di luce e traguardare la suola con un solo occhio così da poter migliorare la messa a fuoco.
L’obiettivo è quello di far fuoriuscire il tagliente in modo uniforme dalla bocca della suola. Se dovessimo notare che il tagliente fuoriesce più da un lato rispetto all’altro agiamo sulla leva laterale spostandola nella stessa direzione di quella dove il tagliente fuoriesce maggiormente. Quindi se il tagliente fuoriesce maggiormente sulla destra spostiamo la leva che comanda lo spostamento laterale della lama verso destra.
Questo movimento è possibile grazie alla terminazione della leva di spostamento laterale che, inserendosi nell’apertura della lama, ne permette lo spostamento. Quando saremo soddisfatti del corretto allineamento del tagliente rispetto alla bocca della suola ritraiamo la lama fino al di sopra della bocca.
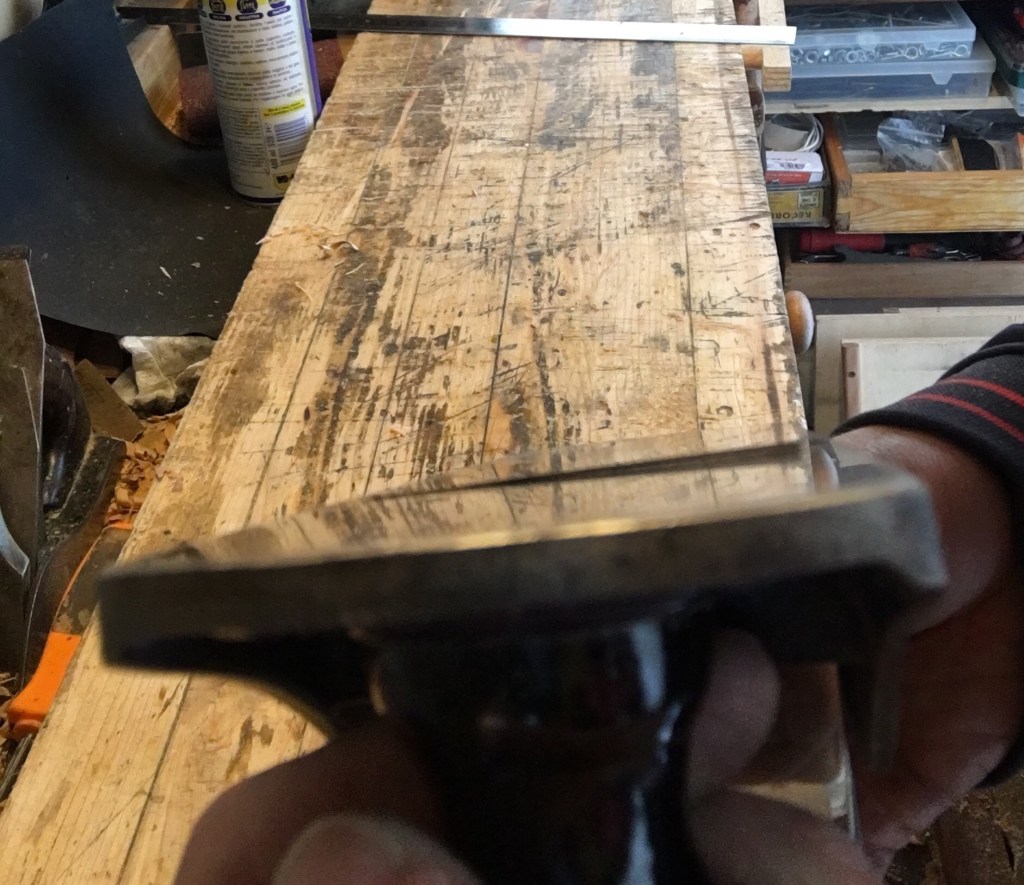
Blocchiamo nella morsa un pezzo di legno posto di costa con uno spessore di circa 2 cm., poniamo la pialla sul pezzo e proviamo a piallare. Al primo tentativo, avendo ritratto la lama, non otterremo alcun truciolo. Ruotiamo quindi la rotella di avanzamento della lama di un quarto di giro e proviamo ancora a piallare. Se ancora non esce niente insistiamo nel far avanzare la lama fino a quando questa, a contatto con il legno, non comincerà a produrre trucioli finissimi. Continuiamo ad abbassare la lama fino a quando il truciolo prodotto sarà della stessa larghezza del pezzo di legno e di una consistenza (spessore) uniforme.
Se dovessimo ottenere un truciolo non omogeneo dobbiamo agire sempre sulla leva di spostamento laterale. Infatti, se il truciolo fosse più spesso sul lato destro significa che la lama fuoriesce di più sul lato destro mangiando più legno su quel lato. Spostando la leva laterale che comanda la lama verso destra faremo avanzare il tagliente sulla sinistra e al contempo lo faremo arretrare sul lato destro, fino ad ottenere il parallelismo necessario tra il tagliente e la bocca della pialla.
La preparazione di una pialla necessita di tante accortezze. Quelle di cui ho parlato sono basilari e sono quelle che ci permettono di cominciare a lavorare il legno. Durante la piallatura poi, potremo adottare tutta una serie di accorgimenti sia tecnici (quindi riguardanti l’impostazione della pialla, come ad esempio la regolazione della bocca) che pratici, come ad esempio la direzione di piallatura. Alcuni cenni sull’argomento potete trovarli a questo link Tecniche di piallatura / planing technique. Tutte cose che comunque avremo modo di approfondire in un futuro post dedicato.
______________________________________________
For restoring and setting up of a plane I refer to all those previous actions for its correct functioning, therefore the sharpening of the blade (back and cutting edge), the flattening of the sole and sides and the layout of the plane in general so that it is able to produce shavings. In this article I will refer to a classic Bailey style Record # 4 but the indications can fit almost any bench plane. A brand new plane normally does not need any special adjustments, with the exception of sharpening the blade. If, on the other hand, we have purchased a vintage plane, it is important to check several things, including the flatness of the sole .
Using a metal ruler, we check if there are hollows, especially near the mouth. If there were, we must eliminate them .
Leaving the blade mounted but retracting it above the mouth we practice with a black marker some parallel traces on the sole of the plane and rub it on the abrasive paper starting from an 80 grit (we could also start from a higher grit, it depends on the condition of the sole ) and we work until the traces have disappeared or in any case not very visible.
It is not essential to remove them all completely, as it is sufficient to eliminate those closest to the mouth, thus ensuring that in that portion of the sole there is perfect flatness.
Make sure that the surface where we put the paper is flat and rigid (such as a glass or granite top or thick plywood). We then move on to the next grits, arriving at at least the 250 grit.
We then place the plane on the side and smooth the sides as well. The abrasive paper will also be useful to eliminate any traces of rust present. If the rust is excessive, we can do a preventive bath in vinegar on the plane, soaking it for at least one night, and then switch to sandpaper or steel wool.
With a few passes of the file we also slightly round the sharp edges of the plane body, especially between the sole and the sides. If we want, we can also finish later with sandpaper.
Finally, let’s take the opportunity to clean all the various parts, then disassembling the frog , lubricating with oil or WD40 the lateral adjustment lever, the depth adjustment wheel and all the various screws. We check the sturdiness of the handles if necessary by tightening the screws, shortening them or adding thick material. If the handles were in poor condition we can sand and pass them with shellac and wax or even repair or replace them. If the plane body paint had come off we could intervene with new paint (so-called japanning ).
Personally I don’t like too invasive interventions on vintage planes. I like to keep some defects and that patina deposited by the time that testifies to the years lived. Once the blade has been sharpened and the counter iron is checked (for this operation, I refer you to the following link Sharpen the chisels and planer blades / Sharpening chisels and plane irons ), put them together by placing the cap iron at a distance between 1 and 2 mm. from the cutting edge of the iron and taking care to align the sides well with each other, taking care not to let the sharp edge touch the cap iron .
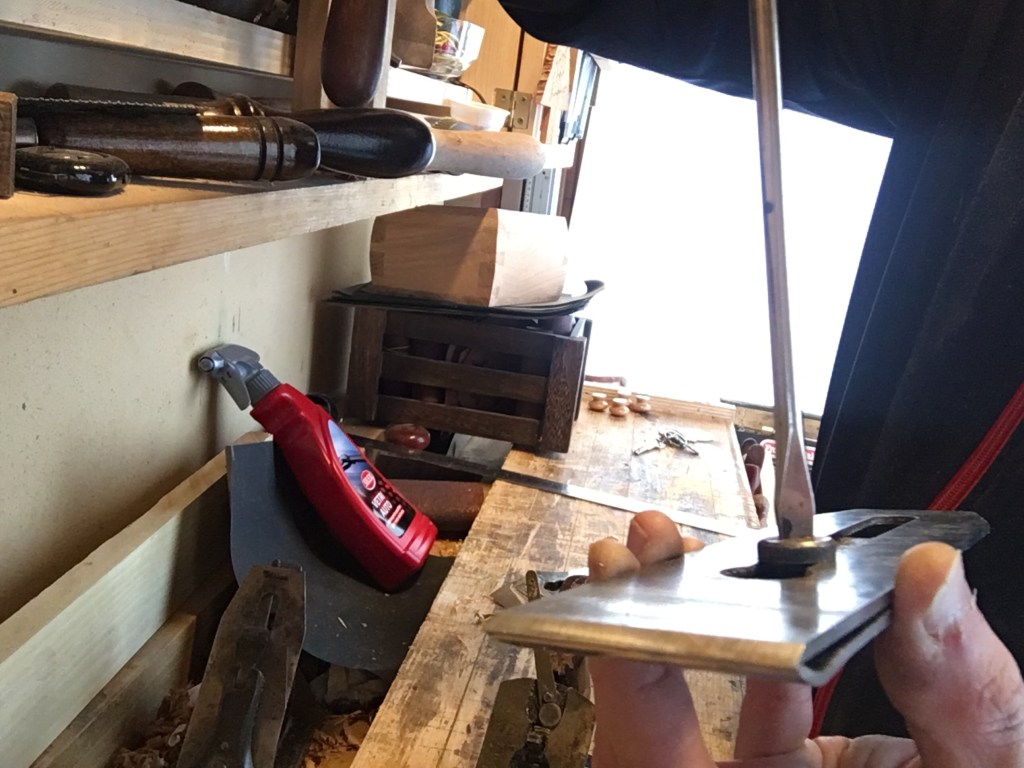
The cap iron must be inserted on the back of the blade and not on the side of the bevel. Then we tighten the iron and cap iron by means of the central screw.
We place the plane on the bench and insert the cutting group thus formed using the central screw and the fork slot present on the frog as inserts, which fits into the upper hole on the cap iron .
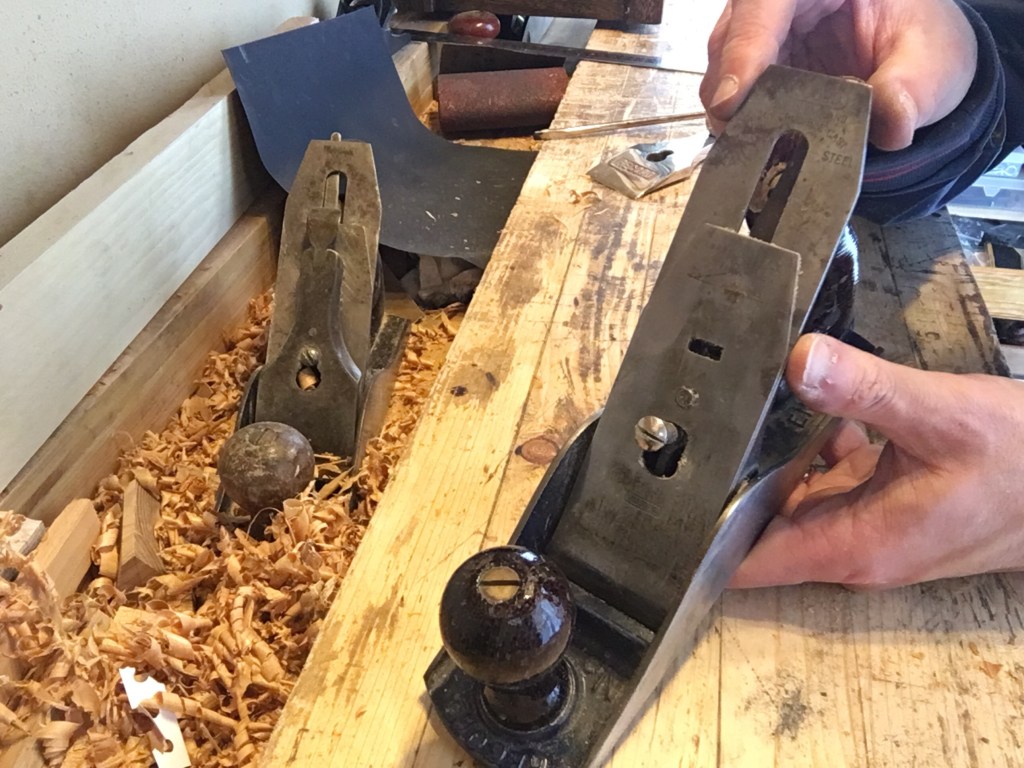
The unit must be mounted on the frog so that the bevel is facing down (plane in bevel down position). Then we insert the lever cap in the central screw and let it slide downwards. Finally we lower the lever cap lever to lock everything in place.
If closing is too difficult, slightly loosen the cap iron central screw with a screwdriver. If it does not tighten enough, we tighten the screw. Let’s proceed by trial and error until we get a locking that offers some resistance but not so much to strain.
In fact, a too rigid locking will make it difficult to easily rotate the wheel that controls the back and forth movement of the iron, while a too weak closure will not keep the blade assembly in place.
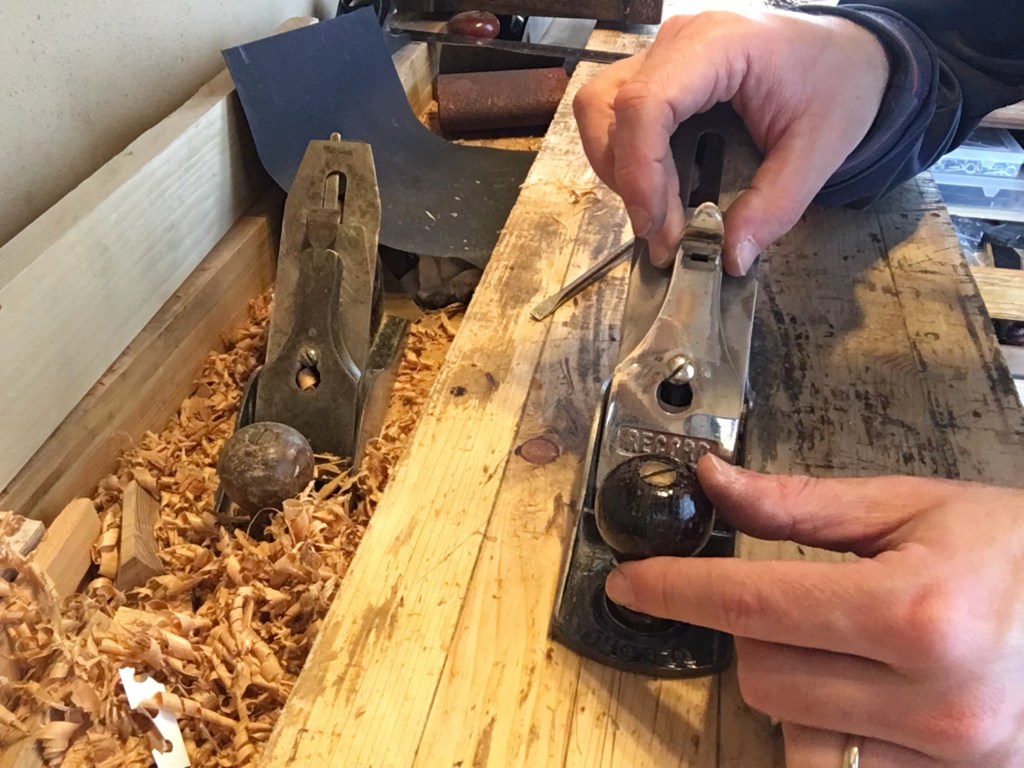
We move the iron back so that it does not come out of the mouth, we grab the plane upside down, then with the sole facing upwards, holding it with the front knob in the left hand while with the right hand we rotate the knurled wheel that controls the movement of the iron moving to the right until we see the cutting edge coming out of the mouth of the sole. For this operation it is advisable to put yourself in favor of light and look at the sole with only one eye so as to be able to improve focus.
The goal is to make the cutting edge come out evenly from the mouth of the sole. If we were to notice that the cutting edge protrudes more from one side than the other, we act on the lateral lever by moving it in the same direction as the one where the cutting edge protrudes more. So if the cutting edge protrudes further to the right, we move the lever that controls the lateral movement of the iron to the right.
This movement is possible thanks to the termination of the lateral adjustment lever which, by inserting into the opening of the iron, allows its displacement. When we are satisfied with the correct alignment of the cutting edge with respect to the mouth of the sole, we retract the iron up above the mouth.
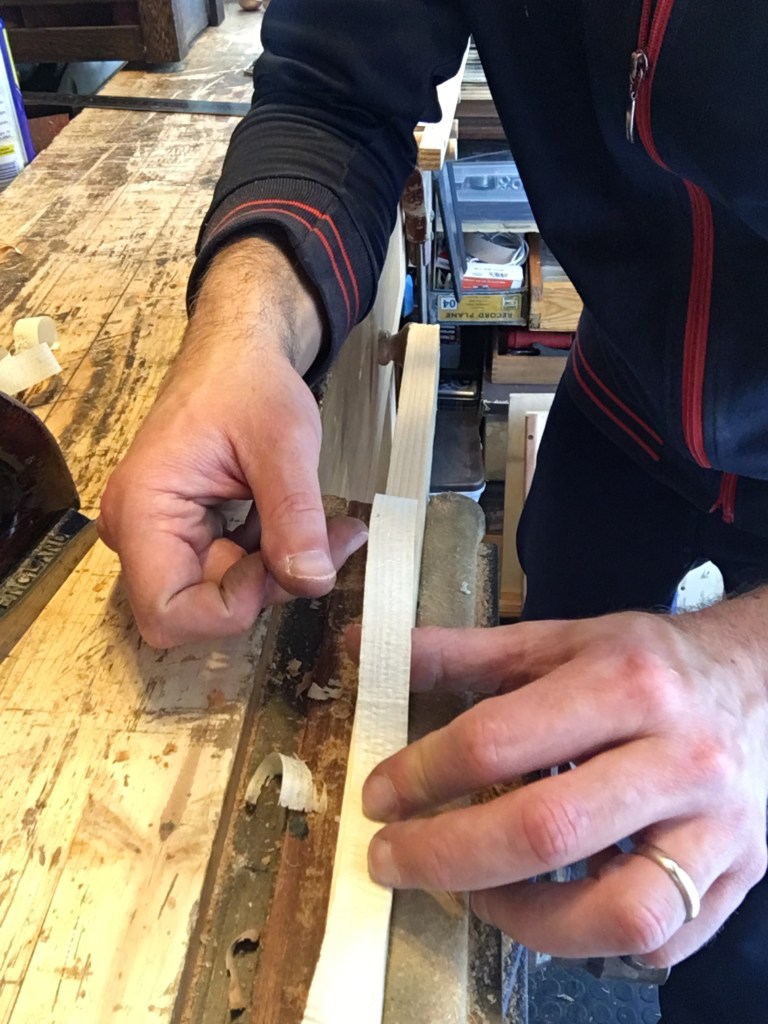
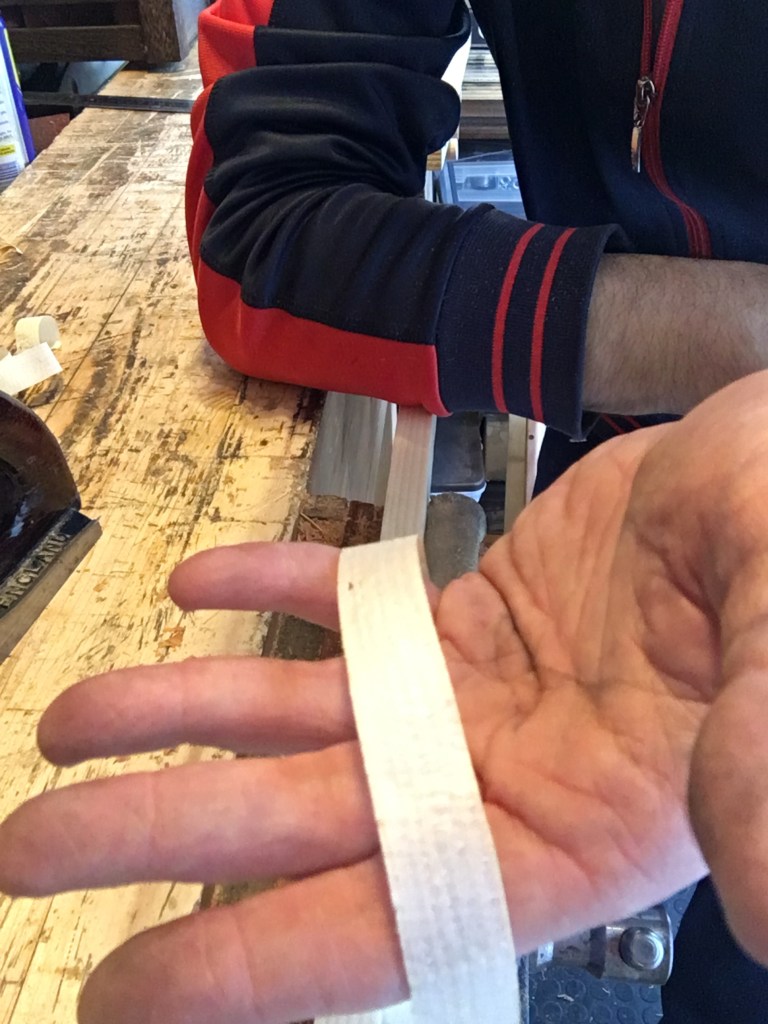
We clamp a piece of wood with a thickness of about 2 cm in the vice, place the plane on the piece and try to plane. At the first attempt, having retracted the blade, we will not get any shavings. We then rotate the depth adjustment wheel by a quarter of a turn and try to plane again. If still nothing comes out, we insist on advancing the iron until this, in contact with the wood, begins to produce very fine shavings. We continue to lower the iron until the shaving produced is the same width as the piece of wood and of a uniform thickness.
If we get a non-homogeneous shaving we must always act on the lateral adjustment lever. In fact, if the shaving is thicker on the right side it means that the iron comes out more on the right side by taking more wood on that side. By moving the lateral lever that controls the iron to the right, we will advance the cutting edge on the left and at the same time make it back on the right side, until the necessary parallelism is obtained between the cutting edge and the mouth of the plane.
Setting up of a plane requires a lot of precautions. The ones I talked about are basic and are the ones that allow us to start working with wood. During the planing then, we will be able to adopt a whole series of both technical (therefore concerning the setting of the plane, such as the adjustment of the mouth) and practical, such as the planing direction. Some hints on the subject can be found at this link Planing techniques / planing techniques. All things that we will still be able to deepen in a future dedicated post.
______________________________________________________

Lascia un commento