MORSETTI E STRETTOI / CLAMPS
English translation at the end of the article

Un vecchio detto recita che gli strettoi in falegnameria non sono mai troppi. E questo è sicuramente vero. Le lavorazioni di falegnameria sono infatti così eterogenee che per ognuna di esse é consigliabile impiegare lo strettoio specifico che meglio si attaglia ai pezzi che abbiamo per le mani, siano questi pezzi lunghi o corti, spessi o sottili, grandi o piccoli o di forme particolari.
 Gli strettoi sono usati principalmente nelle operazioni di incollaggio, ma anche quando si deve bloccare momentaneamente un pezzo di legno al banco oppure due pezzi di legno tra loro (anche se la sola morsa da banco si rivela spesso sufficiente). Un esempio di questo secondo impiego è la cosiddetta “prova a secco” ovvero la prova dell’unione di un incastro prima dell’ utilizzo della colla.
 È comunque per le operazioni di incollaggio che gli strettoi risultano assolutamente indispensabili. Il loro primo compito è infatti quello di mantenere accostati e fermi in posizione due pezzi, sui quali sia stata applicata la colla, impedendo che questi si muovano, mentre il collante dispiega la sua forza di attrazione reticolante.
 Il loro secondo compito, consequenziale al primo, è quello di serrare i due pezzi assieme in modo che si crei quell’ unione virtualmente indistruttibile. L’errore che spesso si compie in questa fase è quello di serrare troppo gli strettoi. Questo è assolutamente inutile, oltrechè dannoso, perché se la colla è stata applicata in modo omogeneo e con oculatezza su tutte le superfici che entrano in contatto sarà questa che in definitiva farà tutto il lavoro. Stringere con molta forza significherebbe peraltro far fuoriuscire la colla dalle unioni con il risultato di ottenere un assemblaggio debole. Inoltre, specialmente se dobbiamo incollare una serie di tavole di costa (come ad esempio nella costruzione di un piano di un tavolo), il rischio è che il piano, una volta asciugata la colla, risulti imbarcato, costringendoci ad un faticoso lavoro di piallatura al fine di recuperarne la planarità, oltre al fatto che, così facendo, otterremmo una tavola con uno spessore ridotto. Ricordiamoci infine che le colature di colla sono particolarmente insidiose per la successiva fase di finitura. Per queste ed altre problematiche inerenti le colle vi rimando al link di seguito. Le colle per legno / Wood glues
Un tempo si era soliti distinguere tra morsetti e strettoi. Con il termine morsetti ci si riferiva ai classici morsetti a forma di C, che però oggi trovano sempre meno applicazione nella falegnameria. Molto più spesso si preferisce parlare di strettoi, riferendosi a tutti i dispositivi di serraggio, nei quali si possono quindi ricomprendere anche gli stessi morsetti a C. 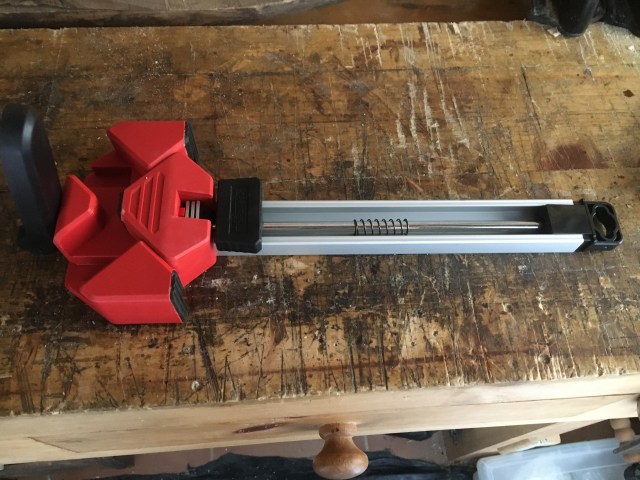
 Per venire incontro alle esigenze del falegname moderno l’industria ha ampliato notevolmente l’offerta di strettoi, cosicché oggi in commercio ne esistono di svariati tipi. La loro struttura è però rimasta sostanzialmente la stessa da centinaia di anni a questa parte con la differenza che un tempo venivano costruiti in ferro e legno mentre oggi vengono utilizzati anche altri tipi di materiale come acciaio, alluminio, plastica, gomma dura, ecc. Anche il principio di funzionamento è rimasto pressochè lo stesso: su una barra si inseriscono due ganasce, una fissa ed una mobile, che scorre su un’asta, azionata da un sistema a vite che ne permette il serraggio vero e proprio. Questo ovviamente volendo semplificare al massimo e prendendo in considerazione gli strettoi più comuni. Nella realtà vedremo che esistono tante variazioni sul tema. Elenchiamo di seguito le principali tipologie di strettoio oggi in commercio. Escludo volutamente tutti i dispositivi di ancoraggio dei pezzi al banco, di cui parlerò in un post specifico.

Morsetti a C
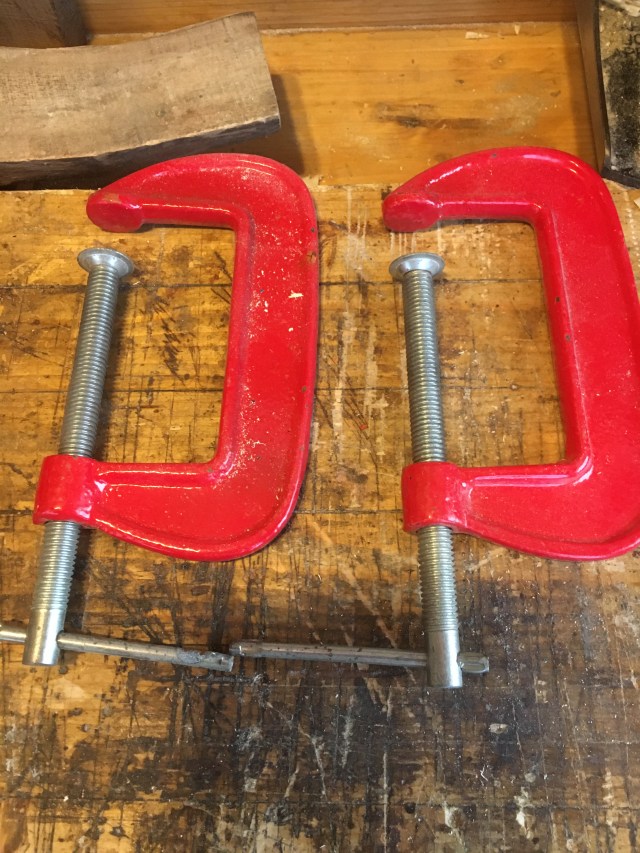
Inconfondibili per la loro particolare forma a C sono costituiti da un unico pezzo in acciaio. Su un’estremità è ricavata una piccola ganascia mentre sull’altra è montato un sistema di serraggio a vite, che può raggiungere una capacità di serraggio di svariati centimetri, e nel quale è inserito un platorello che funziona come seconda ganascia. Il funzionamento è intuitivo e sono assolutamente validi in quanto a forza di trazione. Seppure molto solidi, maneggevoli, leggeri ed economici le loro caratteristiche intrinseche lo rendono di fatto poco utilizzato nella falegnameria tradizionale, relegandone l’impiego ad alcune attività collaterali.
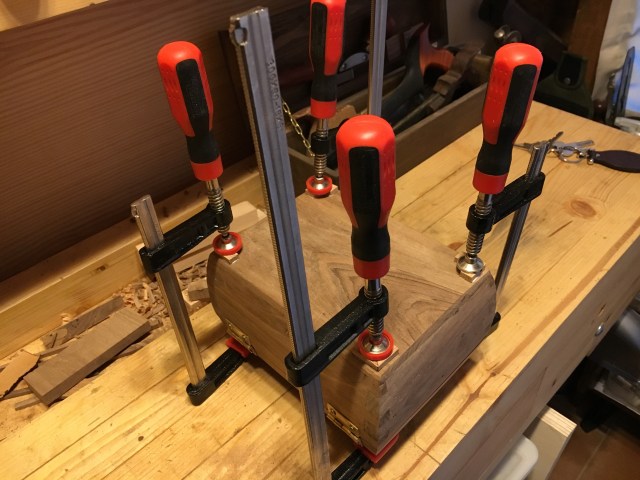
Morsetti a molla o a pinza
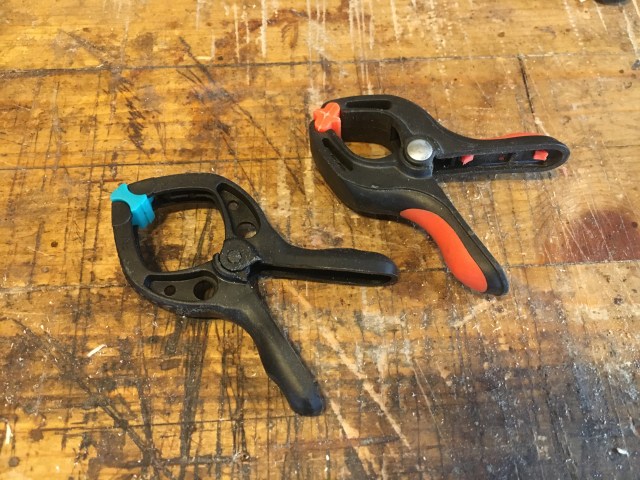
Solitamente di ridotte dimensioni e costruiti in plastica sono facilmente riconoscibili per la loro forma a pinza. Il loro funzionamento è intuitivo e paragonabile a quello delle comuni mollette da bucato, grazie ad una molla interna centrale particolarmente performante che permette un sicuro posizionamento. Sono dotate di piccole ganasce basculanti, solitamente in plastica o gomma dura, ed il loro utilizzo è riconducibile a tutte quelle operazioni nelle quali dobbiamo incollare piccoli pezzi. Molto utili quindi nella piccola falegnameria, nel decoupage e nel modellismo per via delle loro ridotte dimensioni che ne prevedono l’utilizzo con una sola mano, trovando l’unica limitazione proprio nella limitata capacità di apertura e profondità di serraggio. La loro forza di trazione inoltre è modesta ed il loro impiego è quindi più nel posizionamento dei pezzi che nel serraggio vero e proprio. Se ne trovano in commercio di svariate misure e sono acquistabili per pochi euro nei vari bricocentri.


Strettoi a nastro o a fascia
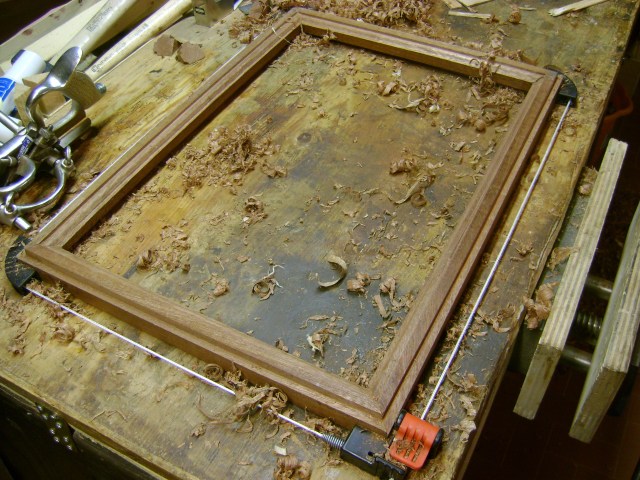
Sono molto utilizzati nell’ incollaggio di grosse strutture e carcasse di mobili per le quali risulterebbe difficoltoso l’utilizzo dei normali strettoi. Una volta aperto il nastro lo si avvolge tutto attorno alla struttura, come una sorta di imbracatura. Quindi con l’ausilio di un sistema di serraggio a vite si provvede a stringere la fasciatura. Una variante molto comune è lo strettoio a nastro per cornici. Il nastro è ovviamente di dimensioni ridotte e nella sua lunghezza sono stati inseriti degli angolari, normalmente in plastica, che si posizionano sugli angoli della cornice. Anche in questo caso, una volta sistemati gli angolari, si provvede a stringere il nastro per mezzo del solito sistema a vite. Parlando di cornici esistono anche degli strettoi specifici da applicare su ogni angolo, oppure si può utilizzare un particolare tipo di strettoio, commercializzato dalla Veritas, che prevede l’utilizzo di apposite barre filettate bloccate da speciali bussole. Non è economico ma è un sistema assolutamente valido e comodo e si adatta anche a cornici di dimensioni considerevoli, grazie alle apposite prolunghe. L’unico problema, potrebbe essere legato proprio alla lunghezza delle barre che, se utilizzate su piccole cornici e se si dispone di poco spazio a disposizione, potrebbero intralciare. Inserisco di seguito un link dove è possibile acquistarlo.

Strettoi a barra o ad asta
Ed eccoci alla famiglia più numerosa ed eterogenea di strettoi. All’interno di questa categoria si possono far rientrare tutti i più comuni strettoi utilizzati in falegnameria tra i quali i più noti sono gli strettoi Alfa, i comuni strettoi a ganascia mobile (detti anche sergenti), i sash clamps, i pipe clamps, gli strettoi Bessey, ecc. in quanto il funzionamento è simile. Tra questi esistono tanti modelli particolari ed alcune aziende hanno brevettato e messo in commercio il proprio tipo di strettoi (come ad esempio Bessey e Jorgensen). Sarebbe quindi difficile, ma anche poco interessante, fare qui un’analisi dei tanti modelli presenti oggi in commercio. Il fattore che li accomuna tutti è anche il fatto che non siano economici, specialmente quelli più moderni, dotati di particolari tecnologie costruttive. Alla fine dell’articolo proverò comunque a dare qualche consiglio sugli acquisti, dettati dalla mia seppur breve esperienza amatoriale.
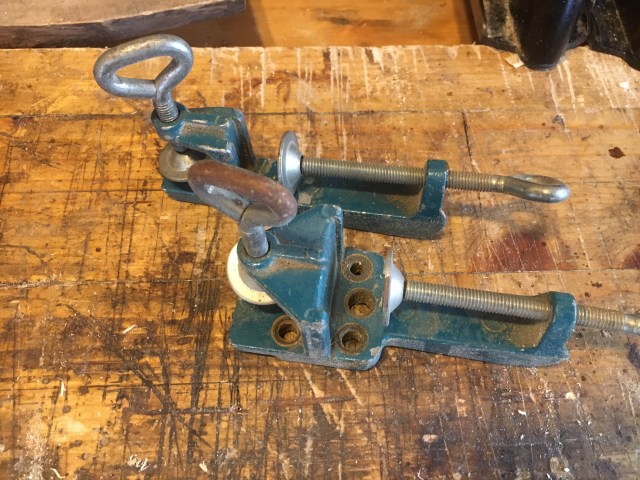
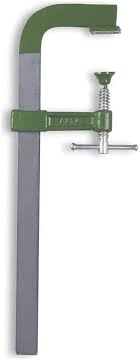
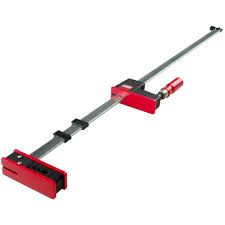
Gli strettoi Alfa sono stati per tanti anni gli strettoi per eccellenza, immancabili nelle botteghe dei falegnami tradizionali. Eccezionali in robustezza e forza di serraggio hanno una ganascia fissa ricavata direttamente dalla curvatura di un estremità dell’ asta e una ganascia mobile che scorre sull’asta nella quale è inserita una barra filettata con una manopola o altro dispositivo per avvitare e alla cui estremità è presente un platorello mobile che fa da appoggio al pezzo da unire. Questa conformazione è pressoché la stessa su tutti i più comuni strettoi usati in falegnameria, i cosiddetti sergenti. Alcune differenze si possono eventualmente trovare nel sistema di fissaggio della ganascia fissa, che invece di essere un tutt’uno con la barra in acciaio è fissata alla stessa mediante punzonatura. Inoltre le dimensioni delle ganasce e la loro forma possono anch’esse variare. Di solito però sono strette e lunghe, quindi particolarmente utili su pezzi spessi. Essendo costruiti interamente in acciaio, sono robusti ma anche pesanti, specialmente considerando che alcuni possono superare i due metri di lunghezza. Il loro uso non prevede particolari accortezze. L’unica attenzione da prestare, ma questa è una regola che vale in generale per tutti gli strettoi con ganasce in ferro o plastica dura, è quella di interporre un pezzo di legno tra la ganascia ed il pezzo da stringere così da evitare segnature ed ammaccature.


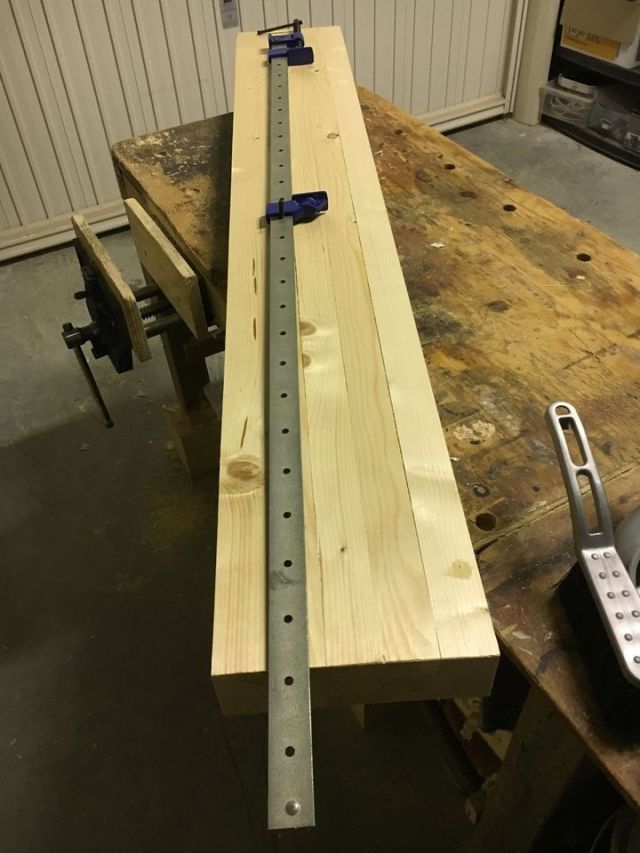
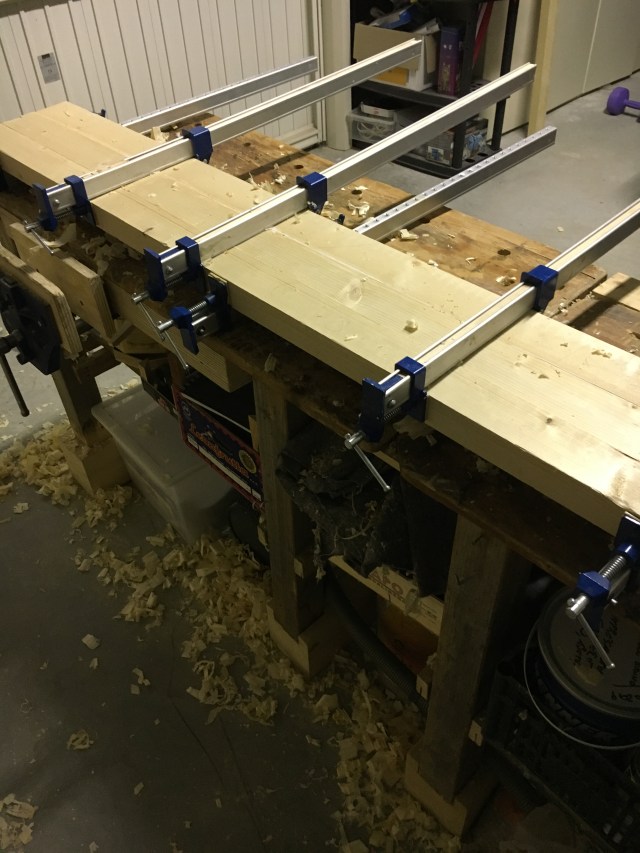
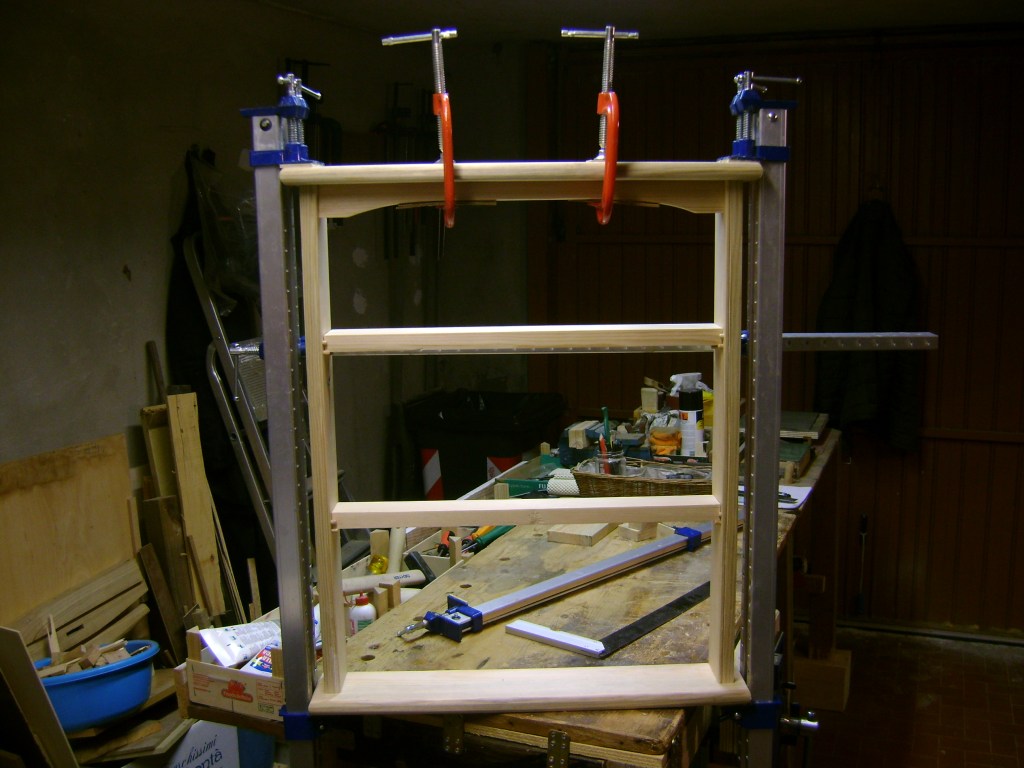
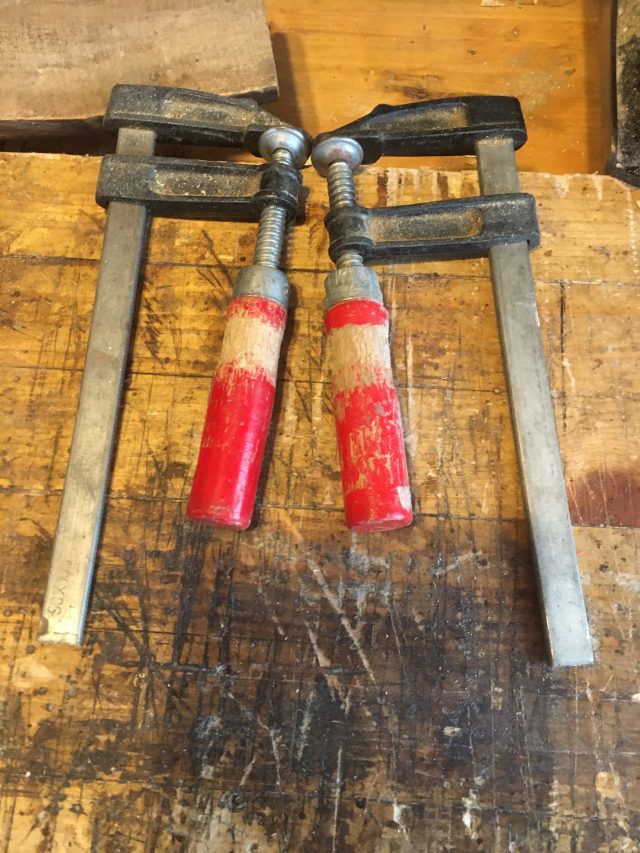
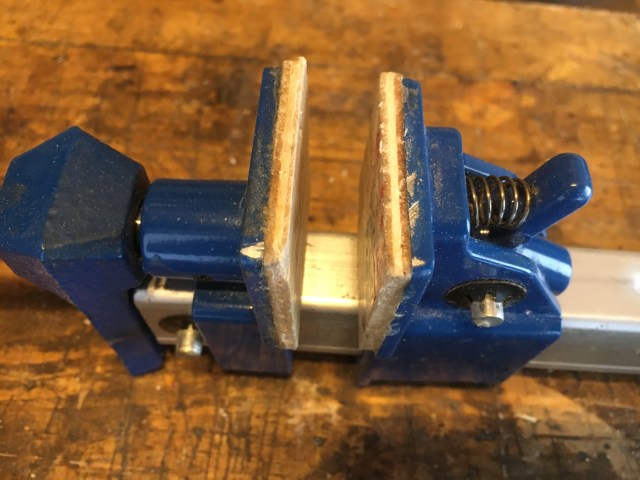
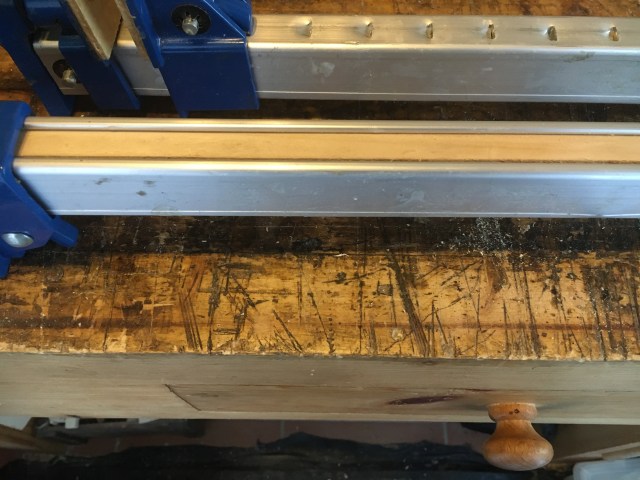
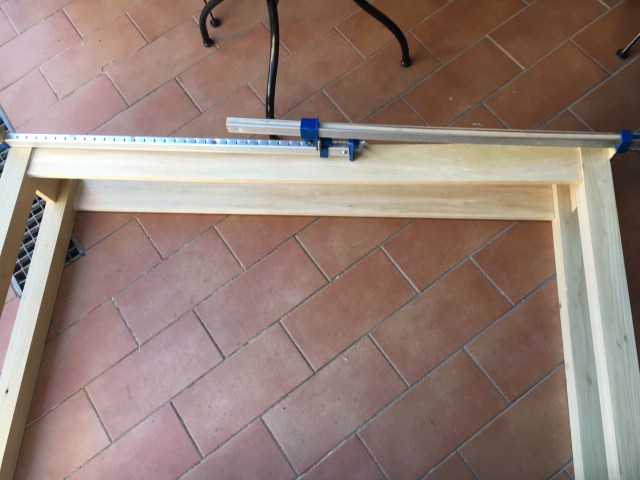
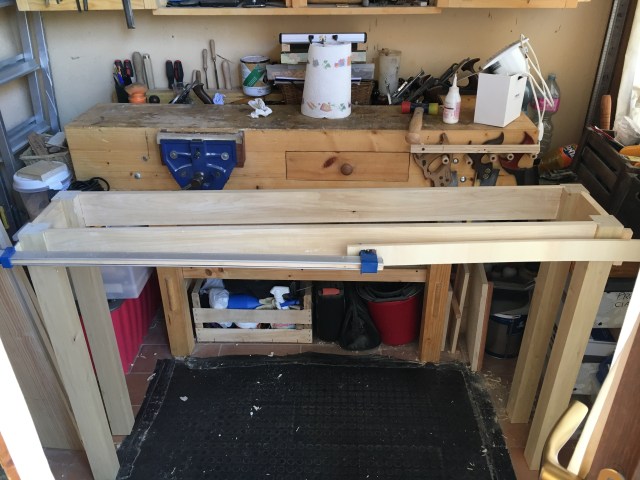
Sash clamps e pipe clampsLe sash clamps e le pipe clamps sono molto simili tra di loro. La differenza sta nella forma della barra, che è di sezione cilindrica nelle pipe clamps. Il sistema di funzionamento è però uguale. Presentano una ganascia fissa nella quale è inserito il morsetto a vite ed una ganascia mobile che si blocca in posizioni prestabilite utilizzando delle scanalature nella barra stessa (in quelle con barra a sezione rettangolare) o dei fori nei quali si inseriscono delle spine cilindriche che fungono da blocco per la ganascia mobile (in quelle a profilato lineare). Le sash clamps e le pipe clamps si caratterizzano per la loro particolare lunghezza e per la ridotta grandezza delle ganasce. Date queste caratteristiche sono particolarmente indicate per l’incollaggio di tavole di costa e per la realizzazione di grandi piani. Per quest’ ultimo impiego è buona regola distanziarle ad intervalli regolari posizionandole da ambo le parti del piano da comporre e possibilmente con l’asta il più possibile accostata ai pezzi. In questo modo avremo una omogenea distribuzione della colla durante il serraggio ed eviteremo il più possibile il fenomeno dell’imbarcamento. Personalmente ho trovato particolarmente comode le sash clamps a sezione rettangolare in alluminio. Sono economiche e molto leggere ma se usate troppo intensamente tendono comunque a deformarsi a differenza delle sash clamps a barra piena che sono più robuste ma anche molto più pesanti. Per ovviare al problema e seguendo le indicazioni di Paul Sellers, che potete trovare a questo link. https://paulsellers.com/2011/11/4473/ Ho provveduto ad inserire al loro interno un legno di rinforzo e bloccarlo all’estremità con una punzonatura. Inoltre, per evitare di ammaccare i pezzi da incollare, sulle ganasce in metallo ho incollato dei tasselli in multistrato.
Con queste semplici accortezze posso dire con tranquillità che questi strettoi sono di gran lunga i migliori che possiedo e quelli che utilizzo di solito nei miei lavori. Se fossero comunque troppo lunghi per le nostre esigenze una buona idea è quella di segarli a circa 50/60 cm. di lunghezza. Di seguito indico un link dove è possibile acquistarli. https://www.amazon.it/gp/product/B000LFXIGC/ref=ppx_yo_dt_b_asin_title_o04_s00?ie=UTF8&psc=1
Gli strettoi Bessey
Una nota a parte meritano gli strettoi della Bessey. Sono famosi per la loro qualità costruttiva e per talune innovazioni che li rendono di fatto il top di gamma. I modelli Body Clamp KR ed Uniklamp presentano soluzioni originali come le particolari ganasce in materiale gommoso e di dimensioni maggiorate, le comode estensioni, i distanziatori e la possibilità di essere utilizzati anche come divaricatori. Unico neo è che non costano poco. Non li possiedo, ma da quello che ho potuto leggere su internet valgono il prezzo pagato.
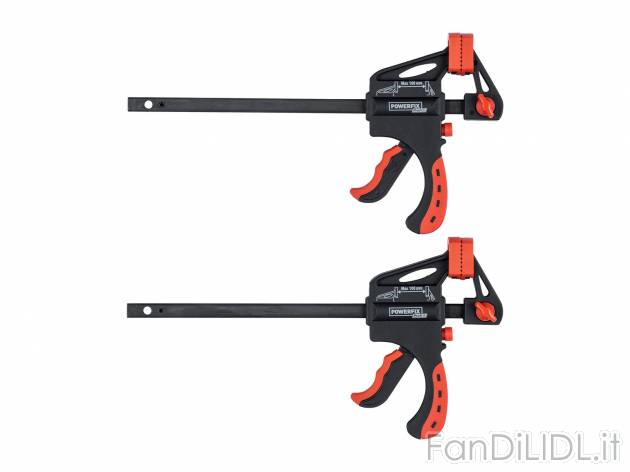
Strettoi rapidi
Gli strettoi rapidi sono facilmente riconoscibili per la particolare forma a pistola, come quella che si usa per le cartucce di silicone. Anche il funzionamento è del tutto similare. Si agisce sul grilletto che permette l’avanzamento a scatti della ganascia mobile e quindi non è possibile farla avanzare più velocemente. Come dice il nome, sono dotati di un sistema di sgancio rapido che permette di rilasciare immediatamente la presa. Altri lati positivi è che sono leggeri, si possono utilizzare con una sola mano e sono economici. Per un uso saltuario e per posizionare i pezzi vanno bene, ma per un uso intensivo e per esercitare una maggiore forza di trazione occorre affidarsi ad altro.
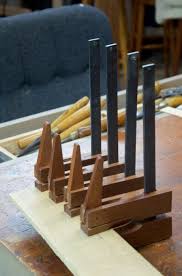
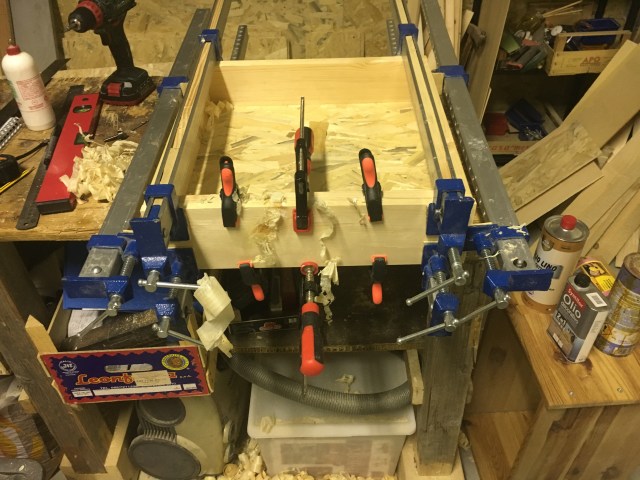
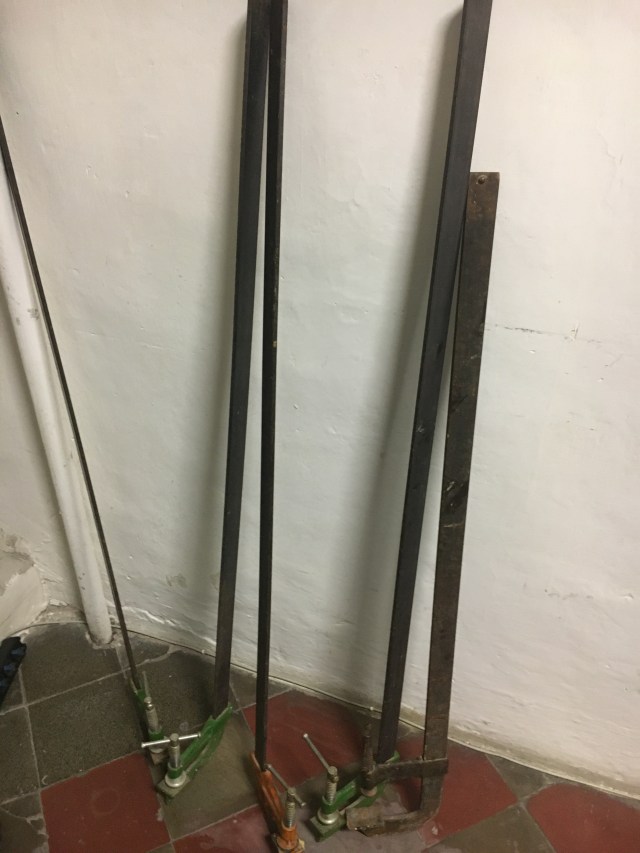
Gli strettoi sono uno strumento assolutamente indispensabile in falegnameria. È bene averne tanti, di varie dimensioni e di diversi modelli. Potremmo dedicarci all’autocostruzione seguendo i tanti tutorial presenti in rete per creare degli strettoi in legno ed acciaio tipo questi sotto. Dovendo però quasi sicuramente acquistarli prepariamoci ad affrontare uno sforzo economico non indifferente. Il mio consiglio è comunque quello di non risparmiare sul loro acquisto, evitando quindi i prodotti di fascia bassa. Uno strettoio di buona qualità durerà una vita mantenendo il suo valore nel tempo sempre a condizione di impiegarlo nei lavori per i quali è stato progettato. Ad esempio, gli strettoi rapidi non li considero dei veri e propri strettoi, quanto più dei posizionatori, e a questo scopo andrebbero dedicati. Gli strettoi in alluminio non possono sopportare sforzi eccessivi e per grosse trazioni è meglio utilizzare quelli in acciaio. Strettoi troppo corti sono inutilizzabili se lavoriamo pezzi lunghi (a meno di non inventarsi qualche stratagemma come quelli in foto sotto) mentre strettoi troppo lunghi intralciano il lavoro. Il problema dello slittamento dei pezzi da incollare in fase di serraggio potrebbe essere ovviato acquistando dei moderni strettoi come quelli ideati dalla Bessey che prevedono soluzioni innovative in tal senso ma che costano parecchio. Quelle appena citate sono solo alcune considerazioni da fare prima di effettuare l’acquisto. In linea generale comunque tutti gli strettoi vecchio tipo, sul modello degli strettoi Alfa, vanno bene. Tra questi mi hanno piacevolmente impressionato quelli in vendita al Lidl (https://volantinolidl.it/prodotto/morsetto-a-vite-officina-attrezzi-lidl-tecnico questi per intendersi) e posso consigliarne l’acquisto. Non altrettanto posso dire degli strettoi rapidi, sempre venduti dalla Lidl, che si rompono abbastanza facilmente. I migliori in assoluto secondo il mio parere rimangono comunque i sash clamps in alluminio, a patto di apportare le modifiche di cui ho accennato sopra. Sono il giusto compromesso qualità prezzo, se non si hanno particolari pretese professionali.
______________________________________________________________
An old saying goes that there are never too many clamps in woodworking. And this is certainly true. Woodworking is in fact so heterogeneous that it is advisable to use the specific clamp that best suits the pieces we have for our hands, be it long or short, thick or thin, large or small or with particular shapes. The clamps are mainly used in gluing operations, but also when you have to temporarily block a piece of wood to the bench or two pieces of wood together (even if the bench vice alone is often sufficient). An example of this second use is the so-called “dry test” or the test of a joint before use some glue. It is however for the gluing operations that the clamps are absolutely essential. Their first task is in fact that of keeping two pieces on which the glue has been applied close and stationary in position, preventing them from moving, while the glue unfolds its cross-linking force of attraction. Their second task, consequential to the first, is to tighten the two pieces together so that a virtually indestructible joint is created. The mistake that is often made in this phase is to tighten the clamps too much. This is absolutely useless, besidesharmful, because if the glue has been applied evenly and wisely on all the surfaces that come into contact, this will ultimately do all the work. Tightening with a lot of force would also mean making the glue come out of the joints with the result of obtaining a weak assembly. Furthermore, especially if we have to glue a series of edge boards (such as in the construction of a table top), the risk is that the top, once the glue has dried, will be embarked, forcing us to a hard planing work in order to recover its flatness, in addition to the fact that, by doing so, we would obtain a board with a reduced thickness. Finally, let us remember that glue drippings are particularly insidious for the subsequent finishing phase. For these and other problems concerning the glues, I refer you to the link below. Wood glues / Wood glues In the past
It was customary to distinguish between clamps. The term clamps referred to the classic C-shaped clamps, which however today find less and less application in woodworking. Much more often we prefer to talk about clamps, referring to all clamping devices, in which we can therefore also include the same C clamps. To meet the needs of the modern woodworkers, the industry has considerably expanded the offer of clamps, so that today there are various types on the market. However, their structure has remained substantially the same for hundreds of years with the difference that once they were built in iron and wood while today other types of materials are also used such as steel, aluminum, plastic, hard rubber, etc. Even the operating principle has remained almost the same: two jaws are inserted on a bar, one fixed and one mobile, which slides on a rod, operated by a screw system that allows the actual tightening. This obviously wanting to simplify as much as possible and taking into consideration the most common. In reality we will see that there are many variations on the theme. We list below the main types of clamps on the market today. I deliberately exclude all the pressing devices of the pieces to the bench, which I will talk about in a specific post.
C-clamps. The name is due to their particular C-shape and they are made from a single piece of steel. On one end there is a small jaw while on the other a screw clamping system is mounted, which can reach a clamping capacity of several centimeters, and in which a backing pad is inserted that functions as a second jaw. The operation is intuitive and they are absolutely valid in terms of traction force. Although very solid, easy to handle, light and cheap, their intrinsic characteristics make it little used in traditional woodworking, relegating its use to some collateral activities.
Spring clamps. Usually of small size and made of plastic, they are easily recognizable by their clamp shape. Their operation is intuitive and comparable to that of common clothes pegs, thanks to a particularly performing central internal spring that allows safe positioning. They are equipped with small tilting jaws, usually in plastic or hard rubber, and their use is attributable to all those operations in which we have to glue small pieces. Therefore, they are very useful in small woodworking, decoupage and model making due to their small size that require use with one hand, finding the only limitation in the opening capacity and clamping depth. Furthermore, their traction force is modest and their use is therefore more in the positioning of the pieces than in the actual clamping. They can be found on the market in various sizes and can be purchased for a few euros in the various brico .
Band clamps. They are widely used in gluing large structures and furniture carcasses for which the use of normal clamps would be difficult. Once the tape is opened, it is wrapped around the structure, like a sort of harness. Then with the help of a screw tightening system the bandage is tightened. A very common variant is the tape press for frames. The tape is obviously of reduced dimensions and in its length some angles have been inserted, usually in plastic, which are positioned on the corners of the frame. Also in this case, once the corner pieces have been arranged, the belt is tightened using the usual screw system. Speaking of frames, there are also specific clamps to be applied on each corner, or you can use a particular type of clamp, marketed by Veritas, which involves the use of special threaded bars blocked by special bushings. It is not cheap but it is an absolutely valid and comfortable system and is also suitable for frames of considerable size, thanks to the special extensions. The only problem could be related to the length of the bars which, if used on small frames and if you have little space available, could get in the way. I post a link below where you can buy it.
Bar clamps. And here we are with the most numerous and heterogeneous family of clamps. Within this category we can include all the most common clamps used in woodworking, among which the best known are the Alfa clamps, the common clamps with movable jaw, the sash clamps , the pipe clamps, Bessey clamps, etc. as the operation is similar. Among these there are many particular models and some companies have patented and marketed their own type of clamps (such as Bessey and Jorgensen). It would therefore be difficult, but also uninteresting, to analyze here the many models available on the market today. The factor that unites them all is also the fact that they are not cheap, especially the more modern ones, equipped with particular construction technologies. At the end of the article, however, I will try to give some advice on purchases, dictated by my brief amateur experience. The Alfa clamps have been for many years the clamps par excellence, a must in the workshops of traditional woodworkers. Exceptional in strength and clamping force, they have a fixed jaw obtained directly from the curvature of one end of the rod and a movable jaw that slides on the rod in which a threaded rod with a knob or other device for screwing is inserted and at whose end is a movable backing pad that supports the piece to be joined. This conformation is almost the same on all the most common clamps used in woodworking. Some differences can possibly be found in the fixing system of the fixed jaw, which instead of being one with the steel bar is fixed to it by punching. Furthermore, the dimensions of the jaws and their shape can also vary. However, they are usually narrow and long, so they are particularly useful on thick pieces. Being built entirely of steel, they are sturdy but also heavy, especially considering that some can exceed two meters in length. Their use does not require particular precautions. The only attention to be paid, but this is a rule that generally applies to all clamps with iron or hard plastic jaws, is to place a piece of wood between the jaw and the piece to be tightened so as to avoid marks and dents. .
Sash clamps and pipe clamps, The sash clamps and pipe clamps are very similar. The difference lies in the shape of the bar, which is cylindrical in section in pipe clamps . However, the operating system is the same. They have a fixed jaw in which the screw clamp is inserted and a movable jaw that locks in predetermined positions using grooves in the bar itself (in those with a rectangular section bar) or holes in which cylindrical pins are inserted which act as block for the movable jaw (in those with linear profile). The sash clamps and pipe clamps are characterized by their particular length and the small size of the jaws. Given these characteristics, they are particularly suitable for jointing edge boards and for the construction of large tabletop. For this last use it is good practice to space them at regular intervals by positioning them on both sides of the top to be composed and possibly with the rod as close as possible to the pieces. In this way we will have a homogeneous distribution of the glue during the tightening and we will avoid the phenomenon of warping as much as possible. Personally, I found the rectangular section aluminum sash clamps particularly comfortable . They are cheap and very light but if used too intensely they still tend to deform unlike solid bar sash clamps which are more robust but also much heavier. To remedy the problem and following the instructions of Paul Sellers, which you can find at this link. https://paulsellers.com/2011/11/4473/ I proceeded to insert a reinforcement wood inside them and block it at the end with a punch. Furthermore, to avoid denting the pieces to be glued, I glued plywood plugs onto the metal jaws. With these simple precautions I can confidently say that these clamps are by far the best I own and the ones I usually use in my works. If they are too long for our needs, a good idea is to saw them at about 50/60 cm. of length. Below I indicate a link where you can buy them. https://www.amazon.it/gp/product/B000LFXIGC/ref=ppx_yo_dt_b_asin_title_o04_s00?ie=UTF8&psc=1
The Bessey clamps. A special mention goes to the Bessey clamps. They are famous for their build quality and for some innovations that make them the top of the range. The Body Clamp KR and Uniklamp models feature original solutions such as the particular jaws in rubbery material and larger dimensions, the comfortable extensions, the spacers and the possibility of being used as retractors. The only drawback is that they are not cheap. I don’t own them, but from what I have been able to read on the internet they worth the price.
Quick clamps. Are easily recognizable by their particular pistol shape, like the one used for silicone cartridges. The operation is also very similar. It acts on the trigger that allows the jaw advancement of the movable jaw and therefore it is not possible to advance it faster. As the name implies, they are equipped with a quick release system that allows you to immediately release the grip. Other positives are that they are light, can be used with one hand and are cheap. For occasional use and to position the pieces they are fine, but for intensive use and to exert a greater traction force, it is necessary to rely on something else.
Clamps are an absolutely indispensable tool in woodworking. It is good to have many, of various sizes and different models. We could devote ourselves to self-construction by following the many tutorials on the net to create wood and steel clamps. However, having to buy them almost certainly, let’s get ready to face a considerable economic effort. My advice, however, is not to save on their purchase, thus avoiding low-end products. A good quality clamp will last a lifetime, maintaining its value over time, always on condition of using it in the jobs for which it was designed. For example, I do not consider quick clamps as real clamps, as much as positioners, and for this purpose they should be dedicated. Aluminum clamps cannot withstand excessive efforts and for large tractions it is better to use steel ones. Too short clamps are unusable if we work long pieces (unless you invent some stratagem like those in the photos above) while clamps that are too long hinder the work. The problem of slipping of the pieces to be glued during the tightening phase could be solved by purchasing modern clamps such as those designed by Bessey which provide innovative solutions in this sense but which cost a lot. Those just mentioned are just some considerations to do before making the purchase. In general, however, all the old type clamps, on the model of the Alfa clamps, are fine. Among these I was pleasantly impressed by those on sale at Lidl (https://volantinolidl.it/prodotto/morsetto-a-vite-officina-attrezz-lidl-tecnico these to be understood) and I can recommend their purchase. I can’t say the same about the quick clamps, also sold by Lidl, which break quite easily. The best ever in my opinion are still the aluminum sash clamps , as long as you make the changes I mentioned above. They are the right compromise between quality and price, if you don’t have particular professional claims.
Alcune foto ed immagini sono state tratte da siti internet esterni / libri per soli scopi informativo didattici e senza fini di lucro. Se si è proprietari delle immagini e se ne desidera la rimozione si prega di segnalarlo nella sezione contatti.

Lascia un commento