COME COSTRUIRE UN BANCO DA FALEGNAME / HOW TO BUILD A WOODWORKING WORKBENCH
English translation at the end of the article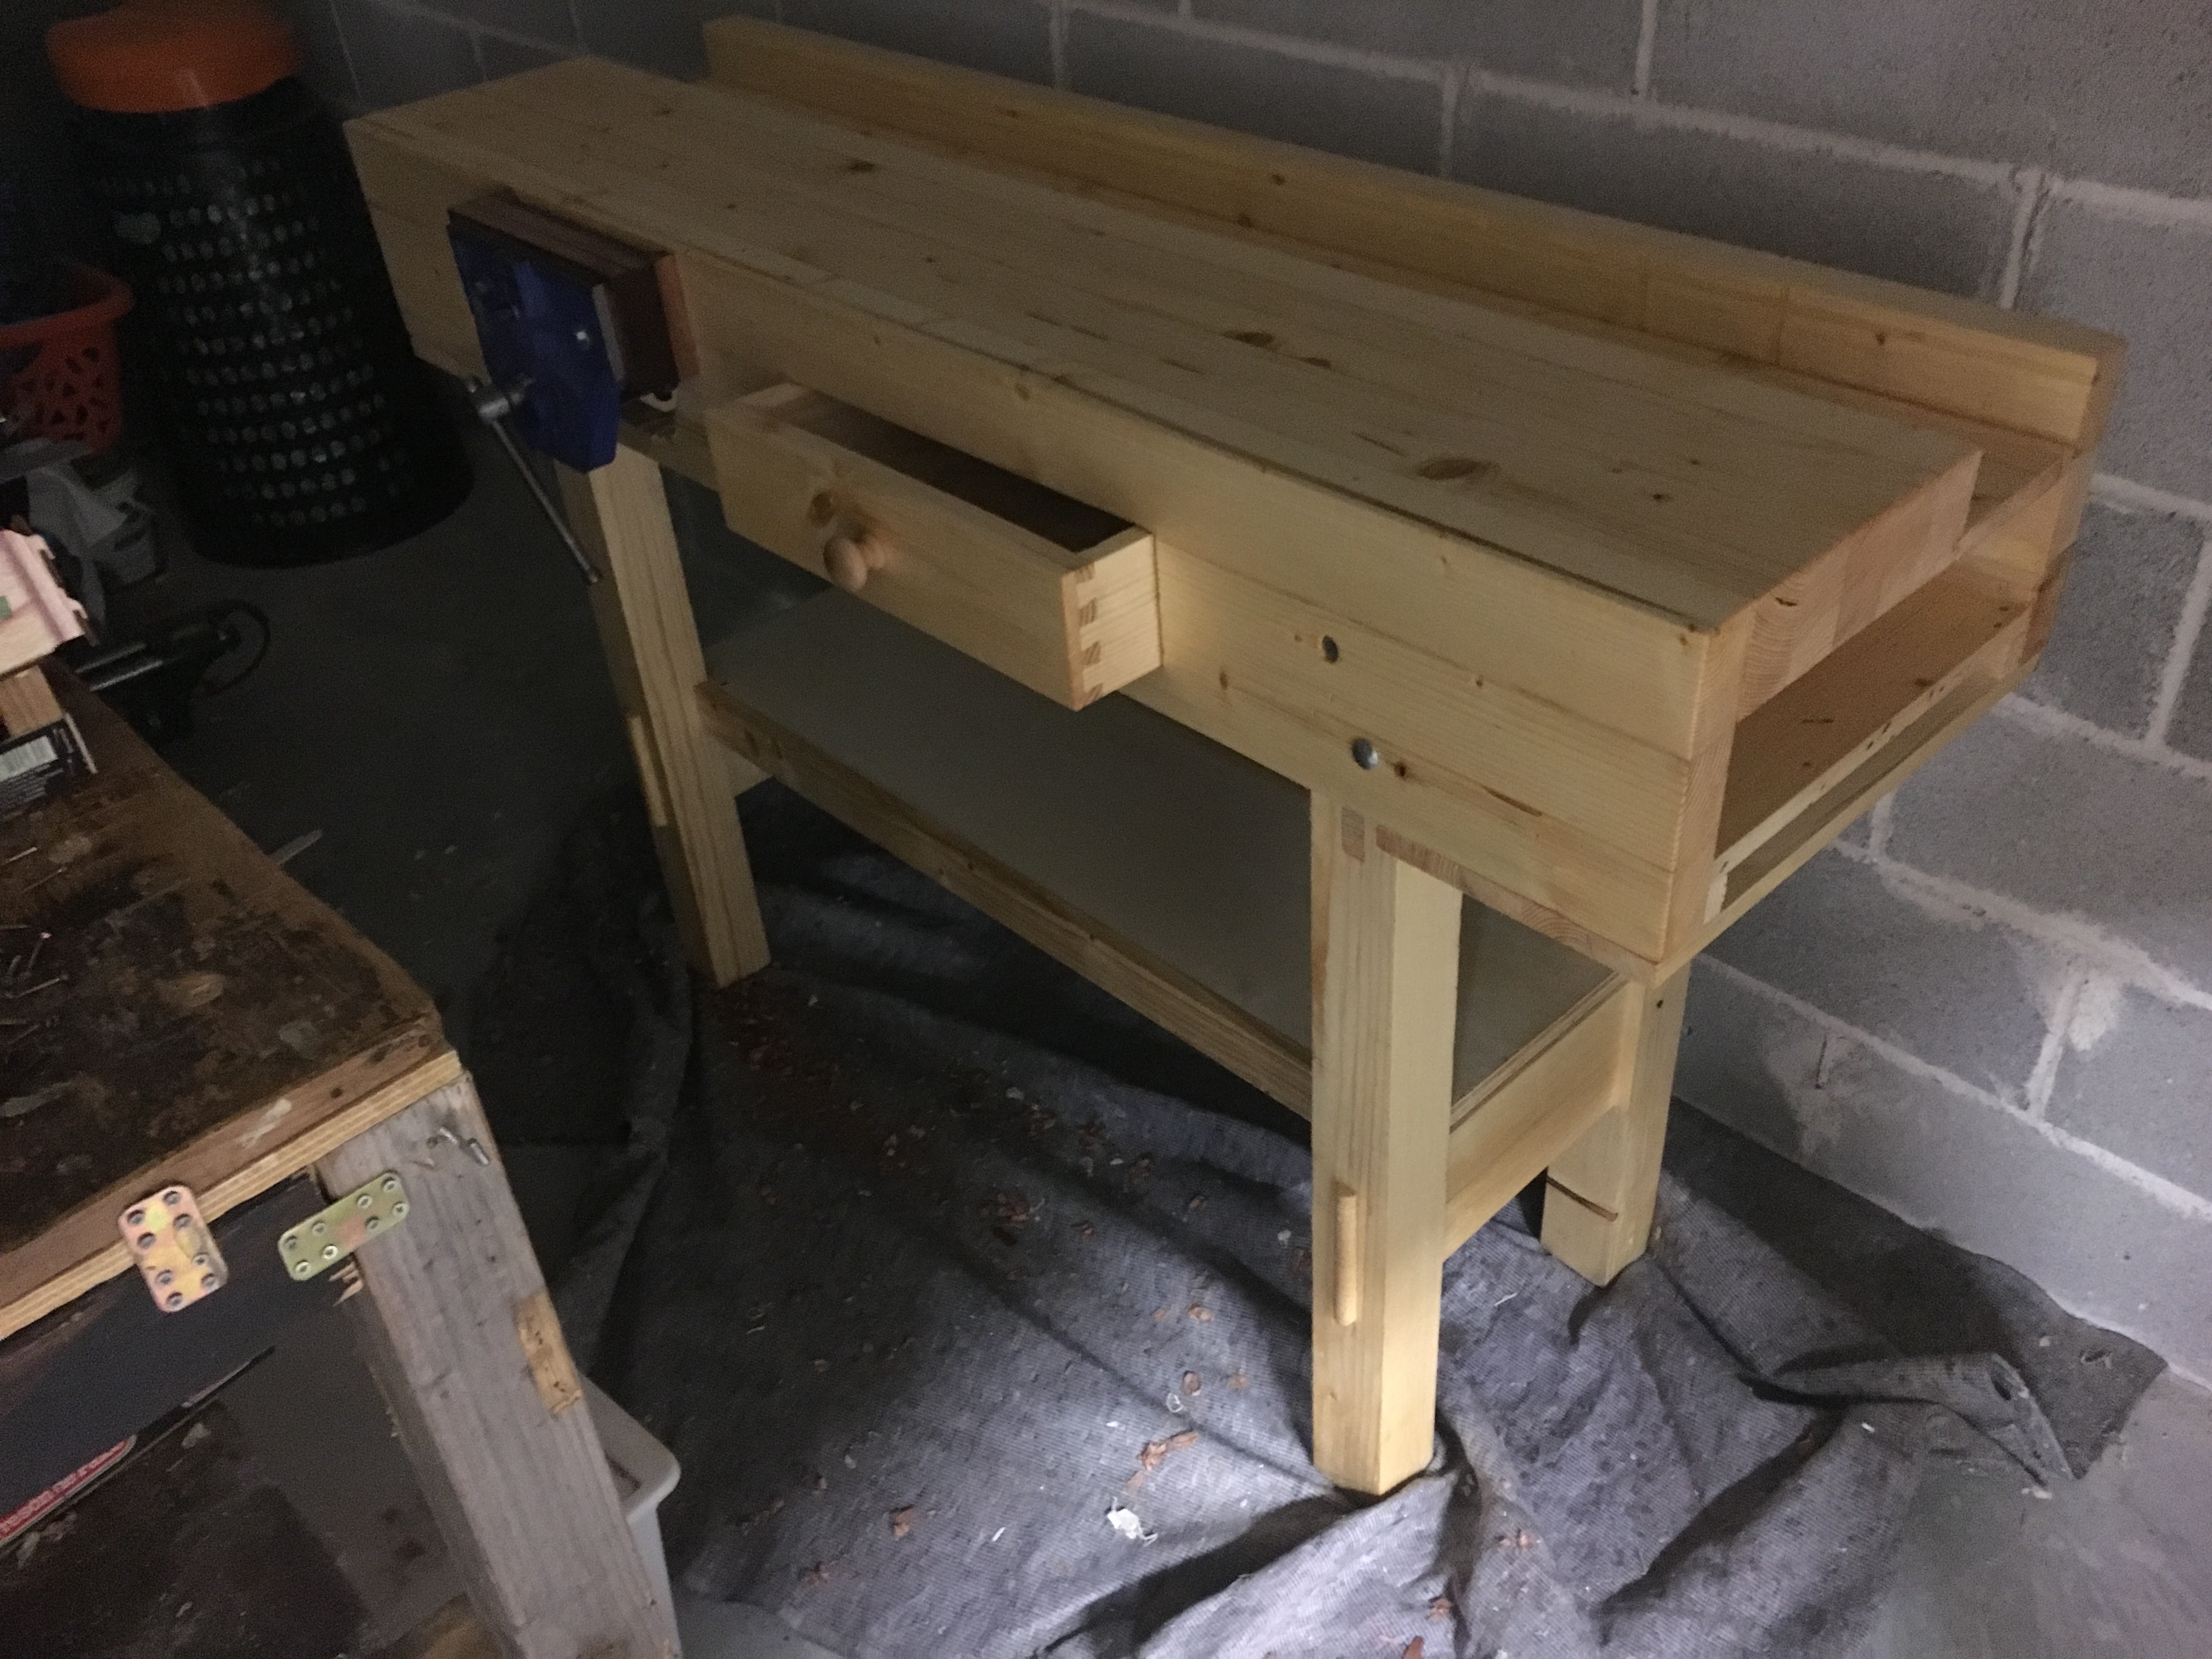
Pensandoci bene questo articolo avrei dovuto scriverlo come primo post, quando ho creato il blog, circa due anni fa. Questo perché il banco è di fondamentale importanza per chi vuole lavorare il legno. All’inizio, quando ancora non sapevo che la falegnameria amanuense sarebbe diventata una vera e propria
passione, non diedi particolare importanza a questo aspetto ma pensai principalmente a farmene uno, che fosse il più spartano possibile.L’urgenza di dover effettuare alcuni lavori nella nuova casa mi spinsero infatti a cercare una soluzione la più rapida ed economica possibile. Mi diressi quindi alla più vicina discarica con l’idea di prendere quanto più legno avessi trovato, già sapendo che avrei recuperato solo del truciolare, buono per essere assemblato alla meno peggio. Destino volle che proprio quel giorno una persona dovesse conferire un furgone pieno di legno, avanzi dello smantellamento di un pub. Tra questi vi erano dei morali in legno di castagno, perfetti per le zampe del mio futuro banco. Trovai poi del truciolare da portare a casa, ma mi rimaneva comunque il problema di come realizzare il piano del banco. Un mio collega di lavoro mi disse che a casa aveva due tavole, di quelle che si utilizzavano per lavorare la pasta, e che ormai non usava più. Le presi, e con l’aggiunta di una tavola di abete del brico, molte staffe e centinaia di viti, mi apprestai a realizzare il mio primo banco di lavoro.


Il prototipo iniziale non prevedeva alcuna morsa ed in realtà non mi posi neanche il problema di metterne una. Il banco doveva essere poco più di un ripiano da mettere in garage, dove poter fare i lavori urgenti di casa. Passò poco tempo quando una sera, girovagando su Internet in cerca di spunti, casualmente trovai il canale di un signore inglese, tale Paul Sellers, che mostrava come costruiva il suo banco da falegname nel giardino di casa, con soli utensili manuali. Fu amore a prima vista. Il modo di lavorare, la calma e la passione che trasmetteva quel falegname britannico mi fecero appassionare alla lavorazione manuale del legno. Cominciai ad abbandonare poco alla volta tutte le attrezzature elettriche di cui mi ero dotato per cominciare ad acquistare solo utensili manuali. Nel frattempo iniziai anche ad apportare alcune migliorie al mio banco. Semplici ma indispensabili adattamenti che mi avrebbero permesso di lavorare nello specifico il materiale legno. Ecco quindi l’acquisto della morsa da banco, l’aggiunta di una vasca laterale dove poter riporre gli utensili, un ripiano inferiore, i buchi nel piano del banco dove poter inserire i cani e una piccola morsa per il ferro. In seguito, passando svariate ore al banco, mi resi conto di come questo fosse oggettivamente troppo basso per la mia statura. Mi procurai quindi dei morali in abete e, dopo aver praticato a mano le mortase, vi inserii le gambe del banco così da alzarlo di circa 8 cm. Andava decisamente meglio. Oggi mi rendo conto che quel tipo di banco era assolutamente non convenzionale e non degno di potersi chiamare banco da falegname. Ma su quel banco ho potuto comunque imparare molte cose e lavorare per svariati anni fino a quando non mi sono finalmente deciso a farmene uno in piena regola e rigorosamente realizzato a mano.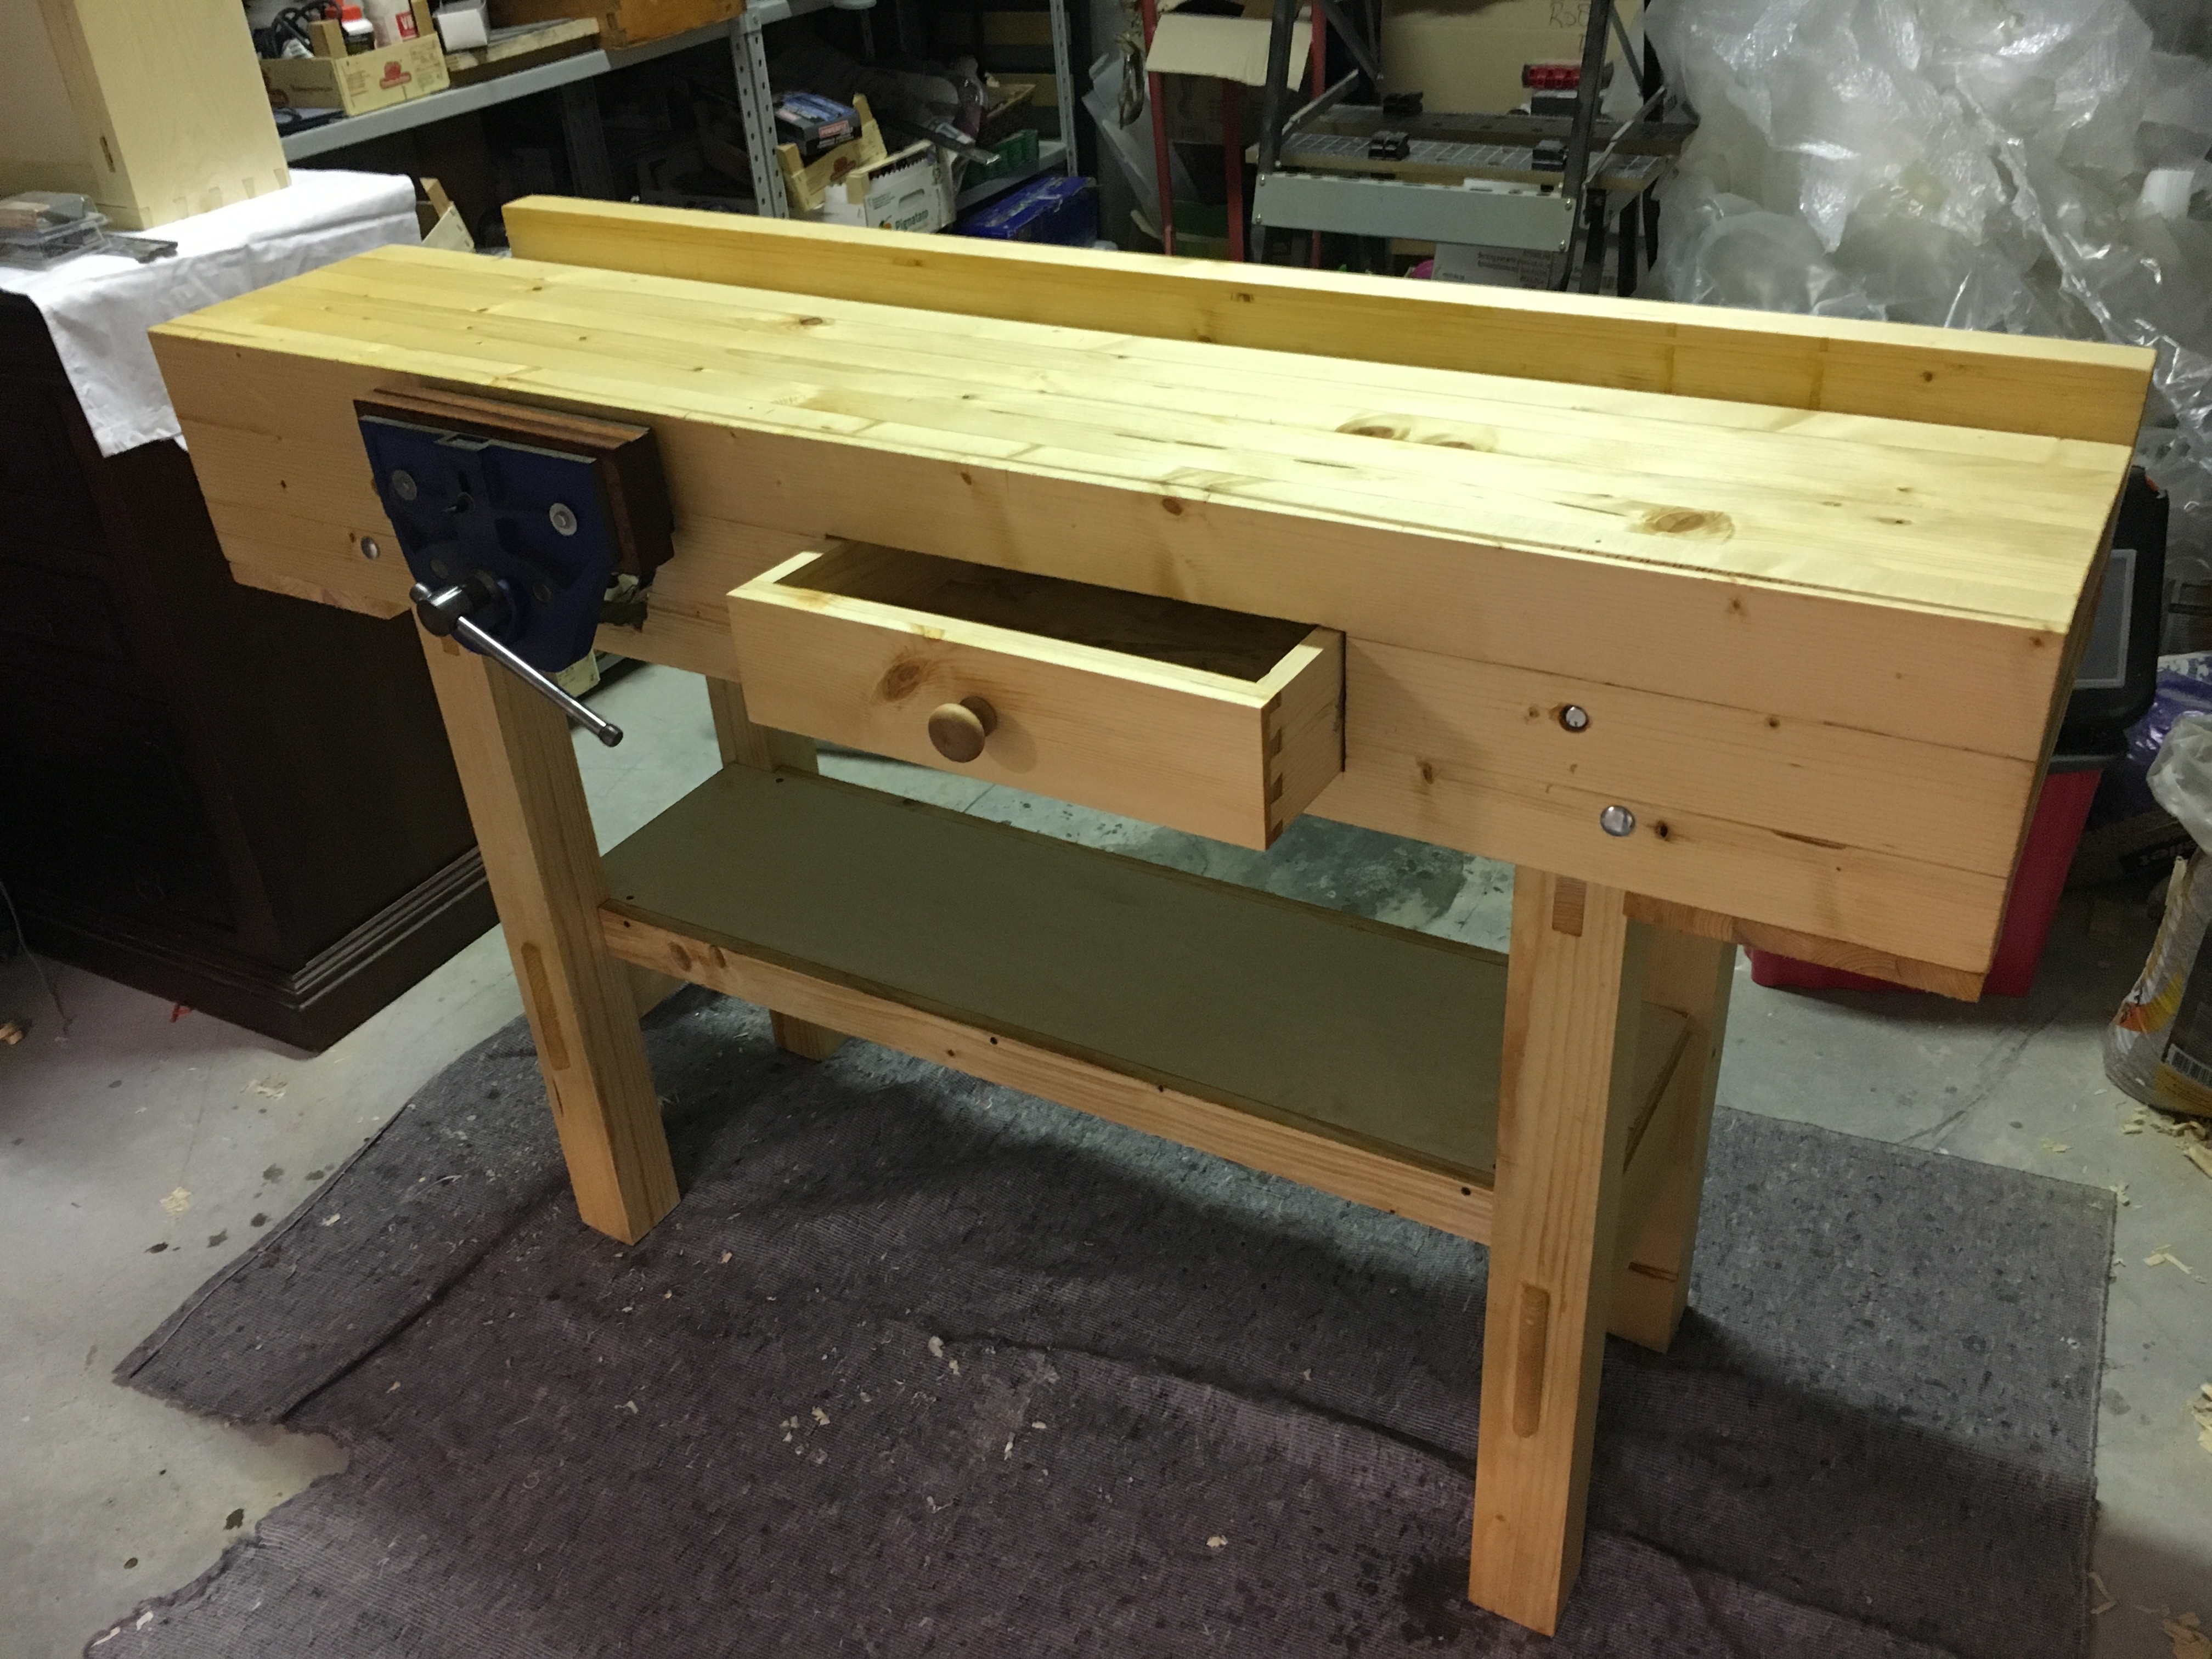 La differenza tra un semplice banco da lavoro ed un banco da falegname è quindi semplice. Il banco da lavoro può essere una qualsiasi superficie piana poggiata su delle gambe o ancorata con sistema a ribalta ad un muro. Non abbisogna di particolari accortezze costruttive e può essere fatto in legno, in ferro, in plastica dura o quant’altro. Può non essere dotato di morsa e non è essenziale che sia particolarmente robusto. Potrebbe addirittura essere sufficiente dotarsi di due cavalletti del brico per poter cominciare a lavorare. Il discorso ovviamente cambia se le nostre necessità di lavorazione dovessero crescere. Lavorare il legno alla vecchia maniera implica giocoforza dotarsi prima o poi di un vero banco da falegname. Come deve essere un banco da falegname? Le dimensioni di un banco sono ampiamente personalizzabili. Se abbiamo molto spazio a disposizione il mio consiglio è di farne uno di almeno 160 cm. di lunghezza per 60 cm. di larghezza. È sempre meglio abbondare con le misure, in quanto ci accorgeremo presto che il piano di lavoro si riempirà in fretta di seghe, pialle, morsetti e utensili vari, oltre ovviamente alla possibilità di poter lavorare con comodità tavole di legno di una certa lunghezza. Ovviamente se lo spazio è ridotto, dovremo obbligatoriamente ridurre anche le misure del banco, sempre tenendo presente che è meglio sfruttare lo spazio a disposizione con un banco da falegname il più grande possibile. Per quanto riguarda l’altezza del banco anche questa è ampiamente personalizzabile e dipende principalmente dalla nostra statura. L’essenziale è comunque che sia di un’altezza tale da poterci permettere di lavorare con comodità. Un banco troppo alto ci impedirebbe, ad esempio, di imprimere forza in fase di piallatura e di taglio. Un banco troppo basso ci costringerebbe a stare costantemente piegati e questo, a lungo andare, creerebbe notevoli problemi di postura, specialmente se prevediamo di passare molte ore al banco (cosa che avviene spesso se si lavora con gli utensili manuali). Basta fare delle prove su un qualsiasi piano per capire quale possa essere la misura ideale. Volendo dare una regola, il metodo tradizionale vuole che per calcolare l’altezza giusta del banco, in rapporto alla nostra altezza, il polso della mano, con le braccia stese lungo il corpo, dovrebbe arrivare pressappoco all’altezza del piano del banco. Altro elemento fondamentale è lo spessore del piano di lavoro. Non dovrebbe essere inferiore ai 5 cm. anche perché deve prevedere il fissaggio e sostenere il peso della morsa frontale. Il materiale del nostro banco deve essere ovviamente il legno, ma quale tipo di legno scegliere? Solitamente si usa il legno di faggio, l’acero o il rovere ma anche l’abete e il pino potrebbero andare bene. Importante è che il legno sia ben stagionato, dritto e privo di nodi. Meglio comunque, se possibile, usare dei legni duri (come detto sopra il rovere o il faggio vanno benissimo) perchè la loro maggiore densità, contribuisce a conferire robustezza, pesantezza e stabilità. Se non possiamo permetterci questi tipi di legno l’abete, ad esempio, è una valida alternativa. Usandolo otterremo certamente un banco meno pesante ma comunque sempre un buon banco sul quale fare affidamento per decenni.
  L’elemento fondamentale per ottenere un ottimo banco da falegname è comunque la qualità costruttiva, ovvero come è strutturato, i tipi di incastri utilizzati, come sono stati fatti, lo spessore del piano del banco, le dimensioni delle gambe, ecc. Per quanto riguarda la dislocazione del banco all’interno del nostro laboratorio questa dipenderà da quanto spazio abbiamo a disposizione e se privilegiamo la falegnameria amanuense. Se abbiamo lo spazio disponibile, la miglior collocazione possibile è metterlo in posizione centrale o comunque tale da poterci girare intorno tranquillamente ed essere raggiunto da qualsiasi lato, lasciando uno spazio di operatività di minimo 1 metro e mezzo. Se lo spazio è poco lo possiamo comunque addossare al muro, sacrificando però la possibilità di mettere tavole lunghe nel senso della larghezza del banco. Questo potrebbe creare qualche problema, specialmente se si decide di lavorare il legno in modo amanuense. È preferibile avere sempre un’ illuminazione naturale ma, se non fosse possibile, è meglio dotarsi di fonti di luce artificiale al led puntate dall’alto verso il banco e sempre in modo che non si creino zone d’ombra sul piano di lavoro. Il banco deve essere costruito seguendo poche semplici regole costruttive, che vedremo di seguito. Questo perché, una volta costruito, deve essere in grado di assolvere a compiti spesso gravosi, su tutti la piallatura ed il taglio, che prevedono un’azione di spinta considerevole. Il banco, in poche parole, deve essere talmente stabile da non spostarsi sotto le sollecitazioni continue, orizzontali e verticali, al quale verrà sottoposto, anche se comunque un minimo di oscillazione è accettabile, se non addirittura consigliato. Per questi motivi si tende sempre a costruire un banco il più solido, grande, pesante, e stabile possibile. Un discorso a parte merita la morsa del banco. Un banco da falegname che si rispetti solitamente ne prevede due, una frontale ed una posta in coda al banco. Se non ci è possibile metterne due è assolutamente necessario mettere almeno quella frontale, che sia già costruita in metallo e rifinita poi con le ganasce in legno, come nei classici banchi anglosassoni o da autocostruirsi in legno e sistema meccanico di scorrimento e posta lungo tutta la gamba frontale del banco, come nei banchi europei. Il mio consiglio è quello di inserire una morsa in metallo con sistema di sgancio rapido ed un’ ampia apertura delle ganasce, almeno 25 / 30 cm. utili di serraggio. La morsa del banco è indispensabile ed è di fatto la nostra terza mano durante le lavorazioni manuali. Sarebbe impensabile poter lavorare su un banco da falegname privo di morsa, qualunque essa sia. Il banco può essere ampiamente personalizzato e prevedere ad esempio i fori per l’inserimento dei cani per il bloccaggio dei pezzi o un supporto frontale per sorreggere tavole particolarmente lunghe o l’inserimento di una vasca centrale porta utensili e tanto altro ancora. Su internet troviamo centinaia di progetti su come fare un banco da falegname. Esistono anche tanti libri sull’argomento, purtroppo però quasi tutti in inglese. Il consiglio è comunque quello di non comprarlo nuovo ma costruirsene uno. Il rischio nel comprarne uno nuovo (ma anche vecchio e/o ristrutturato) è che il banco sia di scarsa qualità, nasconda difetti costruttivi e comunque non soddisfi in pieno le nostre esigenze. E poi, vogliamo mettere la soddisfazione di averlo realizzato con le proprie mani?
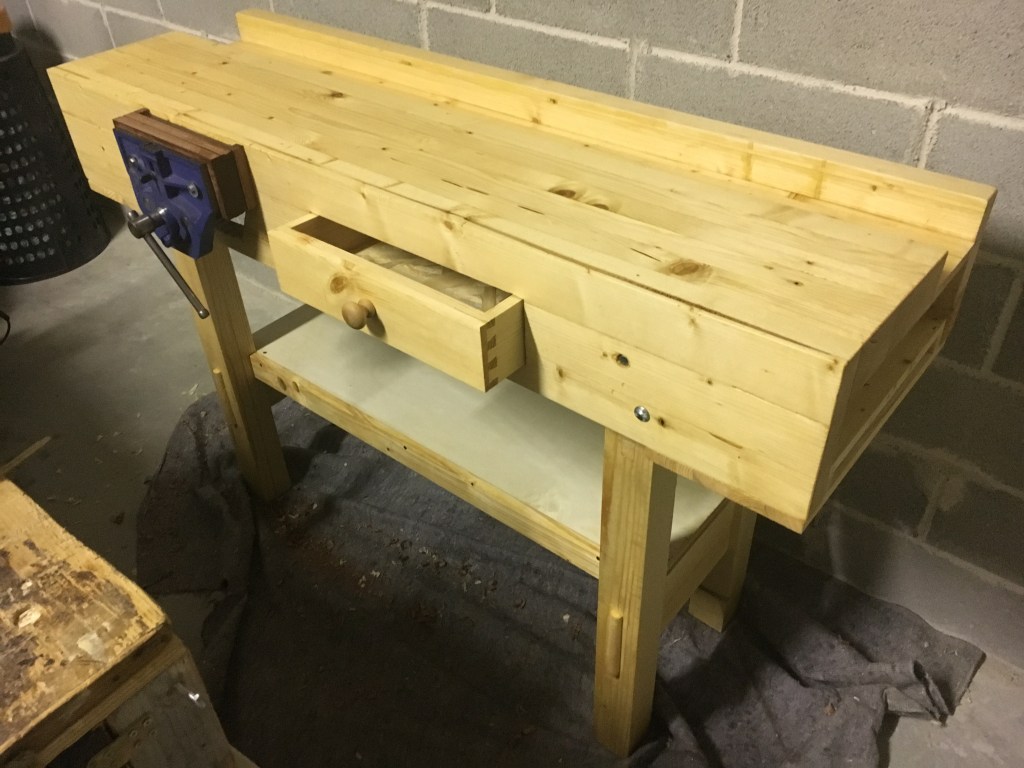
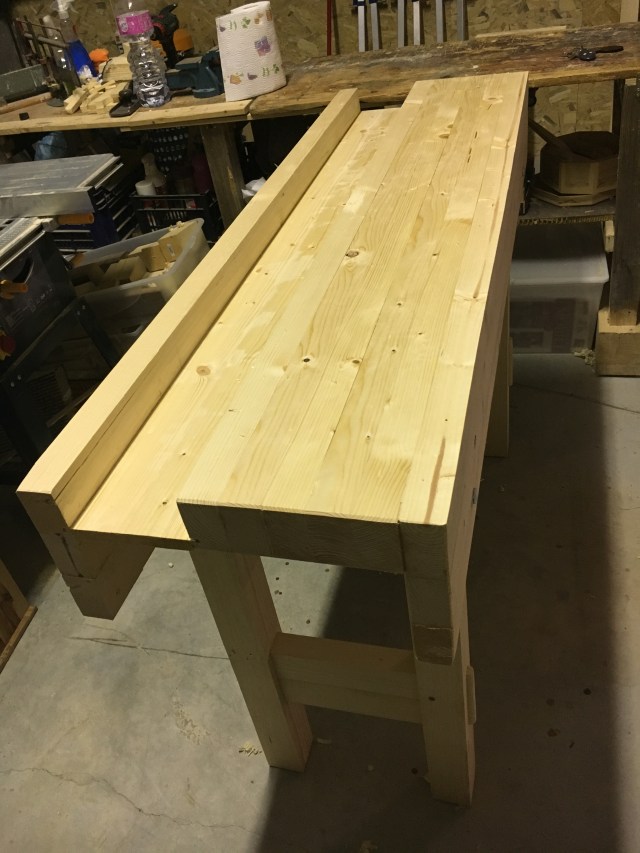
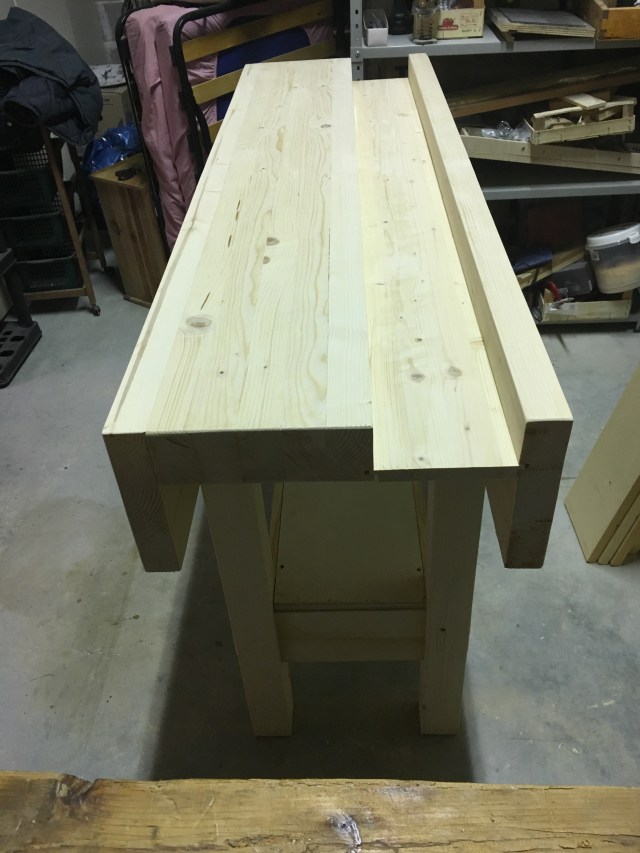
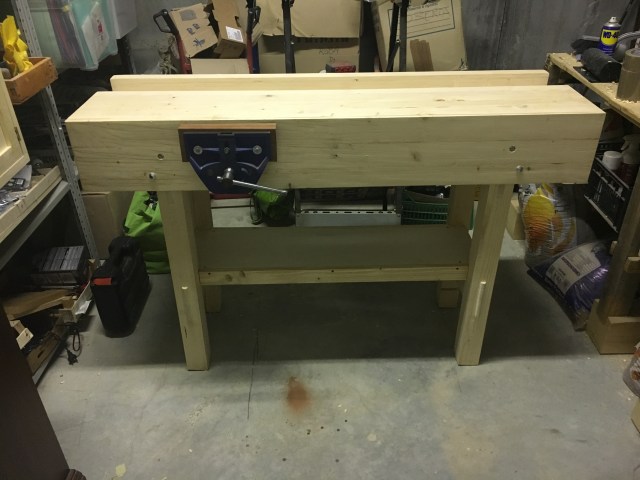
Il banco da falegname che mi sono costruito, esclusivamente con utensili manuali, è ripreso dal progetto di Paul Sellers. È il classico banco in stile inglese, molto semplice nella struttura, fornito di una sola morsa frontale meccanica. È dotato di una vasca centrale scorrevole per contenere gli attrezzi con i quali stiamo lavorando ed è implementato da un cassetto frontale, un ripiano inferiore e due piccoli ripiani ricavati tra i laterali del banco. Di queste ed altre migliorie mi ripropongo far vedere la realizzazione in un post futuro. Il banco è realizzato in legno di abete, in quanto economico e comunque di soddisfacente qualità. Inoltre molto del legno usato lo avevo già disponibile perché riutilizzato dallo smantellamento di un precedente piano di lavoro.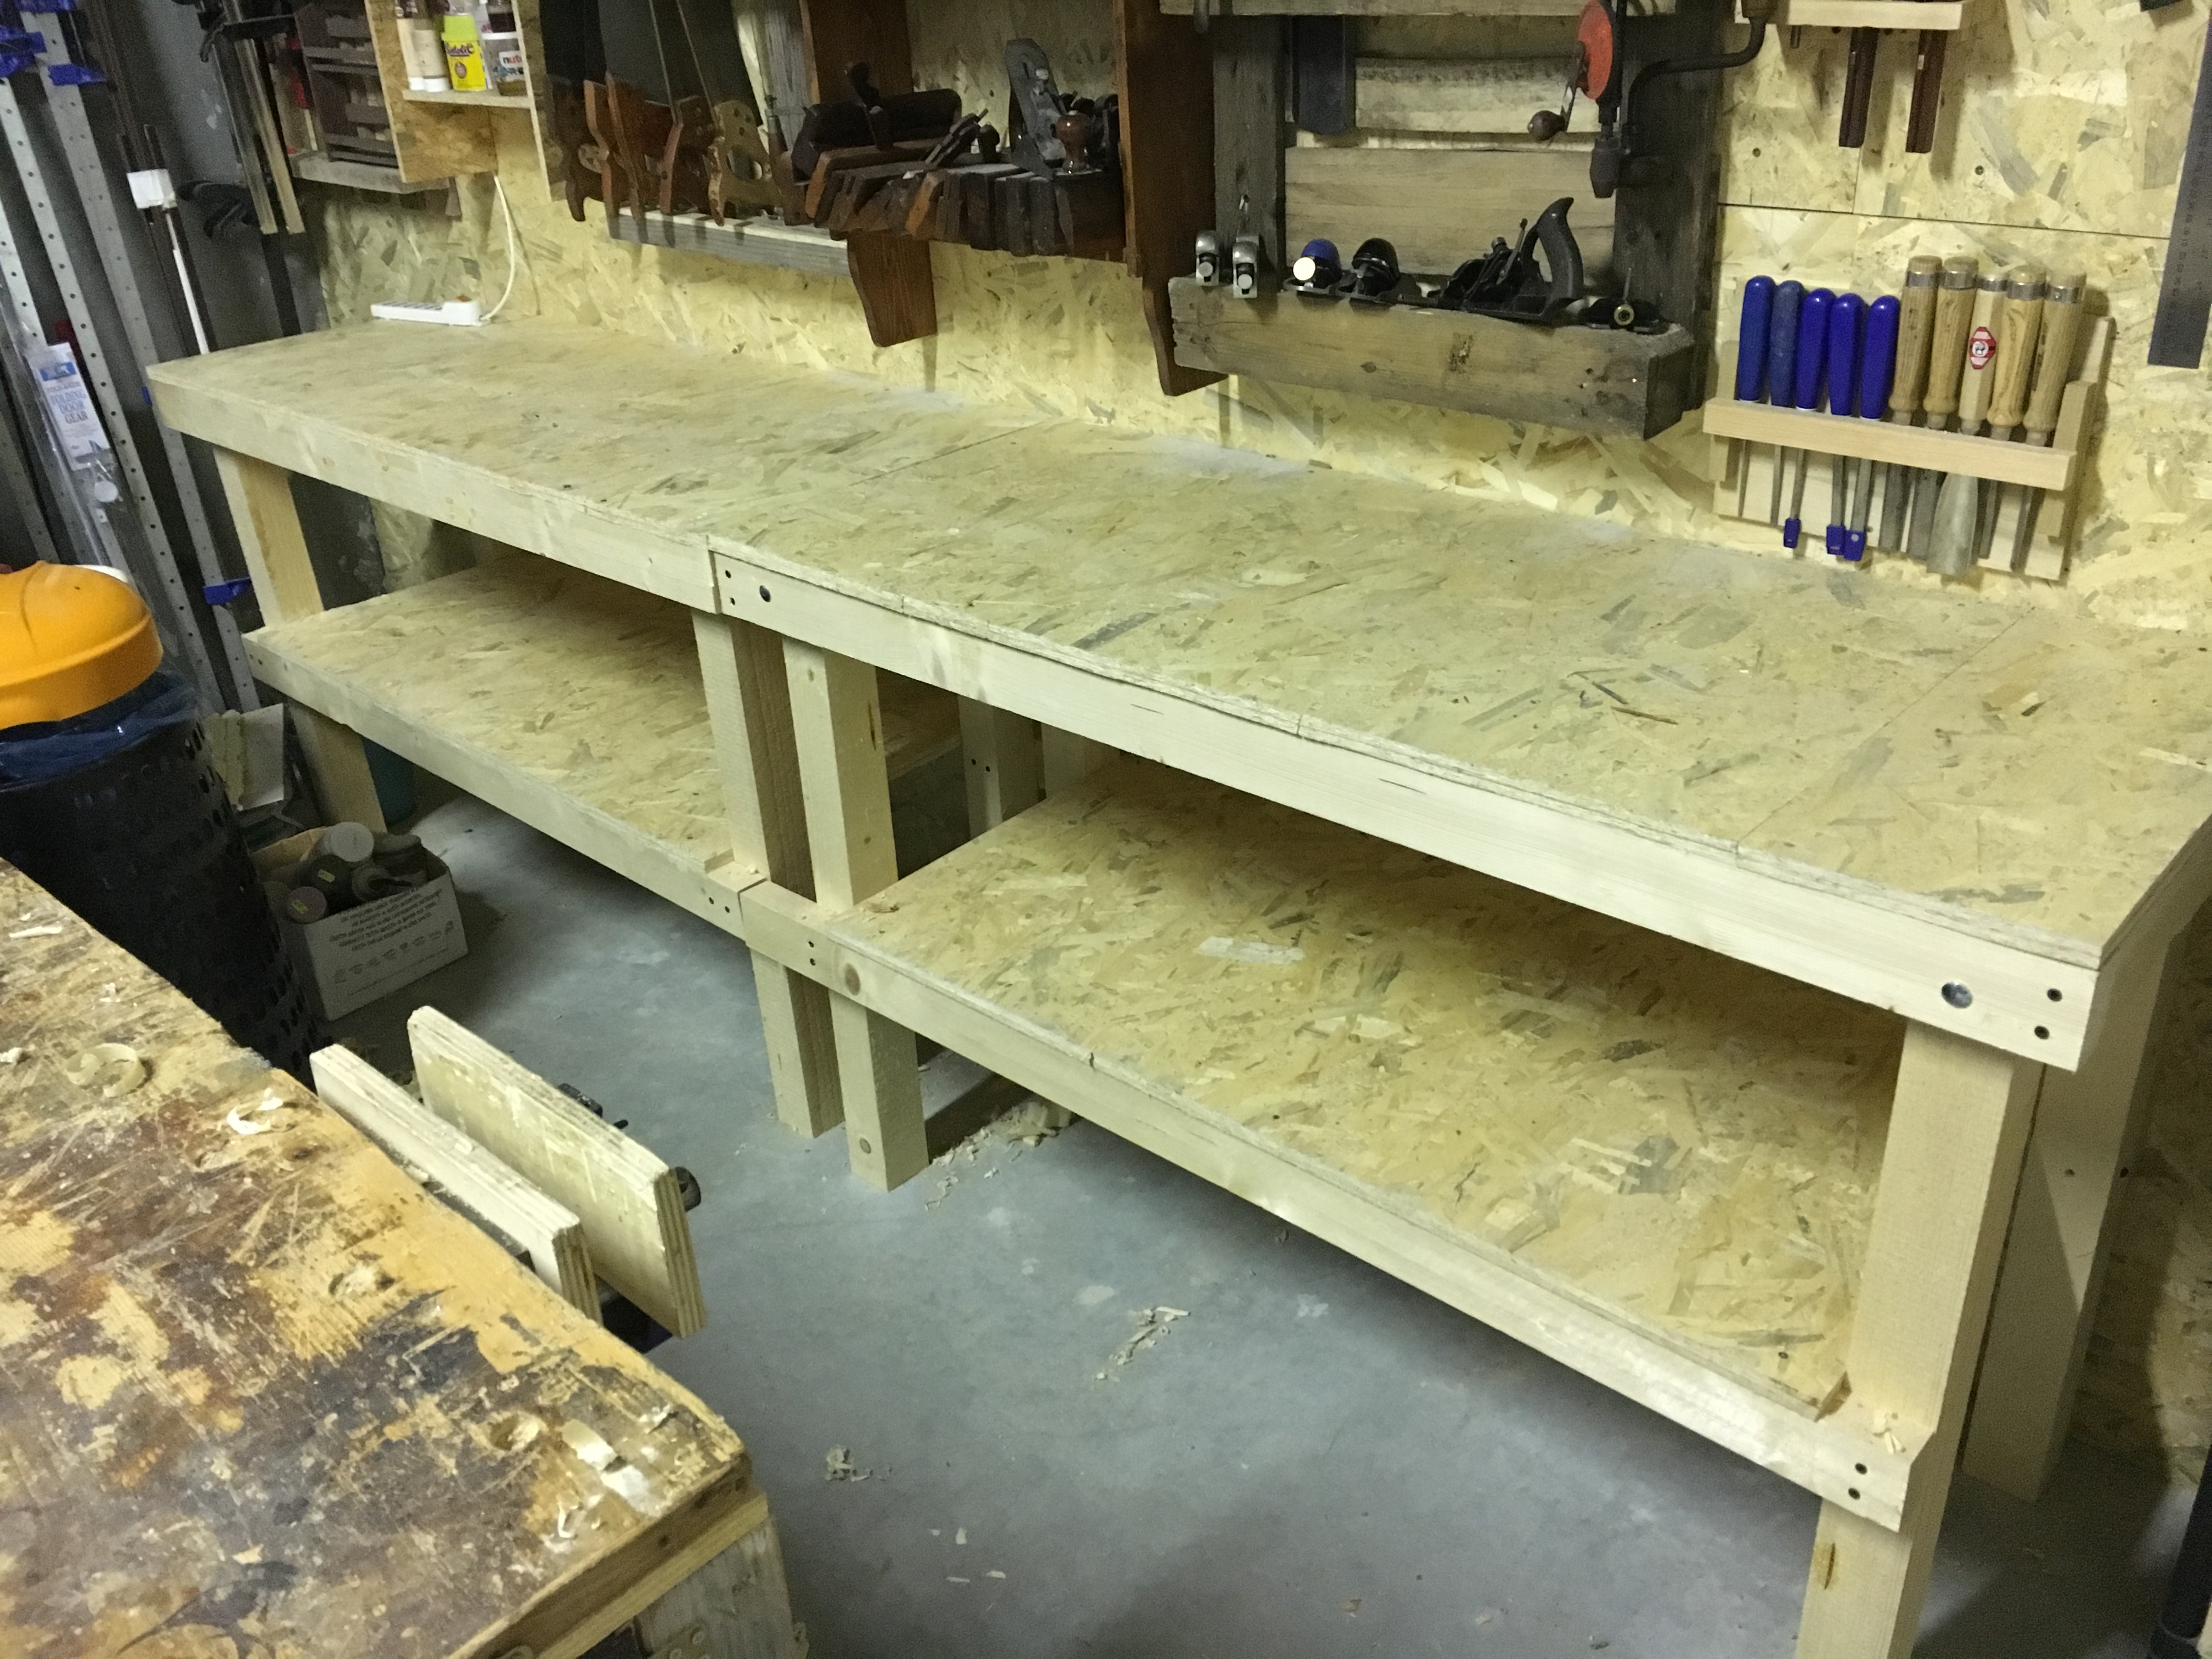
 Il progetto di Sellers prevedeva delle dimensioni maggiori ma, nella prospettiva di doverlo in un futuro (come poi è accaduto) collocare a ridosso di un muro ed in uno spazio molto ristretto, le misure finali si sono necessariamente ridotte. Riporto di seguito le più significative:
Altezza del piano del banco 7 cm;
Larghezza piano del banco escluso i laterali e la vasca portautensili 28 cm;
Altezza dei frontali 21 cm;
Spessore delle gambe 7,5 cm;
Larghezza della vasca portautensili 16 cm;
Lunghezza dei traversi delle gambe escluso l’ingombro delle gambe 27 cm;
Altezza delle mortase e dei tenoni 15 cm;
Distanza della posizione della morsa dal fianco sinistro del banco 32 cm.
Le misure finali ottenute sono quindi circa 150 cm. di lunghezza, 52 cm. di larghezza e 98 cm. di altezza.
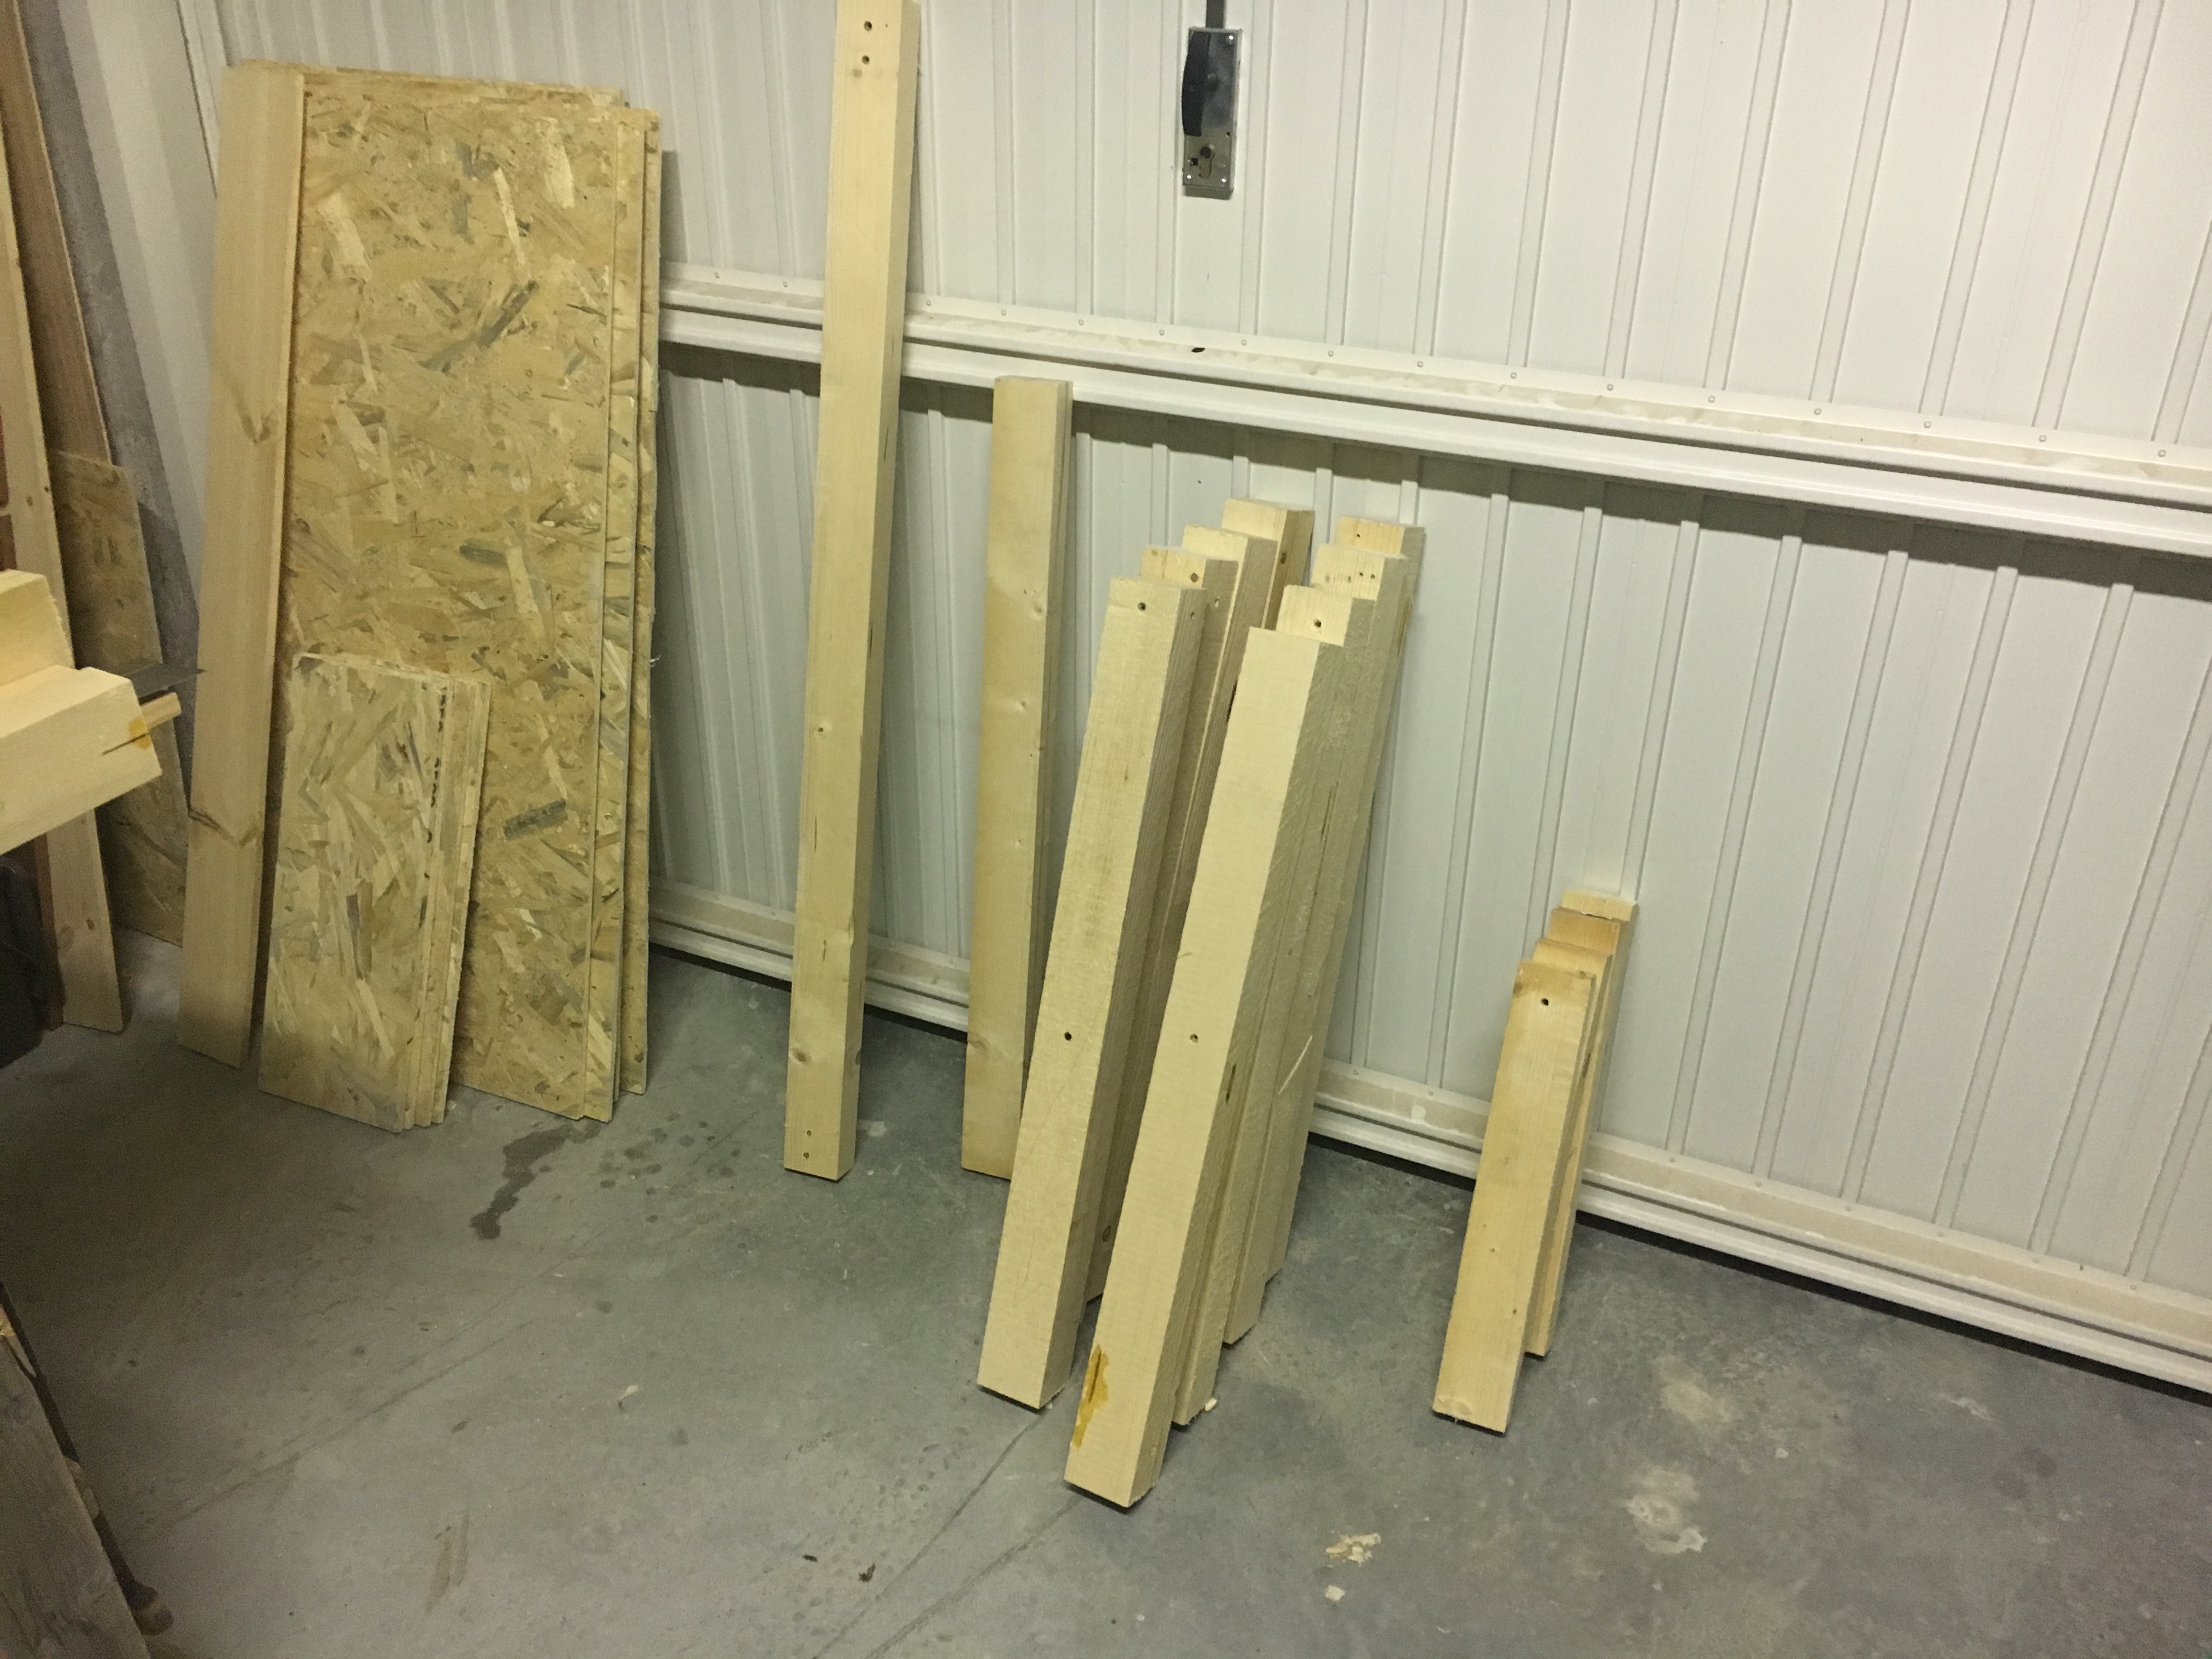
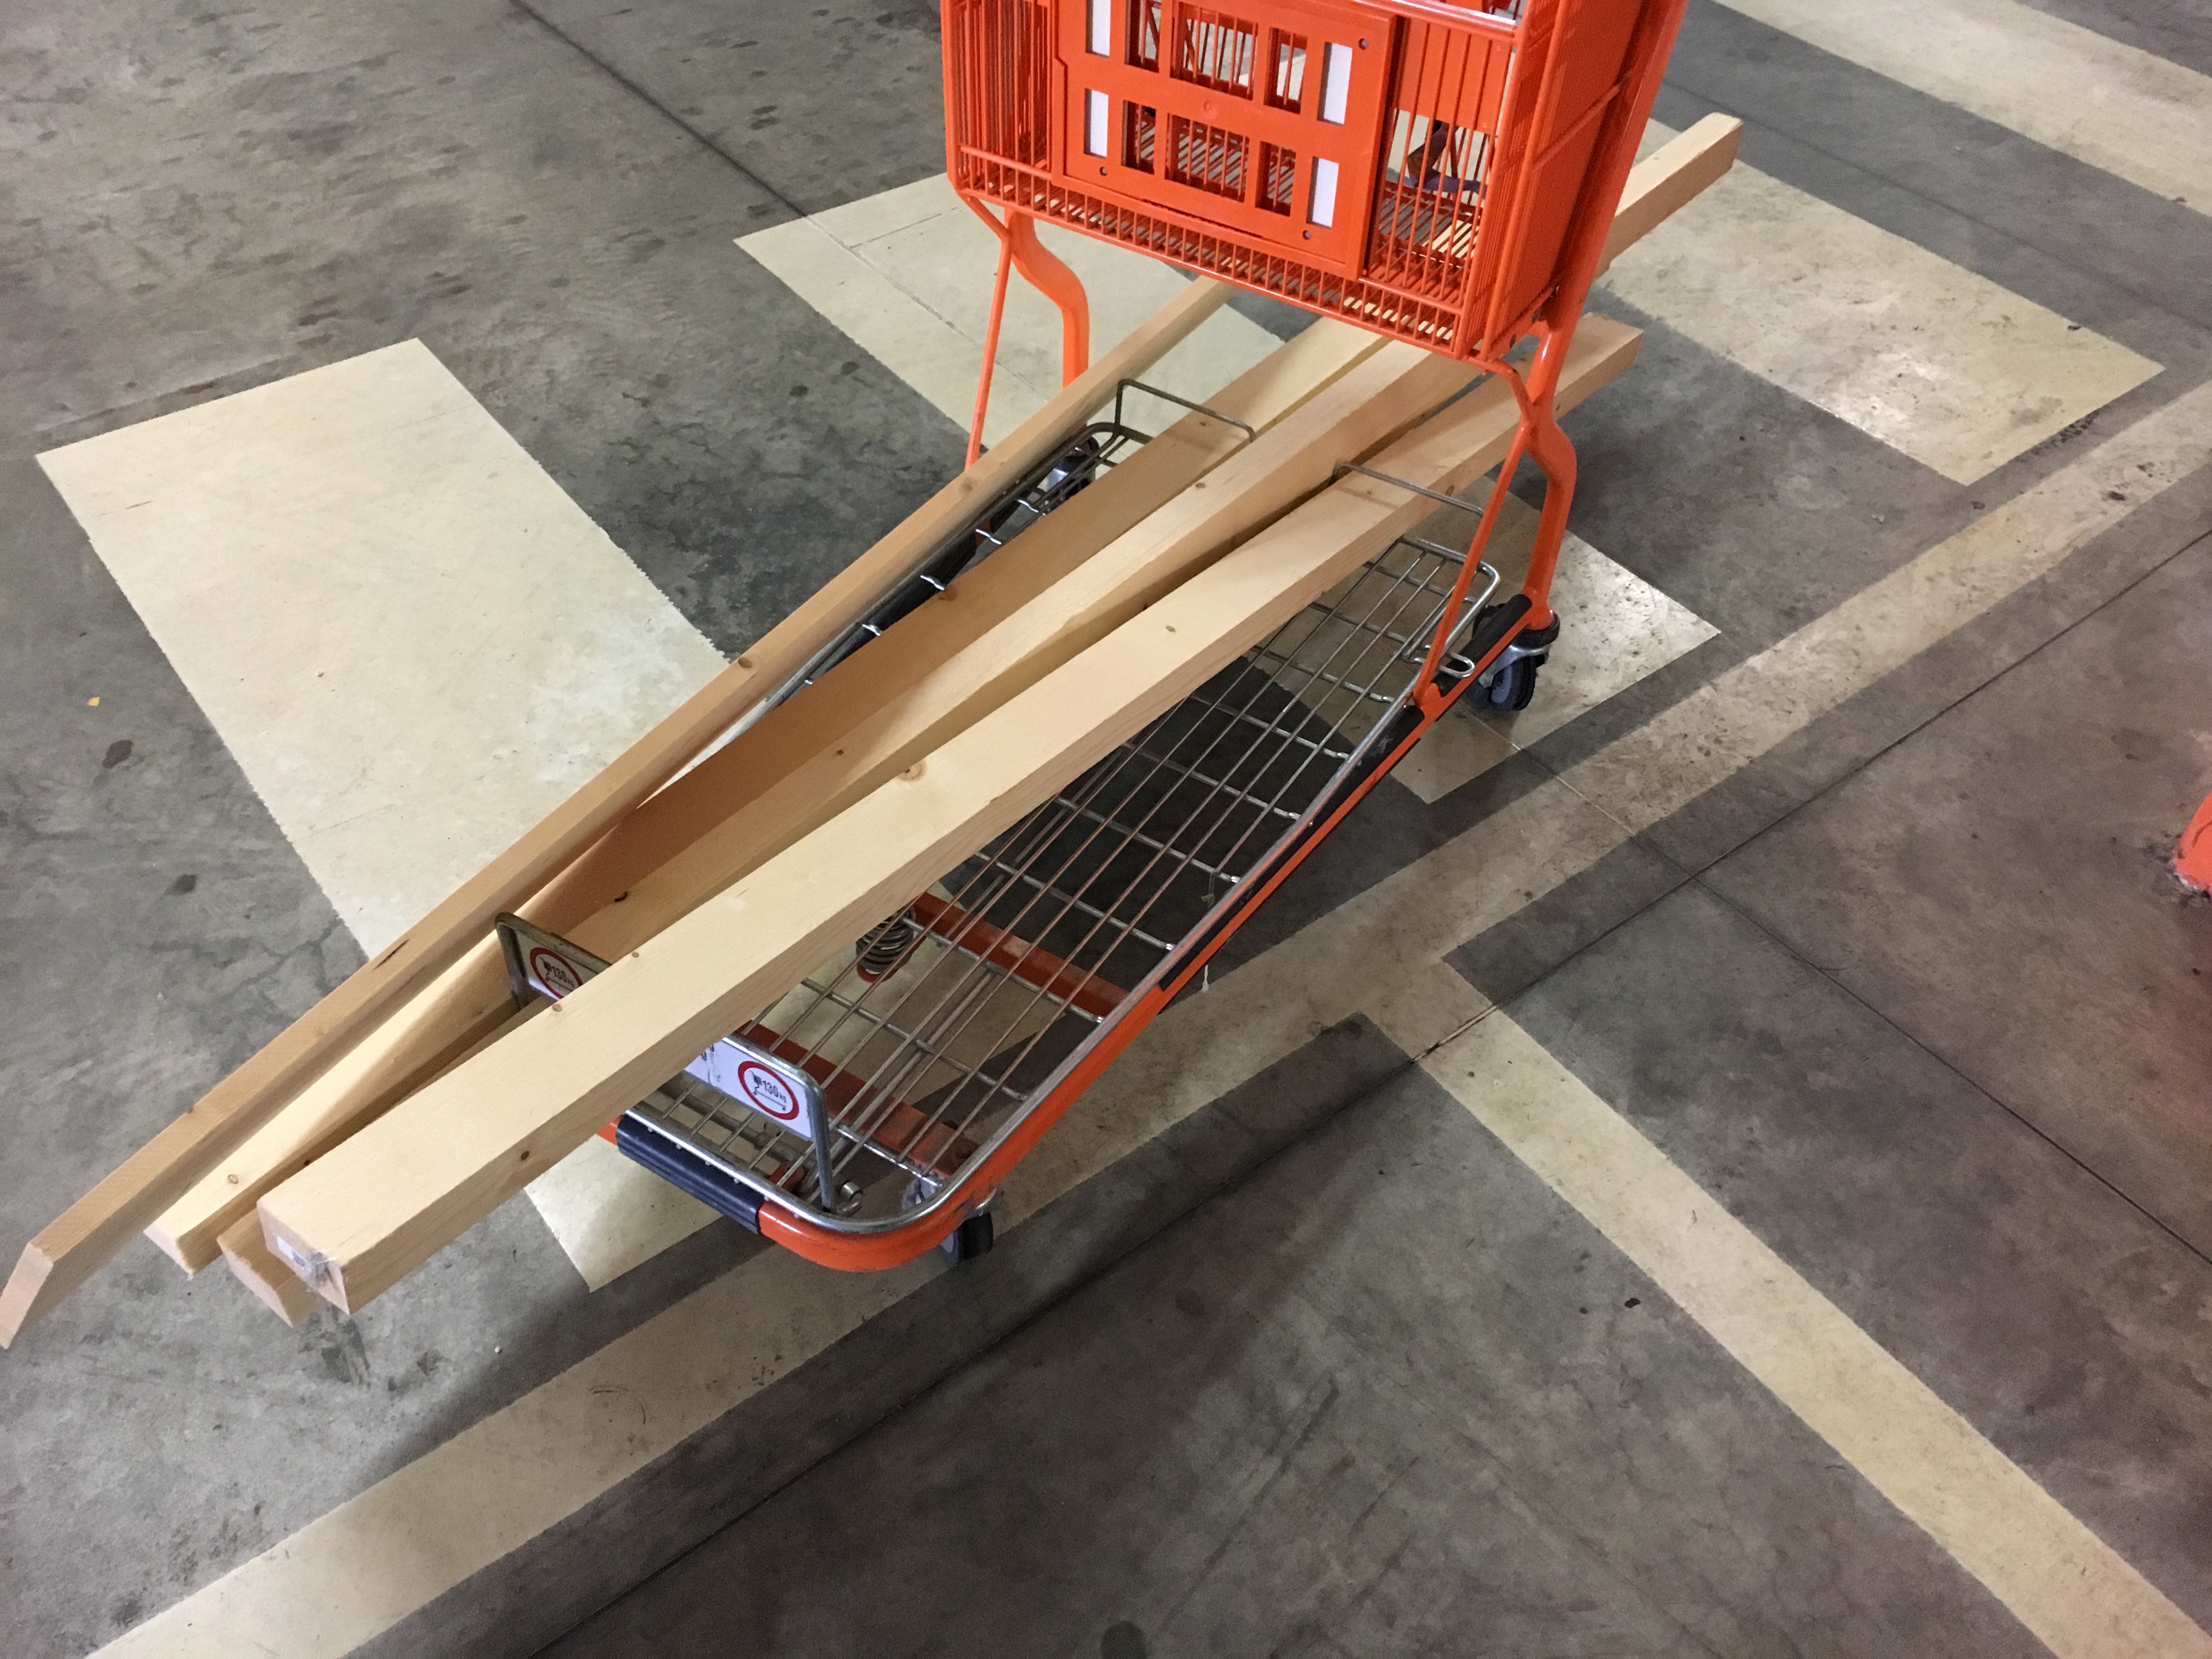
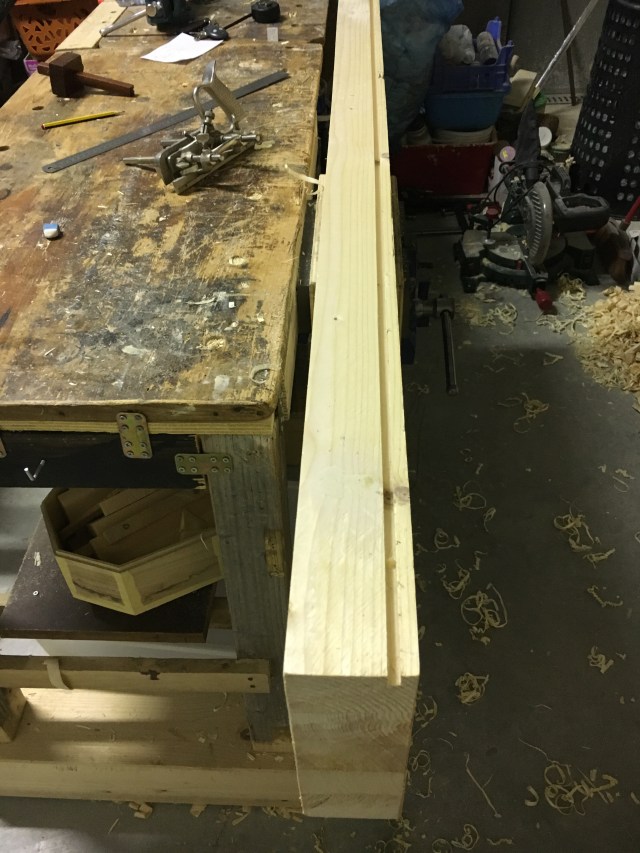
Per il piano del nuovo banco da falegname il legno che avevo non bastava e l’ OSB avanzato dal vecchio bancone mal si addiceva a tale scopo. Quindi mi sono recato in un grande magazzino di faidate ed ho acquistato delle travi in abete in offerta.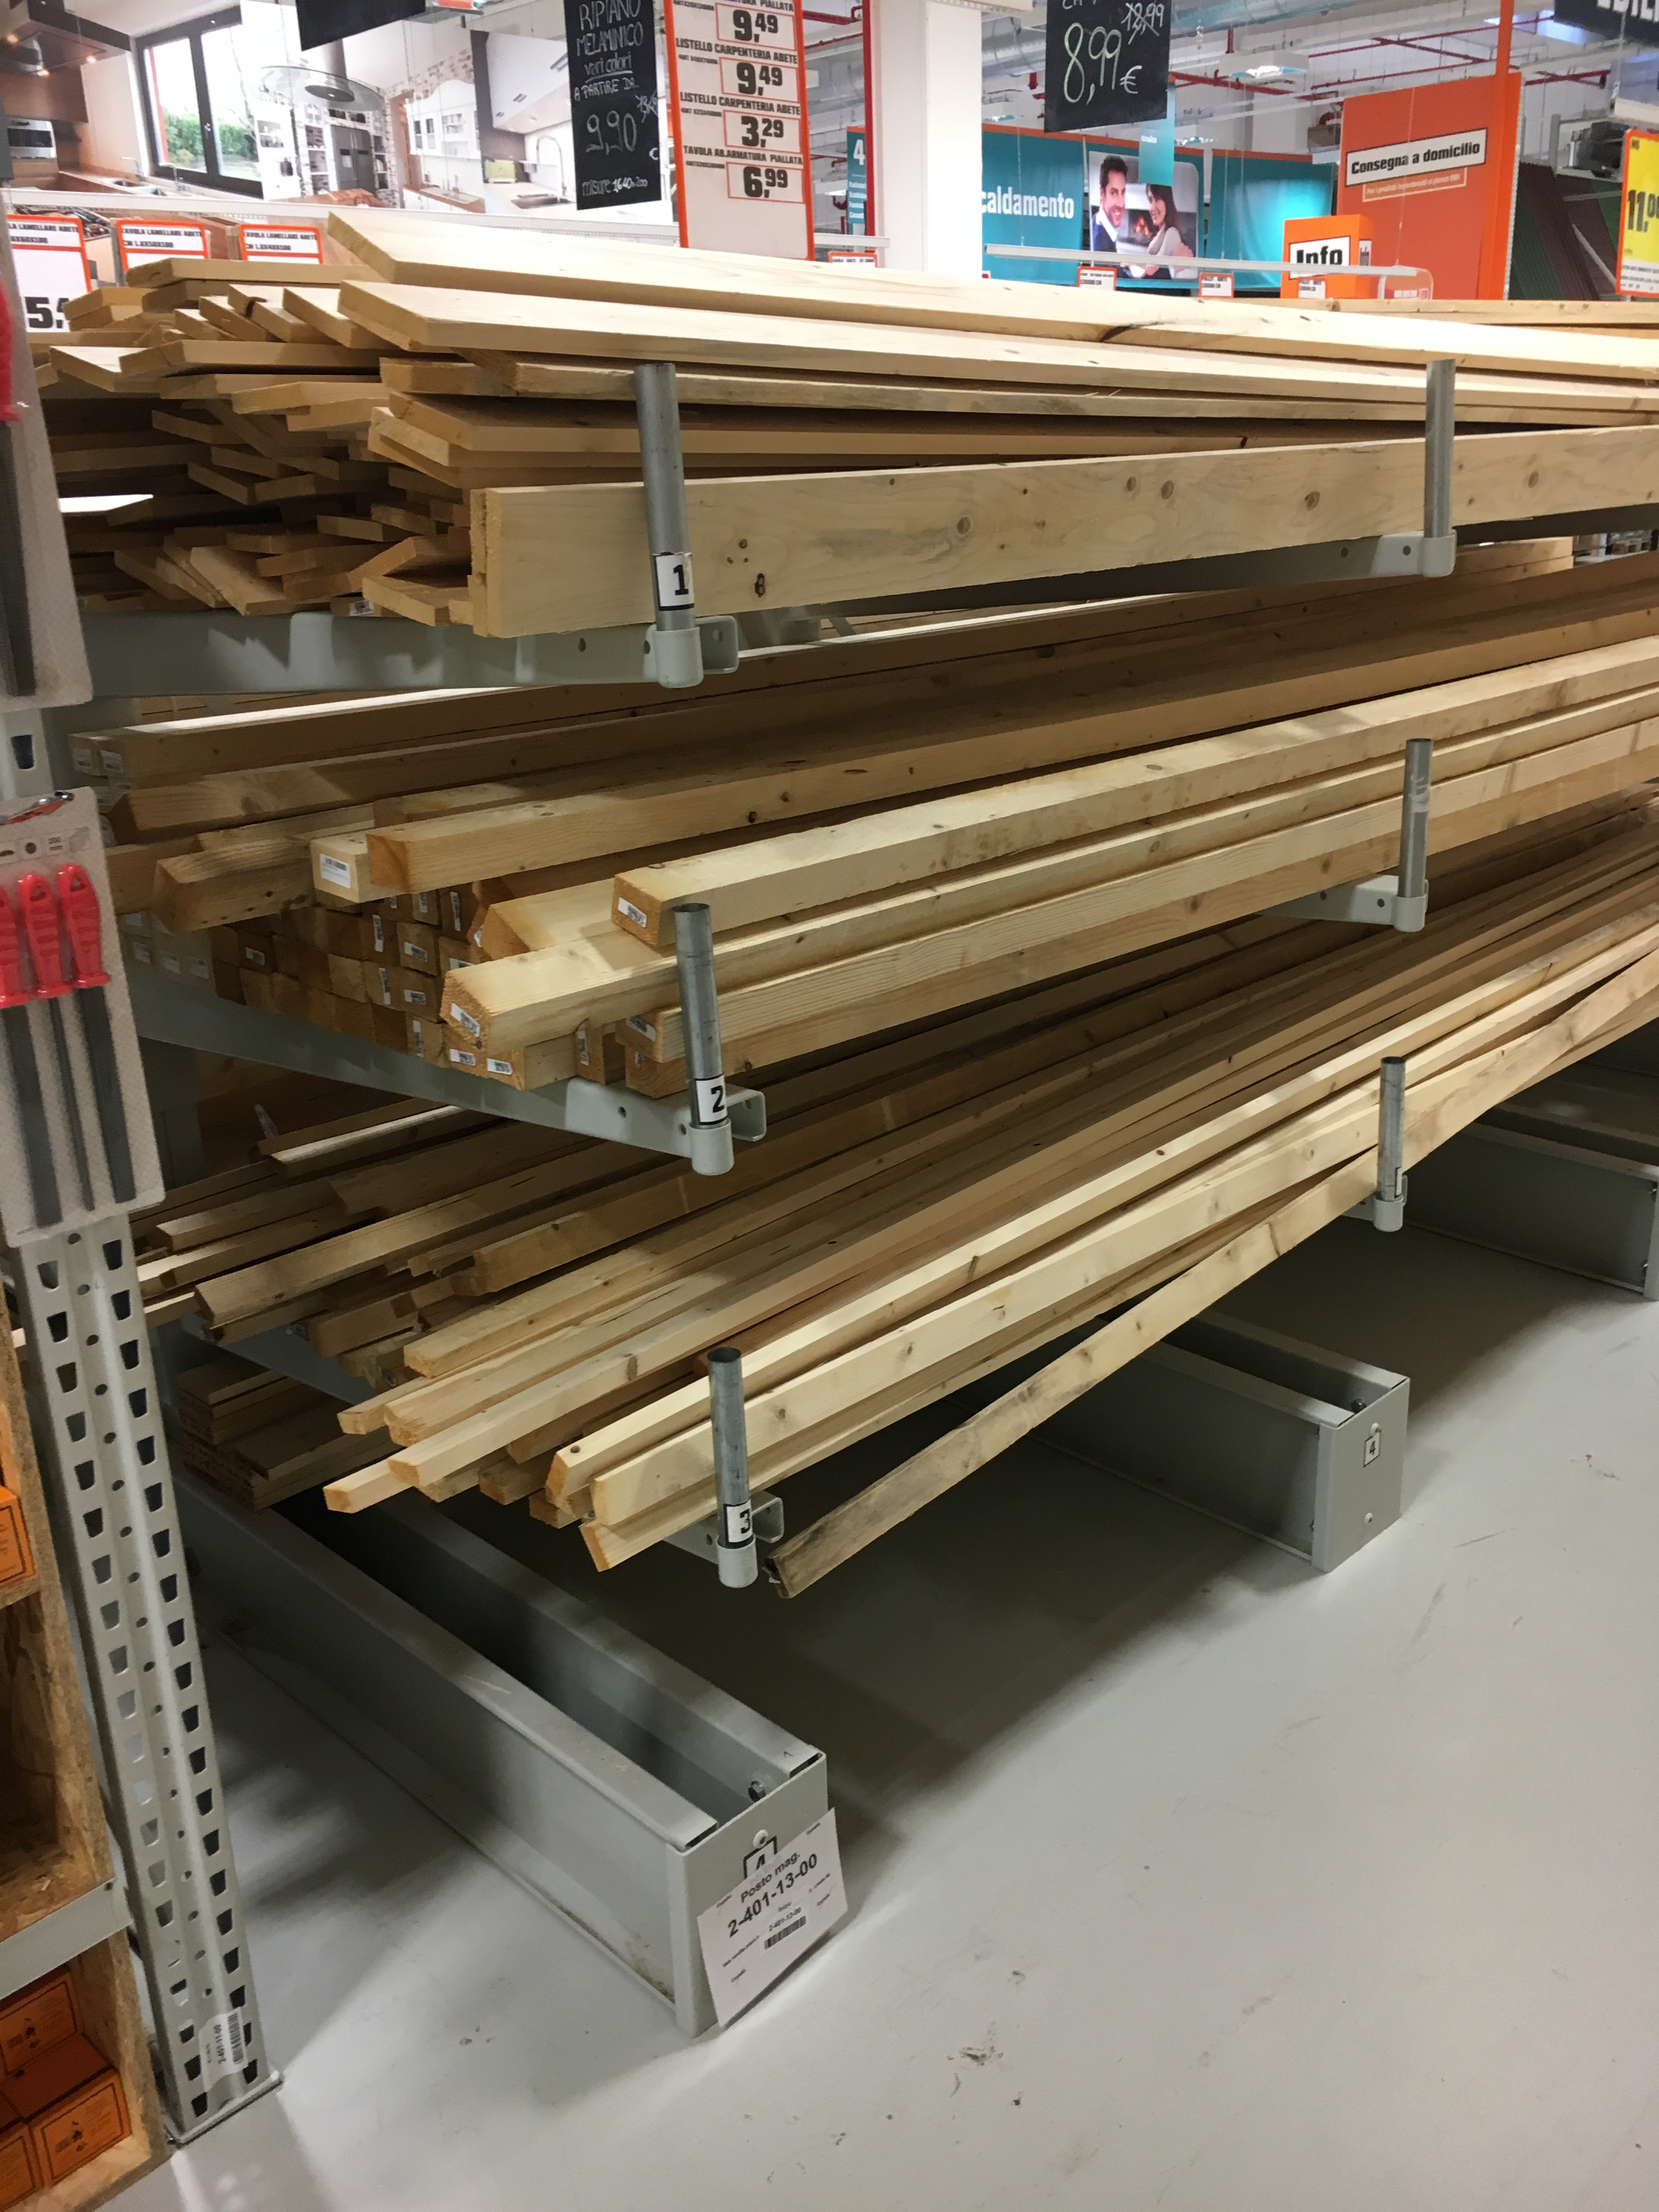
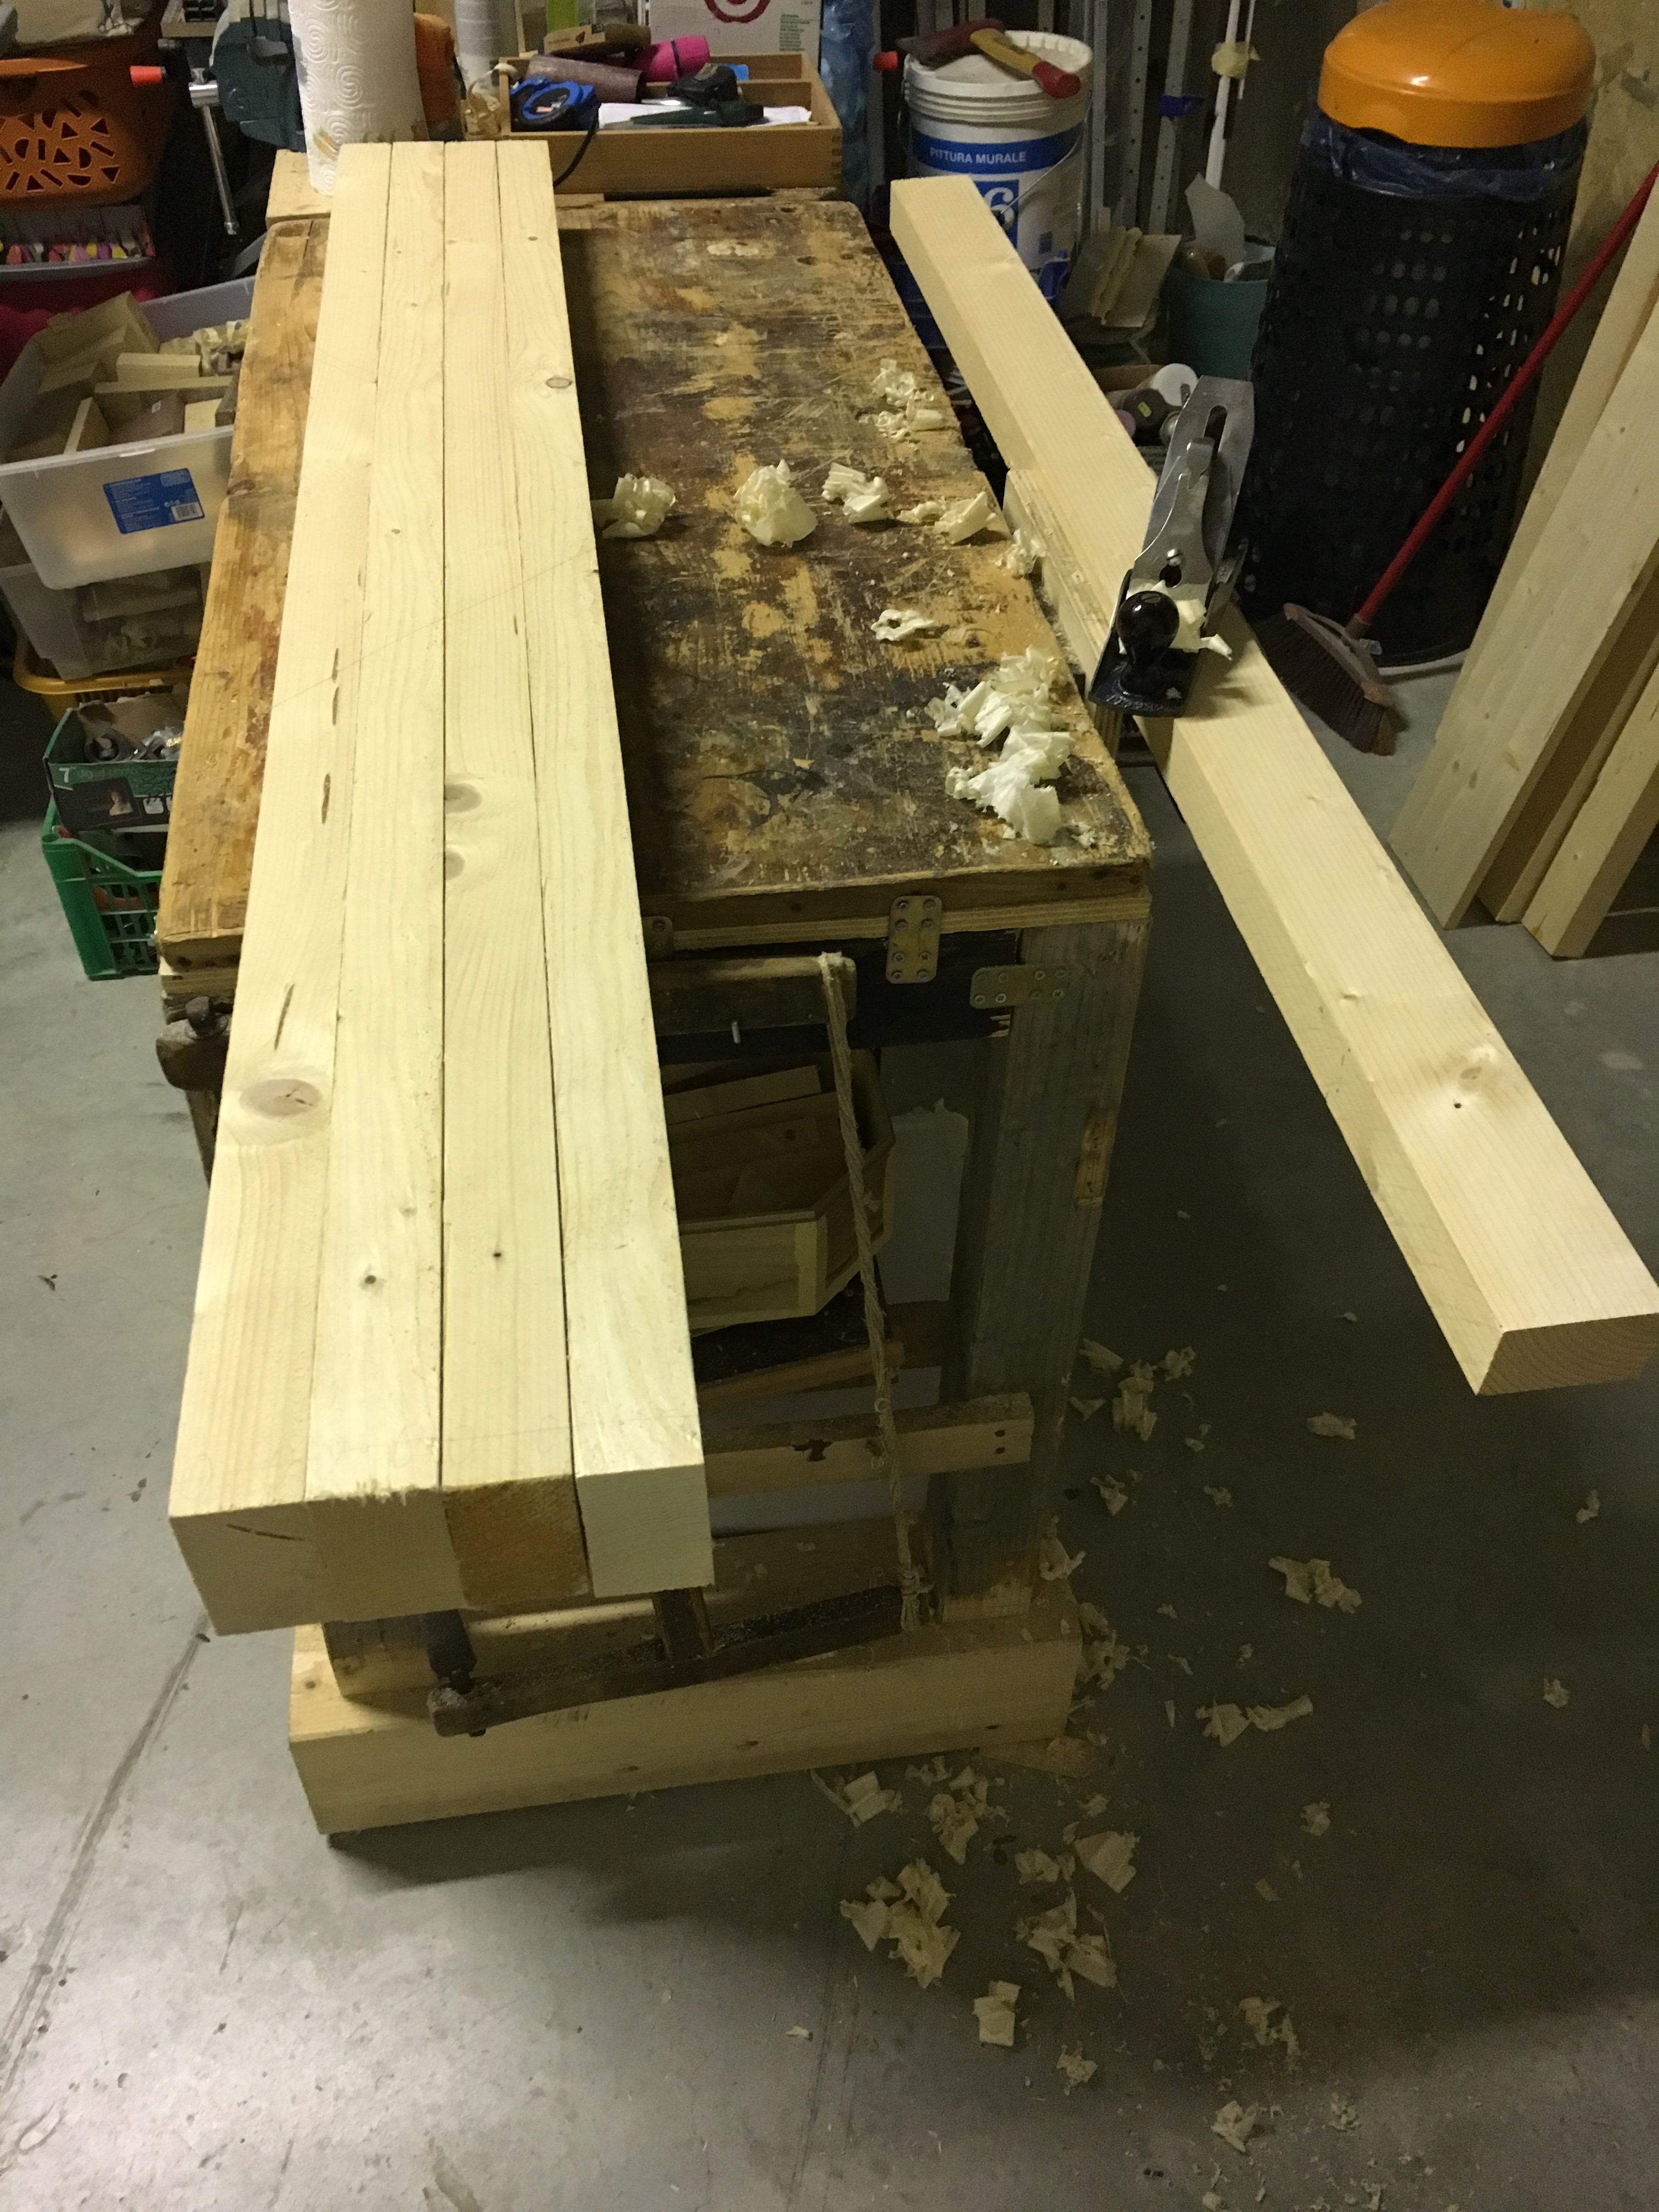
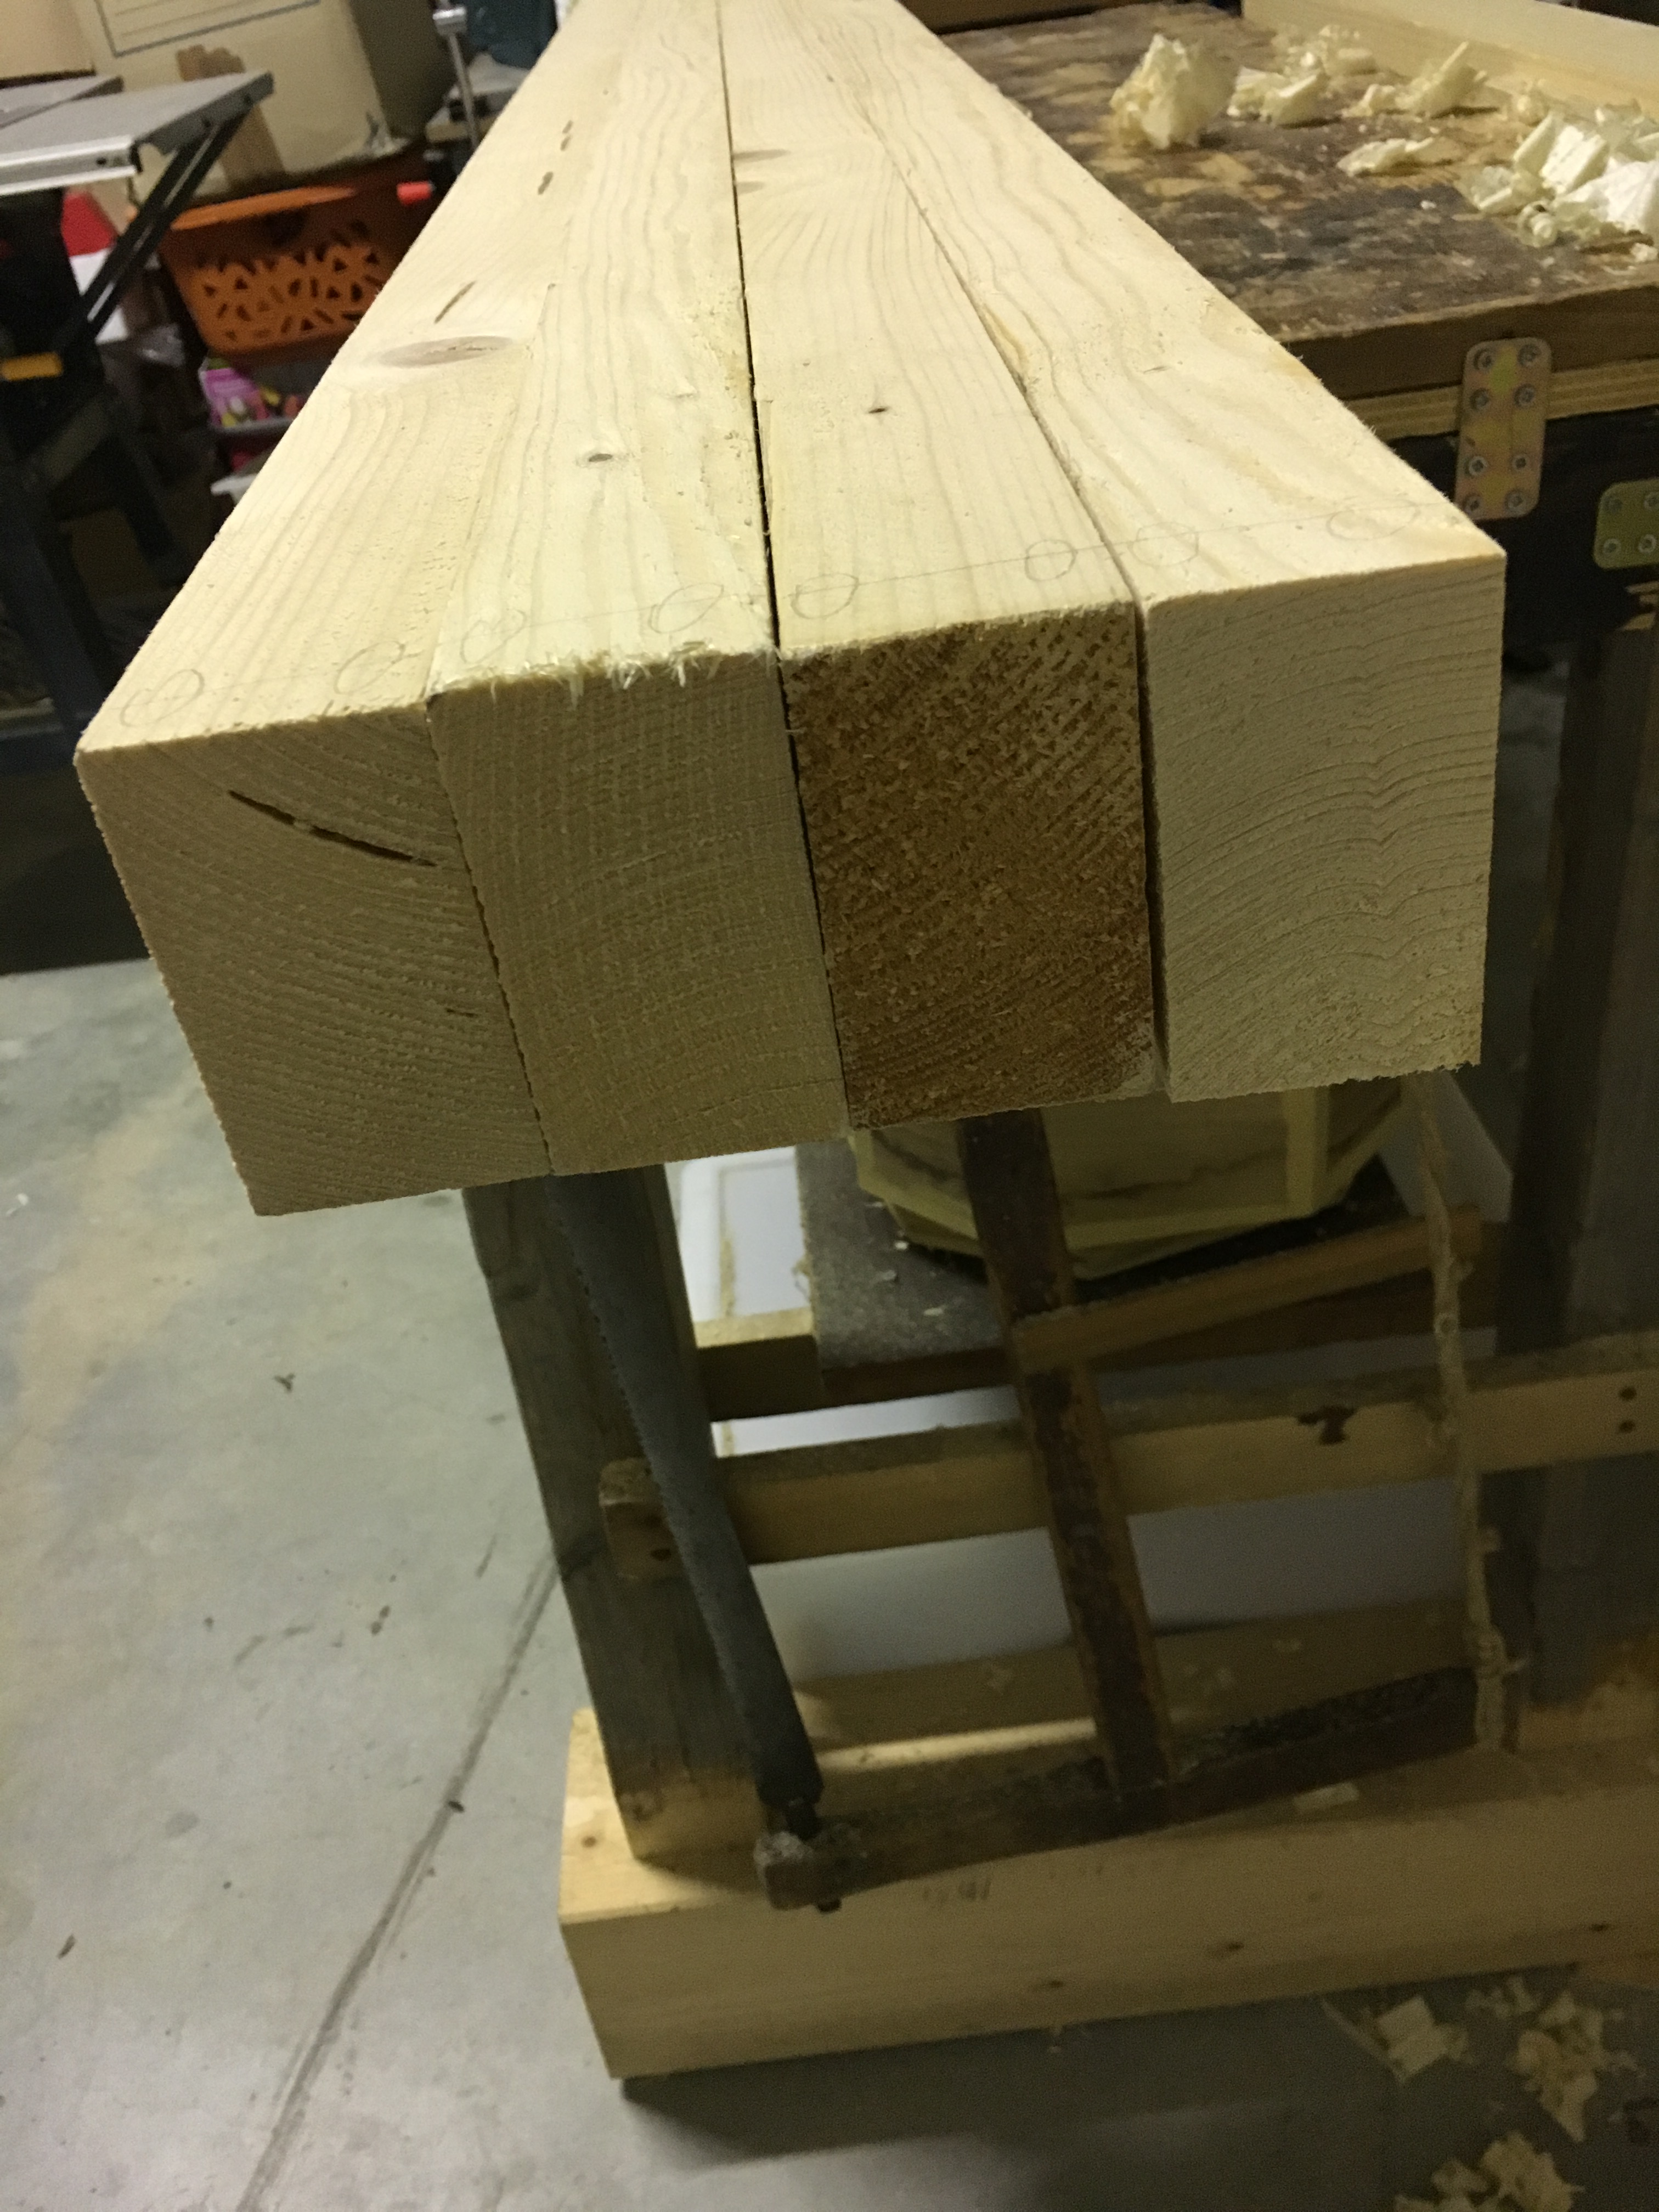
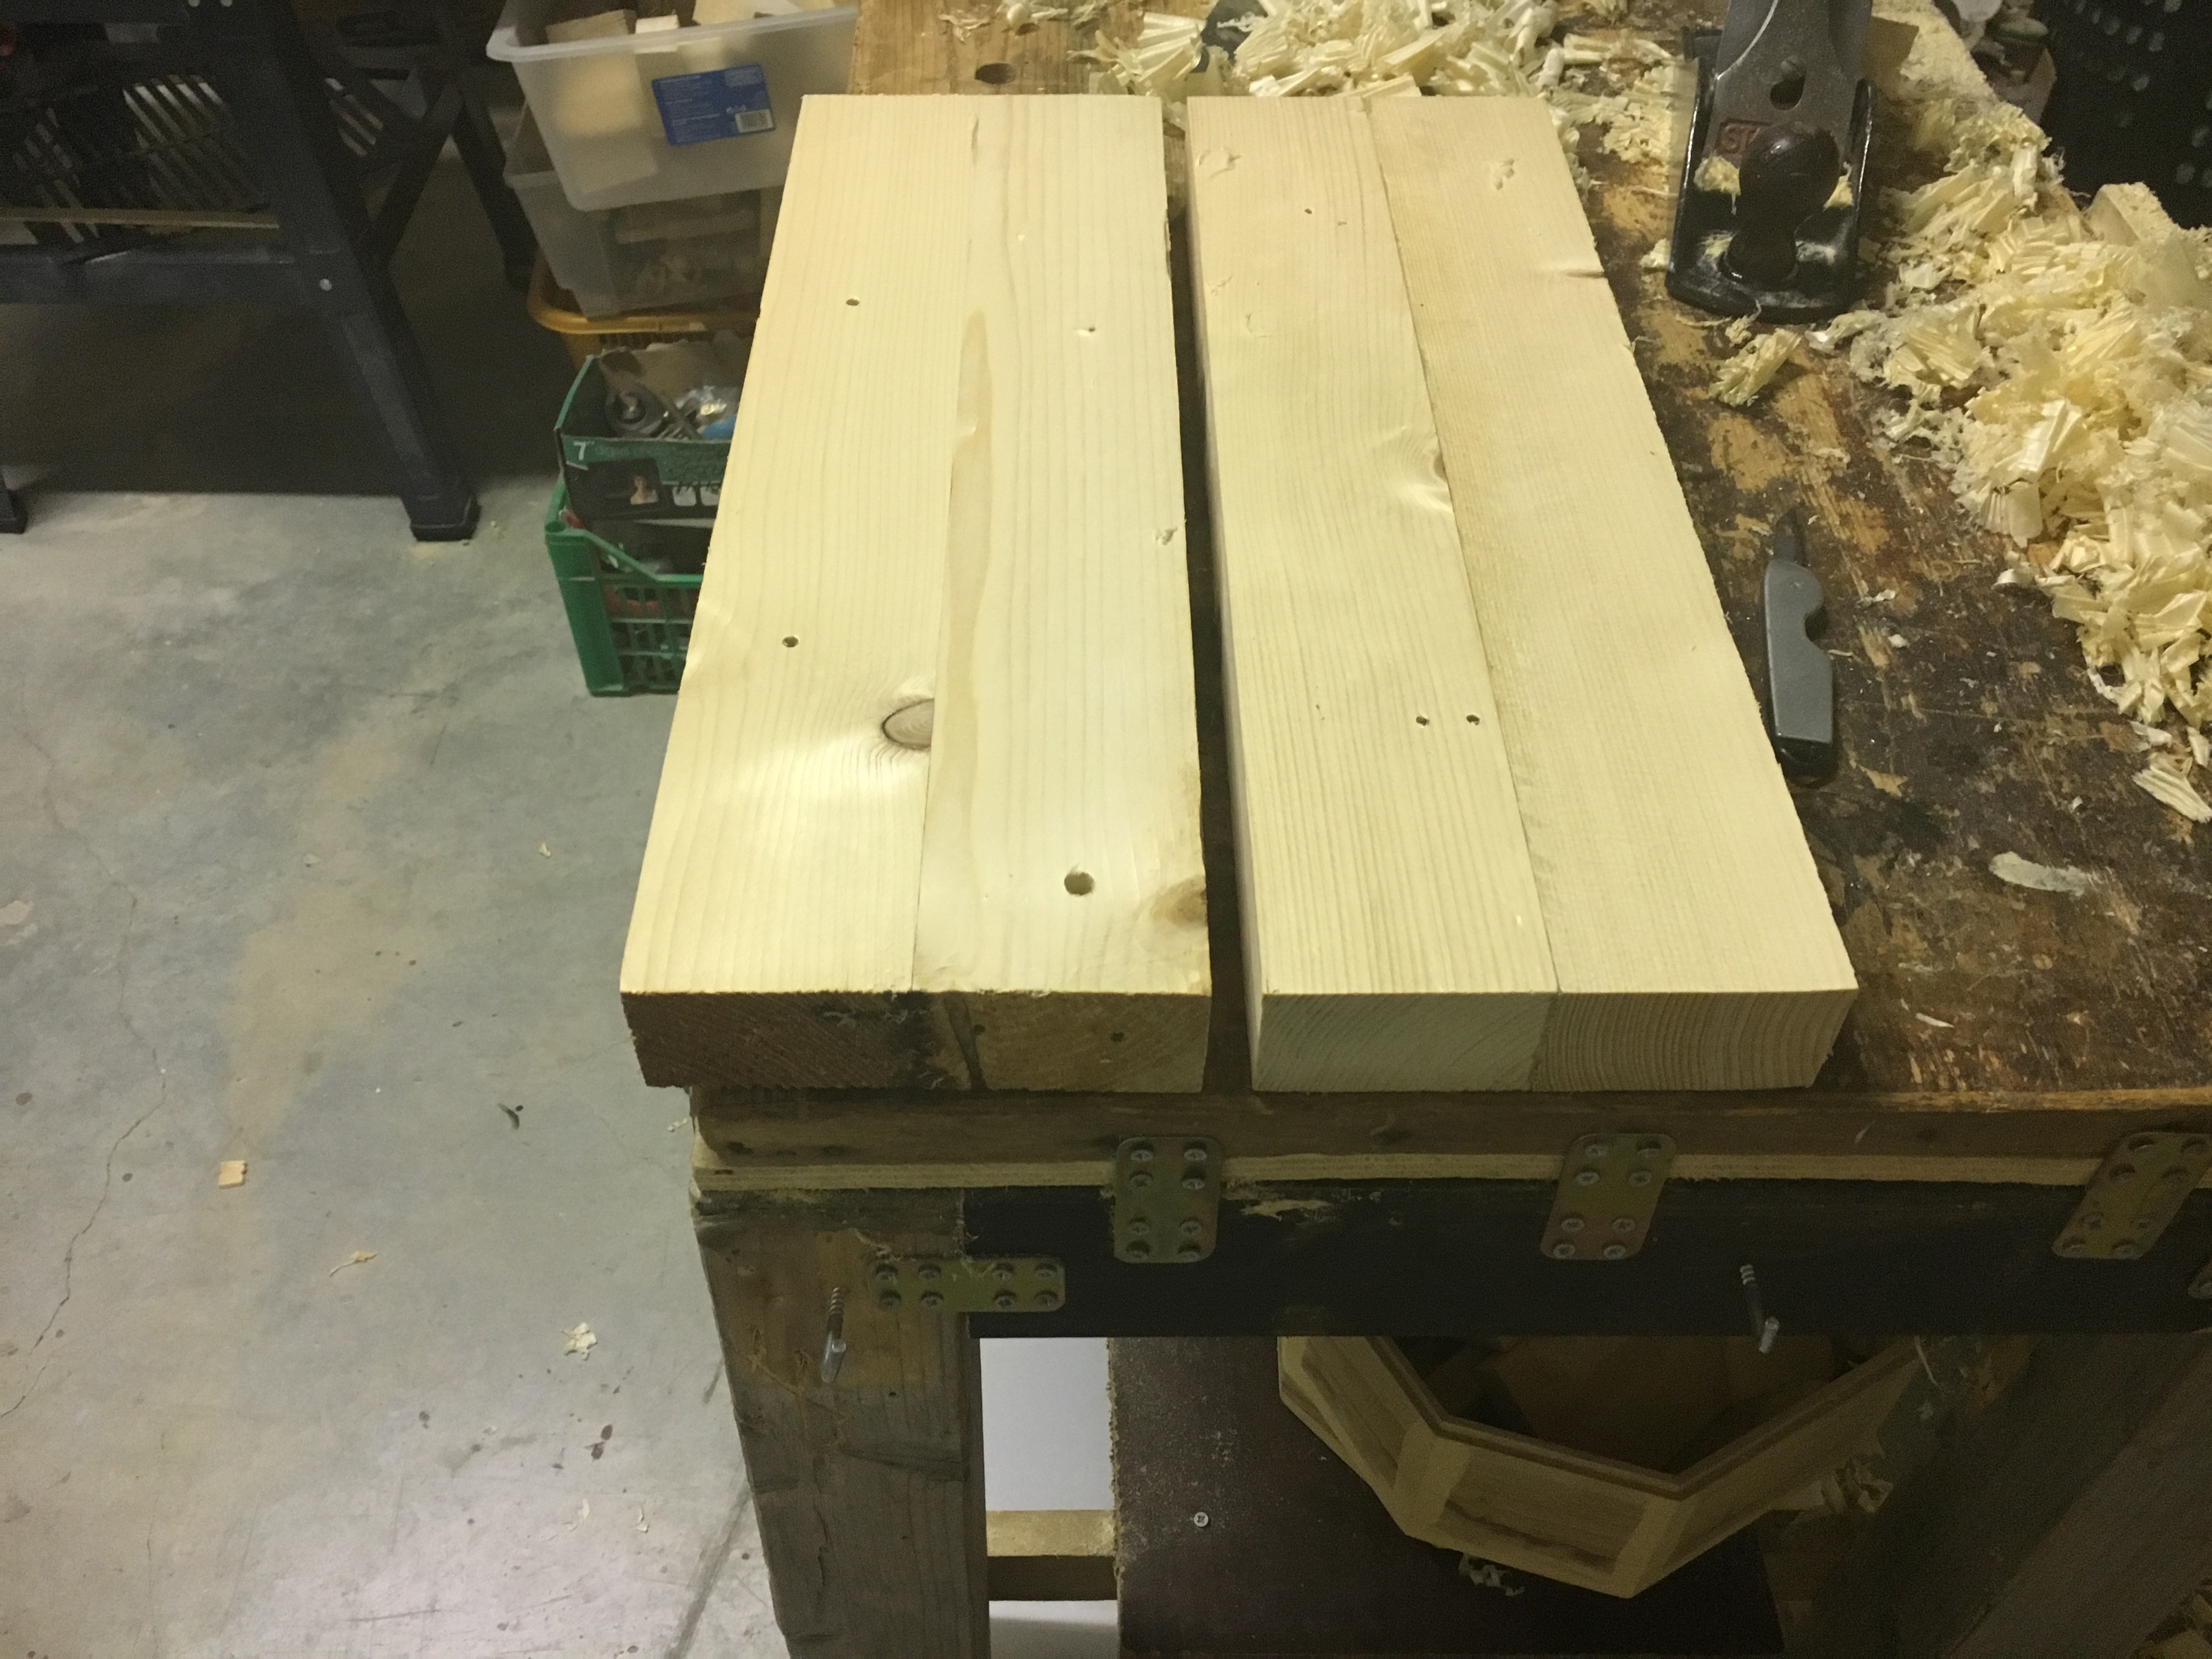
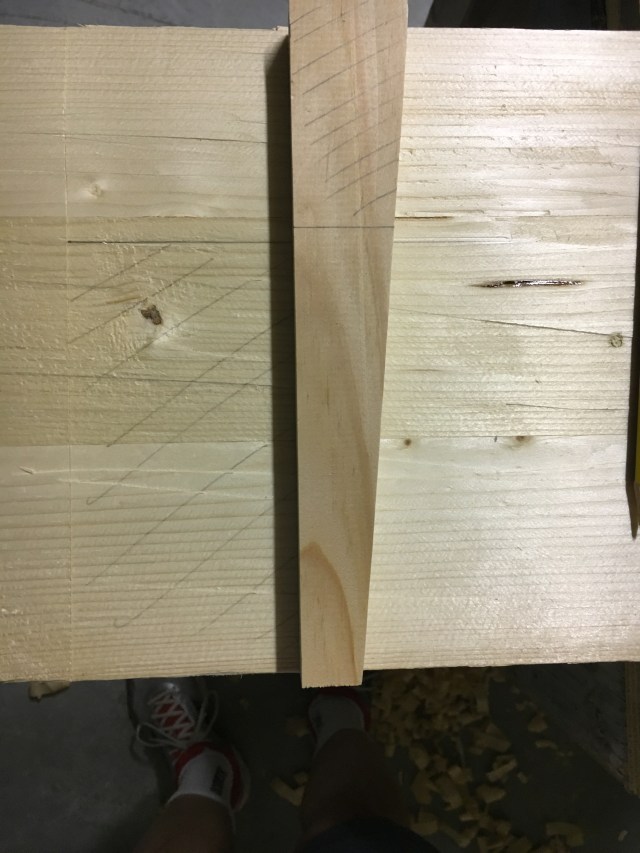
Per prima cosa ho piallato e squadrato le travi che sarebbero andate a comporre il piano del banco.
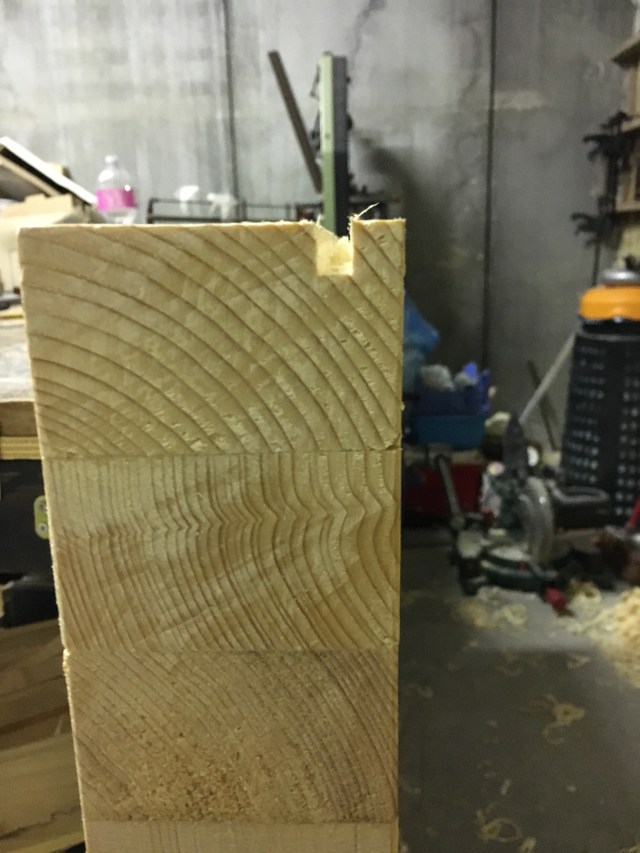
Per la disposizione delle travi ho cercato, per quanto mi era possibile e tenendo conto del fattore estetico, di rispettare la regola di incollare tra loro pezzi che presentino la direzione degli anelli di crescita del legno divergenti. Tale configurazione è osservabile dalla testa del legno. Ho proceduto quindi a mettere la colla e serrare nei morsetti.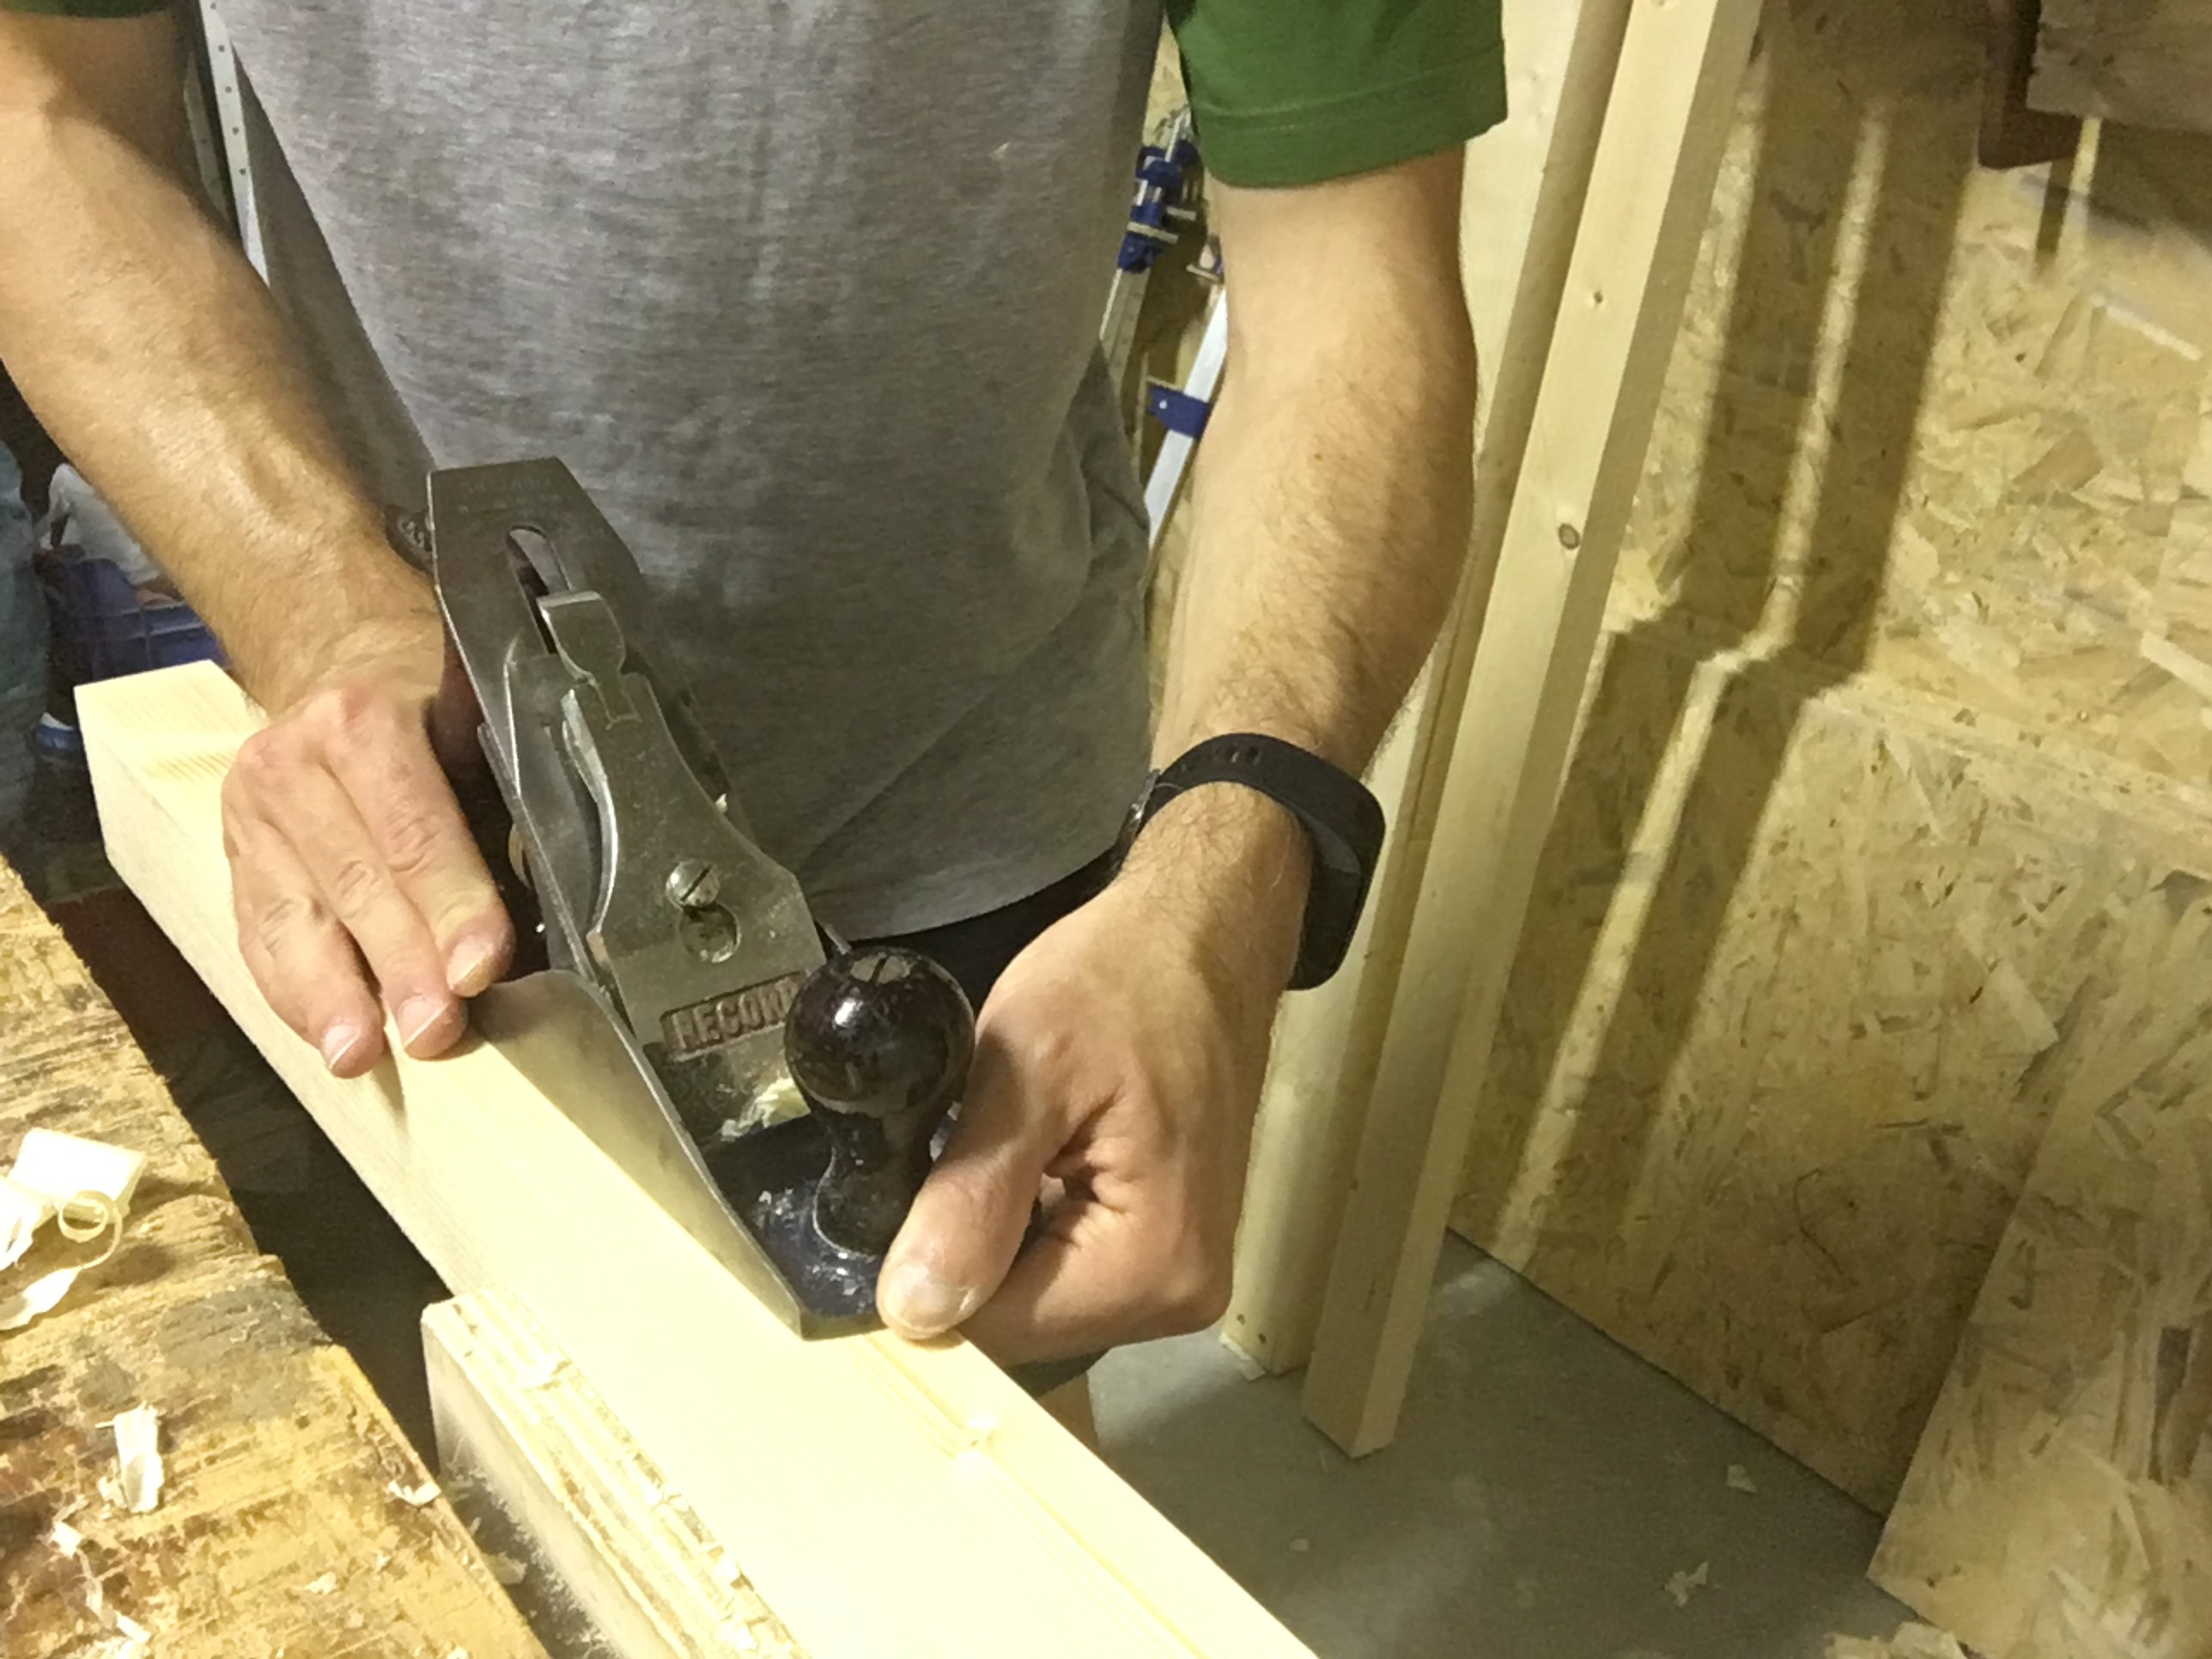

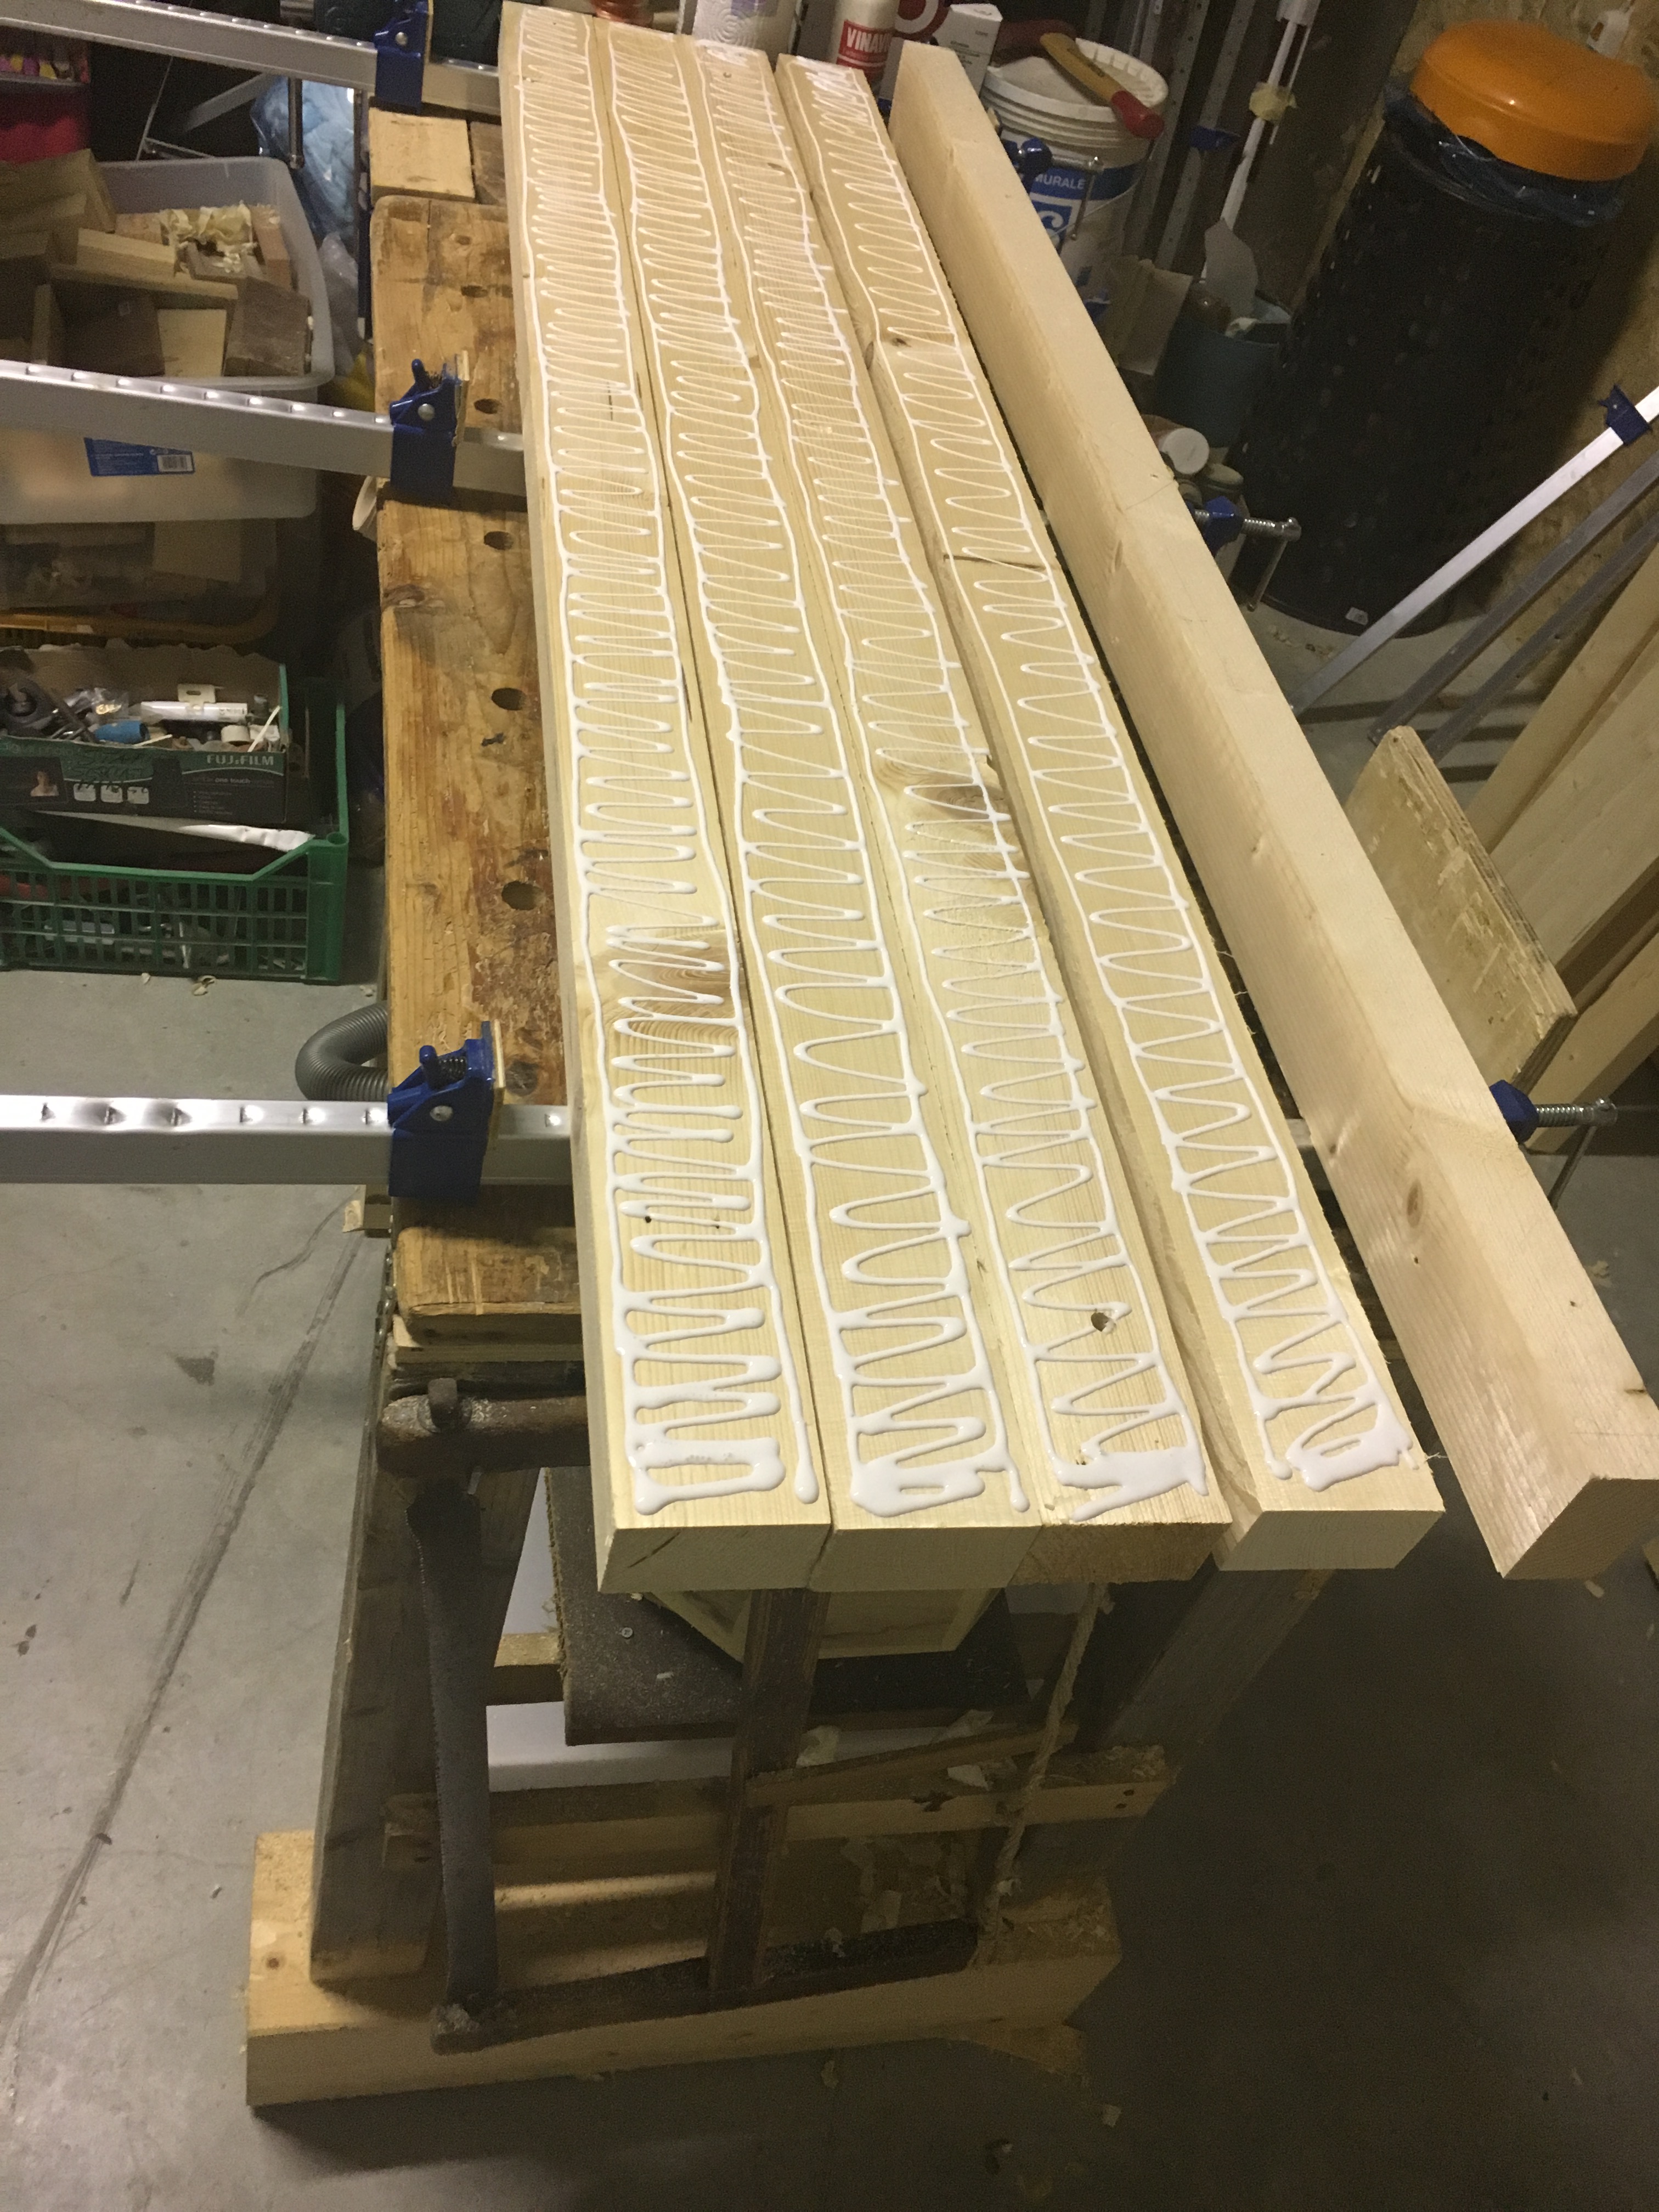

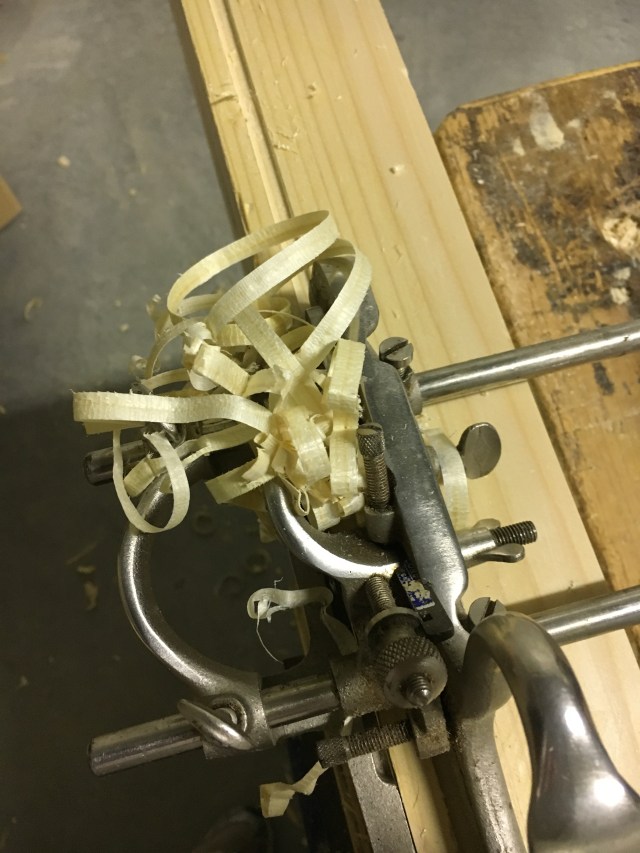
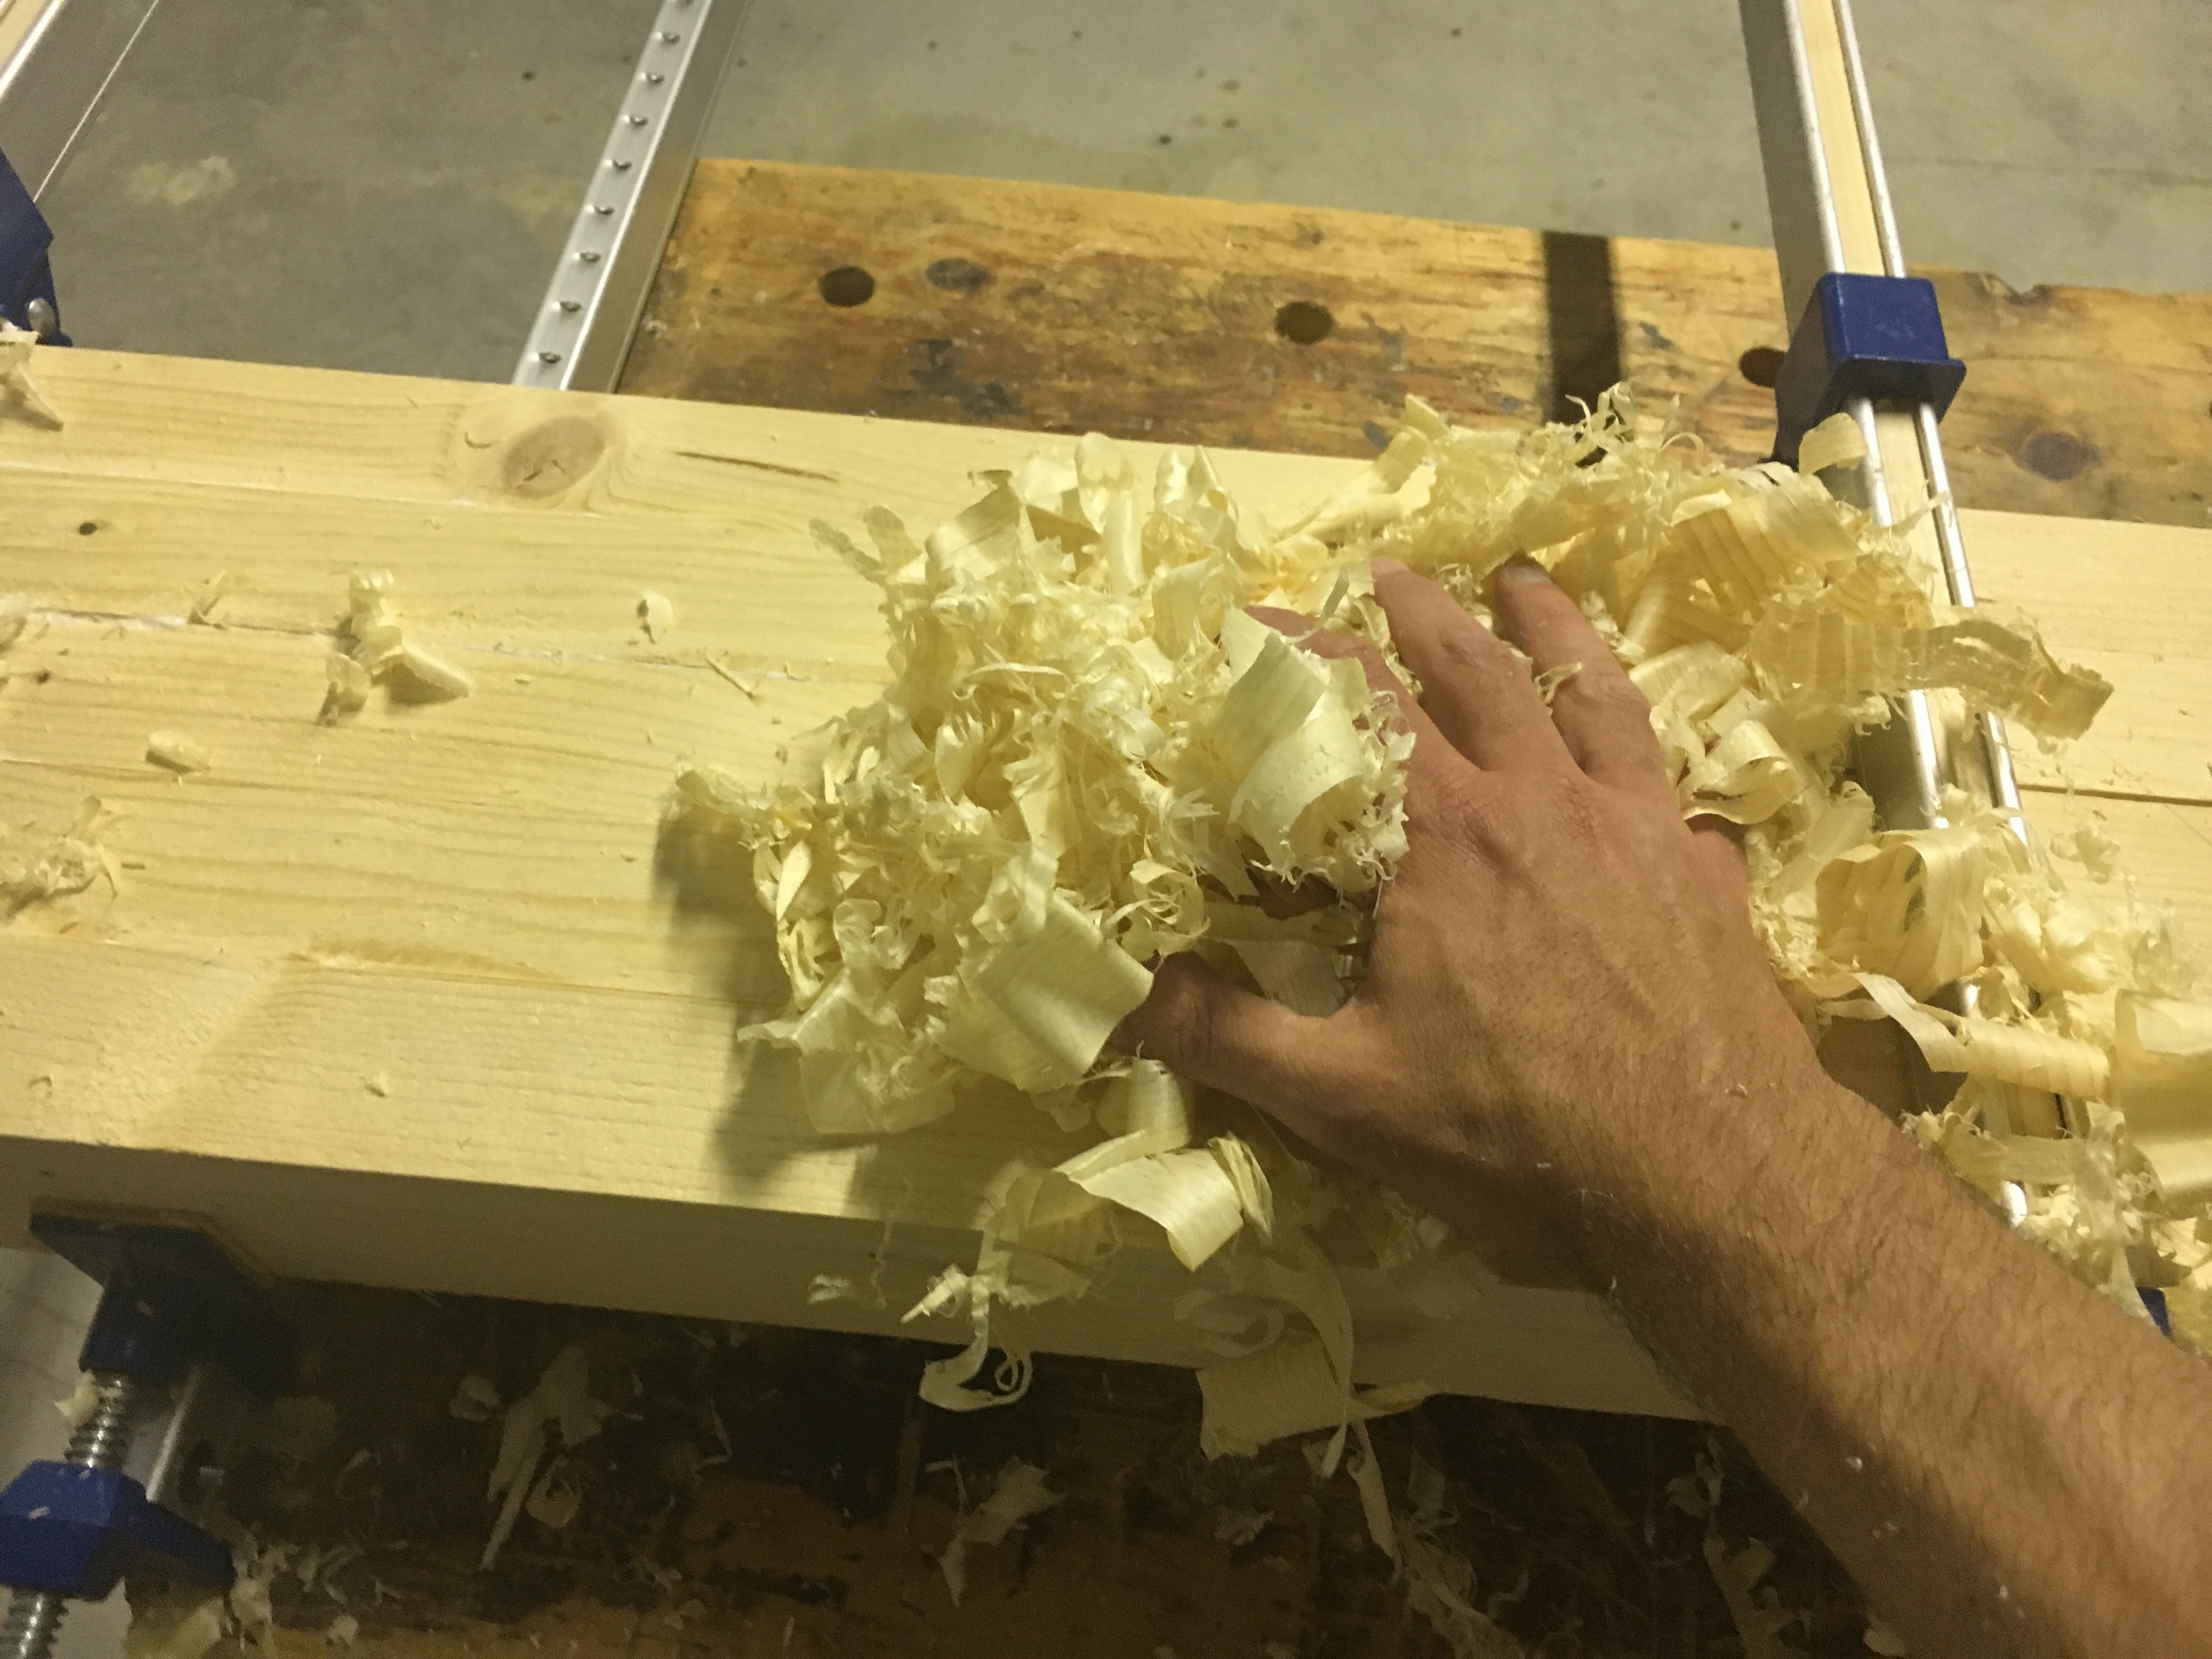 Ho rimosso poi i residui di colla con dei trucioli e fatto dei micro aggiustamenti agendo sui morsetti e con il martello per ottenere un serraggio il più uniforme possibile. Lasciato a riposo una notte, il giorno dopo ho tolto i morsetti e controllato con le winding sticks le distorsioni ancora presenti. L’obiettivo è quello di ottenere una superficie la più dritta e regolare possibile e a tal fine ho nuovamente piallato entrambe le superfici anche per rimuovere i residui di colla ancora presenti.
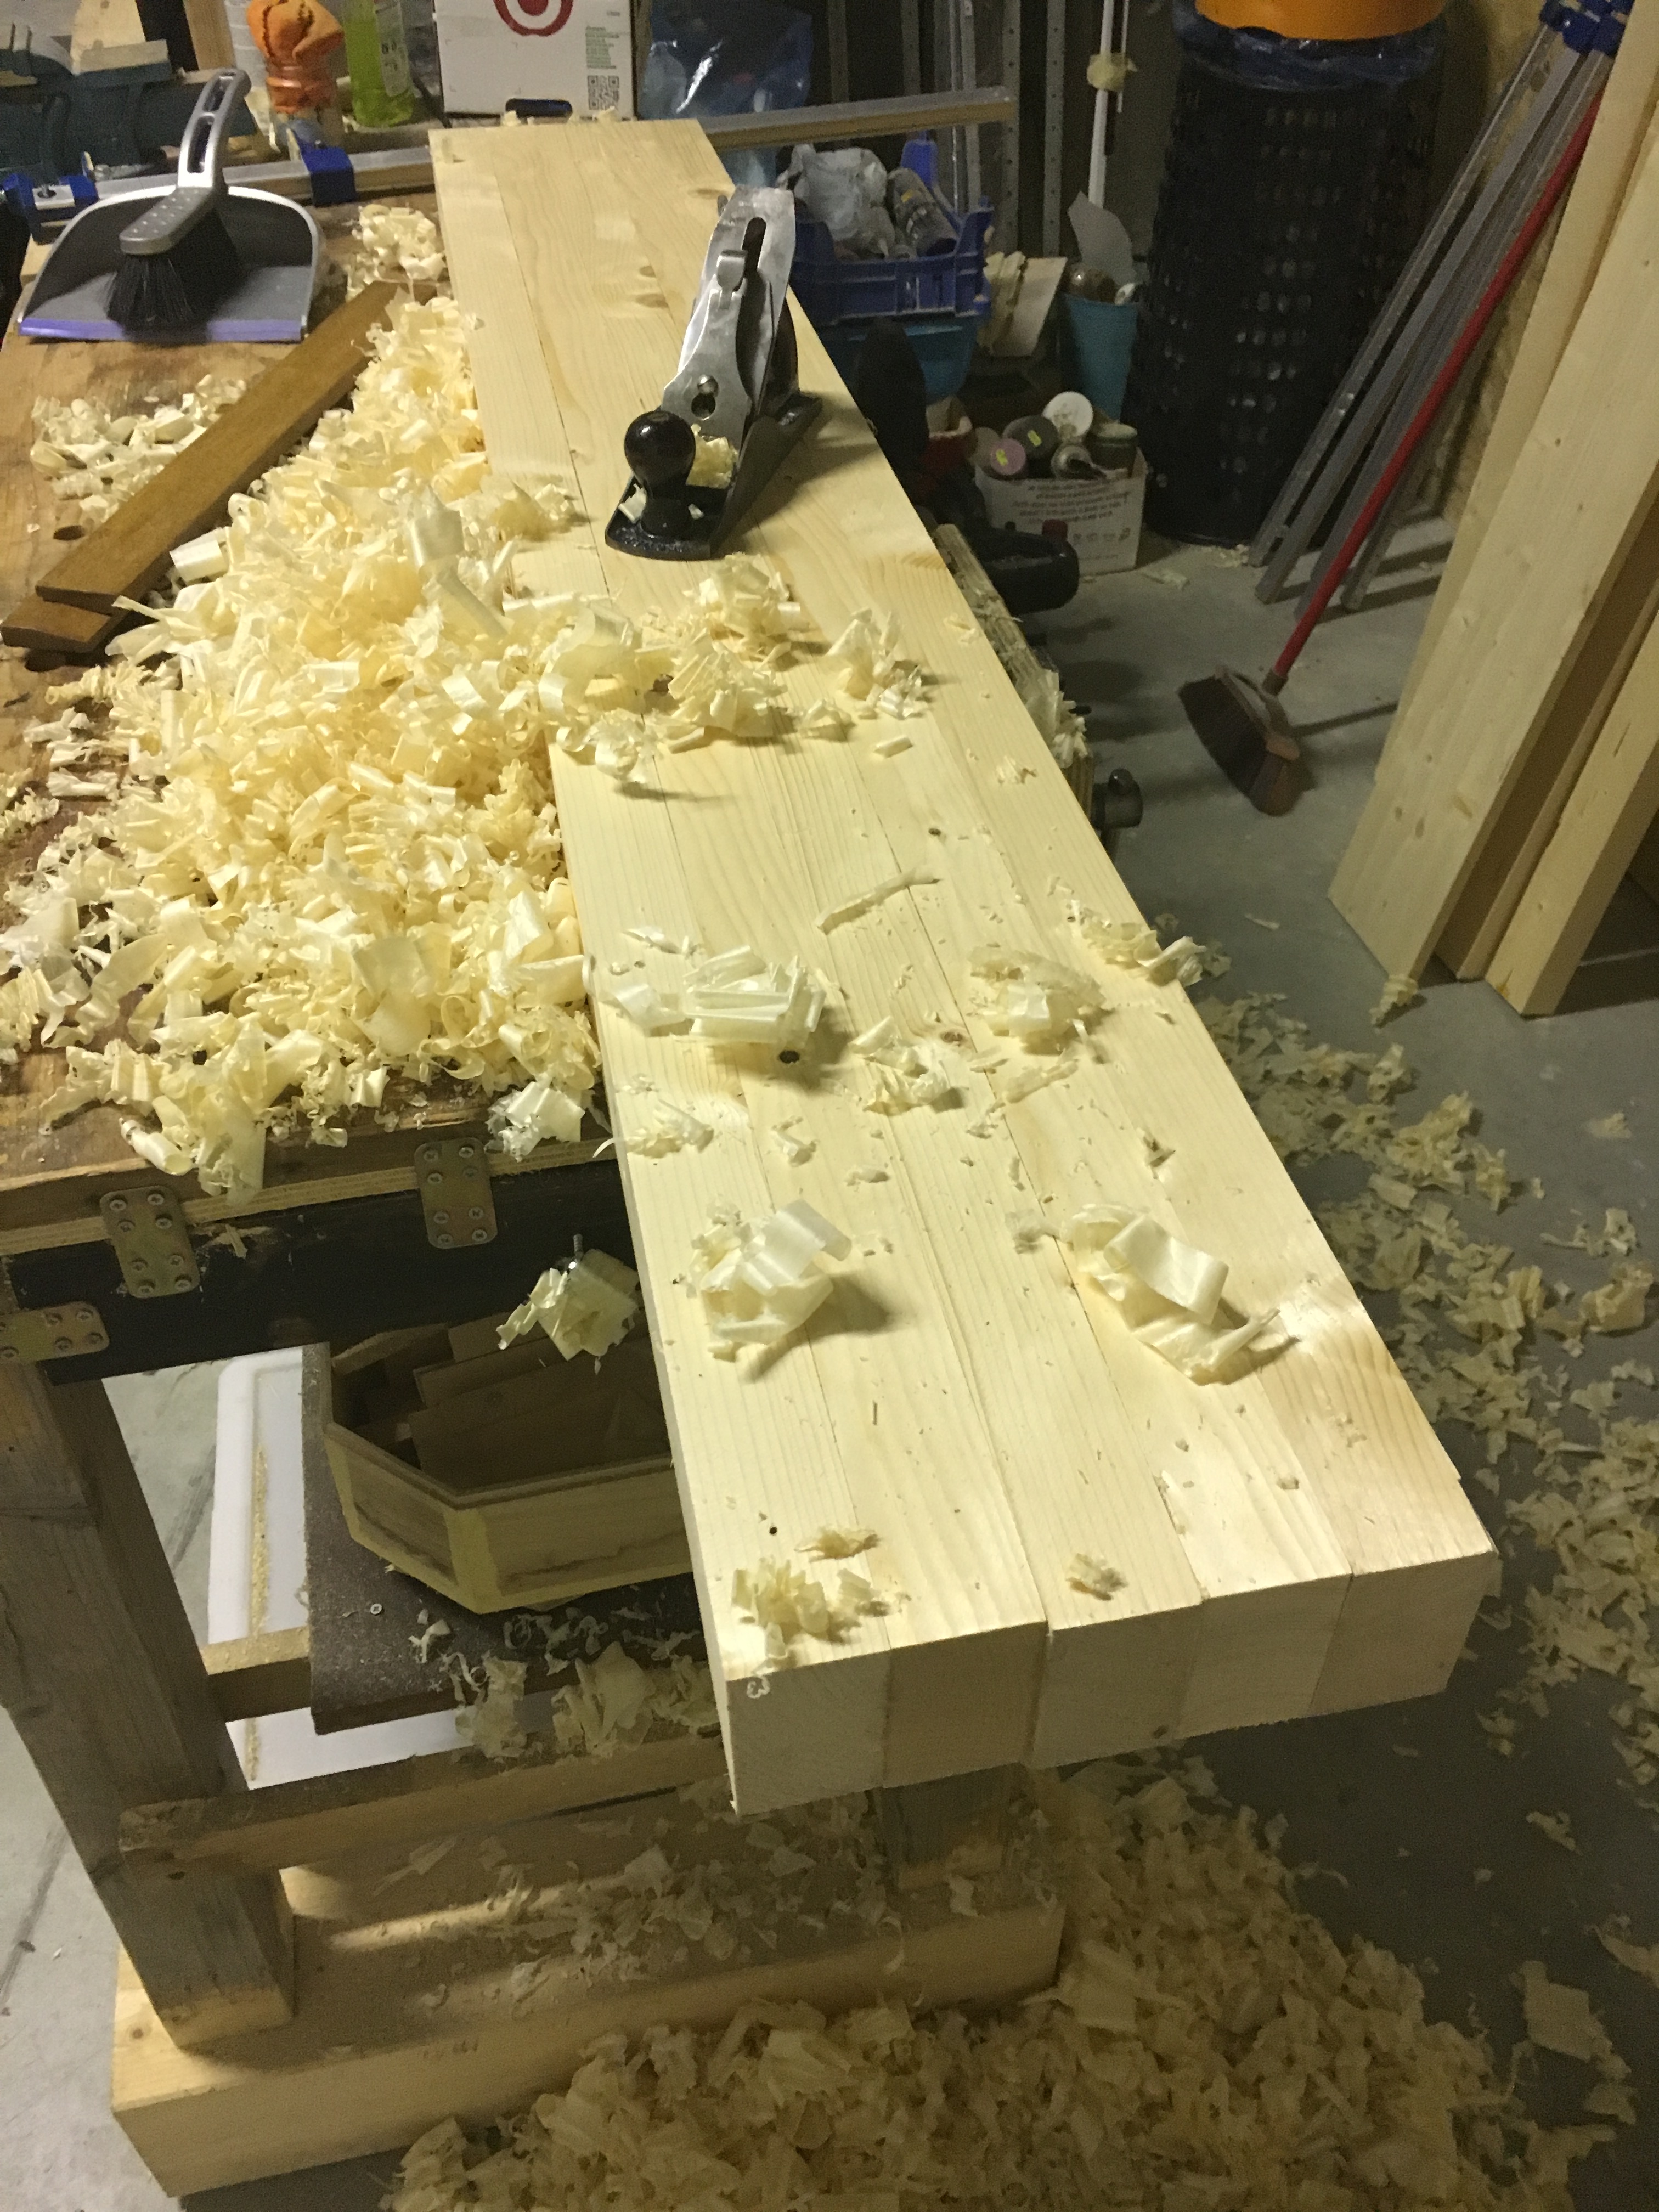

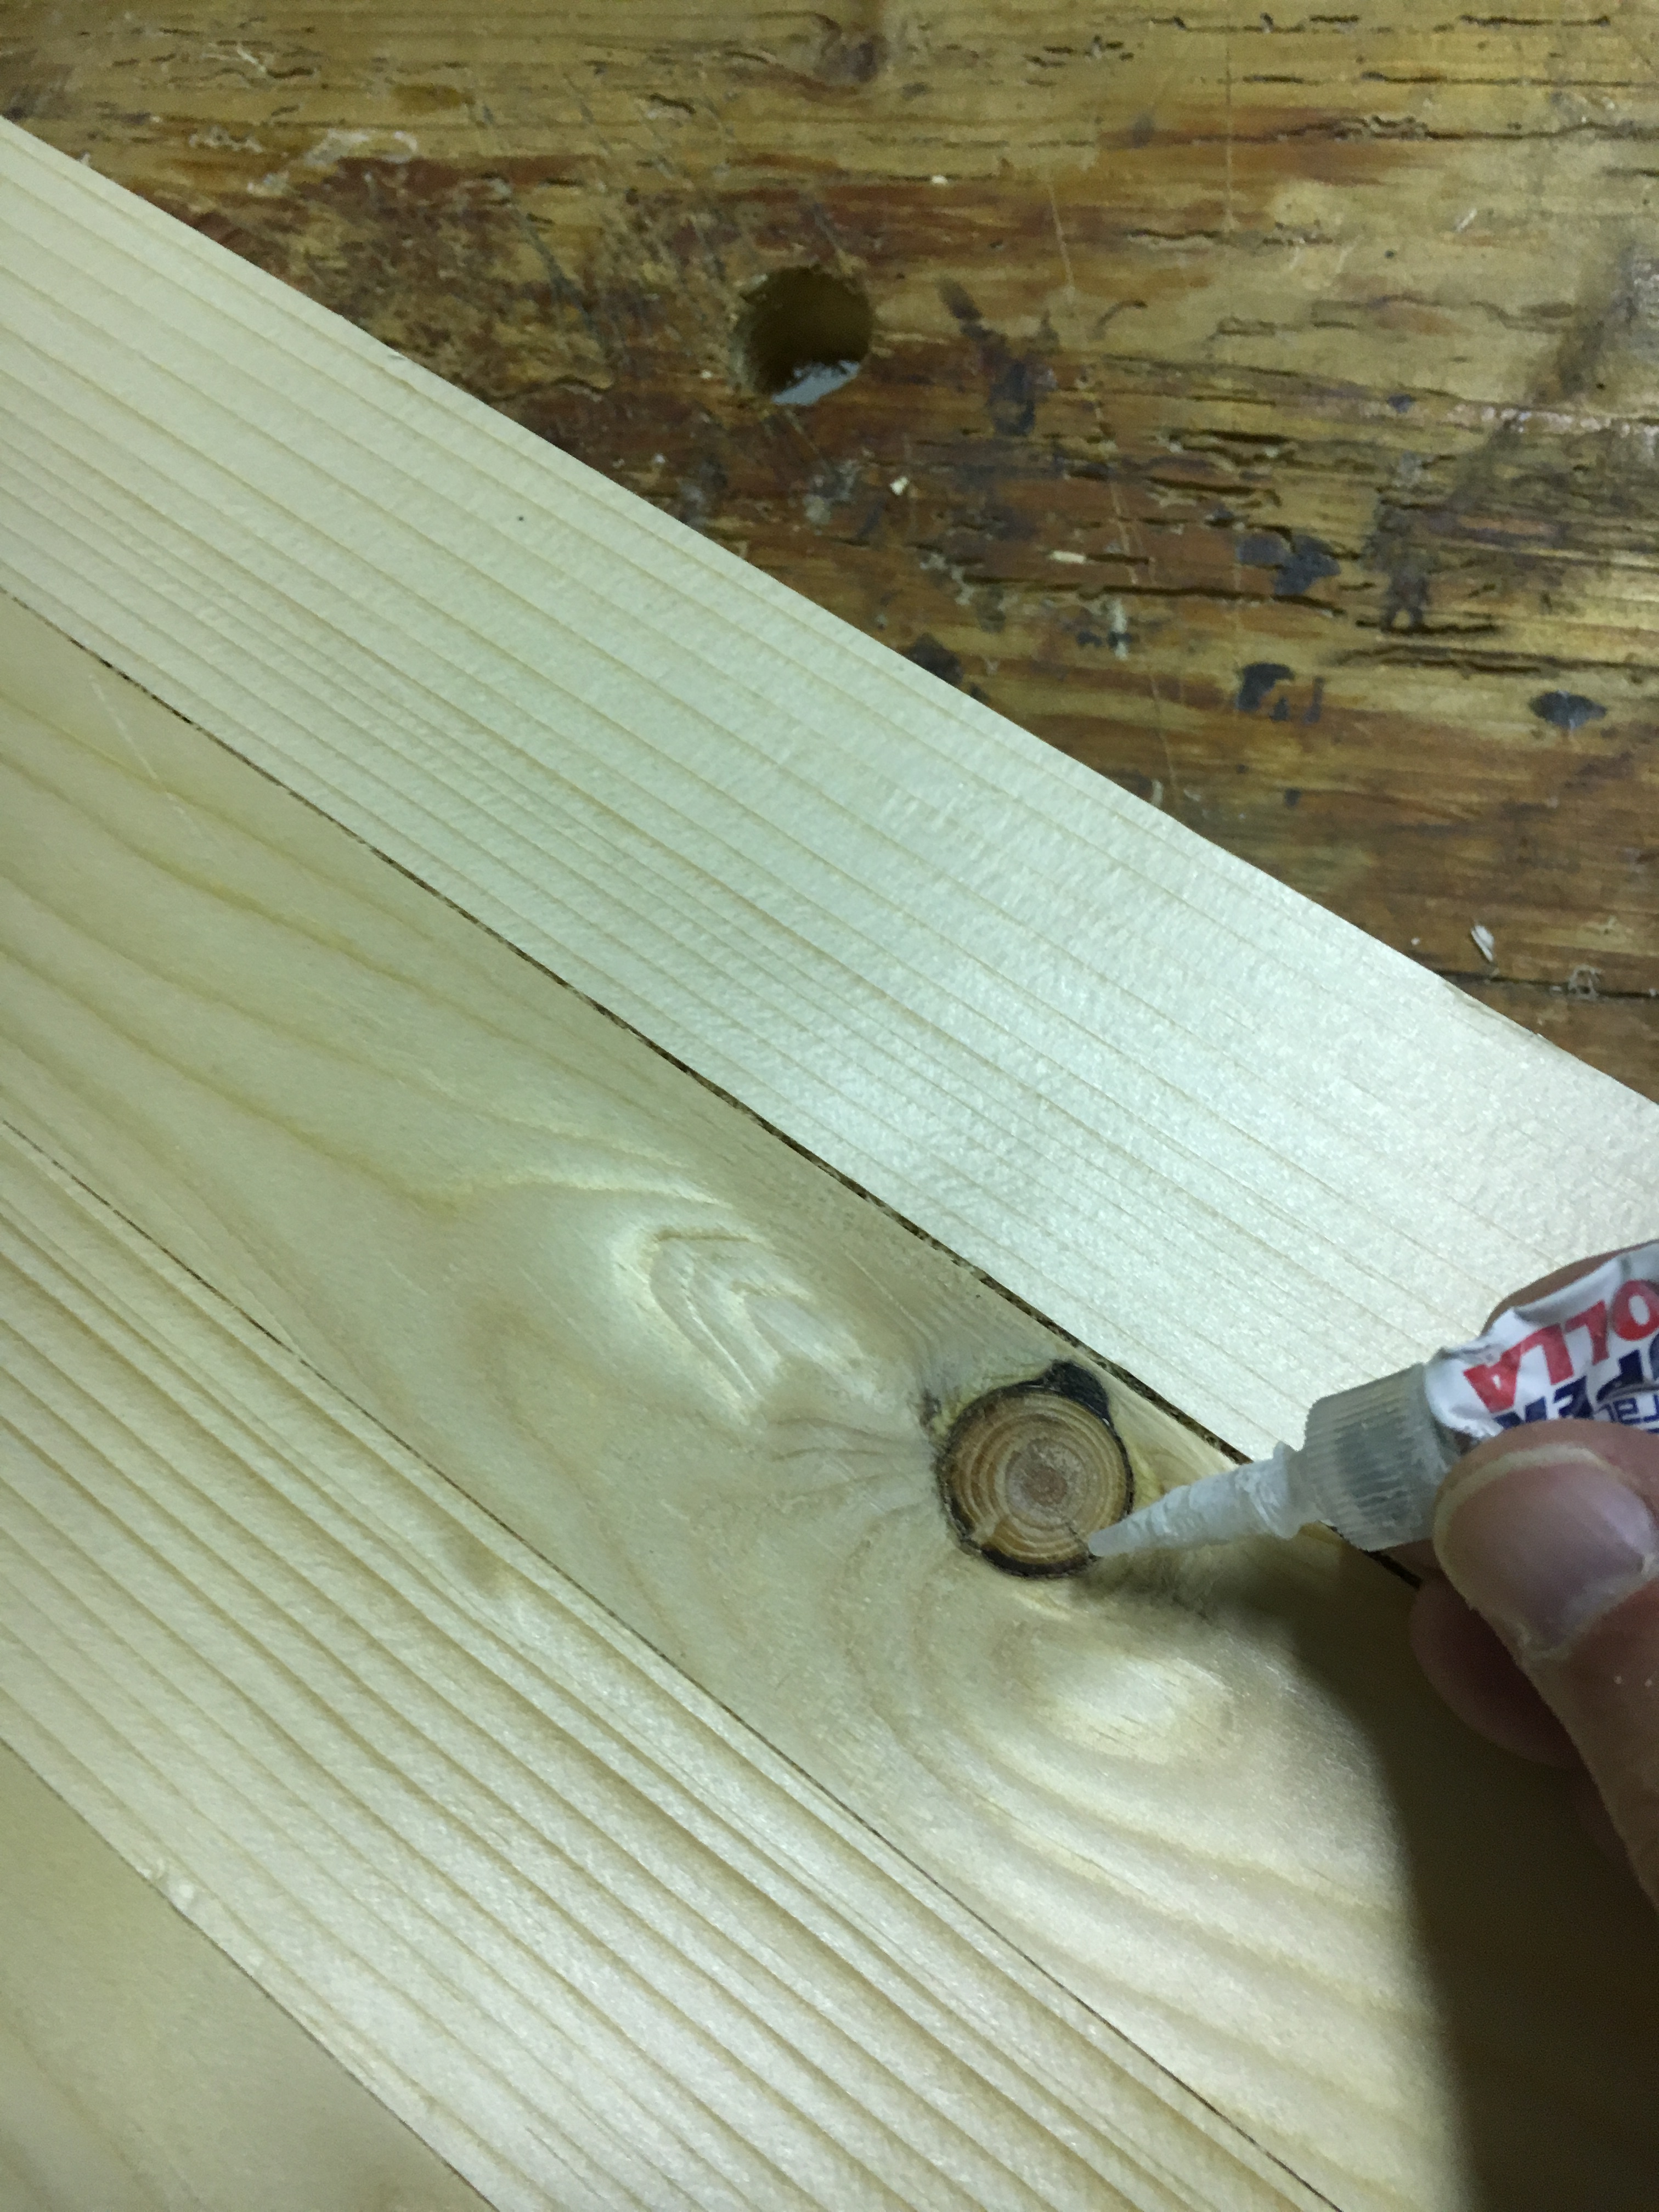
Erano presenti anche alcuni nodi. Per il timore di distacco ho preferito trattarli, fissandoli con della supercolla a presa rapida.
Il piano del banco non è ovviamente solo quello appena descritto. La larghezza finale è infatti composta anche dallo spessore dei due frontali (apron) e dalla vasca portautensili. Questo elemento va tenuto in debita considerazione prima di procedere ad assemblare il piano del banco in quanto le misure finali possono differire sensibilmente.
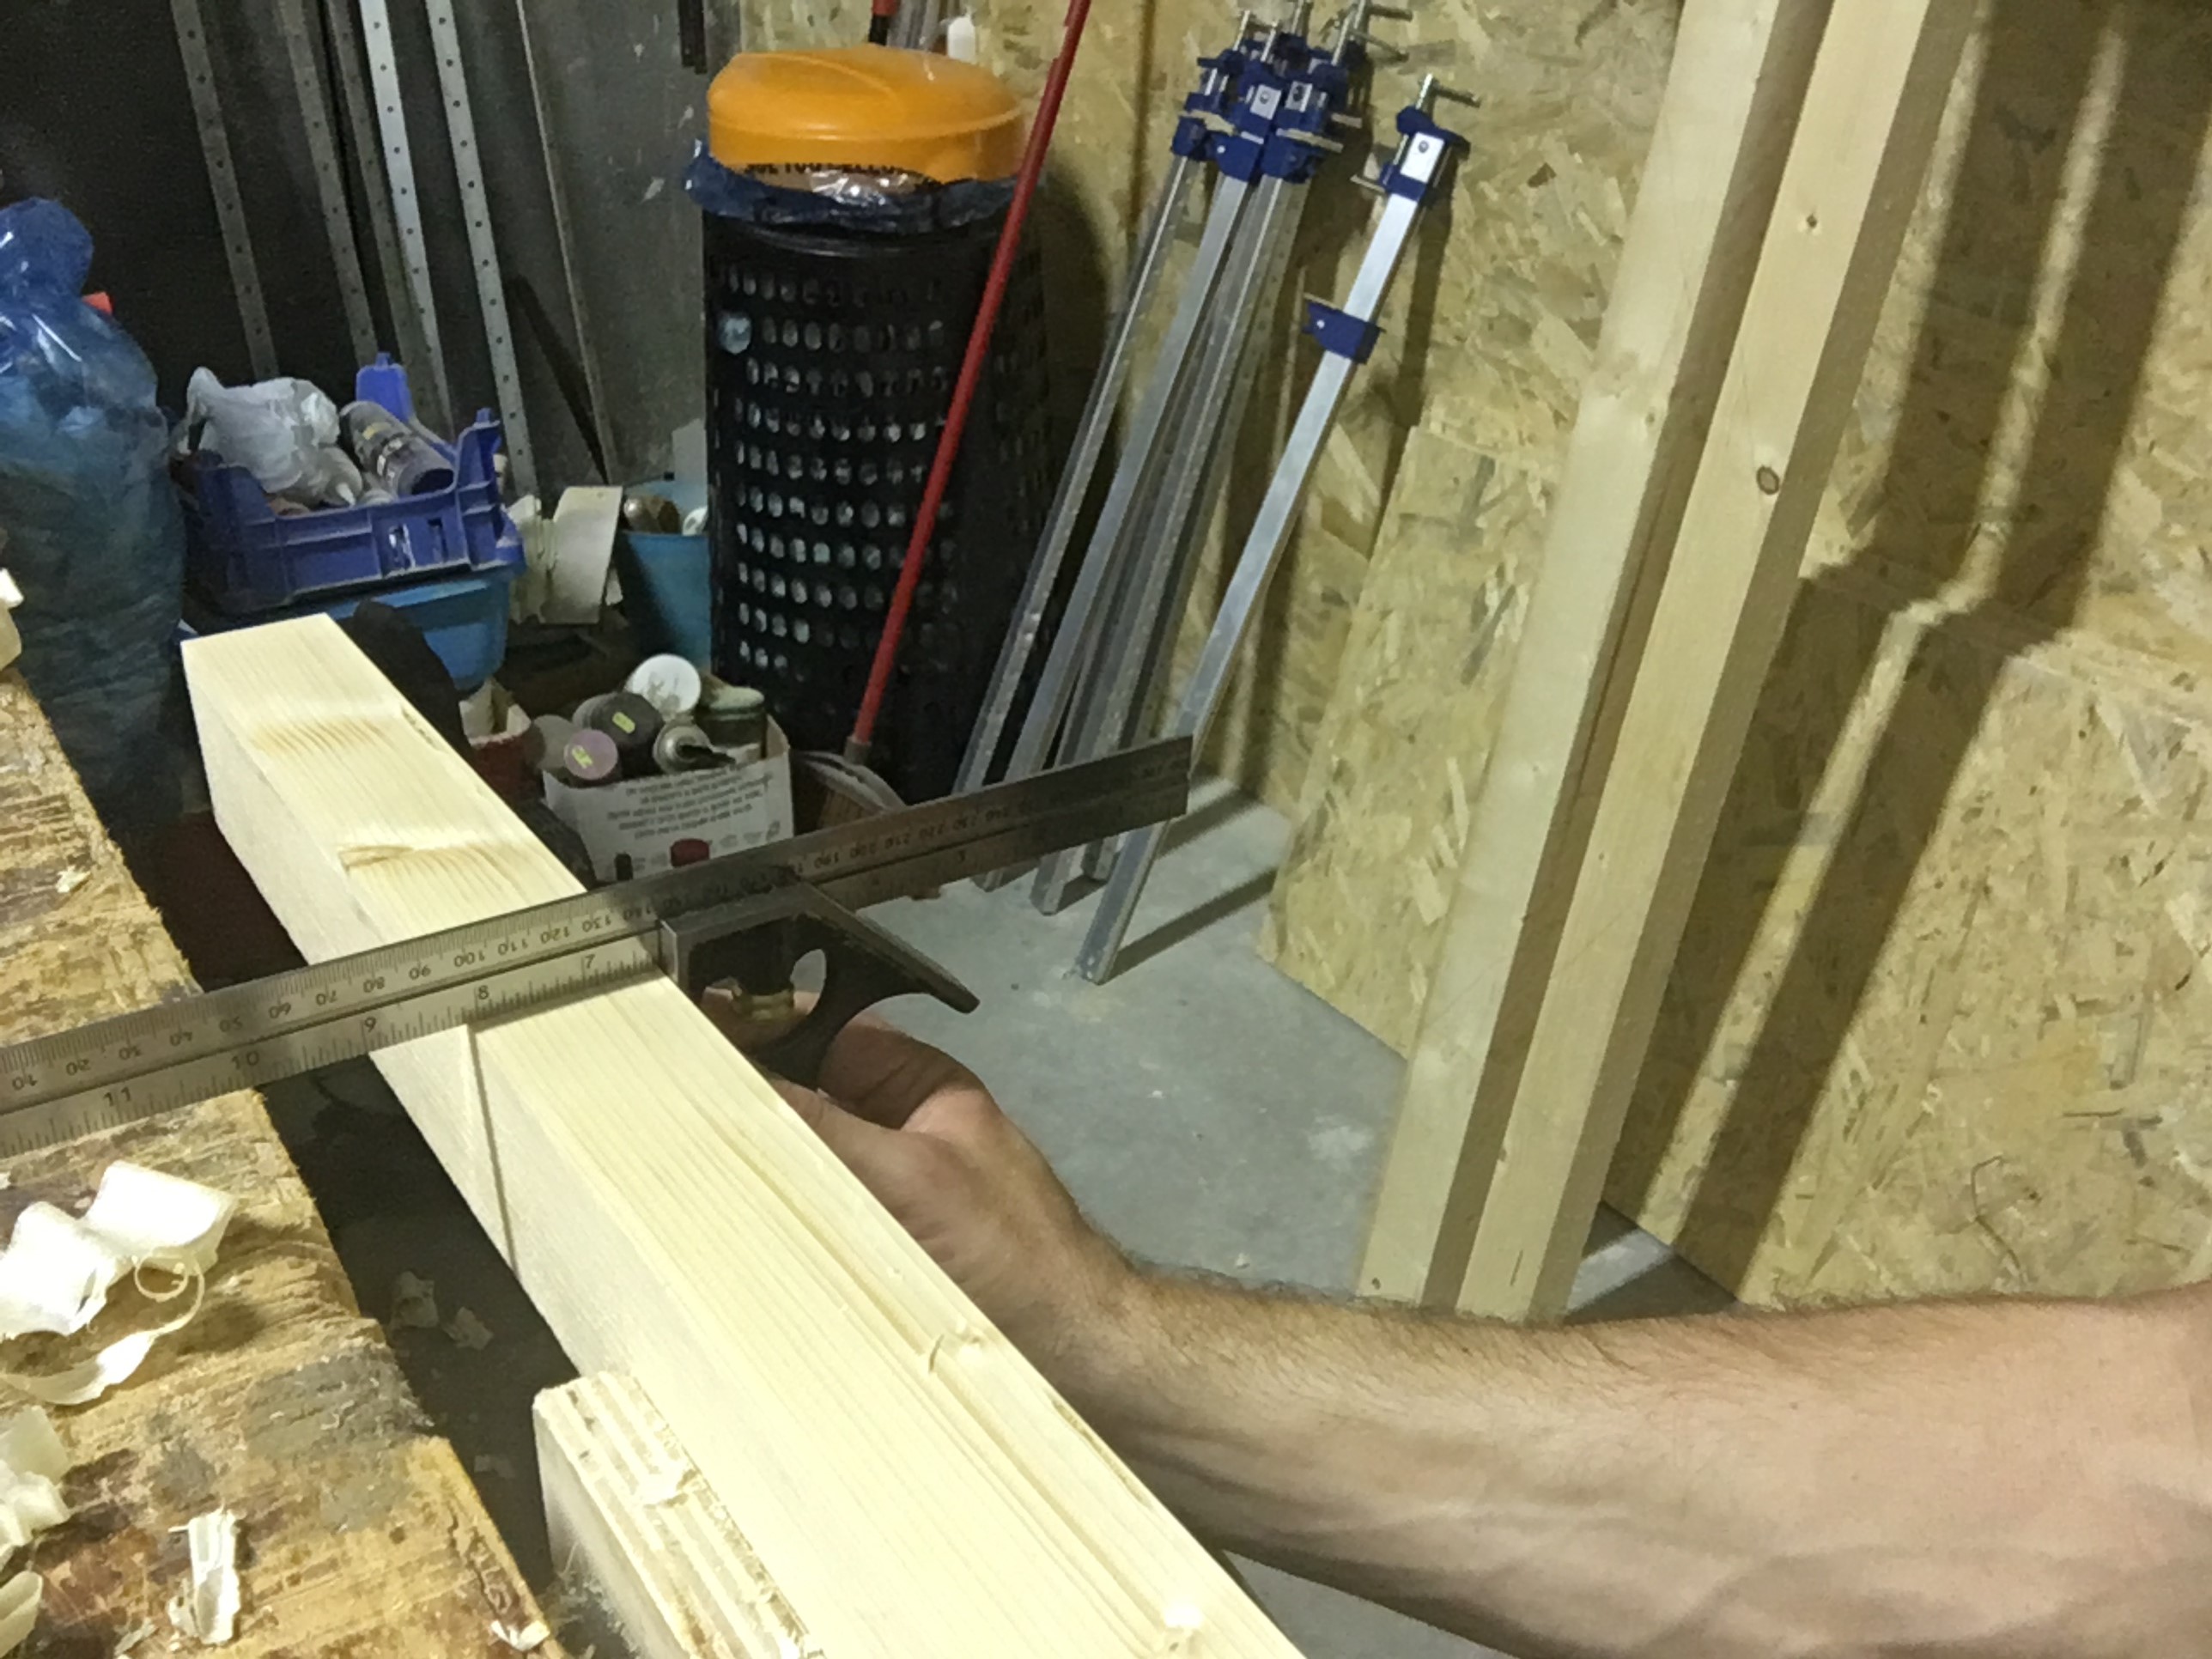
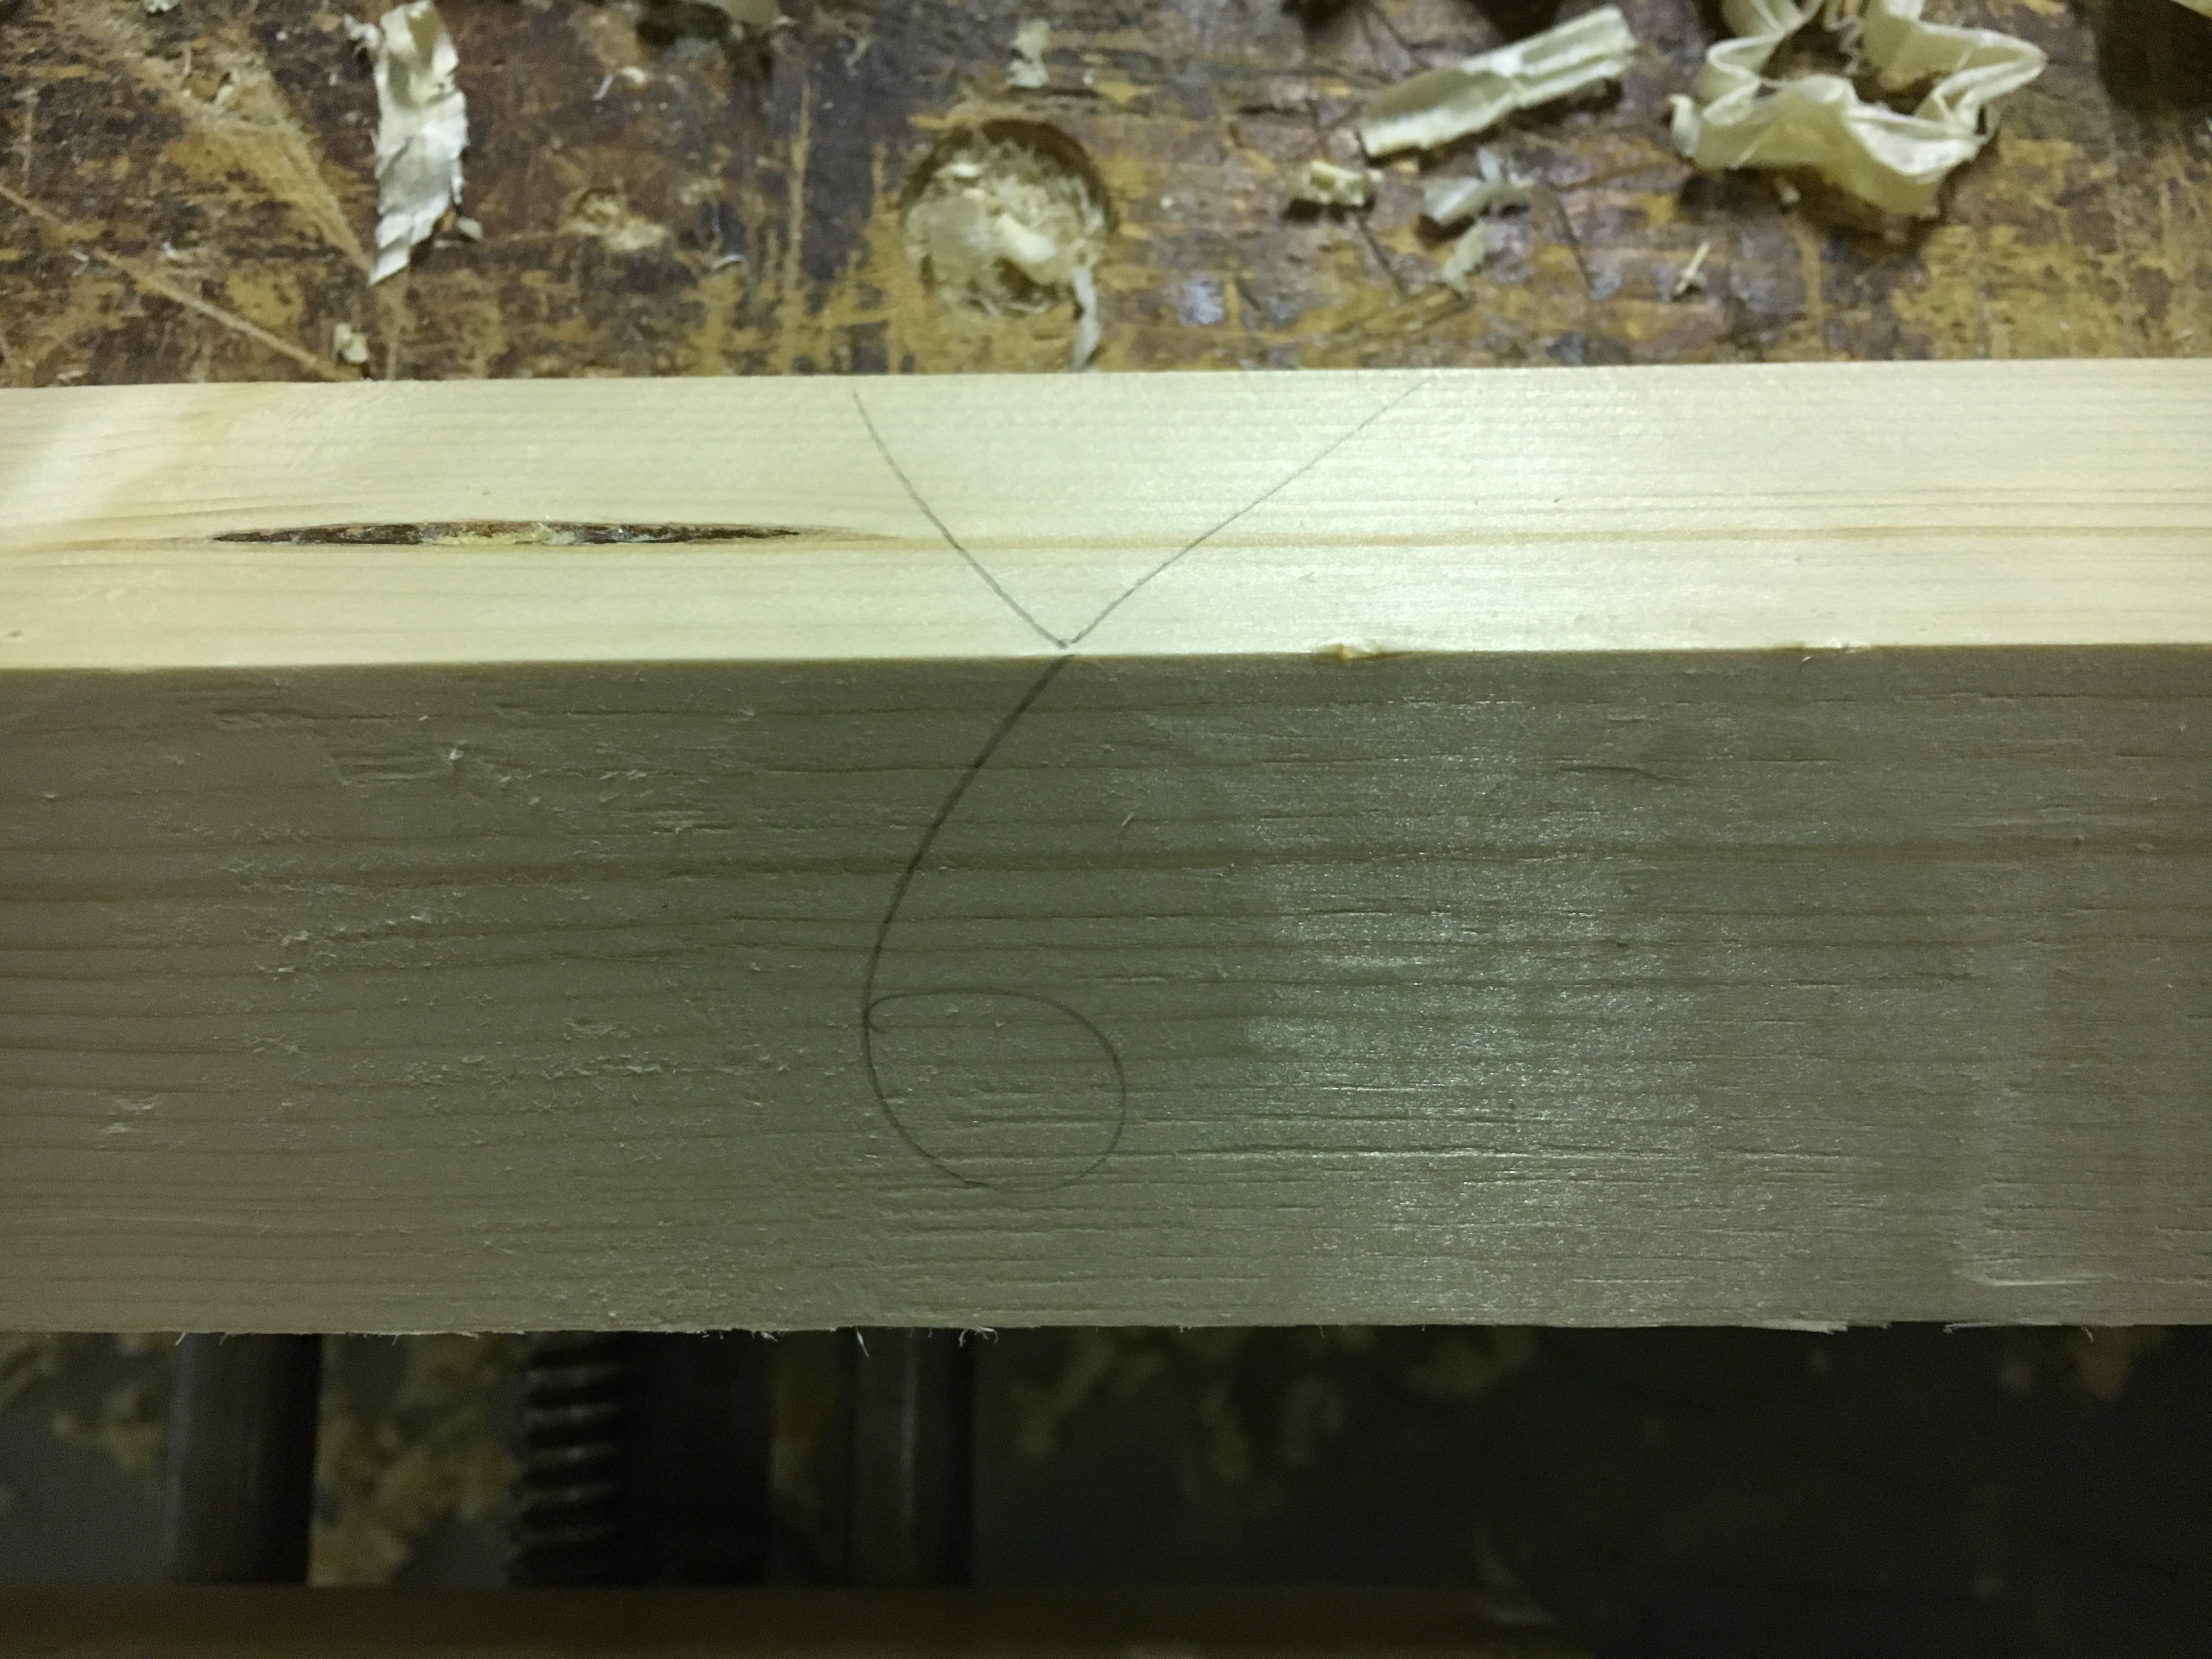
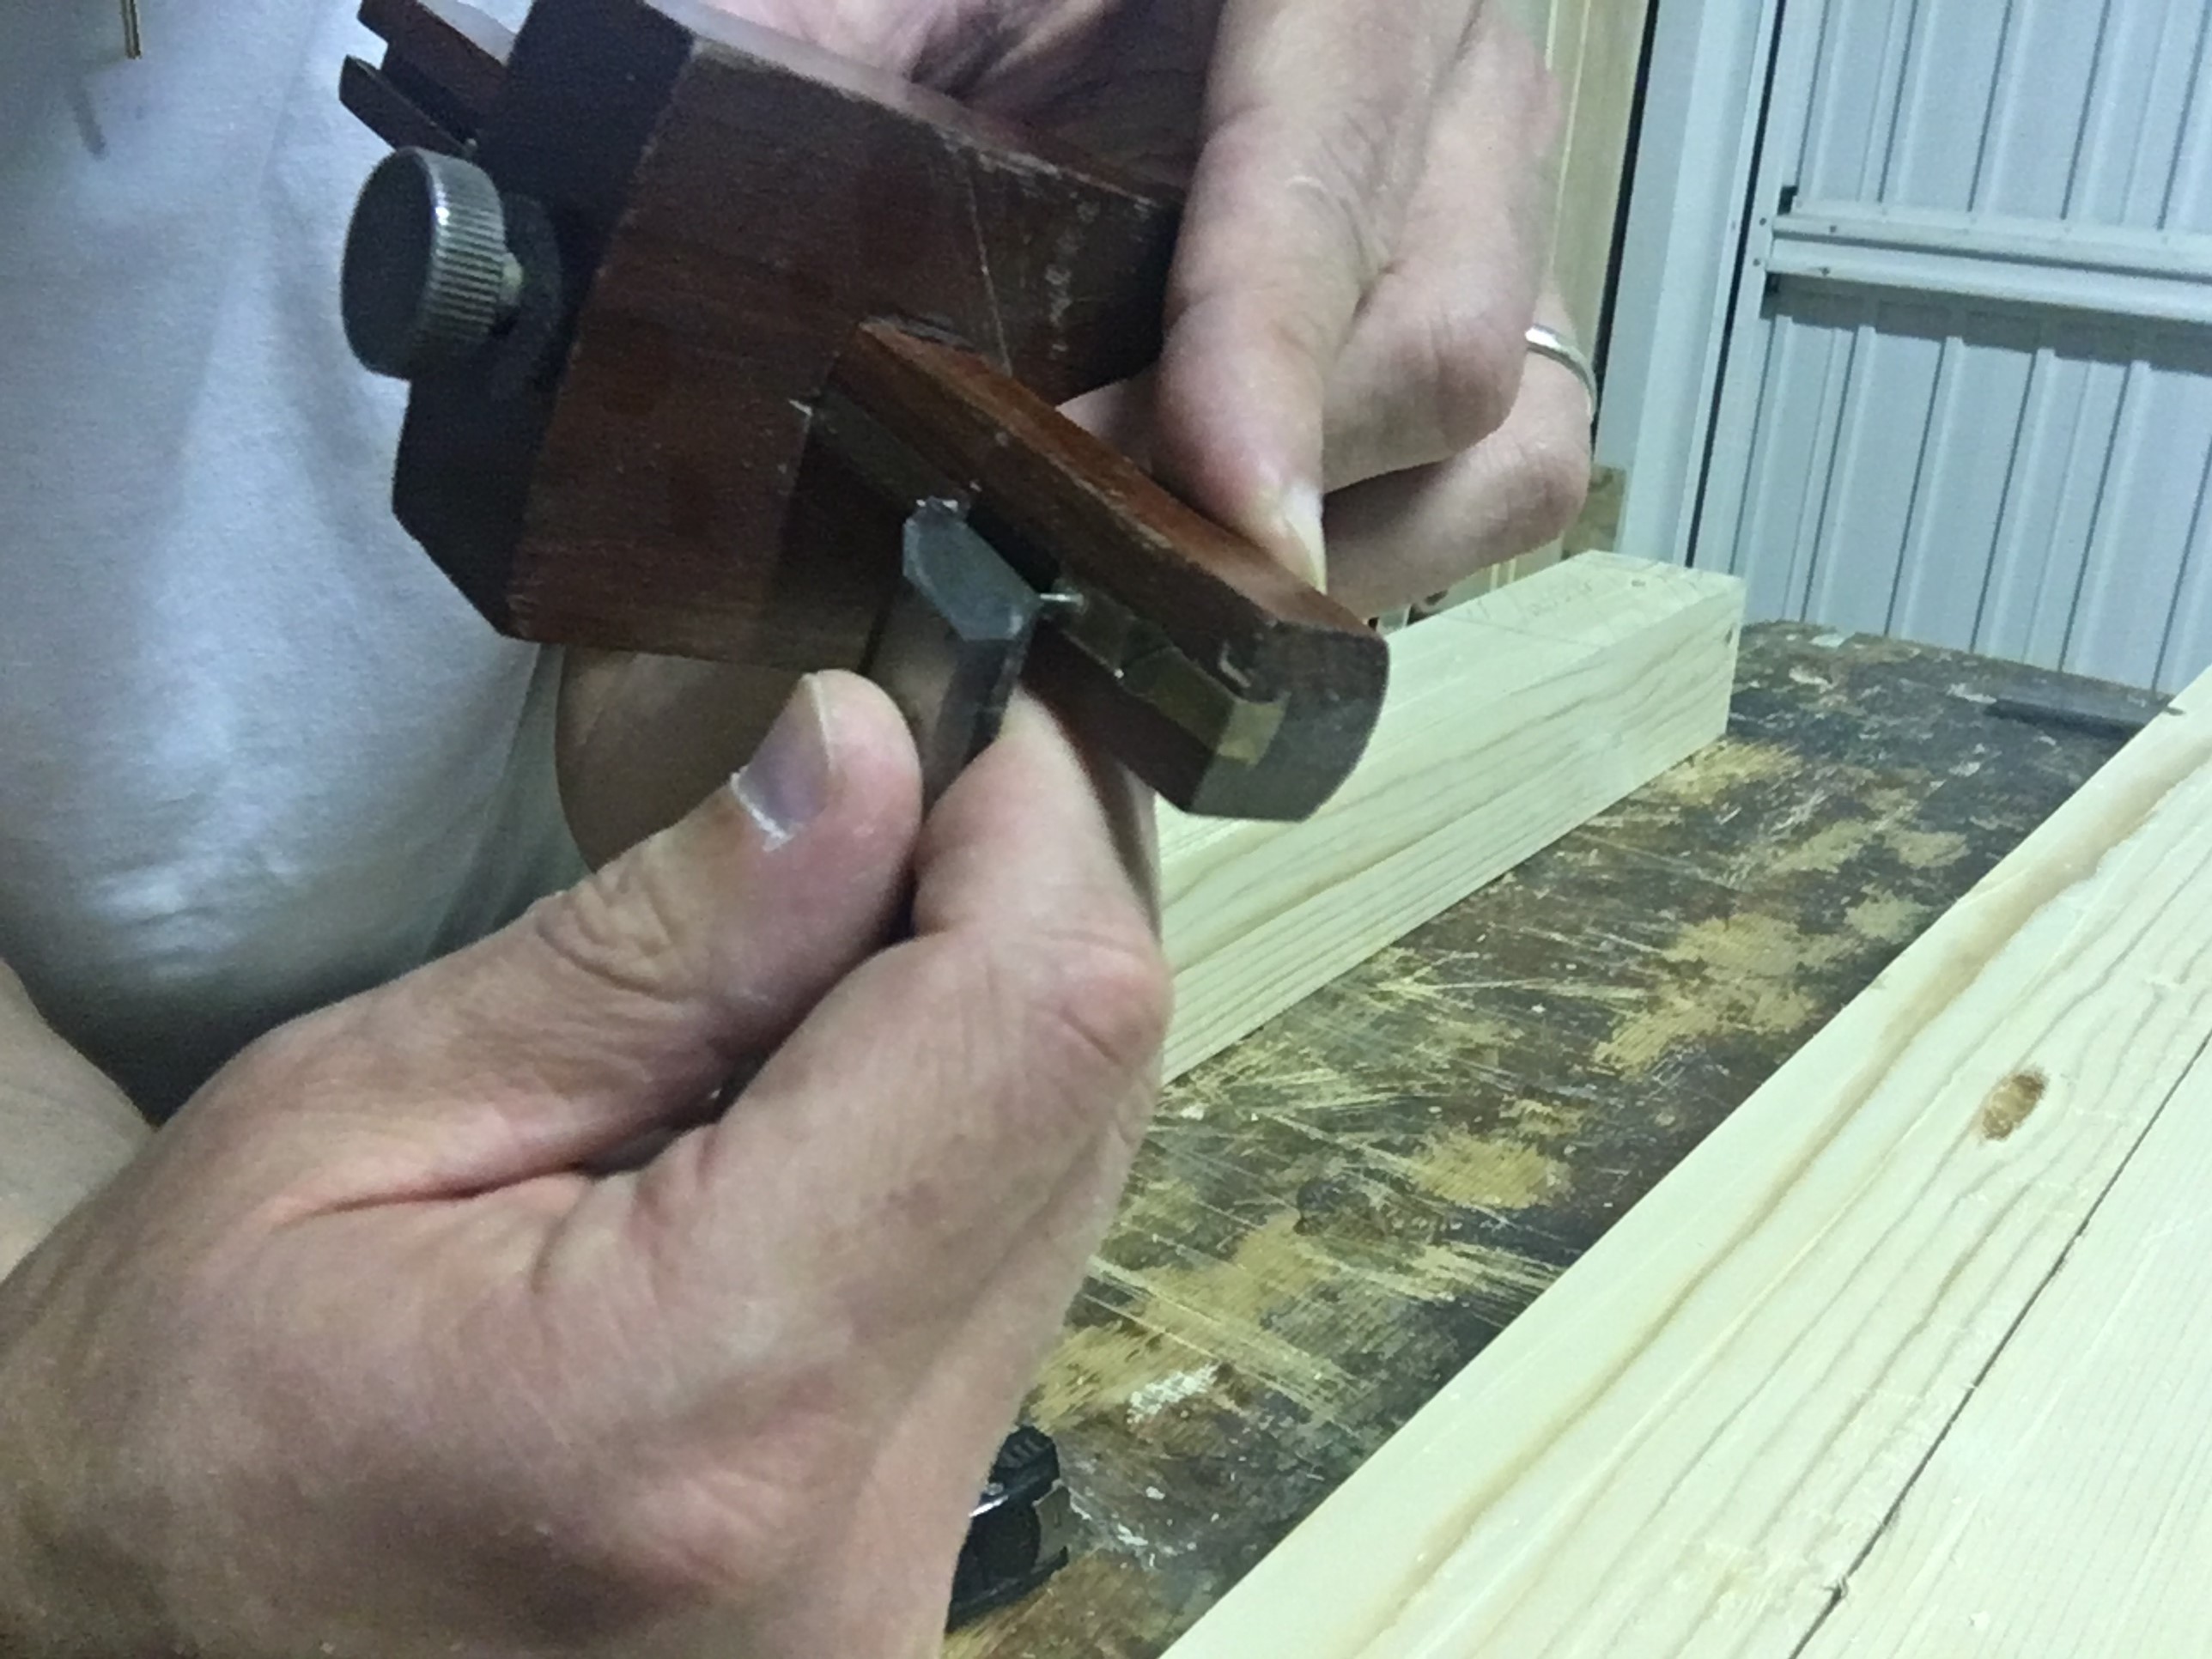
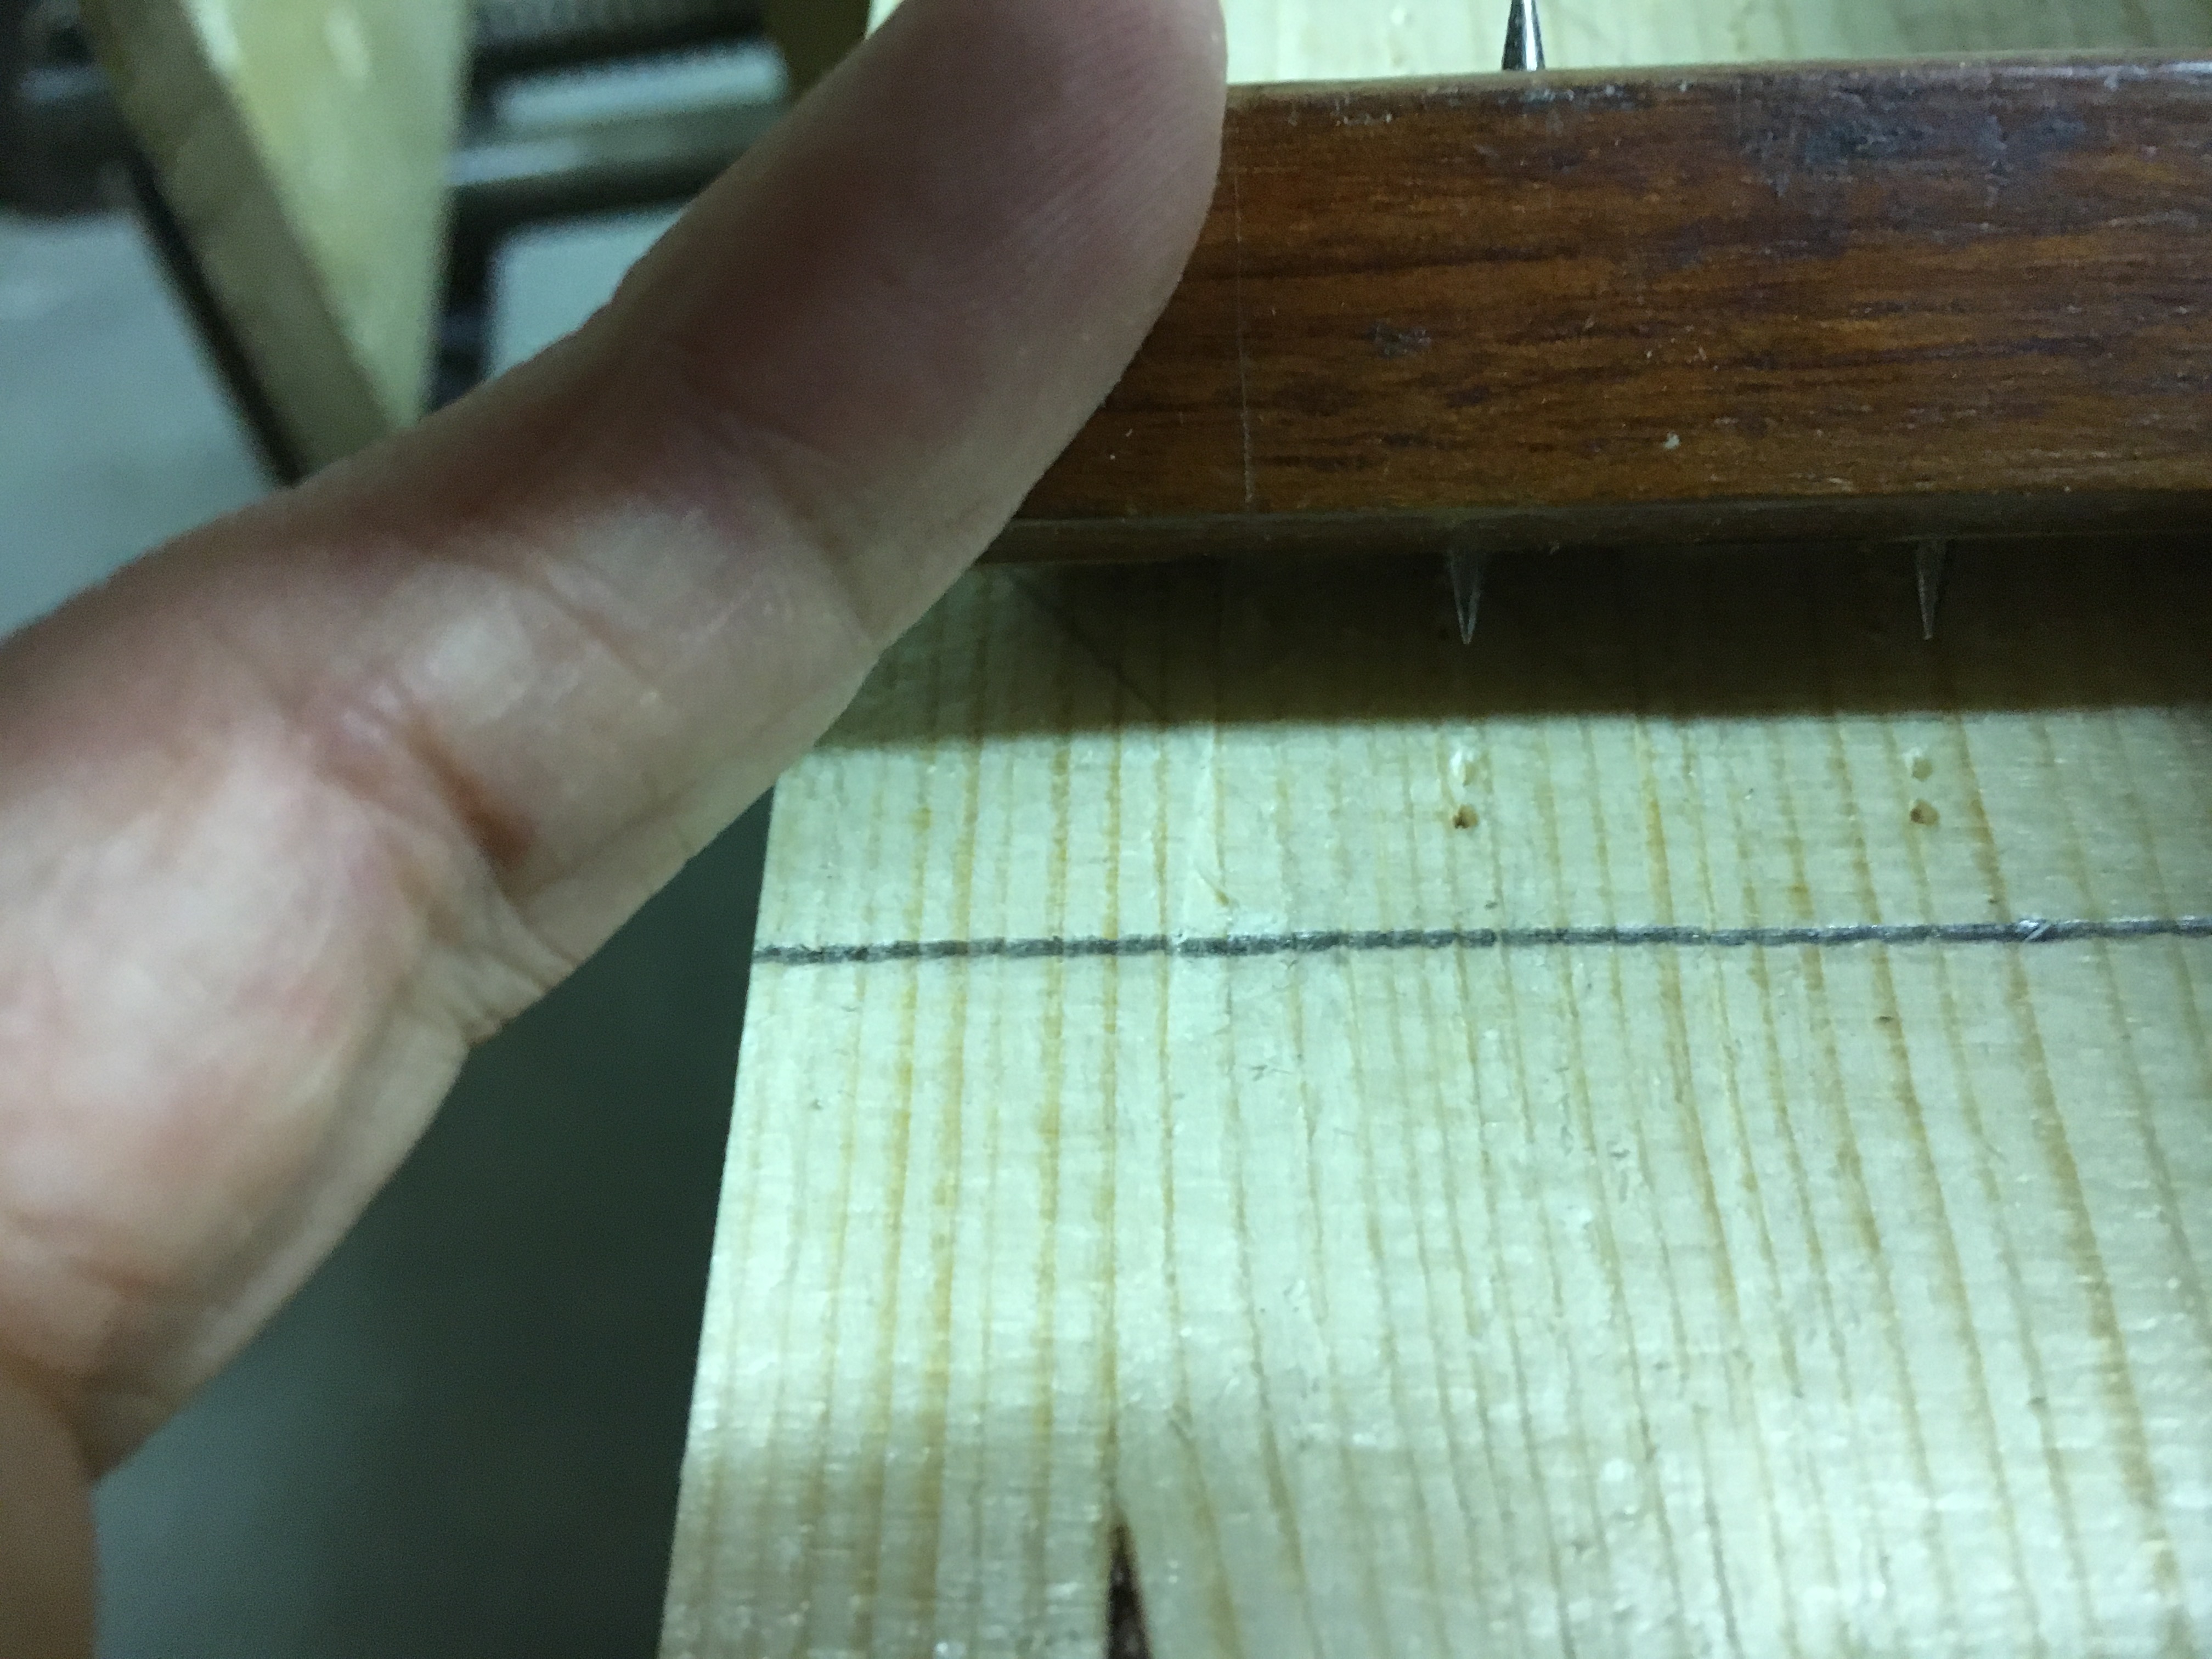
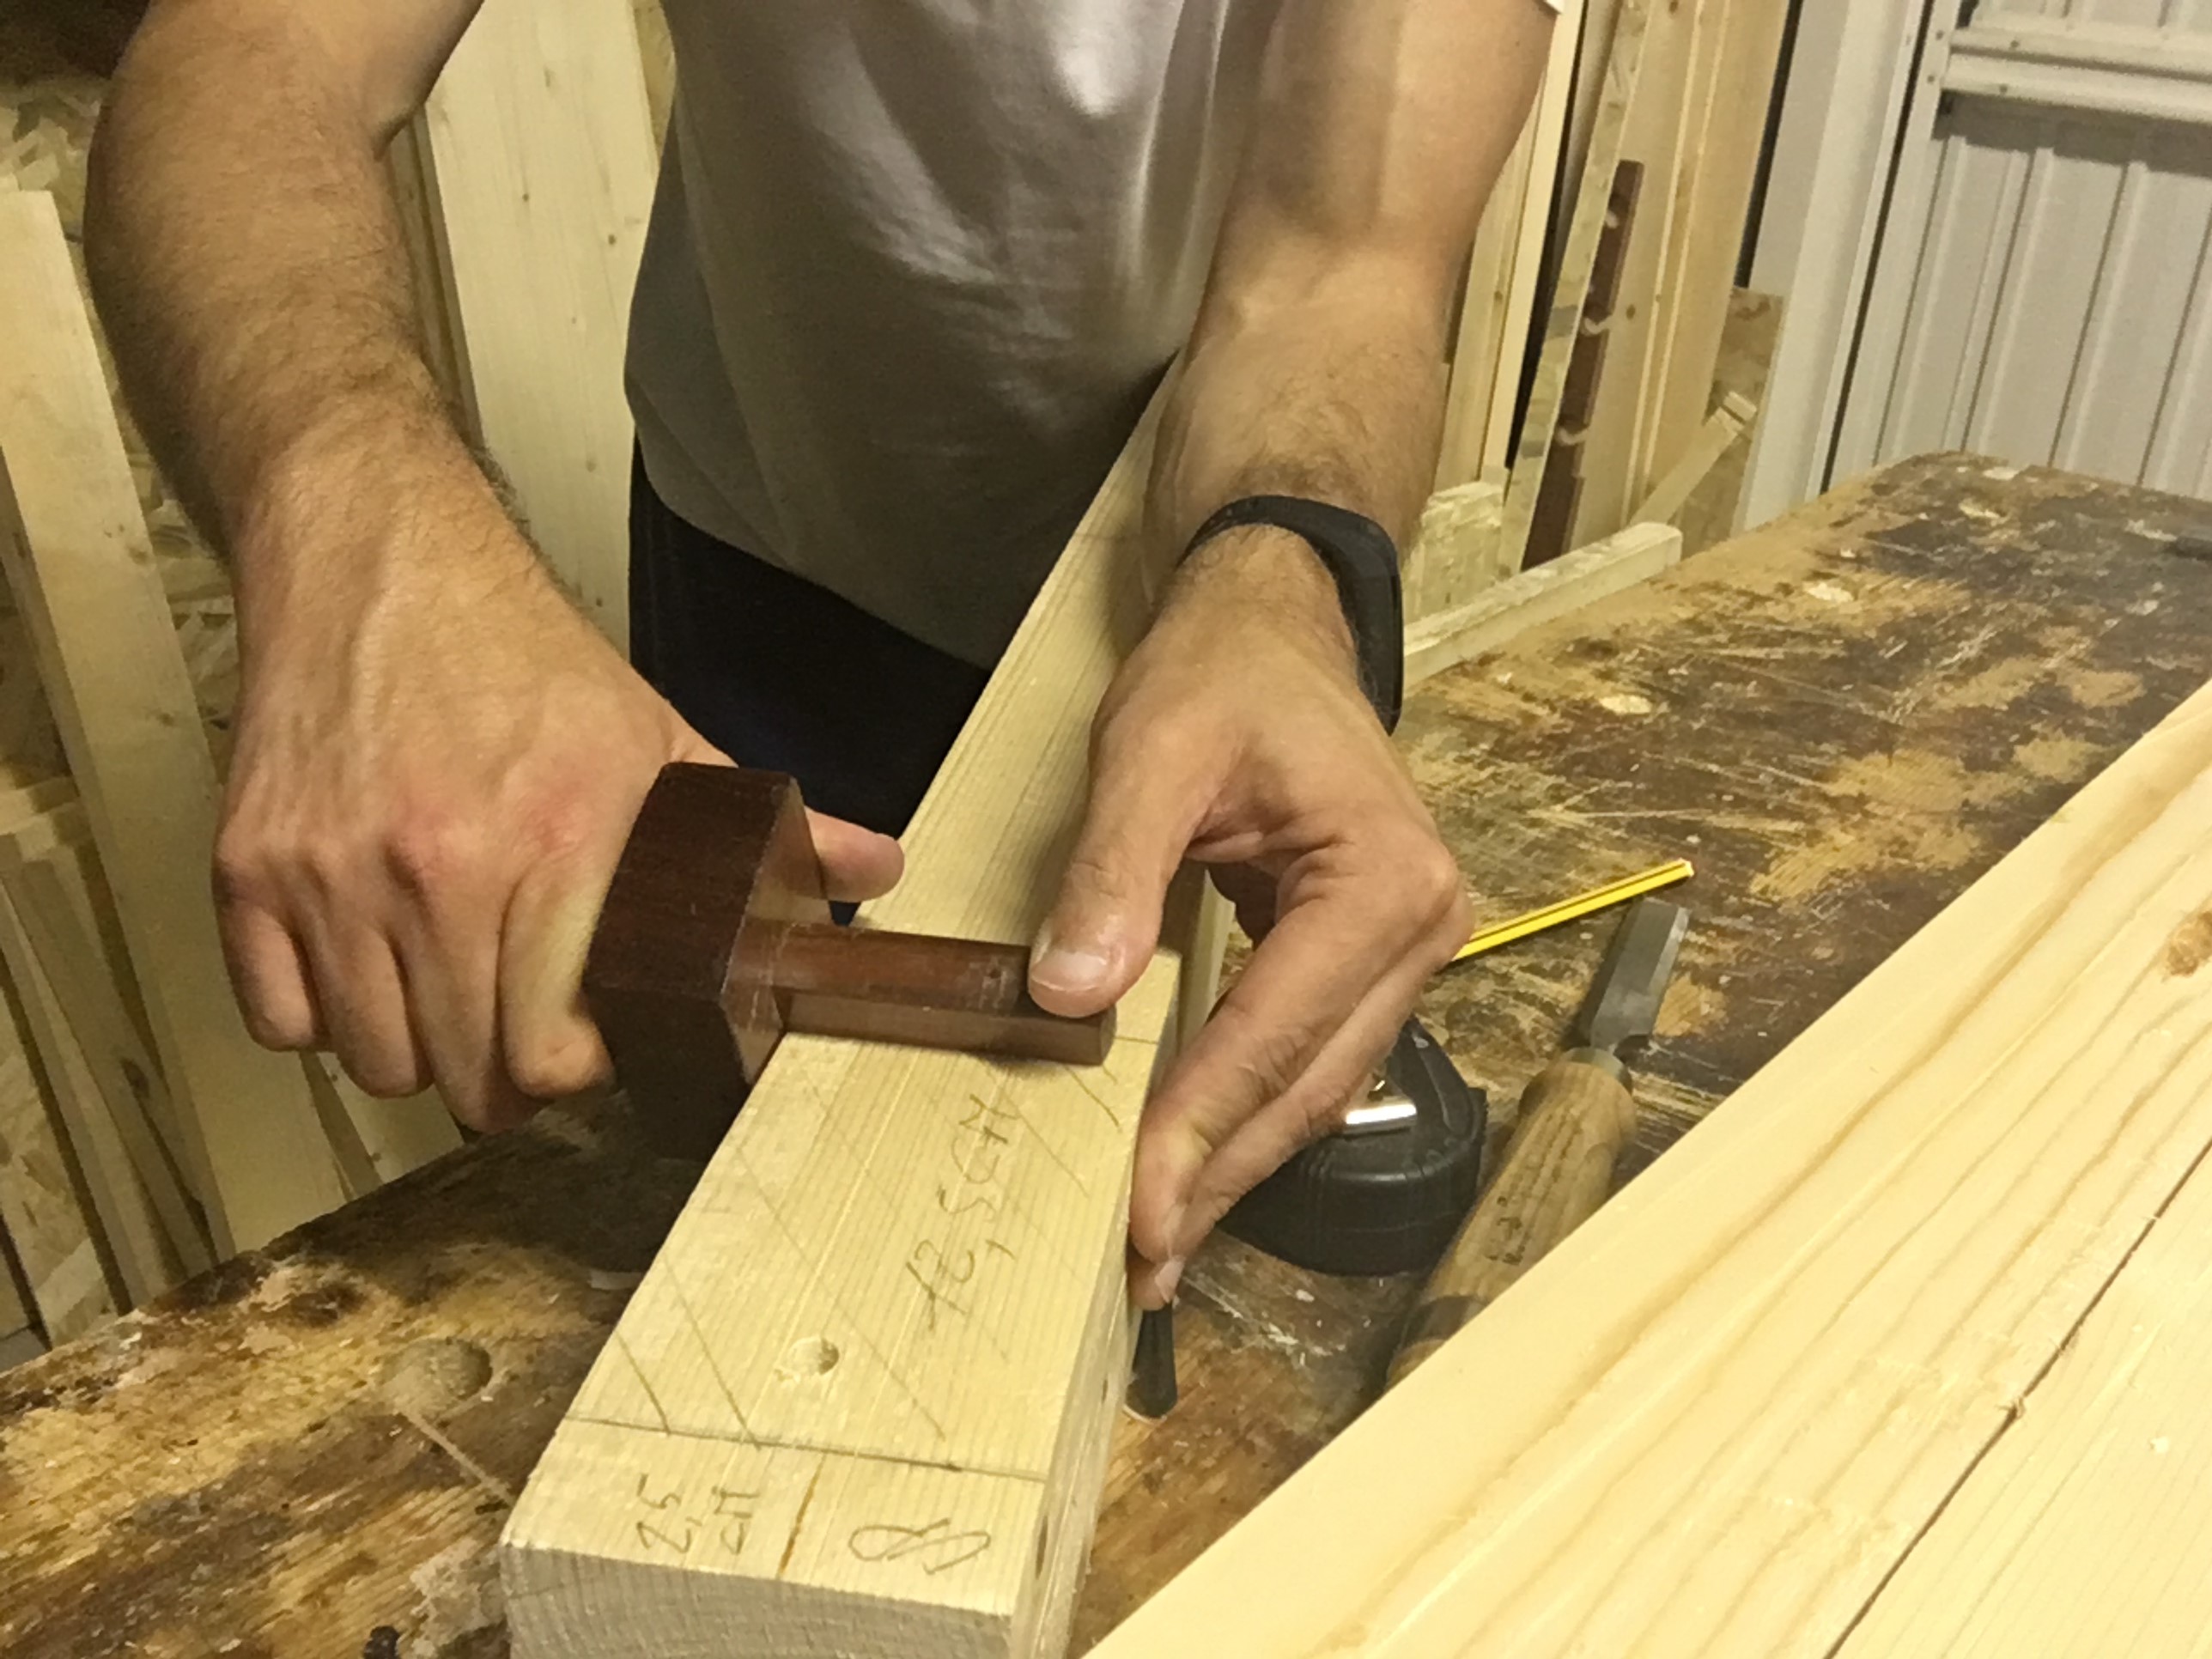
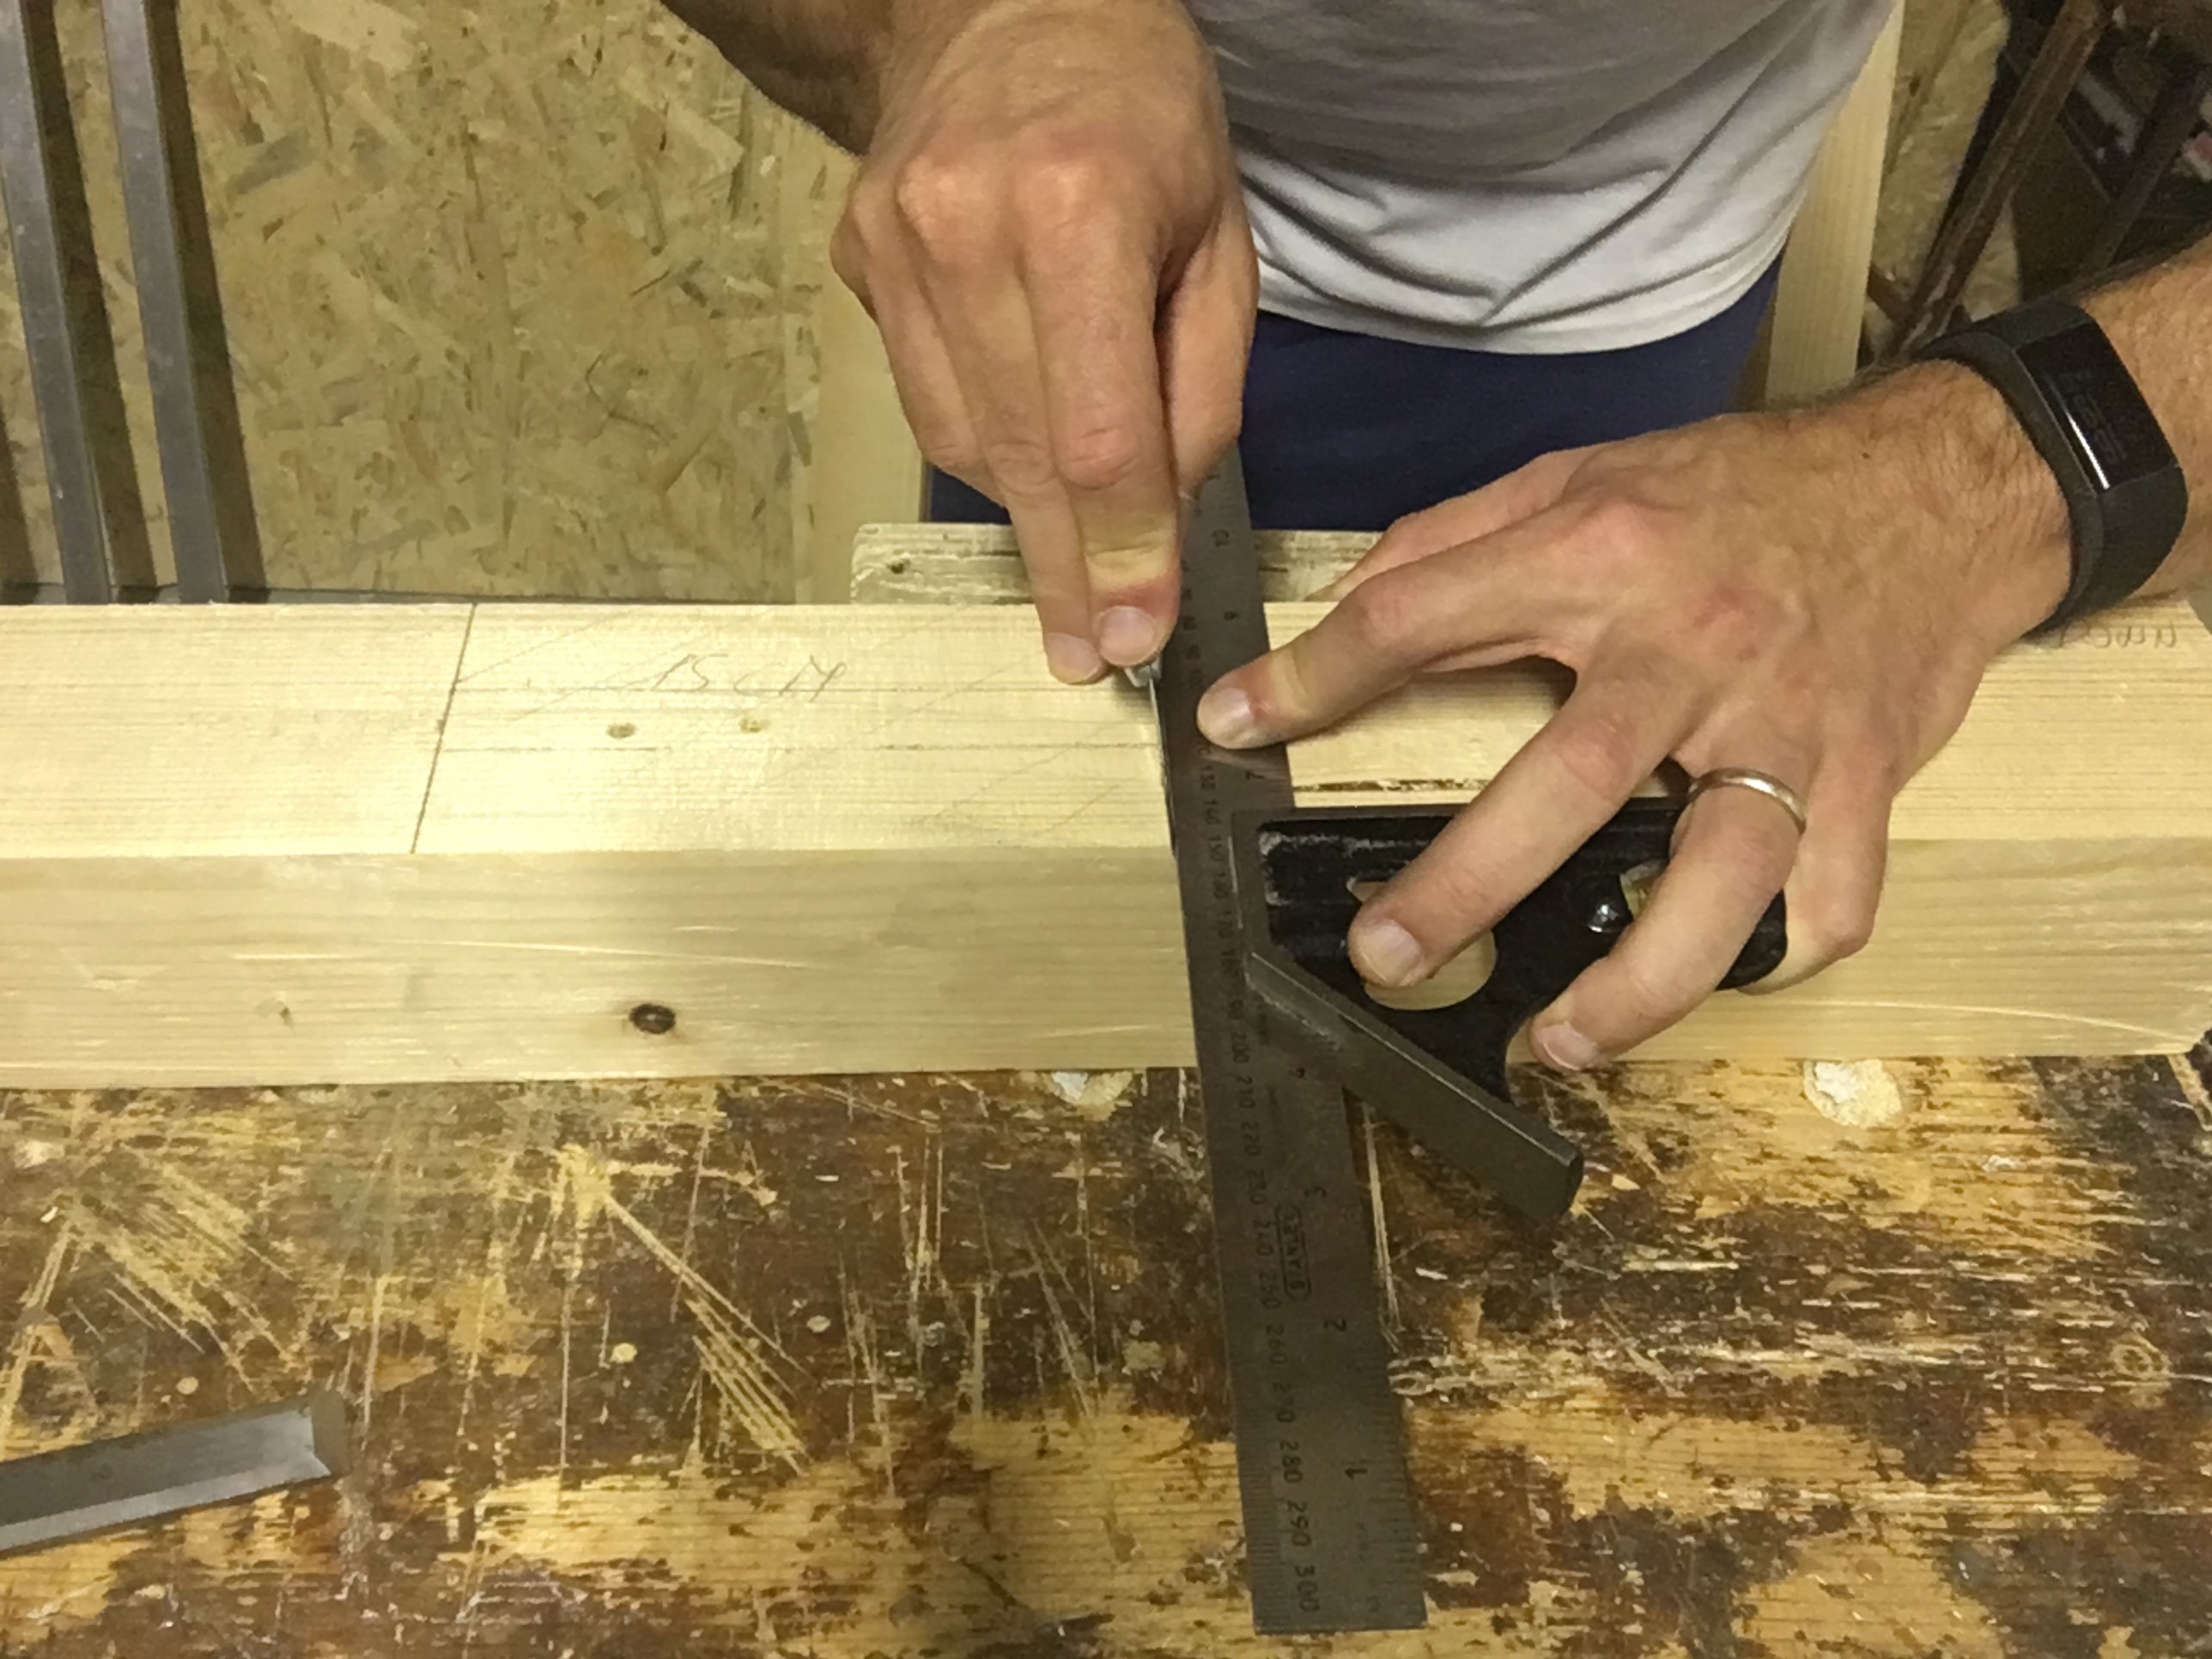
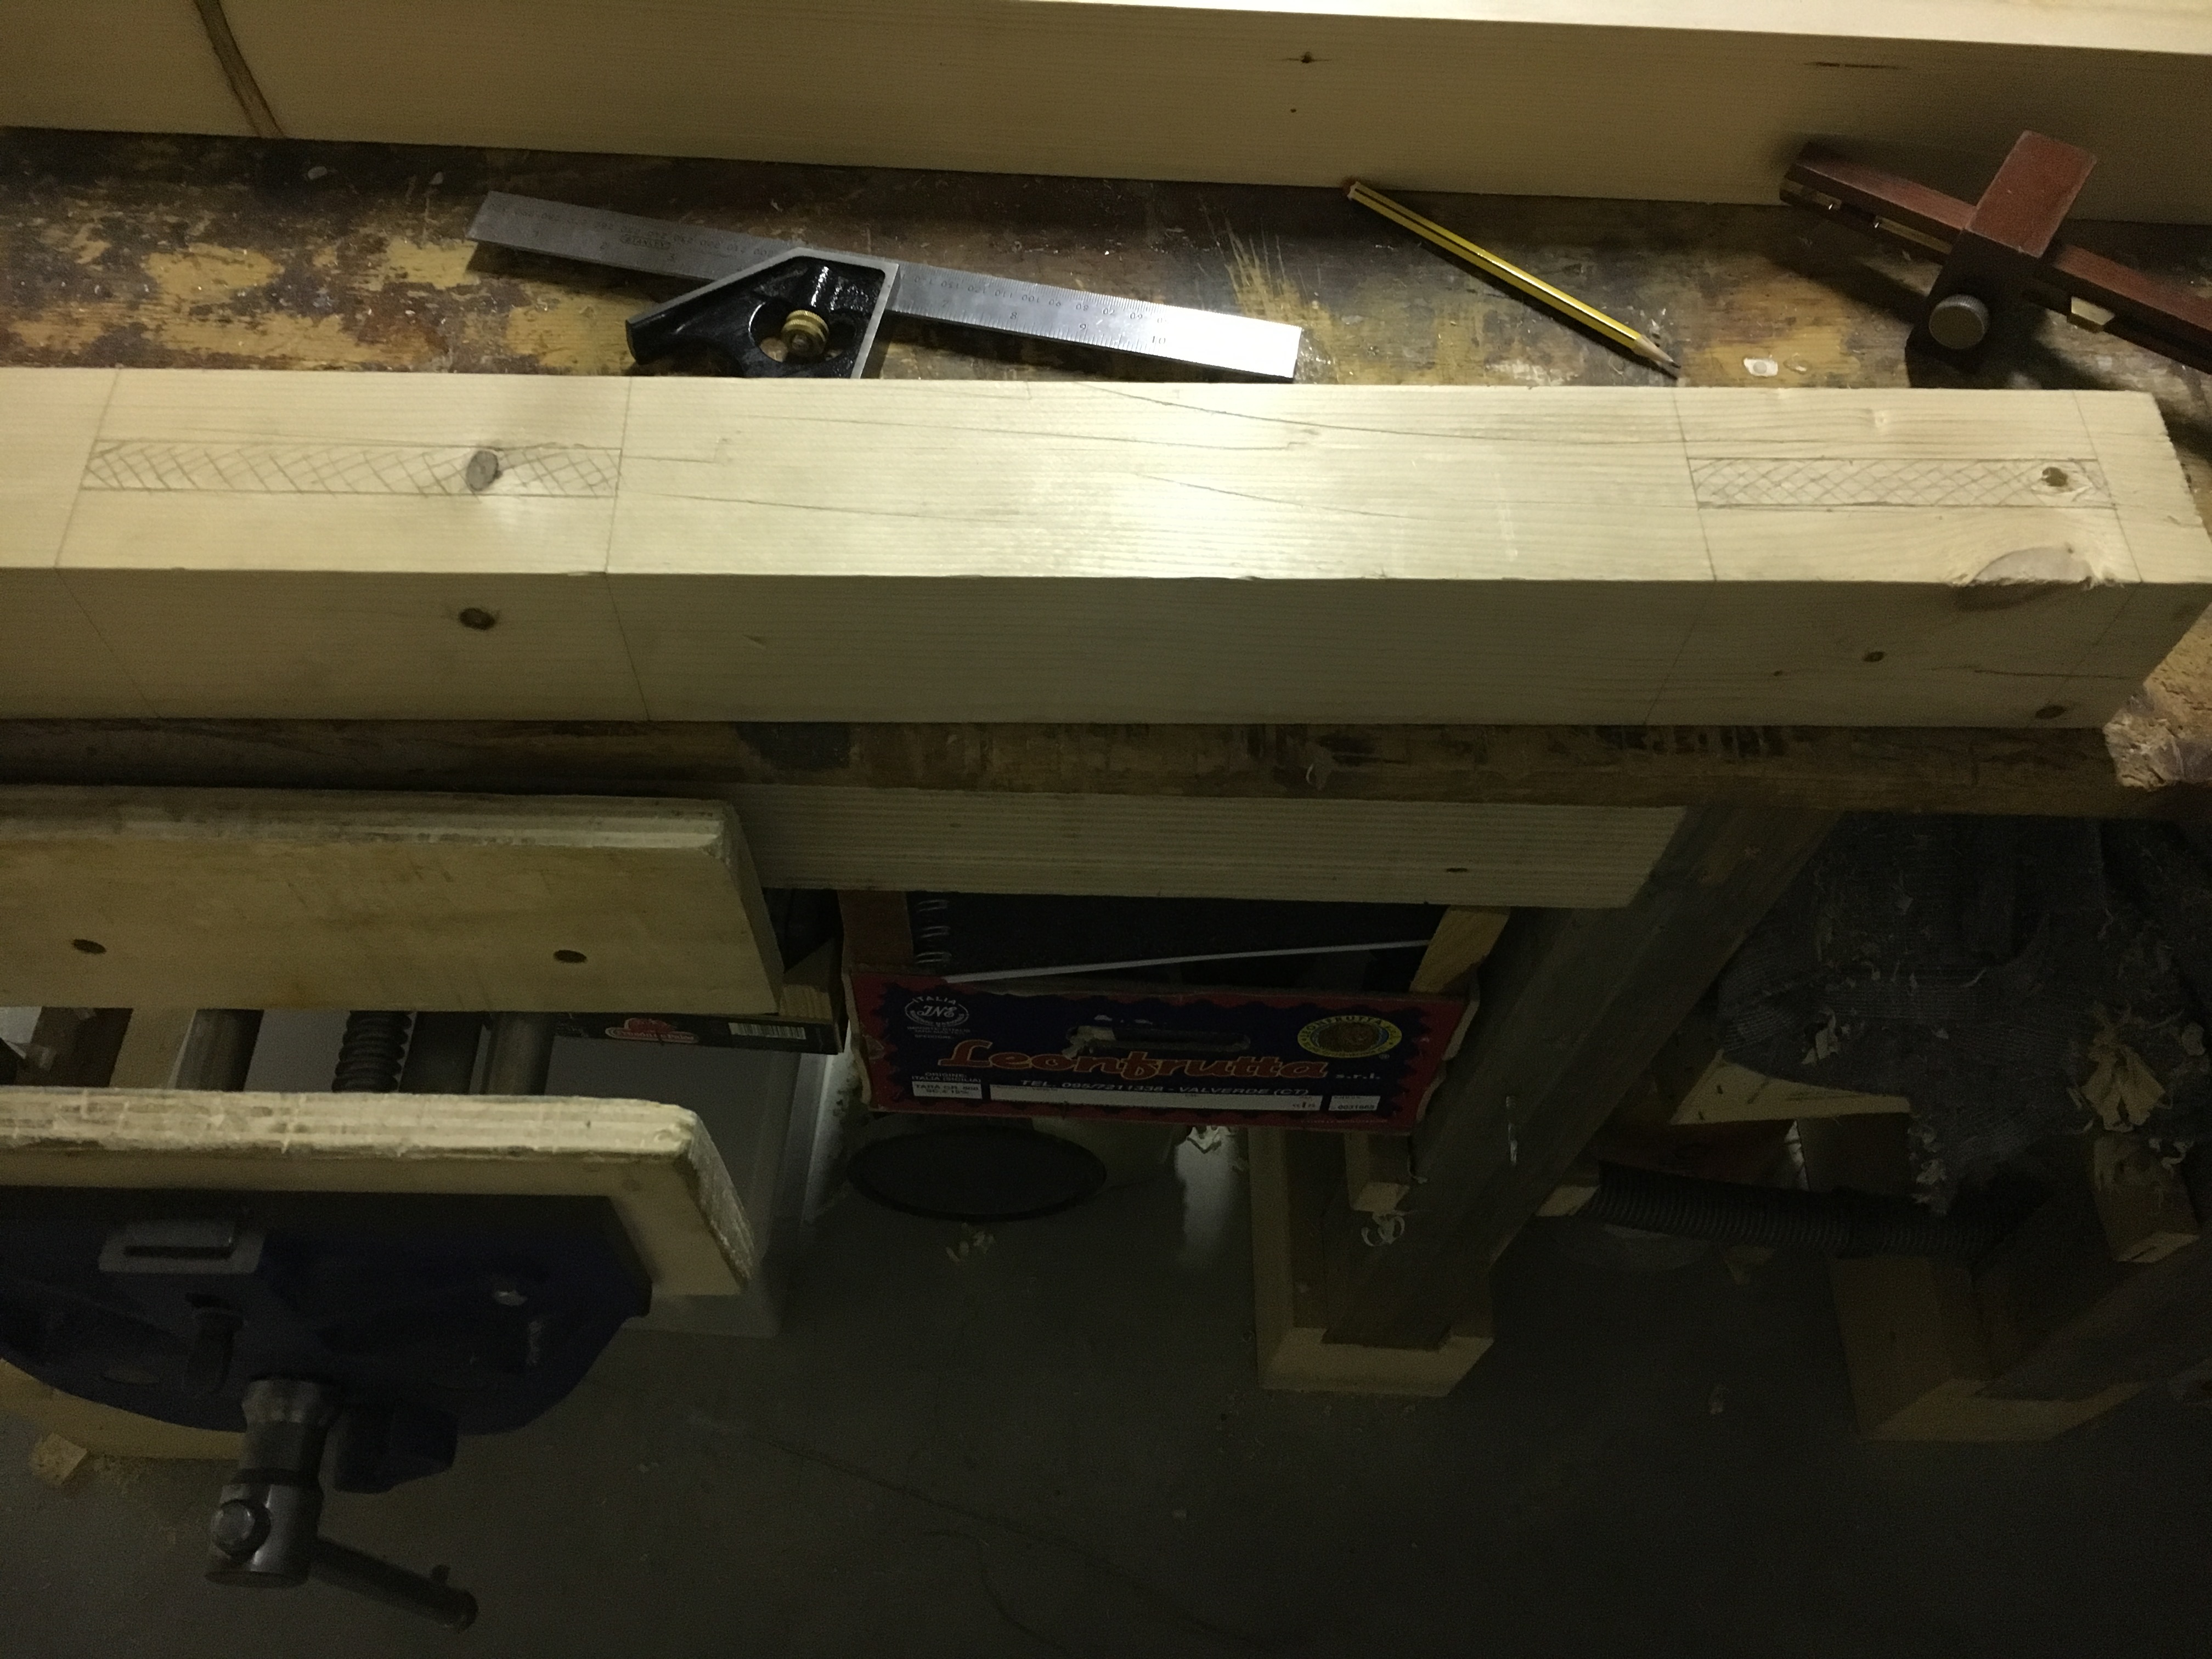
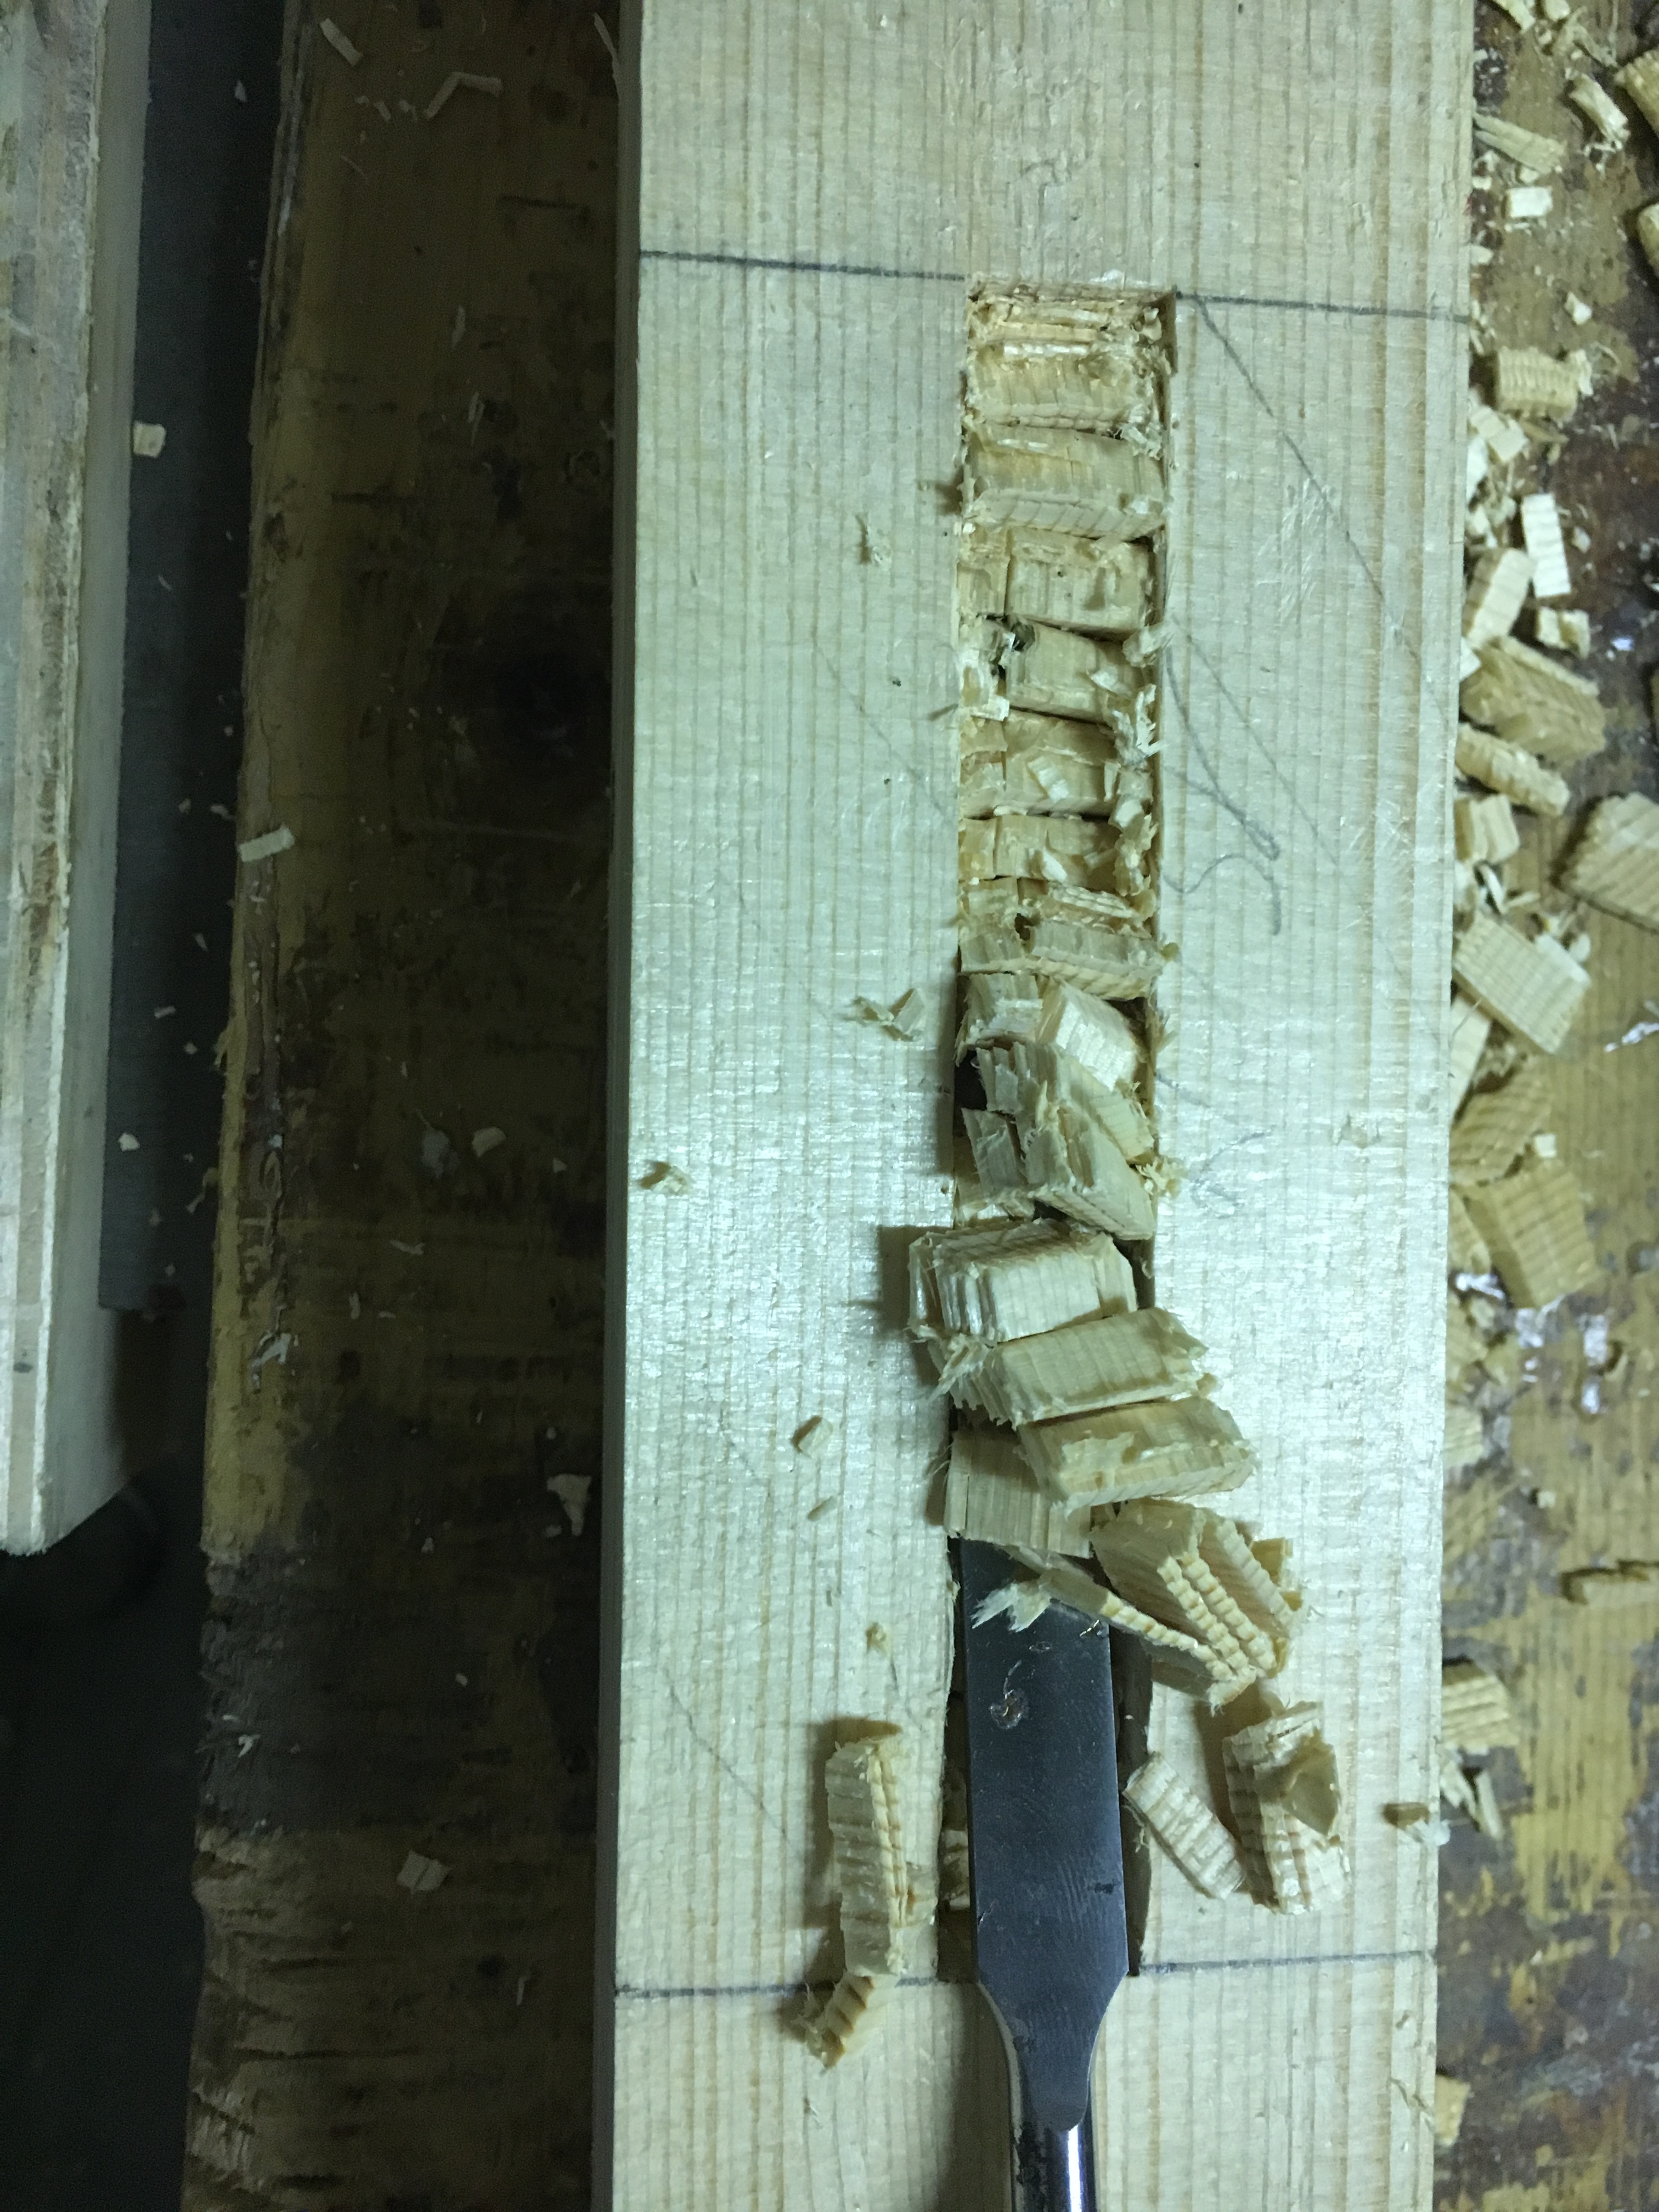
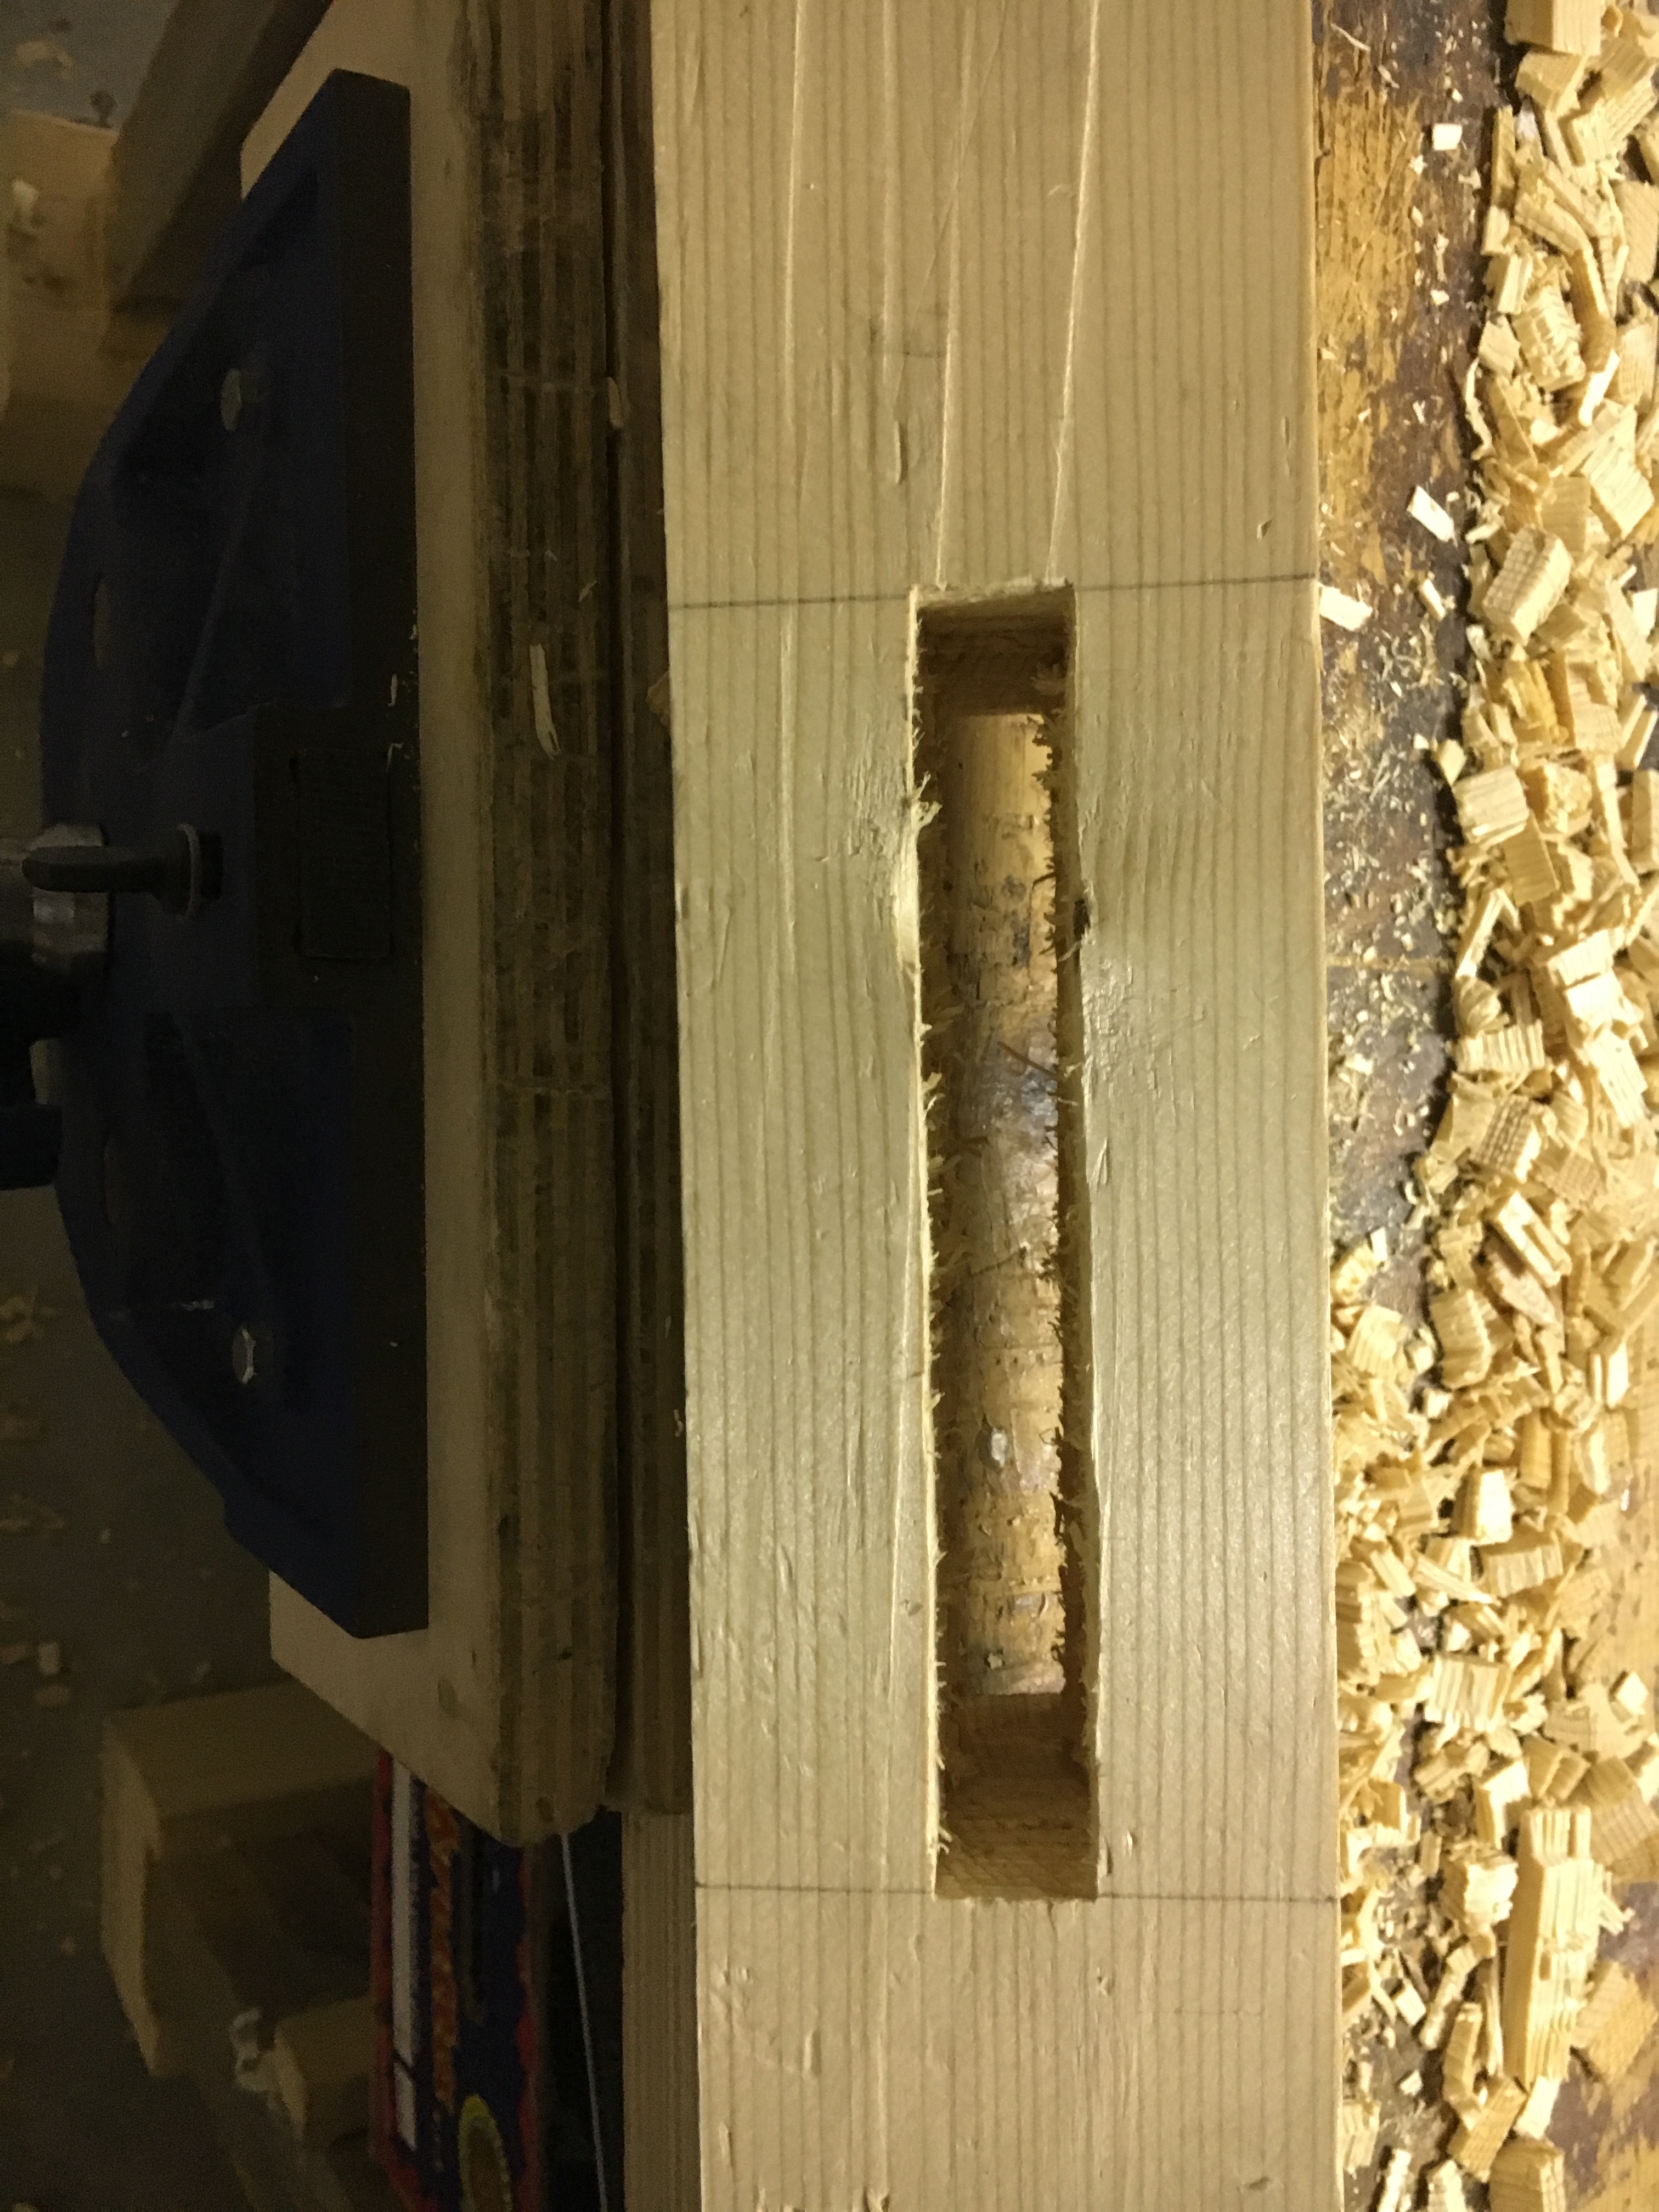
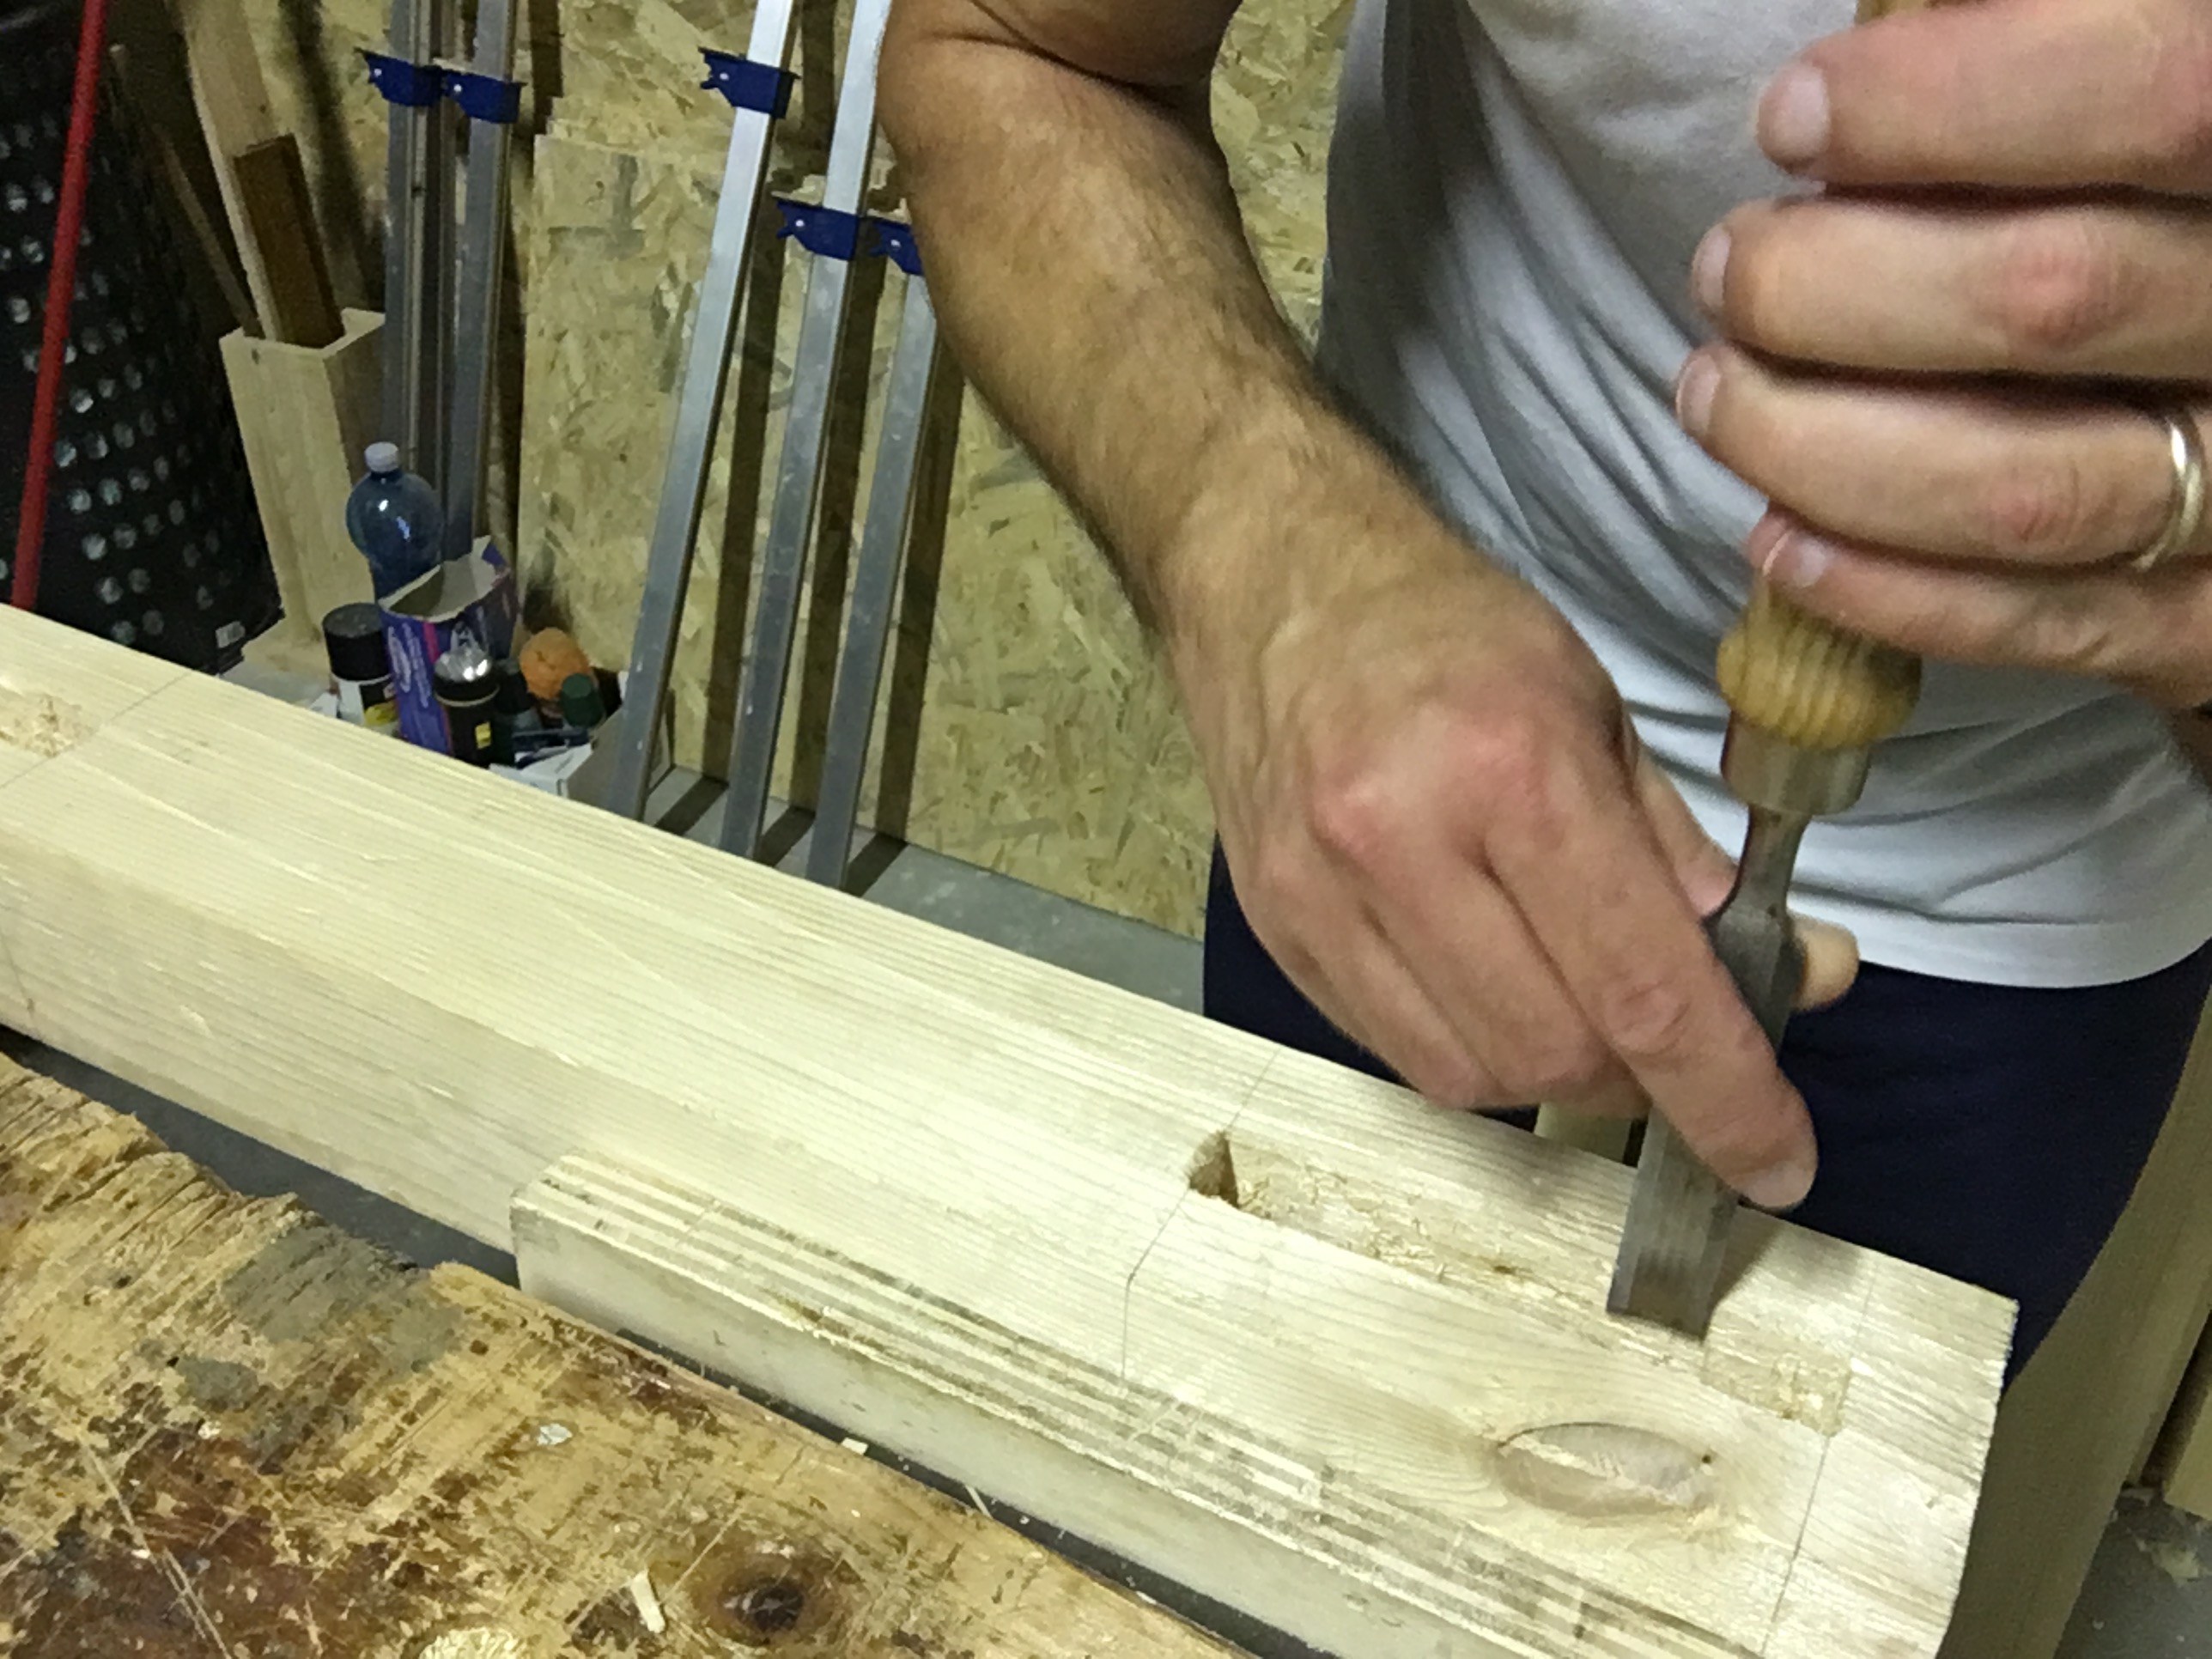
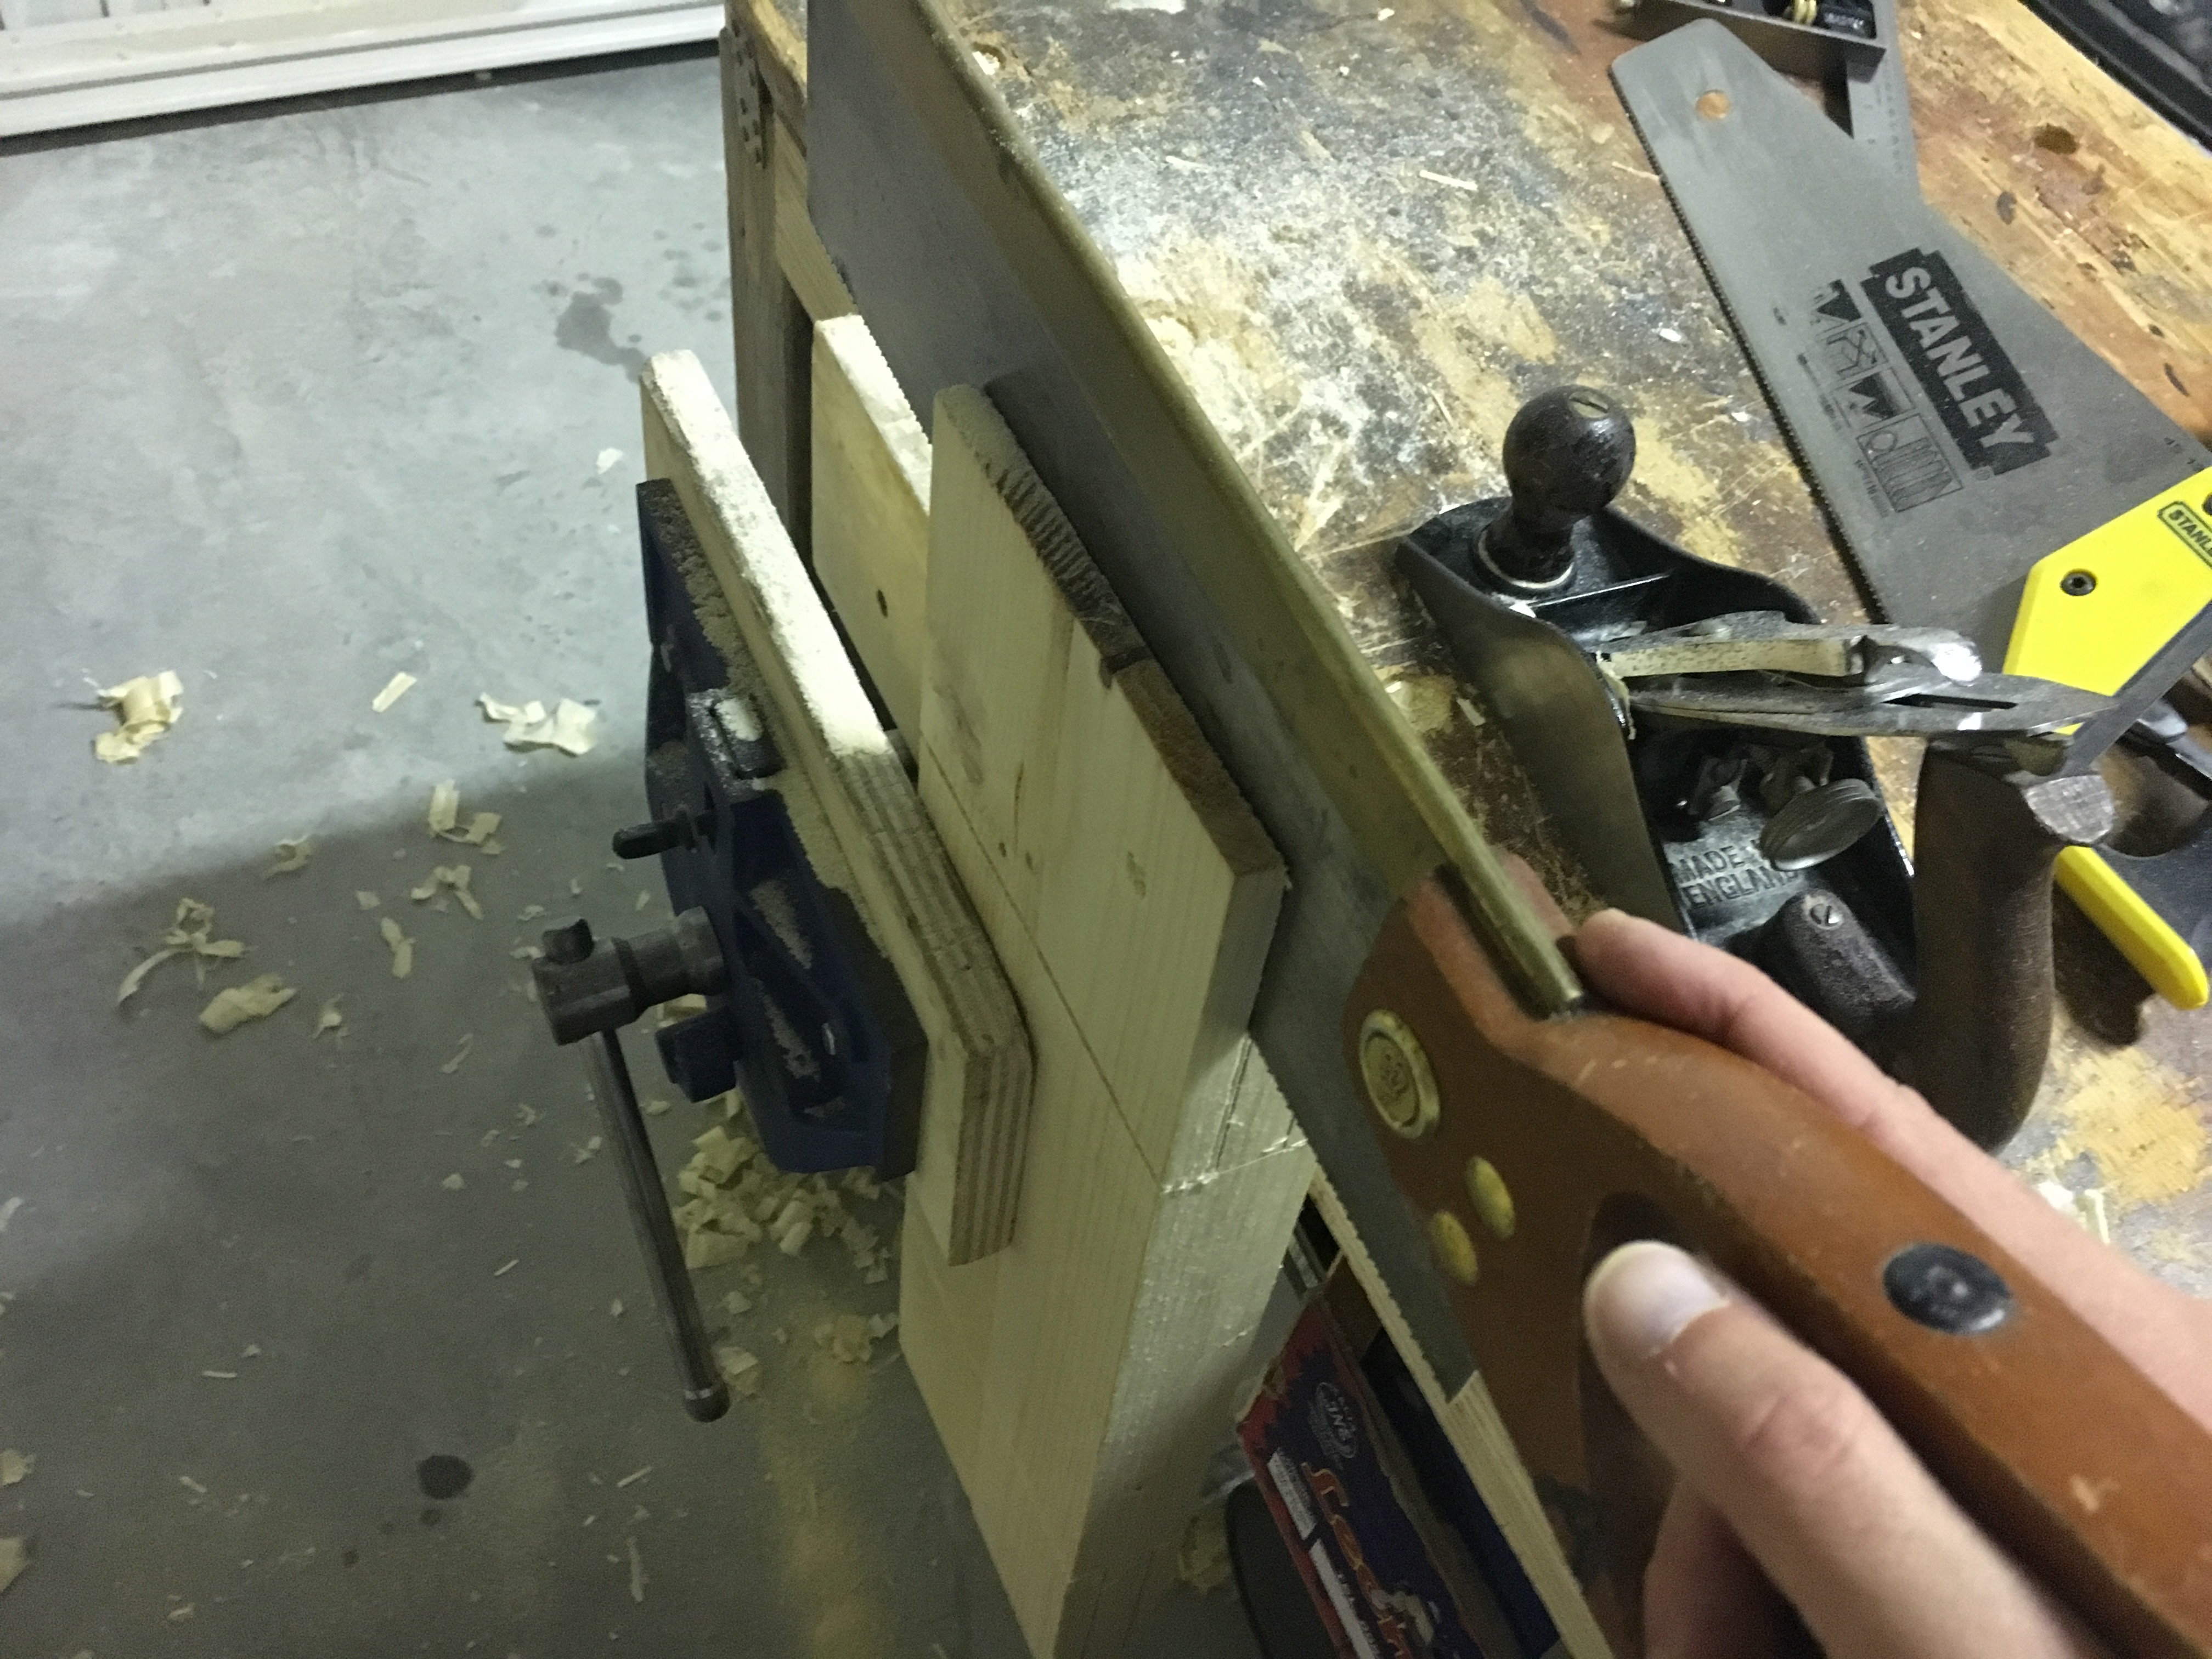
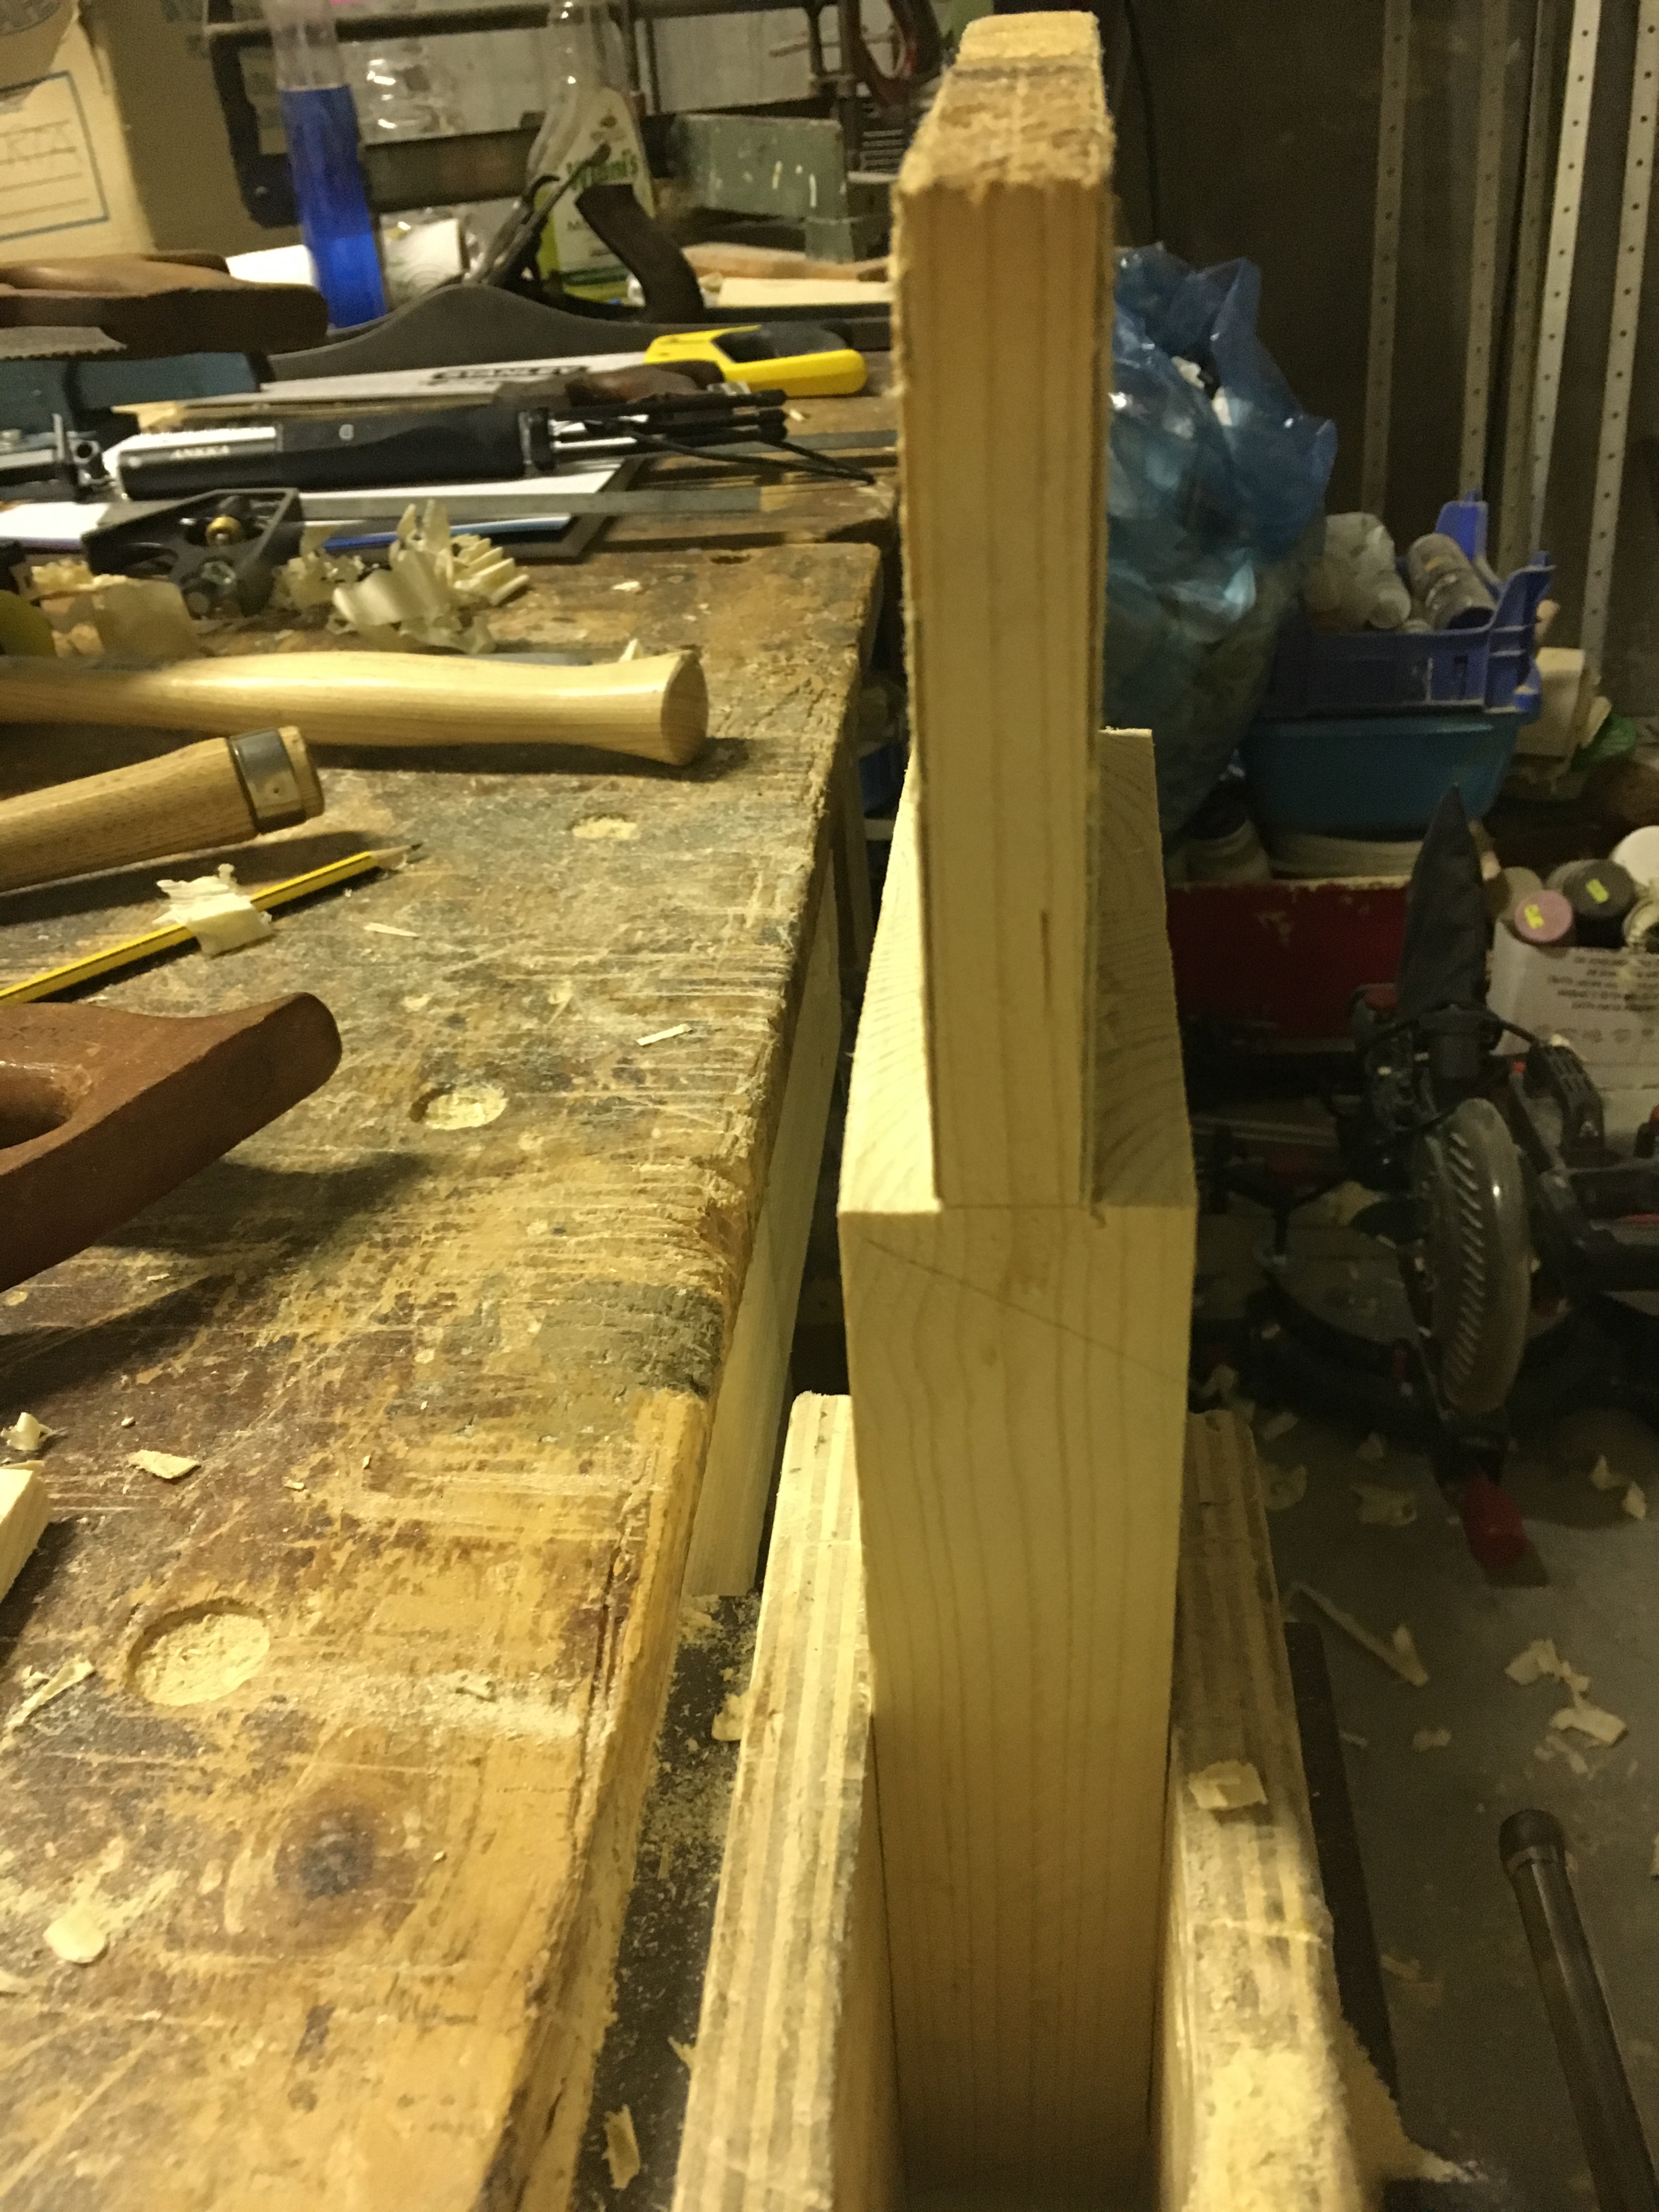
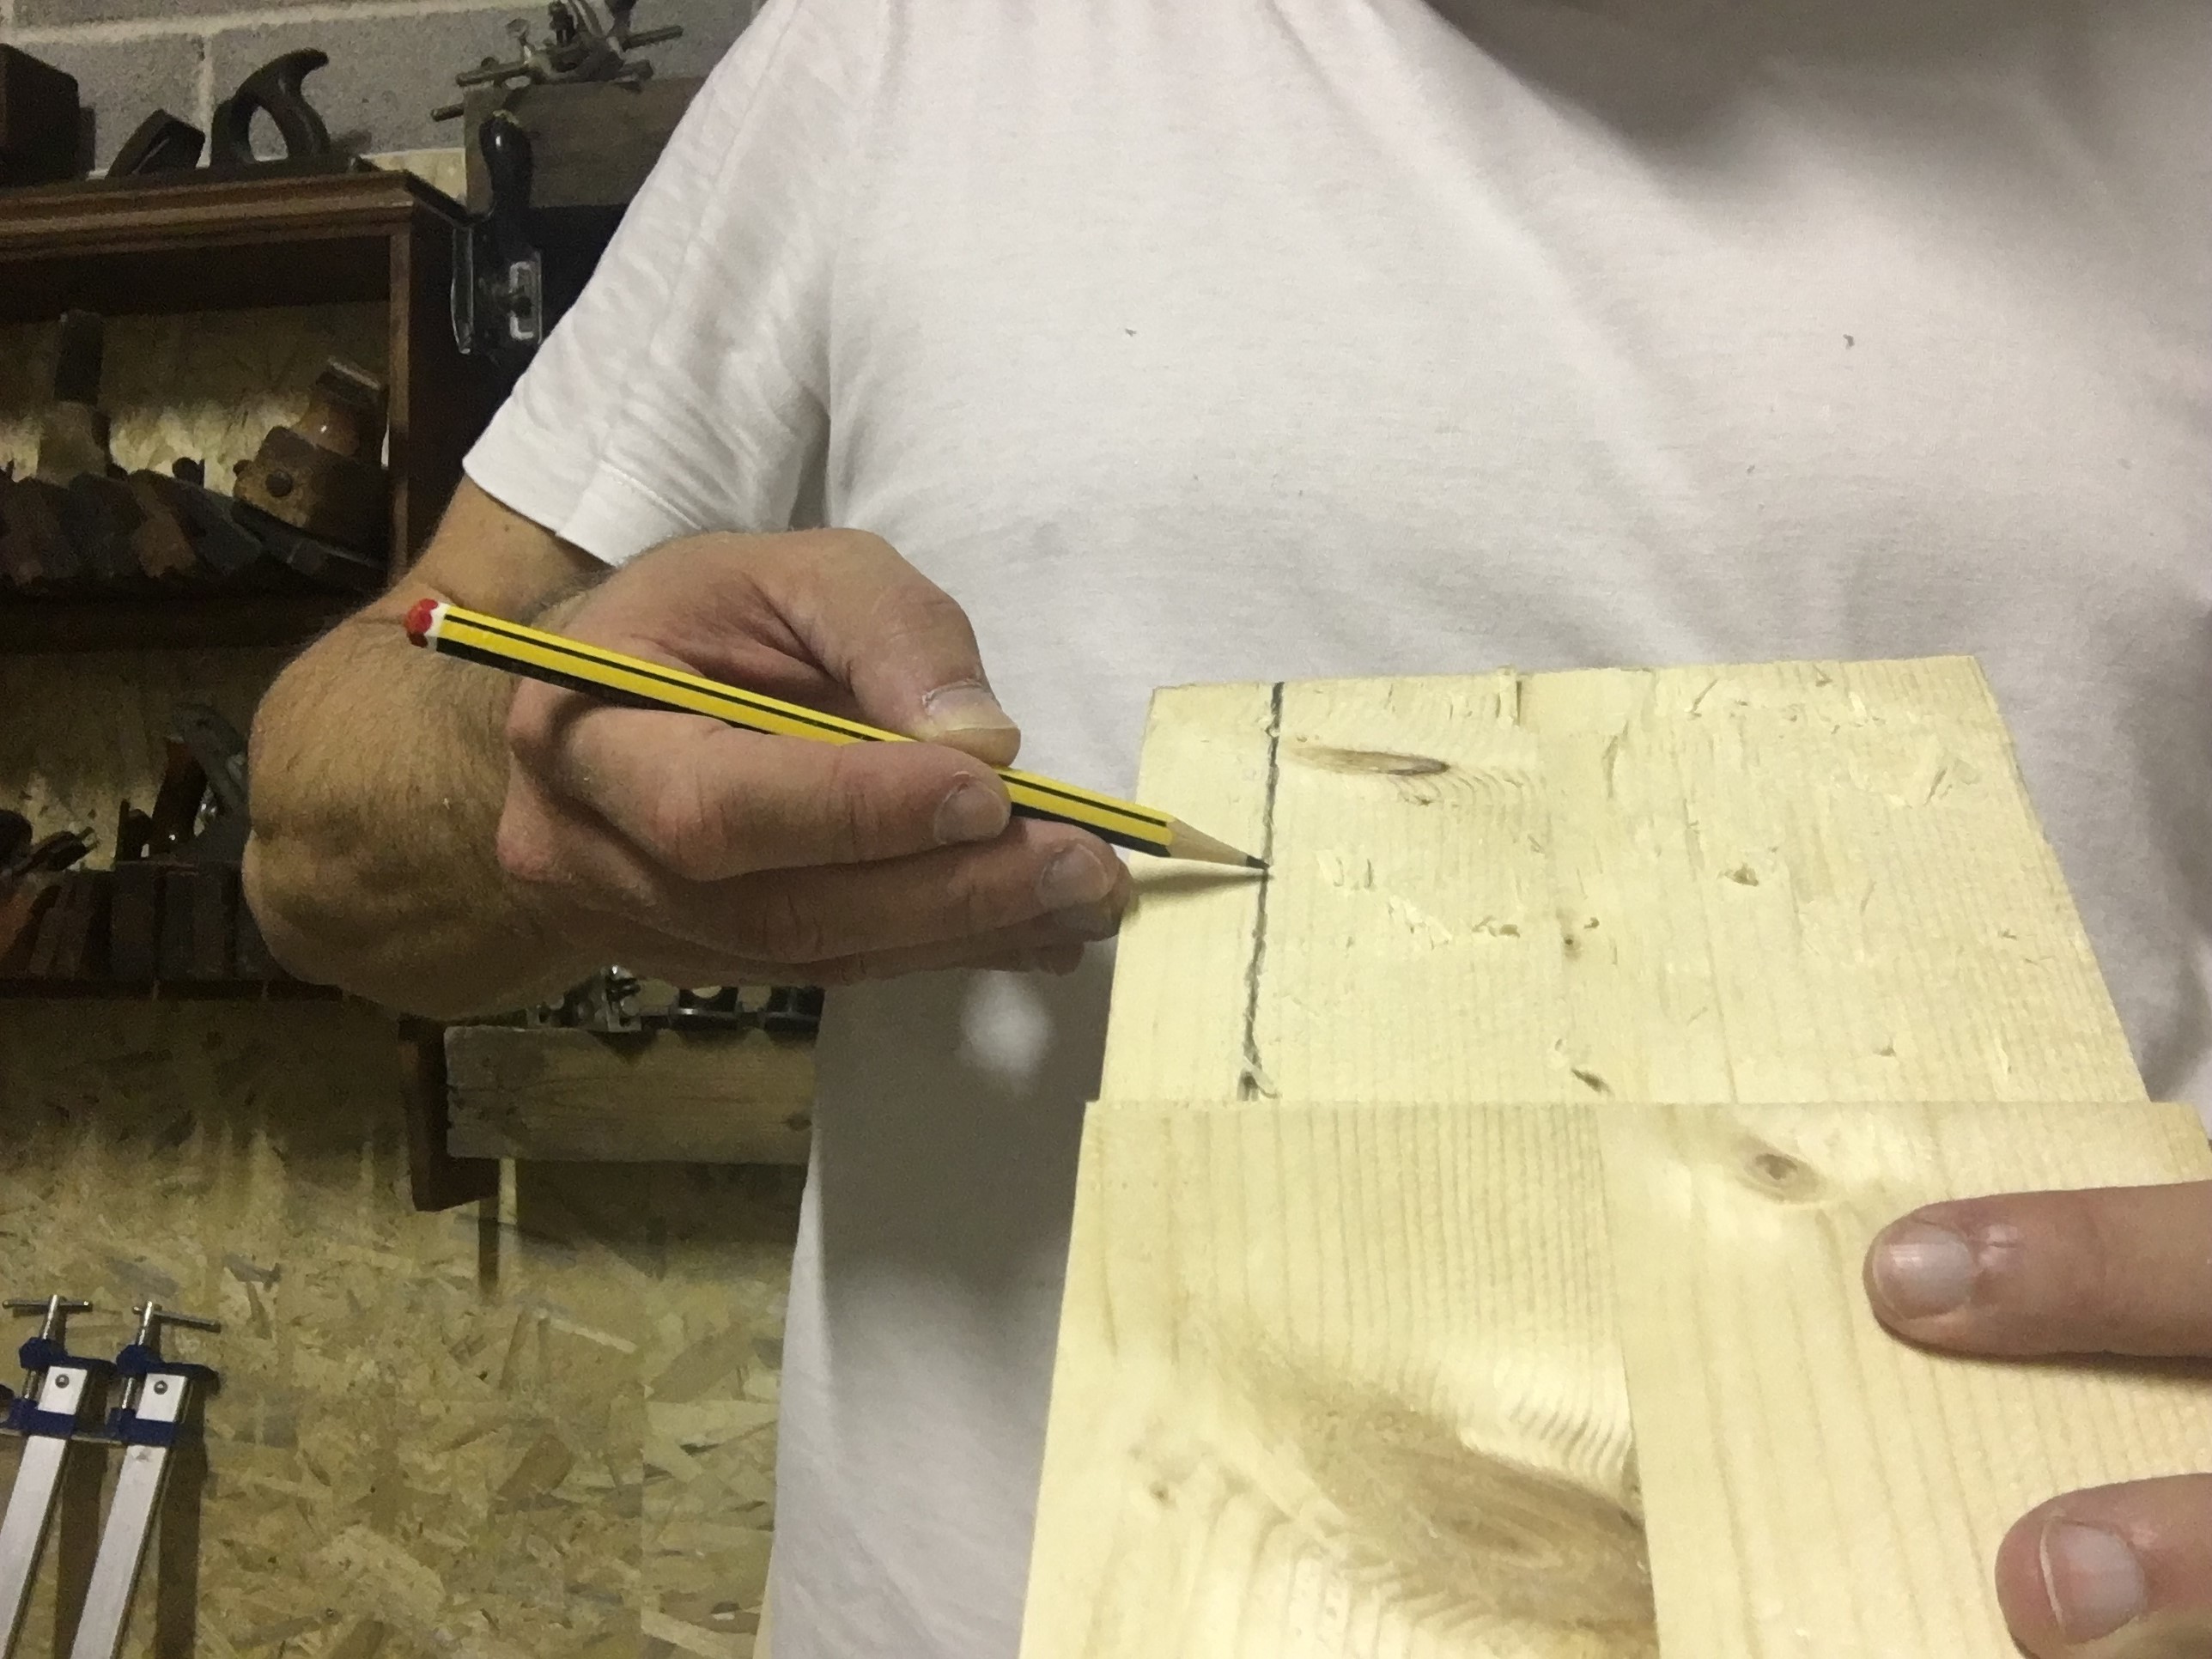
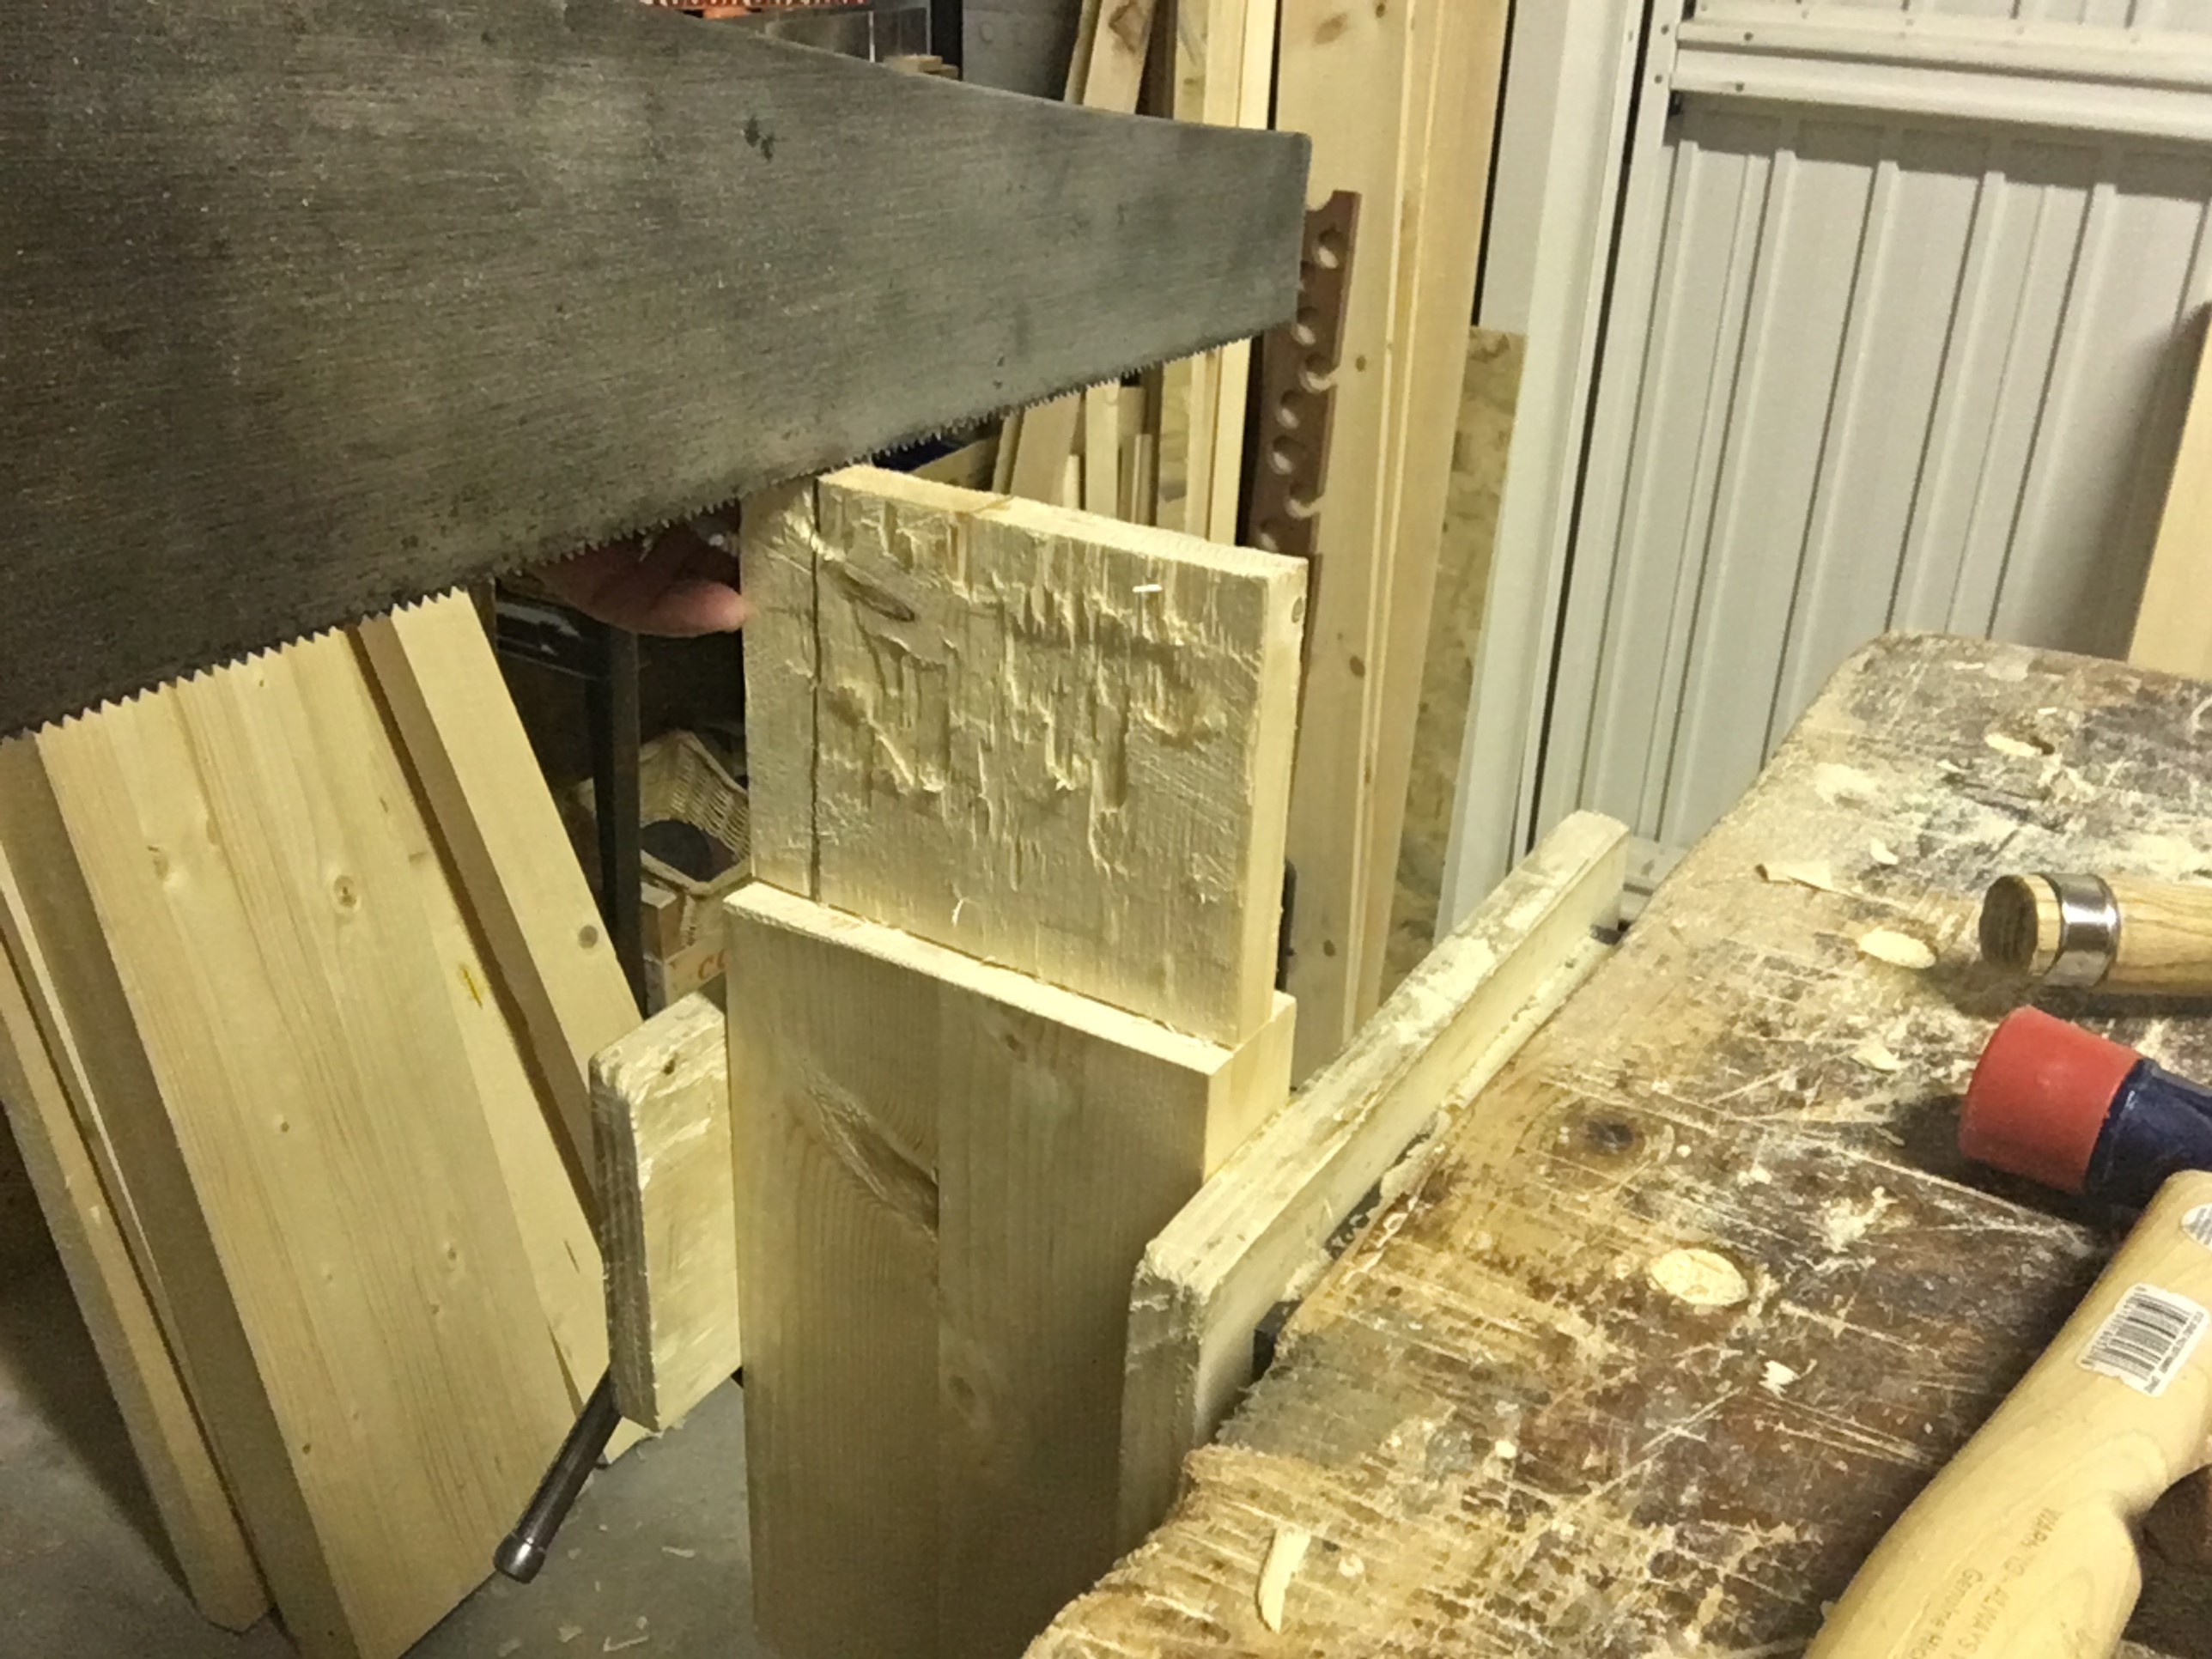
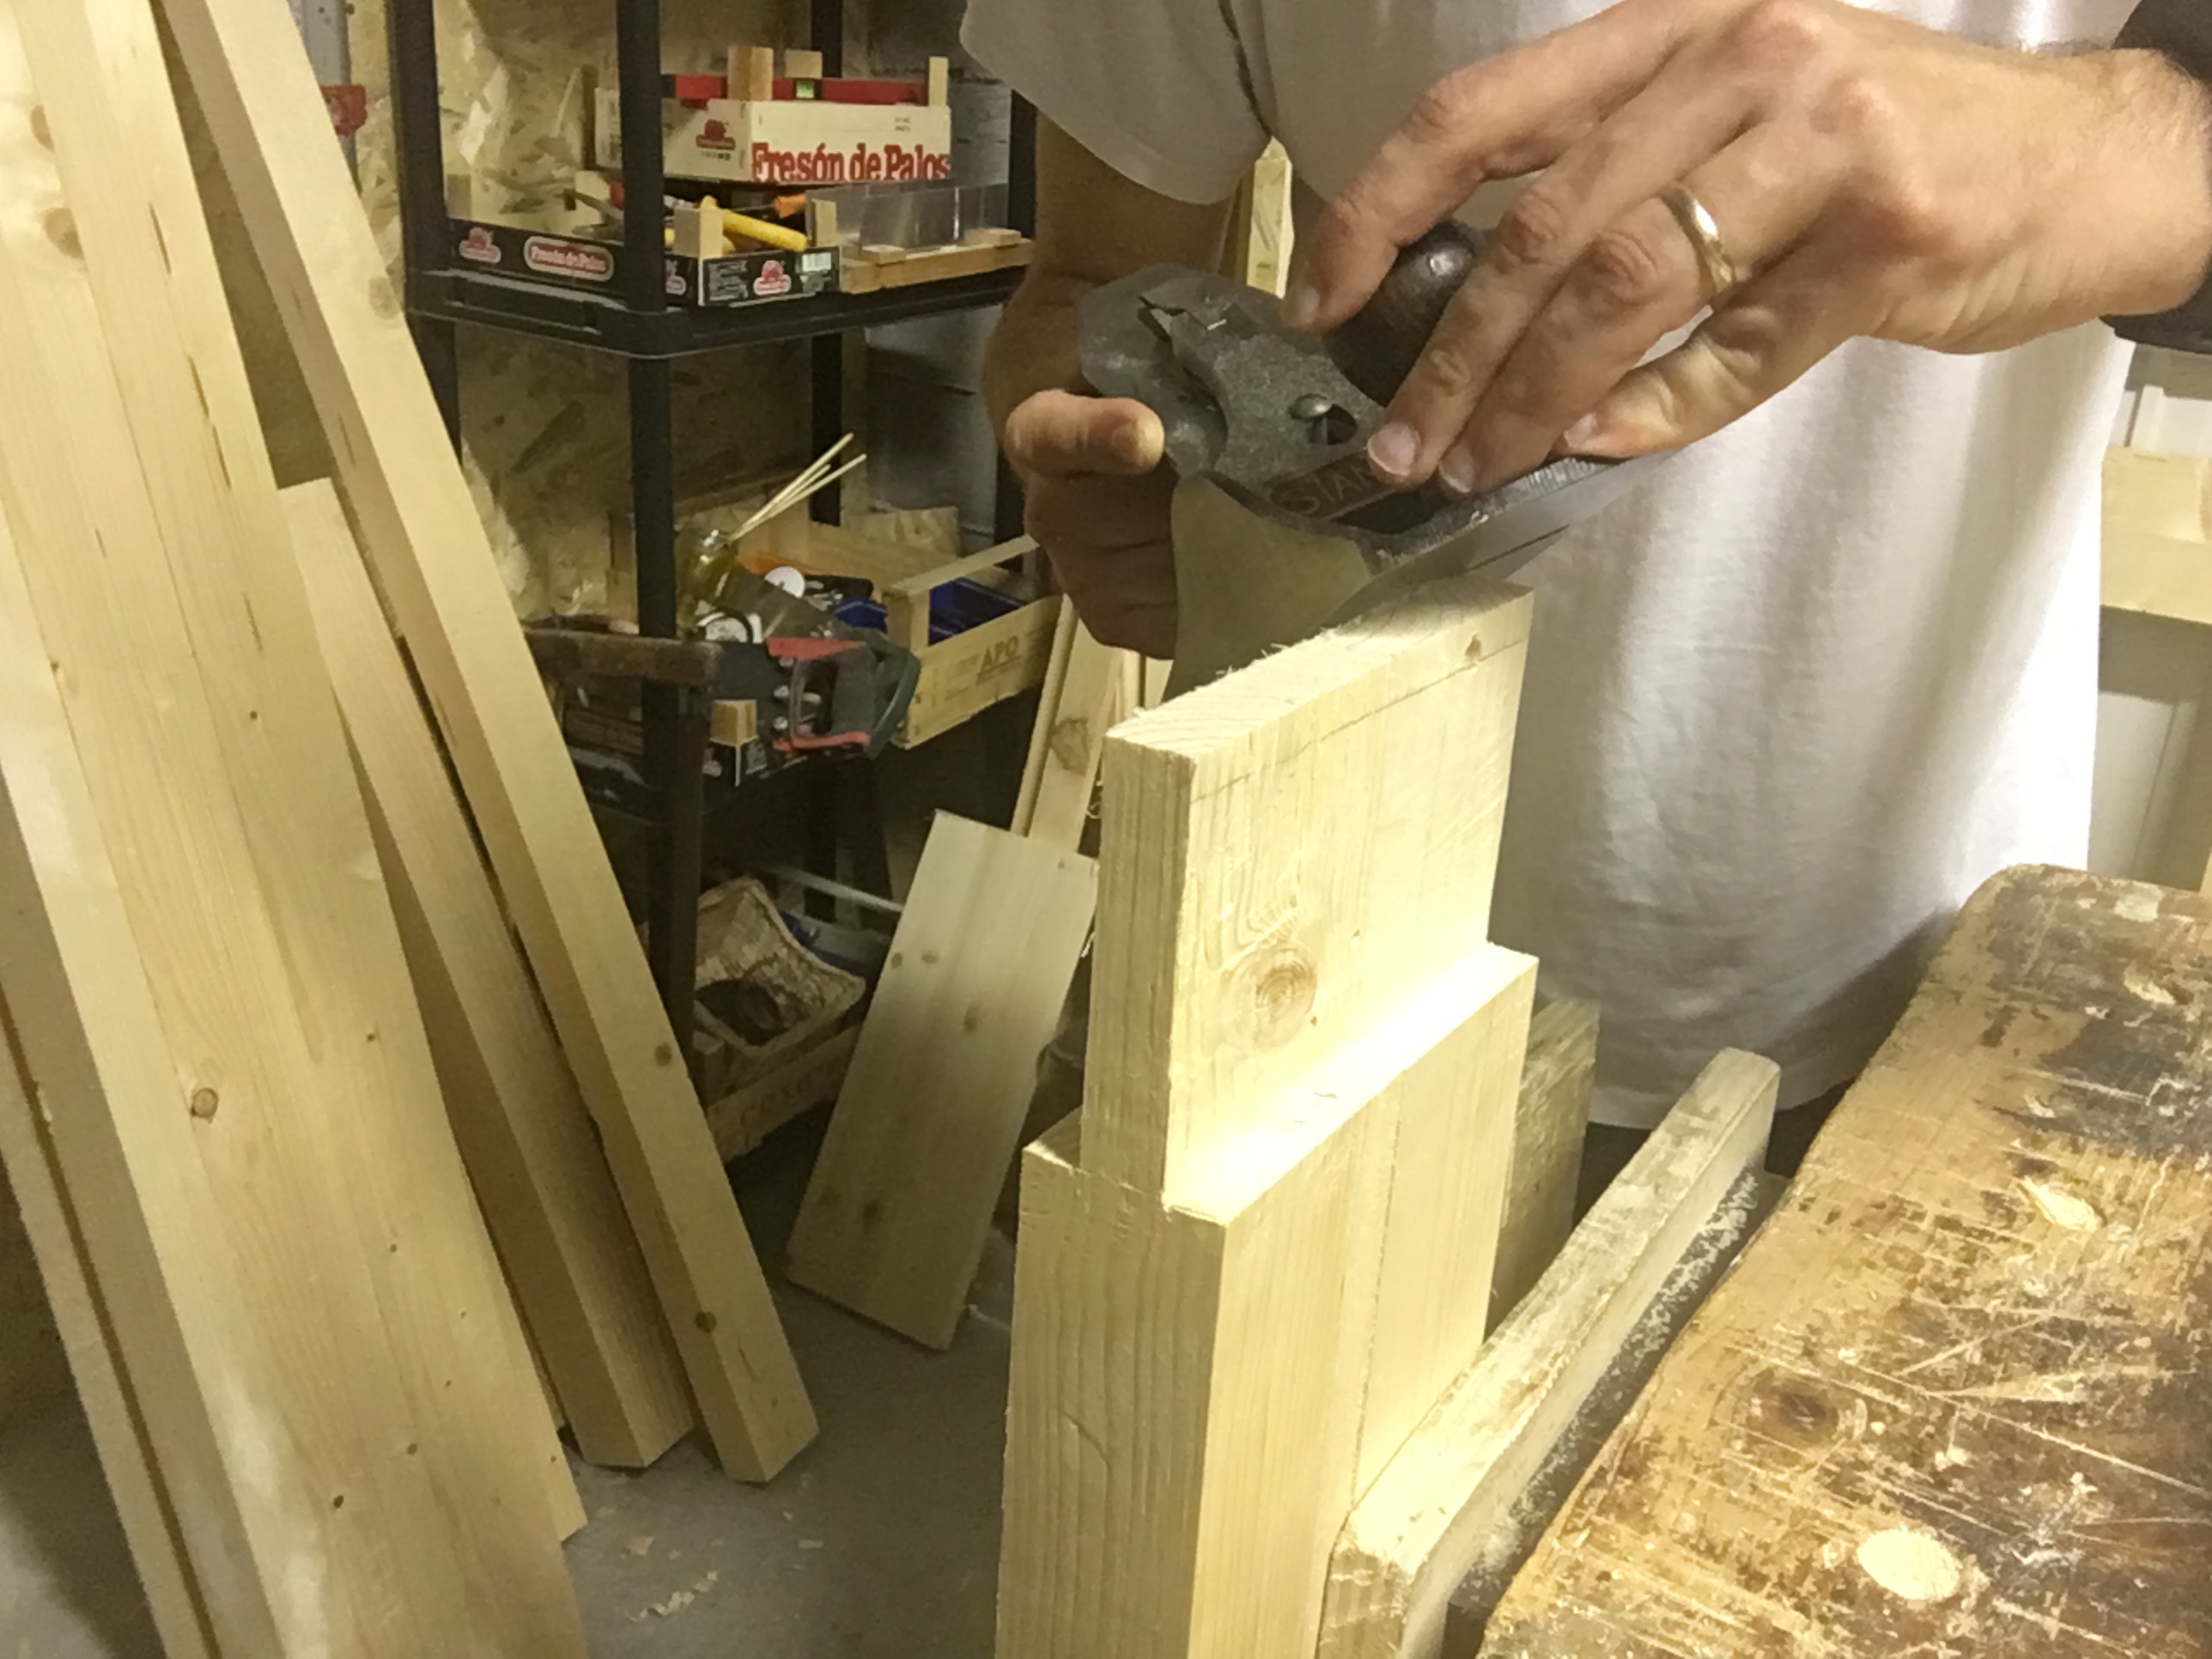
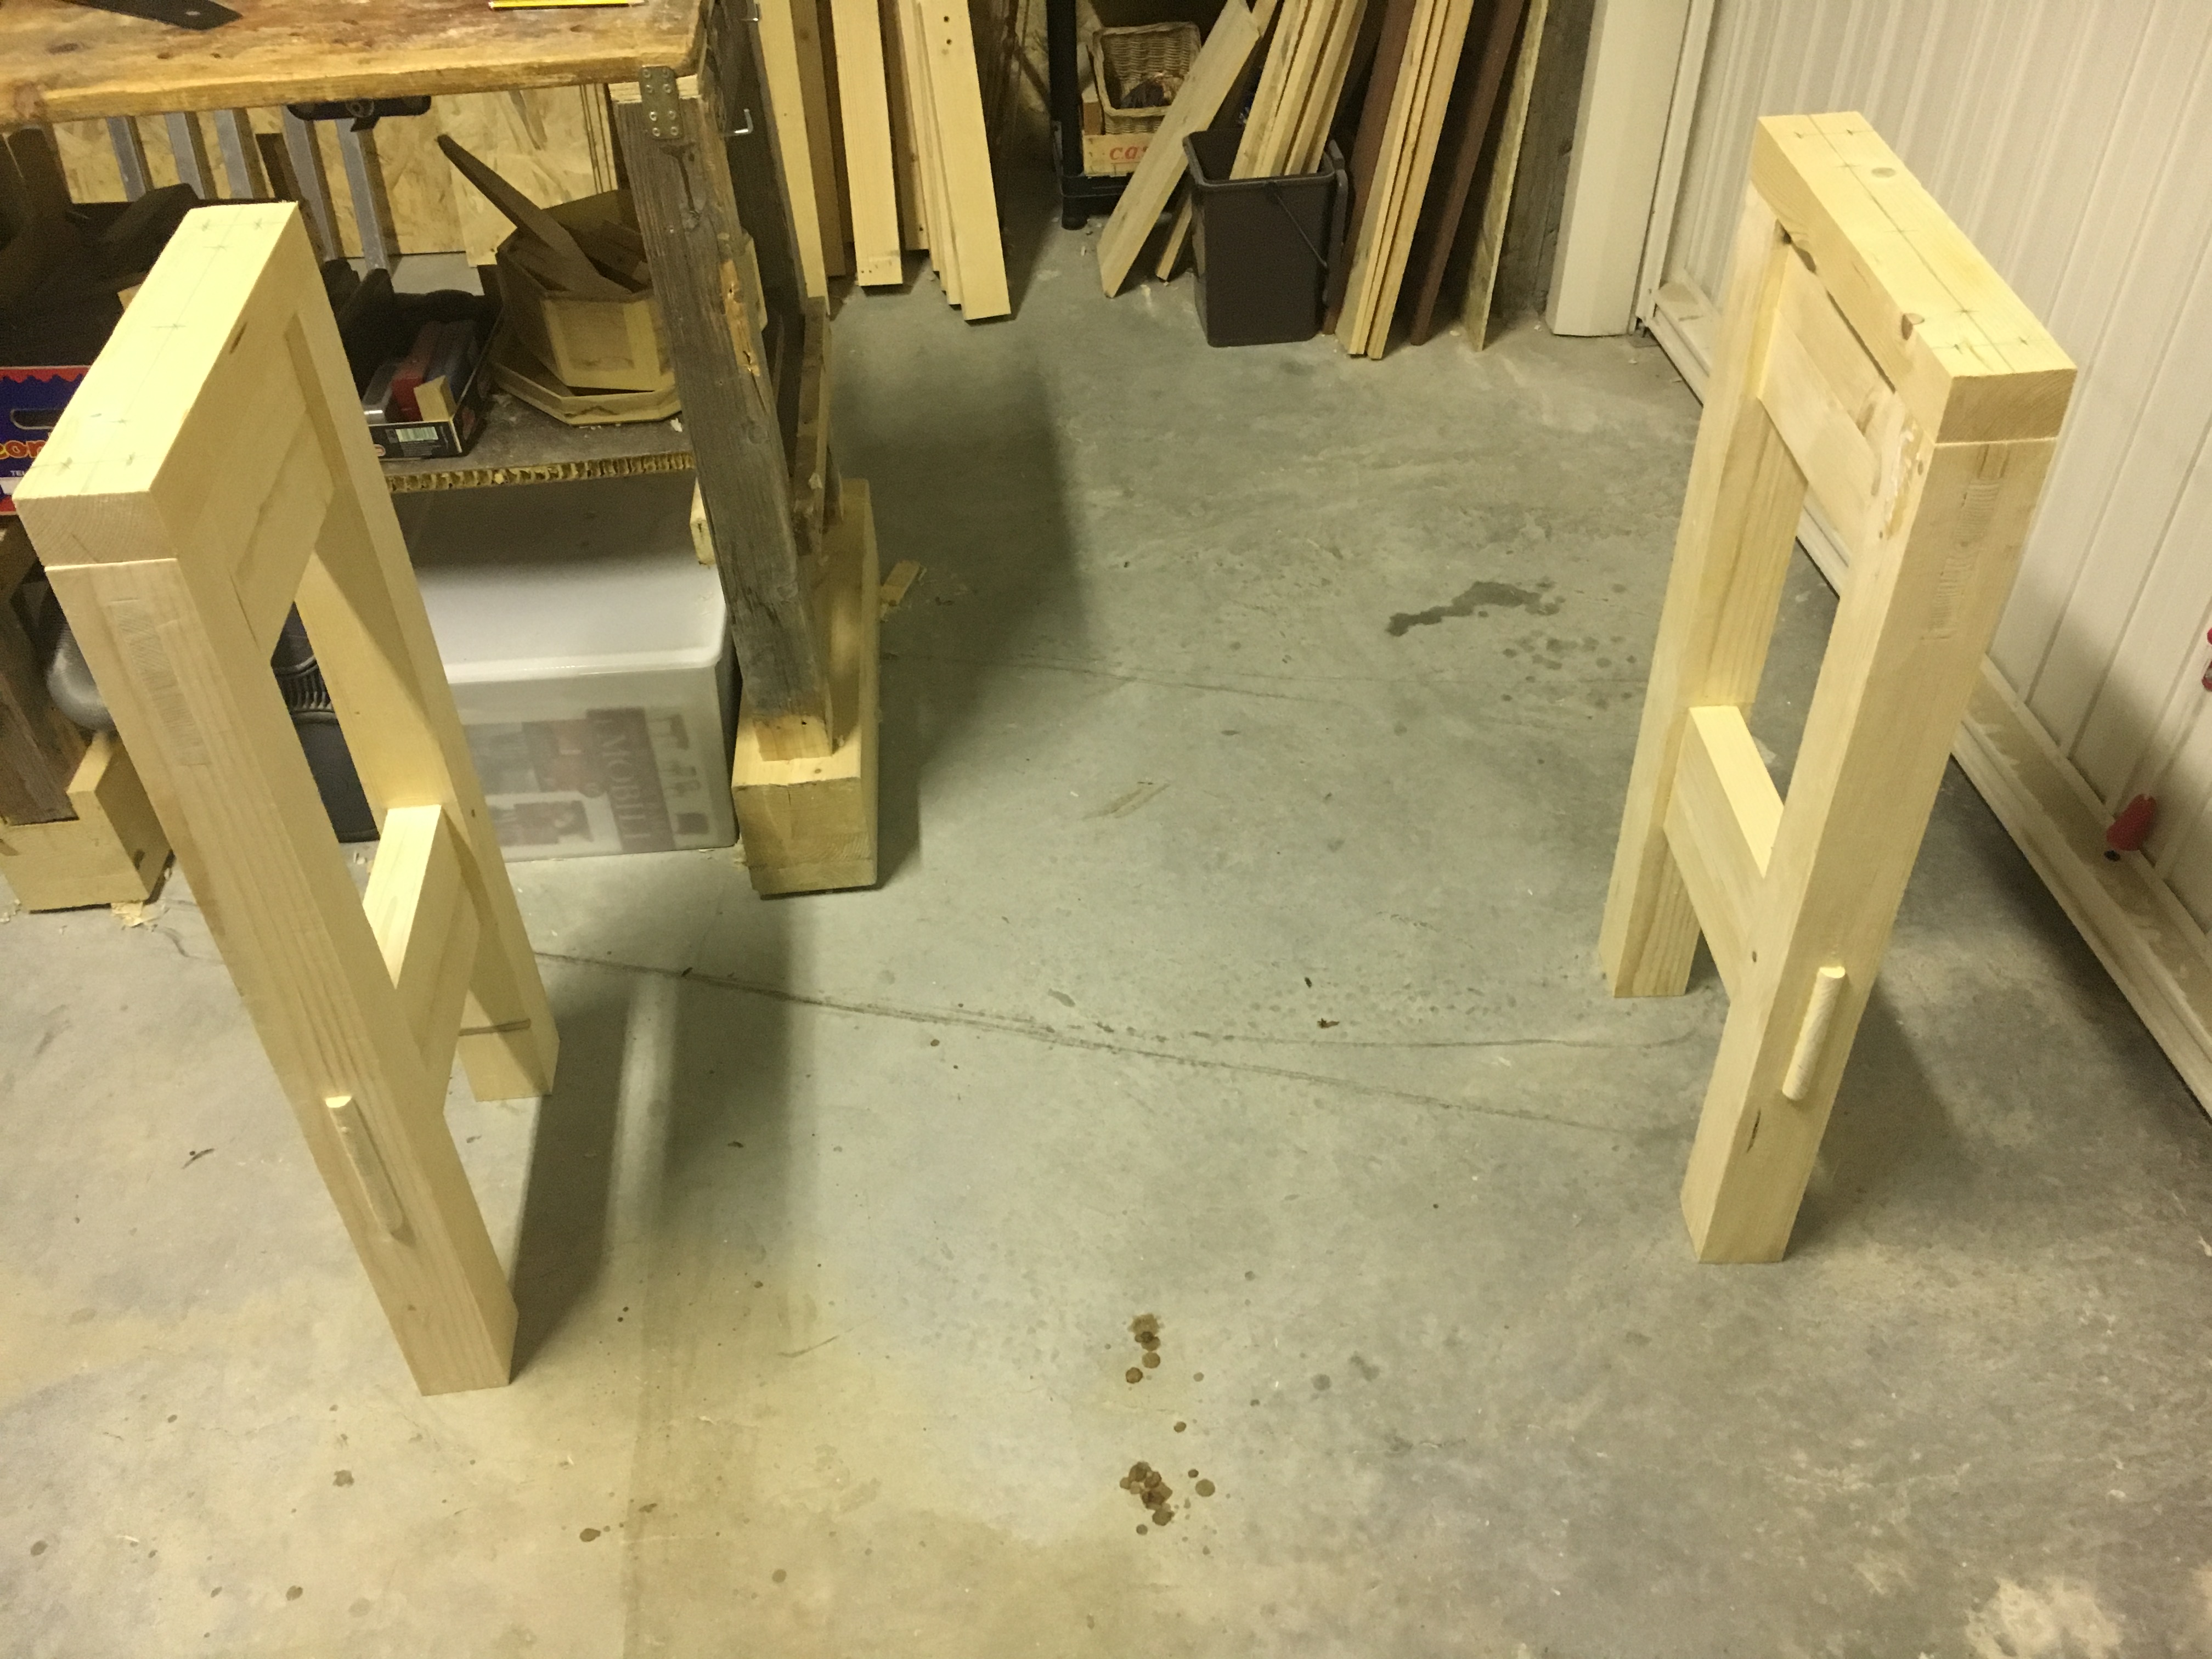
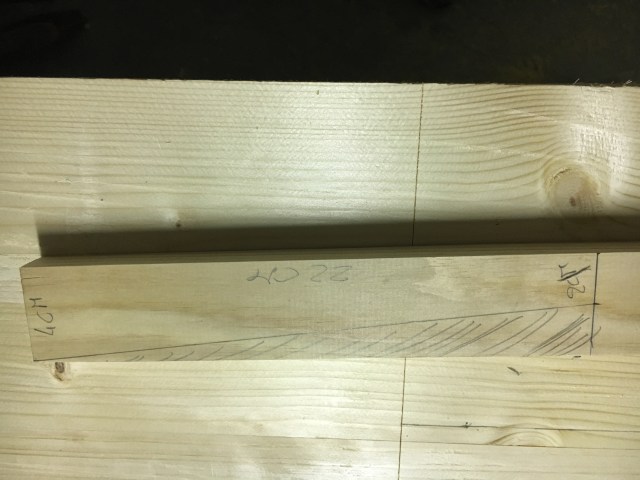
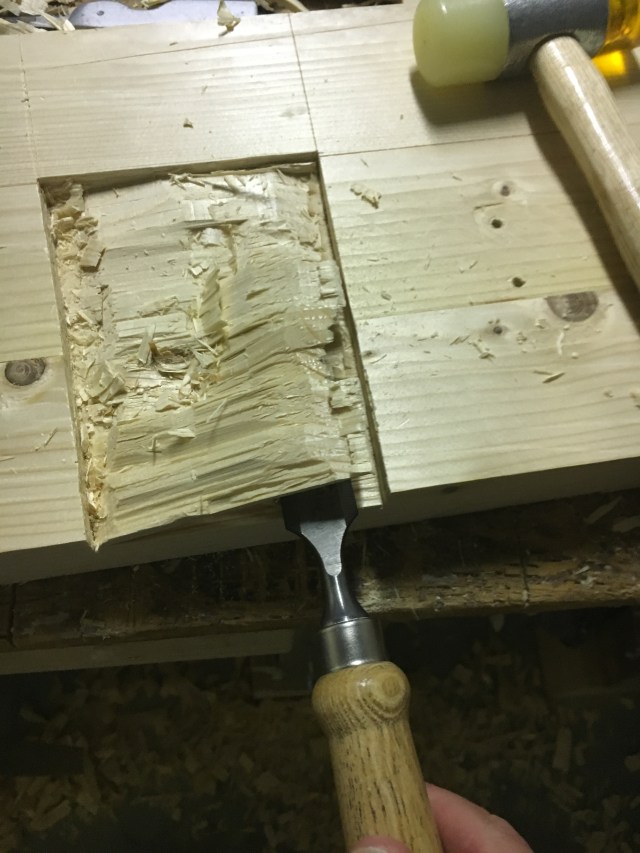
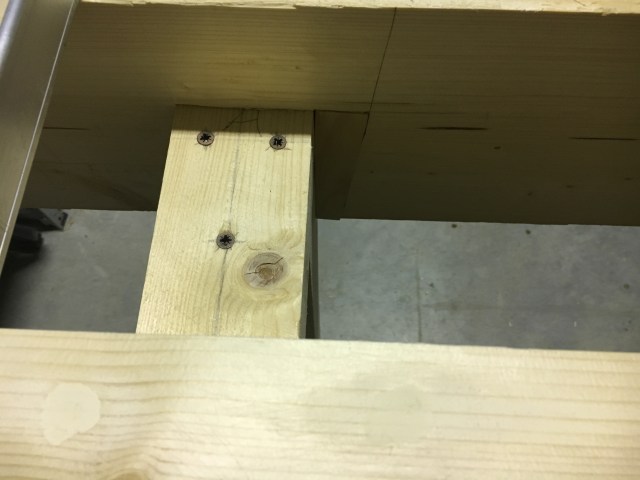
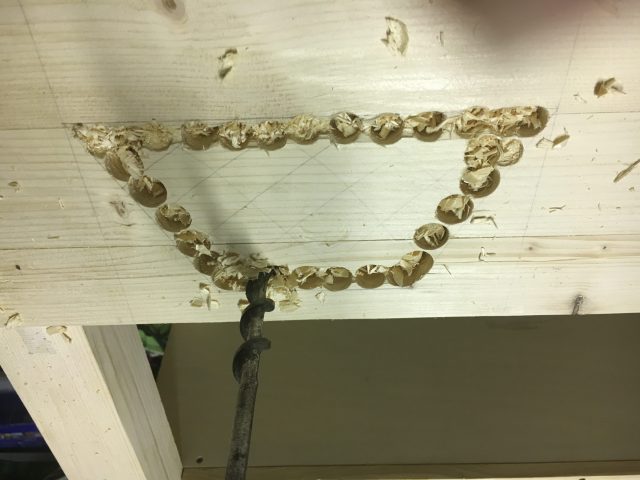
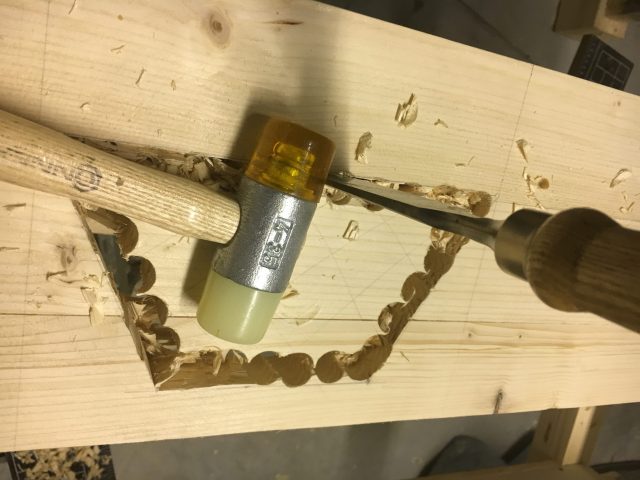
La struttura delle gambe del banco è sicuramente quella che richiede più tempo ed impegno, oltre ad una certa precisione. Come detto, la costruzione ottimale degli incastri è fondamentale. In questo caso gli incastri superiori delle gambe sono a tenone e mortasa semplice, mentre gli incastri inferiori sono a tenone e mortasa passante. Come prima cosa ho provveduto a piallare e squadrare i morali delle gambe. Poi ho segnato a matita e ripassato con coltellino, squadra combinata e truschino le posizioni delle mortasa. Quindi con lo scalpello ho scavato le mortase. Le foto di seguito evidenziano tutta la procedura di lavorazione. Per vedere nello specifico come si fanno gli incastri tenone e mortasa vi rimando a questo post Gli incastri. Come fare l’incastro tenone e mortasa / The joints. How to make the mortise and tenon joint.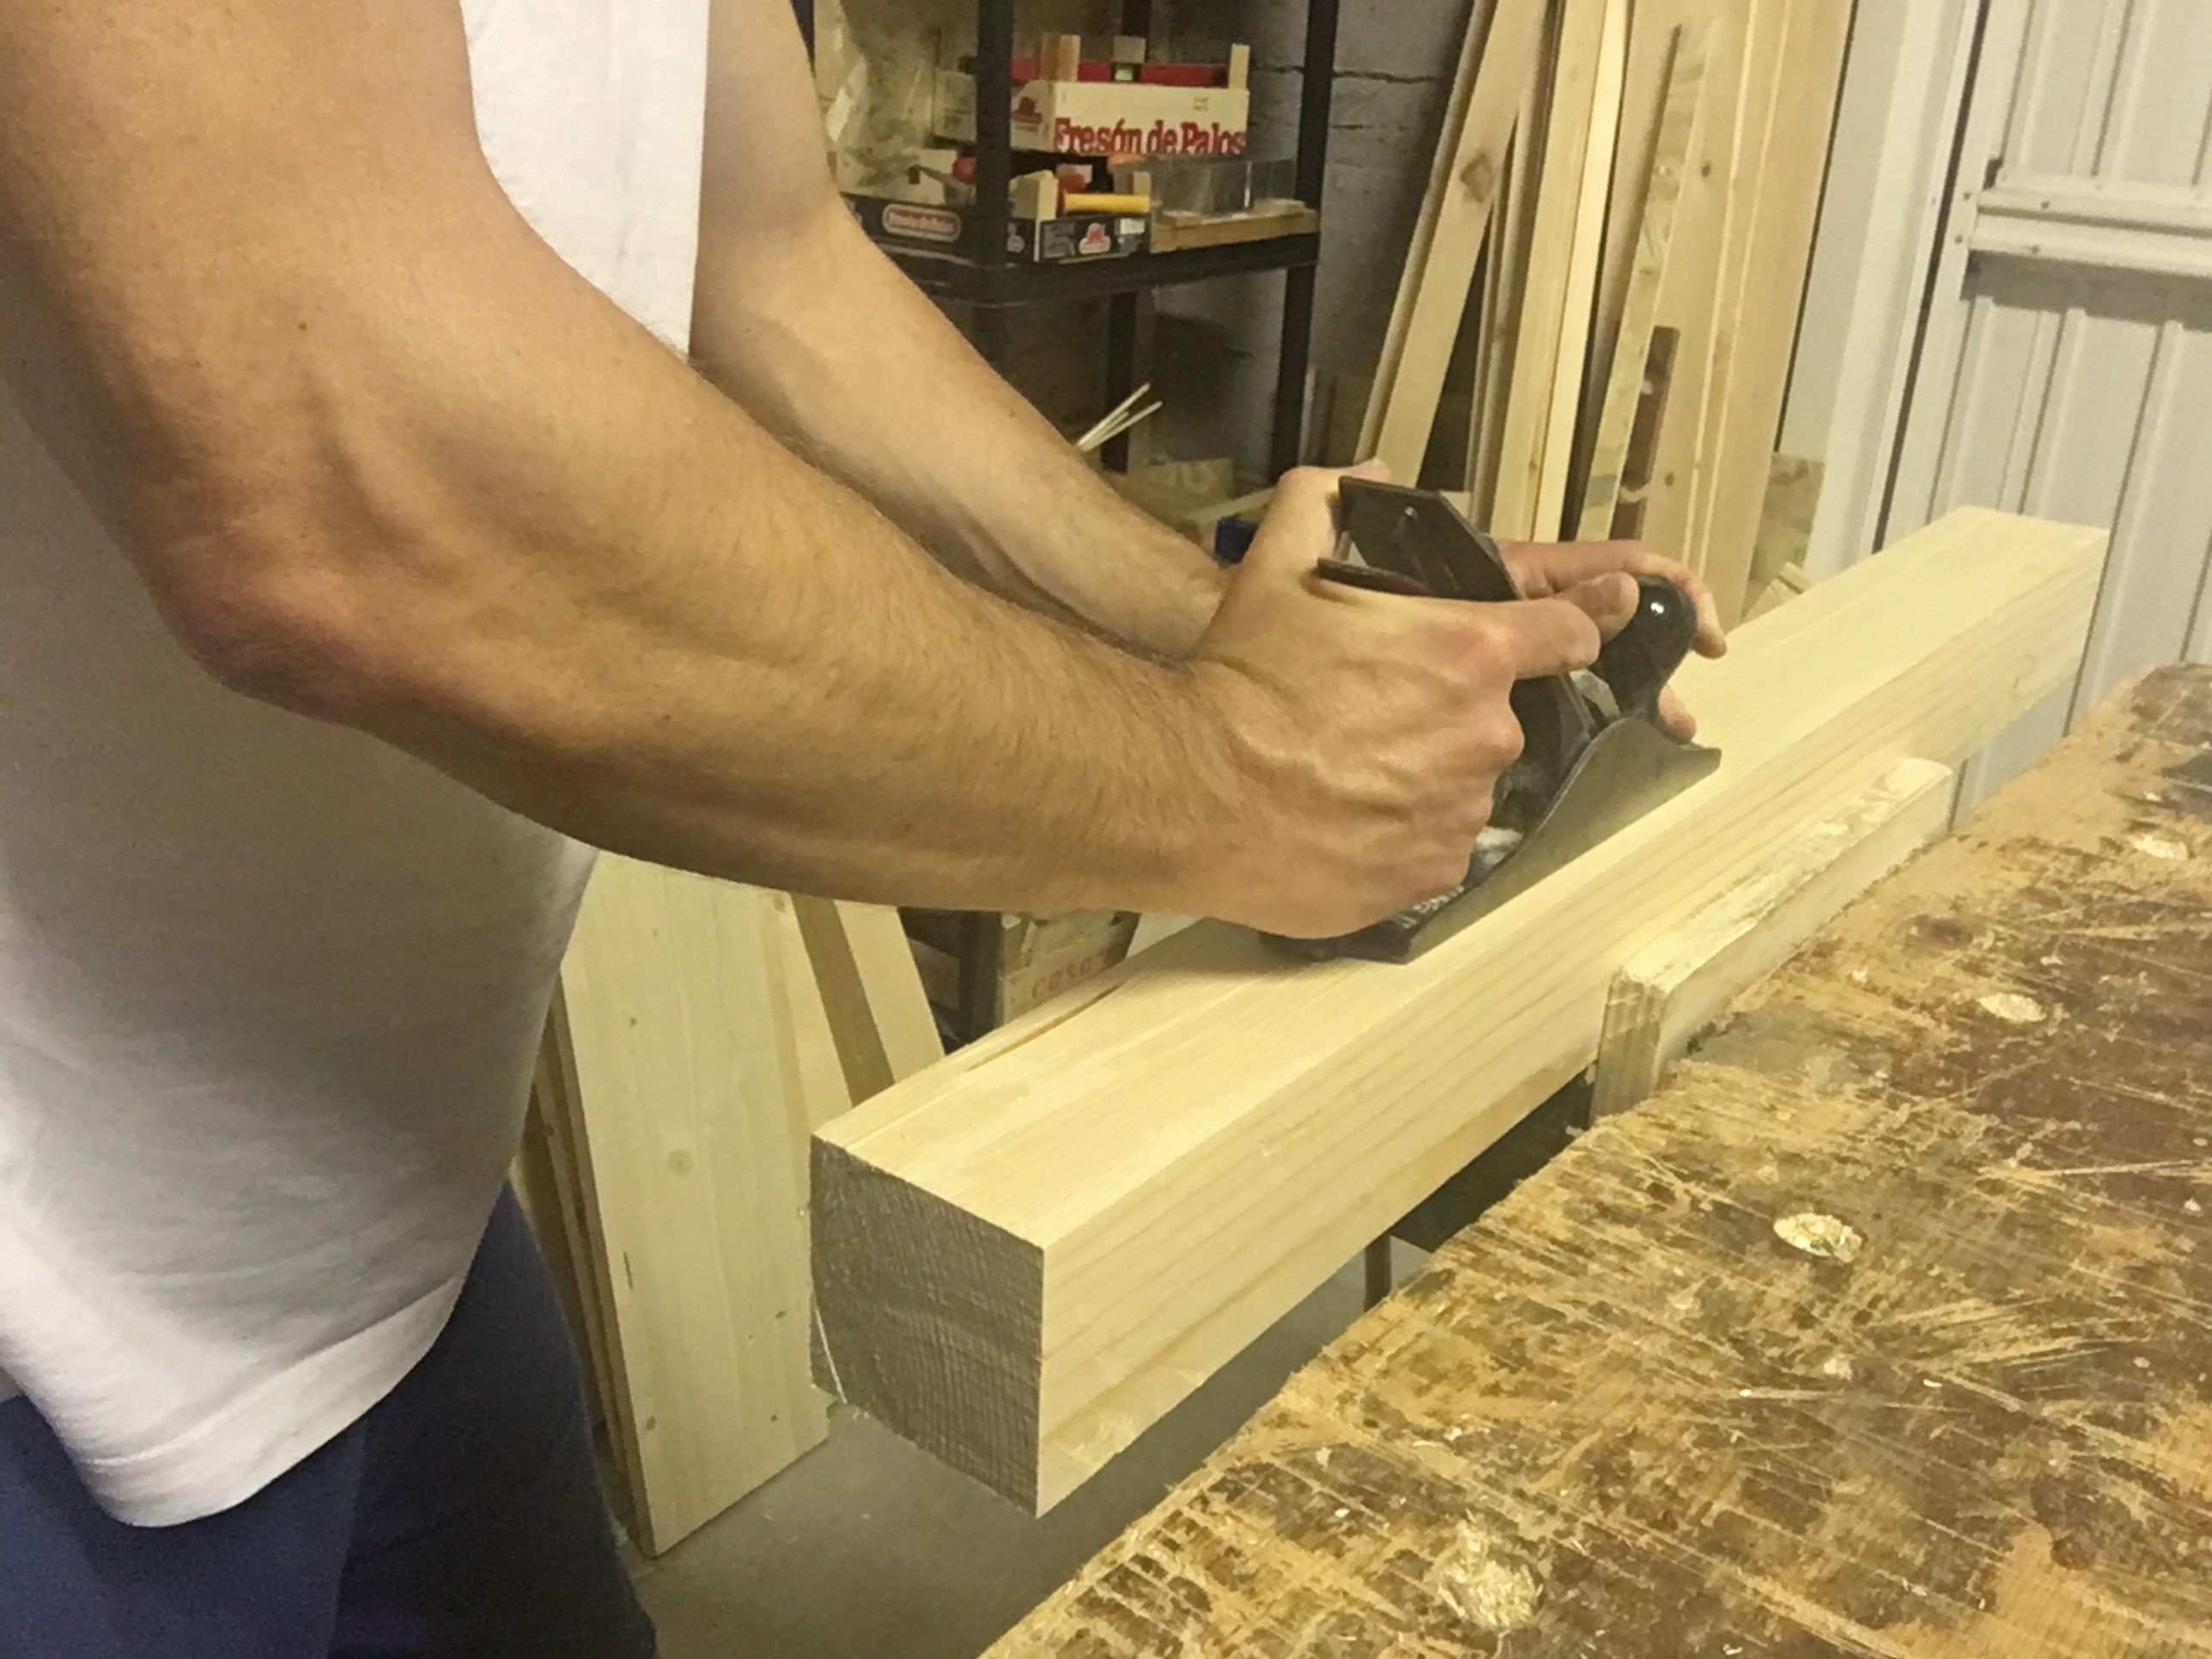

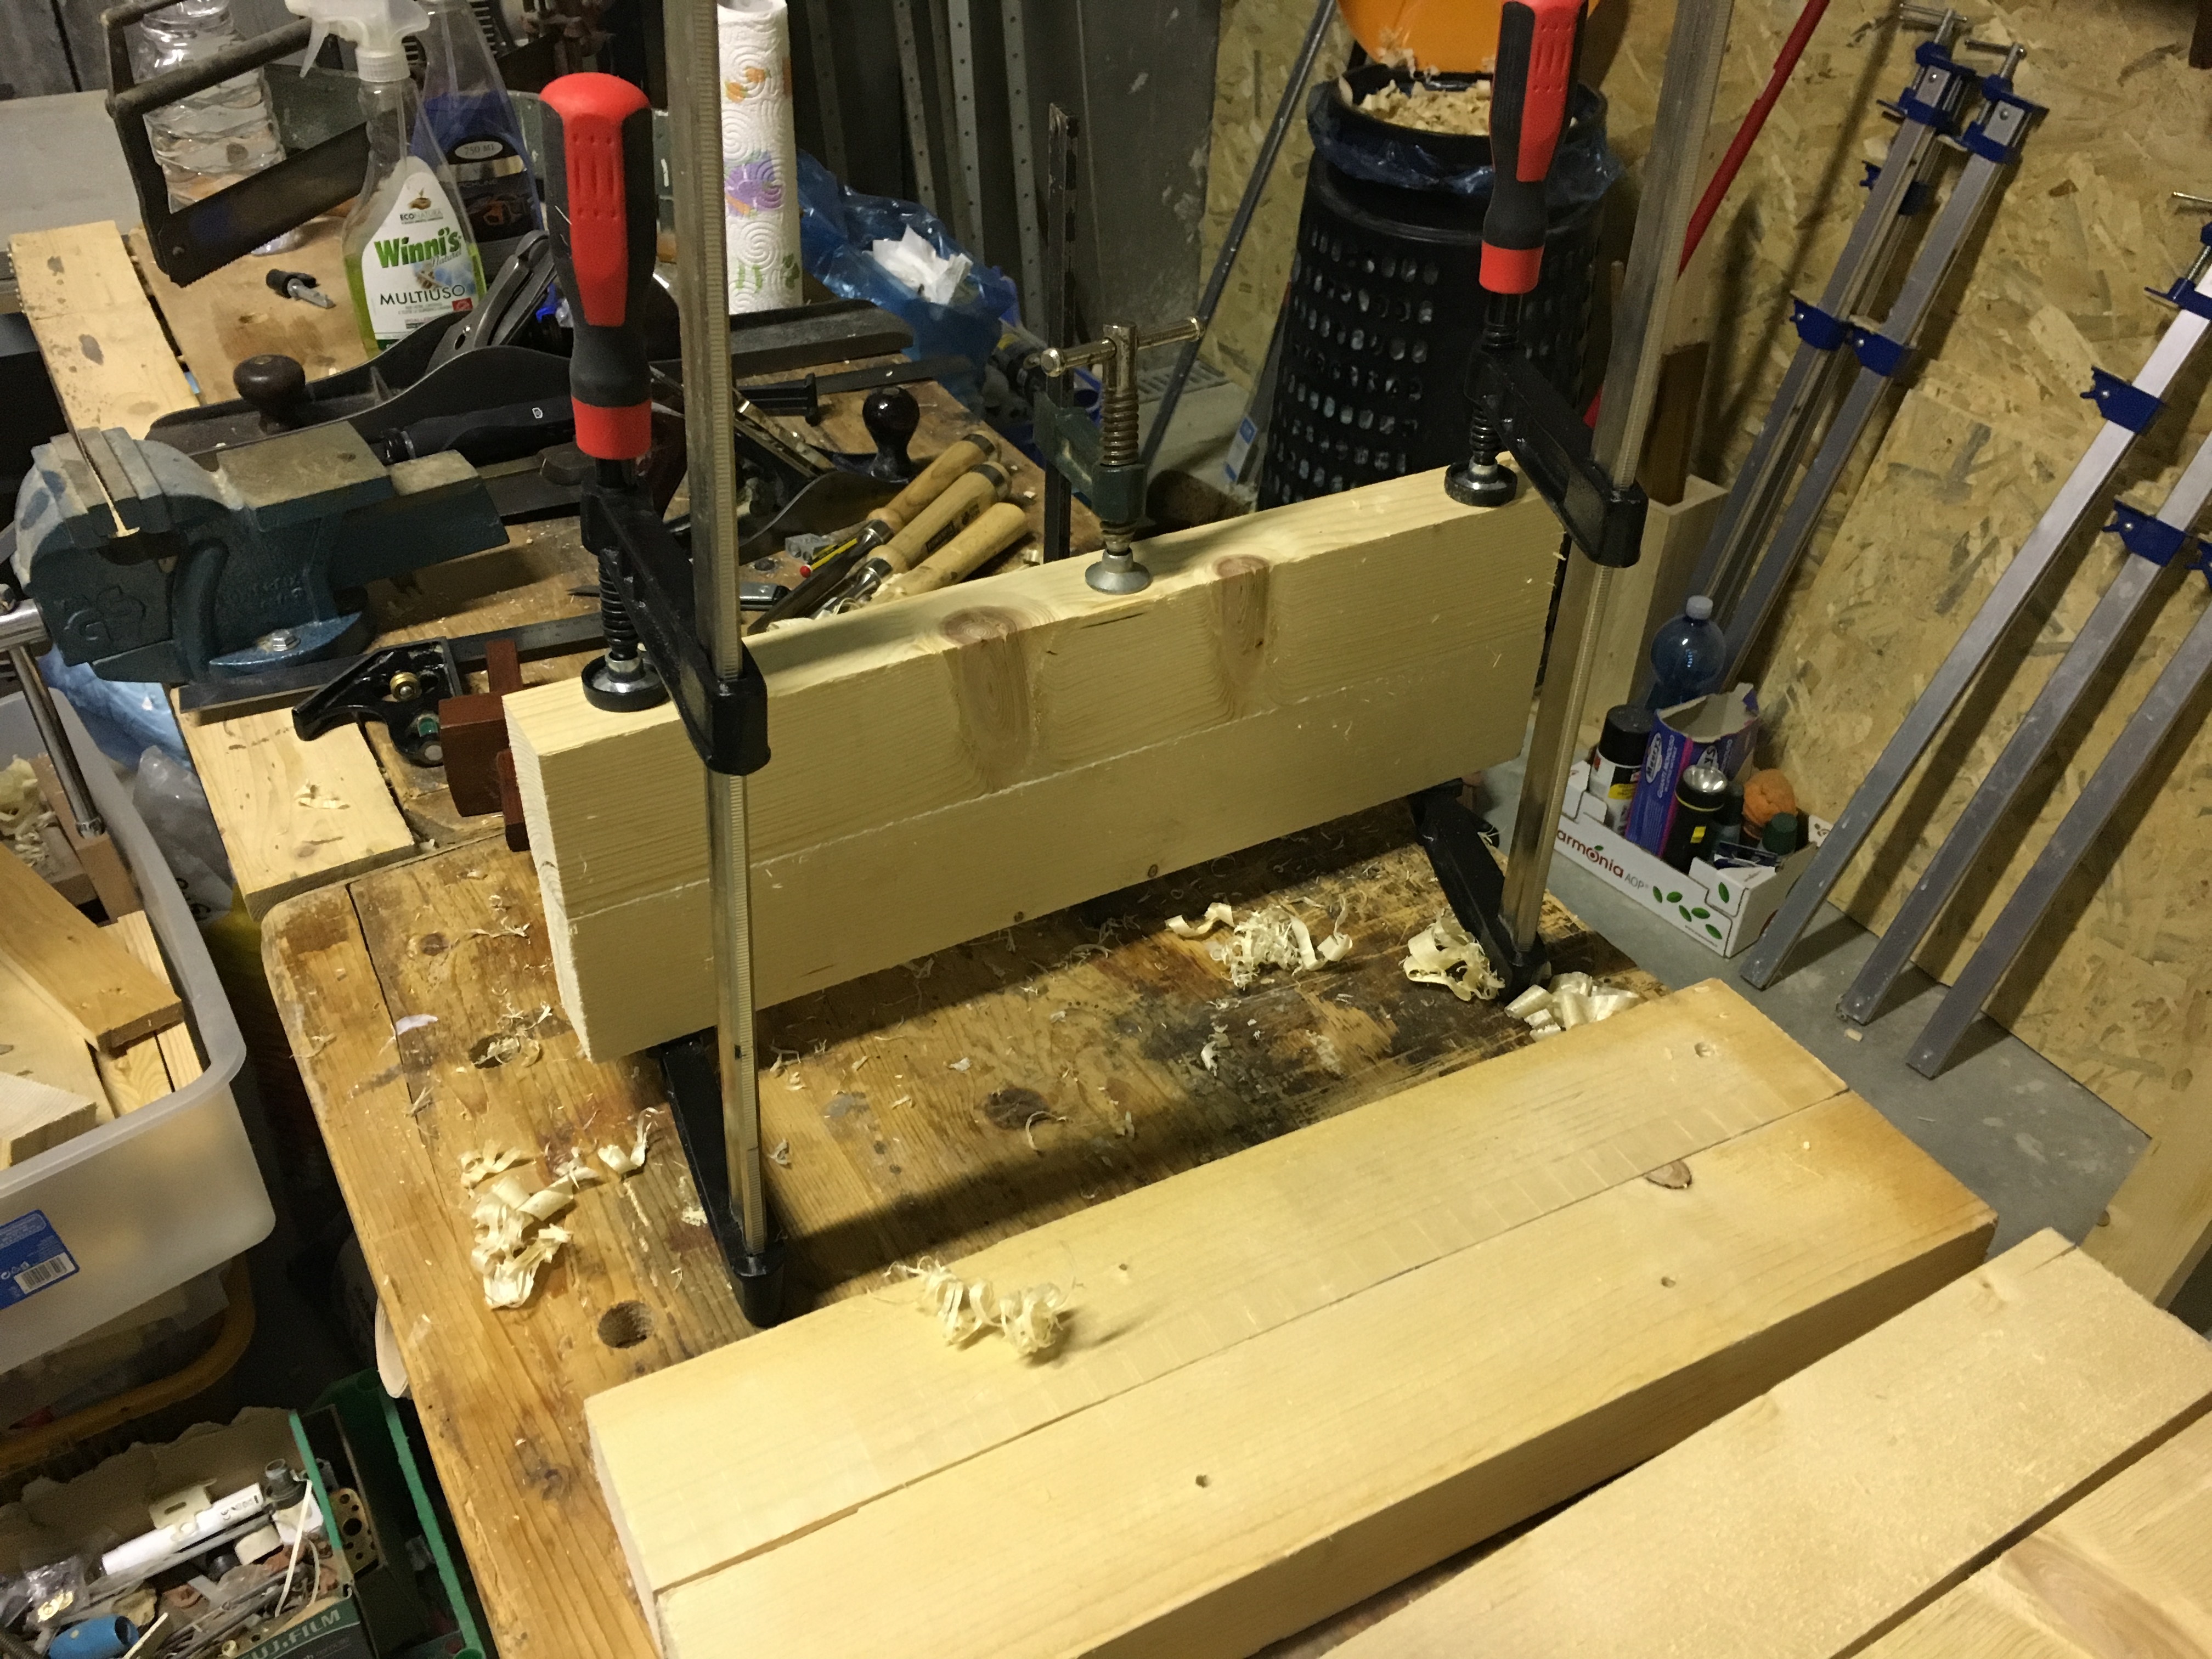
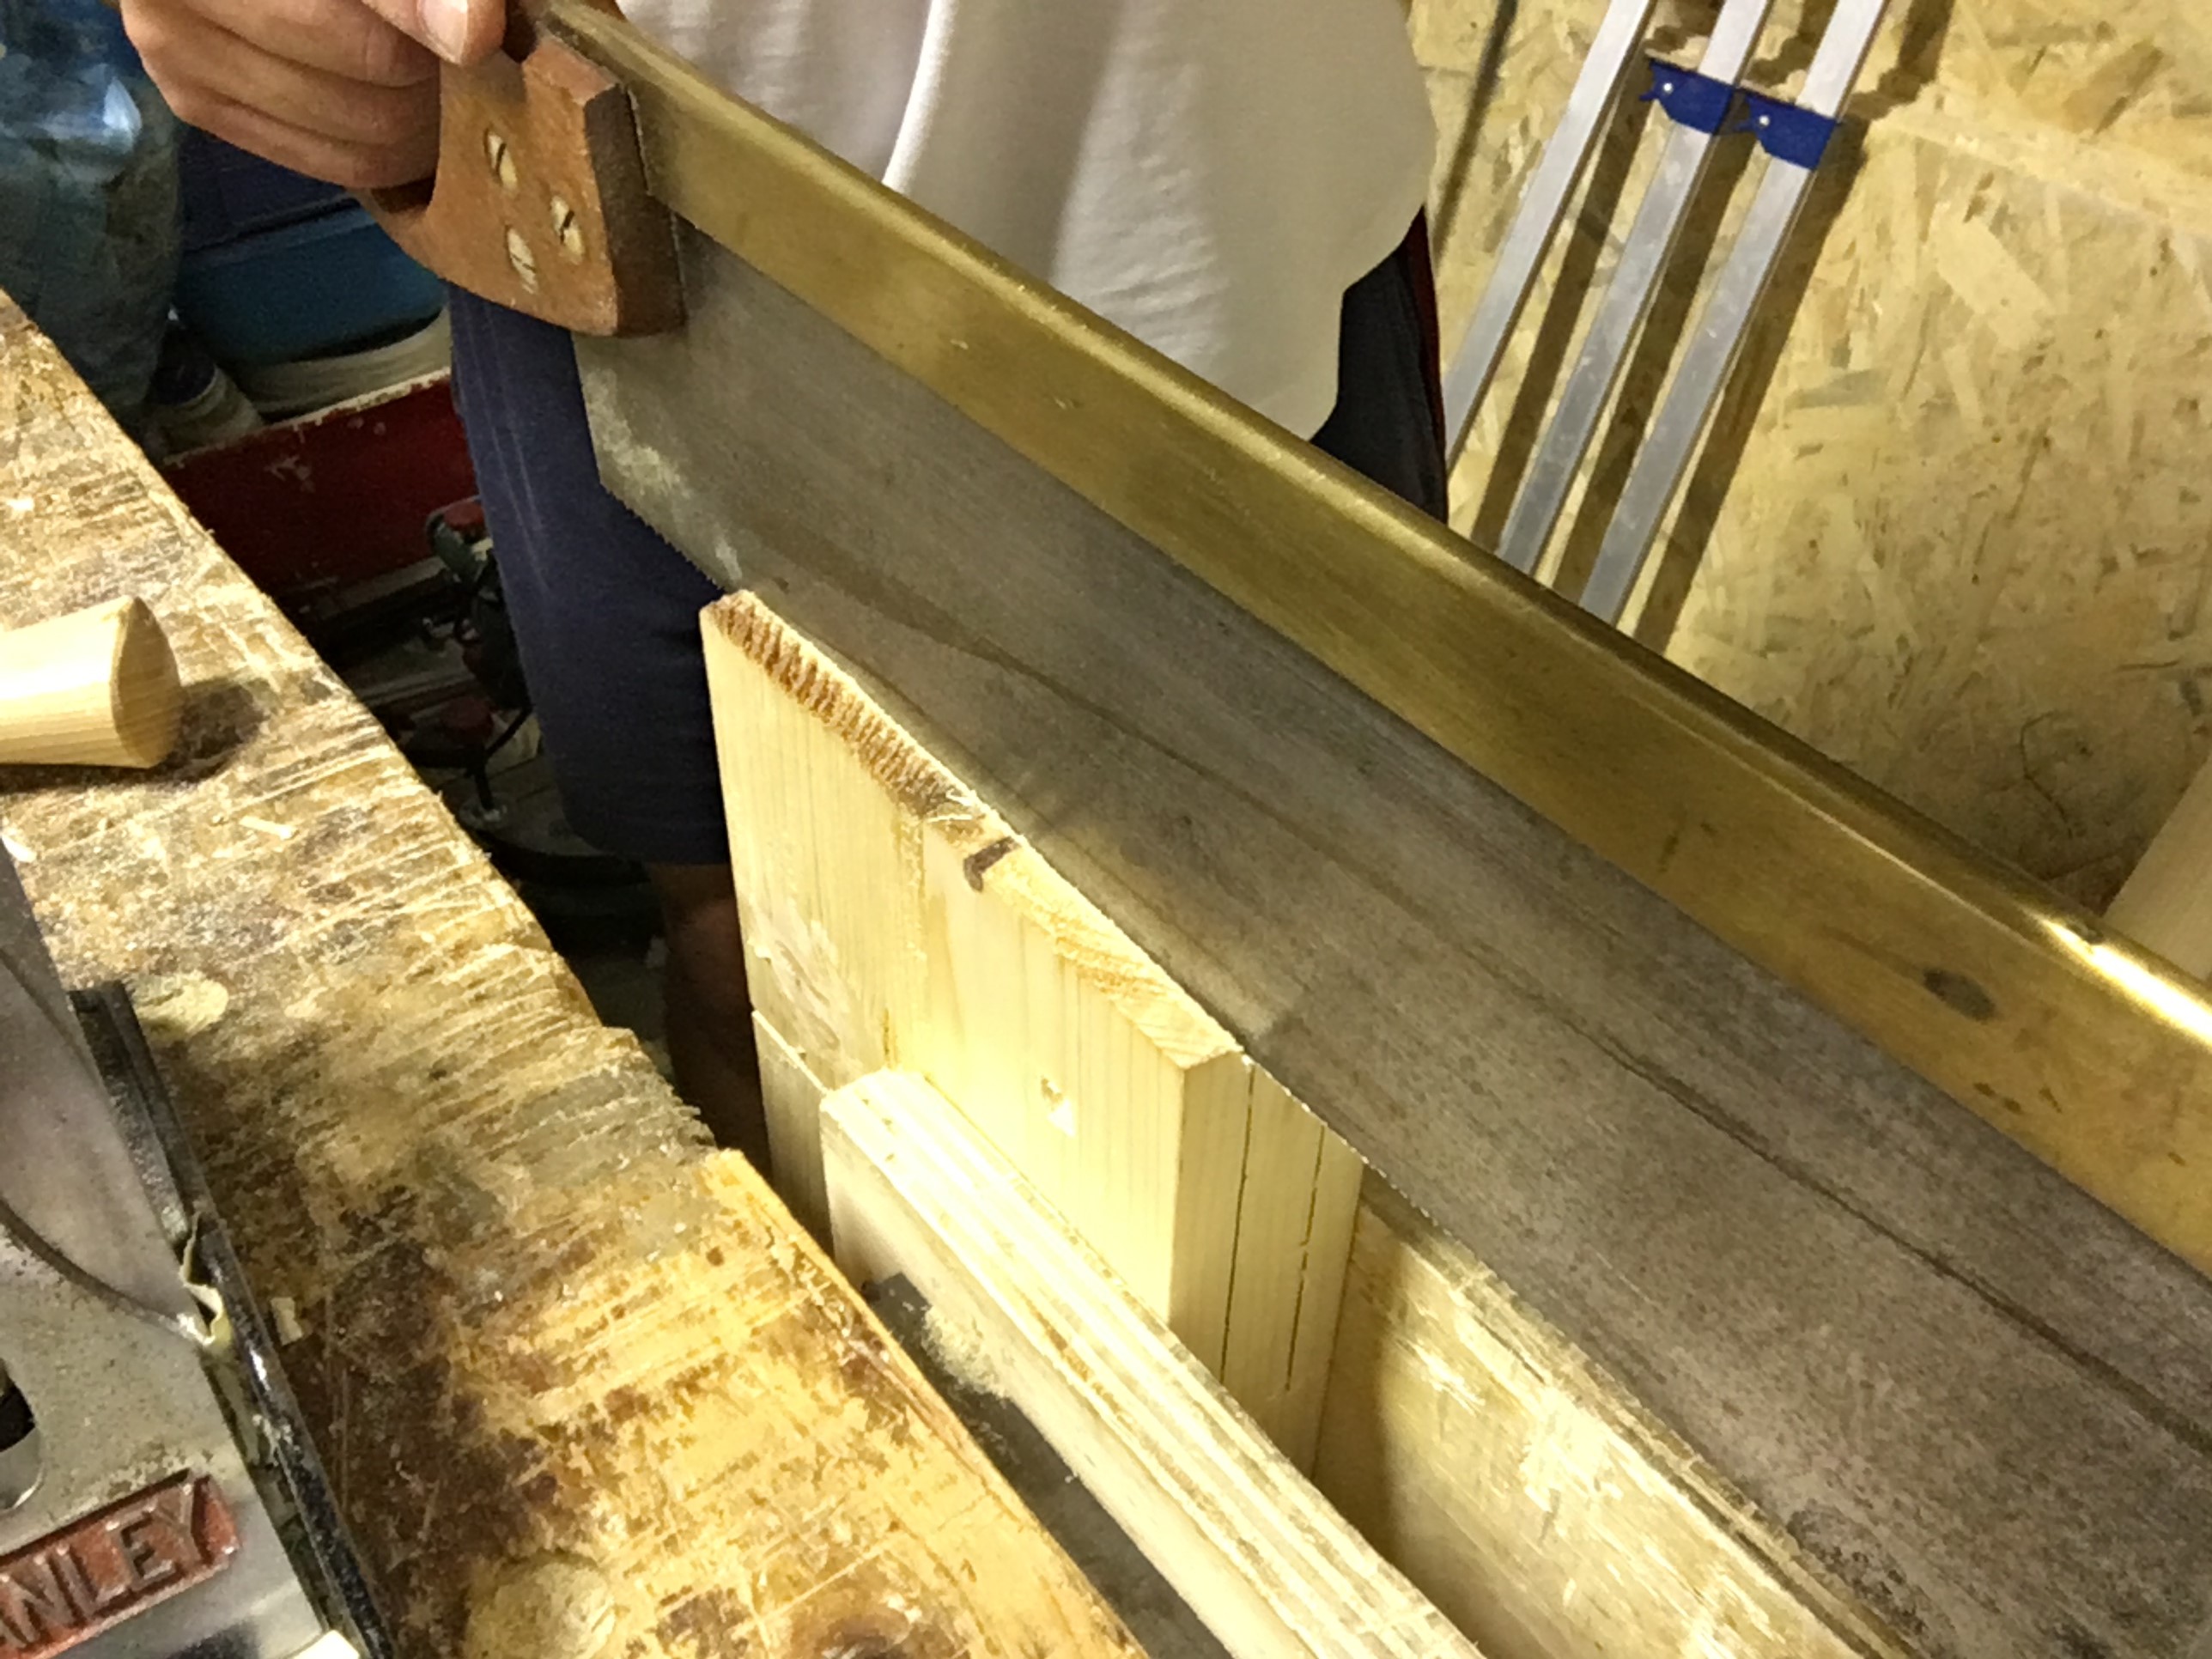
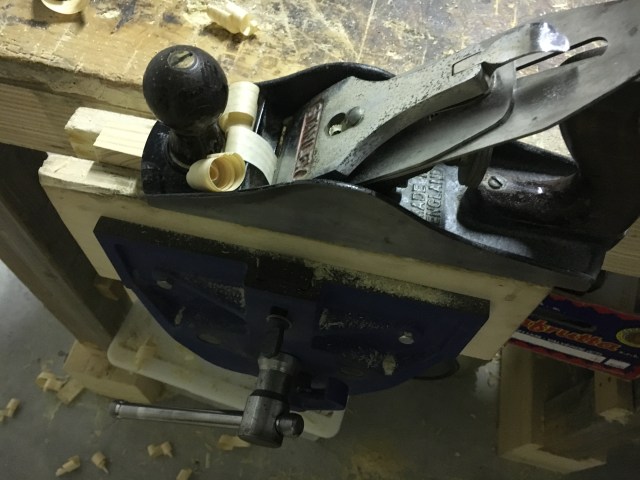
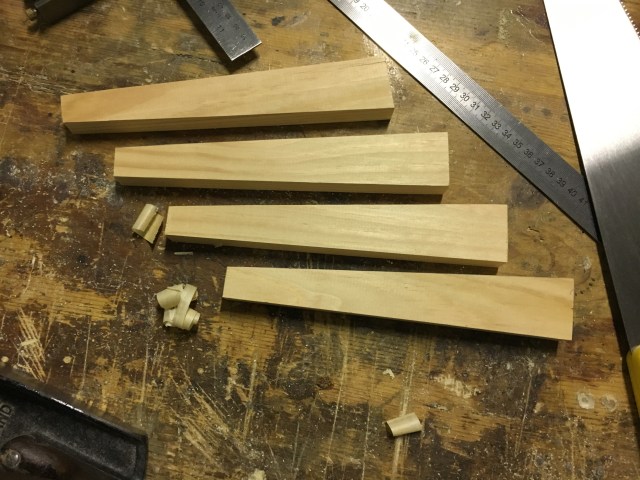
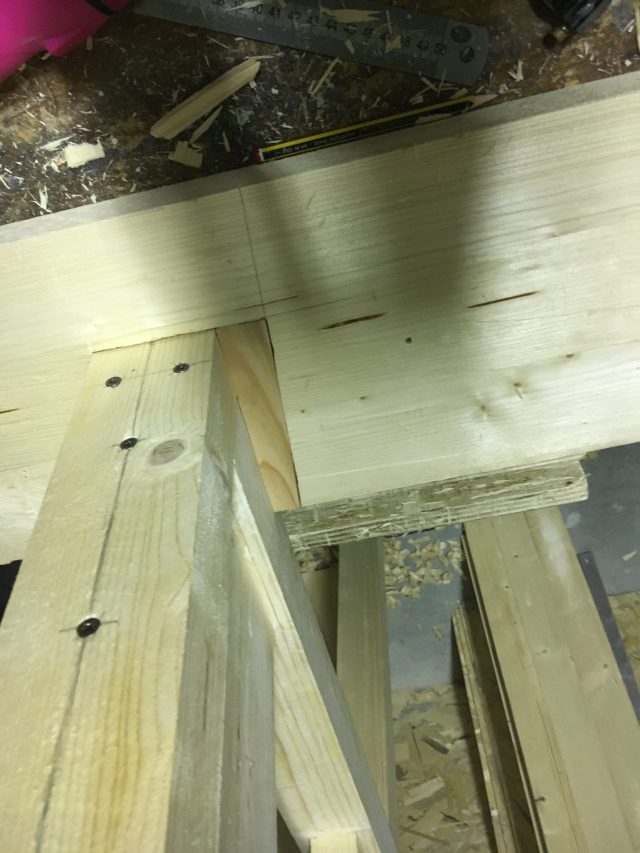
Non avendo disponibili già a misura i traversi delle gambe, ho dovuto provvedere unendo alcuni pezzi avanzati dal vecchio bancone. Segati, piallati ed incollati, dal pezzo finale ho ricavato i tenoni alle estremità. Nelle foto seguenti le varie fasi della lavorazione.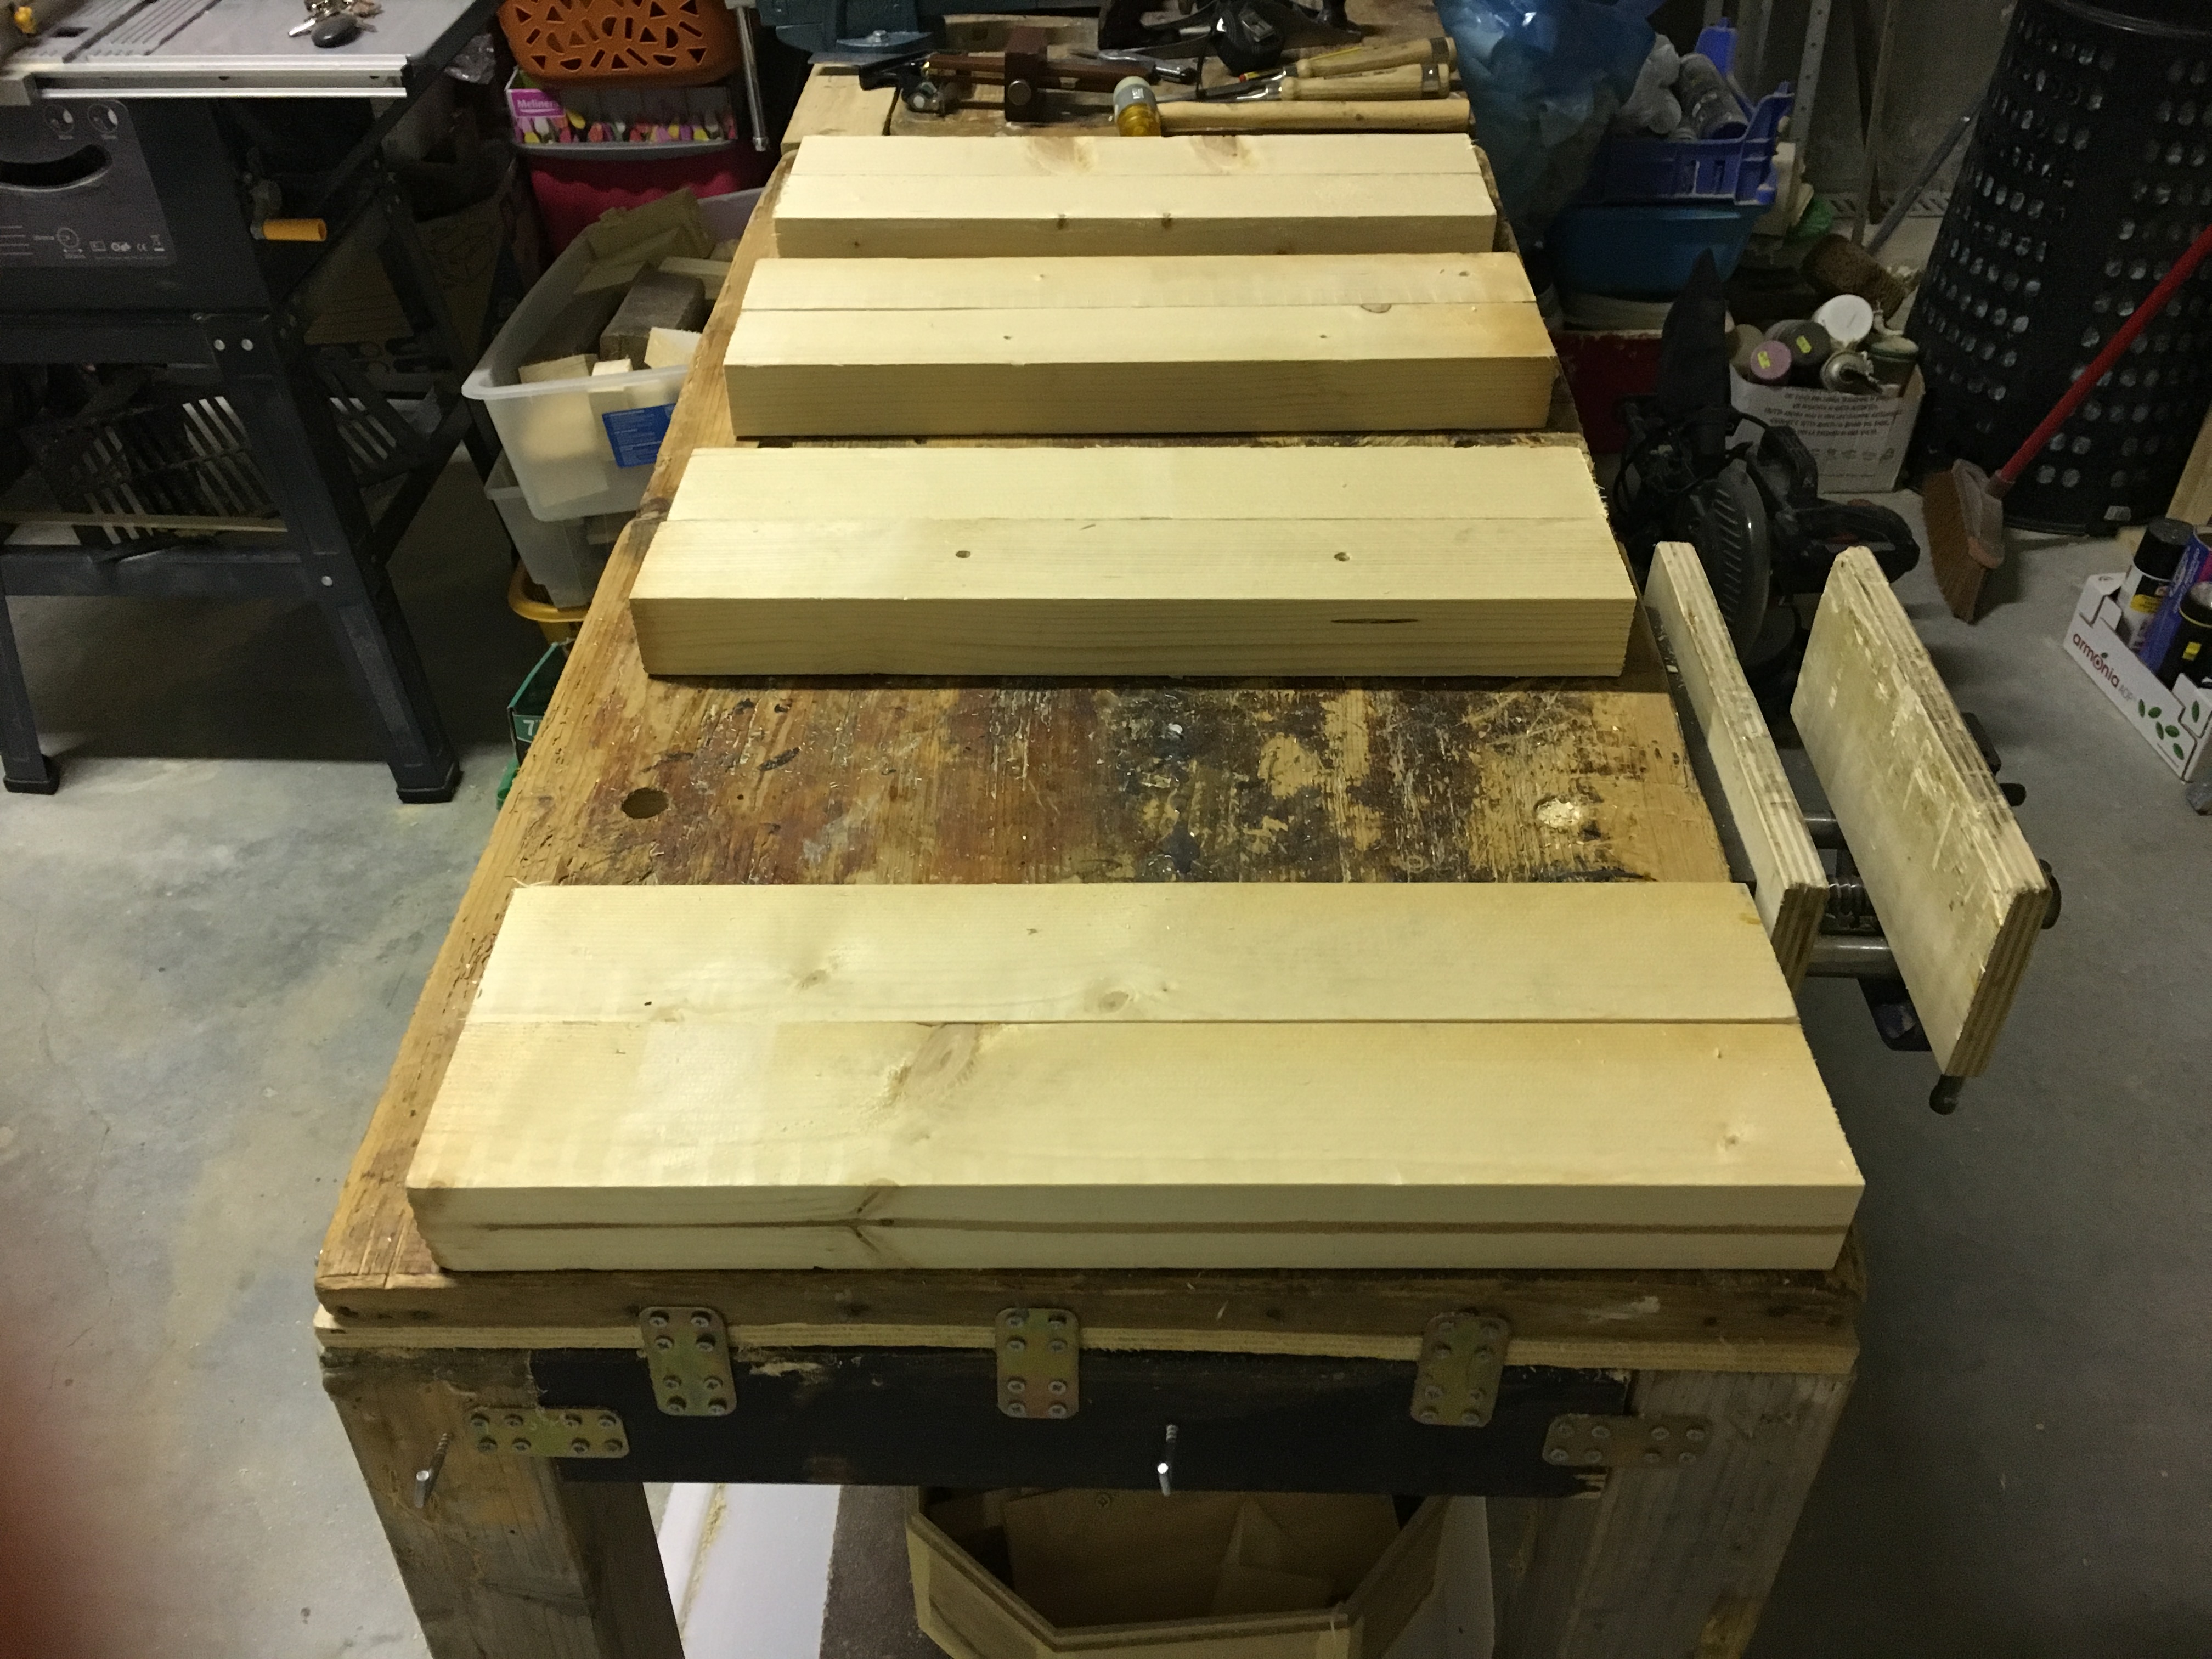
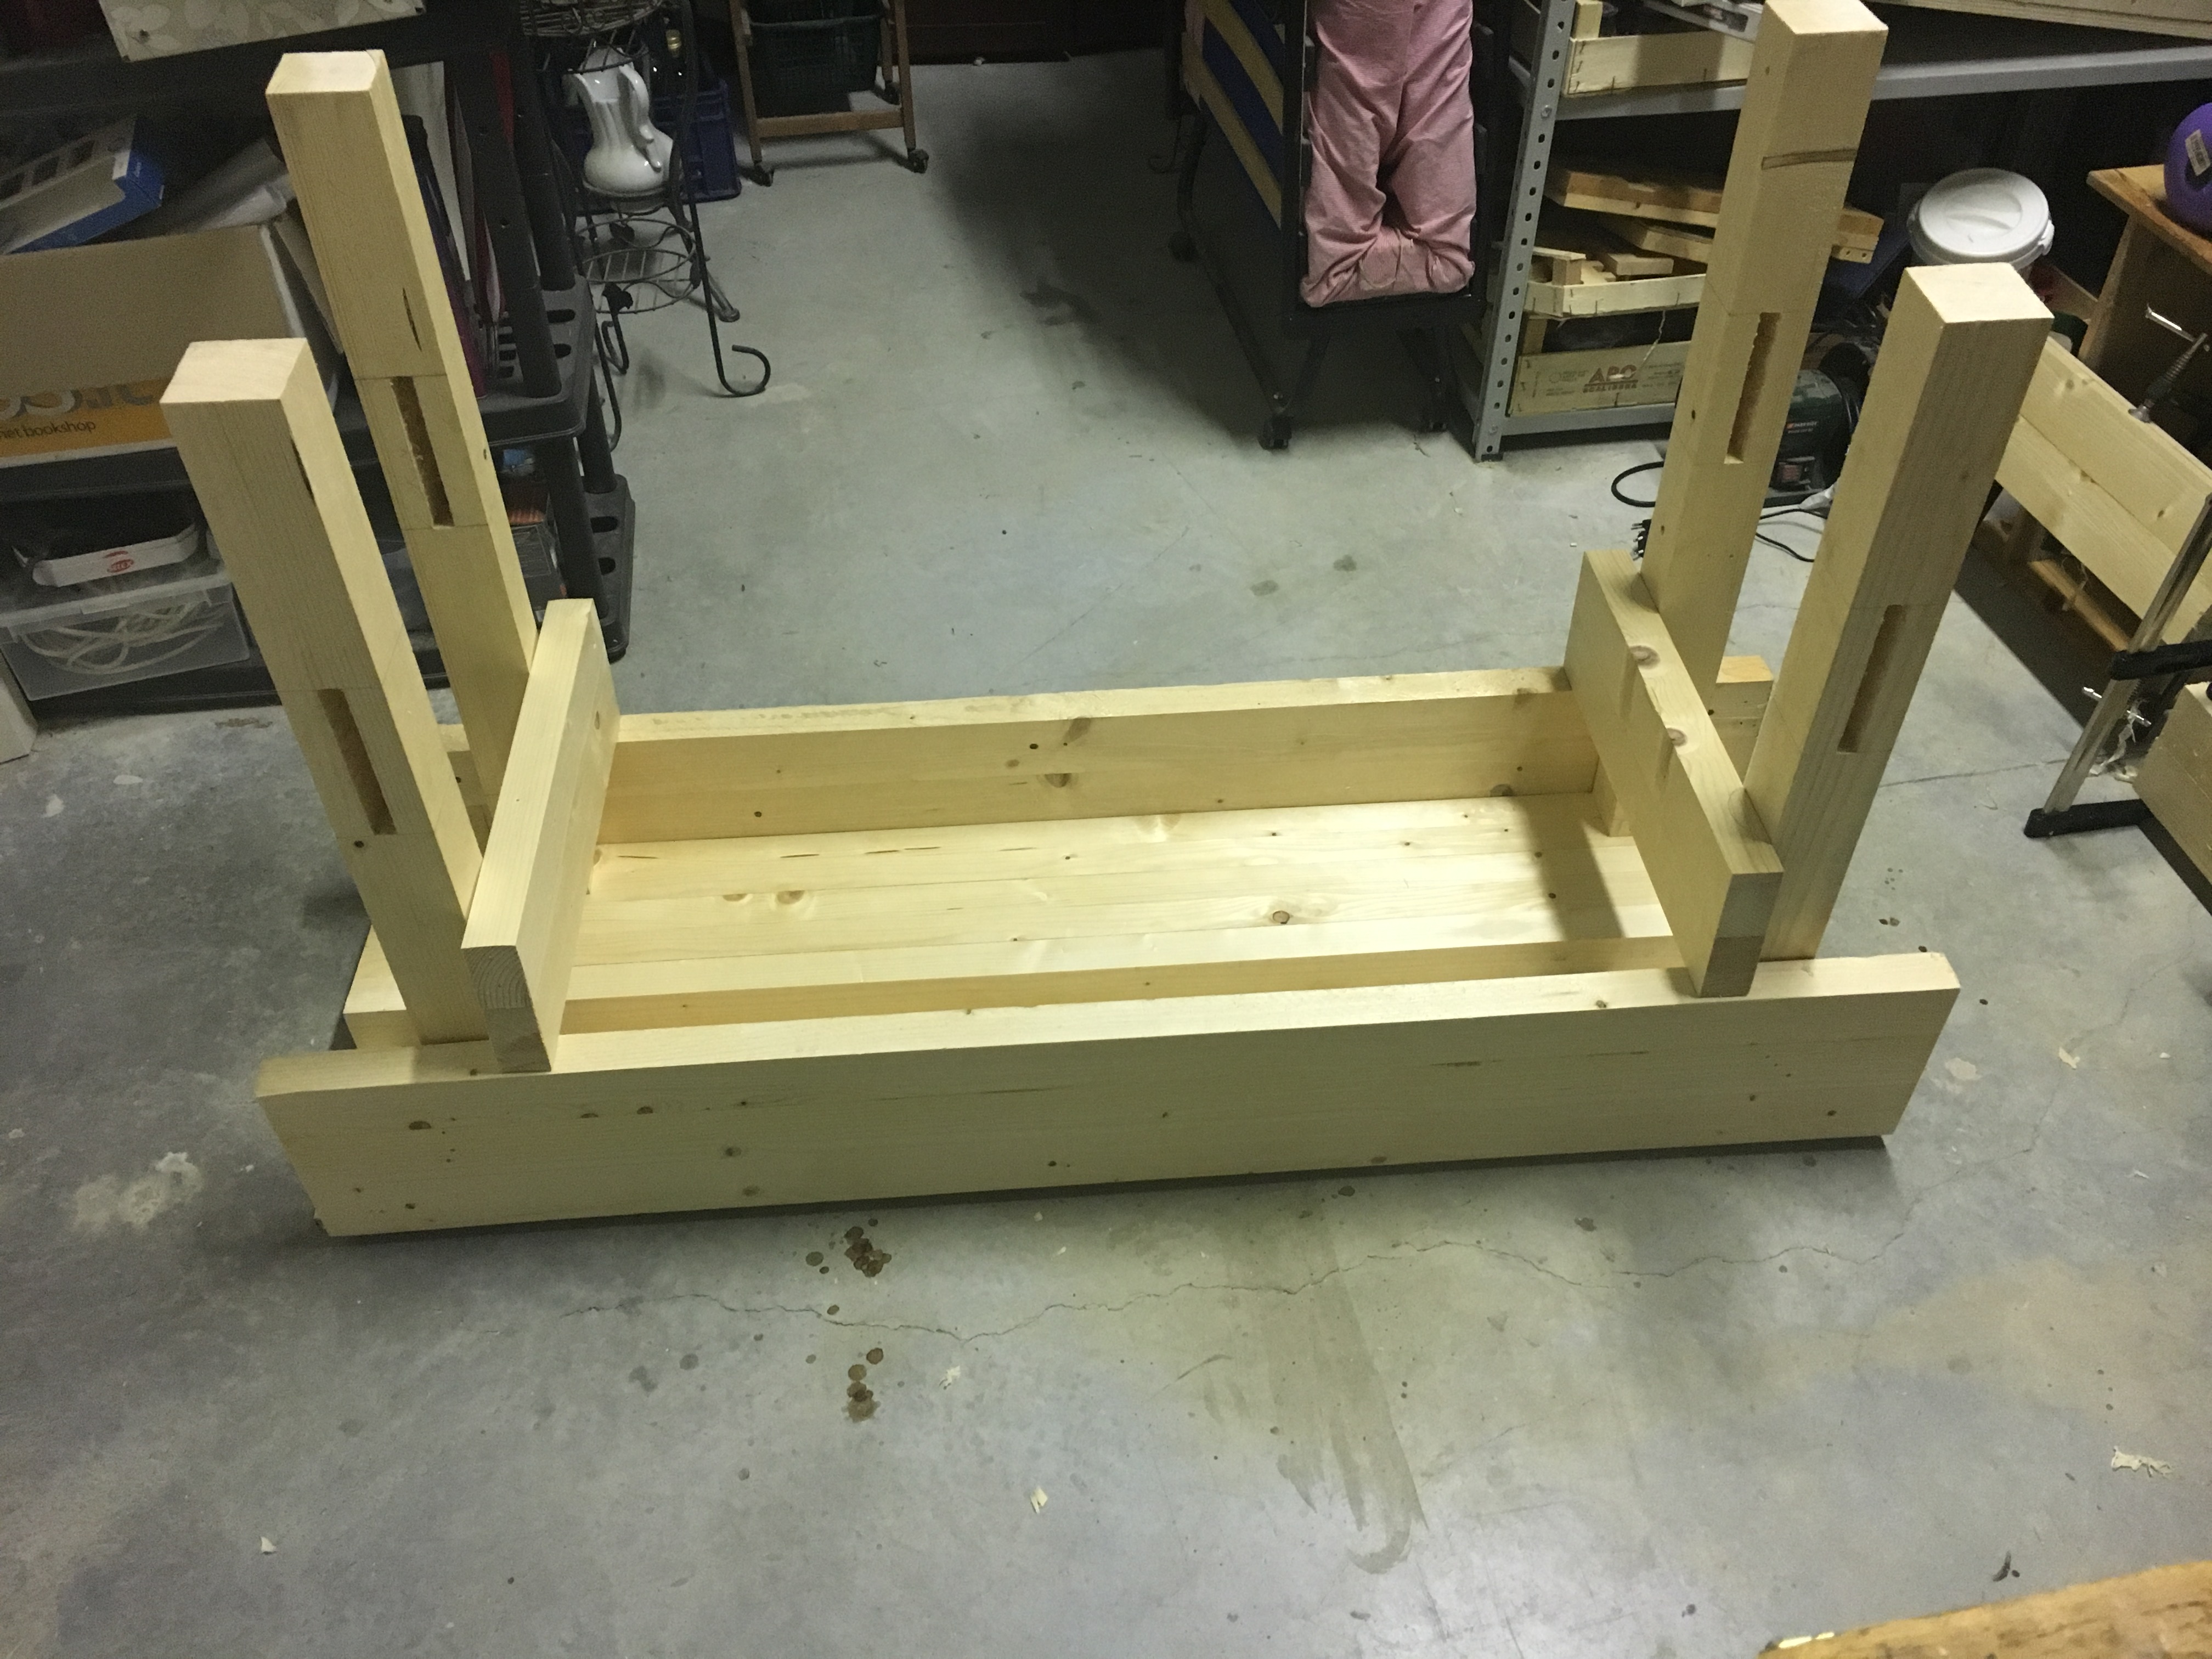
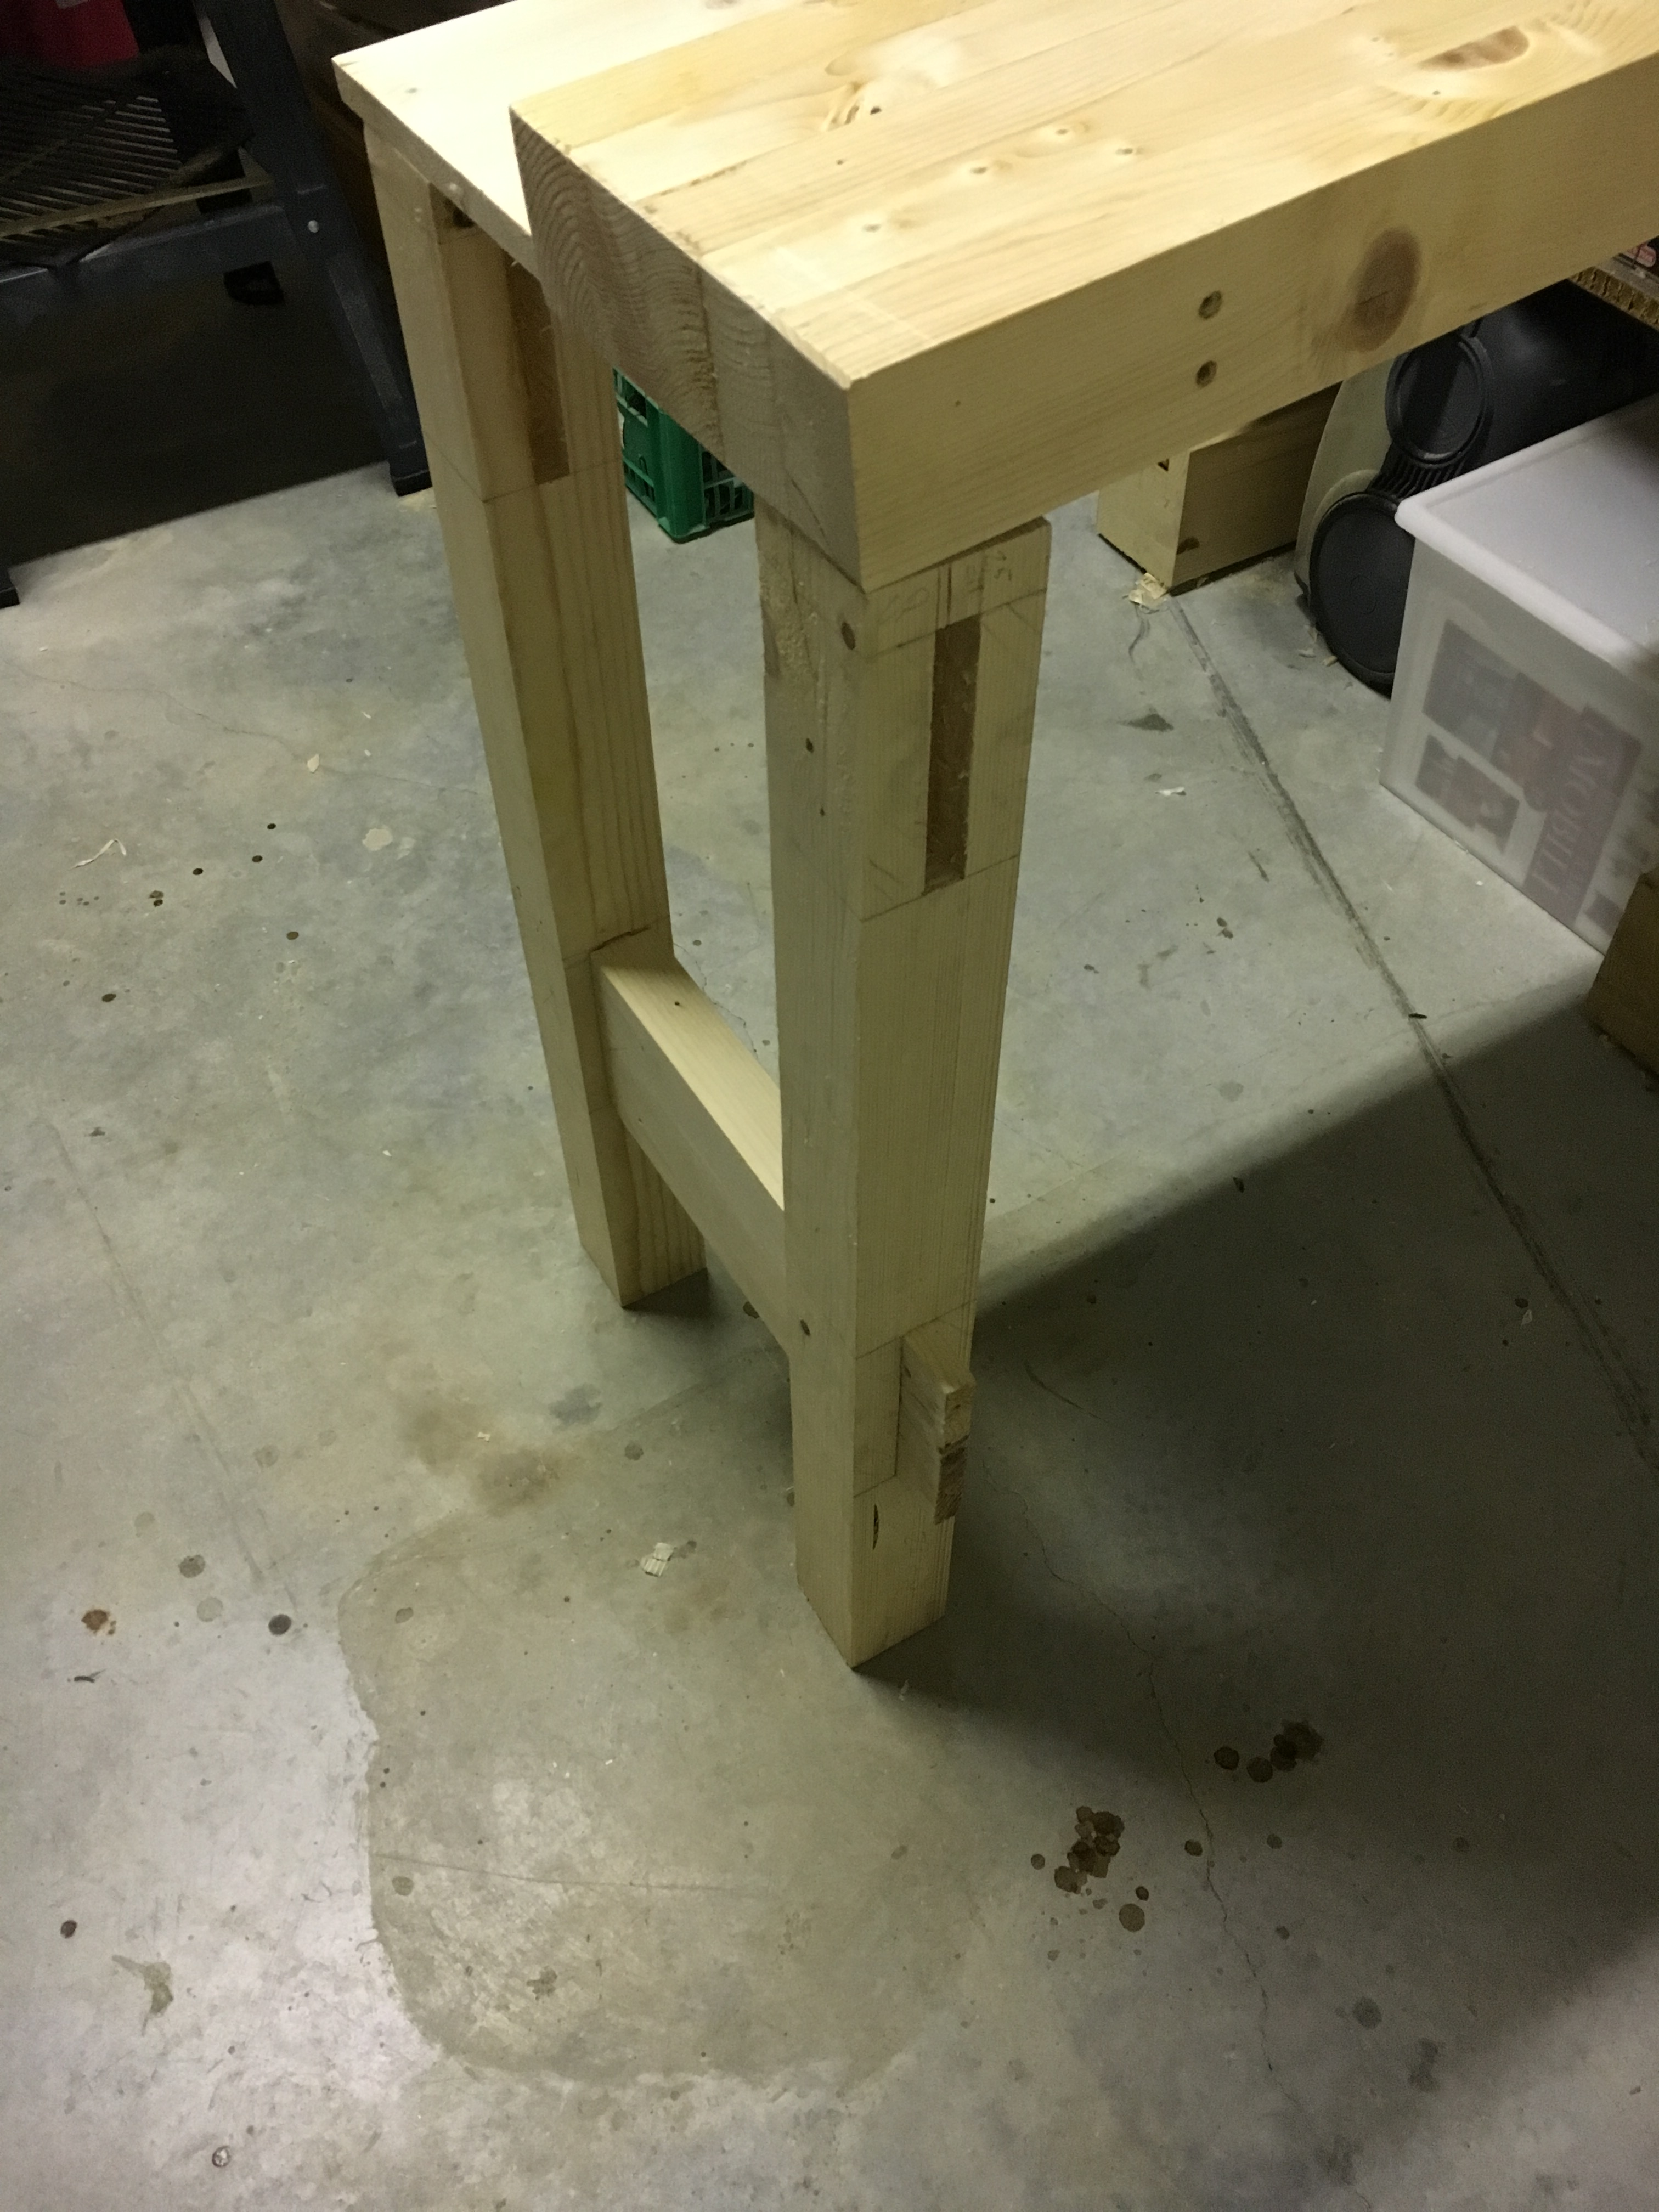
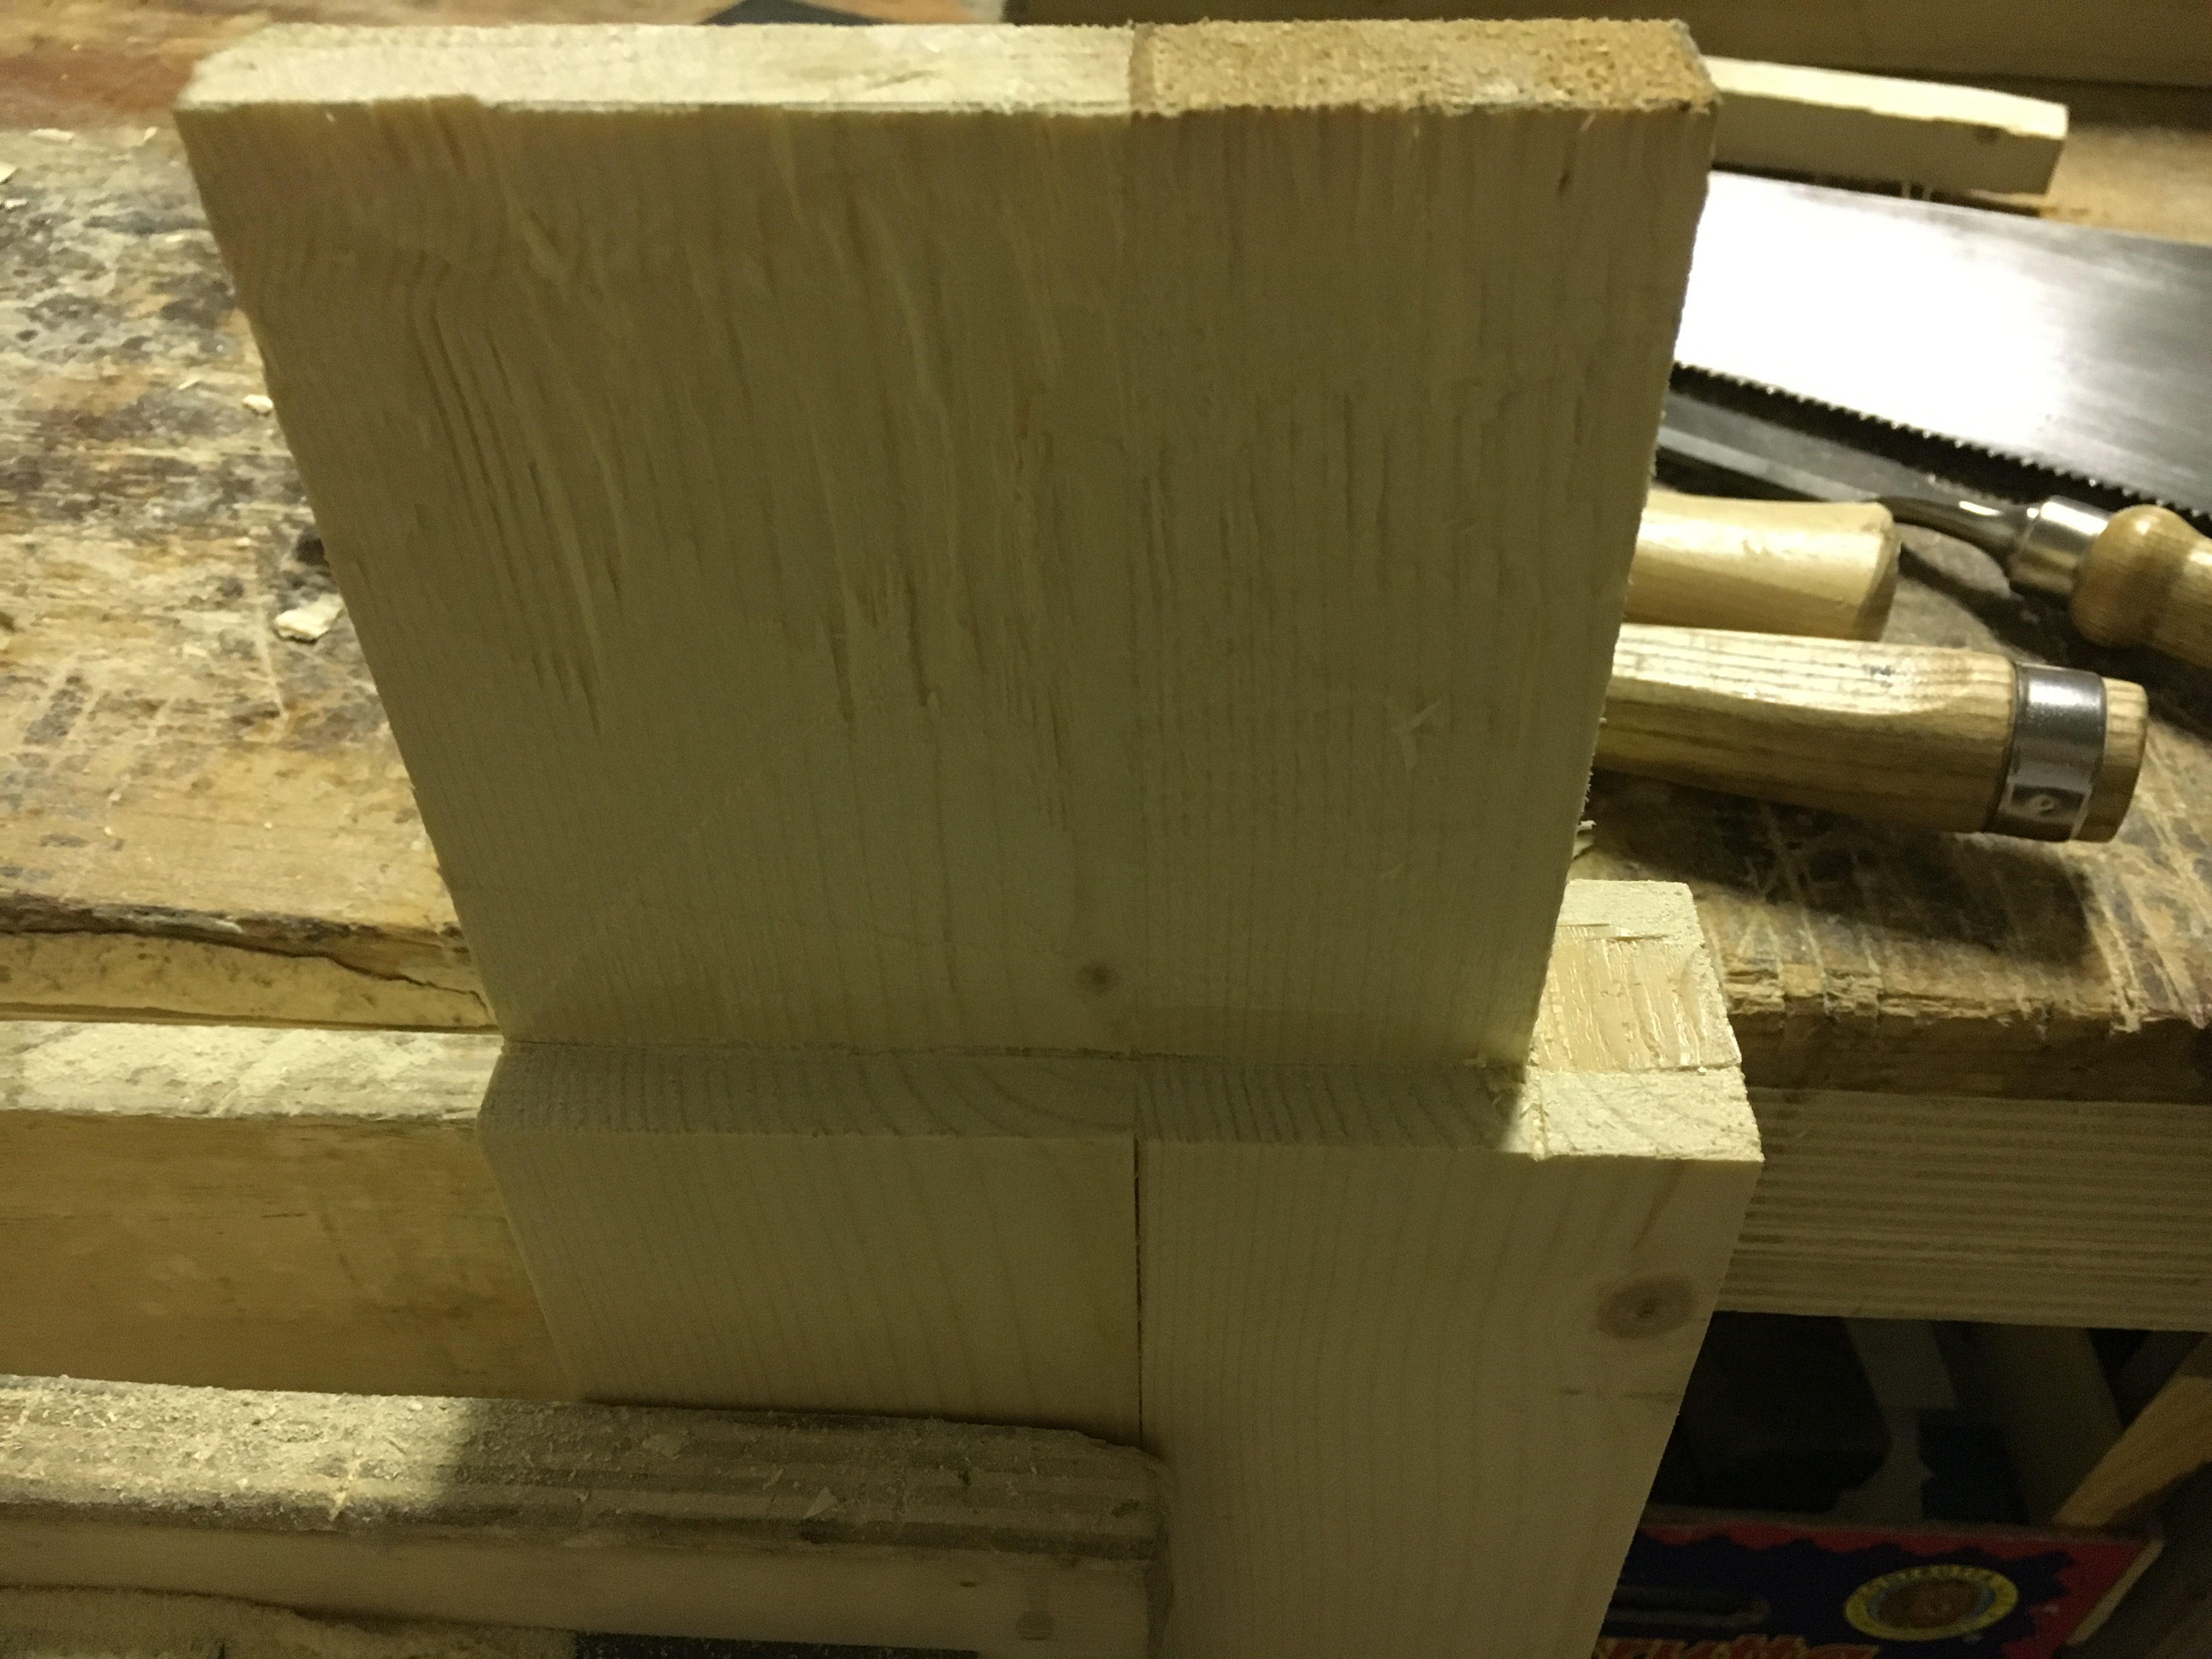
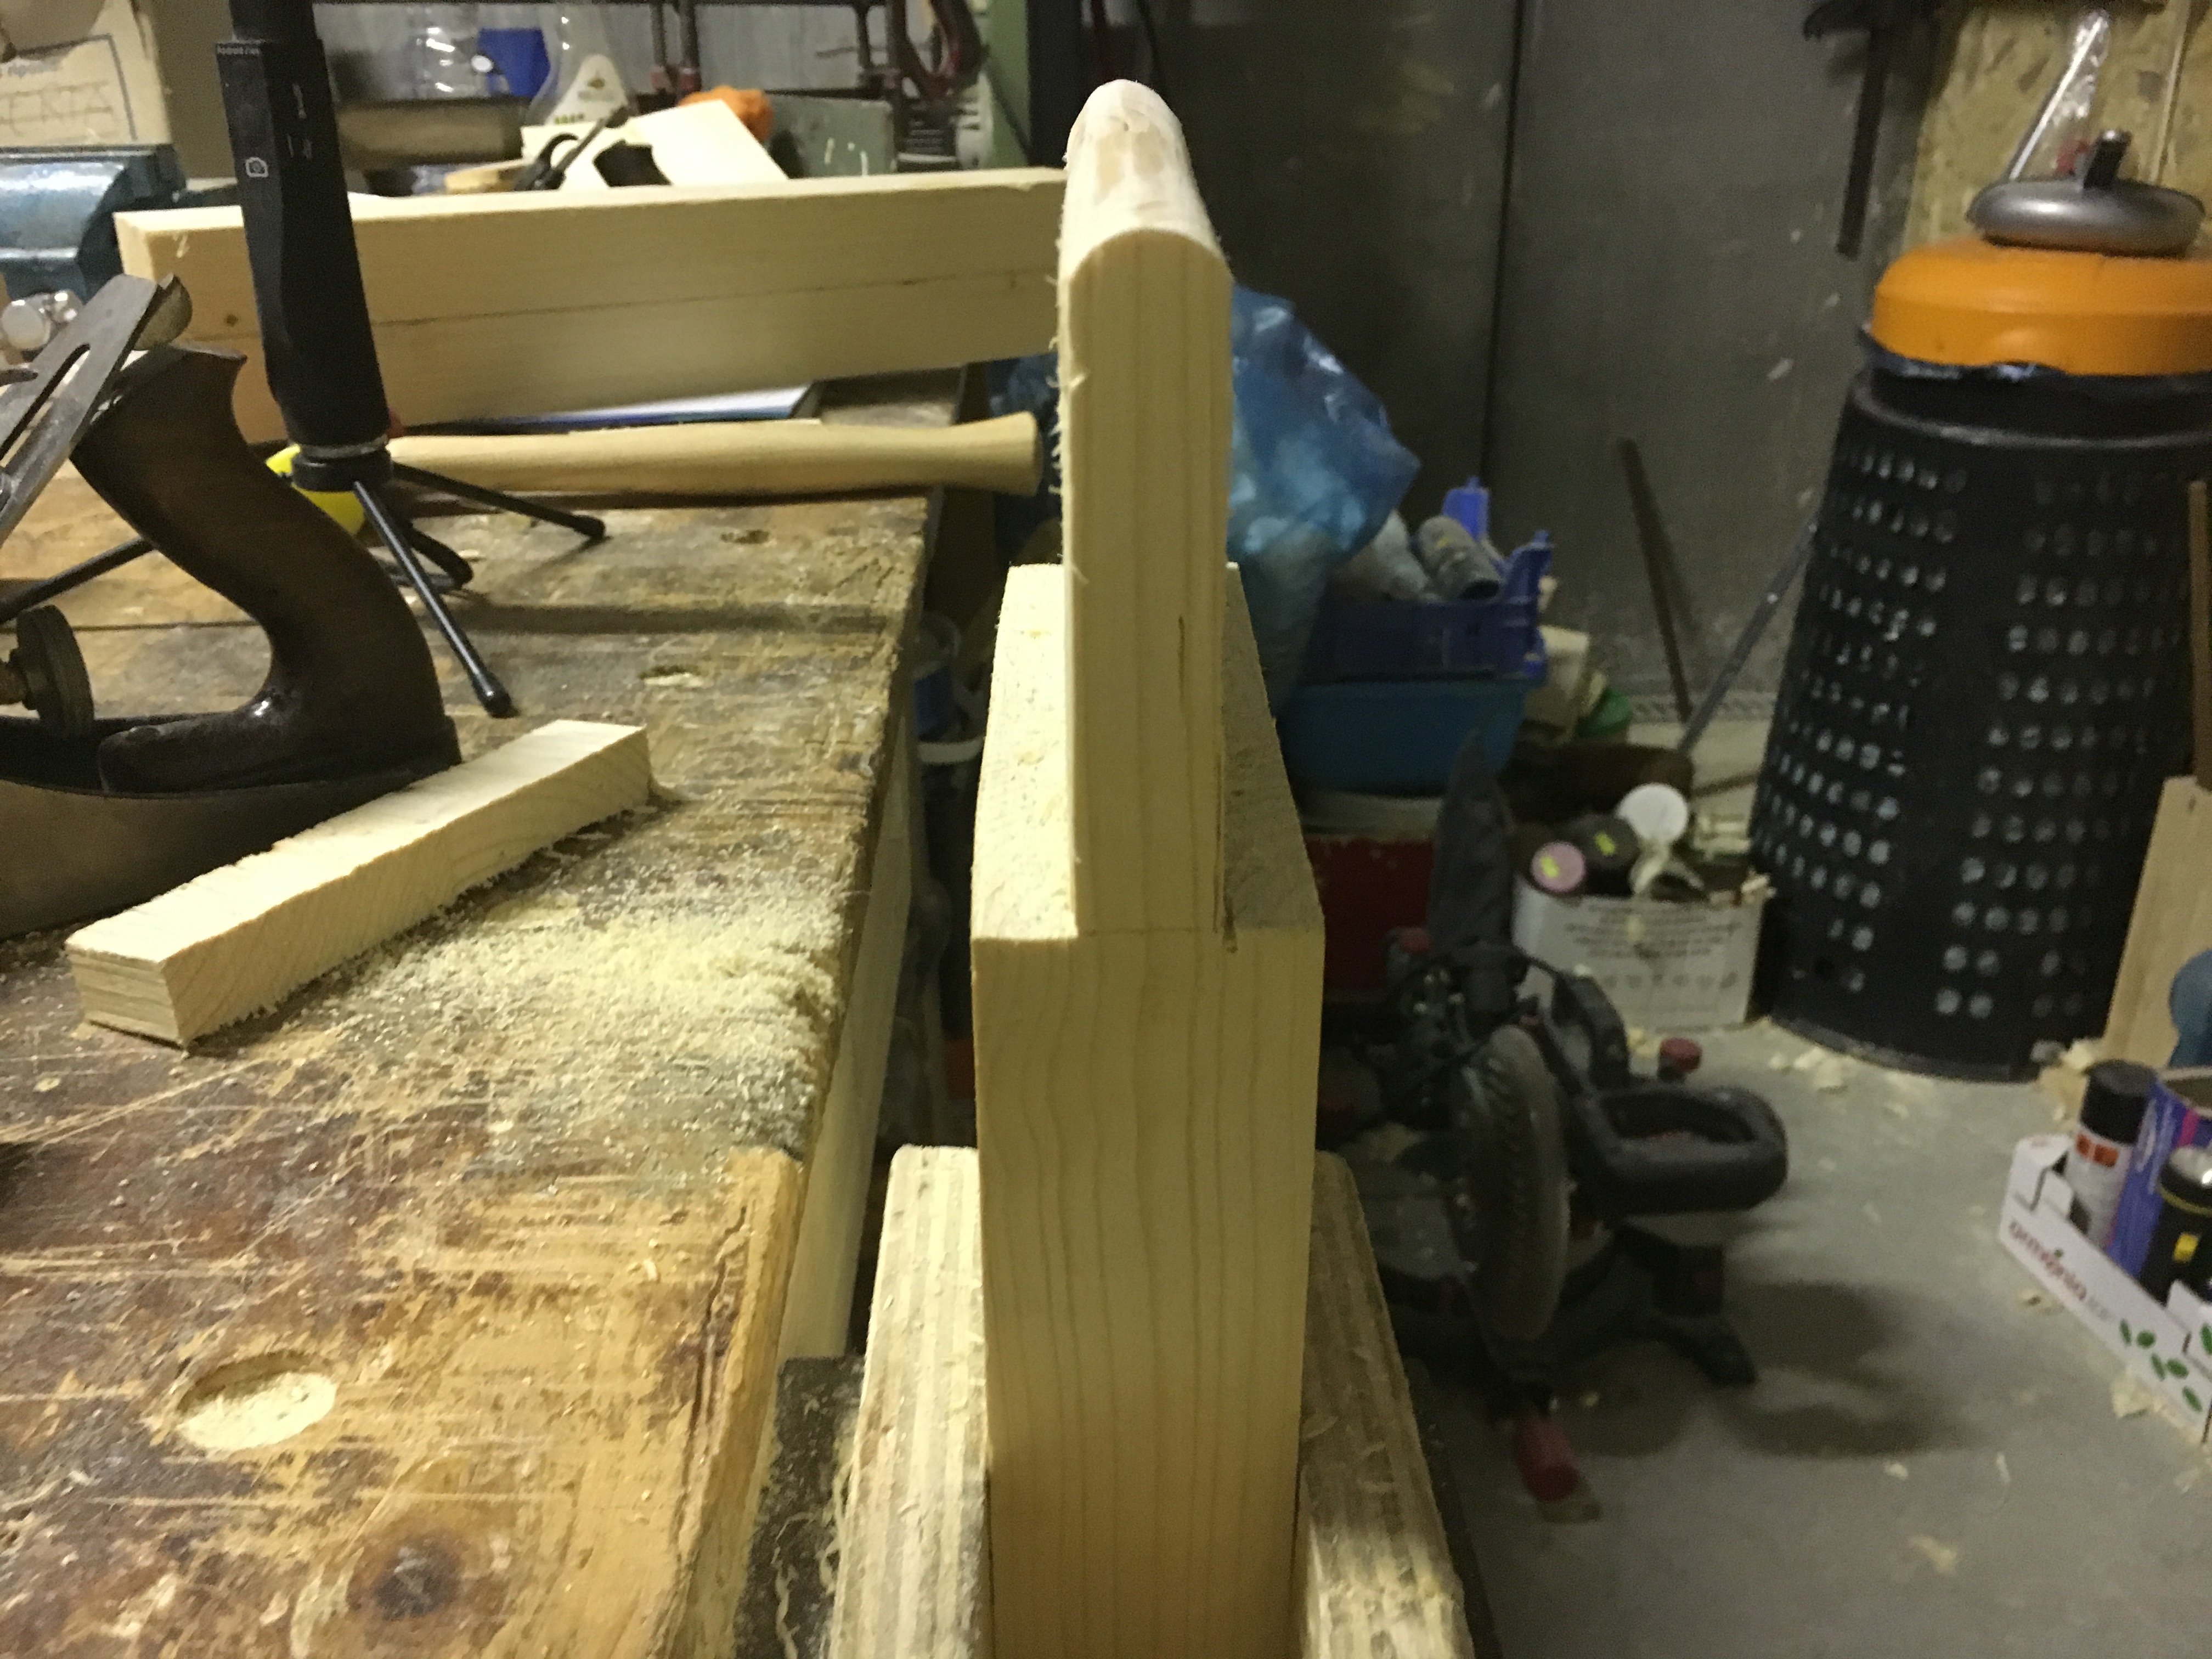
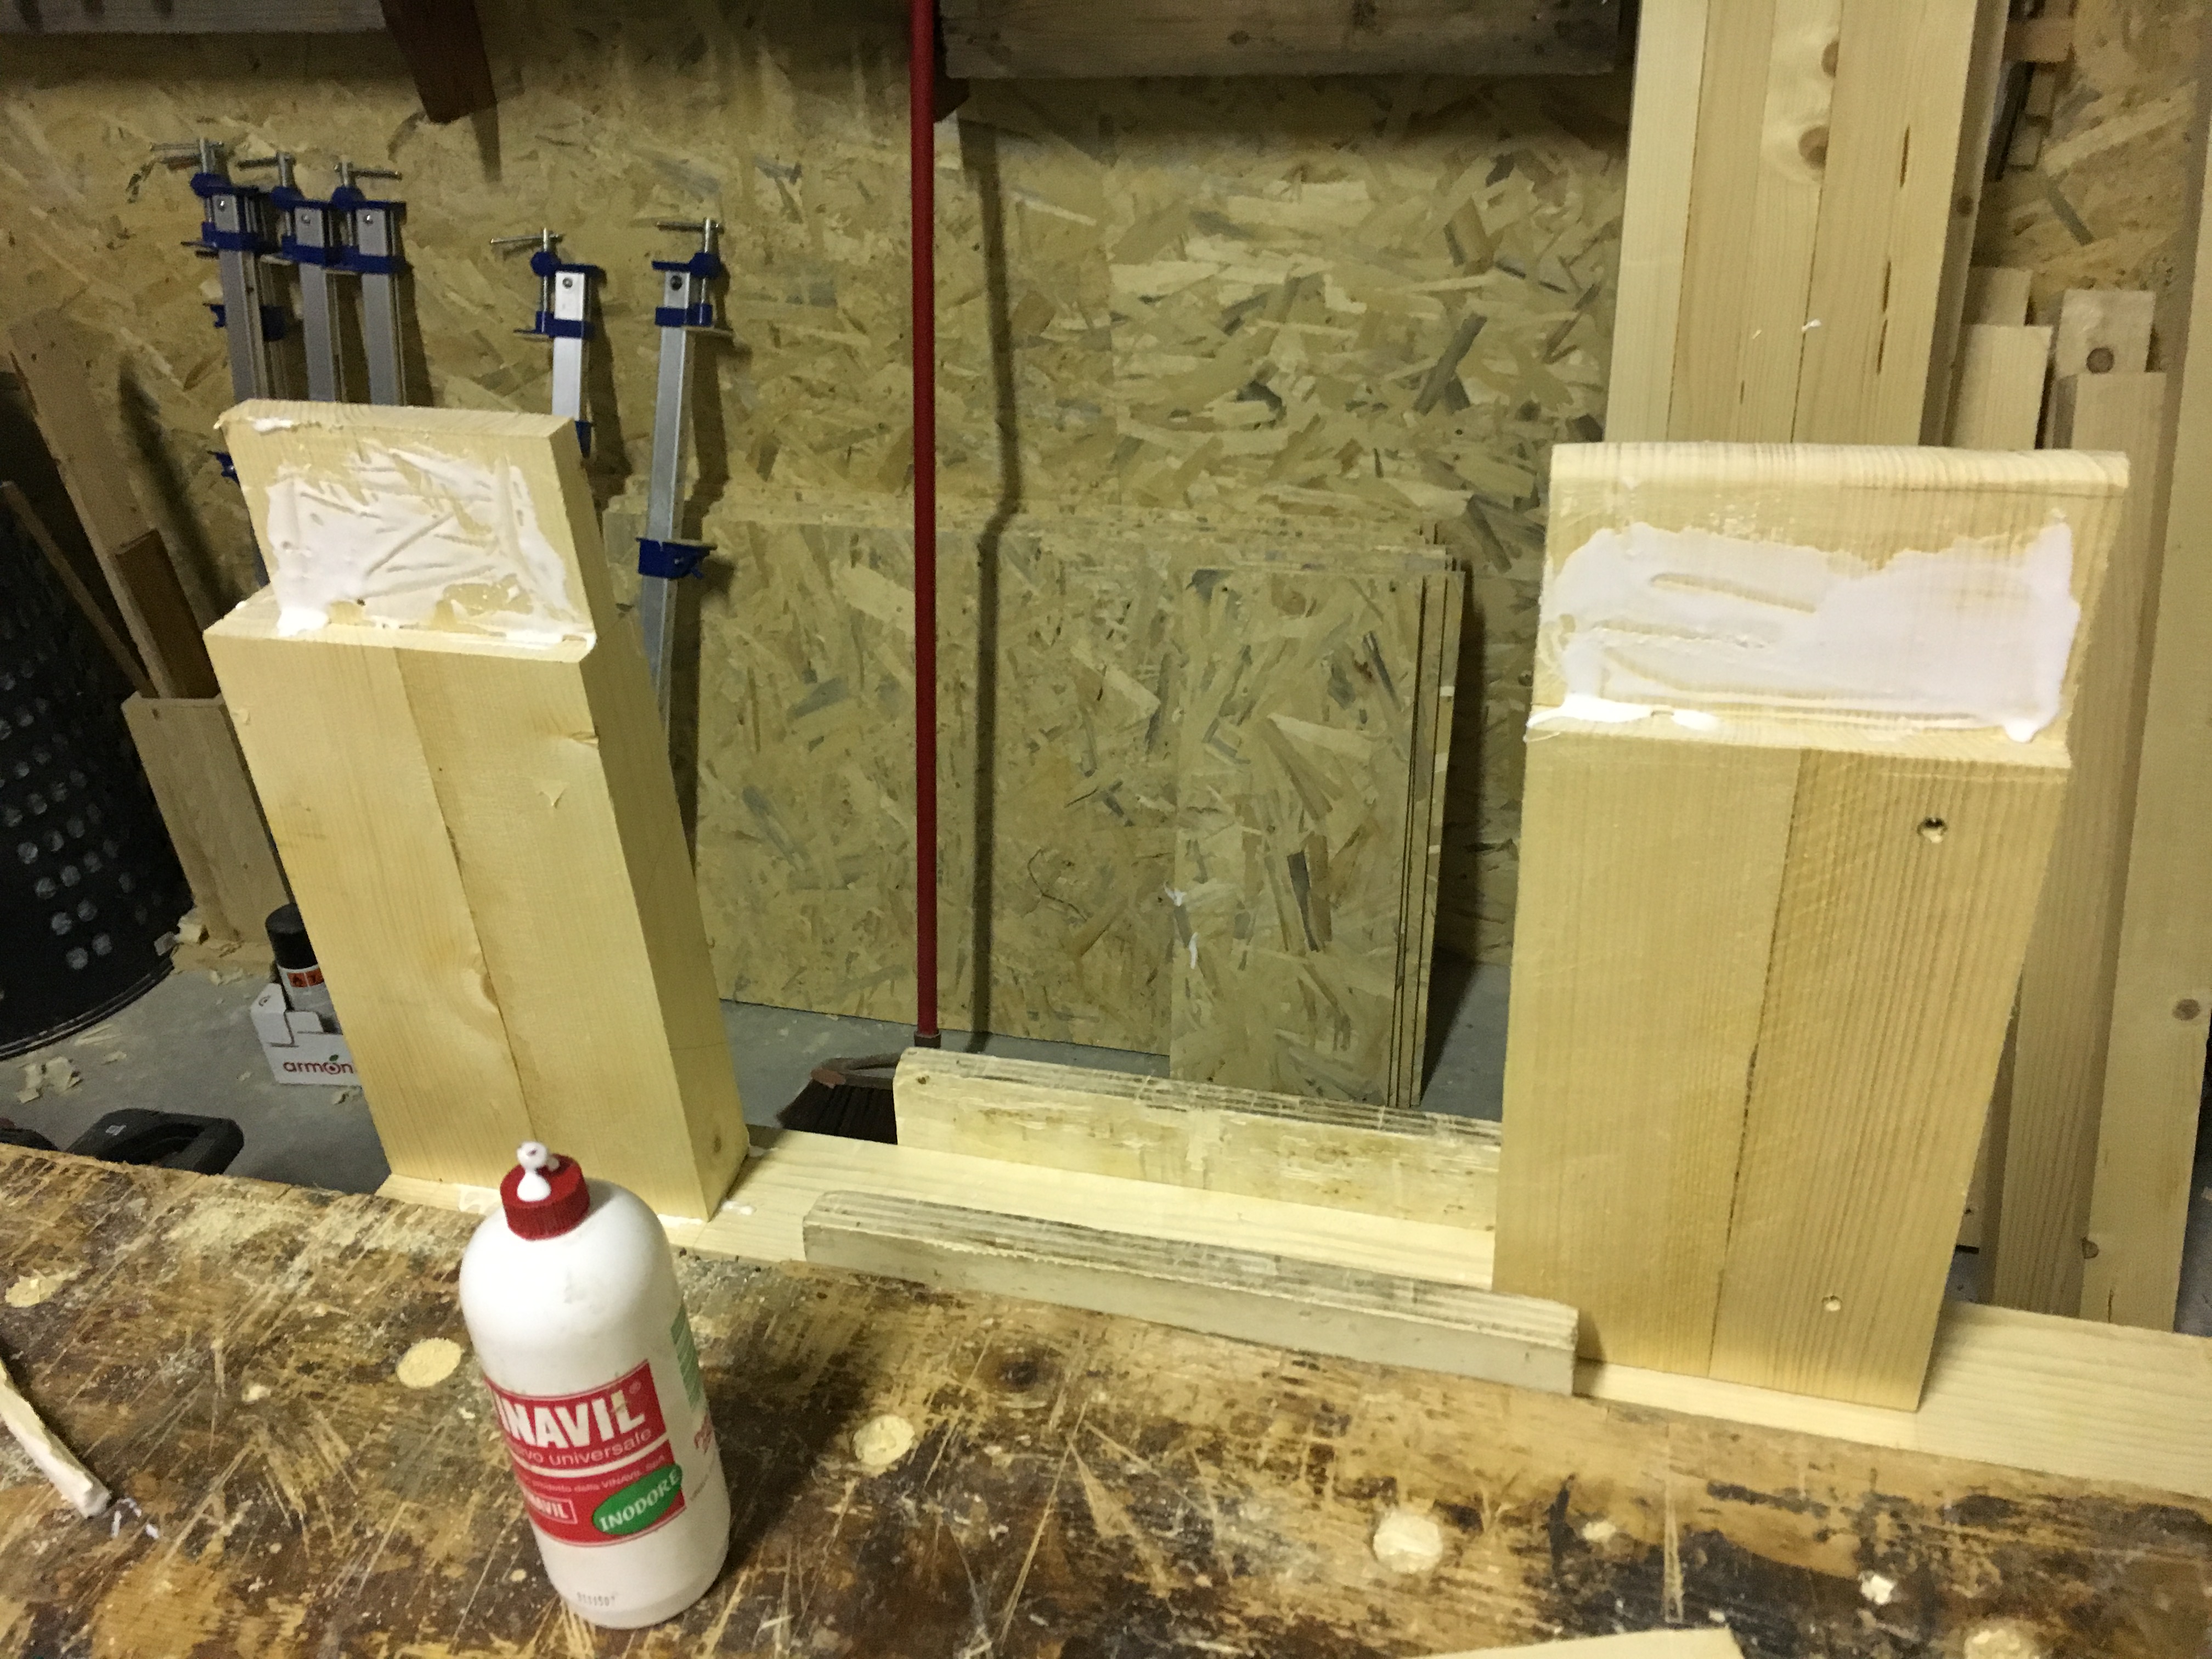

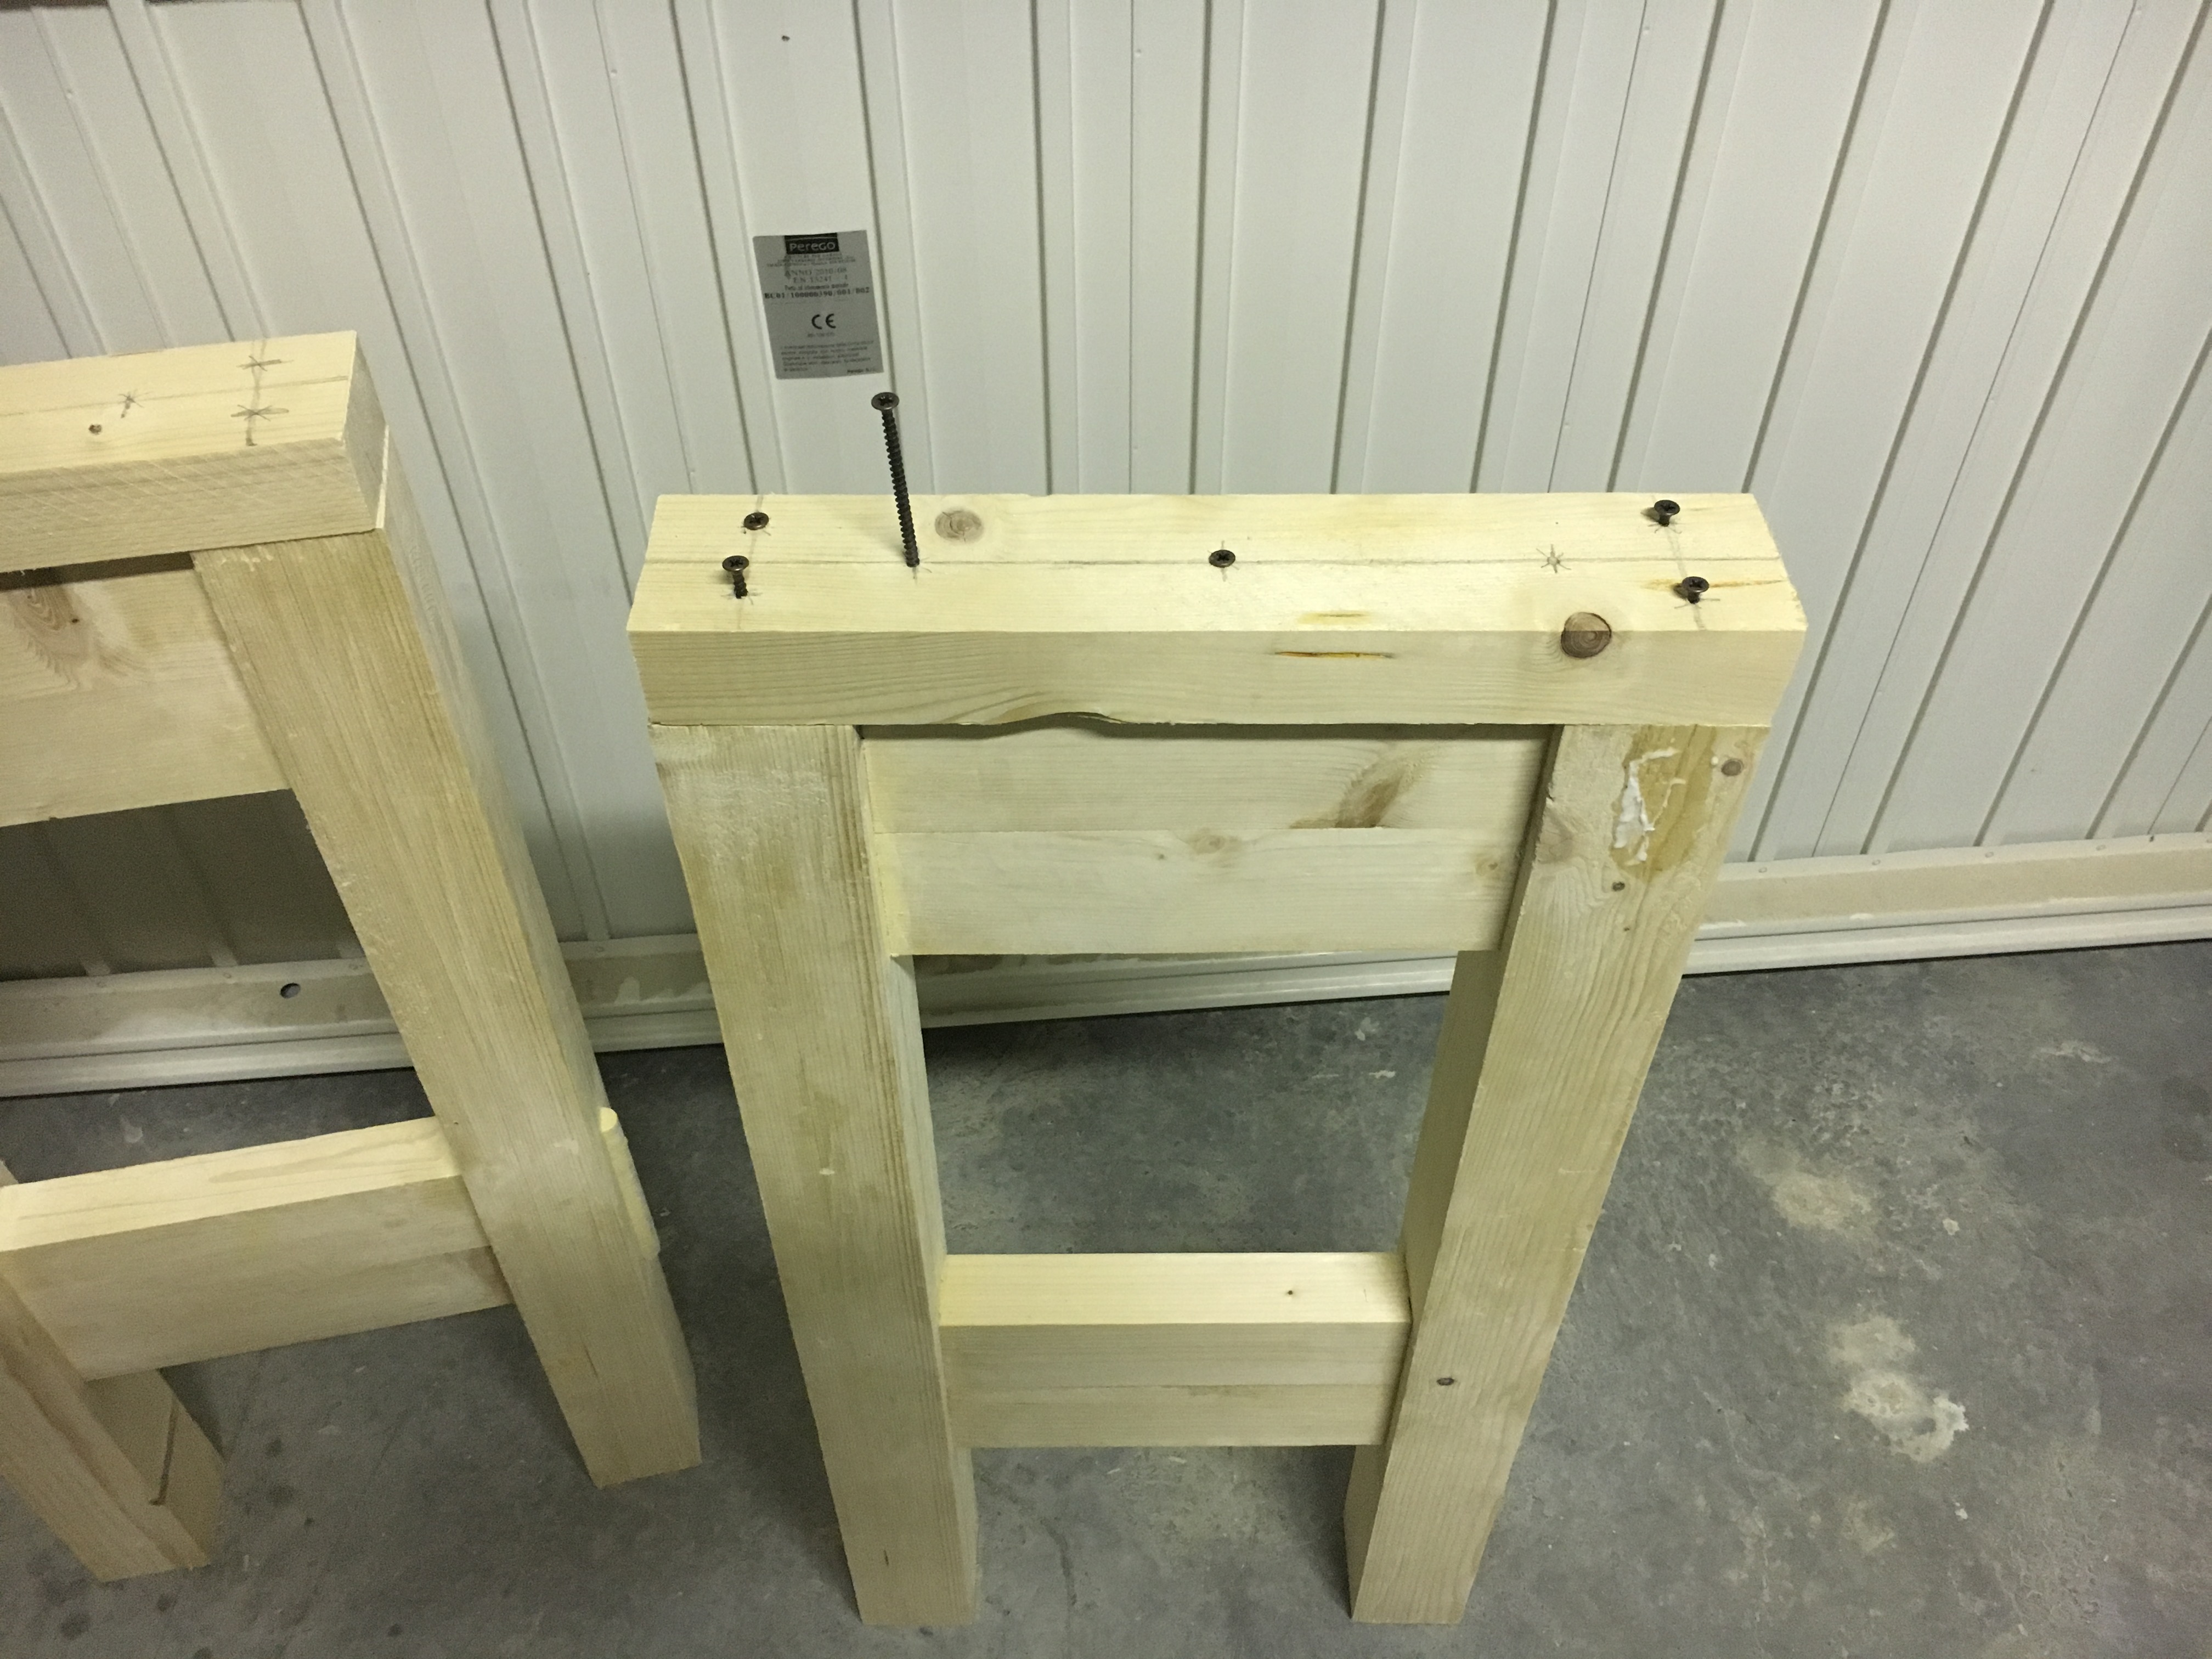
I tenoni inferiori sono passanti. Con la pialla, raspa e carta abrasiva ho smussato gli angoli così da creare un profilo arrotondato. Quelli superiori sono piallati a filo delle gambe del banco. Alle strutture così fatte ho incollato ed avvitato un traverso superiore sul quale poggerà e verrà avvitato il piano del banco.
Nota dell’Autore: Ho appena aperto una piccola prevendita per il Salone del Libro di Torino. Ho preparato 20 copie speciali dei miei libri, accompagnate da un gadget in Rovere numerato che nasconde un segreto. [Scopri i dettagli e come prenotare la tua copia qui].
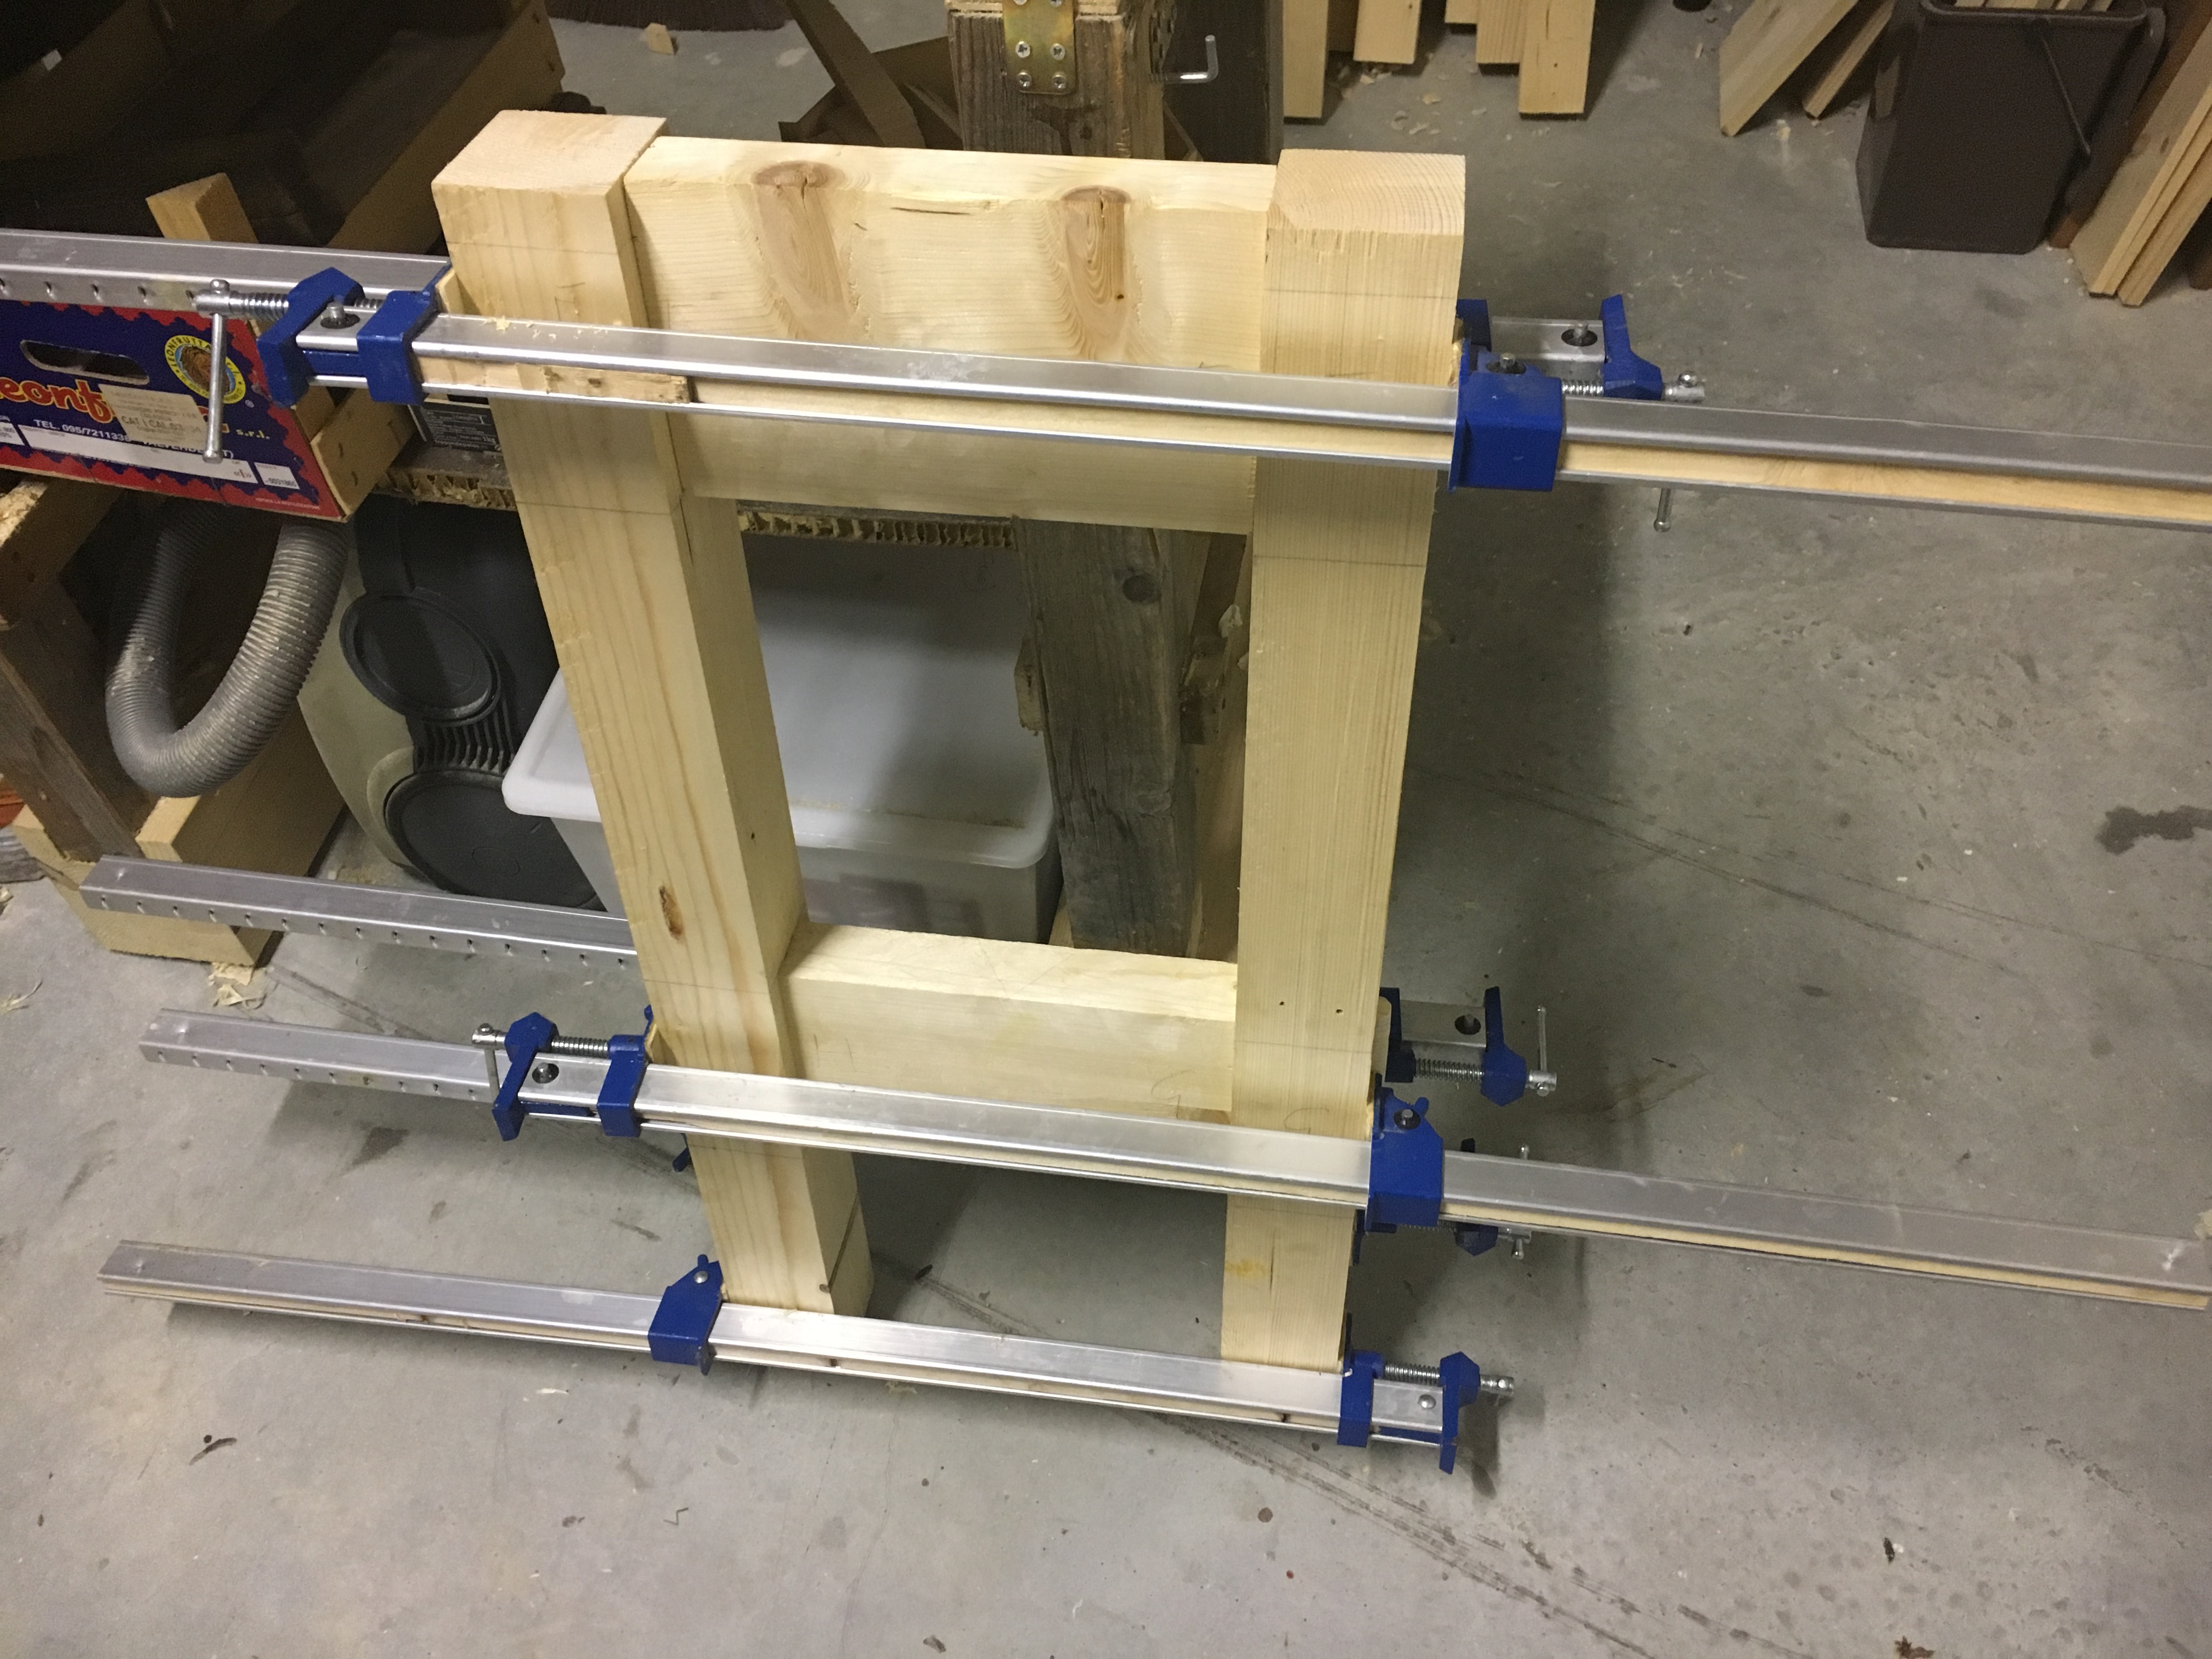
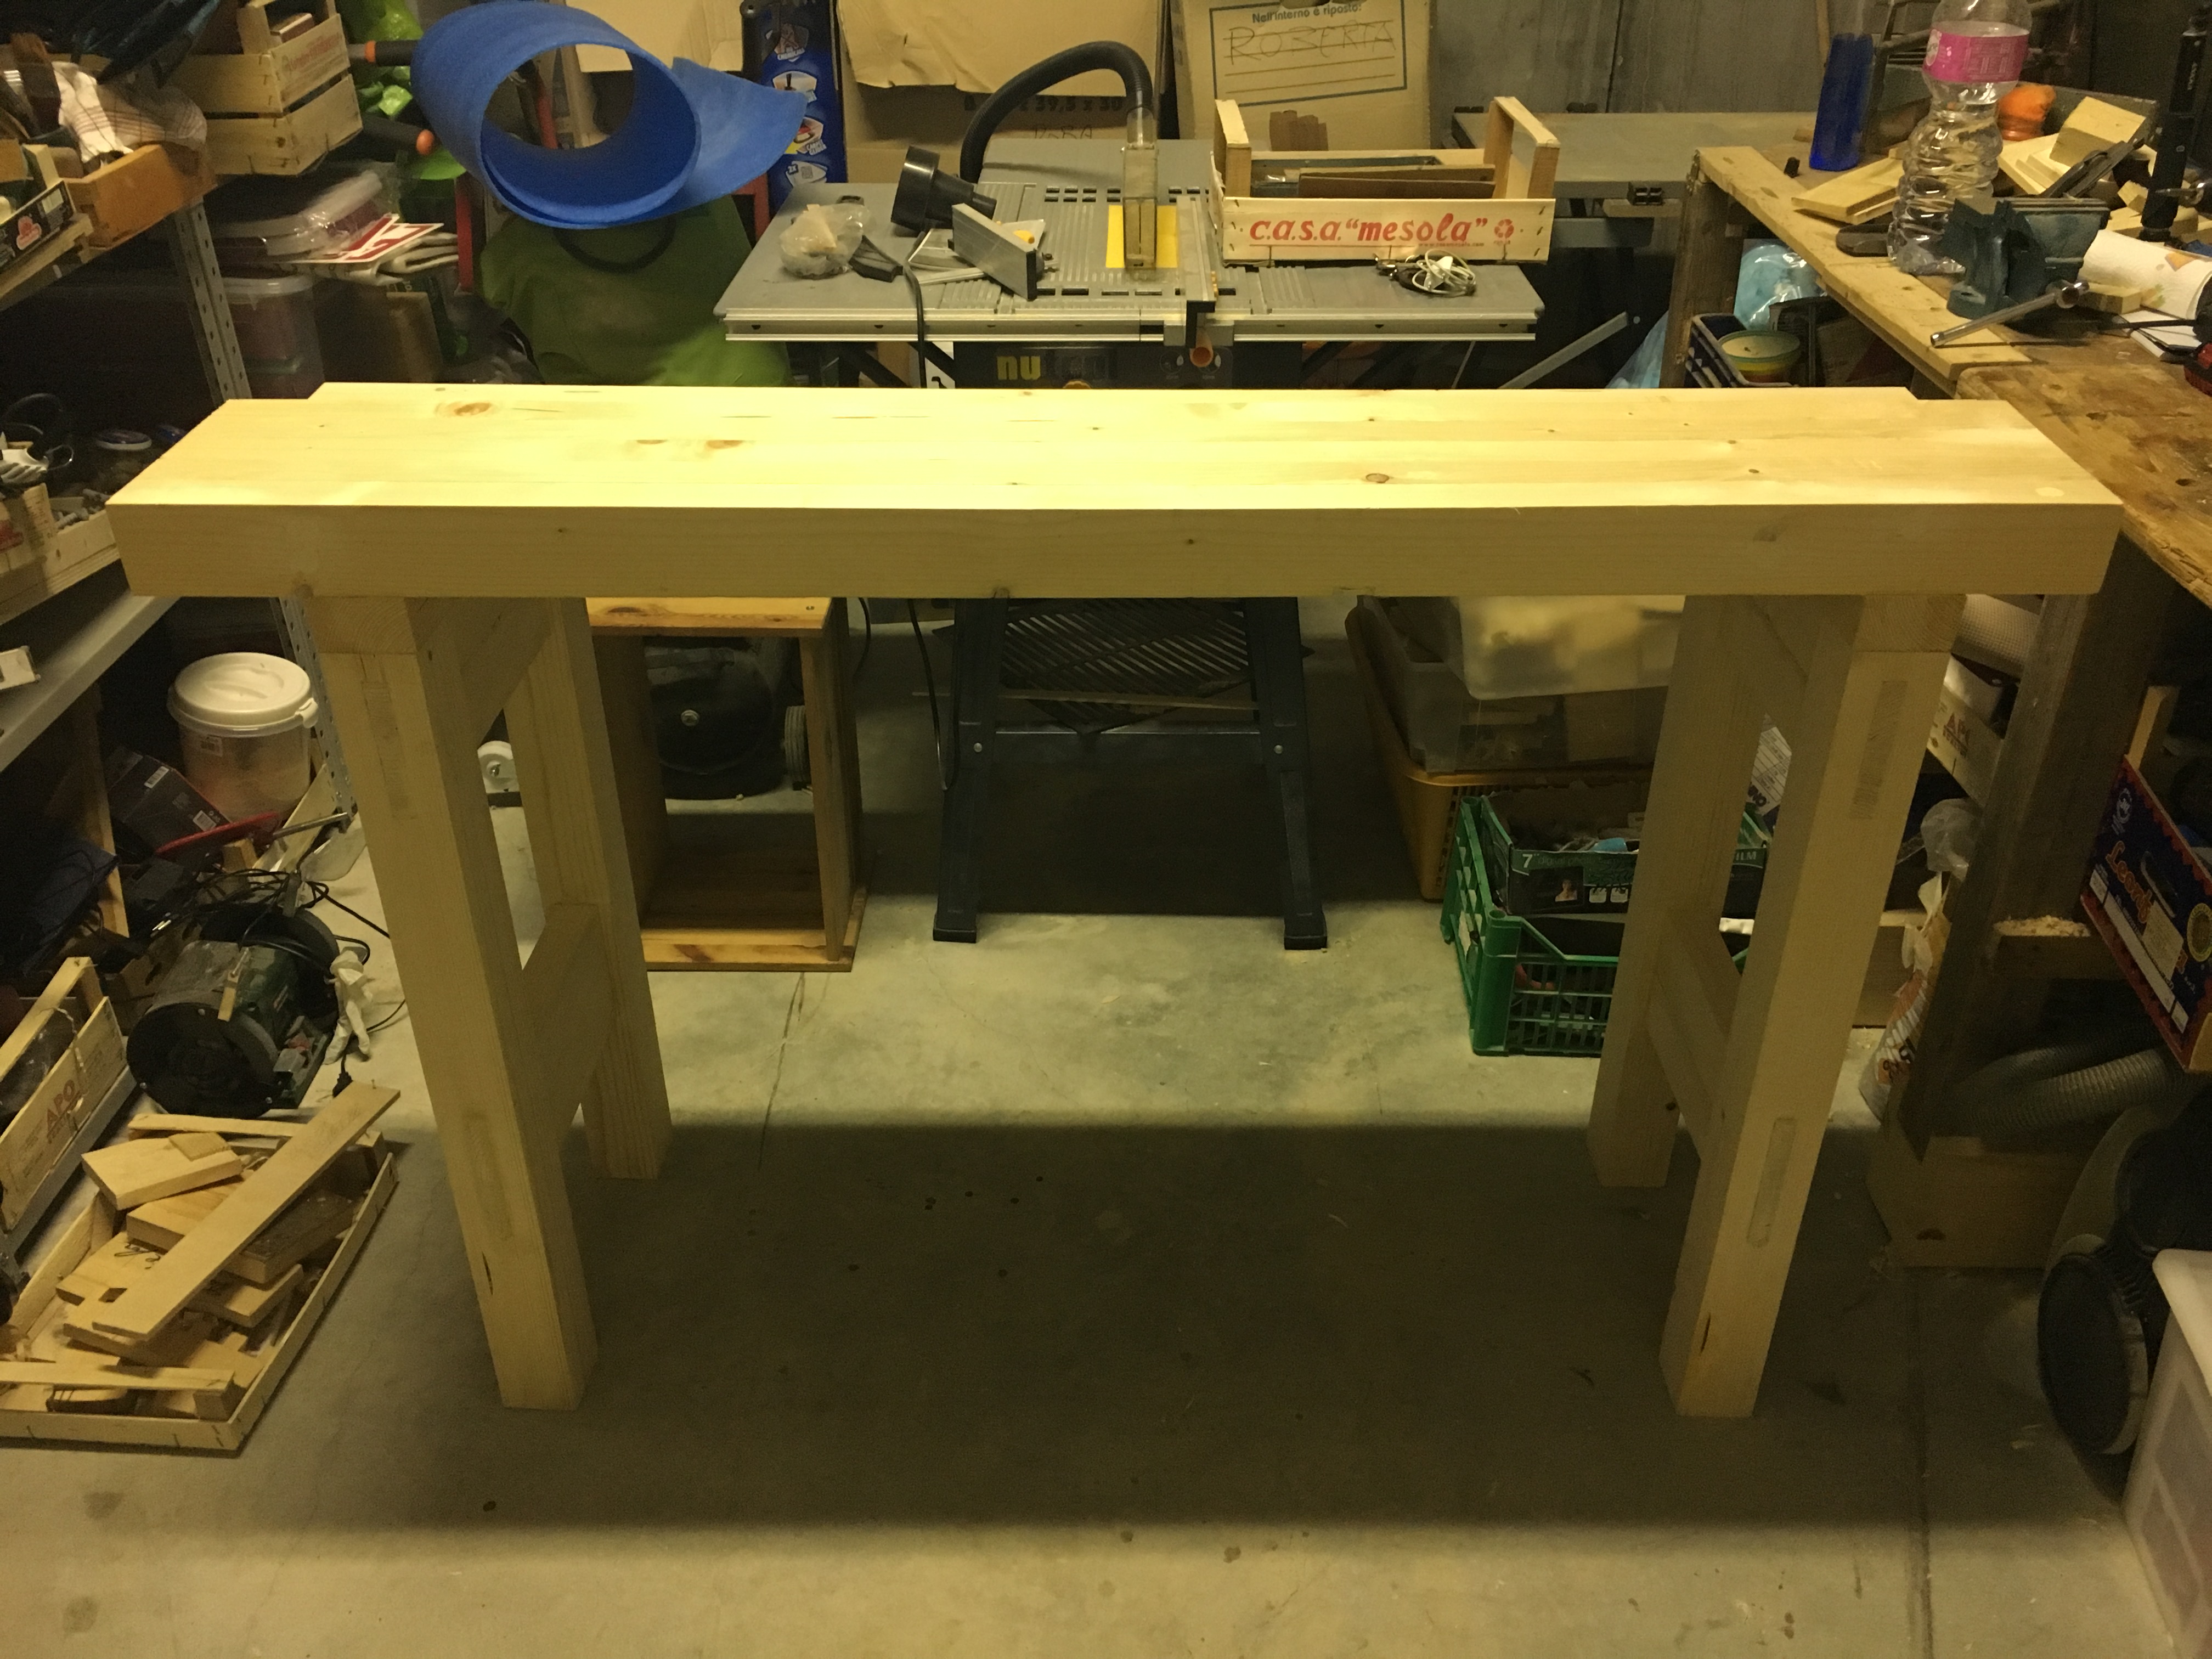
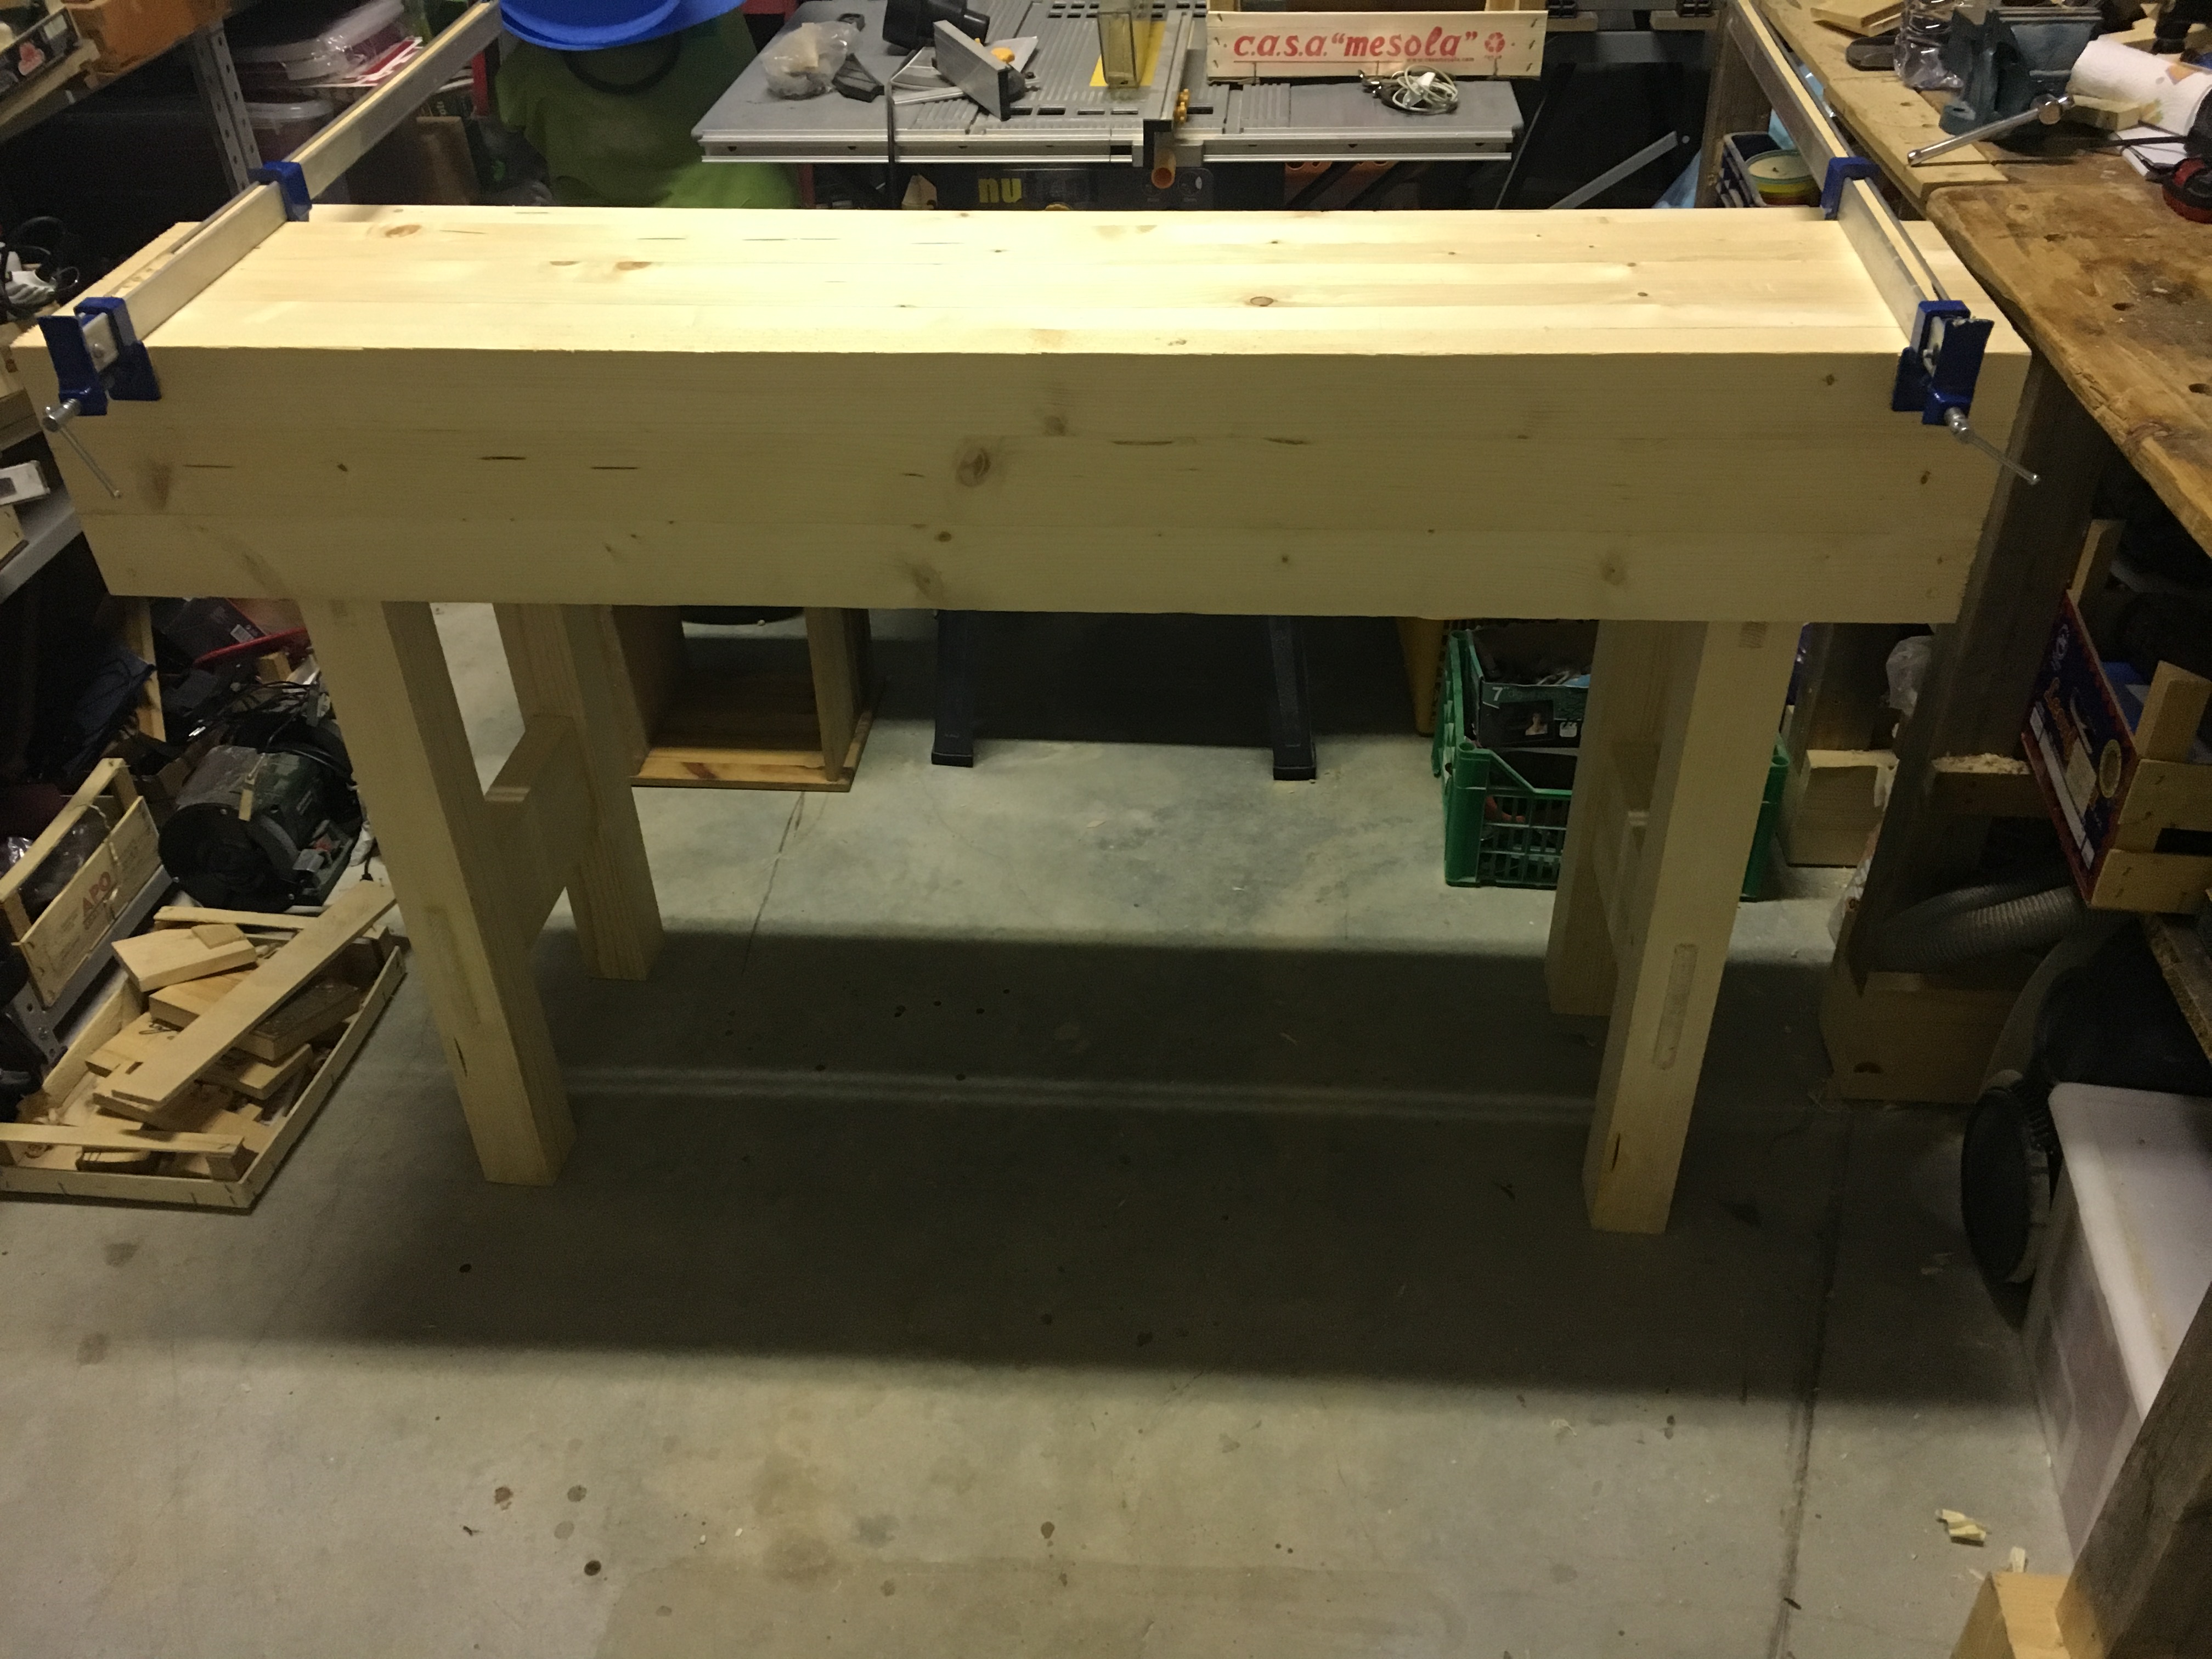
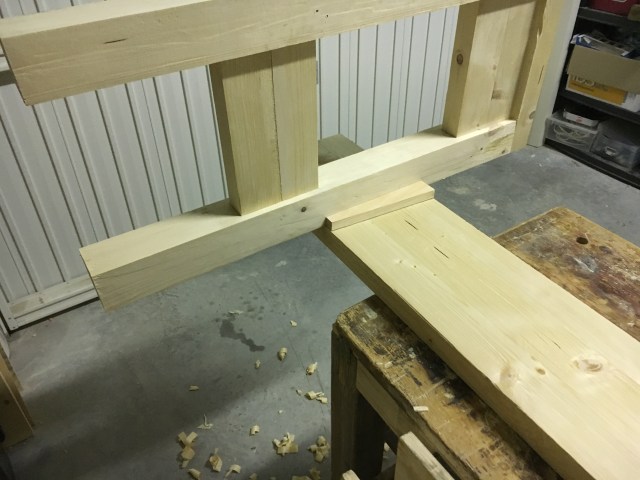
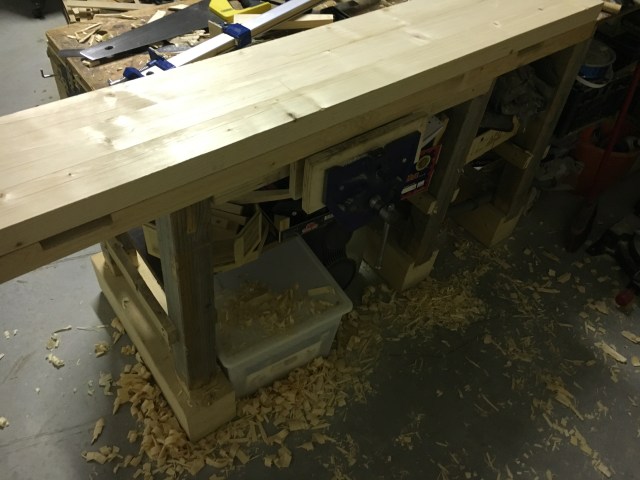
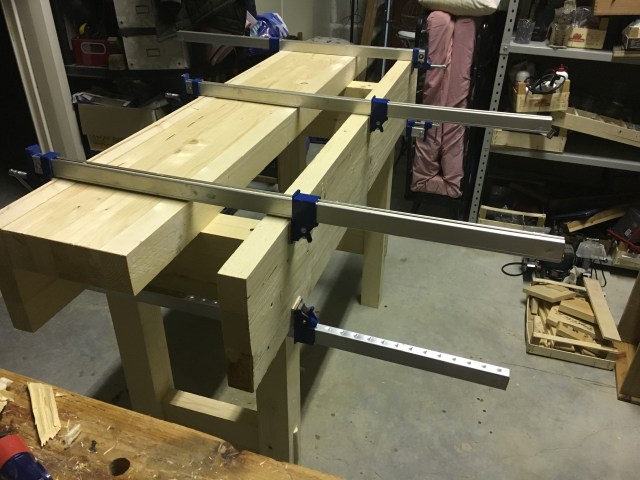
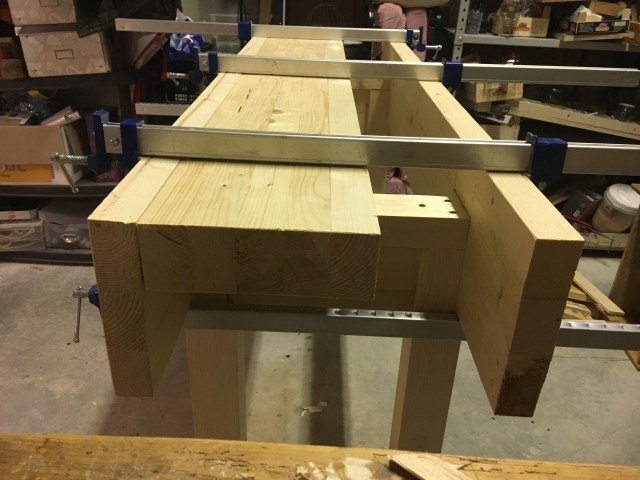
La struttura delle gambe così definita è molto solida e questo è dovuto sia allo spessore dei pezzi sia alle dimensioni considerevoli degli incastri a tenone e mortasa. Probabilmente se non avessi avuto i morali per le gambe già disponibili avrei optato per uno spessore leggermente maggiore ma alla fine posso dire che anche così fatto il banco è comunque molto stabile. Una volta terminata la struttura delle gambe ho fatto una prova aggiungendo il frontale ed il piano superiore, tenuti assieme dai morsetti, giusto per rendermi conto di come stava procedendo il lavoro nel suo complesso.

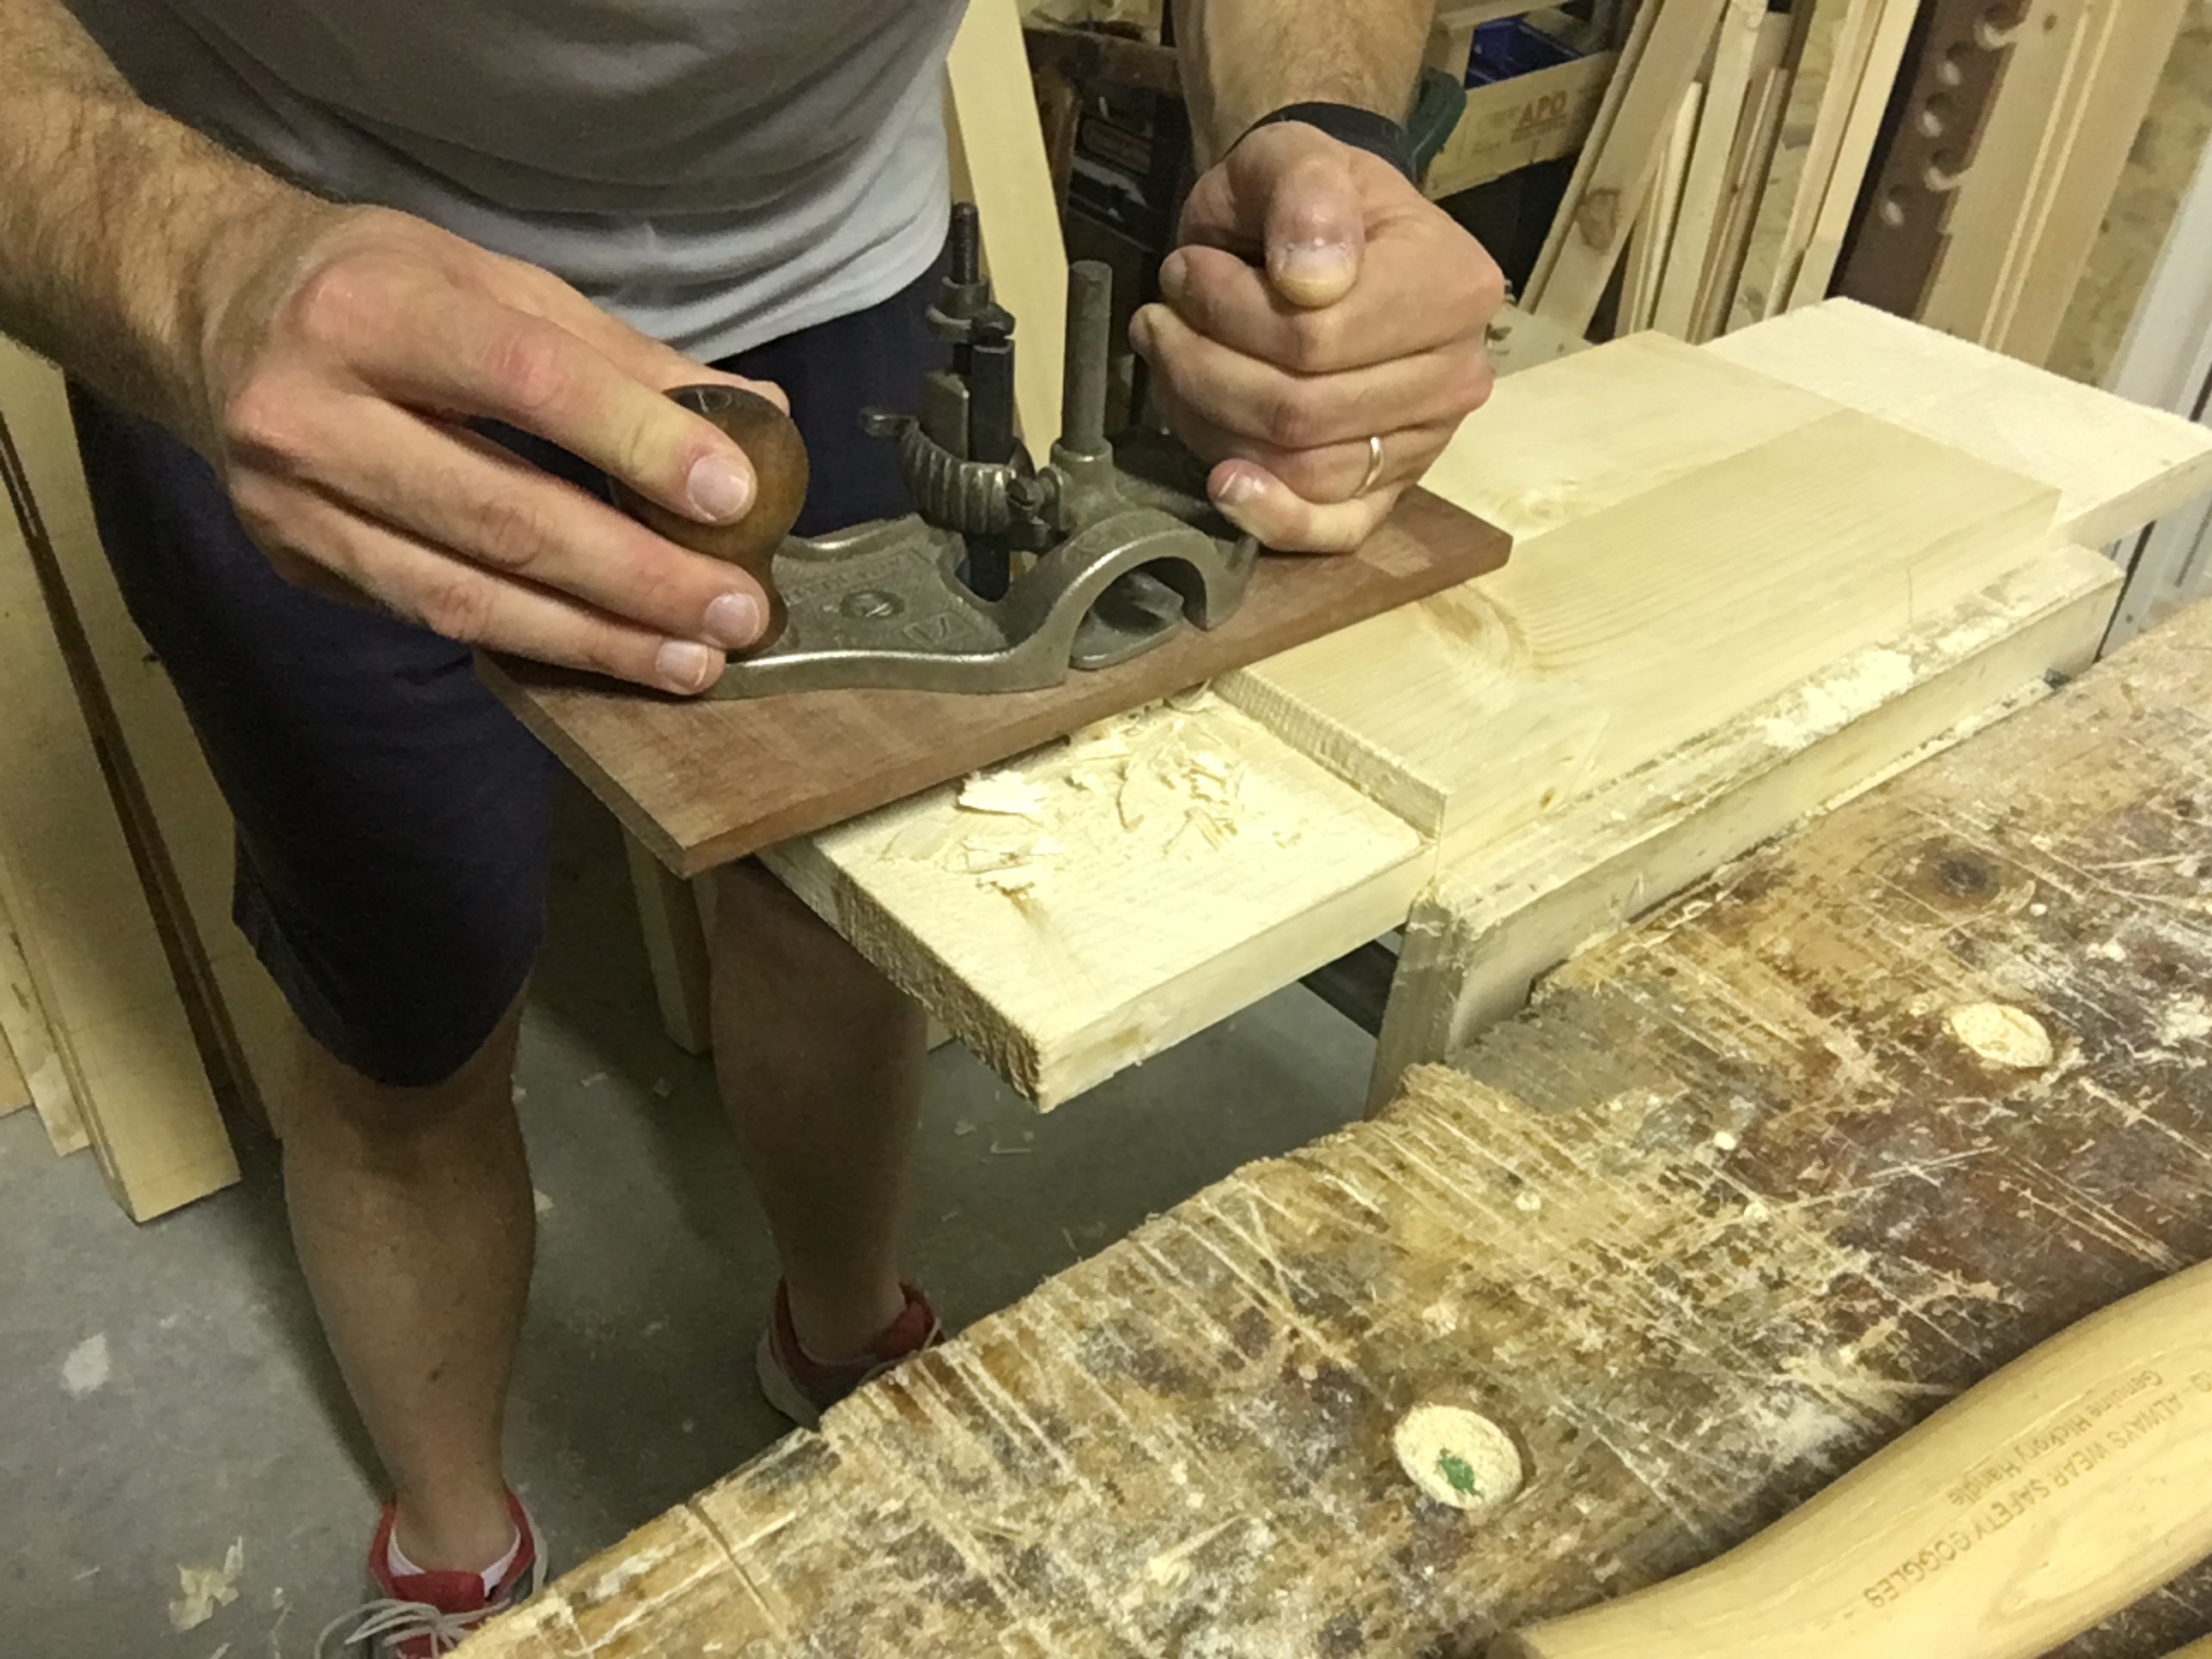
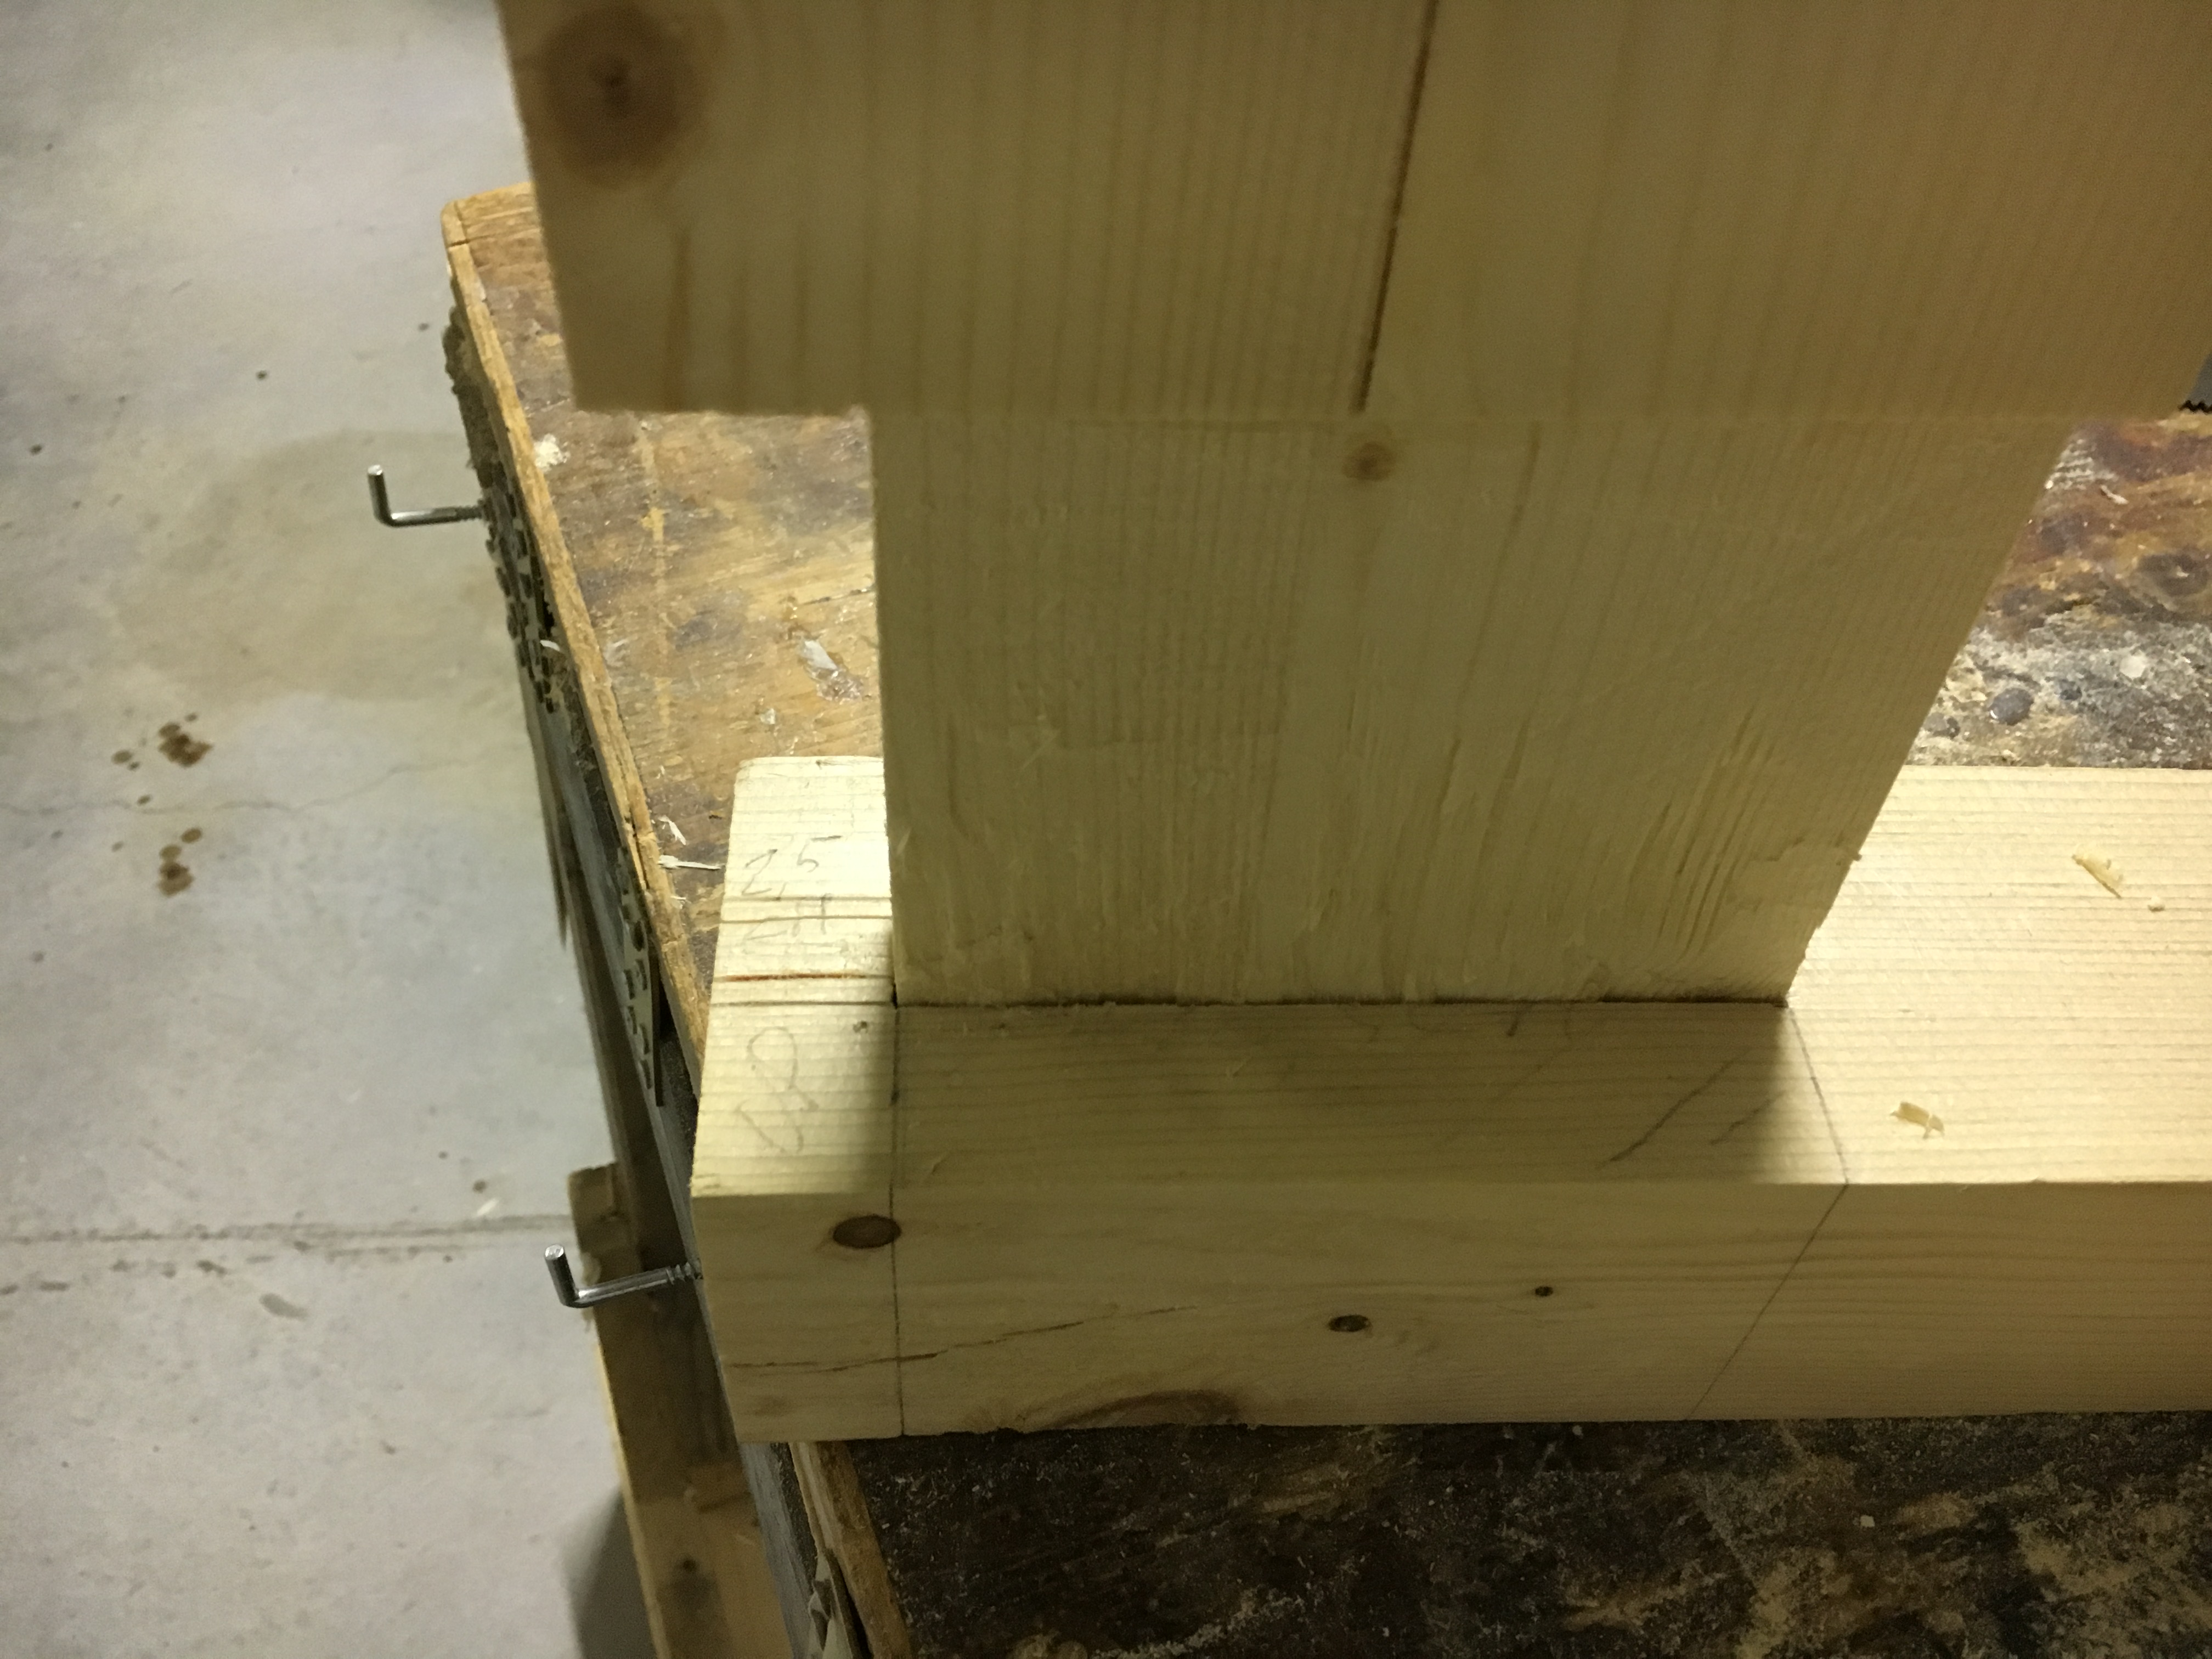
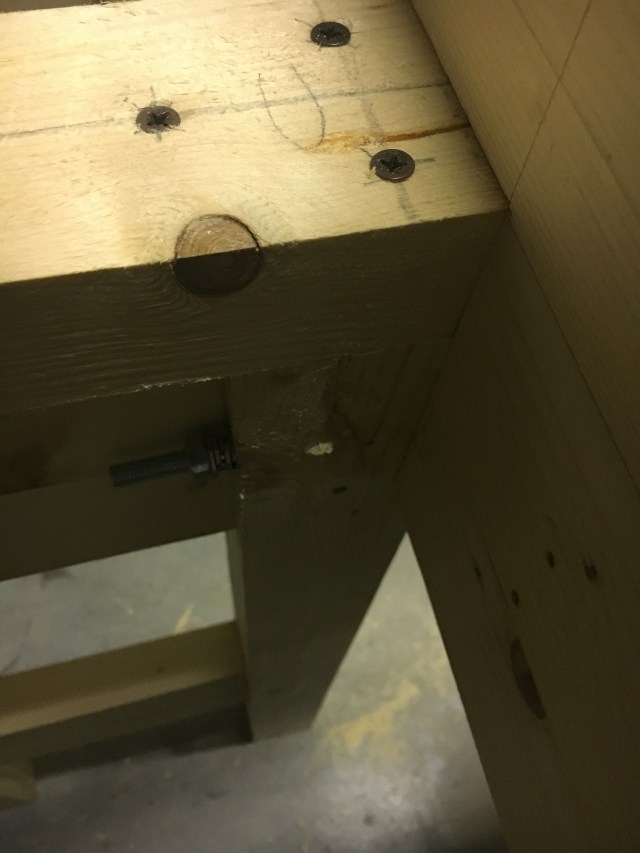
Con dei pezzi di scarto di legno di pino ho fatto i cunei per l’incastro della struttura delle gambe nei laterali del banco. Ho segnato la larghezza della gamba assieme al cuneo su un frontale, alla distanza desiderata dal bordo del piano, scavando la mortasa con lo scalpello e rifinendola con la router plane. Ho fatto una prova di tenuta ed ho trasferito la misura sull’altro frontale procedendo a scavare le restanti mortase. I cunei sono tenuti fermi in posizione da dei blocchetti di legno avvitati al banco. Il grosso del lavoro a questo punto è stato fatto ed il banco comincia a prendere forma.
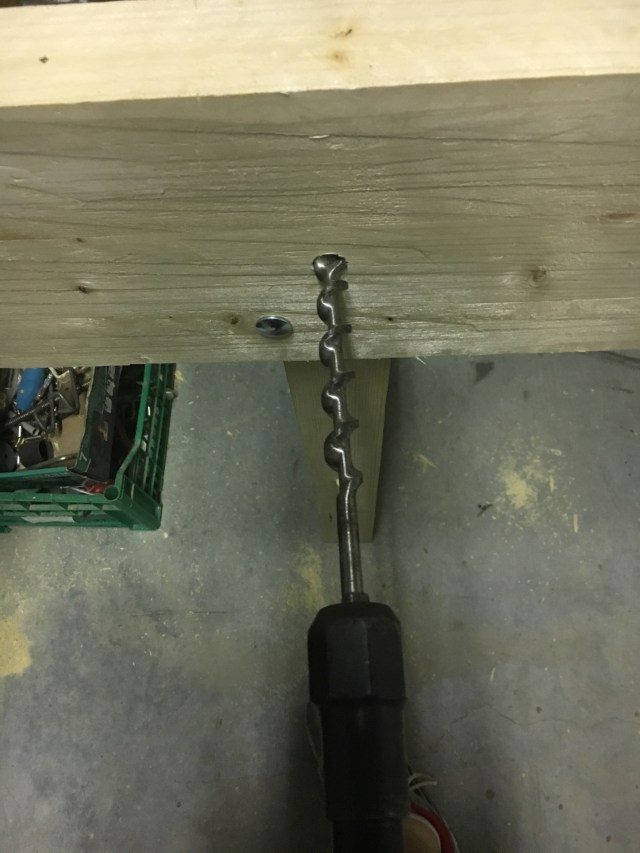
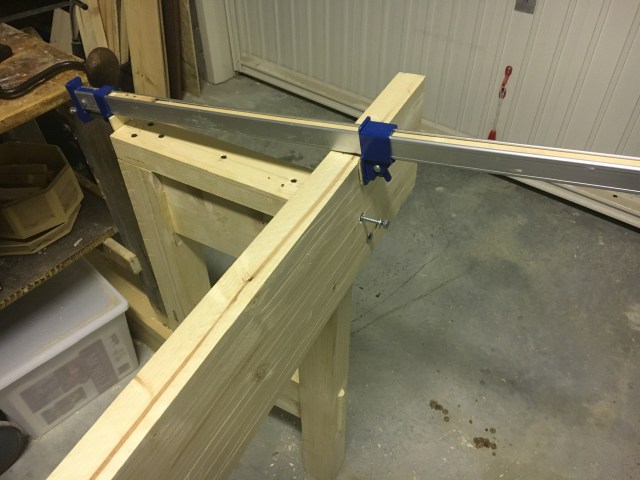
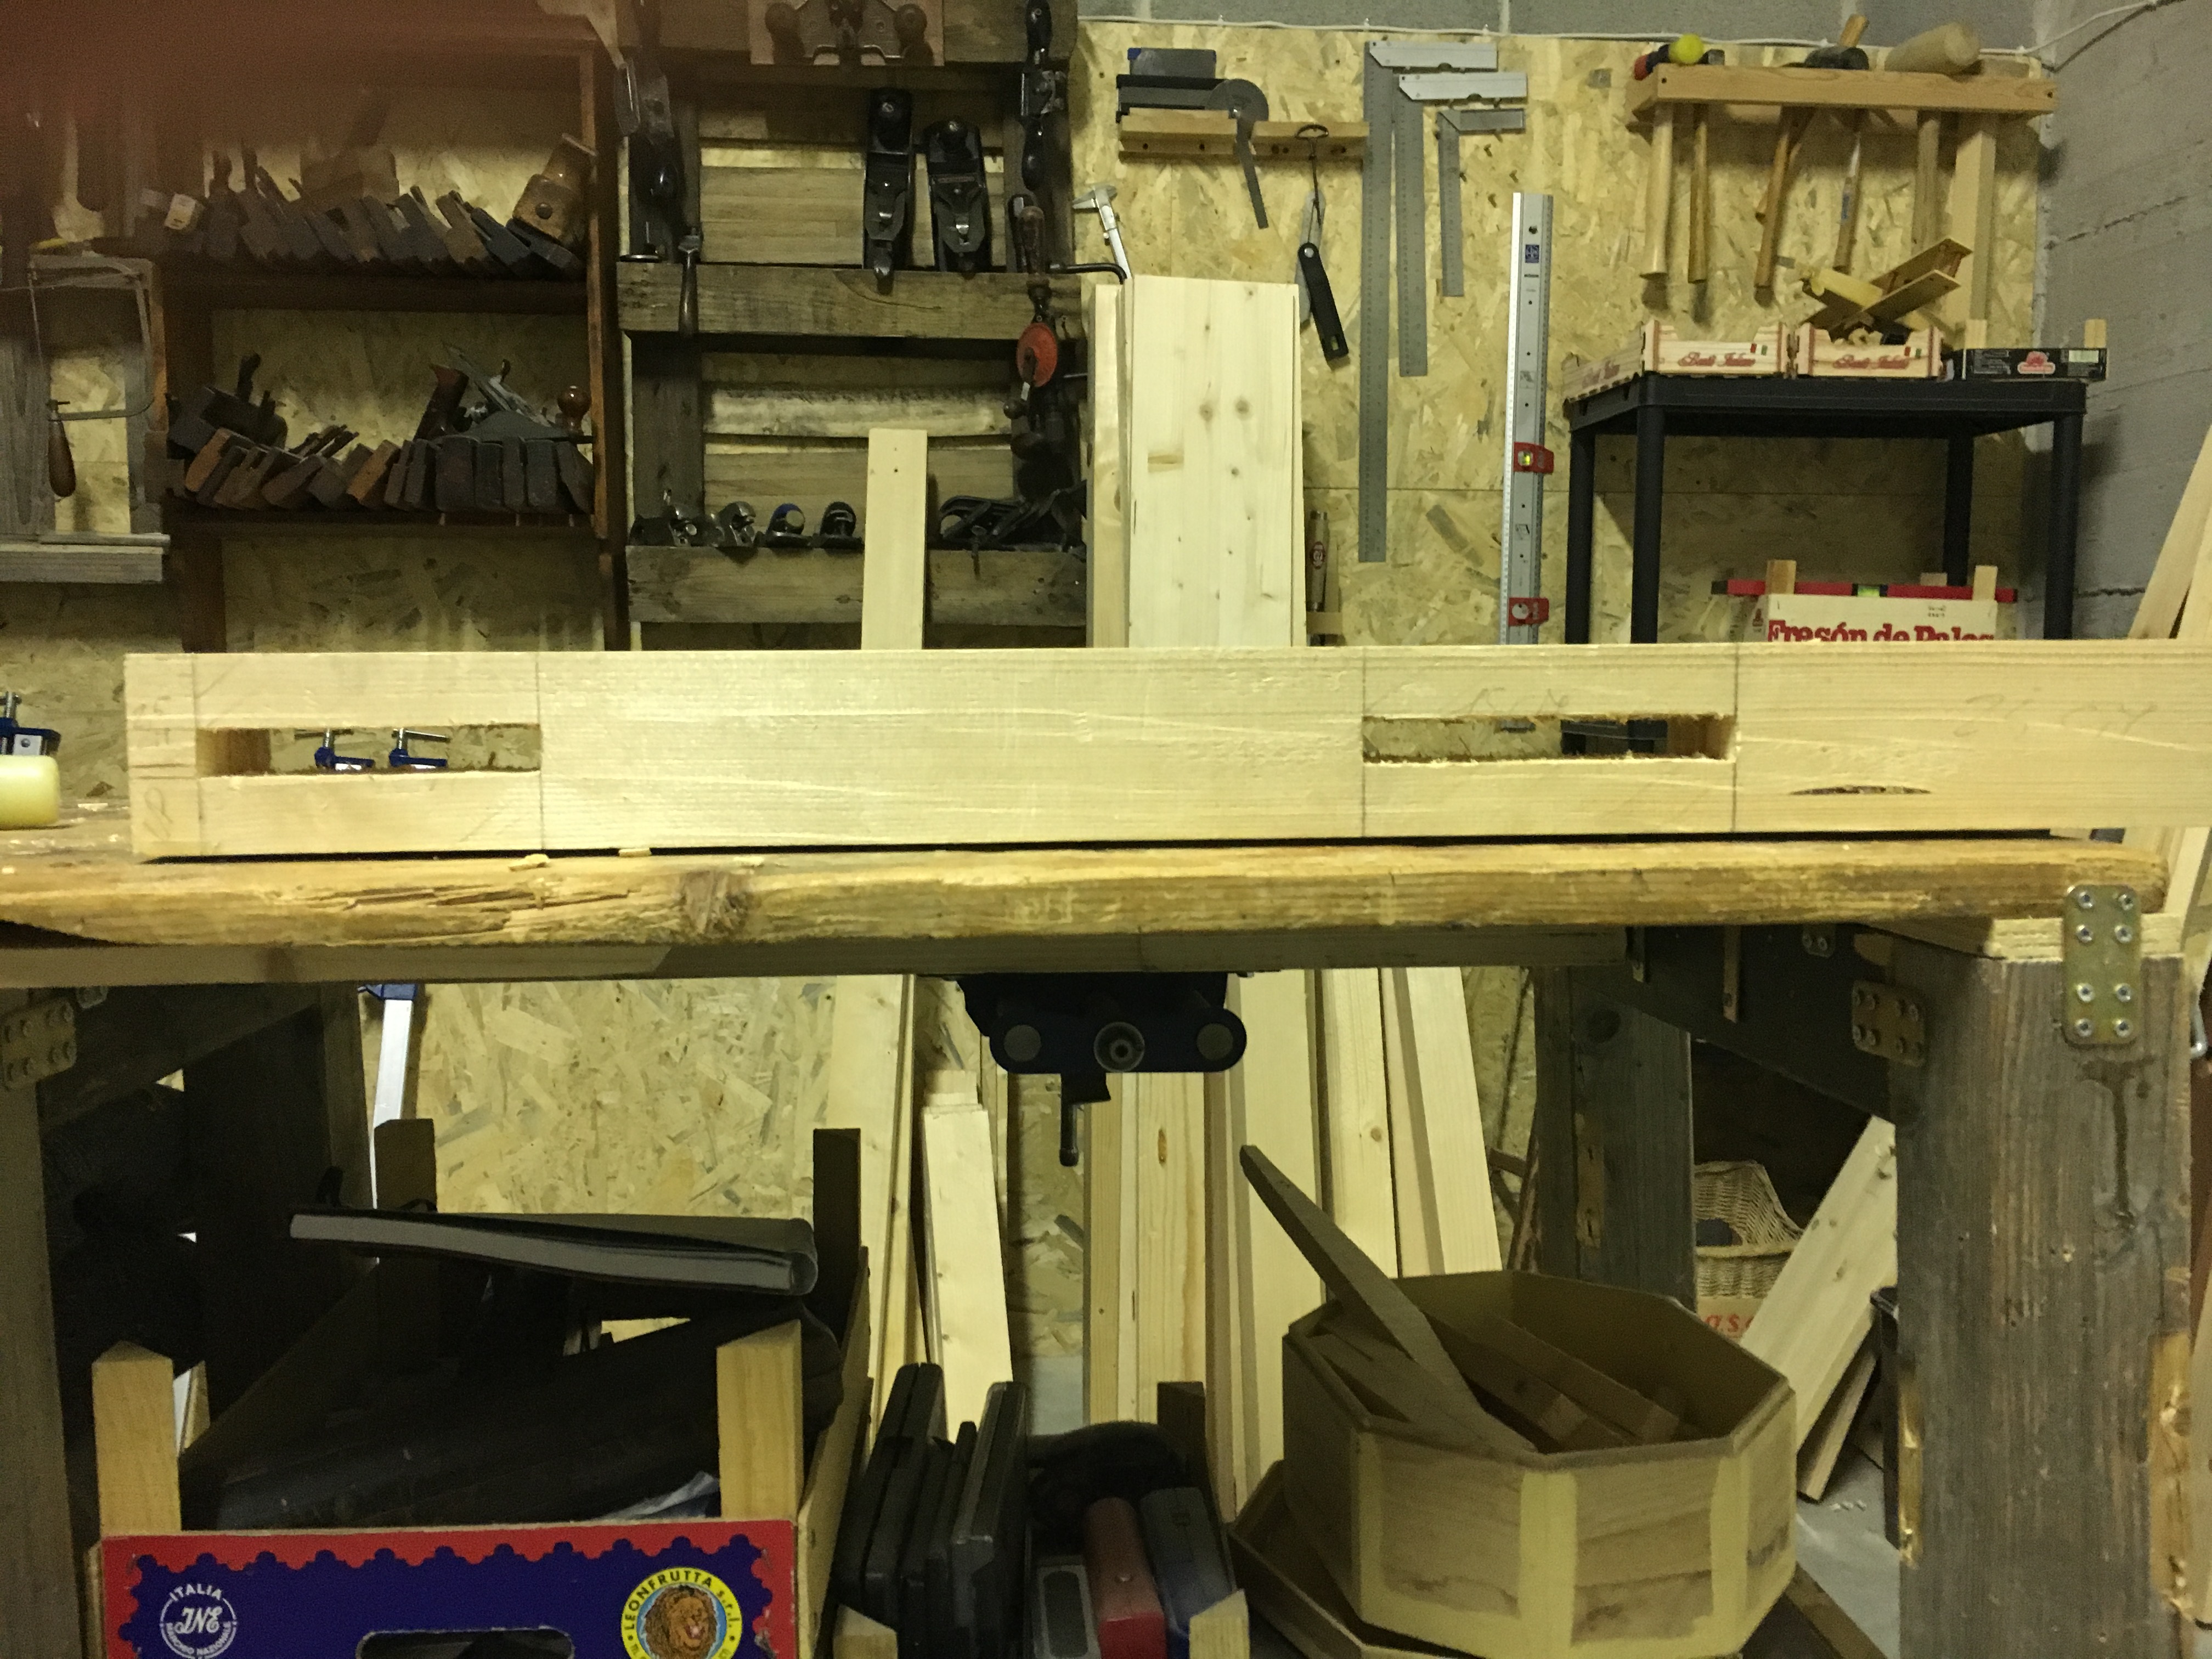
Successivamente, con il girabacchino, ho praticato dei fori nei quali ho inserito dei bulloni a testa quadra ed a testa tonda (tirafondi) in modo da mantenere uniti i laterali alle gambe del banco. A causa del poco spessore residuo a disposizione sul retro delle gambe ho avuto notevoli difficoltà nel far passare nel punto preciso i bulloni. Di seguito ho avvitato il piano del banco alla struttura delle gambe.


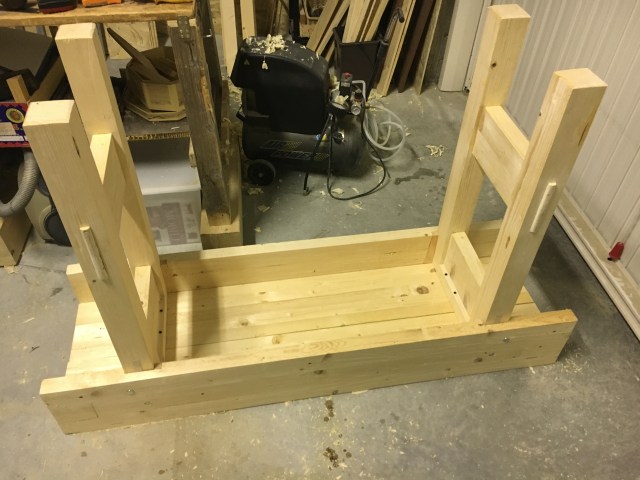
Ho smussato con la pialla gli angoli delle basi delle gambe in modo da evitare future scheggiature del legno. Il banco da adesso in poi verrà capovolto ed il peso si farà sentire. In una foto il banco visto da sotto. La vasca centrale, al momento, è solo appoggiata.
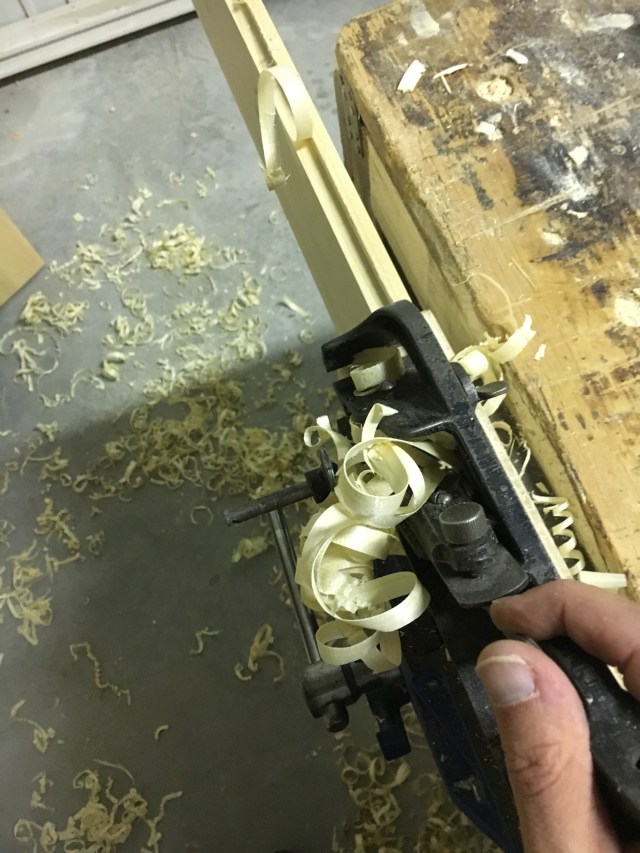
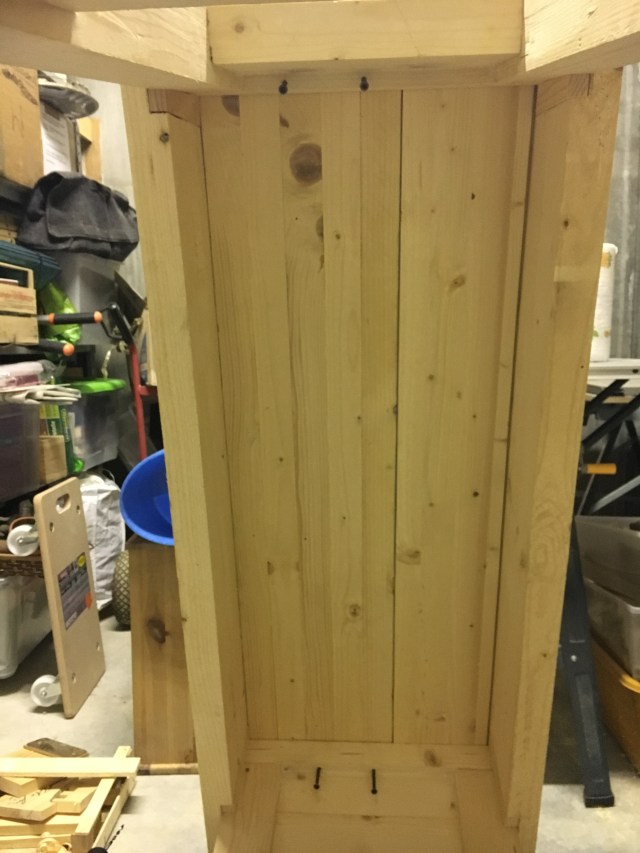
La vasca centrale è a scorrimento tra il piano del banco ed il laterale ed è quindi rimovibile. Con l’incorsatoio ho praticato una scanalatura sia nel fianco del piano del banco che nel fianco del laterale. Quindi con la rebate plane ho creato il dente nella tavola portautensili, di circa 1 mm. inferiore alla scanalatura. E’ importante essere precisi in questa fase o la tavola non scorrerà nei fianchi.
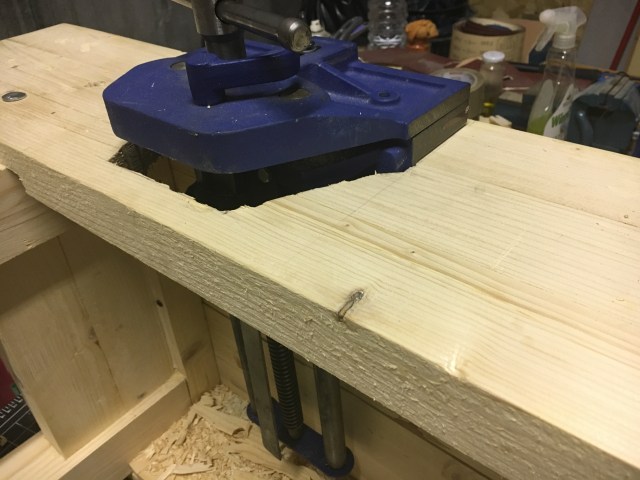
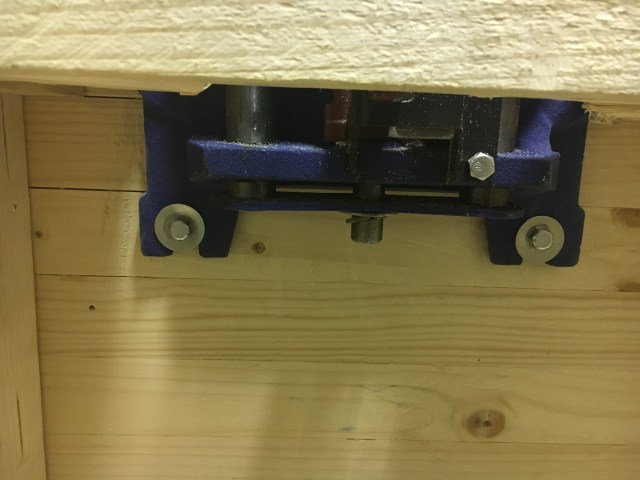
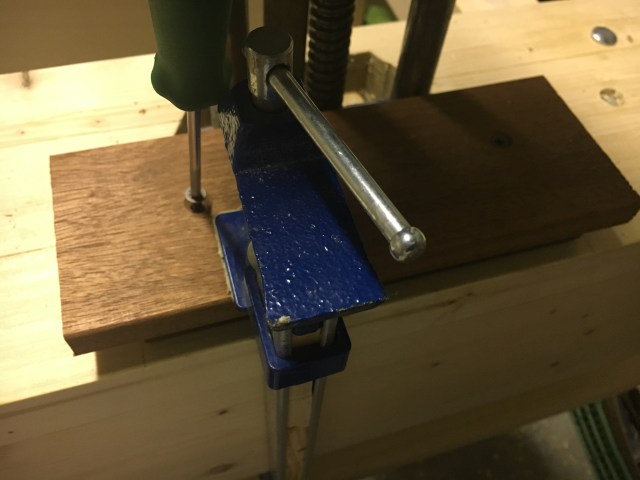
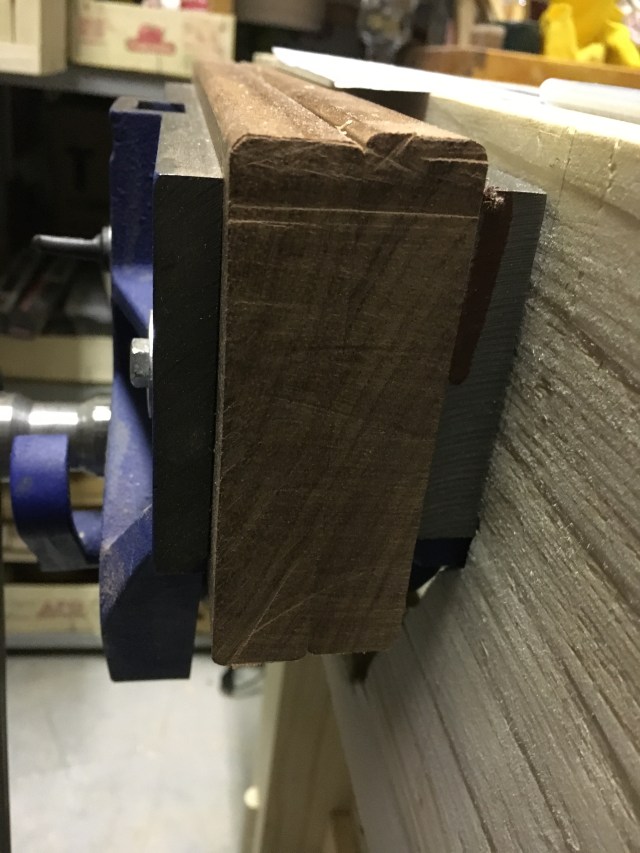
L’ultimo step ha previsto l’inserimento della morsa quick release. Per inserirla ho dapprima tracciato la sagoma della morsa sul frontale del banco nella posizione desiderata. Quindi con il girabacchino ho fatto una serie di buchi lungo tutto il perimetro segnato e rifinito la sagoma con lo scalpello. Ho inserito la morsa che va avvitata sotto al piano del banco. Bisogna prestare attenzione affinchè la morsa una volta montata arrivi con la parte superiore delle ganasce a filo del piano del banco. E’ quindi fondamentale, in fase di tracciatura della posizione della morsa, valutare questa necessità o il lavoro verrà compromesso. Alle ganasce in ferro ho aggiunto poi due guance in legno duro opportunamente sagomate e di seguito piallate a filo del banco.
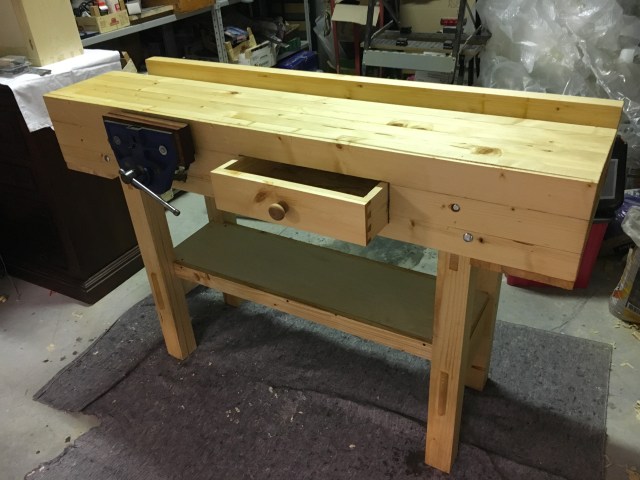
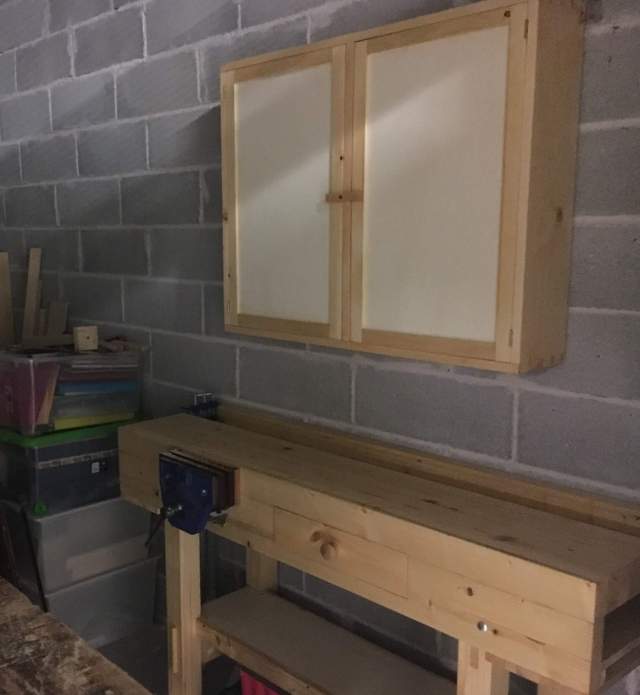
Infine ho dato tre mani di olio di lino cotto passato a straccio. La finitura ad olio è facilmente riparabile e protegge dall’acqua. Al banco così finito ho in seguito aggiunto un cassetto frontale, due ripiani laterali ed un ripiano inferiore. Per queste piccole migliorie mi ripropongo di scrivere un post dedicato (di seguito ecco il link) Apportare variazioni al banco da falegname / improving the workbench
_______________________________________________________________________________________________________
I think that I should have written this article as a first post, when I created the blog, about two years ago. This is because the bench is of fundamental importance for those who want to work with wood. At the beginning, when I still didn’t know that woodworking by hand would become a real passion, I didn’t give particular importance to this aspect but I only thoughth to make one, the most spartan possible.In fact, the urgency of having to do some work in the new house pushed me to look for the fastest and cheapest solution possible. I then headed to the nearest landfill with the idea of taking as much wood as I could find, already knowing that I would only recover some chipboard, good to be assembled at the least worst. Destiny wanted that day a person had to confer a van full of wood, left over from the dismantling of a pub. Among these there were chestnut wood morals, perfect for the legs of my future bench. I then found some chipboard to take home, but I still had the problem of how to make the counter top. A colleague of mine told me that he had two boards at home, the kind used to work pasta, and he no longer used them. I took them, and with the addition of a fir board of brico, many stirrups and hundreds of screws, I prepared to make my first work bench.The initial prototype did not foresee any vice and in reality I did not even pose the problem of putting one. The bench had to be little more than a shelf to put in the garage, where to do urgent home work. Little time passed when one evening, searching on Internet for some ideas, I accidentally found the channel of an English gentleman, Paul Sellers, who showed how he built his workbench in the backyard, with only hand tools. It was love at first sight. The way of working, the calm and the passion that the British woodworker conveyed made me passionate about woodworking by hand. I left many of the electrical equipment I had for buying only hand tools. Meanwhile I also started making some improvements to my poor bench. Simple but important improvements that would have allowed me to work specifically with the wood. Here is the purchase of the bench vise, the addition of a lateral tank where to store the tools, a lower shelf, the holes in the bech top where dogs can be inserted and a small vice for the iron. Later, spending several hours at the bench, I realized that this was objectively too low for my height. I therefore procured fir tree morals and, having practiced the mortises by hand, inserted the legs of the bench so as to raise it by about 8 cm. It was definitely better. Today I realize that this type of bench was absolutely unconventional and not worthy of being called a workbench. But on that bench I could still learn a lot of things and work for several years until I finally decided to do a full-scale and rigorously handmade one.The difference between a simple workbench and a woodworking work ben ho is therefore simple. The work bench can be any flat surface resting on the legs or anchored to a wall by a folding system. It does not need particular constructive care and can be made of wood, iron, hard plastic or whatever. It may not be equipped with a vise and it is not essential that it be particularly solid. It might even be enough to have two easels of brico to start working. The question obviously changes if our processing needs should grow. Working with wood in the old way implies having a workbench sooner or later. What should a woodworking workbench look like? The dimensions of a bench are widely customizable. If we have a lot of space available, my advice is to make one of at least 160 cm. in length by 60 cm. wide. It is always better to have large measurements, as we will soon realize that the work surface will fill up quickly with saws, planes, clamps and various tools, in addition to the possibility of being able to work comfortably with wooden boards of a certain length. Obviously if space is reduced, we will also have to reduce the size of the bench, always keeping in mind that it is better to cover the space available with a bench as large as possible. As for the height of the bench, this is also widely customizable and depends mainly on our height. The essential thing is however that it is of such a height that we can afford to work comfortably. A bench that is too high would prevent us, for example, from giving strength when planing and cutting. A bench too low would force us to stay constantly bent and this, in the long run, would create significant posture problems, especially if we plan to spend many hours at the bench (which happens often if you work with hand tools). Just test on any plan to figure out what the ideal size could be. Wanting to give a rule, the traditional method wants that to calculate the right height of the bench, in relation to our height, the wrist of the hand, with the resting along the body, should arrive roughly the height of the bench top. Another fundamental element is the thickness of the work surface.It should not be less than 5 cm. also because it must provide for fixing and support the weight of the front vise. The material of our bench must obviously be wood, but which type of wood should we choose? Usually we use beech wood, maple or oak, but fir and pine could be fine too. It is important that the wood is well seasoned, straight and free of knots. However, if possible, use hard woods (as mentioned above, oak or beech are fine) because their higher density contributes to giving strength, heaviness and stability. If we cannot afford these types of wood the fir, for example, is a valid alternative. Using it we will certainly get a less heavy bench but still always a good bench on which to rely for decades. The fundamental element to obtain an excellent work bench is however the construction quality, or how it is structured, the types of joints used, how they were made, the thickness of the bench top, the dimensions of the legs, etc. As for the location of bench in our laboratory, this will depend on how much space we have available and whether we like woodworking by hand the most. If we have the space available, the best possible placement is to put it in a central position or in any case such that we can turn around safely and be reached from any side, leaving a space of operation of at least 1 meter and a half.If there is little space we can still lean against the wall, sacrificing the possibility of putting long boards across the width of the bench. This could create some problems, especially if you decide to work the wood in by hand. It is preferable to always have natural lighting but, if it were not possible, it is better to use artificial LED light sources pointed from above towards the bench and always in such a way that there are no shadow areas on the work surface. The bench must be built following a few simple construction rules, which we will see below.This is because, once built, it must be able to perform tasks that are often heavy, above all planing and cutting, which involve a considerable pushing action. The bench, must be so stable that it does not move under continuous horizontal and vertical stresses, to which it will be subjected, even if a minimum vibrations and movements are accettable, if not even advised. For these reasons we always tend to build a bench that is as solid, large, heavy, and stable as possible. The vice is a separate discussion. A good workbench should usually have two, a frontal one and a tail vice. If it is not possible to put two of them it is absolutely necessary to put at least the front one, which is already built in metal and then finished with wooden jaws, as in the classic Anglo-Saxon benches or to be built in wood and a mechanical sliding system placed along the whole frontal leg of the bench, as in European benches. My advice is to insert a metal vice with a quick release system and a wide jaw opening, at least 25/30 cm. useful tightening. The bench vice is indispensable and is in fact our third hand during manual processing. It would be unthinkable to be able to work on a work bench without a vise, whatever it may be. The bench can be extensively customized and, for example, include holes for inserting dogs for clamping the pieces or a front support to hold particularly long boards or the insertion of a central well board and much more. On the internet we find hundreds of projects on how to make a woodworking workbench. There are also many books on the subject, but unfortunately almost all in English. However, the advice is not to buy it new but to build one. The risk in buying a new one (but also old and / or restored) is that the bench is of poor quality, hides construction defects and in any case does not fully meet our needs. And then, do we want to put the satisfaction of having made it with our own hands?
The project of Sellers provided for larger dimensions but, with a view to having it in the future (as it later happened) to place close to a wall and in a very narrow space, the final measurements are necessarily reduced. Here are some measures:
Bench top height 7 cm;
Bench top width excluding aprons width and the well board 28 cm;
Apron height 21 cm;
Leg width 7.5 cm;
Well board width 15 cm;
Cross-section legs lenght excluding legs width 27 cm;
Mortise / tenon height 15 cm;
Distance of the vice from the left bench 32 cm.
The final measurements obtained are therefore around 150 cm. in length, 52 cm. in width and 98 cm. of height.
For the new woodworking bench the wood I had was not enough and the OSB left from the old bench was not suitable for this purpose. So I went to a department store and I bought some fir on offer.First I planed and squared the stock that were going to make up the bench top.
For the arrangement of the beams I tried, as far as I could and taking into account the aesthetic factor, to respect the rule of gluing pieces together that show the direction of the diverging wood growth rings. This configuration can be seen from the end grain. I then proceeded to put the glue and tighten it in the clamps.I then removed the glue residues with shavings and made some micro adjustments by acting on the clamps and with the hammer to obtain a tightening as uniform as possible. Left to rest one night, the next day I removed the clamps and checked for any twisting with the winding sticks. The goal is to get the surface as straight and regular as possible and to this end I have planed both surfaces again to remove any glue residues.Some knots were also present. Because of my fear of detachment, I preferred to treat them, fixing them with a fast-setting superglue.
The bench top is obviously not just the one just described. The final width is in fact also composed of the thickness of the two aprons and the tool-holder tank. This element must be taken into due consideration before proceeding to assemble the bench top as the final measurements may differ significantly.
The structure of the bench legs is certainly the one that requires more time and effort, in addition to a certain precision. As mentioned, the joints are fundamental. In this case the upper joints of the legs are simple and tenon mortise, while the lower joints are through mortise and tenon. First of all I proceeded to plane and square the morals of my legs. Then I marked with a pencil and trace with a small knife, a combination square and marking gauge the positions of the mortises. So with the chisel I chop the mortises. The photos below highlight the entire processing procedure. To see specifically how to make the mortise and tenon joints, I refer you to this post Gli incastri. Come fare l’incastro tenone e mortasa / The joints. How to make the mortise and tenon joint.
Since I didn’t already have the leg supports, I had to provide some pieces from the old bench. Sawn, planed and glued, from the final piece I got the tenons. In the following photos the various stages of processing.The lower tenons are through tenons. With the plane, rasp and abrasive paper I rounded off the corners to create a rounded profile. The upper ones are flush with the bench legs. To the structures made in this way I glued and screwed an upper crosspiece on which the bench top will be screwed.The structure of the legs thus defined is very solid and this is due both to the thickness of the pieces and to the considerable dimensions of the mortise and tenon joints. Probably if I hadn’t had the moral for the legs already available I would have opted for a slightly greater thickness but I can say that even so done the bench is still very stable. Once the structure of the legs was finished, I did a test by adding the apron and the bench top, held together by the clamps, just to realize how the work was progressing.With some scraps of pine I have shaped the four wedges that will tighten the joint of the legs in the aprons. I marked the width of the leg together with the wedge on a apron at the desired distance from the edge of the bench top by chopping the mortise with a chisel and finishing it with the router plane. I did a test and then transferred the size to the other apron proceeding to chop the other mortises. The wedges are held in place by wooden blocks screwed to the bench. The bulk of the work at this point has been done and the bench begins to take shape. Then, with the handbrace drill, I drilled holes in which I inserted square head and round head bolts so as to keep the aprons side by side with the legs of the bench. Because of the little residual thickness available on the back of the legs I had considerable difficulty in passing the bolts in the precise point. Then I screwed the bench top to the leg frame.I smoothed the corners of the legs with the plane so as to avoid future splitting of the wood. The bench from now on will be turned upside down and the weight will be felt. Above, an overview of the bench seen from below, the well board is only supported for now.The well board slides between the bench top and the side of the apron and is therefore removable. With the plough plane I made a groove both in the side of bench top and in the side of the apron. Then with the rebate plane I created the rebate in the well board, about 1 mm. lower than the groove. It is important to be accurate at this stage or the board will not slide. The last step is the fitting of the quick release vice. To insert it I first traced the outline of the vice on the apron in the desired position. Then with handbrace drill I made a series of holes along the entire perimeter marked and finished the shape with the chisel. I inserted the vice that must be screwed under the bench top. Care must be taken to ensure that once it is mounted, the vice arrives with the upper part of the jaws flush with bench top. It is therefore essential, when tracing the position of the vice, to evaluate this need or the work will be compromised. To the iron jaws I added two hardwood cheeks suitably shaped and then planed flush with the bench. I finished the bench with three coats of boiled linsed oil that protects from water and is easily repairable. At the finished workbench I then added a front drawer, two side shelves and a lower shelf. For these small upgrades I will write a dedicated post.

Lascia un commento