DIFFERENZA TRA PIALLE BEVEL UP E PIALLE BEVEL DOWN / DIFFERENCE BETWEEN BEVEL UP AND BEVEL DOWN PLANES
English translation at the end of the article
Era da un pò di tempo che stavo pensando di scrivere qualcosa su questo argomento rimandando però sempre a quando avessi avuto il tempo necessario per poter trattare in maniera approfondita il tema.
Mi sono reso conto però che molte delle cose che sapevo e che ho letto sui vari libri ed articoli sono assolutamente superflue e persino fuorvianti generando solo una gran confusione in chi le legge. Meglio allora concentrarsi su poche ma fondamentali nozioni per farsi una idea la più chiara possibile. Anzitutto cosa significa il termine inglese bevel? In italiano potremmo tradurlo con la parola “bisello”, ovvero quello smusso presente sulla parte terminale della lama, affilato ad una certa inclinazione che, incontrandosi con il dorso della lama stessa, ne forma il tagliente. Se la lama montata sulla pialla presenta il bisello rivolto verso l’alto si dice che la pialla è in configurazione bevel up (bisello su). Viceversa se la lama è montata in modo che il bisello sia rivolto verso il basso si dirà che la pialla è in configurazione bevel down (bisello giù). È interessante fare un piccolo riepilogo dei più comuni modelli di pialla con scritto a fianco come è montata la lama:
Block Plane: bevel up.
Smoothing plane: esistono sia bevel up che bevel down.
Scrub plane: bevel down.
Jack plane: esistono sia bevel up che bevel down.
Jointer plane: esistono sia bevel up che bevel down.
Shoulder plane: bevel up.
Scraper plane: bevel up.
Router plane: bevel up.
Plough plane: bevel down.
Rabbet plane: bevel down.
Spokeshave: esistono sia bevel up che bevel down.
Moulding plane: bevel down.
Per una panoramica sui diversi tipi di pialla e come sono fatte vi rimando a questo post Parliamo di pialle/ Let’s talk about planes
È importante conoscere la configurazione della lama di una pialla? Sicuramente è utile sapere che esiste questa differenza ma non penso sia comunque di fondamentale importanza. Le pialle infatti escono di fabbrica con la lama già impostata per lavorare in una posizione ben definita. Questa posizione è quella che permette alla pialla di operare nel miglior modo possibile per il tipo di lavorazione alla quale essa è deputata. Ad esempio le block planes montano le lame in posizione bevel up perchè sono usate principalmente per lavorare le fibre di testa del legno e, per questa particolare lavorazione, si è visto che tale configurazione restituisce i risultati migliori. Ma niente vieta di lavorare il legno di testa del legno con una pialla in configurazione bevel down, come ad esempio una Stanley n. 4. Con una lama ben affilata ed un po’ di pratica otterremo comunque ottimi risultati.
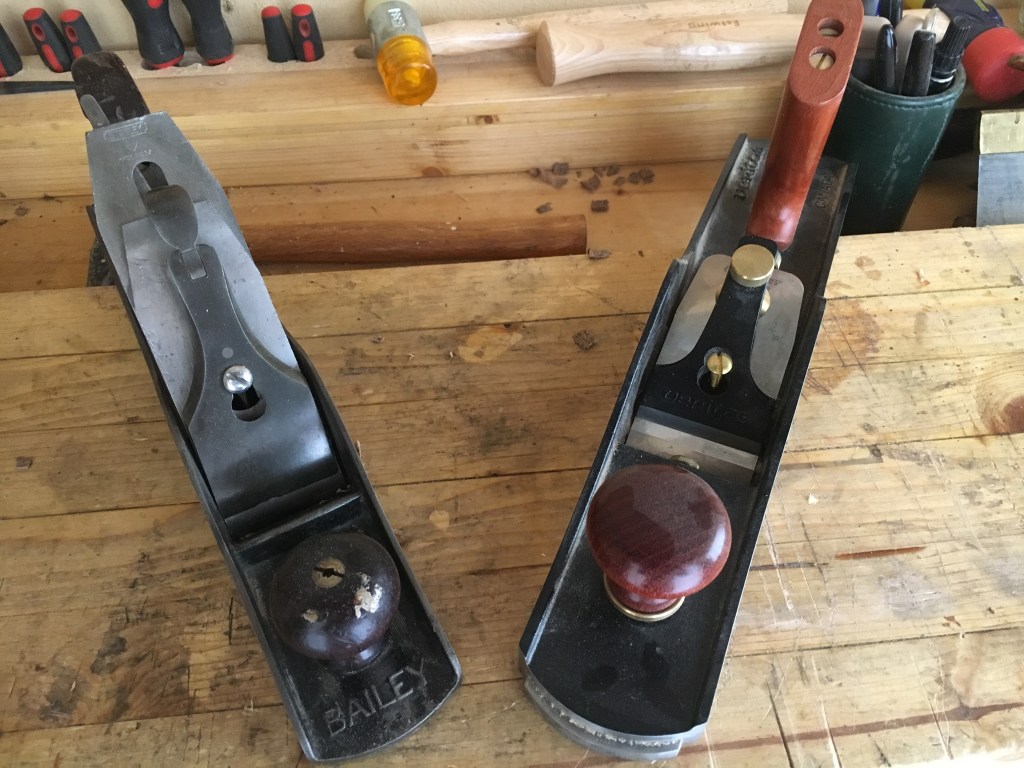
Detto questo vediamo sotto l’aspetto tecnico la differenza tra una pialla con lama bevel up ed una pialla con lama bevel down.
Una pialla bevel up presenta un supporto fisso (bed) sul quale è montata direttamente la lama con il bisello rivolto verso l’alto. L’angolo di seduta del supporto è di 12 gradi mentre il bisello della lama viene solitamente affilato ad una angolazione di 25 gradi, cosicché otterremo un angolo di taglio effettivo di 37 gradi (12 gradi più 25 gradi). Questo è di norma l’angolo di taglio di una pialla bevel up. È possibile però variare questo angolo di taglio effettivo affilando solo il bisello della lama ad una differente inclinazione (visto che il supporto è fisso a 12 gradi) e questo a seconda del tipo di lama che viene montata sulla pialla, del tipo di lavorazione e del tipo di legno che stiamo lavorando. Una pialla bevel down presenta invece un supporto mobile (frog) sul quale è montata la lama con il bisello rivolto verso il basso, unitamente al controferro ed al lever cap. Il frog ha un angolo di seduta di 45 gradi ed il bisello è affilato solitamente tra i 25 ed i 30 gradi. Cambiando l’angolo di affilatura del bisello l’angolo di taglio effettivo della lama rimarrà comunque governato dall’inclinazione del frog e quindi rimarrà sempre di 45 gradi. Questa è la differenza fondamentale. In una pialla bevel up infatti, proprio perché il bisello è rivolto verso l’alto, l’angolo effettivo di taglio della lama è variabile e condizionato dal grado di affilatura del bisello. Ad esempio affilando il bisello a 30 gradi invece che a 25 gradi otterremo un angolo effettivo di taglio di 42 gradi anziché di 37 gradi. In una pialla bevel down questo non può accadere proprio perché il bisello è rivolto verso il basso e questo fa sì che, anche variandone il grado di affilatura, l’angolo effettivo di taglio rimanga sempre di 45 gradi. Di seguito inserisco un disegno che spero esplicativo di quanto appena detto.
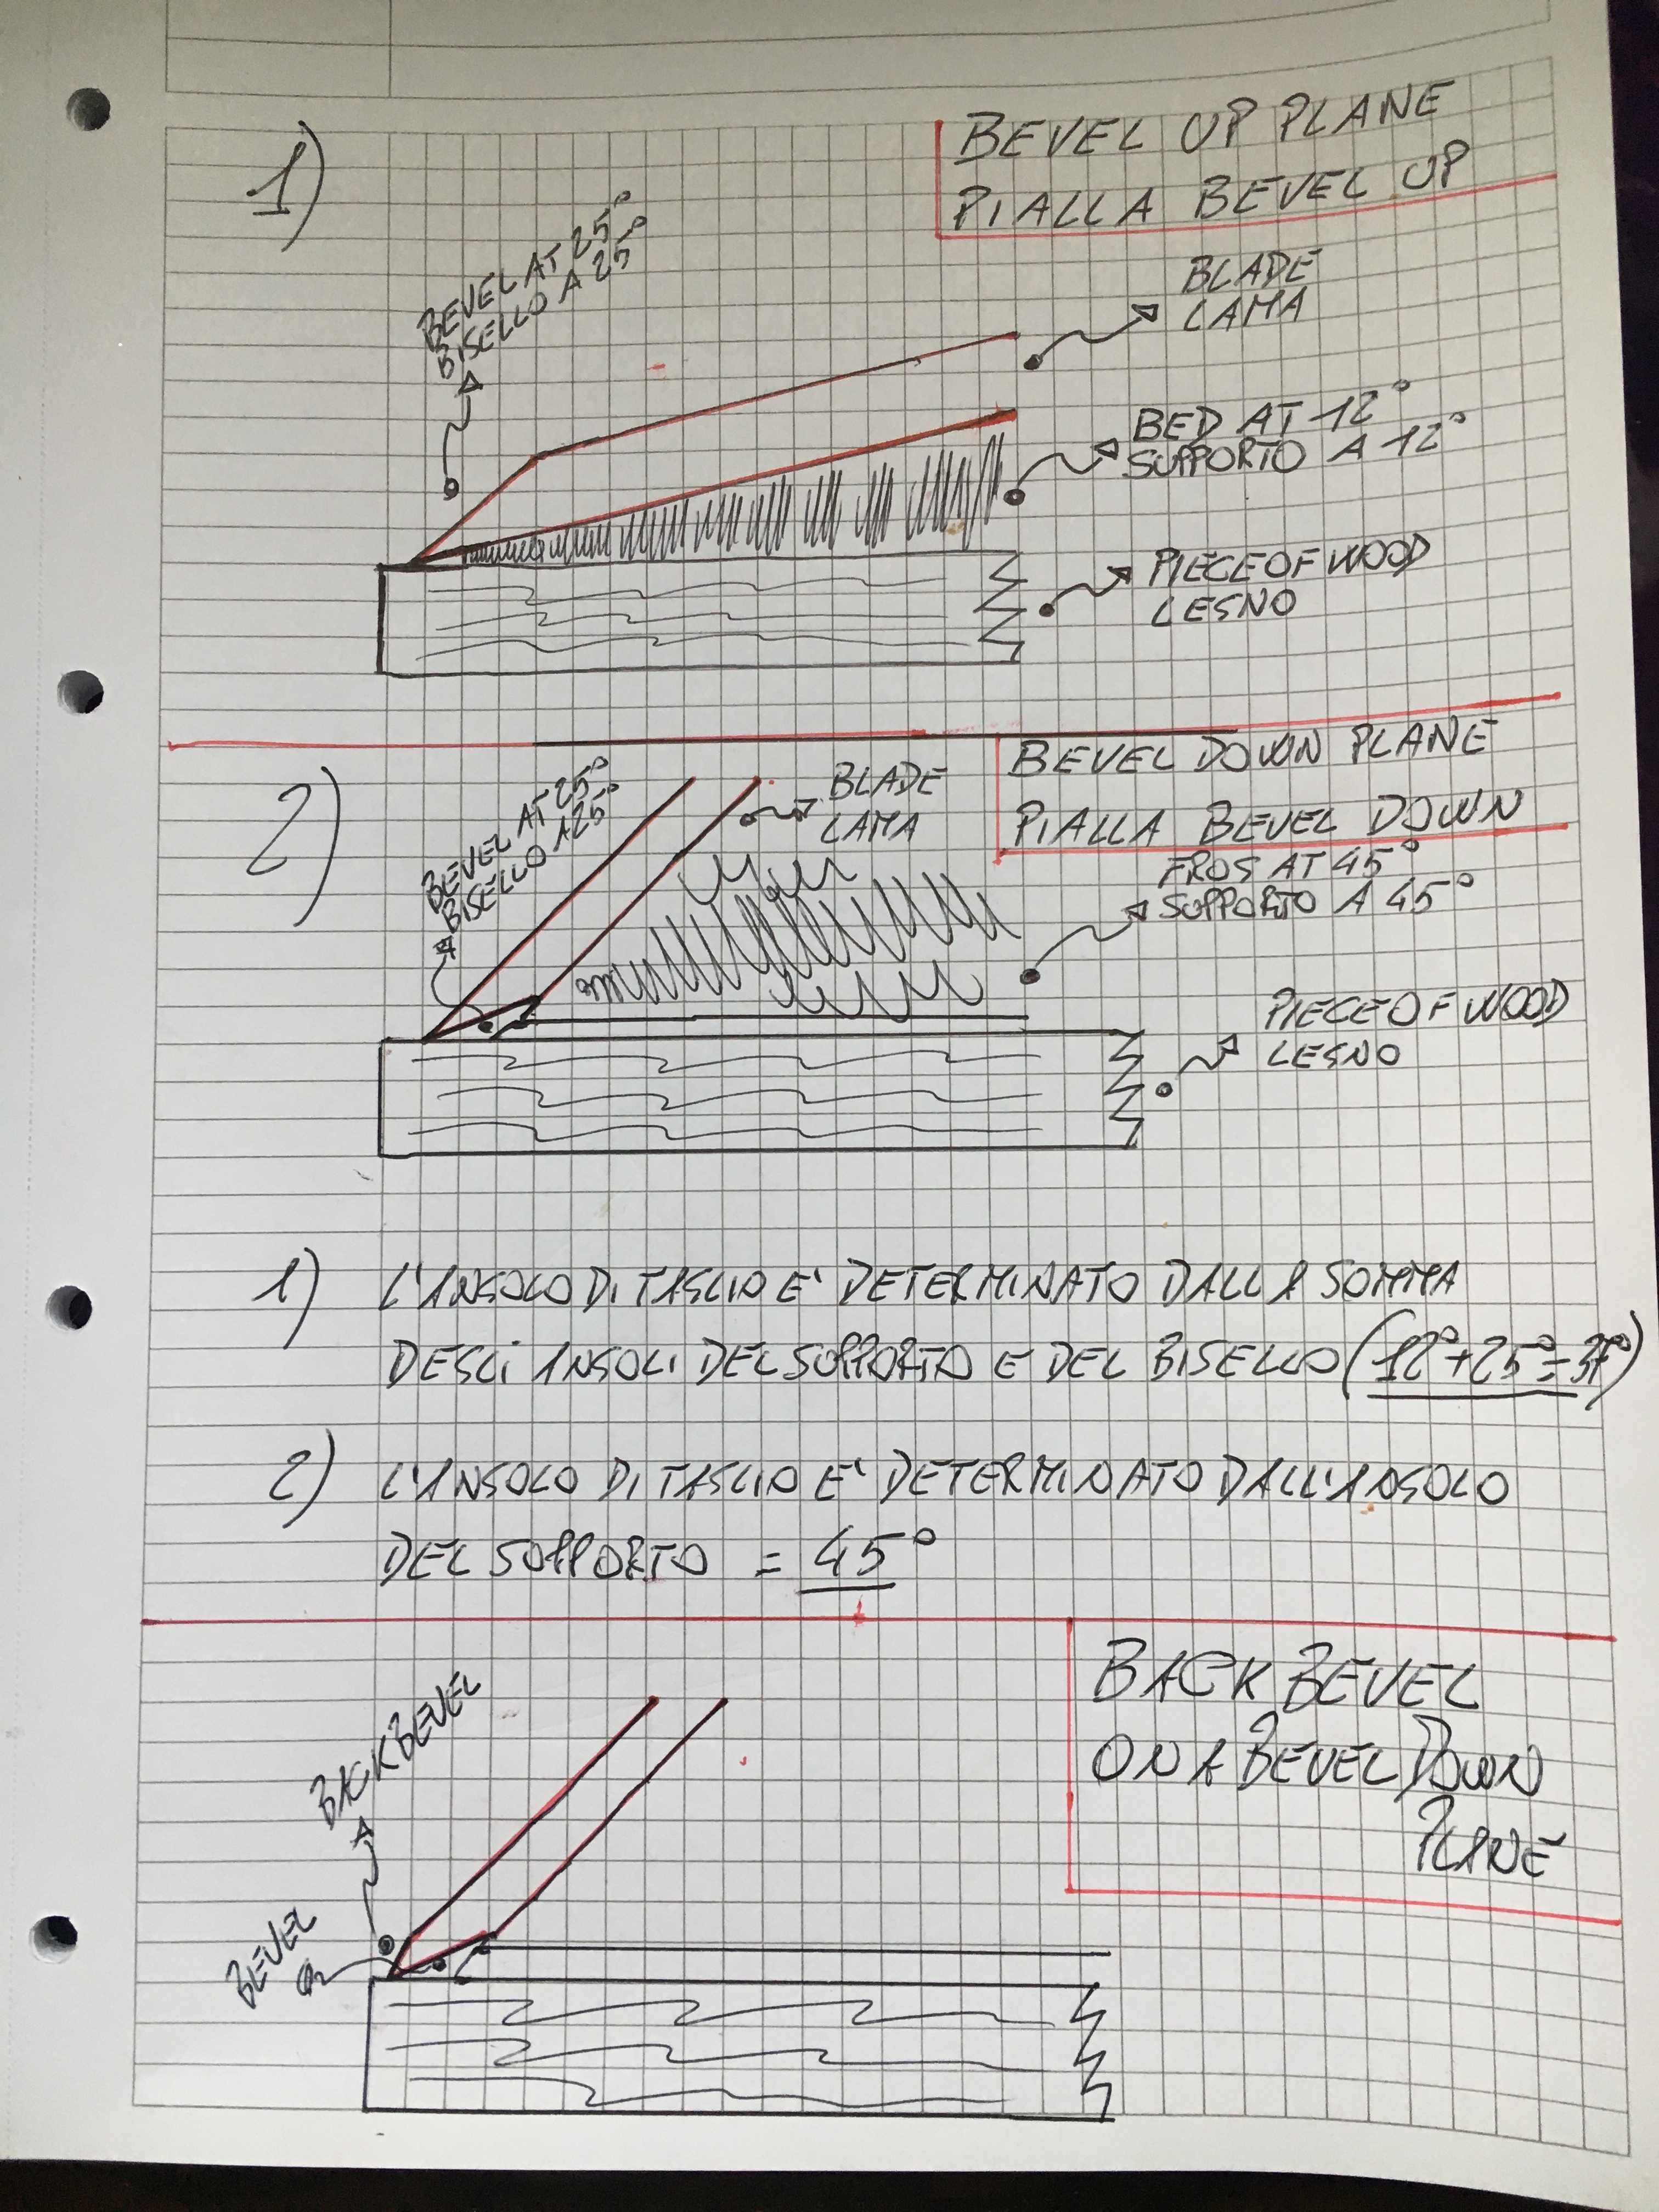
L’unico modo di variare l’angolo effettivo di presentazione del tagliente al legno in una pialla bevel down è quello di creare il cosiddetto back bevel, ovvero un contro bisello ricavato sul dorso della lama, vicino al tagliente(come raffigurato nel disegno sopra).
Nei secoli scorsi la regola era utilizzare per la quasi totalità delle lavorazioni le pialle bevel down. Le pialle bevel up erano utilizzate quasi esclusivamente per piallare le fibre di testa del legno, come accade ad esempio con le block planes o utilizzate assieme alla shooting board. Oggigiorno la configurazione bevel up è stata inserita diffusamente in svariati modelli di pialla. Ad esempio tra le smoothing planes è possibile trovare sia la n. 4 che la n. 5 in versione sia bevel up che bevel down. Sulle riviste e su internet troviamo migliaia di articoli che mettono a confronto questi due tipi di configurazione vedendo schierate due scuole di pensiero. Quella che preferisce le pialle bevel up e quella che preferisce le pialle bevel down. Il mio pensiero è in qualche modo in linea con la scuola tradizionalista. Con le pialle bevel down è possibile piallare praticamente tutto. Se un legno non è piallabile, e questo puo accadere, non è che passando ad una pialla bevel up risolveremo il problema anzi, le pialle bevel up (le smoothing planes nello specifico), possono generare il problema dello strappo delle fibre del legno. Semmai in questi particolari casi potremmo utilizzare una scraper plane o le rasiere oppure lavorare con la pialla in posizione leggermente inclinata rispetto alla direzione di piallatura. Per una panoramica sull’utilizzo delle pialle vi rimando a questo post Tecniche di piallatura / Planing technique
Consideriamo infine il fattore economico: le pialle bevel up sono generalmente molto costose. Non sto dicendo comunque che le pialle bevel up siano inutili, tutt’altro, ma solo che, forse, visto il prezzo considerevole ed il ridotto campo di applicazione, il loro acquisto non è una priorità, potendo fare tutte le lavorazioni con le più economiche e versatili pialle bevel down. Il mio consiglio è quindi quello di dotarsi inizialmente di pialle bevel down e solo in seguito, se vogliamo arricchire il nostro equipaggiamento, acquistare anche una o più pialle bevel up.
——————————————————————————-
It was a while since I was thinking of writing something on this subject, but always delaying to when I had the time to deal with a such peculiar topic. But I realized that many of the things I knew and read about on the various books and articles are absolutely superfluous and even misleading generating confusion in people that is reading. Better then to focus on a few but fundamental notions to get an idea as clear as possible. First of all, what does the English term bevel means in Italian language. It’s the terminal part of the blade, sharpened to a certain inclination which, meeting with the back of the blade itself, forms the cutting edge. If the blade mounted on the plane has the bevel facing up, it is said that the plane is in a bevel-up configuration. If the blade is mounted so that the bevel is facing downwards, it will say that the plane is in a bevel-down configuration. It is interesting to make a small summary of the most common plane models with the writing on the side as the blade is mounted:
Block Plane: bevel up.
Smoothing plane: bevel up and bevel down.
Scrub plane: bevel down.
Jack plane: bevel up and bevel down.
Jointer plane: bevel up and bevel down.
Shoulder plane: bevel up.
Scraper plane: bevel up.
Router plane: bevel up.
Plough plane: bevel down.
Rabbet plane: bevel down.
Spokeshave: bevel up and bevel down.
Moulding plane: bevel down.
You can find some information about planes here Parliamo di pialle/ Let’s talk about planes
Is it important to know the configuration of a plane? Surely it is useful to know that this difference exists but I do not think it is of fundamental importance anyway. The planes in fact leave the factory with the blade already set to work in a well-defined position. This position is the one that allows the plane to work in the best possible way for the type of work to which it is assigned. For example the block planes mount the blades in the bevel up position because they are mainly used to work the end grain of the wood and, for this particular process, we have seen that this configuration gives the best results. But nothing prevents you from working the end grain of the wood with a bevel-down plane, such as a Stanley n. 4. With a well sharpened blade and a little practice we will still get excellent results.
Having said this we see in the technical aspect the difference between a bevel up plane and a bevel down plane.
A bevel up plane has a fixed support (bed) on which the blade is directly mounted with the bevel facing upwards. The angle of the bed is 12 degrees while the bevel of the blade is usually sharpened at an angle of 25 degrees, so that we will get an effective cutting angle of 37 degrees (12 degrees plus 25 degrees). This is normally the cutting angle of a bevel up plane. However, it is possible to vary this effective cutting angle by only sharpening the bevel of the blade to a degree (since the bed is fixed at 12 degrees) and this depending on the type of blade that is mounted on the plane, the type of work and the type of wood we are working on. A bevel down plane has instead a mobile support (frog) on which the blade is mounted with the bevel facing down, together with the cap iron and the lever cap. The frog has a seat angle of 45 degrees and the bevel is usually sharpened between 25 and 30 degrees. Changing the angle of sharpening of the bevel, the effective cutting angle of the blade will remain governed by the inclination of the frog and therefore will always remain 45 degrees. This is the fundamental difference. In fact, in a bevel-up plane, just because the bevel is facing upwards, the effective cutting angle of the blade is variable and conditioned by the degree of sharpening of the bevel. For example, by sharpening the bevel at 30 degrees instead of 25 degrees, we will get an effective cutting angle of 42 degrees instead of 37 degrees. In a bevel down plane this cannot happen because the bevel is facing downwards and this means that, even by varying the degree of sharpening, the actual cutting angle always remains 45 degree. Above I insert a drawing that I hope will explain what I just said.
The only way to vary the actual angle of the cutting edge to the wood in a bevel down is to create the so-called back bevel, i.e a counter bevel obtained on the back of the blade, near the cutting edge (as shown in the drawing above).
In past centuries the rule was to use bevel-down planes for almost all of the processes. Bevel-up planes were used almost exclusively to plane the end grain of the wood, as happens for example with block planes or used together with the shooting board for trimming little pieces to join. Nowadays the bevel up configuration has been widely inserted in various models of planes. For example between the smoothing planes it is possible to find both the n. 4 and the n. 5 in both bevel up and bevel down configuration. On magazines and on internet we find thousands of articles that compare these two types of configuration seeing two schools of thought lined up. The one who prefers bevel-up planes and the one who prefers bevel-down planes. My thinking is somehow in line with the traditionalist school. Almost everything can be planed with bevel down planes. If a wood cannot be planed, and this can happen, it is not that switching to a bevel-up plane we will solve the problem indeed, the bevel-up planes (the smoothing planes in particular), can generate the problem of the tear out. If anything, in these particular cases we could use a scraper plane or card scrapers or work with the plane in a skewed position. For an overview of the use of the planes, I refer you to this post Planing techniques / Planing technique. Finally, consider the economic aspect: bevel-up planes are generally very expensive. I’m not saying however that the bevel up planes are useless, far from it, but only that, perhaps, given the considerable price and the reduced field of application, their purchase is not a priority, being able to do all the works with the most economic and versatile bevel down planes. My advice is therefore to start with some bevel-down planes and only later, if we want to enlarge our equipment, buy one or more bevel-up planes.

Lascia un commento