
GLI INCASTRI. COME FARE L’INCASTRO TENONE E MORTASA / THE JOINTS. HOW TO MAKE THE MORTISE AND TENON JOINT
L’incastro tenone e mortasa è probabilmente il più diffuso tra tutti i tipi di incastro utilizzati in falegnameria. Questo per la sua relativa facilità di esecuzione ma anche e soprattutto per la resistenza e solidità che è in grado di offrire. Nella sua più semplice
definizione possiamo dire che consiste nell’unione di un pezzo opportunamente sagomato (tenone) all’interno di uno scavo in grado di accoglierlo (mortasa). La sua forma è generalmente quella di una L o di una T.
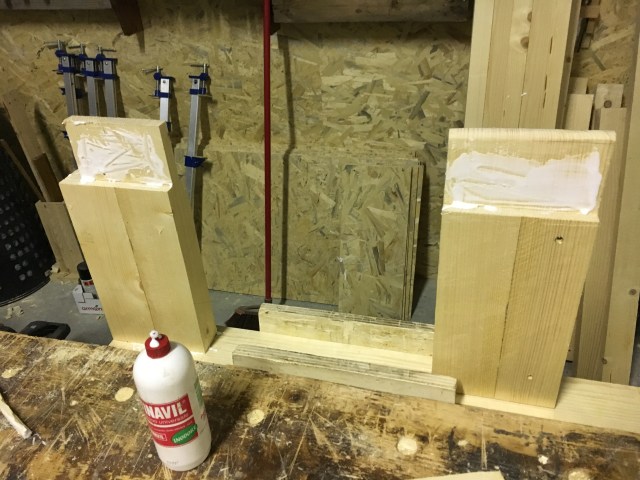
Ne esistono innumerevoli varianti ma la sua modalità di esecuzione rimane sostanzialmente la stessa. Per le generalità su questo ed altri tipi di incastro vi rimando ad un mio vecchio post Gli incastri. I tre incastri fondamentali del legno / The joints. The three essential joints in wood. Quello che vorrei mostrare in questo articolo è la versione tradizionale di come realizzare questo tipo di incastro. Così come fatto per l’incastro a dente canale Gli incastri. Come fare l’incastro dente e canale / The joints. How to make a housing dado joint. inserirò la spiegazione (e traduzione in inglese) direttamente sotto le fotografie per una più semplice comprensione. Le foto mostrano la realizzazione di un incastro tenone e mortasa con spalla per il mio banco da falegname.
Nuovo: Vedi su youtube/ Watch on youtube
The mortise and tenon joint is probably the most used among all types of joints. This is due to its relative ease of execution but also and above all due to the strength and solidity it is able to offer. In its simplest definition we can say that it consists in the union of an appropriately shaped piece (tenon) inside an excavation able to receive it (mortise). Its shape is generally that of an L or a T. There are many types but its execution remains substantially the same. For general information on this and other types of joints I refer you to one of my old post The joints. The three fundamental joints of wood / The joints. The three essential joints in wood. What I would like to show in this article is the traditional version of how to make this type of joint. As well as made for the housing dado joint The joints. How to make a housing sado joint / The joints. How to make a housing dado joint I will insert the explanation (and the English translation) directly under the photographs for a simpler understanding. The photos show the making of a tenon and mortise joint with shoulder for my workbench.

Cerchiamo anzitutto di scegliere pezzi di legno il più possibile privi di nodi.
Questo perché, specialmente se dobbiamo effettuare molti incastri, è molto facile che si ritrovino nel bel mezzo dell’incastro creandoci qualche grattacapo. I pezzi da unire dovranno essere perfettamente squadrati ovvero le facce di ciascun pezzo da unire devono essere perfettamente perpendicolari ed in squadra tra loro. Questo è sempre facilmente verificabile mediante l’ausilio di una squadra.
First of all, we have to look for pieces that are knots free as much as possible.
This is because, especially if we have to make many joints, it is very easy to find them in the middle of the joint creating us some problems. The pieces to be joined must be perfectly squared, i.e the faces of each piece to be joined must be perfectly perpendicular and in square with each other. This is always easily verifiable by the help of a combination square.
REALIZZAZIONE DELLA MORTASA / MAKING THE MORTISE
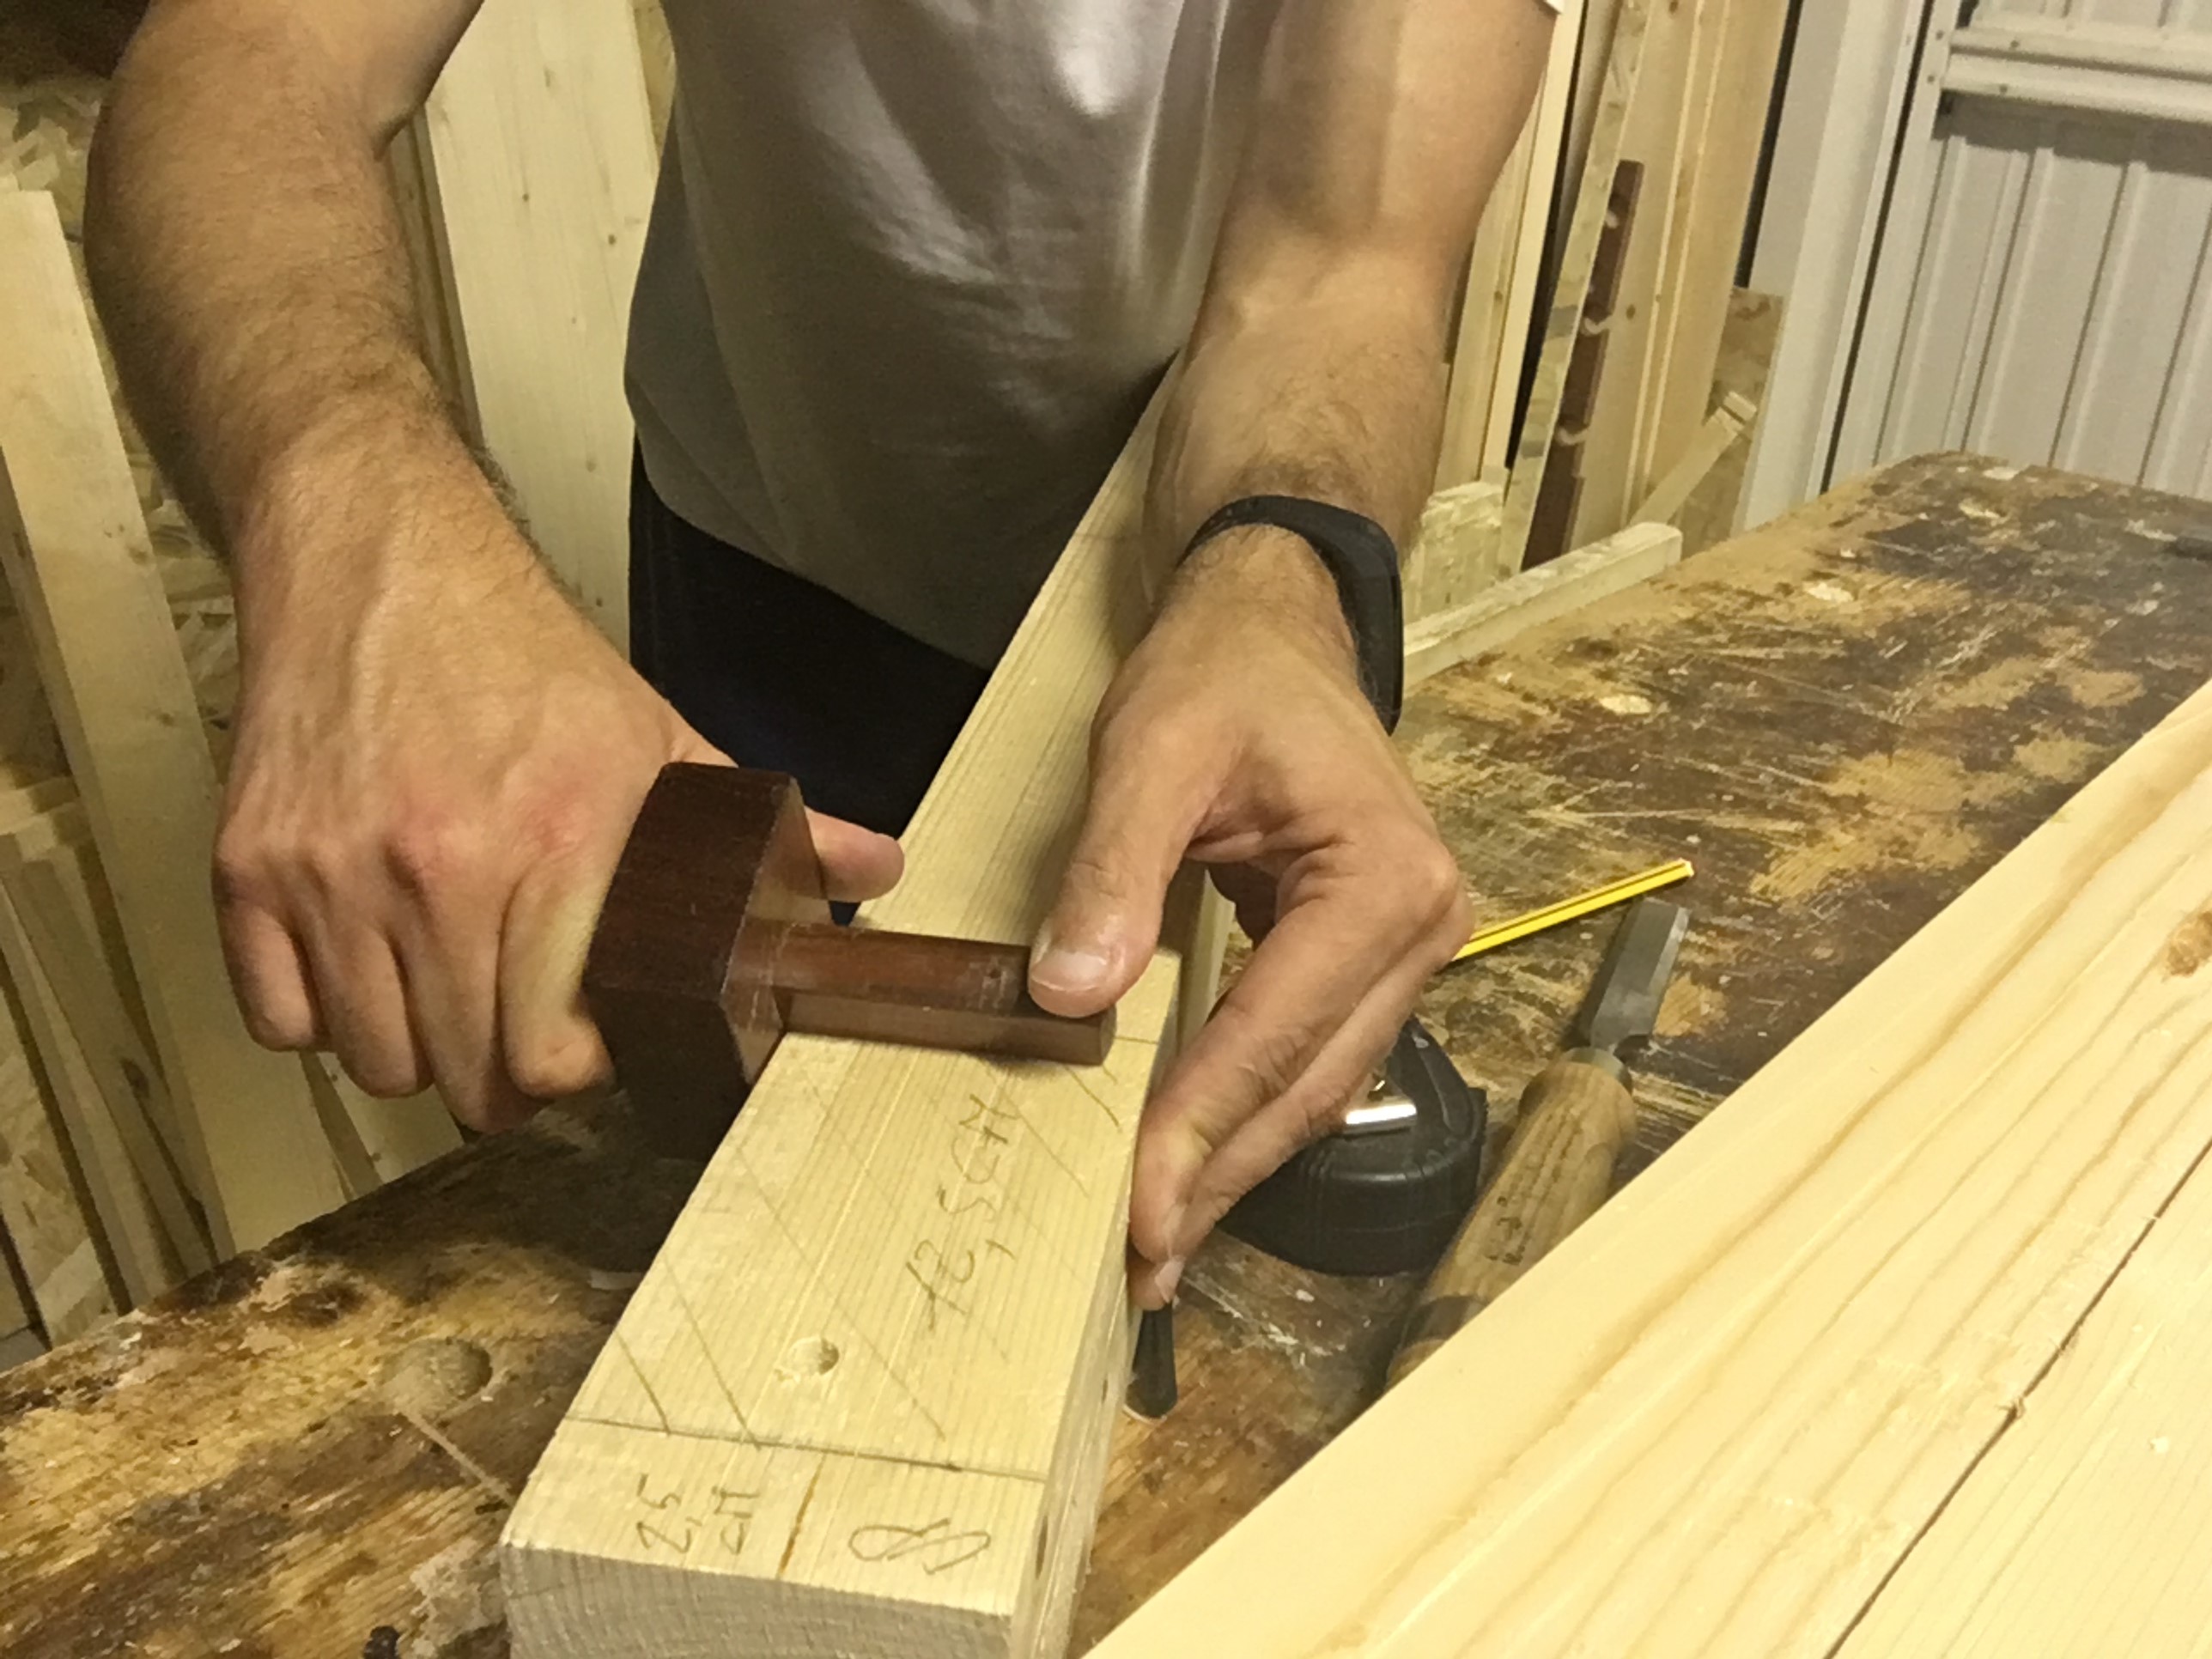
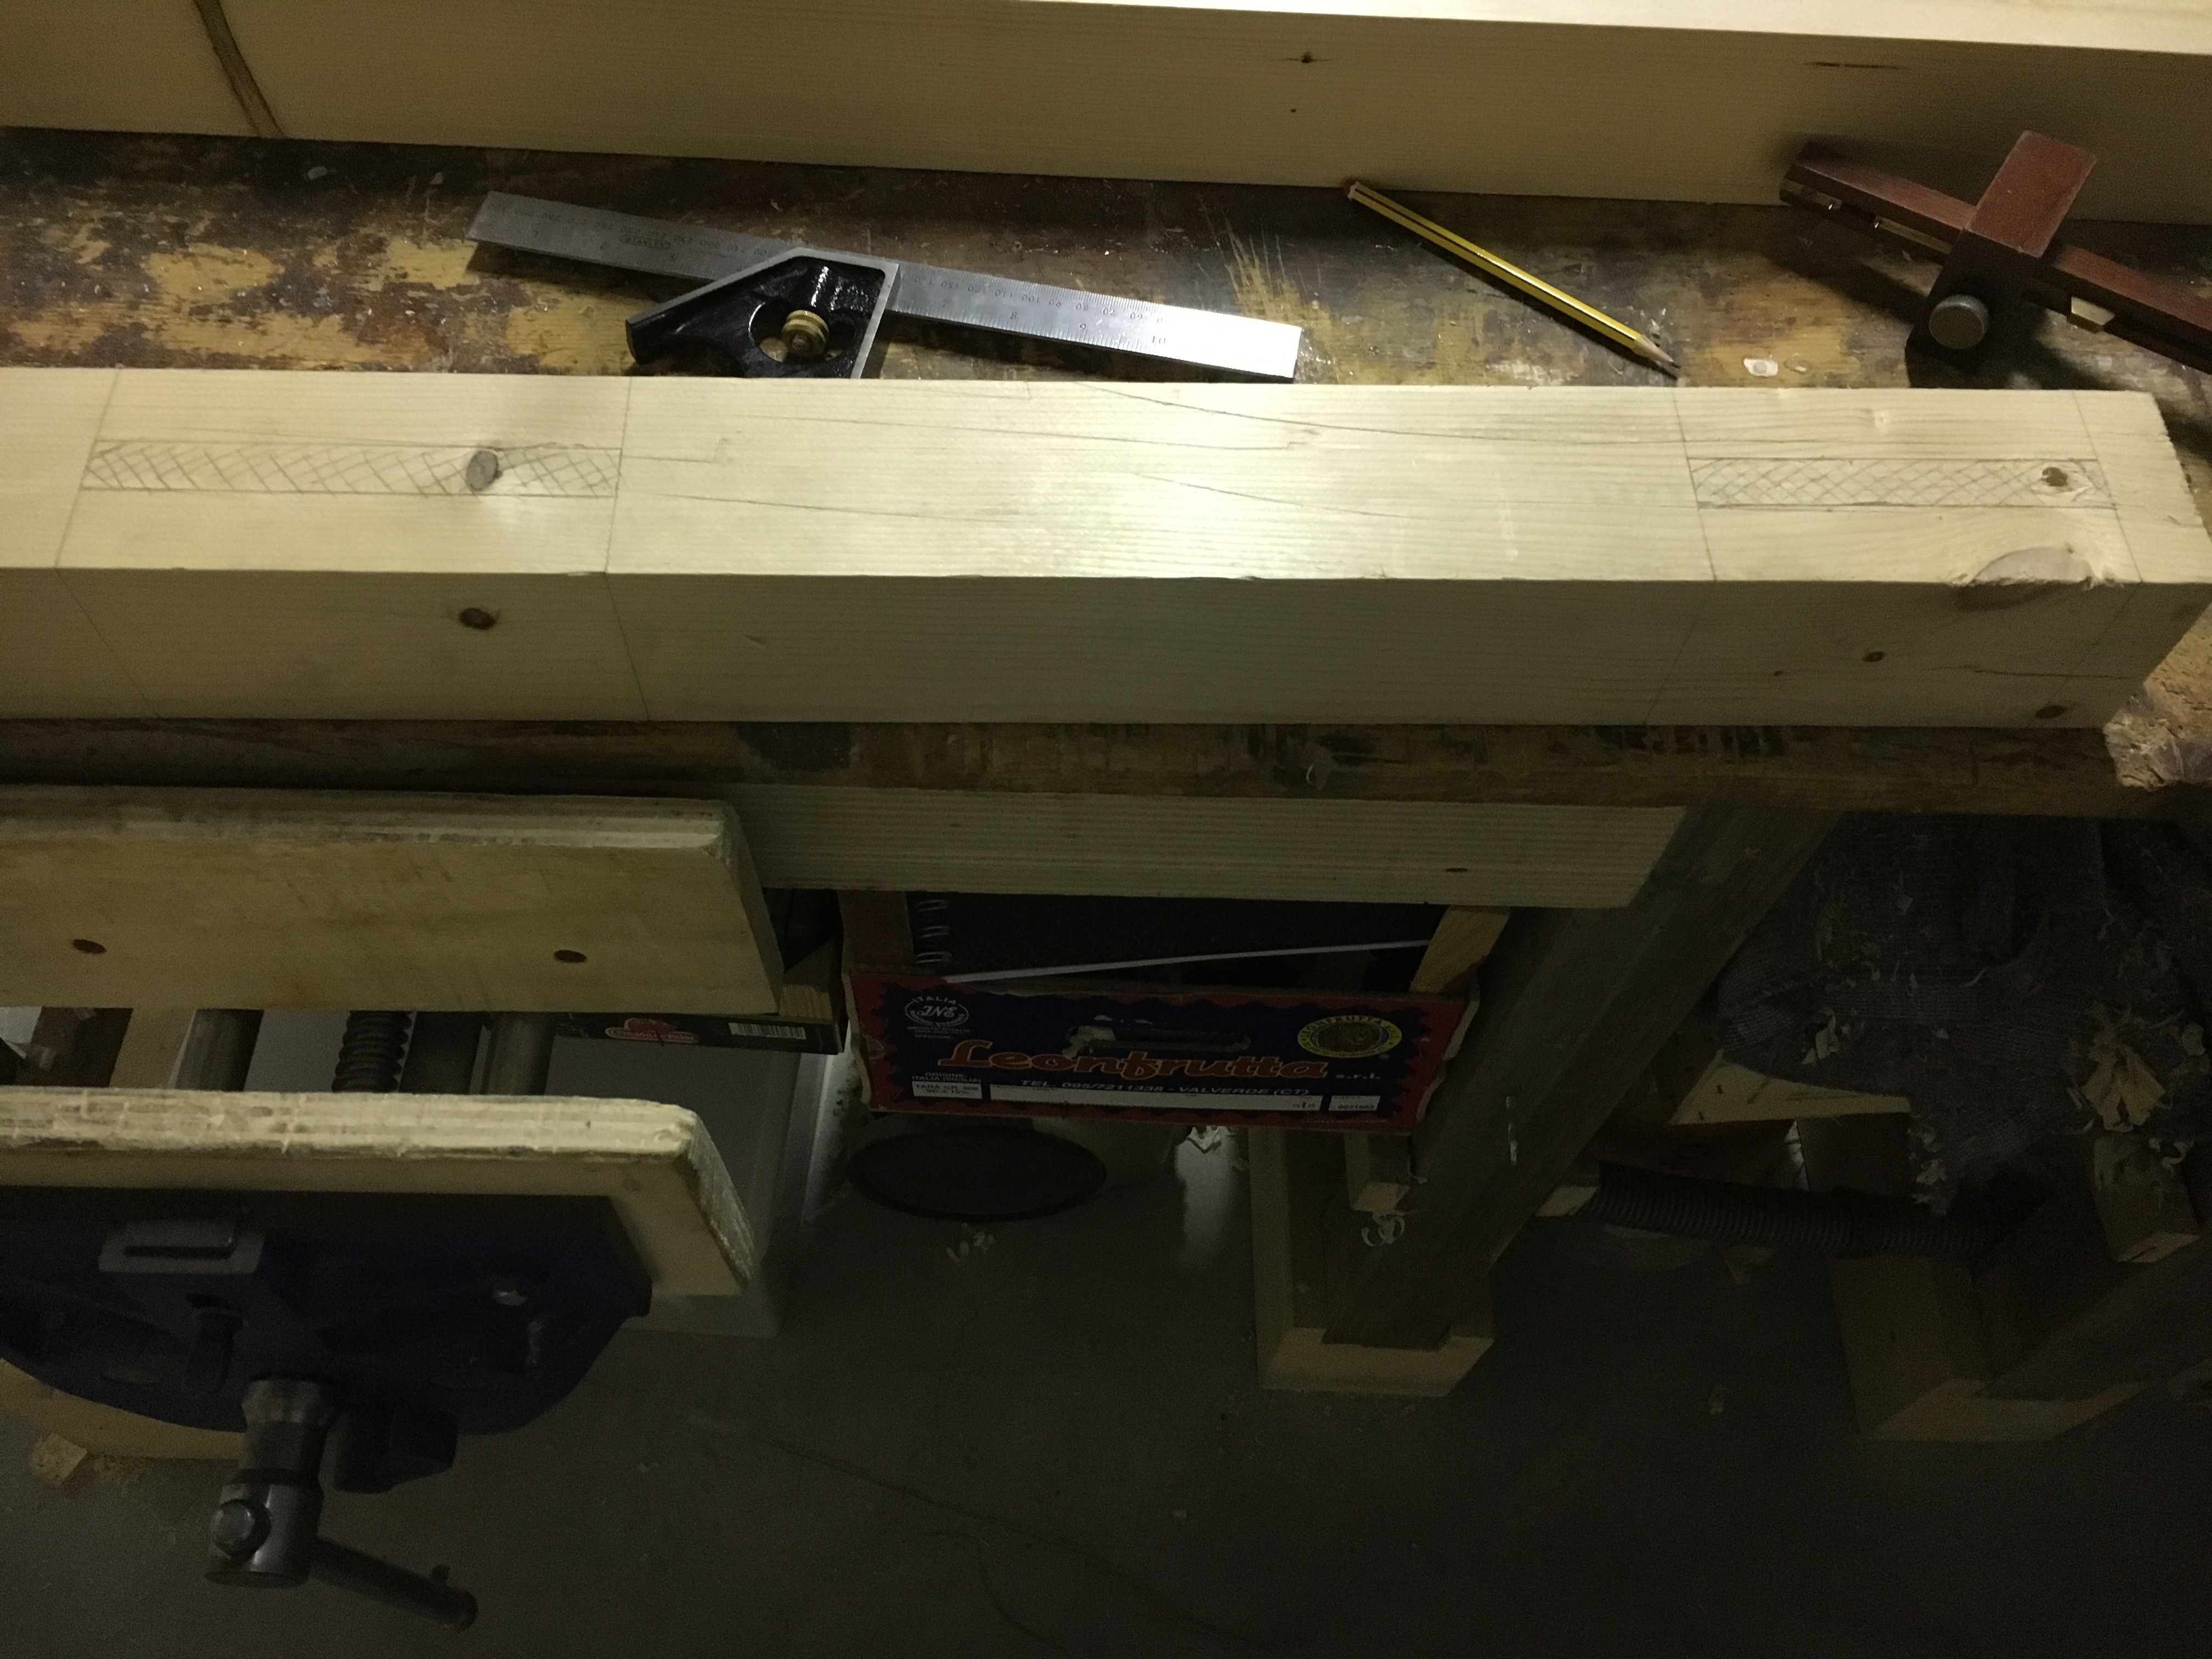
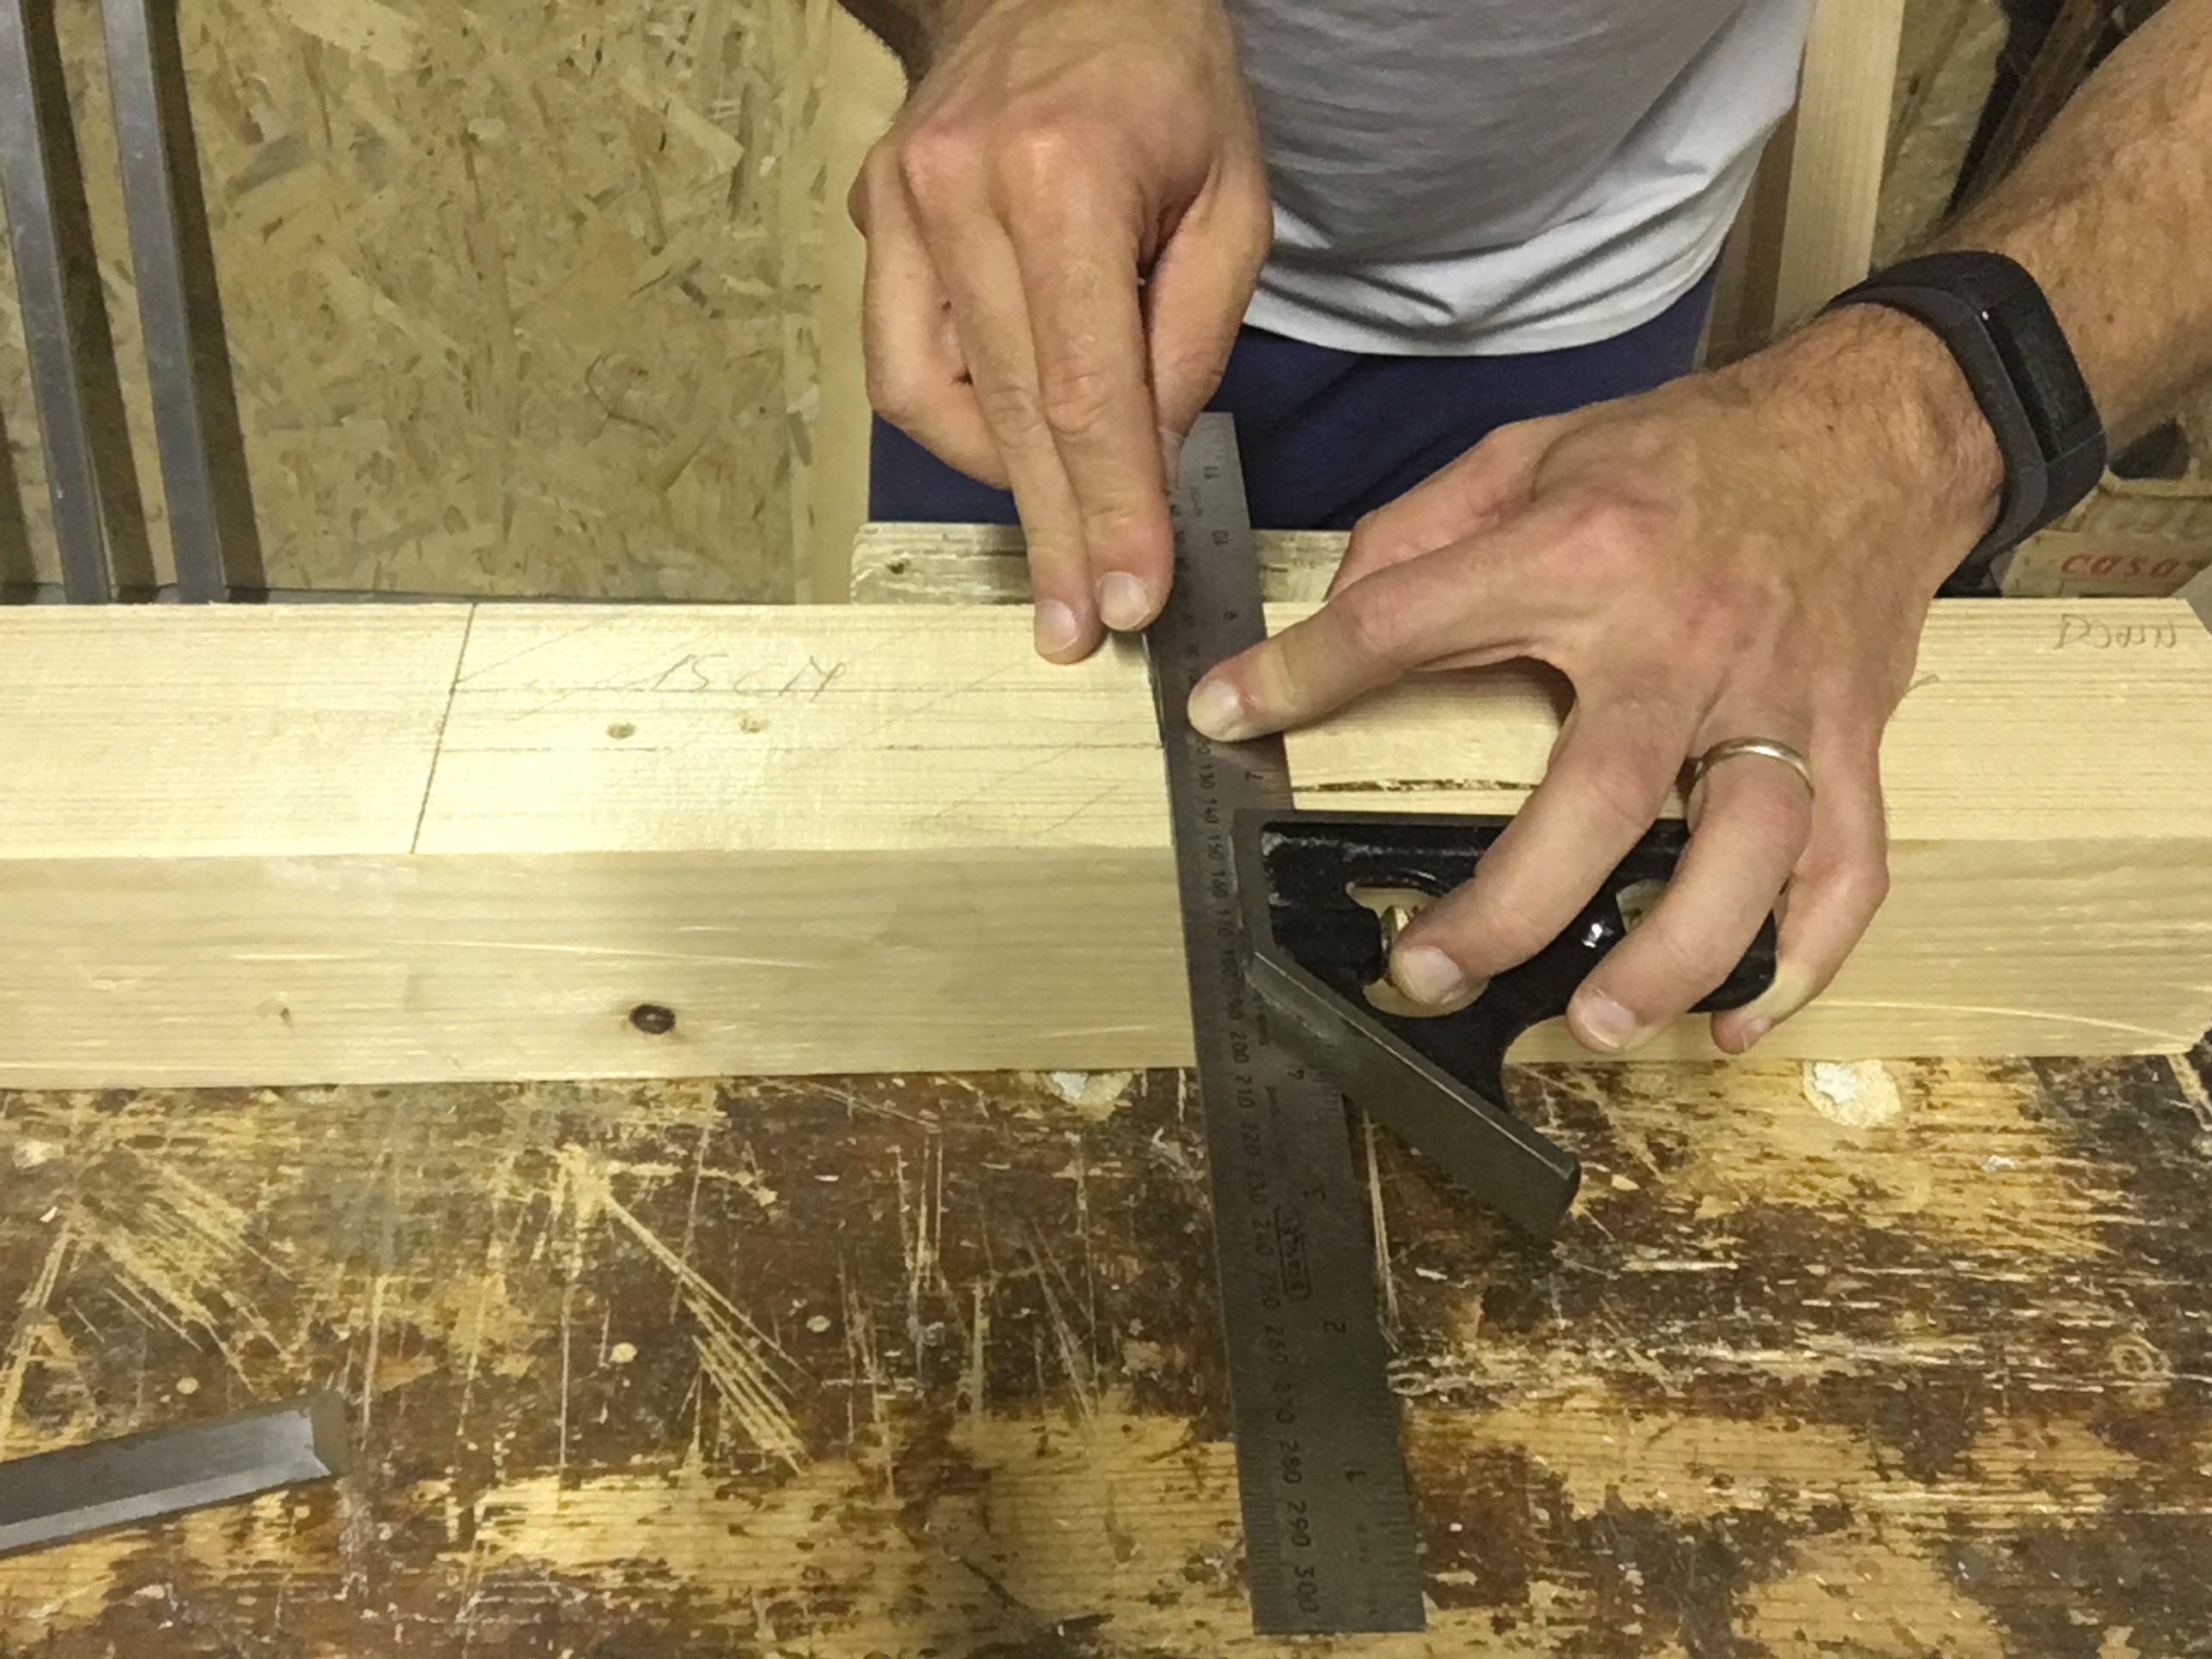
Solitamente si inizia effettuando prima la mortasa e poi il tenone ma non esiste una regola in tal senso e volendo possiamo anche invertire l’ordine in quanto il risultato finale non cambierà. Volendo effettuare nel mio caso prima la mortasa e poi il tenone, una volta individuata la sezione di legno dove voglio praticare l’incastro, traccio a matita sul primo pezzo da unire due righe parallele che corrisponderanno alla larghezza del secondo pezzo da accoppiare. Riportiamo queste linee su tutte e quattro le facce mediante la squadra. Questo ci darà il riscontro visivo di dove fare la nostra mortasa.
Usually we start by first making the mortise and then the tenon but there is no rule in this sense and if we want we can also reverse the order because the final result will not change. Wanting to make in my case first the mortise and then the tenon, once identified the section of wood where I want to make the joint, pencil trace on the first piece to join two parallel lines that will correspond to the width of the second piece to be joined. We report these lines on all four faces with the square. So we have visually where the mortise will be made.
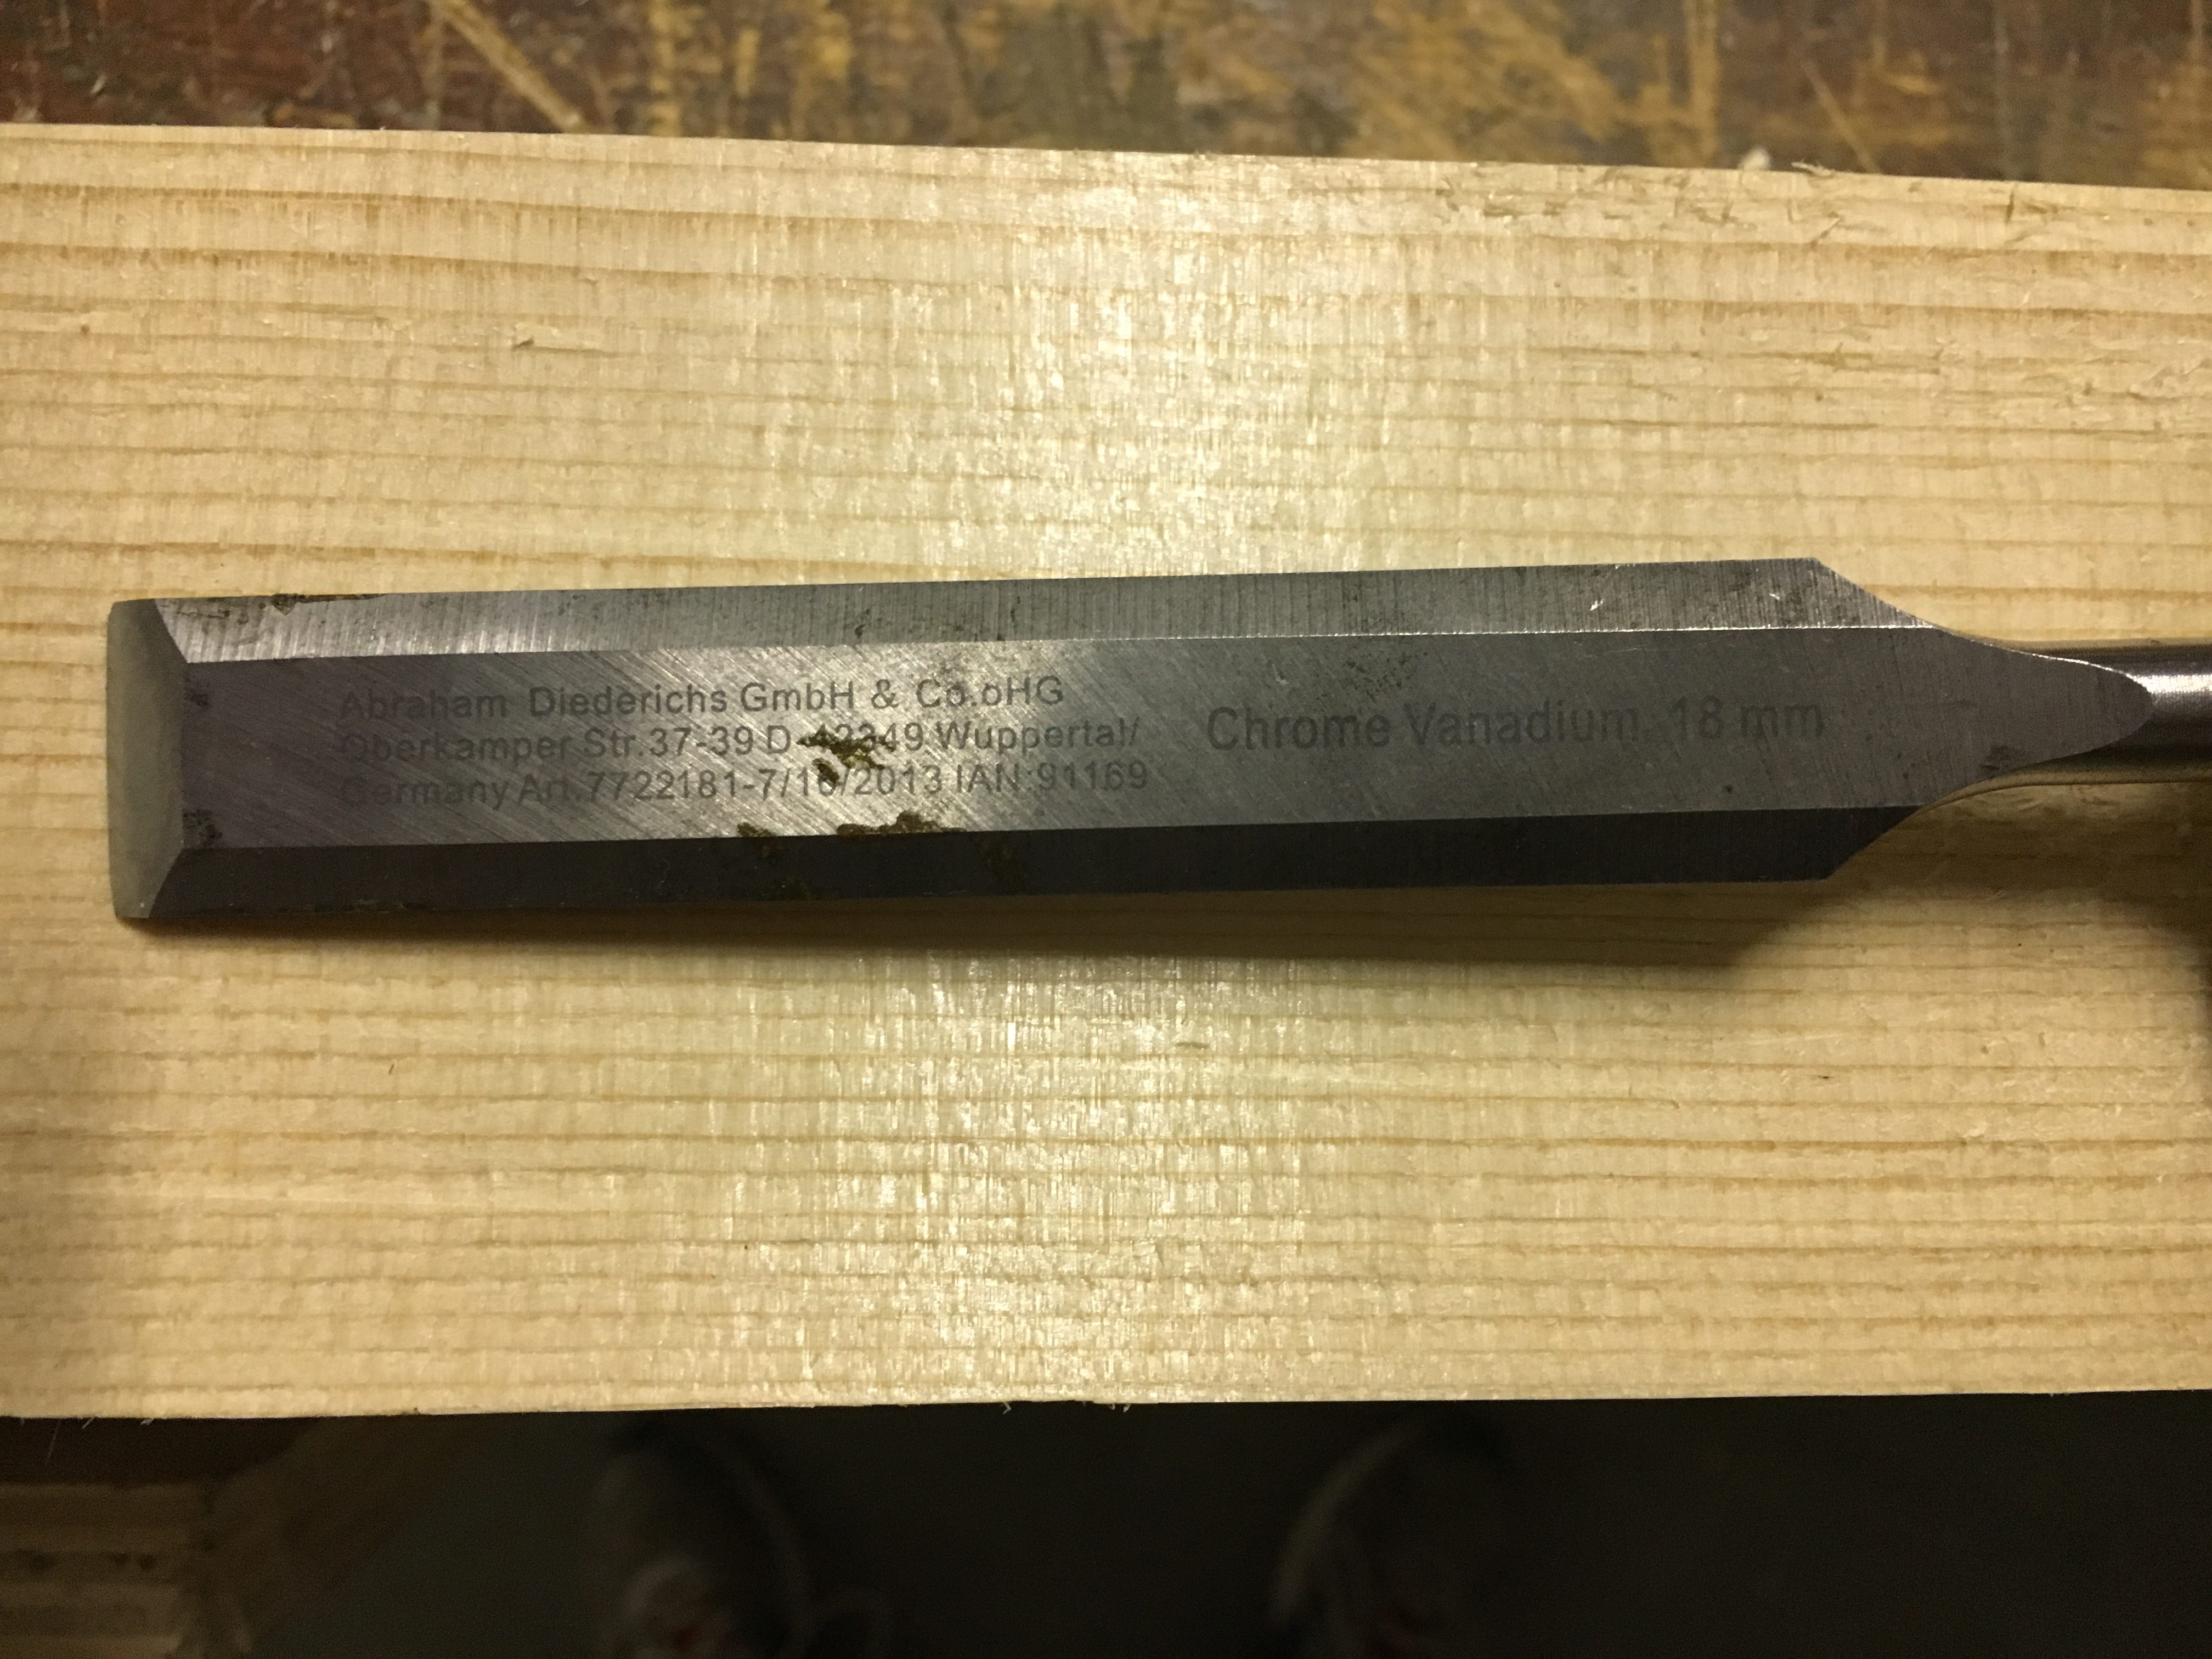
Decidiamo quindi quanto dovrà essere larga la nostra mortasa. Solitamente la si sceglie della stessa larghezza della lama dello scalpello e questo per ovvie ragioni di praticità. Lo scalpello che sceglieremo detterà quindi la larghezza della mortasa stessa. Di solito viene realizzata di circa 1/3 dello spessore del legno stesso.
So we decide how big our mortise should be. Usually you choose the same width as the blade of the chisel and this for obvious reasons of practicality. The chisel we choose will then dictate the width of the mortise itself. Usually it is made of about 1/3 of the thickness of the wood itself.
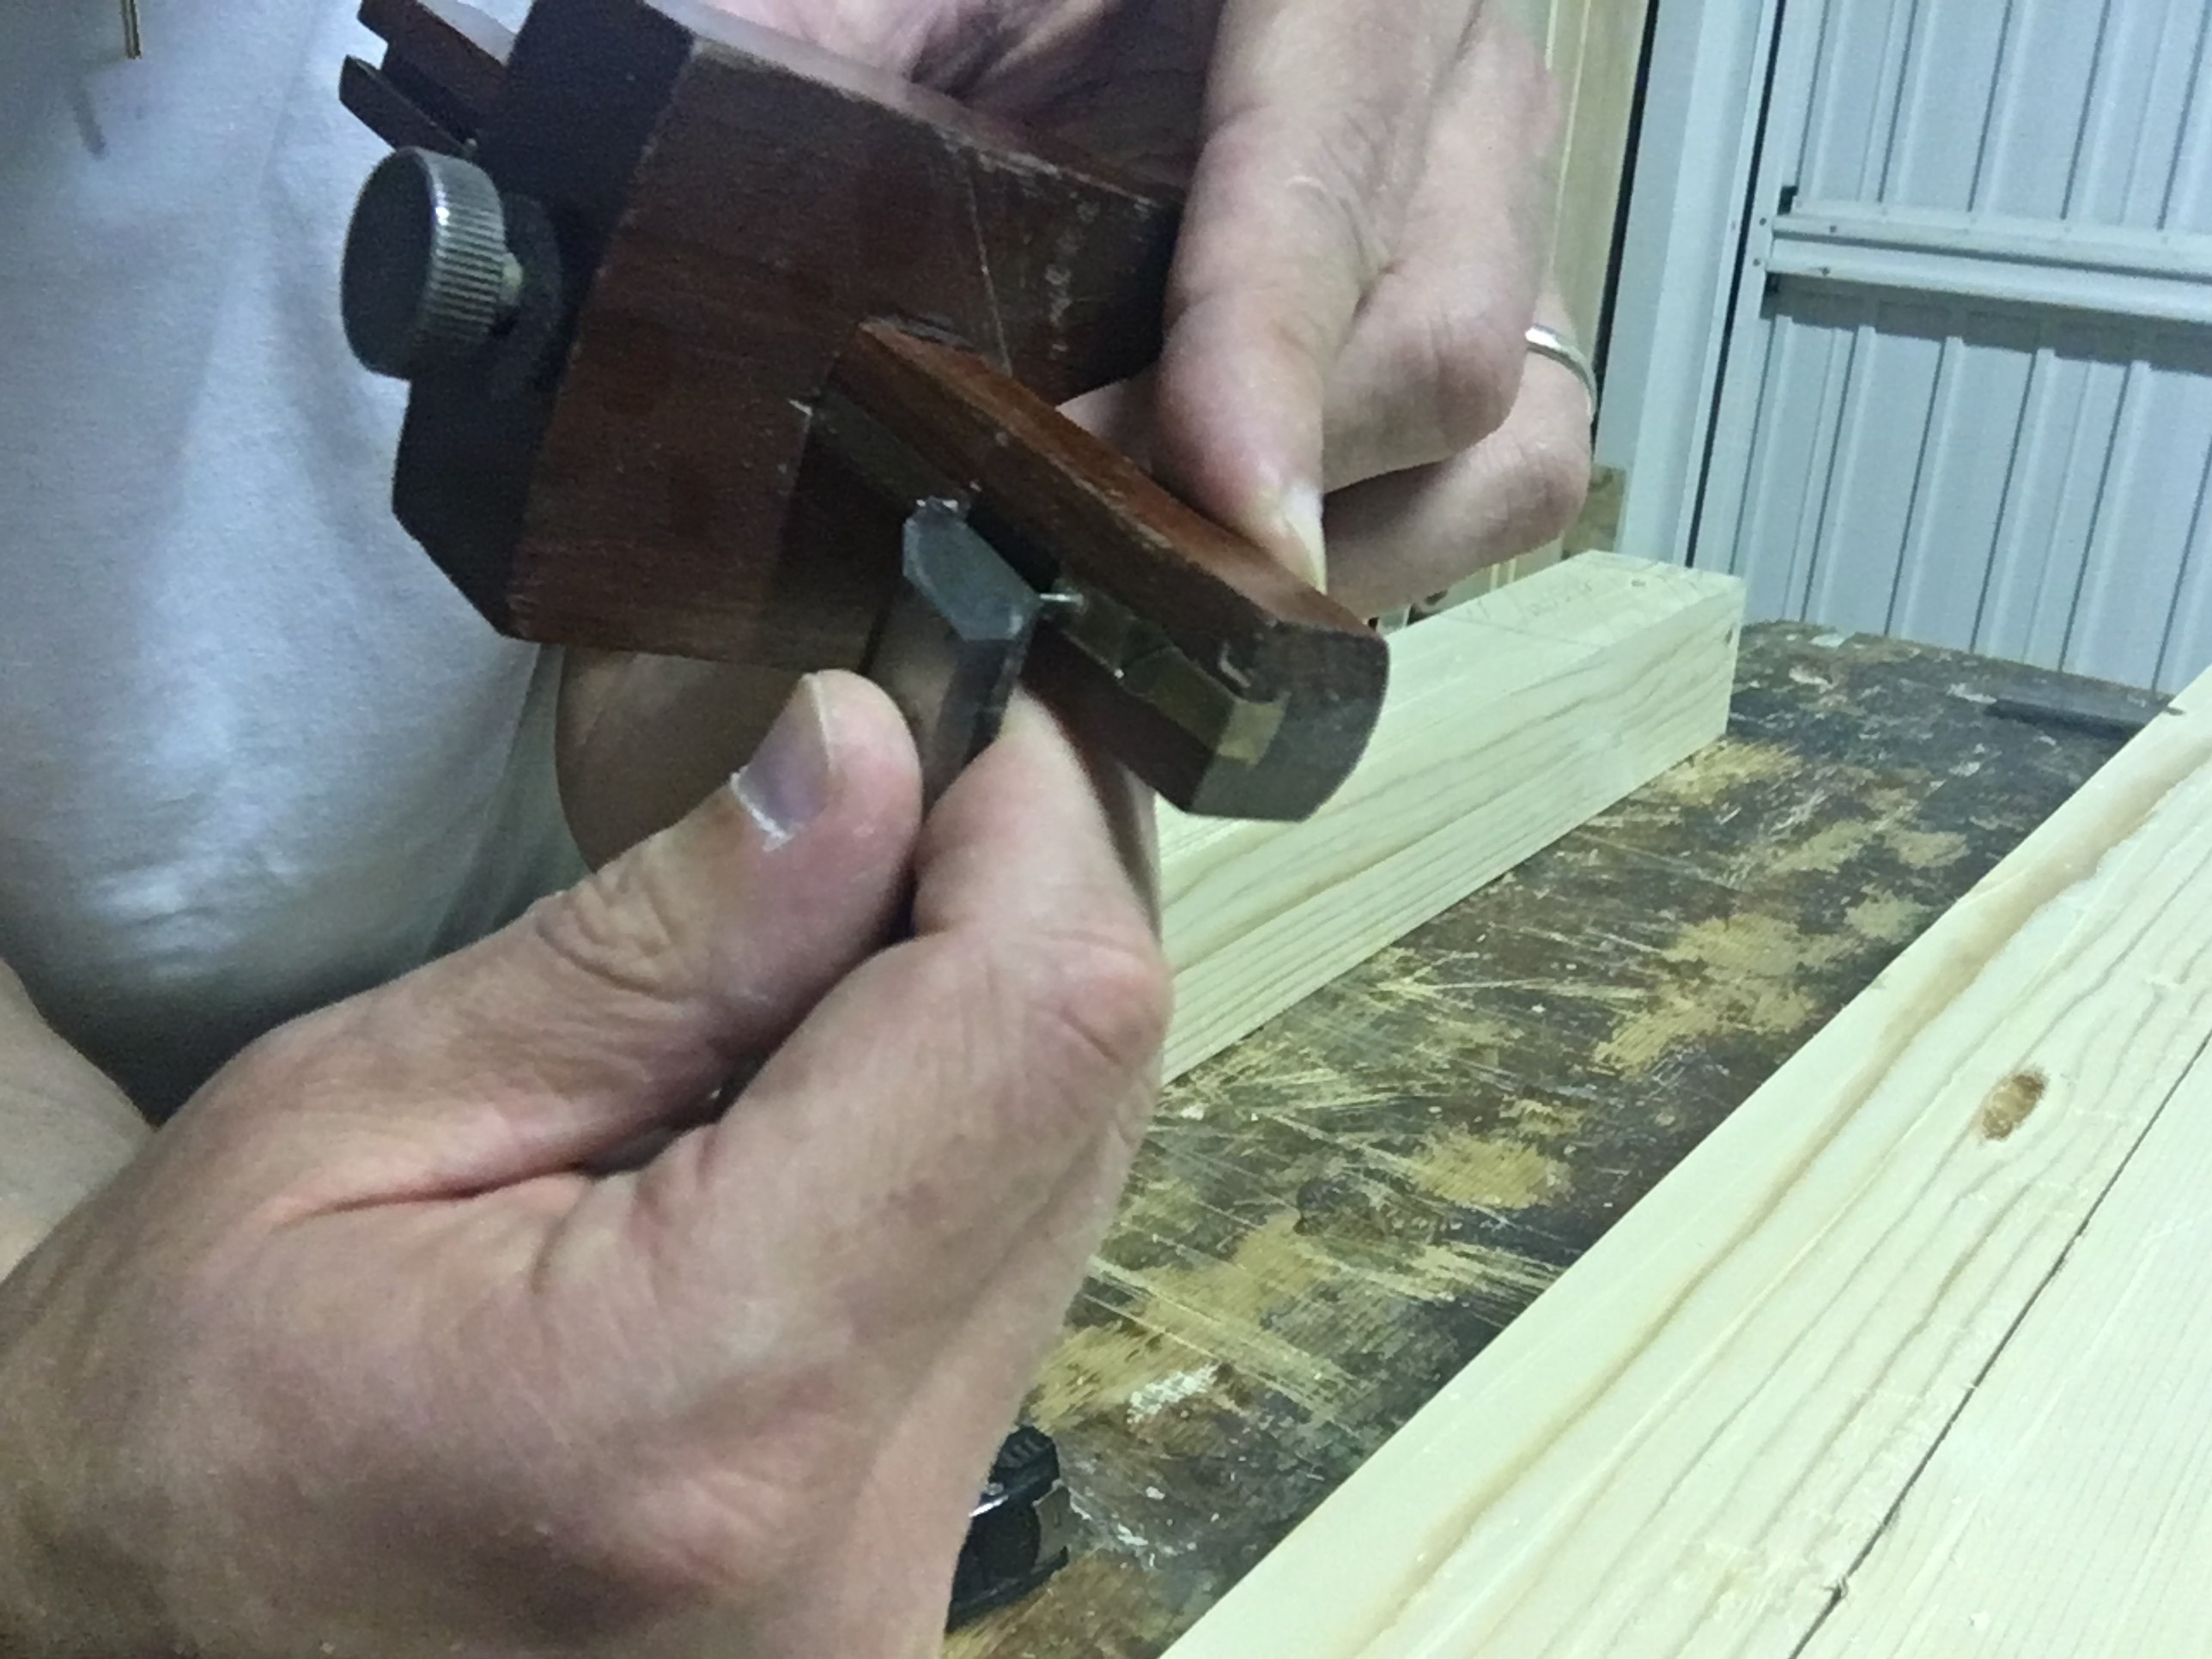
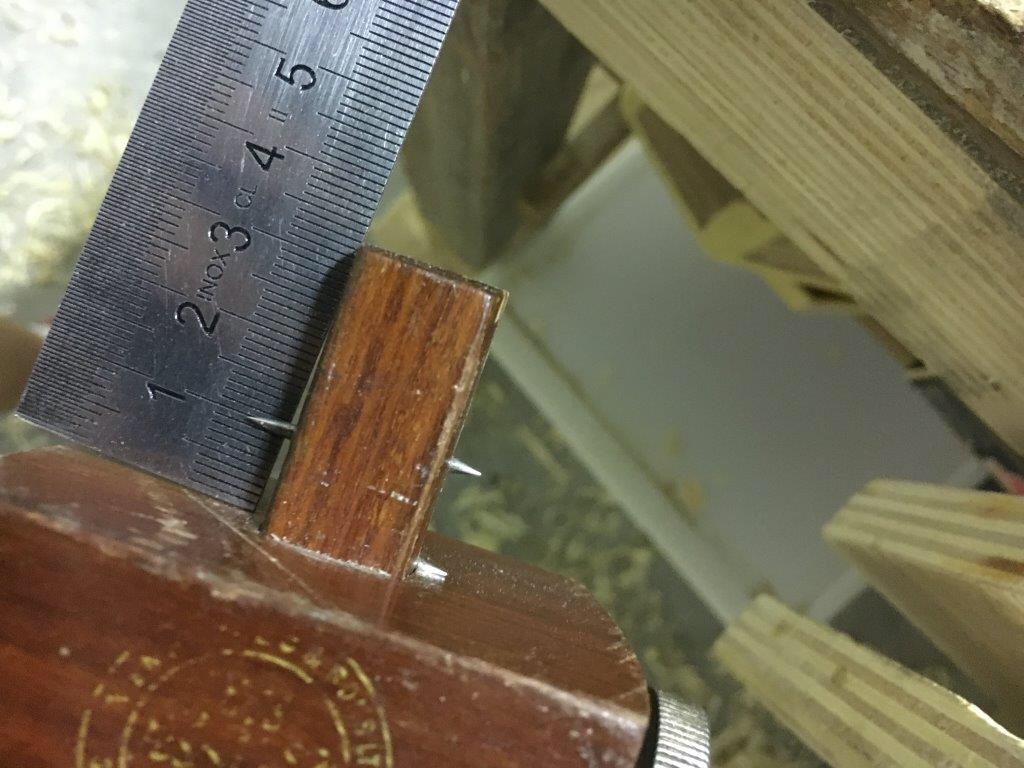
Poniamo la punta dello scalpello tra le cime delle punte del truschino (non alla loro base, altrimenti la mortasa verrà troppo larga) e, con l’ausilio di un righello, stabiliamo la distanza che la mortasa dovrà avere dalla faccia del pezzo da unire. In questo caso la mortasa verrà effettuata centralmente rispetto allo spessore del pezzo.
Place the tip of the chisel between the tops of the tips of the marking gauge (not at their base, otherwise the mortise will be too wide) and, with the help of a ruler, establish the distance that the mortise must have from the face of the piece to be joined. In this case the mortise will be made in the center respect to the thickness of the piece.
Blocchiamo il settaggio del truschino e riportiamo la misura tracciando i solchi direttamente tra le due linee precedentemente tracciate. Cerchiamo di non premere troppo forte le punte del truschino mentre è importante che sia mantenuto ben adeso lateralmente al pezzo, per evitare che le fibre longitudinali del legno lo facciano deviare dalla traccia.
We lock the setting of the marking gauge and transfer the measurement by tracing directly between the two previously drawn lines. We try not to press too hard the tips of the marking gauge while it’s important we keep it well anchored laterally to the piece, to avoid that the fibers of the wood make it deviate from the trace.
Riportiamo le tracce del truschino su entrambe le facce del pezzo di legno. Queste tracce appena ottenute saranno le pareti della nostra mortasa. Nel mio caso ho praticato due sagome per l’esecuzione di due mortase.
We transfer the traces of the marking gauge on both sides of the piece of wood. These traces will be the walls of our mortise. In my case I made two mortises.
Con il coltellino da tracciatura e la squadra definiamo su entrambe le facce del pezzo i limiti della nostra mortasa. Questi limiti, il c.d. knifewall, saranno le spalle della nostra mortasa.
With the knife and the combination square we define the limits of our mortise on both sides of the piece. These limits, (knifewall) they will be the shoulders of our mortise.
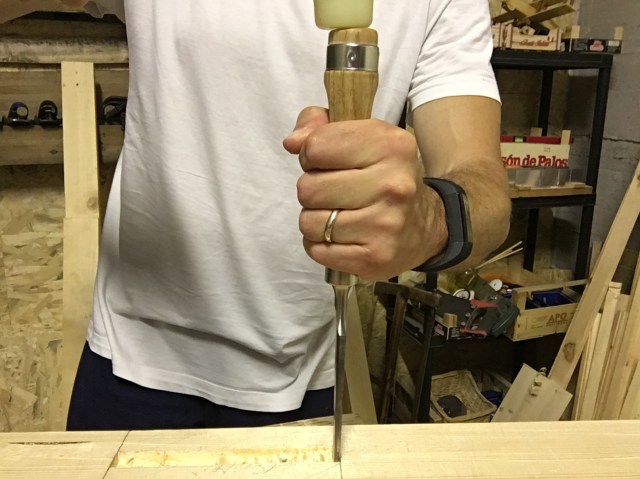


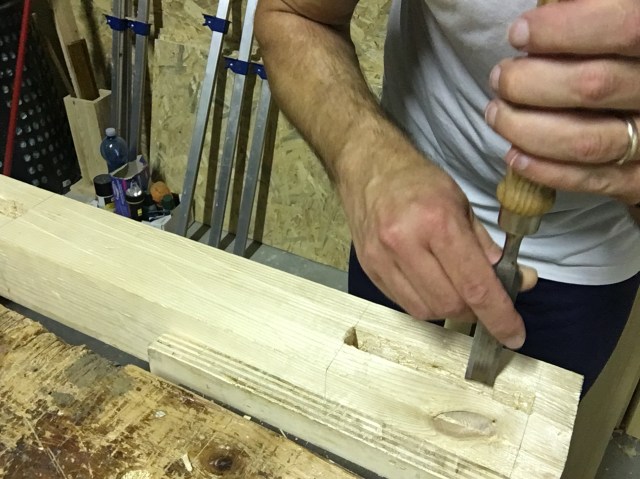
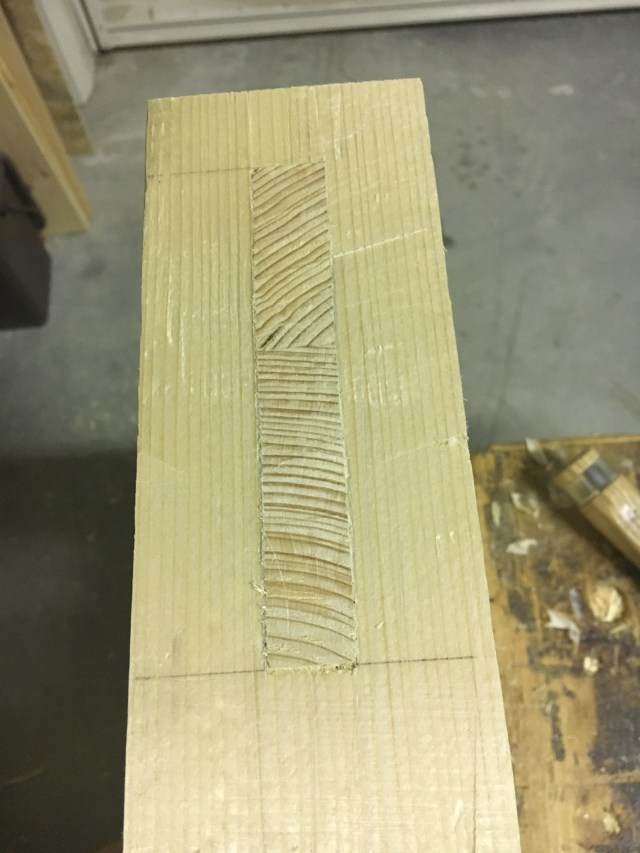
Nelle foto sopra è mostrata la sequenza di lavorazione della mortasa.Con lo scalpello cominciamo a scavare partendo da circa 1 mm dal limite tracciato e con il bisello rivolto verso la direzione nella quale stiamo lavorando. Lo scalpello va mantenuto in posizione il più possibile perpendicolare rispetto alle pareti della mortasa al fine di evitare che le pareti della stessa risultino inclinate.(figura 1)
In the photos above the mortise processing sequence is shown.With the chisel we begin to chop starting from about 1 mm from the traced limit and with the bevel facing the direction in which we are working. The chisel must be kept as perpendicular as possible with the mortise walls in order to prevent them from being tilted (figure 1).
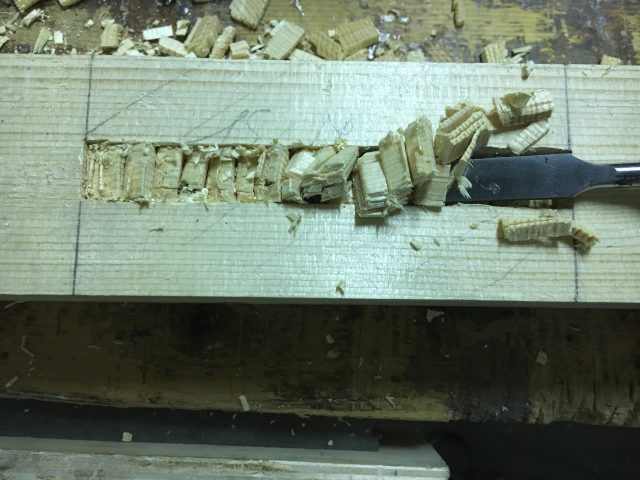
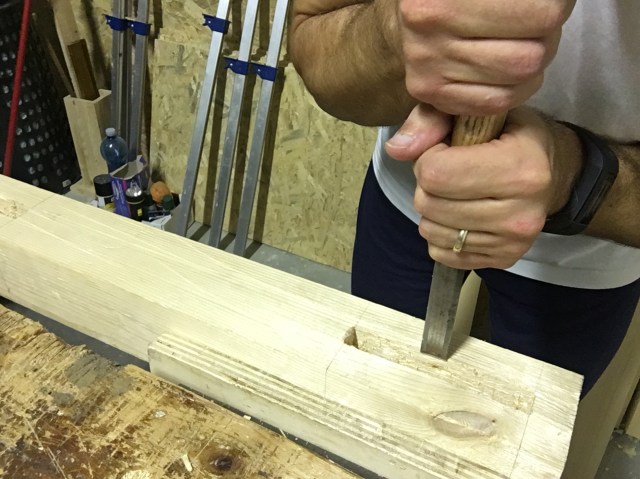
Effettuiamo le incisioni a circa 2 mm di distanza (foto sopra) rimuovendo il legno con un movimento a ritroso e, dopo le prime due o tre incisioni, ritorniamo sulla prima incisione girando lo scalpello con il bisello rivolto nella direzione opposta rimuovendo così il legno più vicino al knifewall (figura 2). Così facendo lo scalpello troverà meno resistenza nel legno evitando di muovere il knifewall. E’ particolarmente importante perché se il knifewall dovesse spostarsi a causa di un colpo troppo forte dato con lo scalpello questo cambierebbe la lunghezza della nostra mortasa. Riprendiamo quindi a lavorare dal punto dove avevamo lasciato riportando nuovamente lo scalpello nella sua posizione originaria e con il bisello nella direzione dove stavamo lavorando.
We make the chops about 2 mm away (pictured above) removing the wood with a backward movement and, after the first two or three passes, we come back to the first pass by turning the chisel with the bevel facing the opposite direction, thus removing the nearest wood to the knifewall (figure 2). In this way the chisel will find less resistance in the wood avoiding moving the knifewall. It is particularly important because if the knifewall were to move due to a too strong blow with the chisel this would change the length of our mortise. We then resume working from the point where we left, bringing the chisel back to its original position and the bevel in the direction where we were working.
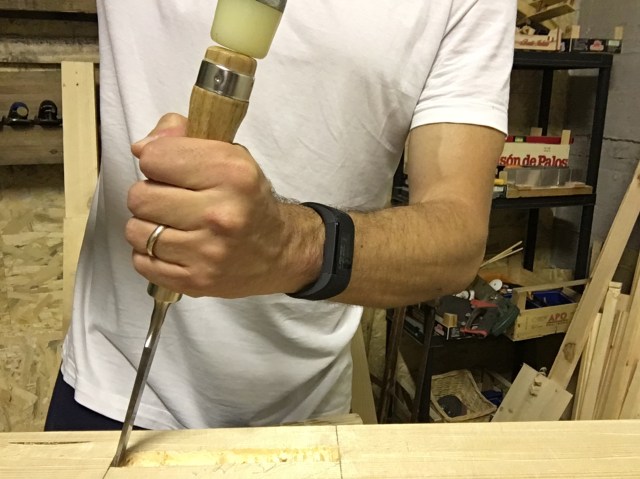
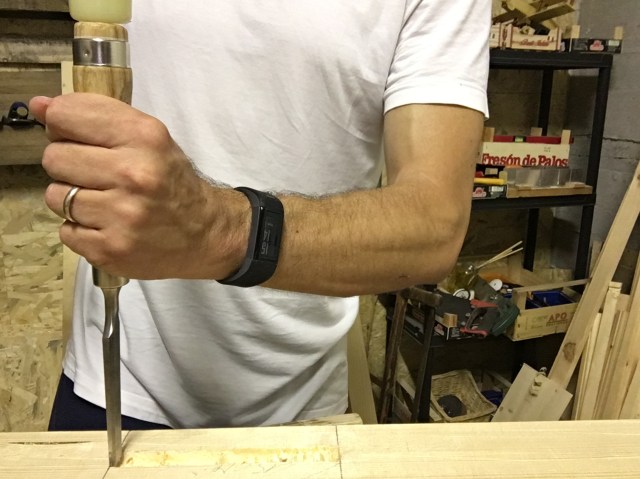
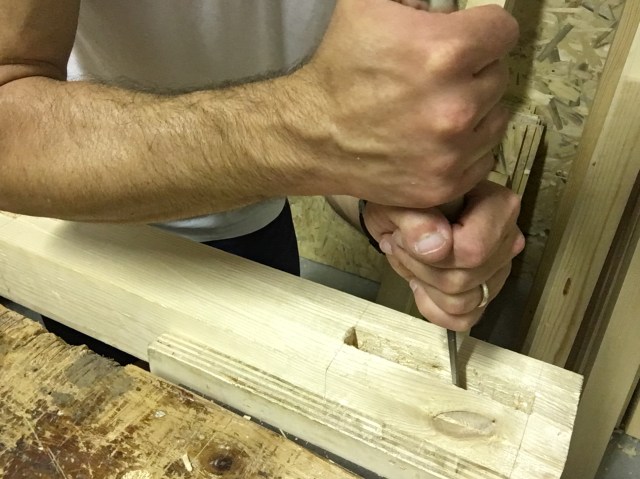
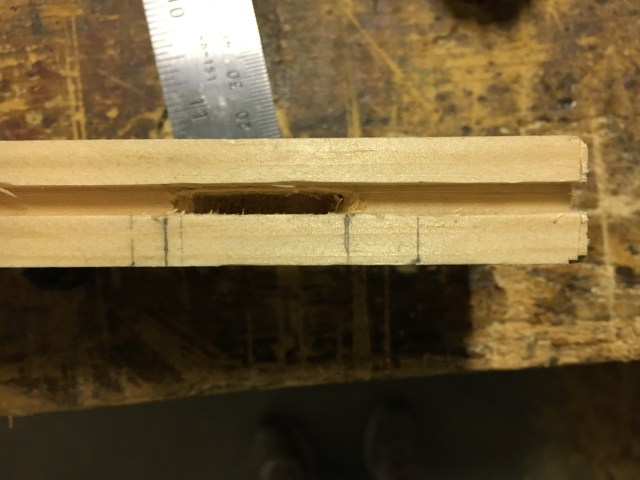
Man mano che proseguiamo riusciremo ad approfondire lo scavo della nostra mortasa arrivando quasi a metà della sua profondità finale. E’ buona regola controllare frequentemente a quale profondità siamo arrivati. In prossimità del secondo knifewall, giriamo lo scalpello e rimuoviamo la parte finale mantenendo questa volta il bisello in posizione perpendicolare (figura 3). Effettuiamo quindi la stessa procedura procedendo questa volta in senso inverso. Vicino ai knifewall lo scalpello va tenuto perfettamente perpendicolare o leggermente inclinato verso l’esterno (figura 4). Quando siamo grosso modo a metà scavo della mortasa è opportuno ruotare il pezzo e procedere dall’altro lato sempre utilizzando la stessa procedura. È importante scavare da entrambi i lati così da evitare lo strappo delle fibre del legno in uscita dalla bocca della mortasa (figura 5 e 6).
As we continue we will be able to deepen the depth of our mortise almost halfway to its final depth. It is a good rule to check frequently at what depth we have arrived. Near the second knifewall, we turn the chisel and remove the final part, this time keeping the bevel in a perpendicular position (figure 3). We then carry out the same procedure proceeding this time in the opposite direction. Near the knifewall, the chisel must be kept perfectly perpendicular or slightly inclined outwards (figure 4). When we are roughly halfway through the mortise it is advisable to rotate the piece and proceed from the other side always using the same procedure. It is important to chop on both sides so as to avoid tearing the wood fibers out of the mortise opening (figures 5 and 6).

In questa fase non bisogna pulire le pareti della mortasa appena scavata. Questo per evitare che la mortasa divenga troppo larga. L’operazione potrebbe invece rendersi necessaria successivamente, per aiutare l’accoppiamento dei due pezzi.
At this stage, the walls of the newly excavated mortise must not be cleaned. This is to prevent the mortise from becoming too large. The operation could instead be necessary later, to help the joint of the two pieces.
REALIZZAZIONE DEL TENONE / MAKING THE TENON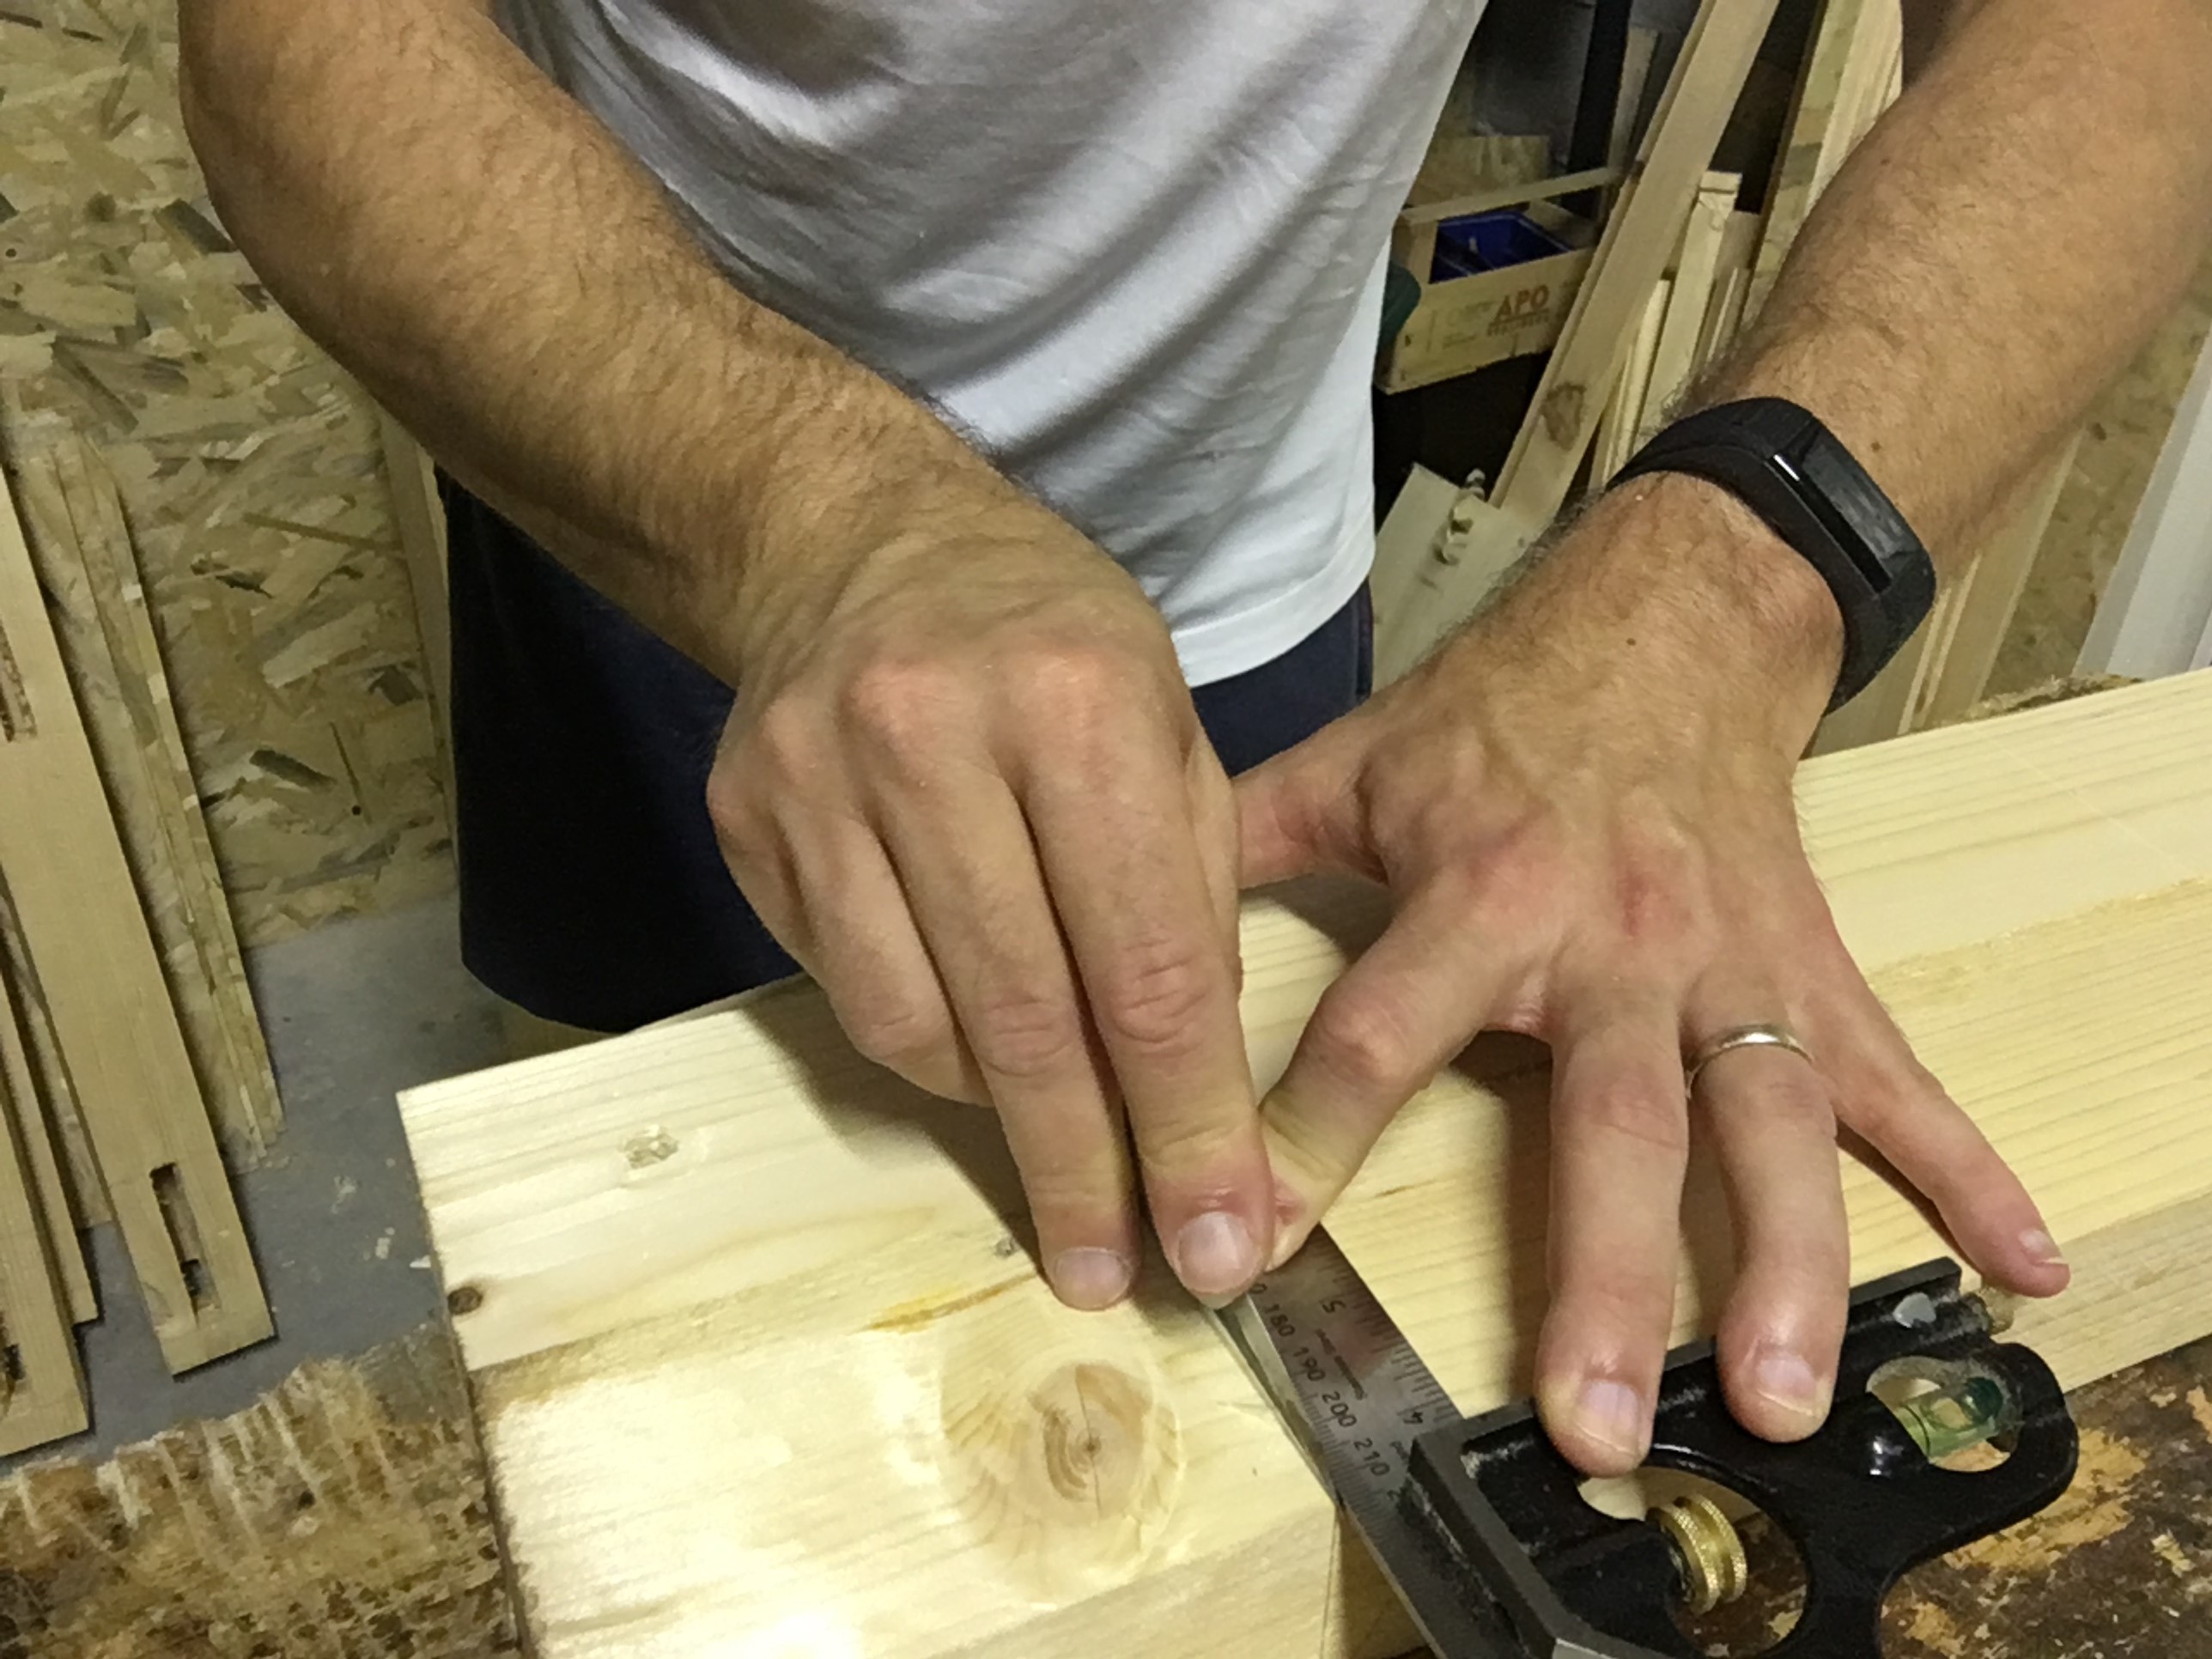
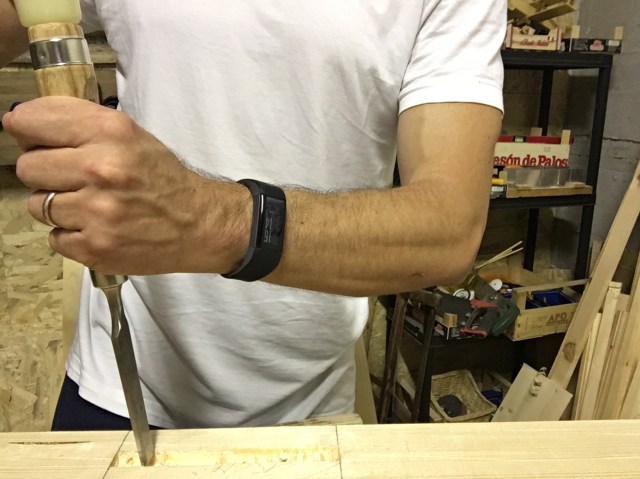
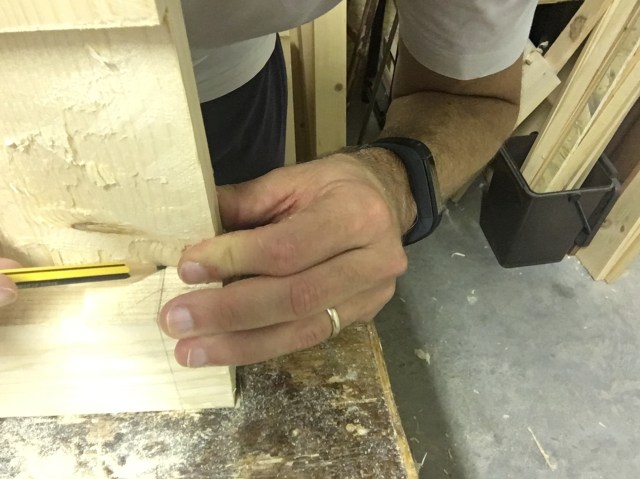
Per fare il tenone come prima cosa si traccia a matita sul secondo pezzo la misura dello spessore del primo pezzo (quello dove abbiamo fatto la mortasa) riportandolo con l’ausilio della squadra su tutte le facce del pezzo. Successivamente tracciamo con il coltellino le spalle del tenone avendo cura di tracciare solo le parti che andranno effettivamente rimosse.
In order to make the tenon, first of all, we trace on the second piece the measure with the pencil on the first piece (the one where we made the mortise), with the help of the combination square and on all the faces of the piece. Then we trace with the knife the shoulders of the tenon taking care to trace only the parts that will actually be removed.
In seguito utilizziamo il truschino mantenendo lo stesso settaggio utilizzato per tracciare la mortasa e riportiamo sulle tre facce del pezzo la misura del tenone che vorremo fare. Mantenendo lo stesso settaggio al truschino avremo la certezza di ottenere il tenone della stessa misura della mortasa.
Then we use the marking gauge maintaining the same setting used to trace the mortise and we transfer on the three faces of the piece the measure of the tenon that we want to do. Keeping the same setting to the marking gauge we will have the certainty of obtaining the tenon of the same measure of mortise.
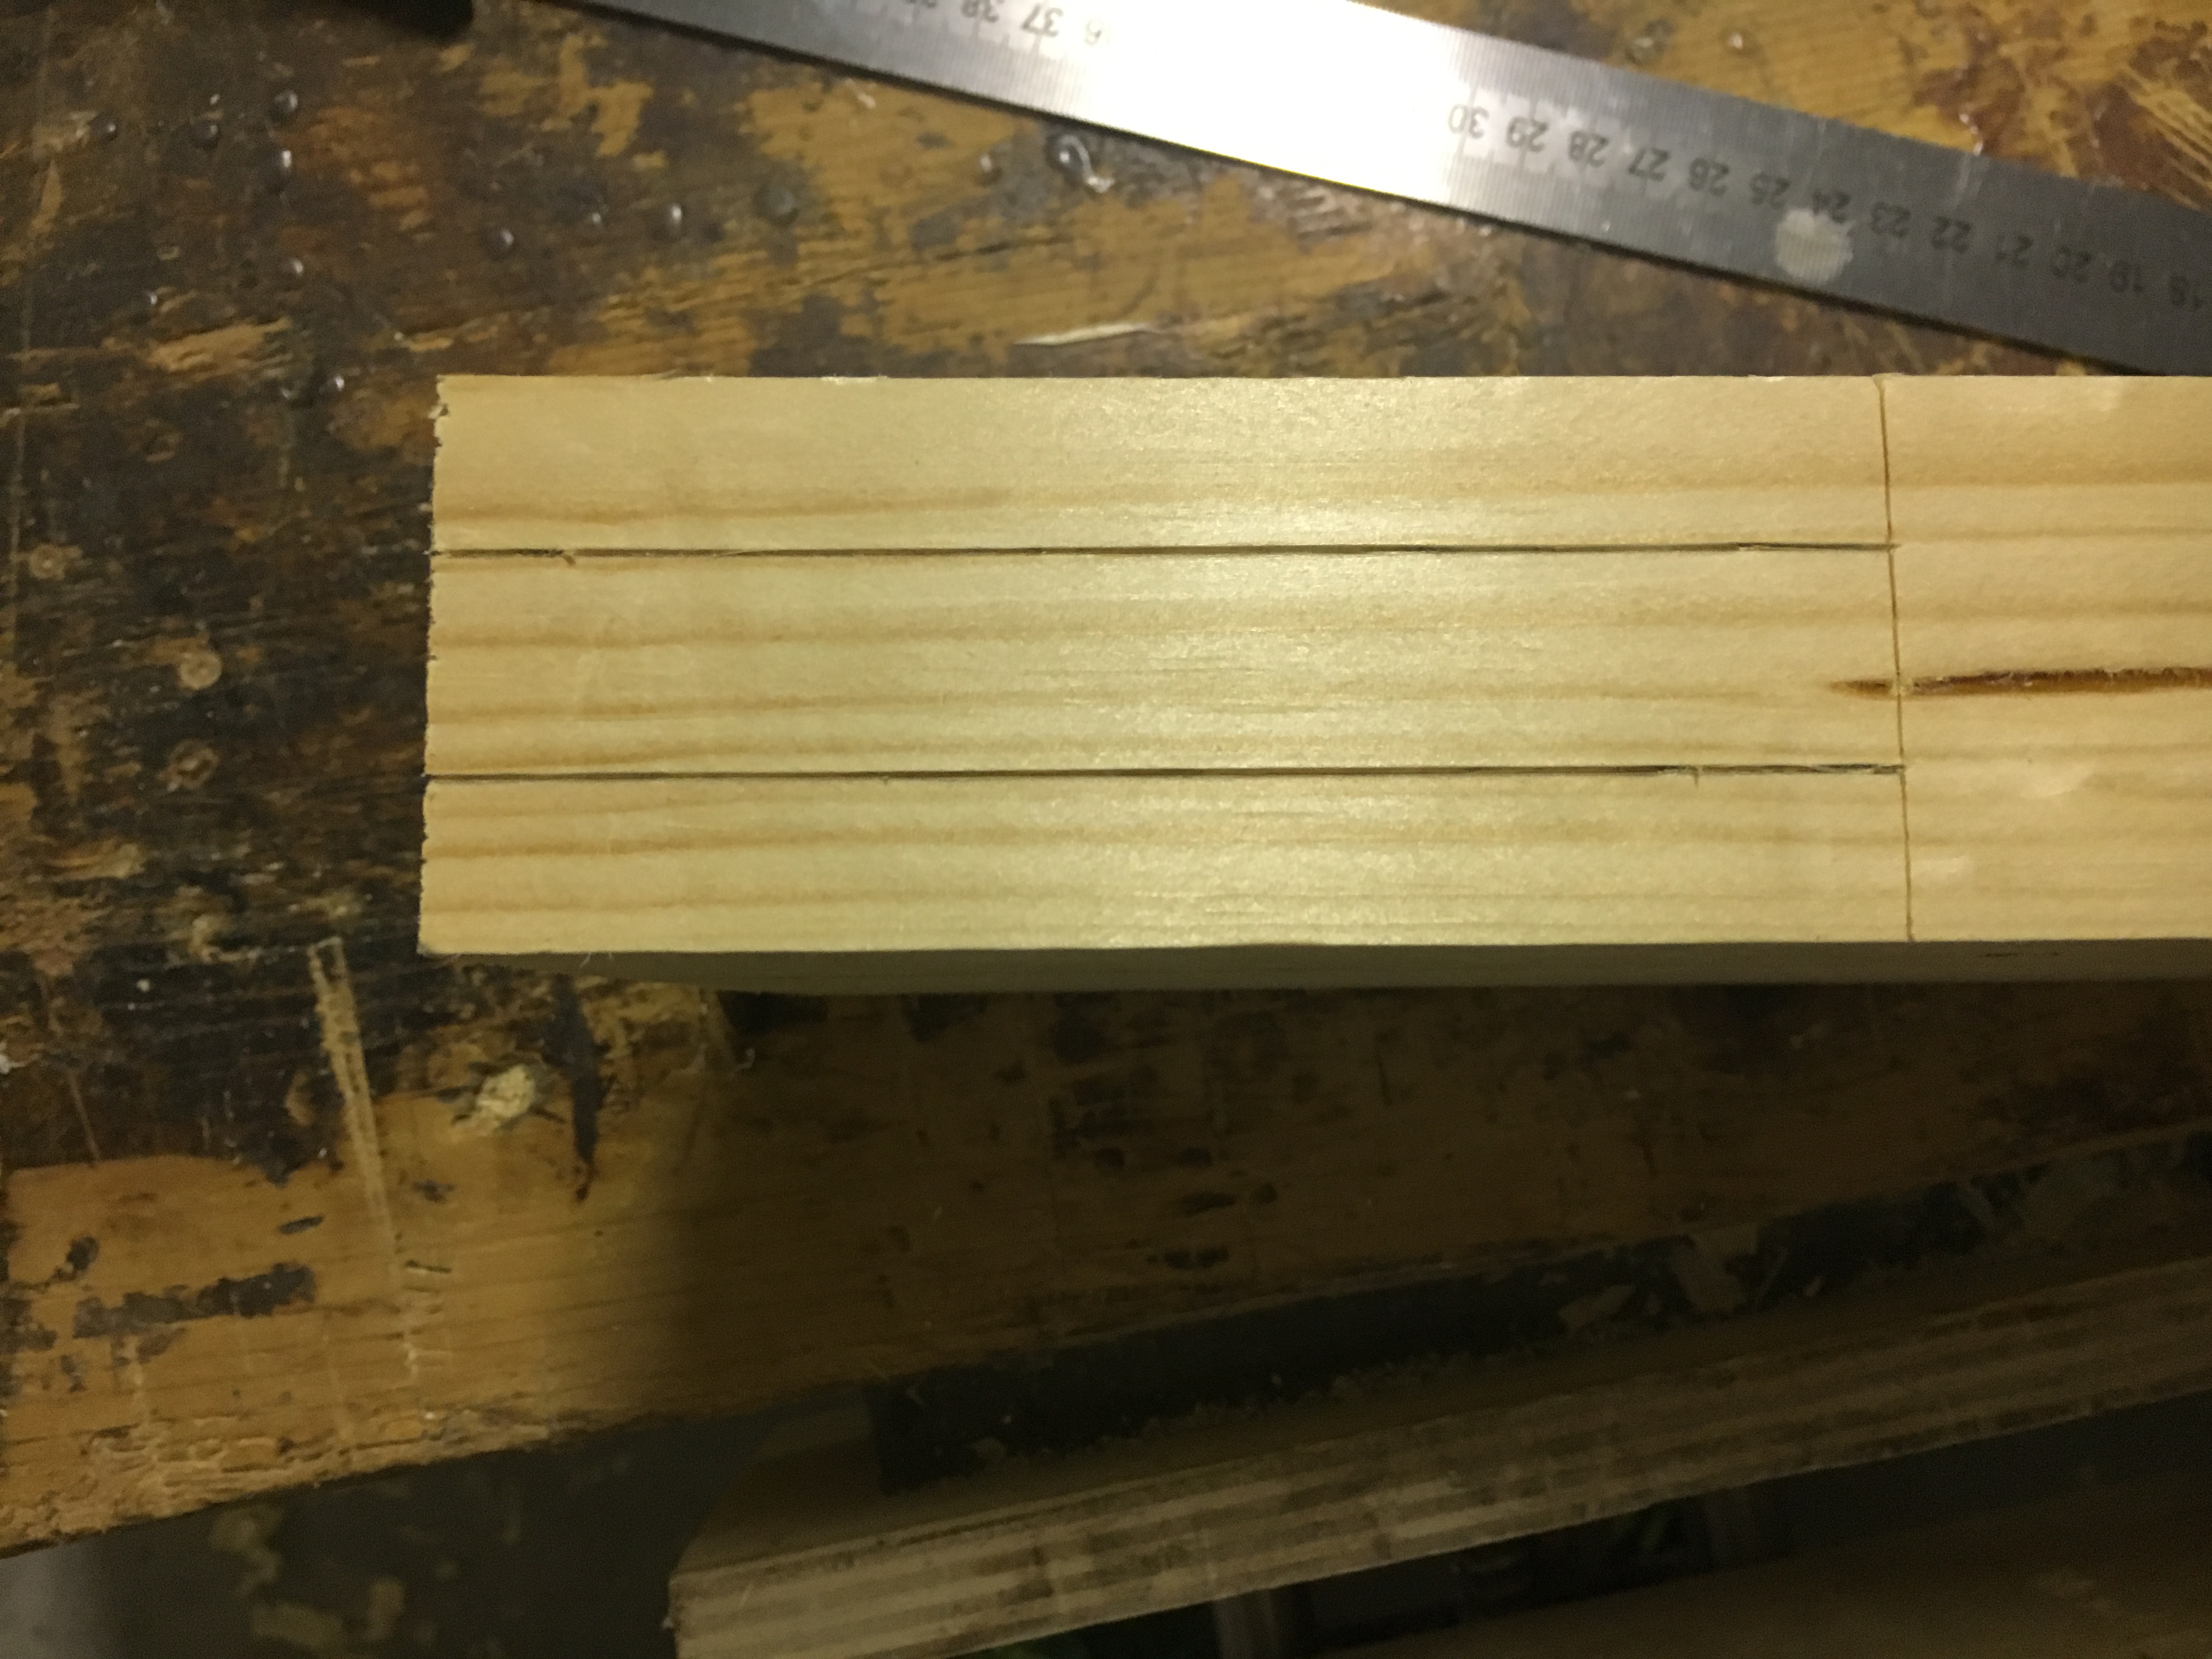
Le tracce appena effettuate delimitano le guance del nostro tenone. Con la matita possiamo definire le tracce appena fatte per una migliore visibilità in fase di taglio.
The traces just made delimit the cheeks of our tenon. With the pencil we can define the traces just made for better visibility during cutting.

Con lo scalpello approfondiamo il solco per permettere alla sega (per tenoni o una sega per le code di rondine) di inserirsi agevolmente e permettere di segare sino alle linee di demarcazione lasciate dal truschino.
With the chisel deepen the groove to allow the saw (a tenon saw or a dovetail saw) to easily fit and allow sawing up to the demarcation lines left by the marking gauge.
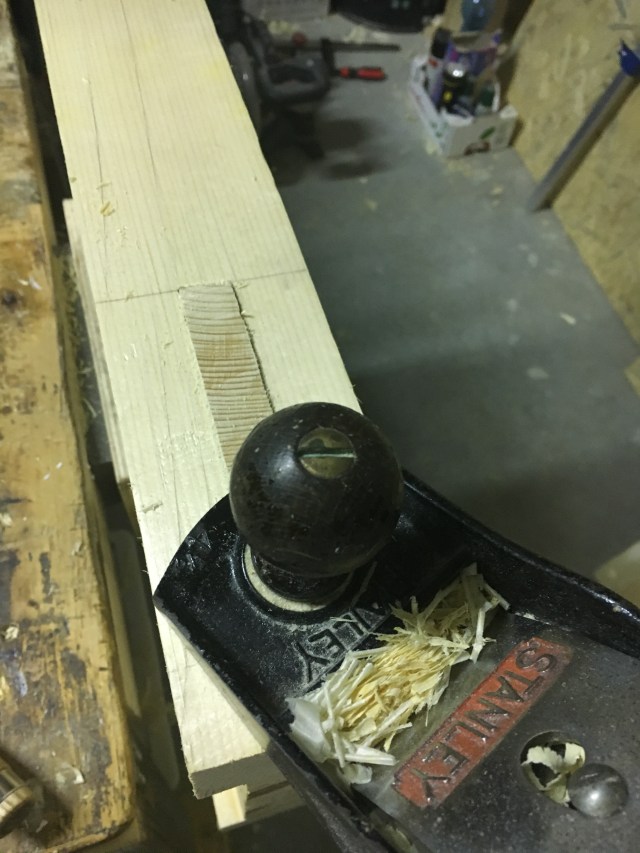
Provvediamo a segare ambedue le spalle del tenone fermandoci alla traccia eseguita con il truschino. Possiamo fermarci anche 1 mm. prima e poi rifinire con lo scalpello o la router plane. L’importante è non segare oltre la traccia o il tenone sarà compromesso.
Then saw both shoulders of the tenon, stopping at the trace made with the marking gauge. We can also stop 1 mm. first and then finish with the chisel or the router plane. The important thing is not to saw beyond the trace or the tenon will be compromised.
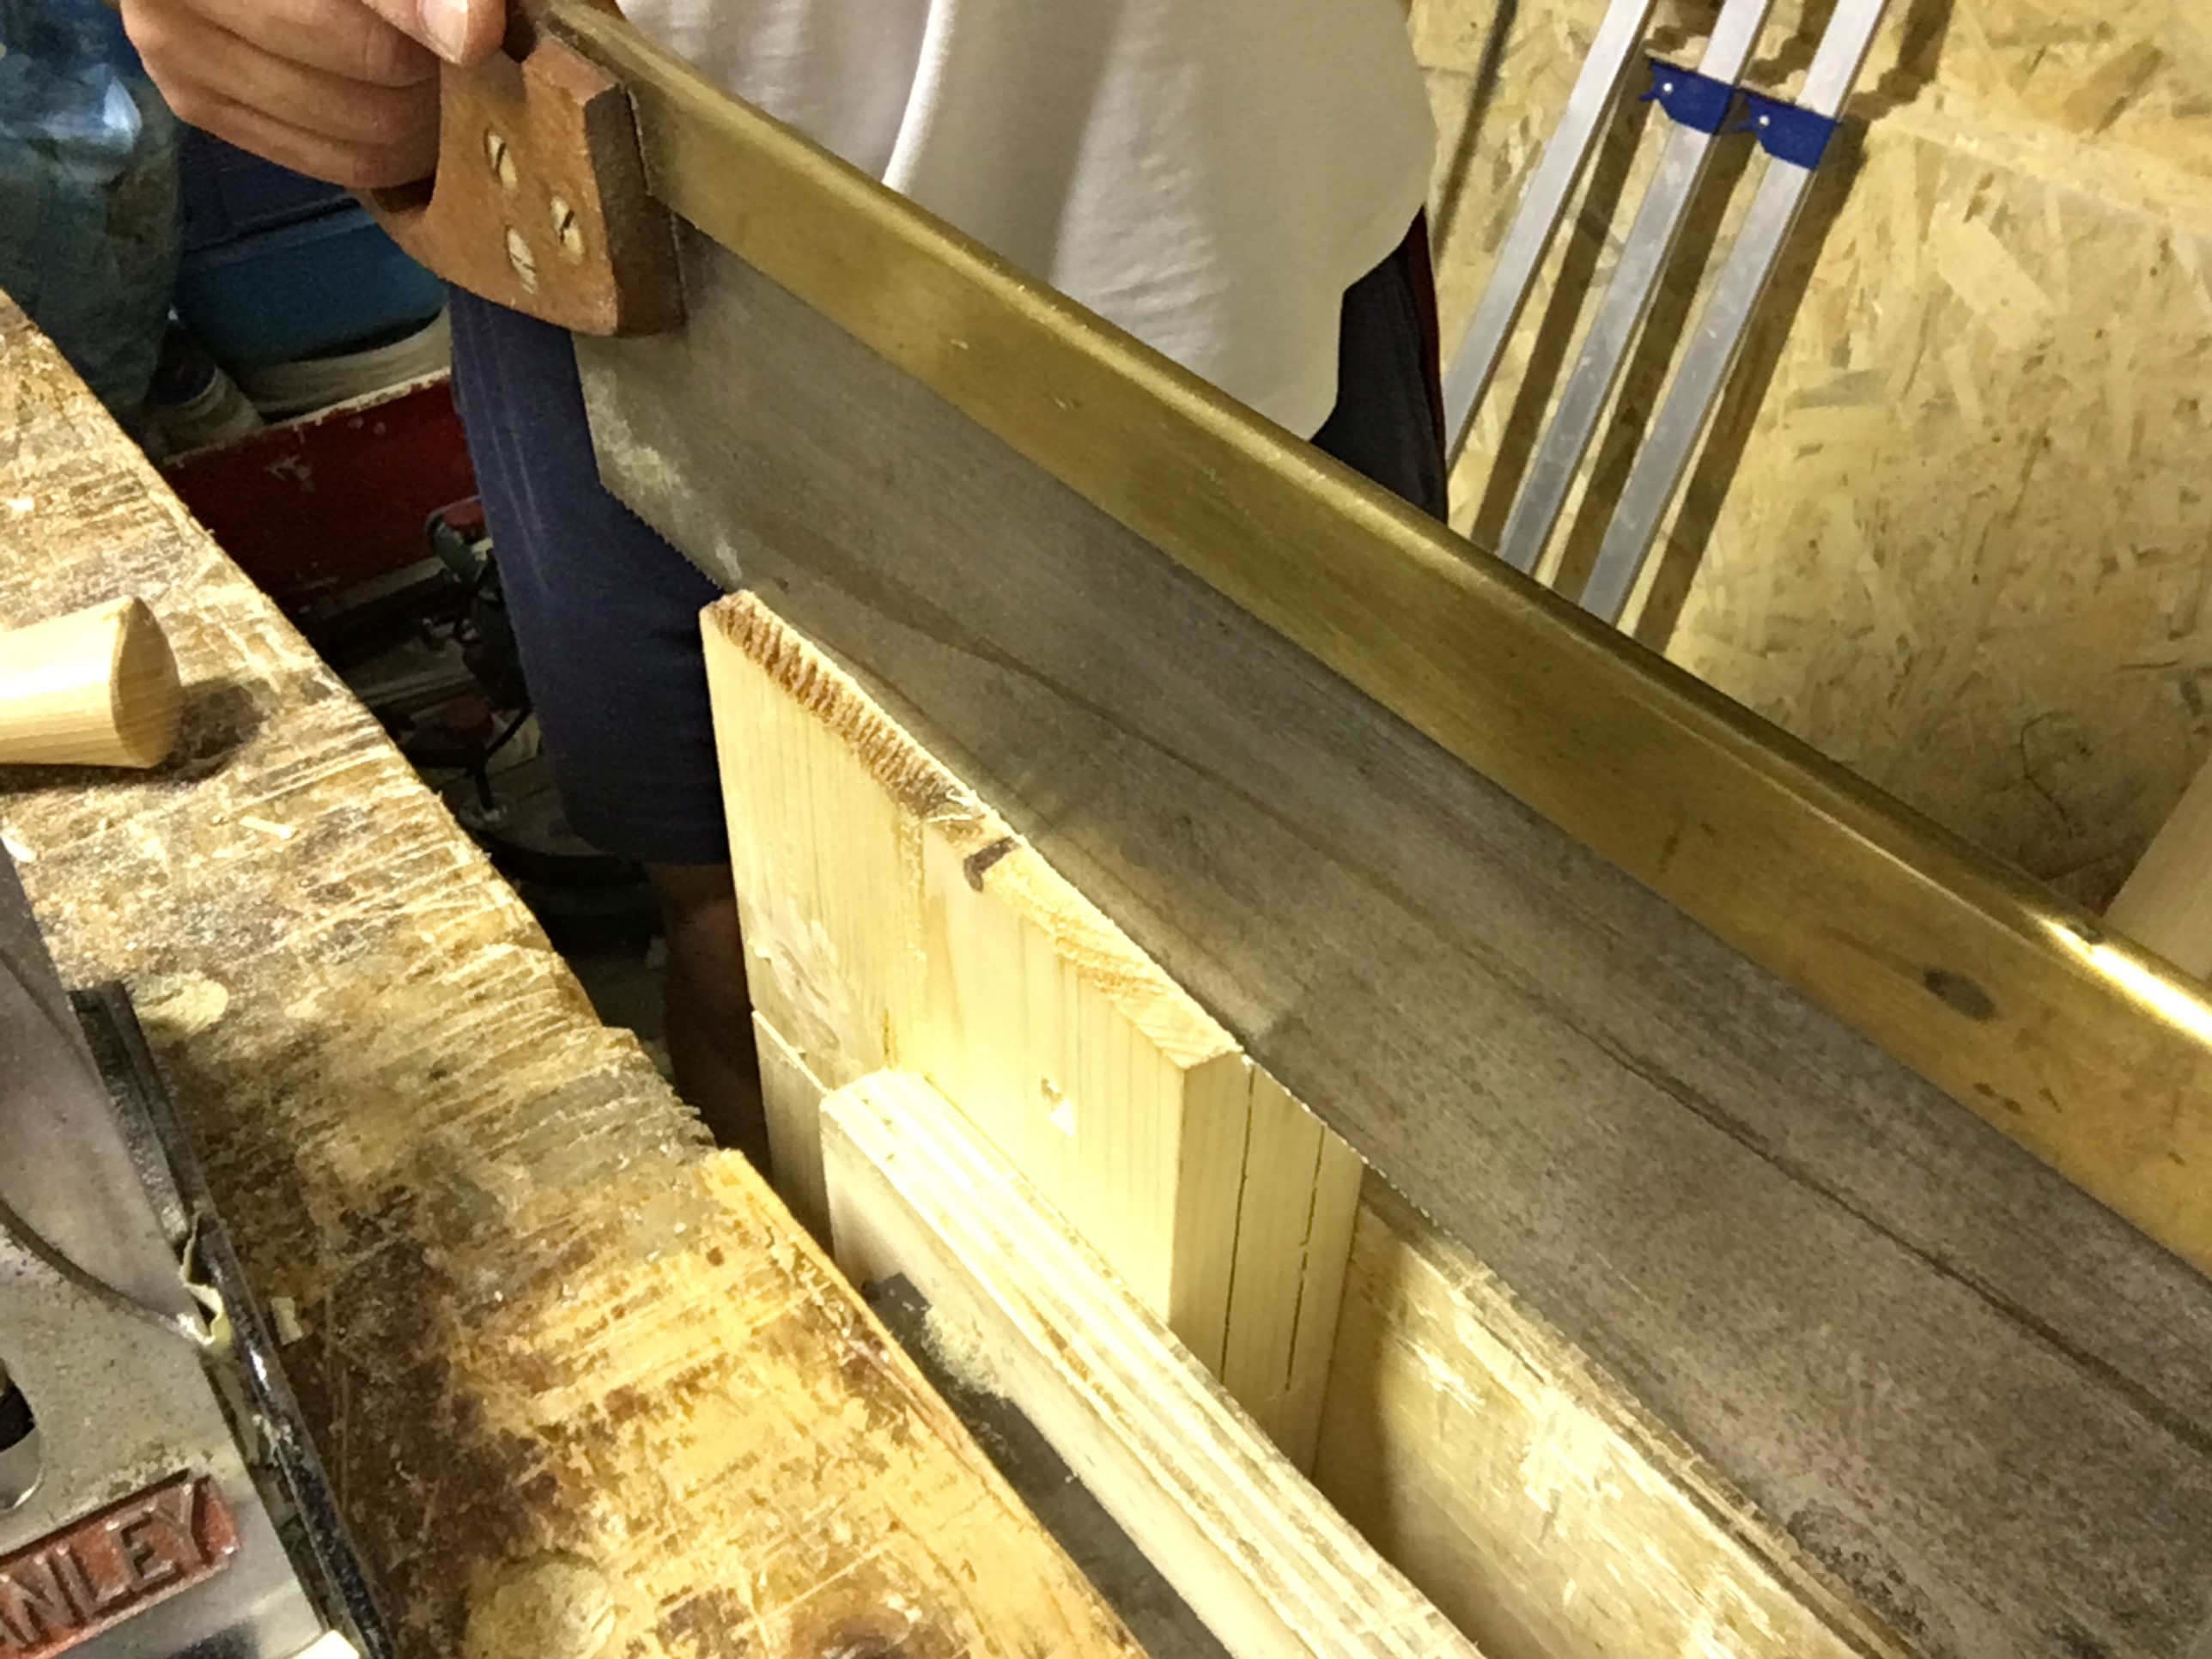
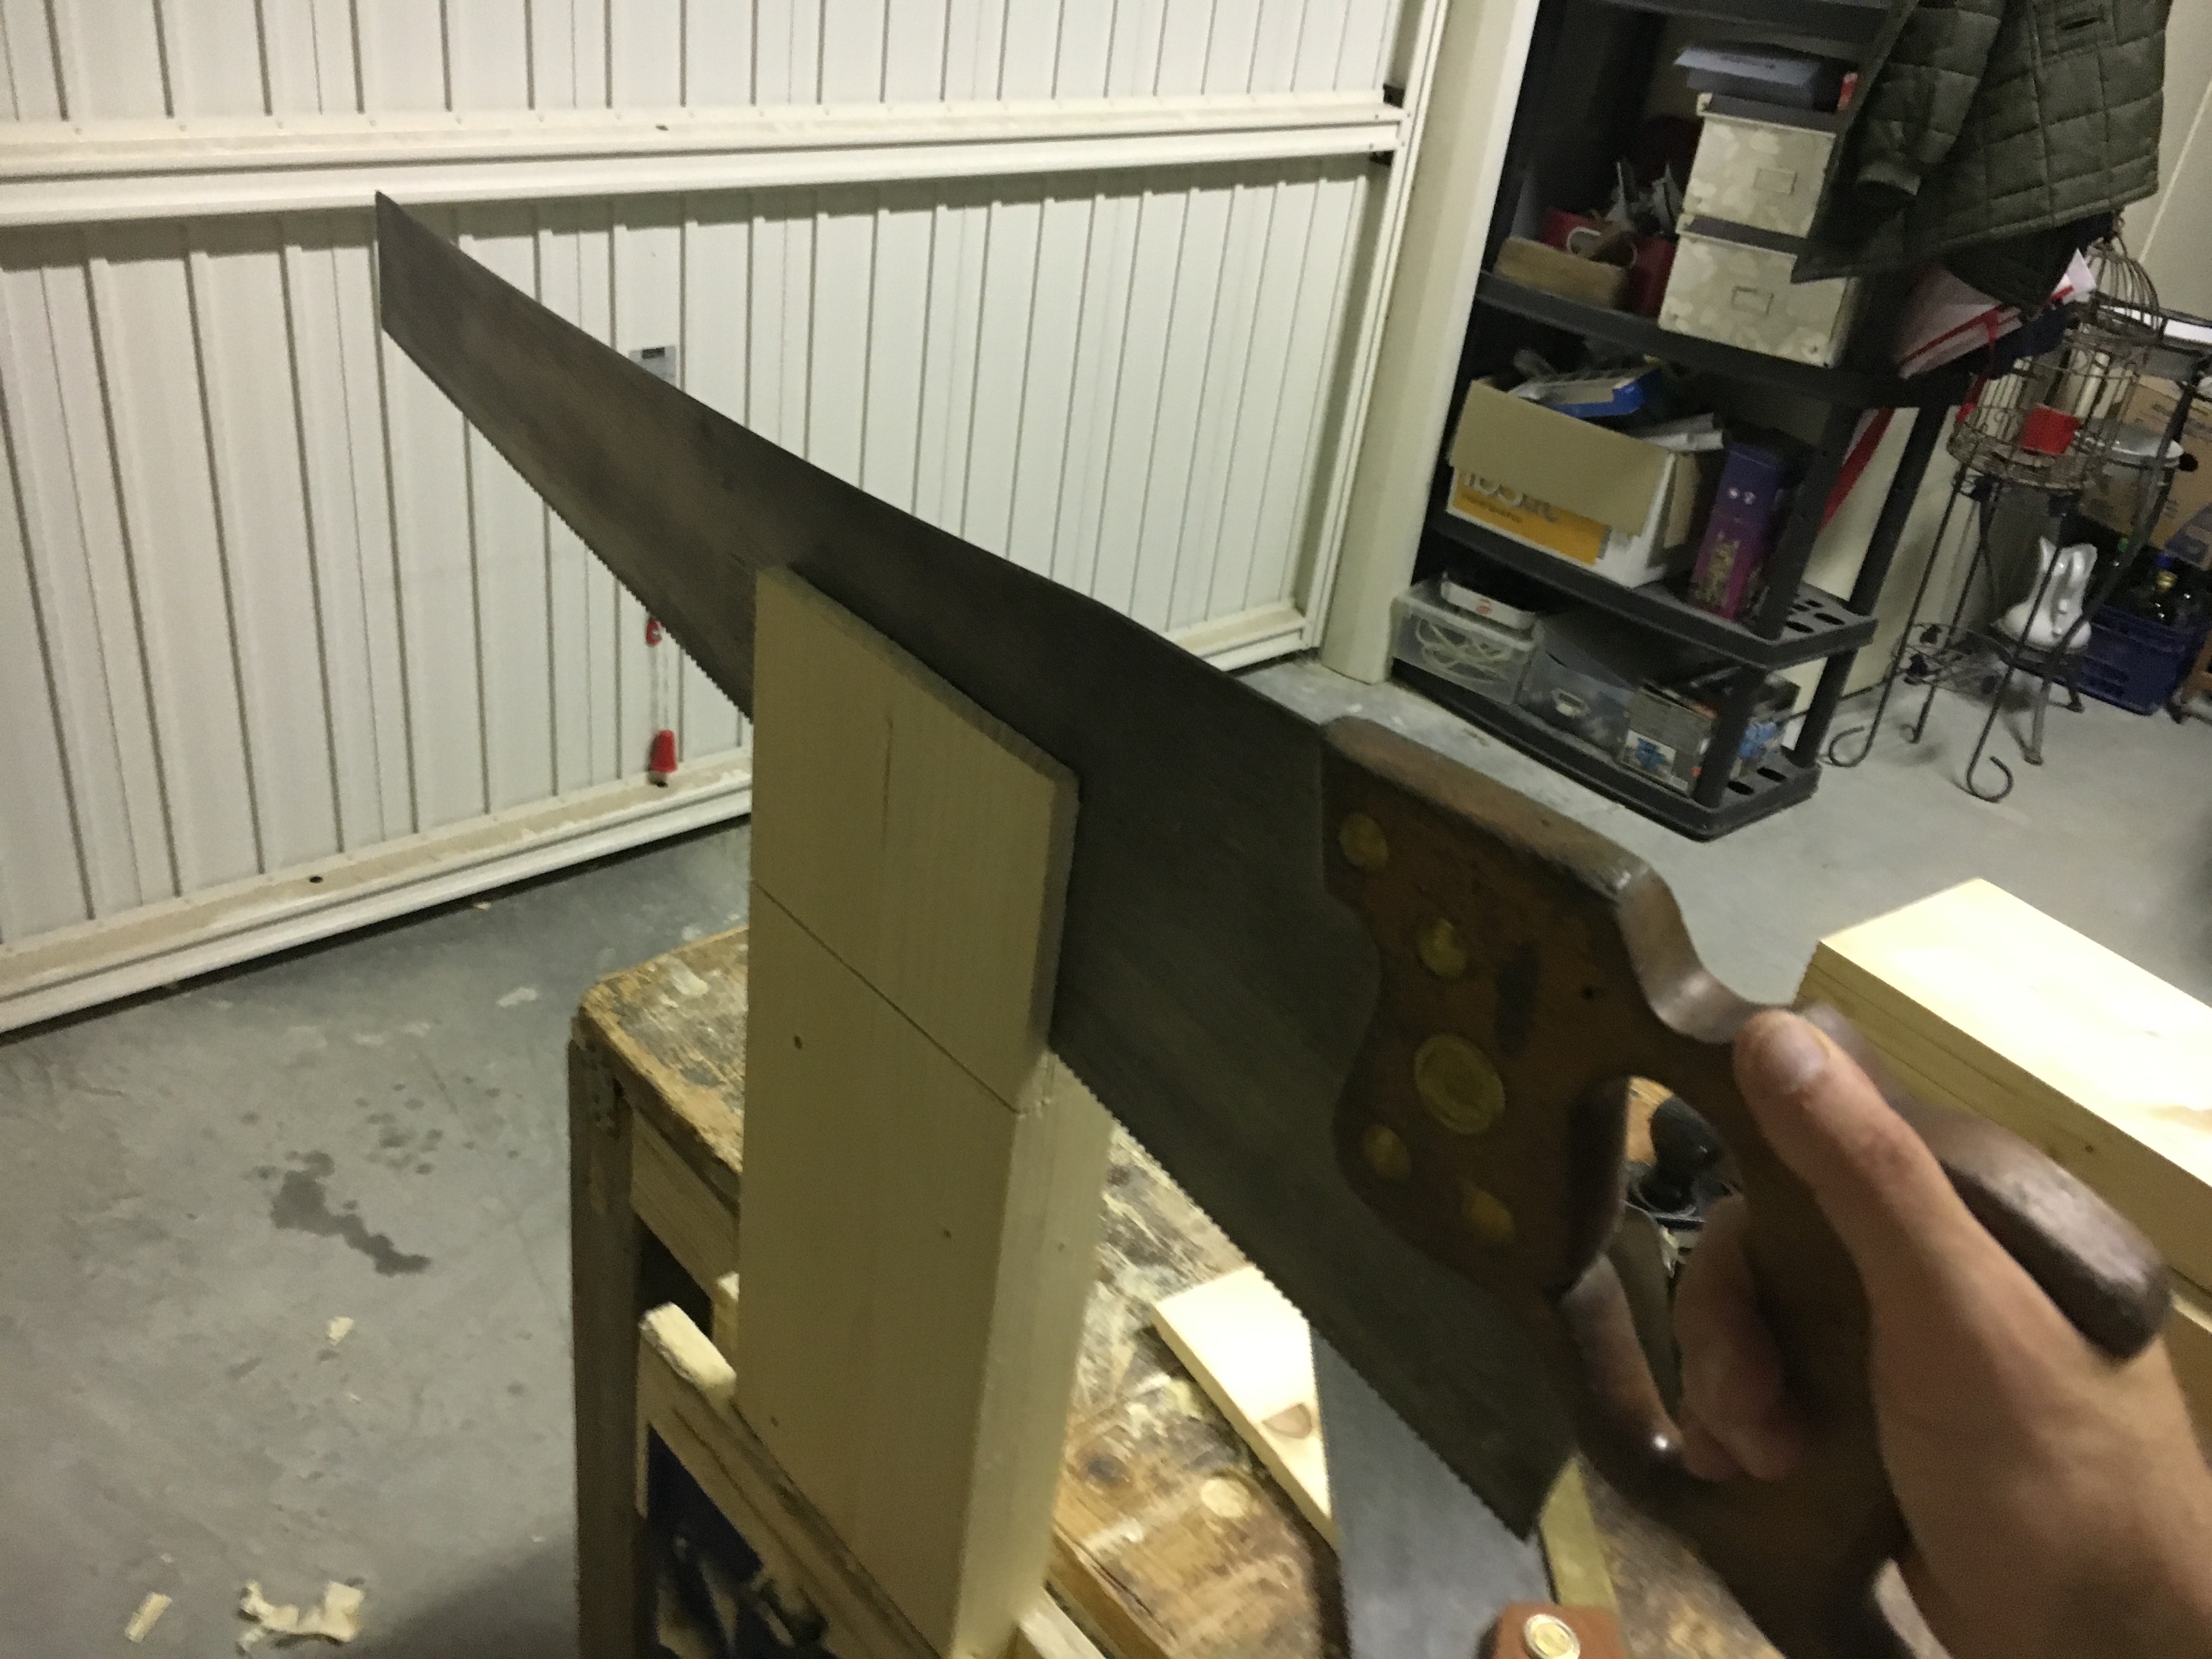
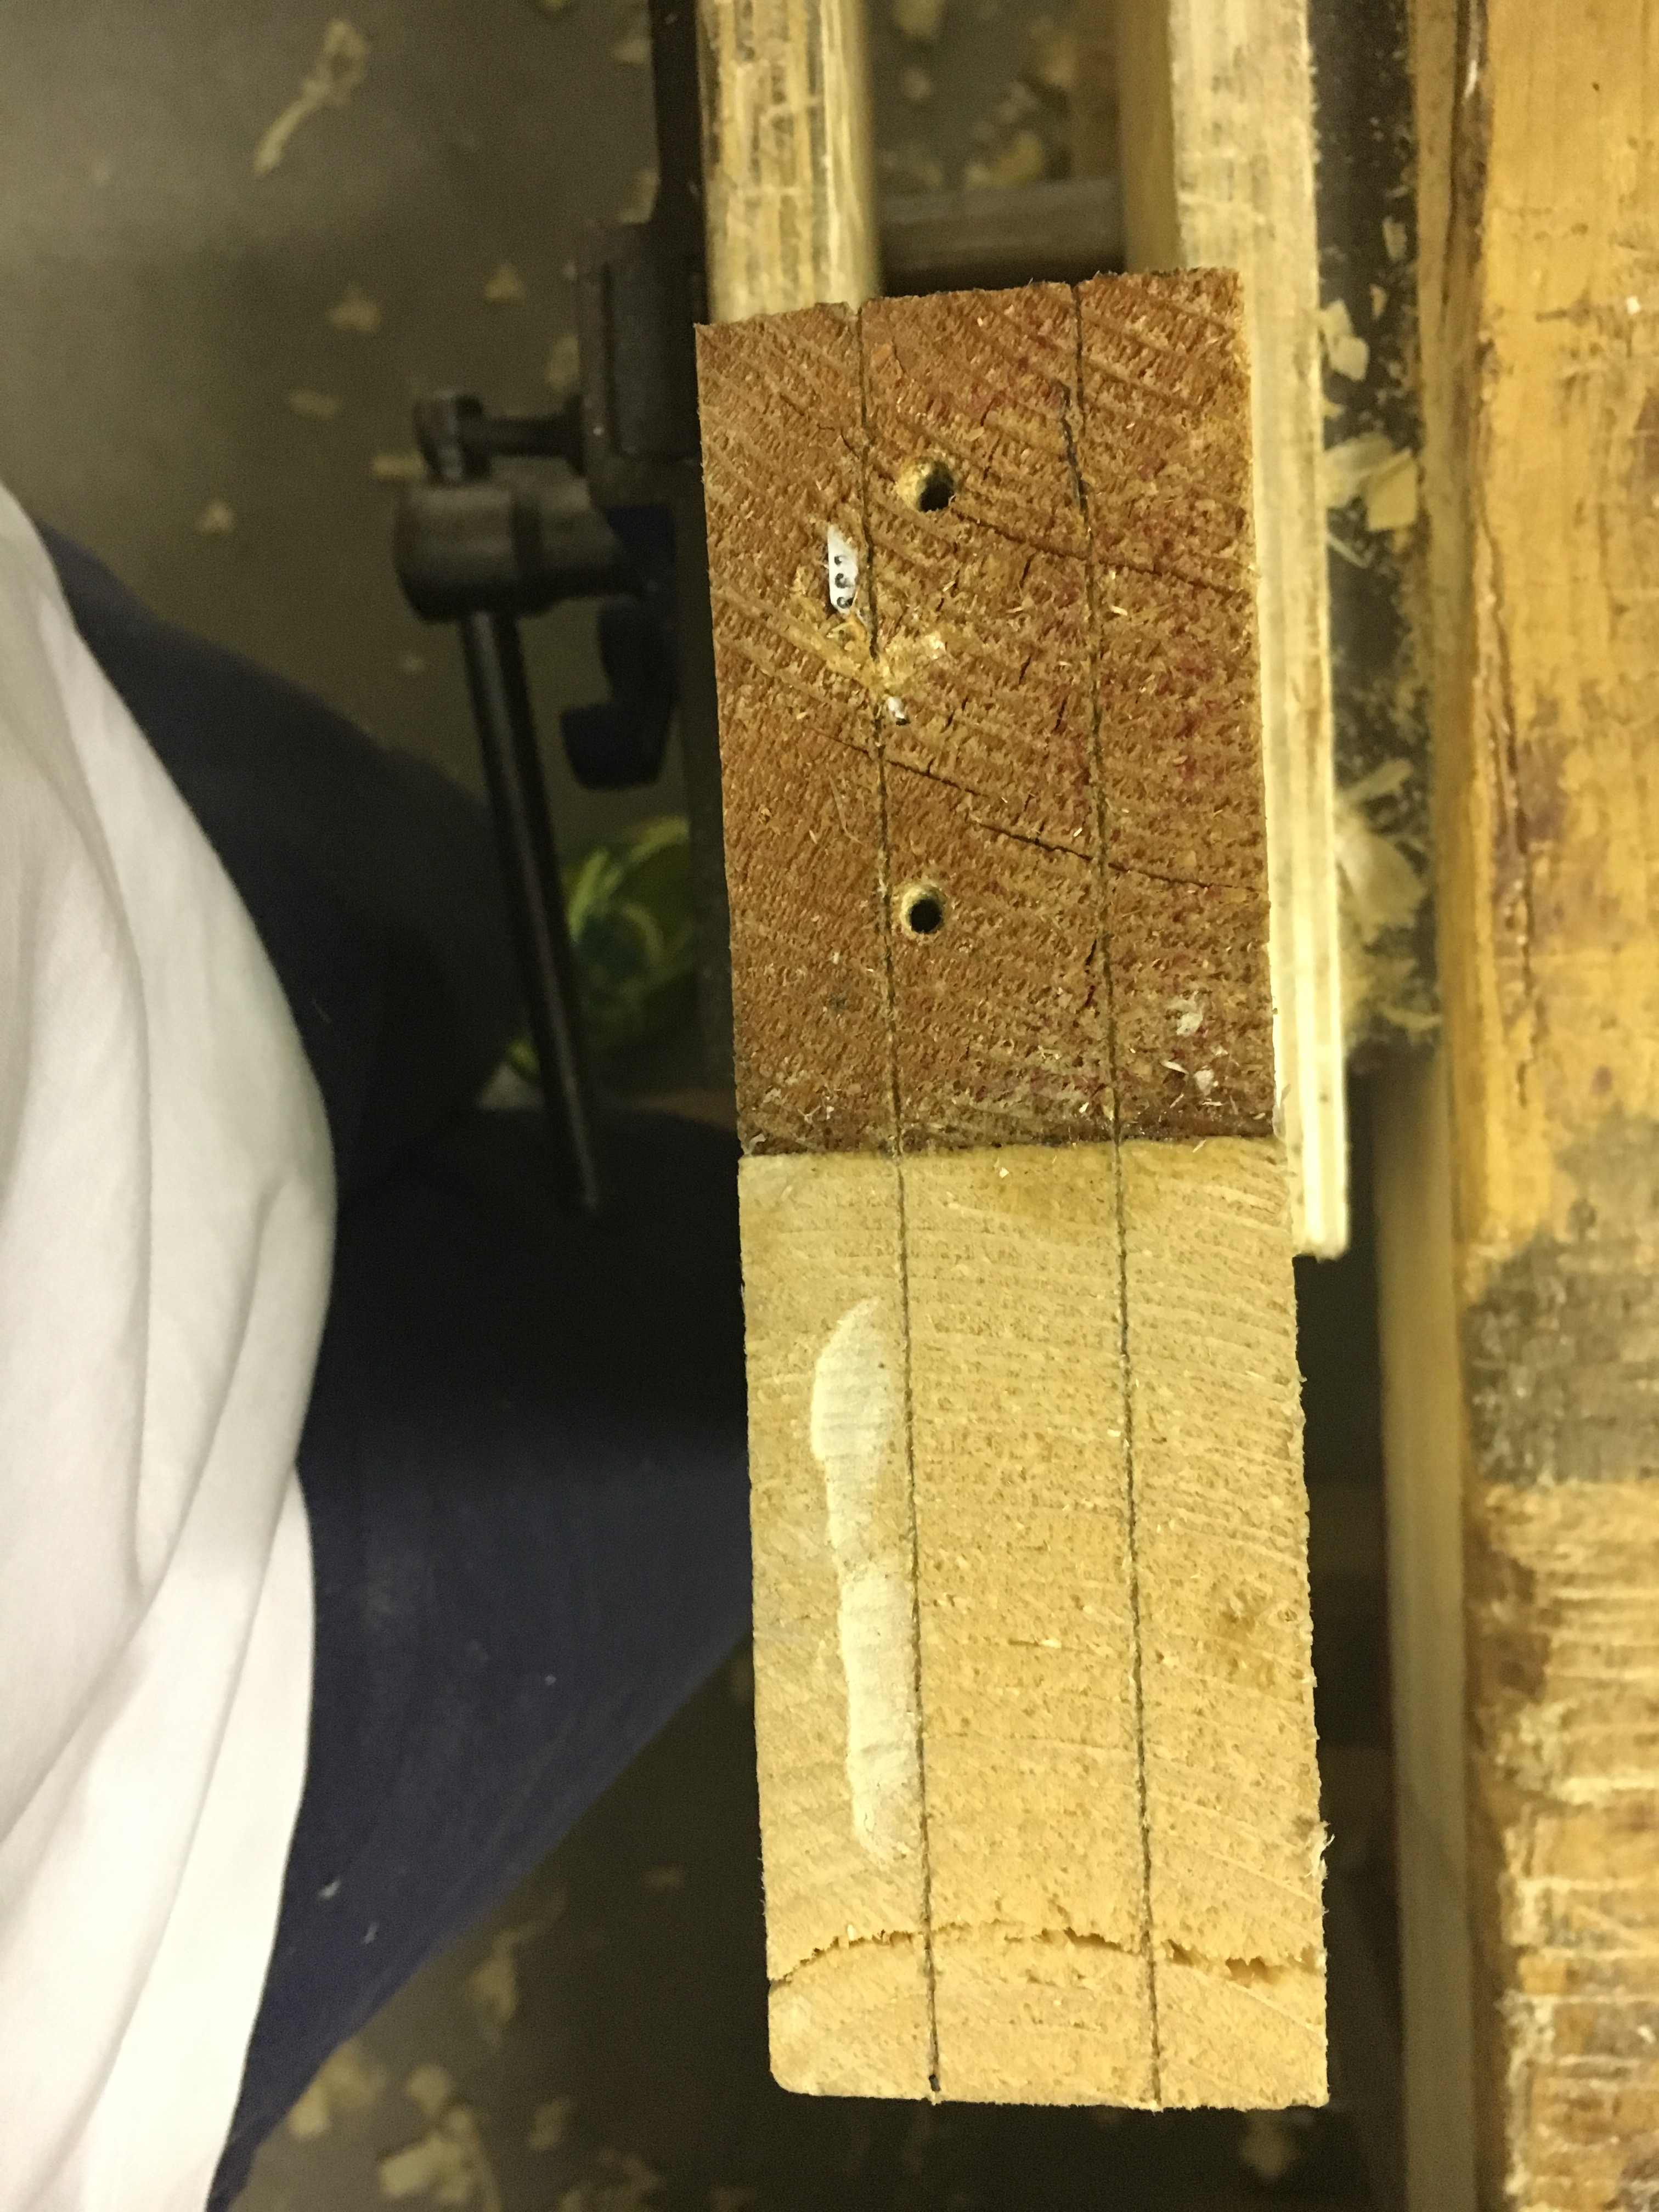
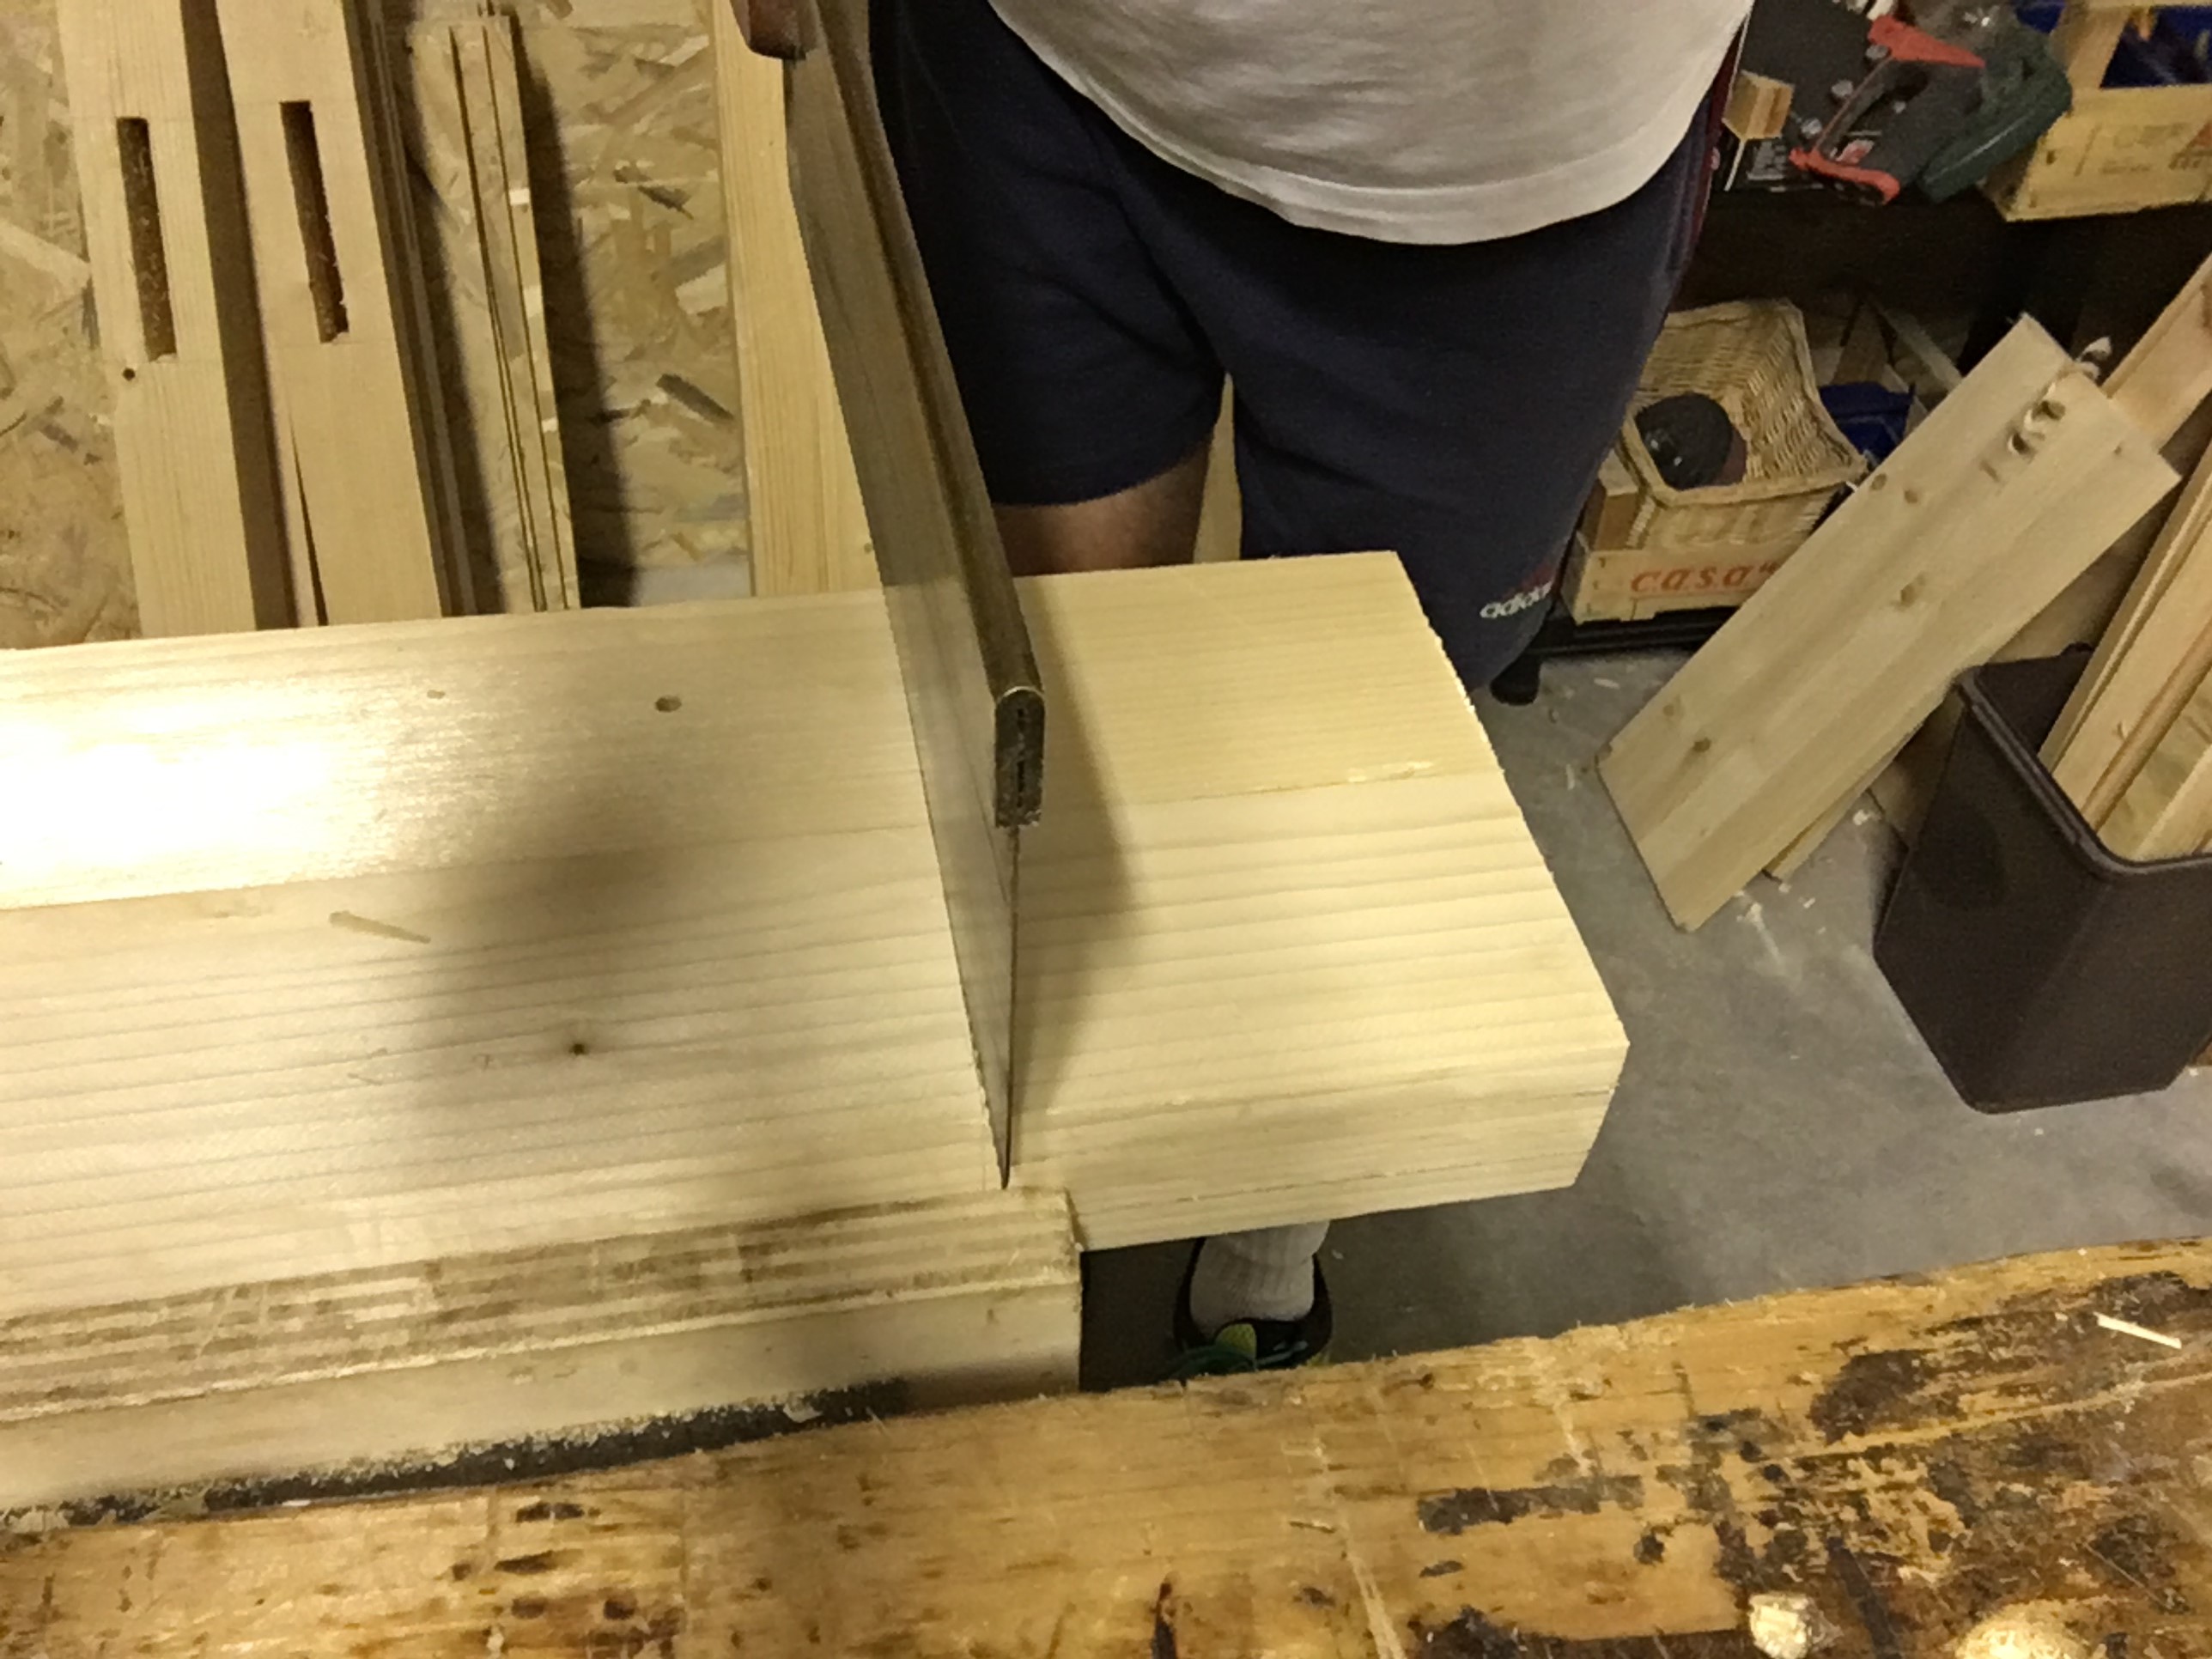
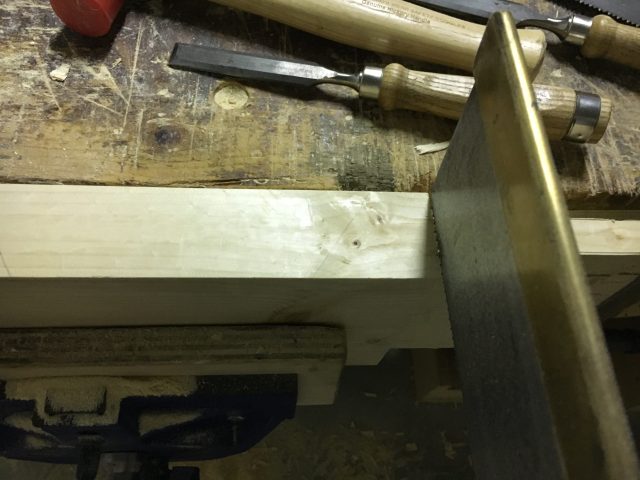
Serrando il pezzo nella morsa, seghiamo le guance del tenone partendo dall’estremità più lontana da noi e successivamente allineando la sega seguendo il più vicino possibile la traccia fatta dal truschino e segando sempre dalla parte che dovremo eliminare. La traccia del truschino deve quindi rimanere dentro ed essere sempre visibile. Cerchiamo anche di segare il più dritto possibile aiutandoci segando da ambedue le parti del pezzo a fasi alterne. Per segare le guance del tenone si usa solitamente una sega per tenoni ma niente vieta che si possa utilizzare una sega per code di rondine, specialmente per tenoni di ridotte dimensioni. Nel mio caso mi sono aiutato anche con un segaccio visto che il dorso della sega per tenoni limitava la profondità del taglio da effettuare.
By tightening the piece in the vice, we saw the tenon’s cheeks starting from the end farthest from us and then aligning the saw by following the trace as close as possible to the marking gauge and always sawing the part that we will have to eliminate. The trace of the marking gauge must therefore remain inside and be always visible. We also try to saw as straight as possible by helping with sawing from both parts of the piece in alternating phases. To cut the tenon’s cheeks, a tenon saw is usually used, but nothing forbids using a dovetail saw, especially for small tenons. In my case I also helped with a panel saw as the back of the tenon saw limited the depth of the cut to be made.

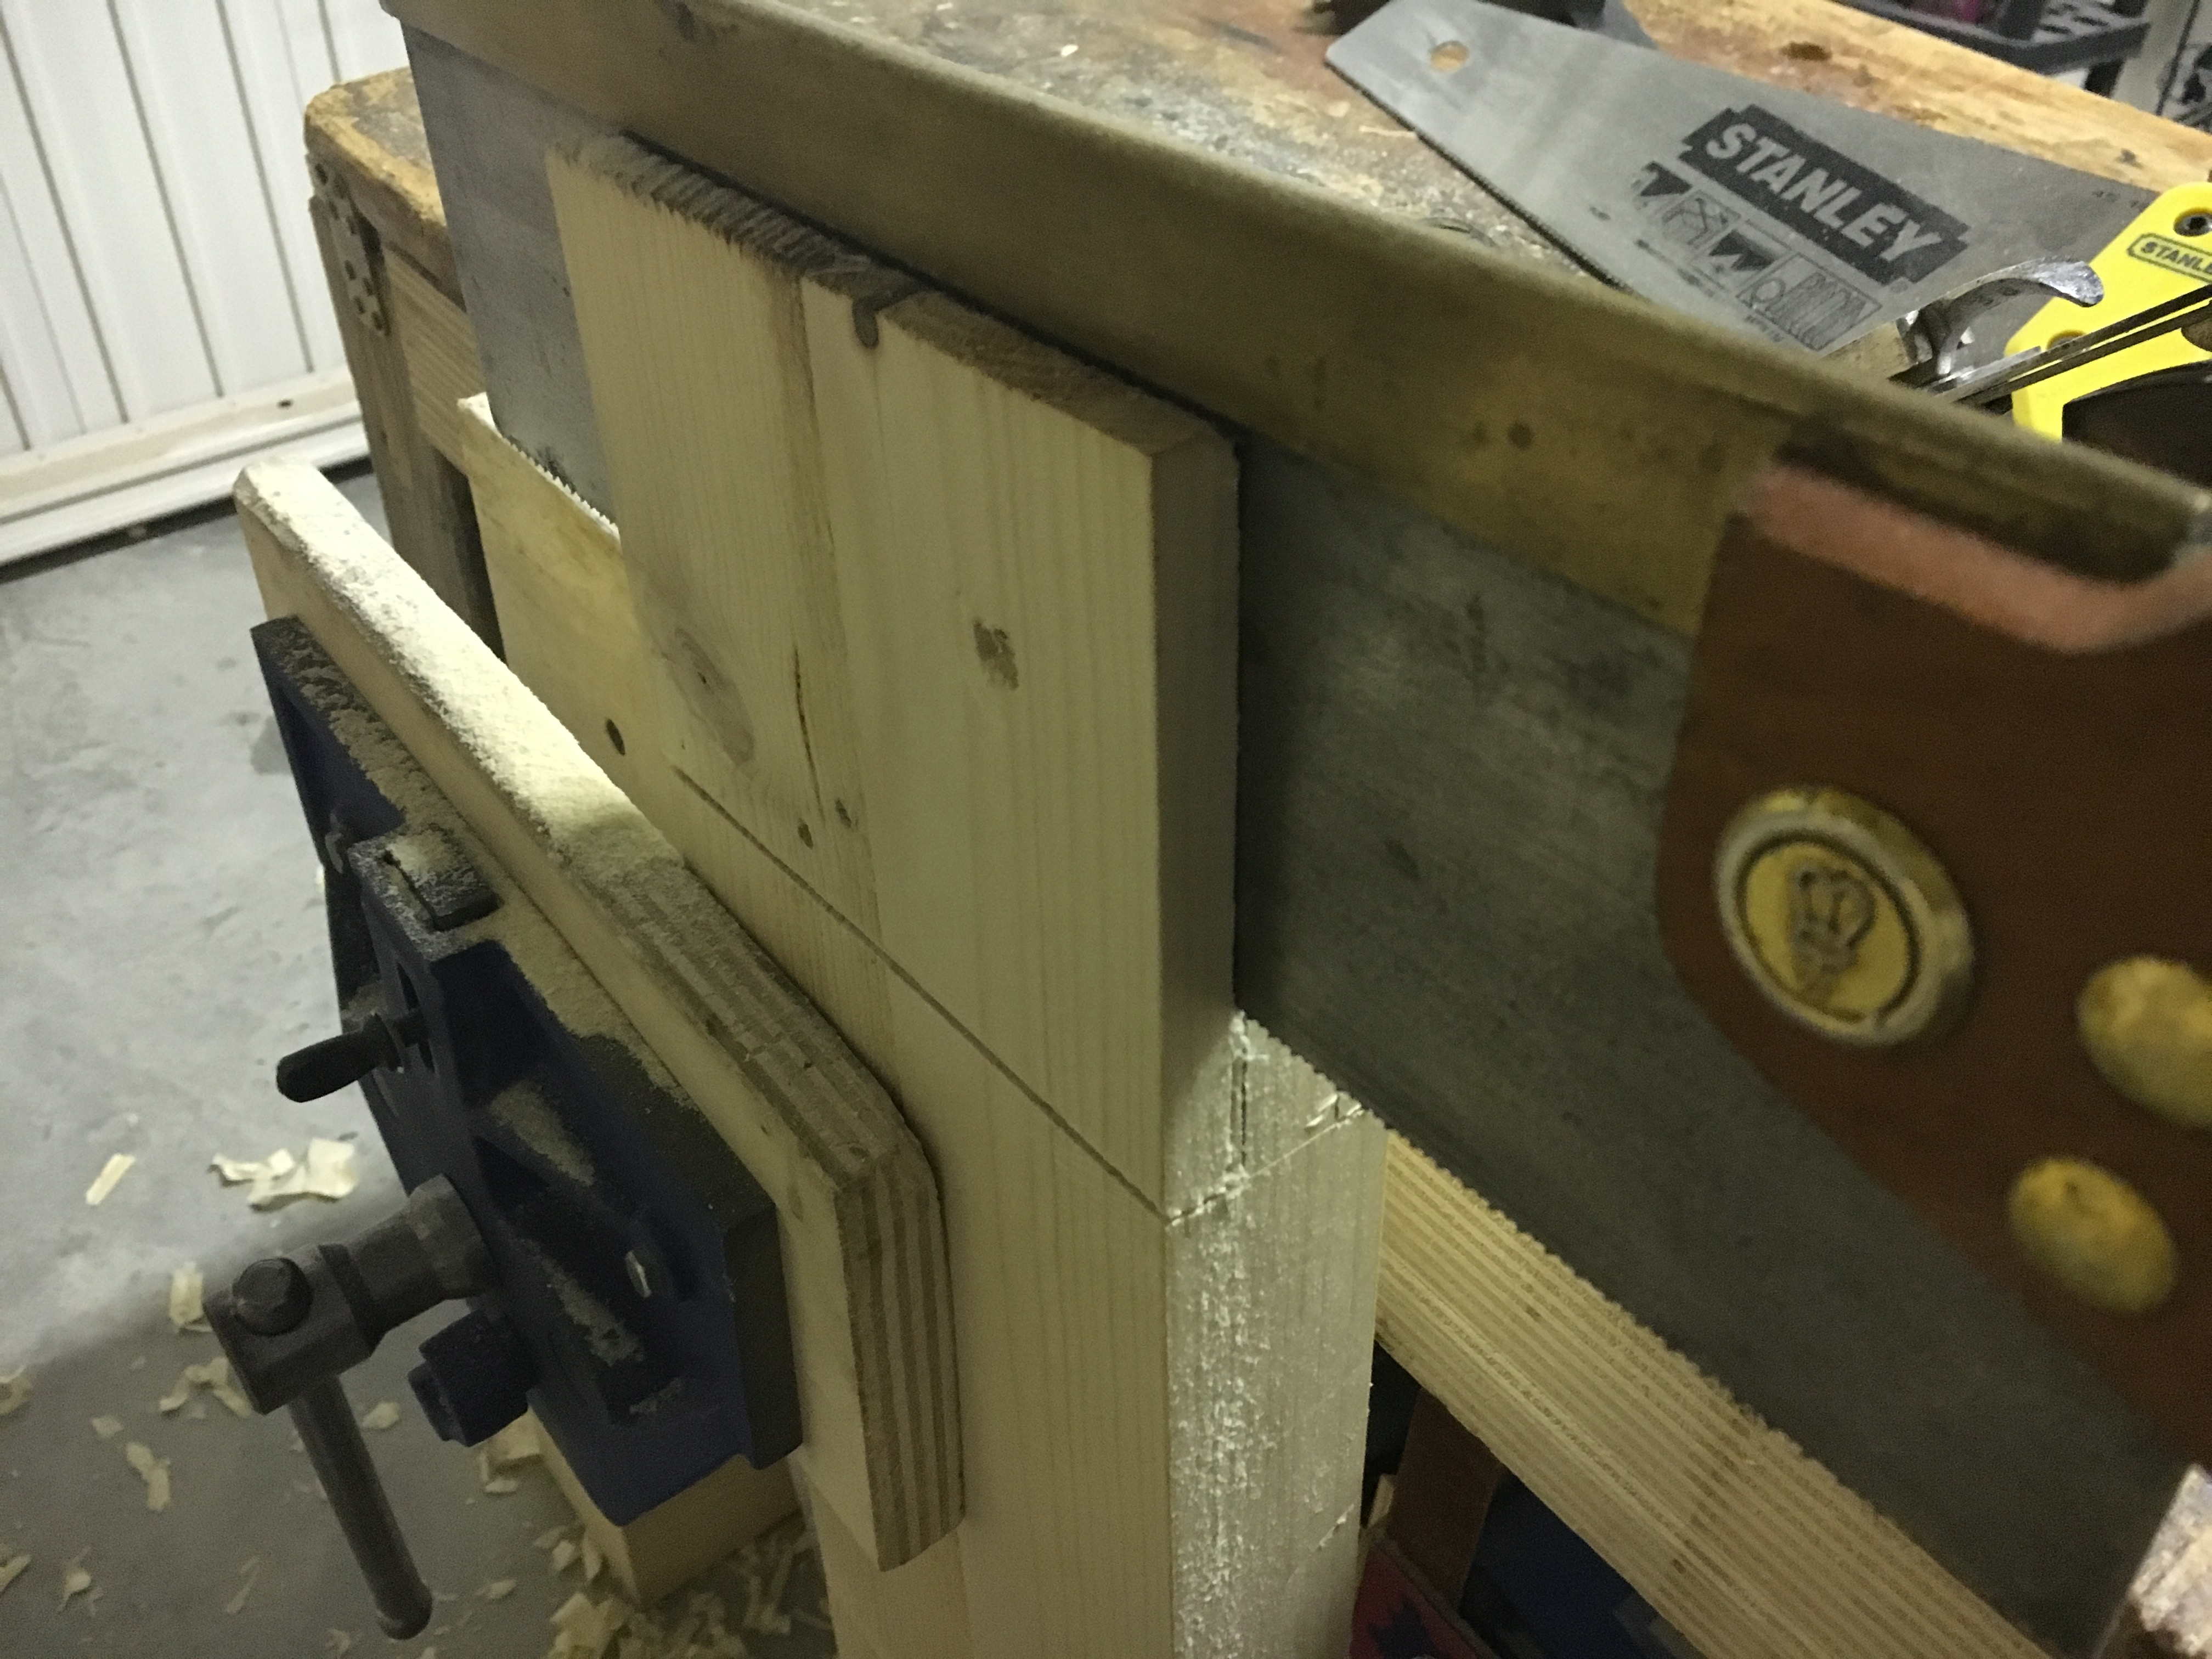
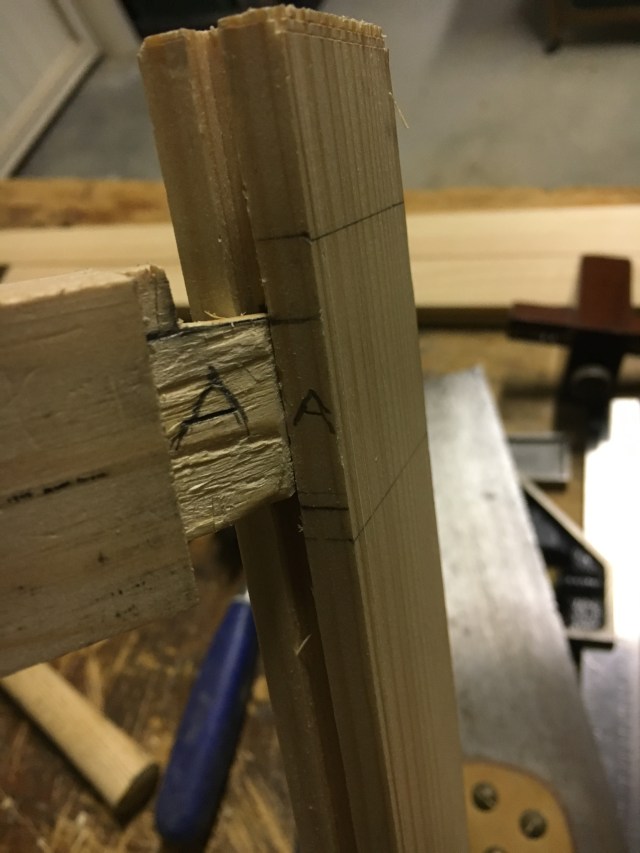
Il tenone è pronto e possiamo procedere all’accoppiamento dei due pezzi inserendo il tenone nella mortasa. Dapprima proviamo ad inserirlo inclinandolo a 45 gradi rispetto alla mortasa e da entrambe le parti del pezzo per provare se entra agevolmente. In seguito, se la prova ha successo, tentiamo di inserirlo perpendicolarmente. Se abbiamo lavorato bene l’incastro dovrebbe avvenire senza problemi. Purtroppo il più delle volte questo non avviene e dobbiamo ricorrere a degli accorgimenti per far sì che l’incastro avvenga agevolmente. Vale la pena di ricordare che un incastro fatto bene non dovrebbe essere né troppo stretto né troppo largo e non mostrare spazi vuoti tra il tenone e la mortasa. In ogni caso se il tenone non dovesse entrare bene ciò può dipendere da varie cause. Di seguito le più comuni.
The tenon is ready and we can proceed to the jointing of the two pieces by inserting the tenon into the mortise. First we try to insert it by tilting it at 45 degrees to the mortise and from both parts of the piece to prove if it enters smoothly. Later, if the test is successful, we try to insert it perpendicularly. If we have worked well, the joint should be without problems. Unfortunately, most of the time this does not happen and we have to resort to some tricks to make sure that the joint is fitting well. It is worth remembering that a well done joint should not be too tight nor too wide and not show empty spaces between the tenon and the mortise. In any case, if the tenon does not enter well, this may depend on various causes. Here are the most common.
CORREZIONI AL TENONE E ALLA MORTASA / REVISIONS TO THE TENON AND TO THE MORTISE
Il tenone è troppo spesso o troppo grande e/o la mortasa è troppo stretta o troppo piccola. Possiamo osservare il tenone e la mortasa stessa cercando dove il legno risulta più usurato. Dovremo intervenire nel punto dove il legno sfrega maggiormente, eventualmente assottigliando lo spessore del tenone con lo scalpello o con la router plane o rifinire le pareti della mortasa con lo scalpello.
The tenon is too thick or too large and / or mortise is too narrow or too small. We can observe the tenon and mortise itself, looking for the most worn wood. We will have to work in the point where the wood rubs the most, eventually thinning the thickness of the tenon with the chisel or with the router plane or finishing the walls of the mortise with the chisel.

Possiamo agevolare l’entrata del tenone smussandone leggermente l’interno con lo scalpello o con la pialla ma solo se stiamo effettuando un tenone passante che andrà smussato o andrà inserito in una mortasa cieca, altrimenti sarà visibile.
We can facilitate the entrance of the tenon smoothing the inside slightly with the chisel or the plane but only if we are making a through rounded tenon or it will go in a stopped mortice or it will show.
Se l’accoppiamento dovesse risultare storto bisogna controllare la perpendicolarità delle pareti della mortasa o il parallelismo delle guance del tenone ed eventualmente intervenire con lo scalpello o la router plane.
If the joint should turn out of square, check the perpendicularity of the mortise walls or the parallelism of the tenon’s cheeks and if necessary work with the chisel or the router plane.
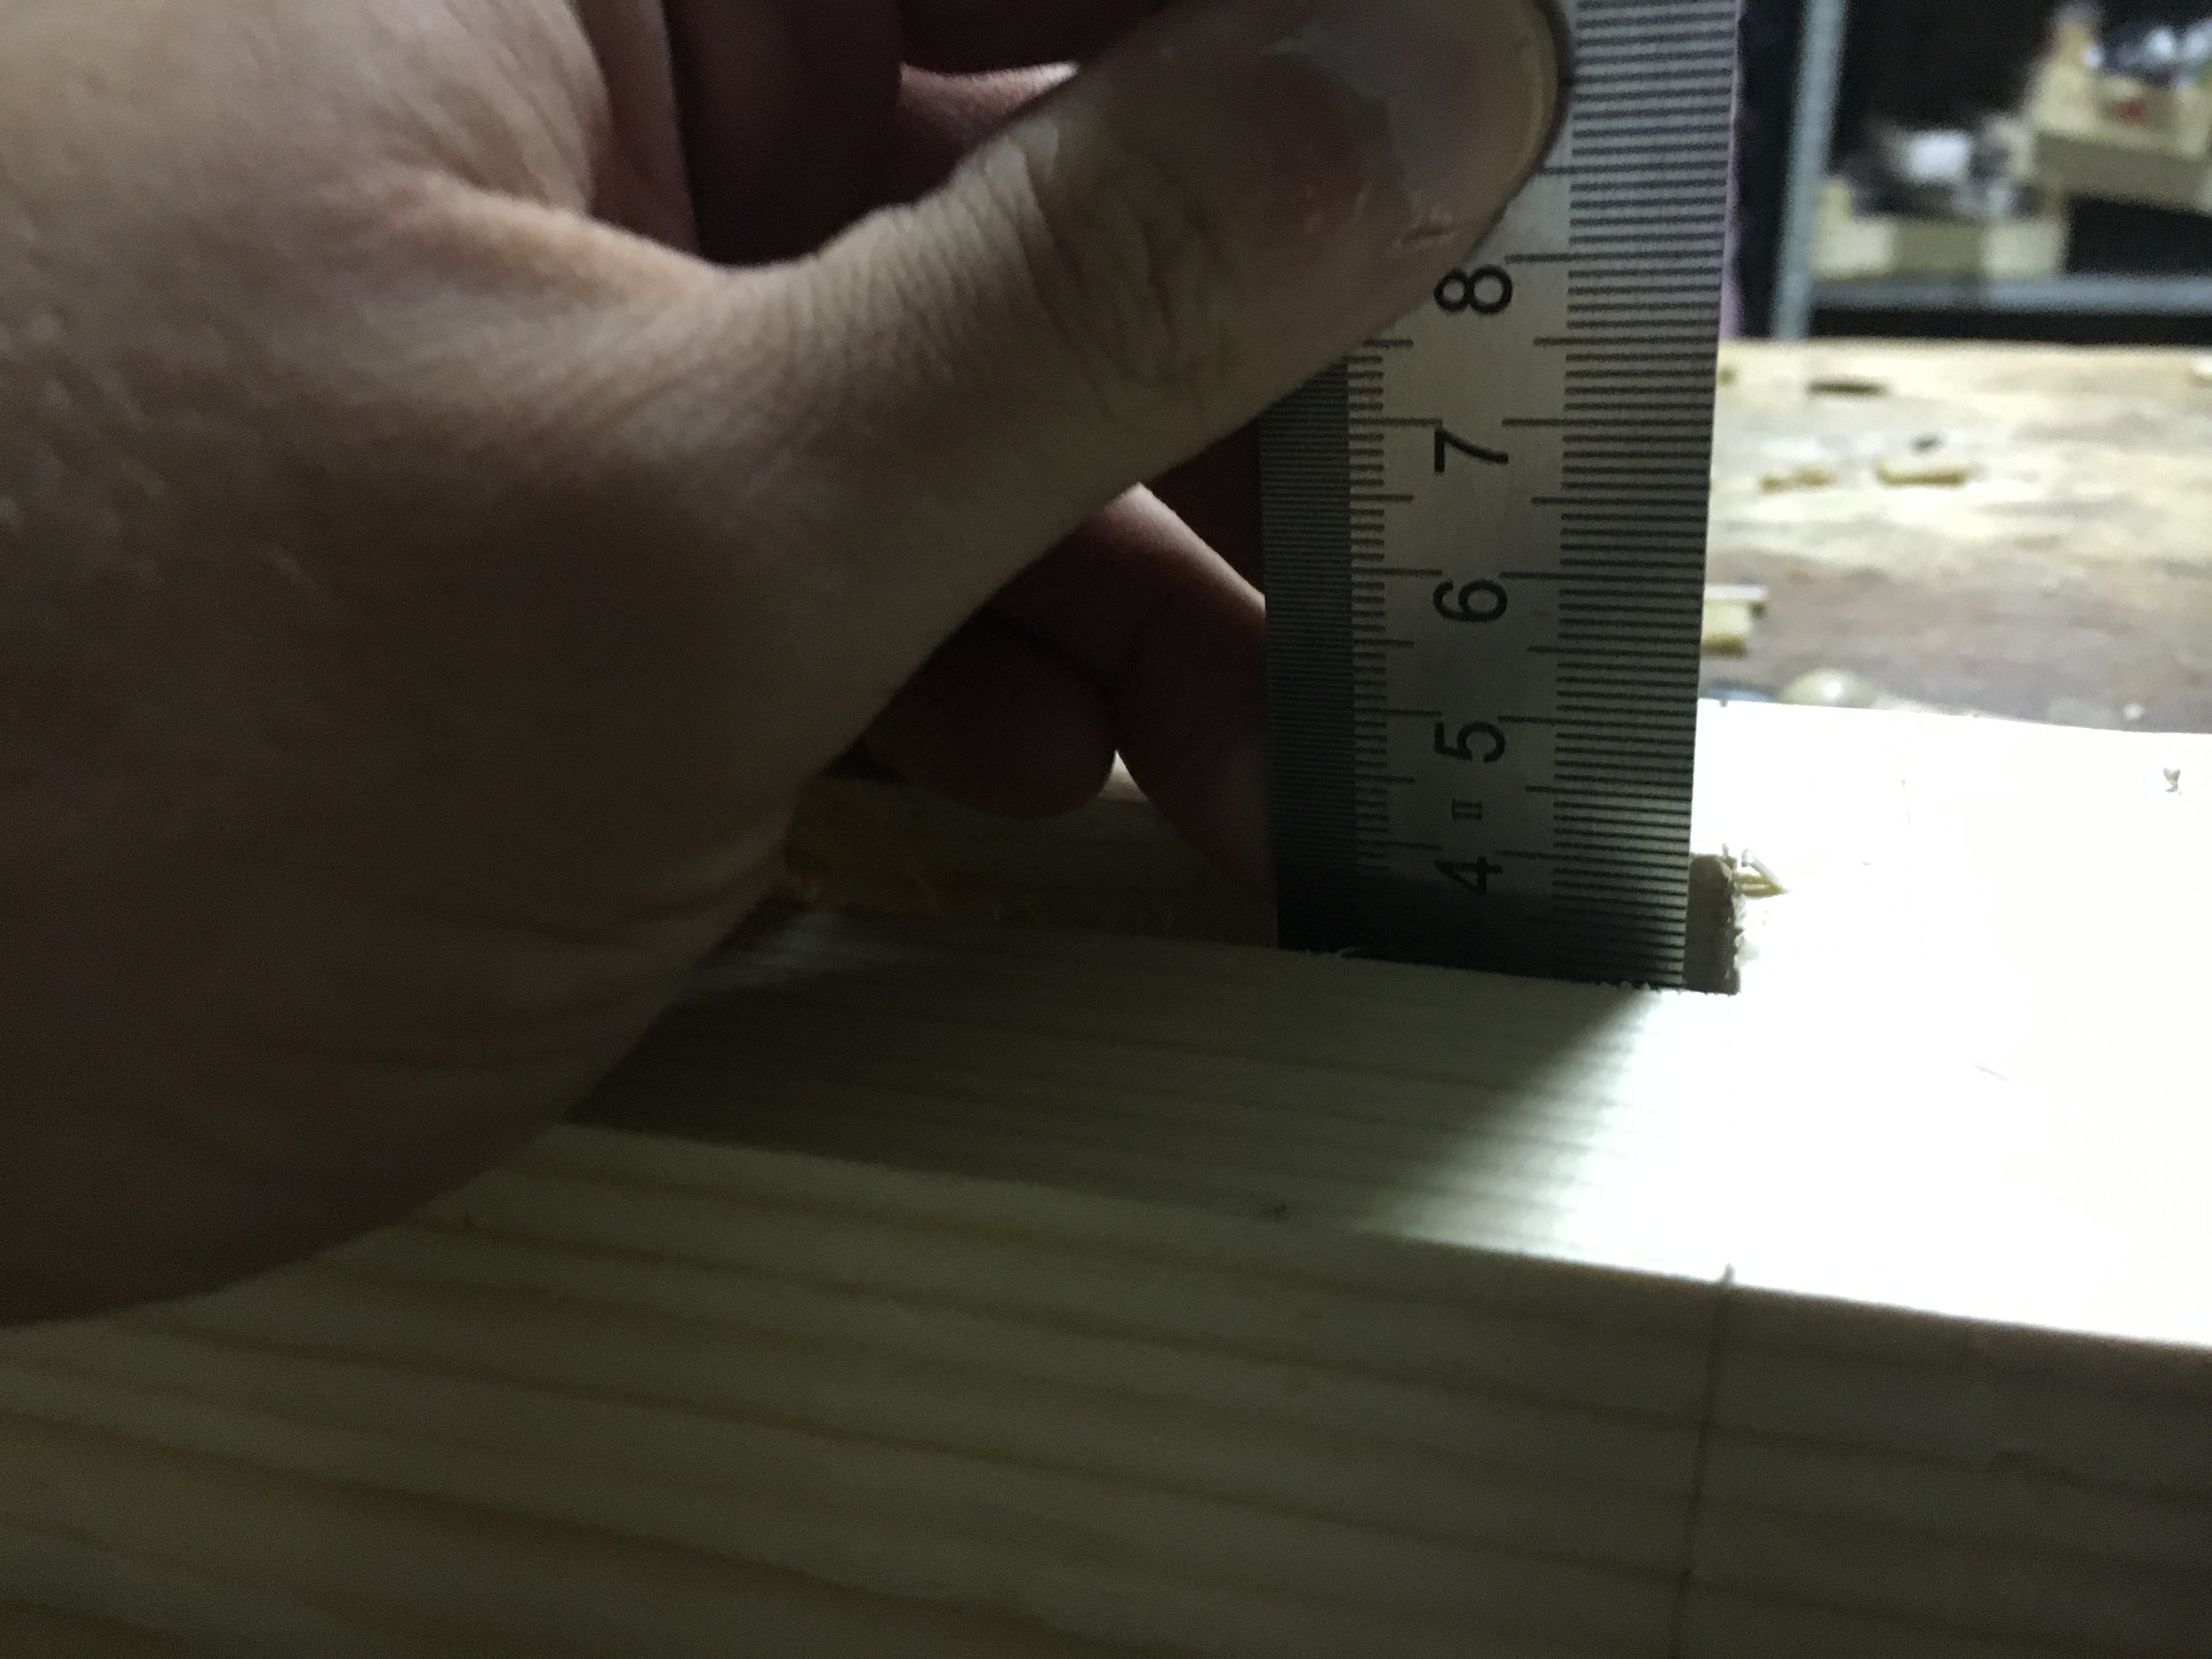
Se dovesse esserci uno spazio nell’accoppiamento, oltre alle cause di cui sopra, può essere che la mortasa sia poco profonda rispetto alla lunghezza del tenone. Possiamo quindi approfondire la mortasa o segare il tenone (ove possibile). Anche se il tenone dovesse dondolare nella sede della mortasa dobbiamo controllare la base della mortasa affinché sia livellata per tutta la sua lunghezza ed eventualmente intervenire con lo scalpello rimuovendo il materiale laddove abbisogna.
If there should be a gap in the joint, in addition to the causes mentioned above, it may be that the mortise is not very deep compared to the length of the tenon. We can then deepen the mortise or saw the tenon (where possible). Even if the tenon had to rock in the mortise, we must check the bottom of the mortise so that it is leveled along its entire length and possibly work with the chisel by removing the material where it needs.
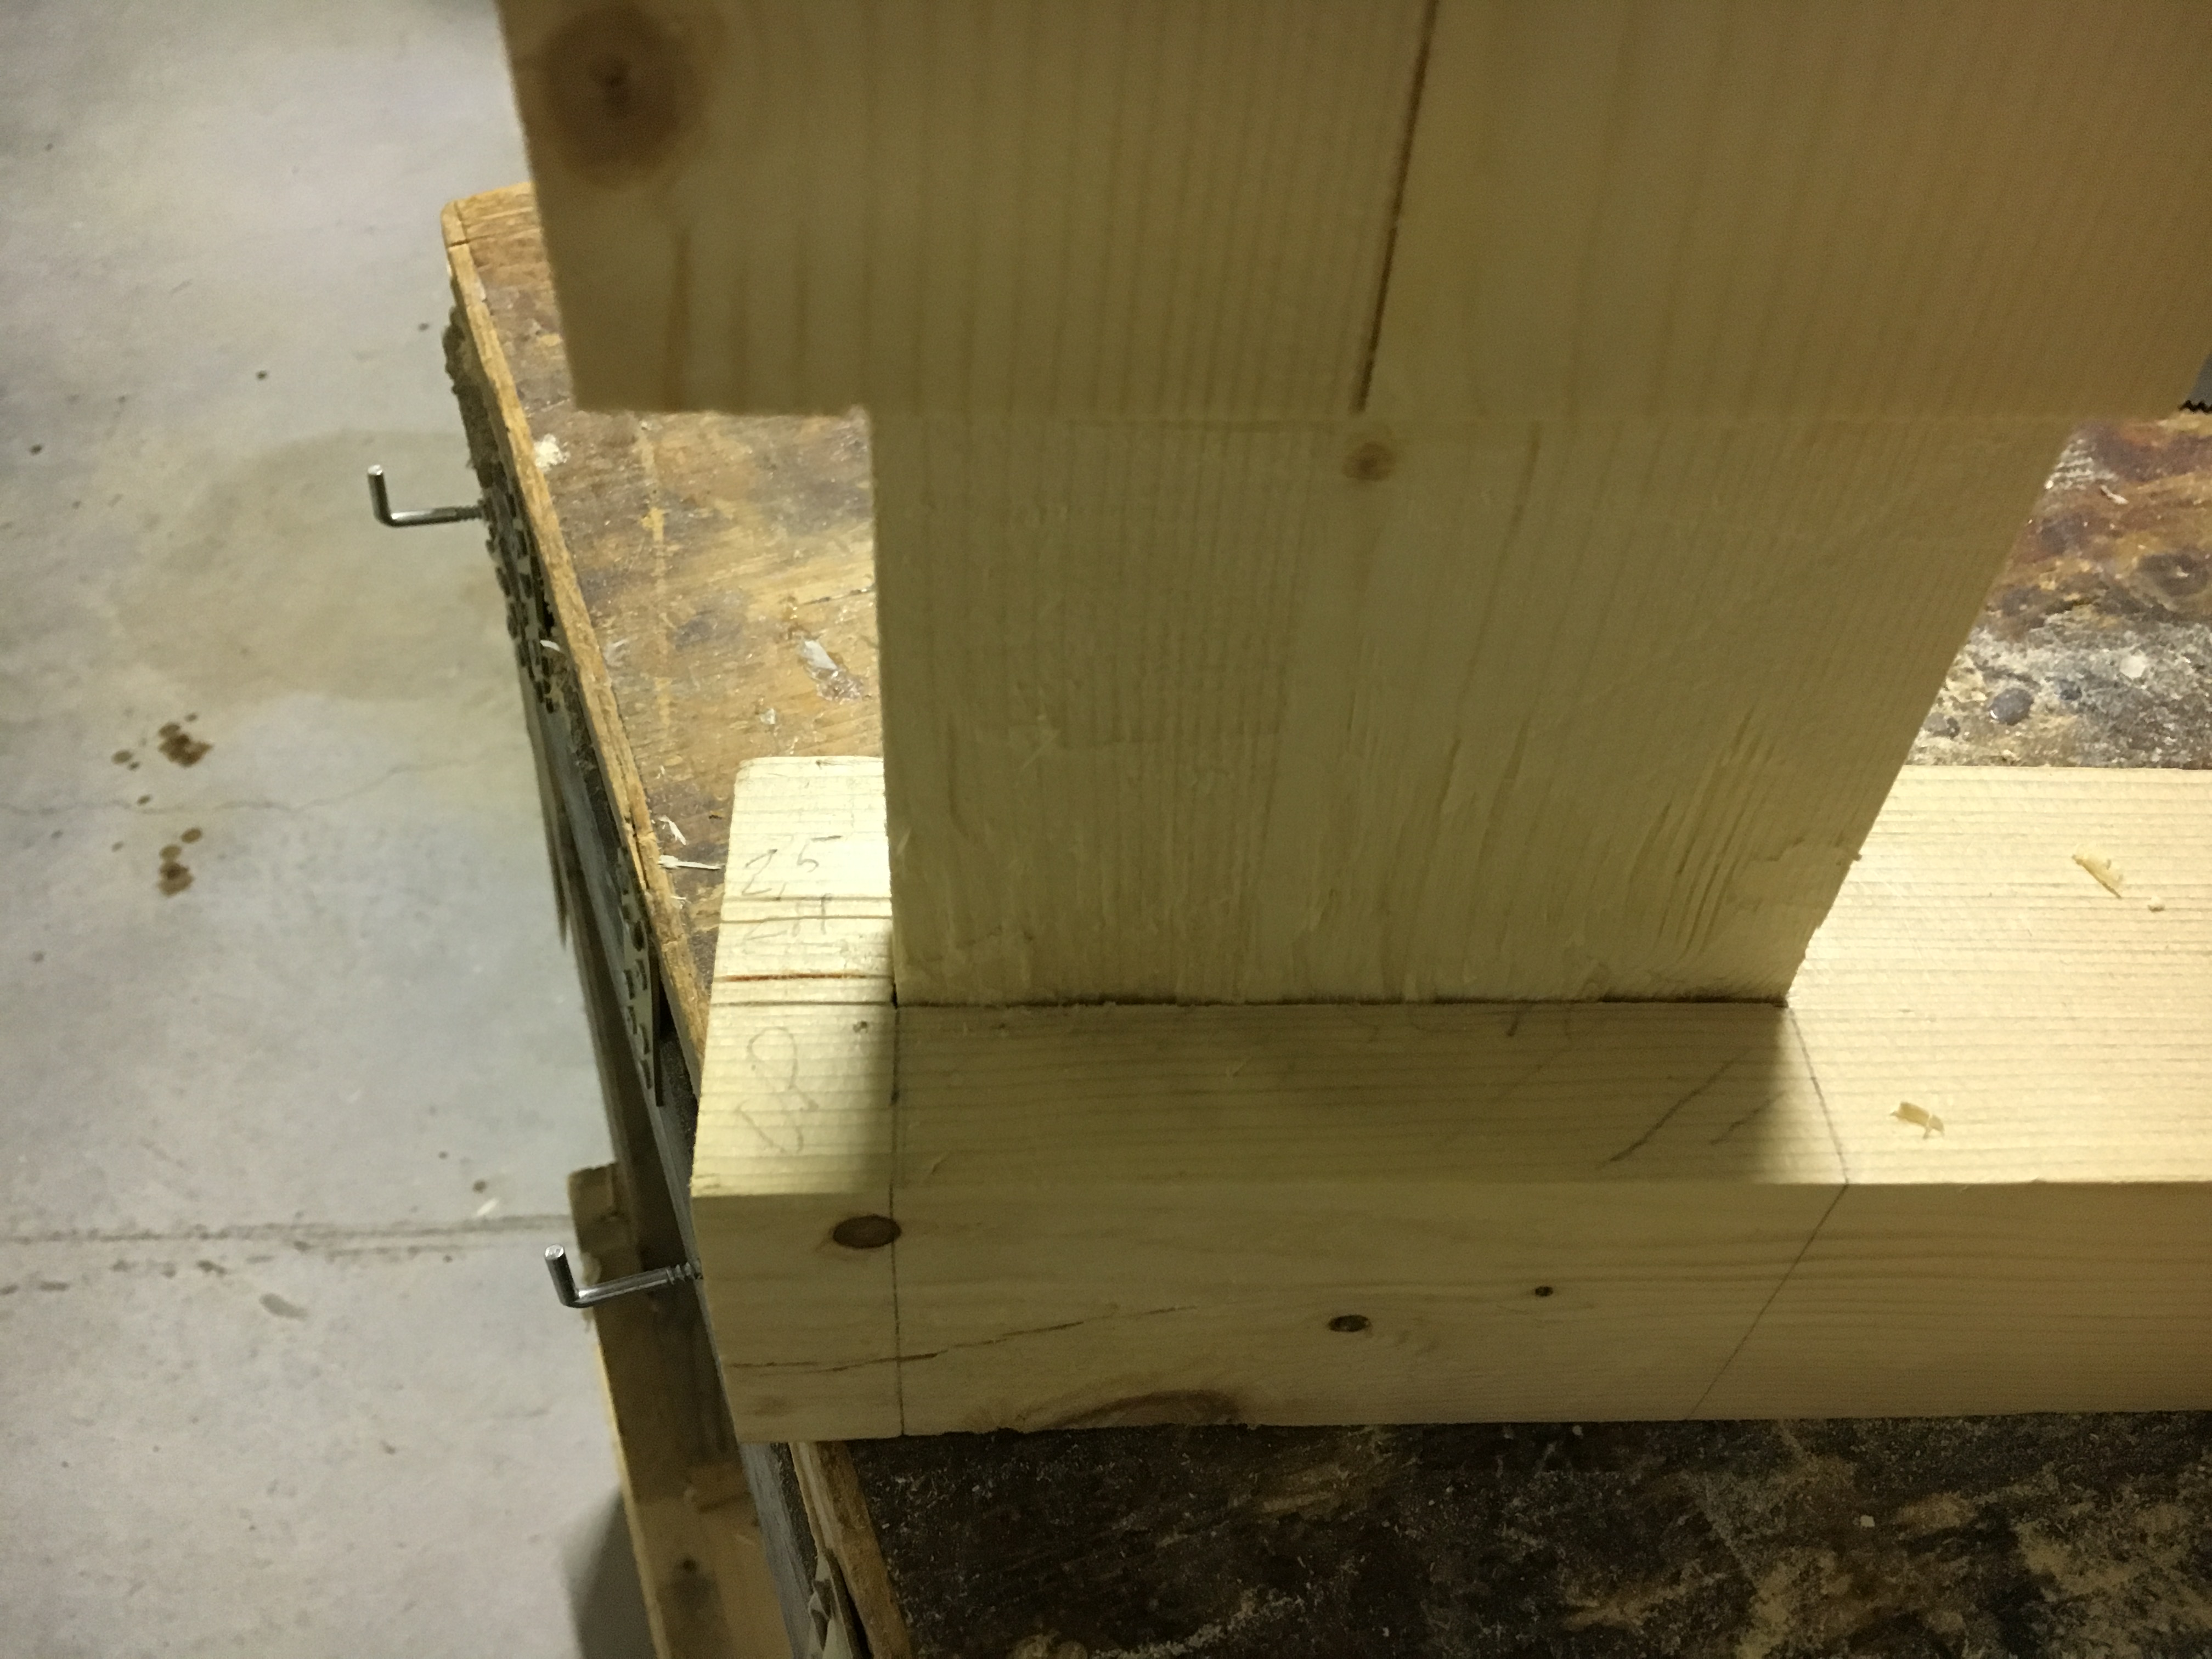
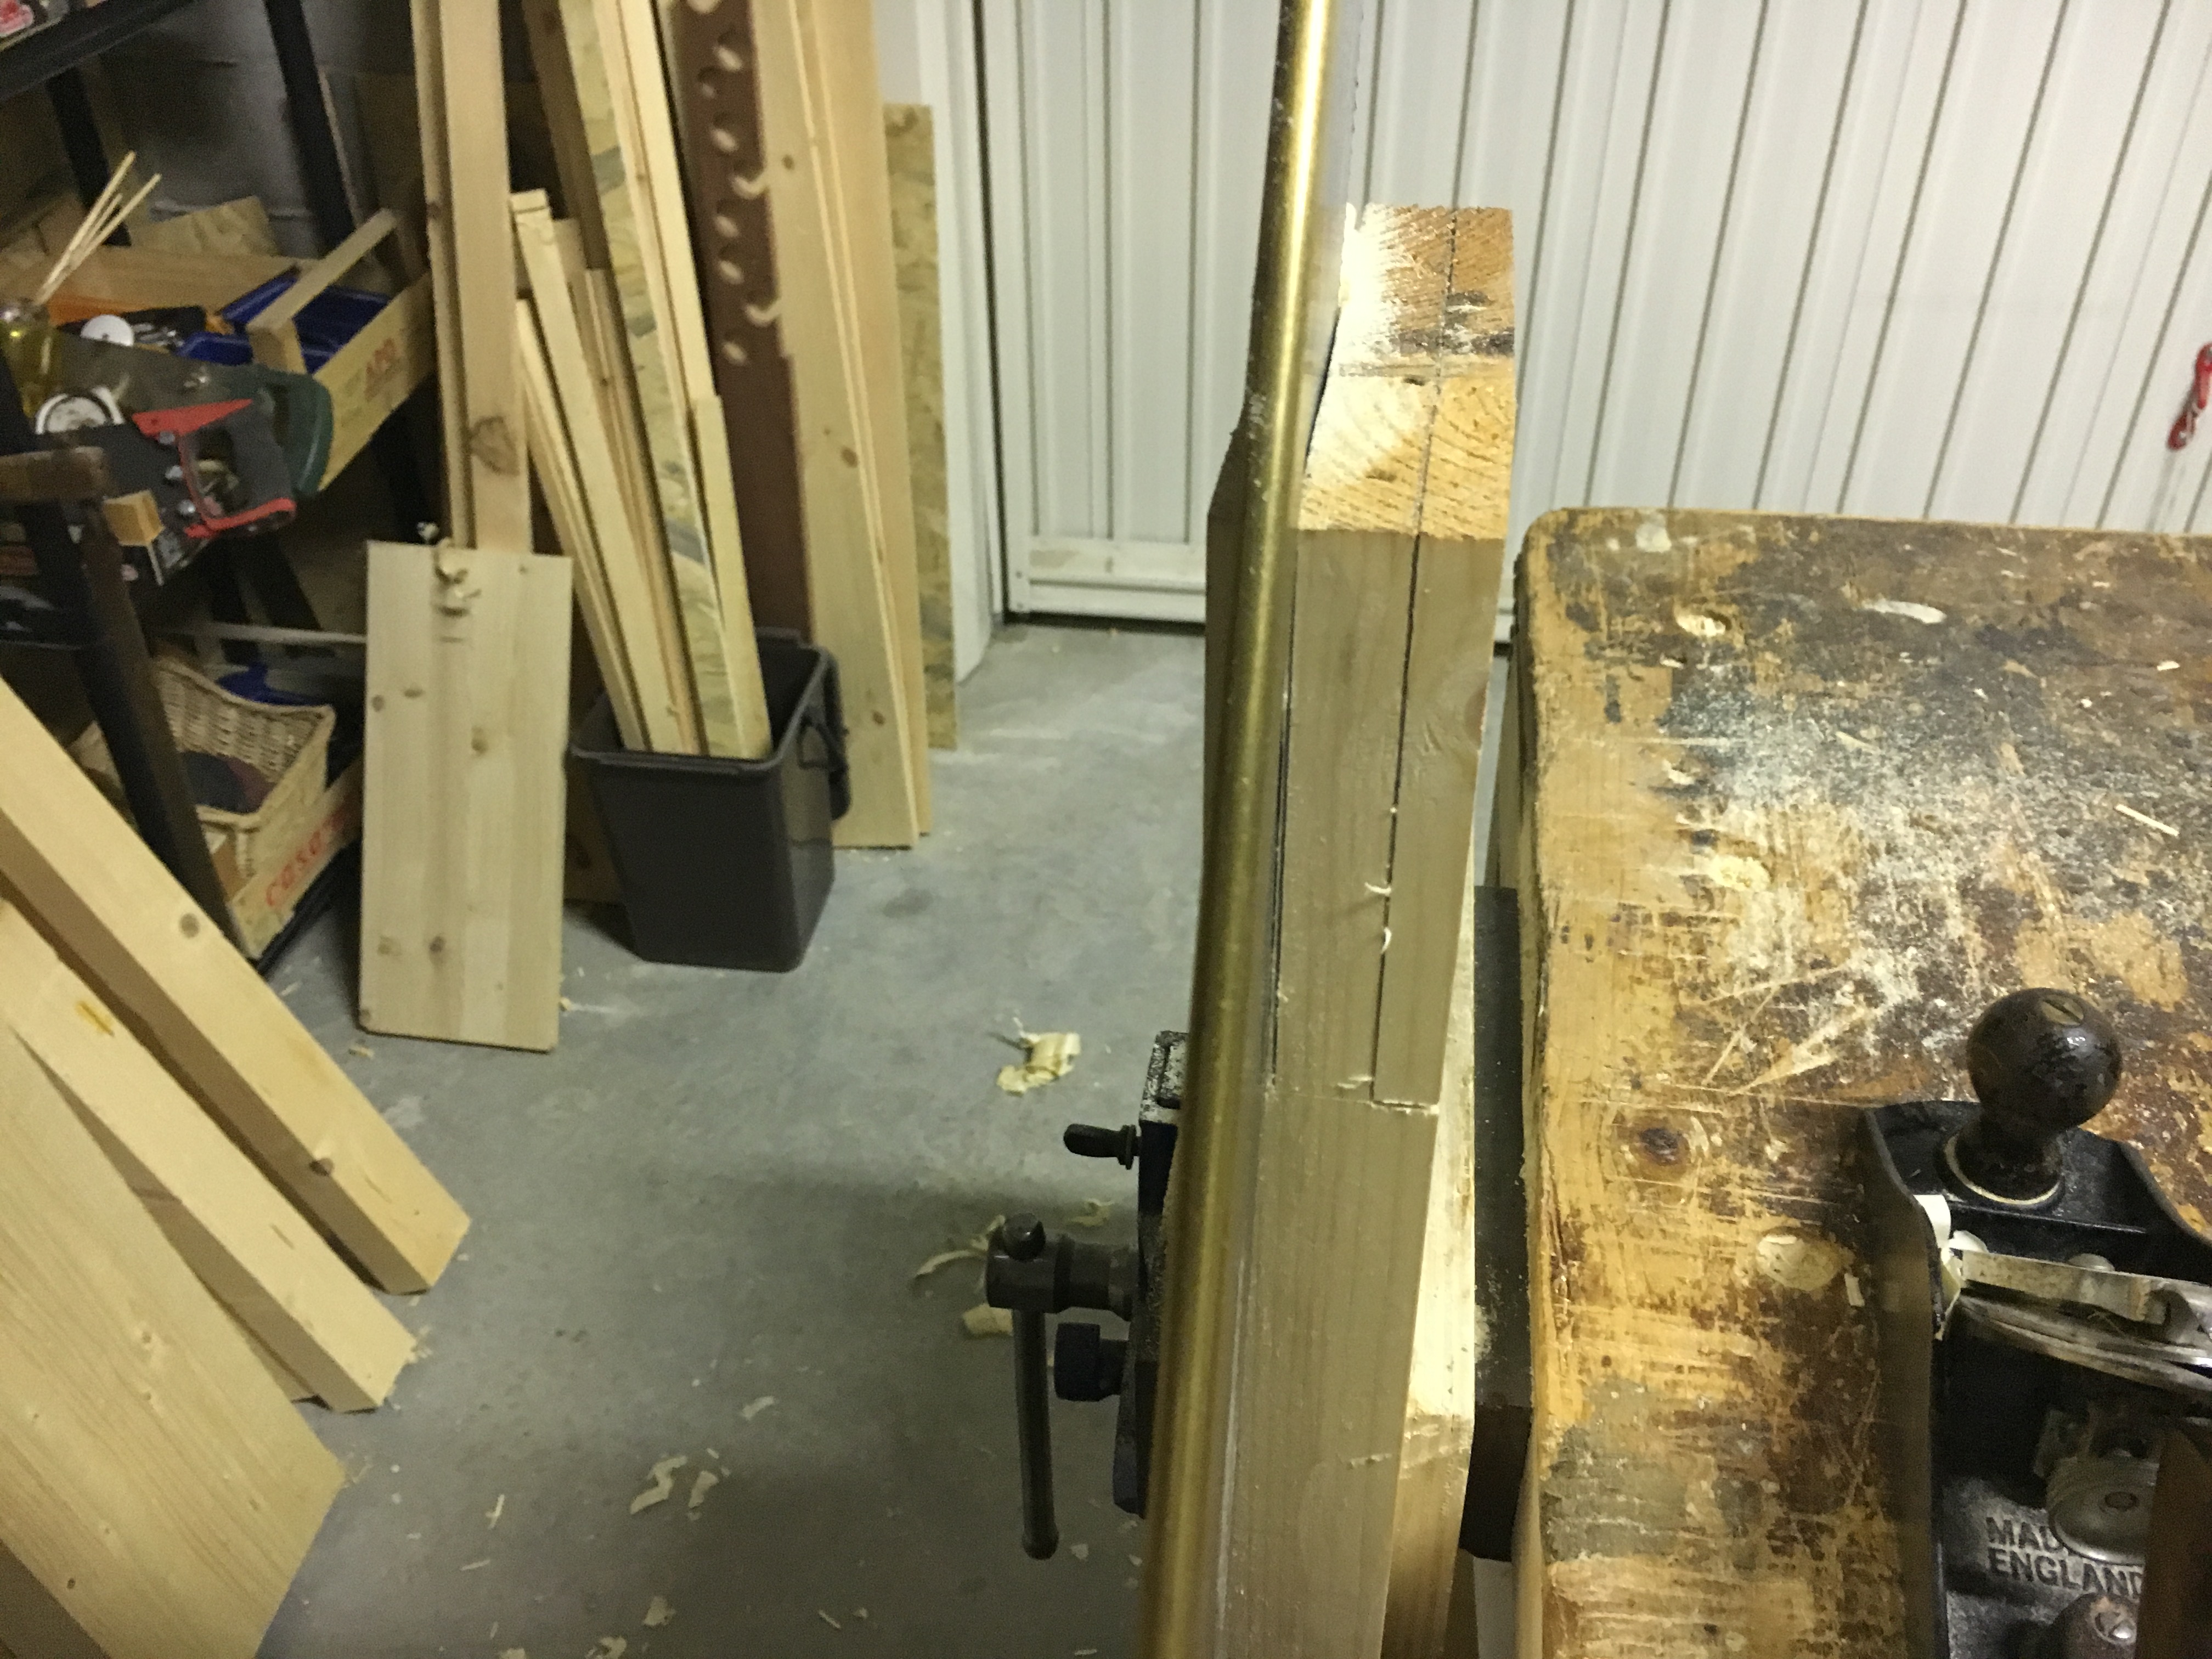
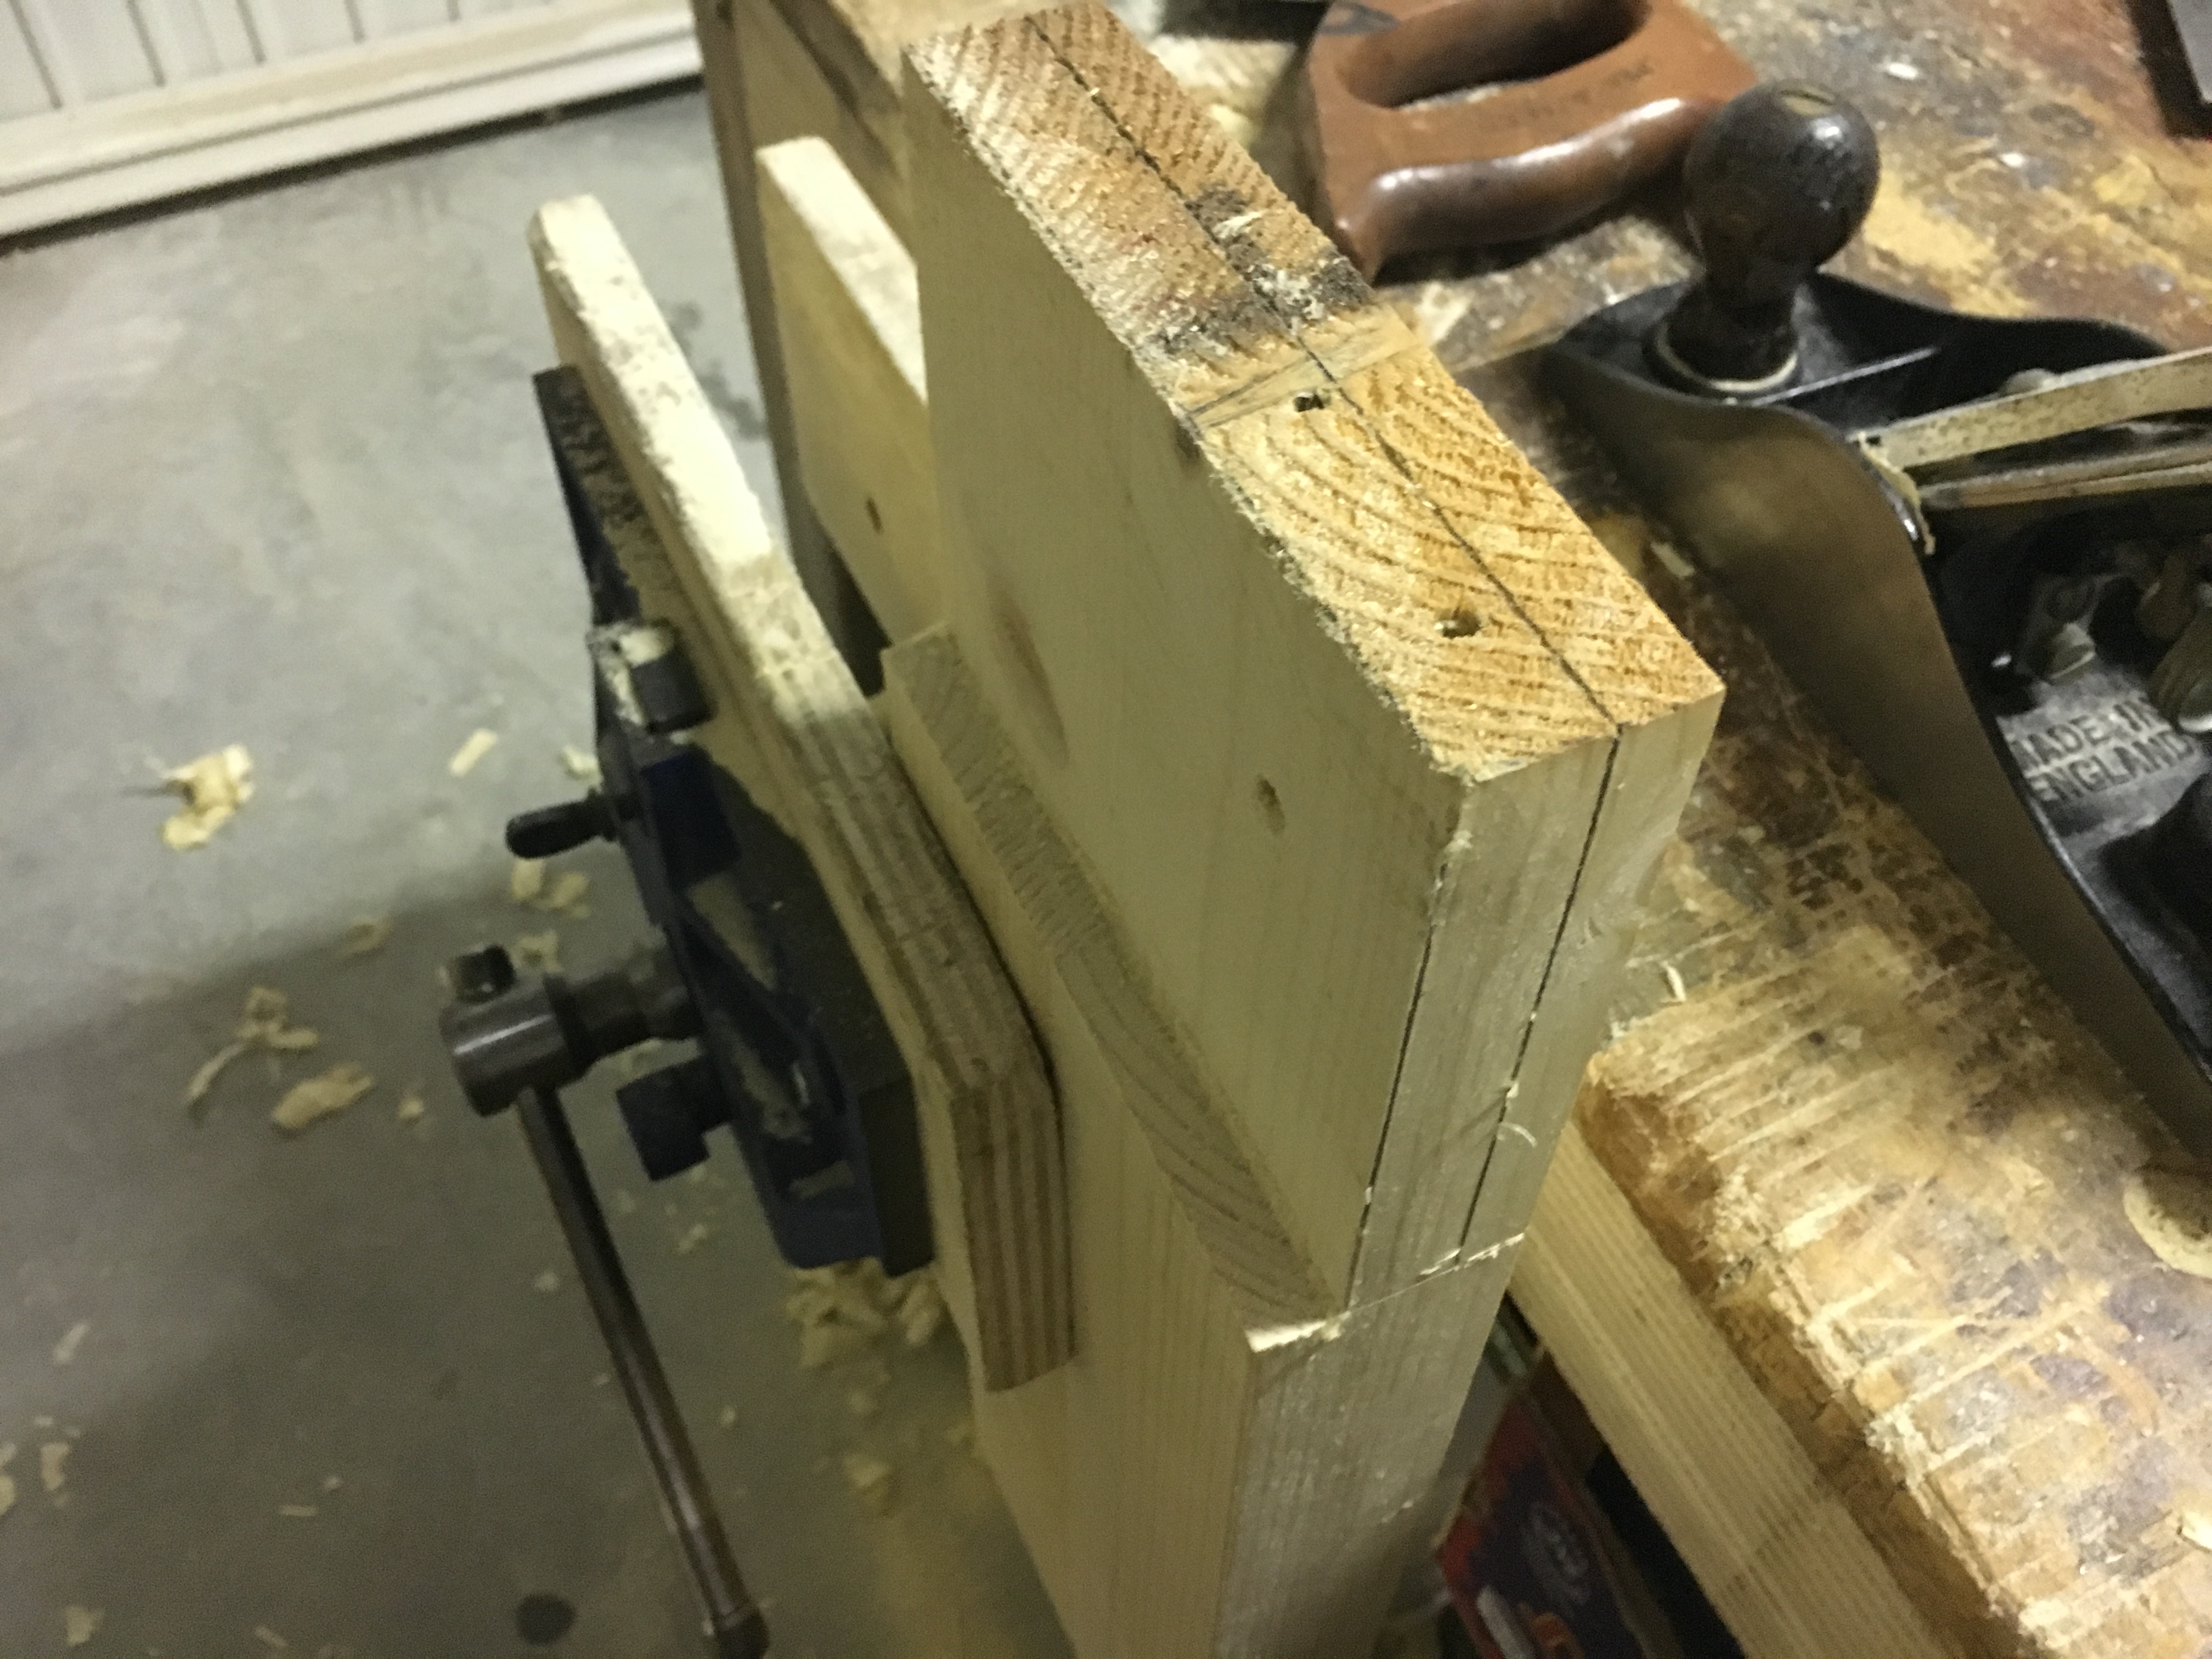
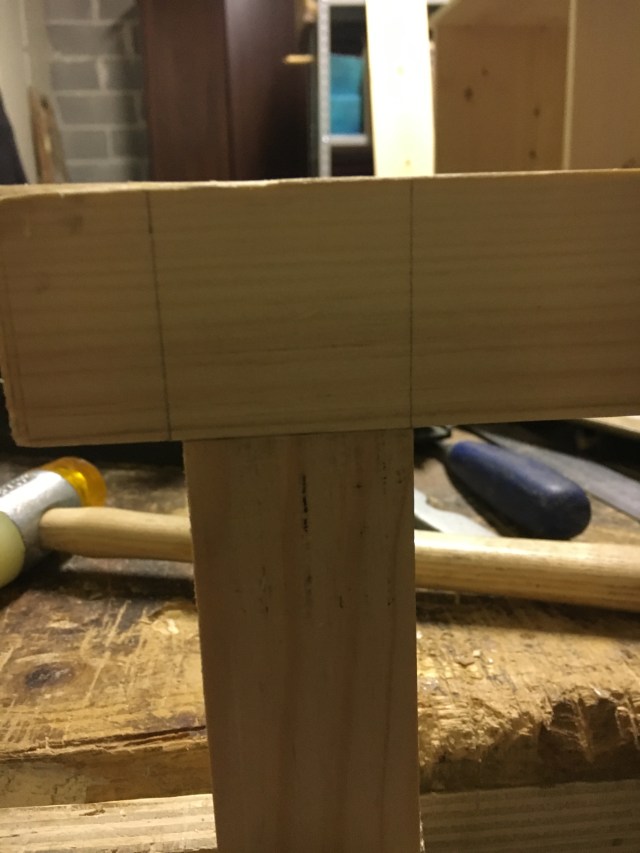
In questo caso è stata realizzato un incastro tenone e mortasa a tutto spessore e con spalletta (che vedremo tra un attimo). L’eventuale protrusione del tenone dalla mortasa può essere eliminata segando l’eccesso e poi piallato a filo del legno o, se di lieve entità, piallato direttamente.Quanto visto sopra vale pressappoco per tutti i tipi di incastro tenone e mortasa. Il procedimento può comunque variare se dobbiamo effettuare speciali tipi di incastro a tenone e mortasa. Vediamo molto brevemente come.
In this case a full-length tenon and mortise joint has been made with a shoulder pad (that we will see in a while). The eventual protrusion of the tenon from the mortise can be sawn and then planed flush with the wood or, if slight, planed directly. The procedure seen above is almost the same for all types of mortise and tenon joints. But it can anyway vary if we have to make special mortice and tenon joints. We see very briefly how.
REALIZZAZIONE DEL TENONE E MORTASA CON SPALLA / MAKING THE MORTISE AND TENON WITH A SHOULDER
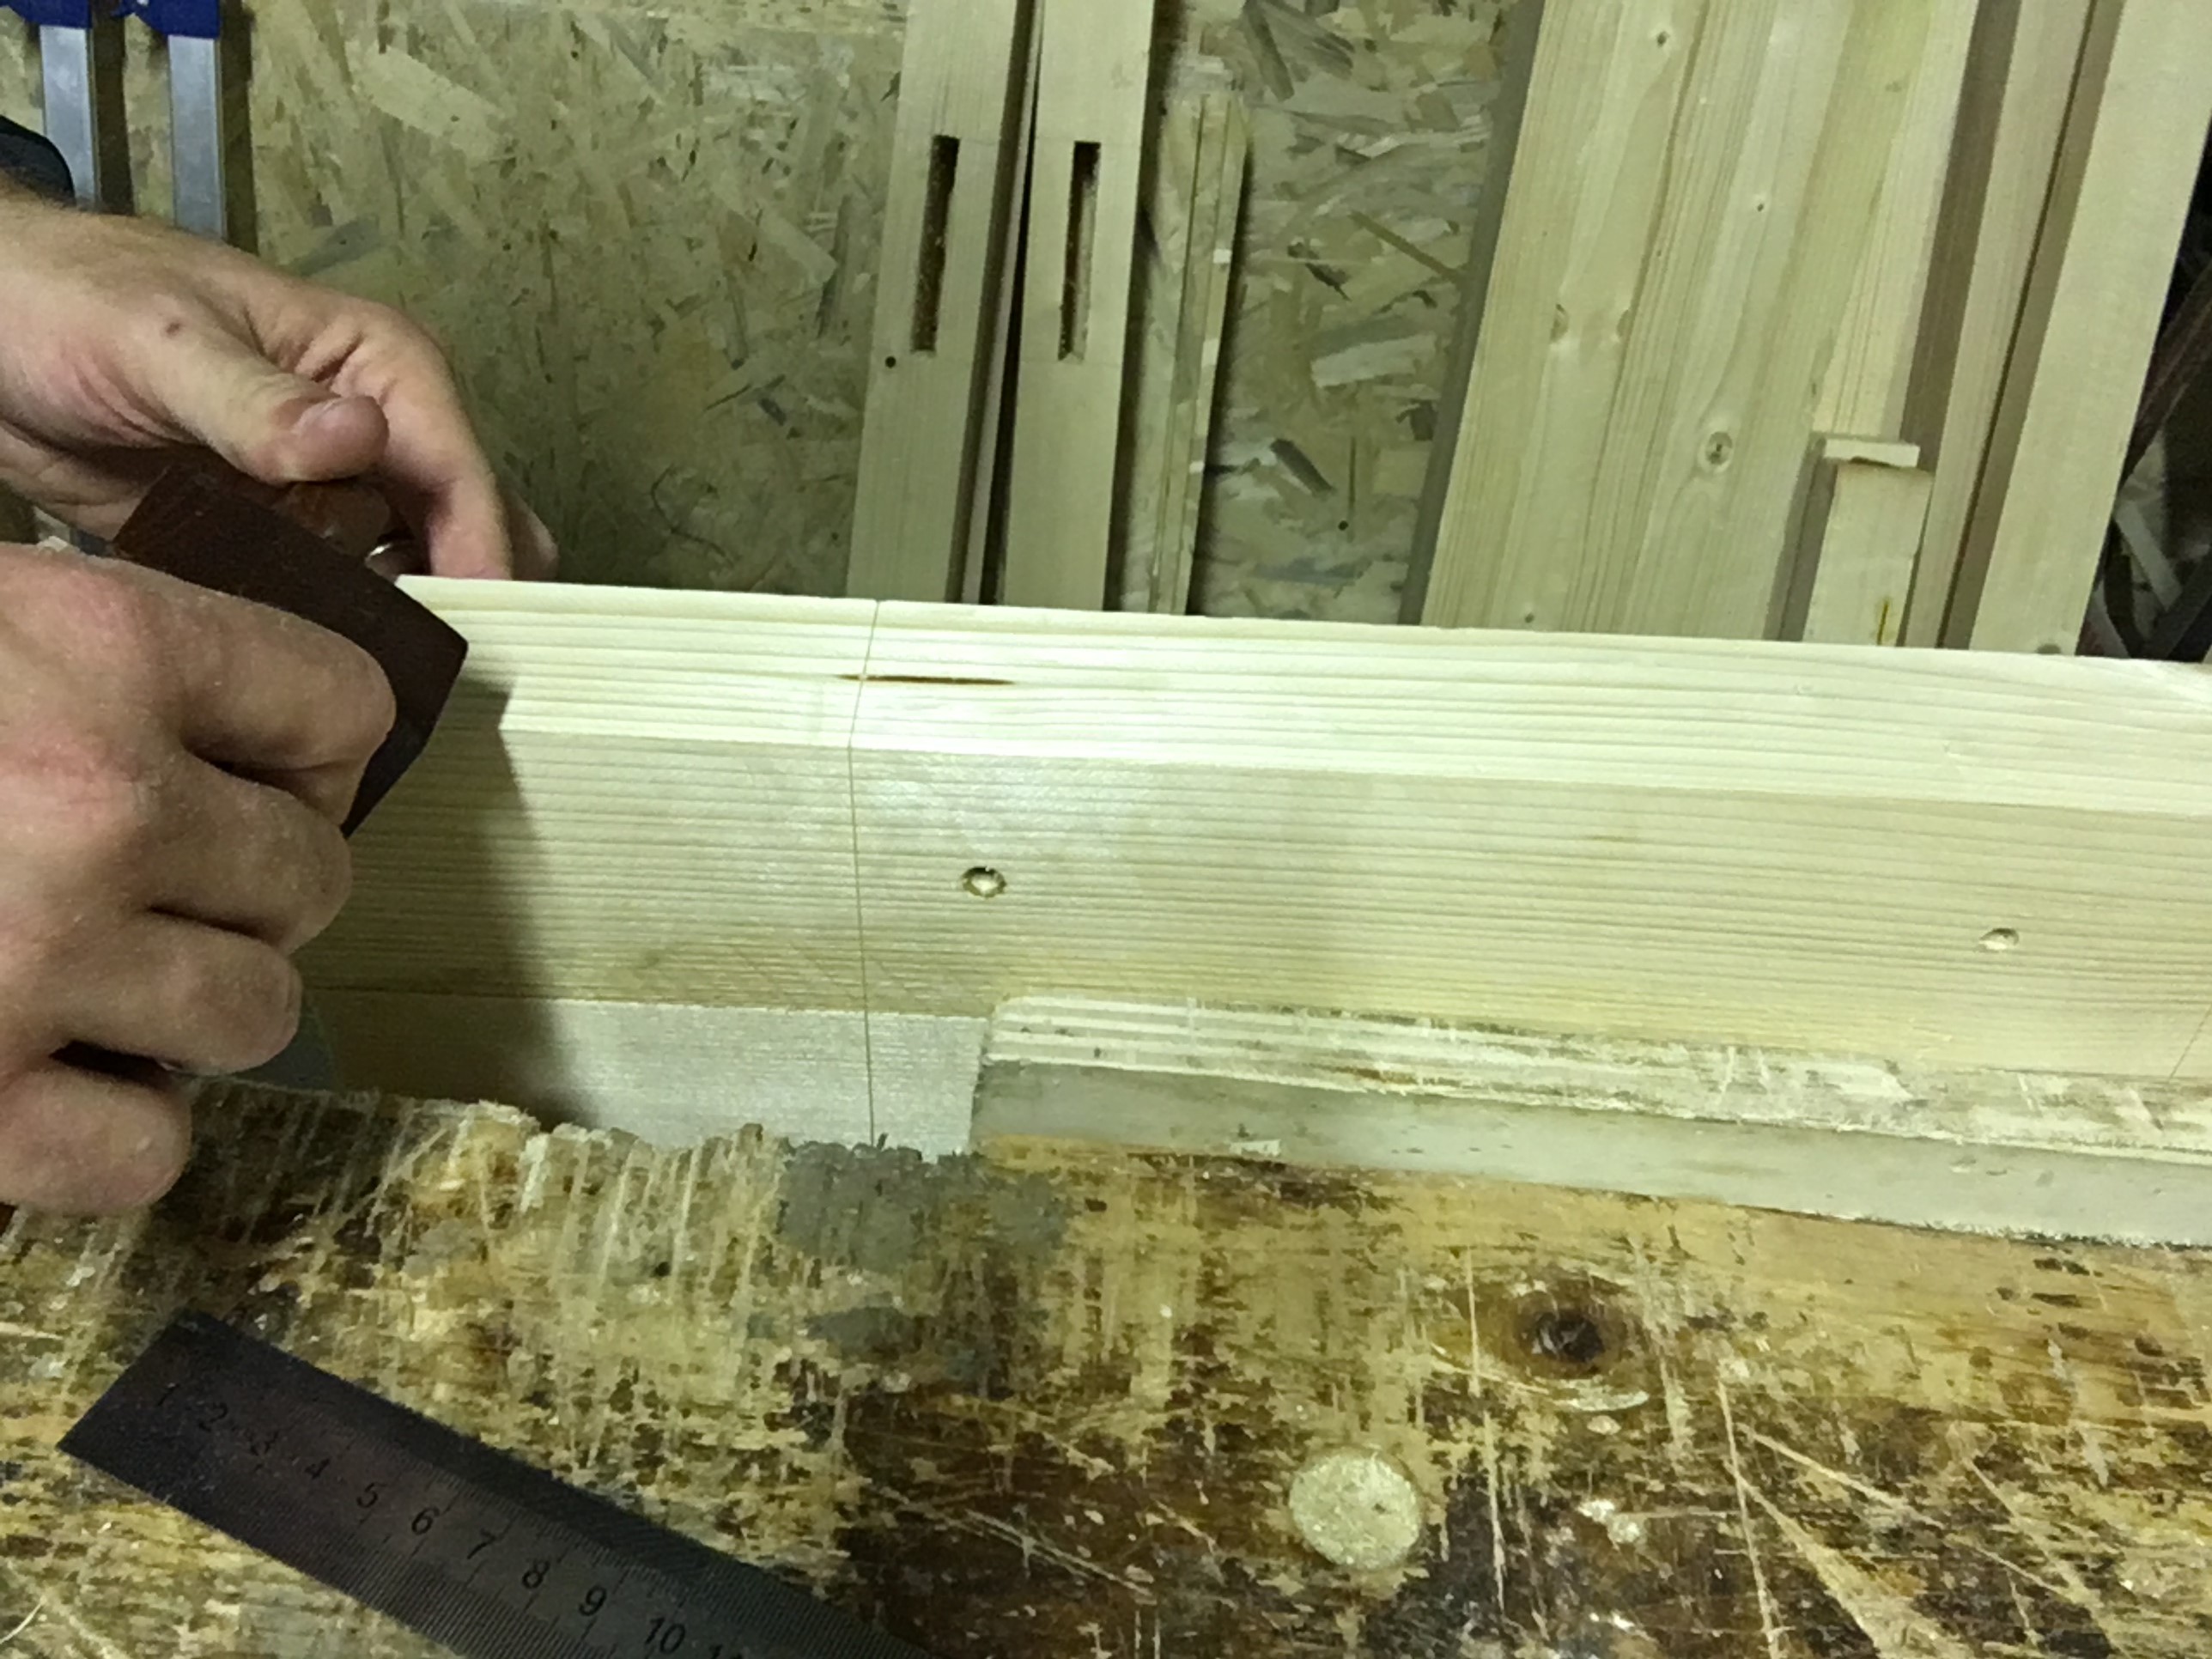
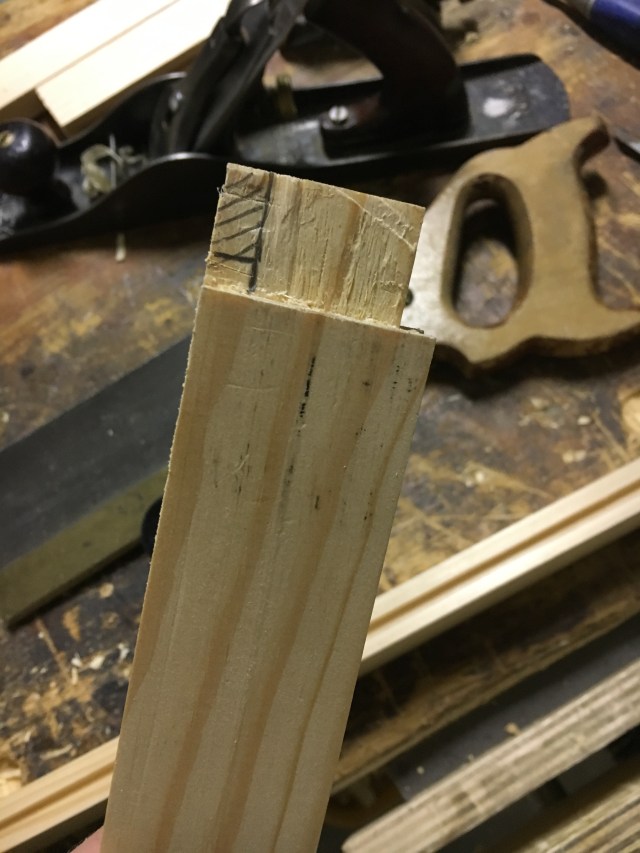
Il procedimento di esecuzione è pressoché identico a quello visto sopra. L’unica differenza sostanziale consiste nell’esecuzione nel tenone di una spalletta che va ad appoggiarsi al pezzo dove abbiamo ricavato la mortasa. Nella fase di segnatura della mortasa dobbiamo quindi prevedere uno spessore aggiuntivo che sarà appunto la larghezza della spalla. Si riporta dapprima la misura sul tenone (come mostrato in una delle prime foto dell’articolo).
The procedure is almost identical to that seen above. The only substantial difference consists in making a shoulder in the tenon that goes to lean on the piece where we created the mortise. In the mortise marking phase we must therefore provide an additional thickness which will be the width of our shoulder (the measurement on the tenon is shown in one of the first photos of the article).
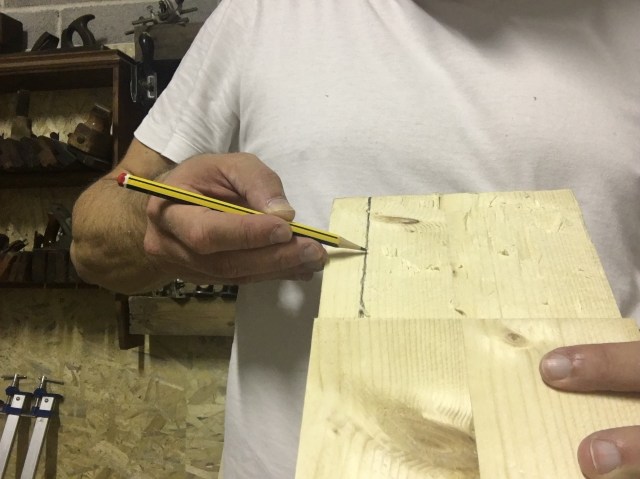
Si trasferisce la misura appena presa per tutta la lunghezza del tenone direttamente a mano o con l’ausilio della squadra.
We transfer the measure just taken along the entire length of the tenon directly by hand or with the help of the combination square.
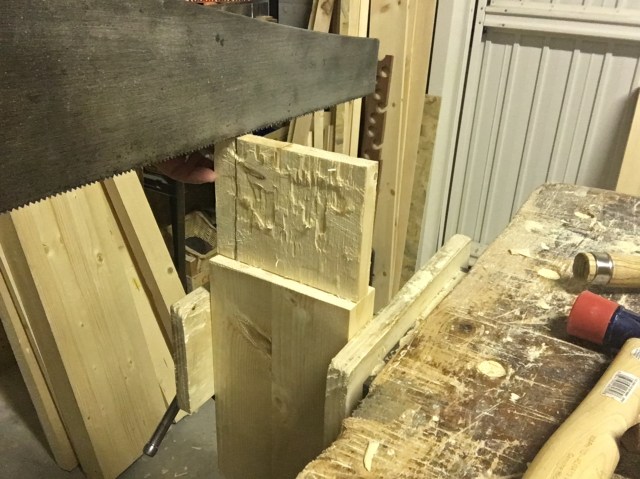
Si sega il più possibile vicino alla traccia, sempre cercando di eseguire un taglio dritto e lasciando la linea dentro.
You saw as close to the trace as possible, always trying to make a straight cut and leaving the line in.
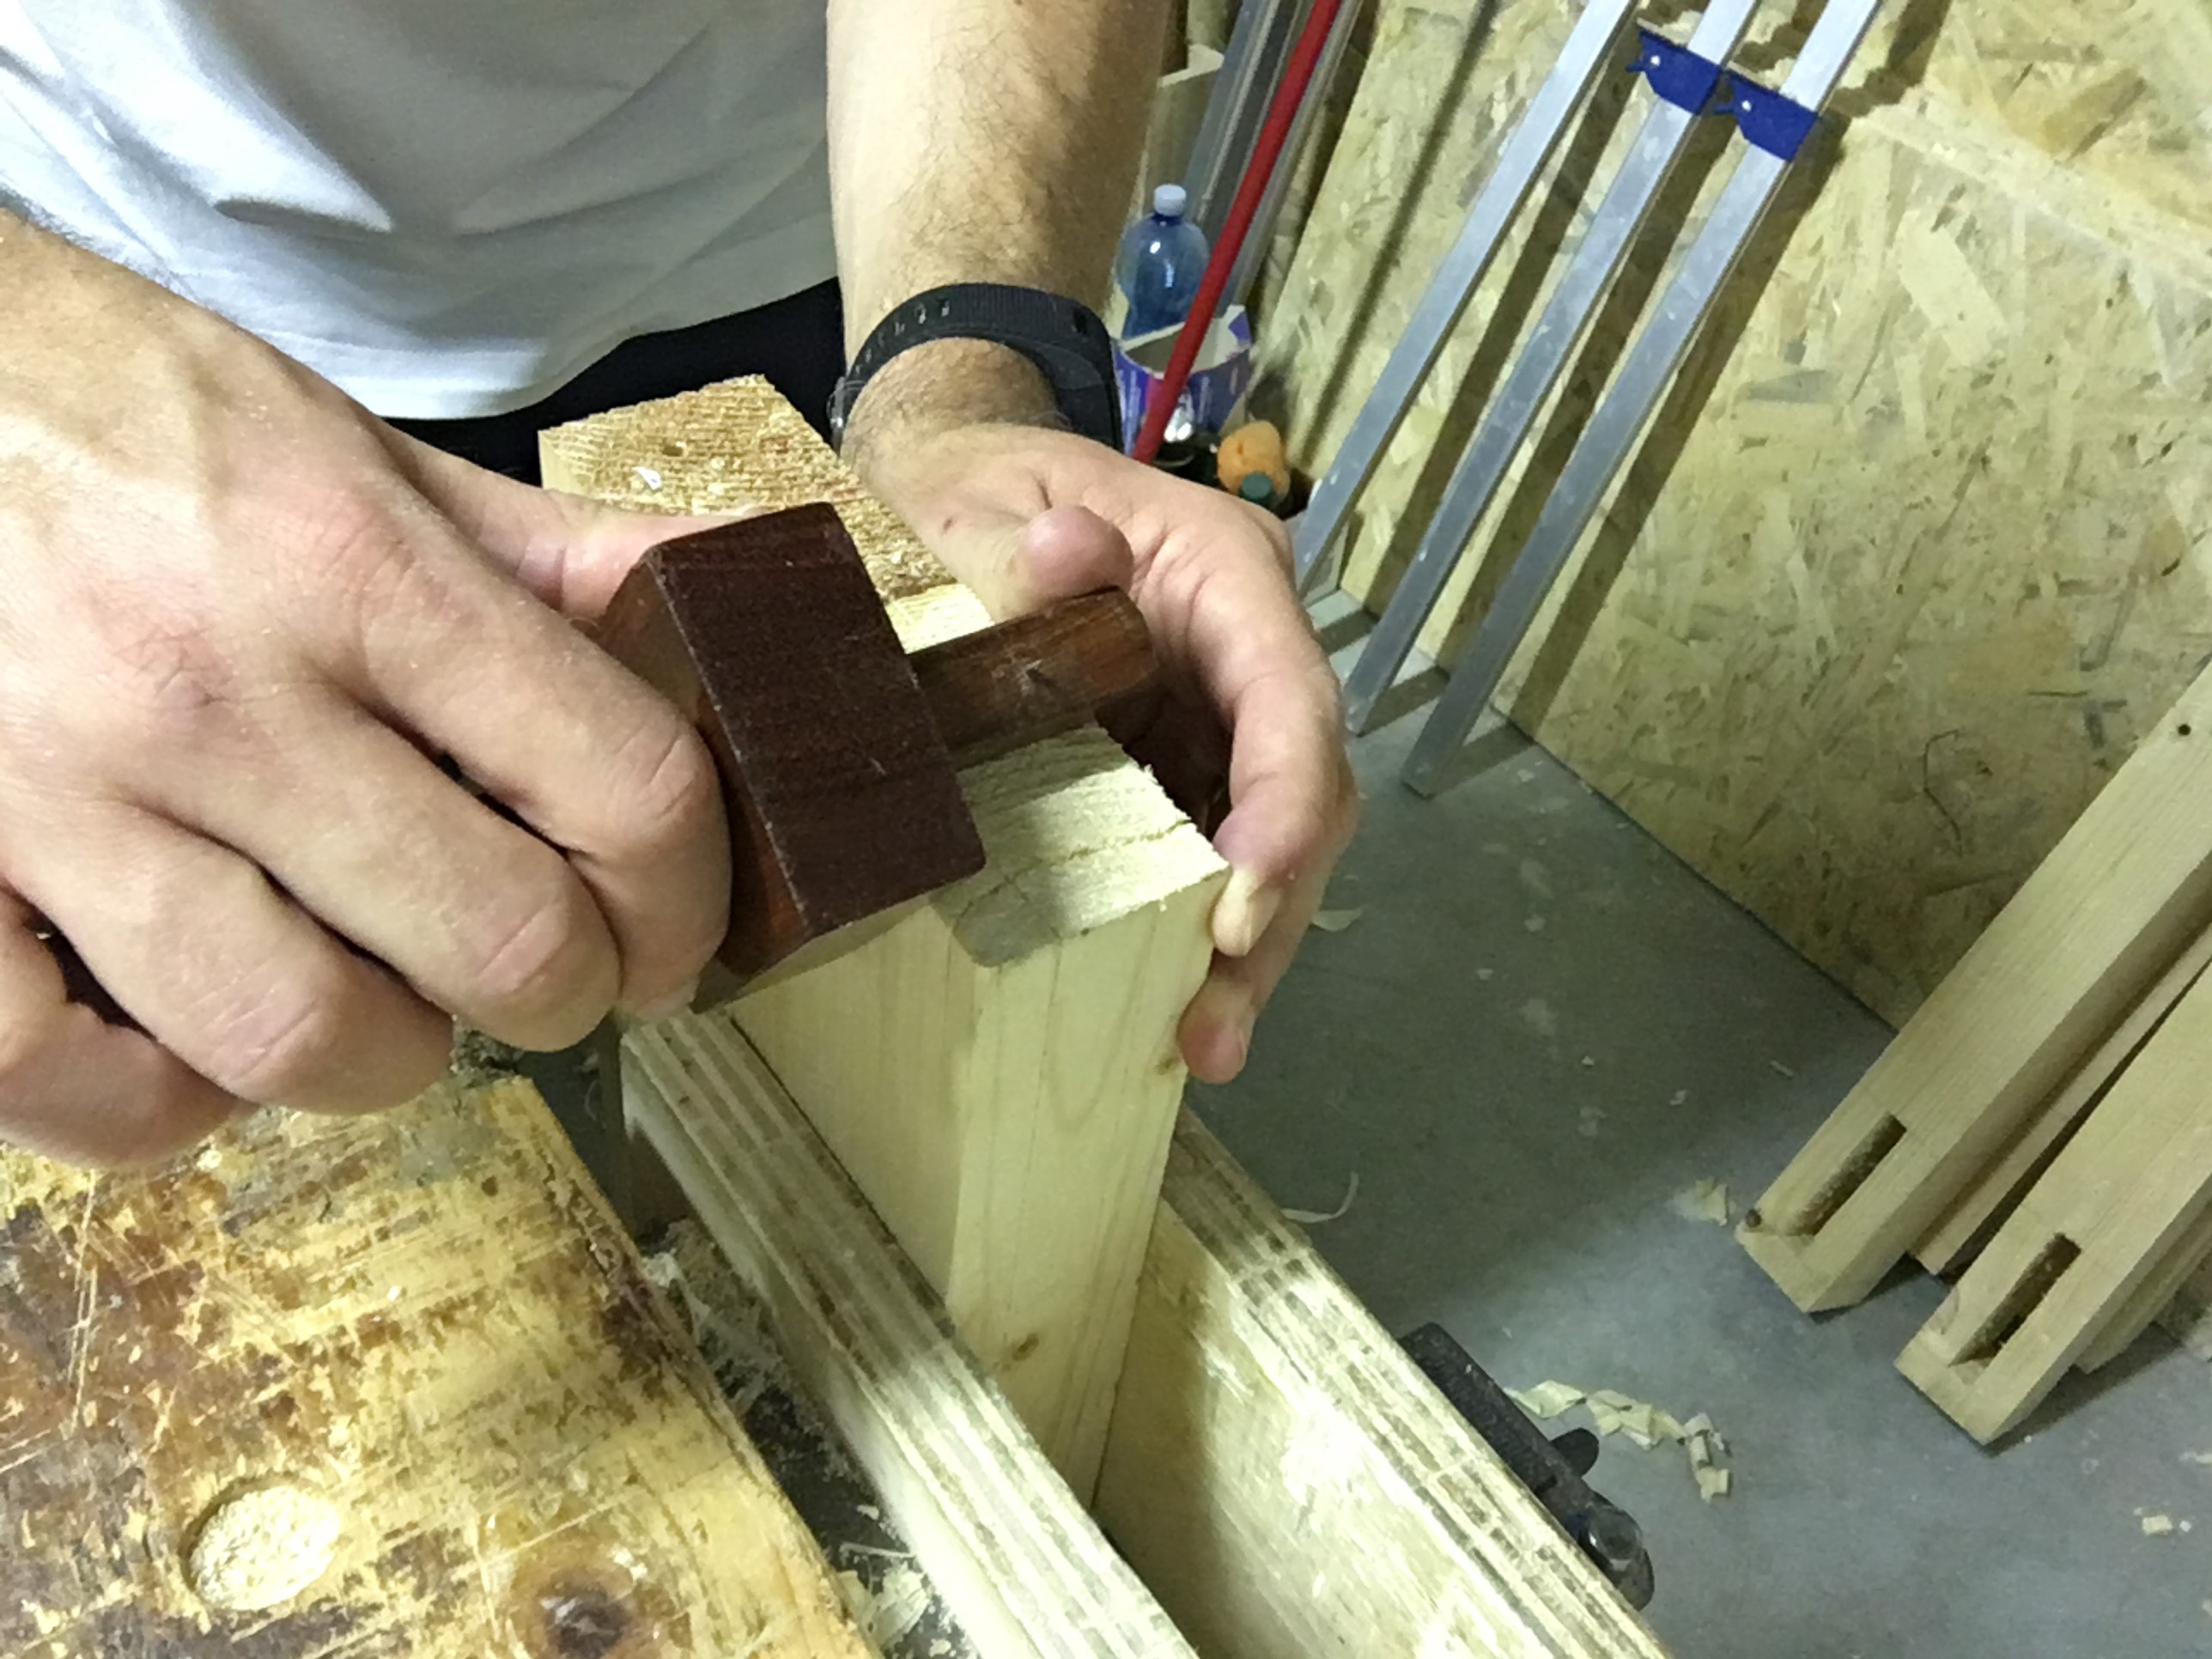
Si taglia infine traverso vena con una sega a dorso.
And finally we cut across the grain with a dovetail saw.
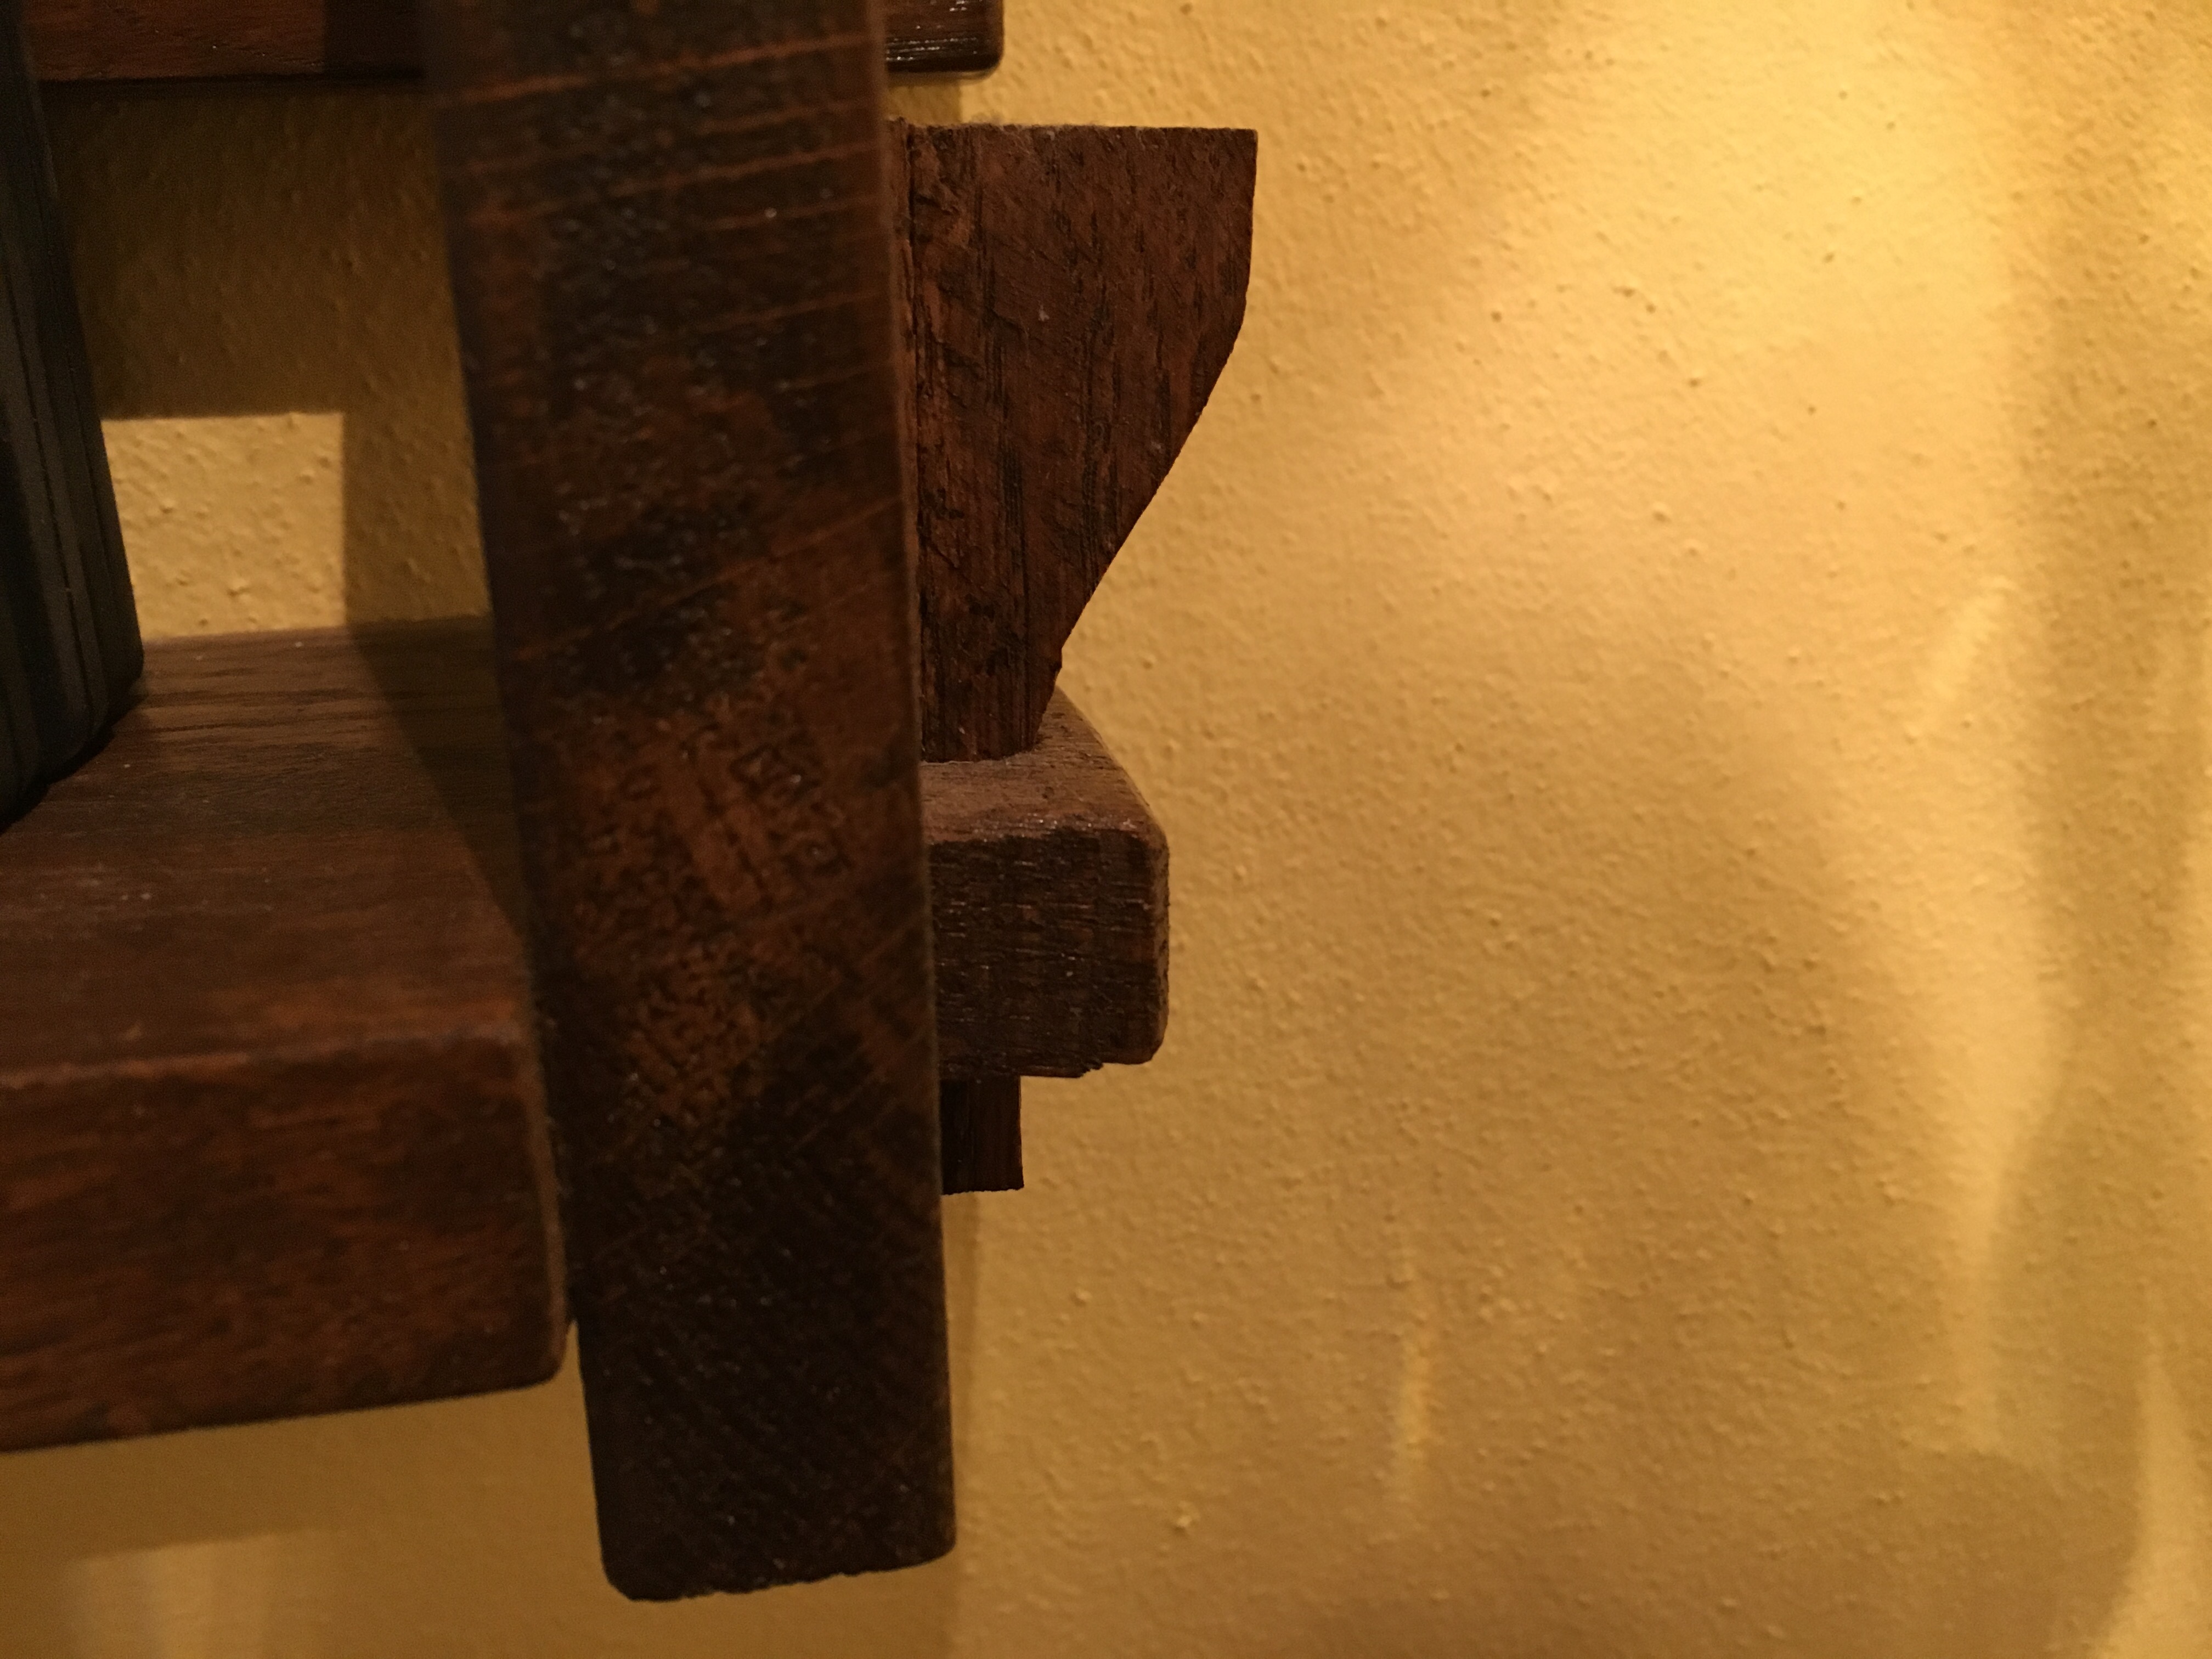
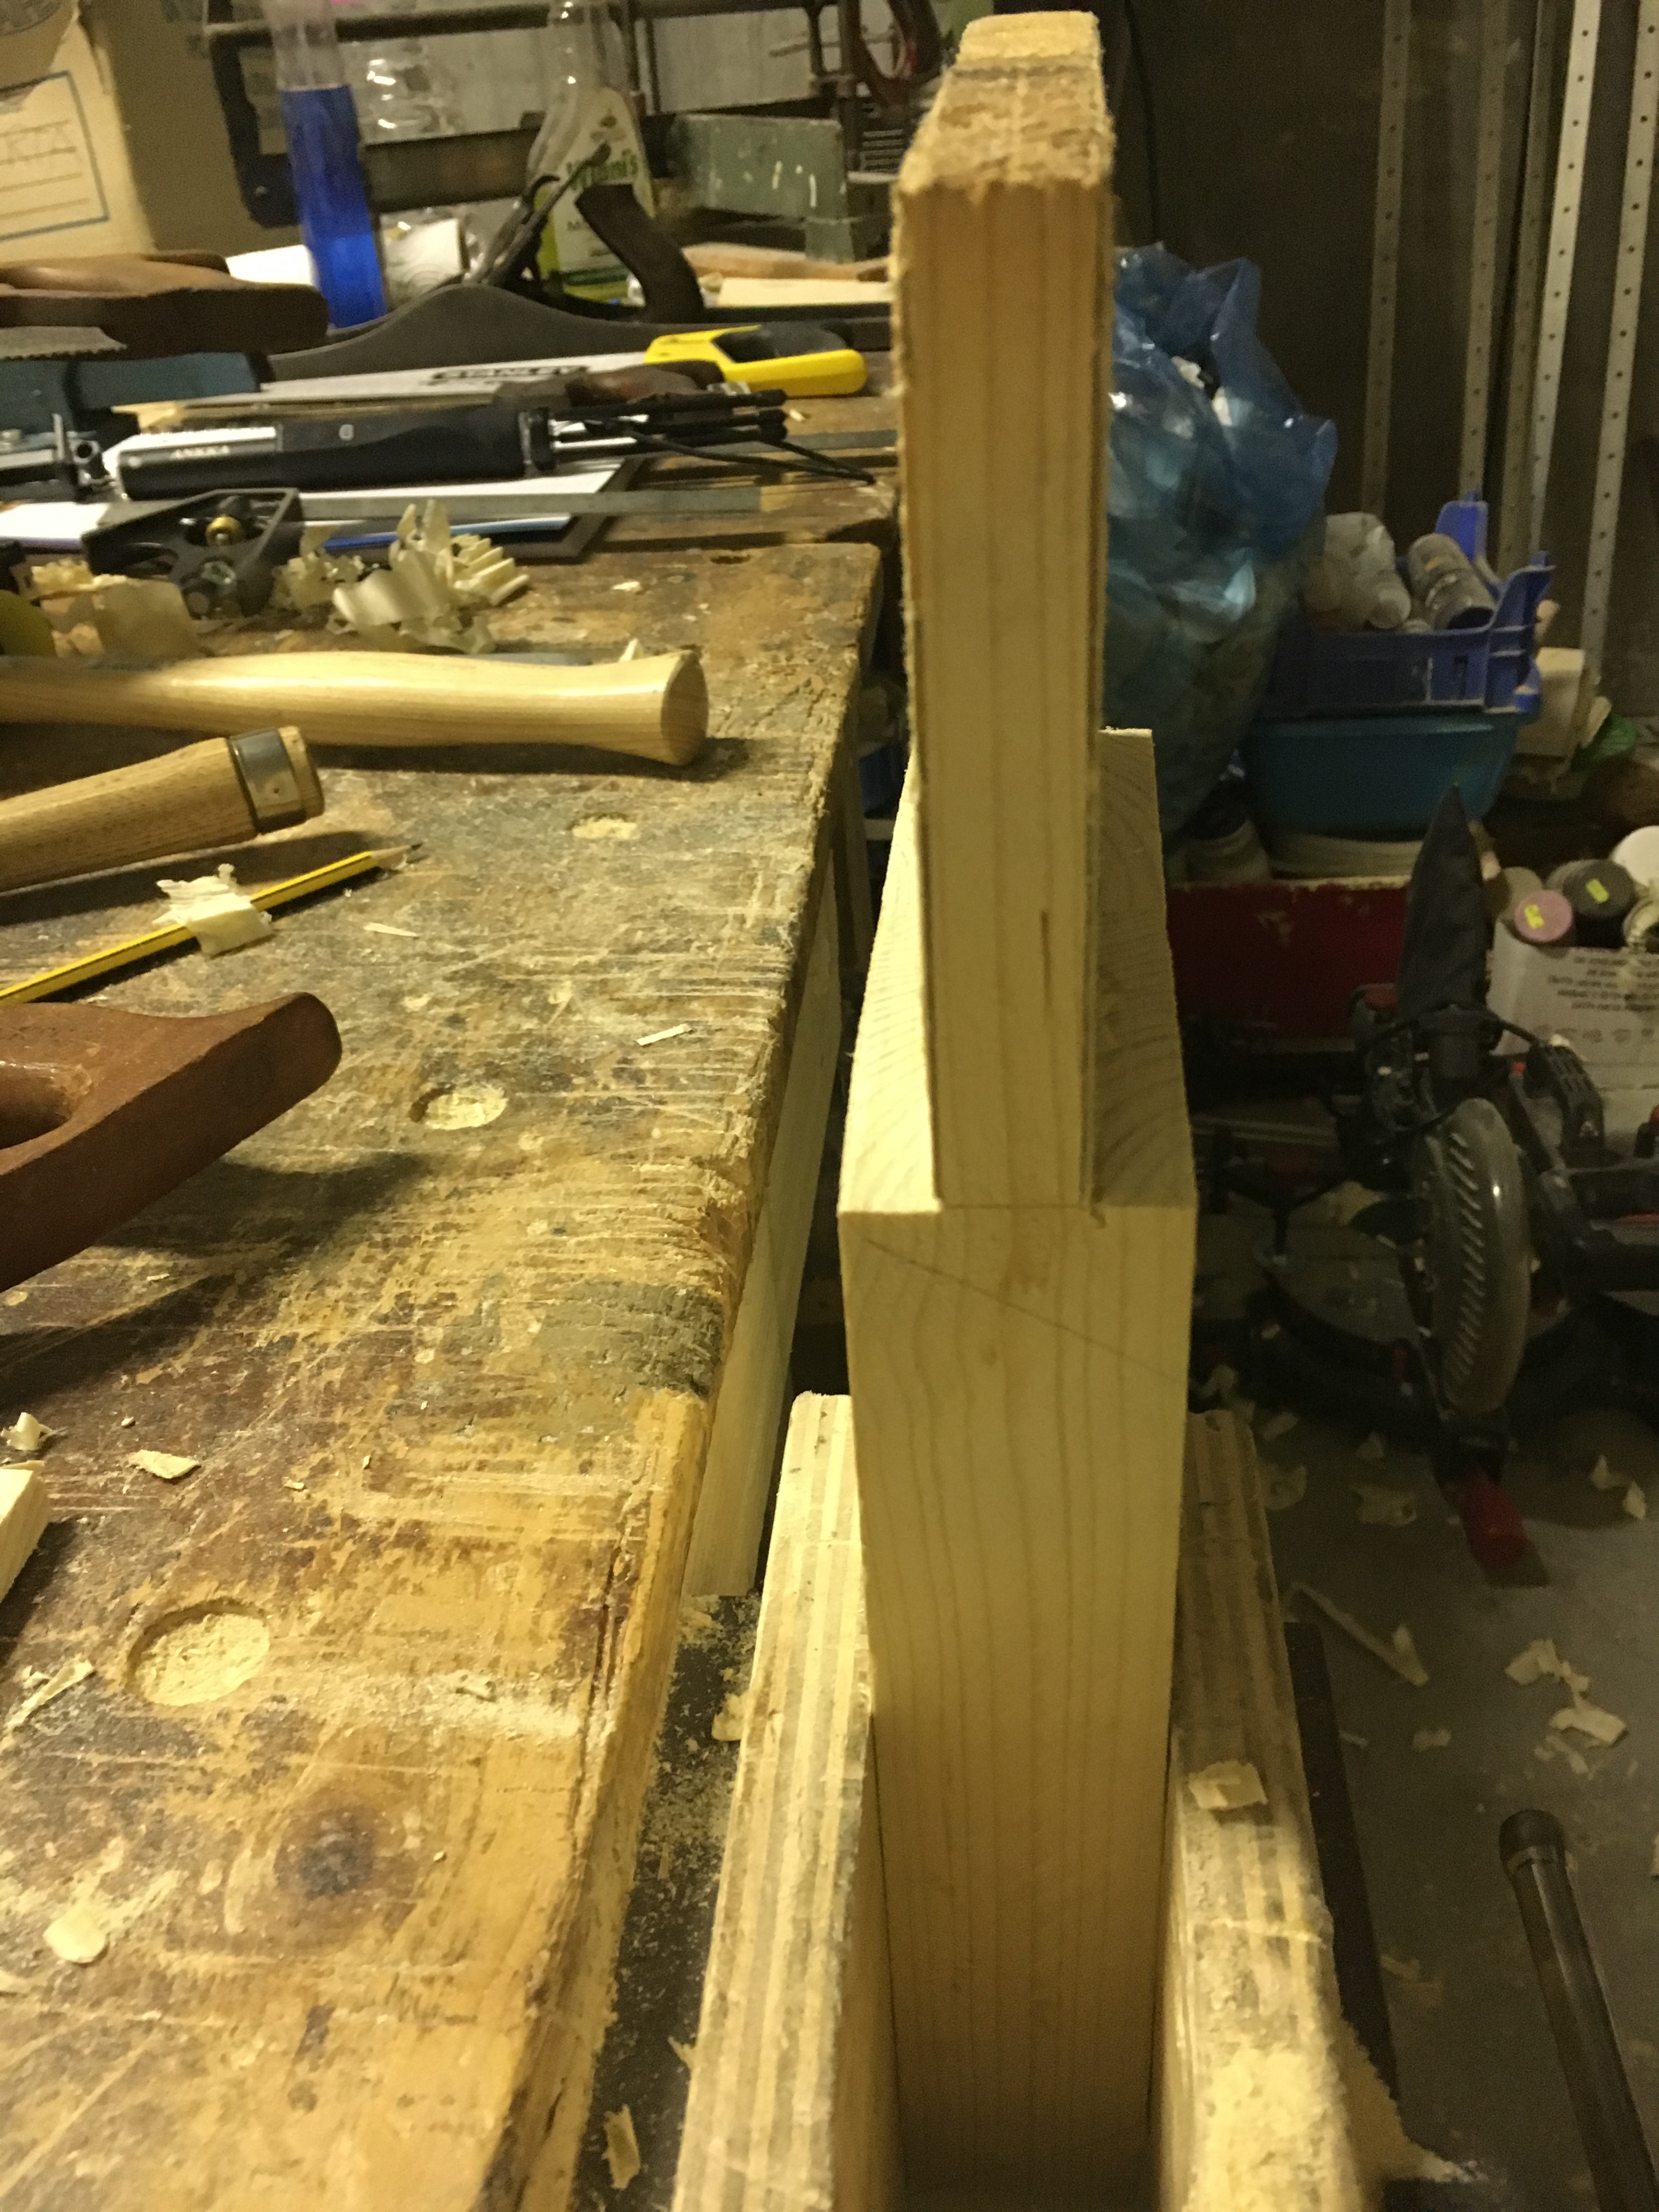
REALIZZAZIONE DEL TENONE E MORTASA CIECA CON ANCA / MAKING THE STOPPED HAUNCHED MORTISE AND TENON
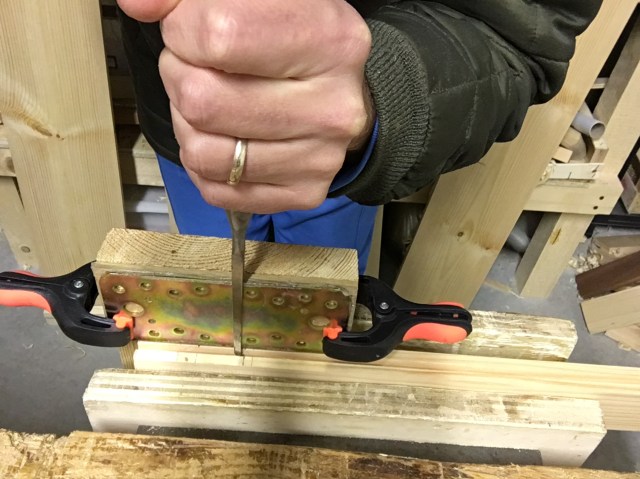
Di seguito un altra variante di tenone e mortasa (con anca) molto utilizzata nel fare ad esempio le gambe dei tavoli o le cornici delle ante dei mobili (le foto sono tratte da un altro progetto). In questo caso la mortasa non è scavata a tutto spessore ma solo fino a circa 2/3. Per mantenere la perpendicolarità dello scalpello mi sono aiutato con un supporto autocostruito.
Following, another variant of the joint, the stopped haunched mortice and tenon (photos taken from another project). In this case the mortise is not chopped all the way through but stops at 2/3 of the piece. To help maintaining the perpendicularity while chopping I used a simple jig tight in the vise.

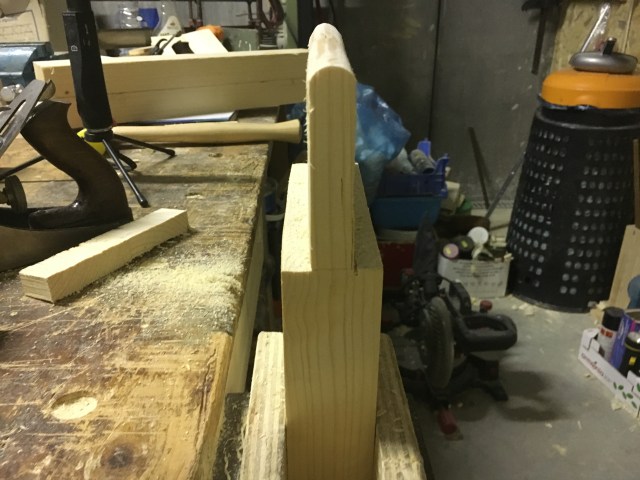
REALIZZAZIONE DI UN INCASTRO TENONE (STONDATO) E MORTASA PASSANTE / MAKING A THROUGH MORTISE AND (ROUNDED) TENON JOINT
Se vogliamo che il tenone sporga dalla mortasa bisogna che la lunghezza del tenone sia maggiore della profondità della mortasa. Prima di iniziare bisogna considerare se vogliamo smussare la parte finale del tenone. Questa operazione infatti andrebbe effettuata prima di incollare l’incastro perché abbastanza difficoltosa se effettuata successivamente. Segniamo a matita su ambedue le facce del tenone la misura fino alla quale vogliamo smussare il tenone. Ovviamente questa misura dovrà essere presa in modo tale che quando il tenone verrà inserito nella mortasa la stondatura vada oltre lo spessore del pezzo.
If we want the tenon to protrude from mortise, the length of the tenon must be longer than the depth of mortise. Before starting we also must consider whether we want to round the final part of the tenon. This operation should be done before gluing the joint because it is quite difficult if carried out later. We mark in pencil on both sides of the tenon the measure up to which we want to round the tenon. Obviously this measurement must be taken in such a way that when the tenon is inserted into the mortise the rounding goes beyond the thickness of the piece.
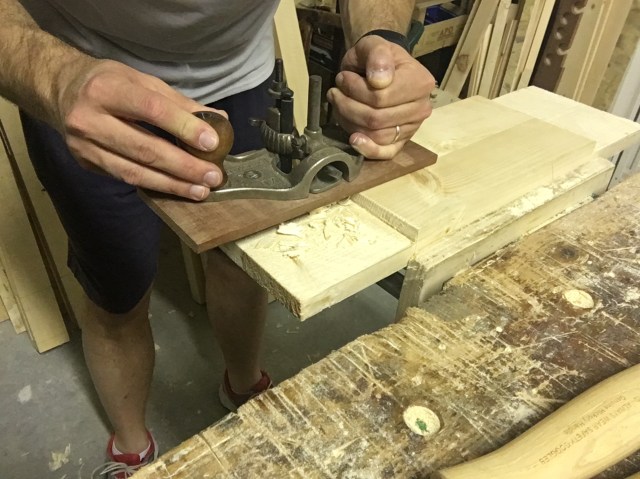
Lavoriamo con la pialla mantenuta a 45 gradi da entrambe le facce del tenone e rifiniamo con la carta abrasiva cercando di ottenere una sagomatura uniforme. Facciamo delle prove a secco (quindi senza colla) dell’incastro. Quando saremo soddisfatti potremo passare alla fase di incollaggio.
We work with the plane at 45 degrees from both sides of the tenon and finish with the abrasive paper trying to get a uniform shape. We do some dry tests (therefore without glue) of the joint. When we are satisfied we can move on to the gluing phase.
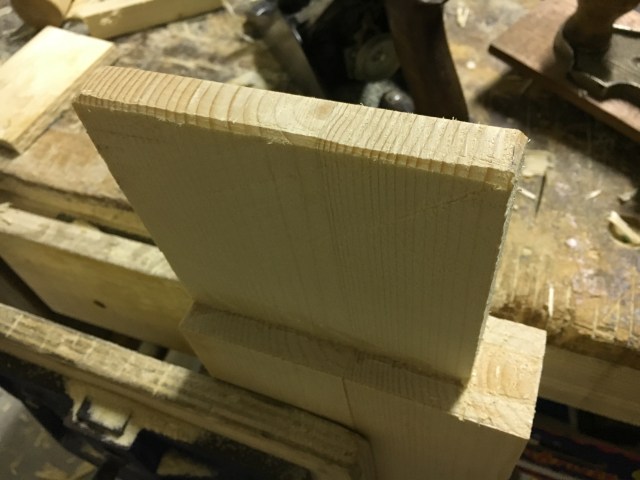
In alto si vedono le due tipologie di tenone. A sinistra il tenone a filo dello spessore del pezzo con la realizzazione della spalla. A destra il tenone passante sagomato.
At the top we see the two types of tenon. On the left the tenon flush with the thickness of the piece with the making of the shoulder. On the right the rounded through tenon.

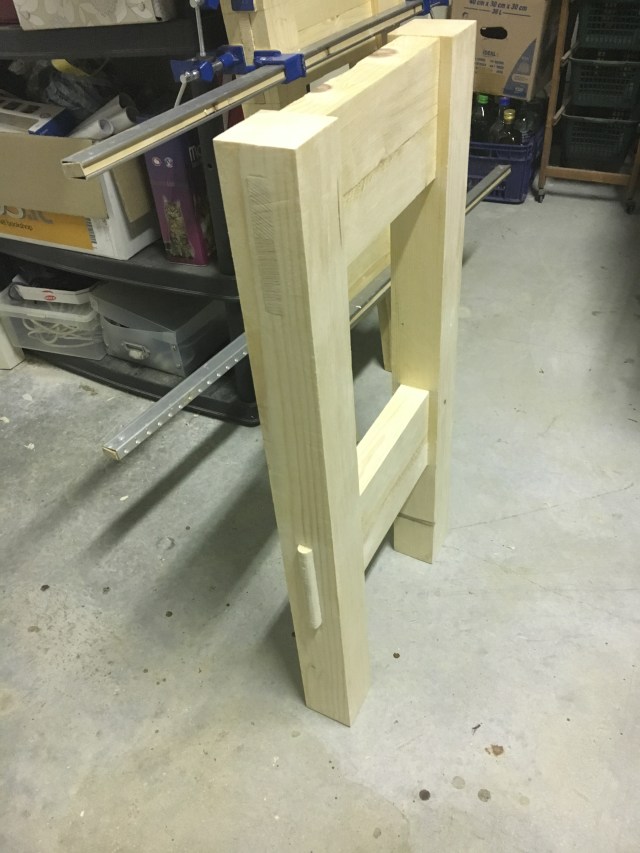
In alto il lavoro finito. Le foto, come detto, sono quasi tutte tratte dall’esecuzione del banco da falegname che mi riprometto di postare appena possibile.
Above the finished work. The photos, as said, refer to the making of my workbench that I plan to post as soon as possible.

Lascia un commento