Affilare gli scalpelli e le lame delle pialle / Sharpening chisels and plane irons
English translation at the end of the article
In un post di qualche mese fa avevo parlato brevemente dell’affilatura degli utensili manuali riproponendomi di approfondire l’argomento in successivi articoli dedicati iniziando dall’affilatura delle seghe. Per chi non avesse letto i vecchi post sull’affilatura metto di seguito i link:
Affilatura degli utensili manuali
Come affilare una sega
In questo articolo invece vorrei parlare dell’affilatura degli scalpelli e delle lame delle pialle. Come sempre, cercherò di scrivere l’essenziale, ciò che ho effettivamente sperimentato nel mio fare, evitando tanti (e, secondo me, inutili tecnicismi).
Anzitutto, perchè trattare in un unico articolo l’affilatura degli scalpelli e dei ferri pialla? Perché la procedura è pressoché identica, se escludiamo l’angolo di affilatura del tagliente della lama. Generalmente infatti le lame degli scalpelli vengono affilate tra i 25 ed i 30 gradi (25 gradi per legni teneri e 30 gradi per legni duri e lavori più gravosi) mentre quelle dei ferri pialla a 25 gradi. Questo in linea teorica. Nella pratica possiamo tranquillamente trovare ferri pialla affilati a 30 gradi e scalpelli affilati a 35 gradi e anche lame con i due diversi gradi di affilatura contemporaneamente. Ciò dipenderà molto dal tipo di legno che dobbiamo lavorare, dal tipo di lavorazione che andremo ad affrontare ma anche dalle preferenze personali. Esistono nella pratica molti sistemi di affilatura. Si può affilare con la mola a secco o ad acqua (soprattutto per interventi gravosi di ripristino del tagliente e quando questo risulta molto danneggiato), con la carta abrasiva (il sistema c.d. scary sharp di cui parlerò in un articolo dedicato) o con l’impiego di pietre ad acqua, ad olio o diamantate. Fatta eccezione per il primo tipo di affilatura (di solito utilizzato in casi eccezionali), tutti gli altri sono molto praticati, estremamente validi e presentano tutti pregi e difetti che ne fanno propendere di volta in volta la scelta verso l’uno o verso l’altro sistema. Avendoli provati un pò tutti sono arrivato alla conclusione che per me il miglior metodo di affilatura, quello che rappresenta il miglior compromesso, fosse quello a mano libera sulle pietre diamantate che poi è il metodo che insegna l’artigiano Paul Sellers. Cercherò di spiegare quindi, nel modo più chiaro e sintetico possibile, come procedo per l’affilatura degli scalpelli e delle lame delle pialle. Alla fine dell’esposizione del procedimento ne vedremo gli aspetti fondamentali.
UN SEGRETO IN ROVERE VI ASPETTA AL SALONE DEL LIBRO DI TORINO
Solo 20 copie speciali dei miei libri avranno questo gadget unico numerato
Il procedimento di affilatura in sintesi.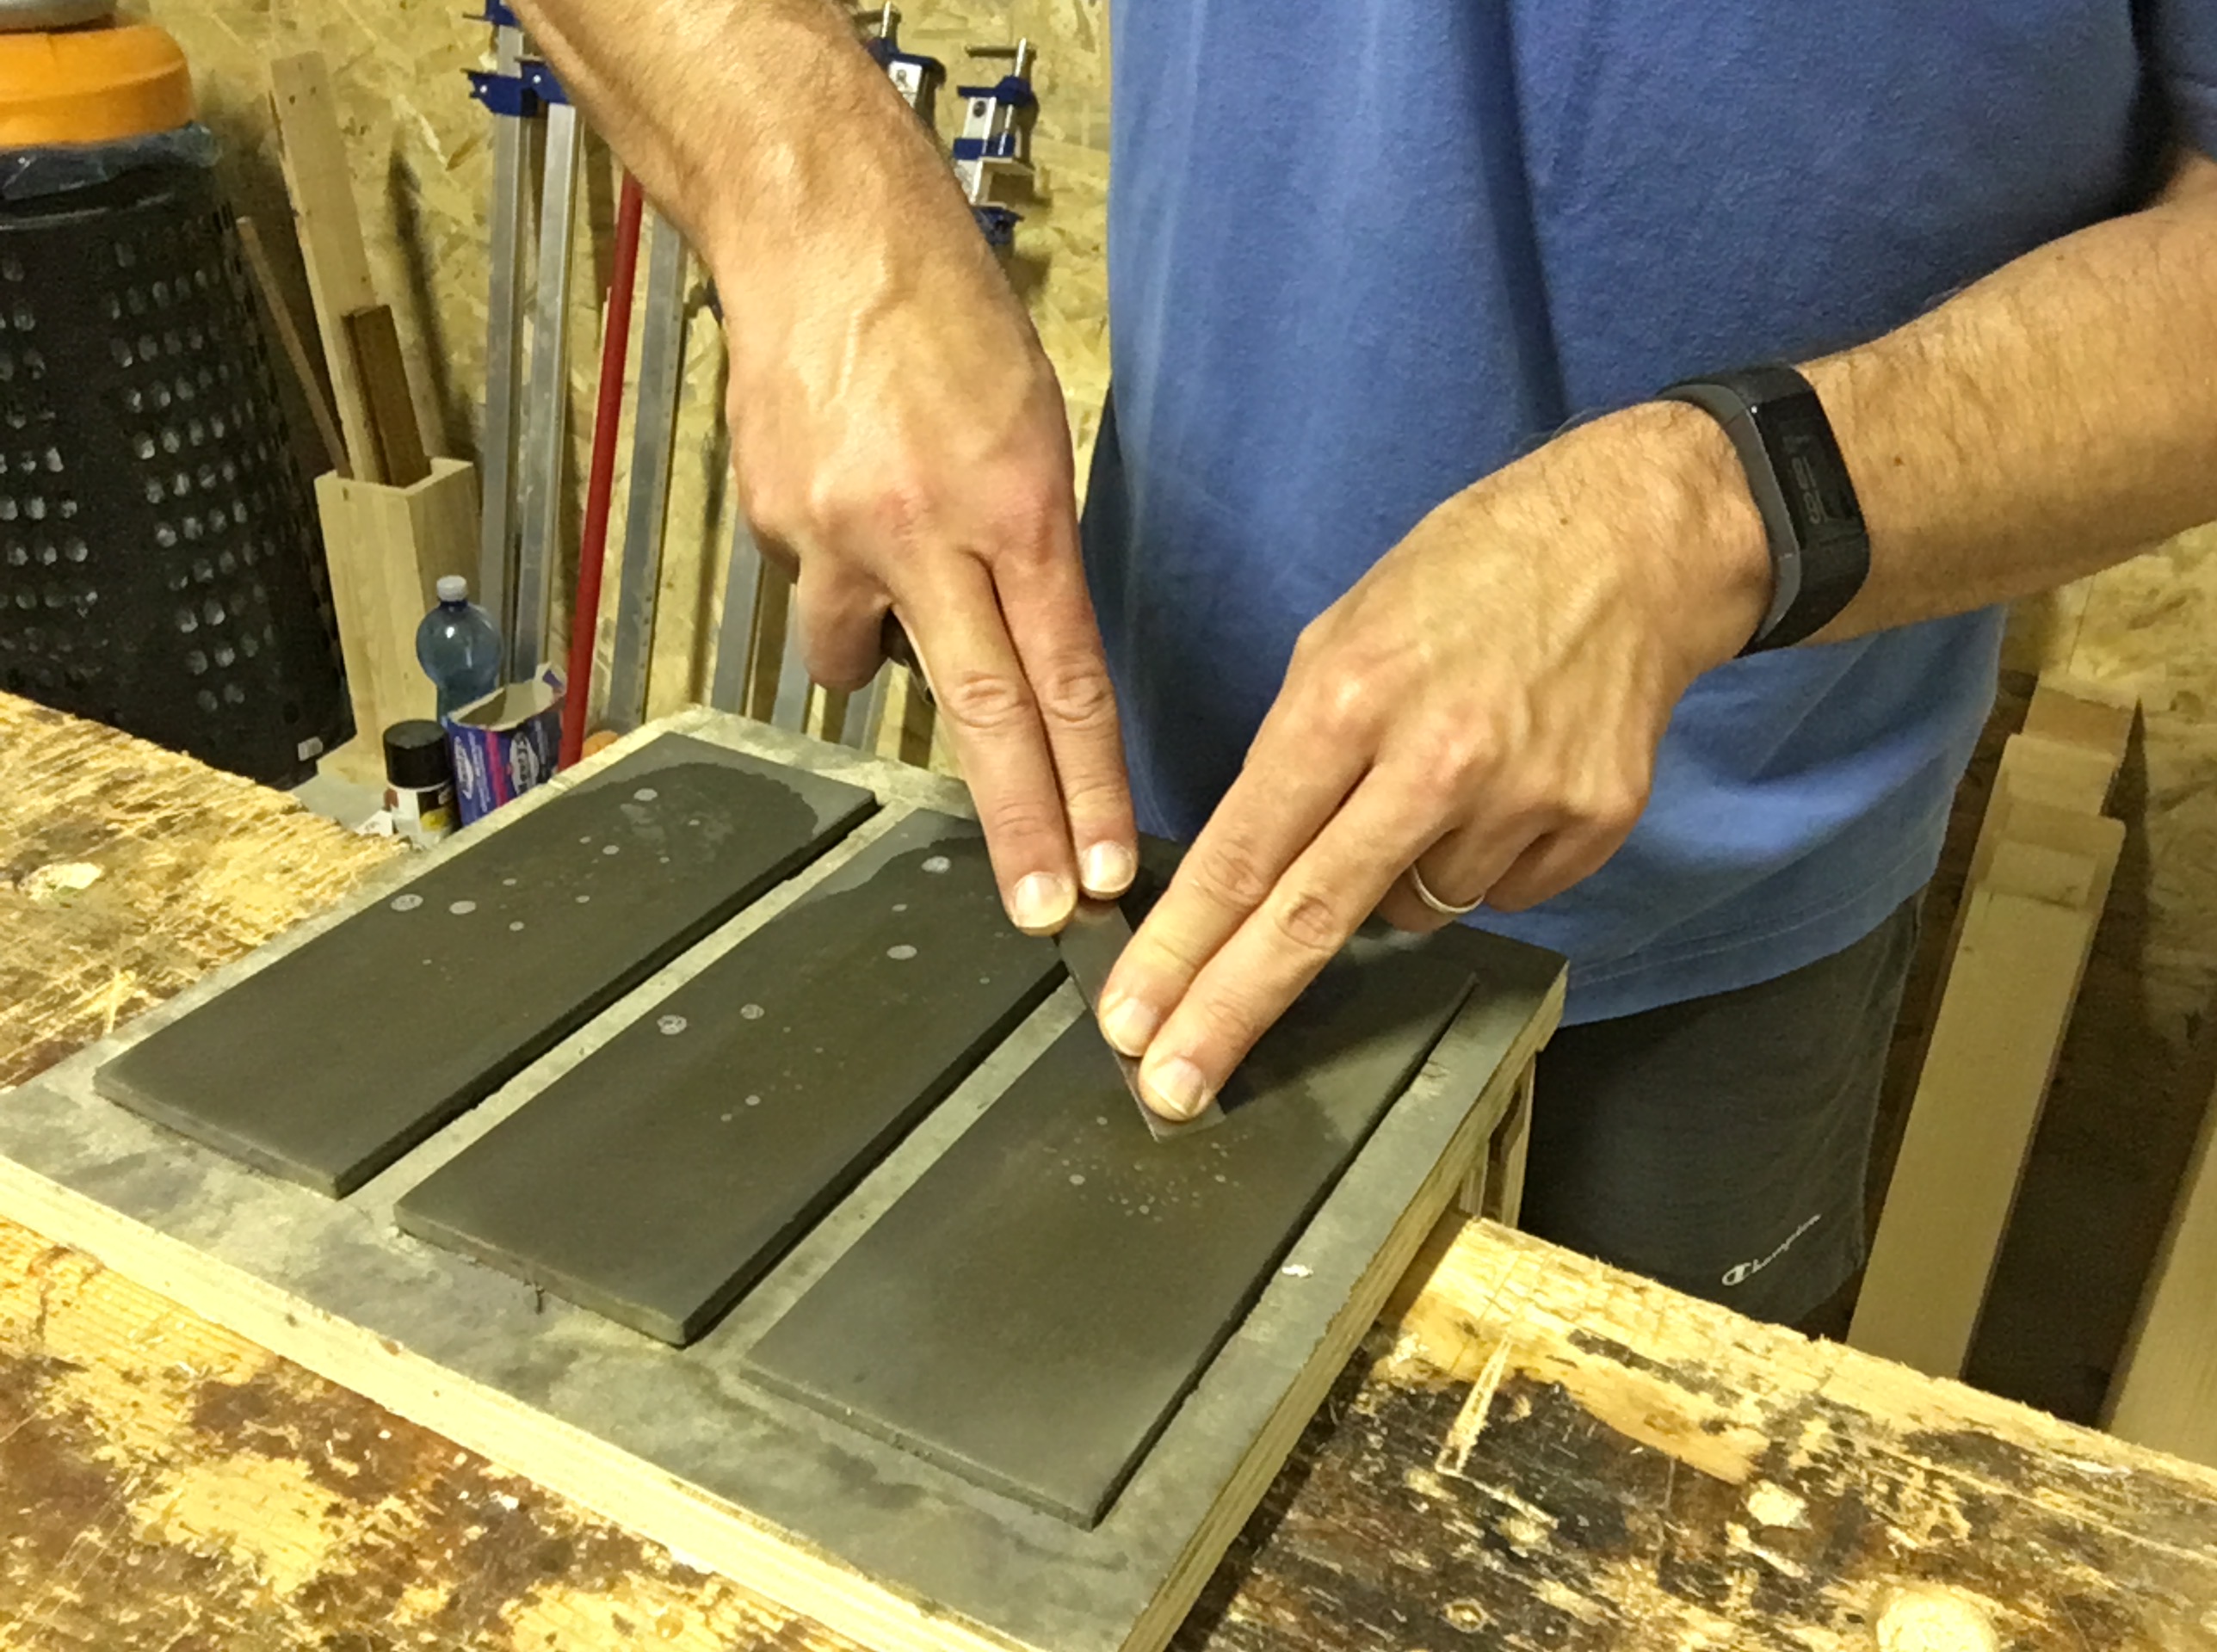
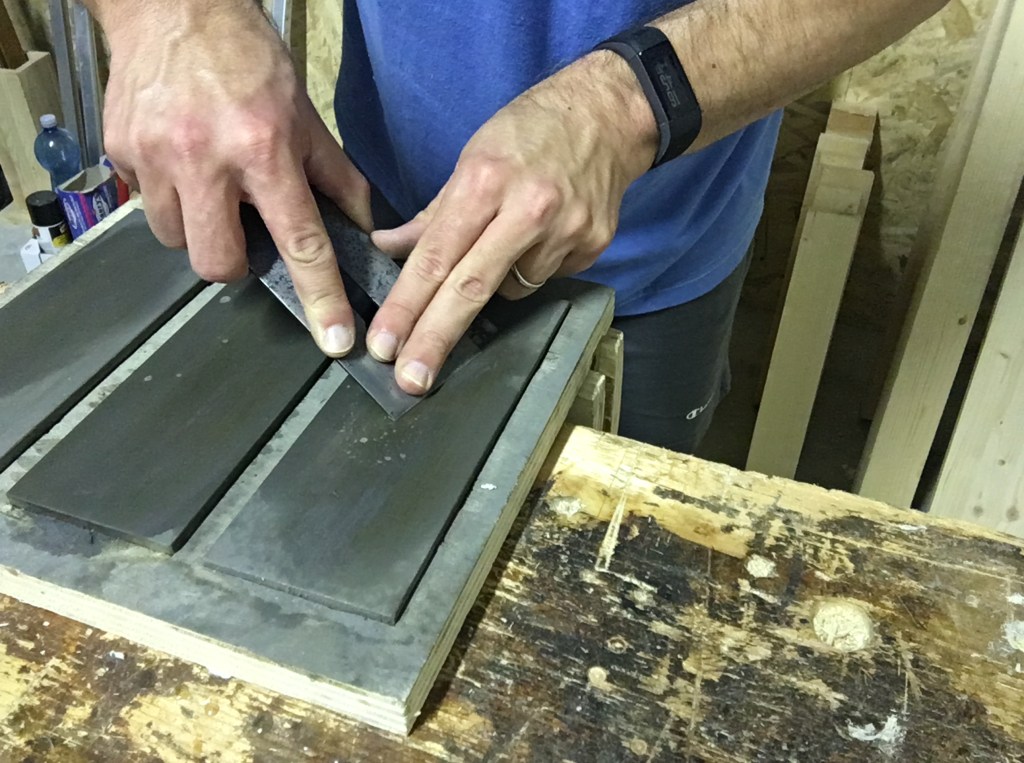
Su un supporto di legno opportunamente sagomato ho inserito tre pietre diamantate di diverse grane. Una pietra a grana grossa (250 grit), una pietra a grana intermedia (600 grit) ed una pietra a grana fine (1200 grit). Bloccato il supporto nella morsa del banco lubrifico le tre pietre con un paio di spruzzate di semplice detersivo spray per vetri. Quindi impugno con la mano dominante il ferro pialla o lo scalpello e con le due dita (indice e medio) dell’altra mano tengo premuto e ben aderente alla pietra il bisello della lama (il bisello è la parte smussata della lama) ad un’angolatura di 25 gradi(tra 25 e 30 gradi per gli scalpelli). Partendo da un’inclinazione di circa 30 gradi con un movimento avanti ed indietro e la lama tenuta leggermente in diagonale rispetto alla direzione di movimento faccio scivolare il bisello sulla pietra avendo cura che solo nella fase terminale del movimento di spinta in avanti il tagliente si stacchi un pochettino dal supporto abrasivo. Procedo sulla pietra a grana grossa fino a quando non si sarà formata su tutta la lunghezza del tagliente una uniforme e continua bava metallica (ricciolo o filo). Per i ferri pialla ogni tanto alzo gli angoli per arrotondarli leggermente. Quando ho ottenuto la bava passo alla pietra di grana intermedia per rimuovere i graffi lasciati dalla pietra precedente. Successivamente passo alla pietra ancora più fine per rimuovere i graffi lasciati dalla pietra a grana media. Per finire, con il dorso della lama rivolto verso il basso, faccio una piccolissima passata a ritroso sulla pietra a grana più fine solo sulla parte dove si è formata la bava metallica al fine di rimuoverla e poter passare poi alla lucidatura (lappatura) del tagliente. Per farla, rimuovo il supporto delle tre pietre ed inserisco nella morsa un pezzo di legno con sopra incollata una striscia di pelle sulla quale ho applicato una pasta abrasiva a 10000 grit. Con un movimento a tirare e con il bisello sempre alla stessa inclinazione e sempre rivolto verso il basso faccio dalle 20 alle 30 passate. Questo in estrema sintesi il procedimento che seguo. Di seguito le specifiche e le note a margine di quanto sopra esposto.
Le pietre diamantate.
Le pietre diamantate sono costose, sicuramente più costose delle pietre ad acqua e ad olio e della carta abrasiva. A fronte di un investimento non indifferente godremo però di molti vantaggi. Tra questi la velocità di affilatura, l’alta capacità di abrasione, la tendenza a rimanere piatte molto a lungo (anche se comunque non sono eterne) ed il fatto di sporcare molto poco. Inoltre non necessitano di ulteriori pietre di rettifica come succede per le pietre ad olio e ad acqua che tendono a consumarsi più velocemente. Quelle che possiedo io sono della Eze Lap e le ho acquistate su Amazon.com qualche anno fa quando ancora non costavano uno sproposito. Purtroppo oggi i prezzi di questo tipo di pietre (già elevati) sono ulteriormente lievitati.
Le pietre che possiedo misurano 203 mm X 76 mm. Questa misura permette di affilare agevolmente tutte le misure degli scalpelli e delle lame delle pialle, essendo queste ultime quasi tutte più larghe degli scalpelli. Il mio consiglio quindi è di non scendere sotto questa misura. Tra le pietre diamantate le Eze Lap non sono sicuramente le migliori (le Dmt e le Atoma sono di qualità superiore, ad esempio) ma hanno un ottimo rapporto qualità prezzo. La pietra a grana grossa è quella che costa di più tra le tre che possiedo ed è anche quella che tende a consumarsi più velocemente visto che è la più sfruttata, per il semplice fatto di essere utilizzata per far comparire la bava sul tagliente. La pietra a grana grossa (coarse) che possiedo ha 250 grit ma ne esistono anche a grana più grossa (extra coarse) e costano un pò di più. La seconda pietra che utilizzo è a grana intermedia (grana fine a 600 grit) ed è forse quella sulla quale faccio meno passate. Assieme alle pietre extra fine costano meno della pietra precedente. Come pietra a grana intermedia si può usare anche un pietra a grana 400. L’ultima pietra che utilizzo è quella extra fine (a 1200 grit).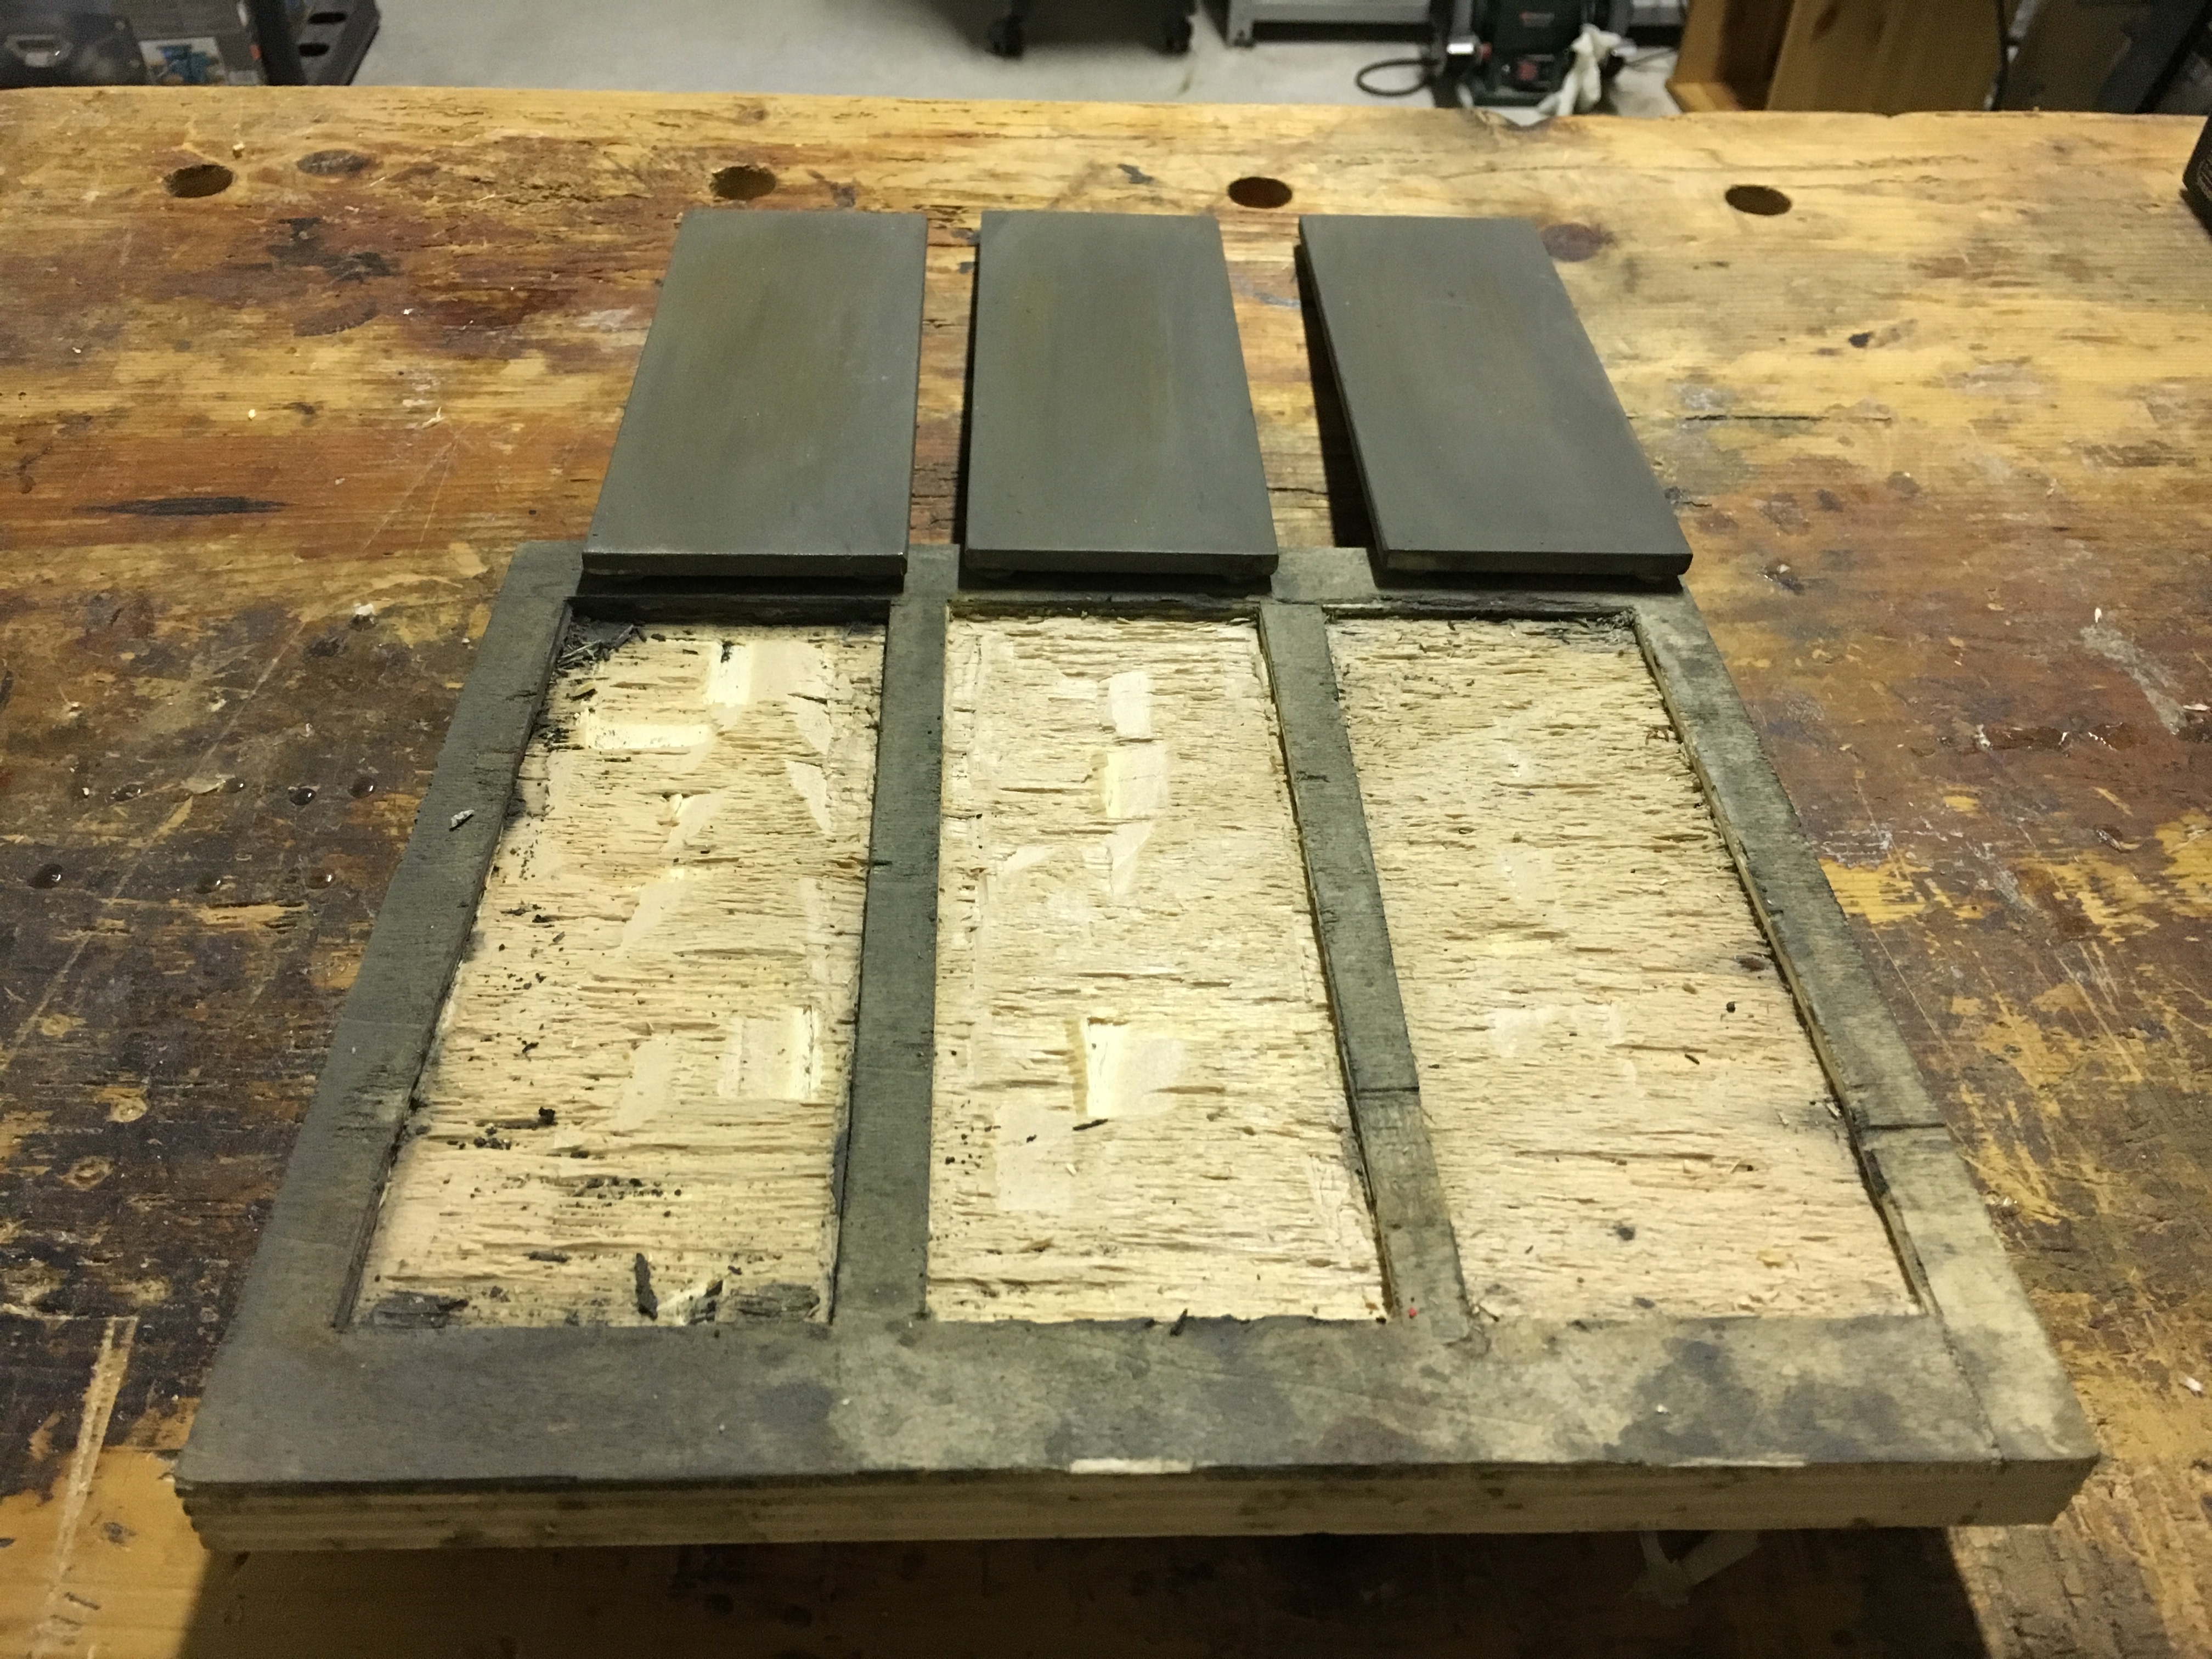
Il consiglio che posso dare è di dotarsi di un supporto per le pietre come quello che mi sono autocostruito. È semplice da farsi, comodo da utilizzarsi (si blocca nella morsa del banco) e mantiene stabili ed al sicuro le pietre. È buona norma, se si utilizza il lubrificante spray, rimuovere con uno straccio, alla fine del processo di affilatura, il liquido rimasto sulle pietre. Le particelle di metallo rimaste nel liquido infatti, se lasciate sulle pietre, tendono con il tempo ad arrugginire.
Di seguito alcuni link dove è possibile acquistarle.
https://www.fine-tools.com/ezelap-diasharpener.html
https://www.fine-tools.com/diasharpener.html
https://www.axminster.co.uk/dmt-dia-sharp-fine-continuous-diamond-whetstones-ax885740
Affilatura con la guida o a mano libera?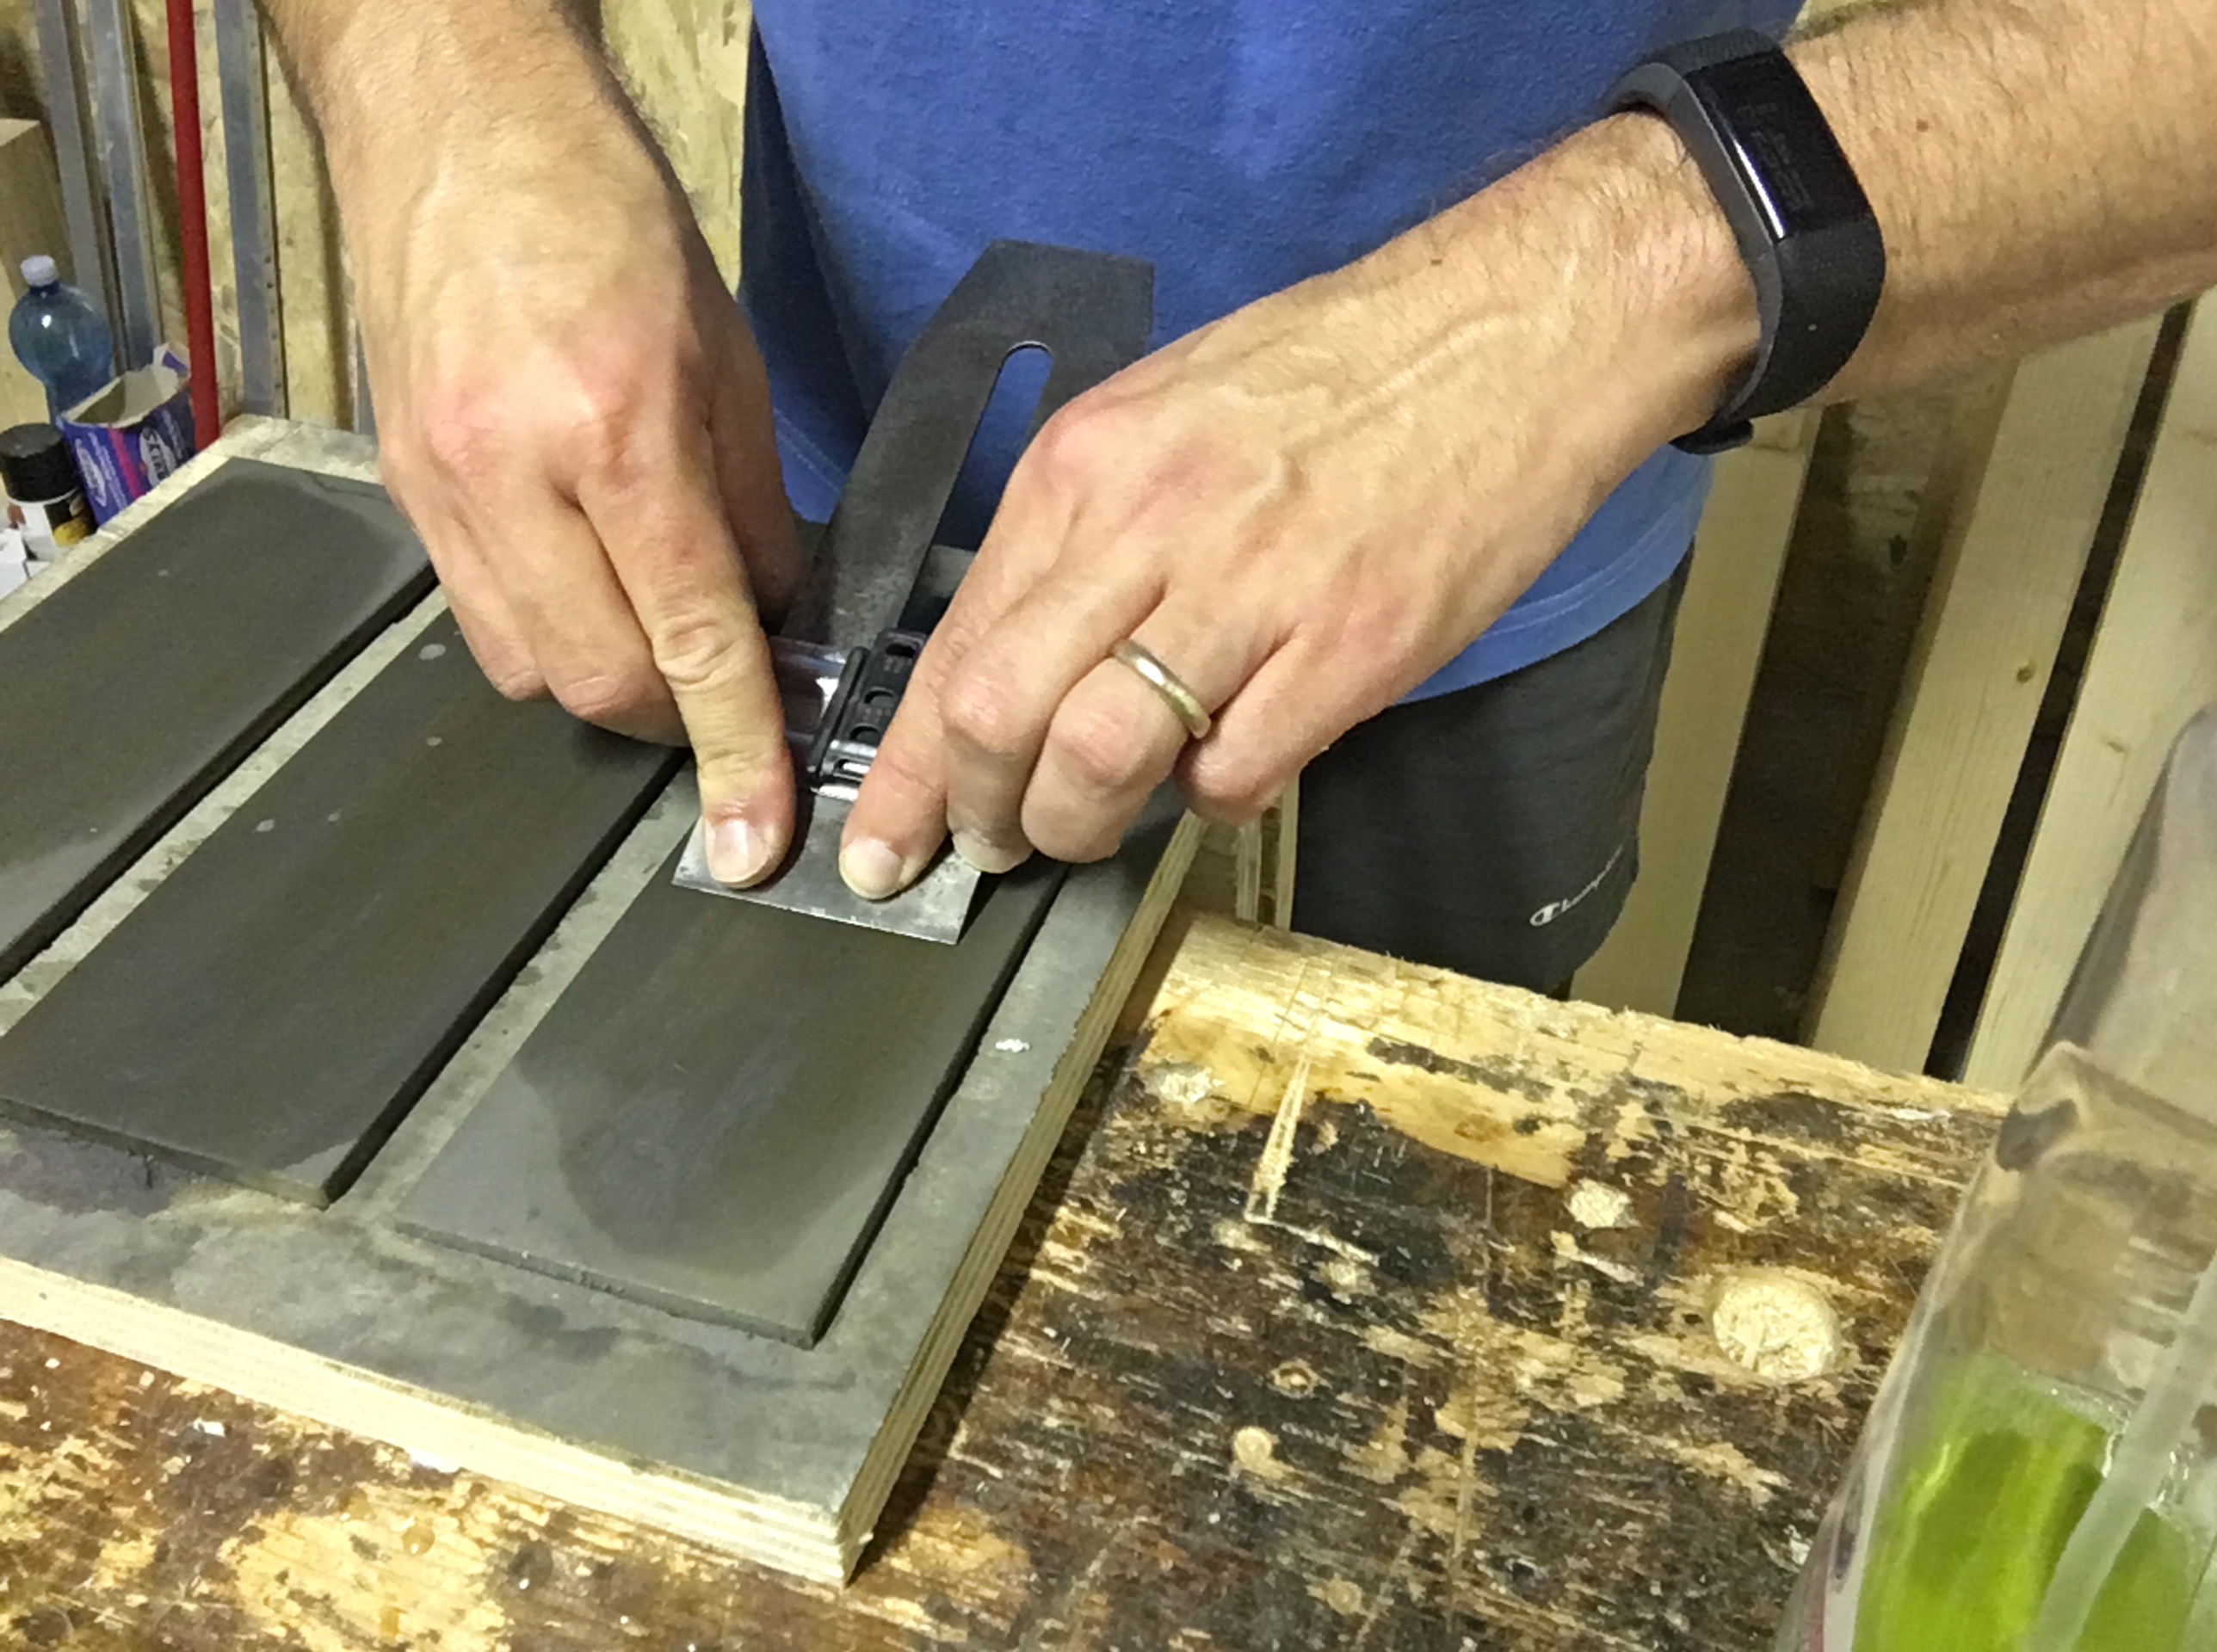
In realtà è un falso problema perché entrambi i metodi sono assolutamente validi ed identici nei movimenti da eseguire. La differenza è esclusivamente nel montare la lama sul supporto. Potremmo dire che l’affilatura con la guida è preferibile quando siamo dei principianti o non si ha ancora piena padronanza dell’affilatura. La guida supplisce a queste carenze in quanto permette di mantenere la posizione della lama da affilare all’ esatta inclinazione desiderata e di mantenerla per tutta la durata dell’affilatura, essendo questo il problema maggiore quando si deve affilare uno scalpello o la lama di una pialla. L’uso della guida risulta molto utile anche quando dobbiamo riprendere taglienti molto danneggiati o storti. Per contro trovo che il dover montare le lame sulla guida interrompa il ritmo di lavoro e si perda comunque del tempo per il corretto settaggio dell’inclinazione.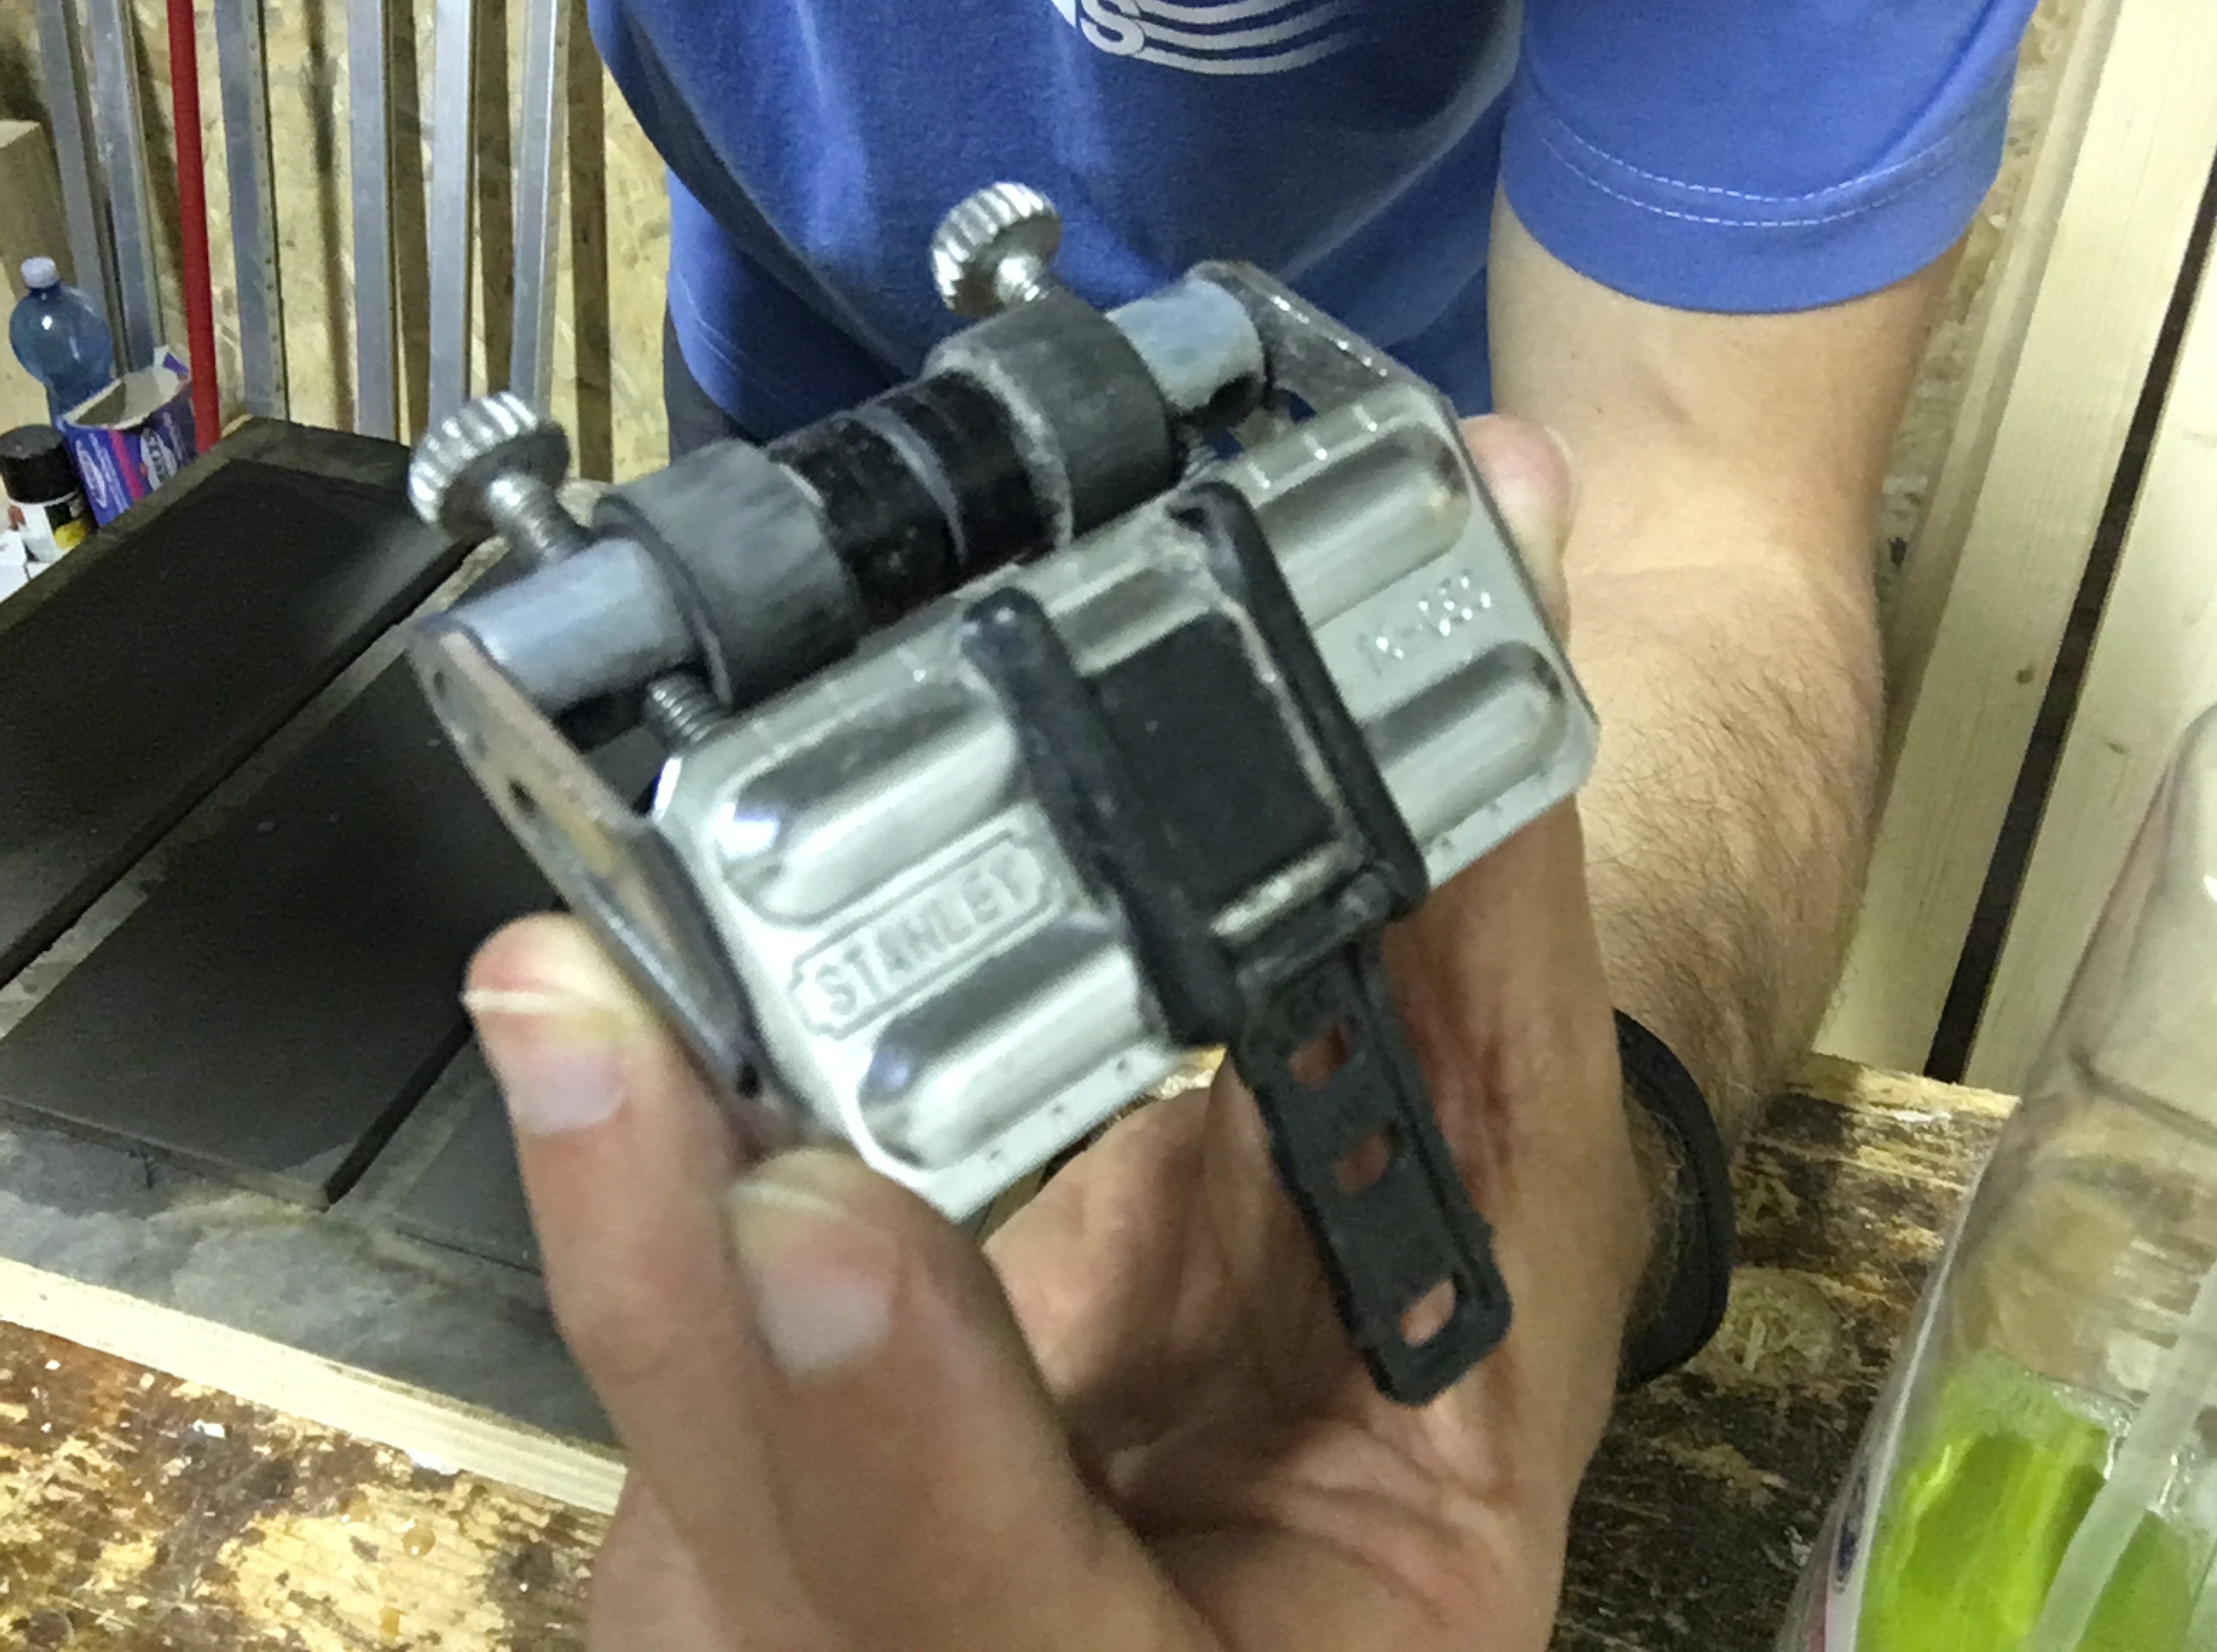
La guida che ho utilizzato per tanto tempo con soddisfazione era una stanley 0 14 050. La guida Stanley è economica e facilmente acquistabile su internet. E’ venduta in un kit comprensivo di pietra per affilatura (di qualità alquanto scadente) e relativo liquido lubrificante. Se vogliamo andare sul vintage si può cercare su Ebay la storica guida Eclipse n.36. Per il nuovo invece è assolutamente consigliabile la guida MKII della Veritas, alquanto costosa in verità.
Di seguito i link alle guide sopra descritte.
https://www.dictum.com/en/honing-guides-ehd/stanley-honing-guide-set-707166
https://www.ebay.co.uk/sch/i.html?_from=R40&_trksid=p2380057.m570.l1313.TR3.TRC1.A0.H0.Xeclipse+honing+guide.TRS0&_nkw=eclipse+honing+guide&_sacat=0
http://www.rma-tools.com/index.php?main_page=product_info&products_id=251
L’affilatura a mano libera è invece consigliabile quando si è acquisita un pò di dimestichezza con l’affilatura con la guida. È sicuramente più veloce e secondo me anche più efficace grazie alla possibilità di poter esercitare una maggiore pressione sulla lama nella zona vicino al tagliente ed in generale fornisce una maggiore consapevolezza durante l’affilatura. Bisogna però sempre prestare particolare attenzione all’inclinazione della lama che, non potendo usufruire dell’assistenza della guida, potrebbe condurre a non mantenere perfettamente il grado di affilatura desiderato. In questo caso il pericolo di rovinare il tagliente e farlo venire storto è sempre dietro l’angolo. Se dovesse succedere sarebbe difficile riuscire a riprendere il tagliente sulle pietre, costringendoci così ad usare la mola. Il consiglio quindi è di iniziare con la guida e poi impratichirsi con l’affilatura a mano libera su qualche scalpello economico o qualche lama di pialla di poco valore. Solo quando ci si sentirà sicuri allora si potrà provare l’affilatura a mano libera su scalpelli e lame di pialle di qualità, senza timore di rovinarle troppo.
Il movimento di affilatura a mano libera e lo smusso (bevel) secondario.
Se stiamo utilizzando la guida, il movimento che andremo ad effettuare sarà molto semplice. Basterà spingere avanti ed indietro la guida sulla pietra senza prestare particolare attenzione all’inclinazione della lama ed al tipo di movimento da efffettuare. L’operazione si complica un pochettino se affiliamo a mano libera. In questo caso infatti è fondamentale cercare di mantenere nel movimento avanti ed indietro sempre la stessa inclinazione. Ogni tanto durante il movimento possiamo alzare gli angoli della lama della pialla per arrotondarli leggermente. Questo tornerà utile in fase di piallatura perché gli angoli così smussati non lasceranno i segni nel legno.
Il bevel (o smusso) secondario è un secondo grado di affilatura del tagliente che va ad aggiungersi al bevel (smusso o tagliente) primario. Quando si affila la lama di una pialla l’angolo di affilatura è di norma di 25 gradi. Una volta ottenuto questo grado di affilatura spesso si è soliti aggiungere un secondo smusso (bevel secondario) affilato a 30 gradi (ma è sufficiente aggiungere un paio di gradi). Lo si ottiene di solito passando il bisello solo sulle pietre fini ed extrafini. Il bevel secondario favorisce l’azione di piallatura ed è molto usato in falegnameria. Usando la guida per l’ affilatura è necessario smontare la lama dal supporto e reimpostare l’inclinazione a 30 gradi.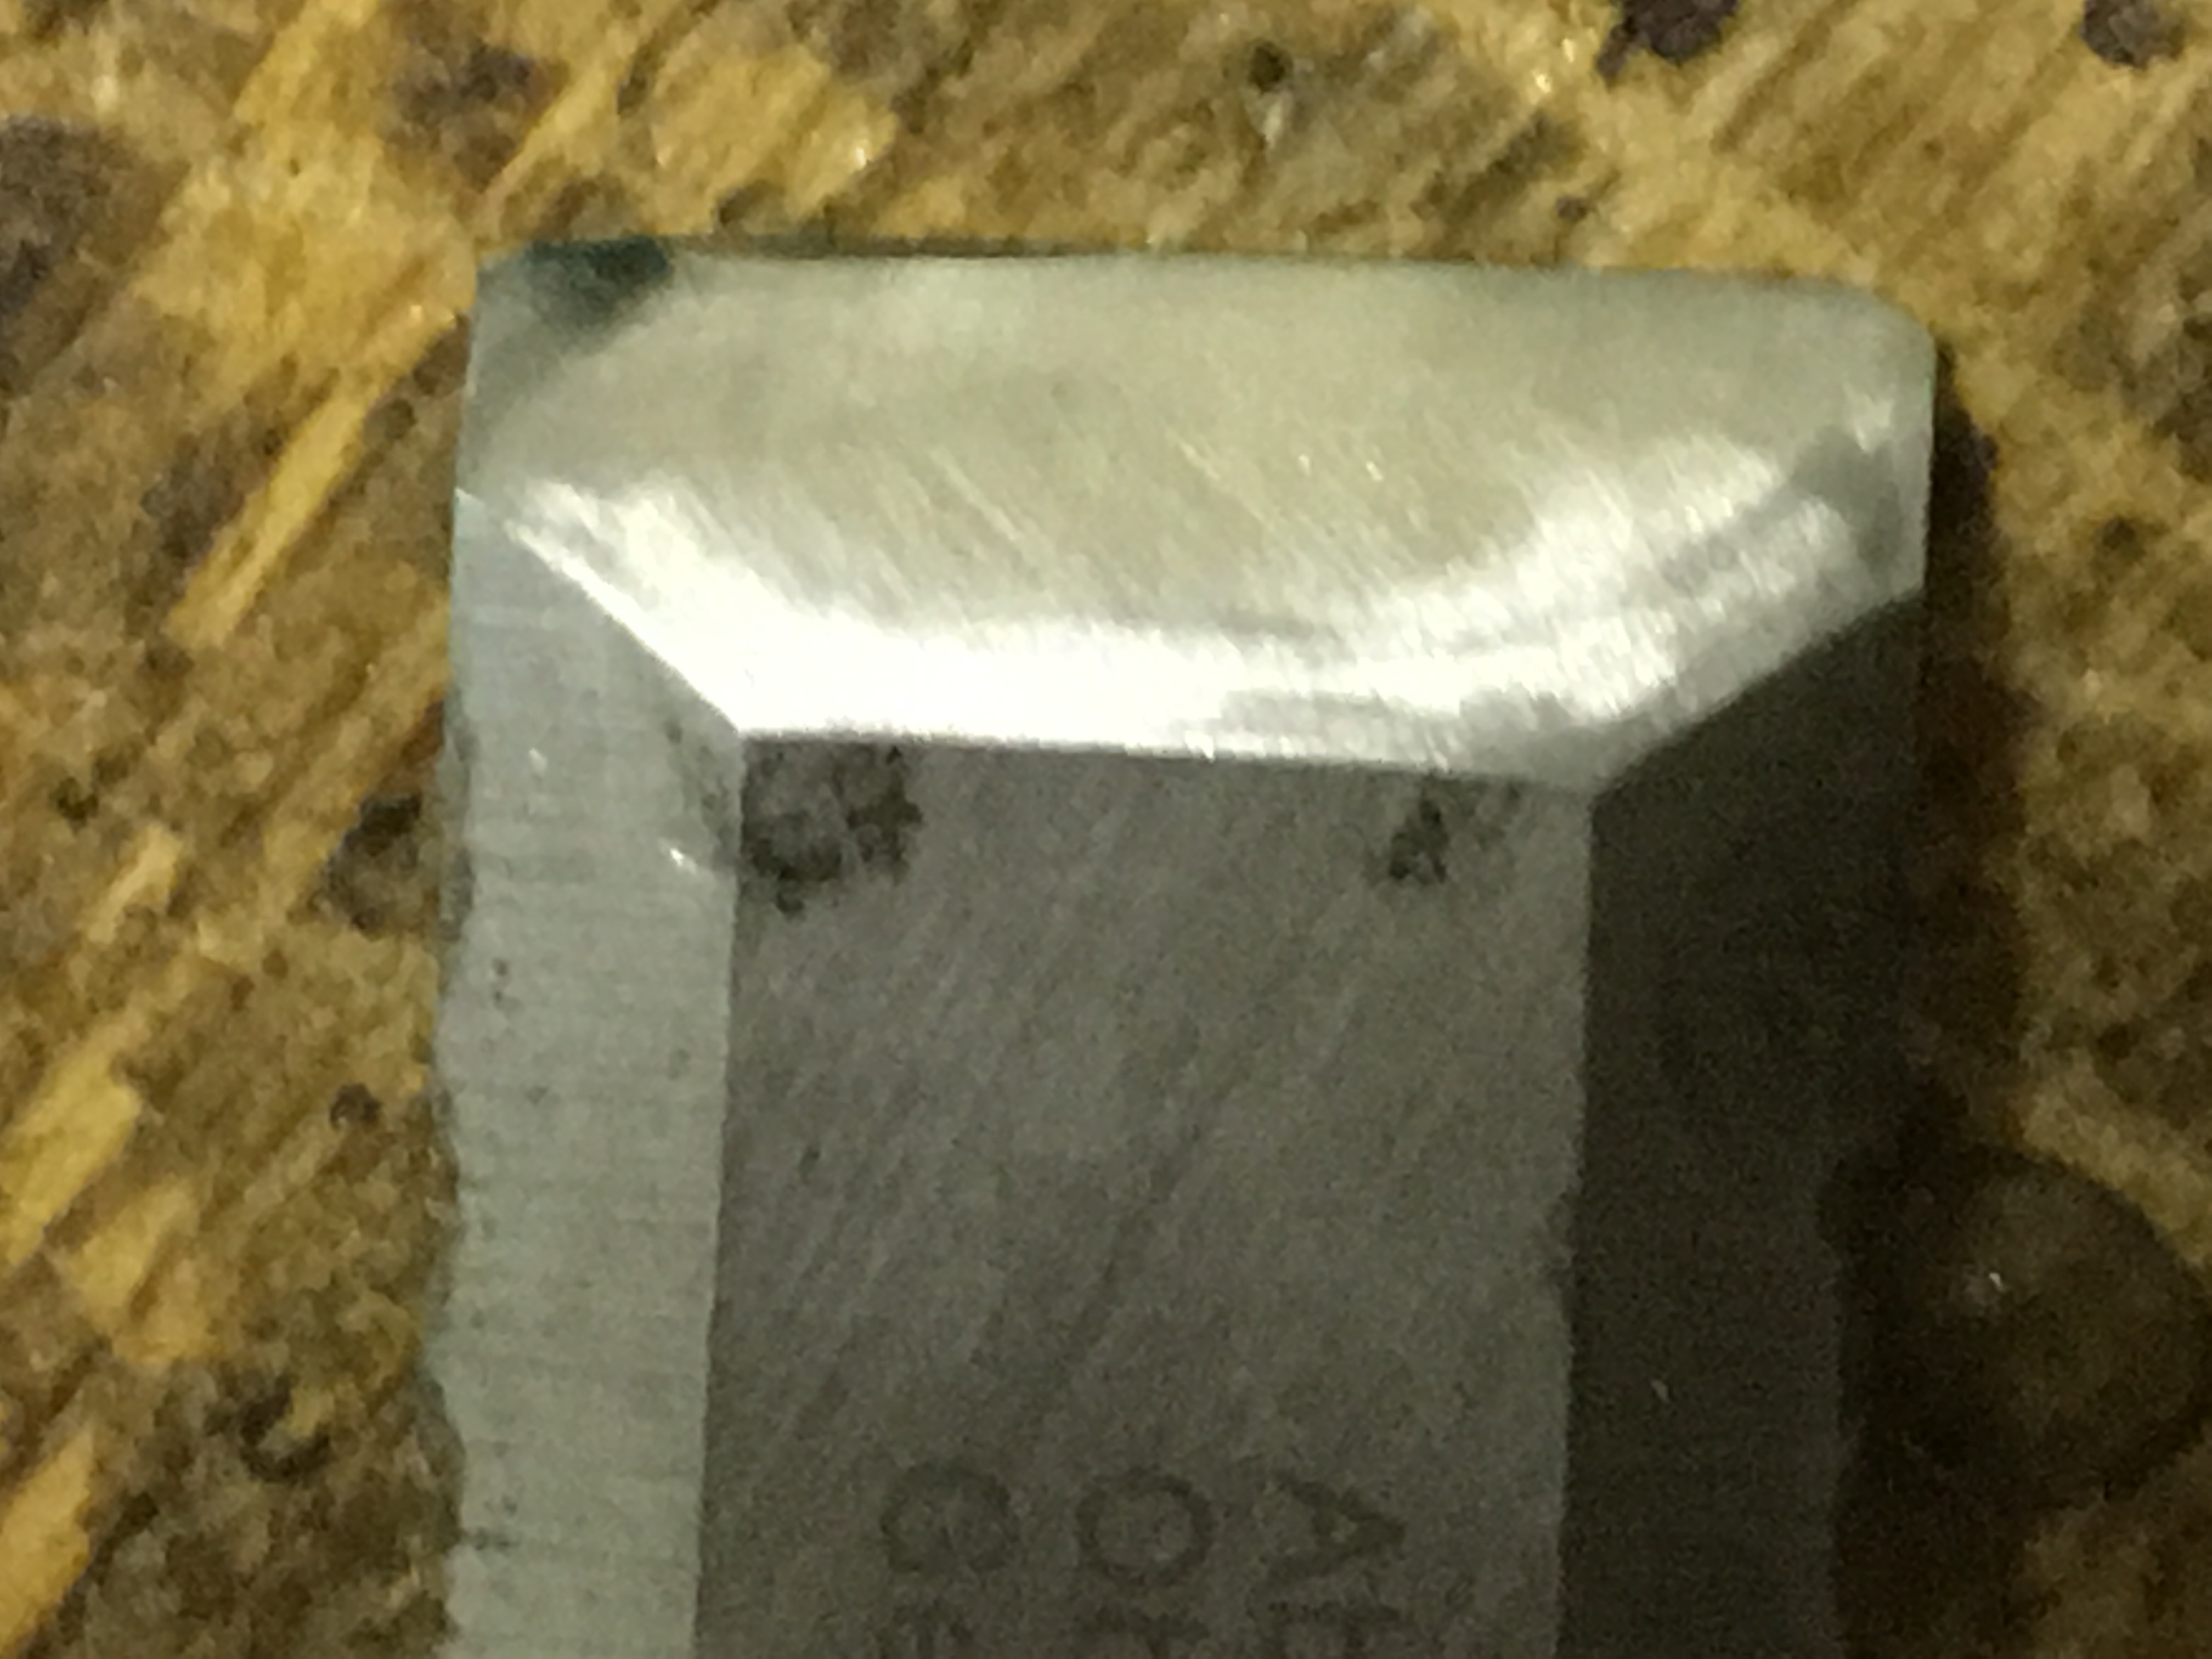
Usando il metodo di Paul Sellers a mano libera invece il bevel secondario diventa un tutt’uno con il primario ottenendo di fatto una leggerissima curvatura del bisello che varierà quindi dai 25 ai 30 gradi di inclinazione. Per ottenerlo è necessario partire da una inclinazione di 30 gradi e, durante il movimento di spinta in affilatura, alzare un pochettino il tagliente nella fase finale del movimento in avanti, (il che avviene naturalmente allontanando le braccia dal corpo), praticando quindi un leggero movimento ondulatorio della lama ( di fatto il movimento varierà quindi dalla posizione iniziale di 30 gradi a quella finale di circa 25 gradi).
Il ricciolo (bava o filo) del tagliente.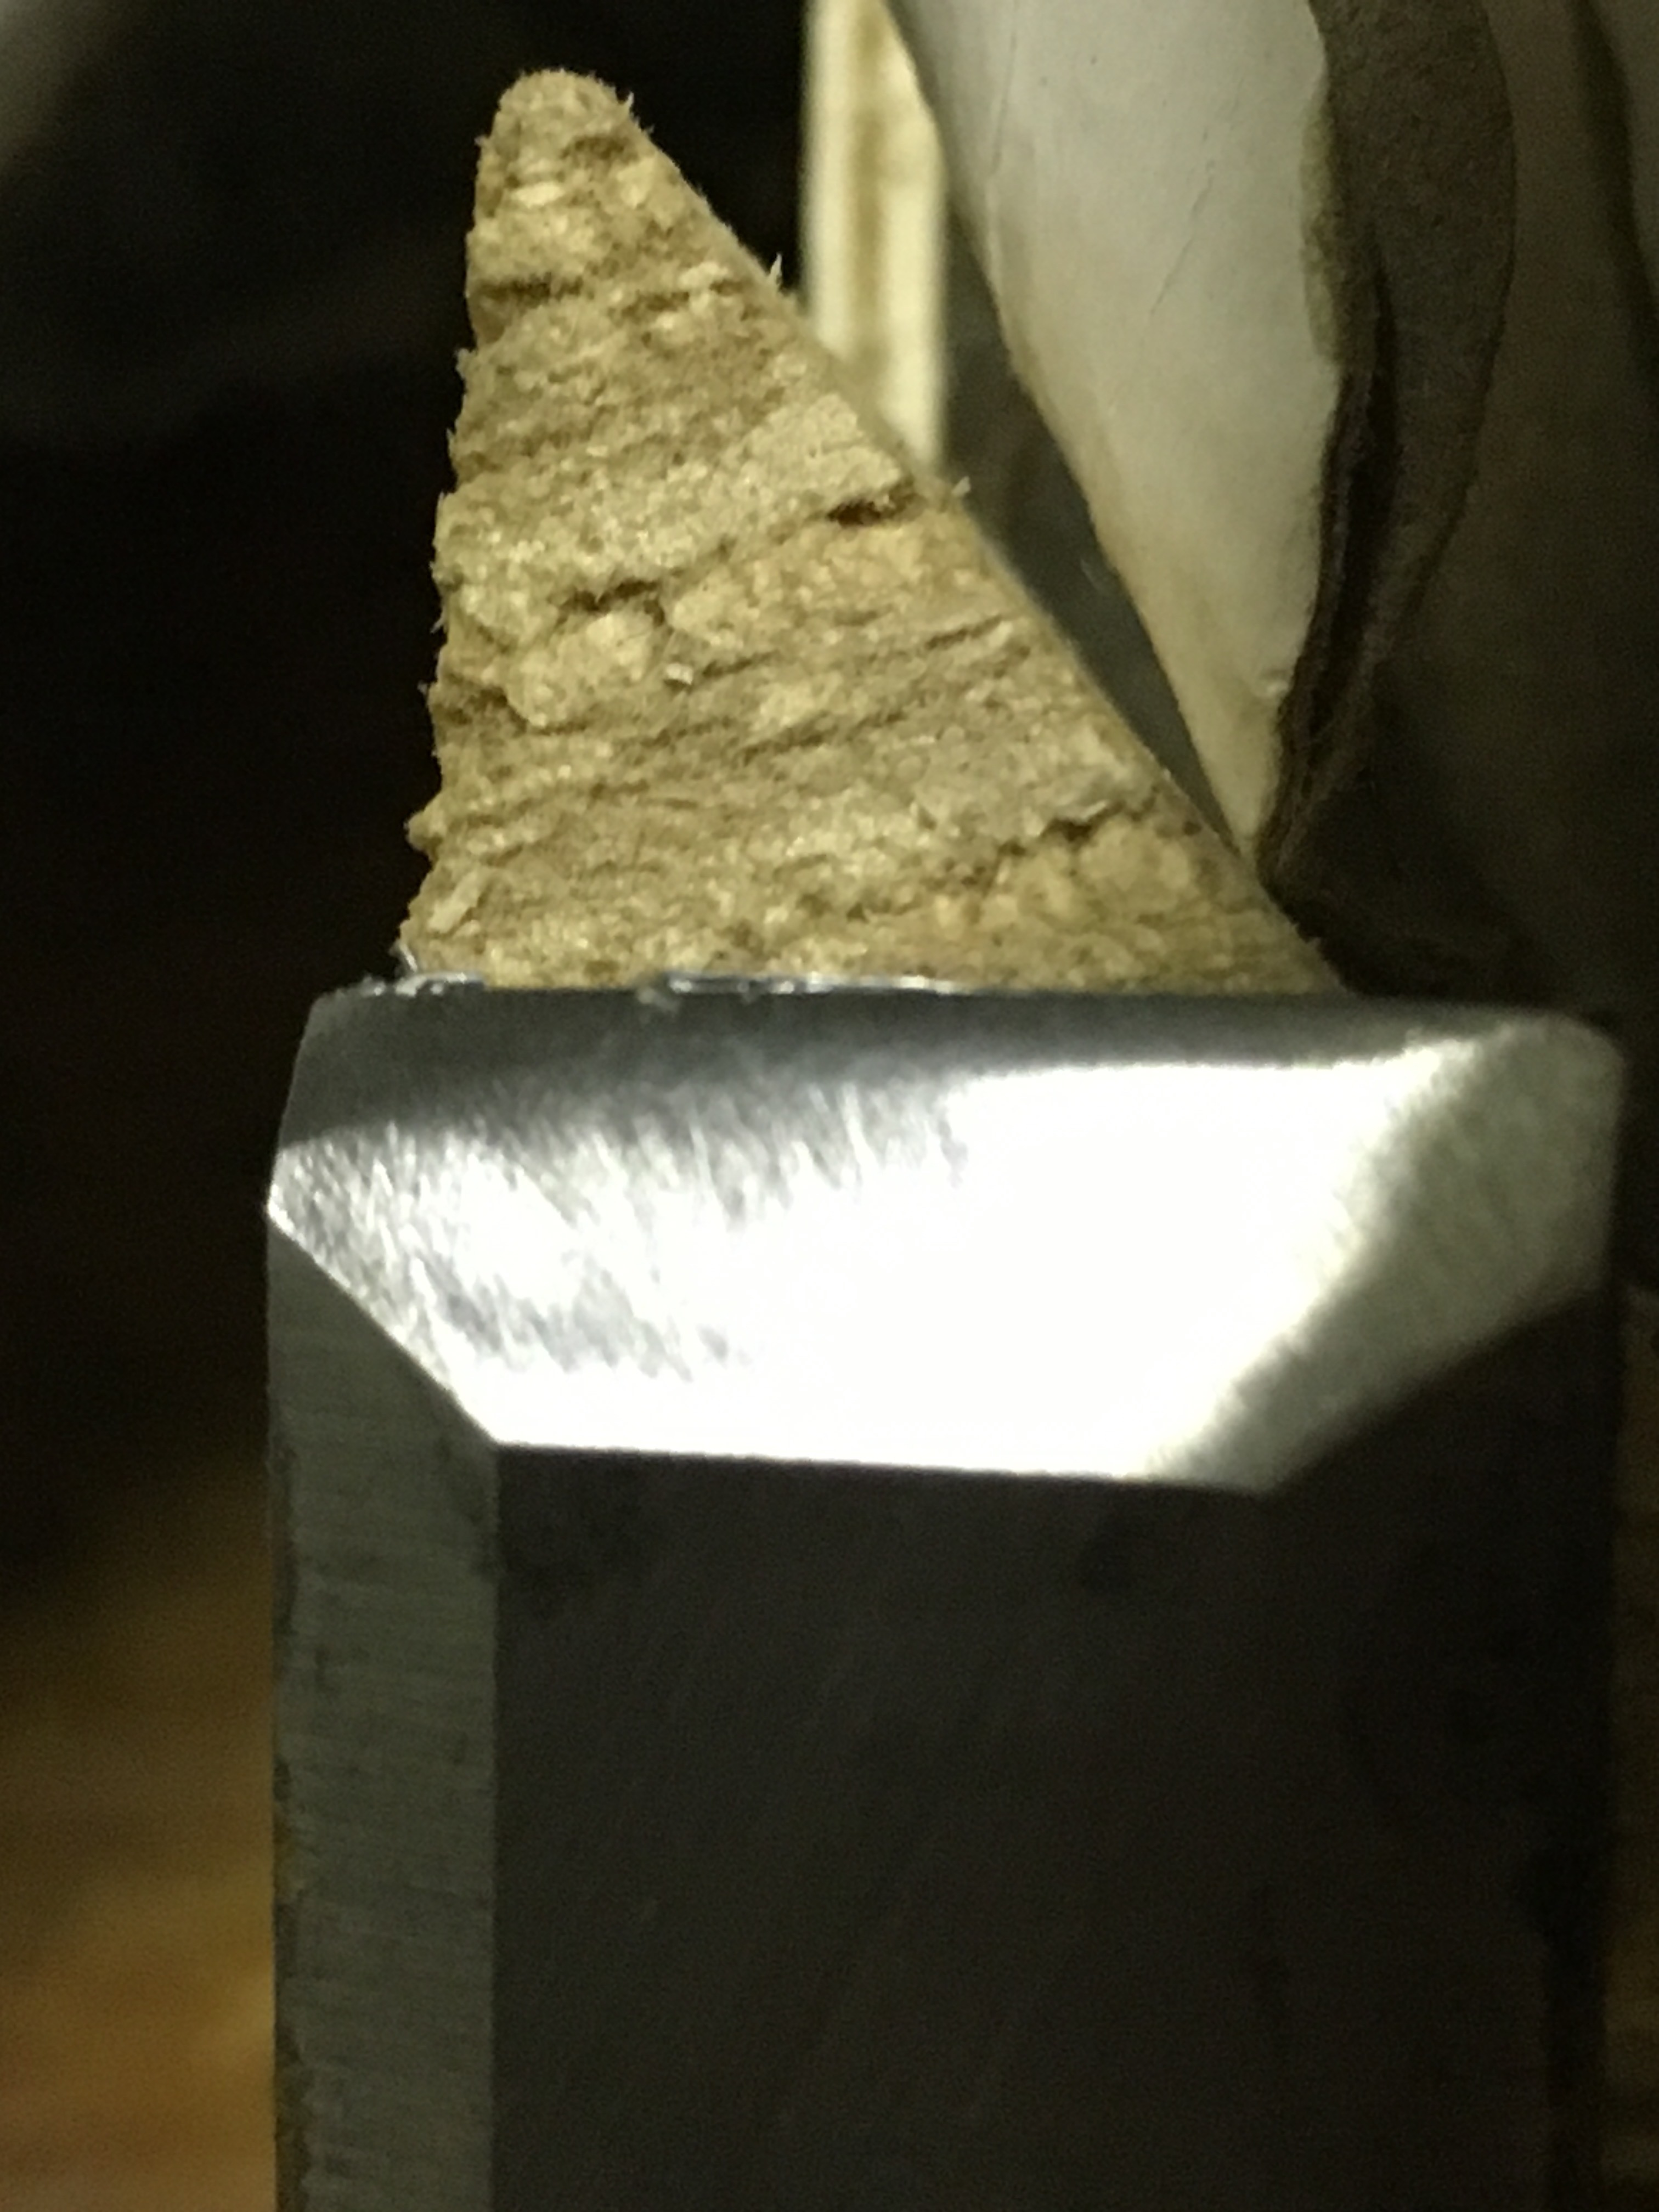
Il tempo da dedicare all’affilatura del tagliente dipenderà dallo stato e dalla qualità della pietra e dalle condizioni in cui si trovava la lama prima dell’affilatura. Se si tratta solo di riprendere un poco il filo del tagliente spesso bastano solo alcune passate sulle pietre fine ed extra fine. Ma se dobbiamo riaffilare completamente un tagliente allora l’obiettivo che dobbiamo raggiungere è quello di ottenere sulla pietra a grana grossa il cosiddetto ricciolo (burr) o bava metallica, praticamente una sorta di ispessimento del tagliente sul retro della lama, nella parte in cui il dorso di questa ed il bisello si incontrano. Fino a quando non avremo ottenuto questo risultato uniforme e per tutta la lunghezza del tagliente non potremo passare alla pietra successiva di grana intermedia.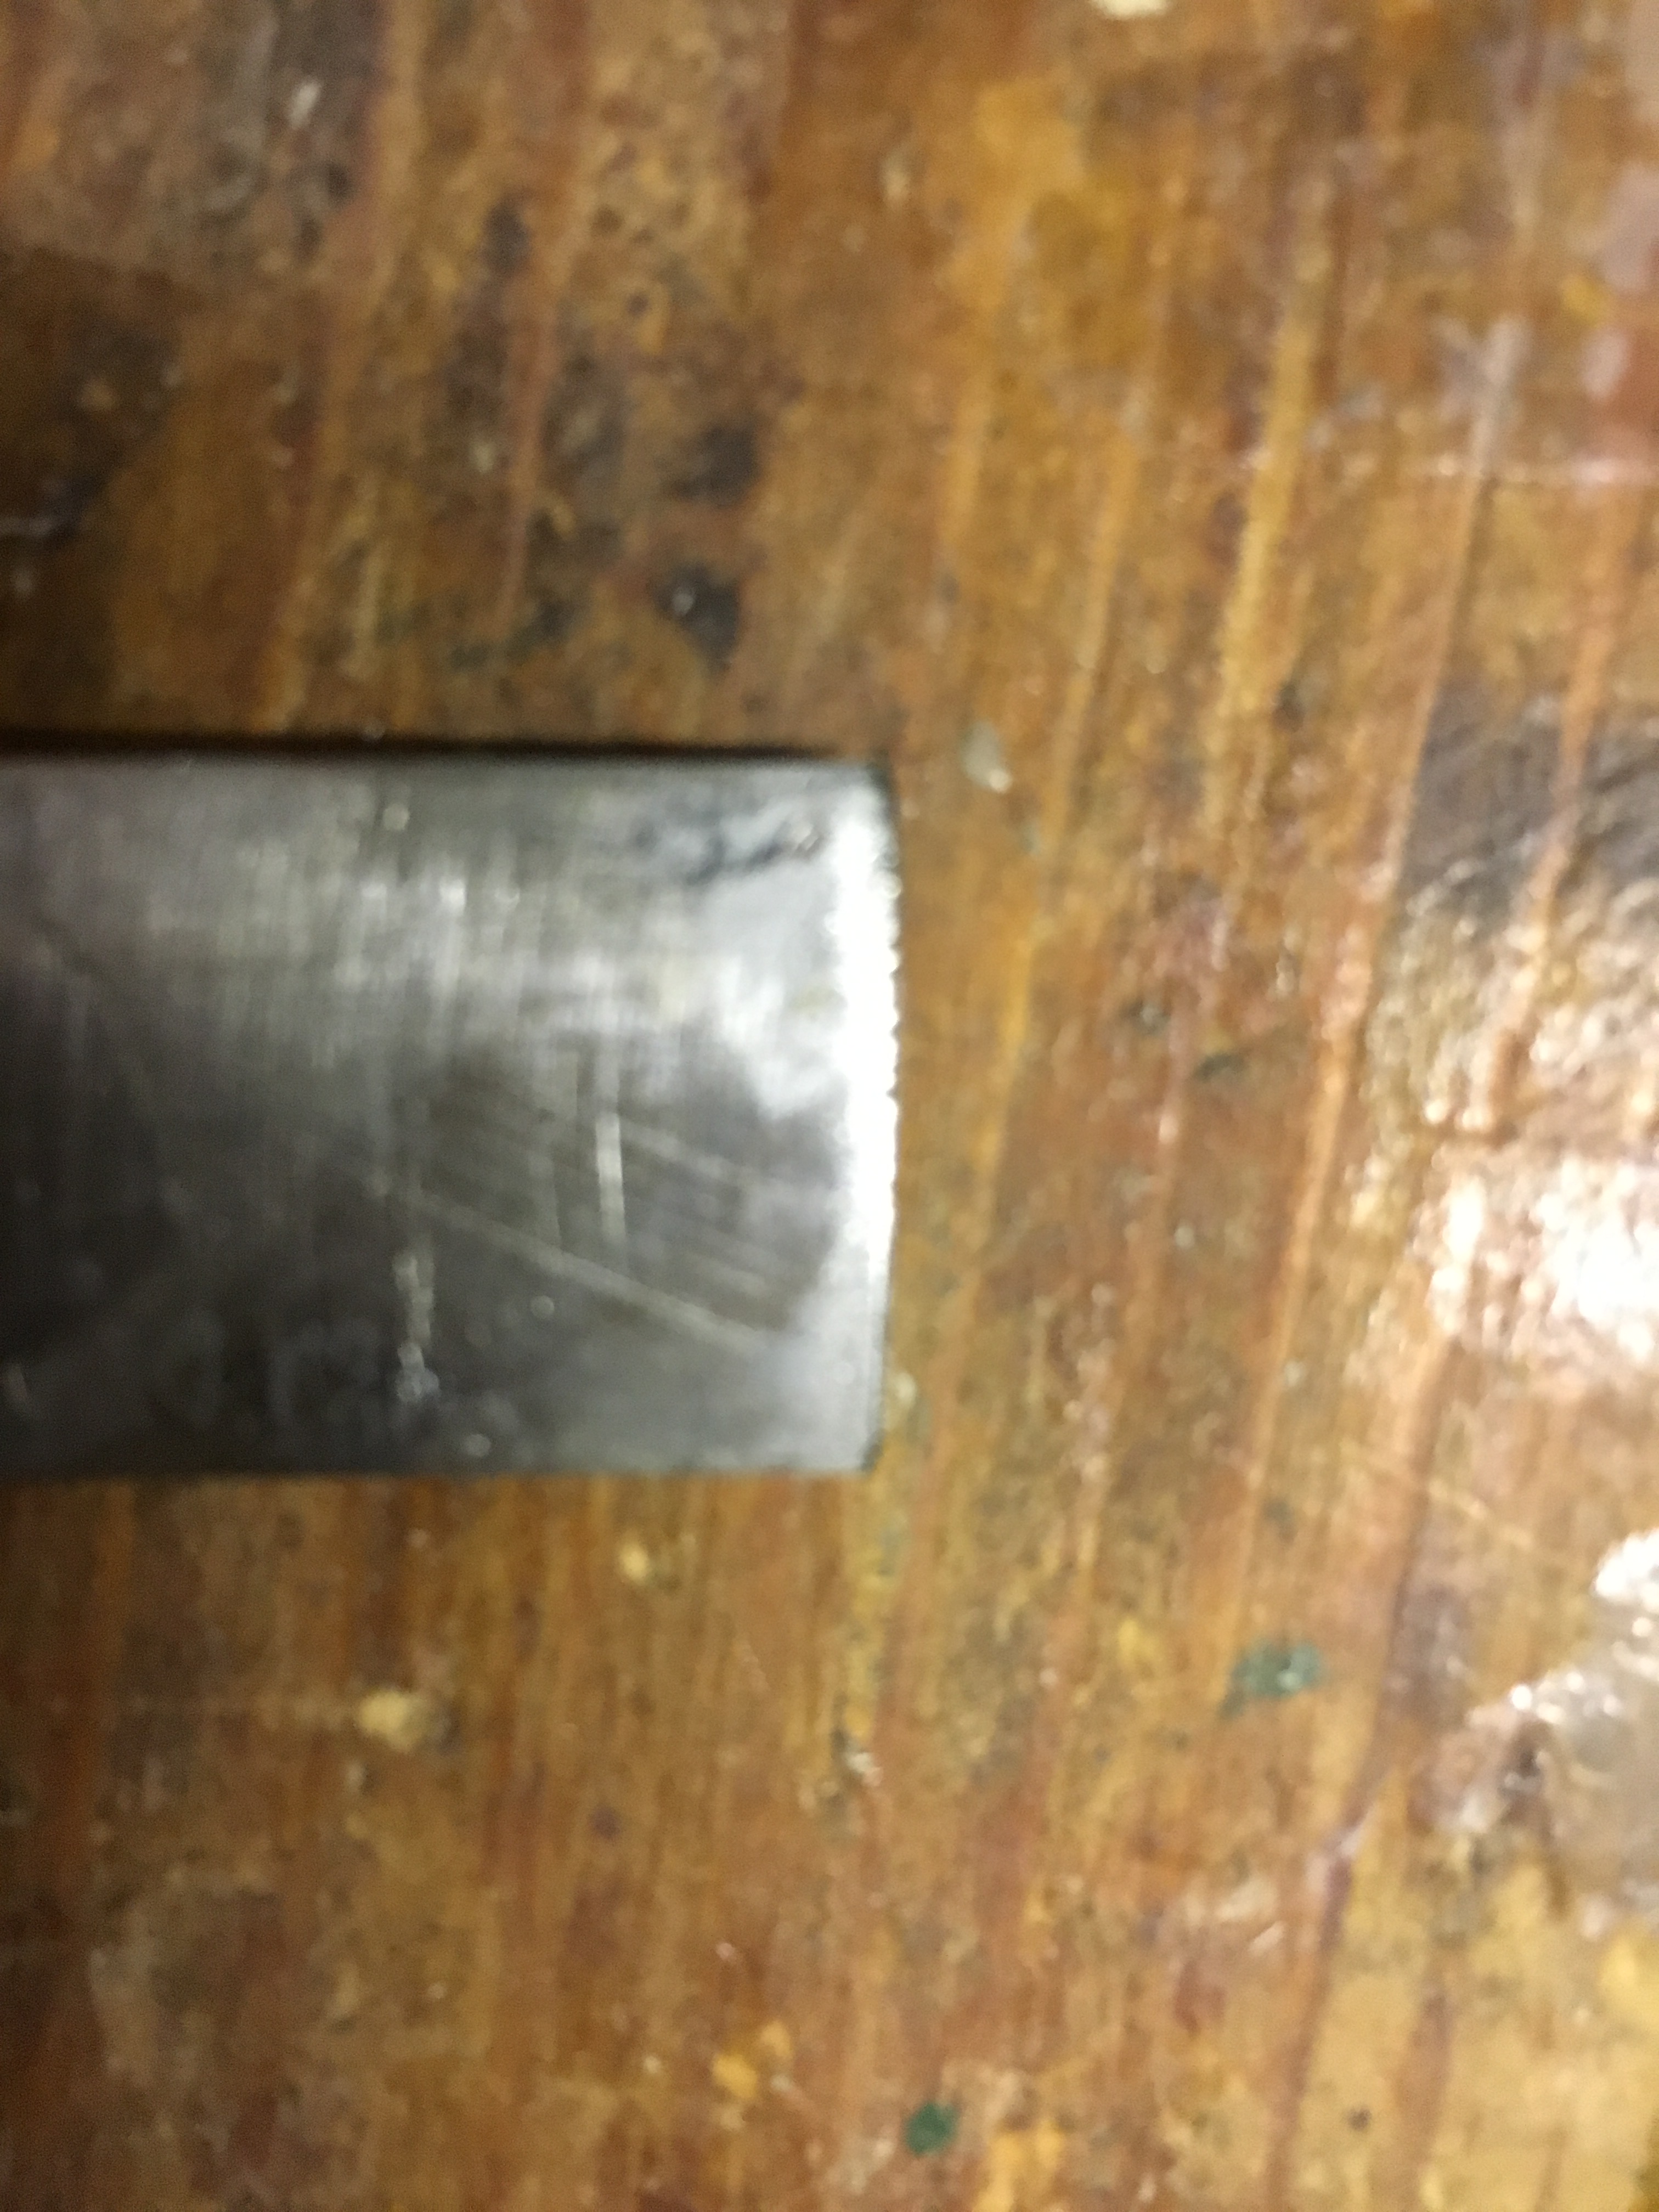
La bava metallica è visibile ad occhio nudo e la si sente passando leggermente il polpastrello sul retro della lama. Fate attenzione a non tagliarvi anche perché al tatto i filamenti metallici potrebbero staccarsi procurandovi micro lesioni cutanee.
Rimozione dei graffi dal bisello.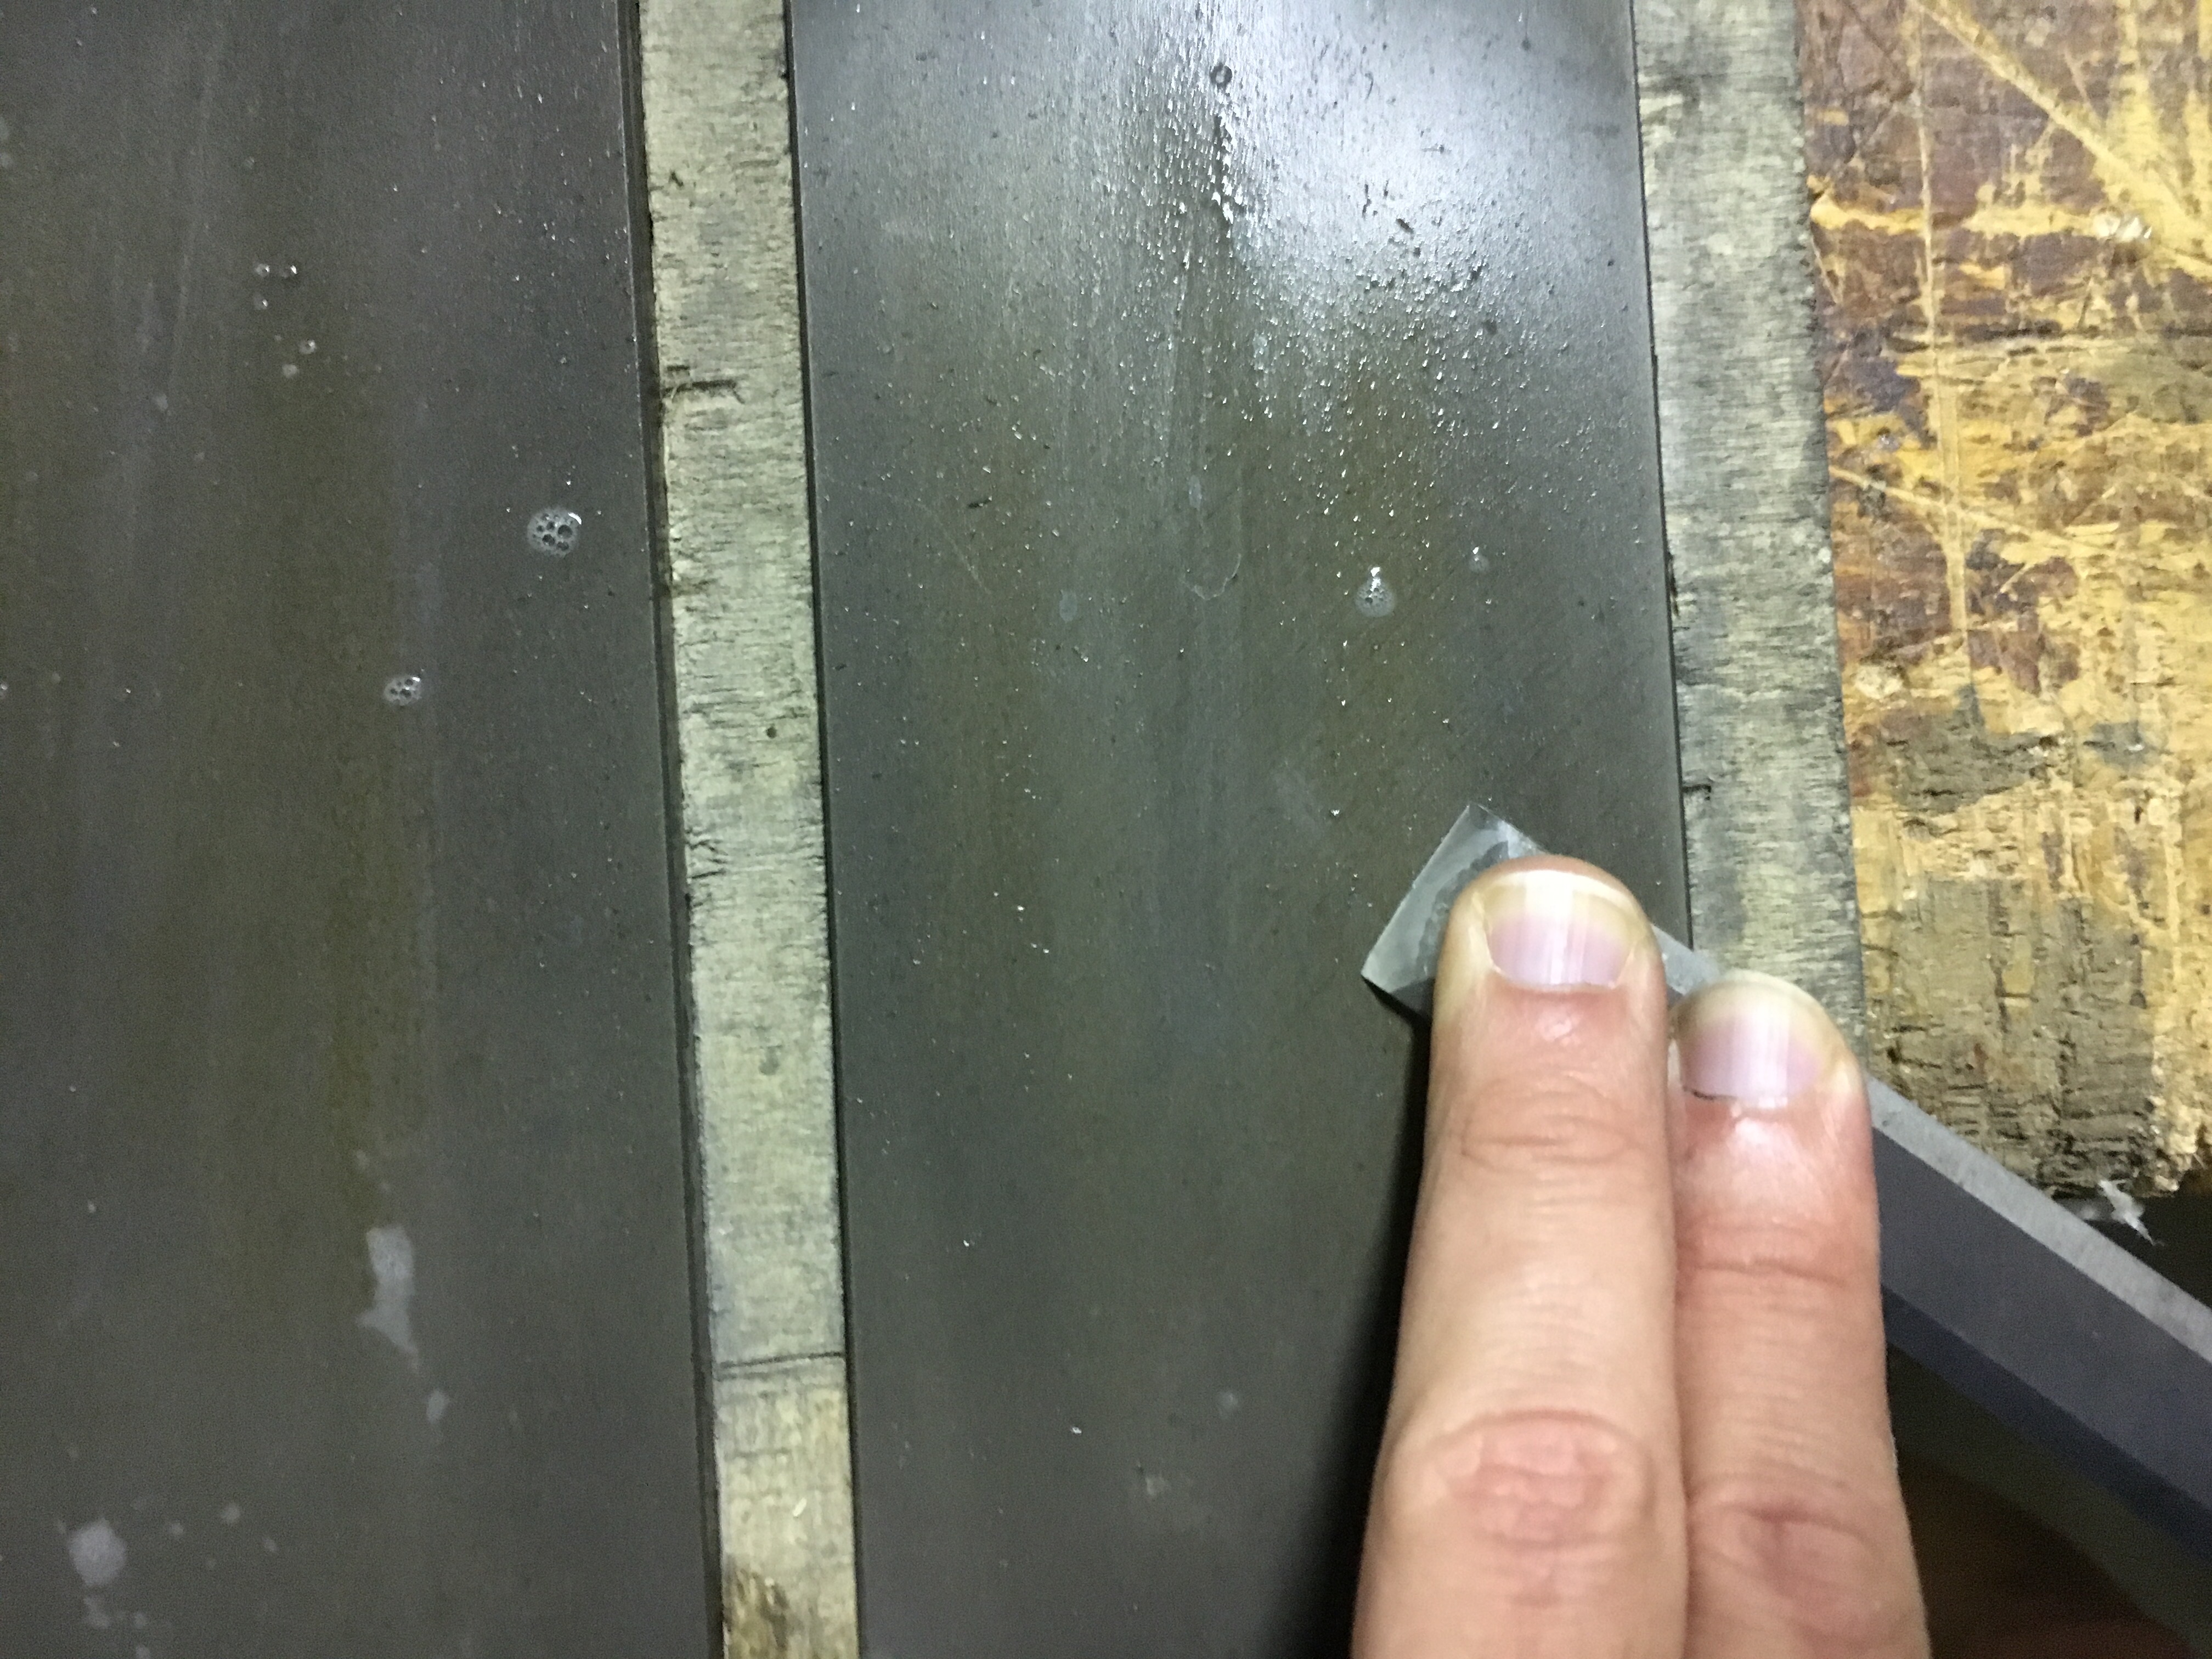
Il ruolo della pietra a grana grossa è quello di formare il ricciolo. Una volta formato dobbiamo passare ad una pietra di grana più fine, come ad esempio una grana 600. Lo scopo è quello di rimuovere i graffi lasciati sul bisello dalla pietra precedente. Quando i graffi più evidenti saranno rimossi, la pietra avrà di nuovo lasciato dei nuovi graffi questa volta più fini. Passando alla pietra con grana extra fine, come ad esempio una grana 1200, si provvede a rimuovere i graffi lasciati dalla pietra precedente. Per finire, su quest’ultima pietra faremo un paio di passate sul dorso della lama dove si è formato il ricciolo, per rimuoverlo. Lo scopo delle pietre a grane più fini è quello di rimuovere i graffi dovuti all’abrasione ed ottenere una lama la più pulita e lucida possibile.
La lappatura e lucidatura del bisello.
Per effettuare la lappatura, e lucidatura del tagliente, ci sono vari metodi ma lo scopo è sempre quello di ottenere una superficie perfettamente a specchio e senza graffi.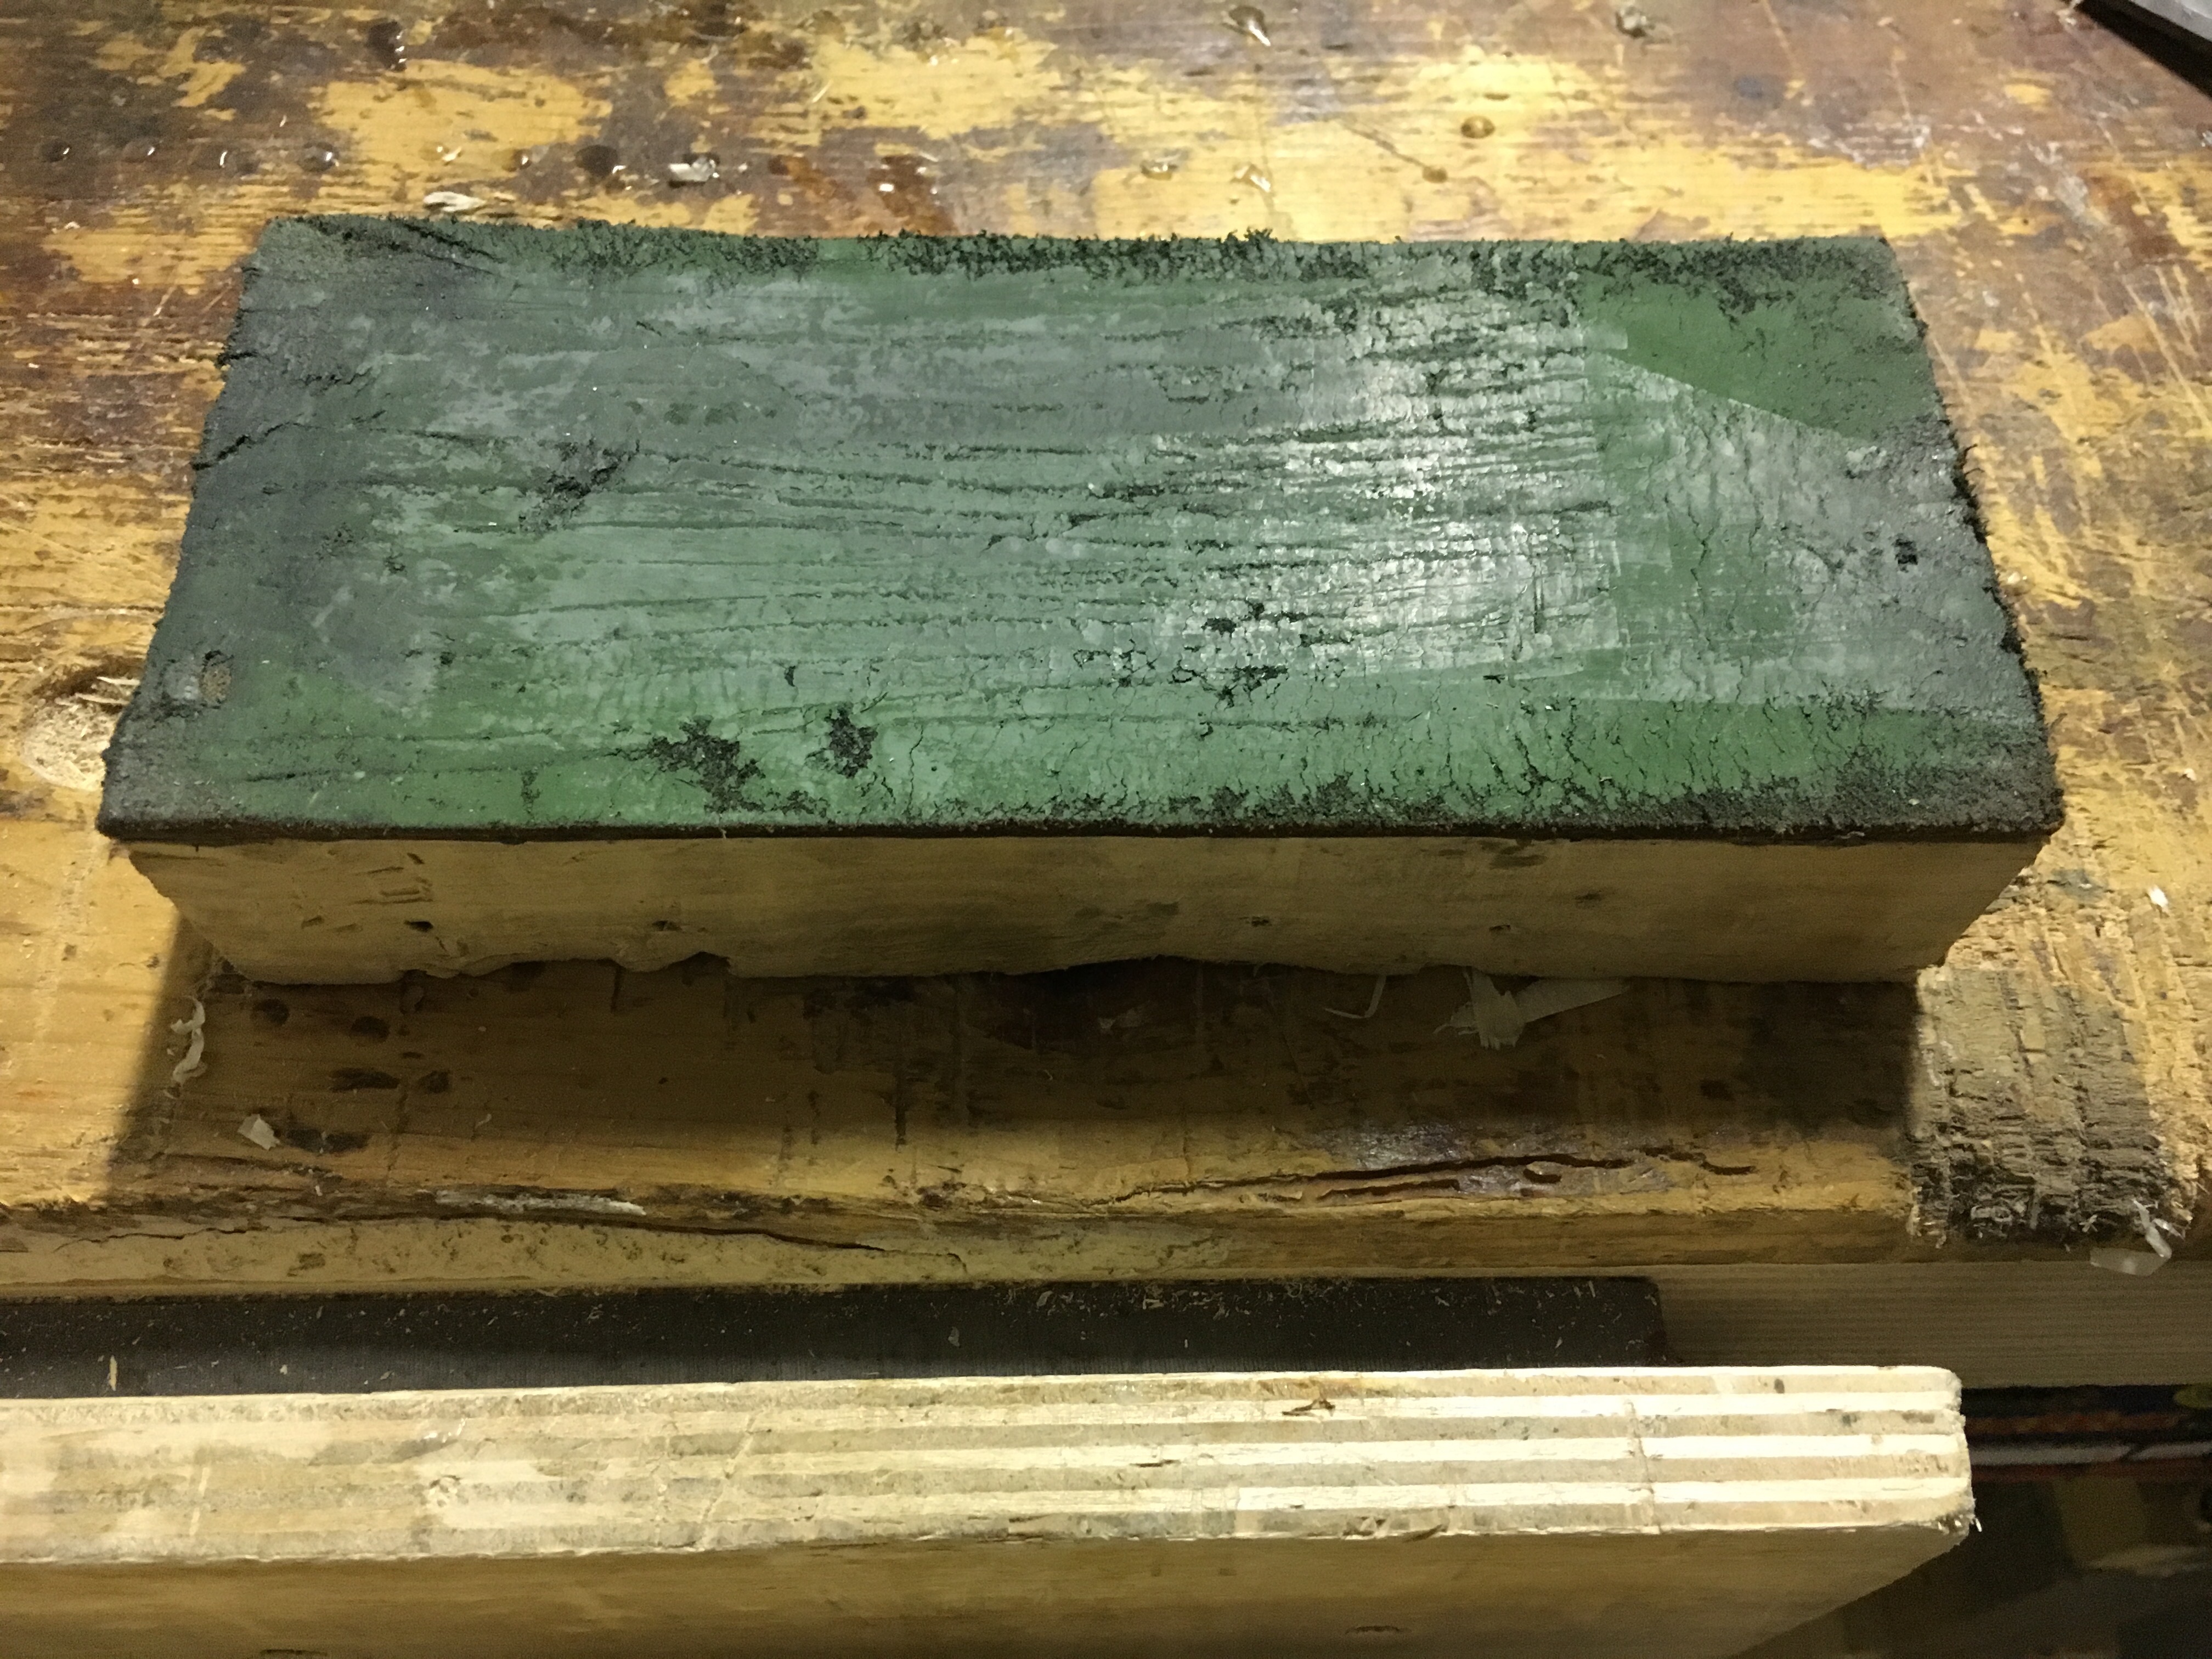
Il metodo che seguo io prevede l’utilizzo di un supporto in legno sul quale su un lato ho incollato una striscia di pelle (il c.d. strop). La pelle è reperibile presso qualunque calzolaio per pochi euro. Va incollata dal lato liscio, lasciando quello ruvido esposto e pronto a ricevere la pasta abrasiva. Quindi si applica sul supporto della pasta abrasiva composta da ossidi di alluminio ed altri minerali a 15000 grit.
A questo punto a seconda della grandezza dello scalpello o della lama della pialla effettueremo dalle 30 alle 40 passate, sempre in un movimento a tirare e mai a spingere, per evitare che il tagliente si impunti nel supporto. E’ importante esercitare una forte pressione con il palmo della mano che va in appoggio alla lama durante il movimento e cercare di mantenere sempre l’inclinazione alla quale abbiamo affilato il tagliente. Il movimento, oltre che con le braccia, dovrebbe essere accompagnato anche con il busto, così da evitare il più possibile di perdere l’inclinazione.
Alla fine del procedimento possiamo fare un paio di passate al retro della lama sulla pasta abrasiva e pulire infine con uno straccio il tagliente appena formatosi.
La pasta che uso io è della Veritas e trovo sia veramente un ottimo prodotto. Una confezione durerà per molto tempo anche se dovete effettuare affilature frequenti.
Di seguito il link dove è possibile acquistarla.
https://www.axminster.co.uk/veritas-honing-compound-477070
Verifica del risultato ottenuto.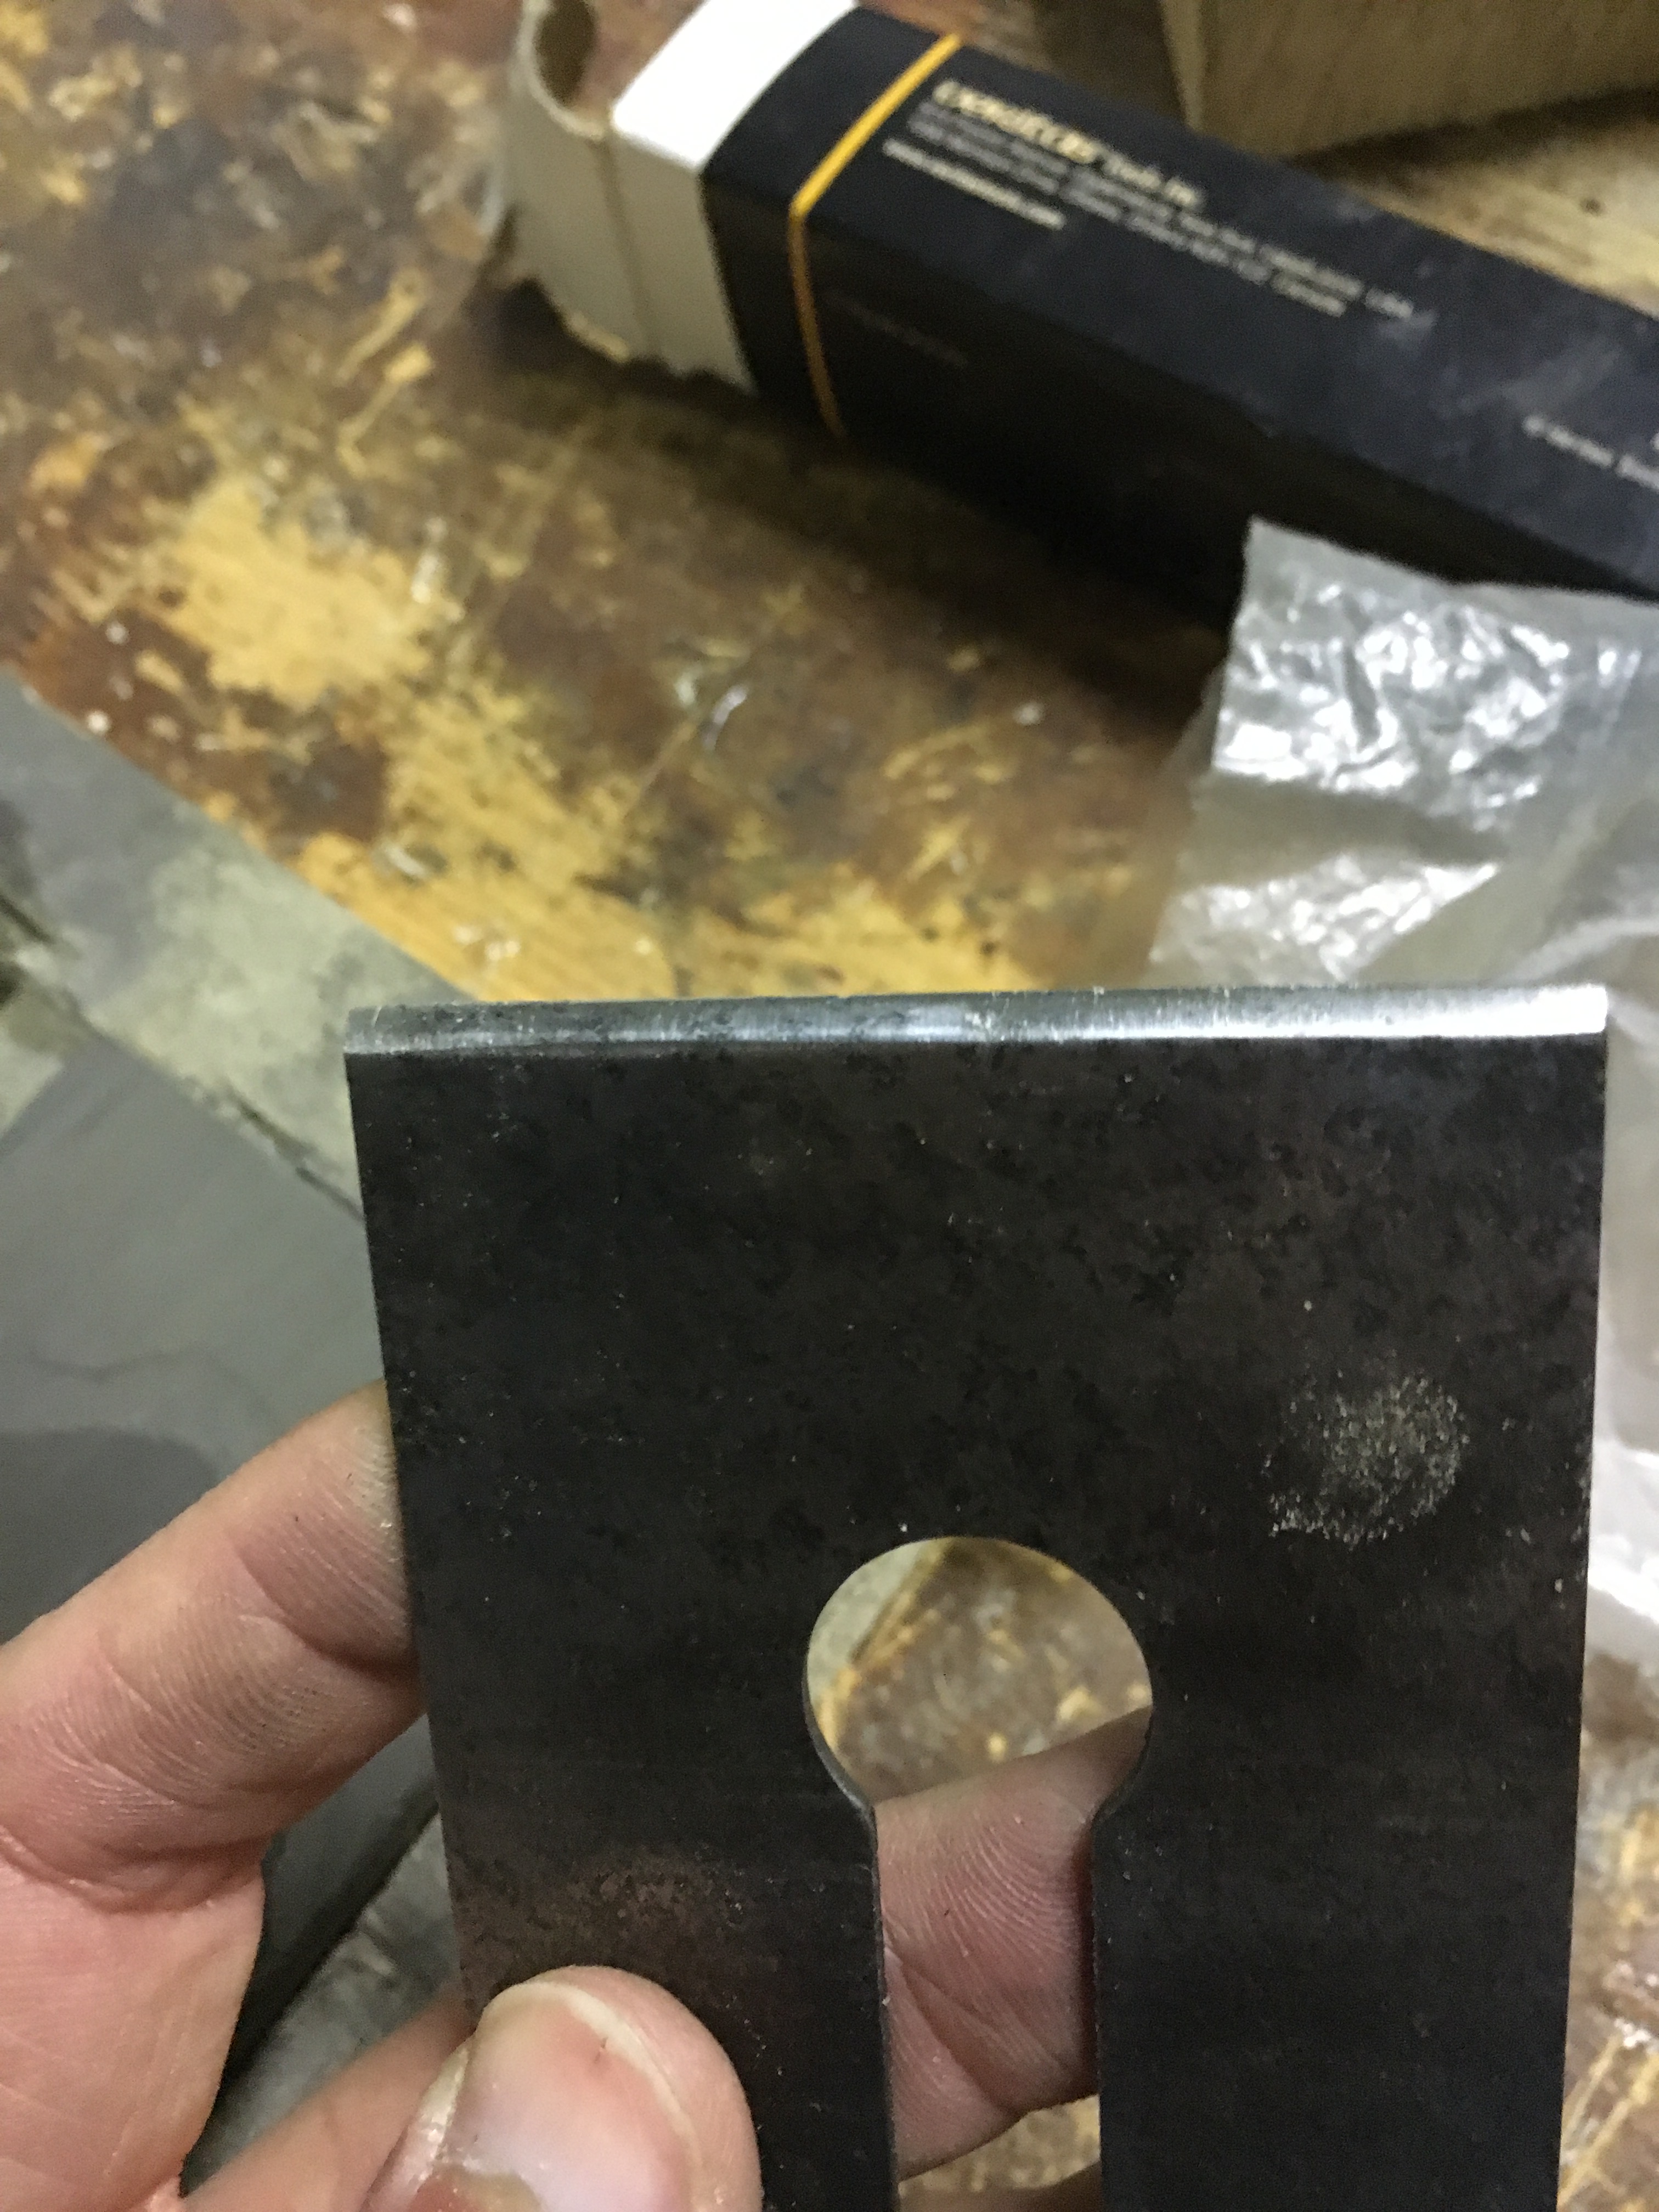

Per capire se abbiamo ottenuto un buon tagliente esistono alcuni metodi empirici. Il primo è visivo. Se la lama è ben affilata il tagliente non dovrebbe riflettere la luce. Se alla luce di una lampada o con l’ausilio di una torcia la luce viene riflessa ciò significa che esiste una superficie riflettente e quindi uno spessore sul tagliente che non dovrebbe esserci. Infatti l’incontro tra il dorso della lama ed il bisello dovrebbe essere tale che lo spessore del tagliente formatosi tra le due superfici sia praticamente inesistente e quindi invisibile. Una pratica utilizzata è anche quella di passare il tagliente su un foglio di carta. Il tagliente dovrebbe essere in grado di ricavare curve nella carta con estrema facilità. Un’altra prova è quella di provare la lama provando a rasarsi i peli del braccio. Un metodo un pò rustico ma di sicuro effetto visivo! Qualunque sia il metodo scelto, il miglior modo per vedere se una lama è affilata rimane comunque quello di metterla al lavoro e vedere come si comporta sul legno. Le lame delle pialle, ad esempio, dovrebbero essere in grado di arrivare a produrre trucioli con spessori finissimi.
Se volete approfondire l’argomento affilatura, vi consiglio la lettura dei miei due volumi sulla falegnameria manuale.
Spianatura del dorso della lama di una pialla o di uno scalpello.
Parliamo infine della spianatura del dorso della lama. In realtà quando si acquista uno scalpello o una pialla, sia che si tratti di nuovo o che si tratti di usato, l’operazione di spianatura del dorso è la prima operazione che andrebbe fatta, ancor prima dell’affilatura del tagliente. Ottenere il dorso della lama spianato è il primo elemento che ci garantirà in seguito un’affilatura del tagliente soddisfacente. Il fatto di dover spianare il dorso di un attrezzo vintage è pressochè scontato. Meno scontato è il dover spianare il dorso di una lama nuova appena uscita di fabbrica. In realtà, sia il dorso che il bisello della lama sono già affilati in modo tale da formare un tagliente in grado di lavorare. Ma non ad un grado soddisfacente, almeno per chi lavora il legno in modo manuale. Molto spesso infatti le lame presentano ancora profondi solchi lasciati dai macchinari. Questi segni vanno rimossi sia dal bisello che dal dorso.
Ciò che ci interessa sia spianato e lucidato a specchio non è tutta la lama ma almeno gli ultimi 3 cm. verso la punta della lama ovvero la parte che si incontra con il bisello e che maggiormente lavorerà il legno. L’operazione di spianatura e lucidatura del dorso è del tutto simile a quella del tagliente e, fatta una volta, non dovrà più essere effettuata. Si esegue a mano libera, senza l’ausilio della guida, ponendo sulle pietre la parte terminale della lama partendo dalla più grossa e scalando a quelle successive man mano che i segni delle pietre precedenti vengono eliminati. Il movimento è sempre avanti ed indietro ed ovviamente non dobbiamo inclinare la lama dovendo spianare il dorso.
Al termine si passa alla lucidatura passandolo sulla pasta abrasiva. In quest’ultimo passaggio di solito applico la pasta abrasiva direttamente sul retro del supporto, quindi direttamente sul legno invece che sulla striscia di pelle.
Considerazioni finali.
Su internet troverete migliaia di articoli sull’argomento affilatura spesso dettagliatissimi e pieni zeppi di tecnicismi riguardanti gli angoli di affilatura, i materiali delle pietre, le guide, ecc. Mi sono reso conto però che a fronte di tutte queste nozioni, spesso assolutamente inutili, quello che serve veramente sapere per poter affilare è assolutamente poco. Anche in questo caso la parola d’ordine è semplificare.
L’affilatura è un’operazione fondamentale da farsi non appena abbiamo la sensazione che i nostri utensili non stiano lavorando a dovere. È un processo che porta via solo pochi minuti e che vi permetterà di lavorare bene, con speditezza e soddisfazione. Una lama non affilata semplicemente non funziona e vi farà perdere tanto tempo prezioso procurandovi frustrazione. Il mio consiglio è quindi quello di dotarsi fin da subito dell’attrezzatura di seguito indicata per poter cominciare ad affilare con soddisfazione i vostri scalpelli e le vostre pialle.
Materiale occorrente per l’affilatura.
A) Tre pietre diamantate di misura circa 20 cm. X 7,5 cm. di cui una a grana grossa (250 grit) una a grana intermedia o fine (400 o 600 grit) ed una a grana extrafine (1200 grit);
B) Una guida (opzionale);
C) Spray lubrificante per vetri;
D) Pasta abrasiva a 15000 grit;
E) Un supporto per le tre pietre;
F) Un supporto per la pasta abrasiva (strop).
In a post a few months ago I spoke briefly about sharpening hand tools and later in another post about sharpening hand saws. For those who have not read these old articles I put here the following links:
Sharpening hand tools
How to sharpen a saw
In this article I would rather talk about sharpening chisels and plane irons. As always I will try to write the essential, what I actually experienced in my f day by day working with hand tools, avoiding the many (and in my opinion unnecessary) technicisms. First of all why talk about sharpening chisels and plane irons together in the same article? Because the procedure is the same, if we exclude the sharpening angle of the cutting edge of the blade. Generally, in fact, the blades of the chisels are sharpened at 30 degrees ( generally at 25 degrees for soft woods and 30 degrees for hard woods and hard works) while those of the plane irons at 25 degrees .This theoretically. In practice we can find easily plane irons sharpened at 25 degrees and chisels to 35 degrees and even blades with the two different degrees of sharpening together. It will depend on the type of wood that we have to work, the type of work we’re going to face but also on personal preference. In practice there are many sharpening systems. You can sharpen with the grinding wheel with the dry or water (for heavy works of restoration of the cutting edge and when this is very damaged), with abrasive paper (the so-called scary sharp system, that I’ll write about in a future article) or by the use of water stones, oiled stones or diamond stones. Except for the first type of sharpening, usually used in exceptional cases, all the others are widely practiced, extremely valid and they all have advantages and disadvantages that make it lean from time to time the choice towards one or the other system . By having them tested all I come to the conclusion that for me the best sharpening method, the one that represents the best compromise, was the freehand method on diamond stones which is the method that teaches Paul Sellers. I’ll try to explain, in the most clear and concise way how I proceed for sharpening chisels and plane irons. At the end of the process we will see the fundamental aspects.
The sharpening process in synthesis.
On a suitably shaped wooden support I have included three diamond stones of different grits. A coarse-grained stone (250 grit), an intermediate grained stone (600 grit) and a fine-grained stone (1200 grit). Once secured the support in the bench vise I lubricate the three stones with a few spurts of simple spray glass cleaner. So I take the iron of the plane or the chisel in my dominant hand and with the two fingers (index and middle fingers) of the other hand I hold press and well fit the blade with the bevel (the chamfered side of the blade) facing downwards and against the stone, at an angle of 25 degrees (between 25 to 30 degrees for the chisels).Starting at 30 degrees with a backward and forward movement and the slightly diagonal sealing blade I slide the bevel of the blade on the stone, taking care that only in the terminal phase of the forward movement the edge of the blade lift off a little bit from the abrasive plate. I proceed on the coarse stone until I get over the entire length of the cutting edge a uniform and continuous metal burr. From time to time I lift up (for the plane irons only) to round the angles. When I got the burr I step at the intermediate grit stone to remove scratches left by the previous stone. Next, move to the last extra fine stone in order to remove the scratches left by the previous stone. Finally, with the back of the blade facing downwards and with a back movement I pass on the extra fine grained stone the very end of the blade, the part where the metal burr is formed, in order to remove it and then be able to pass to the polishing (lapping) phase of the cutting edge. To make it, remove the support of the three stones from the bench vise and insert a piece of wood glued over with a strip leather on which I applied a buffing compound at 10000 grit. With a pull movement, and with the bevel always ta the same inclination and always facing downwards I make from 20 to 30 passes. That’s all. Now some notes and specifications about the process.
The Diamond stones.
The diamond stones are expensive, certainly more expensive than water or oil stones and the abrasive paper. Despite a considerable investment you will enjoy them for many advantages. These include the speed and high abrasive capacity, the tendency to stay flat forma very long time (although they are not forever) and the fact that they are clean. They also do not require further abrasive stones as it happens for the oil and water stones that tend to wear out more quickly. The ones I own are Eze Lap and I bought them on Amazon.com a few years ago when they did not cost a fortune. Unfortunately, today the prices of this type of stones has risen up. The stones I own measure 203 mm X 76 mm. This measure makes it possible to easily sharpen both chisels and the blades of the planes, which are wider. My advice is not to go under this measure. Among all stones the diamond Eze Lap are definitely not the best (the DMT and Atoma are higher quality, for example) but they are a very good value related to their price. The coarse grained stone is the more expensive between the three I own and is also the one that tends to be consumed more quickly as is the more used to bring up the blade to the cutting edge. The coarse stone I own is 250 grit but there are also extra coarse stones that are more expensive. The second stone that I use is an intermediate grain (600 grit) and is perhaps the one on which I make fewer passess. It is less expensive than the previous stone. As intermediate stone you can also use a 400 grit stone . The last stone that I use is the extra fine stone (1200 grit). The advice I can give is to make a support for the stones like the one I made some years ago. Is simple to make, convenient to be used (it hangs in the bench vise) and maintains in place and secure the stones. Is a good idea, if you use the lubricant spray to remove with a rag, at the end of the sharpening process, the liquid remaining on the stones. The metal particles remaining in the liquid if left on stones tend with time to rust.
Below are some links where you can buy them:
https://www.fine-tools.com/ezelap-diasharpener.html
https://www.fine-tools.com/diasharpener.html
https://www.axminster.co.uk/dmt-dia-sharp-fine-continuous-diamond-whetstones-ax885740
Sharpening with the guide or freehand?
In reality is a a false question because both methods are valid and absolutely identical in the movements to be performed. The difference is exclusively in putting the blade on the support. I think that sharpening with the guide is better when you are a beginner or you are not yet fully mastered sharpening. The guide compensates for these shortcomings because it allows to maintain the position of the blade to be sharpened to the exact desired angle and to keep it for the entire sharpening process that is the biggest problem when you have to sharpen a chisel or a plane blade. The use of the guide is very useful when we have to take very damaged or skewed edges. On the other hand I find that putting the blades on the guide stop the pace of work and lose some time for the correct setting of inclination. The guide that I have used for years with satisfaction was a stanley 0 14 050. The Stanley guide is cheap and easy to purchase on internet. It is sold in a kit including a stone for sharpening (of rather poor quality) and the lubricant. If you want to buy vintage you can look on Ebay for the n. 36 Eclipse guide. If you are looking for something new I can suggest the Veritas MKII guide, very expensive actually.
Here are the links to the rails described above.
https://www.dictum.com/en/honing-guides-ehd/stanley-honing-guide-set-707166
https://www.ebay.co.uk/sch/i.html?_from=R40&_trksid=p2380057.m570.l1313.TR3.TRC1.A0.H0.Xeclipse+honing+guide.TRS0&_nkw=eclipse+honing+guide&_sacat= 0
http://www.rma-tools.com/index.php?main_page=product_info&products_id=251
The freehand sharpening method is however advisable when a good practice with the guide sharpening method has been acquired. It’s faster and in my opinion also more effective thanks to the possibility to be able to exert greater pressure on the blade in the area close to the cutting edge and in general a greater sharpening awareness. However you have always to pay particular attention to the inclination of the blade, because without the guide it’s possibile to deviate from the desired inclination. In this case the danger of damaging the cutting edge and get him wrong is always around the corner. If this happens it would be difficult to resume the cutting edge on the stones, forcing us to use the grounding wheel. My advice so is starting with the guide and make practice with that. Then, when you feel confident, trying the freehand sharpening on some economic chisel or some plane iron of little value. Only when you feel ready try the hand-free sharpening method on chisels and plane blades of good quality without fear of damaging them.
The free hand sharpening movement and the secondary bevel.
If we are using the guide the movement will be simple. It’s a matter of pushing forward and backward the guide on the stone without paying particular attention to the inclination of the blade and the type of movement to make. This operation is a little more complicated when we sharpen freehand. In this case in fact is difficult to maintain the right inclination of the blade in the forward and backward. I use to lift up the plane irons at the angles to round them. This will be helpful when planing because the cutting edge won’t leave signs in the wood.
The secondary bevel is a second degree of sharpening of the cutting edge that is in added to the primary bevel. When sharpening the blade of a plane the sharpening angle is normally at 25 degrees. Once you have this degree of sharpening usually is added a second bevel at 30 degrees. This is usually achieved by passing the bevel only on the fine and extra fine stones at this different degree. The secondary bevel helps in the action of planing and is widely used in woodworking. If you are using the guide you’ll have to remove the blade from the support and reset the angle at 30 degrees. Using the Paul Sellers freehand method instead the secondary bevel is all in one with the primary bevel obtaining a slight curved bevel varying approx from 25 to 30 degrees. To get this result you have to start from a position of 30 degrees and during the pushing movement in sharpening, to raise a little bit the cutting edge in the final phase of the forward movement, ( it happens naturally moving the arms) just like if you’re practicing a slight ondulating movement with the blade (in practice the movement start at a 30 degree position and end to a 25 degrees position).
The burr of the cutting edge.
The time you need for sharpening the cutting edge will depend on the status and quality of the stones and the conditions of your chisels and plane irons. If only a little sharpening is needed usually a few passess on the fine and extra fine stones is all you need. But if you have to rensharpen a cutting edge that was totally dull you’ll have to work also on the first coarse stone in order to obtain the so called burr, a kind of thickening of the cutting edge on the back of the blade, in the part where the back of blade and the bevel meet. Until you don’t have this uniform result all along the length of the cutting edge, we can not move to the next intermediate grit stone. The metal burr is eye sight and you can touch it passing the fingertip on the back of the blade. Be careful not to cut your fingers because of the cutting edge and the metal filaments that may come off.
Removing scratches from the bevel.
The role of the coarse stone is to form the burr. Once we have the burr we skip to a finer grit stone such as a 400 or 600 grit. The purpose is to remove the scratches left on the bevel by the previous stone. When the heavier scratches has been removed, on the successive fine stone we remove the scratches left by the coarse stone. Turning to the extra fine stone grit, such as a 1200 grit, we then remove the finer scratches left by the previous stone. Finally on this last stone we will make a couple of passes on the back of the blade where the burr was formed, to remove it. So the purpose of working on finer stones is to remove all the scratches due to the sharpening process to obtain an edge the most polished.
Polishing the bevel.
To polish the cutting edge there are various methods but the purpose is always to get a perfectly mirror surface and no scratches. The method that I follow is to use a wooden support on which on one side I glued a piece of leather. Leather is available from any shoemaker for a few euros. We glue the smooth side, leaving the rough side exposed and ready to receive the abrasive paste. On this side is applied a buffing compound composed of aluminum oxides and other minerals to 15000 grit. At this point, depending on the size of the chisels or the plane bladed we will take from 30 to 40 passes, always in a pull movement and never to push, to avoid that the cutting edge clog in the leather. It’s important to put a great pressure during the movement and try to maintain the angle at which we sharpened the cutting edge. The movement as well as with the arms should be accompanied with the chest to avoid the lose of the inclination. At the end we can clean the back of the blade doing a few passes on the abrasive paste, and finally clean with a rag the newly formed sharp.
The buffing compound I use is Veritas, and I find it is really a great product. One package will last for a long time even if you make frequent sharpening. Below is the link where you can buy it.
https://www.axminster.co.uk/veritas-honing-compound-477070
Check the result.
To check if we got a good sharpened edge there are various empirical methods. The first is visual. If the blade is well sharpened it should not reflect light. If the light of a lamp or with the aid of a torch light is reflected it means that there is a reflective surface and then a cutting edge thickness that should not be there. In fact, the meeting between the back of the blade and the bevel should be such that the thickness of the cutting edge formed between the two surfaces is virtually non-existent and thus invisible. A practice is also to pass the cutting edge on sheet of paper. The cutting edge should be able to easily cut curves in the paper. Another test is trying to shave the hair on our arm with the cutting edge. A somewhat rough approach but of great visual effect! Whichever method you choose the best way to see if a blade is sharp is to put it to work and see how it cuts on the wood. The blades of the planes, for example, should be able to get a very narrow chips.
Flattening the back of the blade of a plane or a chisel.
Finally the flattening of the back of the blade. Actually, when you buy a chisel or a plane no matter if it is new or used the operation of flattening the back is the first operation that should be done, even before the sharpening of the cutting edge. A flattened back blade is the first thing that we have to do if we want a successfull sharpening of the cutting edge. This is a normal operation in old tools. Less obvious is to flatten the back of a brand new blade. In reality the back of these blades has been already sharpened by the manufacturers and they actually work but not at the level we want them to work. Often, in fact, the blades presents heavy scratches left by the machines. These scratches must be removed from the bevel and from the back of the blade. It’s not important to flatten, remove and mirror polish all the scratches from the entire blade but at least the last 3 cm. towards the tip of the blade on the part that meets with the bevel that is the part that get in touch with the wood mostly. The flattening and polishing of the back is very similar to that of the cutting edge and, once made, you don’t have to do that anymore. You can do that freehand, without the aid of the guide, placing the side of the blade terminal on the stones starting from the coarse one and pass to the successive stones when the scratches of the previous stones has been removed. The movement is back and forth and of course we must not tilt the blade having to flatten the back. At the end we make some passages on the strop not on the leather side but on the reverse side where we apply directly the buffing compound on the wood.
Final thoughts.
On the Internet you will find thousands of articles about sharpening hand tools, often very detailed, and full of technicalities regarding the grinding angles, the stones materials, guides, etc. I realized otherwise that the majority of all these notions, are often absolutely useless. All you really need to know to sharpen is very little. Again the word order is simplify.
Sharpening is an operation absolutely essential to do as soon as we feel that our tools are not working properly. It’s a process which takes away only a few minutes and will allow you to work well, with speed and satisfaction. A hand tool if is not sharp simply does not work and makes you waste so much valuable time giving you a sense of frustration. My advice therefore is to adopt immediately the equipment listed below in order to start immediately the sharpening of your chisels and planes.
Three diamond stones measuring about 20 cm. X 7.5 cm. of which a coarse (250 grit) one, an intermediate or fine stone (400 or 600 grit) and an extrafine stone (1200 grit);
A guide (optional);
Lubricant windows spray;
Buffing compound at 15000 grit;
A support for the three stones;
A support for the buffing compound (strop).

Lascia un commento