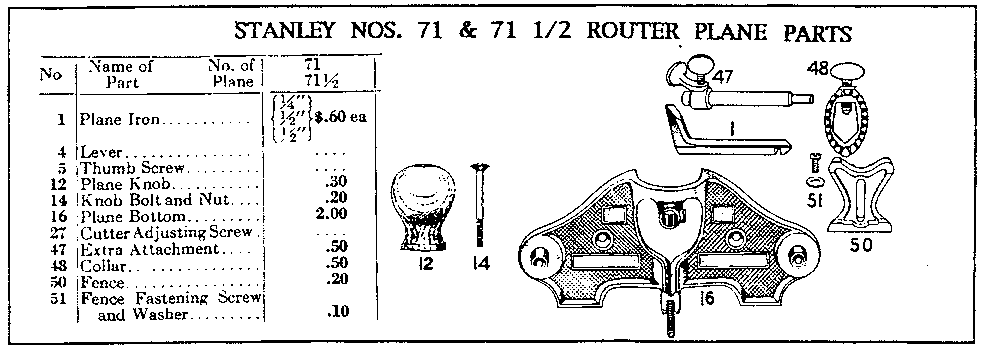
Pialle particolari. La Router plane / Special planes. Router plane
English translation at the end of the article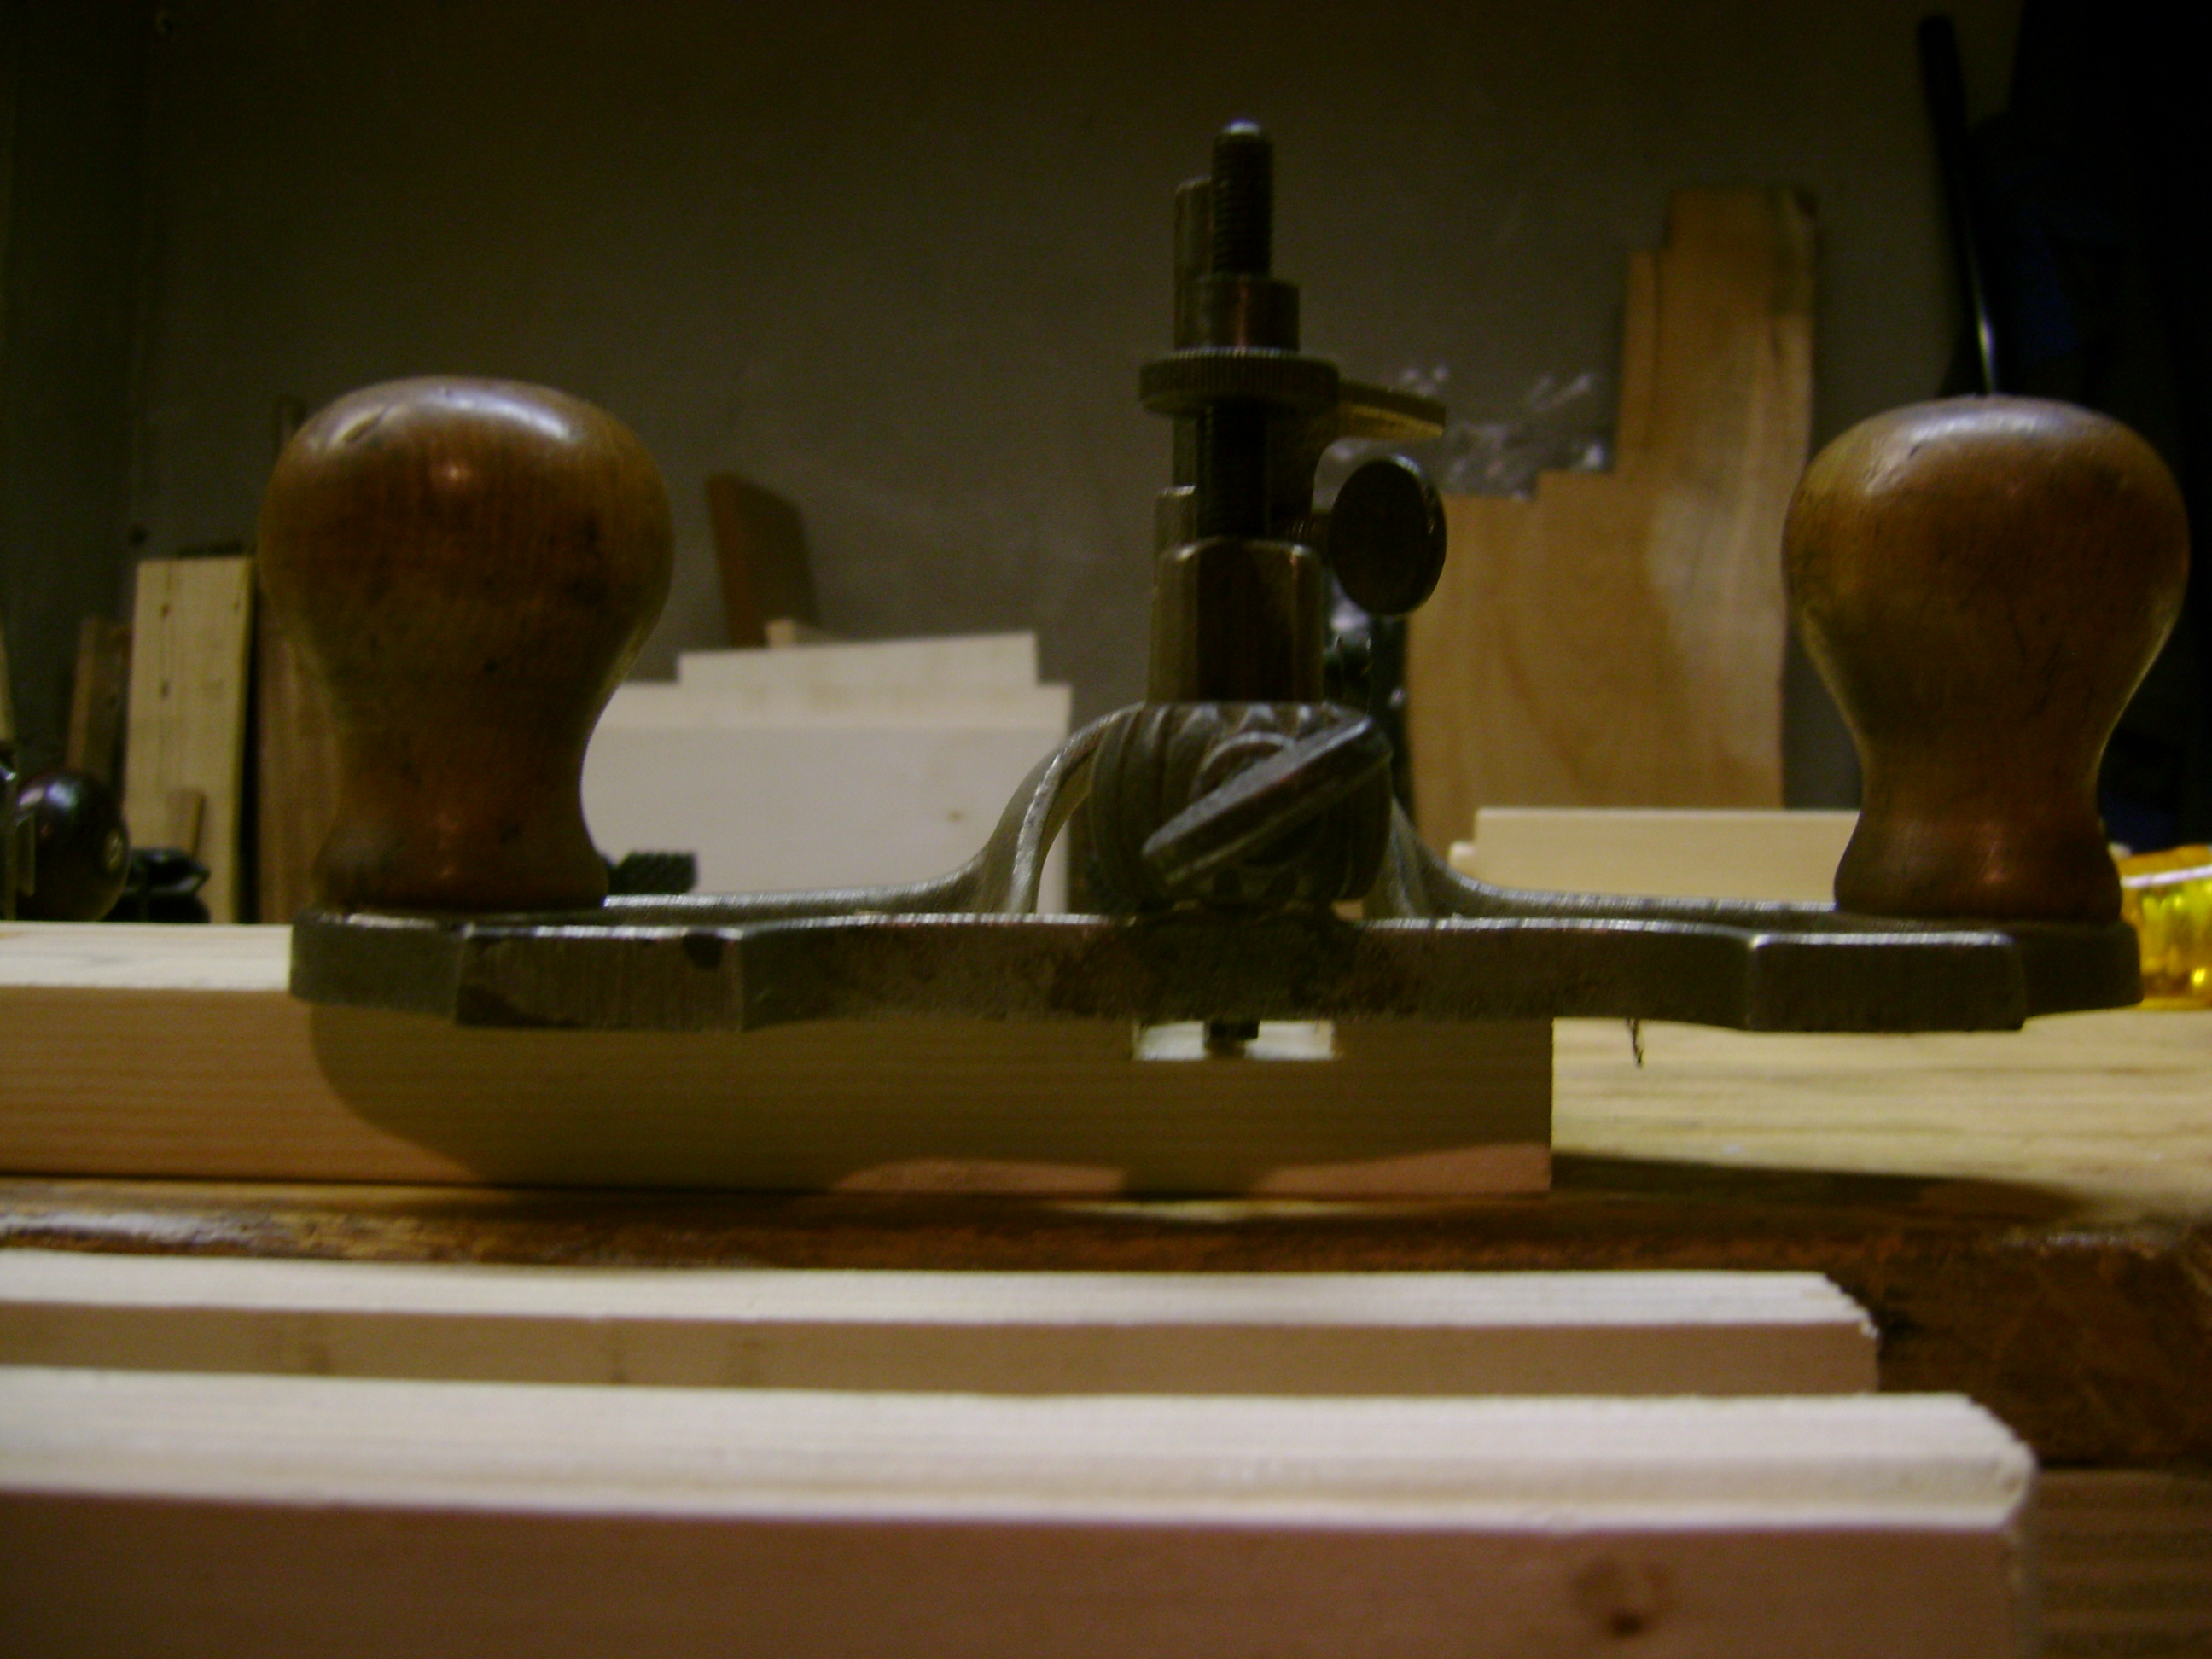
Quando presi in mano per la prima volta una pialla fu una Record n. 4 acquistata su Ebay tramite un amico esperto di pialle. A quel tempo non possedevo ancora informazioni tali che mi permettessero un acquisto in autonomia e preferii quindi chiedere un aiuto. Avevo visto e letto tante cose in merito alle pialle ma un conto è
leggere un libro e vedere foto e filmati su internet, un conto è averne una per le mani e farla funzionare a dovere. L’approccio non fu pertanto dei più semplici e comprenderne la meccanica ed il funzionamento richiese molto tempo e molta pazienza.
Quando finalmente cominciai ad allargare le mie conoscenze, anche attraverso l’acquisto di pialle similari come la Stanley n. 4 ½, la Stanley n. 5 (Jack plane) e la Stanley n. 7 (Jointer plane) oltre a qualche pialla in legno, mi resi conto che il panorama pialle era molto più vasto e variegato di quanto immaginassi e che comprendeva molte pialle per così dire particolari e dedicate a lavorazioni specifiche.
La prima sensazione che ebbi fu che questo tipo di pialle fosse difficile da apprendere (anche a causa della loro struttura abbastanza complessa) ma comunque superflue per le lavorazioni che avessi voluto fare. Col tempo però la curiosità mi ha spinto ad acquistarne qualcuna, ed oggi, col senno di poi, posso dire che mi sbagliavo sul loro conto e che non ne posso assolutamente fare a meno.
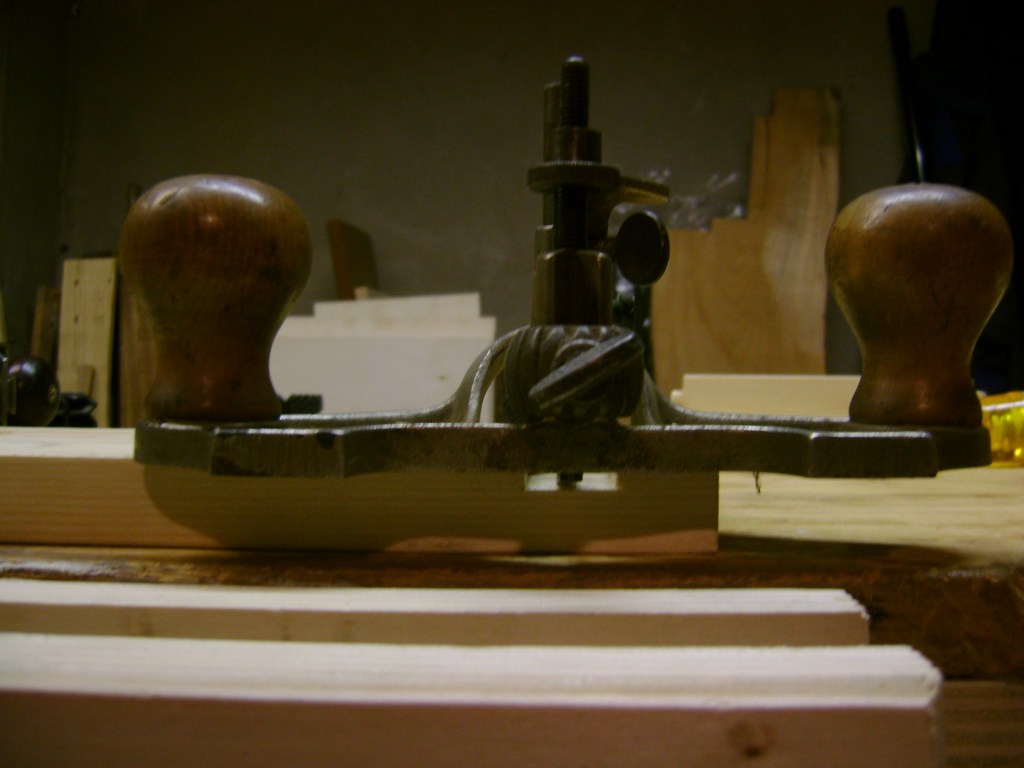
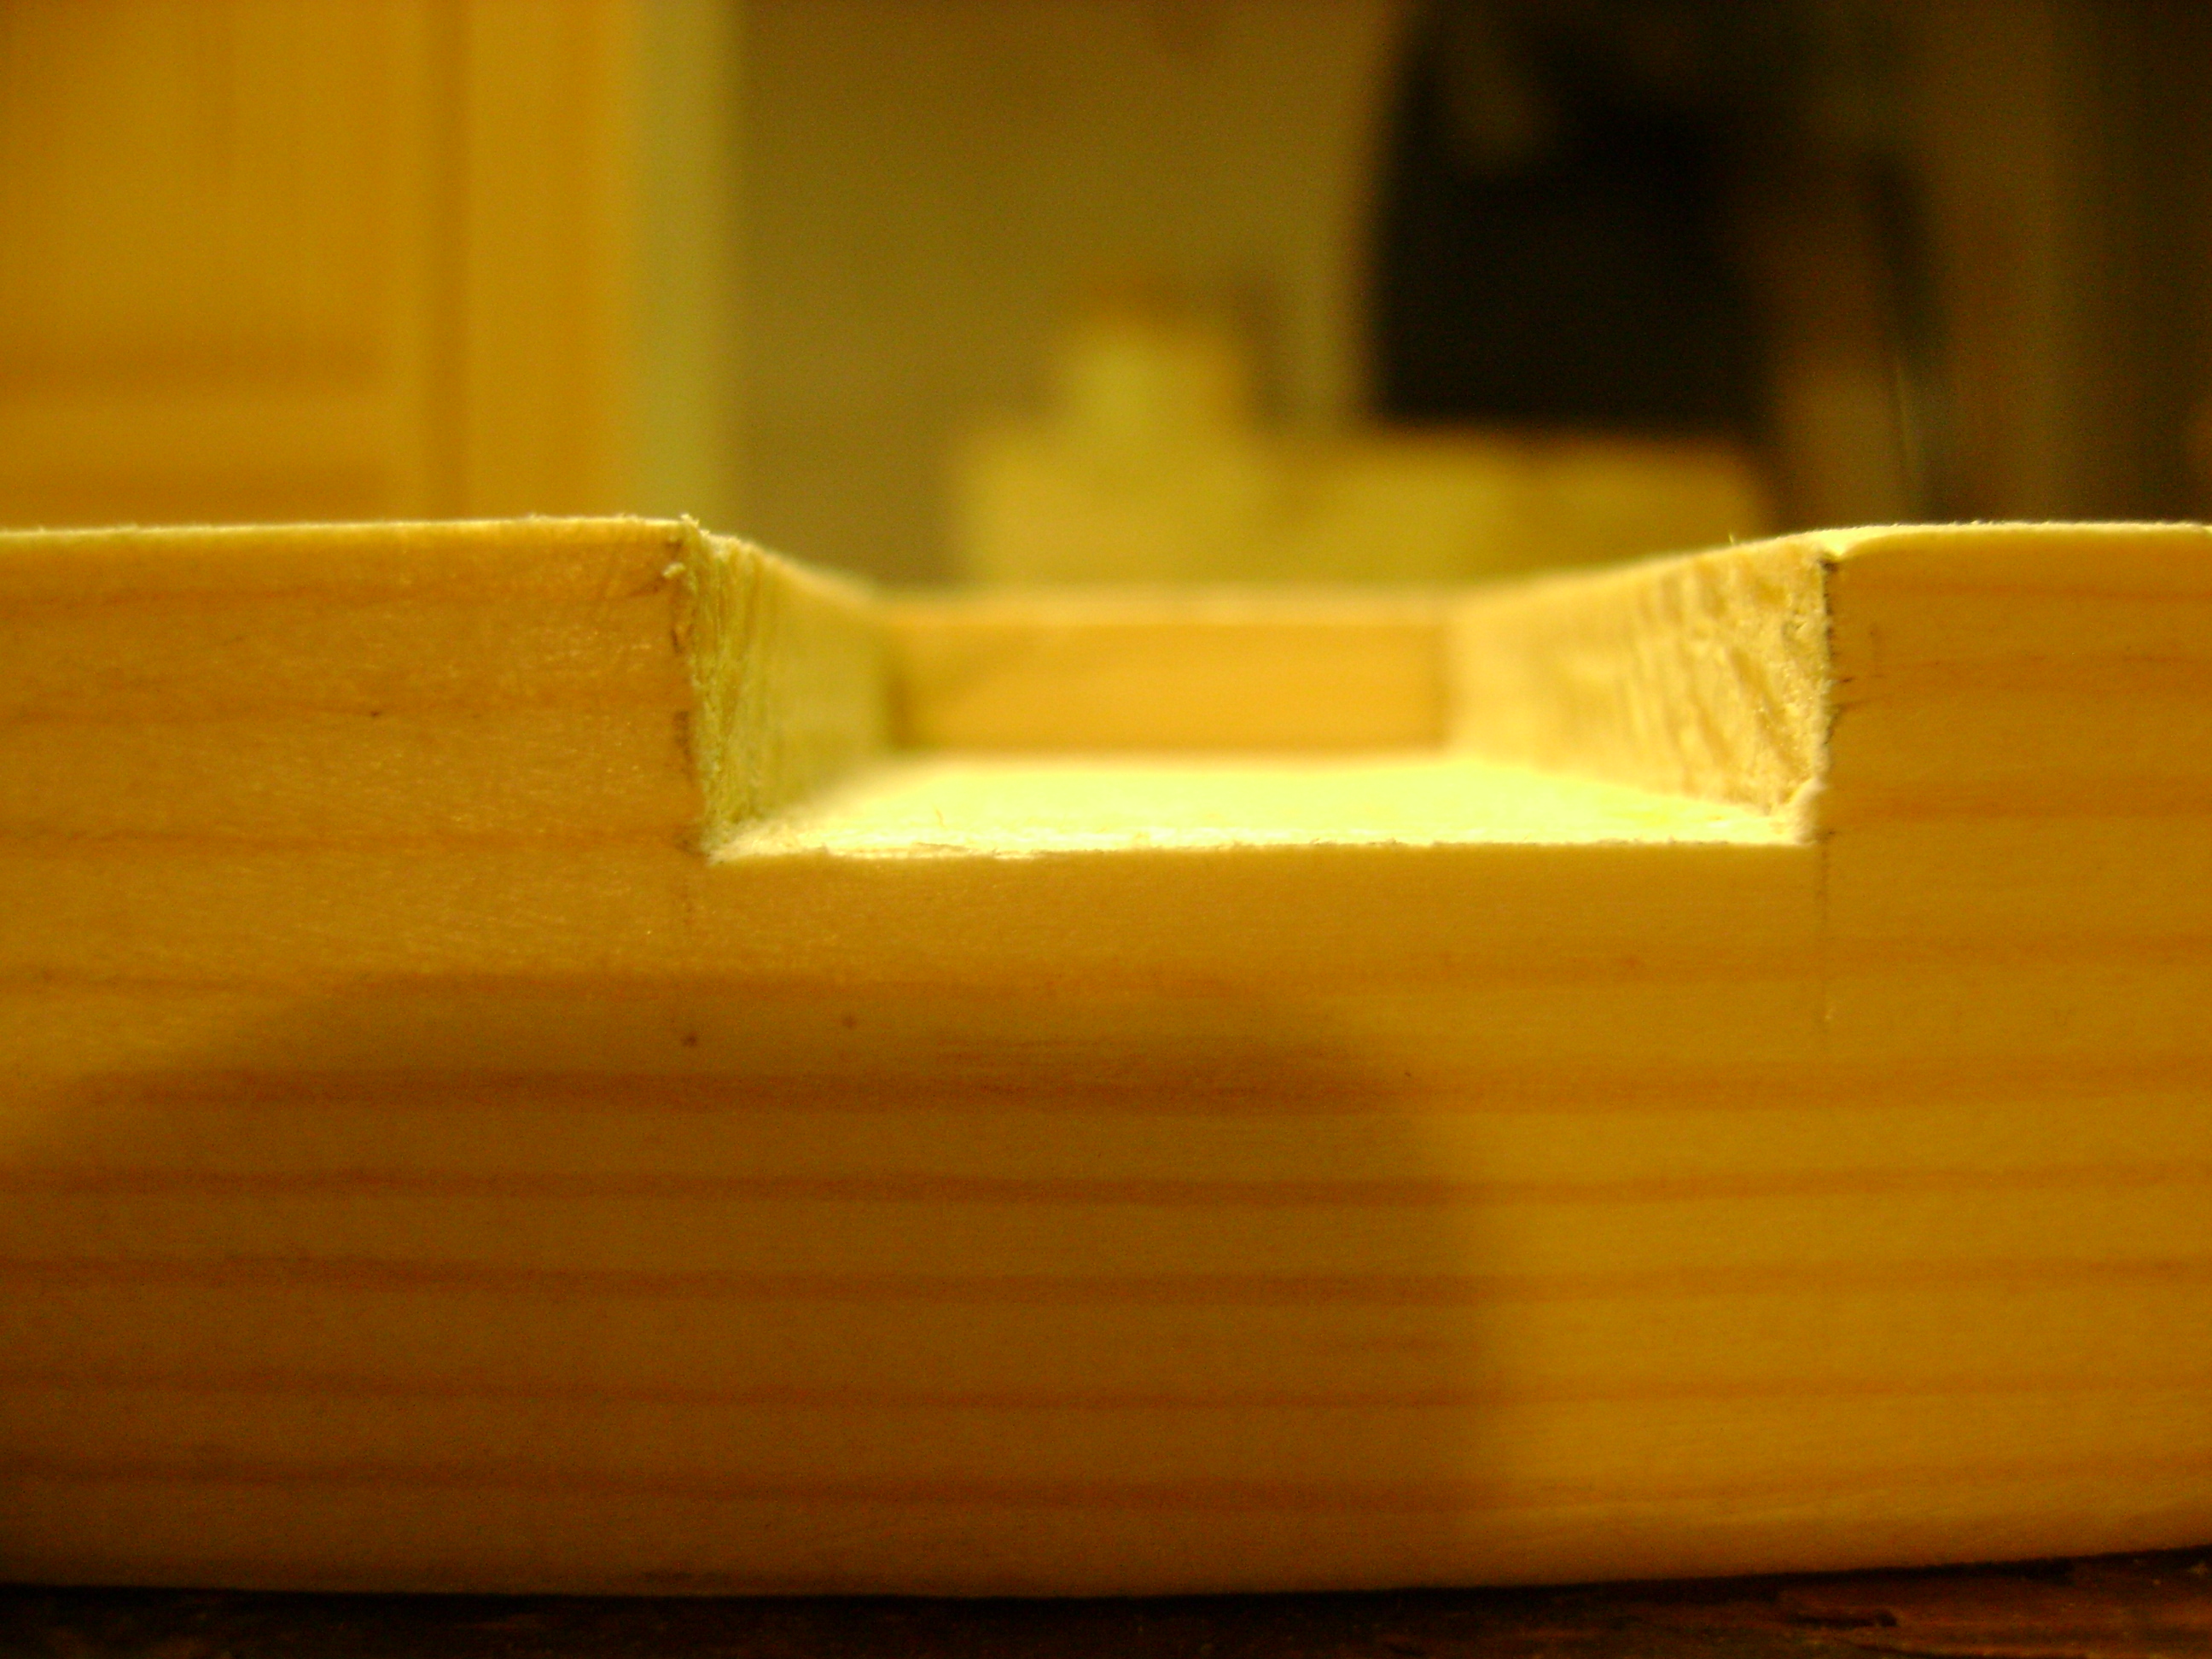
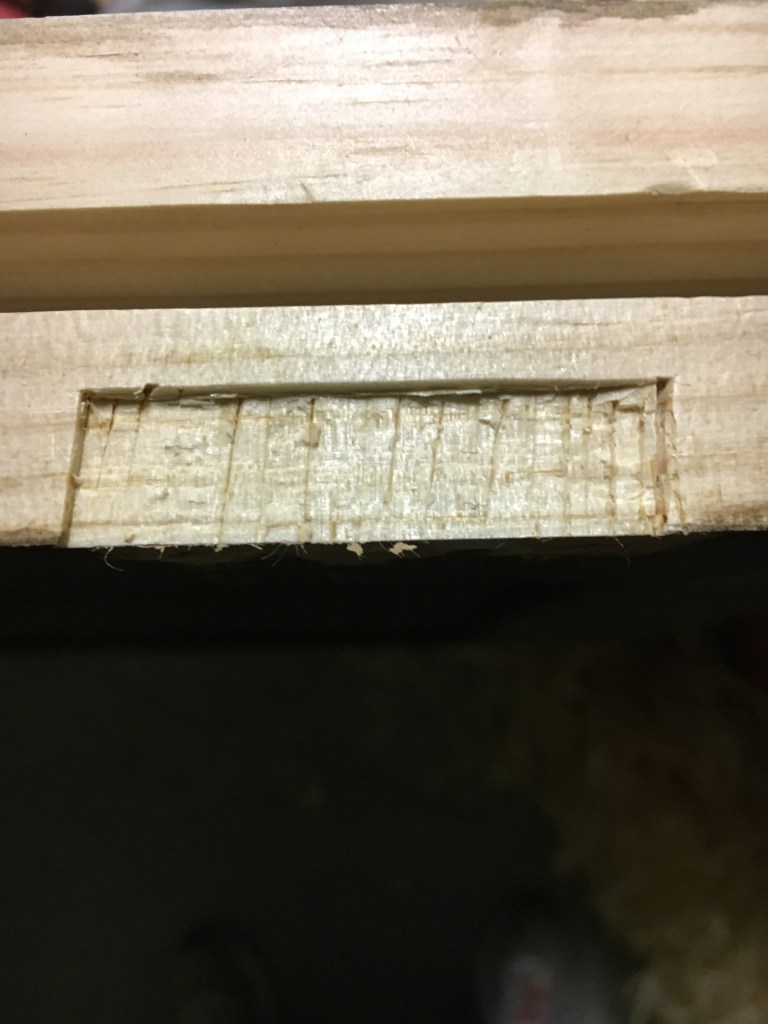
Una delle prime pialle dedicate che ho acquistato è stata la Stanley router plane 71. E’ difficile spiegare in breve le tante lavorazioni che questo tipo di pialla è capace di fare. Genericamente si potrebbe dire che la sua funzione principale è quella di livellare uniformemente una superficie già scavata rendendola perfettamente parallela alla superficie del legno circostante. Questa sua prerogativa la rende quindi uno strumento indispensabile per livellare i fondi dei canali negli incastri dente – canale.
Inoltre la si può usare per rifinire e portare a misura le guance dei tenoni e livellare la base delle mortase negli incastri a tenone e mortasa. Viene inoltre utilizzata per creare lo spazio per l’inserimento delle cerniere piane dei mobili ma anche per tracciare il legno ed altro ancora. Con l’aggiunta di una base in legno e di un estensore è possibile farla lavorare con maggiore stabilità ed in punti altrimenti difficilmente raggiungibili.
La versione in metallo è equipaggiata di alcuni accessori rimovibili: una barra in acciaio ed una basetta (piede) ad essa unita per il tramite di una vite che fanno da stop di profondità ed un riscontro laterale da avvitare sotto la suola della pialla che serve come battuta per le scanalature. Di router plane ne esistono di diverse marche, grandezze e realizzate con diverso materiale. Il marchio storico è la Stanley 71, a cui è seguita, a distanza di anni, la Record 071. Le due pialle sono praticamente identiche e si eguagliano sostanzialmente anche nella qualità.
Un’altra marca di prestigio è la Preston. Quest’ultima si differenzia dalle prime due per la diversa forma (rettangolare) ed ha dalla sua parte il beneficio di offrire una migliore visibilità durante la lavorazione.
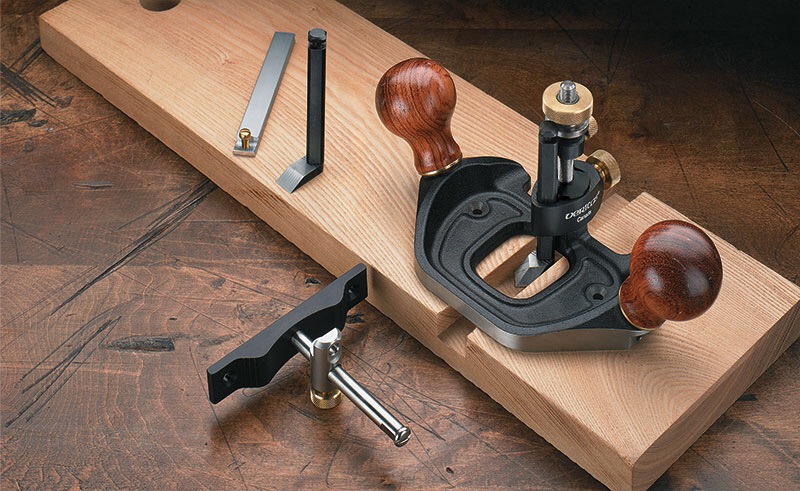
Se vogliamo acquistare qualcosa di nuovo consiglierei invece la router plane della Veritas. Non la possiedo ma le recensioni sono tutte più che lusinghiere. I prezzi delle router plane sono notevolmente saliti negli ultimi anni. Le più economiche sono comunque di solito le Record seguite in ordine crescente dalle Stanley e poi dalle Veritas e dalle Preston.
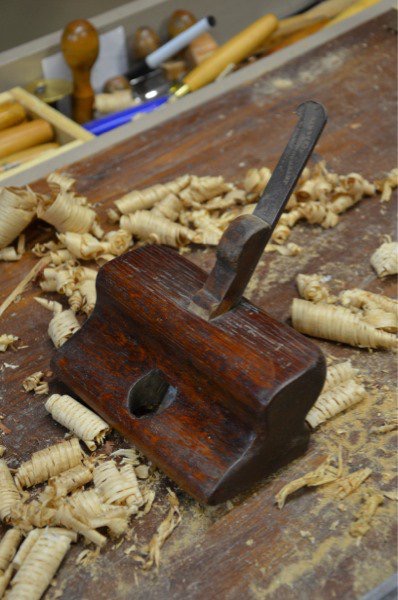
Le router plane alle quali mi riferisco in questo articolo sono quelle in metallo ma i primi modelli erano costruiti in legno e lavorano ugualmente bene. Per le router plane in legno, come per tutte le pialle in legno, la registrazione della profondità del taglio avviene mediante martellamento del corpo della pialla per l’arretramento della lama, mentre occorre battere sulla testa della lama e poi sul cuneo per l’avanzamento e successivo serraggio.
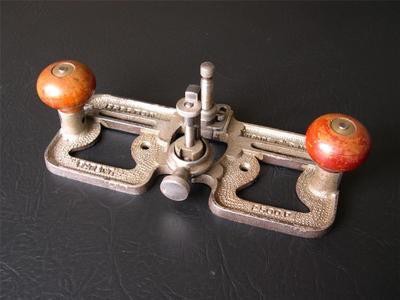
Per particolari tipi di lavorazioni, dove si ha necessità di lavorare in spazi ristretti o su pezzi di ridotte dimensioni, esistono versioni più piccole della router plane, come ad esempio quella offerta dalla Veritas o la storica Stanley 271.
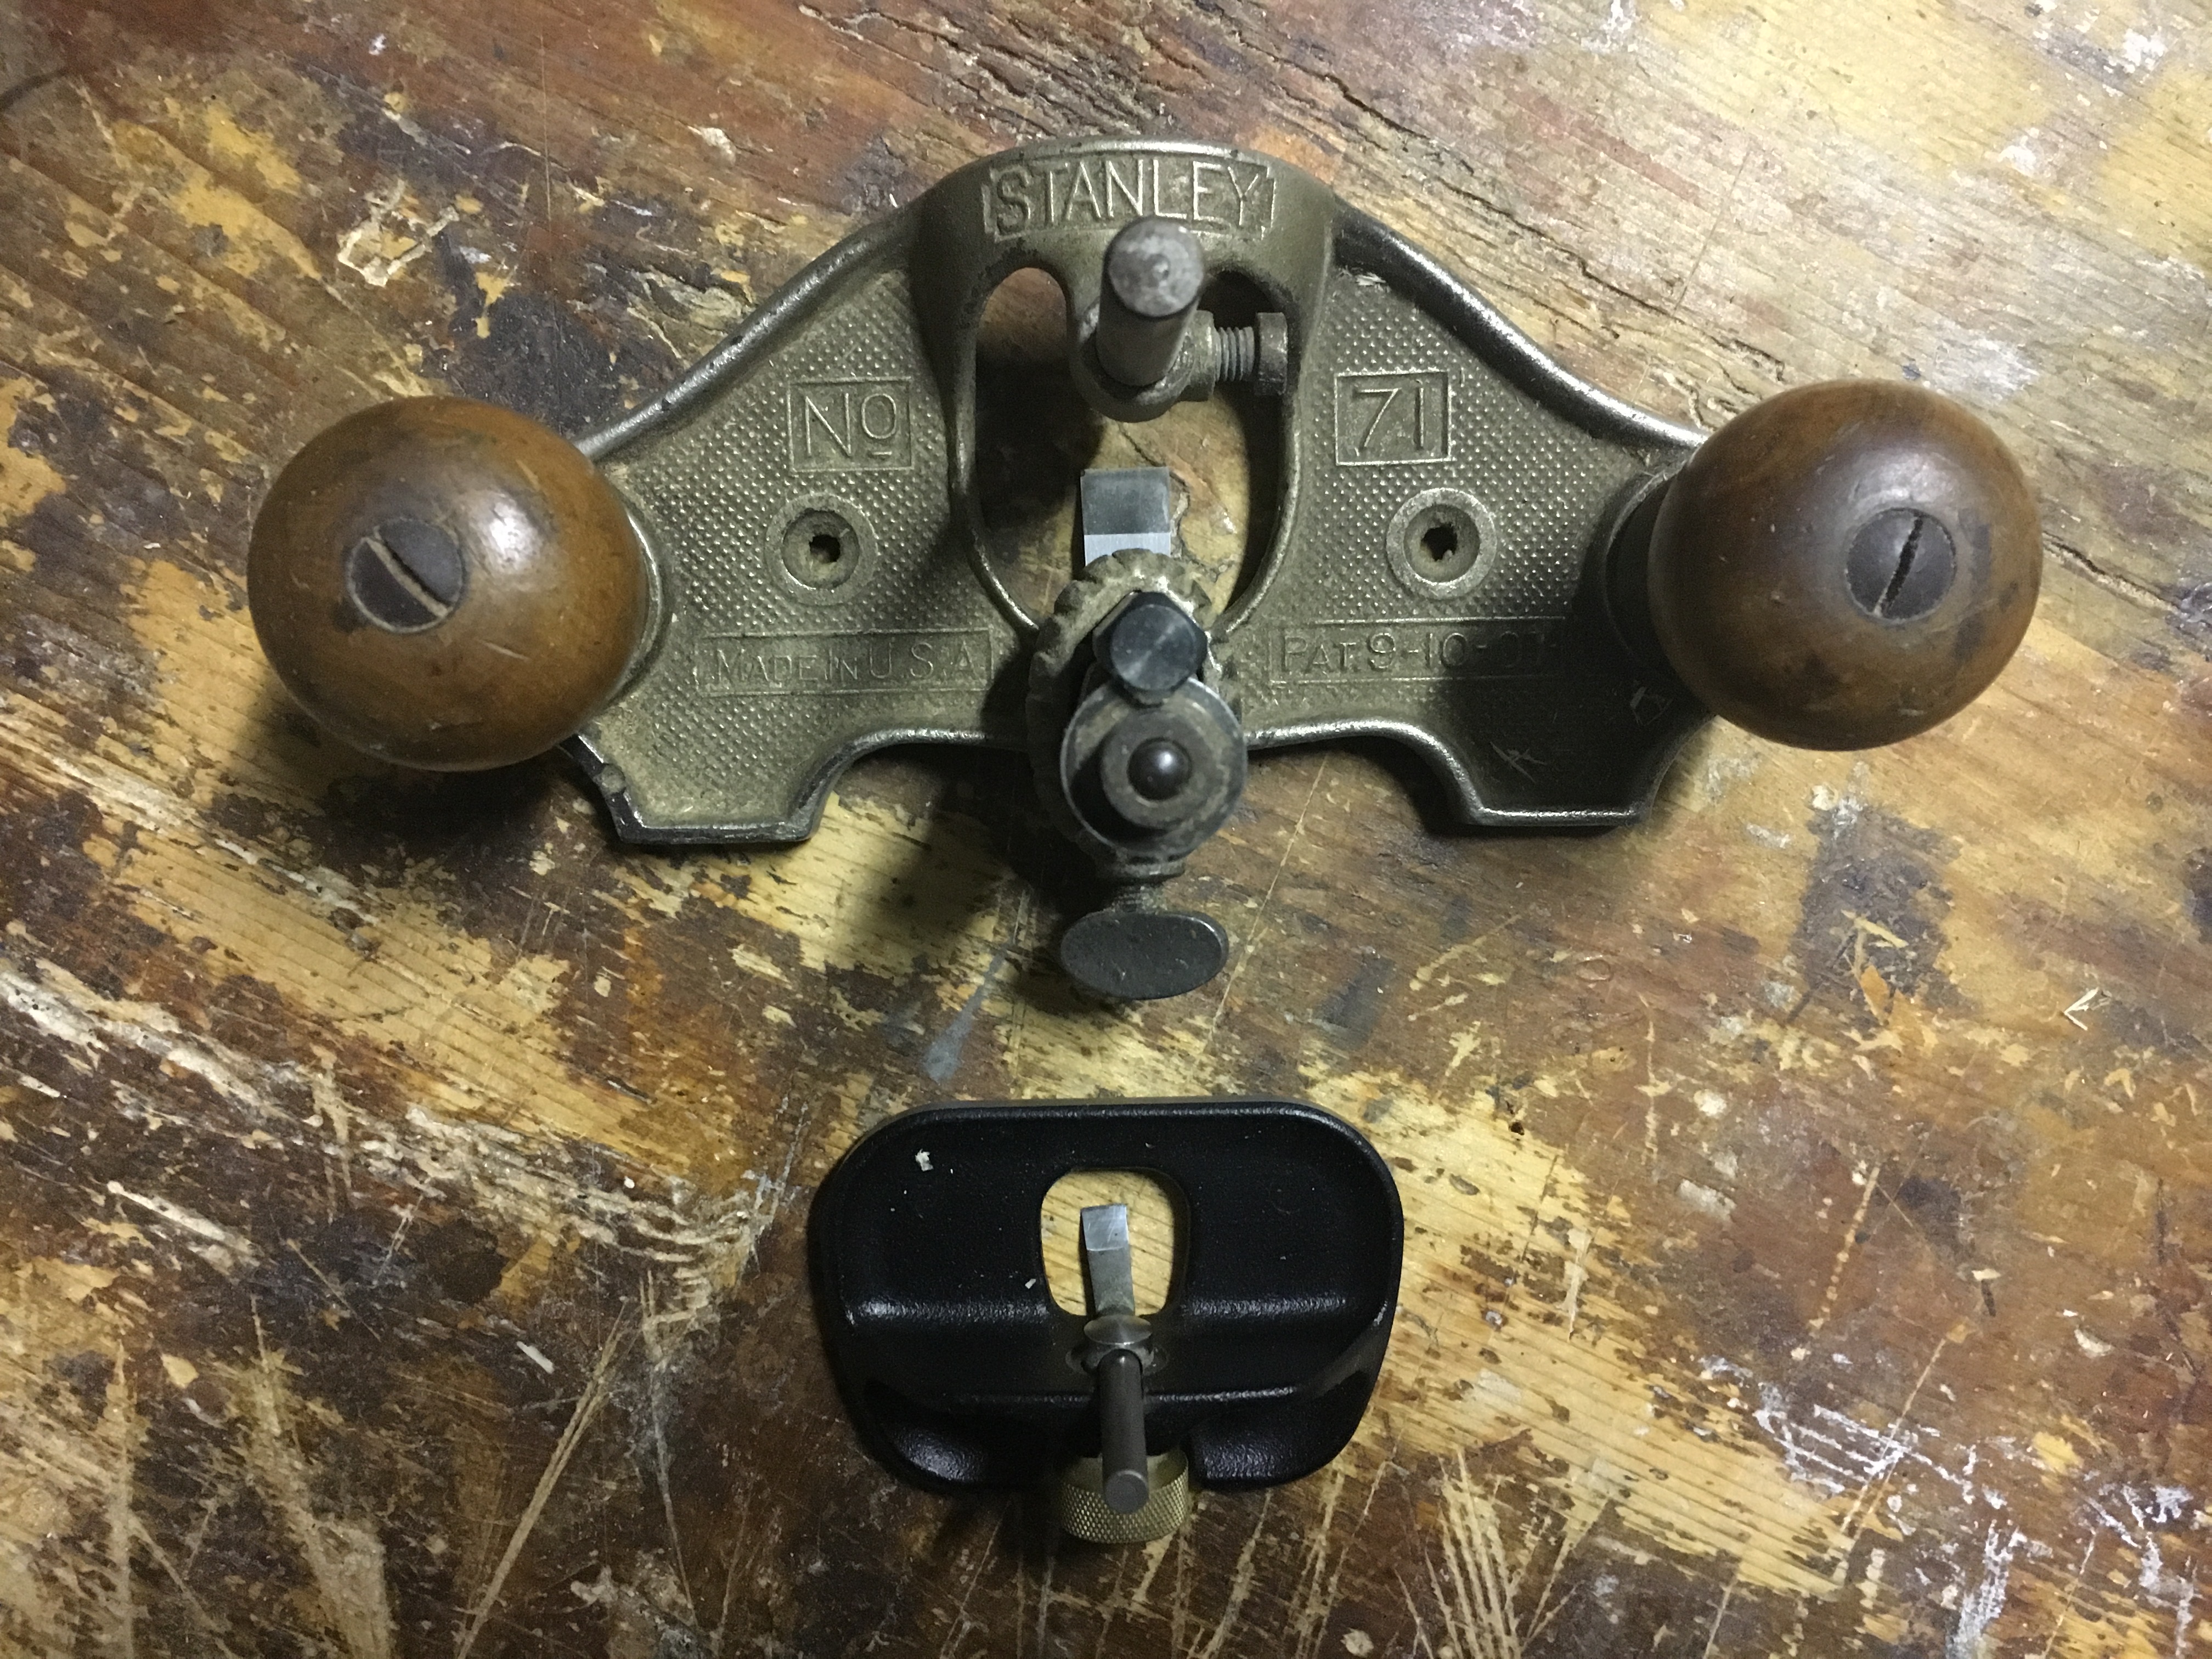
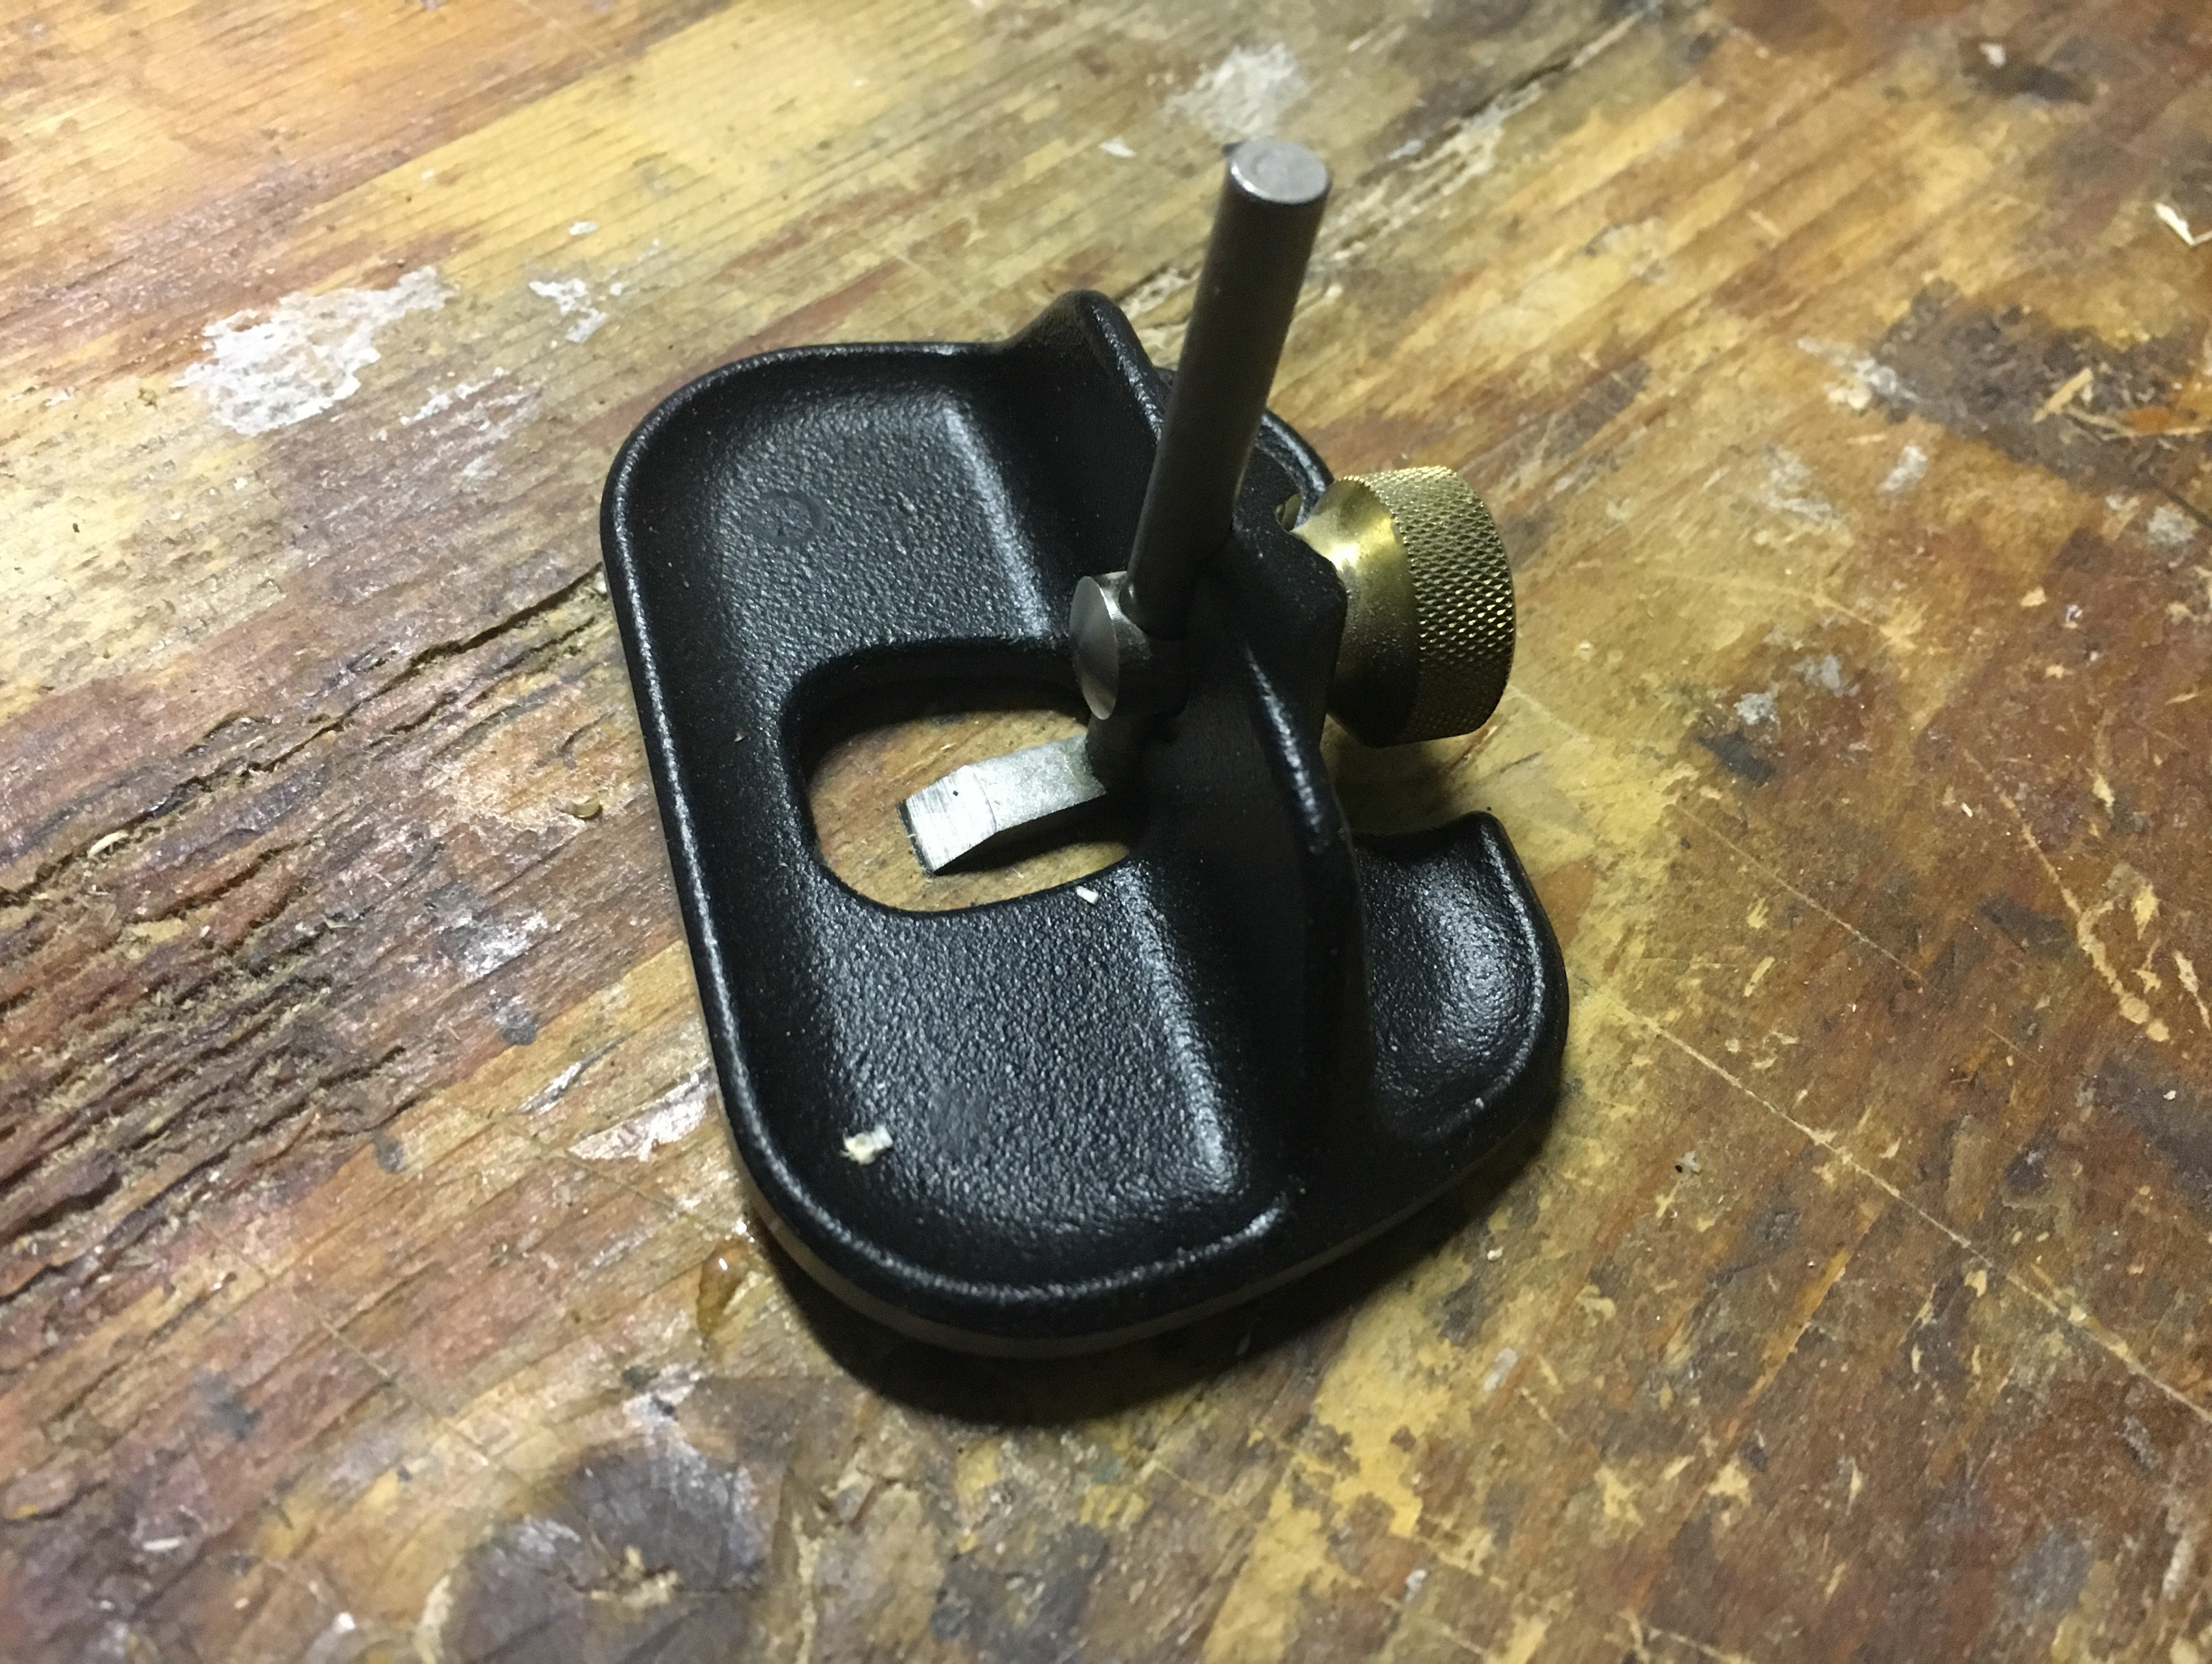
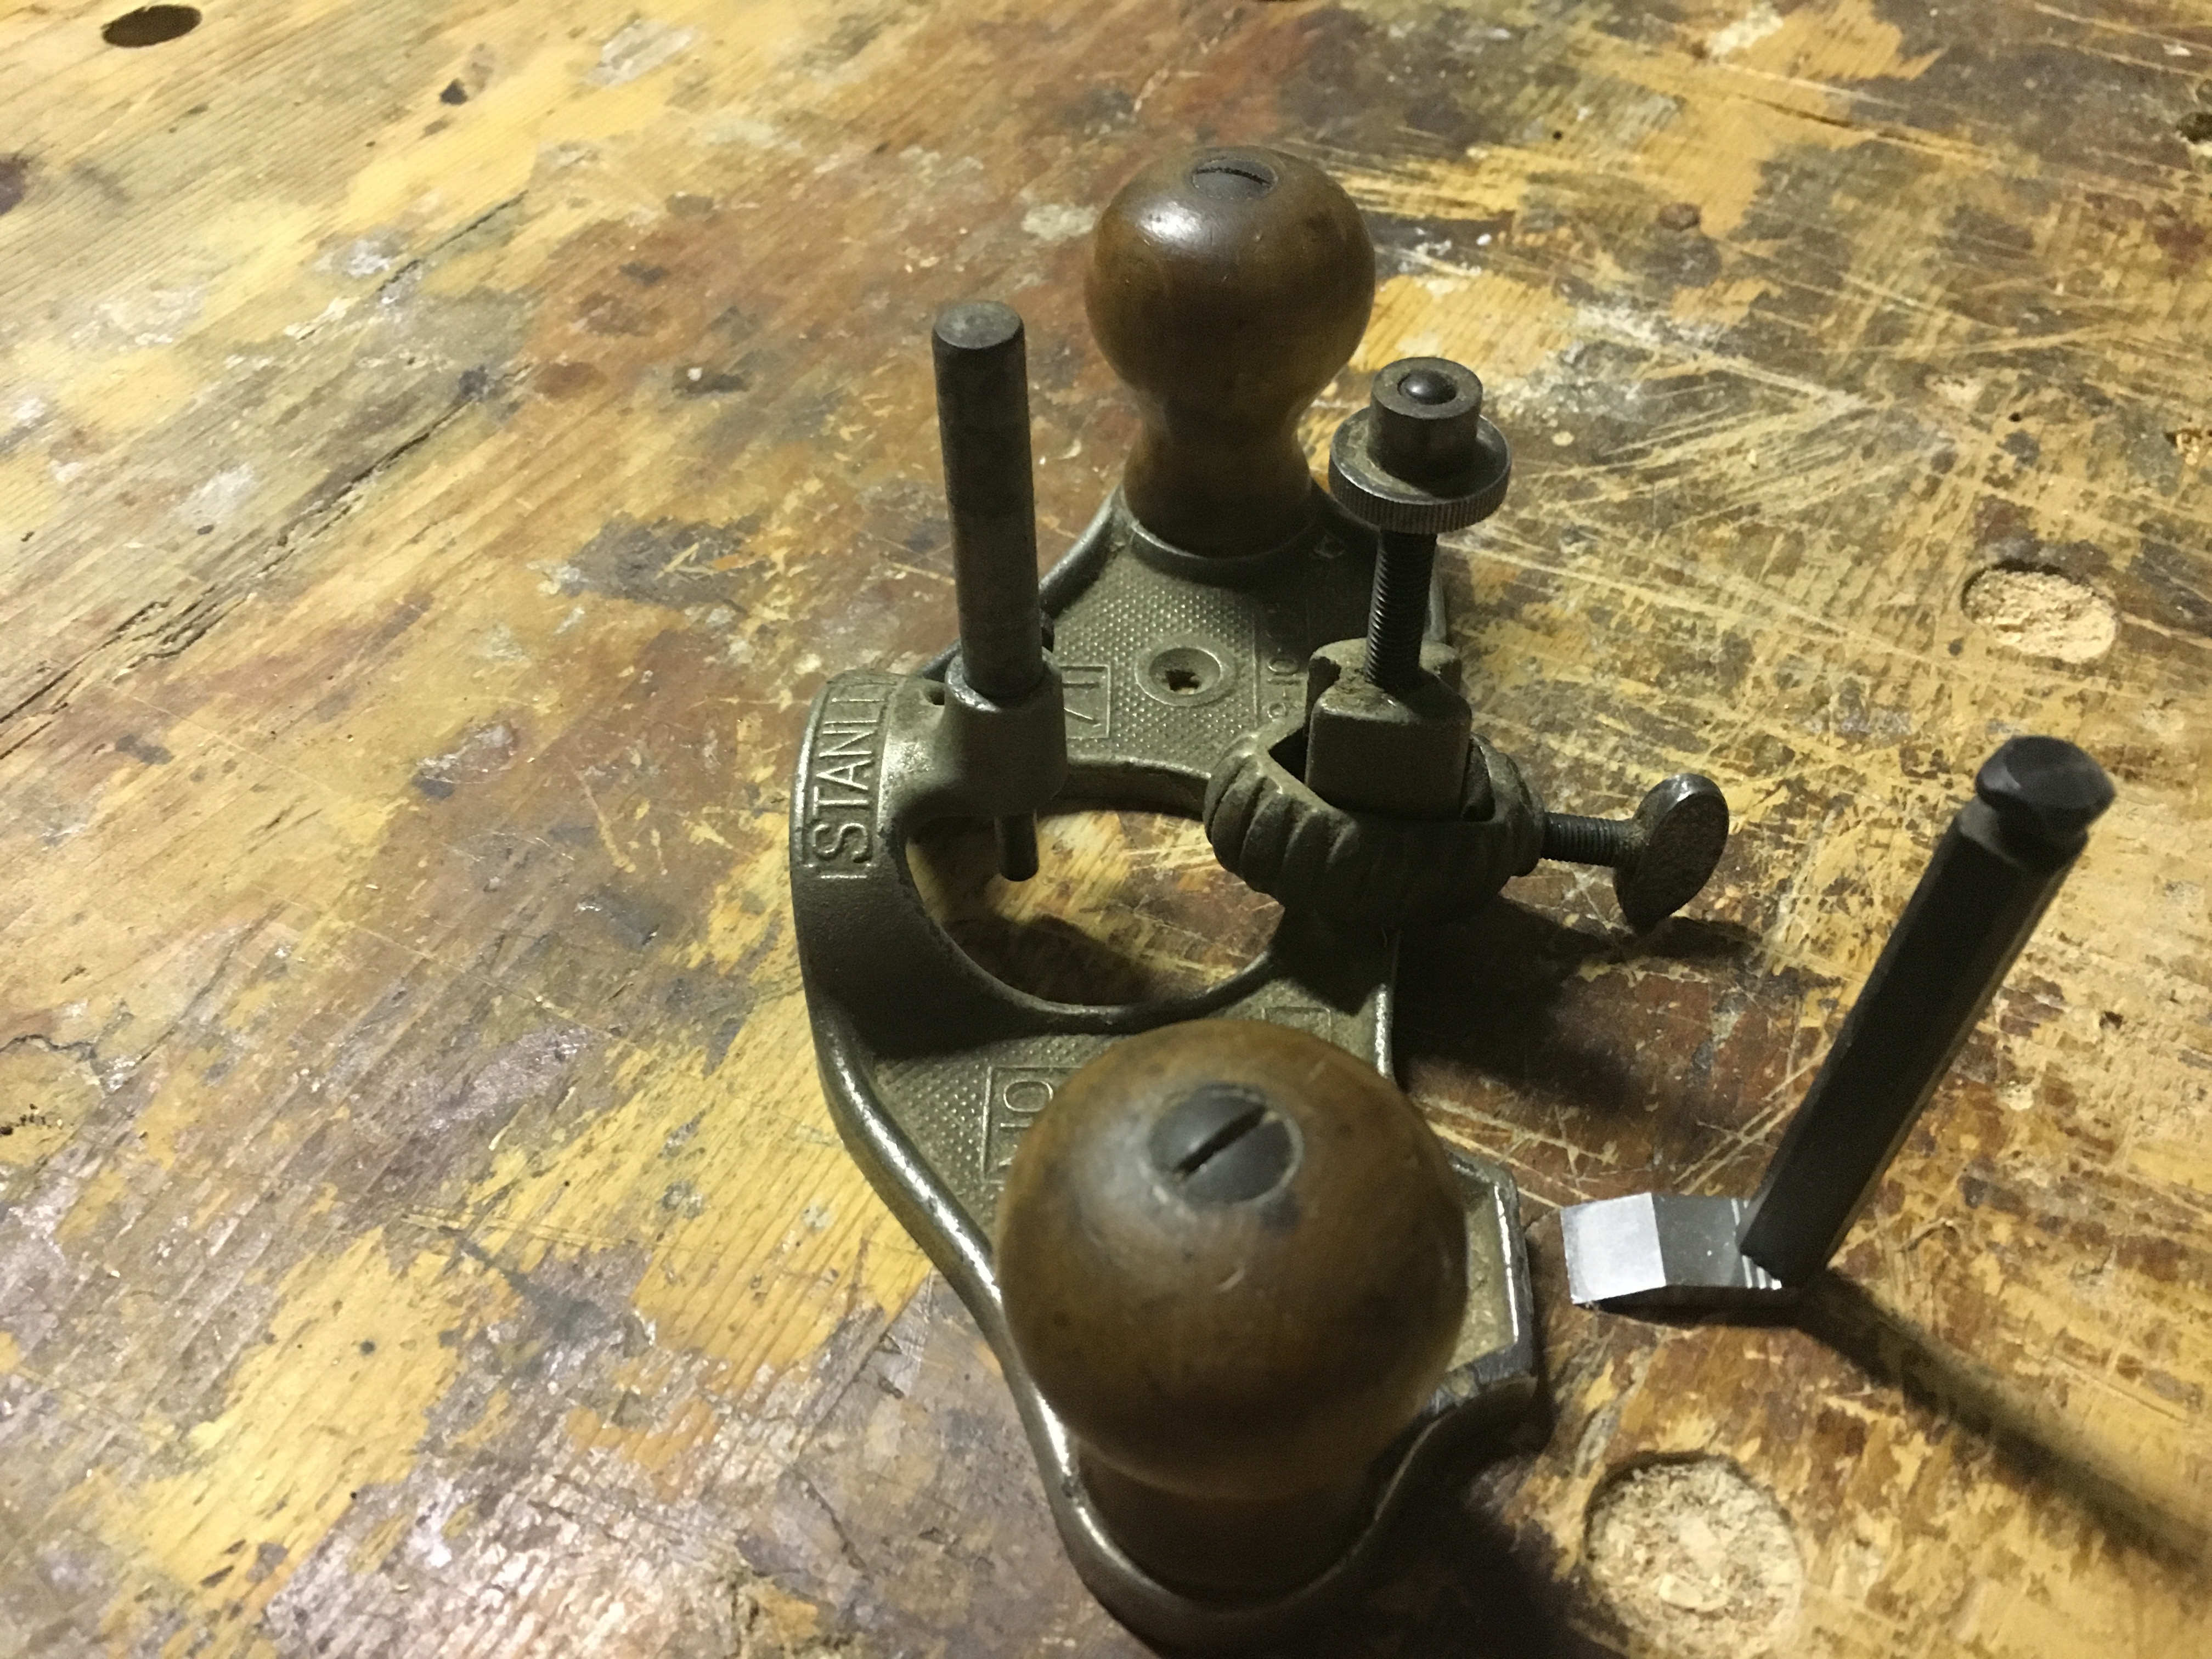
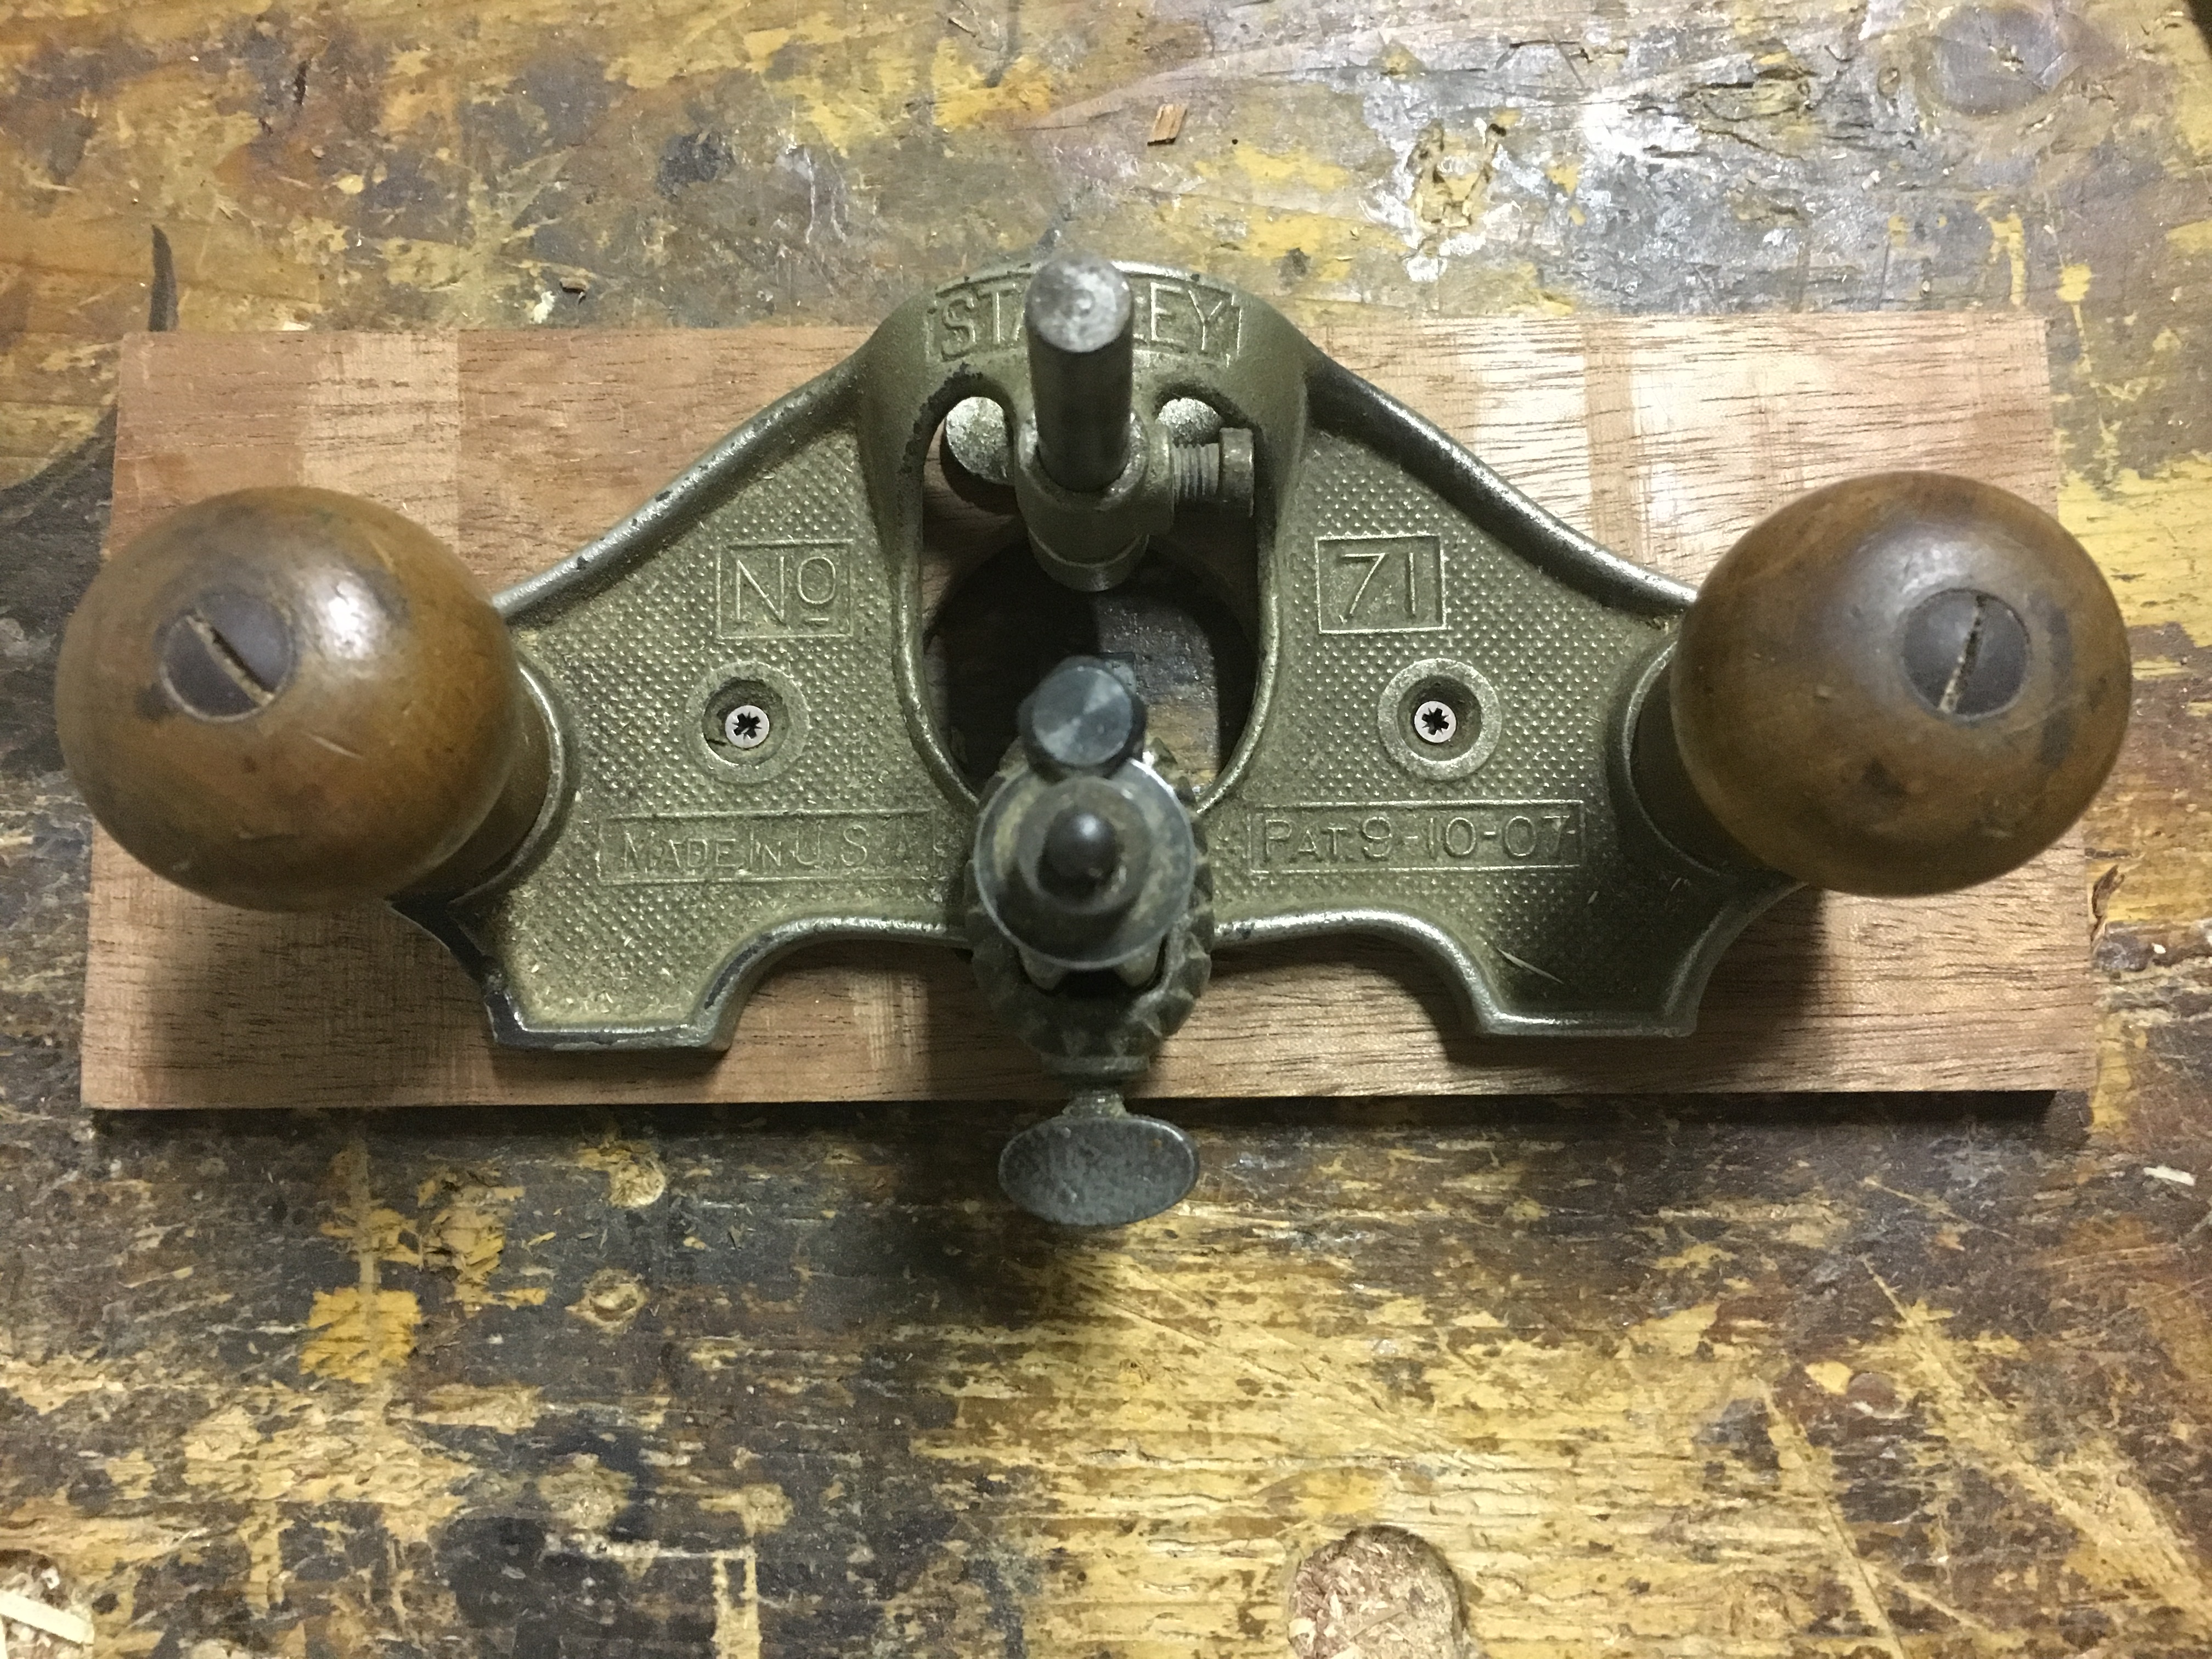
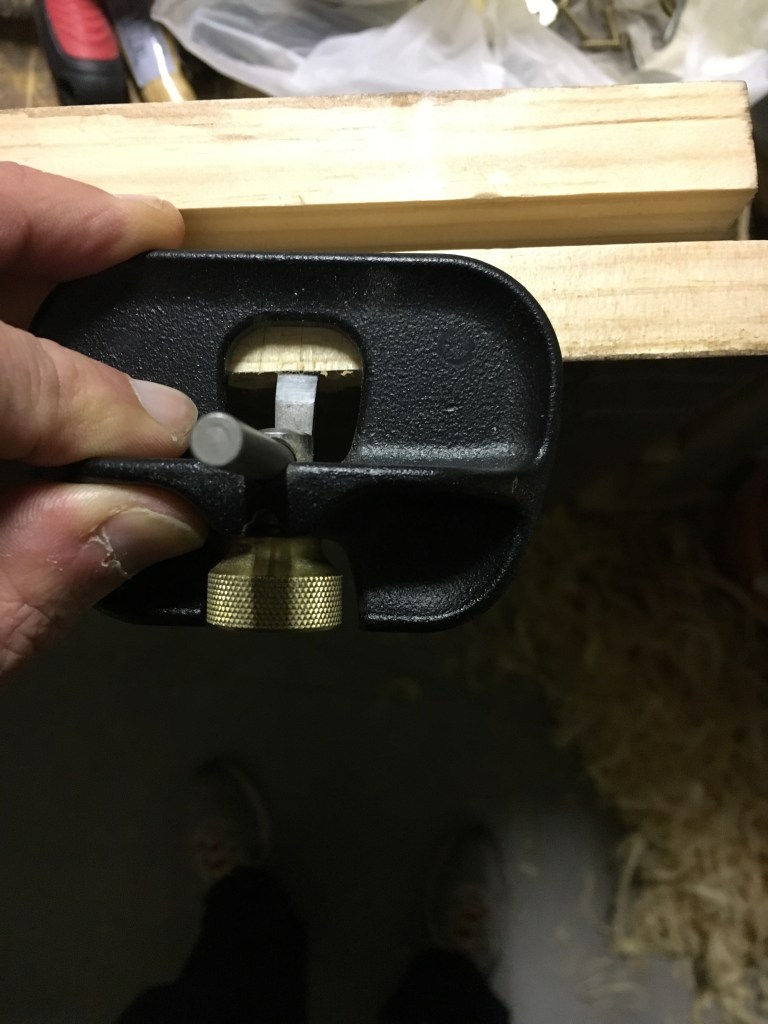
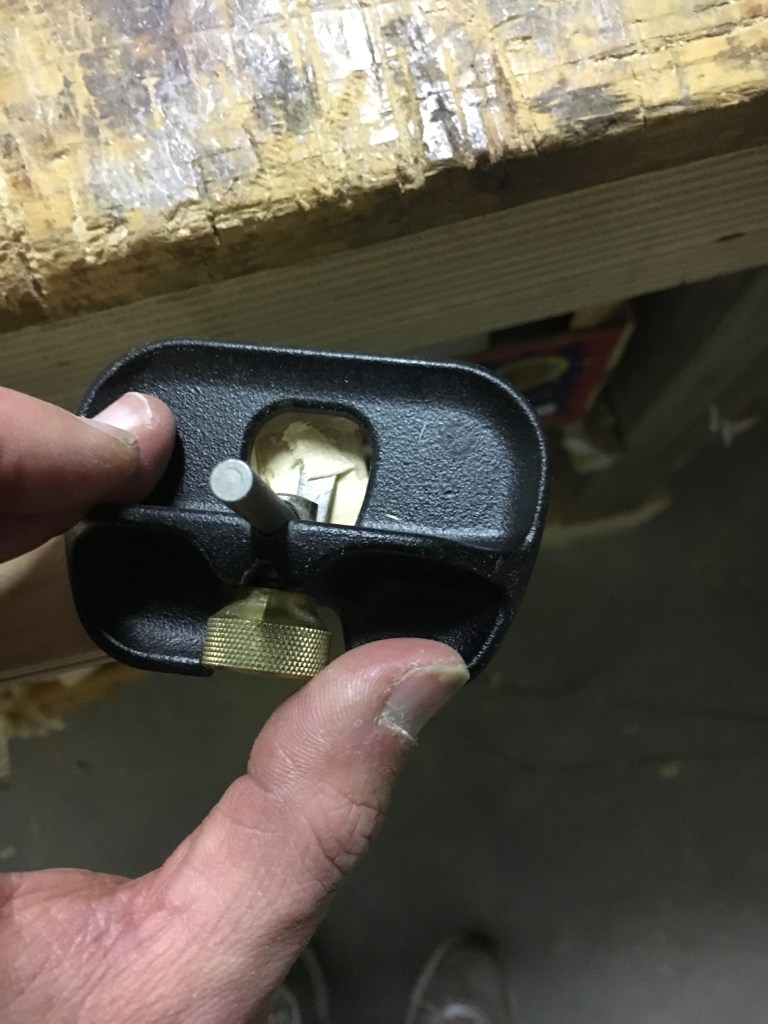
 La Stanley router plane 71 è composta da una suola in metallo nella quale è ricavata un’apertura dalla quale fuoriesce una lama a forma di L. Il gambo della lama ha sezione quadrata e si inserisce fermamente nel supporto a V posto sul corpo della pialla e nella scanalatura a V ricavata nel collare. In questa posizione è mantenuta in posizione perpendicolare alla suola e serrata mediante il suddetto collare con una vite. Il supporto presenta una scanalatura a V su ambedue i fianchi affinché sia possibile inserire la lama anche sul retro della pialla utilizzandola di fatto come una bullnose plane.

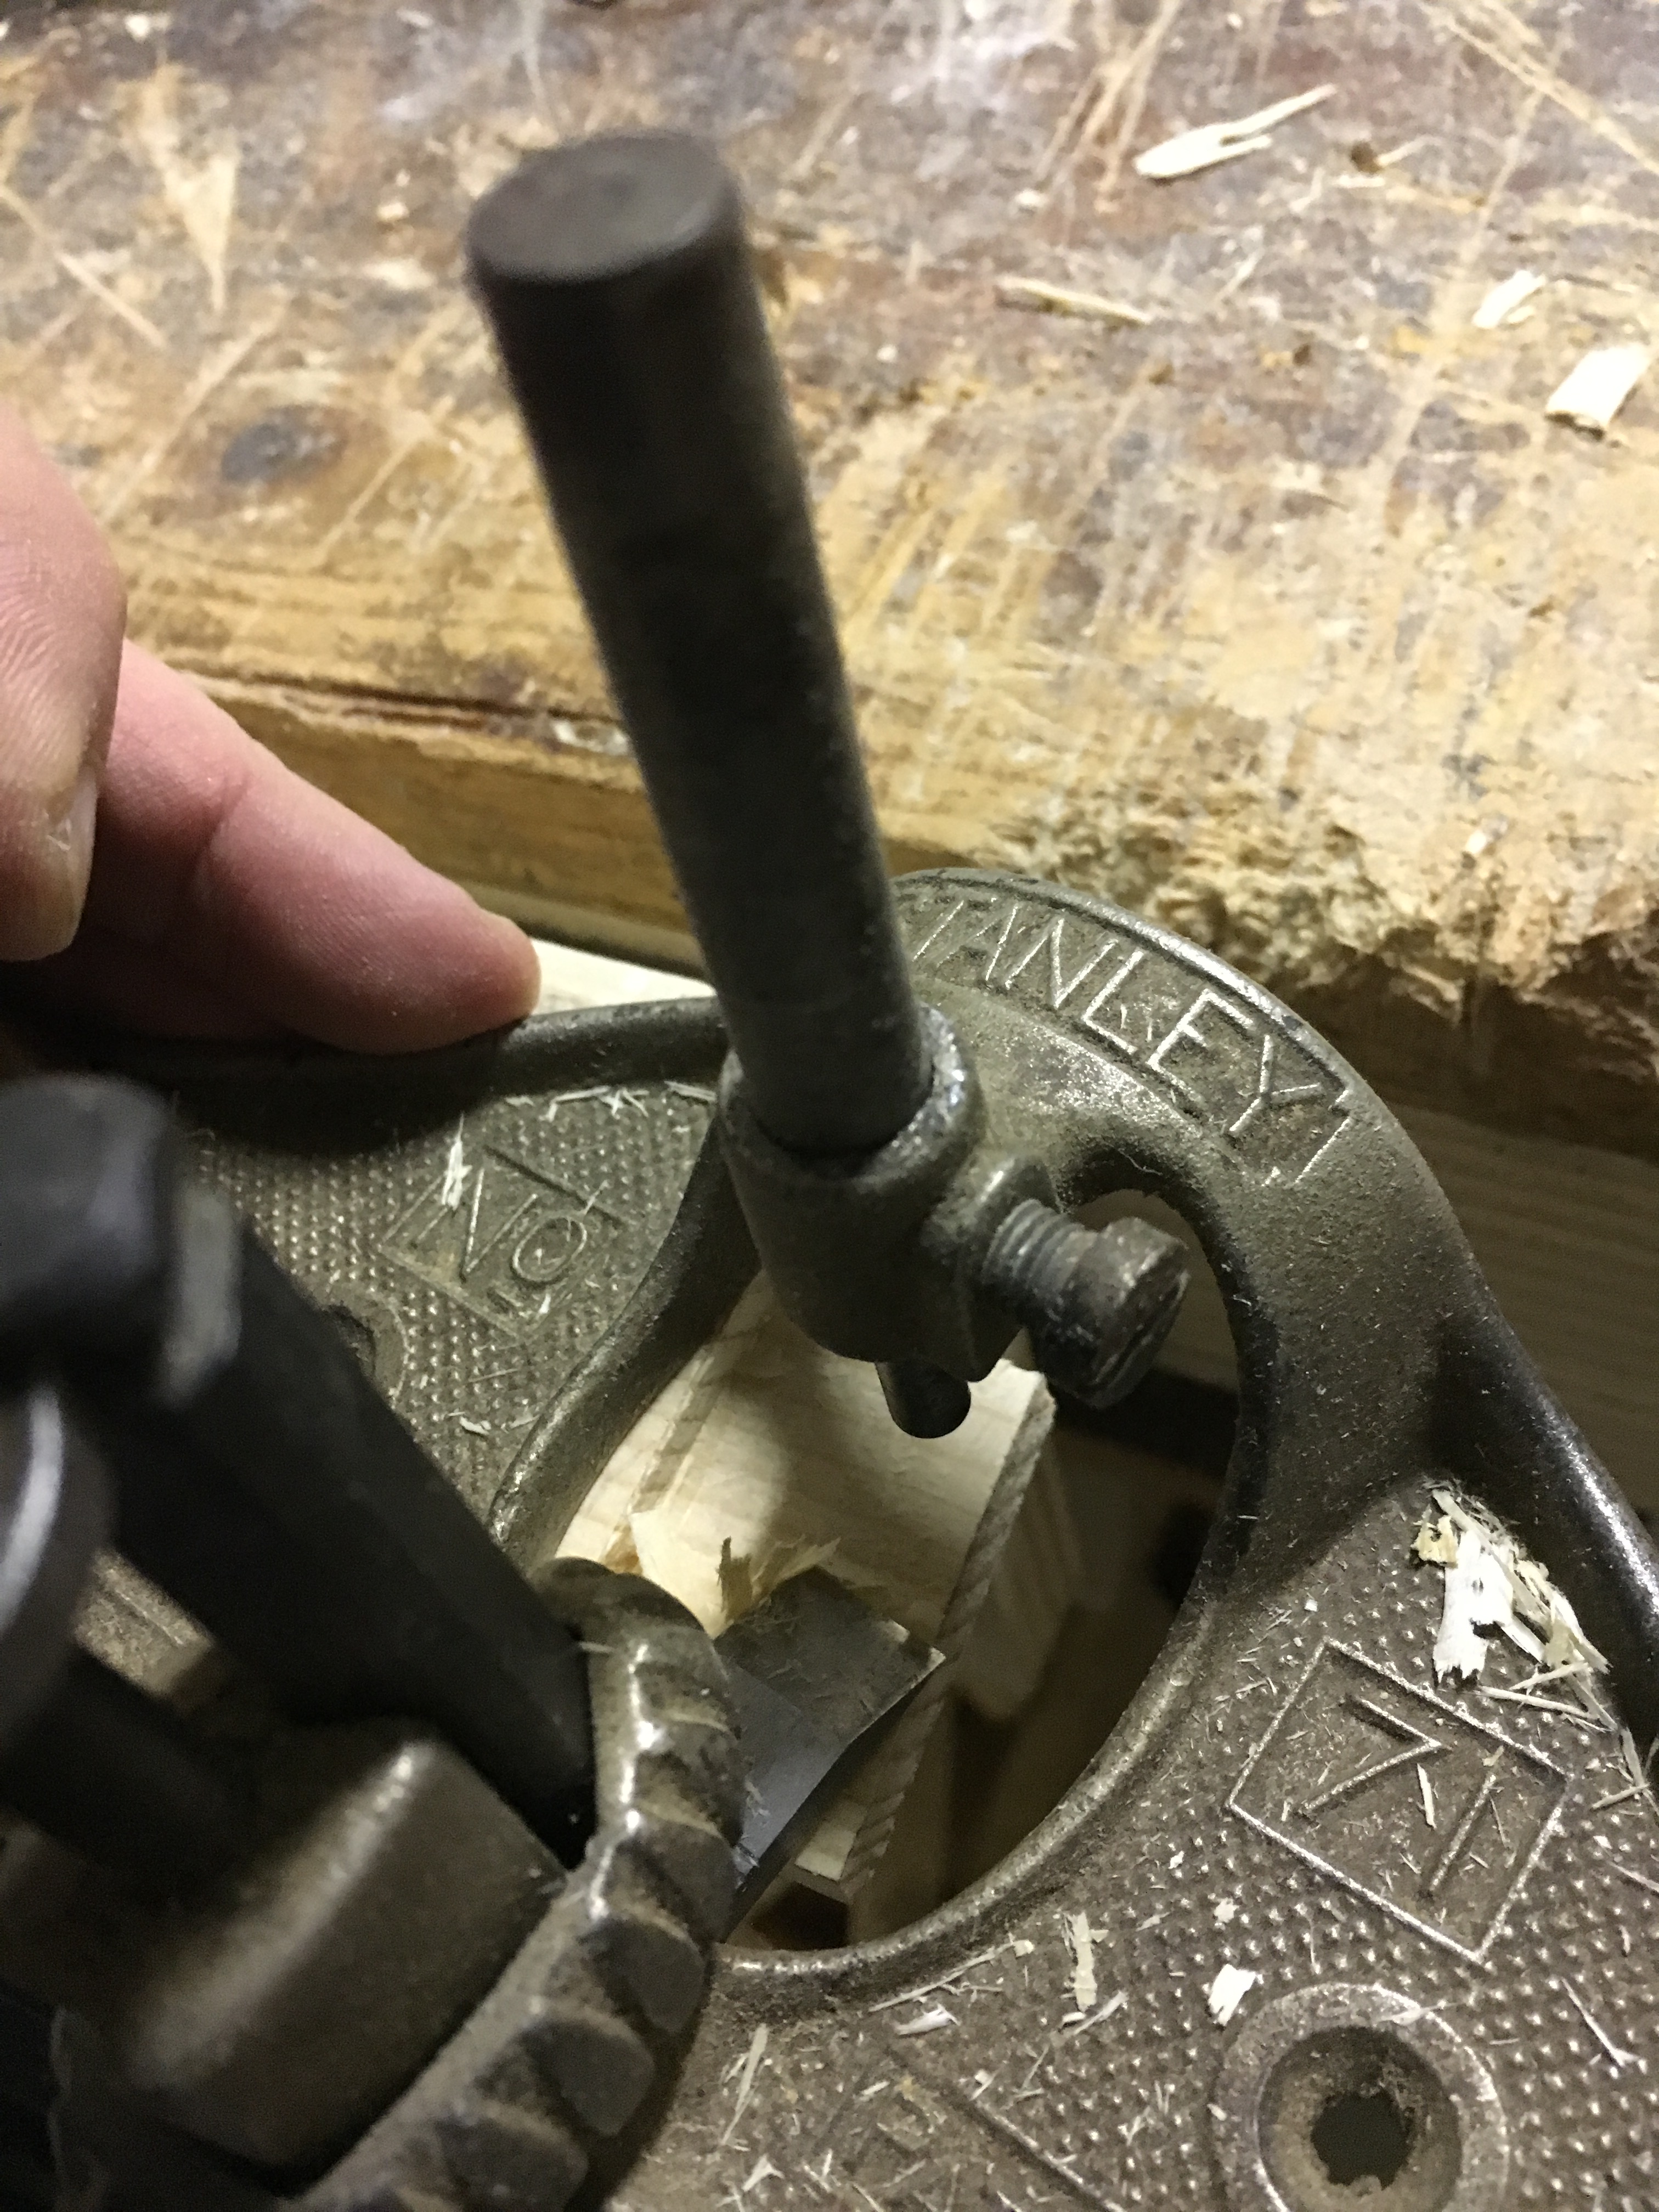
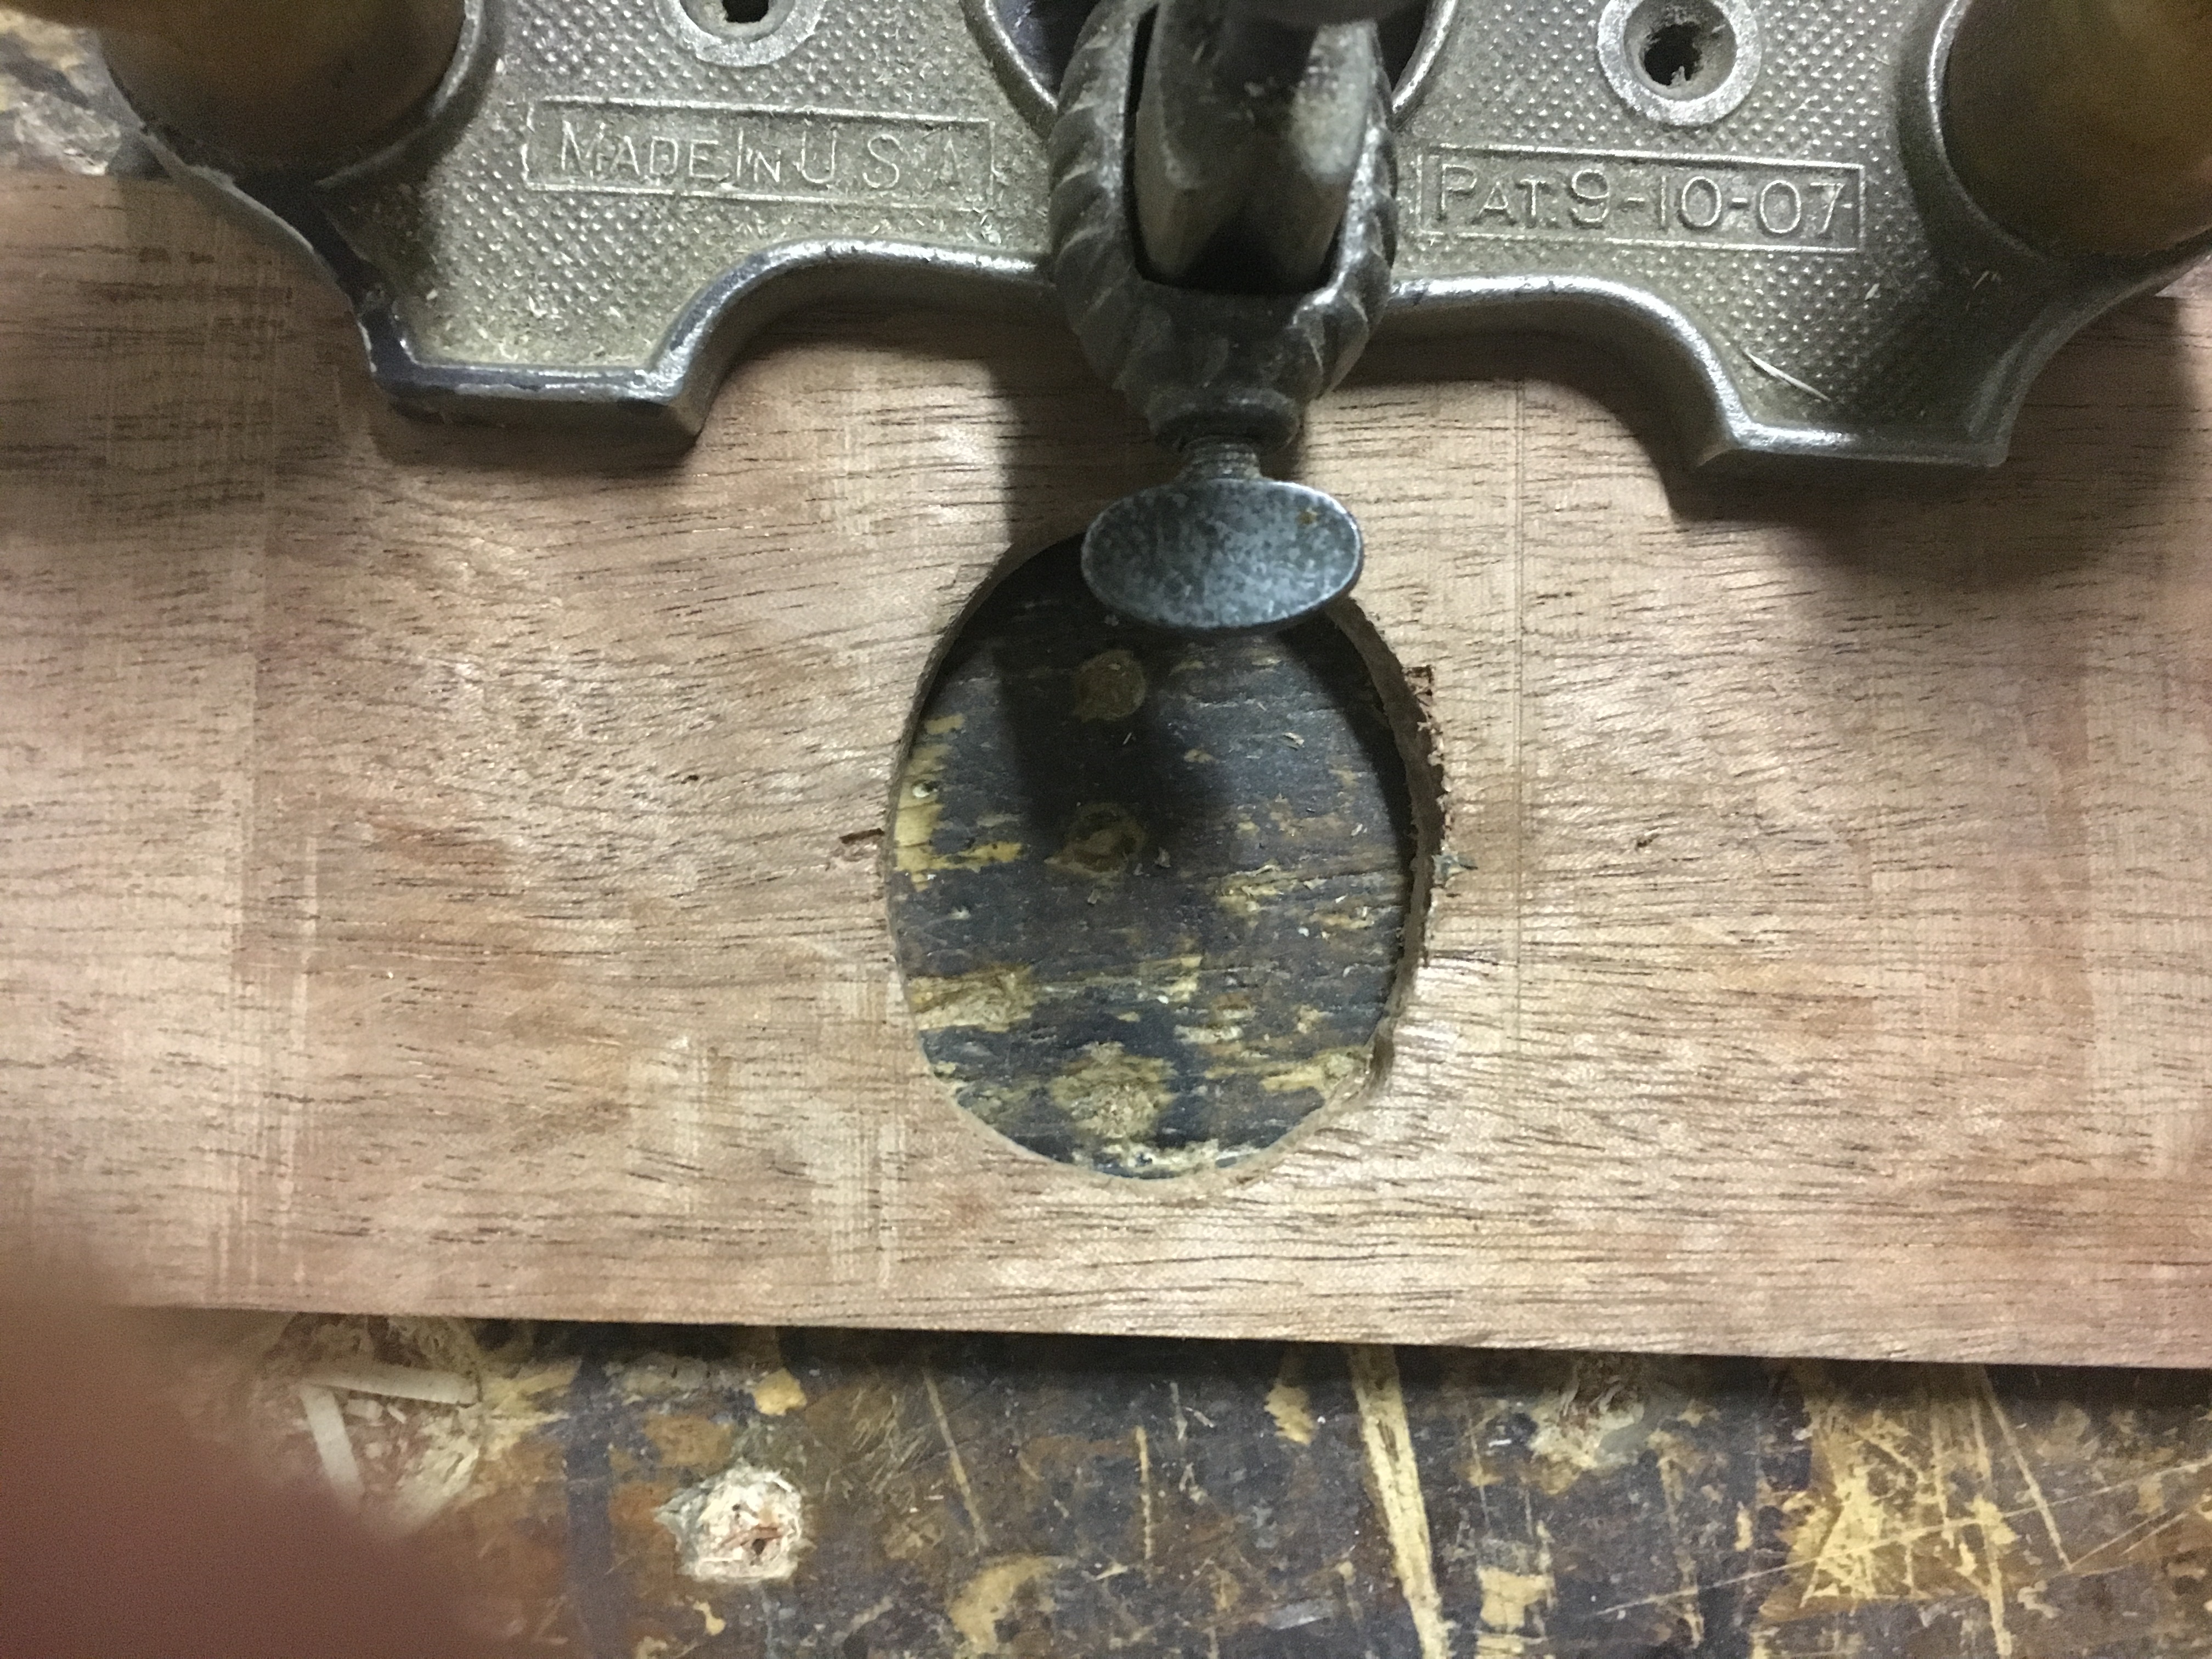
Nella parte superiore del gambo della lama è ricavata una scanalatura nella quale si inserisce la rotella mediante la quale è possibile far scendere e salire la lama. La rotella gira su una barra filettata che permette micro aggiustamenti della profondità della lama
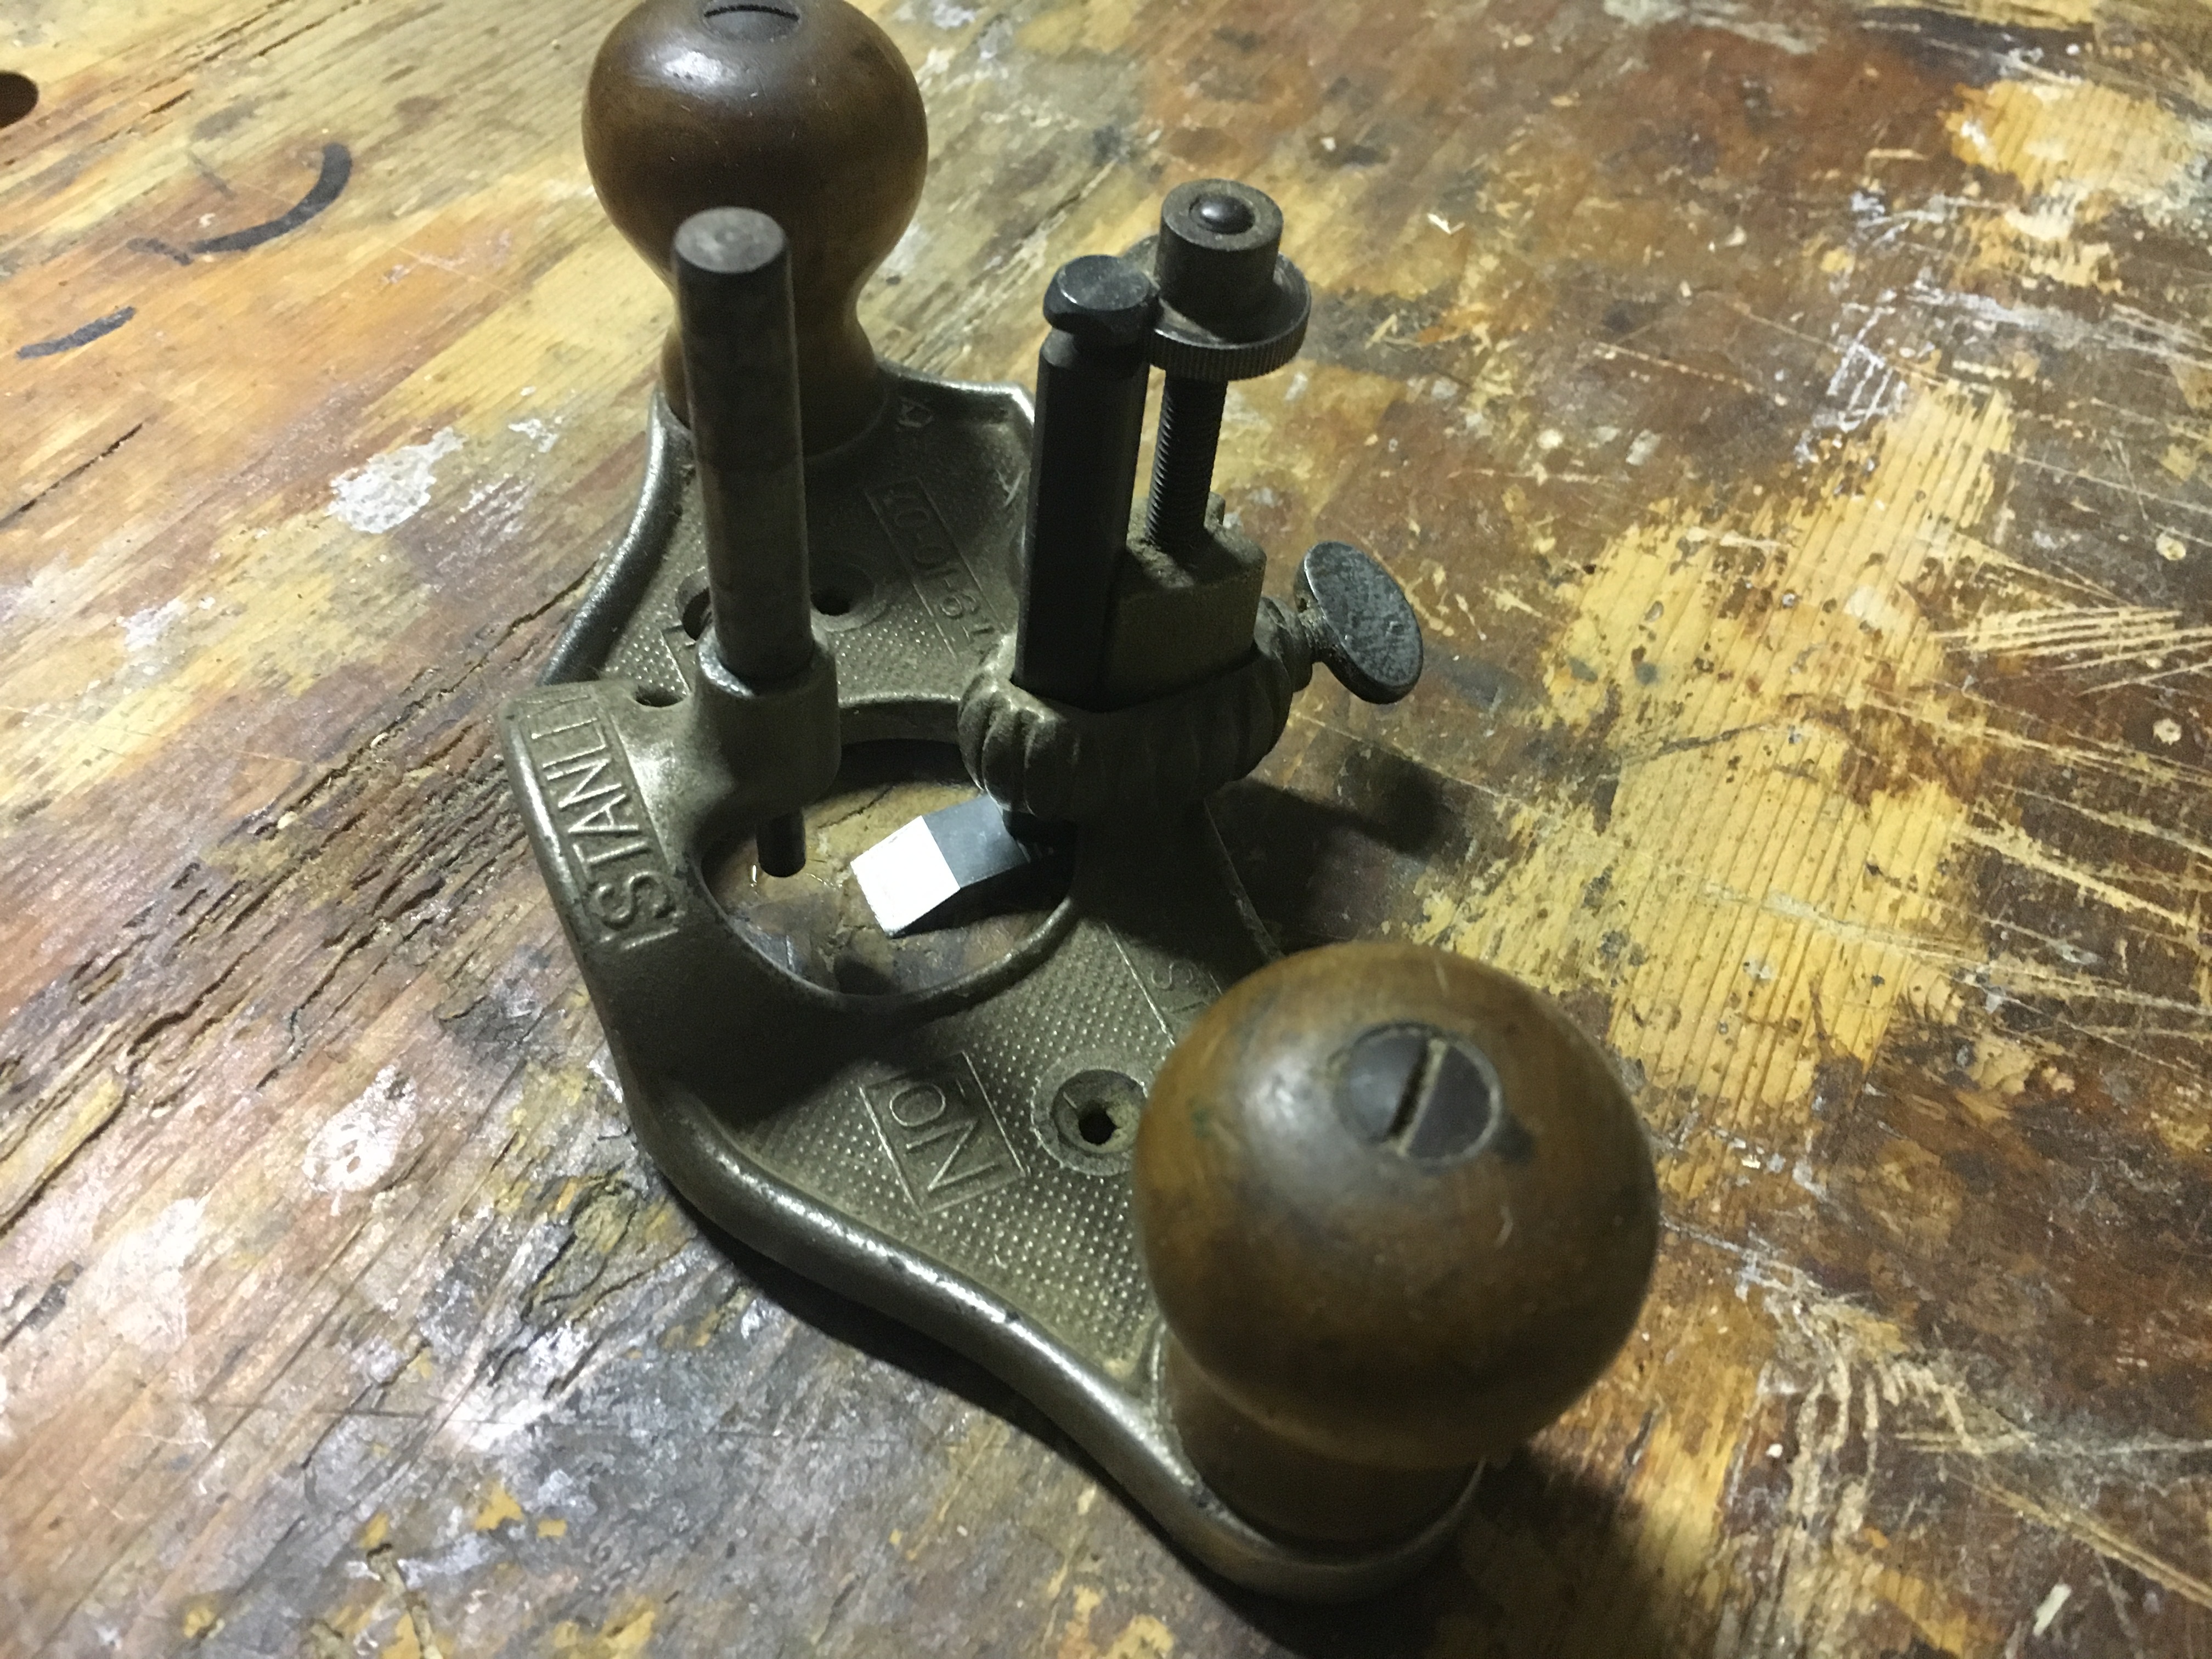
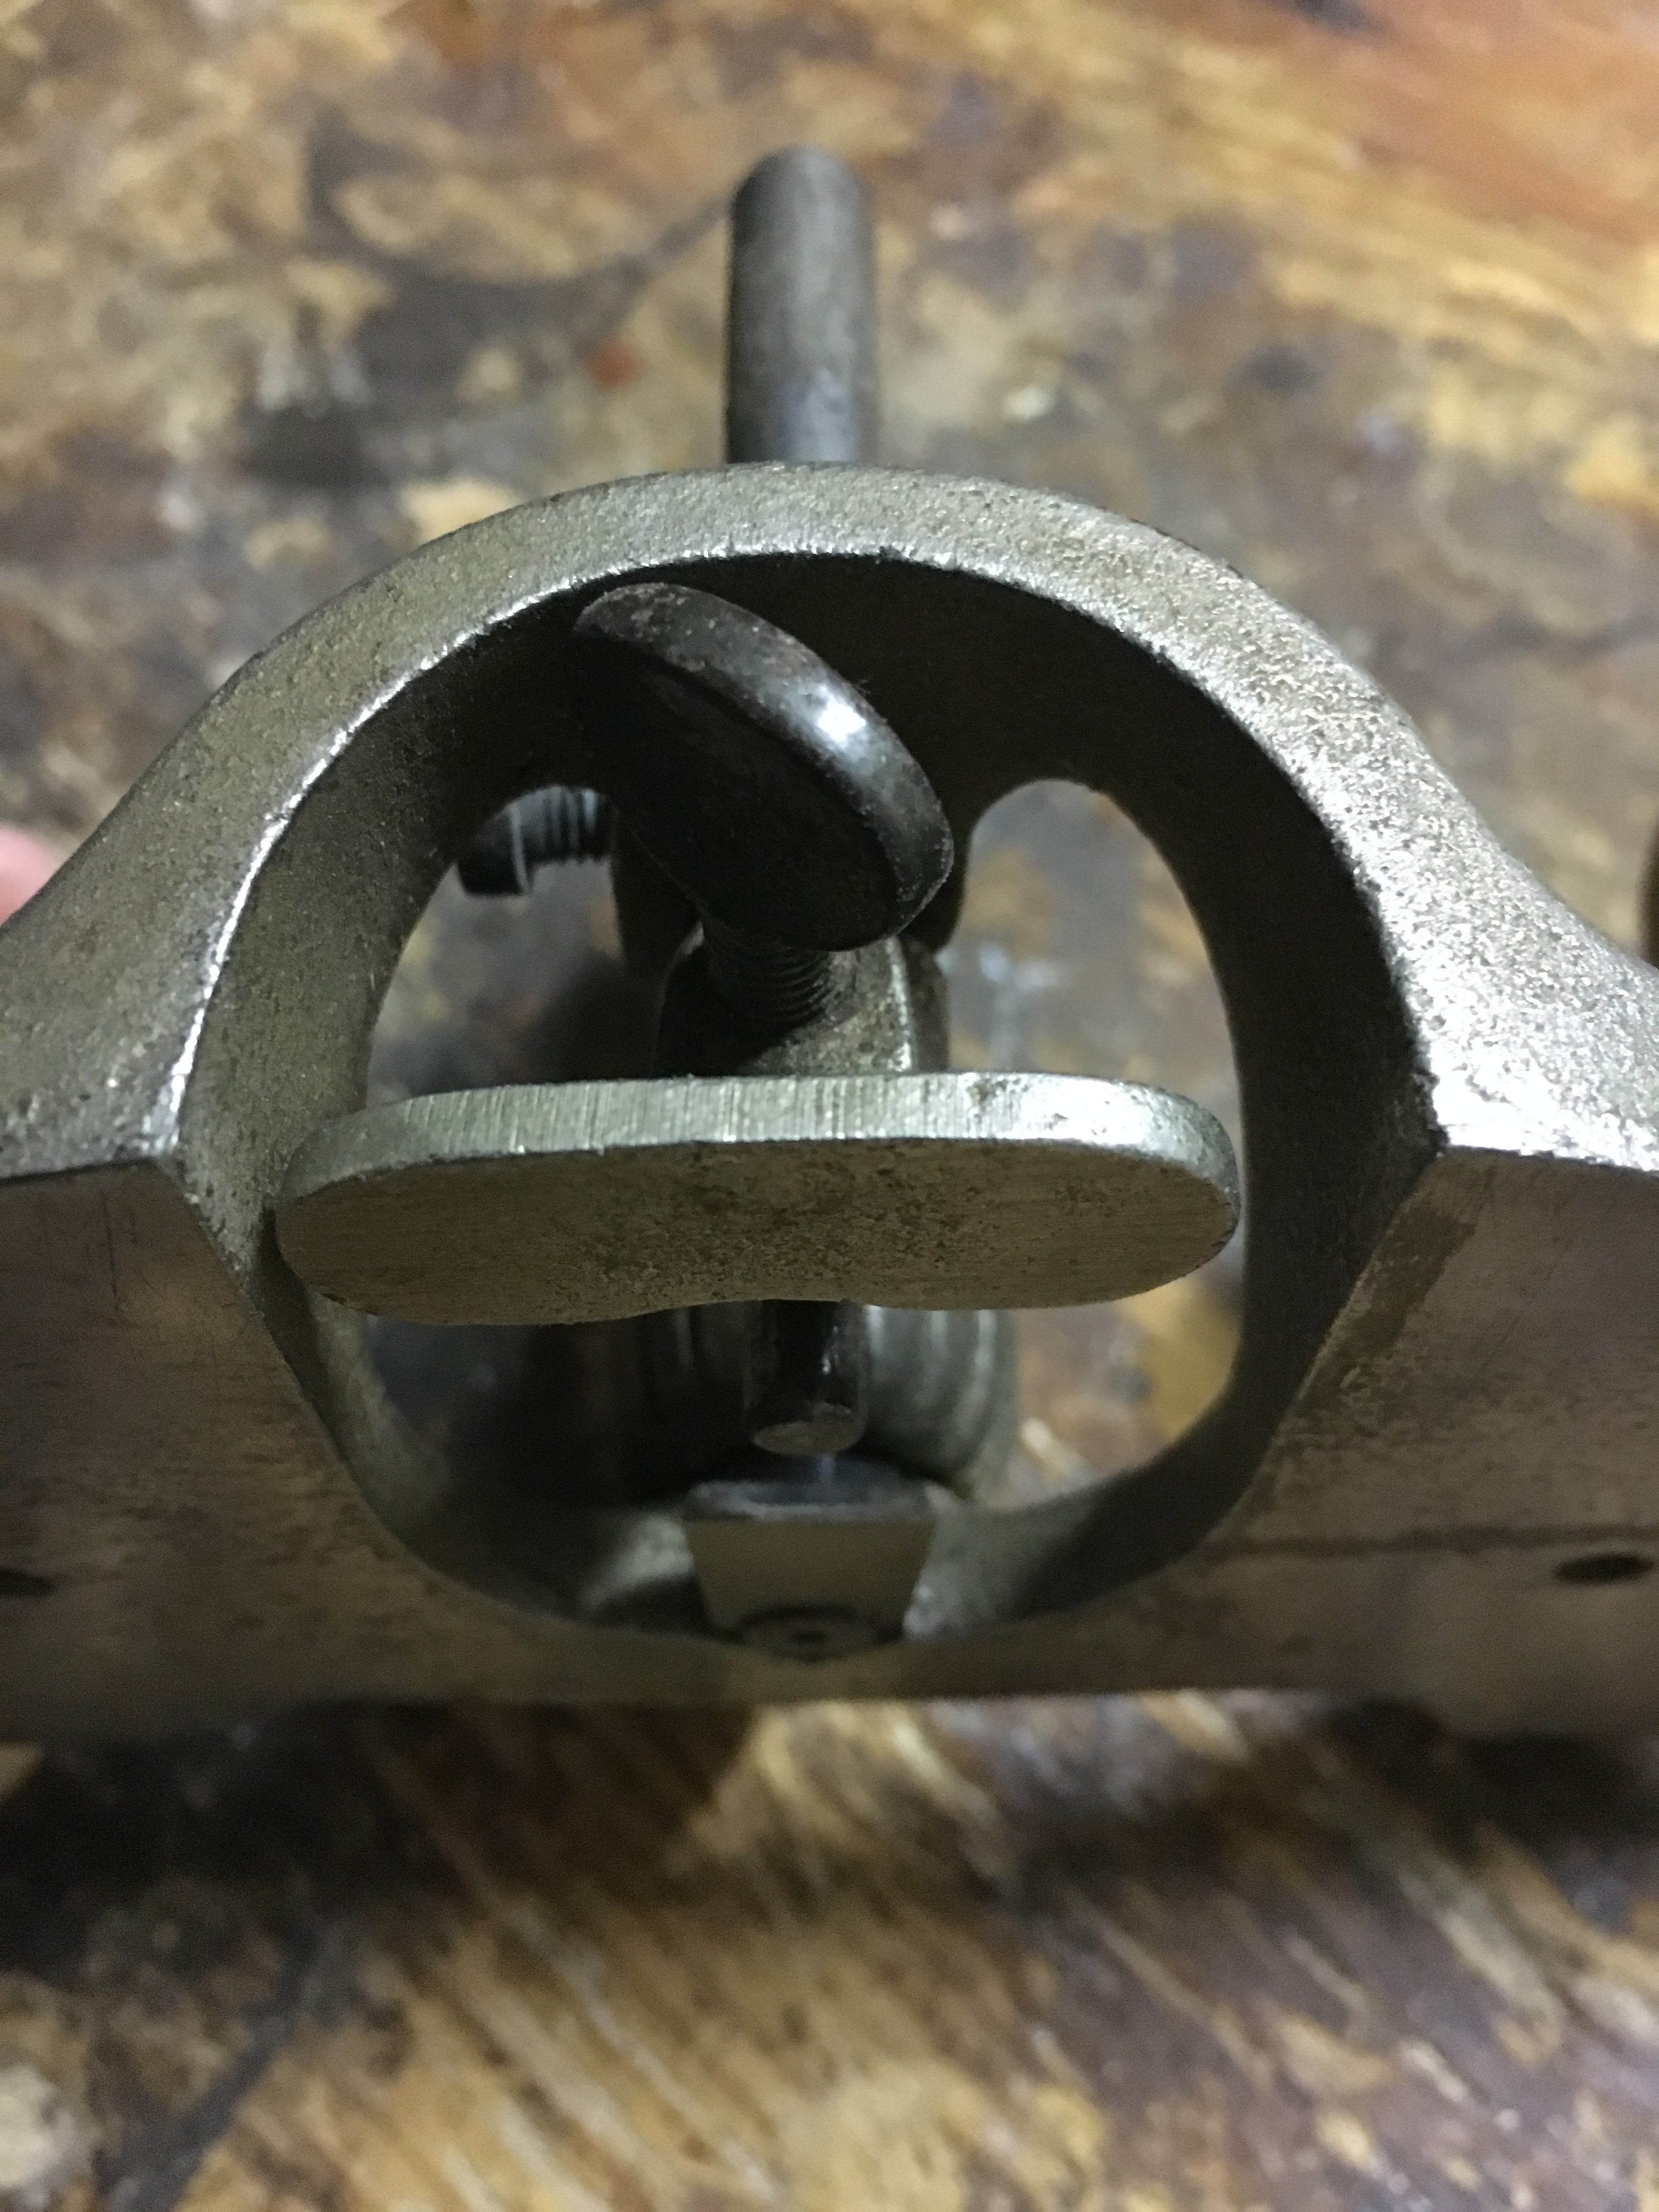
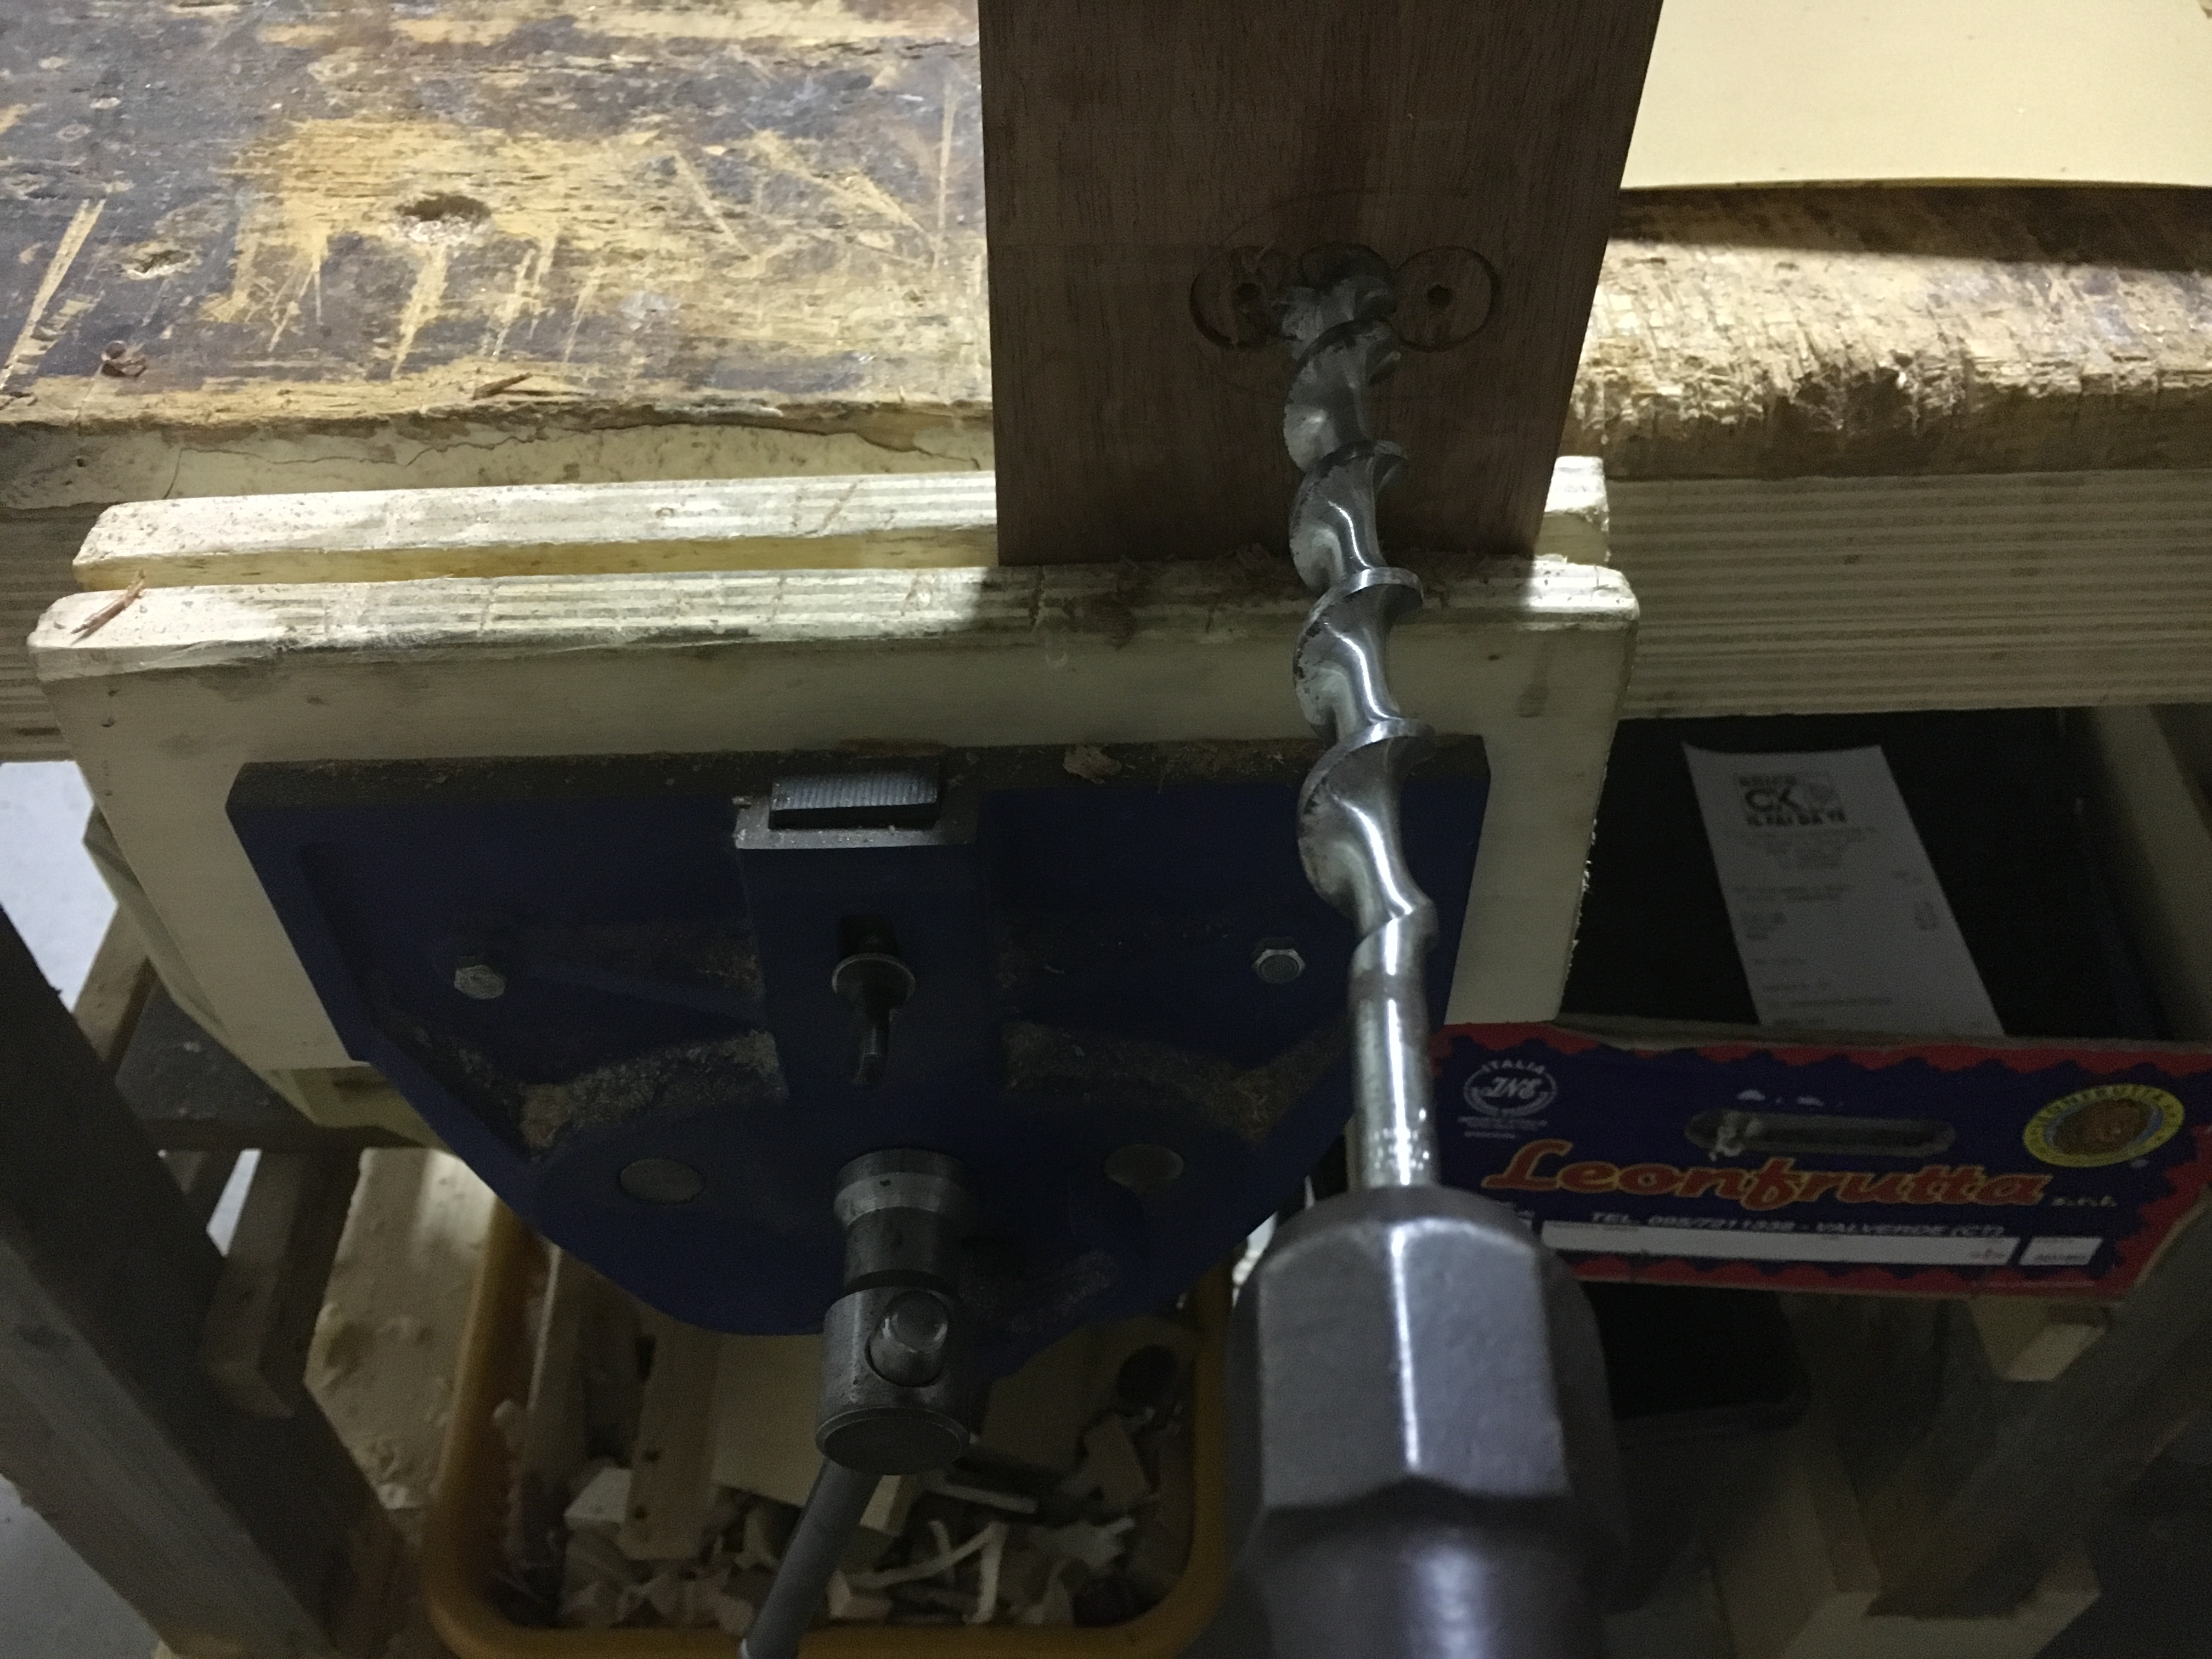
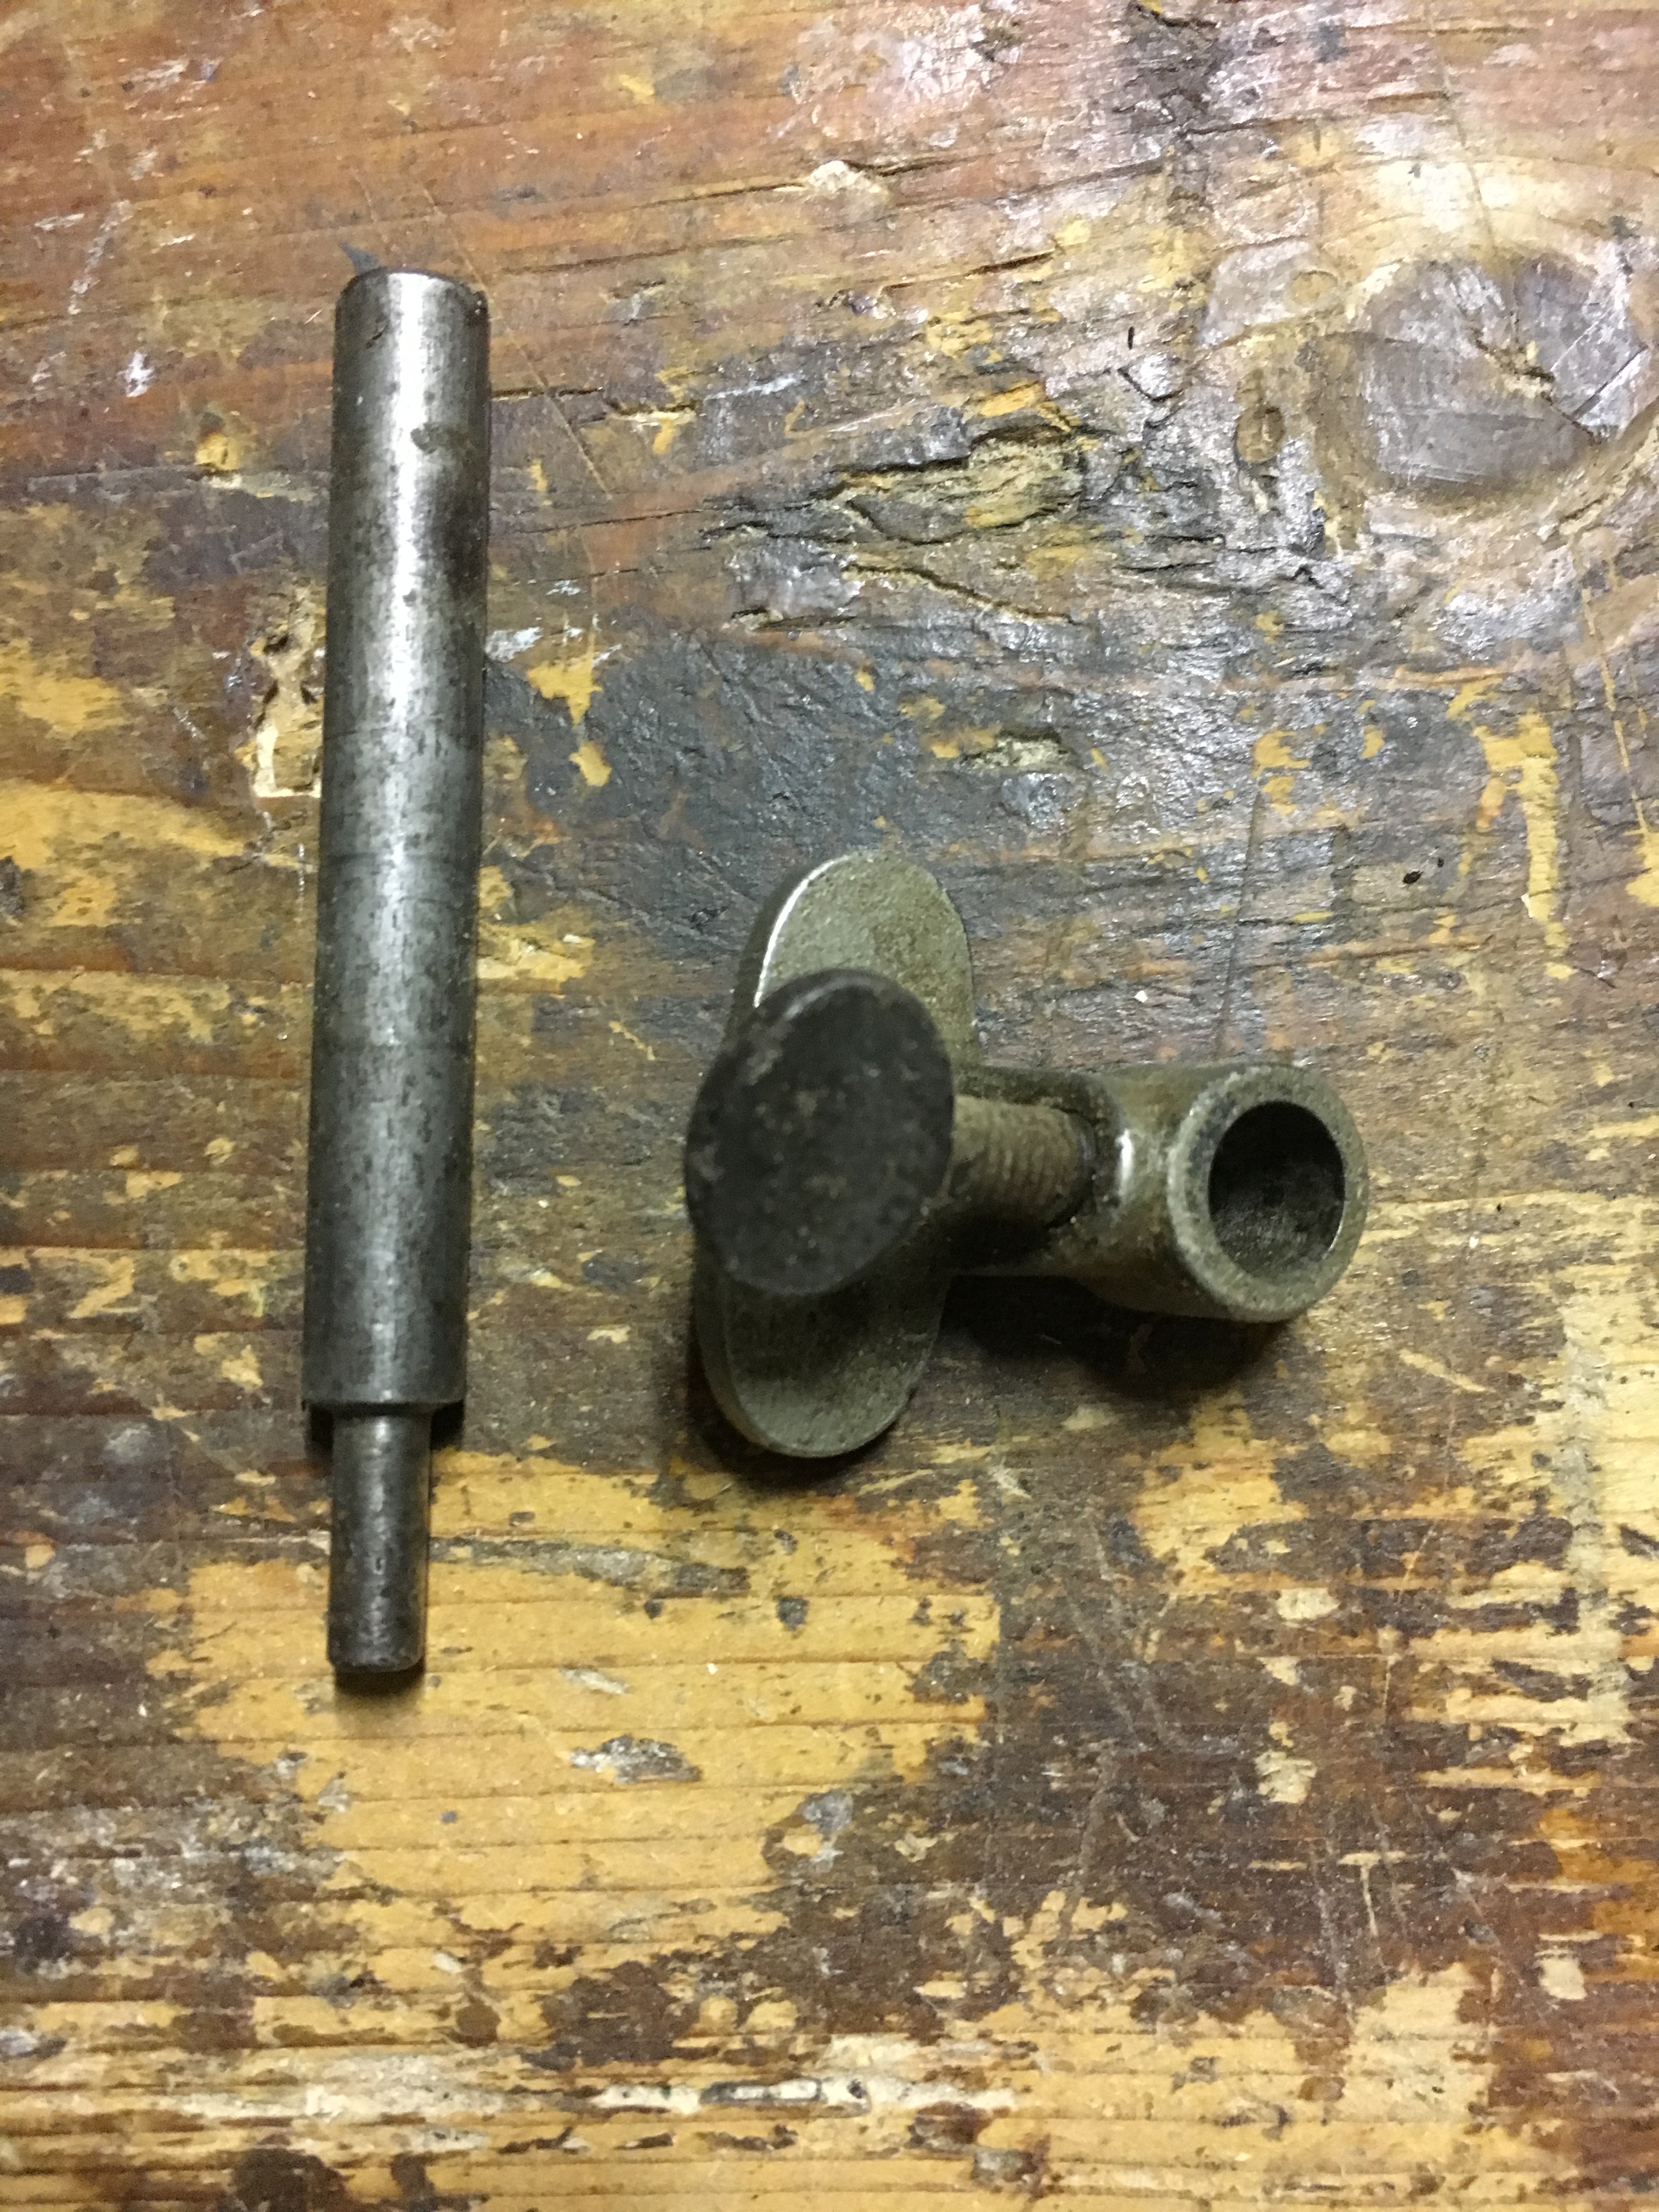 Il gruppo stop di profondità è inserito nella parte anteriore della pialla. E’ costituito da una barra in metallo rastremata ad una estremità e che può essere utilizzata inserendola sia dalla parte dell’estremità maggiore che capovolta. Nella barra scorre una suoletta mobile che viene serrata mediante una vite. La barra di profondità potrebbe fungere essa stessa da stop di profondità anche senza l’ausilio della suoletta. Questo ausilio è particolarmente utile in tutti quei casi in cui dobbiamo lavorare su pezzi molto stretti. In questi casi infatti la suola della pialla non troverebbe sufficiente appoggio laterale e quindi è possibile utilizzare la barra che va ad inserirsi nello scavo e la soletta che appoggiandosi sulle pareti del canale sono in grado di supplire alla mancanza di supporto. Nella normalità la barra viene inserita con la parte di diametro inferiore rivolta verso il basso e lasciata libera di scorrere. Il blocco alla profondità desiderata viene imposto dalla suoletta che rimane al di sopra della parte arcuata della router plane e che impedisce l’ulteriore discesa una volta raggiunta la profondità preimpostata. La suoletta inoltre può venire utilizzata con funzione di chiusura della bocca della pialla, utile per le lavorazioni in spazi stretti.
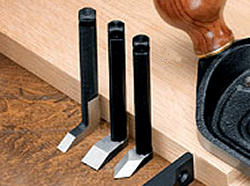
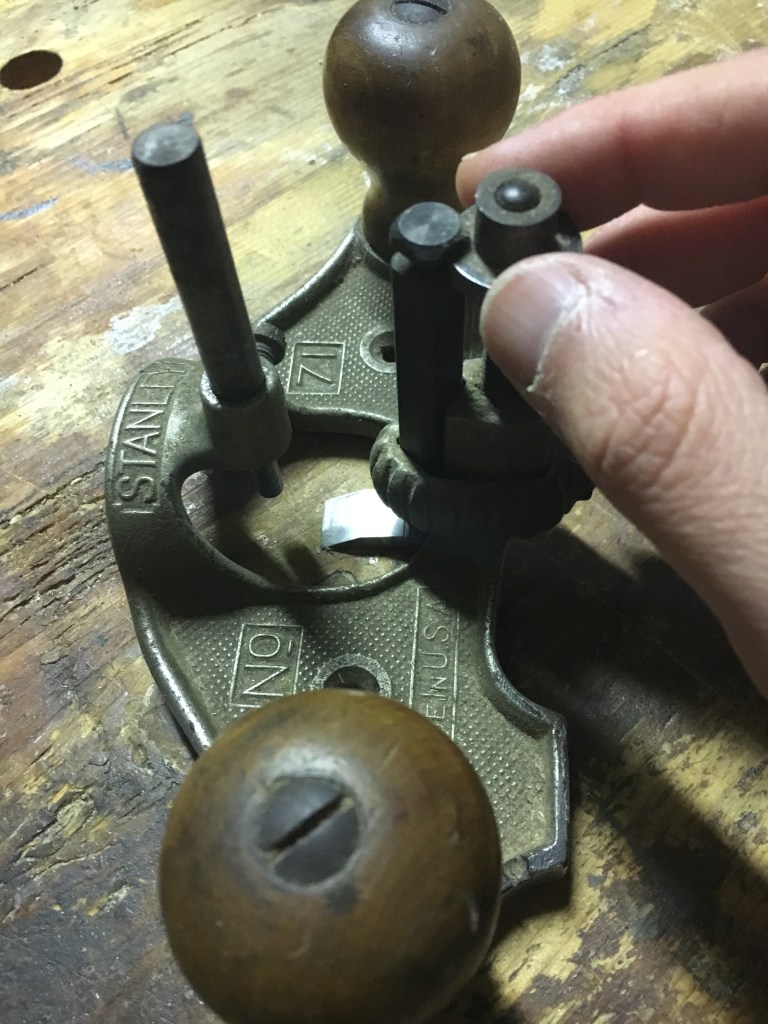
Nella foto in alto a sinistra la battuta rimovibile. A destra le tre classiche lame in dotazione con la Stanley router plane.
La battuta da apporre sotto la suola possiede due differenti profili. Un profilo lineare utile per riscontri rettilinei ed un profilo curvilineo che rende più agevole seguire profili rotondeggianti.
Le lame solitamente in dotazione con questo tipo di pialla sono tre. Due sono similari tra loro ma di dimensioni diverse (solitamente 6 mm. e 13 mm.) ed hanno la normale funzione di livellare la superficie mentre l’ultima presenta una forma particolare che, oltre a svolgere la funzione delle altre due, è in grado di raggiungere e lavorare con maggiore facilità i punti più difficili, come ad esempio gli angoli, le basi dei canali, oppure venature difficili e traverso vena. Tutte e tre le lame si presentano con il tagliente rivolto verso l’alto (configurazione bevel up). Il piede della lama non è perfettamente a 90 gradi rispetto al gambo ma presenta una certa inclinazione, di circa 15 gradi. Questo perché, una volta serrata in posizione perpendicolare rispetto al piano, la base della lama deve offrire al legno il tagliente in modo tale che possa infilarsi sotto la superficie da asportare. Se così non fosse, invece di livellare la superficie asportando il legno, la lama scivolerebbe sulla superficie senza ottenere alcun effetto.
L’ affilatura della lama avviene passando dapprima la base della stessa sulle pietre o sulla carta abrasiva a grane via via crescenti, fermandosi indicativamente attorno alla grana 1200 (non ho trovato utile andare oltre). Questa operazione è da farsi solitamente una sola volta e varrà per sempre.

Per l’affilatura del tagliente invece si capovolge la lama e la si passa sulle pietre o carta abrasiva avendo cura di mantenere lo smusso ben aderente e rivolto verso il basso. In questo caso si può procedere con grane via via più fini fino alla lappatura (lucidatura del tagliente con la pasta abrasiva). Il tagliente viene affilato tra i 25 ed i 30 gradi e durante la sua azione si comporta maggiormente come uno scalpello che da pialla vera e propria.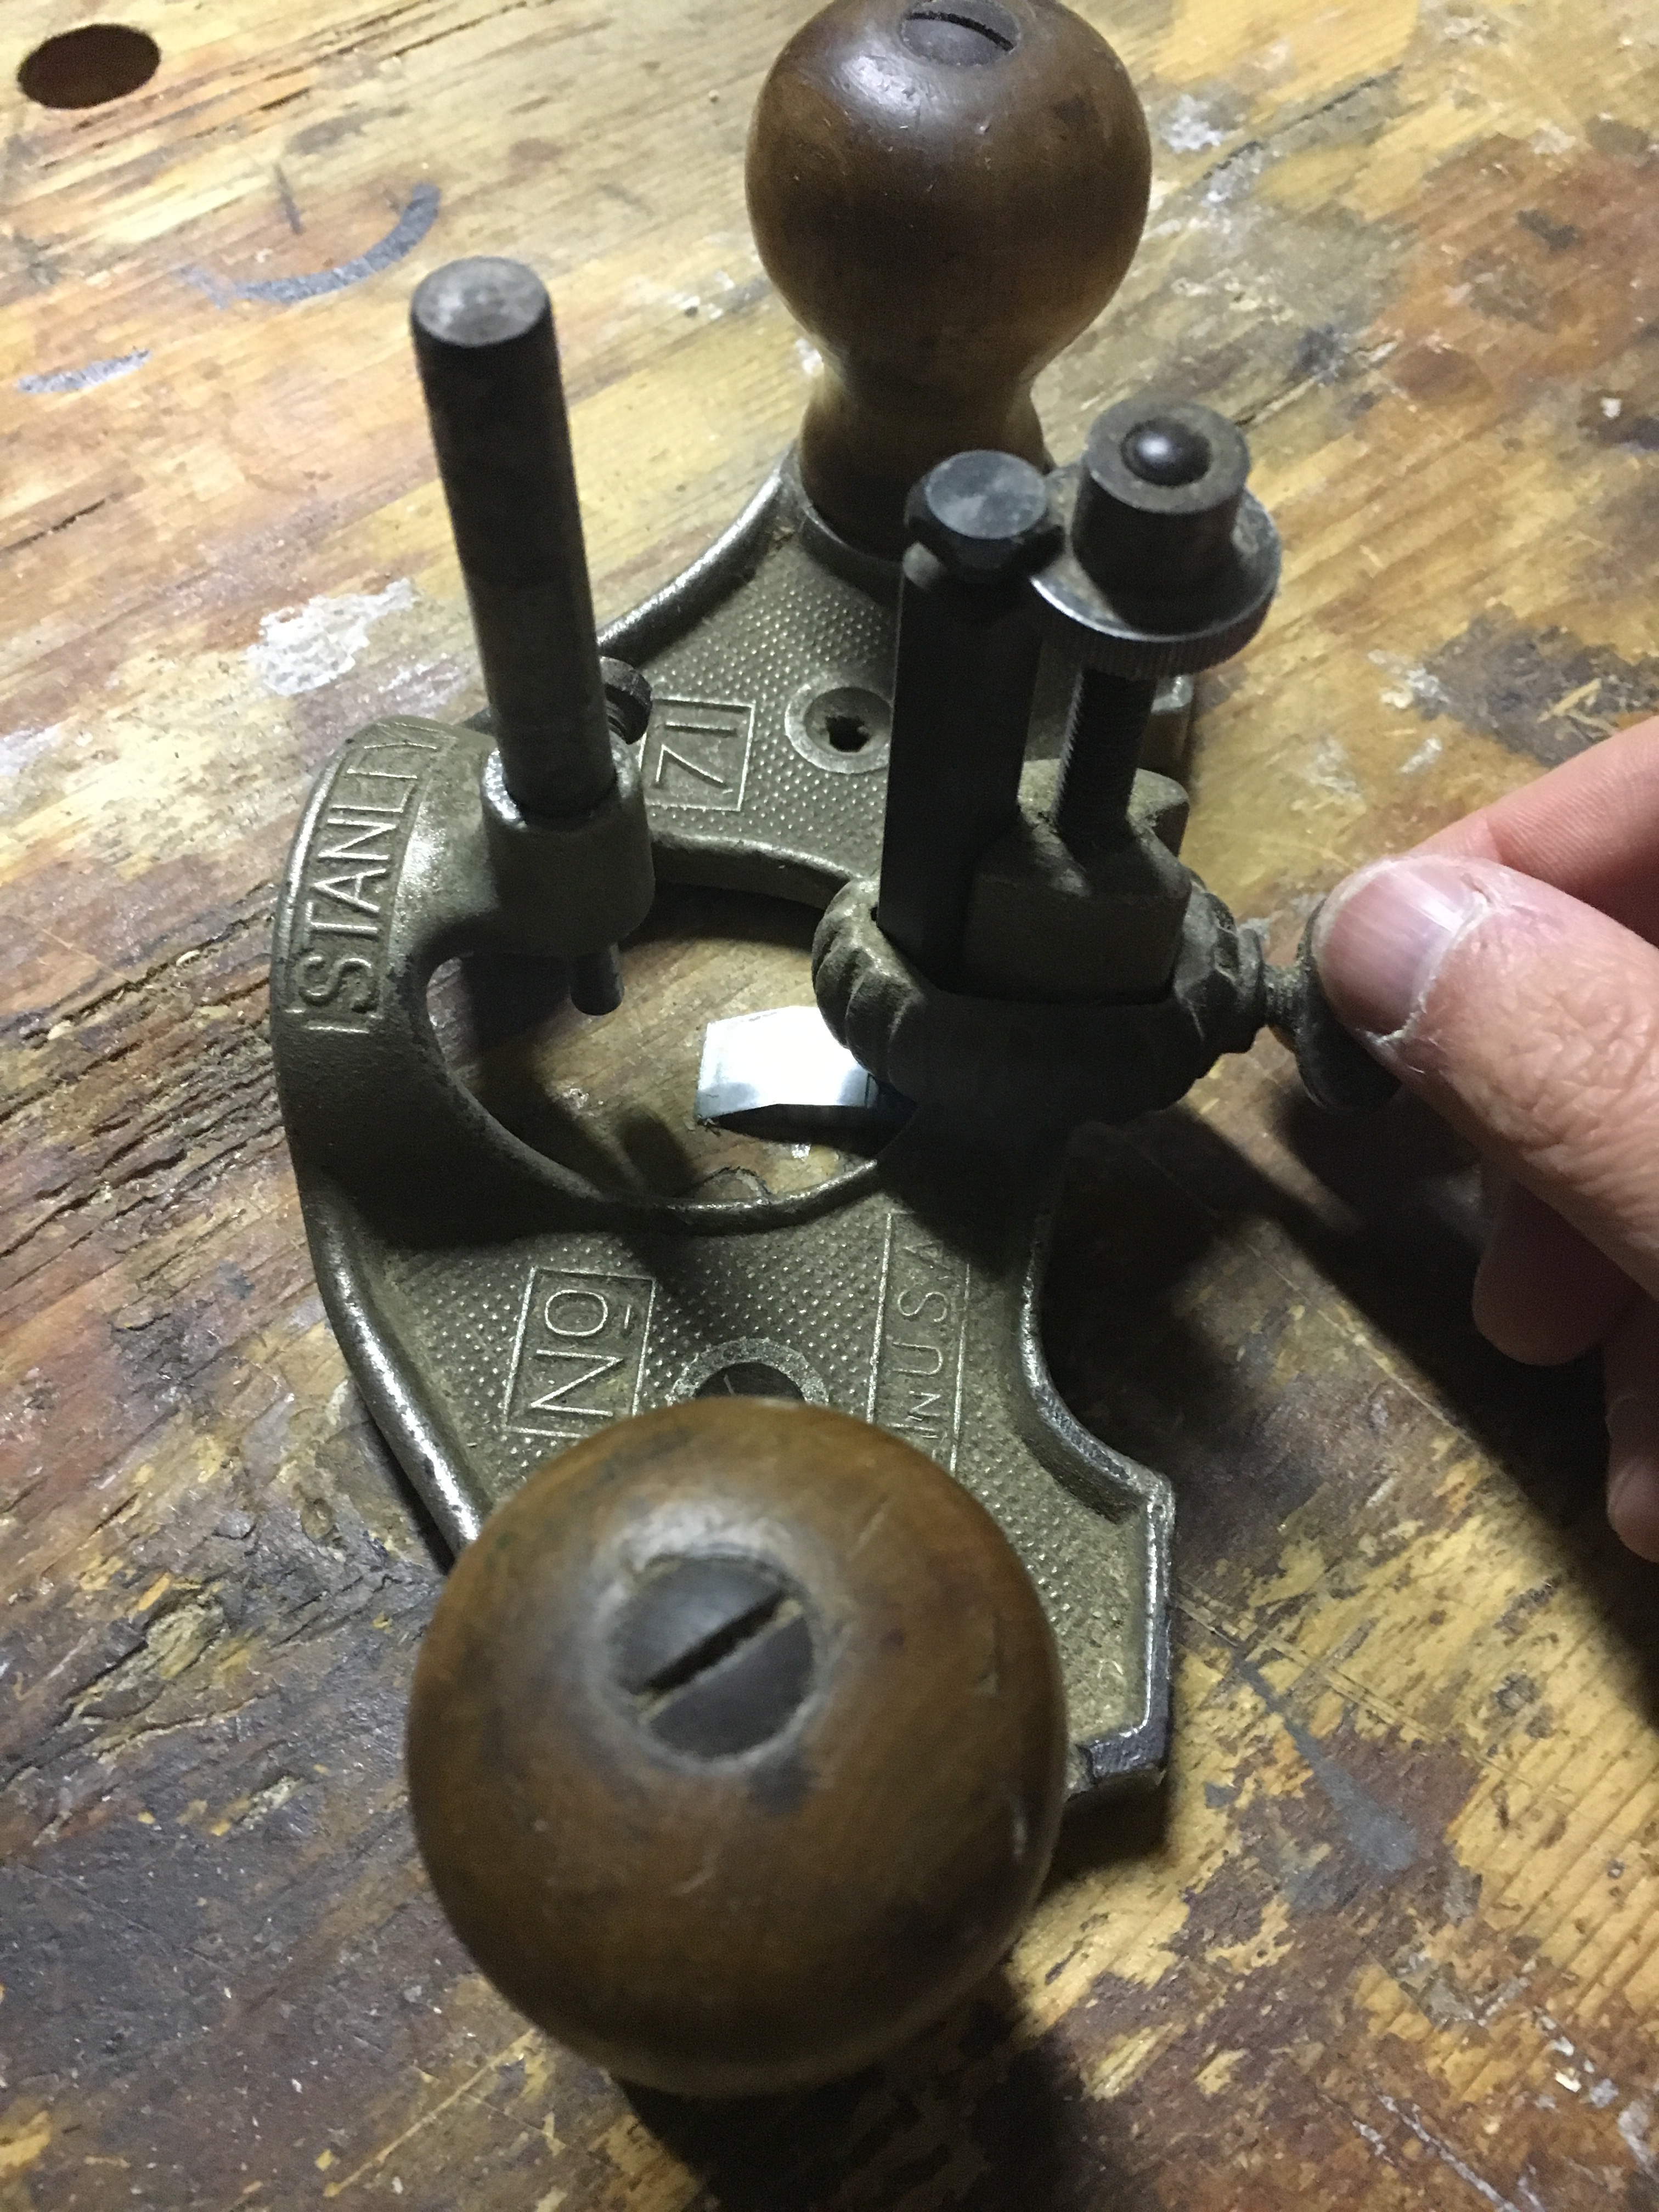
Lo smontaggio della lama prevede di allentare completamente la vite posta sul retro della pialla fino a far sì che la ghiera che blocca il gambo della lama faccia spazio al gambo stesso così da poter uscire dalla sua sede. Ovviamente la lama, vista la sua conformazione, dovrà essere fatta passare da sotto la base della pialla. Per il successivo montaggio adopereremo la procedura inversa.
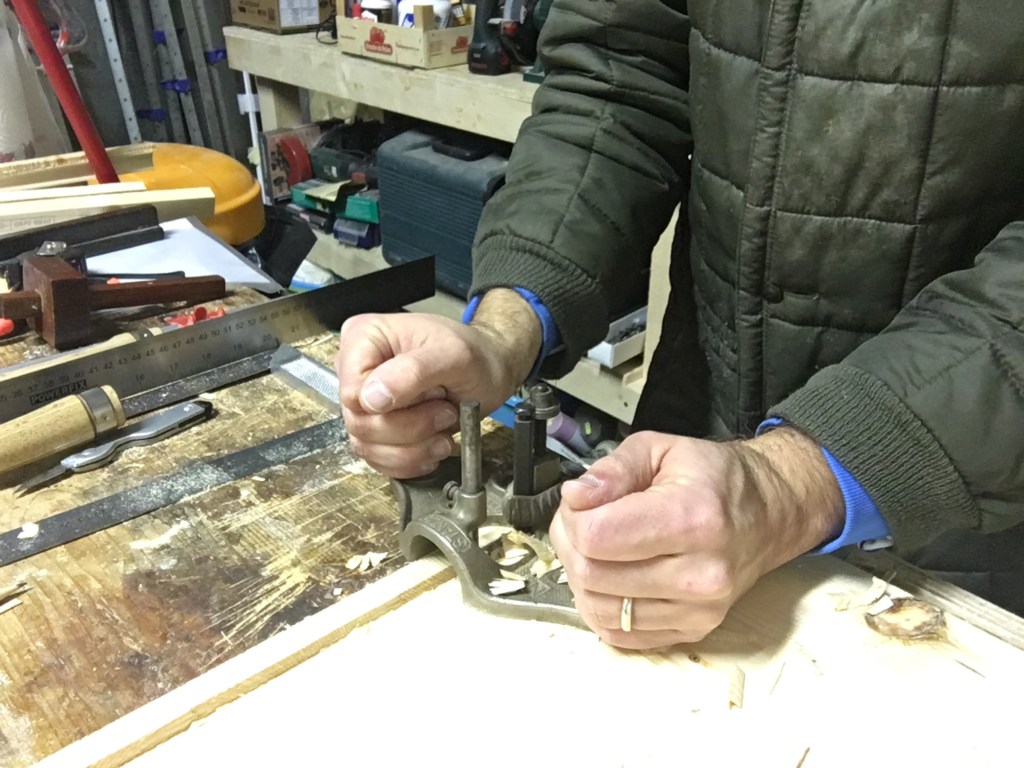
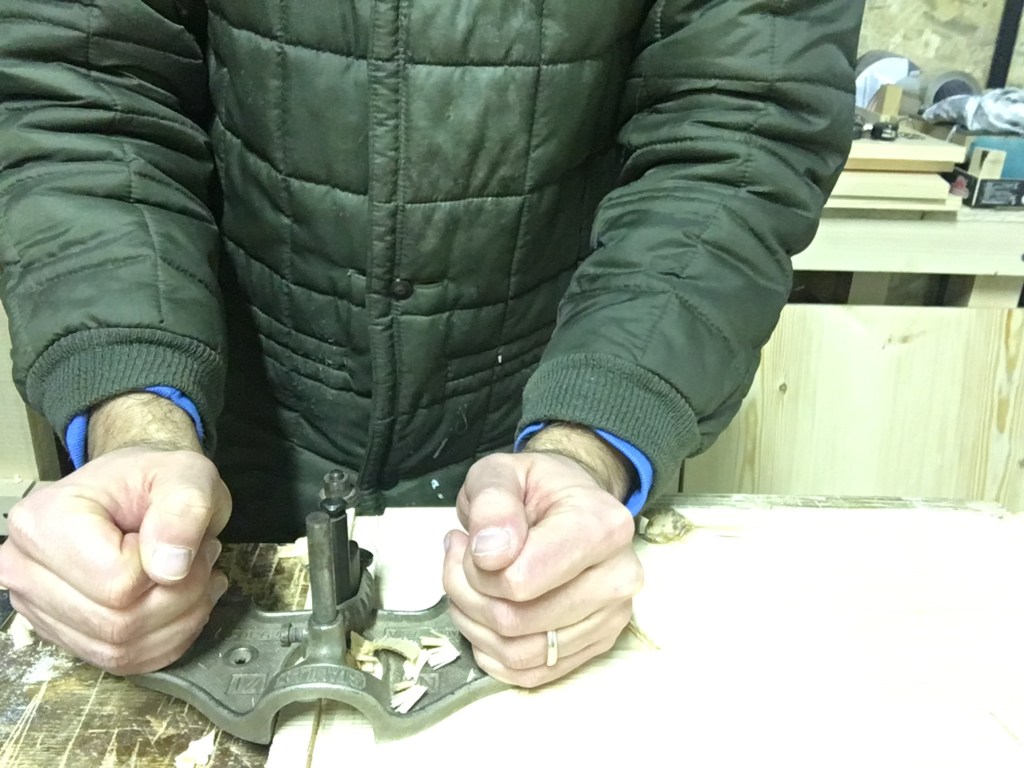
La router plane 71 possiede due pomelli in legno mediante i quali è possibile manovrarla in piena sicurezza. La modalità di impugnatura è soggettiva e molto dipenderà dal tipo di lavorazione che dovremo effettuare.


Le piccole router plane (come ad esempio la 271) sono prive di pomelli ma sono comunque facilmente manovrabili grazie alla loro particolare conformazione. Inoltre, non presentando la rotella di aggiustamento della profondità della lama, questa è regolabile semplicemente allentando la rotella posta sul retro e procedendo poi impostando manualmente la lama alla profondità desiderata.
Come accennato in precedenza questi modelli di pialle in miniatura sono utilissime per tutte le lavorazioni da farsi in spazi ridotti o su piccoli pezzi di legno. L’unico problema che ho riscontrato sulla Veritas è il fatto che la lama tende a muoversi troppo nonostante la vite sia serrata saldamente. Questo è sicuramente dovuto alla conformazione cilindrica del gambo (anziché squadrata come nelle lame della Stanley 71) che permette una sorta di slittamento e spostamento laterale in fase di lavorazione. Un modo per ovviare al problema potrebbe essere quello di spianare con una lima la parte posteriore del gambo migliorandone così il serraggio.
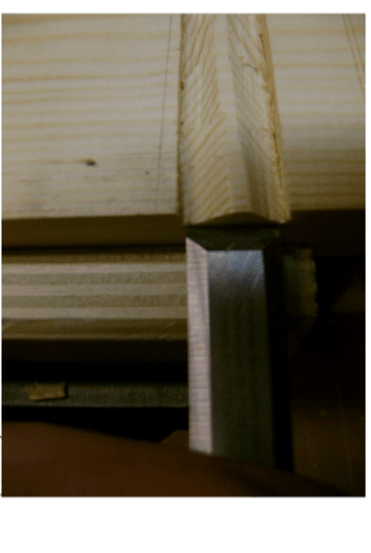
Nelle tre foto in alto la sequenza della lavorazione di scavo prima dell’intervento della router plane.
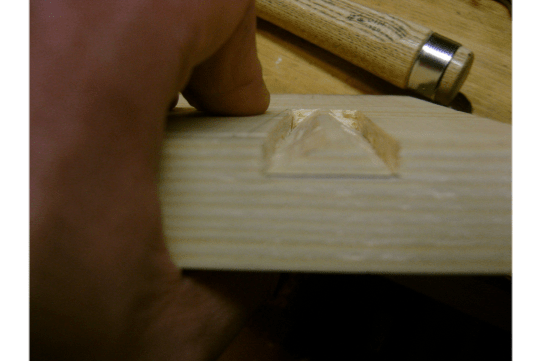
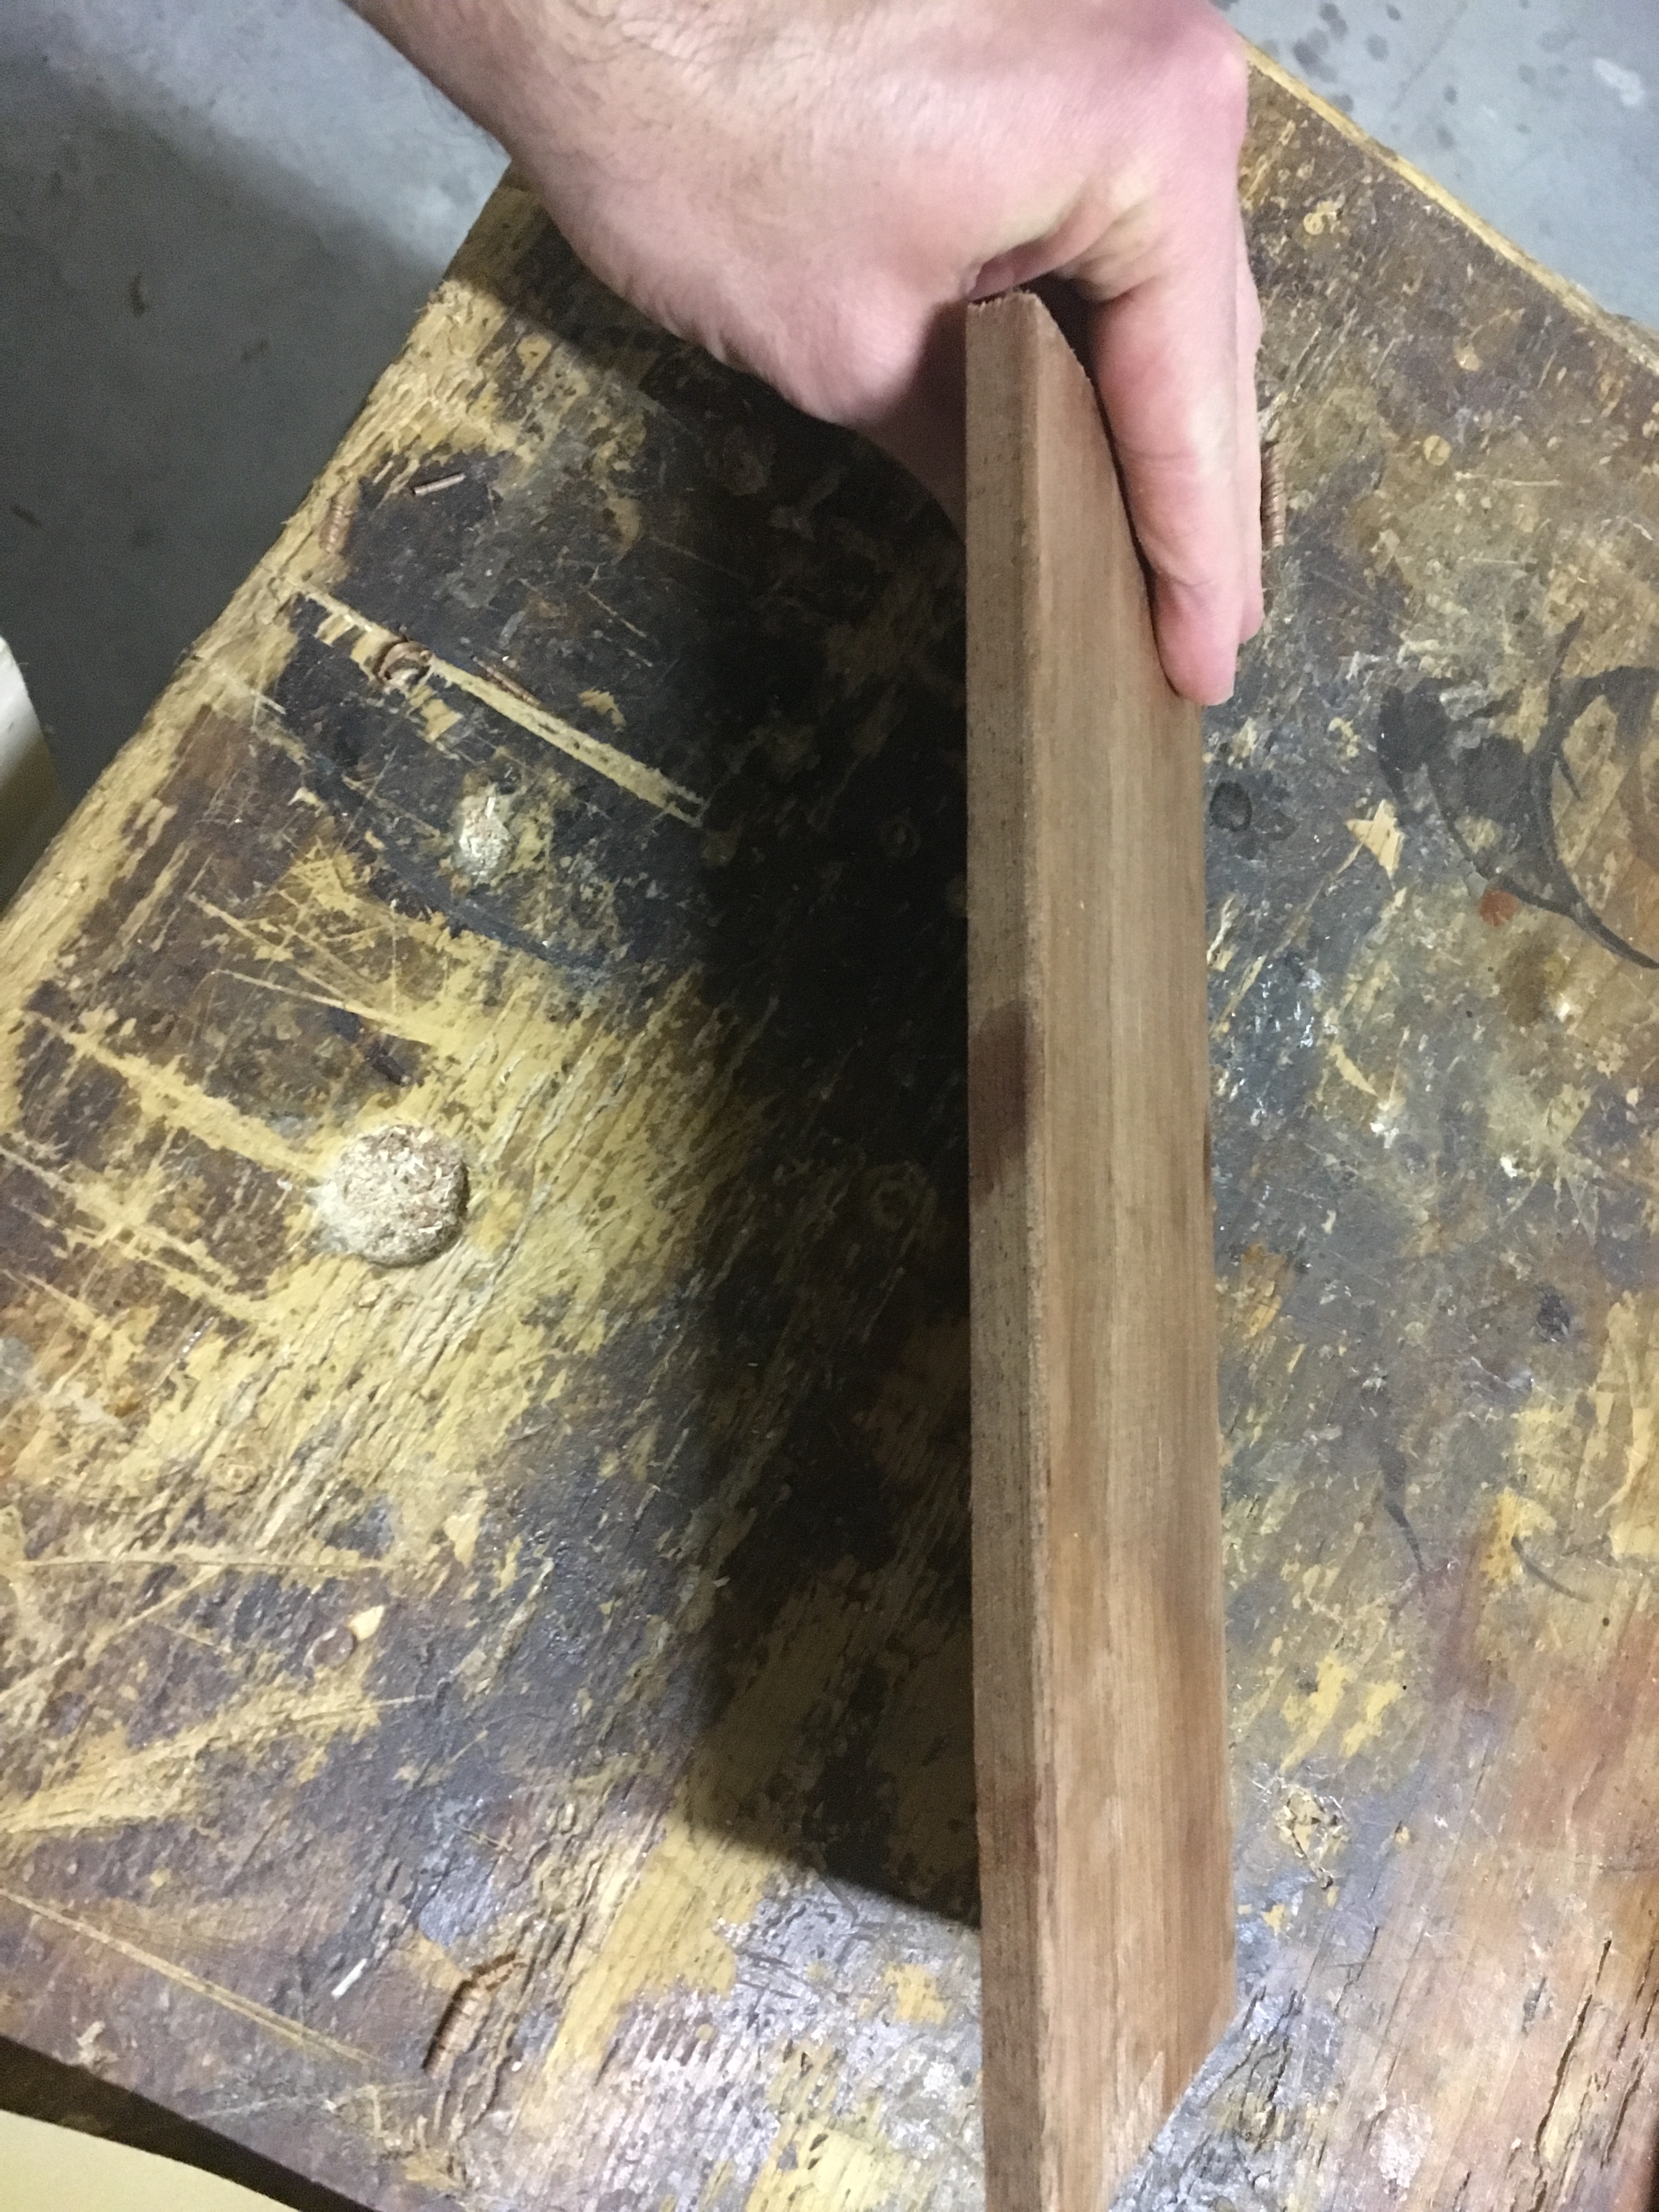
Qualsiasi lavorazione si stia effettuando la router plane interviene sempre in un secondo momento perché effettua essenzialmente un lavoro di rifinitura, dovendo livellare superfici come canali, tenoni e mortase già precedentemente create con altri utensili. Generalmente infatti con martello e scalpello si rimuove la maggior quantità di legno possibile e successivamente, al fine di ottenere una superficie perfettamente livellata, si usa la router plane. Il suo utilizzo prevede movimenti brevi e precisi , avvicinandosi poco per volta alla linea tracciata mediante piccoli aggiustamenti della profondità della lama così da asportare poco materiale e prevenire eventuali strappi.
E’ buona regola, se possibile, lavorare da più direzioni risultando spesso conveniente orientare l’angolo di presentazione della lama rispetto al legno. Il consiglio è quello di lavorare con la dovuta calma, cercando sempre di “percepire” come reagisce il legno al passaggio della lama. Bisogna tenere sempre presente che questo tipo di utensile è specifico per eseguire solo la finitura. Il grosso del lavoro, come detto, deve essere già stato svolto precedentemente mediante l’ausilio di altri utensili.
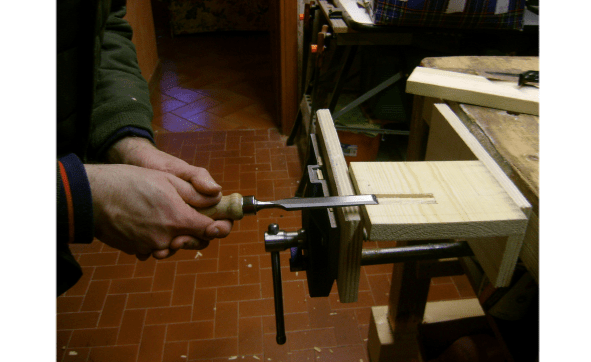
Oltre a livellare uniformemente la superficie di un canale la router plane viene adoperata anche per rifinire le guance dei tenoni e portarle al giusto spessore per il successivo incastro. Per tenoni di ridotte dimensioni può essere utile utilizzare la piccola router plane, mentre per tenoni di dimensioni molto grandi ci si può adoperare creando un estensore, in definitiva una sorta di prolunga della router plane.
Quando si rifinisce un tenone, la mano dominante governa la router plane effettuando brevi movimenti semicircolari mentre l’altra mano mantiene ben adesa la base della pialla alla superficie di riscontro circostante. Quando ci si avvicina all’estremità del tenone ricordiamo sempre di ruotare leggermente la pialla verso l’interno con un movimento “a chiudere” per evitare strappi in uscita.
 Quando si lavorano superfici ampie può essere utile avvitare alla base della router plane una basetta aggiuntiva di legno duro. La basetta è circa lo stesso spessore della base della router plane e larga quanto basta ad ospitarne la base, lasciando un paio di centimetri per lato in lunghezza. Nella basetta ovviamente dovremo creare lo spazio necessario per far passare la lama della router e permettere la visibilità (un foro di circa 5 cm. per 2,5 cm.). Lo svantaggio è che la soletta “ruba” alcuni centimetri alla profondità sfruttabile della lama.
La lama della pialla può inoltre essere utilizzata per tracciare dei segni di misurazione nel legno. Quando dobbiamo tracciare una determinata profondità è più semplice utilizzare il tagliente della lama della router già opportunamente registrata alla profondità che vogliamo raggiungere.
Nella sequenza in alto il lavoro di scavo e rifinitura prima dell’inserimento di una cerniera piana.
Nella pratica viene utilizzata ad esempio quando dobbiamo ricavare degli alloggiamenti per le cerniere piane delle ante dei mobili. Pertanto, in questi casi, la router plane ha una doppia utilità: la tracciatura ed il successivo livellamento dello scavo che ospiterà la cerniera. La stessa procedura può essere utilizzata anche per altri tipi di ferramenta che dovessimo inserire nei nostri manufatti.
When I first took a plane it was a n. 4 Record plane purchased on Ebay by a friend of mine who knew very much about planes. At that time I did not have even such information that allowed me a purchase independently and therefore I preferred a helping hand. I watched and read so many things about planes, but one thing is to read a book and see photos and movies on internet, another thing is to have one of them for your hands and make everything work. So the approach wasn’t easy at all and to understand the mechanics and how they worked took a long time and a lot of patience. When at last I began to expand my knowledge, through the purchase of similar planes like the n. 4 1/2 Stanley plane, the n. 5 Stanley plane (Jack plane) and the n. 7 Stanley plane (Jointer plane) as well as some wooden planes, I realized that the world of the planes was much more vast and varied than I imagined, and included many planes dedicated to specific works. The first feeling I had was that this type of planes were difficult to learn (also because of their relatively complex structure) and in any case unnecessary for the works that I wanted to do. In time, the curiosity took me to buy some, and today, in hindsight, I can say that I was wrong about them and now I can’t really do without. One of the first dedicated plane that I purchased was the 71 Stanley router plane. It’s hard to explain briefly the many processes that this type of plane is able to do. Generally it could be said that its main function is to uniformly leveling an already excavated surfaces making it perfectly parallel to the surrounding wood surface. This prerogative therefore makes it an great tool for leveling the bottoms of the grooves in the housing dado joints. In addition it can be used to refine and take to measure the cheeks of the tenons and leveling the bottom of the mortises in mortise and tenon joints. It is also used to create the space for the insertion of the flat hinges in furnitures, but also to trace the wood and more. With the addition of a wooden base and an extender it is possible to work with greater stability and in points otherwise difficult to reach. The metal version is equipped with several removable accessories: a steel rod and a shoe joined together with a screw which can act as a depth stop and a lateral fence to be screwed below the sole of the plane which serves as a referrer for the grooves. There are several router planes of different brands, sizes and made from different material. The historic brand is the 71 Stanley router plane which was followed, after many years, from 071 Record plane. The two planes are virtually identical and are substantially equal in the quality. Another brand is the world famous Edward Preston. The latter differs from the first two for the different shape (rectangular) and has on its side the benefit of providing better visibility during our work. If we want to buy something new instead I recommend the Veritas router plane. I do not own it, but I read very enthusiastic comments about. The prices of the router planes have risen in recent years. The cheapest are usually the Record ones followed by Stanley and then Veritas and Preston. The router plane to which I refer in this article are metal made but early models were built of wood and worked and actually work well. For wooden router plane, as for all wooden planes, the set up of the depth of the cut is made by hammering the body of the plane for the retraction of the blade, while it is necessary to tap on the blade head and then on the wedge for the advancement and subsequent tightening. For particular works, where you need to work in little spaces or on small pieces, there are smaller versions of the router plane, such as the one offered by the Veritas or the historic 271 Stanley router plane. The 71 Stanley plane is made by a metal sole in which there is a round shape and an opening from which emerges an L-shaped blade. The blade has a square section and is firmly inserted into the V holder placed on the body of the plane and in the V-groove formed in the collar. It is held in perpendicular position to the bottom and tightened by the aforesaid collar with a screw. The holder is double V shaped so that we may put the blade in the back of the router using it as a bullnose plane. In the upper part of the shank of the blade it is formed a recess into which fits the cutter adjusting wheel by which it is possible to lift and move down the blade. The wheel turns on a threaded rod that allows micro adjustments of the blade depth. The depth stop assembly is inserted into the front part of the plane. It consists of a metal rod tapered at one end and which can be used by inserting it from both the higher end part or upside down. In the rod slides a movable sole that is tightened with a screw. The depth bar itself could serve as a depth stop even without the aid of the shoe. This is particularly useful when we have to work on very narrow pieces. In these cases, in fact, the sole of the plane would not find sufficient lateral support and then you can use the rod which is inserted into the groove and the shoe of the stop support, leaning on the walls of the groove, filling the lack of support. In everyday work the road is inserted with the minor diameter to the sole of the plane and left loosen. The stop at the desired depth is guaranteed by the shoe inserted on the the curved profile of the plane. The shoe is also used to close the mouth of the plane when working on narrow spaces. The fence is sliding and has to be screwed under the sole of the plane. It has two different profiles. A linear profile useful for straight profiles and a curved profile that makes it easier to follow rounded profiles. The blades usually supplied with this type of plane are three. Two are similar but of different dimensions (usually 6 mm. and 13 mm.) and have the normal function of leveling the surface, while the last has a peculiar shape (V shape) that, in addition to the function of the other two, is able to more easily reach and work in the most difficult points, such as angles, groove bases, difficult and cross grain. The three blades are in a bevel up configuration. The foot of the blade is not perfectly at 90 degrees respect to the shank but presents a certain inclination, of approximately 15 degrees. This is because, when secured in perpendicular position with the sole of the plane, the cutting edge of the blade must be offered to the wood in such a way that it can level the surface to be removed, going under the wood. If this were not so, instead of leveling the surface by removing the wood, the blade would slide on the surface without getting any effect. The sharpening of the blade takes place passing first the sole of the blade on the abrading stones or abrading sandpaper increasing gradually and stopping indicatively around the 1200 grit (I have not found useful to go further). This operation usually takes place once and will last for ever. For sharpening the bevel the blade is placed upside down with the bevel down on the stones or abrasive paper, taking care to maintain the well-fitting of the bevel facing downwards. In this case you can proceed with gradually finer grits until the lapping (polishing of the cutting edge with the abrasive paste). The cutting edge has to be sharpened between 25 -30 degrees. During the work it acts more like a chisel than a plane. To remove the blade we have to completely loosen the screw on the back of the plane to ensure that the collar that locks the stem of the blade to the shank space let the blade to be able to exit from its seat. Obviously, the blade, having regard to its conformation, has to pass through the bottom of the plane. To reassemble the blade we will work in reverse order. The 71 router plane has two wooden knobs by which it is possible to work safely. The handling is very subjective and will depend on the type of work we are making. The knobs are missing on the small router planes (such as 271) but they are still easy to work thanks to their particular shape. In addition, not presenting the adjustment wheel of the depth of the blade, this is adjustable simply by loosening the wheel on the back and then proceeding by manually setting the blade to the desired depth. As mentioned above these small planes are useful for all the operations to be done in small spaces or small pieces of wood. The only problem I found on the small Veritas router plane is the fact that the blade tends to move too much despite the screw is securely tightened. This is certainly due to the cylindrical shape of the shank (square rather than as in the blades of 71 Stanley) which allows a sort of slippage and lateral displacement during the planing. One way to resolve the problem would be to file the rear portion of the shank so to improve clamping. Any work we are doing with the router plane is always made in a second time because it is essentially used for finishing the work, needing to level an paring surfaces such as grooves, tenons and mortises previously created with other tools. Generally, in fact, with hammer and chisel is removed as much of the wood as possible and subsequently, in order to obtain a perfectly level surface, using the router plane. Its use provides short and accurate movements, shortly approaching to the line drawn, by small adjustments of the depth of the blade so as to remove little material and prevent any tearing. I suggest, if possible, to work from various directions resulting often convenient to orient the angle of presentation of the blade to the wood. I also suggest to work with calm, always trying to “feel” like wood reacts to the passage of the blade. We must always keep in mind that this type of tool is specific to only perform finishing. The bulk of the work, as mentioned, must have already been done previously with the help of other tools. In addition to uniformly leveling the surface of groove the router is also used to refine the cheeks of the tenons and bring them to the right thickness for the next joint. For small tenons may be useful to use the small router plane, while for very large tenons you can create an extender, a kind of extension of the router plane. When we finish a tenon, the dominant hand governs the router plane making short semicircular movements while the other hand keeps the sole of the plane dead flat and pressed down to the surrounding surface. When approaching the edge of the tenon always remember to slightly rotate the plane with an inward movement to avoid outgoing tear out. When working on larger surfaces it can be useful to screw to the sole of the router plane an additional piece of hardwood. The additional sole is about the same thickness of the sole of the router plane and wide enough to receive the sole, leaving a couple of centimeters in length each side. In the added sole, of course, we will have to create the space to pass the blade of the router and allow the visibility when working (an opening of about 5 cm. per 2,5 cm.). The disadvantage is that the additional sole “steals” a few centimeters to the usable depth of the blade. The blade of the plane can also be used for tracing measuring marks in the wood. When we draw a certain depth is easier to use the cutting edge of the router blade already appropriately registered at the depth we want. This practice is used for example when we have to create the housings for flat hinges of furniture doors. Therefore, in these cases, the router plane has a double utility: tracing and the subsequent leveling the recesses that will receive the hinge. The same procedure can also be used for other types of hardware that we should include in our projects.
Alcune foto ed immagini sono state tratte da siti internet esterni per soli scopi informativo didattici e senza fini di lucro. Se si è proprietari delle immagini e se ne desidera la rimozione si prega di segnalarlo nella sezione contatti.

Lascia un commento