GLI INCASTRI. I TRE INCASTRI FONDAMENTALI DEL LEGNO / THE JOINTS. THE THREE ESSENTIAL JOINTS IN WOOD
English translation at the end of the article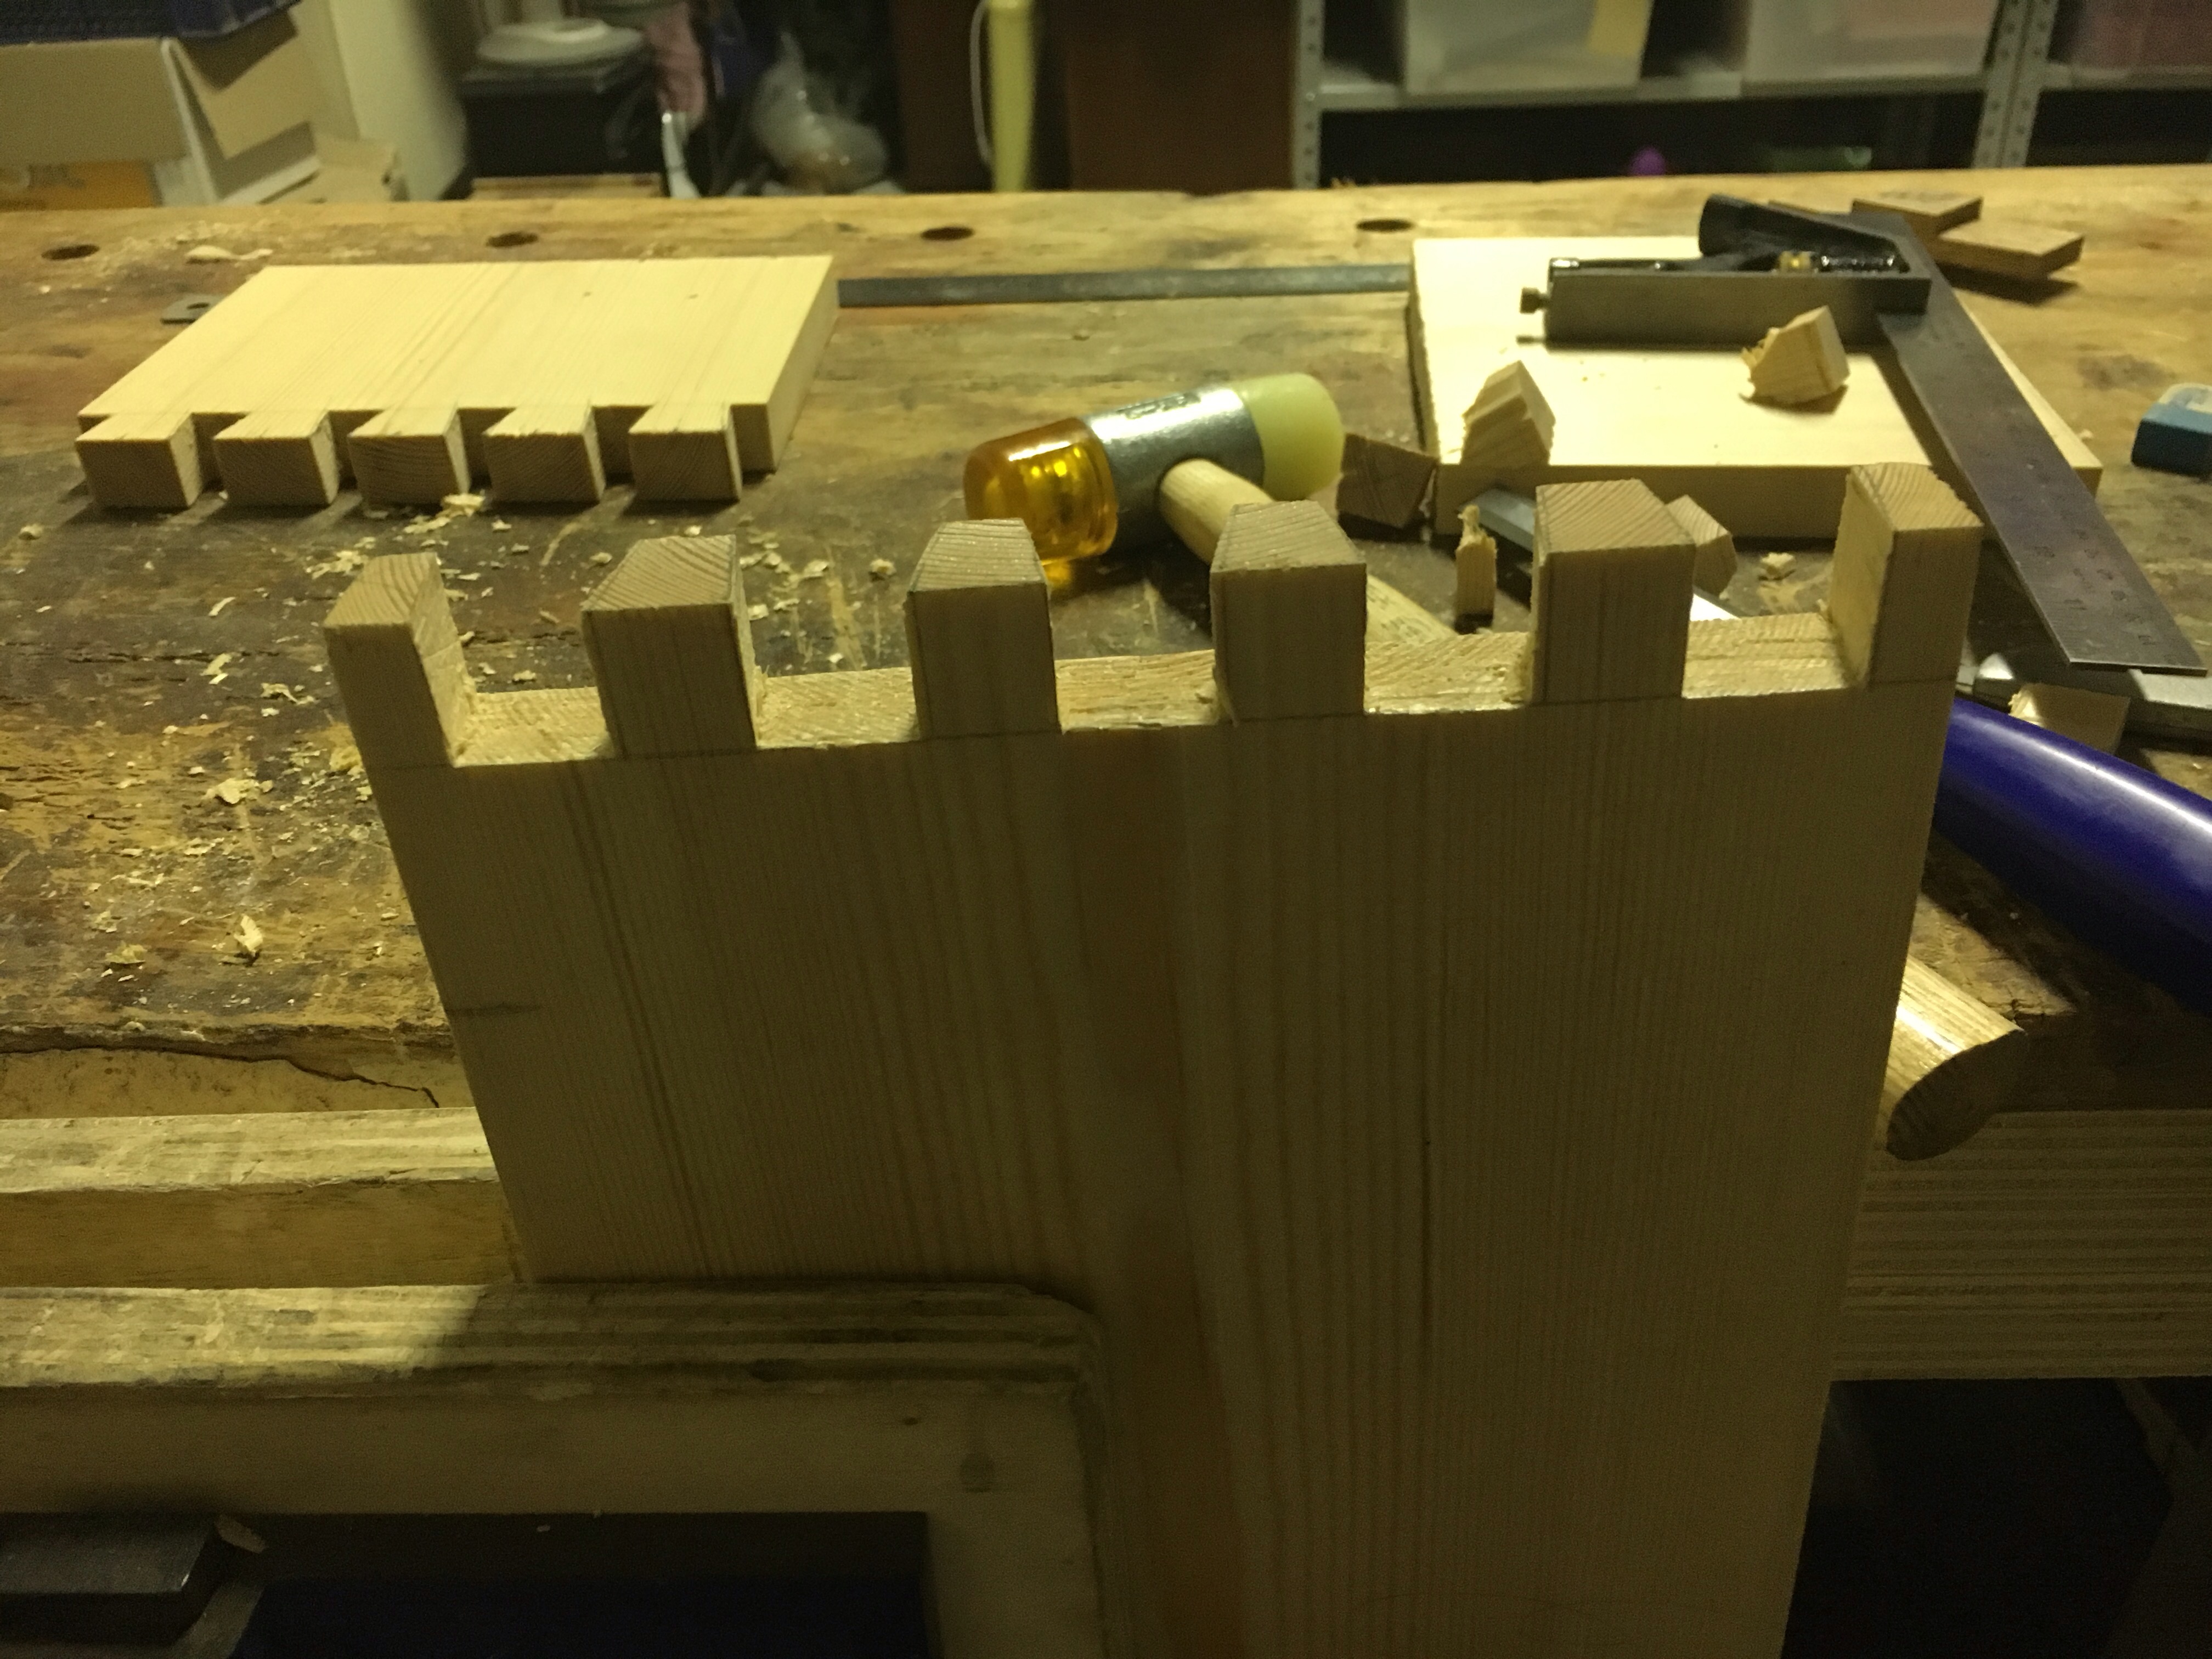 Al giorno d’oggi molti mobili sono assemblati semplicemente con viti, spine di legno e colla senza alcun tipo di incastro particolare. E forse è anche per questo motivo che spesso sono destinati a non durare nel tempo. La resistenza e flessibilità di un mobile, sia essa una sedia, un
tavolo o un armadio è determinata da svariati fattori, in primis dalla qualità di legno adoperato, ma anche dal tipo di assemblaggio che è stato utilizzato.
I mobili moderni, come accennato, sono spesso fatti senza utilizzare alcun tipo di incastro, affidandosi essenzialmente alla tenuta della colla e delle viti. Purtroppo però, senza degli incastri adeguati, il legno, che risente delle variazioni di temperatura e di umidità dell’ambiente in cui viene collocato, varia nelle dimensioni spesso anche di alcuni centimetri e questo, assieme alle sollecitazioni a cui viene sottoposto (pensiamo a quante volte spostiamo un tavolo o le sedie o un mobile), se il manufatto non è adeguatamente sostenuto con degli incastri avrà, come inevitabili conseguenze, scollamenti, movimenti eccessivi, poca tenuta e rotture.

C’è un motivo quindi se per centinaia di anni a questa parte gli artigiani hanno costruito i mobili affidandosi principalmente alla tenuta degli incastri e solo secondariamente alla colla, ai chiodi ed alle viti. Mobili che, se trattati con le dovute cure, sono destinati a durare per altre centinaia di anni.
Prima di creare un incastro nel legno dobbiamo tener conto di alcune particolarità come ad esempio l’essenza che stiamo lavorando, il tipo di costruzione che vogliamo realizzare, la sua destinazione d’uso ed ovviamente il tipo di incastro stesso. Come detto, il legno è soggetto a mutazioni dovute alla temperatura ed alla umidità circostante e quindi può subire mutazioni in forma e dimensioni. Gli incastri devono tener conto di questi cambiamenti e quindi essere eseguiti in modo tale da permetterne liberamente i movimenti. La scelta del tipo di incastro dovrà tenere conto anche della direzione della venatura del legno utilizzato, dell’uso finale del manufatto ed altro ancora. A seconda del tipo di incastro da effettuare, poi, dovremo utilizzare l’ utensile manuale che più si adatta alla sua realizzazione.
Per quanto ho potuto verificare gli utensili che maggiormente utilizzo per la quasi totalità degli incastri fatti a mano sono: flessometro (metro), matita, coltellino da tracciatura, squadra combinata e falsa squadra, truschino, sega per tenoni e code di rondine, scalpelli, martello, router plane (pialla per scanalature) e pialla n. 4 o n. 5.
Esistono centinaia se non migliaia di incastri possibili e farne una classificazione è particolarmente difficile anche perchè ne vengono creati continuamente di nuovi. Tradizionalmente vengono raggruppati in grandi categorie distinguendo quindi le unioni a mezzo legno (come ad esempio le unioni di guancia del legno), le unioni d’angolo (dente e canale), a mezzo spine o lamelle di legno, le unioni di costa (per giuntare di costa le tavole), a tenone e mortasa e a coda di rondine.
Nella pratica ho riscontrato però che la maggior parte degli incastri possono essere effettuati con le tre seguenti tipologie. Partendo dal più semplice troviamo quindi l’incastro dente e canale, l’incastro tenone e mortasa e l’incastro a coda di rondine. Vediamoli nello specifico e vi segnalo che nei miei due volumi sulla lavorazione manuale del legno troverete un intero capitolo dedicato all’argomento incastri.
INCASTRO DENTE E CANALE
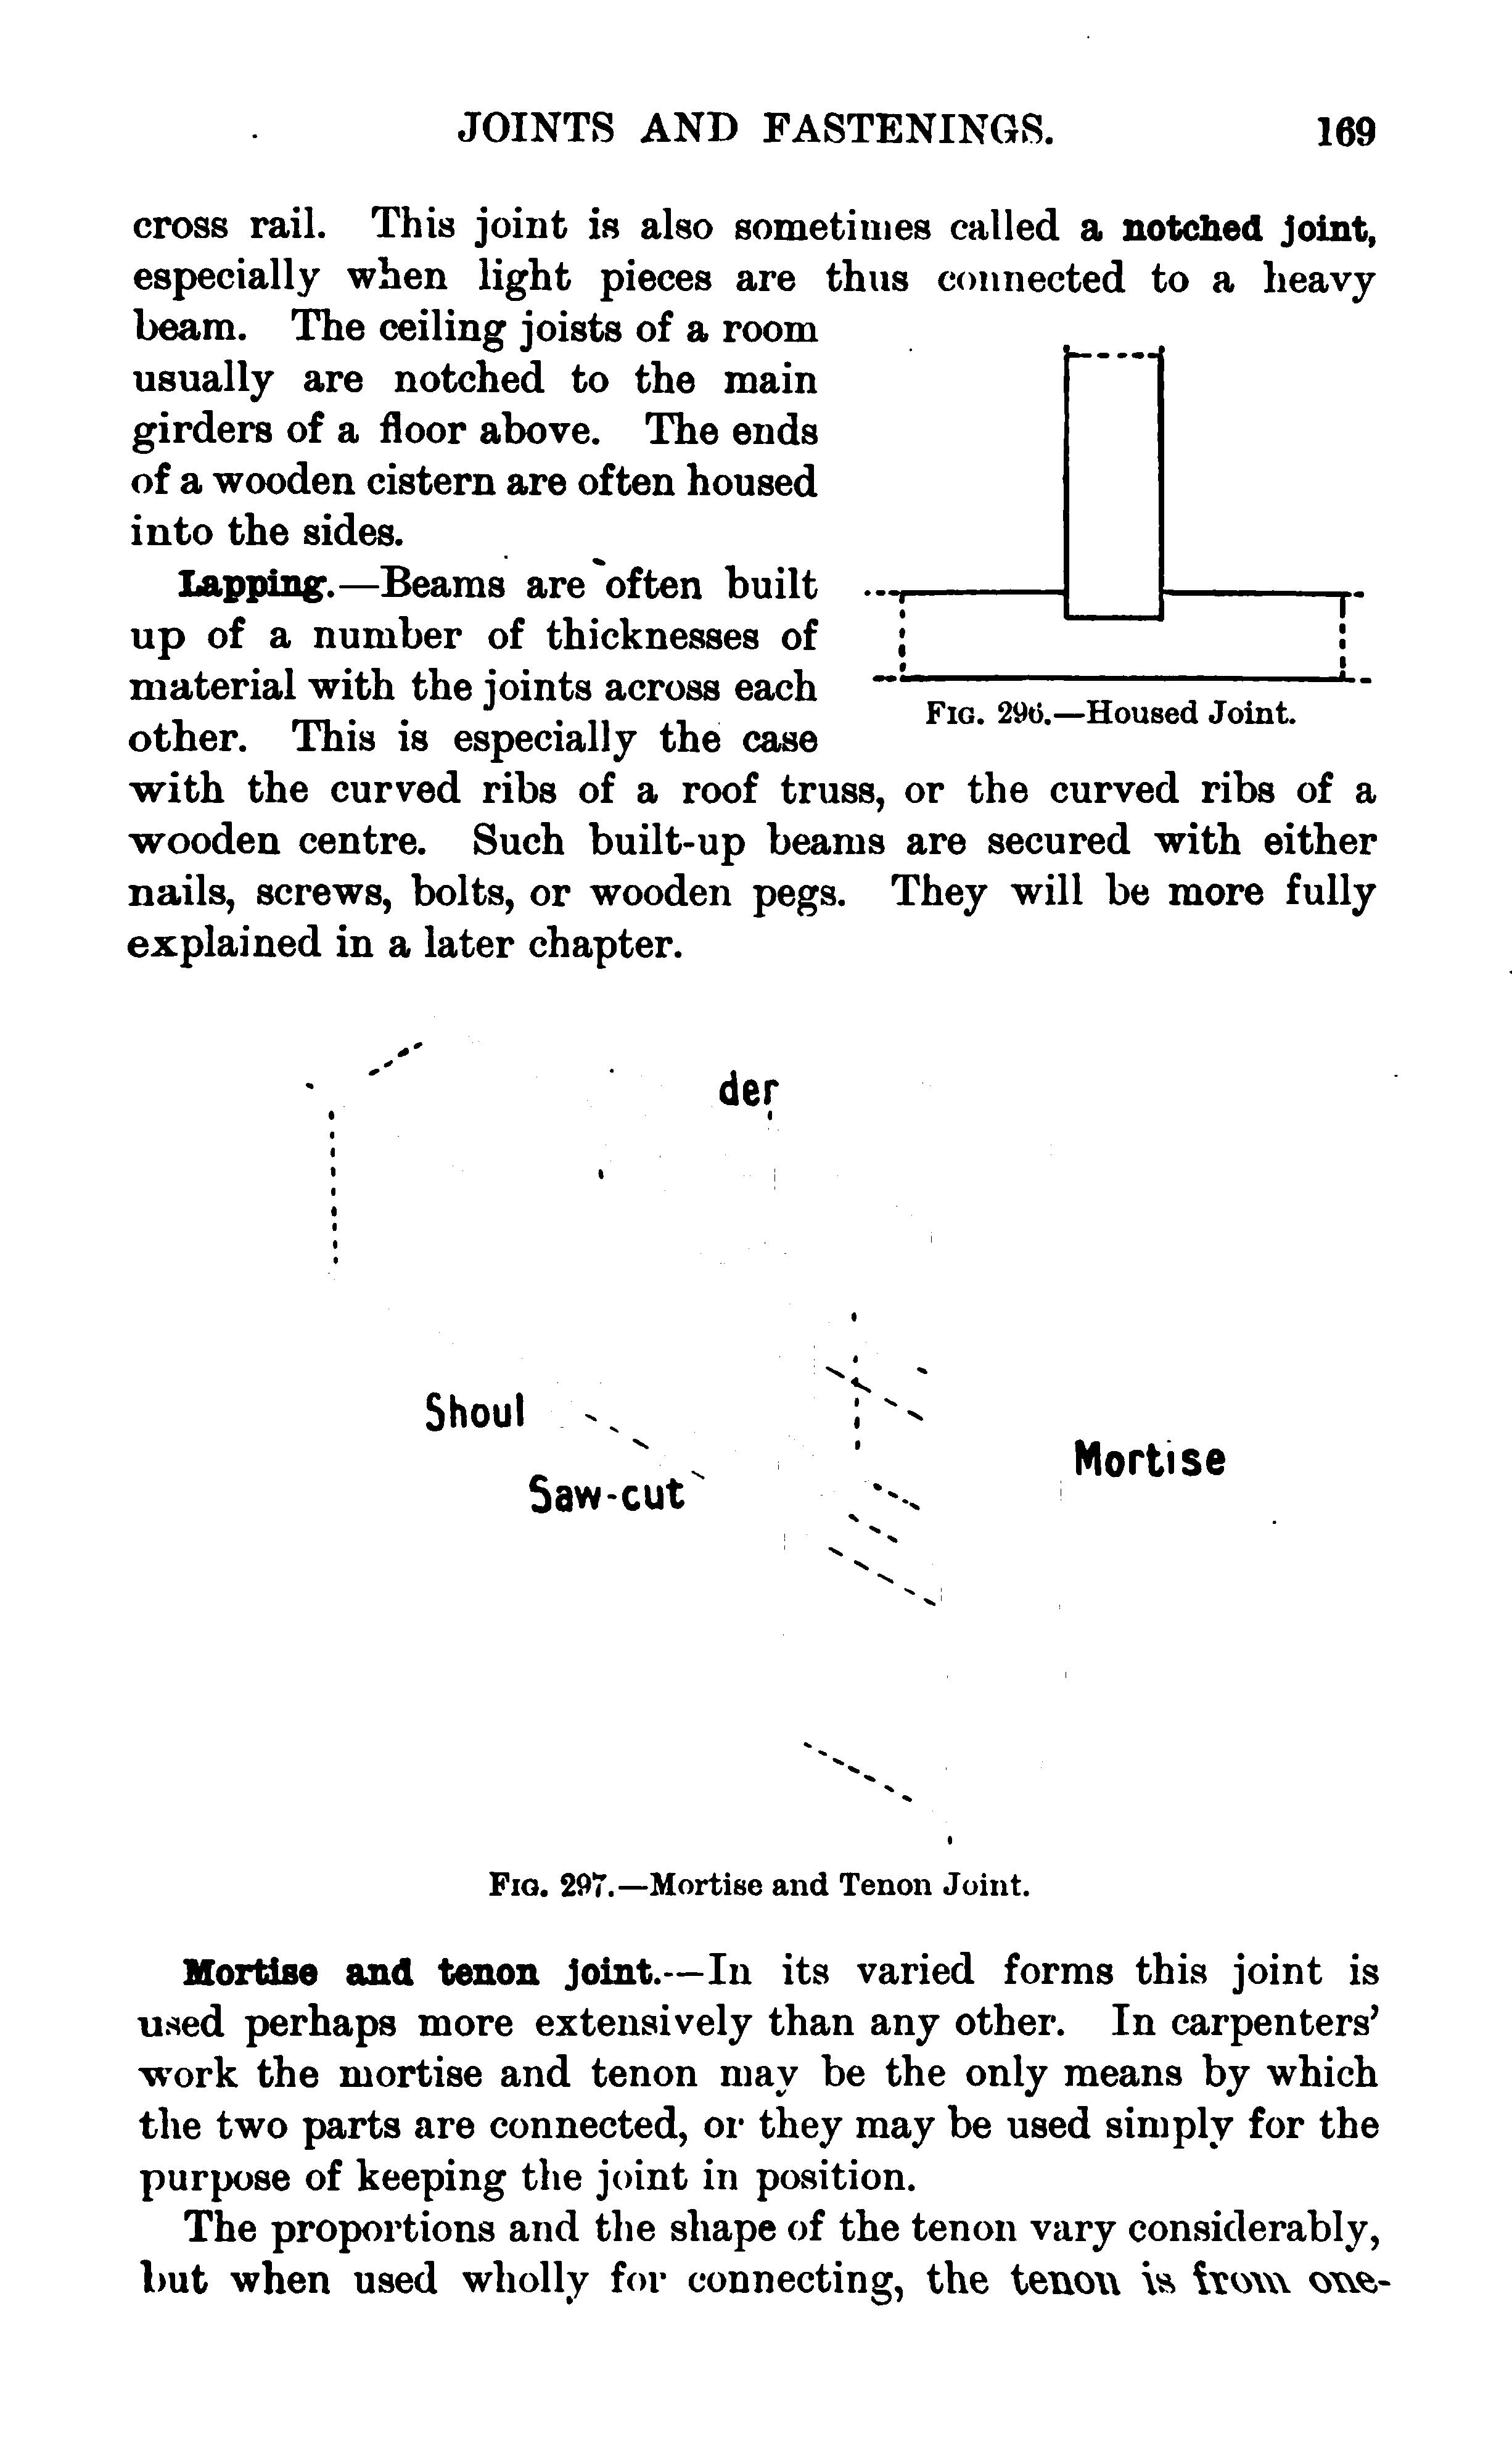
L’incastro dente e canale è probabilmente il più semplice da realizzare ma anche quello che restituisce meno solidità e stabilità. Viene utilizzato per realizzare ripiani nelle scaffalature e nelle librerie ma anche nelle credenze, nel retro dei cassetti o in semplici scatole.
L’estremità di uno dei due pezzi da unire (dente) si inserisce nella scanalatura (canale) creata nell’altro pezzo.
A causa della sua struttura intrinseca questo incastro non garantisce particolare resistenza alle sollecitazioni laterali specie quelle divergenti a meno che l’intera struttura da realizzare non sia irrobustita con l’inserimento di altri incastri del tipo tenone e mortasa o con l’apposizione di un pannello sul retro della carcassa che ne migliori la rigidità.
Esistono due tipologie principali di incastro dente e canale: il dente e canale aperto ed il dente e canale cieco (con o senza spalla).
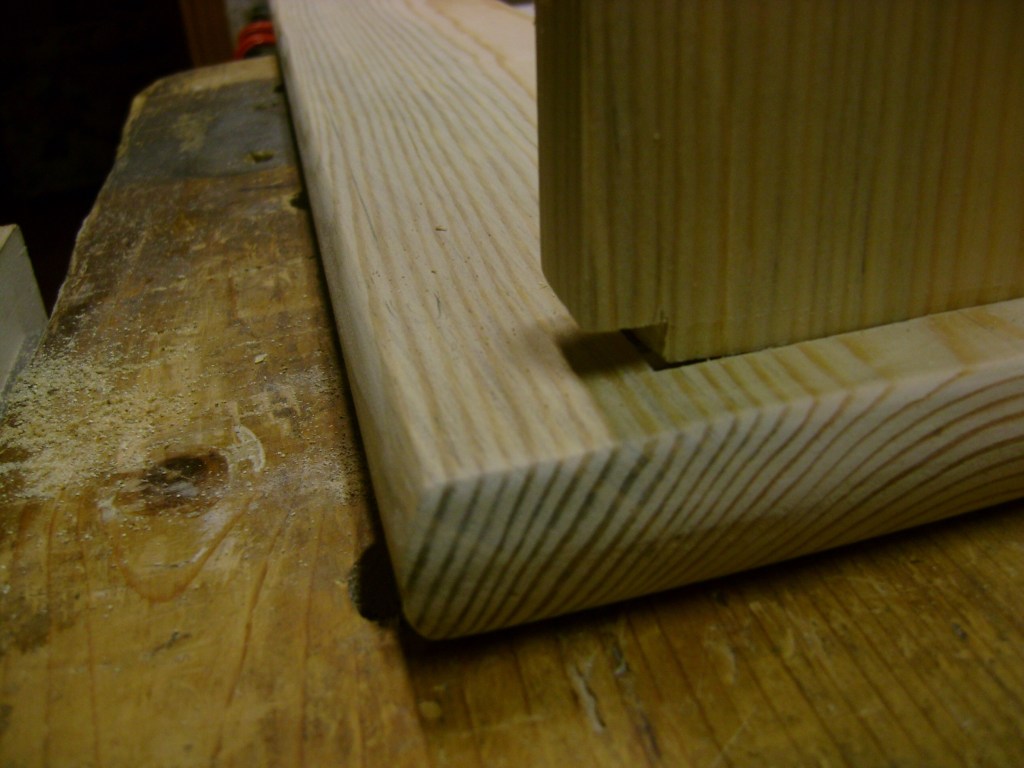
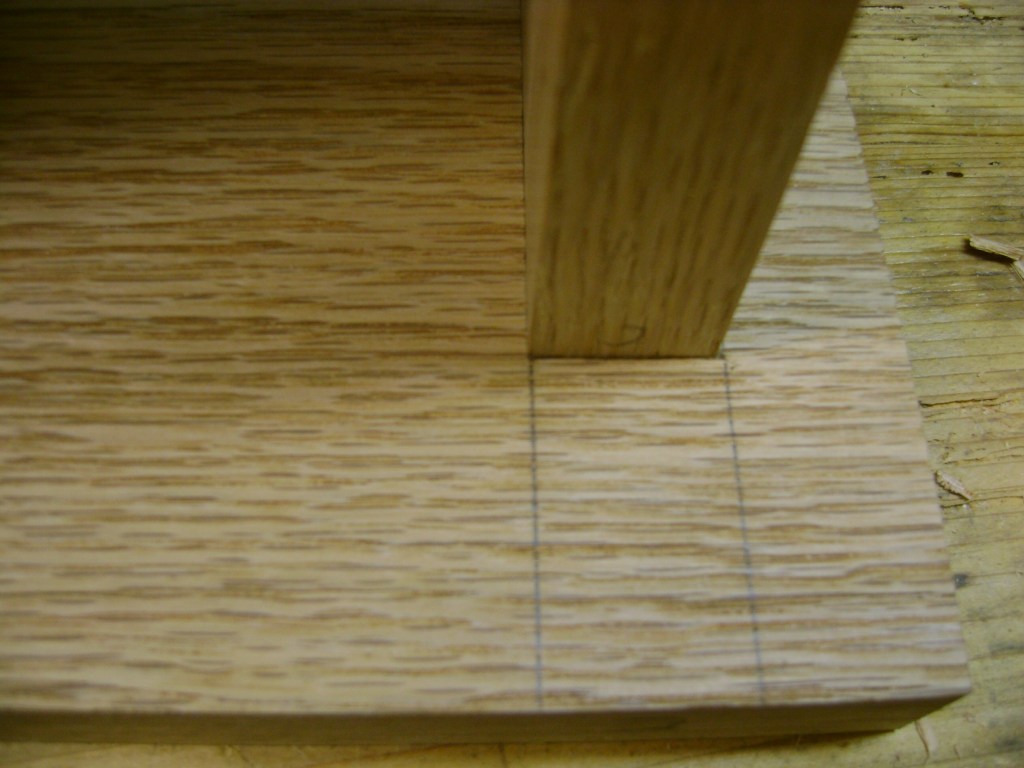
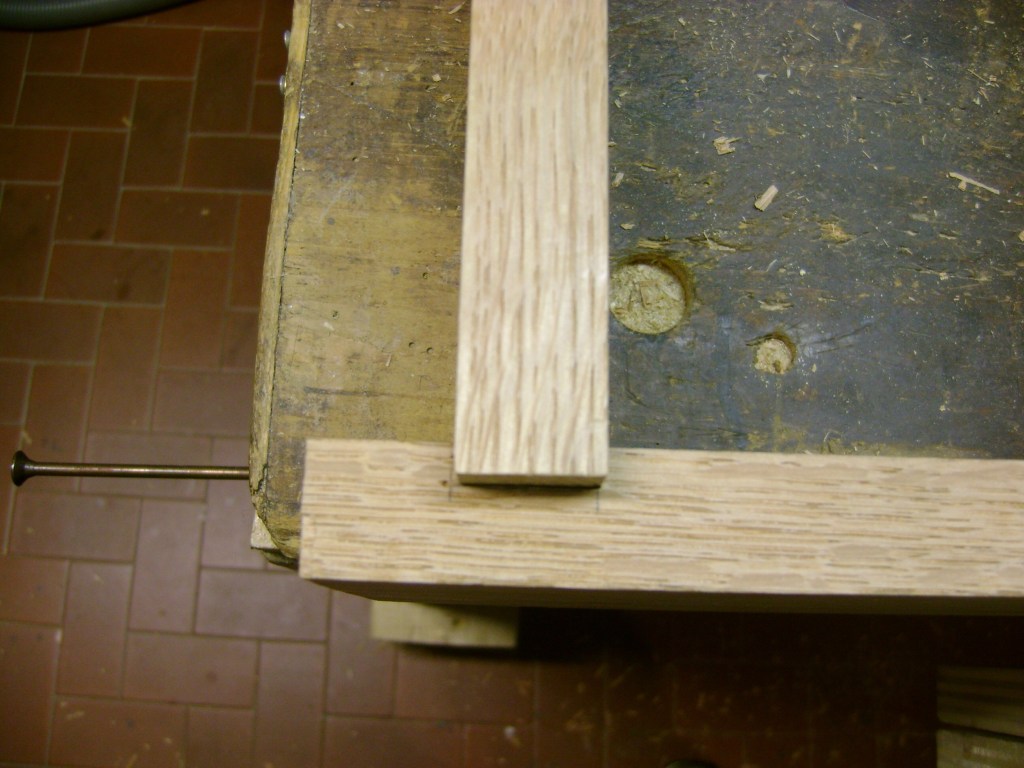
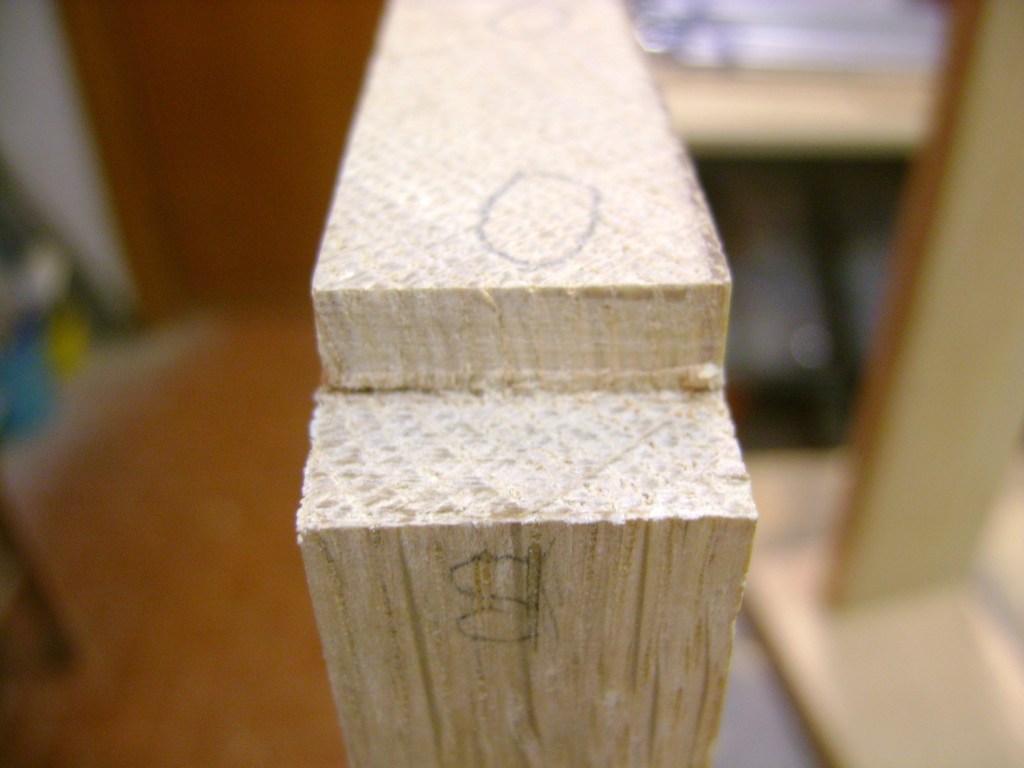
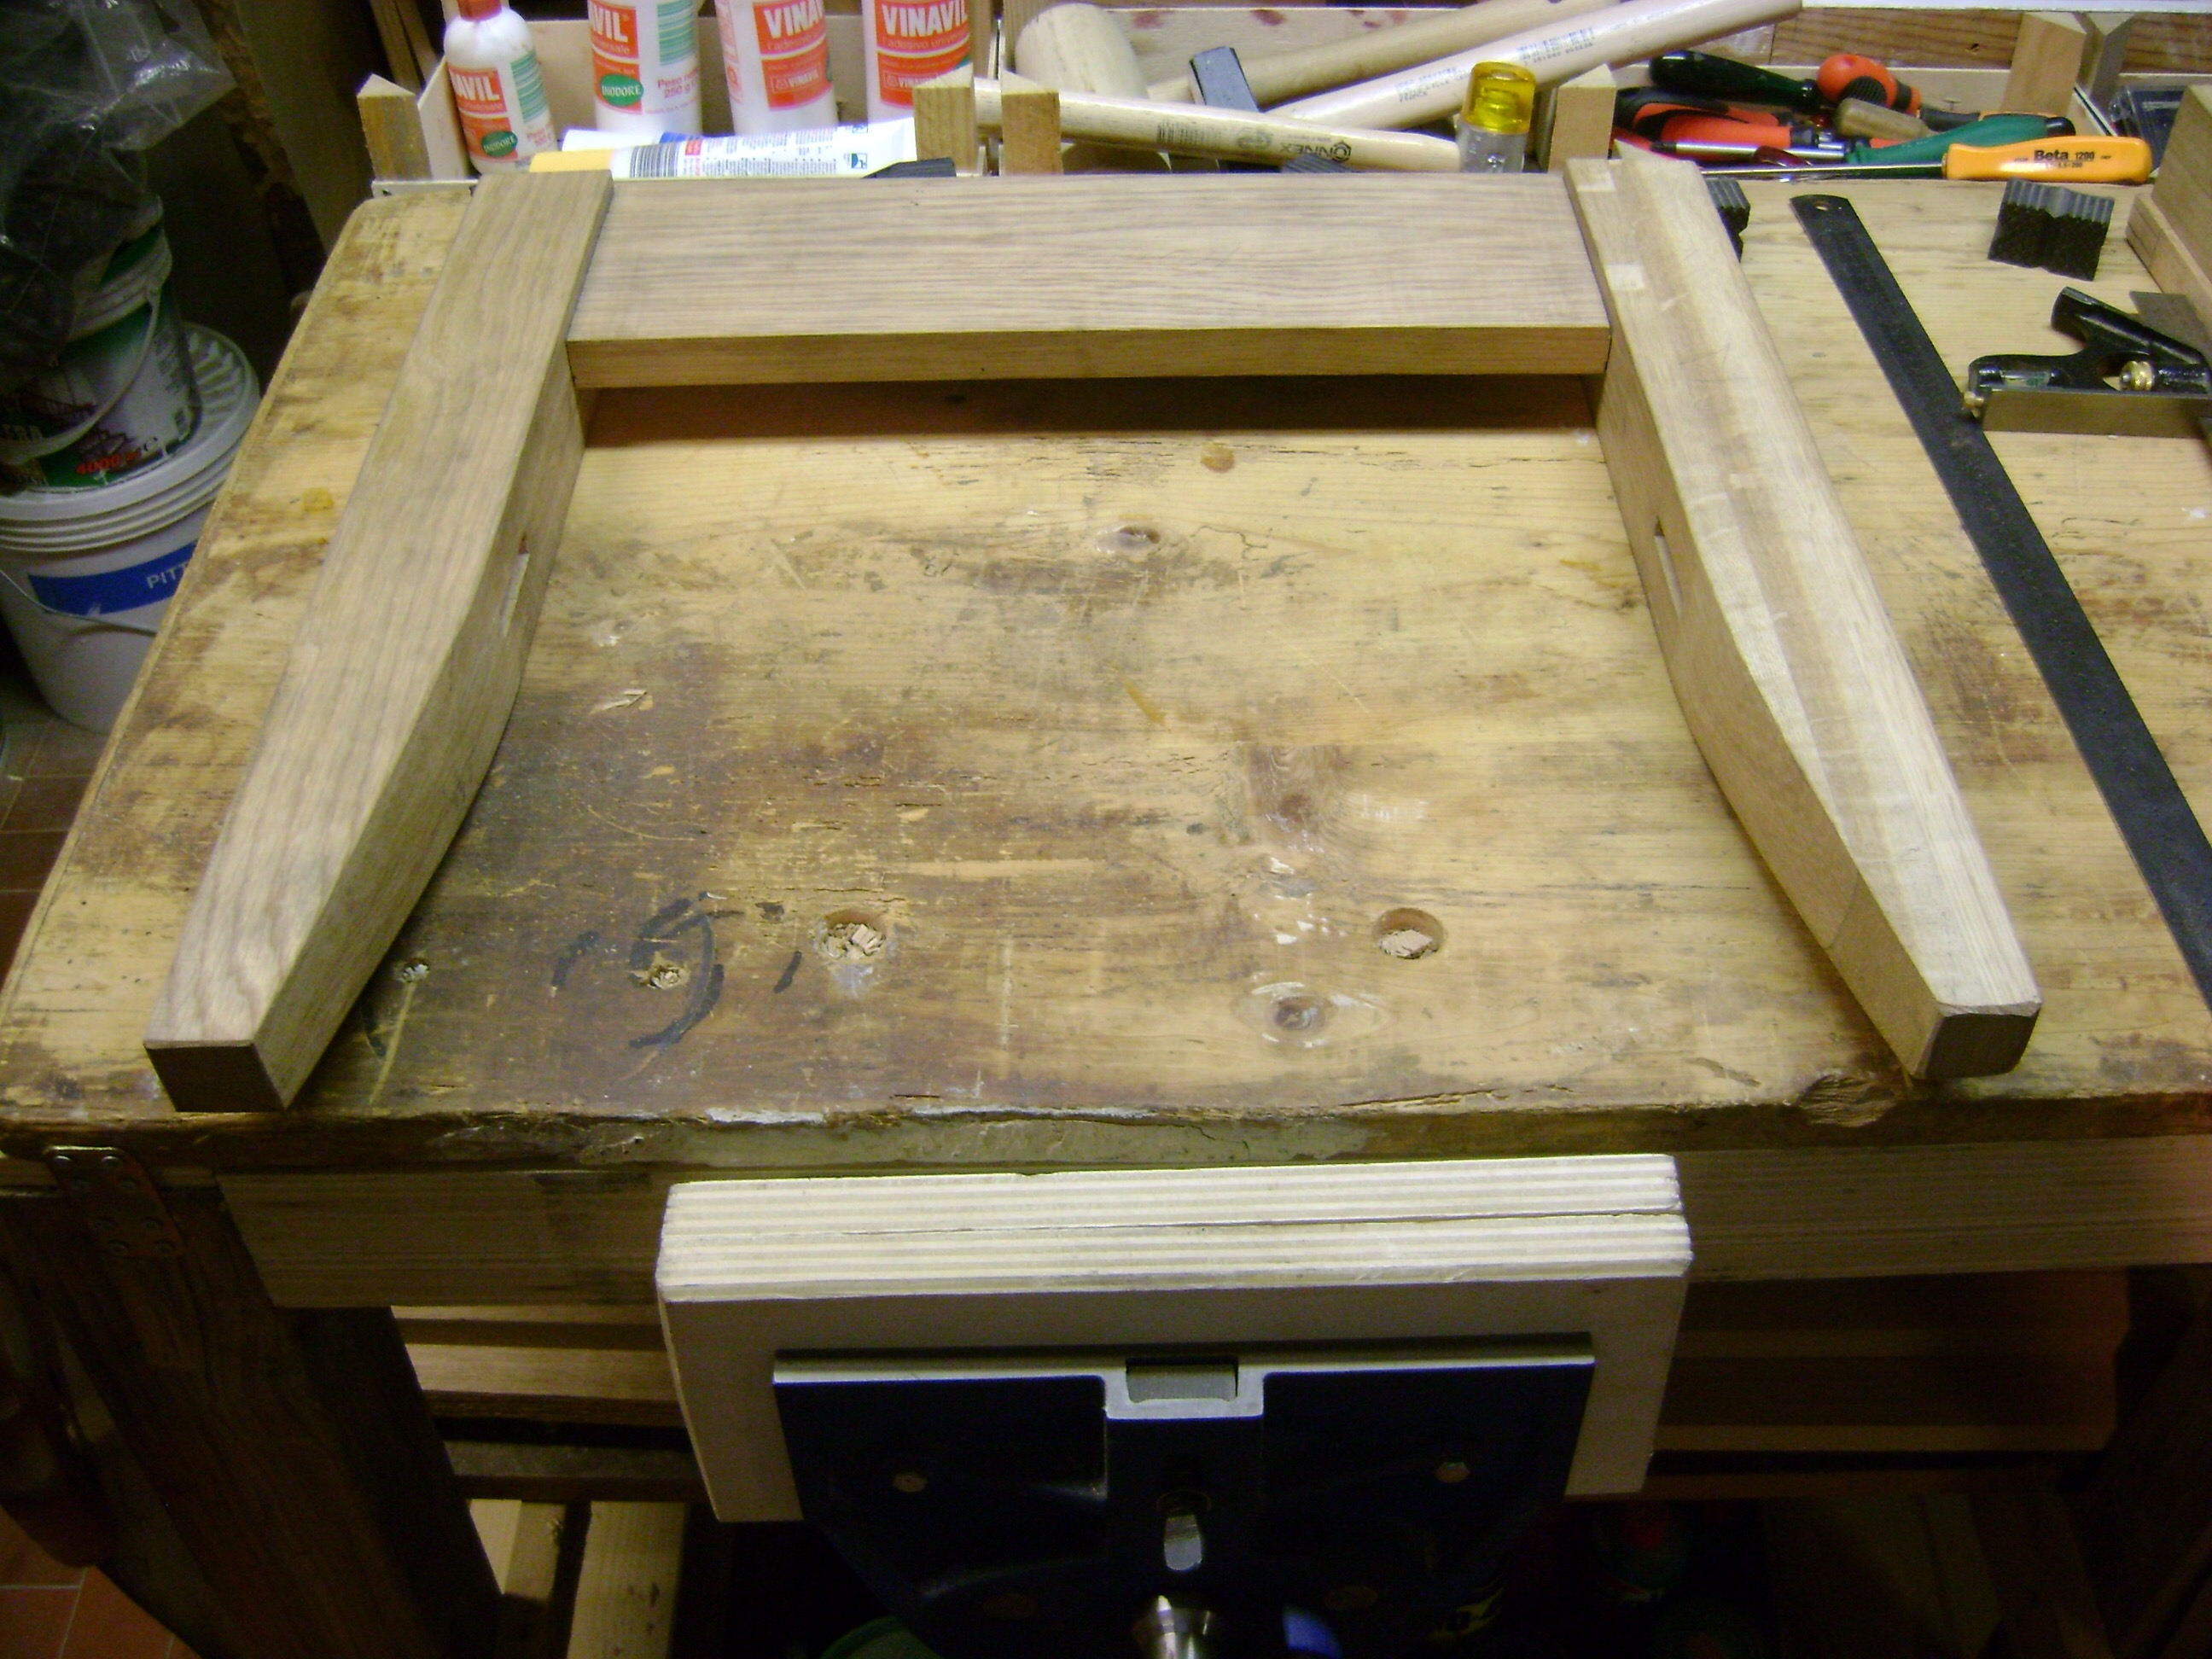
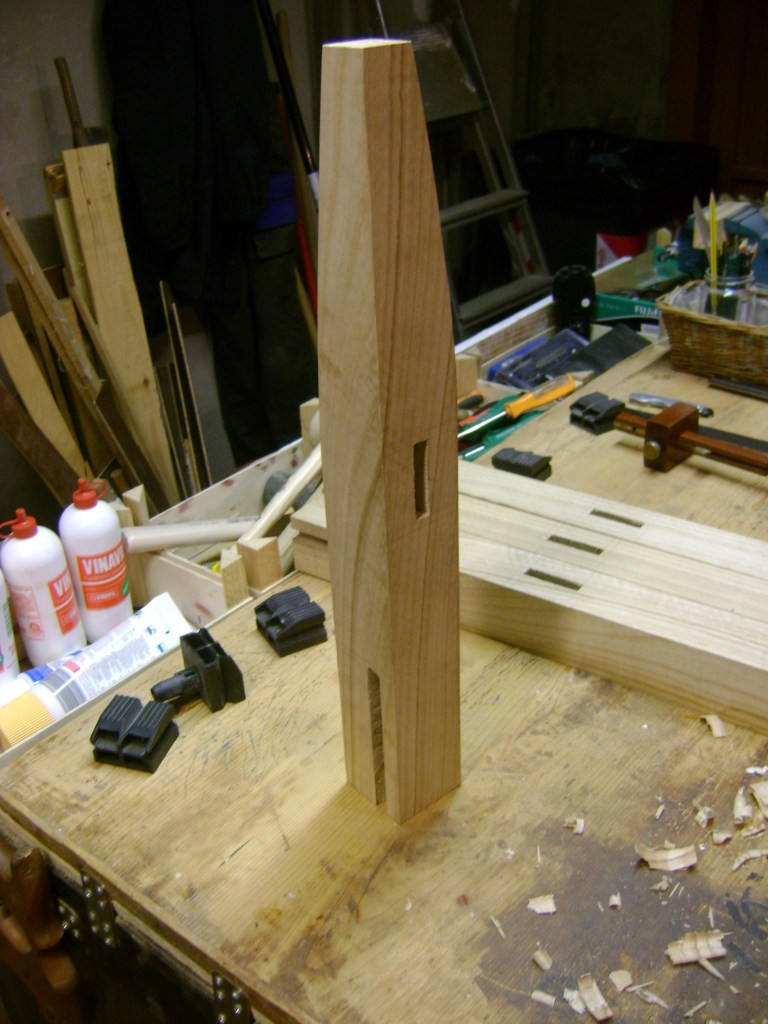
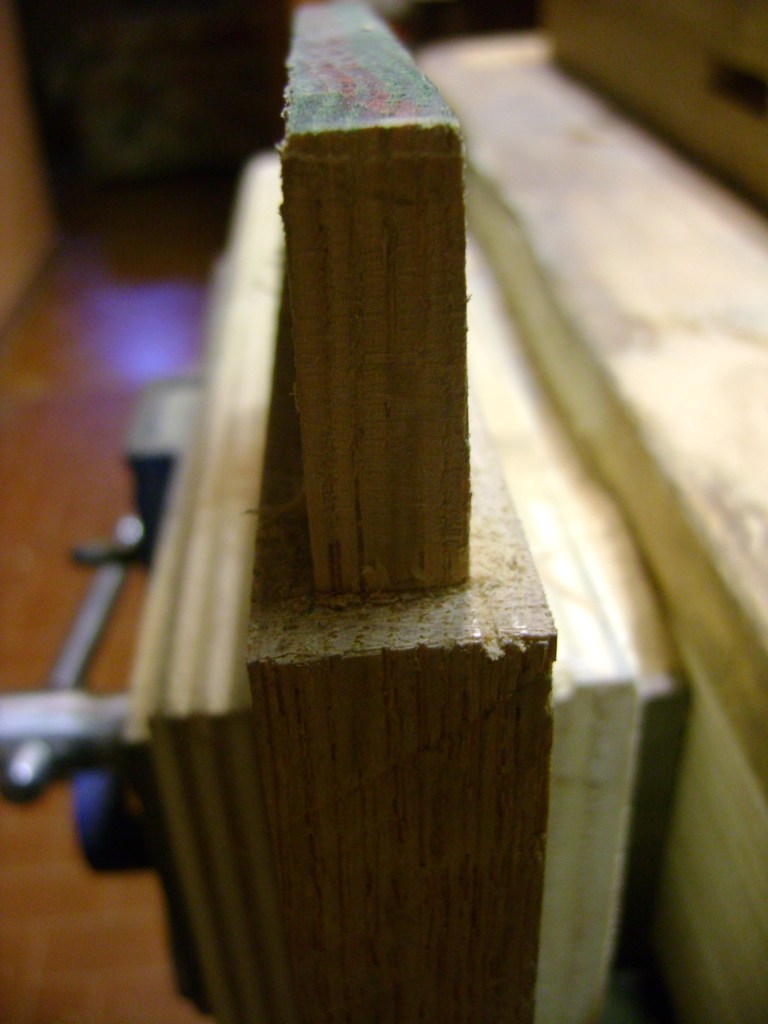
INCASTRO TENONE E MORTASA
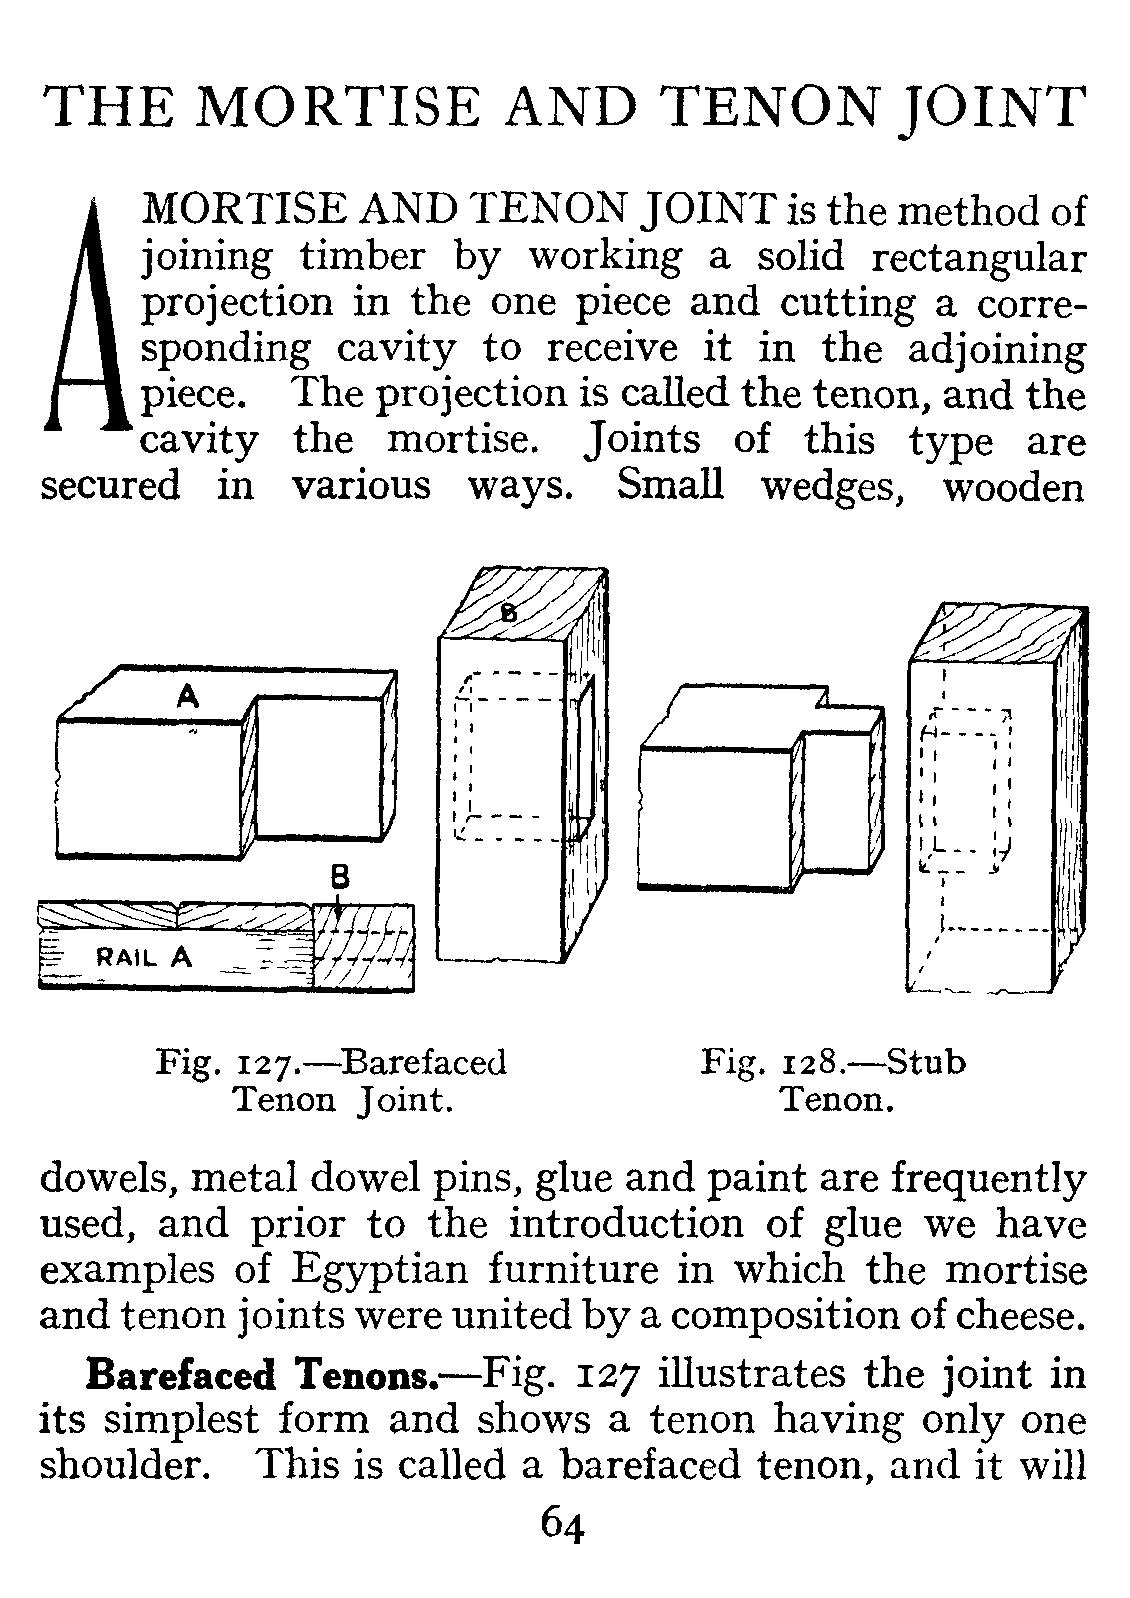
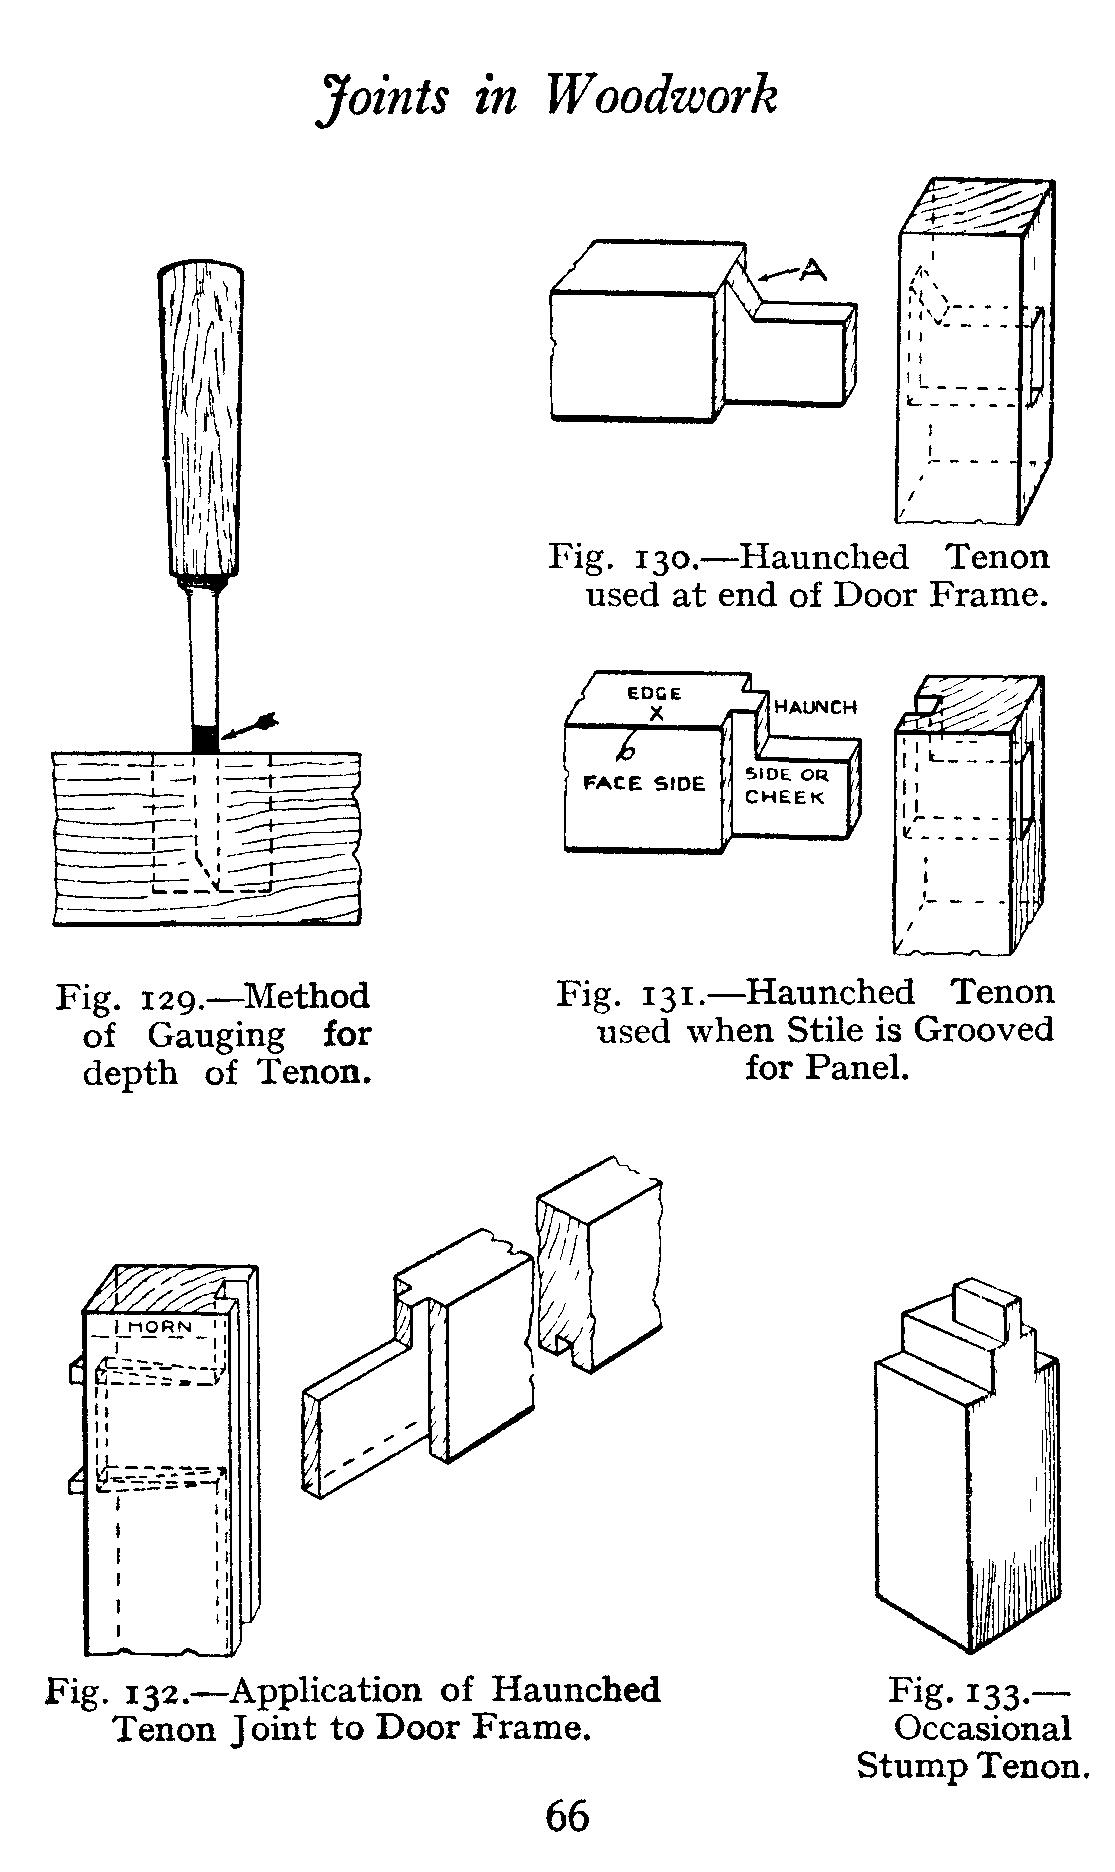
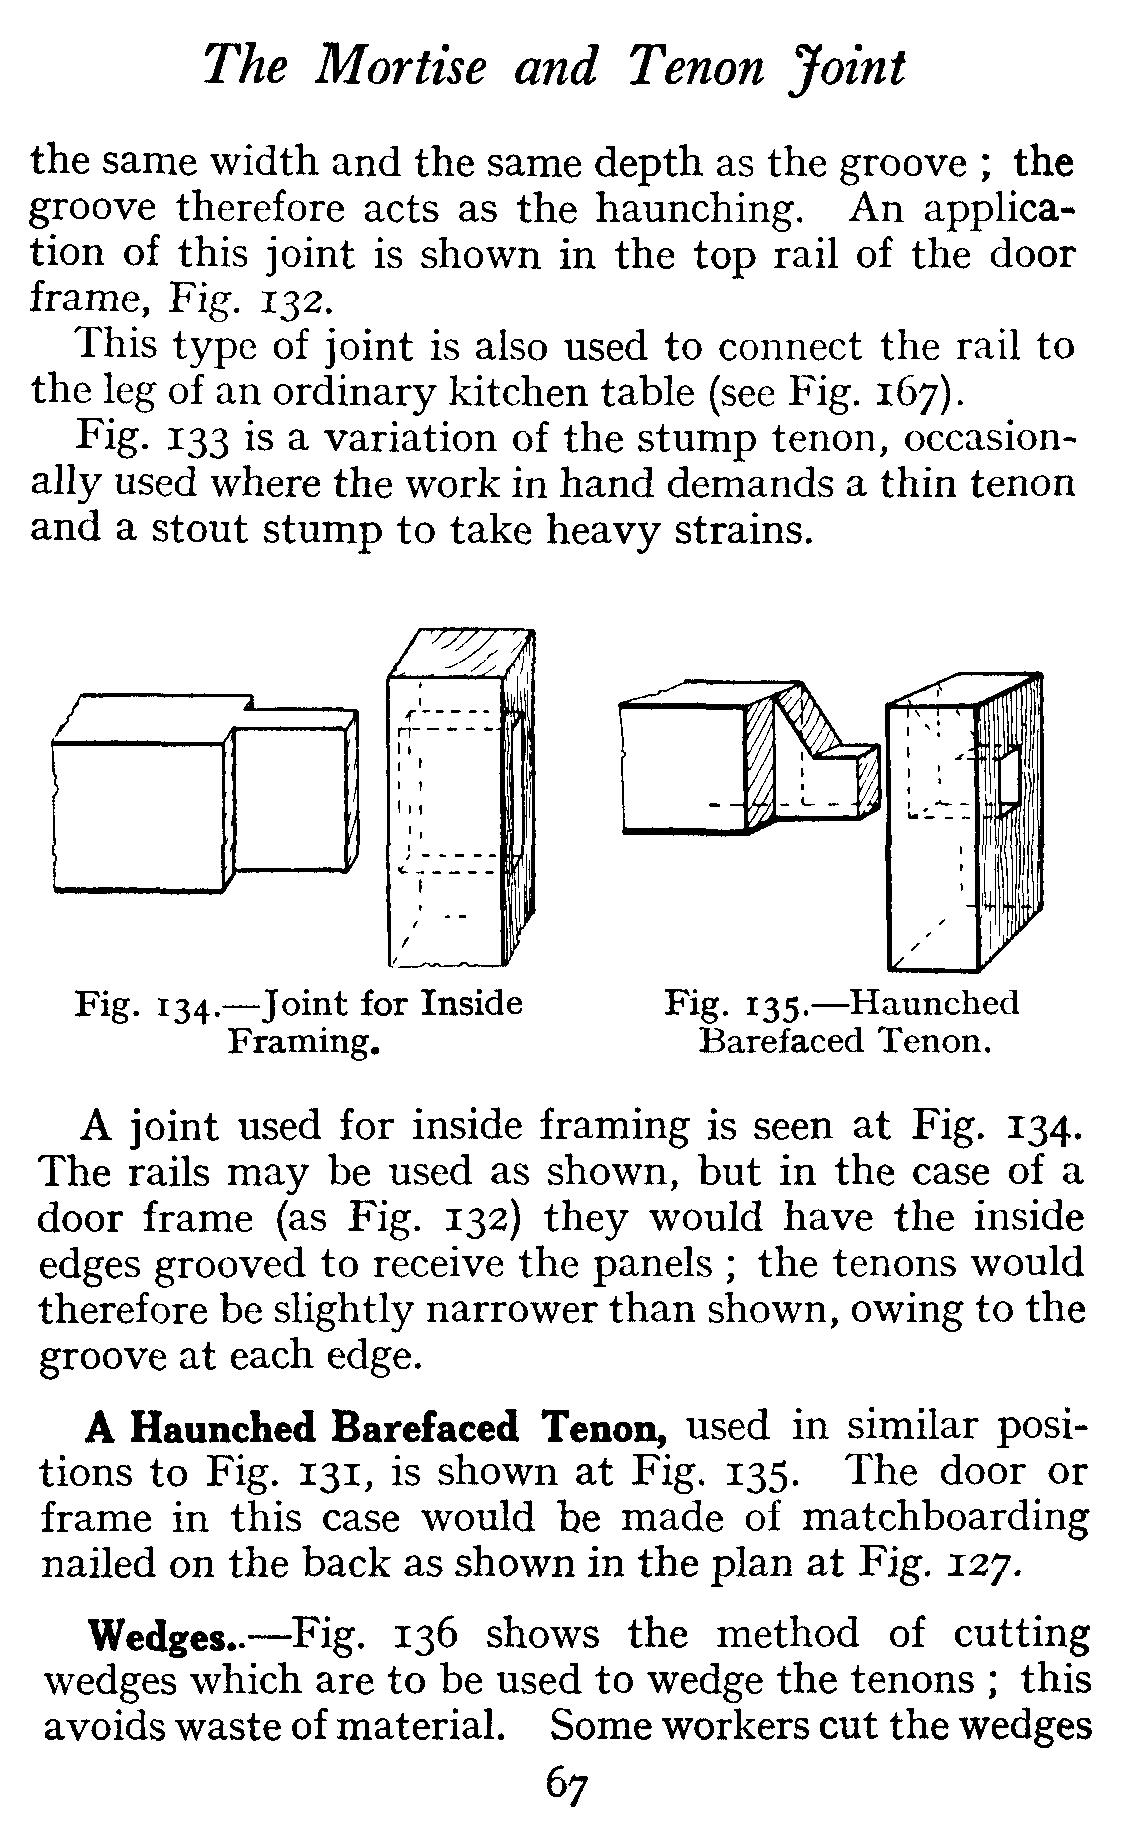
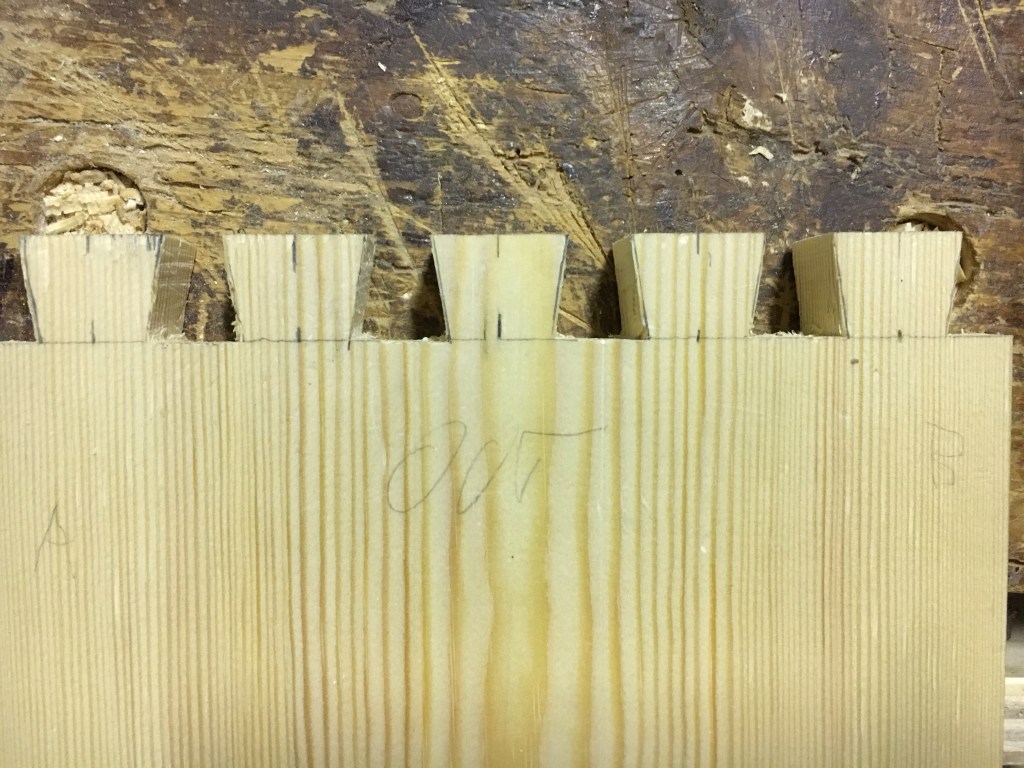
L’incastro tenone e mortasa è di gran lunga il più utilizzato sia per la sua relativa semplicità di esecuzione che per la resistenza e solidità che è in grado di offrire. È presente in centinaia di manufatti come ad esempio sedie, tavoli, librerie, scrivanie, letti, finestre, scale, porte e moltissimi altri ancora.
Esistono tre principali varianti di incastro tenone e mortasa. Tenone e mortasa passante (con o senza cuneo), tenone e mortasa cieca e tenone e mortasa a mezzo tenone.
Volendo ridurre ai minimi termini, l’incastro consiste nell’inserire l’estremità opportunamente sagomata (tenone) di uno dei due pezzi di legno da unire, all’interno della cavità (mortasa) ricavata nell’altro pezzo di legno.
INCASTRO A CODA DI RONDINE
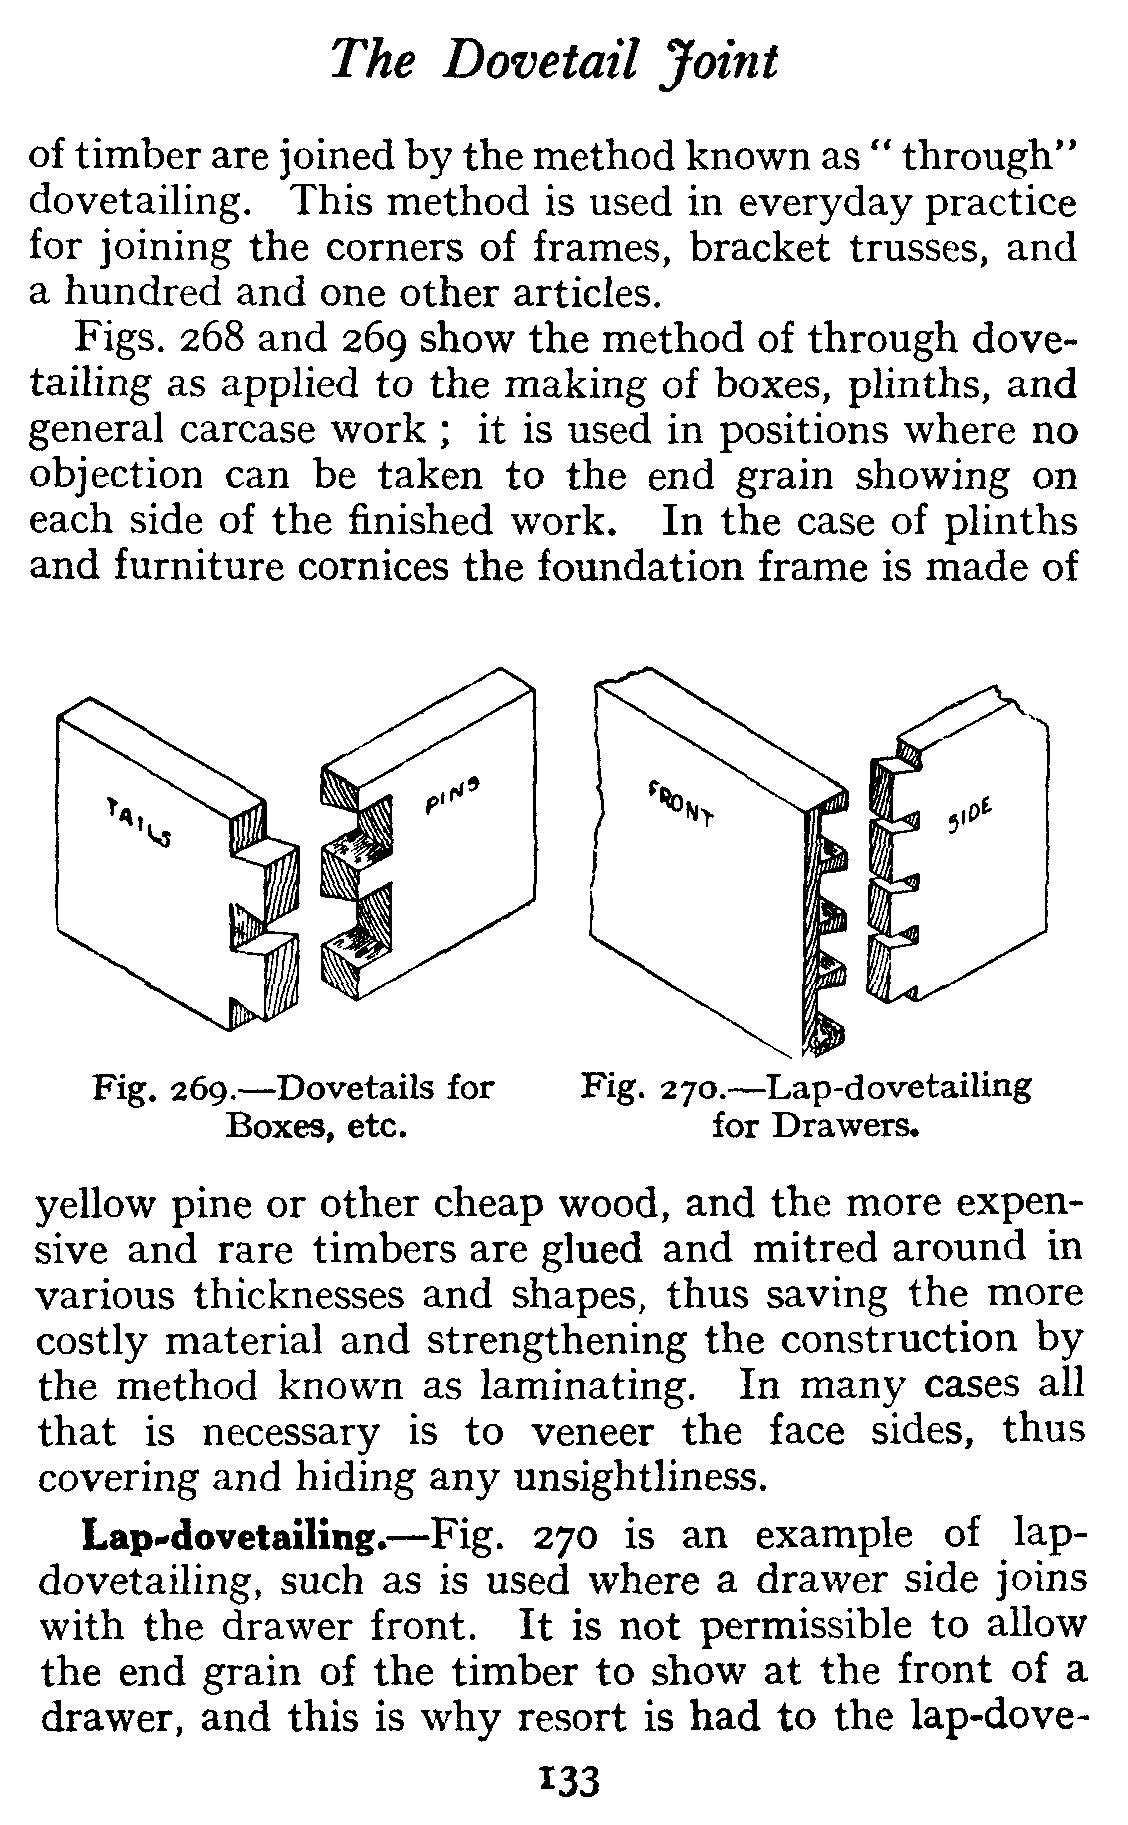
Tra i tre presi in esame l’incastro a coda di rondine è il più difficoltoso da eseguire a causa della particolarità della tracciatura e dei tagli inclinati da eseguire. Per contro offre una resistenza e solidità nettamente superiori agli altri due tipi di incastro. Viene utilizzato generalmente nell’esecuzione di cassetti e di scatole e comunque in qualsiasi struttura nella quale debba essere garantita la massima tenuta.
Esistono principalmente due tipi di incastro a coda di rondine. La coda di rondine aperta (o passante) e la coda di rondine semi nascosta.
Sempre generalizzando al massimo, questo tipo di incastro viene eseguito accoppiando le estremità dei due pezzi di legno, creando sull’estremità del primo pezzo da unire delle sporgenze (code) che andranno a collocarsi dentro a delle cavità (zoccoli) ricavate sull’estremità del secondo pezzo.

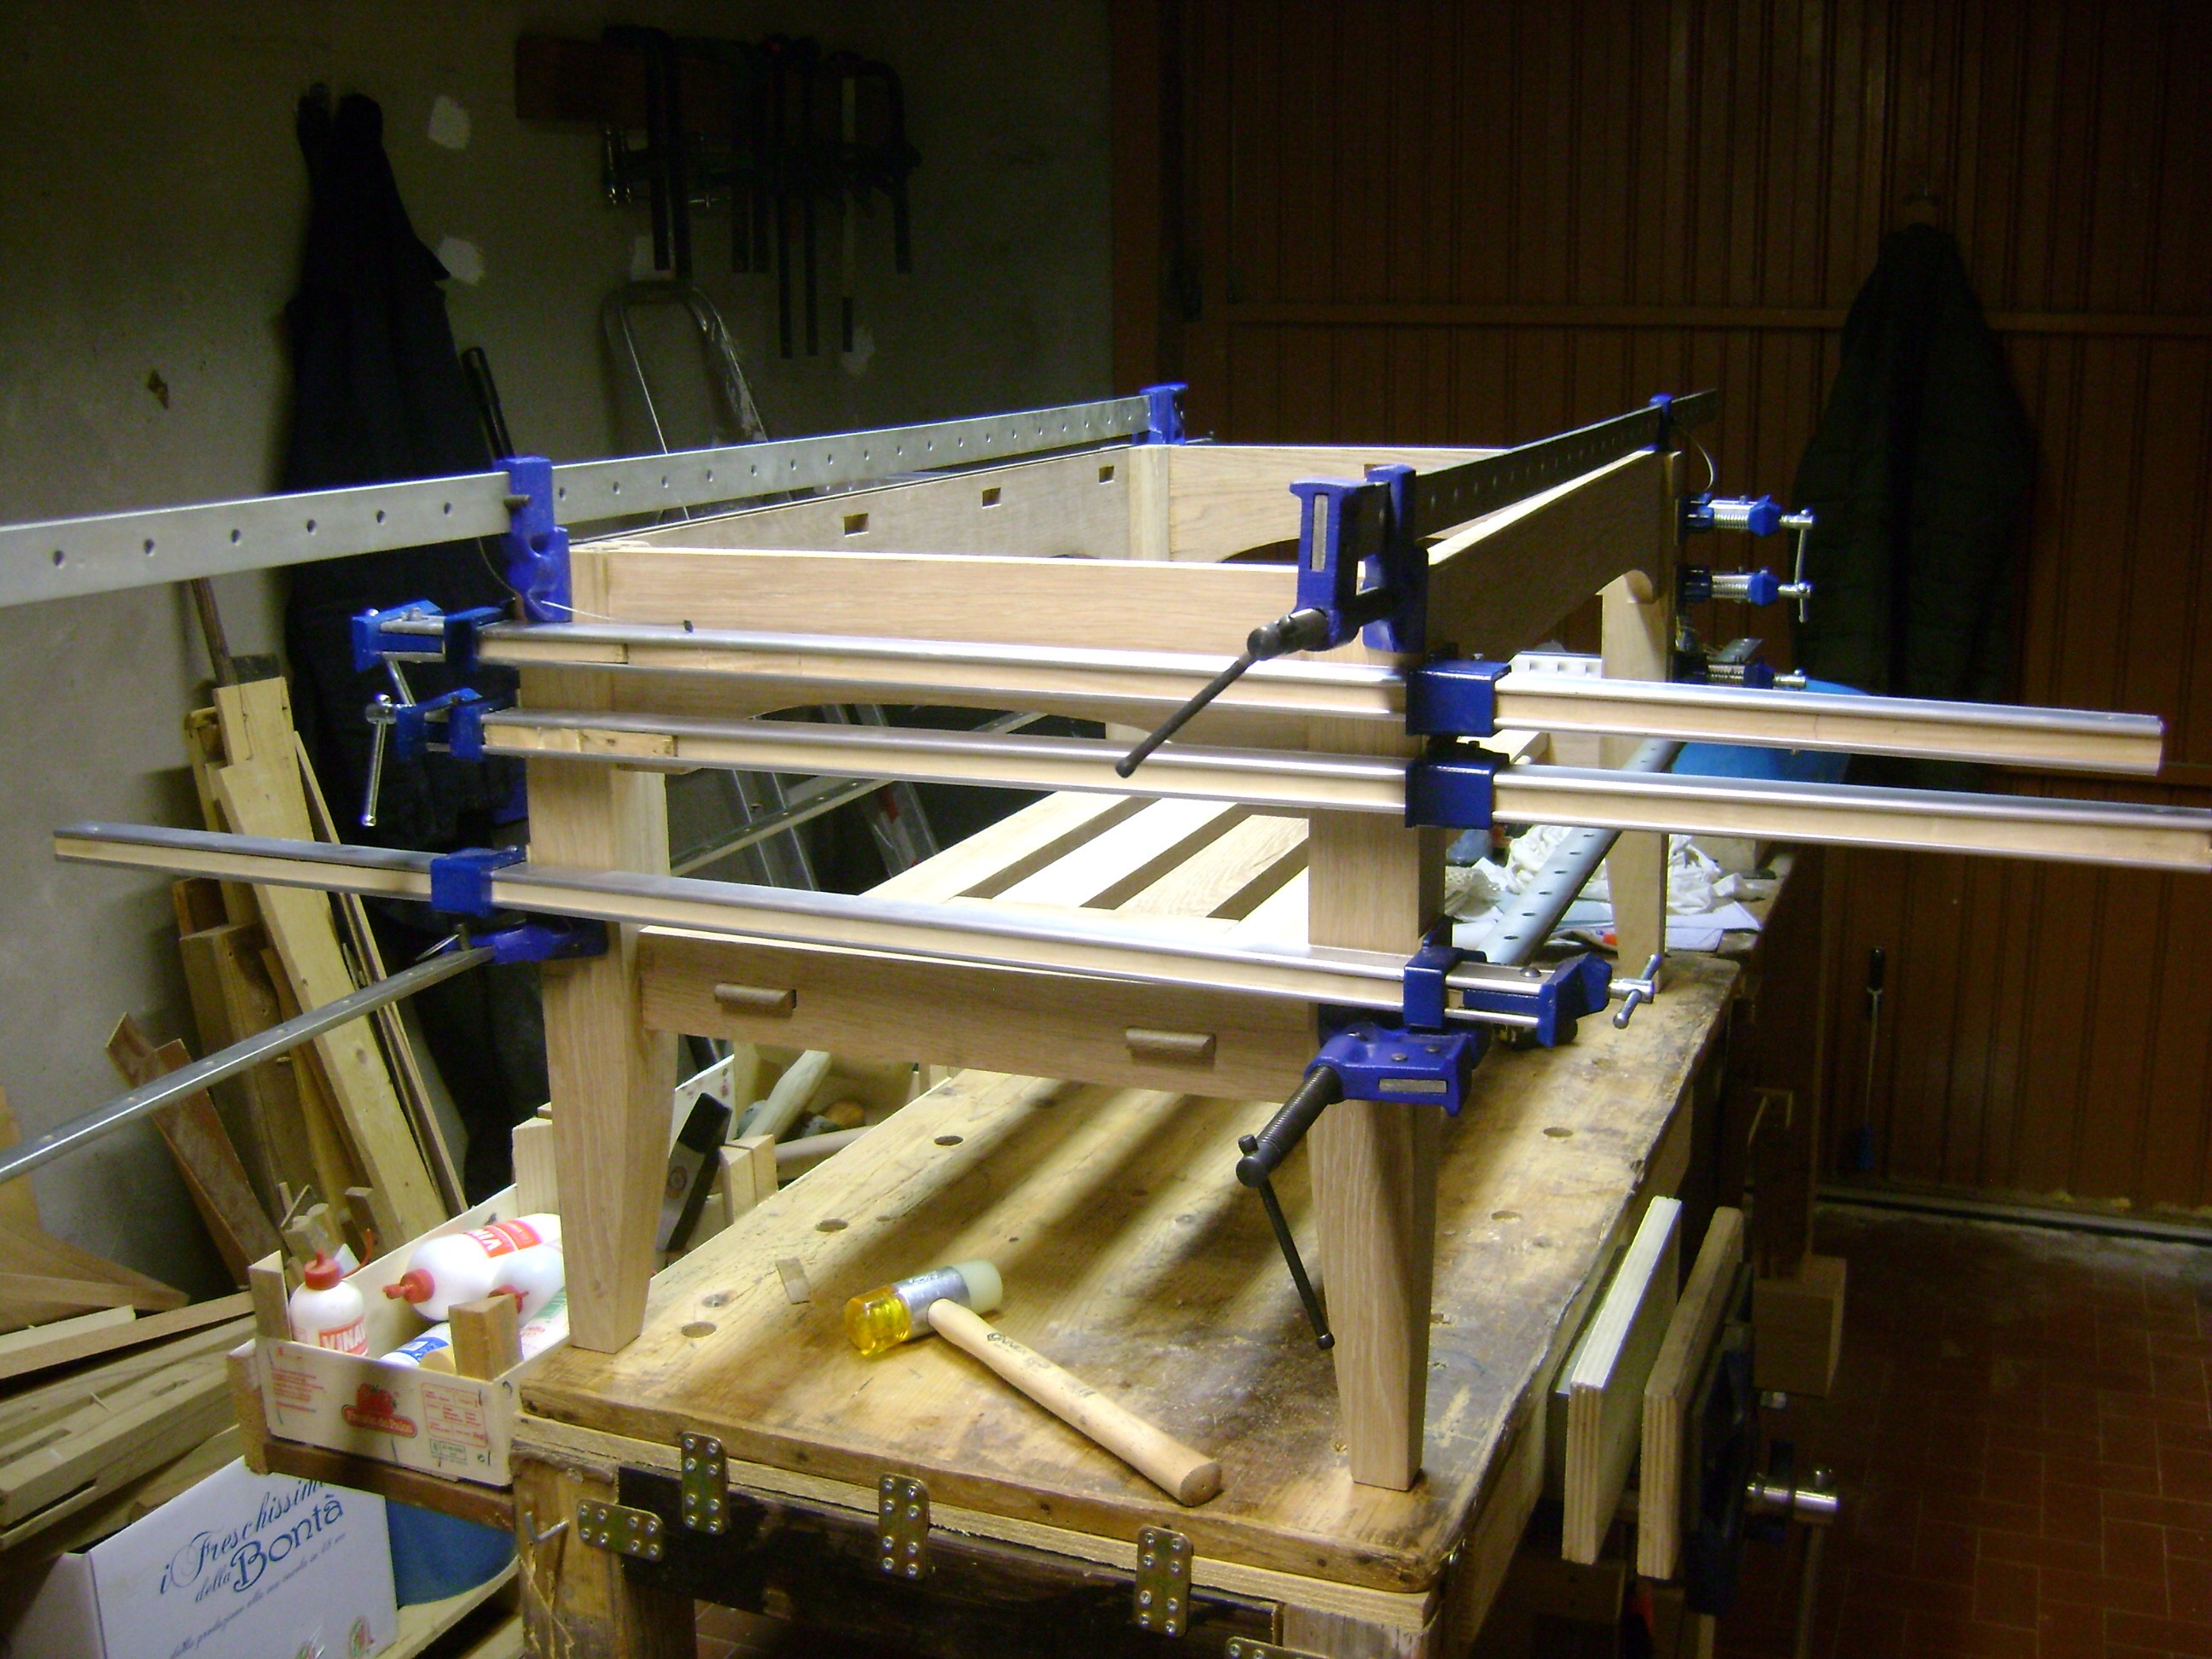
Le parti da unire devono essere ben spianate e squadrate, evitando nodi ed altre imperfezioni del legno. Quindi si lavorano i pezzi di legno da giuntare, seguendo le tecniche che vedremo nei prossimi post, e provando a secco (senza colla) gli incastri così ottenuti, apportando le opportune modifiche sino a quando non saremo soddisfatti del risultato.
Perchè l’incastro possa dirsi ben realizzato questo non dovrebbe risultare nè troppo stretto nè eccessivamente lasco (allentato) e tale da potersi sostenere da solo senza l’ausilio di colle, chiodi o viti, mediante il semplice attrito delle parti in contatto. Quando avremo raggiunto questo risultato potremo procedere all’incollaggio finale delle parti dell’incastro.
Nei post che seguiranno vedremo nello specifico come effettuare tutte queste operazioni partendo dalle tre tipologie di incastro di cui abbiamo accennato.
—————————————————————
Nowadays many pieces of furniture are simply assembled with screws, wooden plugs and glue without any particular type of joint. And perhaps it is also for this reason that they are often destined not to last over time. The resistance and flexibility of a piece of furniture, a chair, a table or a wardrobe, is determined by various factors, first of all the quality of wood used, but also the type of assembly that has been used. The modern furniture, as mentioned, are often made without using any type of joint, relying essentially on glue and screws. Unfortunately, without the appropriate joints, the wood, which is affected by variations in temperature and humidity of the place where it has been placed varies in size, even some centimeters and this, together with the stresses to which it is subjected (think about how many when we move a table or chairs or a piece of furniture), if the furniture is not well made with some joints, it will have, as inevitable consequences, detachments, excessive movements, poor rigidity and even some breaks. There is a reason therefore if for hundred years the craftsmen have built the furniture relying mostly on the strenghth of the joints and only secondarily to the glue, nails and screws. Furniture if treated with due care, is destined to last for hundreds years. Before creating a joint in the wood we have to consider some particularities such as the essence we are working on, the type of construction we want to achieve, its intended use and obviously the type of joint itself. As mentioned, the wood is subject to mutations due to temperature and humidity and can therefore varies in shape and size. When we make joints we have to consider these movements so that they have to allow them. The choice of the type of joint must also take into account the grain of the wood used, the final use of the product and more.Depending on the type of joint to be made, then, we will have to use the hand tool that is most suitable for its construction. As far as I could verify the tools that I mostly use for almost all the joints are: flexometer (meter), pencil, marking knife, combination square and sliding square, marking gauge, dovetail or tenon saw, chisels, hammer, router plane and a n. 4 or n. 5 plane. There are hundreds if not thousands of possible joints and making a classification is particularly difficult, also because new ones are constantly being created. Traditionally they are grouped by large categories so we have the unions by wood (such as the cheek unions), the dado joints, with wooden plugs, joint by edge (to join wooden boards by the edges), mortise and tenon joints and dovetail joints. In practice, I found that most of the joints can be made with the three following types. Starting from the simplest we find the dado joints, the mortise and tenon joints and the dovetail joints. The dado joint is probably the simplest to made but also the one that gives less solidity. It is used to make shelves, shelves for bookcases, but also in chests of drawers, for the back of the drawers or for simple boxes. The end of one of the two pieces to be joined is inserted into the groove created in the other piece. Because of its intrinsic structure, this joint does not guarantee particular resistance to lateral stresses, especially those that are divergent unless the entire structure to be constructed is strengthened with the insertion of some mortise and tenon joints or with the add of a panel on the back of the furniture that improves its rigidity. There are two main types of dado joints: through housing dado, and stepped housing dado (with the stepped back housing dado variation).
The mortise and tenon joint is by far the most used for its relative simplicity of execution and for the strength and solidity that provides. It is present in hundreds of furniture such as chairs, tables, bookcases, desks, beds, windows, stairs, doors and many others. There are three main variants of mortise and tenon joints. Through mortise and tenon (with or without wedge), the haunched mortise and tenon and the mortise and stub tenon. If we want to reduce to a minimum the joint is made by inserting a shaped end of one piece of wood (tenon) into a recess (mortise) obtained in the other piece of wood.
The dovetail joint is the most difficult to perform due to the particularity of the tracing and the cuts to be made at a certain angle. On the other hand, it offers a strength and solidity that is clearly superior to any other joint. It is generally used in making drawers and boxes and in any case in which the maximum strenght must be guaranteed. There are mainly two types of dovetail joints. The through dovetail and the half blind dovetail. Generalizing as usual we can say that this type of joint is performed by joining the ends of the two pieces of wood, creating on the end of the first piece to join some tails that will be placed inside the recesses created at the end of the second piece.
The parts to be joined must be absolutely flat and dead square, avoiding knots and other imperfections of the wood. Then we work the pieces of wood to be joined, following the techniques that we will see in the next posts, and we will try to assembly the joint without glue and making the appropriate changes until we are satisfied with the result. A perfect joint should be not too tight nor excessively loose and such to be able to support itself without the aid of glues, nails or screws by the simple friction of the parts in contact. When we have achieved this result we can proceed to the final gluing of the parts of the joint. In future posts we will see specifically how to perform all these operations starting from the three types of joints we have mentioned.

Lascia un commento