
Giocattoli in legno. Aeroplanino e trenino in legno / Wooden toys. Little wooden plane and train
English translation at the end of the article
Ci stiamo avvicinando al Natale e le festività portano sempre una ventata di gioia e di ottimismo. Le famiglie si riuniscono e le persone si ritrovano per stare insieme e passare momenti spensierati ed in allegria. Ma il Natale è soprattutto la festa dei
bambini ed è a loro che ho pensato quando, qualche mese fa, ho voluto sperimentare qualche piccolo lavoretto nel campo dei giocattoli. Ho realizzato quindi un piccolo aeroplanino (rimasto allo stato grezzo) ed un trenino del west. Entrambi sono stati realizzati interamente con legno di abete riciclato da un vecchio pallet, qualche scarto di multistrato e poco altro. Materiale povero e a costo zero per ricordare che un tempo i giocattoli erano semplici, non essendo importante il loro valore intrinseco ma la fantasia e la gioia di chi ci giocava.
Allego sotto alcuni scatti delle fasi della lavorazione del trenino (purtroppo dell’aeroplanino ho solo le foto finali).
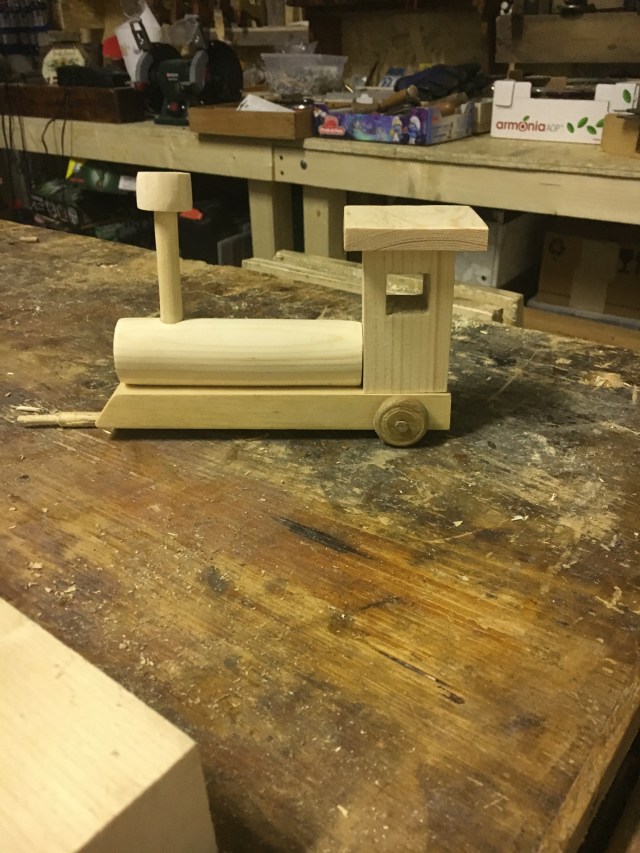
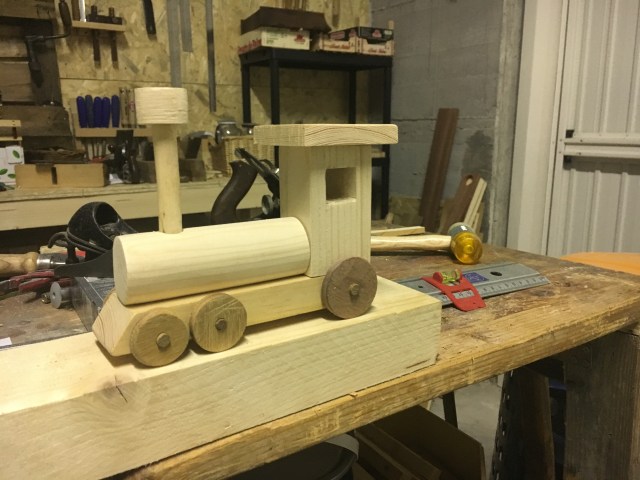
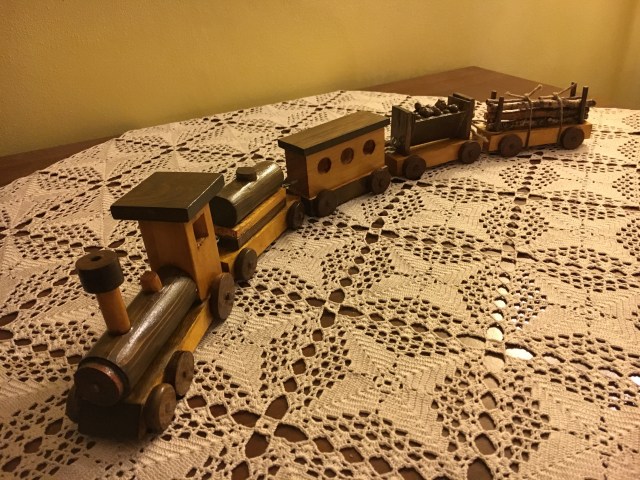
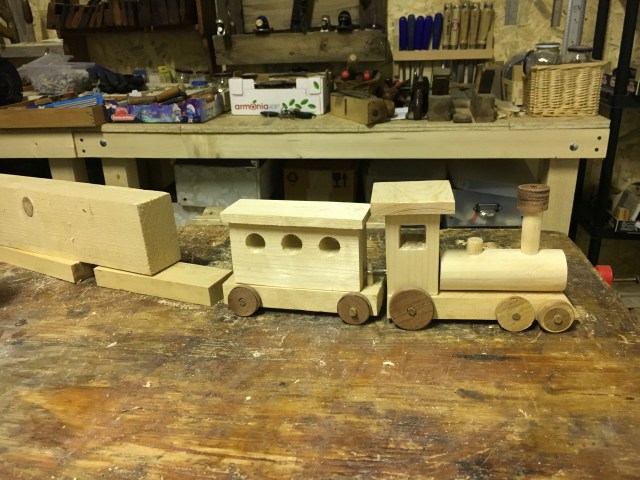
Partendo da un blocco di legno di abete ricavato da un vecchio pallet ho dapprima provveduto a piallarlo ed a squadrarne le superfici. In seguito ho cominciato a sezionare le basi dei vagoni (cinque vagoni compresa la locomotiva). Tutti i vagoni sono della stessa lunghezza eccetto la locomotiva che è leggermente più lunga ed il vagone carbone che è leggermente più corto. La locomotiva è composta da tre parti fondamentali: la base, la cabina e la caldaia. Ho aggiunto quindi la canna fumaria con il comignolo opportunamente sagomato, il fronte del vano caldaia (si vede nelle prossime foto) e smussato la base per rendere l’effetto di locomotiva spartineve. Quindi ho scavato una mortasa per creare la finestrella della cabina, incollato il tetto della cabina stessa e sagomato le ruote ricavate da dei pezzetti di legno duro (mogano) avanzati da precedenti lavori. Le ruote sono montate su degli assi fatti in legno opportunamente sagomati e fatti passare all’interno della base. La foratura praticata all’interno delle basi è leggermente più larga del diametro degli assi così da permettere la rotazione degli stessi e quindi delle ruote che altrimenti non potrebbero girare. Le ruote, solo per la locomotiva, sono di tre grandezze diverse.

Il successivo è il vagone portacombustibile. La sagomatura del cilindro mi ha portato via un pò di tempo perché non volendo usare strumenti elettrici come il tornio, ho provveduto con pialla e vastringa e successivamente con raspe, lime e carta abrasiva sino ad ottenere l’effetto desiderato (lo stesso procedimento l’ho utilizzato per il vano caldaia della locomotiva). Sopra il cilindro ho praticato un foro ed inserito un legno di forma sferica per rappresentare l’apertura del vano portacombustibile. Sotto al cilindro infine ho posto due rialzi incollati tra loro e successivamente due perni che permettono l’unione dei vagoni mediante dei semplici gancetti in ferro.
Di seguito quindi il vagone passeggeri. La sua realizzazione è semplice. Dal pezzo di legno sagomato ho praticato tre fori passanti (le finestrelle) con il Girabacchino e successivamente incollato il tettino.
Il penultimo vagone è il vagone porta carbone. Per farlo ho utilizzato dei pezzetti di scarto di multistrato per creare i montanti del vano e la struttura dello stesso. Quindi li ho sagomati ed incollati per creare l’effetto a V del vano ed ho inserito i montanti nella base del vagone praticando due piccole mortase nello stesso. Successivamente ho praticato due fori nei montanti e nel vano portacarbone ed unito il tutto con due spine di legno. Il vano è ribaltabile, quindi ruota sulle spine di legno ed è riempito di sassolini di tufo leggero incollati tra loro.
L’ultimo vagone è quello portalegname. Ho semplicemente praticato quattro fori vicino alle estremitá della base ed inserito quattro legnetti per creare i sostegni. Quindi ho ricercato nei boschi vicino (non è stato difficile) dei pezzetti di legno e posti sul vagone, tenuti assieme da una semplice cordicella. I legni sono incollati tra loro per evitare che si muovano troppo e successivamente passati con un protettivo per prevenirne l’essiccazione e la rottura.
La fase di finitura è stata eseguita preparando dapprima la superficie usando la carta abrasiva (grana 180 e 400) e successivamente stendendo tre mani di gommalacca ambrata (le parti con il colore giallastro) e tre mani di impregnante color noce (le parti più scure). Infine due mani di protettivo lucidante su tutti i pezzi.
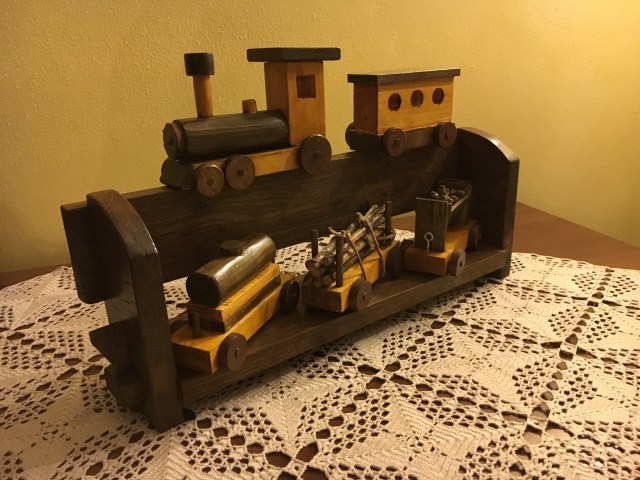
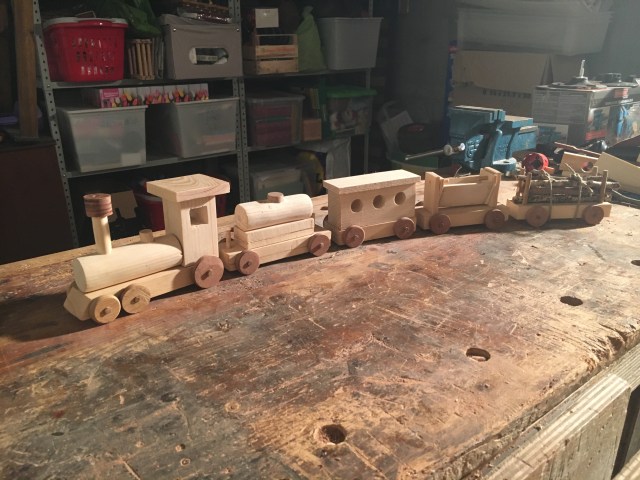
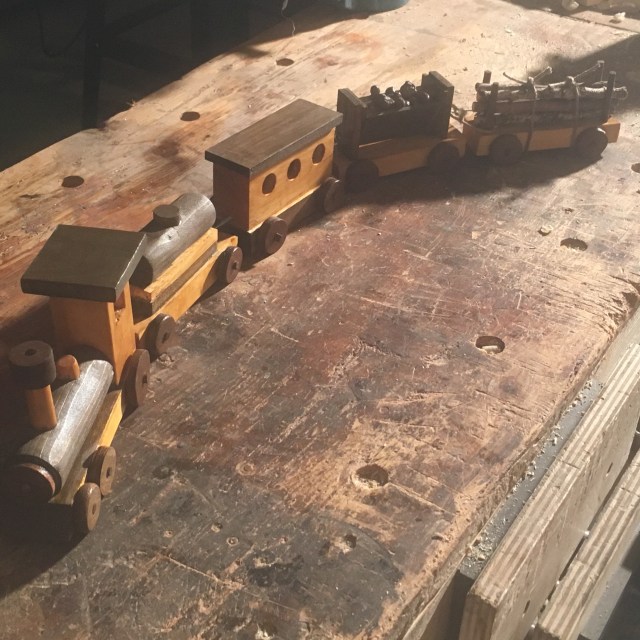
Sopra, il trenino finito ed agganciato e sotto disassemblato e posto sul supporto a mensola.
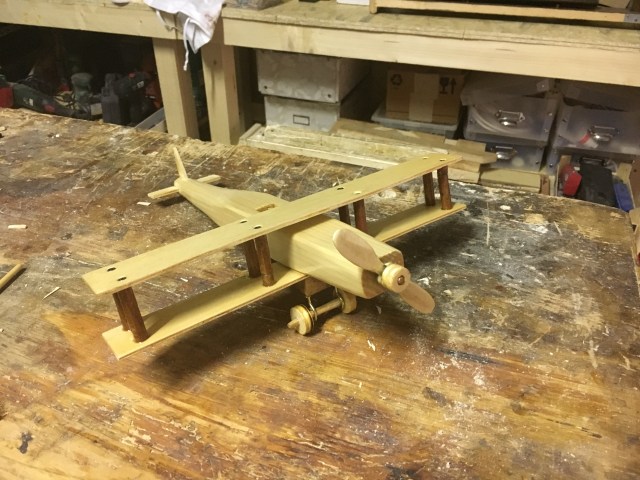
Anche per la realizzazione dell’aeroplanino ho utilizzato legno di abete di un bancale e qualche pezzetto di multistrato leggero. Per i sostegni delle ali, dei pezzetti di mogano avanzato da precedenti lavorazioni, opportunamente sagomati. La fusoliera dell’aereo (in abete) è stata modellata con pialle e vastringa e successivamente rifinita con raspe e lime. Ho creato le scanalature per ospitare le tre alette della coda (in multistrato), la mortasa per il posto pilota, ed il sistema del carrello composto da un sostegno sul quale sono avvitati due gancini con passante un asse che tiene le ruote e che permette alle stesse di poter girare liberamente. Quindi ho realizzato le ali con del multistrato ed avvitato le stesse con delle piccolissime viti ad ogni sostegno sia superiore che inferiore. Le ali sono unite alla fusoliera mediante due viti e della colla posta sulla base inferiore. L’elica rotante è ricavata da un pezzetto di multistrato leggero ed avvitato alla fusoliera. Ho inserito una rondella di ferro nel sistema di bloccaggio per facilitarne la rotazione.
E’ tutto! Auguro di cuore buone feste!
We are approaching Christmas and the holidays always bring a breath of joy and optimism. Families gather and people meet to be together and spend carefree moments in joy. But Christmas is mostly childrens party and it is to them that I thought when, a few months ago, I wanted to experiment some small work in the field of toys. I then made a small airplane (not finished yet) and a train of the west. Both were made entirely from recycled fir wood from an old pallet, some waste plywood and little else. Poor and no cost material to remember that once toys were simple, and that it wasn’t important how much they cost but the imagination and joy of those who played with them.
I attach below some shots of the phases of the processing of the train (unfortunately for the airplane I only have some final photos).
Starting from a block of fir taken from an old pallet I first proceeded to plane it and to square the faces. Later I began to dissect the bases of the wagons (five wagons including the locomotive). All wagons are of the same length except the locomotive which is slightly longer and the coal wagon is slightly shorter. The locomotive consists of three basic parts: the base, the cabin and the boiler. I then added the chimney with the appropriately shaped chimney pot, the front of the boiler compartment (see in the next photos) and beveled the base to make the effect of a snowplow locomotive. So I make a square mortise to create the window of the cabin, glued the roof of the same cabin and shaped the wheels made from some pieces of hardwood (mahogany) left by previous works. The wheels are mounted on wooden shafts suitably shaped and made to pass inside the base. The drilling inside the bases is slightly wider than the diameter of the axes so as to allow the rotation of the same axes and therefore the wheels that otherwise could not turn. The wheels, only for the locomotive, are of three different sizes.
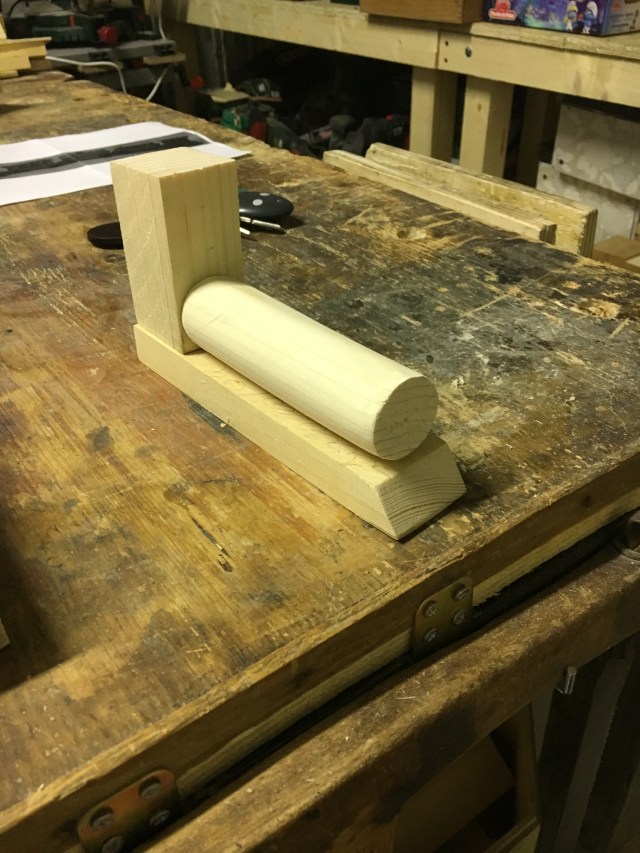
The next is the fuel wagon. The shape of the cylinder took me some time because I did not want to use electric tools like the lathe, so I proceeded with plane and spokeshave and then with rasps, files and abrasive paper to obtain the desired effect (the same procedure that I used for the boiler compartment of the locomotive). Above the cylinder I drilled a hole and inserted a spherical wood to represent the opening of the fuel compartment. Finally, under the cylinder, I placed two ribs glued together and then two pins that allow the union of the wagons through simple iron hooks.
Then the passenger wagon. Its realization is simple. From the shaped piece of wood I made three through holes (the windows) with the hand brace and then glued the roof.
The penultimate wagon is the coal-carrying wagon. To do this I used pieces of waste plywood to create the uprights and the structure. So I shaped and glued them together to create the V-shaped effect of the compartment and I inserted the uprights in the base of the wagon, making two small mortises in the base. Then I drilled two holes in the uprights and in the rod holder and joined together with two wooden pins. The compartment is foldable, then rotates on wooden pins and is filled with light tuff pebbles glued together.
The last wagon is the timber wagon. I simply drilled four holes near the ends of the base and inserted four sticks to create the supports. So I searched in the near woods (it was not difficult) some pieces of wood and placed on the wagon, held together by a simple string. The woods are glued together to prevent them from moving too much and subsequently passed with a protective layer to prevent them from drying and breaking.
The finishing phase was carried out by first preparing the surface using the abrasive paper (grit from 180 to 400) and then applying three coats of amber shellac (the parts with the yellowish color) and three coats of impregnating walnut color (the darker parts) . Finally two coats of protective polishing on all the pieces. Above, the train is finished and hooked and under disassembled and placed on the bracket support.
For the construction of the airplane I also used fir wood from a pallet and a few pieces of light plywood. For the support of the wings some pieces of mahogany left by previous works, suitably shaped. The fuselage of the plane (in fir) was shaped with planes and spokeshave and then finished with rasps and files. I then created the grooves to pit in the three tail fins (in plywood), the mortise for the pilot seat, and the trolley system consisting of a support on which two hooks are screwed through an axle that holds the wheels and that allows the wheels to to turn freely. So I made the wings with plywood and screwed the same with very small screws at each support both upper and lower. The wings are joined to the fuselage by two screws and glue placed on the lower base. The rotating propeller is made from a piece of plywood and screwed to the fuselage. I inserted an iron washer into the locking system to facilitate the rotation.
That’s all. I just wanted to wish you a merry Christmas.

Lascia un commento