
Tecniche di piallatura / Planing technique
English translation at the end of the article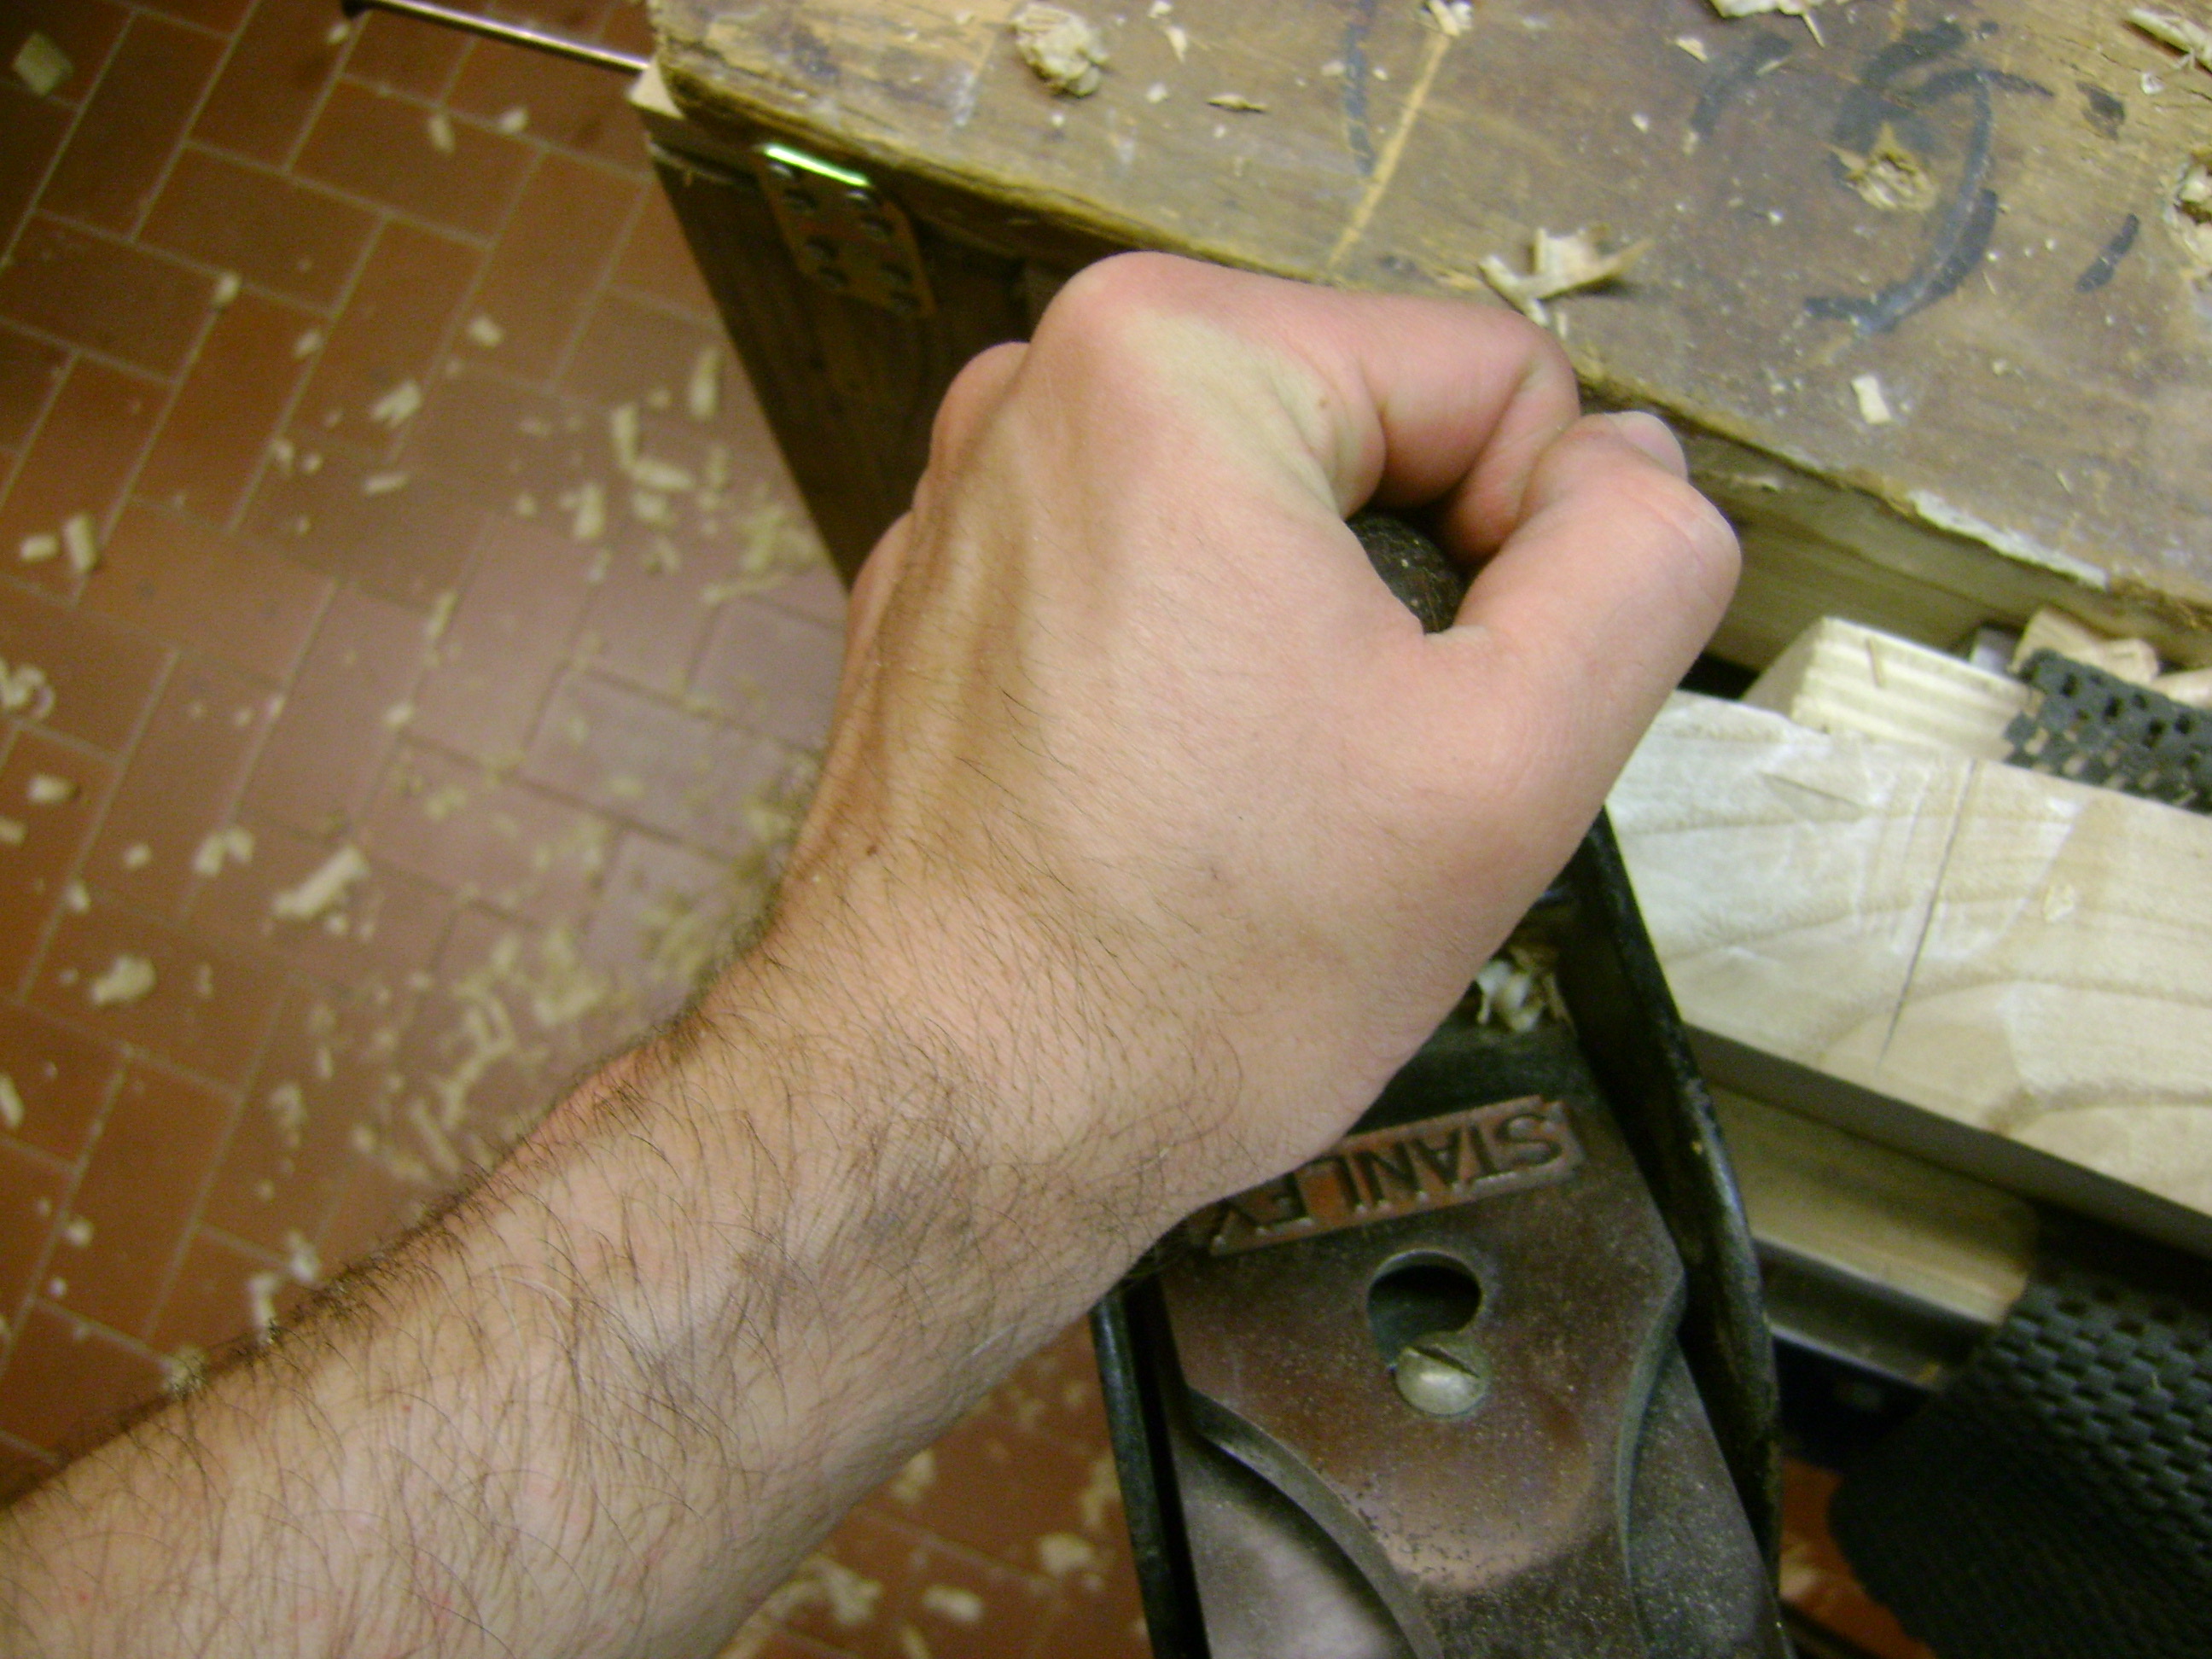 La piallatura e’ una tecnica che si impara nel tempo con molta pazienza e dedizione. In effetti l’approccio può risultare difficoltoso e si potrebbe essere tentati di lasciar perdere
prima del tempo in quanto la piallatura non riesce bene o non riesce affatto.
Le mie prime esperienze con la piallatura sono state assolutamente deludenti. Non riuscivo in alcun modo a far uscire trucioli soddisfacenti ed i pezzi risultavano sempre inesorabilmente fuori squadra e non planari. Ma come spesso succede è proprio dagli insuccessi che nascono le maggiori soddisfazioni. Oggi posso affermare con certezza che non c’e’ lavorazione più appagante della piallatura. Riuscire a rendere liscia una superficie grezza, correggere imperfezioni nella planarità’ di un pezzo di legno, poter creare smussature, incavi, canali e molto, molto altro ancora.
Questo e’ quello che si può fare con una pialla. Quindi non fatevi prendere dallo scoraggiamento, ma abbiate fiducia e perseverate perchè si impara prima di quanto si possa credere.
A riprova di quanto sopra con il tempo ho comunque realizzato che gli insuccessi iniziali molto spesso non nascono tanto dall’imperizia nel movimento di piallatura, che spesso viene fatto correttamente e risulta naturale, quanto da un errato settaggio o da una non corretta affilatura o peggio ancora dalla qualità della pialla stessa.
Ci sono tanti aspetti che possono impedire una buona riuscita. Cercherò’ di riassumere alcuni elementi trattando in questo articolo solo a livello sommario l’azione di piallatura rimandandone l’approfondimento ad un secondo momento, quando prenderò in esame ad una ad una le più diffuse tipologie di pialla.
Detto questo, partiamo da alcuni punti fermi. Mi riferirò alle pialle in metallo, per quelle in legno rimando a prossimi post.
1) la pialla deve essere di buona qualità. Cercate pialle vintage da sistemare come i modelli Record, Stanley ed altre già citate nel precedente post, oppure sul mercato del nuovo marche come la Veritas, Lie Nielsen, o le orientali Qiangsheng, solo per citarne alcune. Evitate comunque le pialle dei vari Brico.
2) la pialla deve avere la suola perfettamente spianata, quantomeno vicino alla bocca da dove fuoriesce il tagliente, e deve essere il più possibile perpendicolare con i fianchi.
3) il tagliente deve essere affilato. Il grado al quale vogliamo affilare la pialla dipenderà dal tipo di lavorazione che dobbiamo fare, ma se il tagliente non è affilato a sufficienza il nostro lavoro verrà vanificato.
4) esistono pialle dedicate a diversi tipi di lavorazione. Anche se ve ne sono alcune che più di altre si prestano ad un utilizzo generico, e’ impensabile voler utilizzare una sola pialla per tutte le lavorazioni. Ve ne sono di specifiche a seconda che si abbia a che fare con grandi tavole, tavole grezze, legno di costa, legno di testa, ecc, quindi impariamo ad utilizzarle.
L’ azione di piallatura, ovvero il movimento da effettuare, e’ di per se’ molto semplice ed intuitivo ed avverrà naturalmente con il tempo.
Si afferra il manico posteriore della pialla con la mano destra e il pomello anteriore con la mano sinistra (o viceversa se si è mancini). La mano destra fornisce la spinta alla pialla, la mano sinistra controlla la direzione di piallatura e fornisce la giusta pressione alla pialla sul pezzo di legno da lavorare. Nell’azione di piallatura non occorre mettere tanta forza, specialmente sul pomello anteriore. La piallatura deve affidarsi quasi esclusivamente all’affilatura del tagliente ed al giusto settaggio della pialla, non nella forza impressa nel movimento. Anche la postura da assumere da parte dell’operatore è importante. Poniamo la gamba sinistra avanti rispetto alla destra così da fornire maggiore stabilità e coordinazione al movimento.
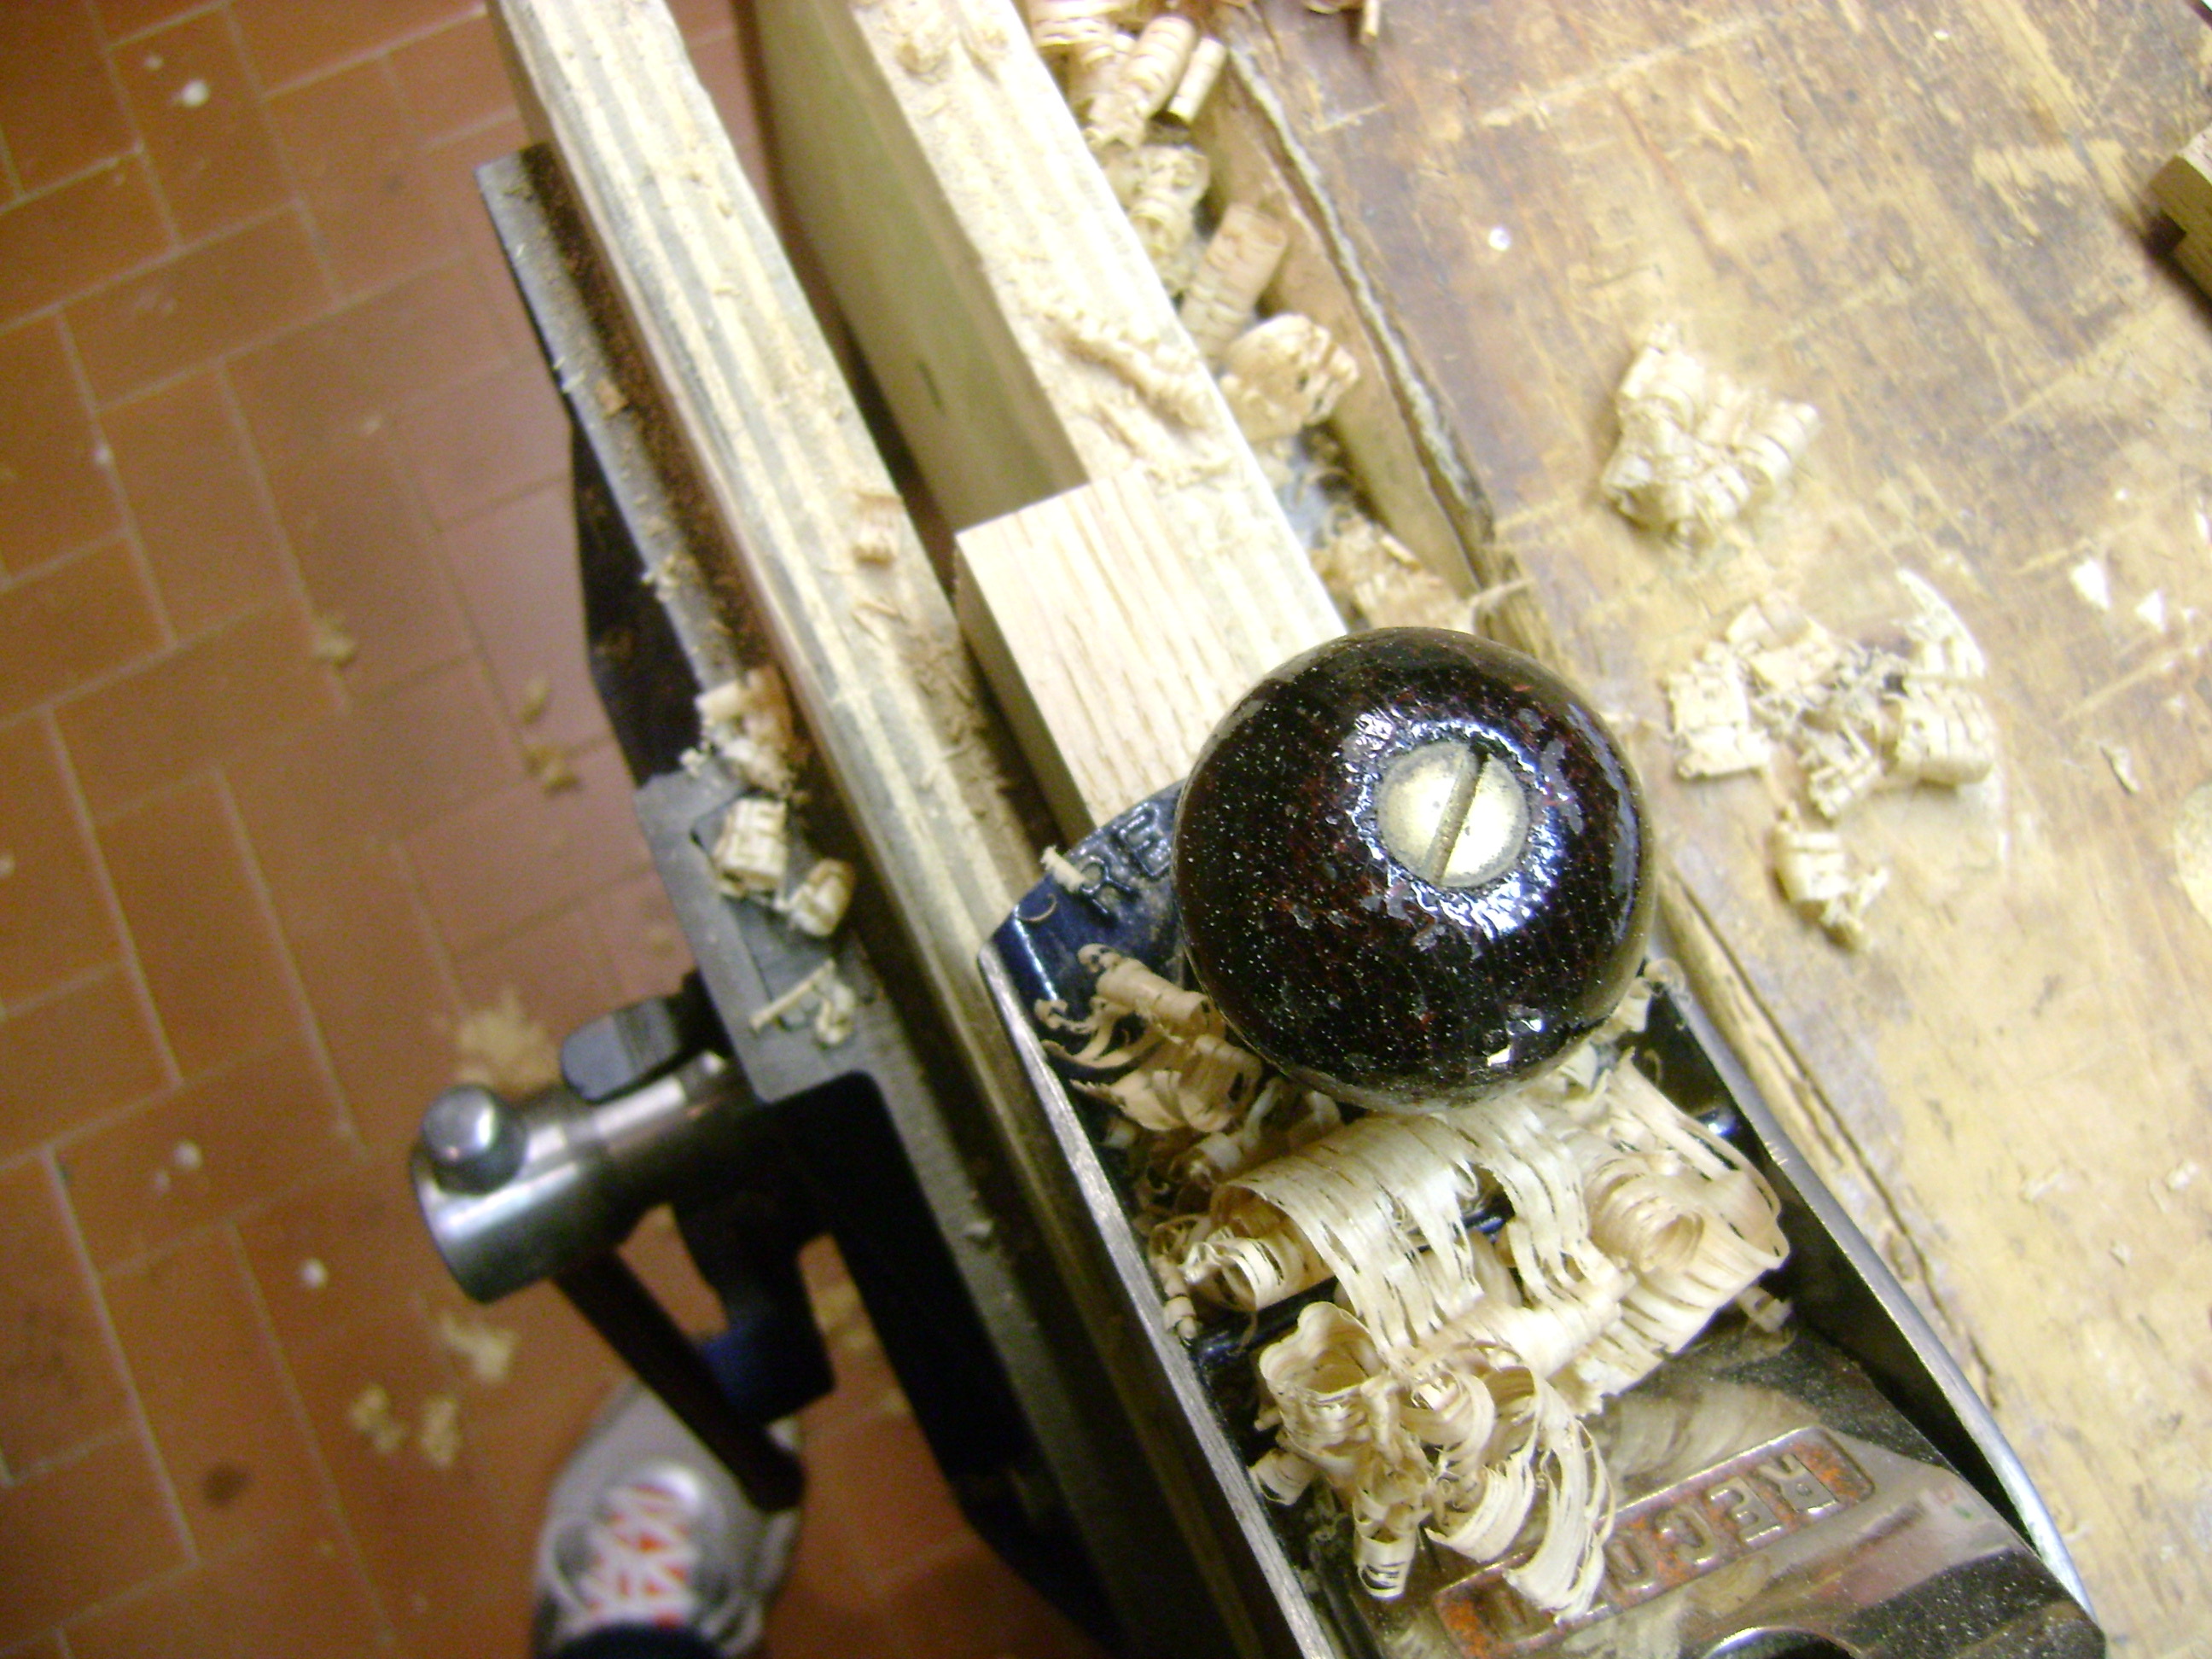
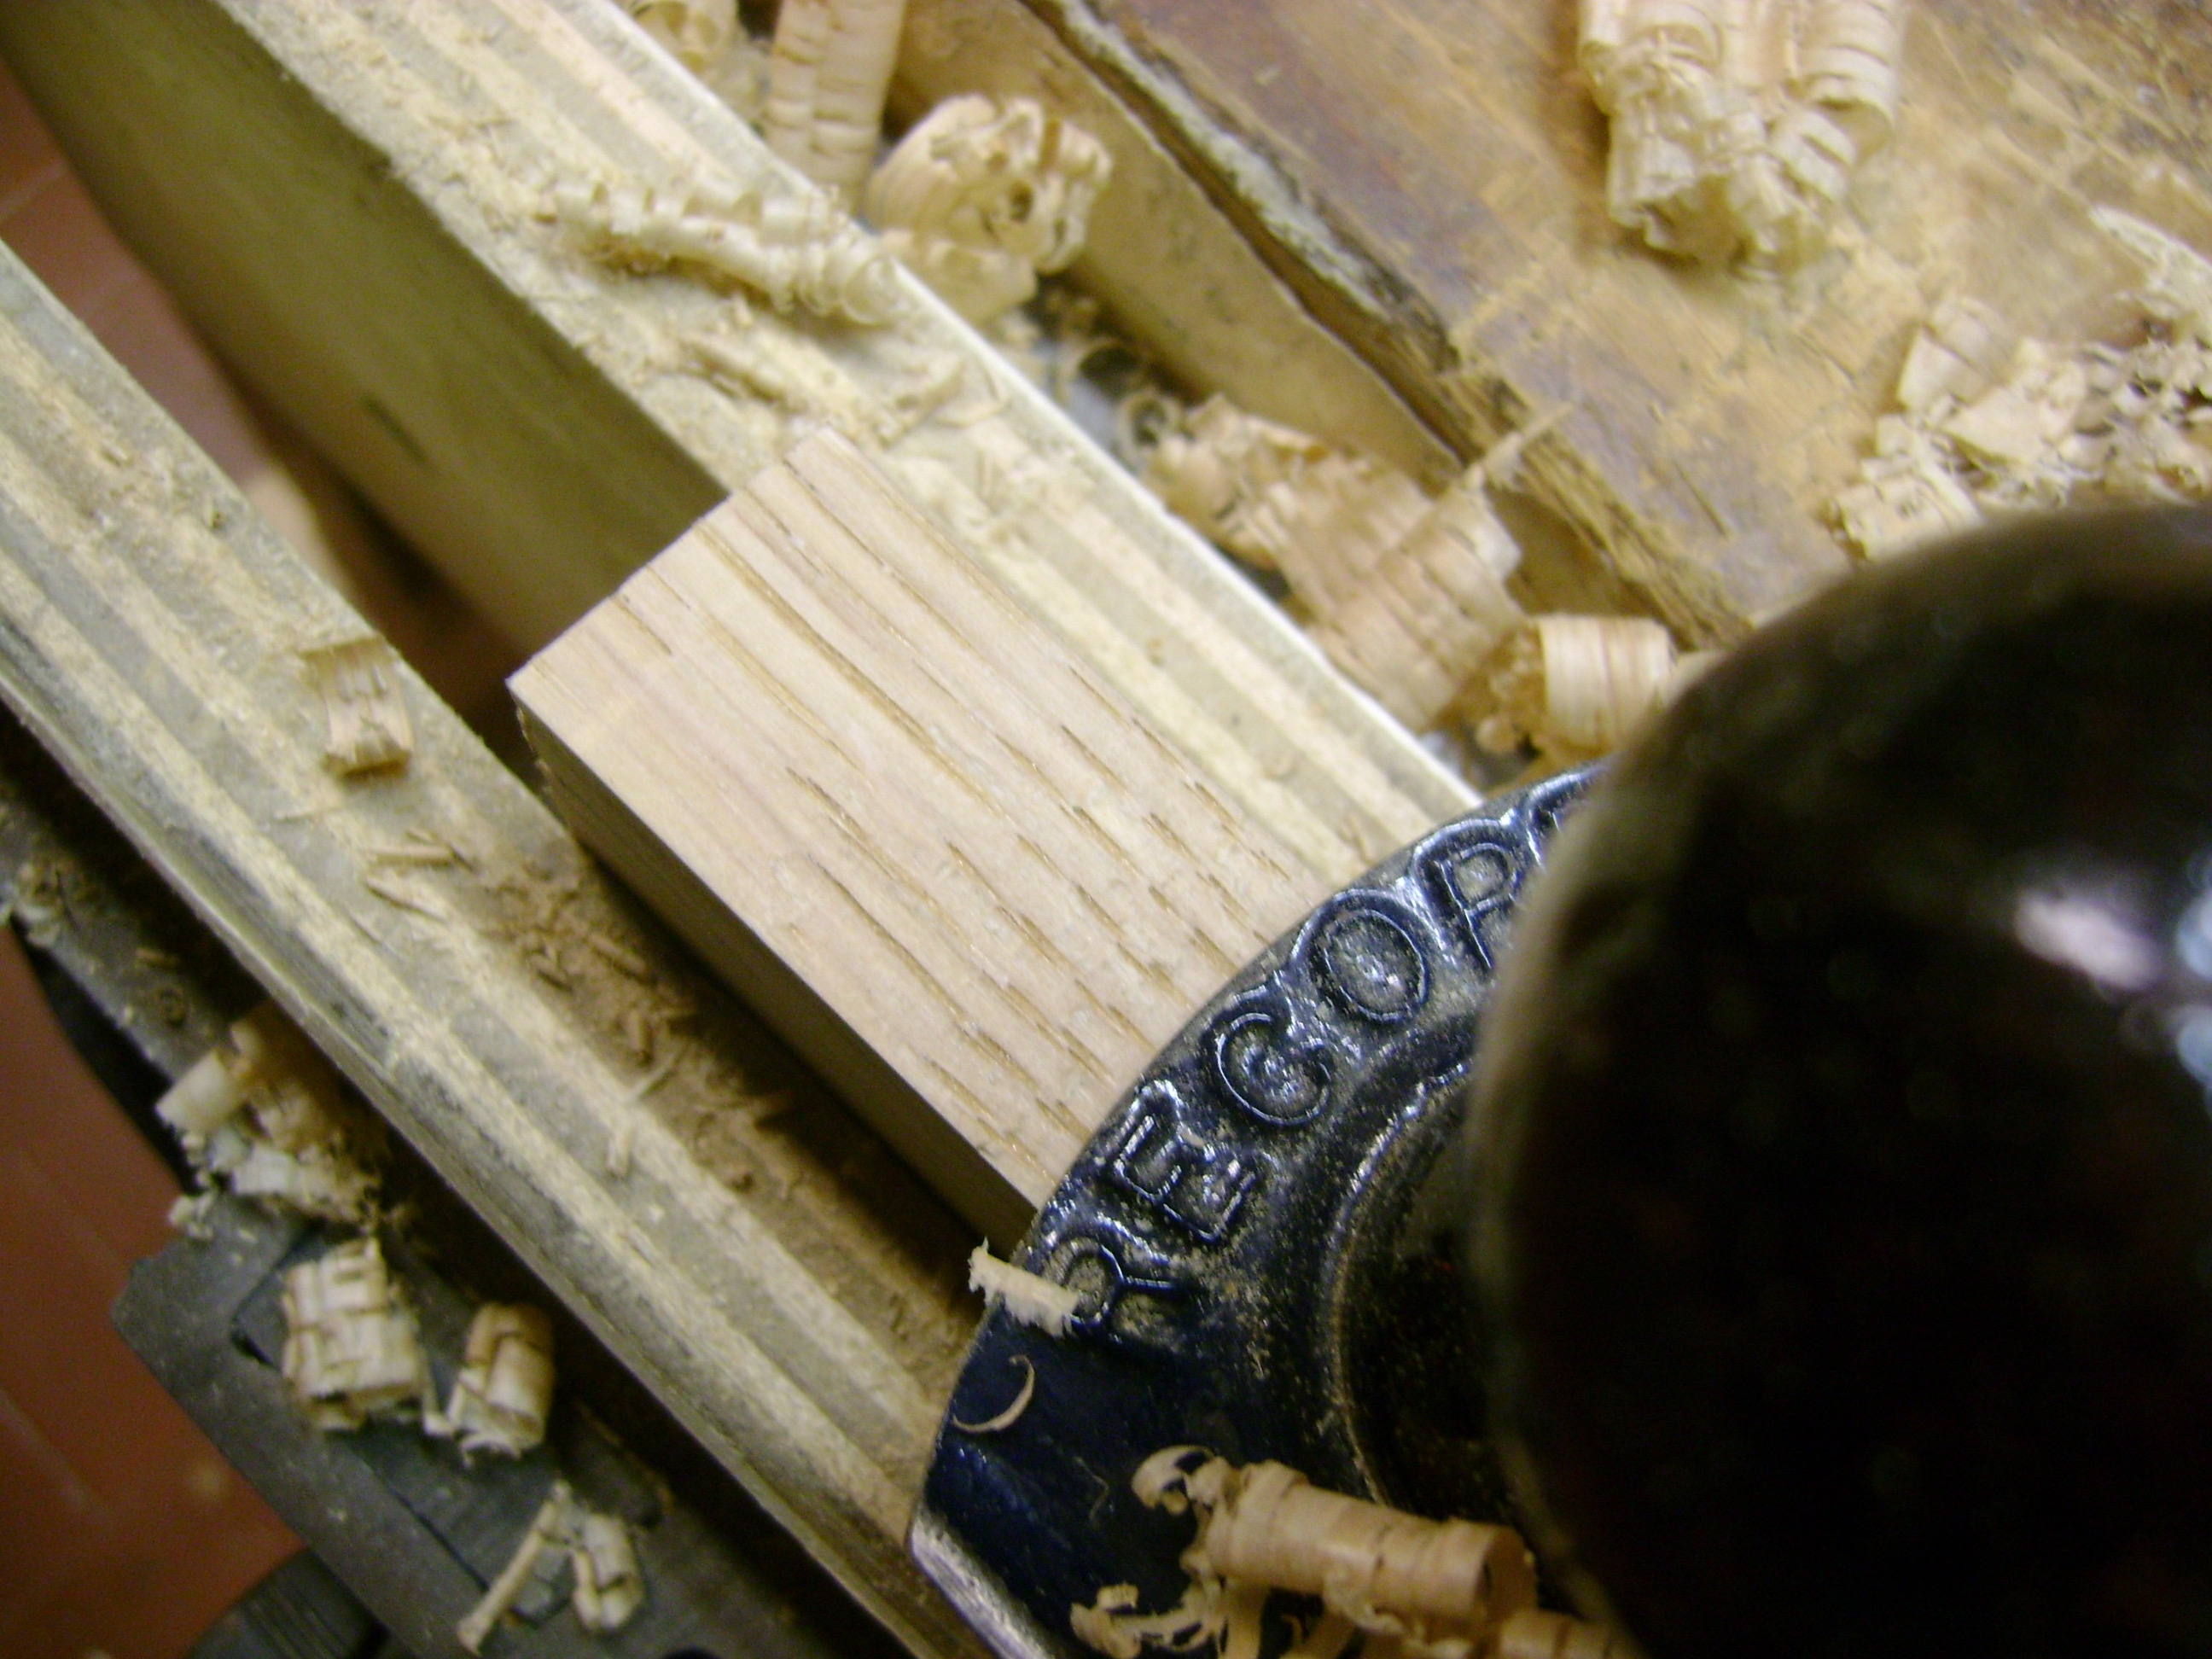
Per cominciare, appoggiata la pialla sul pezzo da lavorare, bisogna arretrare il tagliente affinché questo non tocchi il legno. In seguito, ruotando poco alla volta la rotella di profondità in senso orario, si abbassa il tagliente e, muovendo la pialla, lo abbassiamo fino a quando non si sentirà “mordere” il legno. A questo punto si può provare a fare una prima breve passata e vedere come esce il truciolo. Dovrebbe essere molto sottile e comunque uniforme in tutta la sua larghezza. In caso non lo fosse possiamo agire sulla leva di spostamento laterale affinché il tagliente sia allineato alla bocca della pialla. Solo in un secondo momento possiamo decidere di abbassare ulteriormente il tagliente decidendo quanto materiale vogliamo asportare.
La pialla si appoggia sul pezzo di legno da lavorare dapprima con la parte anteriore e poi viene sospinta con la mano che afferra il manico posteriore. In uscita di piallatura dovremo fare attenzione a sollevare leggermente la parte posteriore della pialla. Così per ogni passata.
Conviene sempre non asportare mai grosse quantità’ di materiale, privilegiando invece il fare più passate asportando trucioli più fini. In questo modo abbiamo maggior controllo sul lavoro che stiamo facendo e non corriamo il rischio di eccedere nel legno da rimuovere.
L’azione di piallatura solitamente si svolge “a ritroso”, partendo quindi dalla parte da piallare più lontana da noi e procedendo in più passate a retrocedere fino all’altra parte del pezzo da piallare, quella più vicina a noi. Infine fare lunghe passate da un estremo all’altro del pezzo da lavorare questa volta partendo dalla parte più vicina a noi.
Altro argomento da accennare, ma da approfondire in futuro, riguarda la direzione di piallatura. E’ fondamentale seguire il senso della fibra del legno. Se per errore piallassimo controvena ce ne accorgeremmo subito in quanto la pialla avrebbe difficoltà a procedere ed il legno tenderebbe a strapparsi. In questi casi occorre cambiare il senso di piallatura o invertire il pezzo da lavorare di modo che possa offrire il giusto senso di venatura alla pialla.
Leggere la venatura del legno comunque non e’ cosa semplice, specialmente all’inizio, ed occorre un po’ di esperienza, variando questa a seconda del tipo di legno che lavoriamo e spesso anche all’interno della stessa tavola che abbiamo per le mani.
Un discorso a parte merita la piallatura del legno di testa per la quale occorrerà porre in essere determinate accortezze come ad esempio regolare al minimo la fuoriuscita del tagliente dalla bocca e non piallare mai per tutta la lunghezza del pezzo di legno in quanto questo inesorabilmente si fratturerà in uscita. In questi casi si può piallare partendo da ambedue i lati della testa del legno e proseguire verso il centro oppure porre un pezzo di legno martire morsettato al pezzo che stiamo lavorando cosi che sostenga il legno in uscita di piallatura.
In alcuni tipi di piallatura, ad esempio su tavole particolarmente grezze e da sgrossare, si utilizza uno sbozzino (in legno o in metallo). In questo caso il senso di piallatura avviene anche traverso vena.
In questo articolo ho voluto solo dare una minima descrizione sulle tecniche di piallatura, giusto per dare un’idea di cosa stiamo parlando. Ma una cosa volevo sottolineare. Anche se possediamo la miglior pialla del mondo, affilata nel miglior modo possibile ed usata dalla persona più abile che esista, esistono superfici che semplicemente non possono essere piallate. E questo è un dato di fatto.
Come vedete rimangono in sospeso ancora tante cose da approfondire. Tra queste l’affilatura ed il settaggio della pialla, l’interpretazione della venatura del legno, le tecniche di piallatura a seconda del tipo di lavorazione da effettuare, i vari tipi di pialla visti nella loro specificità, il mondo delle pialle in legno e molto altro ancora.
La piallatura è un arte nell’arte che si impara ad apprezzare con il tempo.
Rimaniamo in contatto!
———————————————————————————————————————————-
Planing is a technique that we have to learn with patience. At first it may seem difficult and we could discourage if the planing goes wrong. In my first experiences planing was absolutely negative. I was not able to make any shavings and my pieces were out of square and never dead square. But you know from failures often spring great satisfactions. Today I can tell without any doubt that planing is the most pleasant handwork in woodworking. To smooth a rough surface, adjust imperfections to reach for a dead flat surface, create grooves, mouldings and much more. That’s what you can do with a plane. So don’t give up but trust in what you can do because you’ll learn faster than you could think.
Time has passed and now I realize that my first failures were due to my faults, but many were because to a non sharpened cutting edge, a not good set up of the plane ad the poor quality of the plane itself. There are so many reasons that could gives you a bad planing. I try to resume here some of the most elements about planing delaying the specifics to future posts, when I will talk about the most important types of planes. But now, referring to metal planes, I want to point out some things I think they’re important before starting.
1) Planes has to be of good quality. Look for vintage old planes to set up like Record, Stanley and other I suggested on my previous post, or look for new ones like Veritas, Lie Nielsen, or oriental Qiangsheng. Try to avoid Brico planes.
2) The plane must have a dead flat sole, at least near the mouth where the cutting edge protrudes, and perpendicular to the sides of the plane.
3) The cutting edge has to be sharpen, no matter the degree we want to give to our bevel. If the cutting edge is not sharpened it will affect all our work.
4) there are dedicated planes for every single work. Even if there are some that are for generical purpose, I suggest to use the right plane for the right work because you will deal with long boards, narrow boards, cut grooves, rough timber and so on. So let’s learn how to handle them.
Planing is a simple movement to do and it will go natural with practice. Take the rear handle with your right hand (or left hand if you are left handed) and the knob with the other hand. The right hand gives the push movement to the plane and the left hand control the direction of the plane and helps the plane to stay flat to the surface you have to work. You don’t need to give extra strength, nor bull nosing the plane, but the plane has to rely the most on the cutting edge efficiency and on the right set up. At the end of every passes slightly lift up the back side of the plane. Your left leg a step forward the other leg and in the direction of the plane. This will give you stability and coordination in your movements. To start planing put the plane on the piece of wood you have to work and retract the cutting edge using the depth adjuster rotating it counterclockwise because we don’t want at this stage the cutting edge to get in touch with the wood. So gently start to rotate the depth adjuster clockwise till the cutting edge bites the wood. Now you can take some small shavings to see if they are equal in length and width. If they aren’ t you can use the lateral lever to put the cutting edge in line with the mouth of the plane. If you are satisfied with the shavings you can go deeper with the cutting edge to take thicker shavings. So start planing putting the plane on the far away piece of wood and take progressive passes towards you as you go on planing. At the end you can take longer passes on the board starting this time from the nearest part of the piece of wood. My advise is not to exaggerate with the thickness of the shavings but to make light passes that gives you finer thick shavings. You’ll have much control on your work and avoid to take too much wood.Another thing to look at when you are planing is the wood grain direction. The plane always has to work with the grain, never against the grain, sometimes across the grain (for example when you are using a scrub plane). If we are working against the grain the plane gives you a great resistance as the wood will tender to tear out. In these cases we have to change direction to the plane, or to flip over the board to plane with the grain. Reading the grain is not simple especially when you are a beginner. You’ll have to gain some experience to know things as the knots, the changing of directions of the grain of the wood, and many other problems you have to consider when you are working with wood. The grain changes from wood to wood and even on the same wooden board. But just one note I want to point out. No matter the perfect sharpened plane you are using and no matter how good you are in planing it’s a fact that does exist wood that simply can not be planed. Now just a little note about planing end grain. Planing the end grain it’ s not so easy. There are dedicated plane such block planes to do this work but you can plane with a standard smoothing plane with some practice and using always a shallow cutting edge. To avoid the wood to split in planing you have to put a sacrificial piece of wood to support the fibers when you are about to plane near the edge, or to plane from the edge to the center in both directions.
In this post I just wanted to give you some generic information about planing, just to give you a little idea of what planing is and on what we are talking about. But as you can see there are so many aspects I have to talk about such as sharpening, set up plane, reading the grain, planing technique with dedicated planes, the world of wooden planes and much more. Planing is an art into the art of woodworking and you will learn to appreciate it with the time.
Stay tuned!

Lascia un commento